How to Build a Workbench – Initial Assembly (part12)
NOTE:Just so you know, this is an older workbench series. Paul has a newer Workbench series. If you are interested in the updated version of Paul’s workbench please click the button down below. This page links to a cutting list, tools list, FAQS and much more.
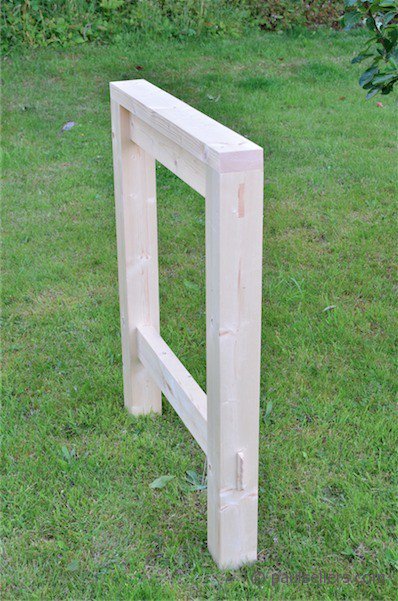
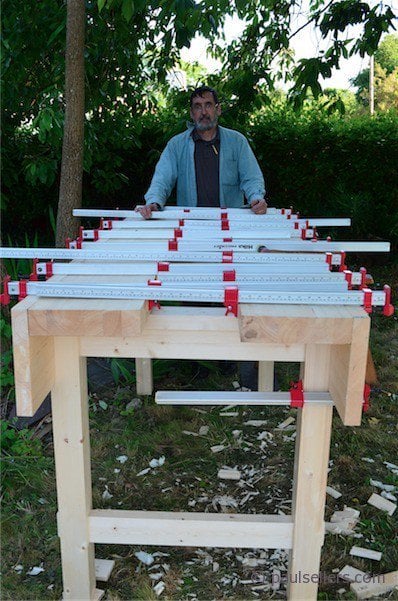
Assembly begins
Yesterday we locked the aprons to the bench with clamps and bolts and screws and lifted the main laminated benchtops in place to dry fit before gluing them to the aprons. This process takes some thinking through to ensure all of the components are together; clamps, hammers, wedges, screws, bolts, lag screws and so on. Think it through. It’s you and your bench in your garage or back yard. Rehearsal is always critically important before final glue-up.
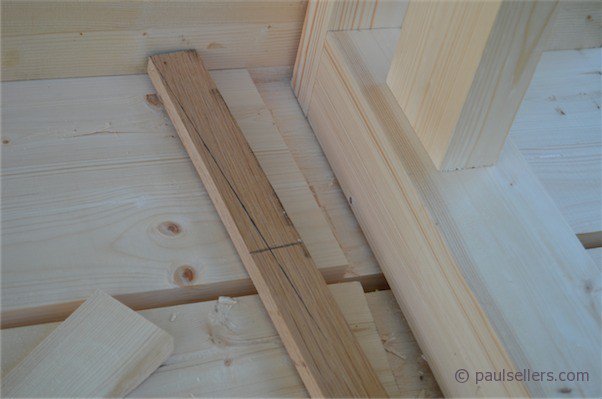
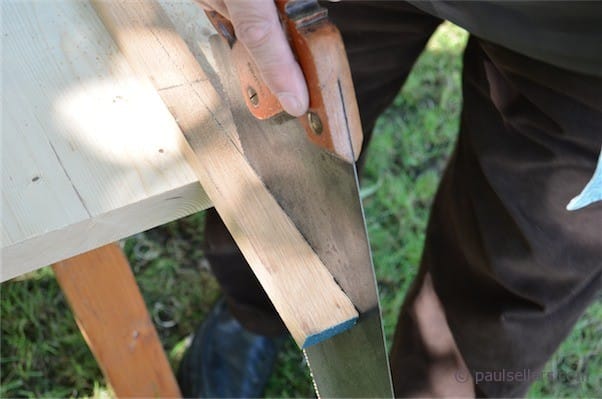
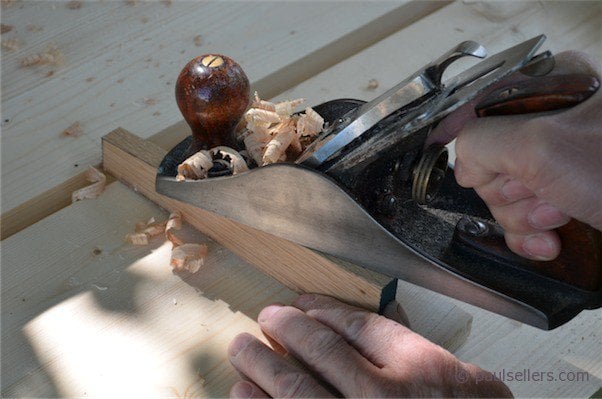
If your measurements are correct, all of the wedges will be the same, but there may be a variance between each joint. I think it best to cut one wedge to a specific recess and then try the one wedge in the other joints. If they are close, you can cut the other three, slightly oversized, ready to plane to fit as needed. 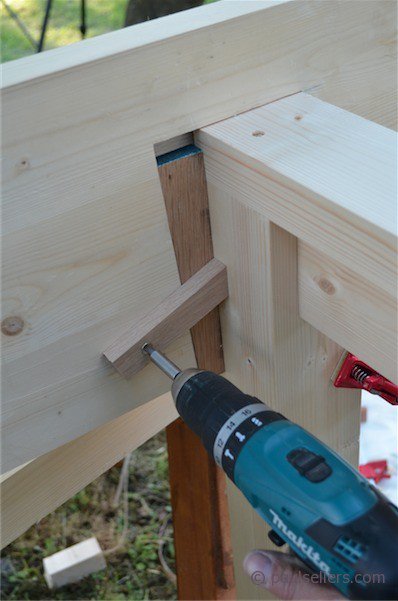
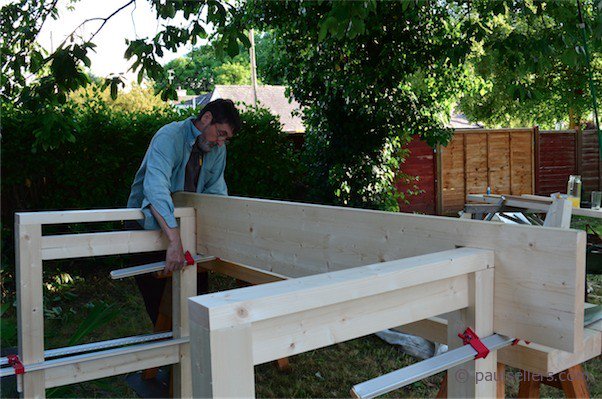


Time to rest and leave overnight for the glue to dry completely.
Take your time and enjoy. I did this series genuinely in my backyard where it rained, got dark and too many other things to distract and frustrate, but I have to say I had a blast. A few years ago I took a sabbatical and we, two of my sons and I, needed a workbench. We did exactly as we did in this article and built it on the patio of the house we were renting in the UK. It was a very wonderful experience for all of us and very bonding as the were in their early and mid teens at the time. We all had a blast and now they are still with me. One is married and the other starts working for Rolls Royce in a few weeks time.
Paul, I still watch this video. I “Literally” would never have started a workbench build without your tutorial build.
Paul,
How do you tighten/loosen the wedges holding the legs to the aprons? I had assumed with a hammer, but there doesn’t appear to be room to do this once the top is on.
THanks, Aaron
Hi Arron
I made my wedge about 5-10mm shy of the underside of the bench, so that there is a gap. Instead of tapping I used a pinch bar (small crow bar) to cinch them into place. A larger screwdriver would work too.
In actuality, because these are designed to be self-tightening as the bench is in use, you don’t actually need to tighten them much at all. You will be surprised that they must be tapped after a few days to free them even when first placed it was using only hand pressure.
Best for now,
Paul
Thanks Paul. That is pretty cool that the wedges are self tightening. Is it because the slots in the apron open transiently when the bench is pounded on, and then gravity pulls the wedges downward (i.e. tighter), or is it that they tighten during the forces put on the bench during planing?
Another question I had concerns whether or not to attach the aprons to the top when the bench is intended to be easily disassembled for moving. Will reversible means of such attachment (machine screws into futon-hardware inserts, perhaps) stay tight enough to give the “stiff angle iron-type top” effect that you’ve mentioned as a second benefit of the aprons. (The primary benefit being to hold the legs very strongly.)
Thanks again,
Aaron
It’s really a combination of all things not the least of which is shock. The bench takes quite a pounding. A bit like reshafting a hammer or ax where you actually strike the end of the shaft with a mallet or hammer to draw the head onto the shaft rather than hit the hammer head onto the handle. Each time you strike the chisel to mortise a hole on the benchtop or in the vise, in theory and in practice, the wedge tightens. Also, let’s say you don’t use the bench for a week, temperatures rise and the leg and or wedge shrink in the housing dado recess. You start work after your break from the workshop, perhaps planing, and as you do the wedge drops into the shrinkage gap and tightens against the leg again.
Hi Paul, thanks for a great and instructive series. The step by step display and minimal tool list has really helped me ease into the world of woodworking. With regard to the aprons, would you lose a significant amount of strength / rigidity by bolting the aprons to the bench top instead of gluing? This bench will definitely be transported a few times in the next year and I’m not sure it’ll fit in the final location (basement) if there is a benchtop and an apron to negotiate the stairs.
Thanks!
You can add spiked washers between the apron and the laminated top, the type used in truss building in construction work. This will lock everything like glue.
Great, thanks!
Not necessary at all, but for filming and time, sometimes using the screws helps and especially if you only have a few cramps.
Lag bolts work fine over and over. How often will you be moving your bench? I think that there are better ways to do things always, but I suppose it is a personal thing as to how much you want perfection.
You made a great point. Probably won’t be moving the bench from the garage unless I move. Using lag bolts is certainly simpler. Thanks again for the advice.
Hi Paul,
When you glue the bench-top to the apron, will the glue squeeze-out cause the top to glue to the H-frame bearer as well?
Thanks for everything!
Only in the corner, only if you use too much glue. It only makes a difference if you don’t want to ever dismantle your bench sometime later. If you do, just use a little less glue at these points to make sure.
Hello Paul,
I recently watched your “How to Build a Workbench” videos. During the assembly of the workbench you used lag screws to attach the apron to the bench legs. This struck me as going against the grain (pun intended) of your woodworking philosophy. You demonstrated nice mortises and tenons (with arts and craft round-over) on the legs… after which, a large bolt, or lag screw, through the aprons seems out of place.
Really this is not a big deal, and I understand the purpose of the bolts. I will probably just bolt the aprons to the legs myself; however, I am curious if there is another, more traditional, way of attaching the aprons to the legs, while still allowing the bench to be dismantled, perhaps more inline with the joinery used elsewhere on the bench?
Best Regards,
Joe
The bench is designed to help woodworkers new to handtools get their bench and get started. You can add sliding dovetails instead but this complicates things and does not resolve the possible shrinkage issues surrounding the leg to apron aspect. I just keep most things simple in bench-builds and leave over complications and over engineering to others. Still not sure why lags, bolts and screws are considered wrong when used correctly. I don’t think most people know really.
Paul,
Thank you for sharing your craft. I apologize for asking the same question as Jason above (20 October 2015) but I don’t see why the tops won’t end up glued to the legs–especially if I apply glue using your “zigzag plus perimeter” approach. I think I could add a margin of safety by inserting some wax paper over the legs before glue up. What do you think?
Thanks
Whit
Without wanting to offend you or be offensive, I think that you are over thinking this. Even if seepage occurred it wouldn’t be such that it would prevent the separation of parts. If you want the extra effort then I see no problem with doing it. I don’t want to introduce something that’s not at all necessary.
Roger that, thanks.
I built my beast over a year ago, perhaps longer and have had zero issues with it to date. I don’t believe I used any glue at all in the final assembly. The wedges and bolts hold it all together very well. I will say your practice of wiping excess glue under the apron where nobody will see it stuck with me. Now that I’ve wiped several bottles worth of glue there it kind of looks like it’s where I wipe my nose, but hey, that’s character. I don’t think anyone is taking pictures of it.