Questions answered – Painting my projects
Questions answered – Painting projects
Q:
I was wondering of you could talk a little bit on painting your pieces. The tool chest you finished recently and many of the boxes have a lovely paint job, at least from the photos. I apologize if you mentioned this somewhere. I did read about the shellac that you like to use. What type of paint do you use? Do you mix it with anything? Do you put on a coat of anything before painting? Do you put a coat of something on after painting? After looking over your blog I have been convinced to buy your book and dvds the next chance I get.
J. D.
A:
Firstly, I love painting wood and the way wood painted looks. Even painting over my hand cut dovetails raised eyebrows with my students until they saw my finished box at the end of class. painting brings a certain uniformity to woods that might otherwise compete in parts contrasting grain colour and texture. 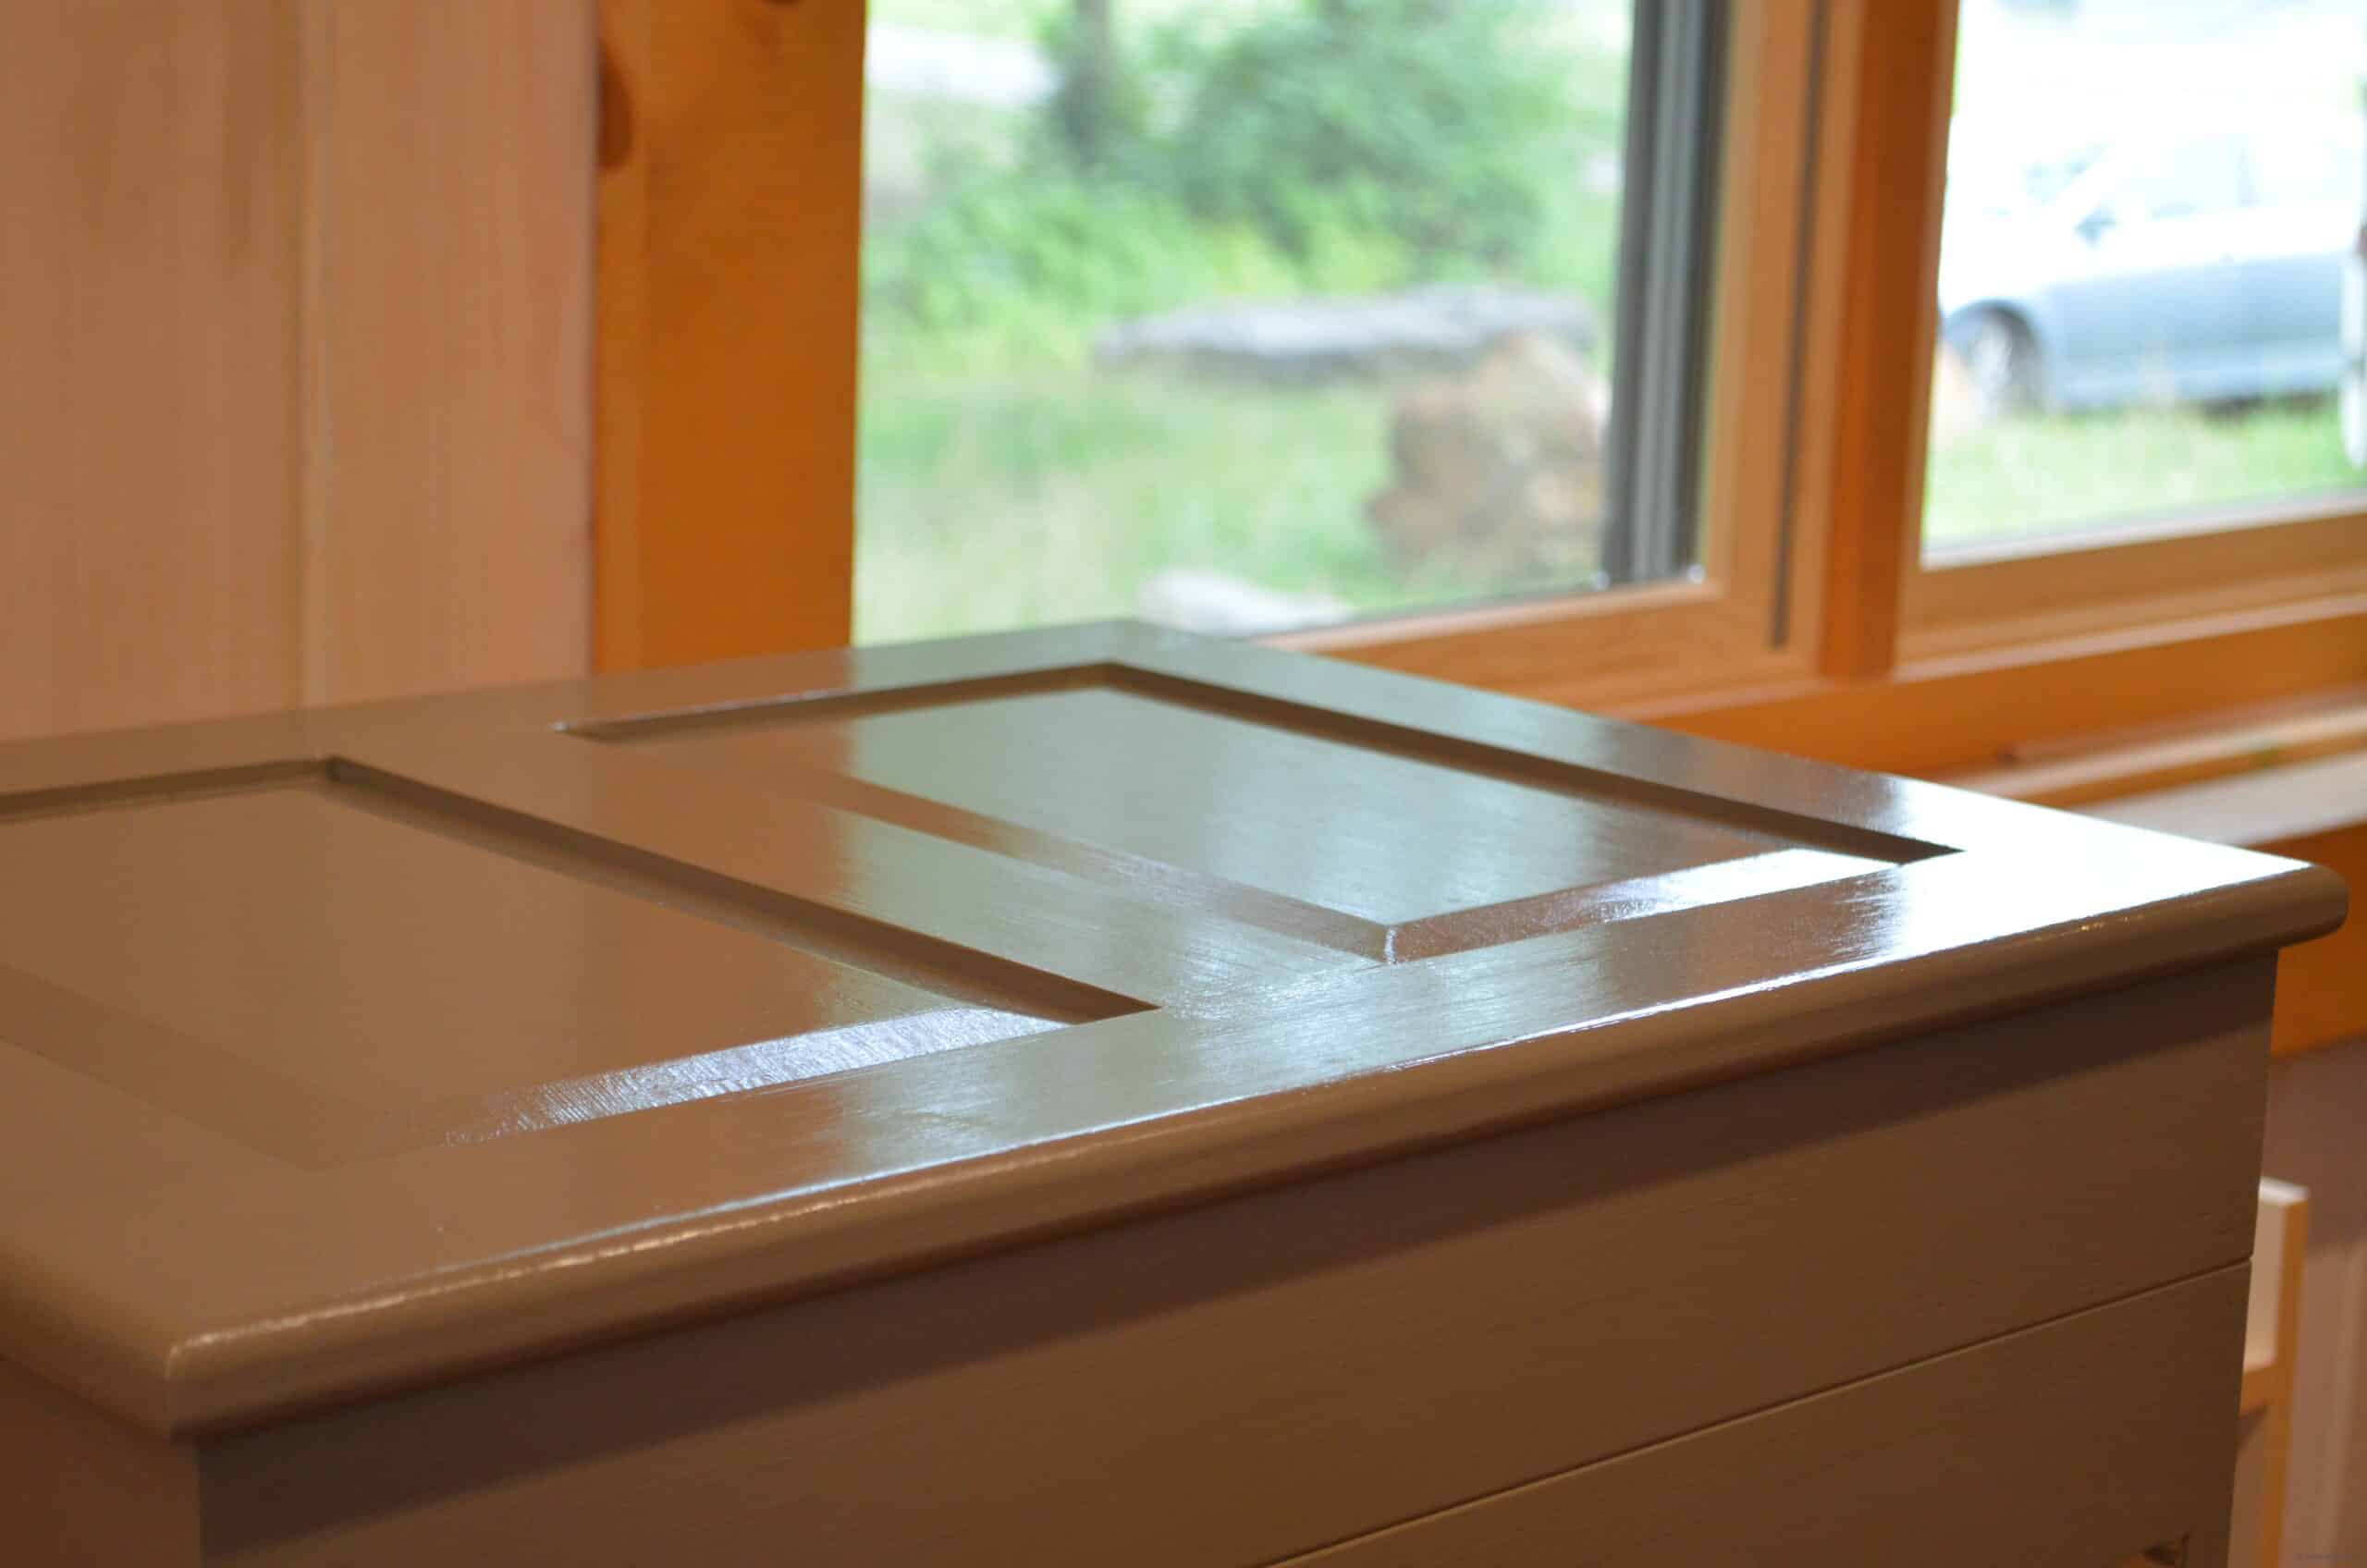
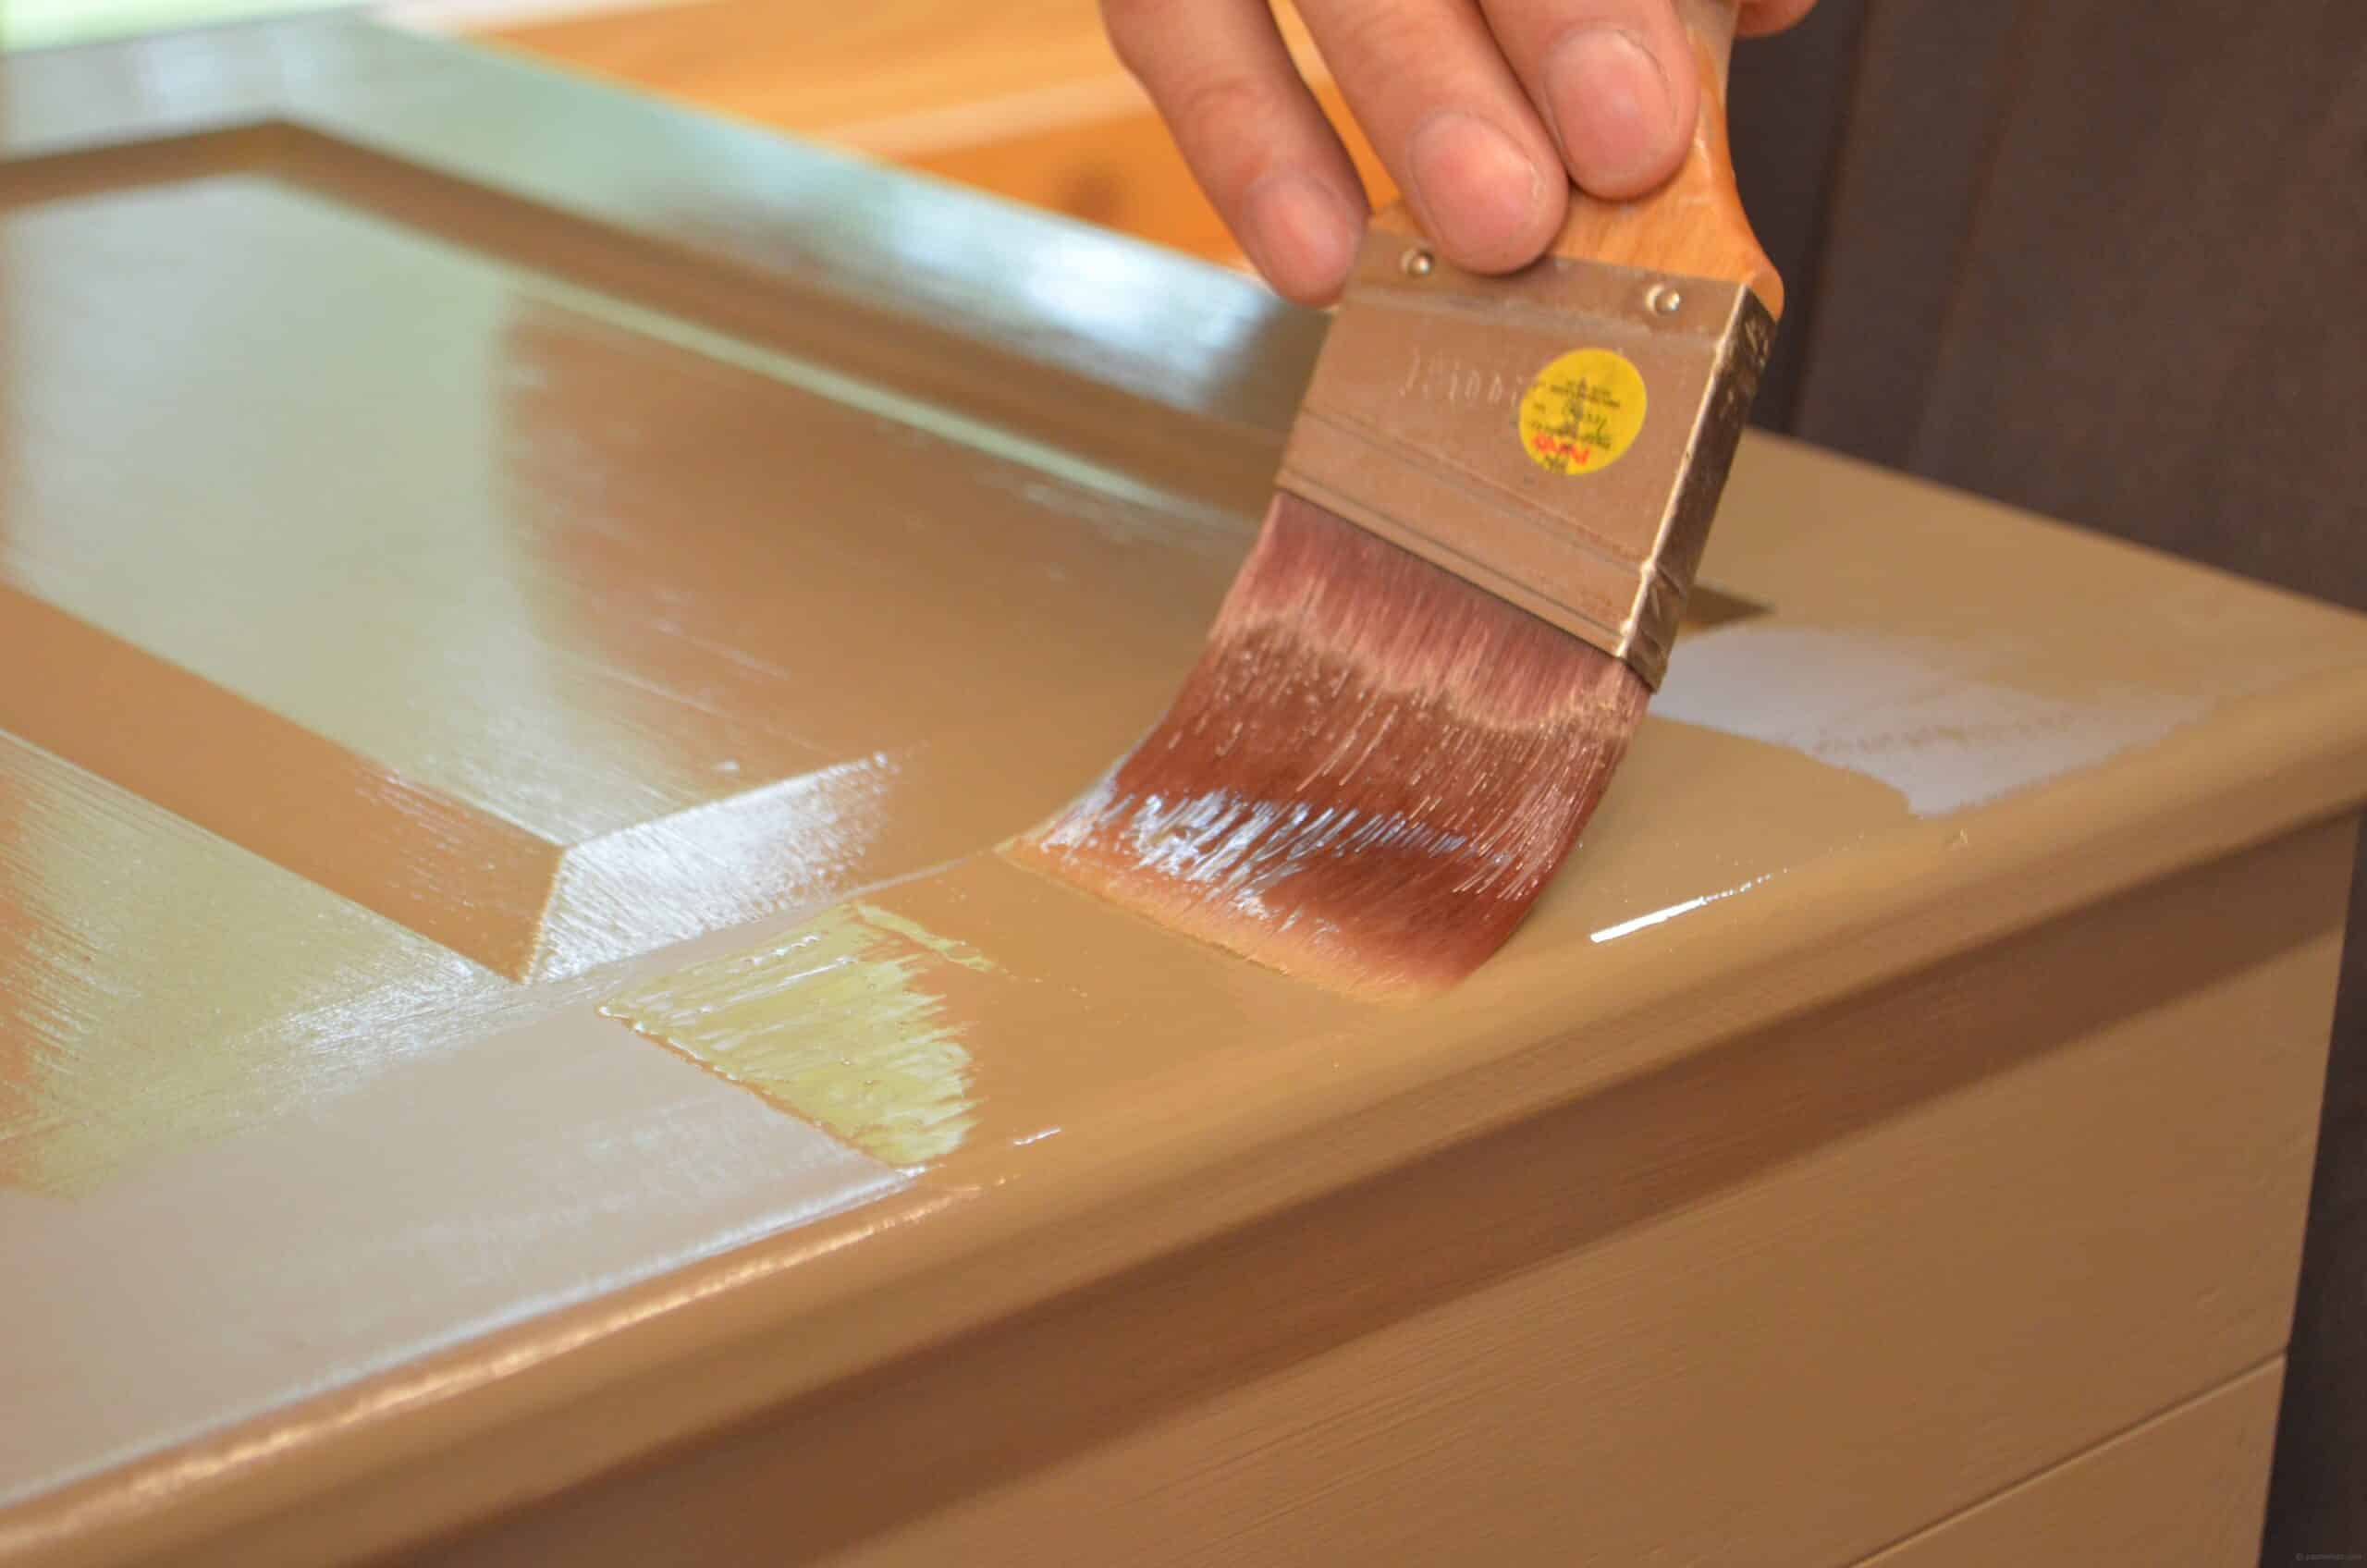
My project is sanded to 240-grit on every facet and roundover. I am using an interior eggshell wall paint made by Benjamin Moore Paints. This paint is water-based and there are a zillion colours to choose from. here in the UK I would choose 1829 paint, again in satin or eggshell, and I buy this from B&Q. This is a great paint for wood.
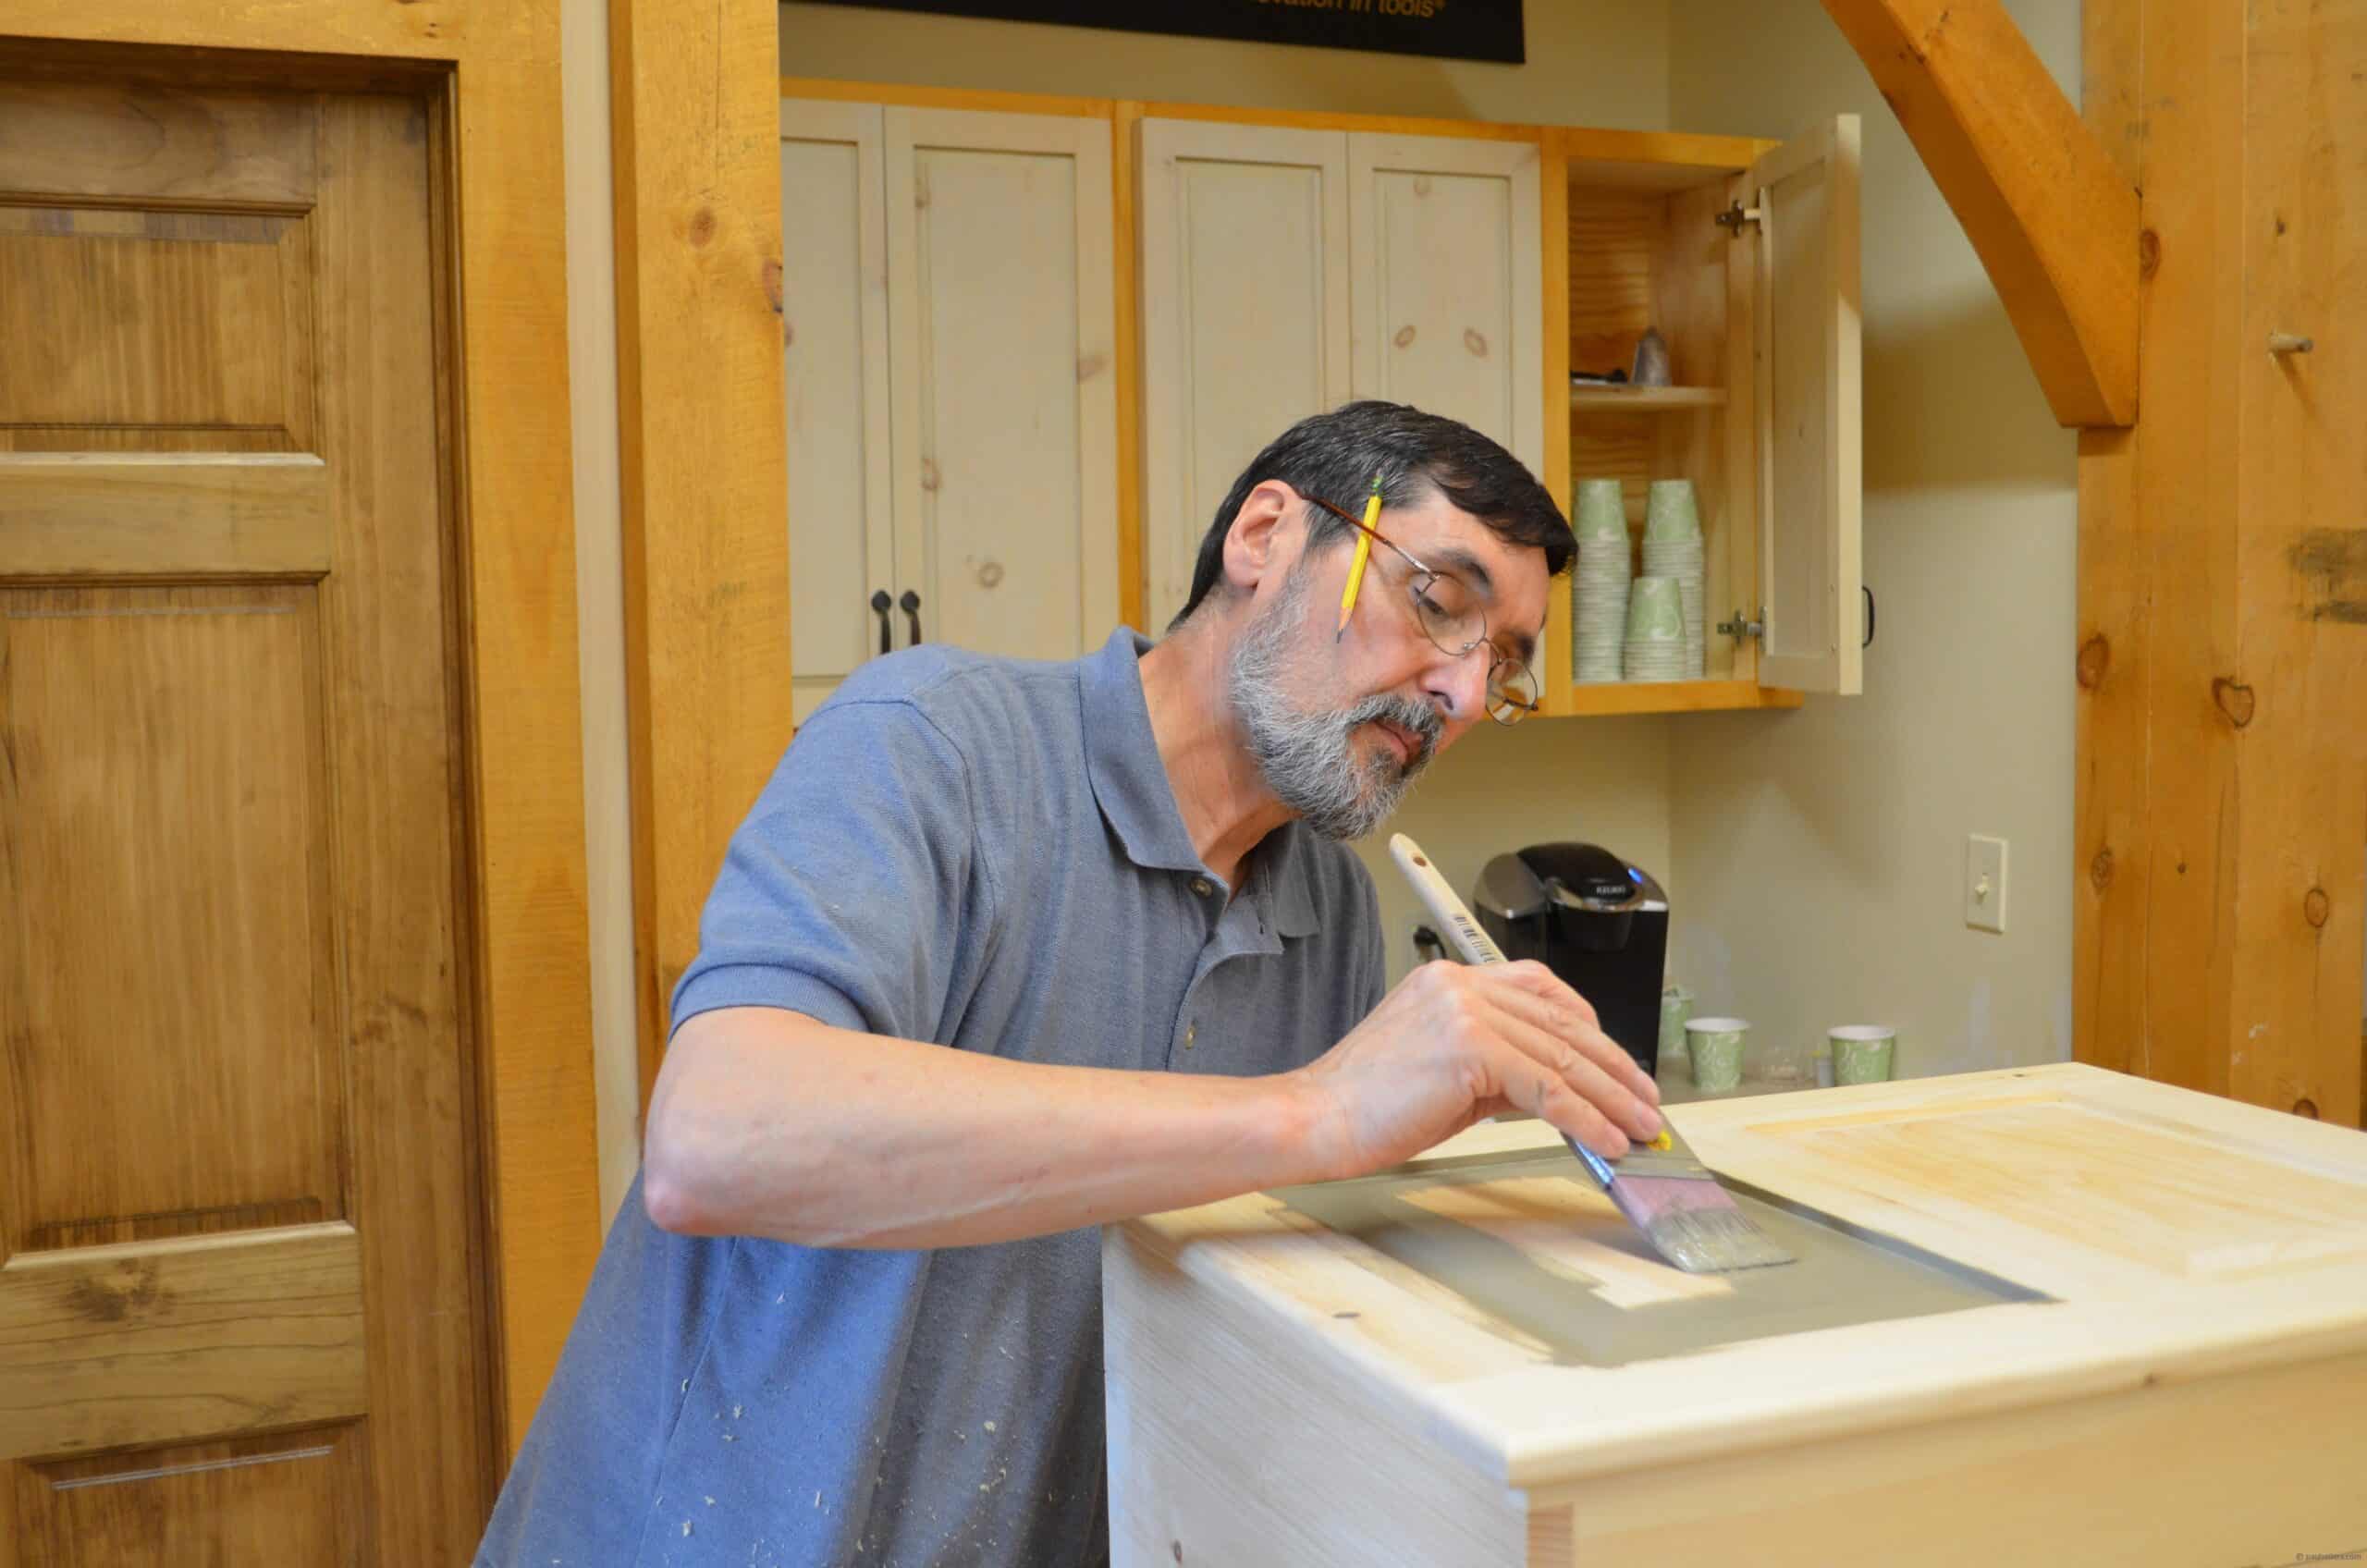
One criticism of water-based paints is flow-out. The oil based paints have a longer open time that allows the paint to level and so minimise brush marks. the trick with any paint is to apply sufficient paint to allow it to level and yet not apply so much it runs into candle-wax drips and hanging curtains. Experience really helps here, but with a good brush, I am using a 2″ Purdy here, you should be able to load your brush properly and apply it evenly.
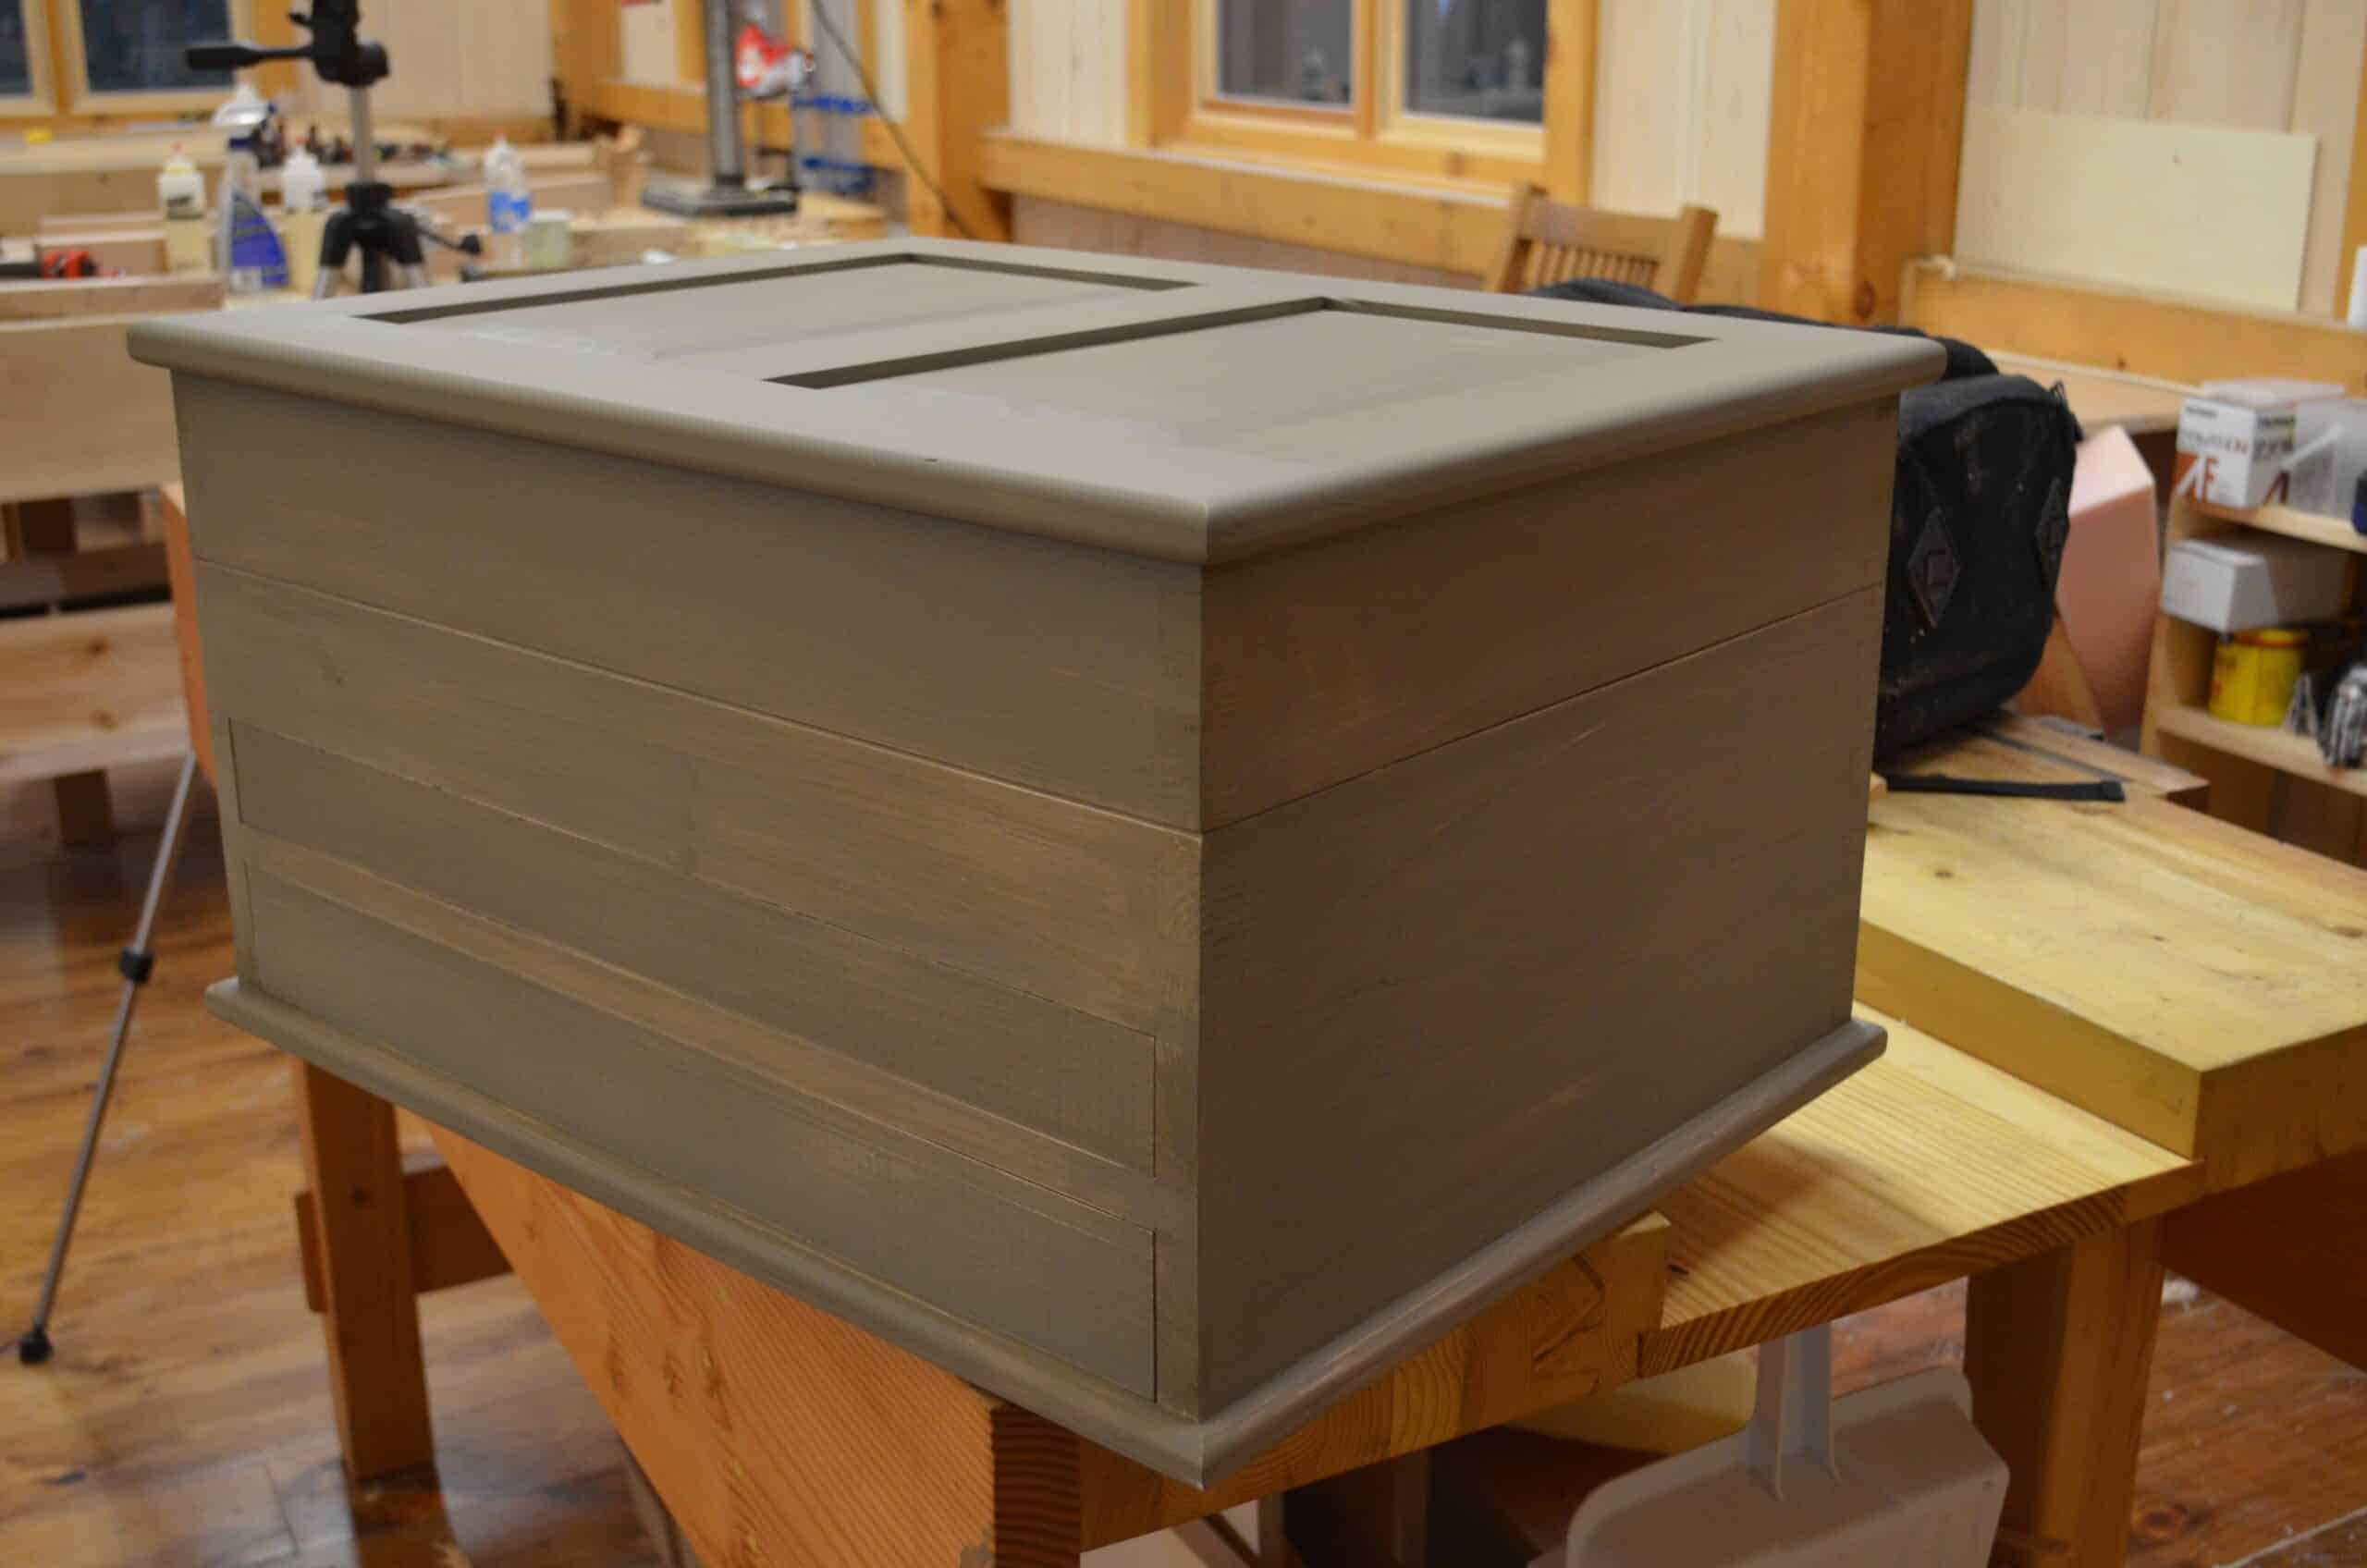
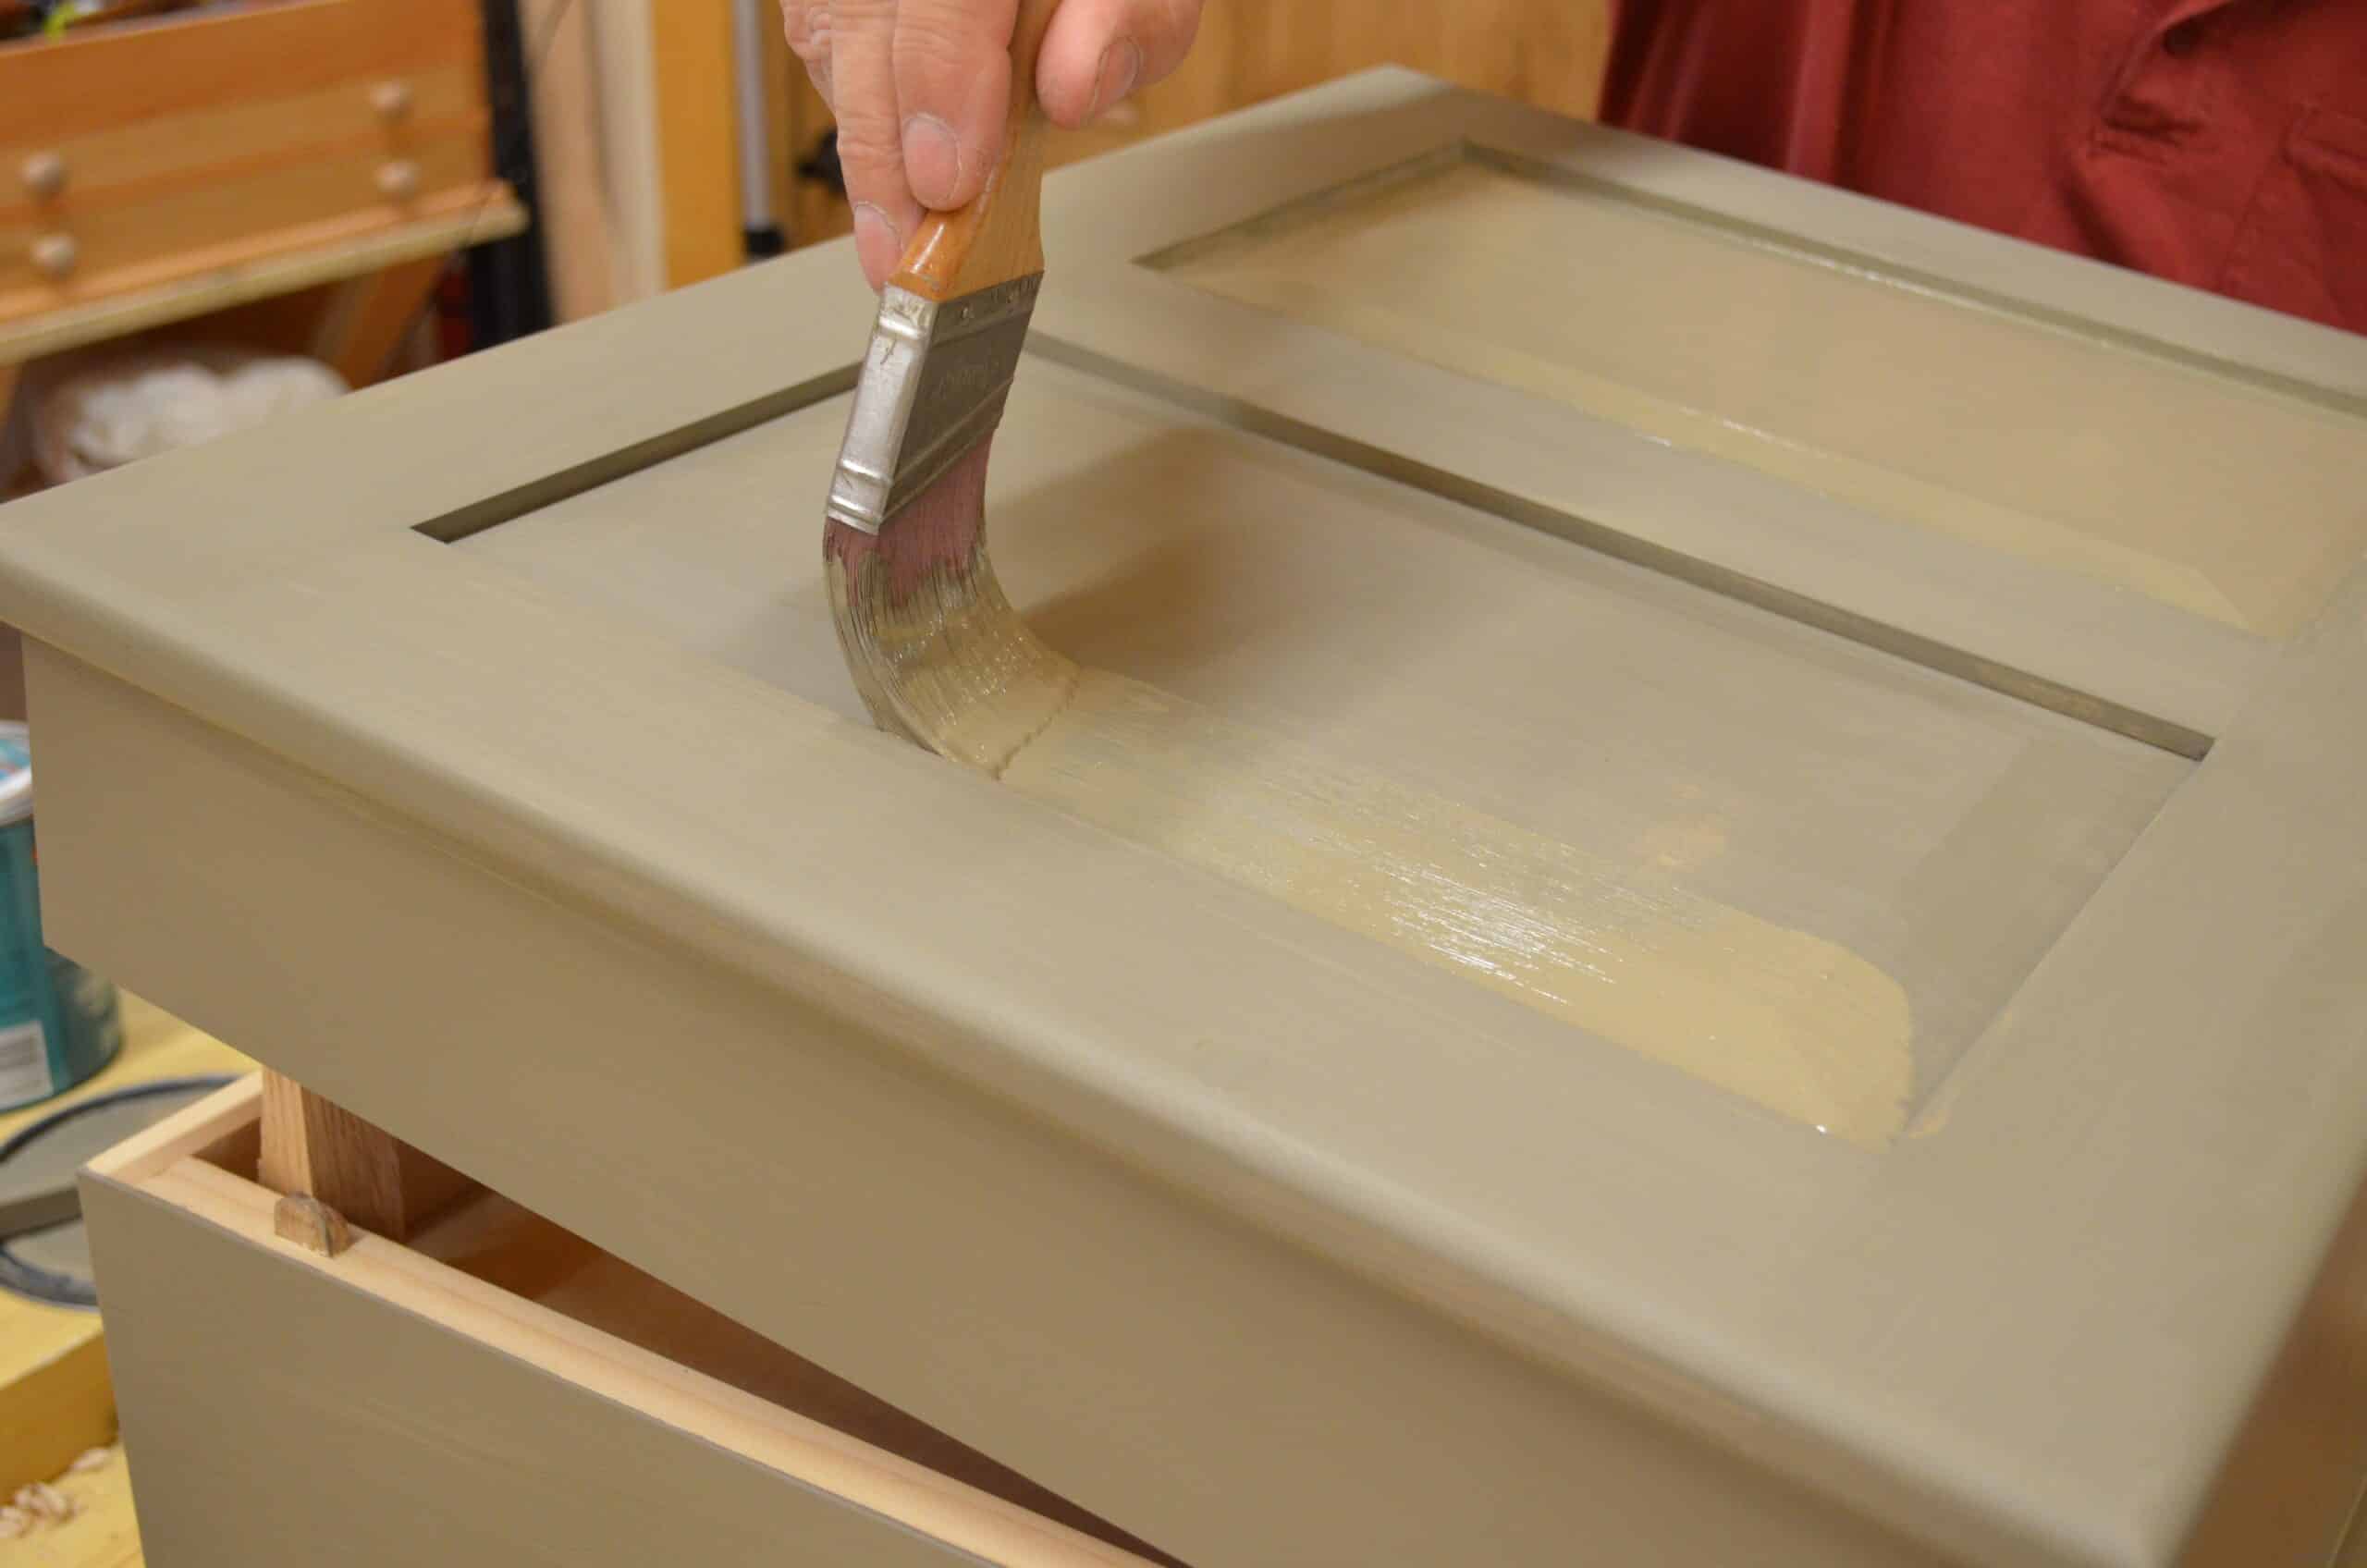
This last colour coat should be full and even in colour with no see-through surfaces. If you need to apply a third coat of paint, sand first to 240-grit and that will do it.
I allow my chest to cure as well as dry, and so I left it for three hours. In this case my final liquid coat is a single coat of brushed on Shellac.

I used the same paintbrush is used for the paint. I can get a heavier coat with a brush rather than the cloth pad often associated with shellac applications, and the corners are much easier with a brush too. Remember too to paint internal corners first with whichever level of painting you start with. Then do the raised surface plains of the raised panels and then the larger areas of all wall panels and faces.
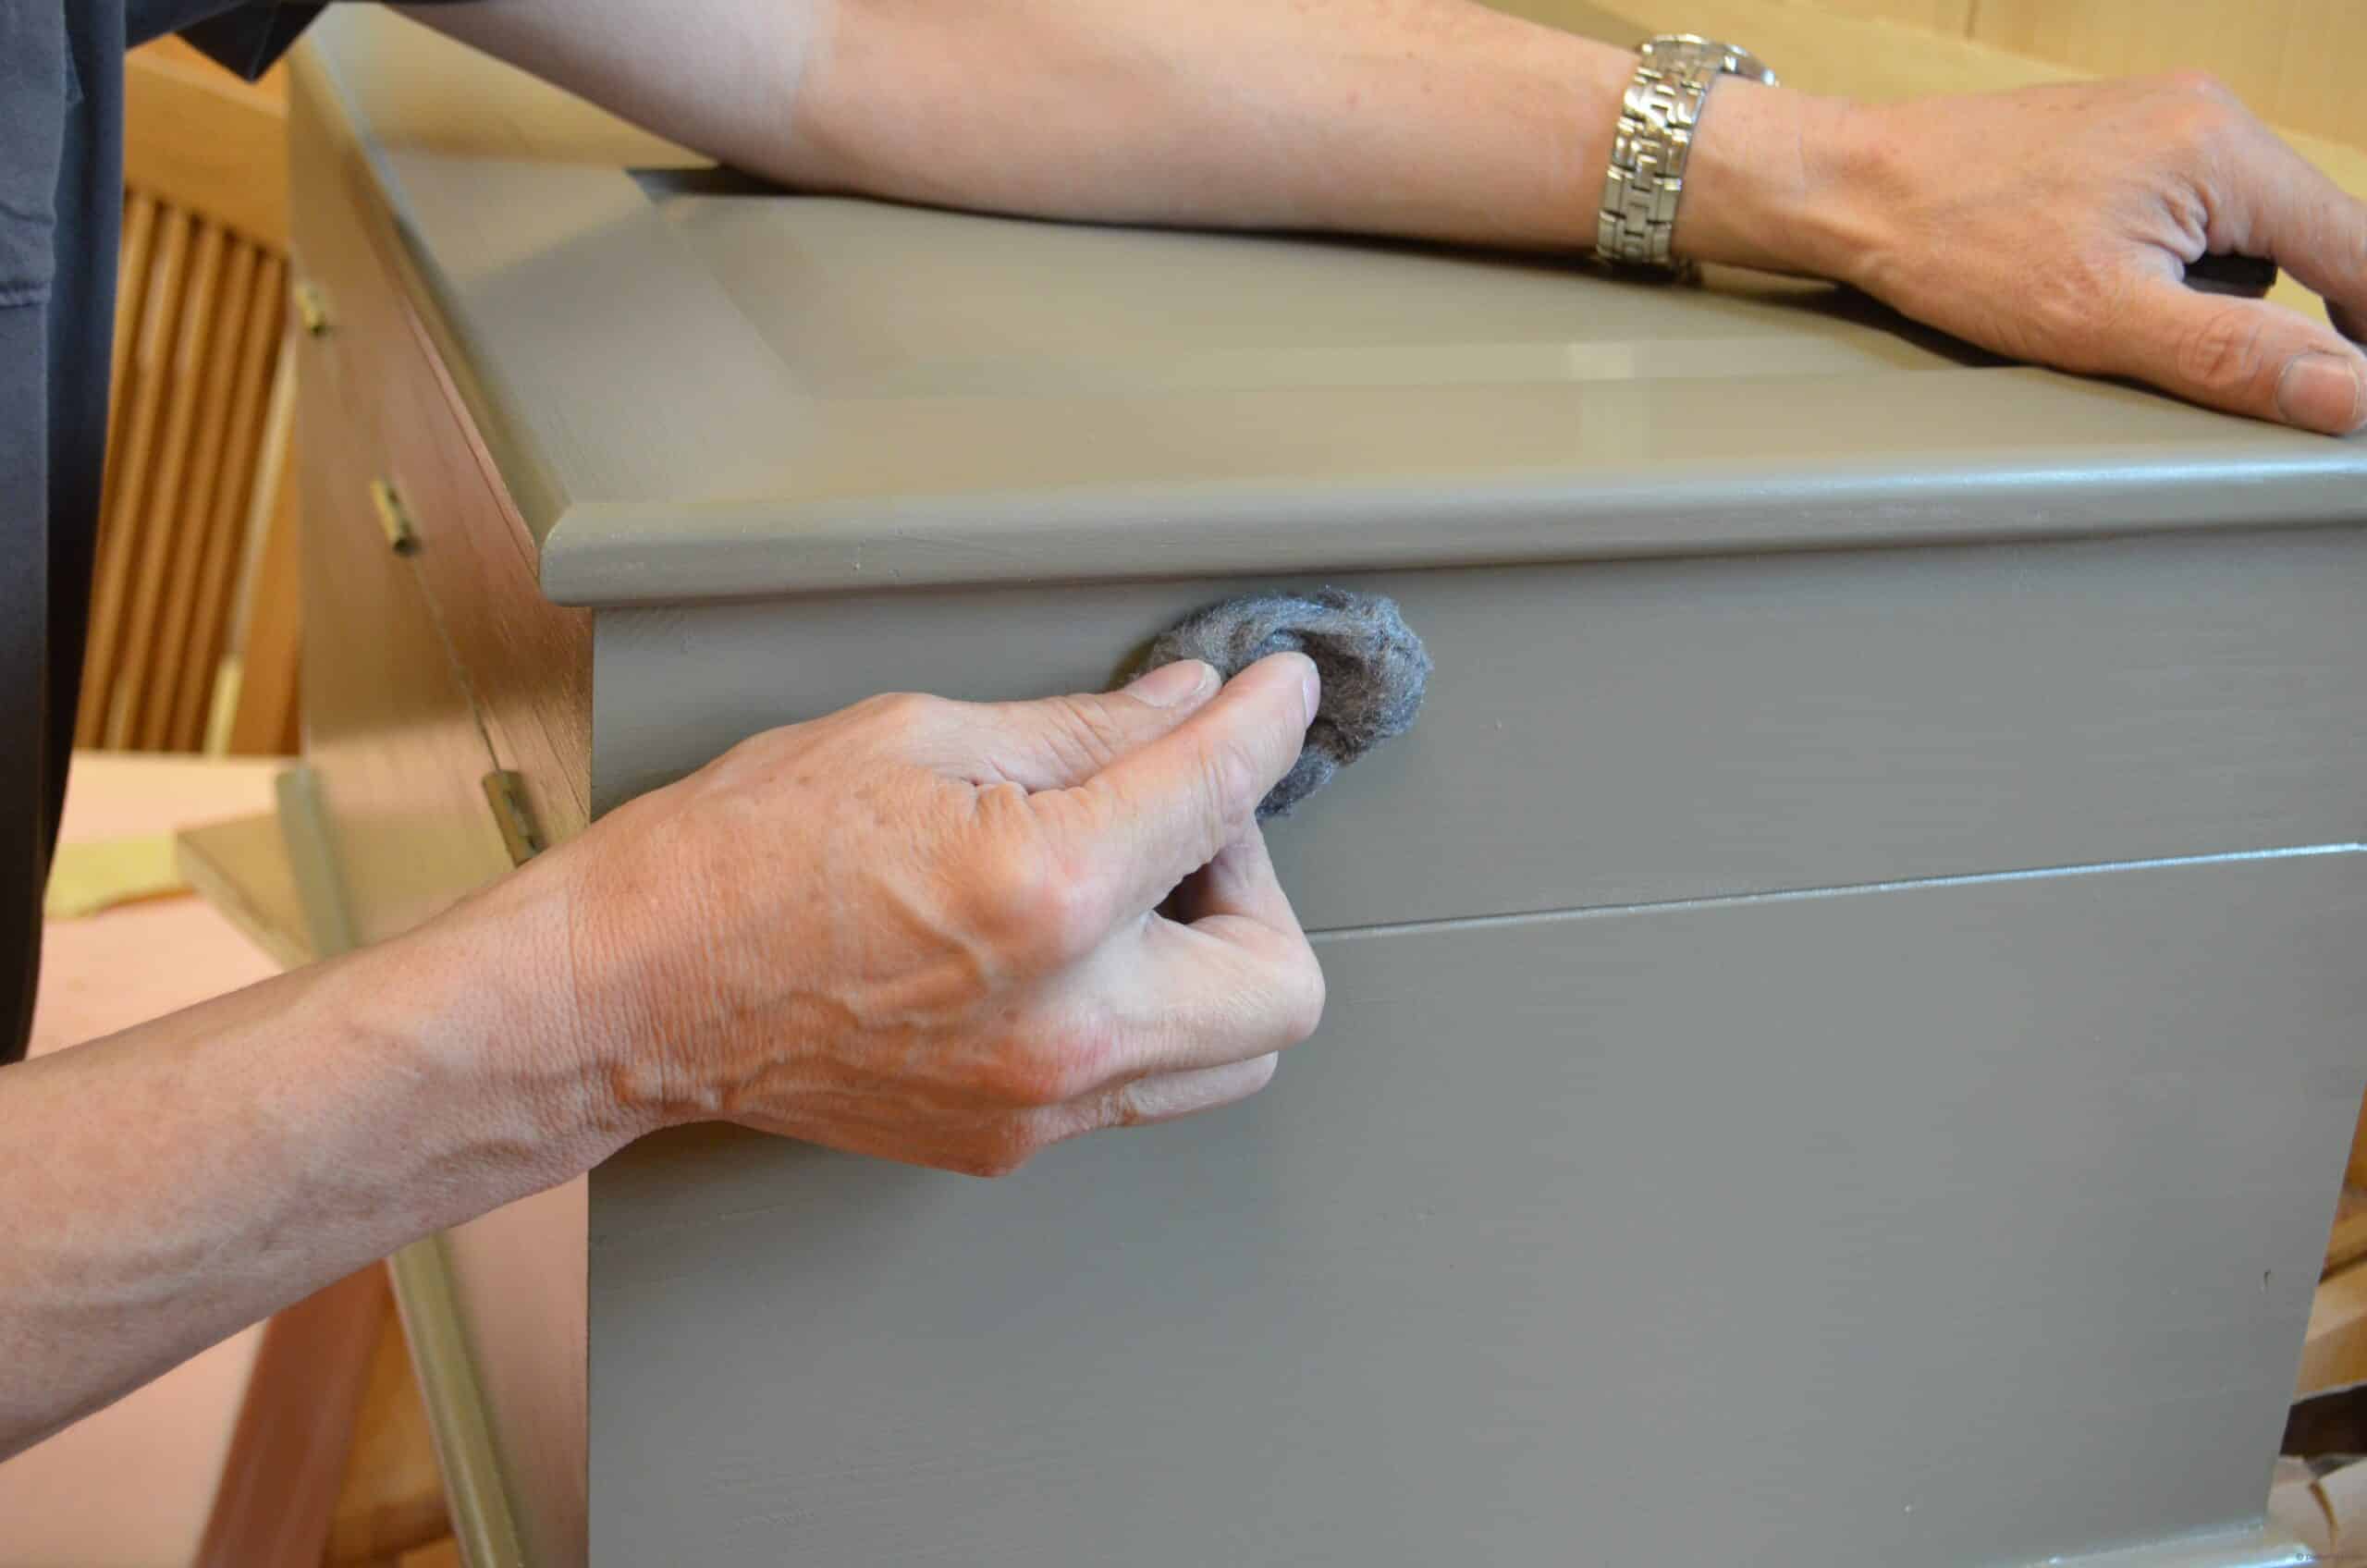
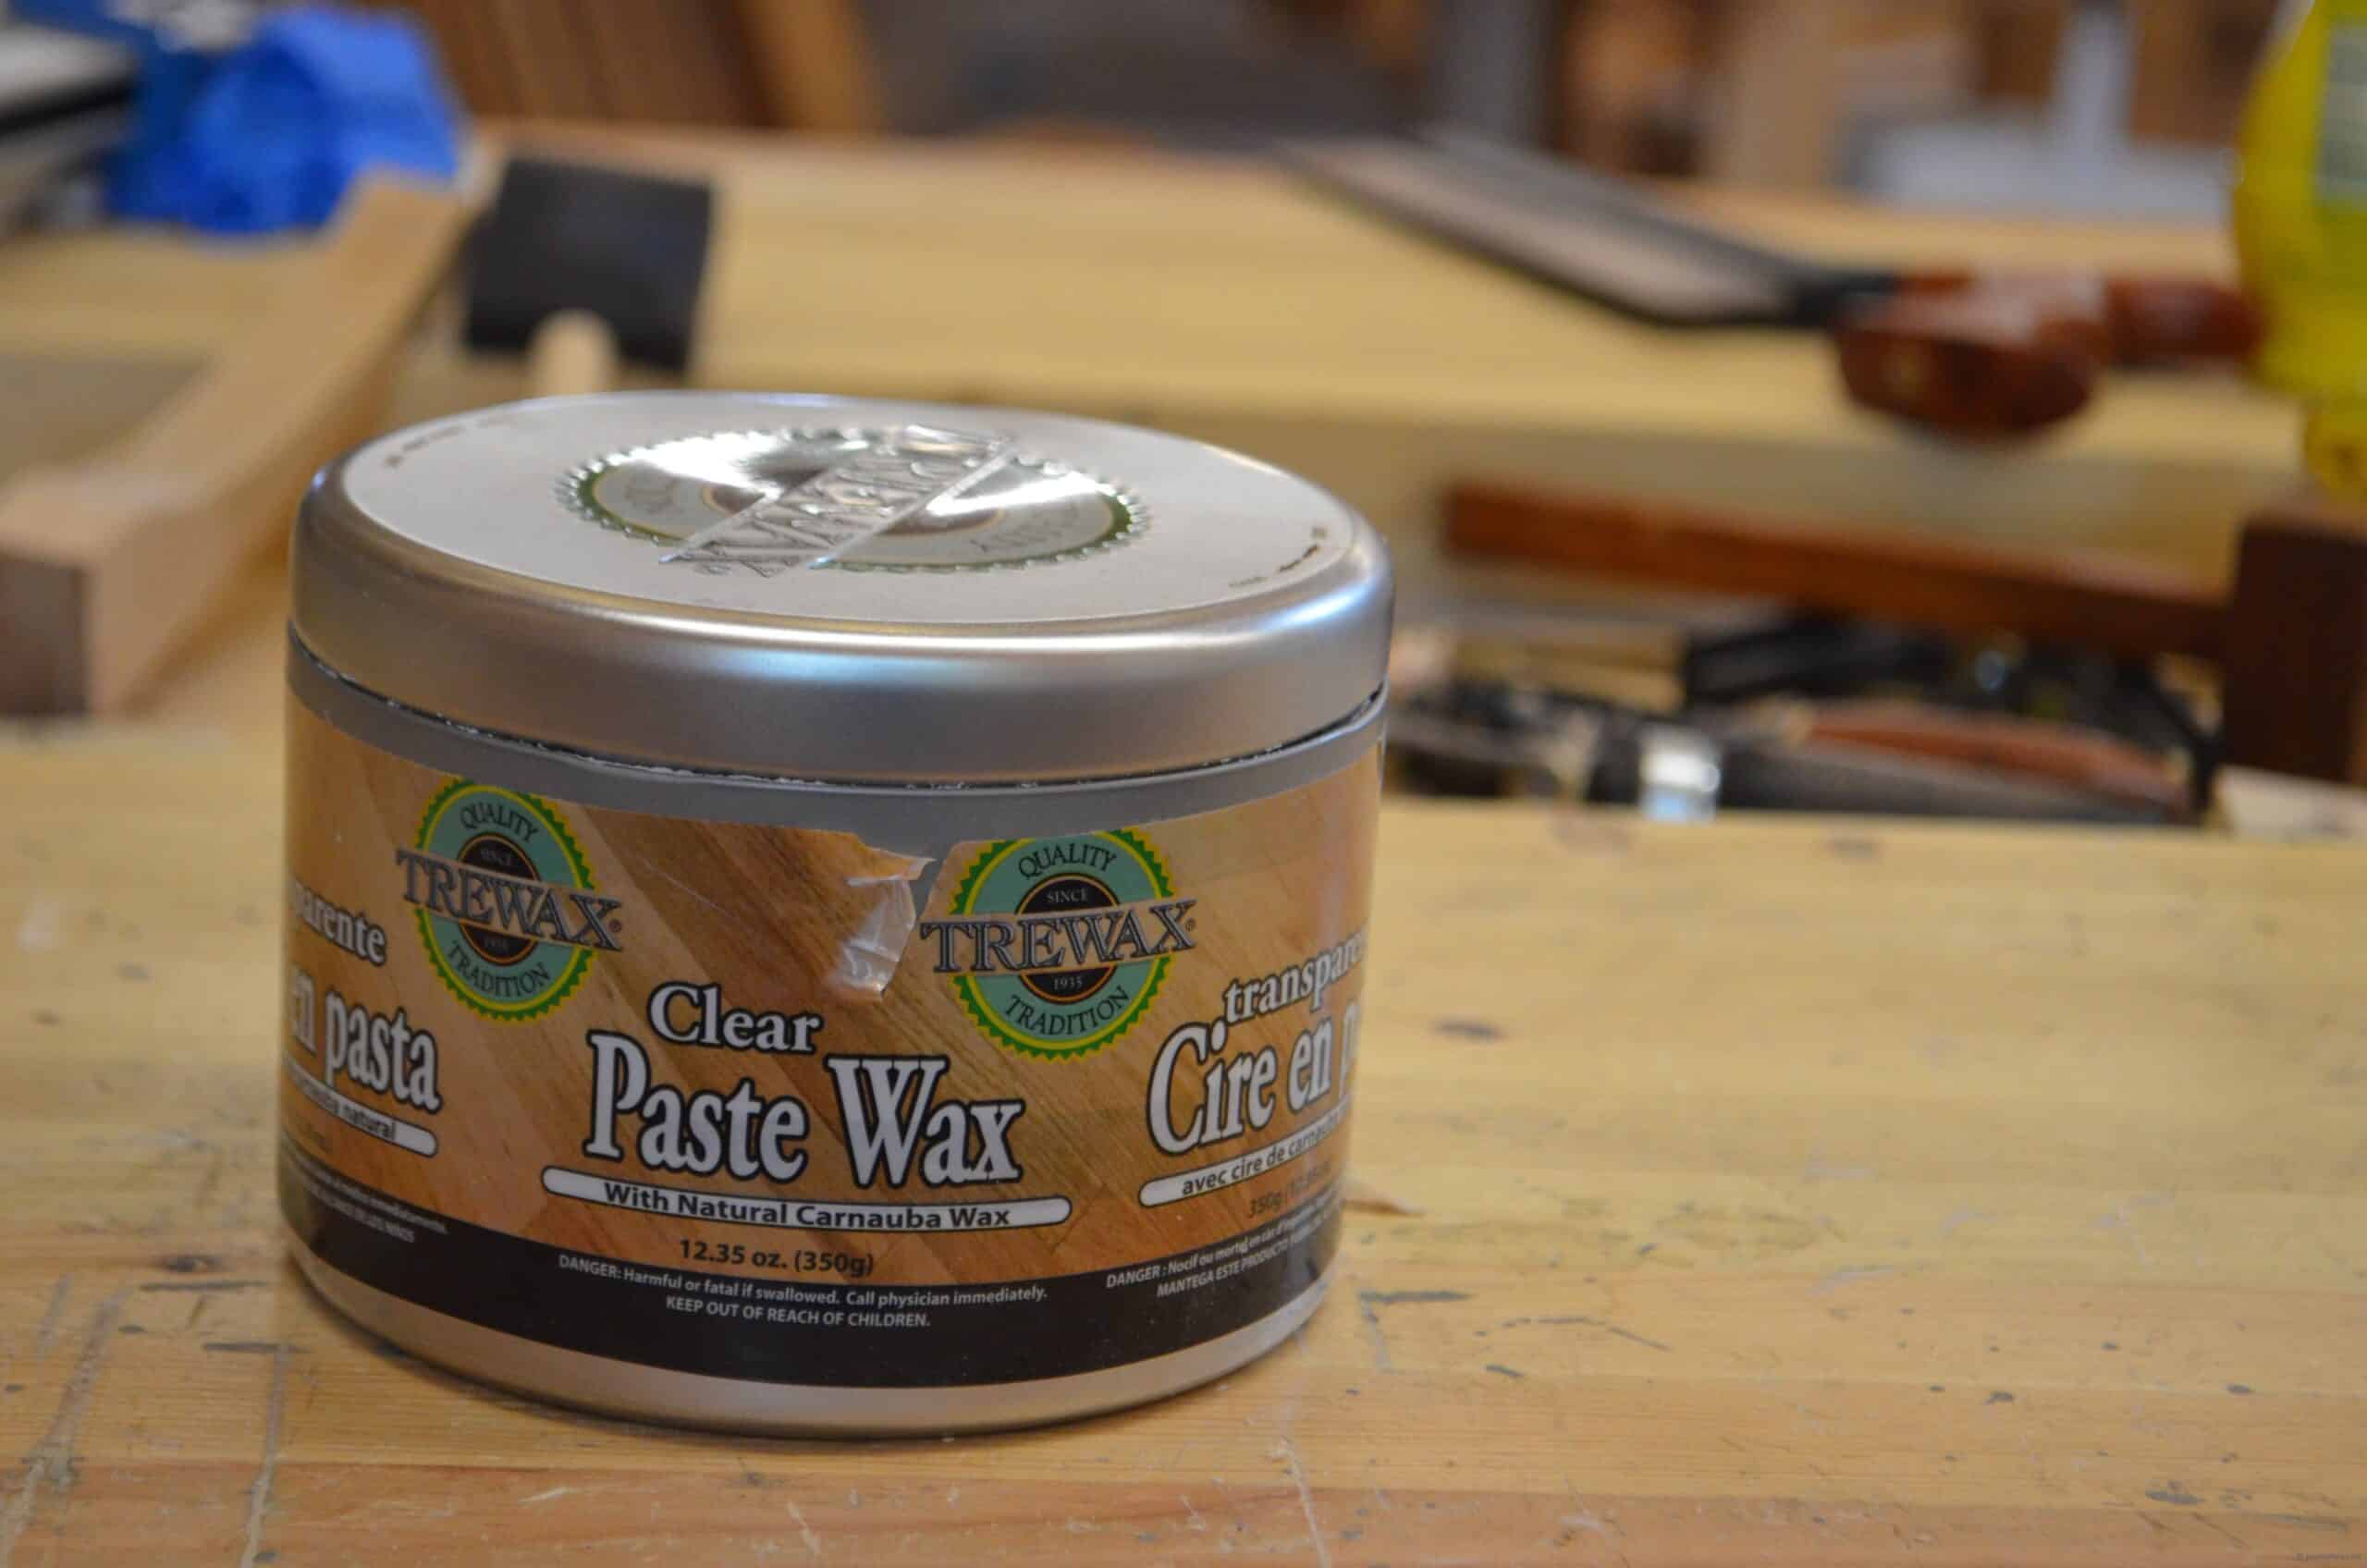
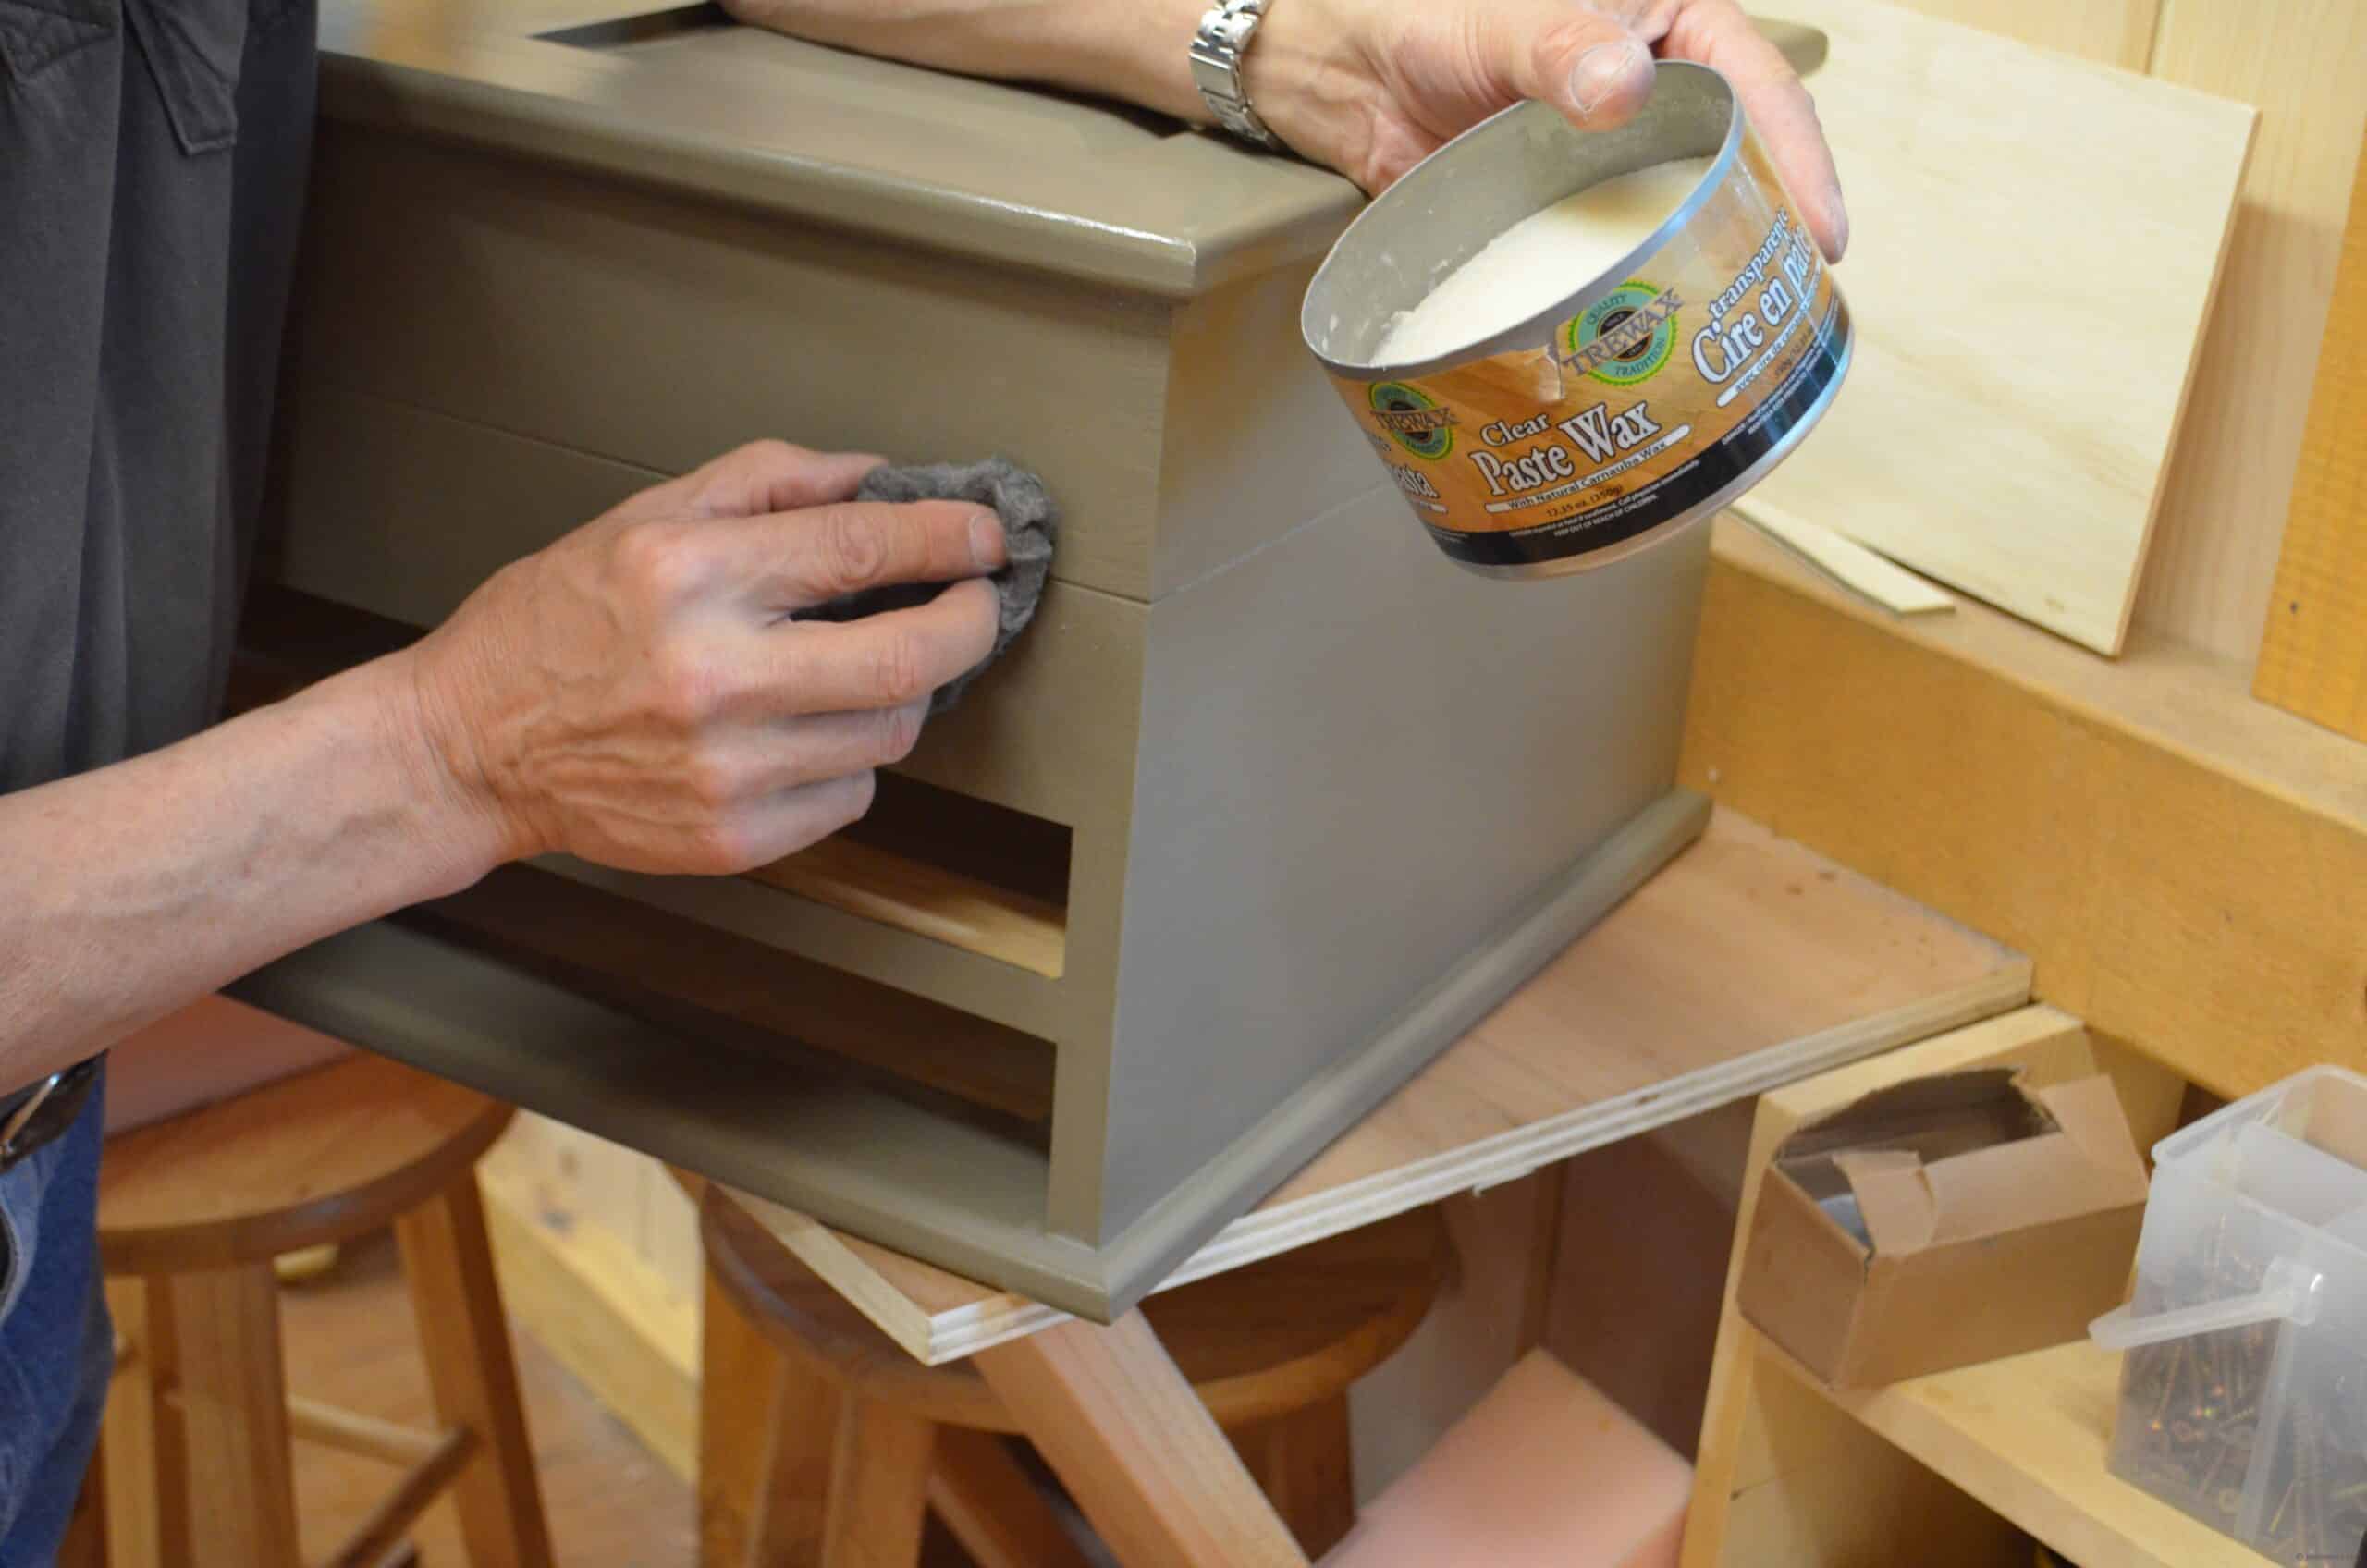
This prevents thick and uneven build up of wax. I work in small surface areas and polish the areas with a soft cloth as I work around the box.
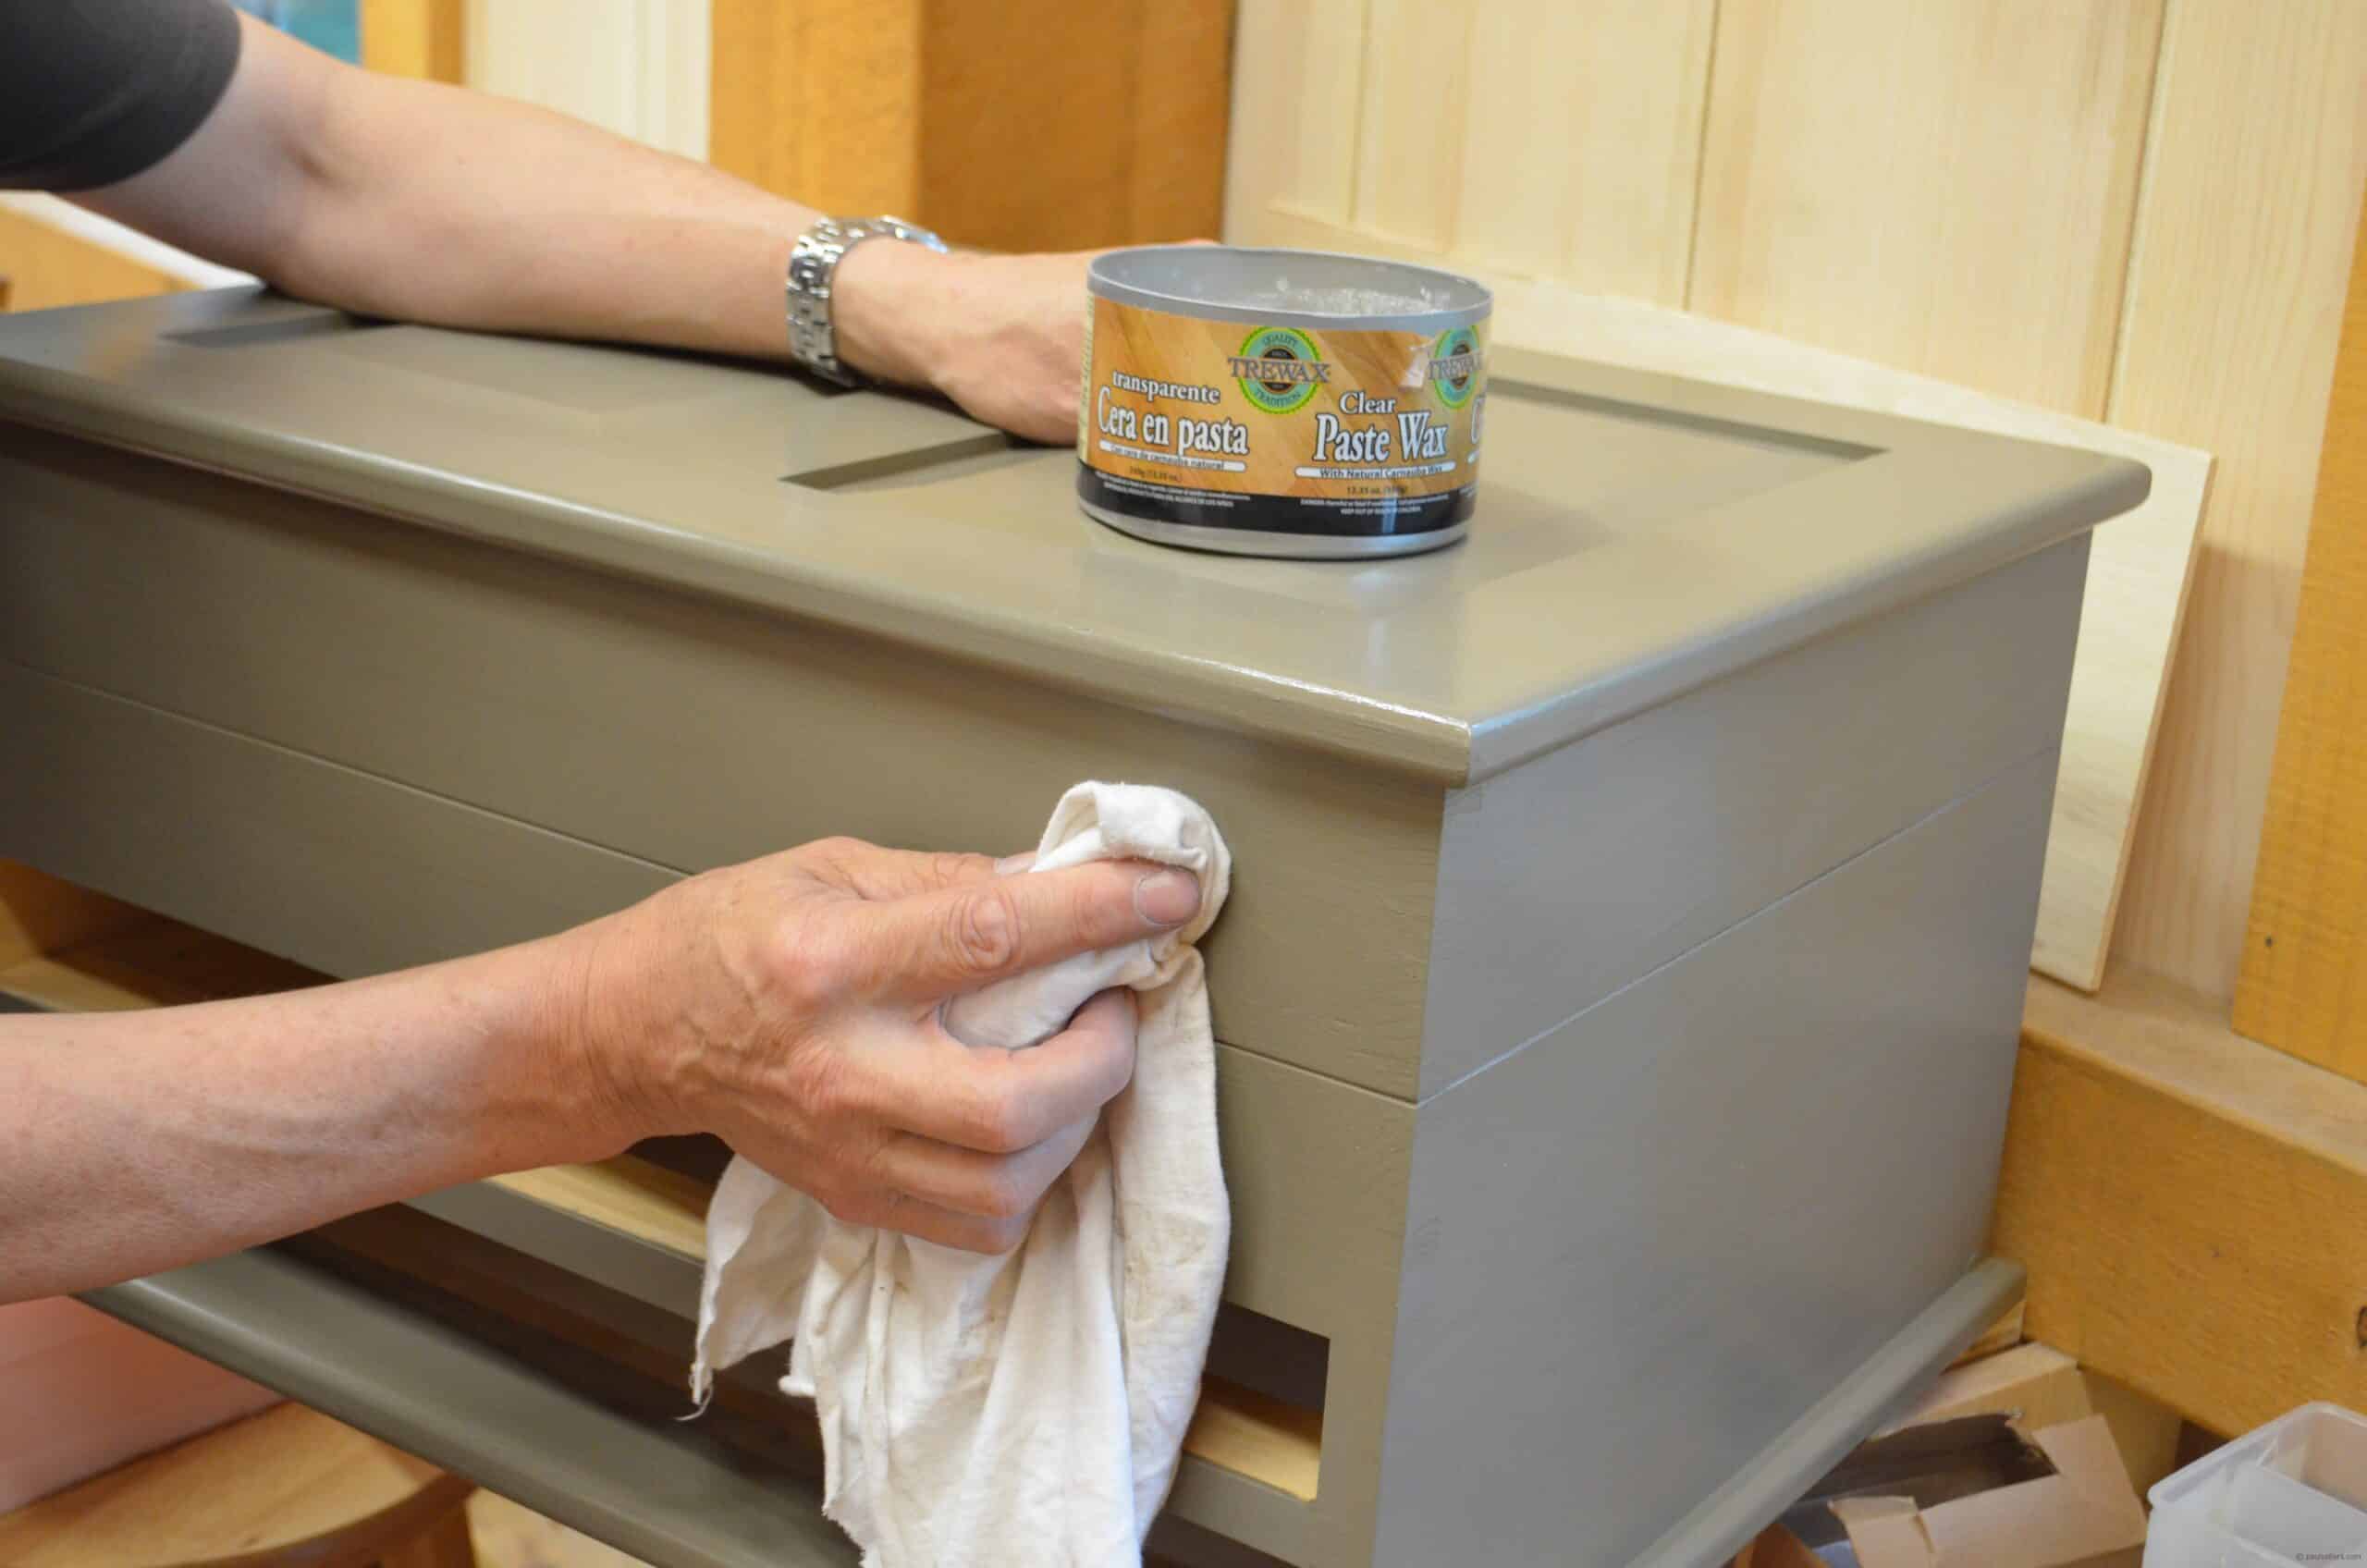
When finished, I finally buff with a soft Kiwi shoeshine brush to get the luster I want. The top picture shows how I finished my box. To soften the shine you can simply steel wool with 0000 steel wool and leave as a waxless finish. Or, do as I did and remove some of the wax shine with 0000 steel wool.
I have to say, I was amazed at how the paint turned out. It’s a really nice look and works really well on the toolbox. I was thinking milk paint for mine but after seeing Paul do his this way I’m convinced (that happened about 200 times over 5 weeks btw.) The other real surprise is how nice it feels after the steel wool and wax.
I do like paint on pine, if nothing else it helps hide some of the blemishes and rough looking area’s. I haven’t tried putting shellac as a top coat so I will give that a try. I did paint my legs and apron’s on my bench and IMO it looks 100% better than the plain wood. Perhaps if I would have had some stellar wood I might not have painted it.
Steve
I could be wrong, but I think the “1812 paint… from B&Q” would be Craig & Rose 1829 paint, which is now being marketed as their “Authentic Periods Colours” range.
I haven’t tried it yet, but intend to some time soon.
http://search.diy.com/search#w=1829%20paint&asug=
http://www.craigandrose.com/range/authentic-period-colours
Dear All. Just a quick note. I really didn’t think I could use a paint brush for many years. Normally I would by a pack of five cheap brushes not cleaning them after the job but simply disposing of them. Then by accident I bought a quality brush. It was in a cheap outlet shop and for this reason only it was within my tight wad price ceiling.
Never again will I use a cheap brush.
In terms of a plane you could compare the finish given by a quality brush to that of a well sharpened No4 plane. The finish given by a cheap brush could be likened to that given by a blunt shovel. Wielded by a myopic drunkard. Not quite the same.
As ever a wonderful post by Paul, thank you. Your generosity in detailing every small-but-important piece of the process, essentially giving away a lifetime of learned and self-developed craftsmanship, never ceases to amaze me.
The problem with the internet is anyone can write an article purporting to do this, but most are either flogging a product or are virtually beginners themselves.
Solid gold.