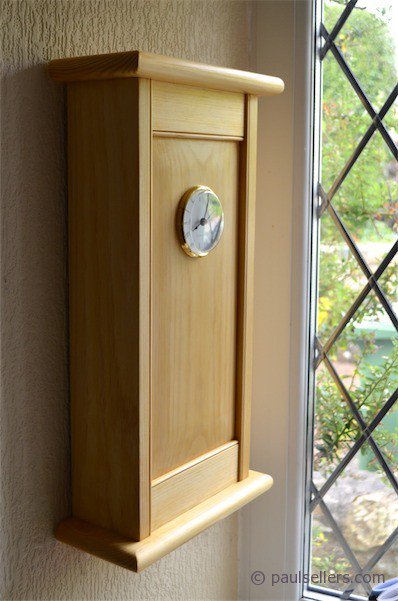
A new series to make the wall clock
In a couple of weeks the Online Broadcast we started will come to an end and the next projects will take us into the new year. You can of course still sign up for the series on the wall clock and the methods and techniques will give a solid beginning for hand tool instruction. Over the next few blogs, however, I will be posting the steps for building one that will accompany the online series so let me introduce this series.
Going through wood lots and lumberyards has been a part of my life for almost five decades. I do it most weeks and this is how I source most of my materials. I have a good idea what i am looking for but sometimes I find materials that are more scarce or unusual and I buy for that reason alone. 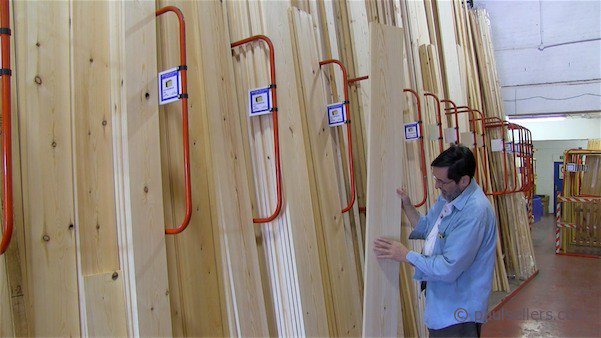
For the clock, I chose my pine carefully. I usually look for flatness and minimal defects when choosing planed stock as this might cause unnecessary difficulty in hand planing the surfaces when I removing machine planer marks. I also look for good, straight grain with pleasing configuration but not fancy grain with crotch patterns or burl figuring and such. That type of grain in pine can be difficult to smooth with a hand plane, even for experienced woodworkers, and you cannot generally use a bench cabinetscraper to take care of this type of grain as you might in say oak or other such harder, denser-grained woods.
My timber yard (lumberyard US) allows me to pick through the wood and I always restack neatly. This company also allows me to cut the length I need as long as I leave two metres on the board.

I cut my pieces to length according to my cutting list before ripping to width. This enables me to plane the ends on the wider board, which is easier than on narrow ends unless of course you have a shooting board.

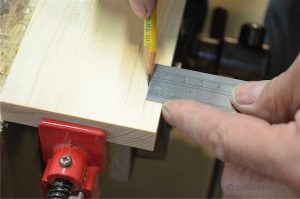
The width of my side pieces is 3 1/2” so I can use either the combination square and pencil as shown here, or I can use a marking gauge, which is a traditional method. I set the combination square to 3 1/2” and ran a pencil line along the length using the square as a guide. This is quick and simple. You can also use a marking gauge for this too.

I used a 10ppi panel saw to rip down the length of the board and left the line there for me to plane down to.
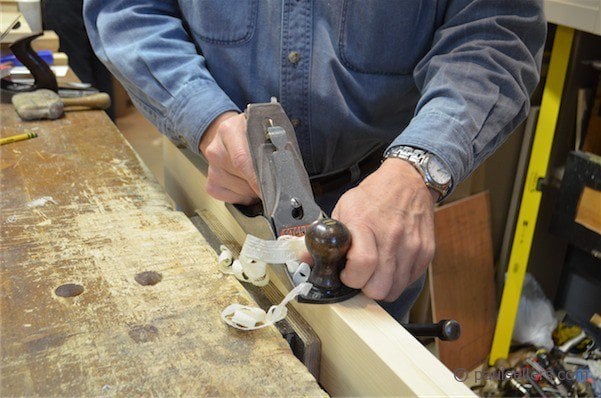
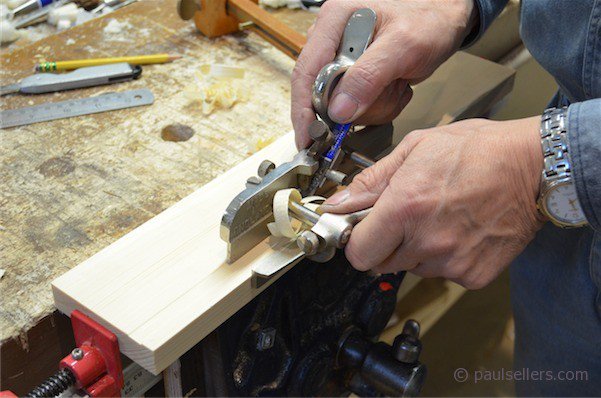
With my pieces cut to width and length according to my cutting list I was ready for grooving the side pieces along the length.
Most of this work can of course be done by machine if preferred but hand cutting gives me a certain rhythm I don’t get with the machine so whenever it’s practical I use hand power.
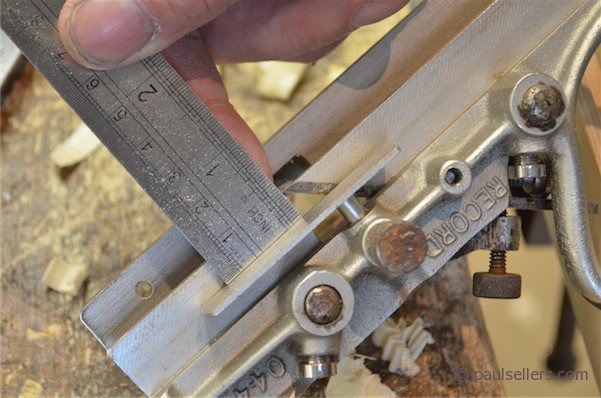
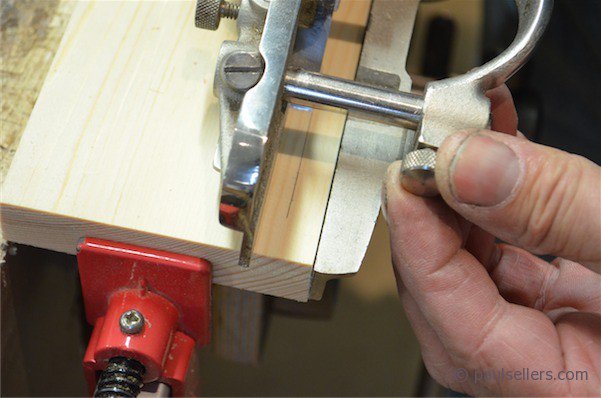
Setting up the plough plane is quick and effective. My groove could be any size between 1/4” and 1/2” and I chose 3/8” of an inch and set the distance 3/8” from the front edge of the side piece.
The cutting list for the clock is as follows:
Main Clock Body
Top 1 @ 7/8” x 4 3/8” x 9 7/8”
Bottom 1 @ 7/8” x 4 3/8” x 9 7/8”
Side 2 @ 7/8” x 3 1/2” x 17 1/2”
Cross rail 2 @ 7/8” x 2” x 7 3/4”
Panel 1 @ 7/8” x 7 3/4” x 13 5/8”
Undercarriage 1 @ 1 3/4” X 2 5/8” x 6 3/8”
Cove 1 @ 7/8” x7/8” x 15”
Hello Paul,
I really enjoy watching the wallclock project.
I have almost finished my first clock by now and i hope to make
some more before christmas for my family.
I never could have thought that creating something myself with
just handtools was so satisfying.
Can’t wait for the other projects.
Thank you Paul for bringing woodworking in to my life.
Well, Juryaan, I am so glad that you and many like you are finding the rewards of working wood by hand an alternative reality to the future of woodworking as a whole. I find myself feeling at my best when I make something that has meaningful results. I hope that you will enjoy the next couple of videos which includes some radical ways of sharpening saws and a project that gets people started in hand tool woodworking. I’ll be discussing the essential ten tools and joinery as we progress through the course. I know that you will also enjoy our major project, which is the Arts and Crafts rocking chair. We bring some unique twists into that too.
Best regards,
Paul
Beautiful clock body!
Hi Paul, this is a great companion to the video series in the Master Class program. Thanks for all the work and care in putting these together.
I am a bit late to the party but have a dimensional question. I have looked throughout the blog more than once and can’t make sense of the length of the rails and the width of the panel. Overall width of clock (ie. length of top and bottom) is 9 7/8″. Distance in from ends to inside of stopped dado is 1 3/4″ each end. This leaves clear distance between dados as 6 3/8″. Adding 5/16″ stub tenon at each end of rails (or sides of panel) gives an overall length of rails (or width of panel) to be 7″. Cut list calls for 7 3/4″.
I can’t believe I am the first to ask this question. Either that or I am totally missing something. Can someone please clarify.
Thanks, Dave
PS Any chance of seeing photo of bottom of clock showing undercarriage and cove? Or is it necessary to purchase this project to see that info?
You are the first and I am not sure where we are with it. I will check soon and get back to you.
Hi Paul I really enjoy all your videos and I’m making a wall clock but where do you get the clock faces from many the steve
You can buy them from Axminster in the UK or Lee Valley Veritas in the USA or Canada.
I watched your entire 8 episode wall clock build with great interest as you have become my favourite new woodworker, in fact I have also ordered a few of the tools you use. Thankyou for that. My biggest problem is with finding the wood for the project and for any of the projects I have wanted to build over the years. I live in Canada on the prairies, and I have NEVER been able to find clear pine of the thickness you are using at any lumberyard or home centre EVER in my entire life and I’m 64. It really irks me when I see projects in American woodworking magazines like a six board chest for example (Mike Dunbar) that he just went down to his local home centre and picked up 12” x 1” thick clear pine boards! They don’t exist here, and we have one of the largest pine forests in the world.( Saskatchewan)The argument being that we Canada ship all our best wood to the states, which may be true, I don’t know.If I want a pine board, it’s a special order at my lumberyard and I certainly won’t have the luxury of being able to pick it out and it will only be a 1 by. and full of knots, Ridiculous.
7\8 ths of an inch? Ridiculous.
In what way? Let me guess, you like metric only!!! Imagine life without imperial measurements. How drab if the whole world worked only in metric!