For more information on planes, see our beginner site Common Woodworking.
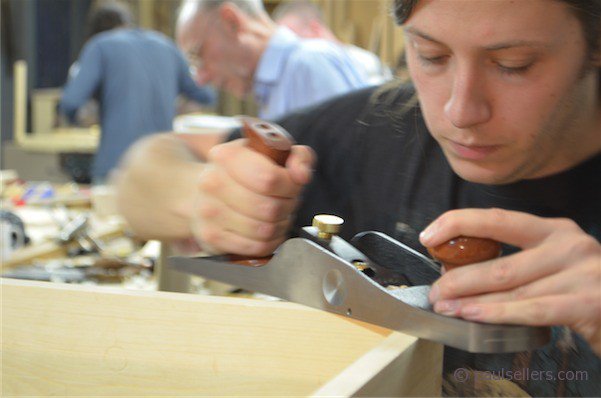
An interesting point just came up on the woodworkingmasterclasses.com forum and it’s something most people will not be aware of when restoring hand planes like the #4s, 4 1/2s, #5s and 5 1/2s. Cast iron soles of any and every type wear and wear quite quickly; more on some woods than others, end grain trimming and especially quickly when trimming narrow engineered boards such as plywoods, melamine coated fibre boards or plastic laminates and so on. When it comes to flattening plane soles, balance is everything and though of course it is a matter of personal preference how much polish you want to bring to the sole casting, actually polishing the sole does not last because the wood itself is so abrasive. In my view it also makes little difference to the functionality of the plane within a few initial strokes. As I said, wood itself is more highly abrasive han we think, it gradually, sometimes quickly, wears away at the sole of the plane and thereby changes its flatness. Many woods will roughen polished soles in a heartbeat and whereas there is nothing more pleasing than flattening out a sole, getting it ready for real work, the polish will get scored by the wood, and other substances, as you use the plane. To show how much wood is abrasive, think how plane soles actually end up going out of flatness. I often buy planes secondhand that have a channel along the length. This is a plane that was used predominantly on narrow stock, perhaps 3/4″- 1″ or so in width. Then there are planes that are hollow along their length, round or twisted. This is a regular issue and not rare at all. Imagine the plane has been used on hollow faces but the plane is always used at a slight skew because of body presentation. The plane sole then develops a twist and so too the wood it planes. Same in reverse. These are indeed common phenomenon and not rare at all. That’s why planes, if used a lot as my own are, need periodic flattening. Another not so apparent influence that changes the sole’s flatness is how the plane owner uses the plane with regards to the plane handles. Planes can be bent by pressure on the fore and rear totes. that means they can be bellied or hollowed depending on the pull and push applied to these two points of contact. Over a number of years, this alone creates hollow, flat or twisted soles. The longer the plane, the more the flex and the more the problem increases. It’s not a one off to flatten a plane sole, perhaps every year or two depending on the amount of use, the biased you have, and the wood you use in the everyday of woodworking. Because I demonstrate sole flattening on average 3-4 times a week, my plane soles remain dead flat. That makes my work easy and so my planes are always ready for fine work. It is a rare situation that demonstrators demonstrate real situations for planing wood. For instance, planing curly maple or even highly figured woods is more rare than normal yet somehow this supposedly proves the plane. This is also true of people showing the thickness of a shaving on a piece of hard maple or oak. These two woods in general plane well and actually, figured maple planes exceptionally well. So too a hardwood billet 1 1/2″ by 1 1/2″ wide and 18″ long. Planing adjacent surfaces of say a door frame, or the rim of a box on the other hand presents a more realistic occurrence for the plane to be proved, so perhaps it’s better to look for this when you are trialling a new plane.
18 Comments
Mr Sellers I just picked up an old #5 stanley jack plane, and have been working at re-furbishing to a workable condition using the methods you discribe. I find it hard to believe tha the stress can ‘bend’ or distort the plane just by hand pressure, but I guess it makes sense. my next purchase will be a to convert a smoother to a scrub plane as I’ve seen you use (#4 – 4-1/2) My question is how do you work that radius into the blade? – I’m awating diamond plates in the mail as we speak – are the coarser ones the one to put the most time in on?
Yes, this one will do the most shaping and reestablishing, the other two plates abrade very quickly. So too the strop for polishing.
Hi Paul,
Is sole wear likely to be more or less of a problem with bronze planes? (I haven’t got one – my metal planes are old Stanleys and Records – but it would be interesting to know if bronze is worth the extra money.)
Thanks, Rob
Don’t know this one but good Q; anyone?
I know that they use bronze ‘wear strips’ on some area of steel production (sold as shims) perhaps that’s a hint as to the wear factor, I’ll see if I can get some additional info.
Thanks Paul and Brian.
I haven’t delved deeply but the only info I have turned up comparing bronze with steel comes from Wikipedia where it says that bronzes are softer, weaker and less stiff than steel, but bronze has better resistance to corrosion (hence use in fittings for ships) and metal fatigue. For use in a hand plane this suggests to me that steel is the better material.
Hello Paul
I am hoping for an idiot check. I’m working through your video on flattening the sole on a used Stanley 4. Now I’m into the procedure over a thousand strokes with 150grit sand paper, a flat granite tile and a coarse EZE-Lap diamond stone. I still have sections of plane with pen marks! Does this sound reasonable? Did I take a left turn somewhere that I shouldn’t have?
Thanks
Jason
I feel your pain Jason. I spent two full days on my number 4 and I still need to do more work on it if I ever find the spare time. Paul you make everything look so easy and fast. I love working with planes but sometimes I get tearout on a straight grain piece of western red cedar with a freshly sharpened blade and I can’t understand why. I watch Paul round an edge for a box lid on end grain and theres no tearout. It can be frustrating not knowing what you’re doing differently when it looks so simple.
Guys, It is not going to take too long. When I trained in this I took the pieces apart over and over for hours until I could assemble in seconds. I was a klutz when I started too, and not every sharpening worked, but I experimented, changed cap iron settings near and far from the cutting edge until Whammo!!! Now I can do it blindfolded, in my sleep even. You can do it.
Jason make sure you have plenty of 150 (or courser) paper to hand as it can quickly wear down and ends up as very fine grit instead.
What kind of granite base did you use for ‘flattening’ the sole of the number 4 plane?
Would a granite chopping board do the job okay?
What about re-storing the side plates of the plane when using a shooting board?
Would the same process be used, as well as a check for being square?
I have used granite countertop savers and to do that you must take a straight edge in the store with you and check for flatness corner to corner as best you can as they are not always flat as the should be.
The sides don’t need to be square to the sole and usually they are not out but a fraction so that matters not because your lateral adjustment leave will align the iron square to the stock as needed. People who obsess the flatness and squareness as sales promo usually don’t mention this as a selling factor is wrongly promoted as a necessity. Get the stock in the shooting board, get the angle right that you are shooting and then tweak the leaver for squareness. Dead simple!
By the way, I use a certified granite block for my work of flattening. Well worth the money.
Hi,
I have a certified granite block from Woodcraft and am using sandpaper on my plane sole. It keeps digging deep scratches and shallow scratches into the sole. The deeper scratches are far deeper than the shallow ones and I can’t seem to sand them out. What is going on?
Jeff D
Some abrasives have a set upper or lower range and there are abrasives of multiple sizes with the largest particulate size being say 150 when other sizes go down in size to 250. That’s all I can suggest.
Hello Jeff,
I’m having the same problem as you as well. Paul makes it look easy; we must keep trying!
I have been told by people who use wood planes a lot that the normal wear point is just in front of the mouth. Took me a while to work out why until I realised that the front of the mouth together with the very rear of the sole are the only points of contact once the plane is fully on the work piece.
If you don’t believe this put the plane on a flat surface and then slide a piece of thin plywood under the front of the plane until it gets to the mouth. The thin plywood represents in a very exaggerated fashion the wood before the shaving is removed and the flat surface the wood after the shaving has been removed. When you look from the side you will see the contact points are just in front of the mouth and the rear of the sole. Power planers have the two beds at different heights to allow for the depth of the cut but since the depth of cut on a hand plane is that much smaller they are made with a flat sole. However the difference in height before & after the shaving is remove still results in the two point contact I described above. When only the front or rear of the plane is on the wood the situation is different.
It’s more there because the fore part sits one fraction above the aft part even though we can be talking thousandths of an inch on the initial insert of the cutting iron into the wood.
Comments are closed.
Privacy Notice
You must enter certain information to submit the form on this page. We take the handling of personal information seriously and appreciate your trust in us. Our Privacy Policy sets out important information about us and how we use and protect your personal data and it also explains your legal rights in respect of it. Please click here to read it before you provide any information on this form.


Mr Sellers I just picked up an old #5 stanley jack plane, and have been working at re-furbishing to a workable condition using the methods you discribe. I find it hard to believe tha the stress can ‘bend’ or distort the plane just by hand pressure, but I guess it makes sense. my next purchase will be a to convert a smoother to a scrub plane as I’ve seen you use (#4 – 4-1/2) My question is how do you work that radius into the blade? – I’m awating diamond plates in the mail as we speak – are the coarser ones the one to put the most time in on?
Yes, this one will do the most shaping and reestablishing, the other two plates abrade very quickly. So too the strop for polishing.
Hi Paul,
Is sole wear likely to be more or less of a problem with bronze planes? (I haven’t got one – my metal planes are old Stanleys and Records – but it would be interesting to know if bronze is worth the extra money.)
Thanks, Rob
Don’t know this one but good Q; anyone?
I know that they use bronze ‘wear strips’ on some area of steel production (sold as shims) perhaps that’s a hint as to the wear factor, I’ll see if I can get some additional info.
Thanks Paul and Brian.
I haven’t delved deeply but the only info I have turned up comparing bronze with steel comes from Wikipedia where it says that bronzes are softer, weaker and less stiff than steel, but bronze has better resistance to corrosion (hence use in fittings for ships) and metal fatigue. For use in a hand plane this suggests to me that steel is the better material.
Hello Paul
I am hoping for an idiot check. I’m working through your video on flattening the sole on a used Stanley 4. Now I’m into the procedure over a thousand strokes with 150grit sand paper, a flat granite tile and a coarse EZE-Lap diamond stone. I still have sections of plane with pen marks! Does this sound reasonable? Did I take a left turn somewhere that I shouldn’t have?
Thanks
Jason
I feel your pain Jason. I spent two full days on my number 4 and I still need to do more work on it if I ever find the spare time. Paul you make everything look so easy and fast. I love working with planes but sometimes I get tearout on a straight grain piece of western red cedar with a freshly sharpened blade and I can’t understand why. I watch Paul round an edge for a box lid on end grain and theres no tearout. It can be frustrating not knowing what you’re doing differently when it looks so simple.
Guys, It is not going to take too long. When I trained in this I took the pieces apart over and over for hours until I could assemble in seconds. I was a klutz when I started too, and not every sharpening worked, but I experimented, changed cap iron settings near and far from the cutting edge until Whammo!!! Now I can do it blindfolded, in my sleep even. You can do it.
Jason make sure you have plenty of 150 (or courser) paper to hand as it can quickly wear down and ends up as very fine grit instead.
What kind of granite base did you use for ‘flattening’ the sole of the number 4 plane?
Would a granite chopping board do the job okay?
What about re-storing the side plates of the plane when using a shooting board?
Would the same process be used, as well as a check for being square?
I have used granite countertop savers and to do that you must take a straight edge in the store with you and check for flatness corner to corner as best you can as they are not always flat as the should be.
The sides don’t need to be square to the sole and usually they are not out but a fraction so that matters not because your lateral adjustment leave will align the iron square to the stock as needed. People who obsess the flatness and squareness as sales promo usually don’t mention this as a selling factor is wrongly promoted as a necessity. Get the stock in the shooting board, get the angle right that you are shooting and then tweak the leaver for squareness. Dead simple!
By the way, I use a certified granite block for my work of flattening. Well worth the money.
Hi,
I have a certified granite block from Woodcraft and am using sandpaper on my plane sole. It keeps digging deep scratches and shallow scratches into the sole. The deeper scratches are far deeper than the shallow ones and I can’t seem to sand them out. What is going on?
Jeff D
Some abrasives have a set upper or lower range and there are abrasives of multiple sizes with the largest particulate size being say 150 when other sizes go down in size to 250. That’s all I can suggest.
Hello Jeff,
I’m having the same problem as you as well. Paul makes it look easy; we must keep trying!
I have been told by people who use wood planes a lot that the normal wear point is just in front of the mouth. Took me a while to work out why until I realised that the front of the mouth together with the very rear of the sole are the only points of contact once the plane is fully on the work piece.
If you don’t believe this put the plane on a flat surface and then slide a piece of thin plywood under the front of the plane until it gets to the mouth. The thin plywood represents in a very exaggerated fashion the wood before the shaving is removed and the flat surface the wood after the shaving has been removed. When you look from the side you will see the contact points are just in front of the mouth and the rear of the sole. Power planers have the two beds at different heights to allow for the depth of the cut but since the depth of cut on a hand plane is that much smaller they are made with a flat sole. However the difference in height before & after the shaving is remove still results in the two point contact I described above. When only the front or rear of the plane is on the wood the situation is different.
It’s more there because the fore part sits one fraction above the aft part even though we can be talking thousandths of an inch on the initial insert of the cutting iron into the wood.