Sharpening – Hard facts you can work with (video)
These three levels of sharpening leave the wood feeling only marginally different, look virtually the same and are all sufficiently finished for sanding and finishing
What does ‘sharp’ really mean in real terms? Sharpness is a relative term. One day everyone will believe that that the only best edge is one with a micro-bevel sharpened with a honing guide and polished out to somewhere between 15-25,000 grit. Such is the dynamism of living on cutting edge technology. Once persuaded toward this methodology, it’s difficult to shift to any alternative that doesn’t have at least the appearance of being more demanding. And it’s this rigid strategy that somehow displaced the more free-forming methods of past craftsmen who , well, simply sharpened and got back to work. This blogpost might help to cast a different, alternative light on what is effectively a simple task complicated by, dare I say it, over-information.
More controversy surrounds the essentiality of sharpness today than ever in the history of woodworking. I think it could be another of those things created by disposable time and disposable income. The question I ask myself is is it obsessive to know more about the steel and give it new titles and facts about edge retention than to know what the tool with the edge can and cannot do? Is it more important to sharpen to tens of thousands of grit sizes than to be able to plane the edge of a door to fit without binding or level two adjacent surfaces in a frame?
As a boy in my joinery-apprenticeship days, most of the men were caught up in the art of working wood and and the sharpening methods and stones they used seemed almost but not quite inconsequential. 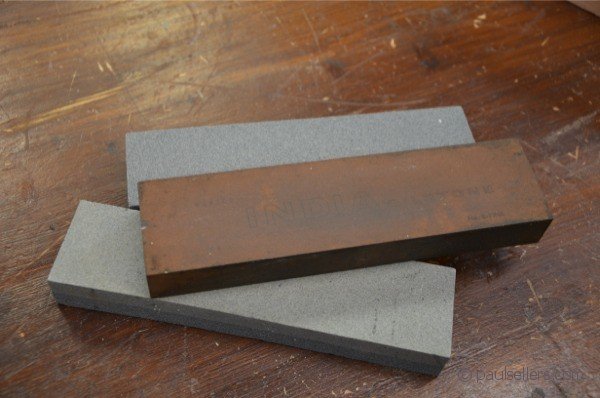

Just what do we want from a cutting edge when it comes to chisels, planes, knives, spokeshaves and so on? Working with woodworking enthusiasts, new and seasoned, I think we can divide the woodworking world into two or three camps, but not equally. I meet people and have friends in one camp where a Saturday morning can be spent sharpening an edge on the very best equipment to bring the best of the very best tools to a level of perfection most others might never achieve. They then spend the afternoon of the same Saturday shaving shavings from beautiful woods like figured maple. The engineers callipers measure the thicknesses of the shavings thousandths of an inch thick and of course their enjoyment was the festoon of shavings floating from the wood to the floor. They then put the tools away until another Saturday comes around and the ritual is started over once again. Of course in this category the goal is the shaving and not necessarily the finished wood or the woodworking that needs shaving. The category is small, very small, but all too often this group perfected the plane setting and the shaving of fixed limits but never went on to discover the expanse of woodworking and where they might invest what they learned into a more comprehensive field encompassing joinery and fine musical instrument making, other woodworking crafts and so on.
Subsequent groups splinter off into a wide range but in the broader range. They are those who want to work wood whether they do it for a living or as an add on to their normal world as a second, income or non-income producing occupation. This group concluded early on that they must have a degree of sharpness to their edge tools and that they must be able to achieve a sharp edge if they wanted to indeed work wood with hand tools. They found the information they needed and started sharpening their tools to similar perfected levels without thought that they might be obsessing over achieving the edge without realising that that was indeed what they were doing. The question then is is it obsessing, or necessary, or practical to go for the so-called “scary-sharp” level of sharpening every time we sharpen our tools. Is it more practical to sharpen to task than to always reach for that surgically-sharp higher-ground cutting edge in pursuit of the perfect sharp edge we are now led to believe to be standard.
There is no doubt that when what you make has nothing to do with earning your living, and in an age of disposable income and time (remember somehow the Brits have 5 1/2 to 8 weeks vacation time a year), we can indeed spend time developing edges that take the chisel edge to new heights. In the new absence of at-the-bench, on-the-job training between master artisan and apprentice, we now have the salesman and magazine. In the land of the blind the one-eyed man is king, remember. 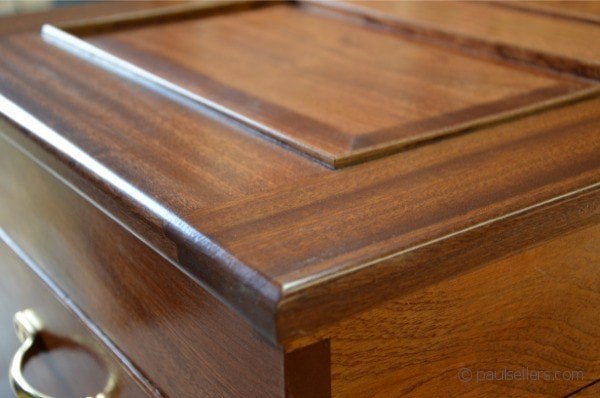
Sharpening does not need to be an obsessive task unless of course you want it to be, in which case it may not be obsessive but undeniably fascinating. It can simply be that the end product you want is the shaving you can see through. All the time these days I read someone’s statement that to test for sharpness you pare the end grain of pine to see if the surface is pristine and shiny and the removed shaving singularly unfractured. It’s a bit silly really, but, again, somehow this has become the standard in the same way micro- and secondary-bevel sharpening has become standard. A chisel sharpened to 400-grit will chop hinge recesses on house doors just fine and effortlessly and so too a plane sharpened to 400-grit will plane the bottom and stile of the same door perfectly smoothly and more than adequately for painting or varnishing.
Sharpness appropriate to task. The fact is that there are levels of sharpness appropriate to task. My son Joseph is a violin maker and when he sharpens he sharpens his planes to about 25,000-grit. He takes each tool through the various levels of particulate diligently, so that the cutting edges cut crisply and flawlessly. This affects the sound of the instrument he is making. On the other hand, as a joiner, I never sharpened to more than 400-grit and neither did the men I worked with. I chopped thousands upon thousands of hinge recesses and chopped hundreds if not thousands of mortise locks using a bevel-edged Stanley or Marples chisel sharpened to no more than 400-grit. Transferring to shop fitting and architectural work I then began to sharpen to finer levels between 400 and 1,200-grit.
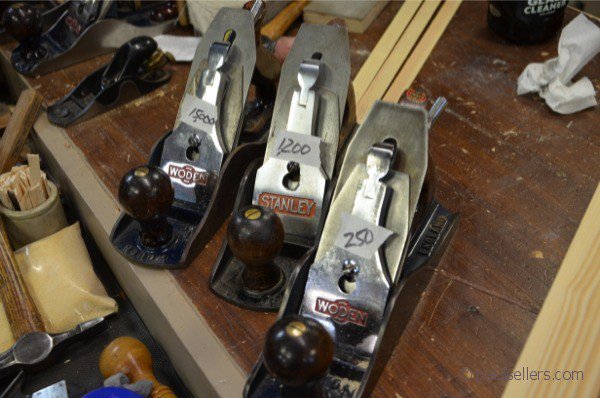
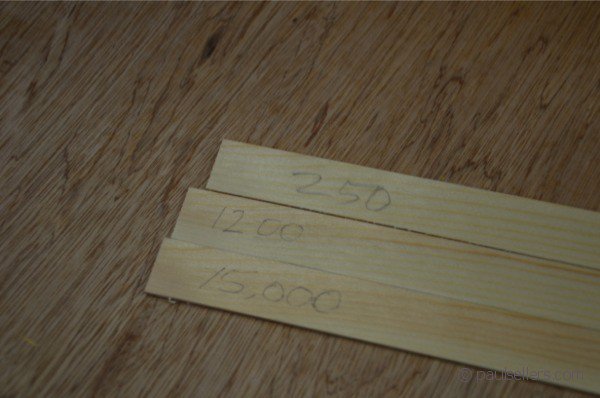
Here I have three planes each sharpened to different levels. One is sharpened to 250-grit, the second to 1,200 and the third to 15,000. I plane subsequent shavings from the same piece of wood. My feeling, that is what I feel in the plane as I use it and not mere opinion, is that the plane cuts perfectly fine but I feel more resistance than when I hone to higher levels. The surface of the wood feels more than adequately smooth and I cannot see or feel any surface roughness that needs resolving with sandpaper. This then cuts my sharpening down by about two thirds. Taking the plane edge to 1,200-grit I can feel marginally less resistance as I push but my fingertips cannot say the surface is particularly smoother than to 250-grit.
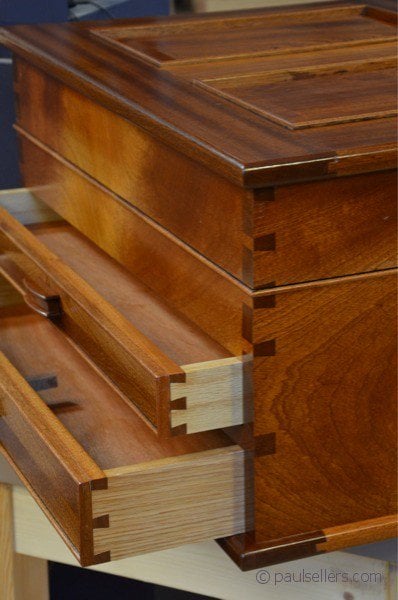
Don’t feel left out if you cannot afford the upper end levels of sharpening straight off the bat it does not generally matter. Depending on your work, you may not need to. I think if you were to try what I suggest here you might be surprised by what you find. My objective here is to say you need only one sharpening level. It could be 250, 400, 600, 800 or 1200. Using any one of these will give you a sharp plane or chisel that will cut and smooth wood well. Any one of these levels will give you a cutting edge that will plane and chisel wood to a smooth level. Any one of these levels will give you a cutting edge that will plane and chisel wood to a smooth level. Which ever level you like or feel most adequate to task is the only one you are likely to need. This is especially so in the initial stages of learning and acquiring the tools you need and when finances might be the biggest challenge. The chest above would have looked the same whichever grit I used.
Here is a video that might help you and indeed show that even without obsessing you can get good results from a chisel and plane.
I injured my elbows wrestling some walnut rounds into and out of my car trunk (boot) this past summer. As a result I’ve found that I can plane for a longer period with a freshly sharpened blade than I can one that’s been through a few days of use. As you age being aware of what causes wear and tear on the joints becomes more important. While I’m on the topic, using Paul’s tomato can oiler is the best aid I’ve found to keeping stress off my elbows!
When sharpening I use “Paul’s Method” and take planes and chisels down to 9 micron / 1200 mesh on a DMT extra fine diamond stone followed by Chromium Oxide on a strop. I’ve found this to be fast, effective, and efficient which makes it much more likely for me to make sharpening part of my regular activities instead of something I put off.
I may one day rise to the level where I need “task specific sharpening” but for now getting everything hair popping sharp with a single method means I get pretty good at that method and I have lots of confidence in the tools when I reach for them.
My two cents.
I couldn’t agree more with this. My tools have never been as sharp as they are now. Paul’s method is very quick once your plane or chisel is tuned up.
Totally agree….since following Paul’s methods, I have been able to do woodworking at a level that I actually somewhat pleased with – and the biggest improvement came from having truly sharp tools. I have a number of friends at work who do some hand tool woodworking (real woodworking), and the thing they all struggle with is sharpening. And each time I direct them to this site to learn from the master himself…and steer them from the endless searches on the internet. Of all the things Paul teaches, this is the one I come back to over and over, more than any other, to learn the nuances. And it gets better and simpler…thanks again Paul for understanding what we need to know and not just going with latest fad…feel free to dispel myths any day. I know my life is richer for what you do and teach….
I have found over the years that if the edge is refined (polished) the edge is retained for longer 10 seconds on the strop would give me ten minutes longer before requiring resharpening. If you look at edge magnified its like saw teeth which break easily but when polished its like a gentle wave and stronger. your method of sharpening I find excellent and would say that sharpening to the full polished standard makes for less effort longer lasting between sharpening
The theory works for me. I like to counter ideology that says spend, spend and spend to get a sharp edge that comes from people selling stuff. A £25 combination Norton India will do the trick for starters and that’s what woodworkers had most of the time in times past. Just another perspective.
sorry replied in wrong place
Paul I found your comments on sharpening seriously helpful, my planes and chisels are, when sharpened on my stones a joy to use. ‘ONLY’ use India stones and have given thought to buy diamond. You have really cleared the fog for me….thank you
I was wondering, would the plane with the coarser grit get duller any quicker than the planes sharpened to a finer grit? My own reasoning says it won’t matter, but I wonder if that’s true or not…
I think that it will make a difference, but if I showed you how quick it is to sharpen at one grit only it would blow your mind.
I well believe it. Could you get away with also using lower grits for flattening the backs of the plane irons?
Yes. The cutting edge is only as good as the poorer of the two adjacent faces.
ah yes, of course!
I learned the importance of a sharp tool from my grandfather
when I was very young. Grandpa was known in the family for the keen edge that was to be found on all of his edge tools. While no one in my family was ever a woodworker, most have done carpentry work but no furniture (joinery).
Anyway, when I became interested in building furniture I abandoned what
I had been taught as a boy by my grandfather and sought out what real
woodworkers were doing. This was 20 plus years ago and the only information that was available was from a library book or magazine. Water stones and jigs, wet
dry grinders more jigs, oil stone and even more jigs were all the rage. The ‘preferred’ method seemed to change with every new publication. And so began my long and expensive quest for the perfect sharpening method. It took me 20 plus years to come full circle and realize that I had learned it as a boy in my grandfather’s garage. It is as follows:
1. Carborundum stone double sided coarse/fine
2. Old leather belt
3. 3-in-1 oil
4. Pick and angle and stick with it
5. Raise a burr
6. Roll the burr from the flat side to the angled side on a single bevel blade
7. Strop the burr off and polish on the old leather belt
8. Should take less than 2min
9. Sharpen often
10. Sharpen often
My grandpa passed away a couple of years ago. Growing up he would chastise me and say, “your making it harder that it really is!”. The older I get the more I realize how right he was. Countless times during the masterclasses series I have thought to myself, “that’s so simple, why didn’t I see that before?”.
Thanks Paul for showing the simplicity once again and for bringing back a vivid memory of my grandfather.
a leather strop or even a piece of MDF dressed with chrome cleaner will polish a saw tooth edge from 400 grit stone making edge last longer
What a lovely film this is. I’m currently using the cheapest stones available, 3 euro for a combination stone. Afterwords I use a strop. Diamond plates are on my wishlist, but they will be on it for a much longer time now…
Sharpening Hysterysis….. ™
Is a contagious virus invented and spread by the manufacturers of
sharpening equipment and those who would teach (promote) the use and
sale of such products.
The inexperienced are particularly vulnerable. The virus attacks the
frontal cortex of the brain causing diminished ingenuity and self
reliance. Since the brain has been dulled, this encourages fear to rise,
that the victims edges may not be sharp enough, to pervade their every
thought.
Every tactic to continue the insecurity instilled, is reinforced in
many places around the world.
Eventually a “carnies and marks”
enviornment emerges, whereby 1/2 the community is hustling products and
services to the other 1/2 that are afflicted with the virus.
The disease robs the victim of productive shop time, and instead puts
the hapless sufferer into a trance like state, whereby they stand and
helplessly stare at shavings (also known as waste) for hours on end.
Victims are often resistant to treatment. The only known cure is
maturity.
yours Scott
I have distinct and happy memories from my childhood sitting on the end of my Grandfathers work bench. He was a cabinet maker by trade he owned our family firm of furniture makers set up by my Great Grandfather in 1916 when he was sent home injured from the trenches of World War One. I remember my grandfather sharpening his chisels he had an oil stone quite worn, a piece of leather, and a rag and that was it. Occasionally he would press a chisel blade against his thumb nail to see if it was sharp. he had no jigs no ultra flat stones of microscopic grit. That is what was done in the workshop by everyone. At that time there where four men at the bench, not counting grandfather, a machinist in another room, and there were always several apprentices.
Paul,
thanks a lot for your videos. I’ve learnt a lot.
I use the method you show for the chisel for all cuting parts of my shop, from 280 ,400,800 to 1000 all by hand and my arm give the right angle now with practise.
I’m really enjoy and proud of the progress i’ve made…
this is thanks to you.
Franck from “small” britany france.
sorry for my bad english
I am amazed at the places people read the blog. I think this is how we grow our woodworking world today. Thanks for your email.
Hi Paul, do you have any tips on sharpening molding planes? I have several old ones and want or use them! They were in the family and now collecting dust.
I don’t remember where I learned it (sharpening), but did three simple things 1) get proper clean bevel with a good wire edge on a wet grinder 2) thin the wire edge on an Arkansas stone 3) Use a buffing wheel with medium grit to remove the wire edge and polish both sides. Thereafter a couple of strokes on the stone and a bit of buffing keeps things going until the secondary bevel gets too big or you ding up the edge.
I’m a novice but the edges seem sharp, find few references to use of a buffing wheel, am I missing something?
PS
Thanks for ALL the wonderful information sharing !!