More on My Small Joinery Workbench
NOTE:Just so you know, Paul has a newer Workbench series. If you are interested in the updated version of Paul’s workbench please click the button down below. This page links to a cutting list, tools list, FAQS and much more.
It’s Only 32″ by 5’0″ and it Works Well
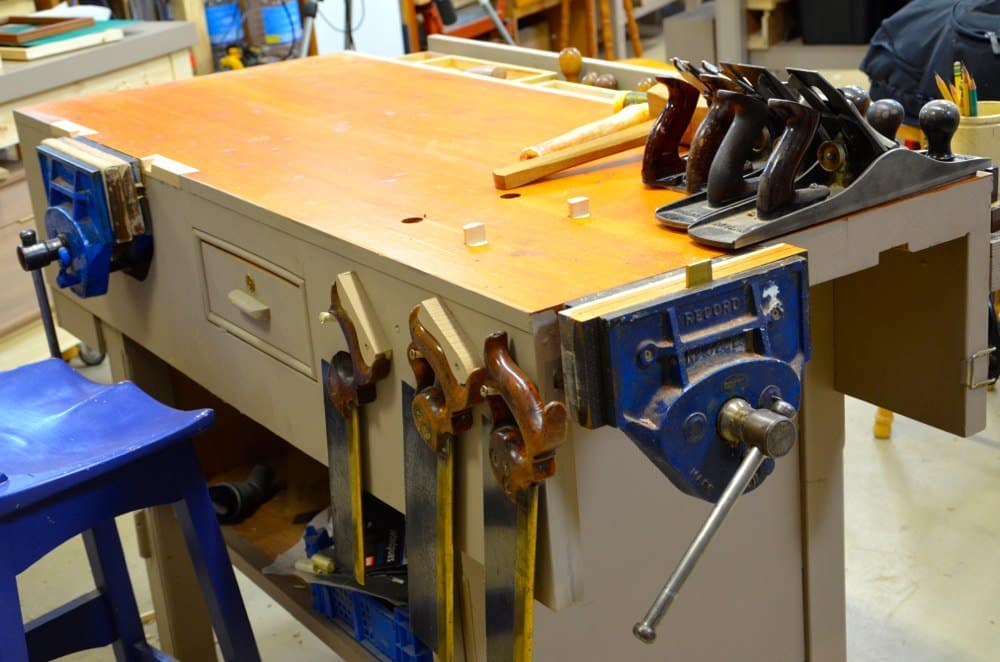
Though I use this bench because its narrower size and short length better suits filming for Woodworking Masterclasses, I certainly haven’t found the wider flat surface any great advantage at all and I sorely miss my well and two-sided benchtop work surfaces. Occasionally someone will comment that the flaw in the well stow for tools is covering the tools with a project and so blinding access to the tools. If you really think through this you will see that the concern is quite silly. 95% of work revolves directly around the vise and the immediate surface surrounding it. The mid-section of the well area is of little consequence as an actual work area until you are perhaps planing or scraping a large surface such as a tabletop or frame of some type. In such cases I think ahead and move what I might need to an accessible part of the well and get on with the work. Simple.
On this workbench I added the well after I had made the workbench because at the time of making I only needed a smaller bench to travel with me from time to time; to demonstrate at show venues or to teach from in other locations. Otherwise I need time to get used to lesser benches and that can be frustrating.
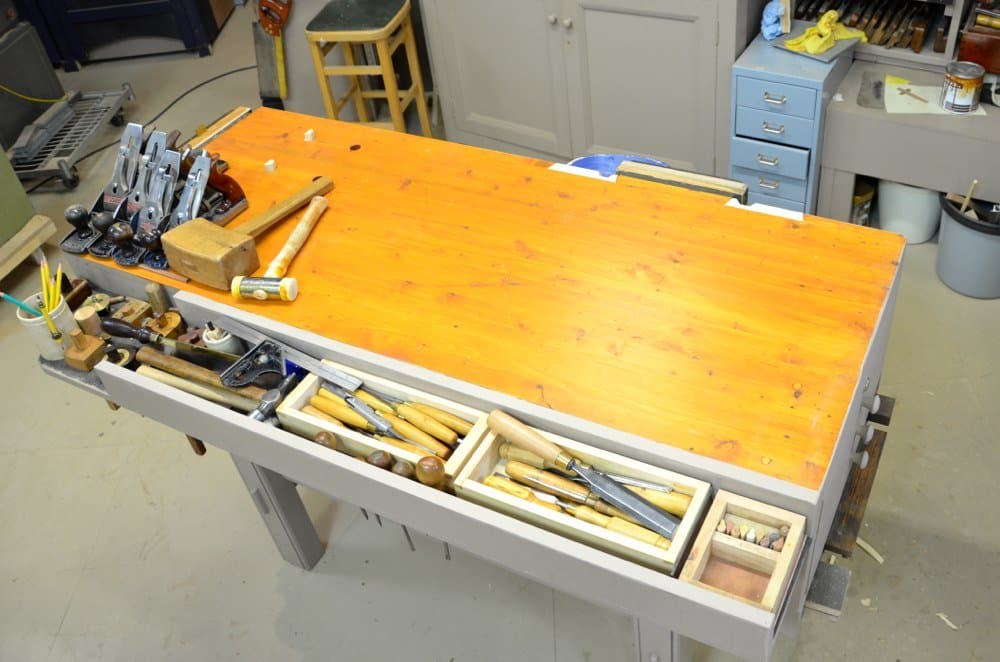
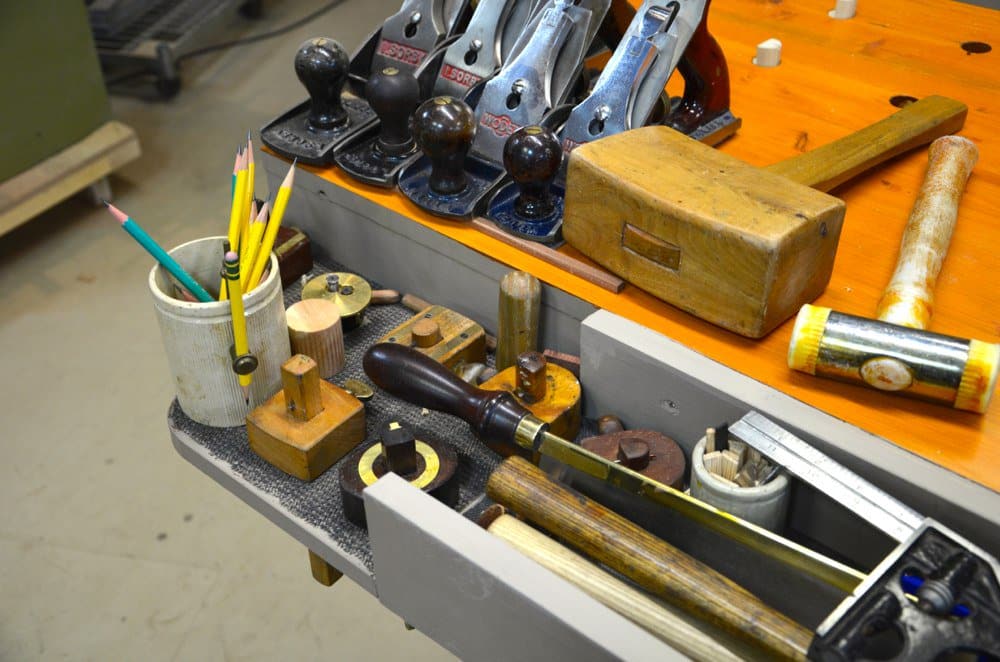
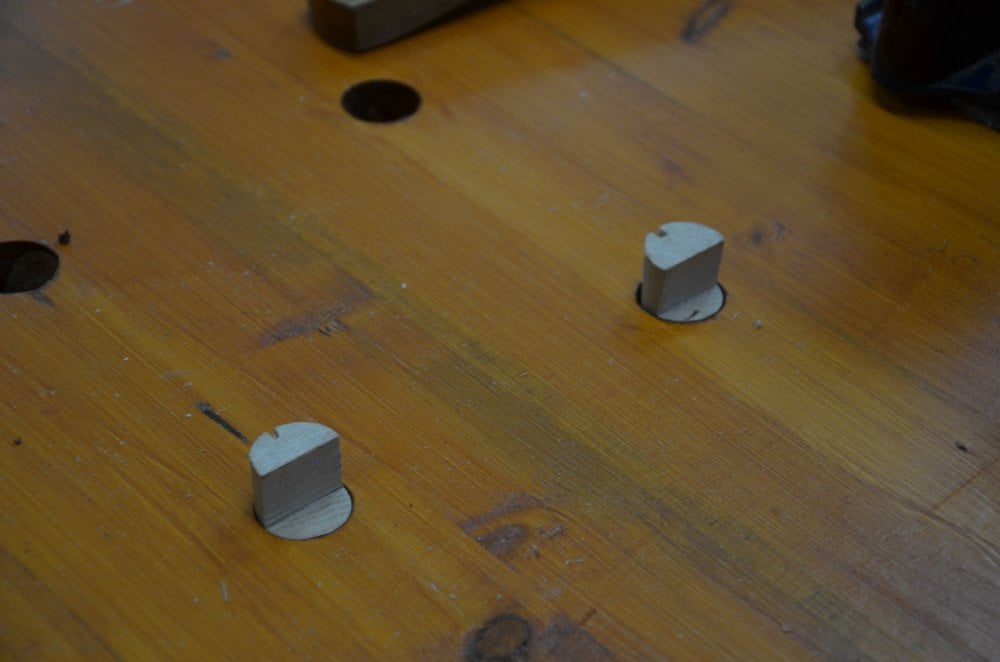
I find it most useful for stowing gauges and screwdrivers upright through holes in the bottom. They are ready to hand and easily stored.
Some say the same for the drawer in the apron but…
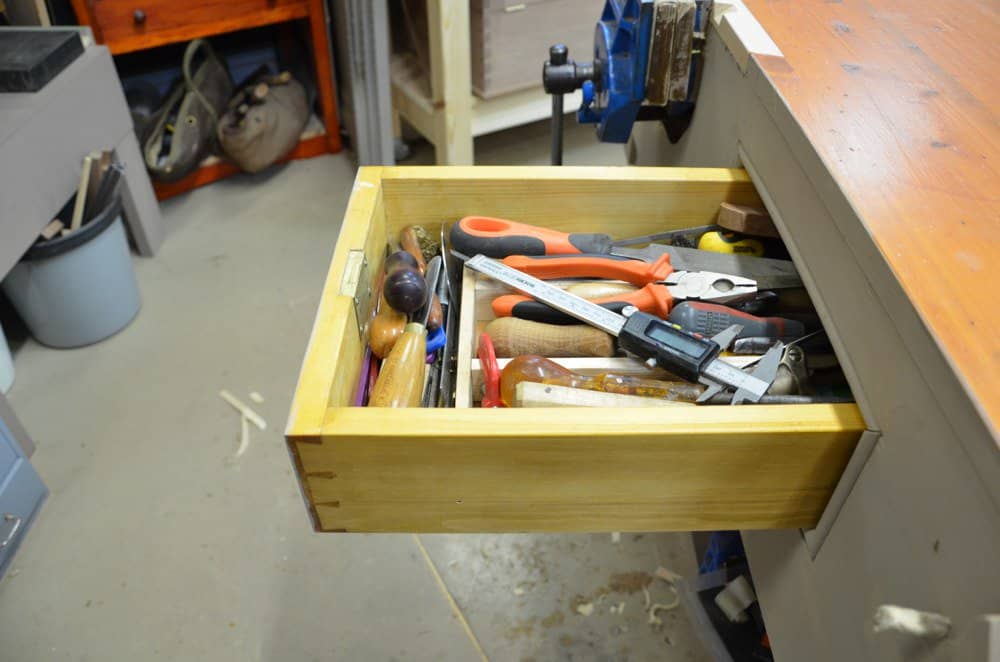
…the advantage of having a handy place for non-conformist tools offsets any and all occasional first-world problems. Also, you can find flaw with any design, but, working from my experience, I find that automatic forward planning, thinking ahead, making decisions as I work into my future is all part of the craftsman’s mode of constant processing and critical thinking. It’s what separates him from a world of theorising and non craft working. Without it work life is hard. The well and the drawer/s work almost all of the time. I would say about 98% for both combined. That makes it most practical compared to not having either. My tools with round handles never roll off the bench or around the bench top. My whole bench top working area is always free to work on and the mid section of well area is clear for me to span with large wood sections, frames and so on.
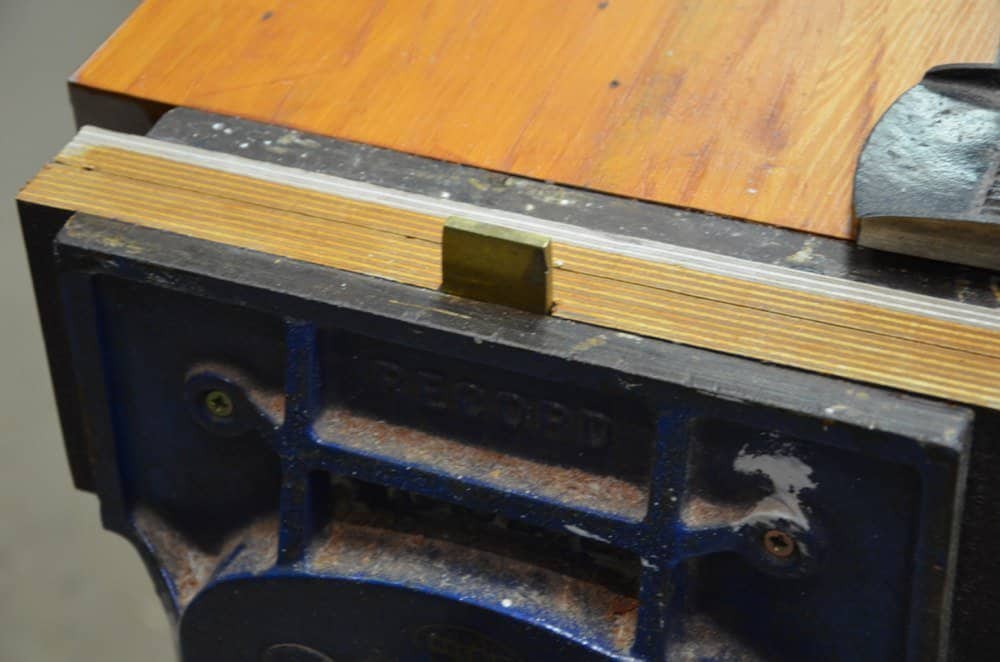
Though I almost never use bench dogs as such because of my clamp-in-the-vise systems they may as well be in the bench as an added option if needed. I retrofitted a non-dogged vise with a brass dog in the wood and it works really as well as the built in models I have used with no compromise.
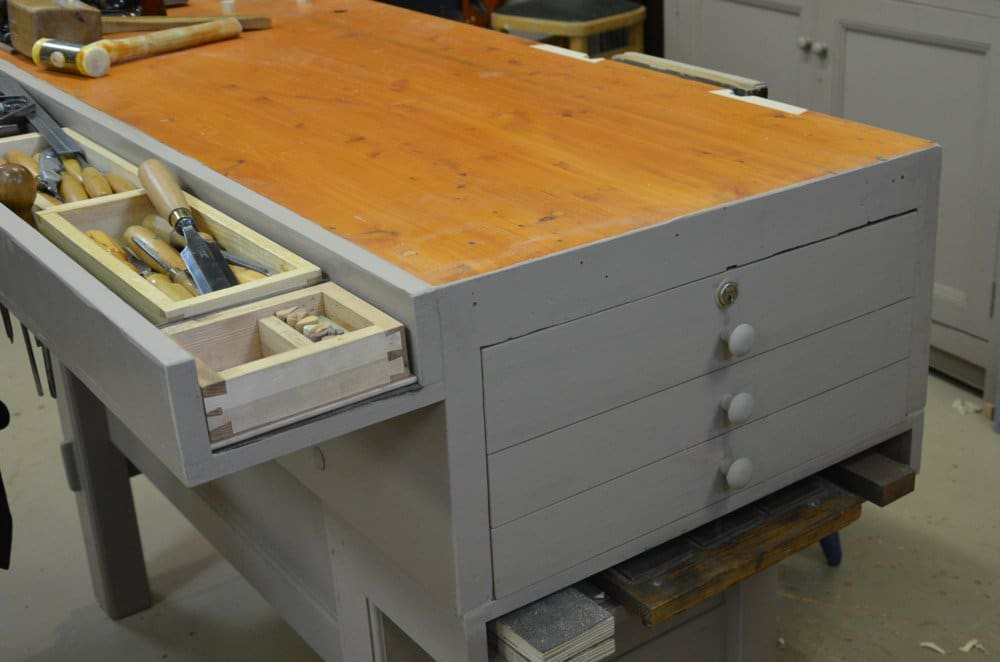
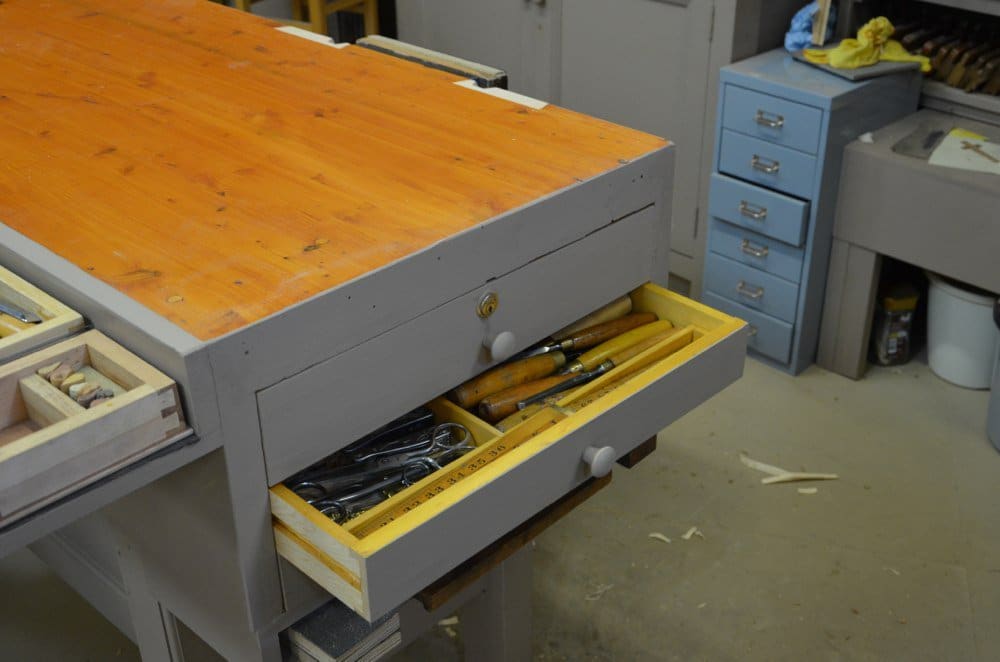
These tills are excellent us of space as you can see. I can pull the whole till out and place it on the benchtop to work from or pull tools as needed. The only issue I have is that occasionally a student will be intrigued by them just before a lecture and pull on one. because they are so short front to back, 7” or so, they pull on them and the whole thing drops the contents to the floor. This is a more recent phenomena surrounding over familiarity, as in my day no one would ever, ever have touched anything of a craftsman’s and especially his tool chest, tool tills, drawers or whatever. Very disrespectful all around.
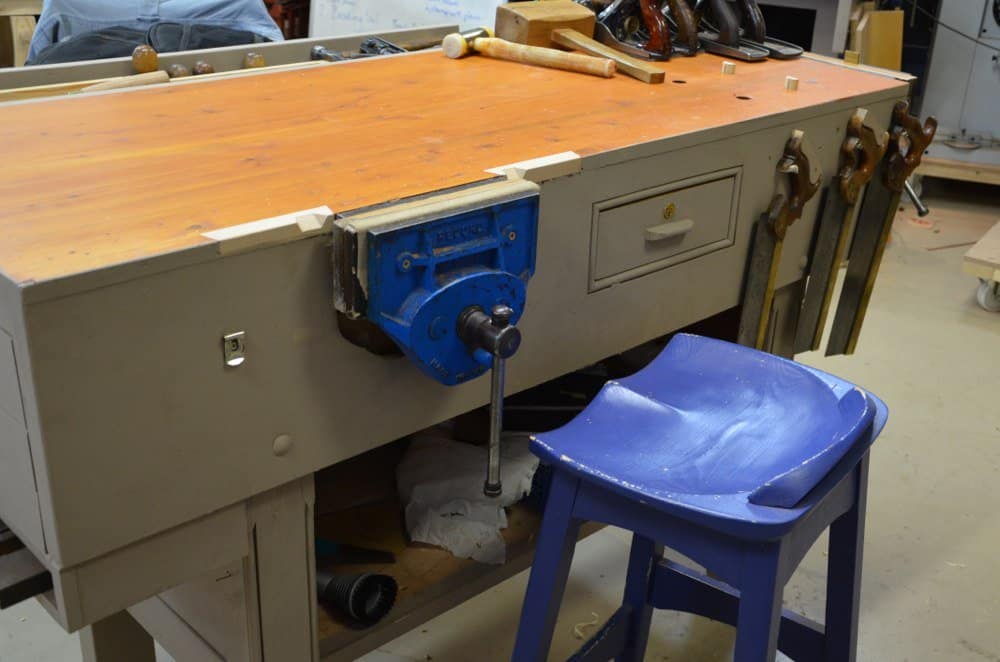
The top is only 60mm (2 3/8”) thick, leaving the well deep enough for chisels and squares and many of my other tools. On my other bench, my big bench, the well is an inch or so deeper and that means my plane (lying on its side, heaven forbid) can be stowed in the bench if I need too. Amazingly, though the top is so thin and made from pine it is rigidly inflexible and does not bounce anywhere at all, at all. It is redwood pine from Northern Europe. Don’t be misled into believing benches must be made from hardwoods or indeed fancy woods. That’s not the case. I do like hardwood benches too. Beech, ash, oak, maple all make good benches, but pine works as well for me and most benches in Britain were indeed always made from softwoods except school benches for children that were usually made from beech.
Conclusion
This bench does everything I need as a joinery bench. It is immovably stable, rock solid to work from and though only pine is used it still takes two people to lift and move it and even then they need to be stoutly built. The added well is by no means a compromise. I can reach it easily and retrieve tools as needed. I quite like the way it feels under heavy weights and even when the vise is fully extended it will not tip in any direction. On push strokes toward the vise with a big saw or planing and scraping across the benchtop it remains put. that’s what I want from a workbench. I think the bench really does need the five foot length. Any shorter and they tend to scoot in the direction you are pushing in along=the-bench strokes.
I’m in the process of designing my work bench and gathering material. I think a leg vise would be a vary usable option and i notice you don’t use one, any reason why?
I don’t really like them but I have never said anything against them.
Everyone should make their workbench to suit themselves. Mine isn’t 38″ tall. It’s not a Nicholson. It has lots of dog holes. I use holdfasts. I have a leg vise and a tail vise and an old front vise on the other side. It’s too wide and too thick. It’s made of old hardwood floor joists so it has some defects in it. In short is isn’t at all like yours but it works for me as well as yours works for you. I’m not sure what all this controversy and fretting is about. Make it your own. Pins or tails first, who cares. Do what works for you.
I whole-heartedly agree. Let common sense prevail.
Hello Paul. Though my bench is a slightly different design, it’s about the same size as yours. This conforms to the space I currently have available. I do wish that I had seen your design prior to building mine; I really like the aprons. I’d enjoy seeing a video showing how to construct the system of drawers in your bench, especially the front drawer. Question: what is the purpose of the clip that appears to be from a tape measure? Very informative blog. Keep up the good work!
I came to the comments hoping to find this same answer!
I thought that was a bottle opener for his beer 😉
Marty, that’s what mine does, but I assume Paul has a legitimate reason for his.
Hi Paul, what do you use the tape rule clip on the front apron for?
It’s for a rag I use for wiping swarf off my sharpening plates.
I notice that you patched the areas left and right of your bench vice (last picture), and notched them so your future sawing would no longer mar the bench top. Nice touch.
You didn’t do this in the past apparently, so the idea must be new. We never stop learning or improving things, do we.
Yes, I realised by repairing the corner I would lose the 12mm dip of depth of cut. Why not create it and gain the depth?
50 years and still perfecting your bench. Looking at your bench reminds me of a couple of “rules” that may help folks design the right bench for them,
The “Cockpit” rule, this concept states that the more often you use a tool the closer it should be to your hand. Tools used often are right at hand and tools used rarely may be across the room but order them by frequency and distance.
The second rule is “A place for everything and everything in it’s place”. Once you have determined where something goes label that location and always return that thing to it’s location when not in use. In my engineering days we called this “Labeling and Workplace organization”.
Paul, I think people will always criticize partly because it’s human nature to feel better about yourself when you think you’re smarter than somebody else. The problem I see with this is the fact that you have over 50 years as a craftsman. If you believe that experience is the best teacher as I do, there are very few that probably have ideas that are better than yours. I’m sure you’d be the first one to admit that you don’t know everything but anybody willing to criticize you should think twice about your experience. One quick question about the ad on well: is it supported from underneath with brackets or is it merely attached to the edge of the backside of the bench? I ask because I wonder if the weight that it carries would have to be distributed with more then just screws are lag bolts into the edge of the bench. Thanks as always for sharing your ideas.
Hello Paul,
You have not replied the question from Garry Blair :
“I’d enjoy seeing a video showing how to construct the system of drawers in your bench, especially the front drawer. ”
Here and there on you site, we can see a mention of those drawer and even a small cabinet in between the fron legs.
You said you will explain “soon” [tm]. I’ve never see a description of them. I’ve your book and videos and there is no mention of them neither.
Regards
Jean-Luc
It has to be a ‘perhaps’ thing. People often ask questions that demand more and more of my time and push the things I would like to achieve further and further back. Were this to be reversed and I ask the questions it might be more balanced because everyone else asks one question but I have hundreds in a given week. I am still a working man and work 12-14 hours a day 5 1/2 days a week to keep up and to provide what I provide for free; not retired yet. Have many obligations and responsibilities that rely on me I’m afraid. I am a few weeks off from retirement now. The big question isn’t whether I can retire. I can. The big question is will I?
Yes, I can understand that.
I really enjoy all you are giving to us !
Many thanks
J-L
No Paul,
We all still have a lot to learn, and as a collective decided you cannot retire! 🙂
Thank goodness! I have no plans to that end.
I love this bench … can you put shop drawing on your blog that show the drawers etc. Thanks again for all you do for us !!!
Not at this stage. I will tell you that my plans for a new work will include some of this though.
One of my favorite benches is made of comercialy available saw horses and Interlocking plywood panels. It stores in my van it is flat and sturdy enough to saw, plane and bang on. It is nothing like Pauls bench but it enables accurate work and sets me apart from other carpenter’s. I have other benches but this one stores in 2 square feet of van space and sets up in about 5 minutes, so it goes where I go.
Paul I really like your bench and so glad I built one very similar to yours. Mine worked out to 59 1/2″ X 25″ ( including well board and apron thickness ) X 38 1/2″ height. I added a clamp rack to hold ( 7 ) HF modified clamps on one end and a small attached tool rack to house ( 2 ) saws and holes for chisels and my starrett squares on the front apron at the opposite end from vise.
I would like to add drawers and a shelf for my diamond stones but have done so yet. The bench thus far has worked out great and would not change a thing.
I hear you on retiring and obviously you do deserve your time but selflessly hoping you won’t do that any time soon. I have learned a lot from you and hope to learn more on the way you work wood and have enjoyed your projects. For what it is worth I retired in 2009 and did nothing other than refurbish some tools etc. for about a year and decided to go back and work part time 4 hours or so a day. I worked in corporate America for all most 40 years working 60 – 70 hours a week.
Keep up the good work but also take care of yourself and not over do it.
Steve
Great bench Paul. Looks like I got some work to do. I will be adding those features to my bench. Thanks for sharing and for what you do for all of us. You are an inspiration to us all.
Hi Paul
We or certainly I hope you won’t retire quite yet?
In the west country we say “I’m gonna slow down slowly until I stop one day” 😉
Some others that do popular blogs only post on certain days of the week and keep a theme running only for a time period.
It alarms me your working 12-14 hours a day with such lovely coutryside just outside your door.
Of course we hang on every word you write but I’m sure we can wait a little longer, after all skills aren’t learnt in a day!
Your giving much hard earned knowledge I’m sure we can be more patient
Thanks all the same
I worry I’ll forget something or run out of time.
Given your level of output and the scope of material that has already been covered try not to worry too much Paul. The realisation that there is always something new to learn or develop will come to all your students at some point. What you have achieved through the spread of your knowledge to date is no small thing. It is evident you are a conscientious man with self awareness who understands that knowledge is a powerful thing and a gift made tangible by the recipient. I speak for myself and I dare say for others who follow your prodigious output in the gratitude we have for what you have achieved. Time does not wait for any man, that much is true, but it does keep us on our toes.
Paul, I didn’t see where you keep your sharpening gear. Is it in the drawers or somewhere else in your work area?
If you look at the pictures in my last blog post you will see a bank of three tills at the end of my bench. I add a pocket there for stones (plate holder) and strops. It keeps them stowed and my bench top clean too.
Apropos of retirng, Paul, I did so an even decade ago, and I’m busier now than I can remember being in my heyday. I know it’s a cliche, and I was amazed to find it’s really true.
Hopefully someday you will put the instructions to build this workbench online. Enjoyed seeing it.
The construction methods are the same as my free workbench build via YouTube but just different sizes and a solid top without the well centred in the benchtop area.
In the photo at the top of this post it looks like the top is overhanging the aprons by a small fraction while in your videos you you made the top flush to the insides of the aprons. Is the top overhanging the aprons or did I misunderstand the photo?
No, on this bench I did do things differently but the better method is to glue the edge of the top inside the aprons.
I see. Thank you.
I really like this workbench and I think the external tool well makes it quite modular if one would like to make the well smaller or larger. One thing I would like to ask though is how it should be assembled correctly? If I have understood you videos making the large workbench with the split top correctly, you attach the aprons to the legs, then the tops to the aprons and screw the tops down to the leg bearer. This method makes the legs sit deep in the apron housing, the aprons flush to the side of the tops and the tops flush to the bearer. Any dimension differences will be solved by adjusting the well board between the laminated tops. Correct? But at this smaller bench there is no well board between the aprons to take up any dimension tolerances so how is it assembled to make sure the legs sits deep in the apron housing and the aprons flush to both sides of the laminated top without creating any gaps or over stressing the glued joints?
This is a good question…
I think it would be very difficult to avoid gaps or interferences due top tolerances. Although you can plane one side of the laminated top until it fits snugly between aprons, it still is a very hard work to manipulate like that a big chunk like the top, and still a lot of chances to get gaps along.
I think the best would be to start the assembly from top to bottom.
Glue the top to the aprons first.
Then put the legs into the housing dadoes with the wedges.
Then make the 2 stretchers exact to the separation of the legs.
Well at least it makes sense to me.
I’m glad i read this question because soon I’ll be making a small bench with this design and I had not thought about it before.
Thank you chavafloresv, for understanding my concern.
I also would like to build a small size workbench like this but as you can see I’m not sure how to minimize the risk with the tolerance chain unless there is a well board installed.
Everybody’s bench is a conglomeration of ideas and needs, wants and requirements.
Don’t Poo-Poo this bench – Copy what fits your needs !!
For the till at the end that the intrigued students pull out – could you install a kicker to stop the drawer?
I did but then I just tell them the story and they leave them be.
Mr. Sellers,
What did you paint your bench with?
It looks like milk paint.
Looks very good.
I have a four foot bench, but i chase it too much when i use my no. 4 plane.
Sometimes it even wants to tip over.
So i’m going with a five foot with large legs for weight.
hope it help.
mark
It’s a water based paint by Craig and Rose and the link is here
Yes, I can see that happening. I go for min five feet long and if possible 30″ deep on 3 1/2″x 3 1/2″ square legs. Otherwise I might put a shelf underneath and load it with some extra weight there too.
Dear All
Is there likely to be an issue with expansion of the top between the aprons in a bench of this type? I wonder if there is any need to deal with this in some way as the aprons are rigidly held by the legs and stretchers/bearers.
None whatsoever as long as your wood is correctly dried.
Mr Sellers,
I am trying to design and plan my first work bench. I’m liking the Roubou style, but after reading your blogs and watching all the videos I am intrigued with your jointers bench with the apron. My question had to deal with long panels and the front vice. You have answered the question about how the front vice doesn’t necessarily need to be flush with the bench (a big issue with those who promote Roubou’s bench); how do you handle these long boards? I’ve noticed in your videos and now see the behind the scene look at the bench how you have your tenon saws on the front apron – how do they not get in your way?
Thank you for sharing your accumulated knowledge. I always look forward to your new videos and posts.
Very appreciatively,
Jason Zvokel
Actually, I don’t really understand what the issue is if you are using the type of vise that I use. I try to imagine why I would want anything clamped tight to the long edge of a bench top and can, if I really apply myself, think of an occasion every five years where it might possibly be useful. Most tabletops are six foot long for the average family home. King size beds are around 6’3 (1.91m) less the posts, so are similar in length. Generally these two pieces if furniture are the longest in any household. Putting the boards centred in the vise with 1 foot (300mm) of it fully gripped by the vise means I have 30″ overhanging. Usually glued up tabletops are made from 6 to 8″ (150-200mm) wide boards say 1-1 1/2″ (25-38mm) thick and usually hardwoods such as oak or cherry, walnut, maple and such. These woods in those diameters don’t bend easily with that much beam strength. The board will barely flex over so short a distance if being planed to true up. Combine two in the vise as we generally do and we have twice the resistance to flex during edge planing. Now on narrower materials this does change but only marginally and narrower pieces can usually be taken care of on the bench top or still in the vise but moving it along on the vise. This is how I have done it for decades. Okay, most woodworkers downsize their materials for planing to near finished sizes. This is increased economy and ease of work.I tried to think of what I make as a rule here and I can scarcely think of many components being more than the lengths give but with 98% of component pieces being somewhere below 48″ (1.22m). Even then that is more rare than normal and most pieces are under 36″ (.91m). I could go on but then these pieces so readily fit into the standard vise that I’ve happily used throughout my woodworking life.
Now then, I added a tail vise because everyone felt my bench was lacking in some way and I even put dog holes at that end so I could take pictures to show what dog holes were and did. Again, I never use these additional “accessories”. However, what I can do and what I might find useful occasionally is adding a clamp in the tail vise as I do in my main vise from time to time. Now this can be used to support the end of a long piece of wood.
With regards to my hanging my saws where I do. I would be lost without this facility. Far more lost than I am without a flat-front aligned vise jaw. My three saws hang there patiently awaiting my interchange of use between the three. I find three saws can quickly and awkwardly clutter up a benchtop in a heartbeat. My system beats any I have seen to date. They don’t really get in the way especially when you are used to them being there but even then this is rare as the vise with the jaw lining provides and 1 1/4″ (30mm) gap and the saws and hooks protrude only 1″ (25mm). The greatest advantage to the overhanging vise is crystal clear. You can grip your wood and install just about anything in the vise without struggling with a full handed overhand or underhand grip. This is no small thing. For those who might perhaps have made the mistake of installing a flush vise the answer is very simple. Just add a dummy wooden vise jaw to the face of your bench with two screws. That way you can remove it if you don’t like it or remove it when you want to clamp something along your benchtop edge.
Thanks for the question Jason. I hope my answer makes sense of it. I am answering this as a blog entry as it is a common enough question.
It answered it very well indeed.
Thank you!
Using Sketch-up I have created a detailed drawing of the workbench featured on Paul’s YouTube channel. I will gladly make the drawing available to the public (PDF or SKP format) but as it is Paul’s design I won’t do it without first getting his approval.
Paul, if you are interested I can send you the file or simply make it available via the Sketch-up warehouse.
Mr Sellers,
I am planning my first workbench and I’m looking all over for inspiration. This “small” joinery bench looks much like what I see in my mind. I know I want a tool well but I’m afraid the bench would be too large for my space if I placed it in the center of the bench, and as I plan on only working from one side I was planning on the tool well going on the back side. I think you commented that the week in this bench was an after addition; how did you attach it and make it sturdy?
Thank you,
Jason
I’m going to build a bench like this one but I’m worried to ruin stability and usability if I make my guesses on proportions, having zero experience myself.
How do you (in general) position leg frames relative to the bench top (along its length)?
Could you please share this parameter on this particular workbench?
Also what is the width of the bench top without the well? Asking because I’m confused if it is 32″ wide with or without the well.
Love your work,
Serge
We have an announcement to make regarding this so hang in there. Soon.
Hi Paul,
sorry for resurrecting a very old post once again, but I think it’s the most appropriate to ask this question here.
I’ve watched your old making bench video series on youtube, and I now also follow the new series on woodworkingmasterclasses. Honestly the bench I love the most is the one from this post, your “small joinery workbench”! I currently have a cheap workbench from sjöbergs and don’t like it very much (it’s lightweight and unsteady). So I want to build a bench myself! The thing is my current bench is about 28″ which is more or less the same as your “small joinery workbench” without the attached well (at least that’s what I figured from the photos). Now I’m in doubts if I should build a bench following your new design with the half well & half work surface benchtop, or try to figure out myself sizing and build a copy of your small joinery bench. The questions is why did you decide to build the well in the benchtop instead of attaching it on the side (I’ve seen on some photos you attached an additional well to your own bench in addition to the builtin one). Is it just a practicality to make the well more sturdy, or do you consider 12″ benchtop enough for general use.
Anyway I’d love to hear some more thoughts behind the new design if you have time.
Thanks in advance!
Hi Alexander,
Found your old post while I was doing some reading on Paul’s site. I built my new workbench with a 24″ wide top and added a 2″ deep well to back. I was on the fence about the well, but it turns out that I like it. It helps to keep the tools corralled and from rolling around. But more importantly, it tends to make you keep your tools located instead of ending up all over the bench top. So it impacts your work process and makes it more efficient. You automatically look to the well for your tool.
As far as a wide top, Paul is correct that you really only need 1 foot wide top for most joinery work. But I like the wider top for a couple reasons. It actually helps to keep the well free of shavings and saw dust since it is back a bit further. So less cleaning out the well. It is also nice to have the extra space for laying out boards and organizing. I think it also adds a bit of heft and feels really solid. For me, I also like the look of the wider bench top. My bench is in an area where visitors may be coming through on occasions and it looks impressive. Kind of vain, but fun.
I hope your build came out well. Enjoy…
Tom