Restoring woodworking gouges: project 2 part 1
For more information on the gouge, see our beginner site Common Woodworking.

This 1 1/4″ woodworking gouge has an out canal and is used for carving scalloped work like wooden bowls and spoons. This was made by Thos Ibbotson who was a famous chisel and cutting iron maker from Sheffield England and had a good reputation amongst hand tool makers and hand tool users like myself. Bit rugged to look at yet and John has a little more work to perfect it, but these are the steps to restoring an old gouge so far.
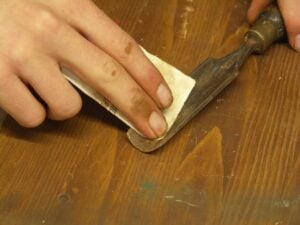
Remove as much rust as possible until clear steel appears across the whole tool. Go through grits from 150-grit to 250-grit. This should be smooth enough for most woodworkers.
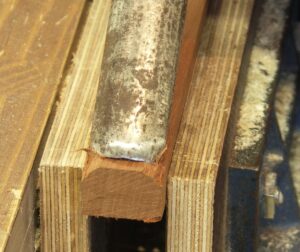
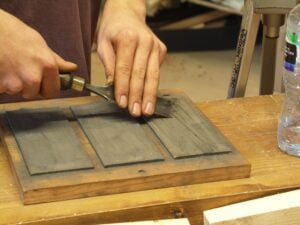
This gouge has lost most of its cutting edge through fracturing and rough treatment but no matter. I found John a piece of scrap wood and showed him how to get the profile at each end of the scrap using ht actual gouge as shown. Even though its a bit rough to look at this serves as a rough guide for profiling the round.

Using a smoothing plane, he refines the profile to the exact shape detailed at either end. This is not an exact science but it works perfectly and it’s simple, cheap and gets results. No need for the conventional (and expensive) slip stones at all.
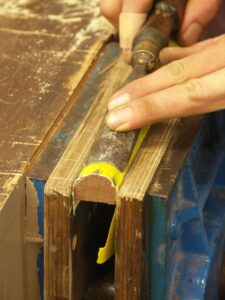
John then wraps coarse sandpaper onto the profile as shown and then draws the inside of the gouge onto the rounded profile to develop a clean-steel profile in preparation for honing and polishing the canal. He starts with the coarse paper first and then progresses to 150-grit paper.
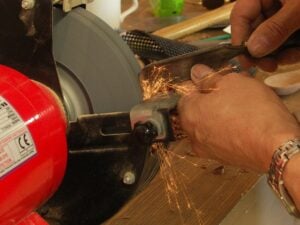
I used the grindstone to redefine the convex bevel John needs for a bowl gouge, just to remove the bulk of the damaged steel at the edge. Follow safety patterns for grinding with power tools.
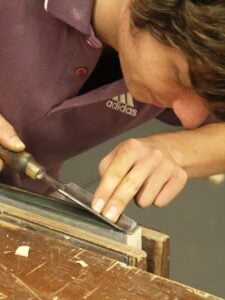
John refines the gouge inside and out and focusses on further developing and refining the cutting edge. First he uses the diamond sharpening plates and rolls the outside bevel on the stone backwards and forwards then further refine the convex bevel.
For this next step he uses a method I developed to create a strop system that hones and polishes the edge area. He has two pieces of wood that he shapes as shown. The convex one he achieves as shown in the photographs, the concave channel he develops and refines with the gouge he’s sharpening. Starting at one end, he works the channel backwards towards the opposite end. Notice the scrap wood hes making the strop from is the same width as the gouge.
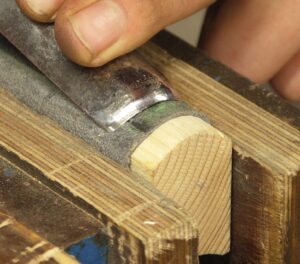
Clamping the block wrapped with leather in the vise creates a good strop. He charges a detached piece of leather with buffing compound and polishes both the inside and outside of the cutting edge by pulling the gouge along the strop leather until a surgically sharp edge is developed.
I have taught hands-on workshops focussing on conservation courses and restoration woodworking for years. Restoring hand tools is an important skill for any woodworker. My woodworking course include the essential elements of saw sharpening instruction and working with hand tools, which is why I chose the name The Hand Tool School all those years ago. If you want to master skills in sharpening your saws and planes, consider our courses. They really work and you can glean from my 46 years of woodworking knowledge just like my personal apprentice John is now.
More inspiration to you!
That’s what we mostly do. It’s actually best to work the insode of the gouge berofre you sharpen the gouge at all so that you polish the inside to a pristine finish and even a mirror finish. After that you never really need to touch that face, only the bevel. the inside face can then be done on the strop in the usual manner.
Hello Paul Sellers,
Your book, this web site and youtube presentations are great and most welcomed hand woodworking sources. Taught myself woodworking decades ago reading and looking at Charles Hayward’s books. Presently I teach CADD and woodworking to 7th – 12th graders. You British guys do articulate fine woodworking very well.
Is it possible to have a video showing in detail the two methods for sharpening and shaping the bevel of a gouge?
Regards, Roy Carter
Actually, my new book, due out shortly, does show the two methods and there is a two-set video on all of the hand tools in the book which includes the two methods for sharpening the gouge.
Hi Paul. What edge angle do you prefere on your gouges? I bought some old gouges and going to restore them, but they have pretty steep angle,a somewhere near 50°
Gouges really are very different to chisels where three angles take care if everything pretty much; paring chisels from 20-25 degrees, regular chisels 25-30 degrees and mortise chisels 30 to 35 degrees. Carving gouges are very different. A 50-degree bevel can be used to effect certain cuts as with glancing strikes from a mallet. Paring gouges can be as low as possible, say even as low as 15-degrees, because we use only a paring action from hand pressure. Bevels can therefore be any angle the carver chooses to best suit specific cuts as in the inside of a leaf or petal or the eye of a bird of prey like an eagle. So, there is no one size fits all for most carving tool edges.
Hi Paul. Thanks.
I just bought a cheap set of gouges. I don’t know anything about gouges, maybe I was hoping to get a decent tool if I sharpen it correctly, or even change handles if needed:
https://www.amazon.com/gp/product/B005W12IEI/ref=oh_aui_detailpage_o00_s03?ie=UTF8&psc=1
I readed your answer about the angle of gouges being too variable depending on the task, however I was wondering if there’s some sort of general angle to work with the most general tasks, or for some initial and occasional carving (to make a wooden spoon, for example).
I’m planning to get more decent gouges in the future of course, but right now I kind of have to go with what I have. These come with a 45º angle. I was thinking about grind them to another angle (I don’t know about carving… but 45º sounds like an angle for specific task, jeje) and follow your method to polish and sharpening gouges. This come in different sizes of course. I suppose I should leave them all at the same angle?
Thank you for everything Mr. Sellers.