How to Build a Workbench – Fitting the Vise (part14)
NOTE:Just so you know, this is an older workbench series. Paul has a newer Workbench series. If you are interested in the updated version of Paul’s workbench please click the button down below. This page links to a cutting list, tools list, FAQS and much more.
The final stage of the bench make is to install the helping hands that grip the work of a lifetime. It’s so good to get to this stage and though I do not need any more benches (wherever I am I have a dozen or more to choose from), I want to know that you and hundreds if not thousands of others will own a fine workbench.
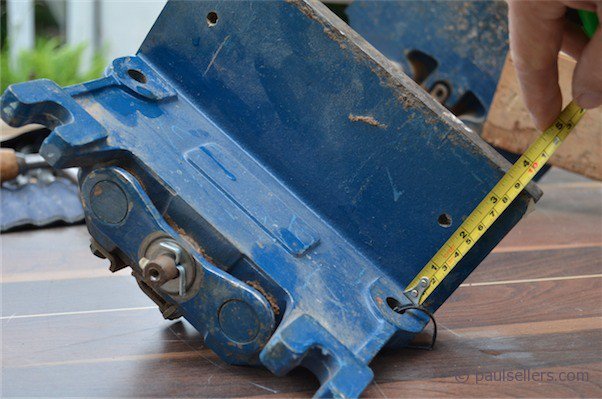
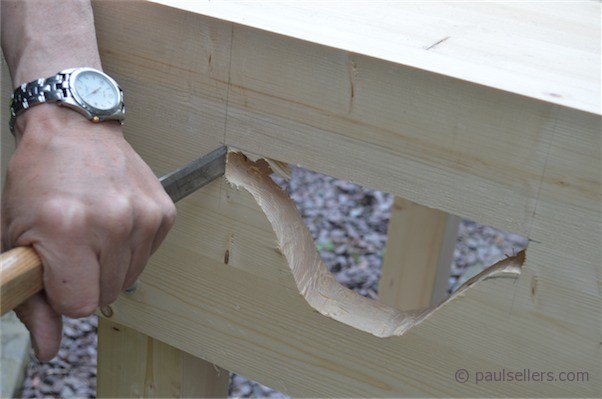
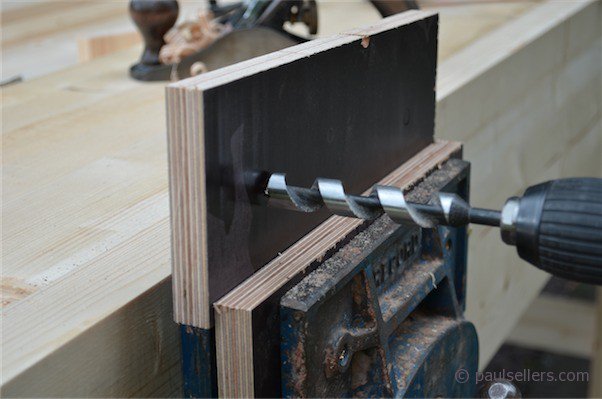
The vise is best fitted with an auger bit and brace (the first cordless drill) or of course you could use a drill-driver and paddle bit too. I begin by measuring the width of the vise jaw and adding 1/8”. Vises sometimes need repair or adjusting, and I like some room to maneuver heavy vises in and out. One sixteenth either side is enough.
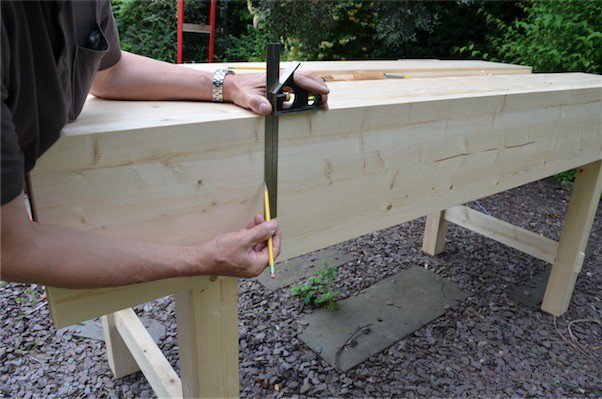
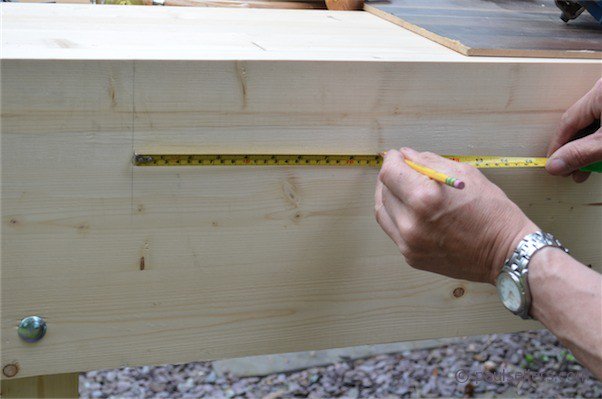
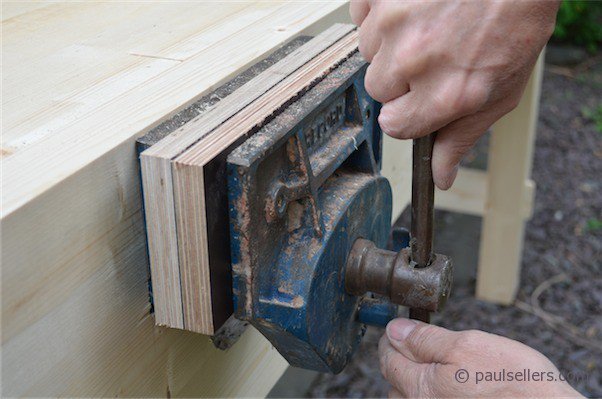
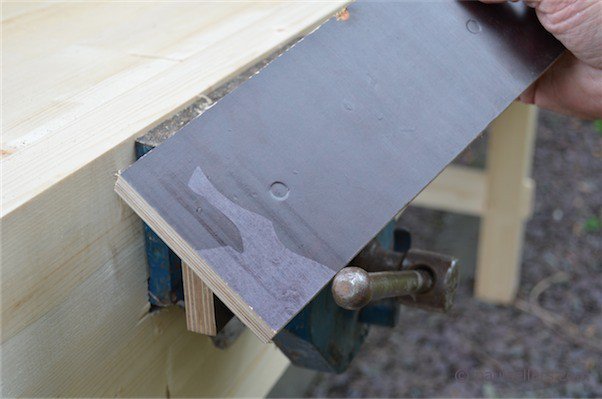
Because I have wedges alongside the leg, I begin 1 ½” from the inside of the leg and then measure the width of 9 1/8”. Square the lines downwards and then take the measurement of the depth of the jaw from the inside of the ‘L’ formation of the casting and add another 1/8”, which will set the jaw 1/8” below the surface of the workbench when installed.


Measure component parts and transfer to the bench. Again, I find it best to give plenty of room around the vise. Sometimes something works loose and needs tightening or oiling or cleaning and there is little value to tight tolerances here.


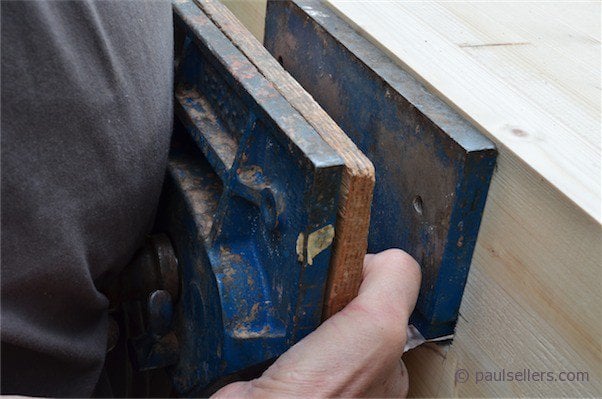


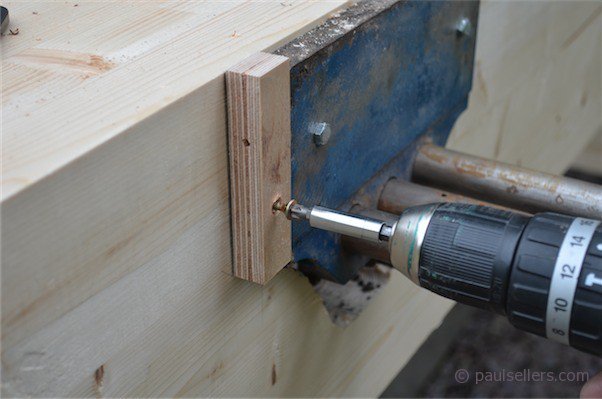
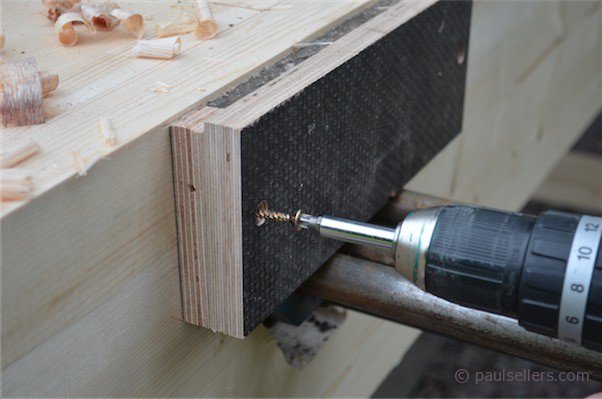
Screw in the lag bolts and washers and cinch them tight if the vise jaw is seating against the bench properly.
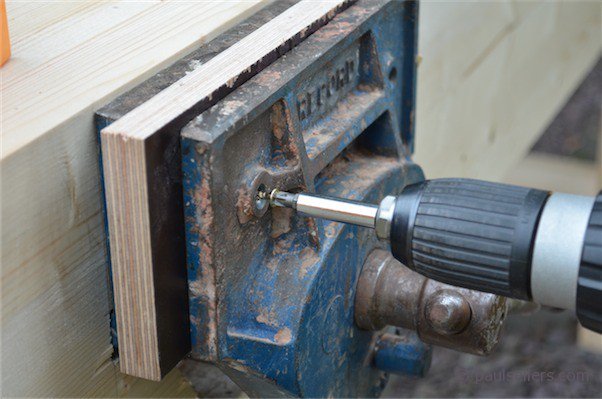

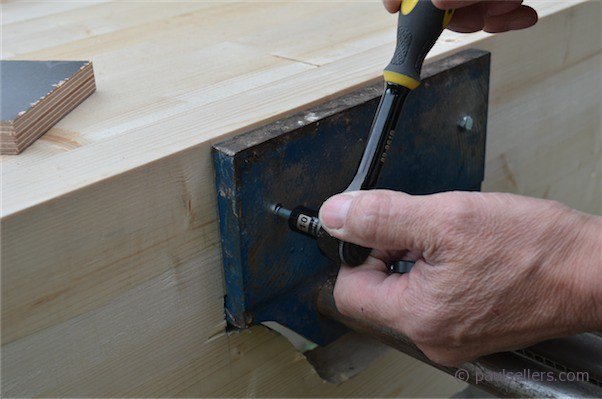
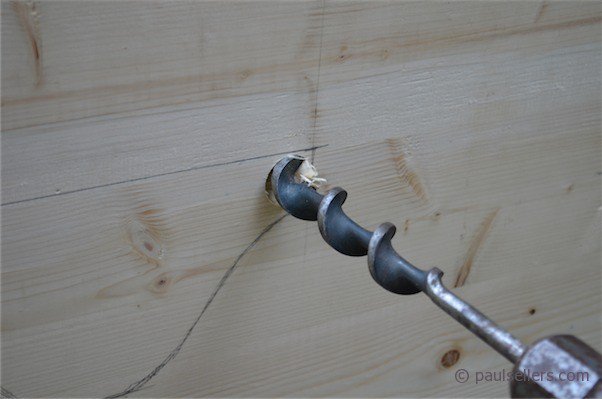
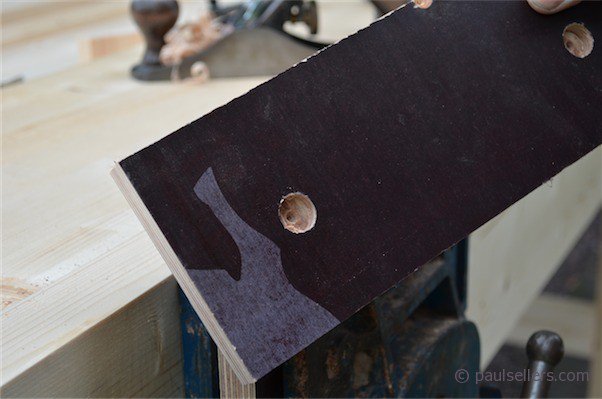
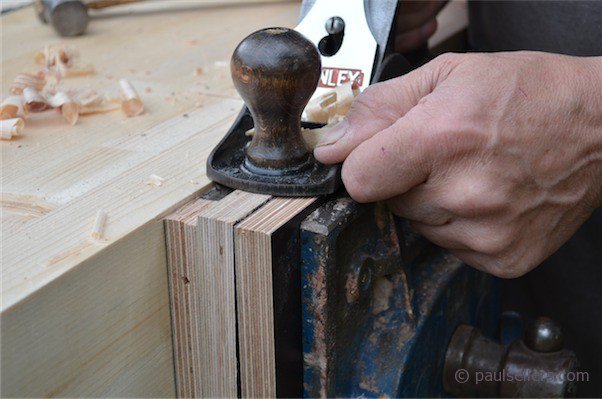
To install the second liner, open the front jaw all the way so that you can drill through the face of the jaw and into the bench top. Normally the wooden vise jaws are screwed through these holes, but I have a different method shown shortly. Drill the 3/16” pilot holes for the lag bolts and install them through the jaw.
Tomorrow I show the poor man’s dogging system for none dogged vises.
Really looking forward to getting started on my bench. Many thanks for these Paul, You make it so much easer my friend
Hi Paul.
If a tail vise is to be added at some point, how far from the end of the bench should the legs be? I know there has to be varying clearances depending on the size of vise chosen. Which brings up another question, if I want to use one of the quick release steel vises from Veritas, which size do you recommend for the end/tail vise? They range from 7″, 9″ & 10 1/2″, with 13″, 18″ and 20″ clearances needed.
http://www.leevalley.com/en/wood/page.aspx?p=49980&cat=1,41659
Is 20″ from the end too far for a 6′ bench?
Thanks again for helping us all out with this series.
On my workbench build I did the legs the same form each end and altered the tope rail to take the stems and screw of the vise between the top of the top rail and the bearer. You would not generally mallet in the tail vise as it is used more for dogging the work although my last post using the clamp is the best doggon dogging system I know of..
Hello Paul,
In your book and accompanying DVD you show installing the vise with (2) lag bolts underneath, the second set of holes being hidden beneath the skirt board, and (2) screws through the rear jaw. Here you used lag bolts in place of screws in the rear jaw. On the New Legacy blog you show recessing the rear jaw so that (4) lag bolts can be installed underneath. Have you found any appreciable difference in these methods? Which do you currently recommend?
Thanks again for all that you are doing!
Paul am I correct in thinking that you can only bolt in two of the four mounting holes on the vise as the apron gets in the way of the other tow on the base nearest the bench jaw on the clamp. Your pedicure DCS-028 aboves shows that this mounting hole will be obscured by the apron. Hence the additional mounting through the jaw face into the apron? I guess this is similar to Gregs question below… I’m sure your answer would satisfy both questions.
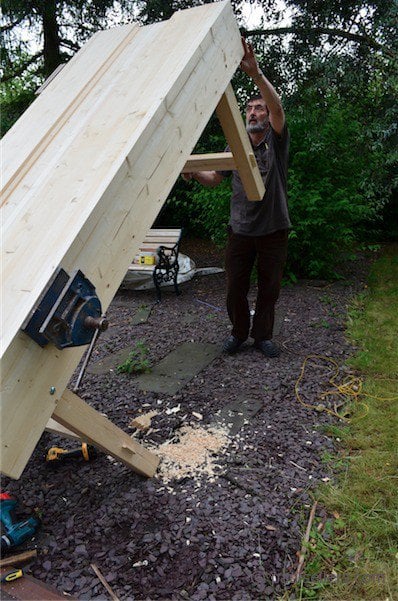
Another handy hint when fitting a vice. You may not have the room to prop you bench up on two legs not to mention the health and safety issues. Instead get a piece of timber about 2 foot taller than the bench height (38 inches). Insert the timber into the vice until it reaches the floor and the vice at the perfect hight for fixing against the bench. Tighten the jaws of the vice and hey presto the weight of the vice is taken up by the timber allowing easy adjustment into position. Using a clamp to hold the timber against the bench it is possible to have the vice supported position for fixing. NB Make sure the rear jaw is tight against the bench.
Another handy hint when fitting a vice. You may not have the room to prop you bench up on two legs not to mention the health and safety issues. Instead get a piece of timber about 2 foot taller than the bench height (38 inches). Insert the timber into the vice until it reaches the floor and the vice at the perfect hight for fixing against the bench. Tighten the jaws of the vice and hey presto the weight of the vice is taken up by the timber allowing easy adjustment into position. Using a clamp to hold the timber against the bench it is possible to have the vice supported position for fixing. NB Make sure the rear jaw is tight against the bench.
The picture below shows the vice in position supported by the timber. I drilled the holes with the vice in position and then fastened it with lag screws.
This is a good question and easy to answer. It also answers it for others and I like that too.
Because I can only recommend a face vise like the Woden and Record vises I personally use, I can chop mortises and work in the vise without fear of damaging the threads and the mechanism (This does not apply to modern Record vises made in the last ten years. These are not made to the same standards as pre-millennia vises made by the original Record Company). Placing the vise ‘outboard’ as it were, means much more ‘bounce because the vise is no longer suspended and supported between two rigidly fixed points, ie, the legs. This means the mallet and hammer blows are less efficient and you really notice the difference.
Hi Paul
I am currently looking to build your bench, and as such have purchased a bench vice. I am looking to follow your directions on fitting it. However, I can no longer view the photos on your; How to Build a Workbench – Fitting the Vise (part14) article.
Would you be able to post them again as when I go to view them it says; error 404: not found
many thanks
Paul,
I plan to build my first workbench to your design 5ft x 18″ that will sit against two brick walls (back and left hand edges) in a narrow shed. I am right handed, so siting the vice is a little awkward; two foot from the left hand end would allow comfortable sawing of boards in the vice without my left shoulder colliding with the wall. I suppose the left hand leg frame should be moved close to the vice to remove flex whilst morticing, so there would be a ~18″ unsupported overhang of the laminated benchtop. Does the design and ergonomics sound sensible or are there better alternatives, e.g. build the standard bench for a left hander and sacrifice the convenient tool resting position? Abandon the leg frames altogether and attach multiple angled supports to the wall?
Paul,
Is there an equivalant in the US to the buffalo board you used as liners for your bench vise?
Thanks,
BillS
Sorry Bill I am sure there is but I don’t know. Anyone out there help Bill with this one?
I did a search for “phenolic birch plywood” and found these…
http://www.woodcraft.com/Product/131170/phenolic-faced-plywood-18mm34-x-24-x-48.aspx
http://www.rockler.com/light-brown-phenolic-faced-plywood-sheets
Hello Paul,
first of all I’m sorry if my english is not perfect, I am French. I am new in woodworking and you woodworking masterclasses help me a lot.
My question is about a vise I’ve just bought on ebay ( UK ).You talk about Record and Woden but the one I bought is a Parkinson 16”, do you know about this label?
Best regards
Cyrille Velez
Yes, you have bought one of the good ones. It will serve you very well I think.
Thank you for taking time to answer .
best regards
Cyrille
Hi Paul i just had the same queries as Robert and Greg as to whether recessing the vice face is any better that not and if you should lag all 4 bottom mounting holes?
cheers
There is no problem recessing the vise face to access the holes better as you can fix the jaw liner protruding and use a wider liner so the hand can still access the wood to hols. personally i would rather cut a more open hold and access the bolt area even though it may not look as pretty. I have in times past cut out a channel to access the bolts for fixing and then fitted a wooden section to fill the gap too.
Paul (if you are still replying here.)
I had the luxury of an old bench whilst planing the timber to make my varient of your design, Again thanks for your effort in sharing it. My old bench had, still has, 2 vices – one relativly new cheapy and a wooden one with an acme screw that I made about 40 years ago (the mechism for this was rescued from an old woodwork bench). These made planing long lenths easy. On the new one I have fitted a quick release vice. I used this to plane the well board to fit, but for such a long length the end needed support. I used a sash clamp and a block between the board and bench cheek. I was thinking of fitting a drawer as I have seen one pulled out to support long lengths. But it occured that a sort of bench hook hung downwards could act as a support. So presently I have some of the offcuts from making the bench clamped up as a laminate hook. The bottom ledge will be bolted initially to allow me to adjust it. Have I invented this idea or has it been used before? Will come back once I have used it.
Paul, or anyone really.
I have a Record vise just like yours, with the quick release lever. I’ve never done any maintenance on it, and now I’m probably paying for it. When I try and unscrew the vise it doesn’t move, only ratchets. I have to hold the quick release lever in order to get the vise to open. Any wisdom as to what to grease, clean, etc?
Clean the bars with sandpaper. oil them, oil the threads and it should go. If you go to my blog and do a search for restoring vises too.
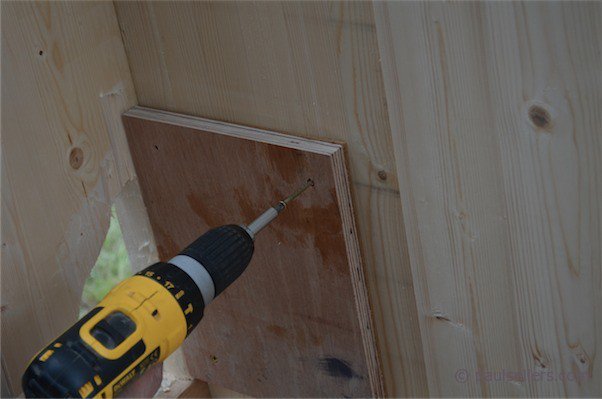
Seems like the recess between the back jaw and the benchtop would accumulate debris. Any reason not to fit a patch in there?
Here is a blog on how we do it now:
Part 3) https://paulsellers.com/2016/06/vises-part-iii/
There are two others that come before this one for a full vise fit too:
Part 2) https://paulsellers.com/2016/06/bench-vise-part-ii/
Part 1) https://paulsellers.com/2016/06/on-vises-part-i/
Hi Paul, my work bench is all based on your design, made from 45+ year old yellow pine. it is well used now and has held up very well from every day work. i have resorted many ebay used tools and saws. we are the same age and needed to work after retirement…thank you many times for real wood working.
my question is: on your work bench you use a small screw up lumber stop for planning on work bench top, made from plated steel with teeth. i have looked with no results.
in advance your time is appreciated
Carrollton Tx
Morning Brent,
I believe this is the product Paul uses on his bench. It’s a small, toothed, planing stop and I’m thinking about putting one on my bench as well.
http://www.leevalley.com/US/garden/page.aspx?p=31148&cat=1,41637
John
Brent,
Well the page I couldn’t find a moment ago just popped up. Here’s Paul’s blogpost about the planing stop.
https://paulsellers.com/2015/03/adding-a-flush-bench-stop/
John
Dear Paul,
I’m currently almost concluding my bench following your design and made from rough pine wood. The height of my tops is 8 cm and the vice I have is a QR Woden with 6″ jaws. The height of the back jaw L js about 6 cm. So I was wondering if it’s necessary doing a 2 cm recess in the down side of the top so that I can fit the vice the 1/8″ under the edge of the top as you do in your benches or if it would be possible to fit the vice lower so as to avoiding doing the recess and use taller jaw linings. I still haven’t glued the aprons to the tops in case I should do the recess.
I would be glad to know your opinion about the best that I can do in this situation with what I have.
Although it’s been a very hard work squaring all the rough wood and it has taken a lot of time I have emjoyed it a lot and have practised a lot of planing and learned a lot of facts about working with wood. Really a great experience I recommend to everyone.
Soon another bench of yours will be ready for woodworking in Spain.
Thanks in advance and greetings from Spain
Well done. On the Woden vise, I am sure you can leave it lower and extend the vise jaw liner the two needed centimetres you need without a problem. There will come a time when you will want a larger vise as a 9″ wide is much stronger, weightier and more powerful and of course will hold much more in terms of width and depth; 36cm travel from close to fully open with the wooden liners in place and 10cm in height. Indeed, I have done this many times and it works fine, especially if you use plywood for the liners, which is good and strong both ways because of the opposing layers.
Hi Paul,
I am just about ready to fit my vise, and I’m wondering if there is any disadvantage to fitting the vise closer to the middle, or on the right rather than next to the left leg? I’m right handed but my workspace is a little constrained with a washtub next to the end of the bench, so I wouldn’t have space to work with the vise there.
Thanks!