NOTE:Just so you know, this is an older workbench series. Paul has a newer Workbench series. If you are interested in the updated version of Paul’s workbench please click the button down below. This page links to a cutting list, tools list, FAQS and much more.
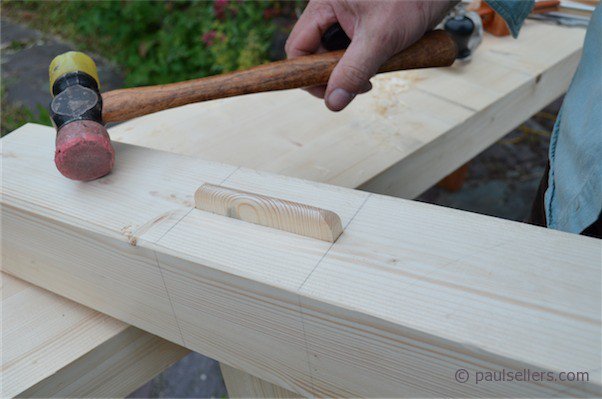
Gluing up the leg frames comes next. If the joints are good and tight then they must be glued and left to dry for an hour or so, but even so, I prefer and suggest that you leave them overnight to completely glue-cure. With tight and large joints you must move quickly and be ready with a rubber headed hammer to drive the two together if need be. I have seen many joints ‘freeze’ mid glue-up in my five decades of working wood every day and combining clamping pressure with a hammer and block may be the only way to ‘unfreeze’ the surfaces inside the joint to fully seat the joint shoulders. This is more by way of a warning. It may not happen, but always have hammer and block at the ready just in case.
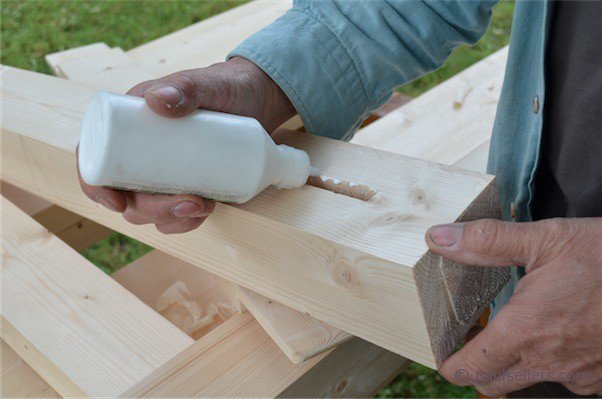
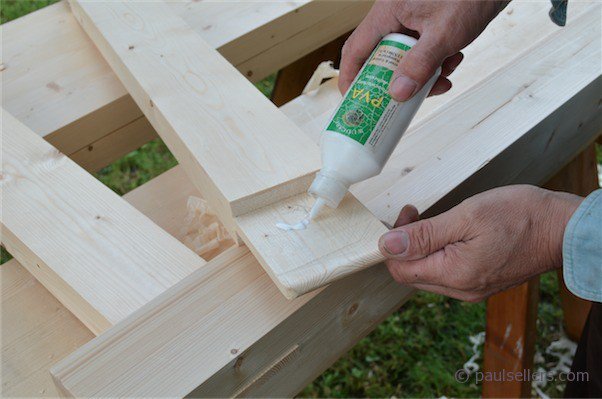
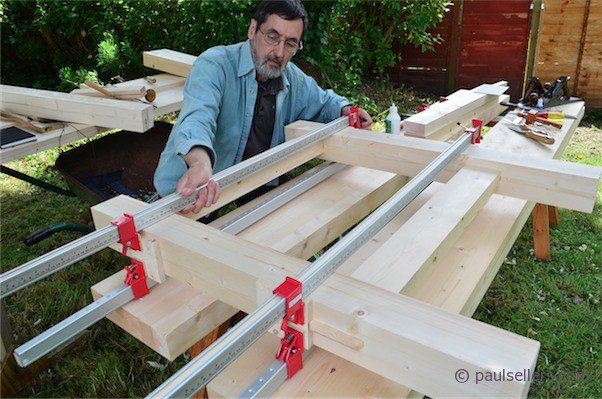
All of my joints snug together with the right amount of pressure on the cheeks. I sand my surfaces before I glue and so a dry run comes one time more just in case. This is my personal general practice because once glue hits wood I am in general at the point of no return. As a last plane step I take a flash shaving off all surfaces to remove pencil marks, grubby areas left from garden constructing a workbench and to prepare for the final stage, which is to sand the surfaces. Generally, I sand my surfaces because the hand planed surfaces are so smooth the finish will not take as well. That being so, I technically sand ‘rough’ rather than sand ‘smooth’. This sanding gives ‘tooth’ to the surfaces, an anchor for certain finishes to hold on to. But my sanding begins in general with 250-grit and ends there too. It’s a brief encounter between wood and abrasive. I rarely use abrasive to create level or smooth surfaces in the way machinist woodworkers must. The #4 plane will get me where I need to be in general levelling and smoothing. Having planed all surfaces of the bench leg frame assembly and my dry runs completed I am ready for gluing up. I have all my clamps pre-set from my dry run. In many cases I run a bead of glue around the entrance rim of my mortise, to help ‘lubricate’ entry, which is a good tip, but in the case of the lower cross rail mortise and tenons I do not have this luxury because the protruding tenon would be smeared with glue. When the tenon lies flush, as with the top cross rail tenon, I can wipe off and plane the surface and flush the tenon so there is no trace of glue on any surface. You will need at least four sash clamps per leg frame assembly for this session. It’s worth having a couple of extras if you have them, just in case something needs some extra torque.
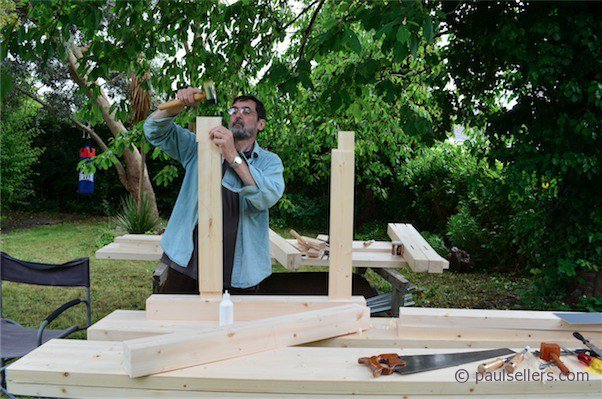
You must glue one side of the frame first; that is, you must glue the same ends of the top and bottom rails into the one leg and then do the opposite ends to receive the second leg. You will not be able to spread the legs should you glue up one rail to two legs. I mention it because it happens from time to time. Once a tenon goes together with a mortise it is often impossible to separate them. Use the rubber headed hammer or a regular hammer and block of wood to fully seat the joints as much as you can. With that done, apply the clamps, one to each side of each frame as shown. This will guarantee equal pressure from each side of the frame and to each shoulder. Use the hammer too. Even if the joint is seated I still add a couple of hammer blows to shock-seat the shoulders. It works.
Though it is almost impossible to make a frame like this out of square if the joints are well cut and shoulders square across and so on, it is possible to clamp a frame out of square. Check for square by measuring inside corner to inside corner. If the measurements are the same or within 1/8” (which means 1/16” out of square) there is no need to alter anything. If it is more, check that the clamps are parallel to the run of the rails. This can force a frame out of square and most often does, but people don’t realise it. Even if they are parallel, it is still possible to correct any out of squareness by adjust the clamps so that that they pull the longer distance into square. If your rails are the same length and the mortise holes dead parallel, and they should be if you followed the patterns and methods give, you will not have a problem. I give just-in-case solutions to help resolve possible issues ahead of time.
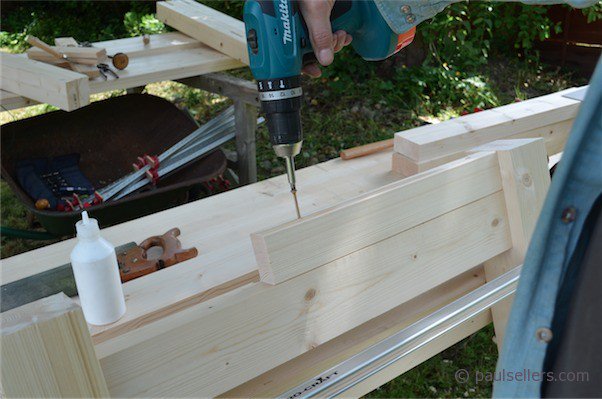
With both leg frames assembled you can add the bearer by gluing and screwing it to the rail and ends of the legs. On the standard leg frame assembly, pre drill the bearer with four 3/16” holes, run a zigzag of glue and secure with 2 ½” #12 screws. If you have made a leg frame to receive the tail vise simply screw the bearer to the tops of each leg with a single screw through each end. We then cut a block of 1 7/8” x whatever length we can to fit between the bearer and the top rail and the side of the vise screw mechanisms and the leg. This extends the support between the top rail and the bearer to reduce any flexing around this area. You can do this on either side of the vise screw mechanisms to shorten span distance to the underside of the benchtop, which minimises any flexing.
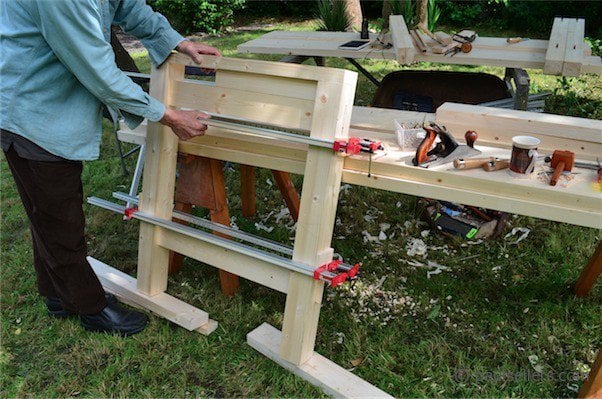
That is the leg frame assembly completed. Now we focus on the apron joinery.
5 Comments
Hi Paul:
In the book you say to cut the bearer 1/2″ short on each side but here I see they totally flush. Why the difference?
Thanks
On that bench the bearer went between the apron boards and not into the 1/2″ dado. That bench was screwed and fitted together differently in that it was not loose-wedged for continued stability when and if shrinkage takes place in the leg. Just a different more advanced approach with the added wedge really.
Hi Paul: I finally completed my bench in early Nov 2013. I built a combination of the one in the book and the video on this site. It is 5 feet long with a top of about 20 inches and a small well of about 4 inches. I wasn’t sure about the well at first which is why I made it small and even with that size I do find it useful. I made the H-frame on the right side with the opening for a side vise in case I decide to install one, and I used the wedge technique to hold the top. I haven’t installed a vise yet as I want to figure out how I use the bench and see where it fits best for me. I finished it with a couple coats of danish oil. Wish I could upload a picture but have no idea how. Just this passed week I built my first project using the bench and it worked very well even without a vise. I can hold work pieces with clamps for now. All in all, very pleased I decided to built my version of this bench. Thank you very much for sharing your knowledge with us.
Thanks for this Francois,I have the bench I use for filming that has a wider top, 24″, but I sorely miss my well area in the middle. I added a narrower external well that works fine now.8″ wide. People are often critical of the well because they always say you can’t get to the tools when work is on the bench. This happens to be true about twice a year. But it’s funny how people say things like that and it seems so logical yet in practice it’s just not true. people also say you can’t clamp things to the apron of Pul Sellers’ bench, which is so untrue too. Funny when you are looking for fault you will find it.
I really want to build this bench or something similar. The one you’re showing here winds up being 3 feet wide, two 12″ surfaces plus a 12″ well. I think that’s going to be a bit wide for my shop. My current bench is 24″, which is just about right. In Working Wood, you show a bench similar to this, but with one 12″ surface and a 12″ well. I feel like that would work pretty well for me. Any drawbacks to not having the extra surface on the back?
Comments are closed.
Privacy Notice
You must enter certain information to submit the form on this page. We take the handling of personal information seriously and appreciate your trust in us. Our Privacy Policy sets out important information about us and how we use and protect your personal data and it also explains your legal rights in respect of it. Please click here to read it before you provide any information on this form.


Hi Paul:
In the book you say to cut the bearer 1/2″ short on each side but here I see they totally flush. Why the difference?
Thanks
On that bench the bearer went between the apron boards and not into the 1/2″ dado. That bench was screwed and fitted together differently in that it was not loose-wedged for continued stability when and if shrinkage takes place in the leg. Just a different more advanced approach with the added wedge really.
Hi Paul: I finally completed my bench in early Nov 2013. I built a combination of the one in the book and the video on this site. It is 5 feet long with a top of about 20 inches and a small well of about 4 inches. I wasn’t sure about the well at first which is why I made it small and even with that size I do find it useful. I made the H-frame on the right side with the opening for a side vise in case I decide to install one, and I used the wedge technique to hold the top. I haven’t installed a vise yet as I want to figure out how I use the bench and see where it fits best for me. I finished it with a couple coats of danish oil. Wish I could upload a picture but have no idea how. Just this passed week I built my first project using the bench and it worked very well even without a vise. I can hold work pieces with clamps for now. All in all, very pleased I decided to built my version of this bench. Thank you very much for sharing your knowledge with us.
Thanks for this Francois,I have the bench I use for filming that has a wider top, 24″, but I sorely miss my well area in the middle. I added a narrower external well that works fine now.8″ wide. People are often critical of the well because they always say you can’t get to the tools when work is on the bench. This happens to be true about twice a year. But it’s funny how people say things like that and it seems so logical yet in practice it’s just not true. people also say you can’t clamp things to the apron of Pul Sellers’ bench, which is so untrue too. Funny when you are looking for fault you will find it.
I really want to build this bench or something similar. The one you’re showing here winds up being 3 feet wide, two 12″ surfaces plus a 12″ well. I think that’s going to be a bit wide for my shop. My current bench is 24″, which is just about right. In Working Wood, you show a bench similar to this, but with one 12″ surface and a 12″ well. I feel like that would work pretty well for me. Any drawbacks to not having the extra surface on the back?