Questions answered – planing bench leg square
Paul,
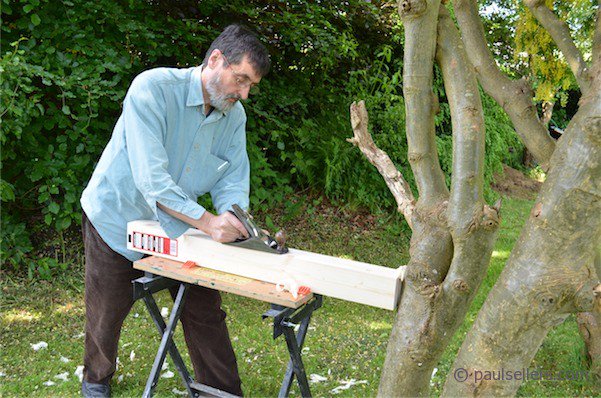
I am in the process of building your workbench. The problem I am having is I can’t get each face of the leg 90 degrees to each other. Is there any way I can do this without a jointer? I really would rather do it by hand. Is it possible? I own a Veritas #4 smoothing plane and a veritas jointer plane. I can plane each face flat but I am having trouble getting it 90 degrees to the adjacent face. When I put my right angle square against an edge, it wobbles around. How can I get is square? Any tips on jointing by hand? I was in my shop for 3 hours on one small piece of pine. I’m going crazy.
Q:
I cannot seem to plane my bench legs square
A:
There are several issues you must resolve in this and not being there to see everything makes it a little harder for me to help. I will run through a checklist and you can check yourself against the list.
1: Examine the plane’s cutting iron
2: Adjustment of the plane
Is it adjusted so that the iron is perfectly parallel to the sole of the plane? This is a common failure in setting the plane. Ensuring that the iron is set perfectly parallel is the only way of taking a perfectly even shaving from the face of the wood and even a small amount of discrepancy will result in being out of square. Subsequent swipes with the plane will again leave one side higher than the other and so leave the leg out of square. Also, make certain you are not taking off too much by having the iron set too coarsely.
3: Where to start the plane
When you plane do you start at the nose and work backwards? Many times people are way to rigid and want long even strokes with the plane starting at one end and pushing heavily towards the other rather than taking shorter strokes and moving backwards along the workpiece. I start at the one end working from side to side with the same length stroke and then move backwards the distance of my first opening strokes and start again. I keep moving backwards that way until I reach the opposite end. I n completion, I set my plane for a very shallow cut, something that would likely measure about two thousandths of an inch, and take the final long strokes I need to create a pristine finish.
4: Compensatory forces
We tend to want to cock the plane over as if somehow we can register the plane to some imaginary angle of correctness and then take a series of strokes to correct the flawed squareness. In general that doesn’t work and we create on over correction comparable to corrective steering at high speed. In reality we should for the man part start by simply pressing more heavily on the side that needs more removal. This ‘willing’ the plane over really works because your hand and arm muscles tense to task and rather than bulldogging it to the wood and crying “say uncle” we draw on intuitive mastery as the wood compresses into the mouth of the plane more heavily on the heavy side needing reduction.
5: Relaxing flex to task
In essence, I find loosening up brings better results than over tenseness now knowing that when I am anxious I rarely get the results from my tools that I want or should be getting. I have confidence in what I can achieve with my tools and know their and my limitations. Loosening the grip doesn’t mean losing control but most often gaining it. White knuckling doesn’t work too well at all and white-knuckling often indicates losing the innate sensitivity we should have in maintaining total control. It indicates a deeper anxiety that momentarily permeates our whole being and thus freezes us from achieving the flex we should have throughout our body. This is regardless of tool, wood or task and should be present in us all the time. In essence we can lose contact with the very senses that should be informing us and guiding.
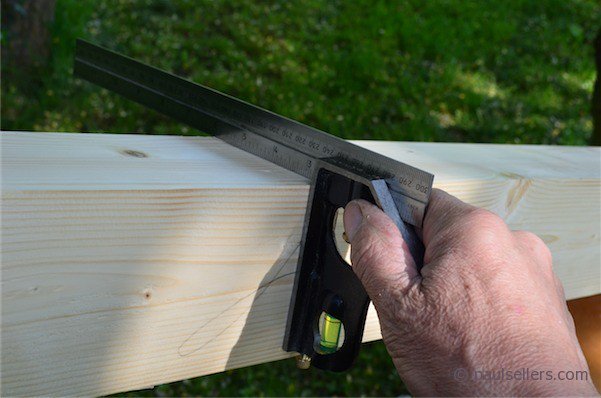
When you have one truly flat and straight face you should then focus on one adjacent face and get that face flat and straight, then check it for square to the first. Use winding sticks on the first face to make certain you have no twist in this face. If you do, you will not be able to get the second face square to the first. Also, eyeball down the first flat face corner to see if it is truly dead flat. You should be able to get this with the smoothing plane, the number four, but you could also use your jointer plane if as you say you have one.
7: Developing foursquare
Once you have the second face square to the first, and straight along its length, use a marking gauge to mark a parallel line to the first front face and mark both sides. This will make certain you plane to a parallel level. Once that’s done do the same to the last face and the leg will be square.
8: Persevere
Don’t give up. The first stage to success is to overcome the opposition. Doubting yourself is often the first obstacle.
Great advice!
I was fighting with some pie dough at work and Paul’s voice telling us to perservere went through my head until I rolled it into submission. It is the same when I am working on my bench, I hear the cheer to keep going (especially during glue-up for me) and it really helps me see steps through to completion.
I dunno what you all have done to me but I can’t hardly go a day without a plane in my hand. It is like comfort food for my soul.
I find sanity in my workshop that I cannot find elsewhere. Purpose I cannot replace with a keyboard and mouse. I write because I feel compelled to help my unknown friends find what has been lost. The power of hand tool woodworking depends on those who know its worth. Pass it on!
Working two surfaces perpendicular to each other (or parallel for that matter) is not really that difficult to do with a handplane. For me, when I started, the primary problem is covered in #5. Once you relax your grip, fore and aft on the plane, as well as work at a comfortable height and with a proper stance it just works. Your natural sense of level seems to take over and you can sense if you are working one side more than another quite easily. On narrow edges, those narrower than the plane blade is wide, using your off-hand wrapped around the front of the plane body with your index finger curled under the sole, you can ride the reference face and get quite a lot of information automatically transmitted to your brain. Works like a charm.
Use a pencil to mark up the edge/face your are working on after testing with your try-square. You may begin to see patterns forming. Perhaps you tend to be under 90 at the beginning, transitioning to greater than 90 at the far end. Or vice versa. This could give you clues as to what your body and weight distribution is doing as you plane.
Squaring up a timber isn’t terribly difficult with a bit of practice. The key word being practice. Practice, practice, practice. Take a break. Then practice some more. It will come to you.
Did you check your square to make sure IT is square before using it to see if your wood is square?
I check my square once year. Its 49 years old and I bought it new. Its still square.
Can you recommend a current brand (for a square) or one to look for on ebay that will stay square?