There’s a sense of apprehension sometimes about shaping the wood and especially when you carved a perfect bowl. This is what we call the risk of work. In general, machines are designed to substitute for workers developing skill. Skilled workers in the past ended up in the factories of the western world to become part of the mechanism of the Industrial Revolution. Redesigning product manufacture for machine production brought predictability to the work place in the same way engineered boards meant predictability for IKEA, Walmart, Asda and other big box companies. Using machines took out the risk of making normally associated with craftsmanship and took away the heart of craftwork. Dumbing down skill of course meant cheap goods to satisfy demand for the insatiable consumerism that feeds economies like ours, it was of course the only way to guarantee profits through and for mass manufactories. The way of the crafting artisan on the other hand knows no such bounds; he and she must live and work inside their materials so that nothing intimidates them and they come to understand their material thoroughly and then some.
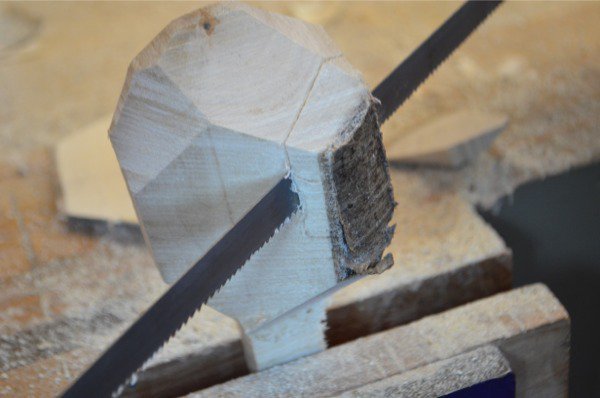
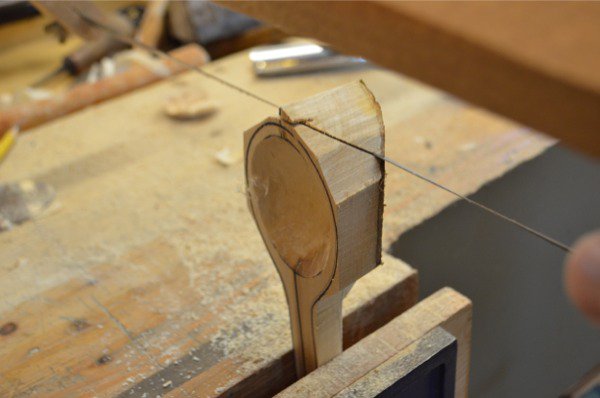
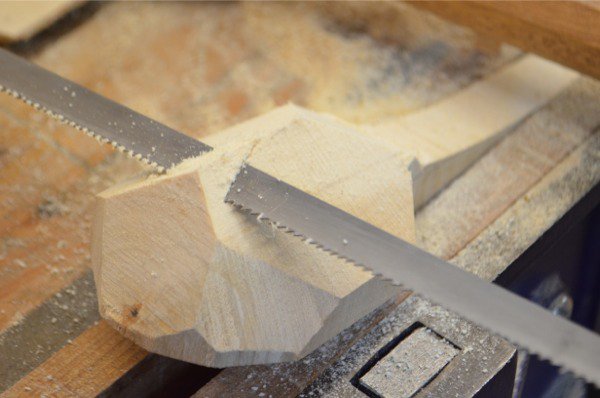
Once the outline shape of the spoon is established and cut, further shaping begins by removing the bulk of the waste. This can be done by sawing, chiseling or axing. You can also remove material with a spokeshave but this takes much longer. We will use the spokeshave for refining the work of the other tools. That’s what they do best.
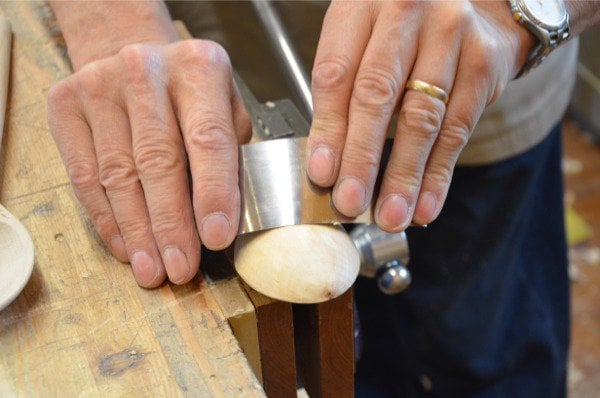
The spokeshave is the first tool I ever bought for my boys. It’s simple and effective to use and it lives very close to hand on my workbench. The spokeshave is basically a plane with side handles. Two types are available; bevel-up and bevel-down blades. Today, the most commonly used are the bevel-down versions we know as the 151 originally made by Stanley but now made by others too. There’s not much to go wrong with the 151. Keep it sharp and it will perform almost any task in the round as it were.
Removing the waste is quick using the bow saw and the bow saw brings a predictability to the shaping without too much practice. Axe splitting too removes material quickly, but you must develop accuracy and skill. This of course takes a little practice and don’t be put off by the thought. I think it’s important to develop the ability to read the grain and so better understand where each cut must be placed. Using a chisel and mallet will remove material effectively too, but you must understand grain orientation to guarantee a good outcome.
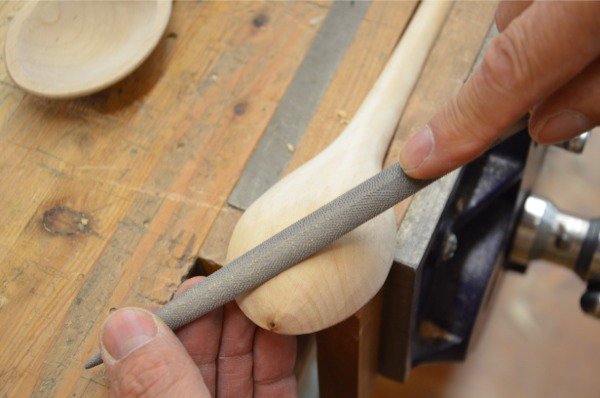
Of all the tools used I think that the spokeshave works wonderfully for shaping and rounding the handle and refining the back curves of the spoon. With careful direction choice the spokeshave leaves a lovely texture to the surface of the wood and is an acceptable surface finish.
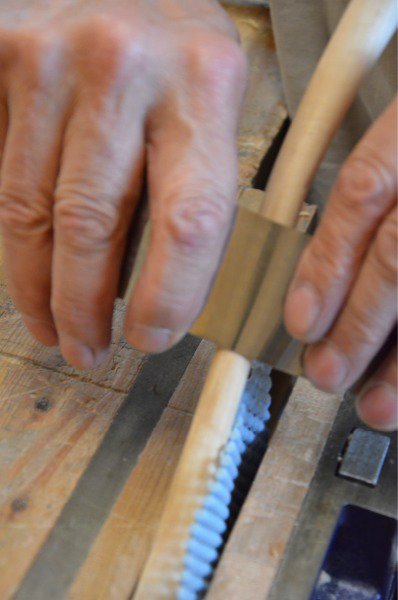
I recently tested out the Auriou rasps and really loved using them. They are risk free and they remove material quickly.
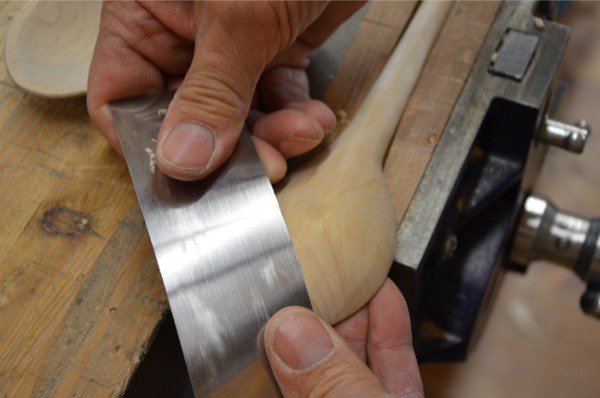
Beyond the spokeshave I often use the card scraper to refine the work of the spokeshave. This leaves a smooth surface and removes any and all undulation left by the other tools. I use thin plate card scrapers because I can flex them to the surface and get a continuous finish.It’s a matter of personal choice how much you want the spoon to be finished, whether you sand the surfaces or leave the tool marks as part of the texture.
7 Comments
Paul,
do you use the auriou rifflers for the backs of the spoons?
Not for this. You need the wider surface for this if you are to use a rasp. I have to say that the Auriou’s are really working out for me. I have a question yet to be answered on their longevity. So far they show no signs of wear and I have made about ten walking sticks, staffs and canes, about 8 spoons and some other shaped items as well as using it on pieces of oak furniture.
I have the chair-makers set that works for just about any type of work.
I am really enjoying this series as well and can’t wait to get started. Looks like I may need to add a Bow Saw to my arsenal. I bought a plumb hatchet so this is a start and I need to get the #7 gouge.
Thanks for all of this !
Steve
We have a film series planned for making the bowsaw and also a blog series that will help you.
I used a number 5, a number 9 and a number 13, but you could probably work with just the 13 which is the finer one.
Paul, now that you’ve completed the spoon, what, if any, finish do you use? Or is it ready to add to the kitchen for use as is?
Technically they are ready to go. Immersing the spoon in boiling fluids removes finish and oils in a matter of seconds. But they look nice for sale or as a gift with some kind of safe oil such as vegetable oil or mineral oil.
Comments are closed.
Privacy Notice
You must enter certain information to submit the form on this page. We take the handling of personal information seriously and appreciate your trust in us. Our Privacy Policy sets out important information about us and how we use and protect your personal data and it also explains your legal rights in respect of it. Please click here to read it before you provide any information on this form.
Paul,
do you use the auriou rifflers for the backs of the spoons?
Not for this. You need the wider surface for this if you are to use a rasp. I have to say that the Auriou’s are really working out for me. I have a question yet to be answered on their longevity. So far they show no signs of wear and I have made about ten walking sticks, staffs and canes, about 8 spoons and some other shaped items as well as using it on pieces of oak furniture.
I have the chair-makers set that works for just about any type of work.
I am really enjoying this series as well and can’t wait to get started. Looks like I may need to add a Bow Saw to my arsenal. I bought a plumb hatchet so this is a start and I need to get the #7 gouge.
Thanks for all of this !
Steve
We have a film series planned for making the bowsaw and also a blog series that will help you.
I used a number 5, a number 9 and a number 13, but you could probably work with just the 13 which is the finer one.
Paul, now that you’ve completed the spoon, what, if any, finish do you use? Or is it ready to add to the kitchen for use as is?
Technically they are ready to go. Immersing the spoon in boiling fluids removes finish and oils in a matter of seconds. But they look nice for sale or as a gift with some kind of safe oil such as vegetable oil or mineral oil.