Last On Traditional Saw Horses Series

My saw horses stack. The gussets can restrict this and though I have a 11” wide gussets to increase strength, this width can be substantially reduced even to as little as 6”. This is up to you but the saw horses will still be strong and sturdy. Stackabilty is steadier and using narrower gussets will reduce the stacked height substantially too.

Soon we will scribe the feet of the legs to correspond to the angle of presentation to the floor or a flat surface. Exactness is always good to shoot for, but sawhorses are designed with flex in mind and will accommodate the general inexactitude of wood, tile or concrete floors when in use. I add the gussets before I cut the feet to correspond to the splayed legs. Place the gusset piece against the outside edges of the legs, under the outer end of the beam, and mark the angles to both sides with a pencil. Cut the gusset just off the line on the waste side, leaving enough to plane flush after securing the gussets to the legs.
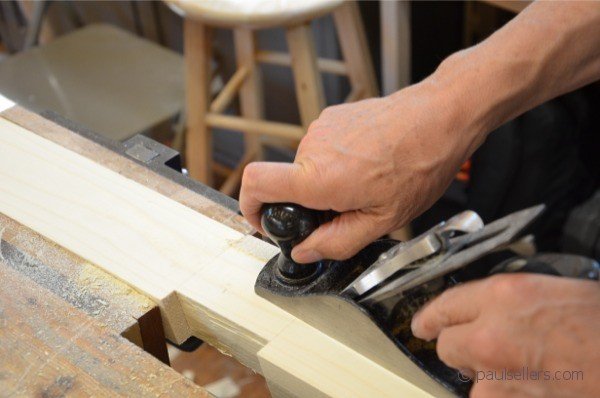
Pre drill and countersink the gussets. You may want to consider planing the ends of the gussets in a vise at the bench and offering them to the saw horse until flush or you can glue and screw them in place and as shown and then plane them exactly flush.
I like to remove any and all corners with a couple of swipes with the plane. In other words removing the arris.
Scribing the feet
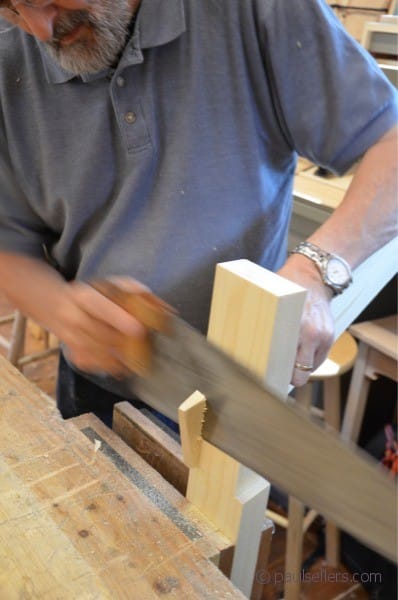
This final phase requires a flat surface large enough to encompass the footprint of the saw horse. Place the saw horse on the bench, flat floor or the tablesaw table. The distance to the short outside corner of the leg is the scribe distance we need. Cut a block of wood to that distance or simply use the blade of a square if it corresponds to the distance needed. Pencil the line all the way around the log. That way you can choose which face to cut from that suits your comfort. Saw the scribed feet carefully to the finished length.
Now you have a pair of thoroughbred saw horses. Use them carefully and they will last you a lifetime.
Paul,
In the first article you mentioned having two different heights of saw horses. What would be the other height of saw horse you use ?
Thanks for all you do in helping us who wish to learn,
≈
Paul-
Why not use the a 2×4 gusset about 6-11″ down the leg? This seems like a good use of the left over 2×4 sections.
You can do that but the gusset of plywood will be stronger and more stable as the width of the plywood will not shrink and yet you have maximised the width too. As plywood shrinks and expands only minimally compared to solid wood the plywood will remain solidly glued whereas the expansion and contraction of something so wide in solid wood means constant movement around this critical juncture.
Thanks, that makes alot of sense.
Paul,
Would you make a video for saw horses for dummies.
We have it on our list, so, yes, we will.
This one is killing me. My first attempt at this produced… substandard results. My biggest issue was probably because I kept your 9″ prop stick even though I used different stock sizes… but then used the sliding bevel for the birdsmouth layout… uh-oh!
Another point: Do you force the legs down into the housing when laying out your birdsmouth cuts? If the short point is flush with the top of the beam and the leg is propped up 9″ from the bench top you must be either not touching the inner face of the leg to the top edge of the housing, or you must have forced it in.
I have come only recently to your YouTube presentations and blog and thank you, Paul, for rekindling my interest in woodworking by your excellent demonstrations and articles.
I was, initially, intrigued and puzzled concerning your employment of only one bevel gauge at the one setting throughout the process of marking and gauging the work as I had found it necessary in the past to use two bevel gauges at different settings for sawhorses. This had always produced uncertainty and confusion on my part. An observer would have found it disturbing, on occasion, to view a man of exceedingly mature years contemplating hara kiri with the “wrong” bevel gauge, the instrument of his woodworking misfortune.
Now, mercifully, the penny has dropped. The subtraction of the width of the beam,
3 1/2″, from the length of the “stick”, 9″, gives a distance of sideways splay of the leg at the foot of 5 1/2″, the same distance as the lengthways splay of the leg at the foot. In other words, the run (the height of the beam above the surface on which the sawhorse stands) and rise of the leg both sideways and lengthways is 22″ to
5 1/2″ or in the ratio of 44:11 or, more usefully, 4:1, a ratio deserving to be chiseled in stone. My unfortunate past practice had been to employ different rates of splay sideways and lengthways, hence my confusing need in the past to use two bevel gauges.
Pythagoras would argue that, by finding the square root of the sums of the squares of the run (22″), the sideways rise (5.5″) and the lengthways rise (5.5″), the length of the leg in its finished state should be 23.335″ or, 23 5/16″ if we don’t quibble about thirty-seconds.
Time to retrieve my tools from storage.
Well 46 years ago the foreman called me aside and told me to make a pair of sawhorses. I knew it was a test. In my box I had a D8 rip saw,D23 crosscut,framing square,bevel square,chalk line,level, folding rule and a pencil. All given to me by a carpenter to old to work. I grabbed a 2x6x16 and 16p nails. I have no idea the angles,made them by eye.
I still have and use them today although a bit heavy and I have to reset the nails every so often.
Paul
The sawhorses can have a sacrificial top added slightly wider than the original. I counter sink and screw mine, but don’t glue. The horse then can be used and maybe abused, but the original construct keeps its integrity.
Great wisdom from your expertise.
Many thanks
Len
At the end of Part2, Paul entions the addition of a wider top, that could be somewhat sacraficial.
How would this be fixed in order to keep screw heads and bodies as far away from the working surface? From underneath? That might be a bit of a bodge?
Thanks, again, for such excellent work!