Please don’t think that this plane is difficult and complicated to make. It’s not. Curve-soled, round-soled, straight-soled and hollow-soled planes all come via the same patterns for making and so too low-angled planes, high-angled planes and even toothing planes. I think that you could make about ten different planes using these methods and the cost would be under £50 max. I am not saying these will replace the metal-cast bench planes, and of course they could, but that they will give anyone the low-use specialist planes we use from time to time. Making the planes for a special task is quick, effective and simple. You can of course make the plane to the width of an existing plane iron and borrow the iron for a task. This works with any of the planes that don’t need the curved sole. Spokeshave irons can work for this. If you are making a special-task plane for a one-shot shaved area, screwing through a non-fitted wedge into the main body will work just fine.
Because you cut the channels to the wedge and the blade, there should be little fitting to the actual grooves you formed in the sides of the plane body. But these can of course be tweaked with a a sharp chisel if or as needed.
The wedge is more critical than you might think and of course it’s purpose is to allow plane iron adjustment to the sole of the pane and also lock the plane iron to depth of thickness. The complexities occur when you arrange the cuts on the wedge to remove material in such a way as to hold the blade all the way along the side edges of the plane iron, down and near to either side of the throat opening. The wedge should in no way obstruct even the smallest aspect or area of a shaving and is made so as to ‘direct’ shavings into and up through the throat so that it exits freely in the upper cavity of the plane body.
Now that I have made that sound truly complicated and even impossible, lets tackle the task and do it as simply as possible.
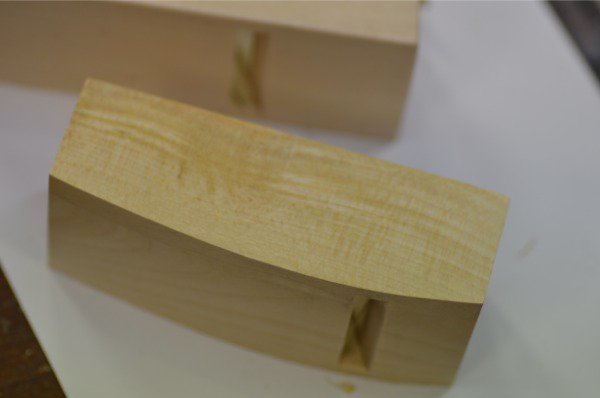
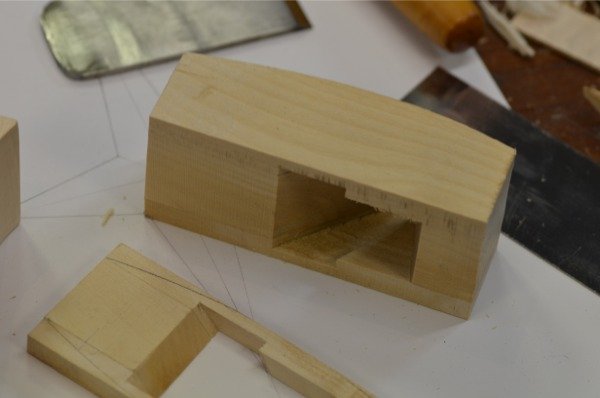
As we are making the curve-soled plane we have two radii to consider. The long axis along the length of the plane, and the short axis across the sole width. The radius for the long arc is 175mm (7″) and the shorter radius will be 75″ (3″). You can of course change both of these as you can change the overall width of the plane body itself if you wish. I would not go too wide, 50mm (2”) maybe. After 50mm we tend to shift to a travisher because a bent blade give added strength to the cutting edge through its curve and this means no chatter or skudding.
Best to start on the long curve as this may affect the wedge position and length in the throat. You can of course use a compass to describe the arc, but I think it easier and quicker to guesstimate the curve and use a bent steel rule to eyeball the shape you want. I used a thin scraper plate because I can flex with one hand and mark with the other. For the technophiles the compass gives guaranteed results and they may prefer this.
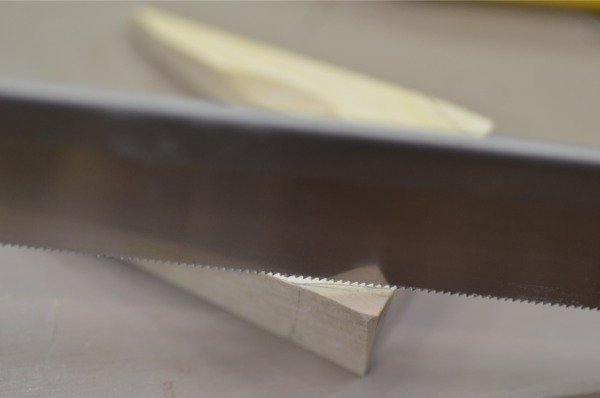
With the shape marked, remove the waste with a 1” chisel and then use a rasp to refine the curve.
The across-the-sole-curve simply follows the arc and I use a flat-bottomed spokeshave followed by a rasp for this.
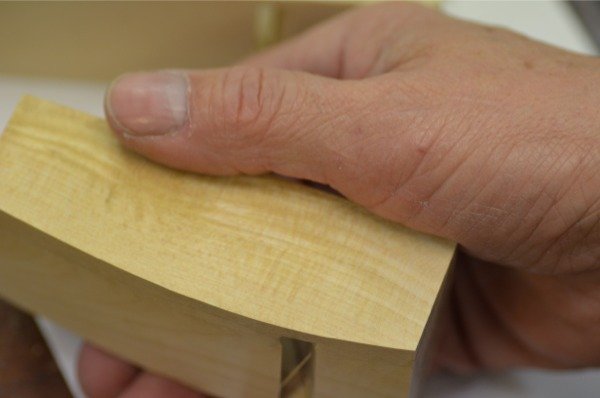
After the shape is fully formed I found a thin plate card scraper works really well for removing any hard edges. Simply flex the scraper to conform to the shape and pull or push until fully fared.
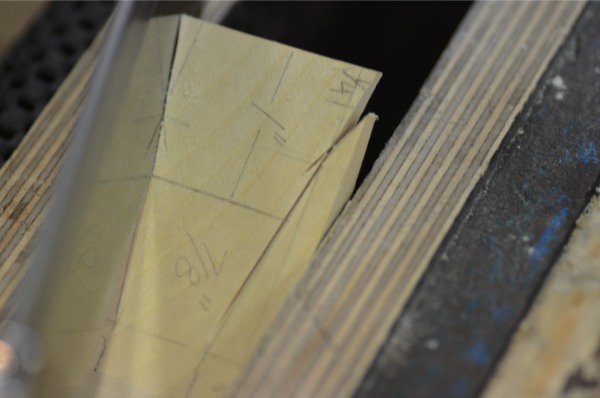
Next comes the wedge
The wedge has a channel down its centre that allows the free passage of the shaving to exit the plane. The channel is of little consequence in terms of functionality but using it helps unite the wedges to each side and at the same time allows the main body of the wedges to dampen vibration.
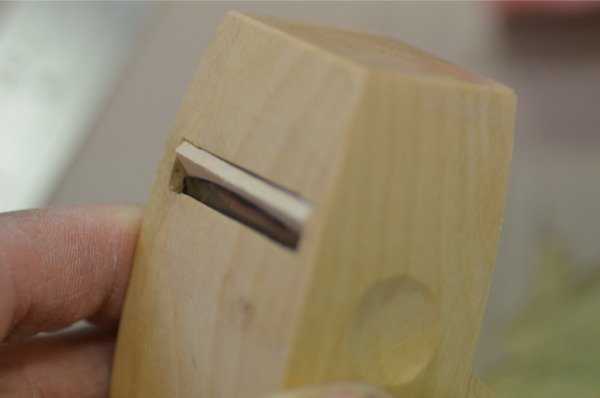
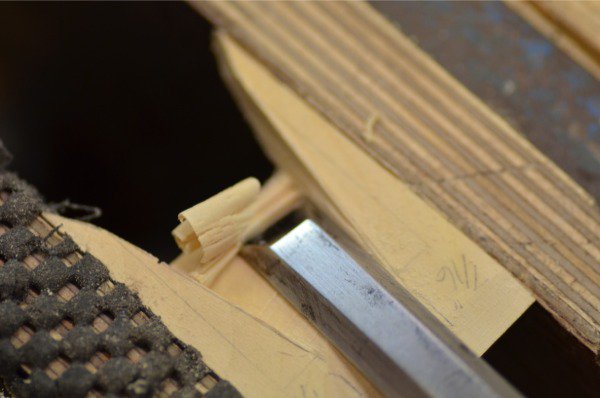
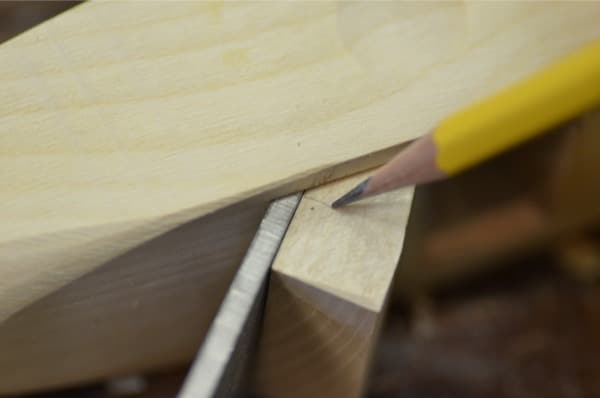
Insert the blade and wedge to see how the wedge fits through or into the mouth. Sometimes this protrudes and sometimes not. If it protrudes, mark the length and trim off. This is a start point and will be altered and refined more shortly.
I made the plane taller because you have a longer wedge and a longer iron, but I decided to cut my plane down to a lower profile and so took 10mm off the top.
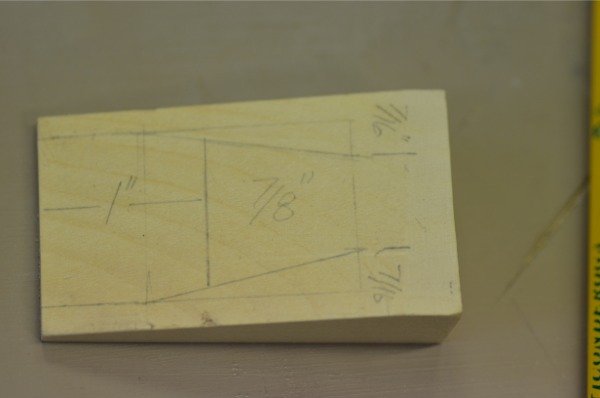
Inside the chamber from the top side, mark the sides of the channel onto the wedge on both sides. the wedge and start to lay out as per the markings shown on this image.
There is no exacting detail to this so the details given here are the PS outline.
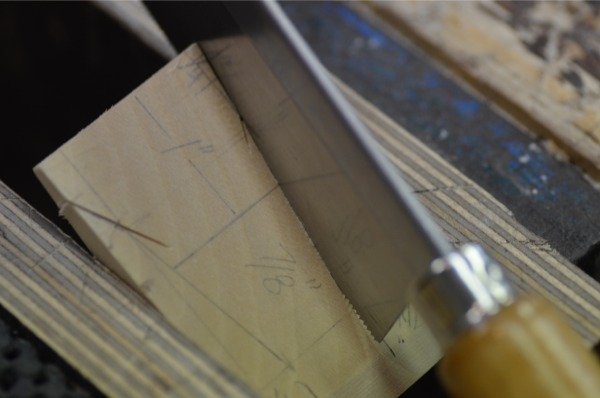
Cutting the two leading edges to each side is best done with a fine toothed saw. The Zona saw works well for this.
I then cut the longer angles that form the built-in wedges and it’s these that really hold the cutting iron whilst continuing to direct the savings up through the chamber and away from the cutting edge.
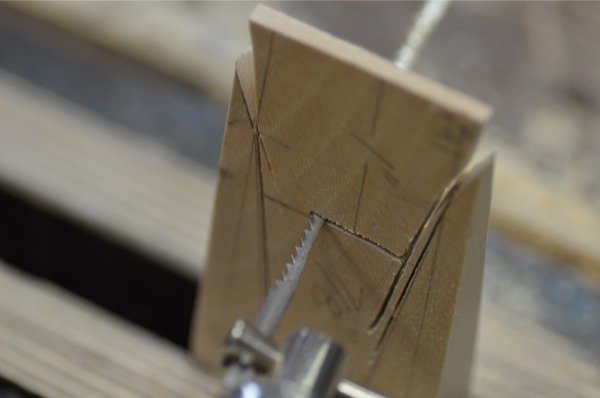
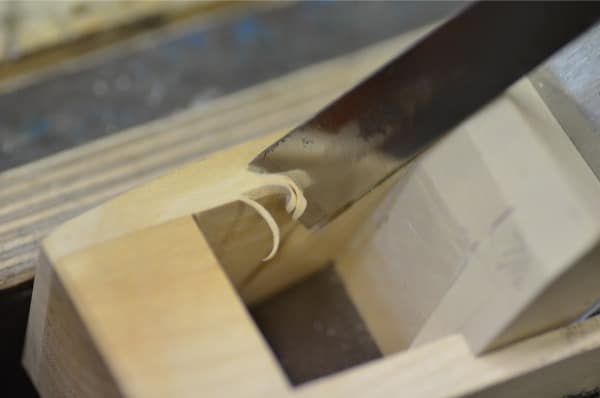
Remove the mid section with a coping saw.
Using a 18mm (3/4″) bevel-edged chisel, I remove the mid-waste area and then pared down to the middle of the channel.
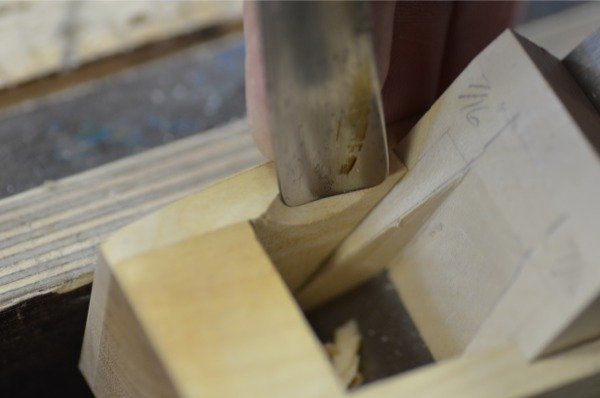
I scalloped the top corners of the plane to make the chamber neater. This is a comfort and appearance issue. The plane performs as well with or without this detail. Work from both ends of the scallop with a chisel, bevel down.
I refined further with a shallow gouge, but a scraper and sandpaper gets good results for this and you can wrap the sandpaper around a dowel or chisel handle to get crisp results.
As can be seen in the image, I repeated the scalloping to the wedge also.
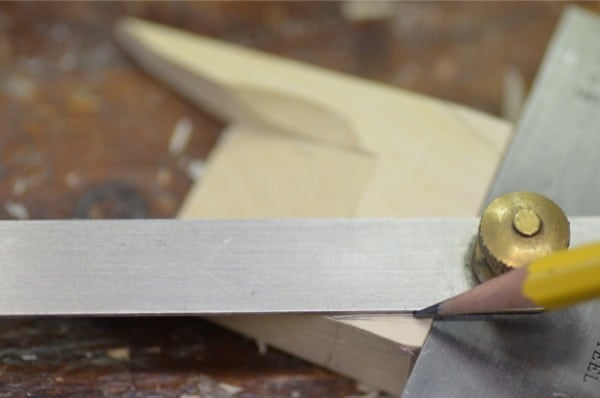
Remove the corners to the top edges of the wedges. This is an appearance and comfort issue again but…
…make sure that the angle starts above the sidewall of the plane by marking a start point.
One Comment
This is awesome, Paul! I have a nice book on making a wooden plane this way, but as usual you’ve distilled it down to essentials to just do it, not that much work. I have some maple that I harvested from a coworkers backyard that’s been quartered, stacked, and stickered in my shop for about 6 years, should be perfect for this. I always thought it would make nice plane bodies, though it’s diameter is just at the edge of useable.
Comments are closed.
Privacy Notice
You must enter certain information to submit the form on this page. We take the handling of personal information seriously and appreciate your trust in us. Our Privacy Policy sets out important information about us and how we use and protect your personal data and it also explains your legal rights in respect of it. Please click here to read it before you provide any information on this form.
This is awesome, Paul! I have a nice book on making a wooden plane this way, but as usual you’ve distilled it down to essentials to just do it, not that much work. I have some maple that I harvested from a coworkers backyard that’s been quartered, stacked, and stickered in my shop for about 6 years, should be perfect for this. I always thought it would make nice plane bodies, though it’s diameter is just at the edge of useable.