We concluded the filming for a different batch of how to’s coming up and into the new year. Hard to imagine 2013 is coming to its close but then it closes to a new opening yet to unfold. I look forward to that.
Should I tell you about the next online broadcast project with woodworkingmasterclasses? I’d like to just because we had so much a sense of fulfillment from making the workbench stools for filming but also for using. What I take for granted, just my work and the way I work and make, causes me to really rethink when I know I have to make it in front of a camera and present it. Once the cameras are rolling, and sometimes that’s for a few hours with an occasional break or two, I start thinking about you and how this is going to create new woodworkers all over the globe.
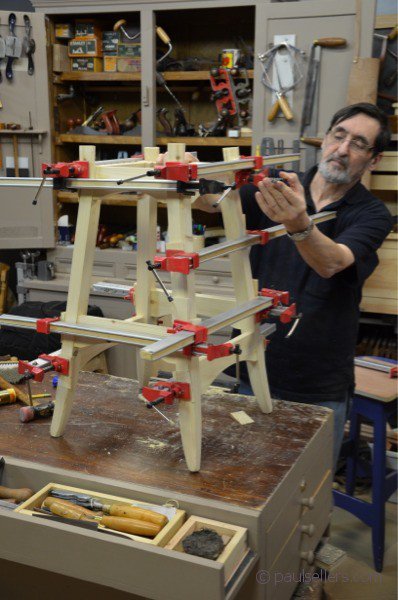
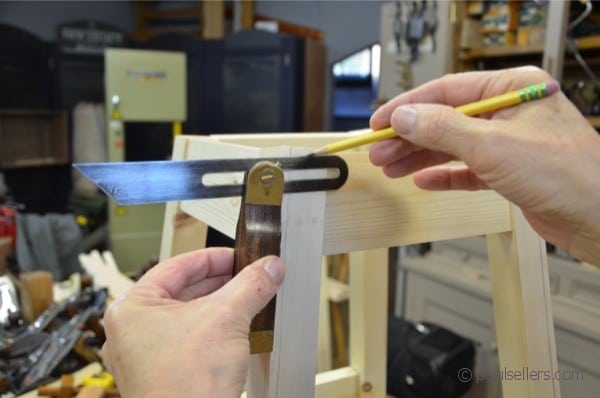
Soon we will finish off the series on making walking canes, sticks and staffs and move on to more shaping and carving as well as more complex joinery. The workbench or and bar stool is our first step into chairmaking and all of the complexities that entails as we work out angles and rakes for shoulder-lines to tenons and so on. My goal in making the bench stool is to present a stool you will not find today. As I said, it’s a first step toward the complex craft of chairmaking; an aspect of woodworking and furniture making most experienced woodworking artisans and furniture makers avoid like the plague. It has eight mortise and tenon joints with angled shoulders to each joint. It demands exactness and an intolerance toward inaccuracy simply because the shoulders must meet the legs perfectly. In other words it’s a new level. Most stools in stores are made for bars and we discussed that in an earlier blog on prototyping this stool. These mass-made stools always have round rails which sit in round holes, shrinkage happens, the joints rack and soon they are wobbly and thrown out. I wanted the proper joints I knew would last for a century and more. I wanted to reinvent the quality we could have at the bench and a customising that matched the body that would sit on it and a quality of work you would be moving toward as you follow the various courses in developing your craft skills through woodworkingmasterclasses.
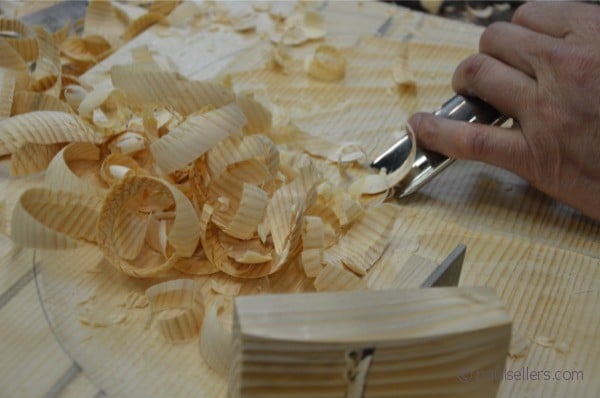
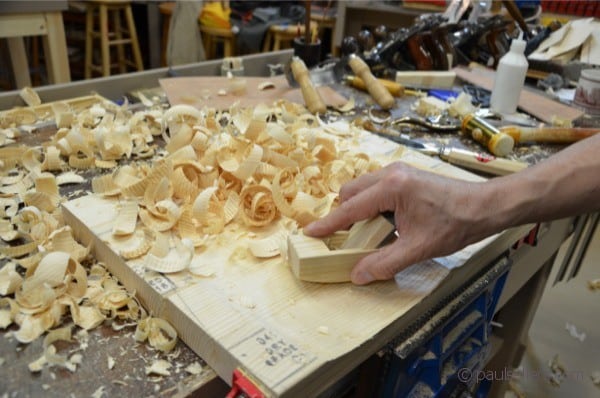
In making this workbench stool we entered the realms of seat carving and shaping. Instead of sending you out to buy expensive tools like inshaves and travishers, we made a radius plane from a single scrap of pine; offcuts from the scalloped and carved bench stool seat. You can adapt the methods we use in making this workbench stool to whole range of furniture pieces ranging from Craftsman-style pieces to Shaker-inspired pieces and a whole range of others too. I will be showing you how to make one of these planes and that includes the cutting iron from O1 flat stock, which we will grind and shape and harden for a lifetime of use in the workshop.
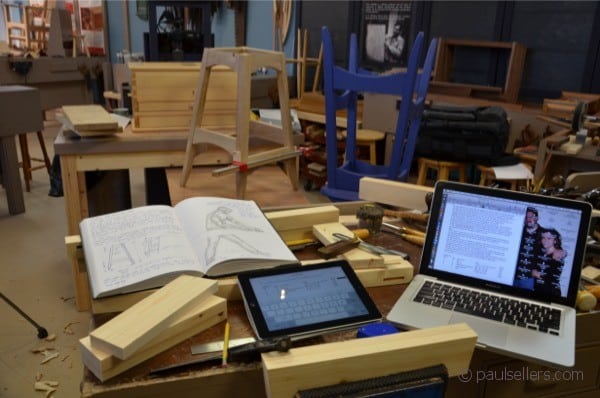
The seat, the frame, making the radiused plane, are all part of this past week’s work. I hope that you can join us next week as we finish off the walking canes, staffs and sticks and move onto a fully jointed workbench stool like no other.
Oh, and we haven’t forgotten some of the quick, beautiful and simple Christmas decorations and gifts you have never seen filmed before. Join us for that too.
NOTE:Just so you know, Paul has a newer Workbench series. If you are interested in the updated version of Paul’s workbench please click the button down below. This page links to a cutting list, tools list, FAQS and much more.
I am so excited about finishing the canes & staffs, but now even more excited about the stool and plane making. You are so down to down to earth, with a nuts and bolts approach very few others use. No wildly expensive tool collections or crazy jigs on massive power equipment. It’s just you, me, a basic bench, a #4 and a few other tools, some wood, and a lot of enjoyment.
Thank you Paul for everything you do to share your knowledge.
Paul thanks again for looks to be another wonderful project. I have so enjoyed the projects this year and looking forward to the up and coming next year. I have a couple store bought stools I am really not fond of and i just finished your bench so this project is welcomed.
Thanks again for everything Paul and crew for this past year !
Can’t wait! I’ve been anxious to tackle chair making but don’t know where to start. Plus I could really use a stool in my workshop so this will be the perfect project for me. Thanks again.
I’m really looking forward to this! Especially making the plane and the plane iron. I do love wooden planes. I have already made one small plane. I would like to make another one soon, and I’ve been looking at making my own cutting iron as well, but even though I have an idea, I’m not quite sure how to do it yet.
I recently bought myself a Record 044 plough plane, and I will soon start my own tool chest project, where I’ll be using it like you taught me. I really really look forward to that. But I also look forward to starting your other projects as well. I think these broadcasts are really inspiring, and I learn so much from you. There is so much to woodworking yet to learn and build – it’s like a well of knowledge, inspiration and experience with no bottom at all!
I’d like to get a jump on making the radius plane. What size steel blank should we hunt for? Thickness. I love to make tools so I’m really looking forward to this.
The stock is 1 1/2″ x 1/8″ and you need a piece about 2 1/2″ long. It’s O1 (oil-hardened) steel.
Paul, your timing with this project is wonderful. I just finished a workbench built and my existing (purchased) stool is a little too tall. The workbench stool will likely give me the practice to tackle some chair projects for my granddaughter next.
You always impress me with your no-nonsense, inventive and affordable tool approach. It has stopped me from procrastinating projects just because I believed I did not have all the perfect tools yet. The plane project will open doors for personal tool making for me. Thanks so much.
This sounds like a really interesting project. I’ve been thinking for ages that I need some sort of stool in my workshop and if this can serve as a springboard into chair making so much the better. I really want to be able to build some chairs to go with a dining table I built; I simply don’t want to have mass produced furniture when I can have something that I’ve crafted and put love and care into. I’ve ordered my steel strip so I’ll be ready to make the plane when I need it. I’m so looking forward to this.
So what kind of membership do I need? To see this stool series ?
Projects generally require paying member. Others are subscription without payment if they are for instance techniques or tool making and things such as that.
Comments are closed.
Privacy Notice
You must enter certain information to submit the form on this page. We take the handling of personal information seriously and appreciate your trust in us. Our Privacy Policy sets out important information about us and how we use and protect your personal data and it also explains your legal rights in respect of it. Please click here to read it before you provide any information on this form.
I am so excited about finishing the canes & staffs, but now even more excited about the stool and plane making. You are so down to down to earth, with a nuts and bolts approach very few others use. No wildly expensive tool collections or crazy jigs on massive power equipment. It’s just you, me, a basic bench, a #4 and a few other tools, some wood, and a lot of enjoyment.
Thank you Paul for everything you do to share your knowledge.
Paul thanks again for looks to be another wonderful project. I have so enjoyed the projects this year and looking forward to the up and coming next year. I have a couple store bought stools I am really not fond of and i just finished your bench so this project is welcomed.
Thanks again for everything Paul and crew for this past year !
Can’t wait! I’ve been anxious to tackle chair making but don’t know where to start. Plus I could really use a stool in my workshop so this will be the perfect project for me. Thanks again.
I’m really looking forward to this! Especially making the plane and the plane iron. I do love wooden planes. I have already made one small plane. I would like to make another one soon, and I’ve been looking at making my own cutting iron as well, but even though I have an idea, I’m not quite sure how to do it yet.
I recently bought myself a Record 044 plough plane, and I will soon start my own tool chest project, where I’ll be using it like you taught me. I really really look forward to that. But I also look forward to starting your other projects as well. I think these broadcasts are really inspiring, and I learn so much from you. There is so much to woodworking yet to learn and build – it’s like a well of knowledge, inspiration and experience with no bottom at all!
I’d like to get a jump on making the radius plane. What size steel blank should we hunt for? Thickness. I love to make tools so I’m really looking forward to this.
The stock is 1 1/2″ x 1/8″ and you need a piece about 2 1/2″ long. It’s O1 (oil-hardened) steel.
Paul, your timing with this project is wonderful. I just finished a workbench built and my existing (purchased) stool is a little too tall. The workbench stool will likely give me the practice to tackle some chair projects for my granddaughter next.
You always impress me with your no-nonsense, inventive and affordable tool approach. It has stopped me from procrastinating projects just because I believed I did not have all the perfect tools yet. The plane project will open doors for personal tool making for me. Thanks so much.
This sounds like a really interesting project. I’ve been thinking for ages that I need some sort of stool in my workshop and if this can serve as a springboard into chair making so much the better. I really want to be able to build some chairs to go with a dining table I built; I simply don’t want to have mass produced furniture when I can have something that I’ve crafted and put love and care into. I’ve ordered my steel strip so I’ll be ready to make the plane when I need it. I’m so looking forward to this.
So what kind of membership do I need? To see this stool series ?
Projects generally require paying member. Others are subscription without payment if they are for instance techniques or tool making and things such as that.