Upcycling, Retro, Retrofurbing, Retrofurbish, Shabby chic – What’s in a name?
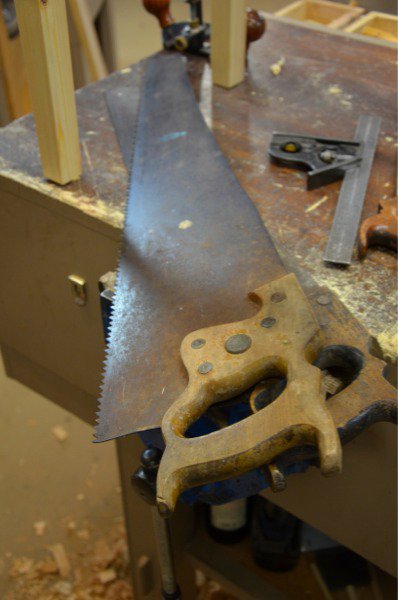
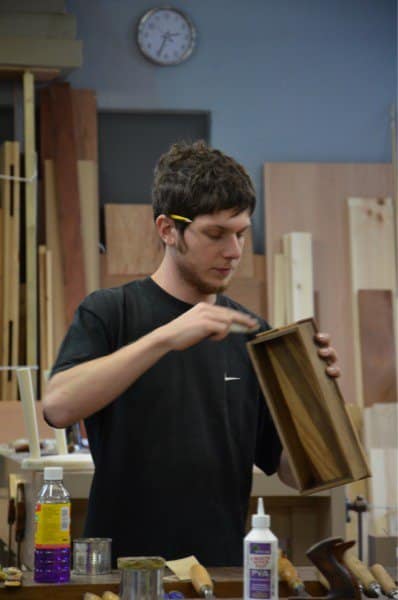
Passing by an old handsaw amidst piles of junk is hard spot for me. I glance first at the medallion and that tells me a lot. Without conscious thought I have already judged the plate and so I lift it to my eye to cast my eye along its teeth from heel to toe. Price doesn’t really matter too much; any Disston saw with a wooden handle and ‘Phil’ in the disc is worth £40. I wouldn’t pay that myself but it would be worth that at least. They never go for more than £5 at a flea market or car boot sale. These two cost me £6. How can I go wrong? In an hour the set and sharpen is done and the plate on one is shining steel again. The other is a big 6-point crosscut Disston, slightly breasted, just ever so slightly. The other, the one I started, is nameless, but it’s a good saw, even with a split handle. I can just restore it or cut the plate along the length and make a wider frame saw blade from it – in under about 20 minutes I think. Upgrading or upcycling creates creativity in my mind and I look forward to the new possibilities. Down one of the aisles ahead of me, John picks out some bits of wood from a trashy box full of junk. He sees something no one else sees and pulls out five pieces of very aged pieces of darkish wood 10mm thick and a few centimeters wide. He, because of who he is, sees an upcycle on the make. A box unmade but beyond only possible. The man selling them says he can have them and so he tucks them under his arm and walks away.
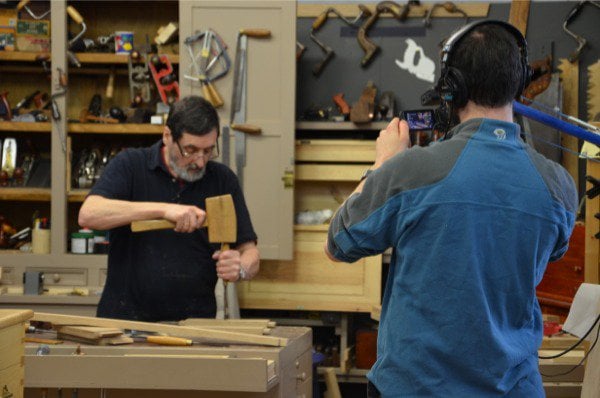
Phil sees a set of six of the old Marples bevel-edged bluechips on ebay and bids in at £20, I think. He wins and they arrive at his house a couple of days later. The steel is stained only, not pitted at all. the blue handles show signs of neglect as do the whole of the chisels, but inside is good stock material and in an hour he too will have them working better than when they were crude and new. I suggest to the guys they look for something I am about to blog on and that they should buy this week because the price will go up in the next few weeks. In two days and for little more than a few pounds they acquire some good stuff that I think they will really need and that will last them throughout their woodworking life. John bought an old beech plane for a few pounds and took it apart. He has a plane iron he can cut into knives or make another iron from and a handle he can retro to a metal-cast plane if or as needed. The plane itself will make a couple of small planes he needs for finishing his workbench stool. The day passes quickly and I see his new chisel box emerge from the five pieces of junk he bought. My saws become the centre of a video we are making on restoring a saw and so we all upgrade, recycle, upcycle and move through our workday.
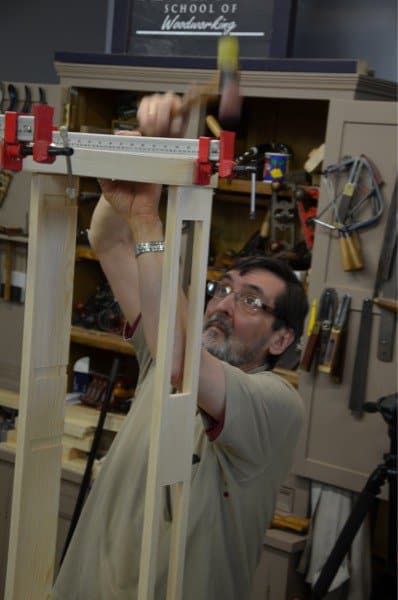
I made a new table for our latest woodworkingmasterclasses and we filmed it. While I was doing that I made a second one for my wife that will be her computer desk behind the sofa in the house. Now the filming is done we will go on to film the technique for finishing it using an old method used a hundred years ago that is a wonderful alternative to stain and dyes. The other one may be shabby-chic possibly. I may change my mind though.
John’s 7-sweep gouge from Ashley Iles developed a crack in the handle in the first three or four blows. He decides to replace the replacement handle himself, which took over a week to arrive instead of the next day it should have taken. John decides to replace the handle himself so that we can see the guts of the tang for ourselves. It was a disappointing experience because he had waited over six weeks for delivery and nearly two weeks to resolve the issue with the split handle, but we developed it into an education and upgraded the whole by grinding the rectangular tang to a more traditional tapered one. It was John’s first tang fitting so he learned about stepped drilling and such like that. Now that it’s retrofitted and the steel’s been worked remedially and polished out to where it should be, it’s going to work. Not quite up to the Hirsch gouge, but that’s British complacency. About two more minutes in production time with the most basic equipment and it could surpass the Hirsch. With its nice brass ferrule and well shaped beech handle, the ingredients were right, but there you go. We polished out the inside of the gouge behind the cutting edge and also the brass ferrule and then the general body of the steel too, so that it felt more comfortable. In the end, after a couple of hours work, John felt good about his new gouge. It’s no wonder we lose our grip bit by bit though.
A new design for me
Next week I have new design for a lamp I will make for the next series on woodworkingmasterclasses. It’s a craftsman-style lamp with stained glass, mica or paper panels. The wood will be oak I think and the lamp may be both a floor standing or table type. It’s all in the day, the week of lifestyle woodworkers.
6 Comments
Paul,
Thanks for sharing your day with us. I would love to have been there, finding treasures with you guys. I live on Maui Island, and there are no car boot sales here, and not many old tools to find. I have purchased some items from ebay, but it’s not quite the same as digging through a pile of “junk” and uncovering a gem. Still, I have my Stanley #4, some Marples shamrock chisles, Veritas saws, and a few tools that I made myself. I follow your videos while I listen to the birds singing and contemplate my next steps while enjoying the lush green of the trees, pops of color from flowers, and deep blue of the ocean in the distance. I look forward to teaching my grandson, when he is a bit older, the peacful way of woodworking.
It sounds as though you are off the conveyor belt and that’s what matters. Choosing a passage and working out as best you can to take total responsibility for your life is key.
I have many such chisels that I’ve picked up here and there, I’m a passable turner and fancy turning my own handles but tang fitting and step drilling are arcane mysteries to me. Where would one learn such practices?
John fitted his tang in the replacement chisel handle sent from Ashley Iles using a simple jig we devised. I am working on a blog on it and will post the whole.
This weekend I will be going to a flea market in search of handsaw, similar to the 22-24″ panel saw but searching for ‘panel saw’ on line brings up all kinds of table options for use in commercial sign shops, and the few hand saw references mention crosscut tooth. searching your blog the D8 comes up as does S&J and others. I’m looking for a saw for crosscut/ rip as you suggest in your sharpening video – is a ‘panel saw’ a lost name in some respects now a days?
Can’t wait for the restoration video. I picked up two older Disston saws that are in good shape but the plate is rusty. I haven’t wanted to touch them since I am unsure of the best way to clean the metal.
Comments are closed.
Privacy Notice
You must enter certain information to submit the form on this page. We take the handling of personal information seriously and appreciate your trust in us. Our Privacy Policy sets out important information about us and how we use and protect your personal data and it also explains your legal rights in respect of it. Please click here to read it before you provide any information on this form.

Paul,
Thanks for sharing your day with us. I would love to have been there, finding treasures with you guys. I live on Maui Island, and there are no car boot sales here, and not many old tools to find. I have purchased some items from ebay, but it’s not quite the same as digging through a pile of “junk” and uncovering a gem. Still, I have my Stanley #4, some Marples shamrock chisles, Veritas saws, and a few tools that I made myself. I follow your videos while I listen to the birds singing and contemplate my next steps while enjoying the lush green of the trees, pops of color from flowers, and deep blue of the ocean in the distance. I look forward to teaching my grandson, when he is a bit older, the peacful way of woodworking.
It sounds as though you are off the conveyor belt and that’s what matters. Choosing a passage and working out as best you can to take total responsibility for your life is key.
I have many such chisels that I’ve picked up here and there, I’m a passable turner and fancy turning my own handles but tang fitting and step drilling are arcane mysteries to me. Where would one learn such practices?
John fitted his tang in the replacement chisel handle sent from Ashley Iles using a simple jig we devised. I am working on a blog on it and will post the whole.
This weekend I will be going to a flea market in search of handsaw, similar to the 22-24″ panel saw but searching for ‘panel saw’ on line brings up all kinds of table options for use in commercial sign shops, and the few hand saw references mention crosscut tooth. searching your blog the D8 comes up as does S&J and others. I’m looking for a saw for crosscut/ rip as you suggest in your sharpening video – is a ‘panel saw’ a lost name in some respects now a days?
Can’t wait for the restoration video. I picked up two older Disston saws that are in good shape but the plate is rusty. I haven’t wanted to touch them since I am unsure of the best way to clean the metal.