Marking Gauges Part II – Mortise Gauges and More
For more information on gauges, see our beginner site Common Woodworking.
Mortise gauges
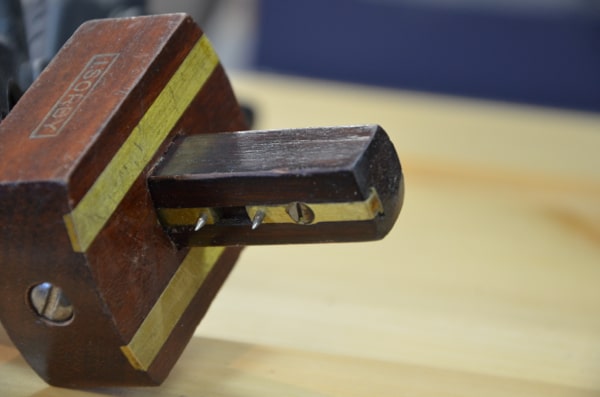
Mortise gauges follow the same pattern as the marking gauge but have one moveable pin we adjust to the first fixed pin for distance or width. The term mortise relates to the common use for the gauge which is to set out the width of a mortise for creating mortise holes ready for chopping with chisels. Whether it was economy of words that we left it at mortise gauge I don’t know, but reason tells me that the gauge is used in equal measure for laying out the corresponding part of the joint, the tenon, too. I suppose if the manuals were rewritten and the jargon redefined too, the tool might be aptly and accurately named the mortise and tenon gauge.

Combination gauges
As I have said somewhere here, combination gauges give us the two most important used gauges in one; the marking gauge and the mortise gauge. I am not sure why, perhaps it’s convenience or the fact that I have gathered so many, but I do prefer the dedicated gauges and rarely would I reach for combo gauge if I needed marking gauge or vice versa. If on the other hand i go out of the shop somewhere or if i were starting out i would suggest a combination gauge as a perfect starter gauge. I do use them when it comes to economy of space for travel, going to shows, someones house or office to work and such so I would always own at least two and indeed keep two close to my bench tools.
It is the convenience of dedicated gauges I like but I should also add that in the middle of a project where gauges are set to a task size it’s not usually convenient to assign the gauge to another task and then have to reset with the same exact size and you may need both gauges set at the same time. These facts are not always easy to think ahead to and plan for. How do I know these things???
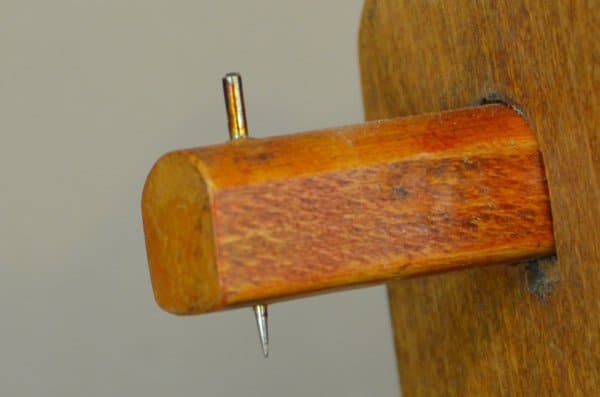
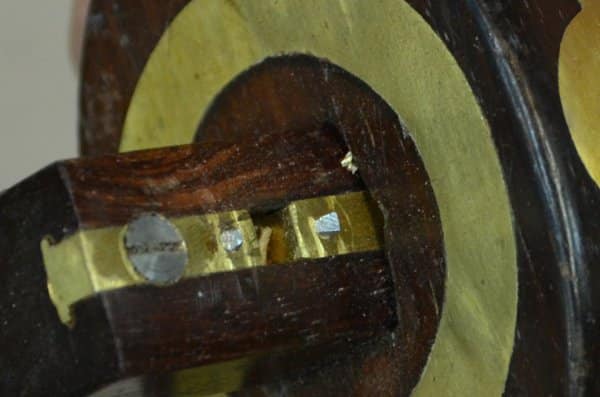
Compare the pin of the marking gauge here and notice its long and slender point and also the longer single pin of the combination gauge is thinner than the two mortise pins. Also notice that the angles of the pin bevels on the mortising pins are at different angles to the marking pin point.

I have generally noticed that mortise gauges are usually stouter in pin sizing with shallower points for increased strength than their marking gauge counterparts. The pins are often shorter too. I think that this is because of the type and nature of the work. Marking gauges are mostly used with or along the grain for tasks such as insetting hinges, lock recessing and so on. Finer pins work better and this may well be the reason for the differences. Mortise gauges are used a lot on end grain marking for tenons and this place a high-demand on the points of pins.
This gauge made by Sorby in the 1930s shows the forethought of the maker. The longer more slender pin shows that the thoughts of the craftsman were considered.
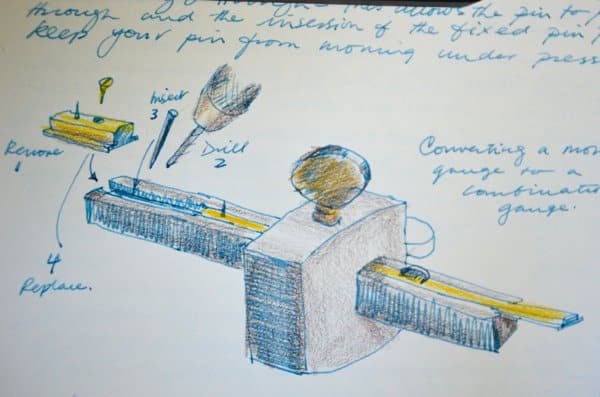
It’s a simple thing to change a mortise gauge to a combination gauge by adding a pin. Here is a drawing from an old journal that shows what to do.
How many gauges do you really need anyway?
I have acquired many different gauges in the form of marking gauge, mortise gauge, combination gauge and cutting or slitting gauge.
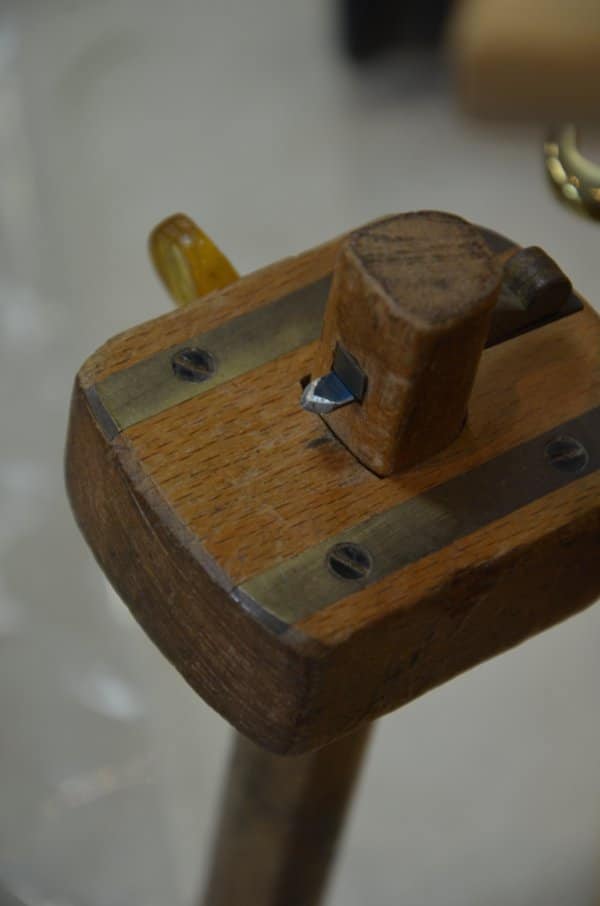
Here above is a cutting gauge to compare the difference with the others.

In five decades gravitating to the magnetism of secondhand discoveries you are bound to find tools for a few pennies from time to time. This gathering here happened in the last five years and I have many more besides these in the USA. In reality I would suggest you will use no more than four mortise gauges on most projects and perhaps the same number of marking gauges. You don’t need them all at once and so two of each would be practical if you have already got started and decided this craft is for you. I like choices in my tools and so have planes, saws, chisels, knives and so on in excess that I then pick from to use in a particular aspect of work. I like to do the same with gauges and find I will pick out one gauge over another for no particular reason but knowing inside myself that I did in fact prefer one over another. I do tend to prefer long thin pins over short dumpy ones and of course on old gauges, especially mortise gauges, the pins are often filed or worn down to little more than nubs. Twin-pinned gauges are often problematic because they are difficult to sharpen to equal heights. It’s best to sharpen them on two sides only rather than to a round point; so that they look more like chisel edges – used sideways of course.
There is little point, no pun intended, in sharpening to a round point apart from the fact that they do look nicer. When they are on the tool though, sharpening to a cone point is more difficult. On a more recent point, pun intended this time, the more recent models of gauges often have extremely hard pins that cannot be sharpened with a file. In this case get the EZE-Lap paddle-type UK or here US . They are simple to use and don’t cut into the wood or brass either side of the pins like say a flat file or triangular file will.
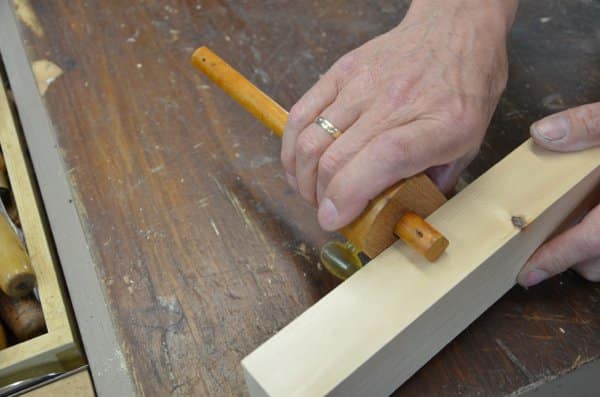
How to use the gauges correctly
Working with struggling students through the years has helped me to understand problems and issues surrounding different gauges. In the beginning I find the the problem mostly surrounds the awkwardness they feel in handling the tool itself. I think that that is understandable but they often don’t understand why something that seems so simple presents such difficulty. Fact is it’s just an awkward tool. Following that, because the tool is awkward in the hand, they then fell who hard can this be and feel they must somehow dominate this tool and and bull doggedly press it to task. usually the opposite of what’s wanted and this then increases the pressure to both make it work and to make it stay on course and then make it produce the marks properly and cleanly. In actuality, what’s needed is a lightness of touch; from lateral pressure pressing the stock of the gauge to the edge of the wood and then keeping a firm but not deep press forward along the wood. Pressing too heavily into the wood and believing that that is what is necessary is a real problem exacerbating the problem of use rather than resolving it. My advice? Relax!
Paul, I wonder if you have an opinion on thumb screw vs screwdriver-turned locking? There seem to be a lot of the screwdriver-style gauges around in the UK, particularly online, but I can’t think of a single reason other than maybe aesthetic to choose this design. Having used only the thumb-screw type I wonder if you have some “eureka” insight into their operation in actual use?
Thank you for your continued work on this blog, what a fantastic depository of information for woodworkers of all levels it has become. From a dedicated reader, Matt
The thumb screws are very convenient and they work well. I have thought of brazing in a thumbscrew to the slot of my setscrew gauges.
Any opinions on wedge-locked gauges? I have a set in different sizes kicking around in my head that I haven’t made yet.
I used to avoid the wedged gauges but, after watching a video on using them (by Paul I think, or possibly Richard McGuire “the English Woodworker”) but now I look out for them! The video essentially showed how to lock the setting precisely. Used properly they work well. Now I’ll have to go and find the video….
Paul, How do the “Twist to lock” style gauges (like Frank Kraus uses ) work and are they often available used?