Wooden Spokeshave in Use
For more information on spokeshaves, see our beginner site Common Woodworking.
Wooden Spokeshaves
Wooden spokeshaves predate the cast metal ones by centuries and more if you delve into the histories of ancient worlds. Spikes and spokes give some limited indication as to why these tools are called ‘spoke’ shaves, but so limited a definiendum only serves to undervalue the breadth and scope of a tool that multidimensionally defies limitation as a specialised tool. I cannot think of any other hand tool shaving tool that so capably spins in the hands of experienced woodworkers and amateurs too. With every shifting, twisting wrist and slight adjustment of hand the spokeshave creates unlimited possibilities for shaping and shaving wood.
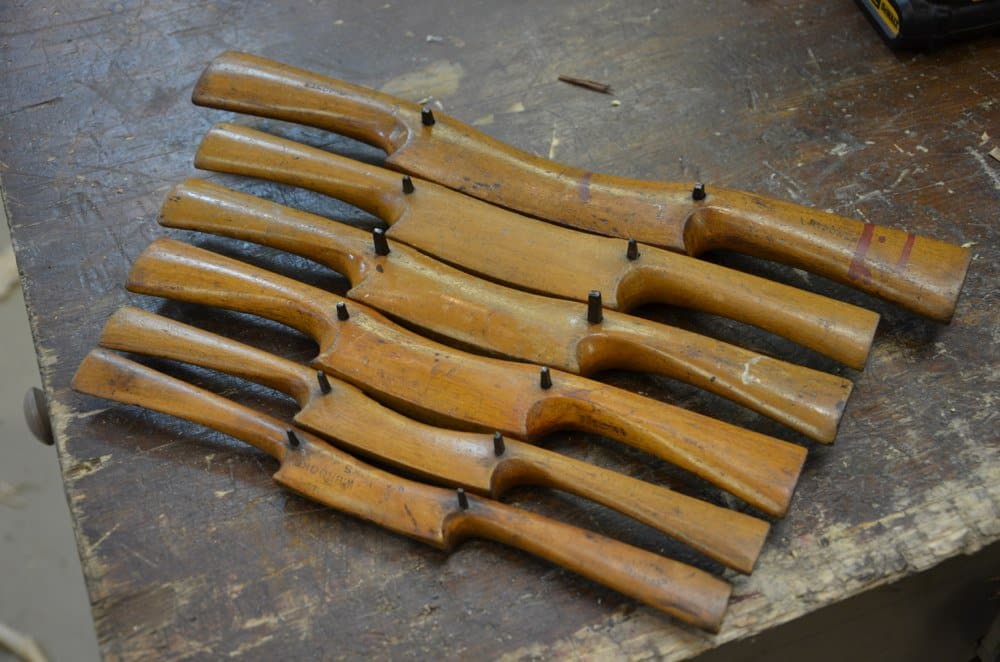
Traditional Tanged Spokeshaves Can be Large and Small
Watching trainees through the many years I’ve spent training apprentices and teaching students and then literally thousands of them, I have seen what makes the spokeshave most effective and what renders it almost useless. A common thread creates many problems affecting almost all hand tools in a world that has devalued skills, devalued real and practical knowledge and lost sensitivity in craft work handling wood, materials and hand tools. This common thread is sensitivity and the desensitised use of tools throughout every aspect of work.
We tend to see sensitivity in its most very limited sphere surrounding a sort of gentleness and yet it’s more expansive realm includes developed sensitivity that enables us to feel for and know how and where and when to apply the right pressures, great, small and every level in between. Sensitivity determines the exactness of direction according to felt pressures at the tool’s cutting edge. It’s only by sensing the minute by minute changes needed that we can shift and change so as to present the tool’s cutting edge to its most effective cutting position according to small shifts in grain direction and configuration in the wood. By sensitivity we determine sharpness and the need to sharpen, change the bevel slightly and much much more beyond. We may not even be capable of defining in words alone what sensitivity means when it comes to the way we respond to a tool’s cutting edge or the grain in the wood we work. We may not even be mentally aware of the subtle changes we make by effectively changing a hand and finger position as we work the tool but we do it every second if, when we work, we sense what needs to change and make the changes immediately.
A Round-bottomed Spokeshave for Convex Work
Though spokeshaves are indeed forgiving tools when it comes to making and taking shavings, and it’s because of this that sharpness is indeed neglected, sharpness affects the work much more than we can appreciate. Green woodworking and working bark from round stems and branches do not rely on the sharpness we might rely on say for shaping a cello neck or a queen Anne leg. Green bark and riven green wood is probably the easiest wood of all to work, so sharpness, although I still think it’s important, may seem less critical to say a chair bodger.
I say all of this to say that there is much more to a spokeshave than making spokes and spindles for chair parts. I have used them for refining arched doors and indeed making them. Shaping narrow sticks for chair spindles is important and so too the crinoline stretcher for an English Windsor. The seat itself and the comb too all come from the cutting edge of a spokeshave. Long bows and wagons, wagon wheels and ox yokes all come from this very humble woodworking tool as do a vast range of highly refined and defined furniture pieces including Chippendale and Sheraton, Hepplewhite, Queen Anne, Colonial, Federal, Stickley, Mission, Craftsman and so many more dating from as far beyond cabriole as you can go.
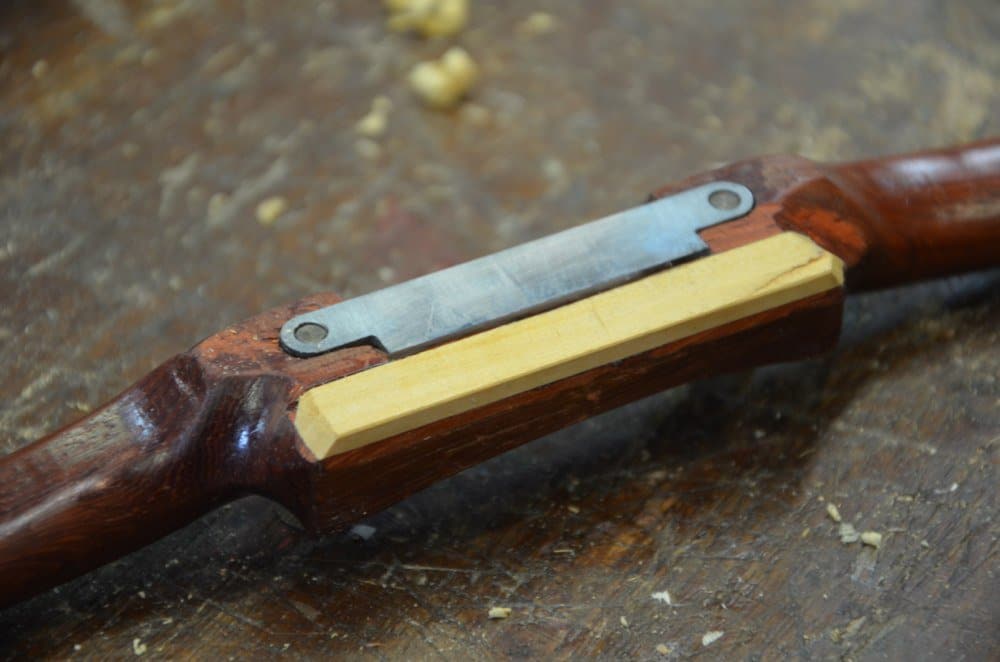
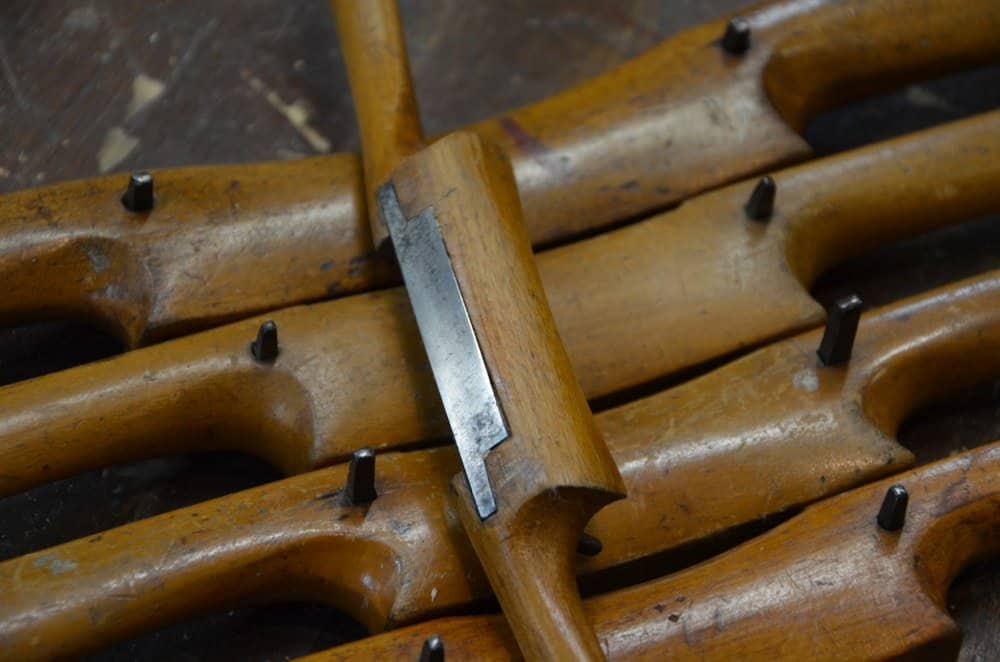
Yesterday I replaced the worn down forepart to my Padauk spokeshave with some boxwood salvaged from an old boxwood chisel handle. No it’s flat and square again. I own three of these and love them. They work identically to the old tanged ones of old and I can say that without compromise. The older spokeshaves rely on two tangs passing through the wooden handle of the spokeshave. When the tool is well used the tangs often become loose so the the adjustment is less reliable. Progressing a cut into the wood can be subjected to pressures that act like a wedge between the spokeshave blade and the body if the spokeshave. This drives the blade out and the spokeshave develops an unintended heavy cut.
Using a fixed blade on the other hand, that has controllable adjusters, guarantees no such movement can take place and that’s what made me invest in making the Veritas spokeshaves using their component parts. It really is a lifetime tool. It looks complicated but following the instructions step by step gives a guaranteed outcome. What I like too is you can also create your own round bottomed model and use the same blade assembly. Switching the components takes only a minute.

Here you can see the shaving emerge from the rear of the spokeshave as I push the spokeshave into the wood…
…and here you can it rise up as I pull it toward me.
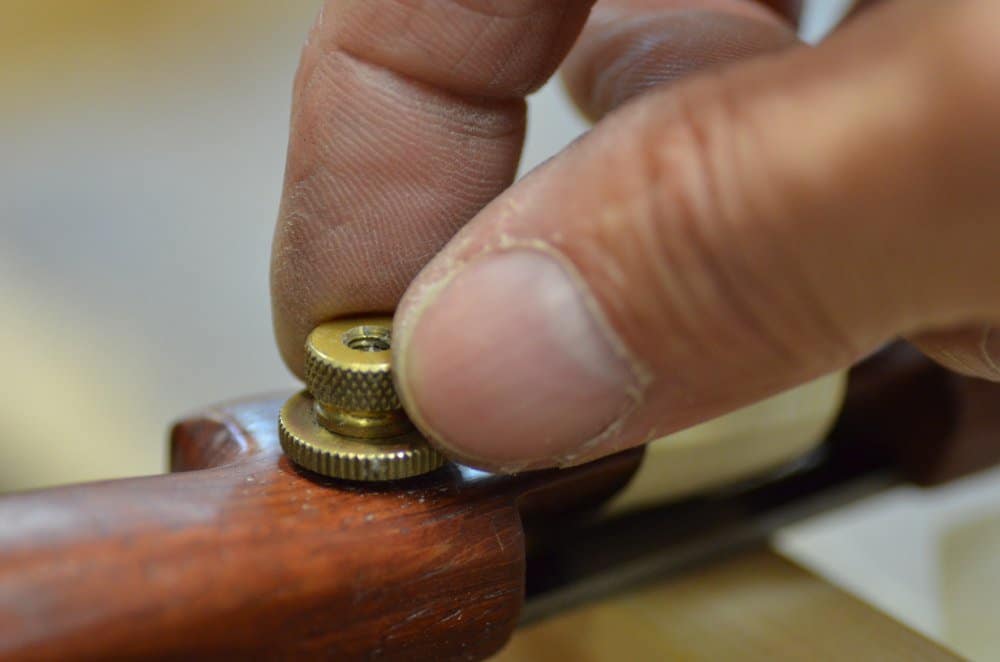
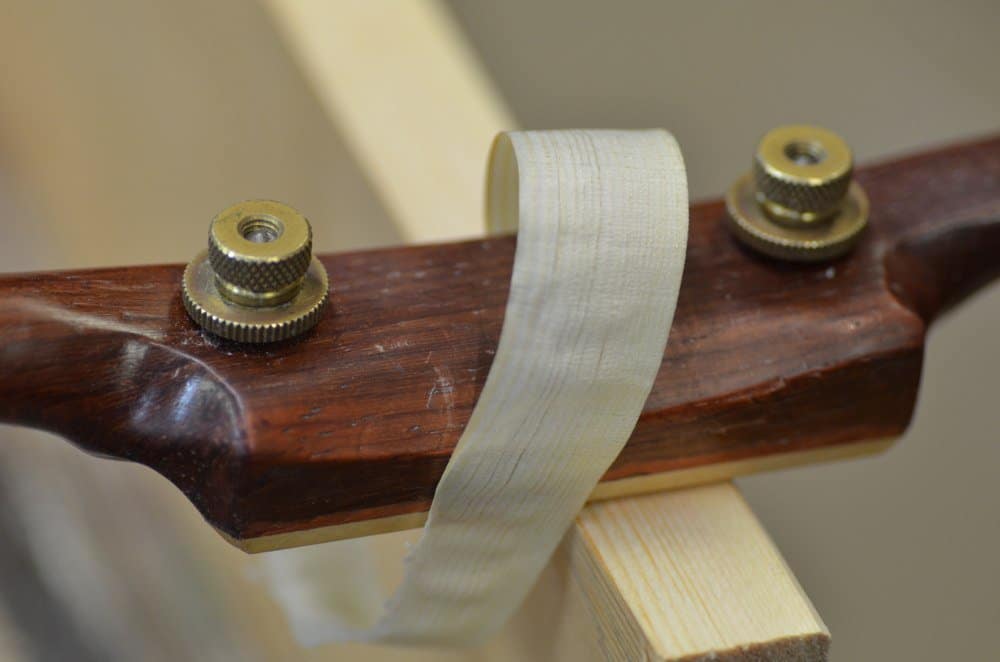
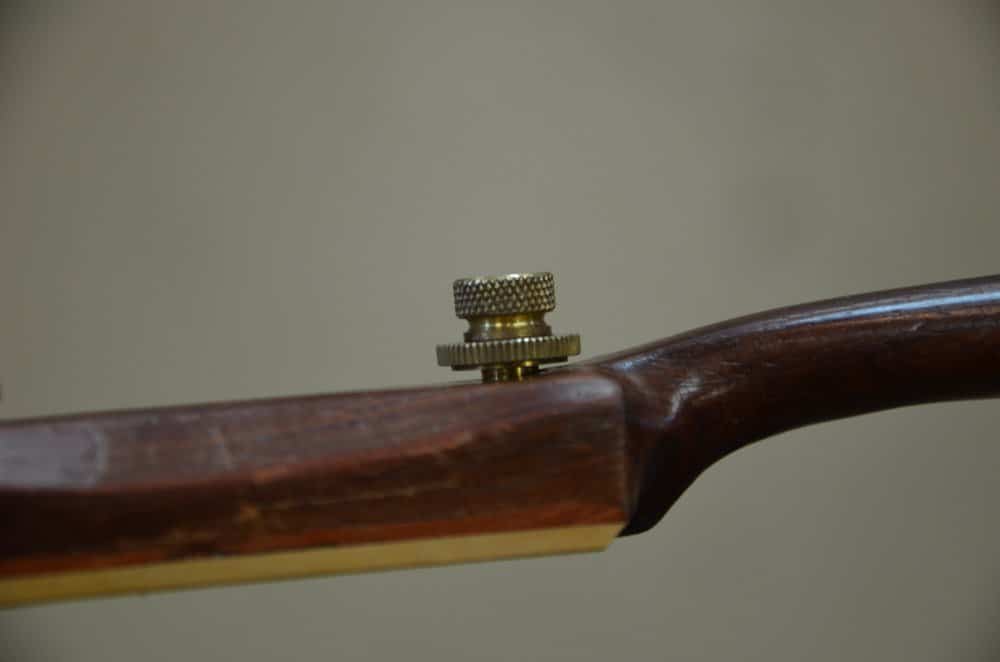
Adjustment is truly simple though at first it’s hard to wrap your mind around it. The larger diameter disc at the bottom, beneath my thumb, seats a threaded tube into the body of the spokeshave. The knurled knob I am turning here secures the blade stems that pass through the tube against the end of the tubes either side and so the distance between the body and the blade is set.
Very simple. The kit you buy includes the taps to thread the holes in the wood.
For years my only spokeshave was a 1970’s no64. It absolutely exudes cheap and nasty. However, properly sharpened and adjusted using light taps from a hammer it has done a job. Now I have something special The Christmas before last, the kids bought me a spokeshave kit from James Mursell at ‘The Windsor Workshop’. Have you tied this type?
It has screwed posts like the Veritas but uses grub screws threaded into the body to react against the blade. Although you need an allen key to set the depth of cut, rather than the double threaded post of the Veritas kit. I don’t find that a problem. I have one setup with a slant giving medium to fine cut and another set even and very fine. I’m going to make at least one more soon with a rounded bed.
I must also take the opportunity to thank you and the team for all your great work. I love the blog and am really enjoying the Master Classes. You have helped me to rekindle a passion for woodworking I thought lost to childhood.
Thank you, thank you all, Mark.
I have one made by JOB from some years ago but it seemed less convenient, especially as I like to change adjustment constantly on most tasks.
I recently tried my hand at using Granddad’s spokeshave, which came to me with a number of his chisels, planes, and other tools. It’s a Bagshaw and Field spokeshave, very like those in the top photo here. I only used it for one piece of a project, and a small one at that, but in those few strokes I made, it became clear that I’ve got a lot to learn about how to use that tool well. Sensitivity, indeed!
Great post, Paul. Thanks for the read and the tip about the Veritas kit. I might try one of those.
Thanks for this. One of the first handtools I was fortunate to acquire decades ago was a vintage wooden spokeshave with the same knurled knob adjustment. It is a joy to use and is amazingly versatile-there are so many jobs it can do. It was also one of my children’s favorite tools when they were small, it was so simple to shave fine curls chamfering a length of pine. Still one of my favorite tools.
I’ve never used a spoke shave but am keening to. What do you suggest for a beginner?
Hi Paul,
the old wooden spokeshaves has all the blade slightly arched? I have several of theem and all present these feature. It seems that they where made only for rounded work.
Thanks,
Valerio.
For a better version of the brass knob depth adjuster see Dave’s Shaves or Hock blades. I even think that Veritas has gone to this better version for depth control. In this system, there is a small phillips head screw under either end of the blade that allow you to remove the blade for sharpening and return it to the same adjustment. 1/8th of a turn of the screw in either direction gives a usable change in depth. I was taught to have slightly different depths at either end of the blade so you can do both rough and fine work without changing anything – this was for chair parts, but I find it works fine on guitar necks also.