We Look Deeper Into the Past…
Yesterday I visited my friend Bill’s car boot booth as I might every other week or so. He has nice pieces, choice and repaired usually. Usually not what I want to buy because I want to knock them apart usually, to see what makes up the guts of everything and discover the unknowns.
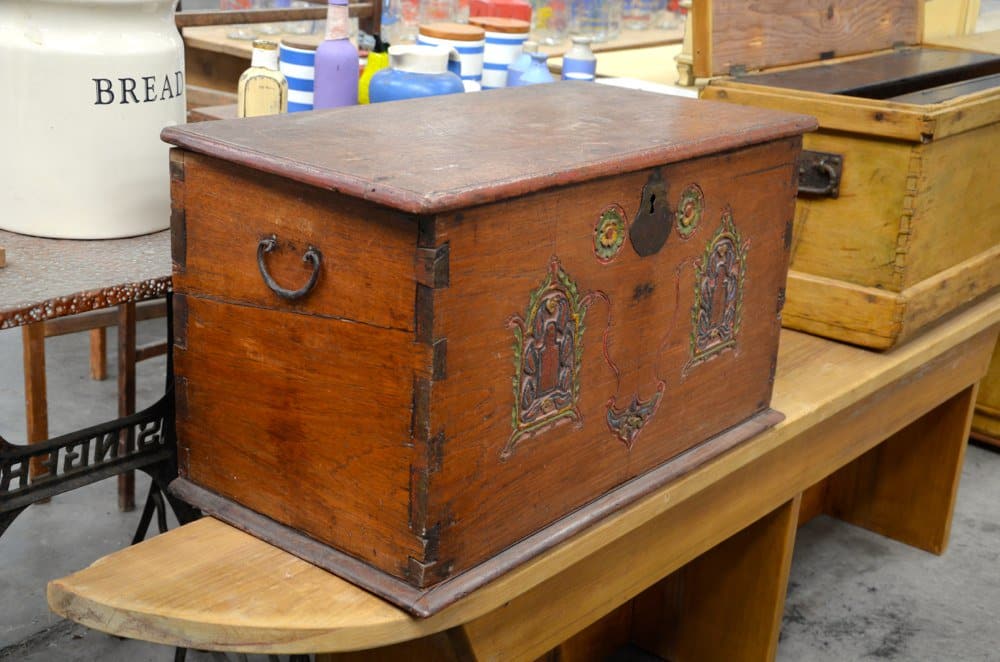
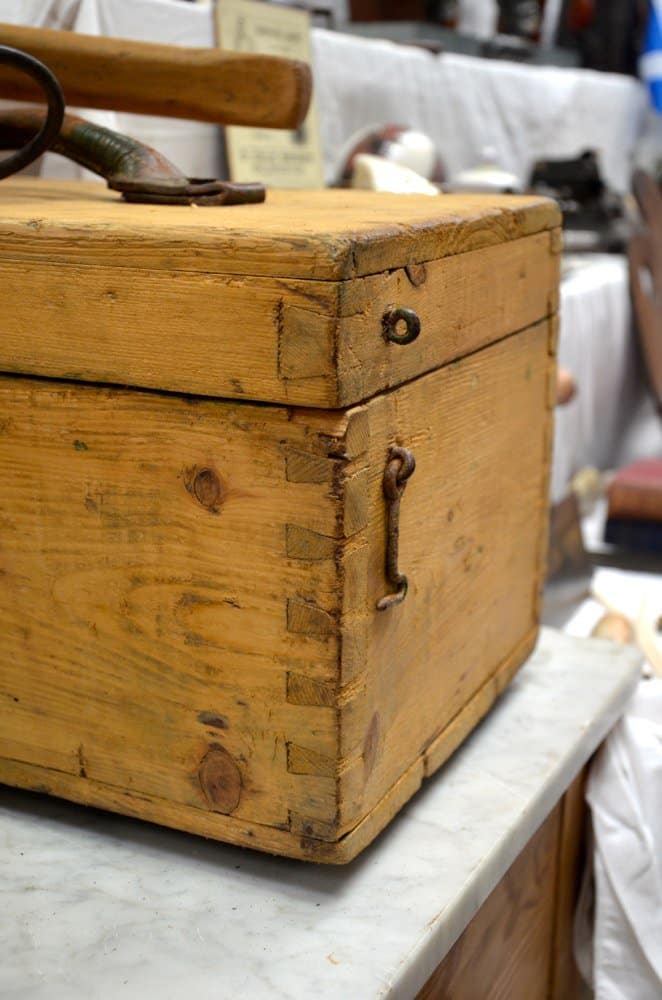

Rarely am I disappointed and I never really feel cheated. Bill has many, many chests to study and one stood out because it was a smaller but practical version of the workman carpenter and joiner tool chest most simply and commonly known as a tool box or tool chest. The corners were dovetailed as usual and so too the skirt.
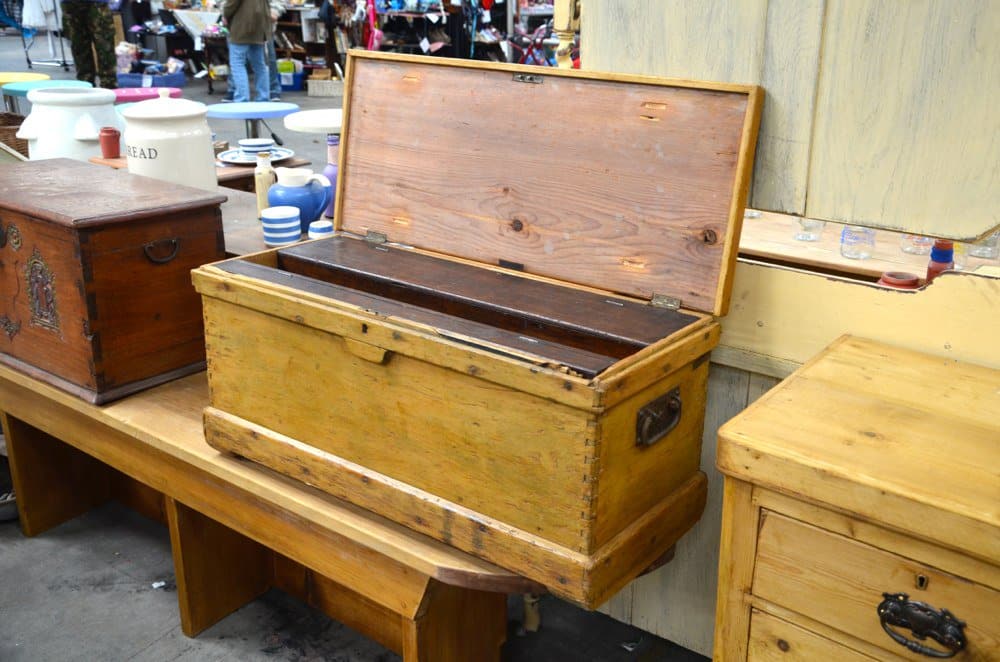
Many details I thought nice created something of a difference to the norm and I considered it as a Woodworking masterclasses project as another tool chest small enough to fit smaller workshops and large enough to accomodate essential tools. It’s not big enough to be really cumbersome and if you made two of them you would have easier access to the inside and be able to fit them accessibly into even a small shop. Another neat thing is that its really scaleable too, so if you wanted a larger version you could scale the whole without any trouble at all.
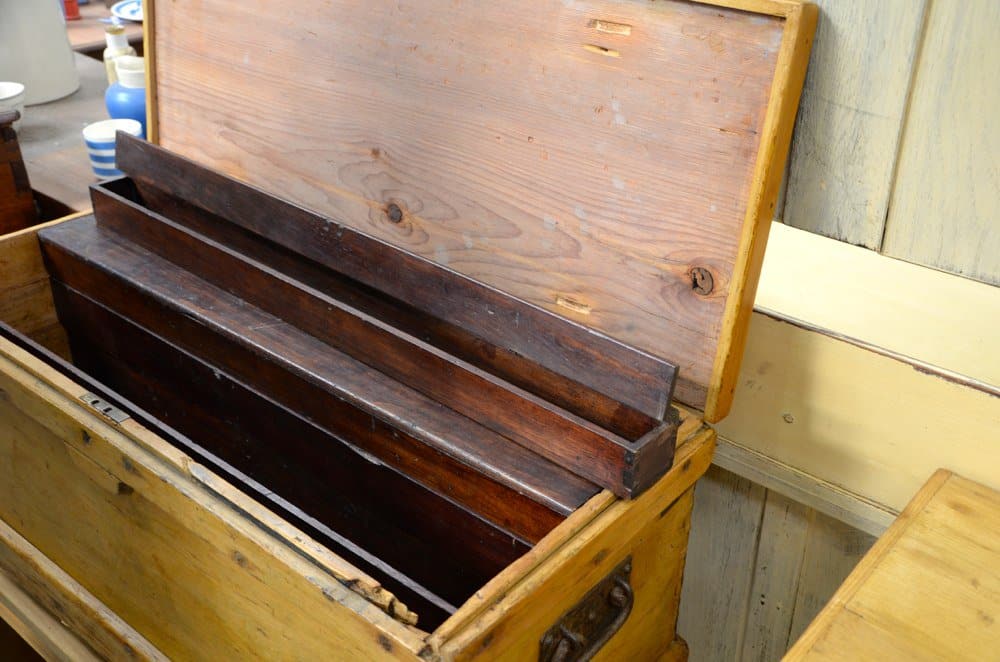
Tool chests like these gradually decreased in popularity as the machine methods of working supplanted hand tools and the need for hundreds of different wooden planes that were cumbersome, awkward and eventually or gradually unneeded. This tool chest struck me as perhaps a transition toward the joiner’s traveling tool box like the ones I use. Inside, the compartments and tills were long enough and yet quite narrow and so allowed for a box that wasn’t deep too. I tried to imagine the tools a woodworker with a decent amount of tools to work with wood fit his or her tools into the space. This tool box was a craftsman user and built by the owner. It’s been chemically stripped which is not always bad but mostly not good. It affects the joinery, swells the wood and discolours it to this sort greenish yellow colour. Most likely it was originally painted black. That was standard and many tool chests were even coated with black pitch like a telegraph pole if it was going to be used in damp places or transported on hand carts, carriages and ships.
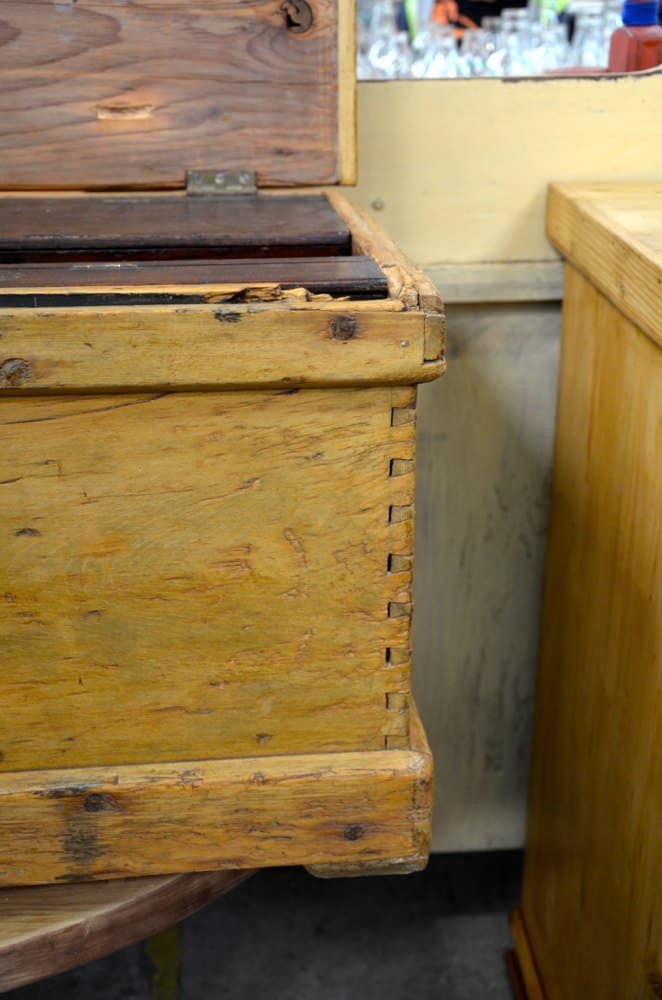
The joinery is free cut in that it wasn’t laid out. I noticed the angles are not too different but that the opposites are all biased in degree. That’s a bad habit to allow to develop but there is a good chance this was hurriedly done by an apprentice or newly qualified joinery. It made little difference to the corners generally, but I think that there was too much inaccuracy to this corner.
If you look closely you can see the top angle to the dovetail is less sloped than the lower aspect go each. Many early woodworkers gauged size to the dovetails by eye and also the angles too. very fast. When I work the one I make to camera I always make one freely. I will show you how its done one time on a video. Looking at these vernacular dovetails is more common that people think because a man had little time to himself. He may have made it as I did mine at the back of the timber racks where the boss wouldn’t find it or see it being made in his time. It was dark back there and the dovetails weren’t perfect. I wish that I had kept it but I made better ones and then designed the ones I make and teach today and they are vastly better.
This tool chest has many more details I want to go over so will do that shortly if I think it has enough interest.
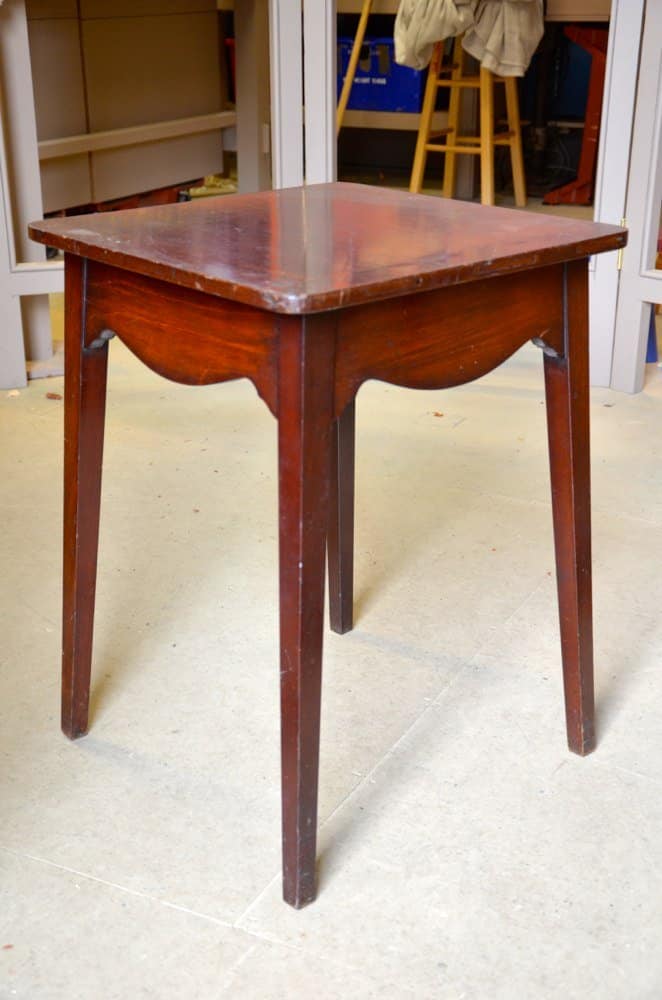
I bought a most lovely table made of a rich mahogany. I felt rich with my £3 purchase and I know others will be too. It has some very unique features, the maker-workman’s mistaken through mortise and I think important considerations for any design whether modern or old. I plane to use this one for woodworkingmasterclasses series where we use the design concept decisions of the originator to create a modern design.
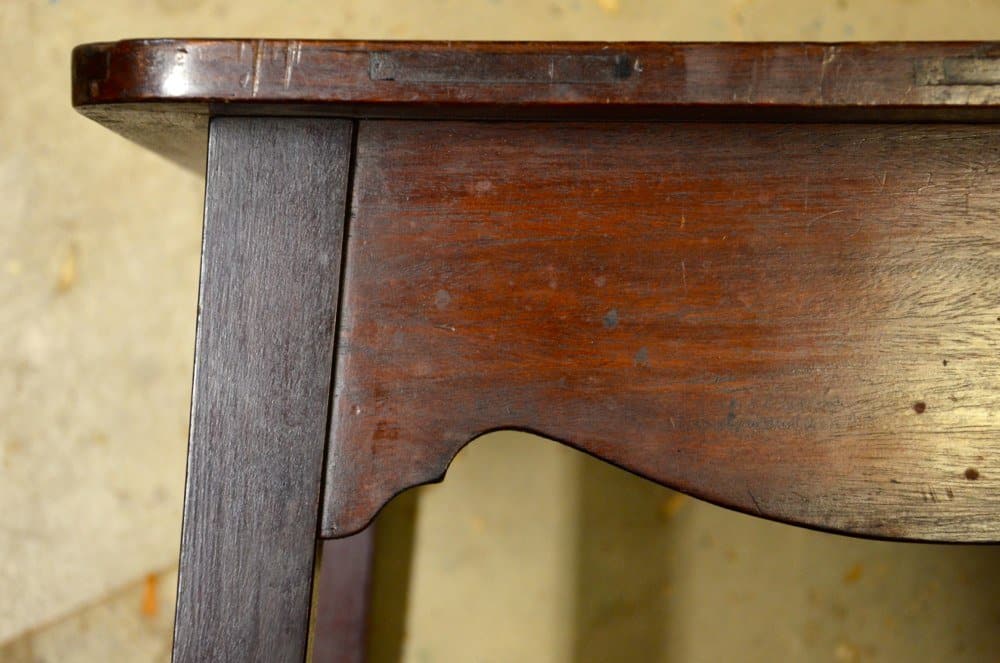
First I want to dissect the design to show you what the man that made it considered the most. I think this is going to be eye opening.
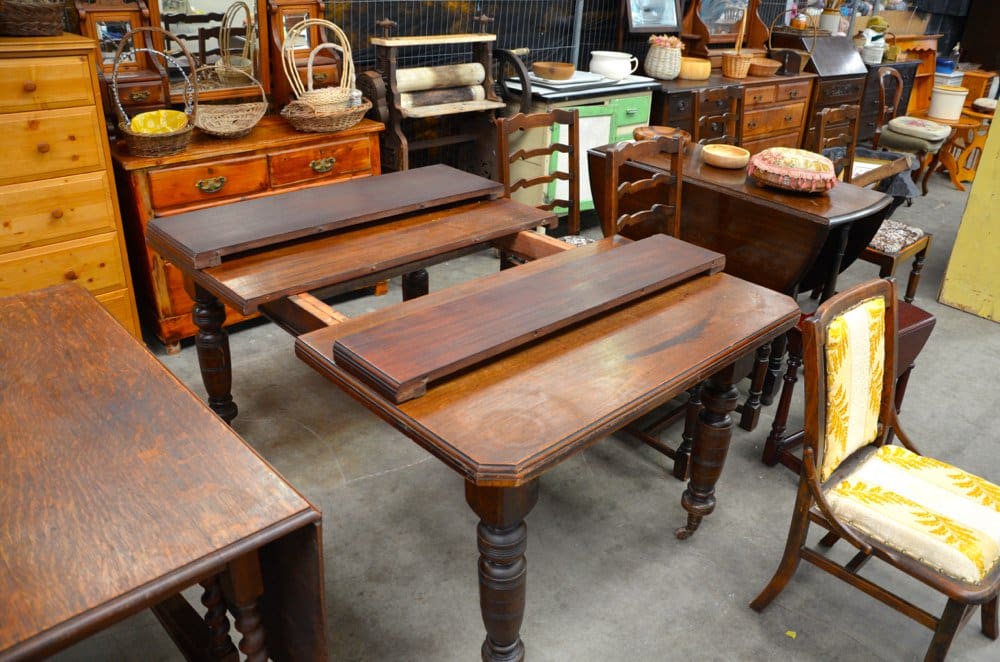
Above is a large table I bought. The legs are a bit monstrous; woodworm too, but none living and still most solid. All in all they are in good shape as far as solidness goes and of course they can be returned and the mortises reused. Not sure what I will use them for. But the tops are very nice wood. Mahogany. I dismantled it yesterday and salvaged what I wanted. This piece too has some very interested material recorded in the textures left by tools. It tells me so clearly how my woodworking forebears trued up their stock and worked the wood to so fine a finish. It confirms also that my ways of working are not so oddball too. Reversing machinist trends in domestic shops has indeed been a challenge. Not a bad job though. Just challenging. My dismantling revealed some detail on secondary woods and of course the shortcuts to completion. I will show things unseen before…I think.
There are other details to the design we shall see that expand our training and also our options. I will show some historic notes and see how they fit today’s work. My plan at the moment is to replicate the small table and then create the modern version in a new and modern design concept.
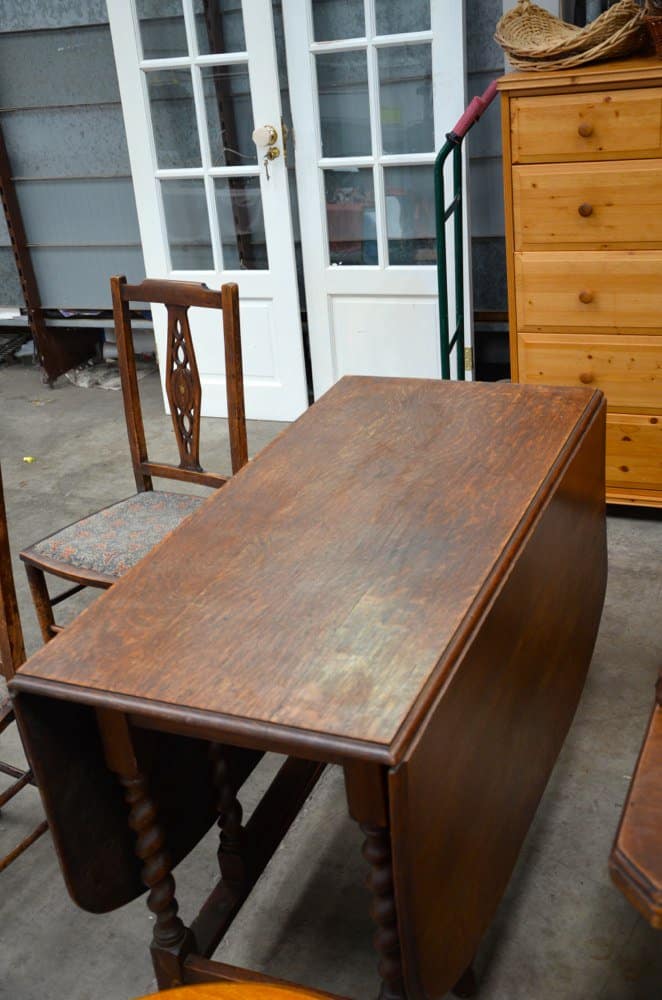
John bought his oak drop-leaf table from the same buyer. He wants to make an up cycled tool chest using both old mahogany and old oak. The oak was passed over at £25 but the top is quartersawn and has very nice figuring. Now he must prep the wood, thin it appropriately and work the grain features into the overall design. There were many telltale signs in this piece too. I think you will find this interesting too.
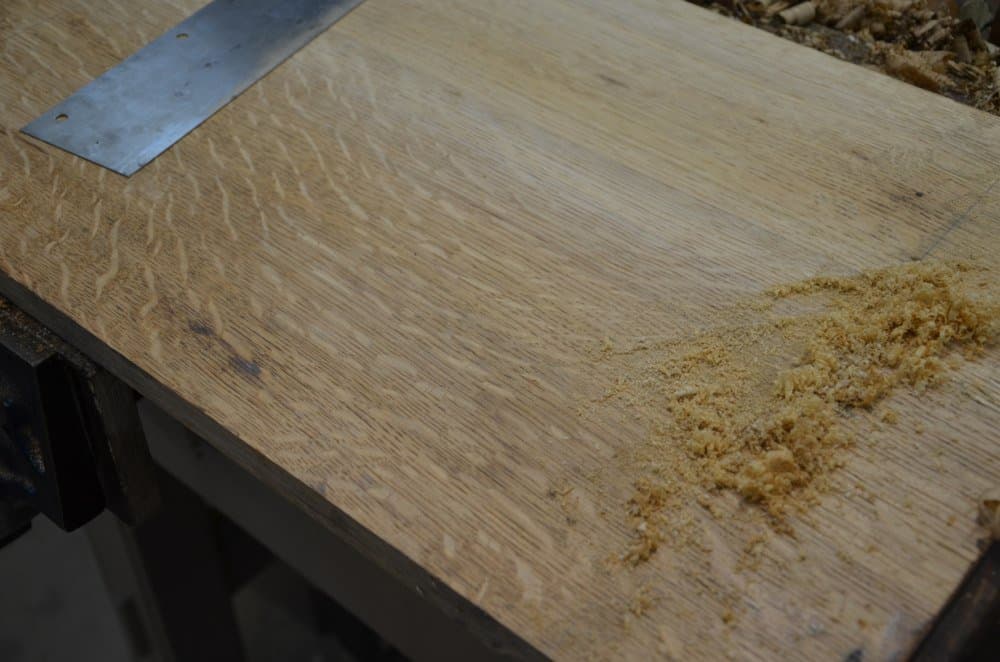
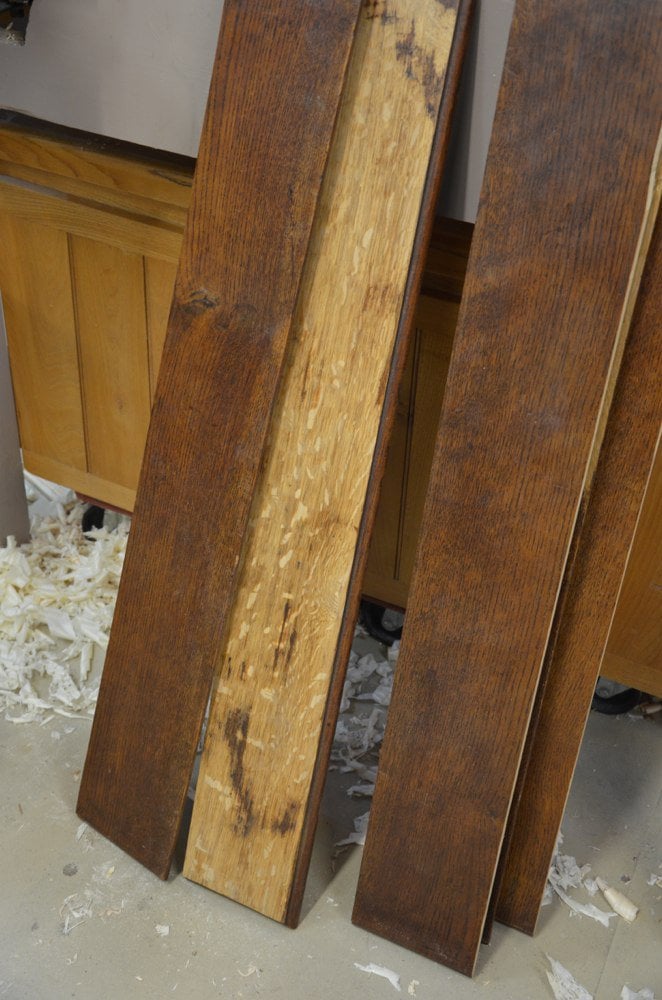
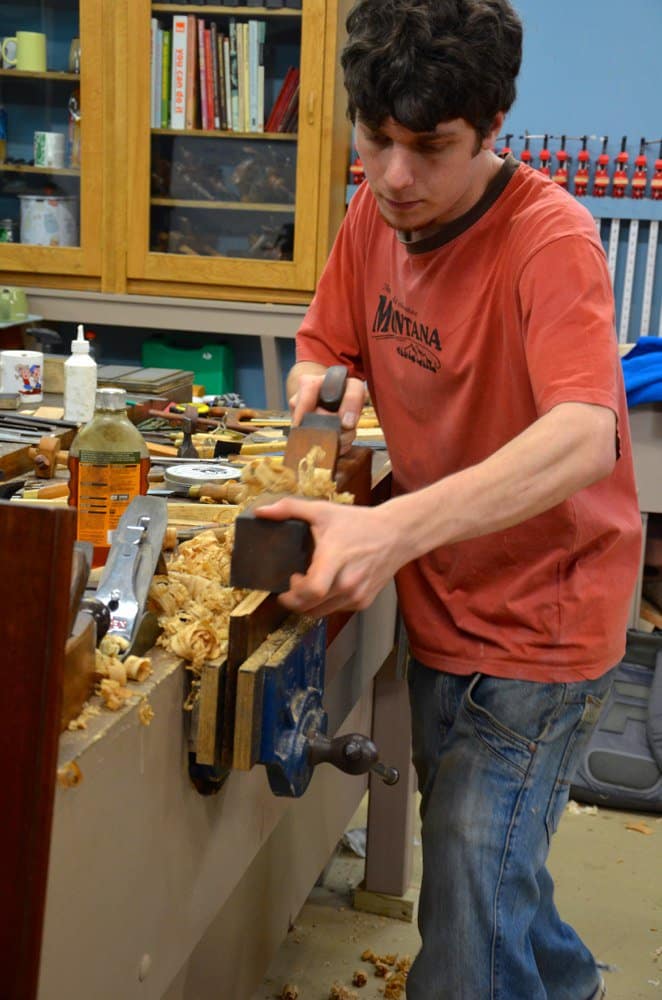
Here he’s cleaning up the surfaces and edges ready for grain reading. You start to see how upcycling works and how we ensure a future by reconciling the lostness of things to become wanted and cared for again.
I look forward to each new post and loving the continued ‘forensics’ theme. A chance to gain some real insight into why and how of it from years ago.
I like the “forensic” side of things, but “upcycling” is nothing new for me. Here in Canada we don’t have much of old furniture, and certainly not old mahagany furniture. Still, a thrown-out red oak coffee table yields an amazing amount of 3/4″ oak stock, and once made into a child’s toy chest and painted, costed me very little in materials.
A great deal of my “project” wood comes from Ikea–in the form of thrown out shelving units and bed boards. With screws going through the standards and then into the end-grain of the shelving, it makes for a very poor and rickety joinery, which is why the shelving units are usually thrown out. I usually convert them into other projects that are painted or for storage units in the garage.
I hope I haven’t given the impression this is new or originated with me. I have seen it done for half a century. I think that there is great value in dissecting the methods of the past and taking a closer look at things from the otherwise unseen realms. All I intend doing through this is to try to unpackage some of the past so we can see that traditional methodology has a lot of value in hand tool use today.
I love what you are doing with old unwanted and unappreciated furniture. I always feel sad seeing some beautiful old furniture left by the side of the road with no other defect than a glue joint coming apart or some water marks. The value of the old wood alone would surpass the total value of an IKEA table or even wardrobe.
I find it amazing that some people will pay thousands for a new table with metal legs and a glass top, but will not pay someone a few hundreds to fix an old piece of crafted furniture that would last them another lifetime.
Thank you for sharing with us and for teaching us.
All the Best.
what a fantastic resouce is it close to your workshop
Looking forward to the table, but would also be very enthusiastic about making a tool chest like this.
I love these posts about dissecting old pieces and going through the evidence of how they were made. It is so helpful and informative to have someone so knowledgeable as yourself explaining things, Paul. Great stuff!
I love the upcycling as well. Here in NJ, USA I constantly notice that people are continually getting rid of incredible furniture pieces. Real gems, constantly placed on the curbside or given away through an email “freecycling” group. Many people consider this just part of normal “decluttering” without realizing what it is they have or can do with the wood. Real gems. It’s too bad I don’t have enough space for all of it.
‘This tool chest has many more details I want to go over so will do that shortly if I think it has enough interest.’
Yes please, can’t wait, very interested, have been planning to build one exactly like that one, not too large but still in the same classic design, I’ve been thinking about since I read The Anarchist Tool Chest a couple of years ago but recently thinking I’d be better off with a smaller version just like that one.
Would love to see more photos and details of the tills etc. I built a large outdoor version for a customer but still haven’t got around to making one for me. Maybe I should start hiding some pieces behind the wood rack and start doing a little work each day where the boss won’t see me………..Oh, hang on, I am the boss, I better stop reading this blog and get back to work.
Thanks Paul for yet another interesting blog entry.
Hi. I just wanted you to know that I am really enjoying this “forensic” series and I’m definitely interested in that tool chest you found. I don’t have a dedicated space to work in, so a small chest that is easily manageable would be a great asset. The part of the “forensics” I like the most is the explanation of the choices (good and bad) that people make in their joinery. I’m teaching myself, and I find that a lot of books and magazines explain the mechanical part of the cutting etc, but never get into much detail about why certain joints work best in certain situations or with different wood characteristics. Thank you for making the time in your life to share your knowledge. Your videos are fantastic. You never fail to give us the straight goods and that is greatly appreciated!
Paul,
I don’t understand how you take a piece of furniture apart. I assume you don’t just bang it apart. How do you deal with the glue that is still holding the wood?
I am another one who will keep an old piece for recycling the wood. I will soon get my 3 year old Grand Daughters Baby Crib to salvage the wood as it does not meet up to today’s code. This is and was a nice piece when made several years ago and the wood is in great shape, better than taking it to the Landfill.
Great posts by the way Paul.
Steve