Making the Toolbox – Pare and Chop Dovetails and Pins
I said recently that using the coping saw is less acceptable for removing waste from tails and pins and that I felt it was less the way of the craftsman. I see it much the same way I see it when woodworkers ask if I ever gang up the dovetails to cut four at once or something like that. It’s a mentality issue for me. I do cut rougher dovetails with a coping saw to remove the waste and then chisel to finesse the cut on say a beehive or a tool tote. When it comes to finer work I feel the method and passage is as important as just getting the job done. Someone wrote and said that they couldn’t use a chisel on thin pinned dovetails and that the only way to remove the waste would be with a piercing or fretsaw and I suppose that’s fine. I make choices in my work and then work I might choose not to be involved with in certain cases. I tend not to be involved in creating what might be regarded as overly refined to the point that they offer impracticality and pretentiousness. I’m not really an advocate of royalty and the upper echelon of the privileged few lording it over the poorer classes. Some refinements in woodworking were catering to the rich and wealthy and were, really, pretentious at best. This was expressed in certain work such as string inlays and thin dovetails. All very creative and not particularly complex, but it was the minority rich expressing its standing in society and their control over the working classes ‘in service’ in order to show how very refined their tastes were. So I tend not to make overly thin pins in dovetails just to impress people. I do not want very thin pins that push to the limits and become weak elements in my work. I’d like my dovetails to look substantive enough to live up to the work in some work such as cases and toolboxes, knowing that they will indeed last the lifetime of service. For some work I might choose thinner pins but never so thin they compromise longevity and consciousness toward quality workmanship.
Chop and pare is the method I like the most and by like I mean enjoy. It gives me implicit control throughout and I feel the method to be the least aggressively invasive. Everyone will have their view, but the sharpness of the chisel gives me dead on pare and tap cutting that resonates in my soul.
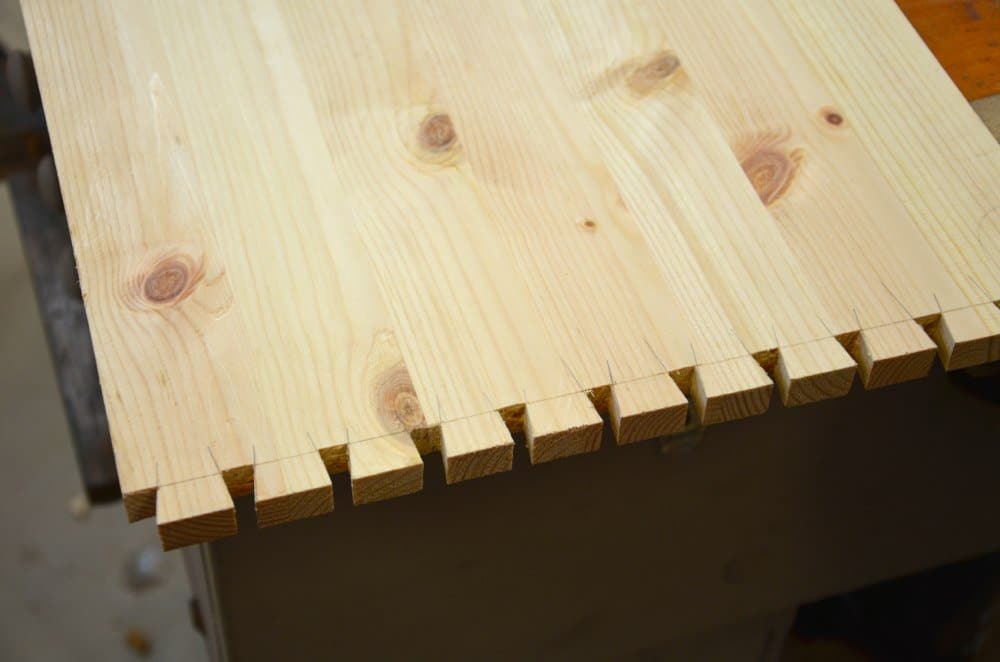
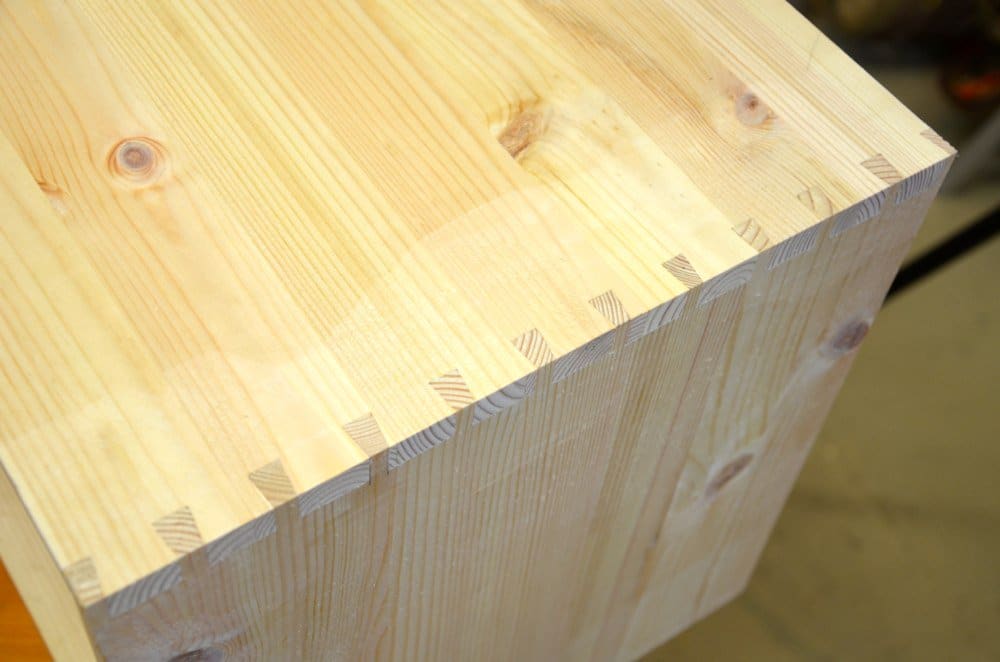
Below, you see full pins and the contrast between half pins flanking either side of the central pins and tails.

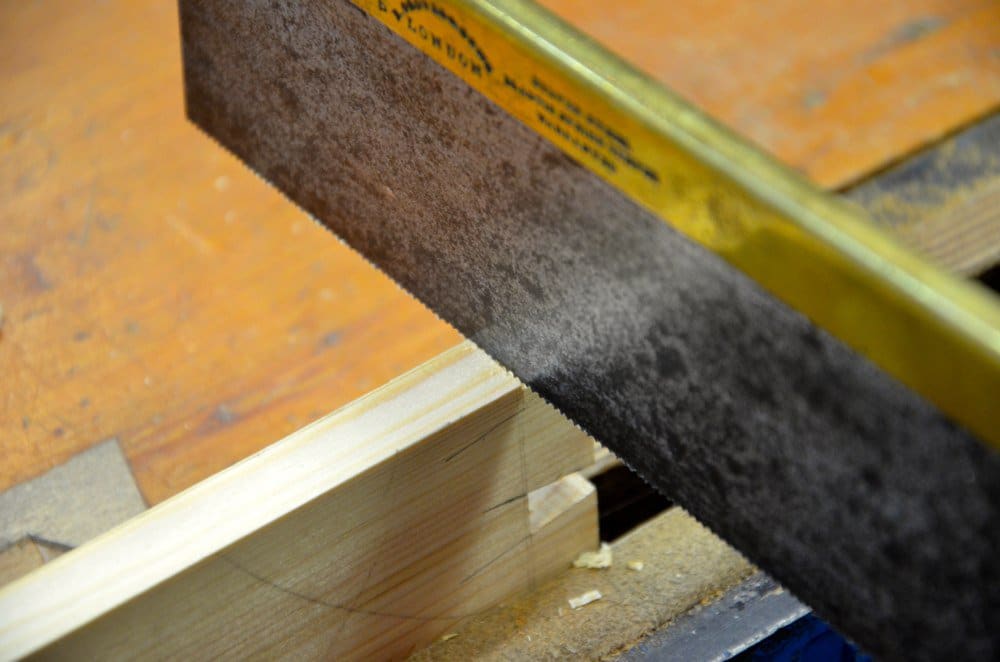
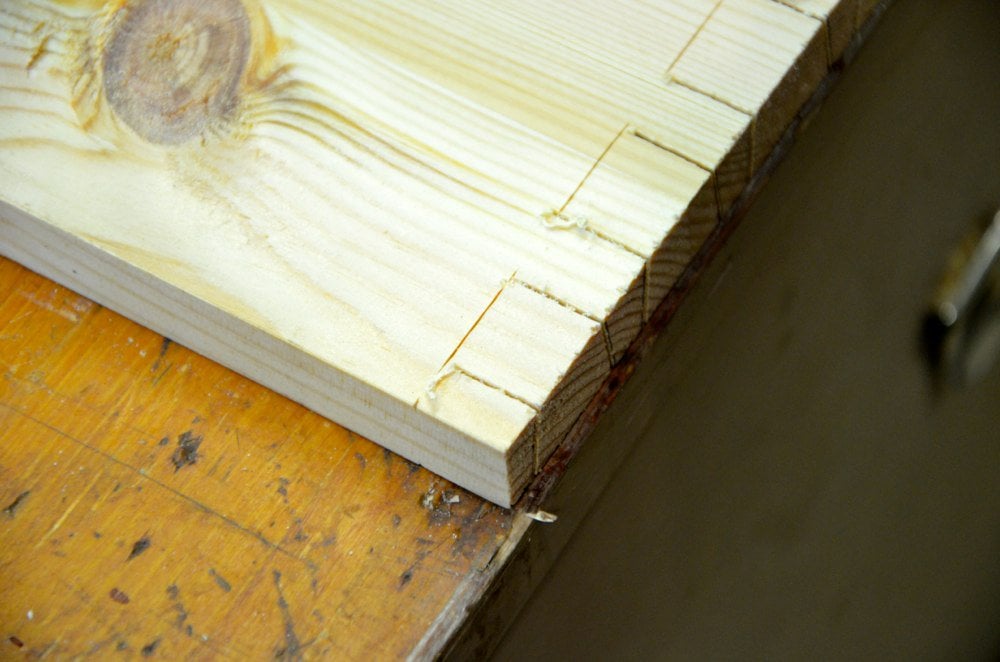
I saw down the tails first. It’s necessary to cut dovetails from pins occasionally but again, in my view, it’s backwards to generally cut the tails from the pins. Might as well start out doing it the right way. I cut dead to the side of the lines and on the waste side of the line at that. I stop just shy of the line and stop.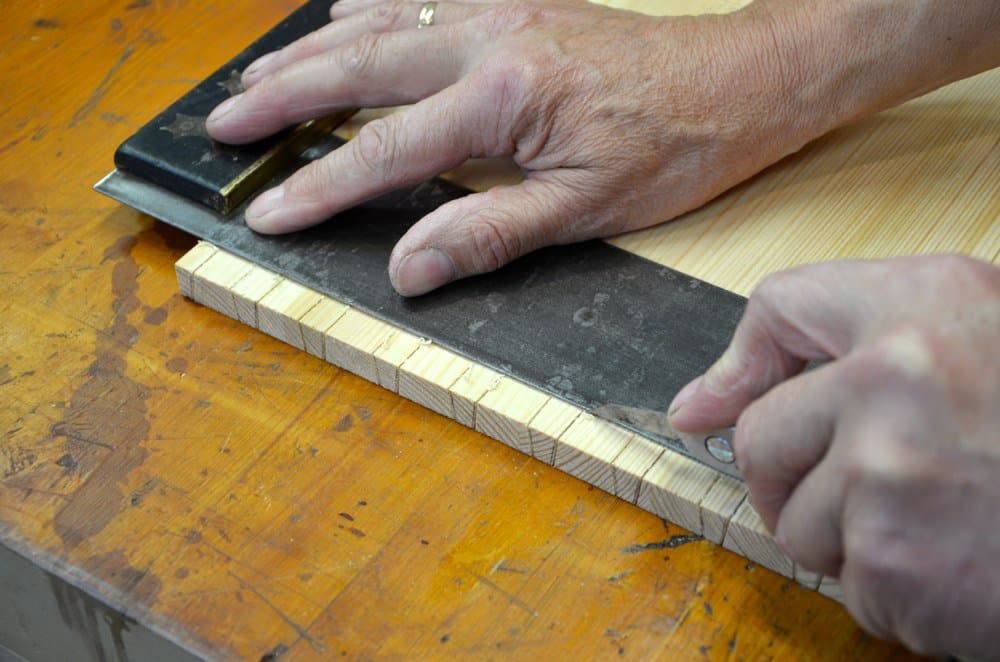
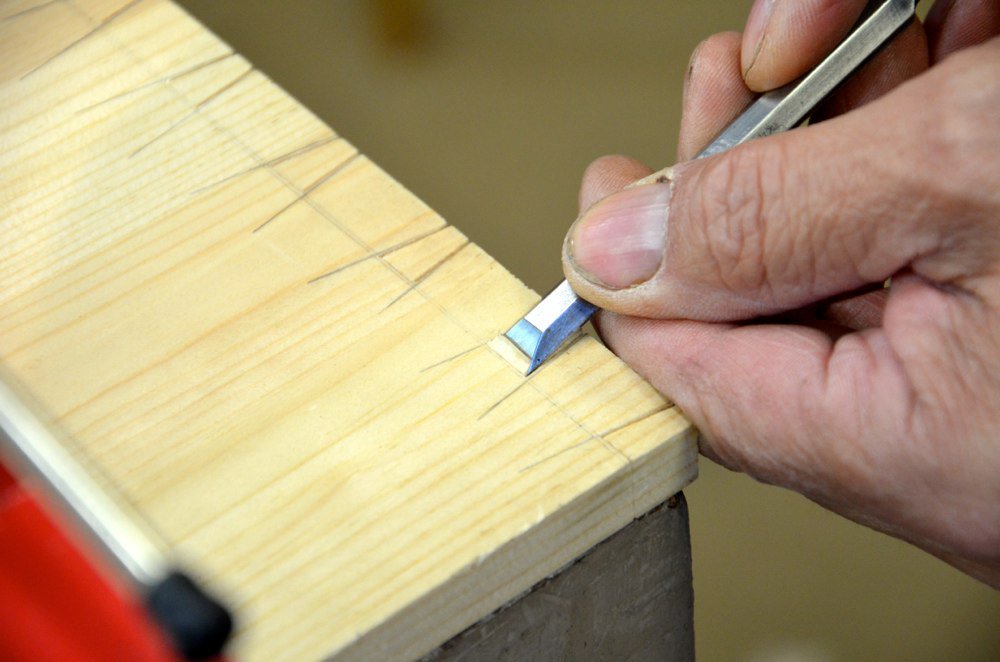
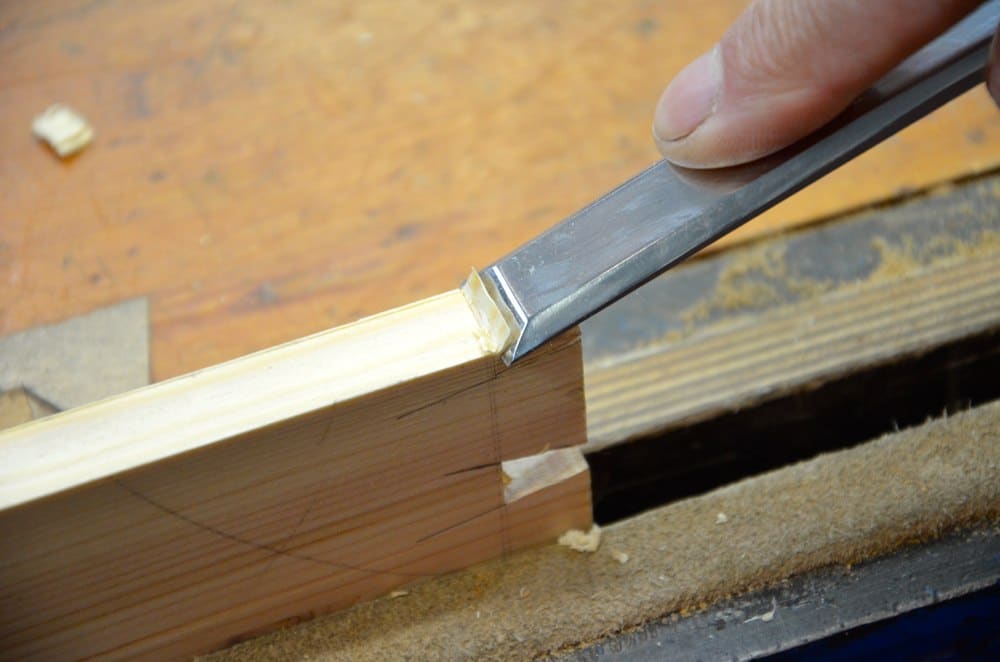
Once the tails are all sawn I lay the board on the bench and cut the knife wall in between the tails and not passing the knife over the face of the dovetails. If you want the authenticity of pin lines you can use the marking gauge and follow with the knifewall between the dovetails.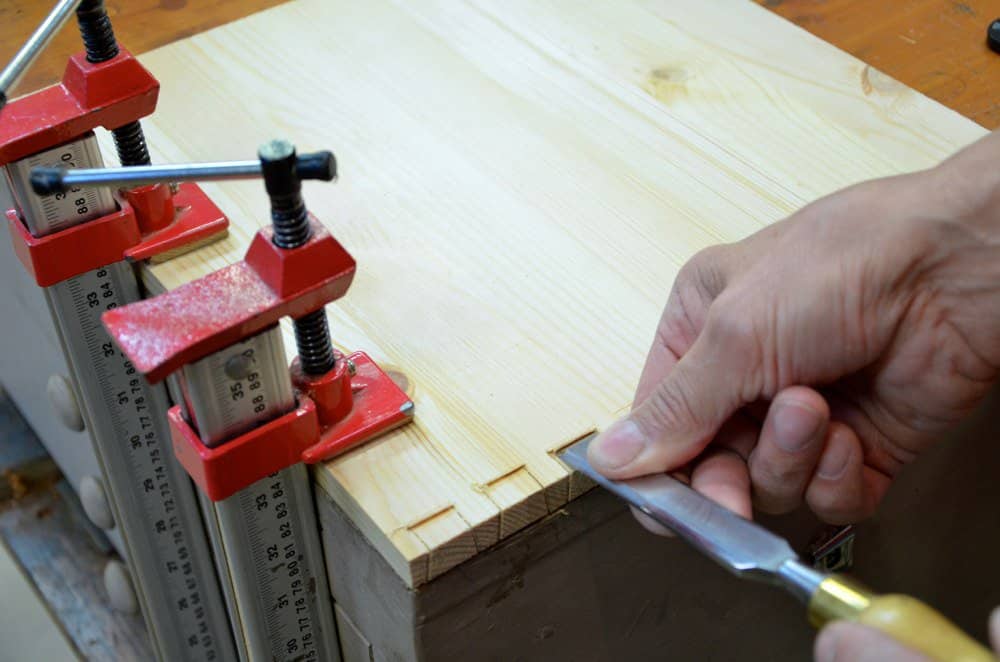
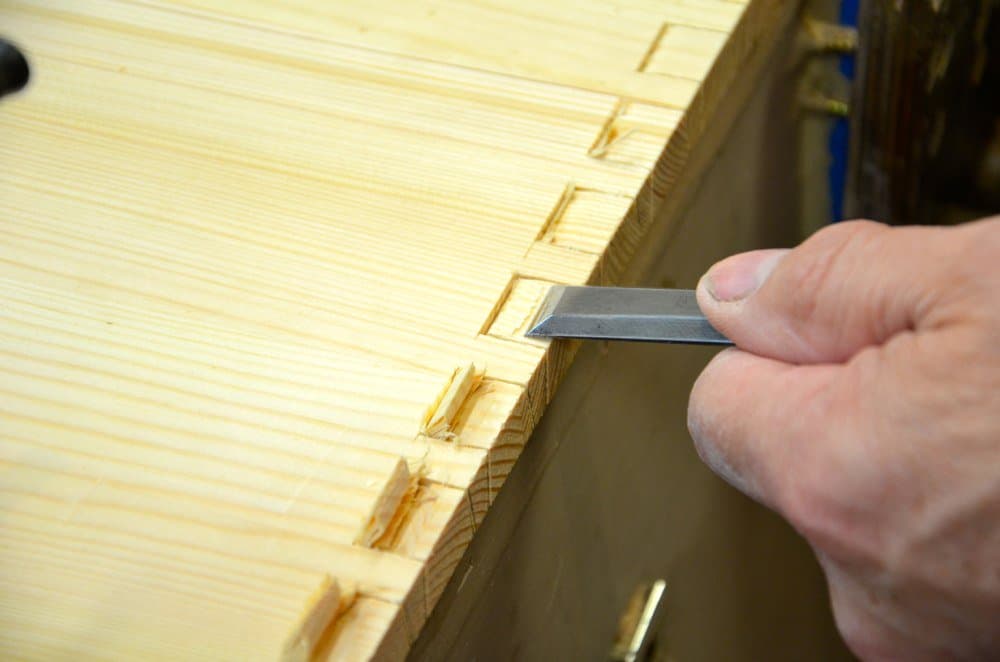
I trace the knifewall on the inside face and when done I slide the chisel into the knifewall at a low pitch.
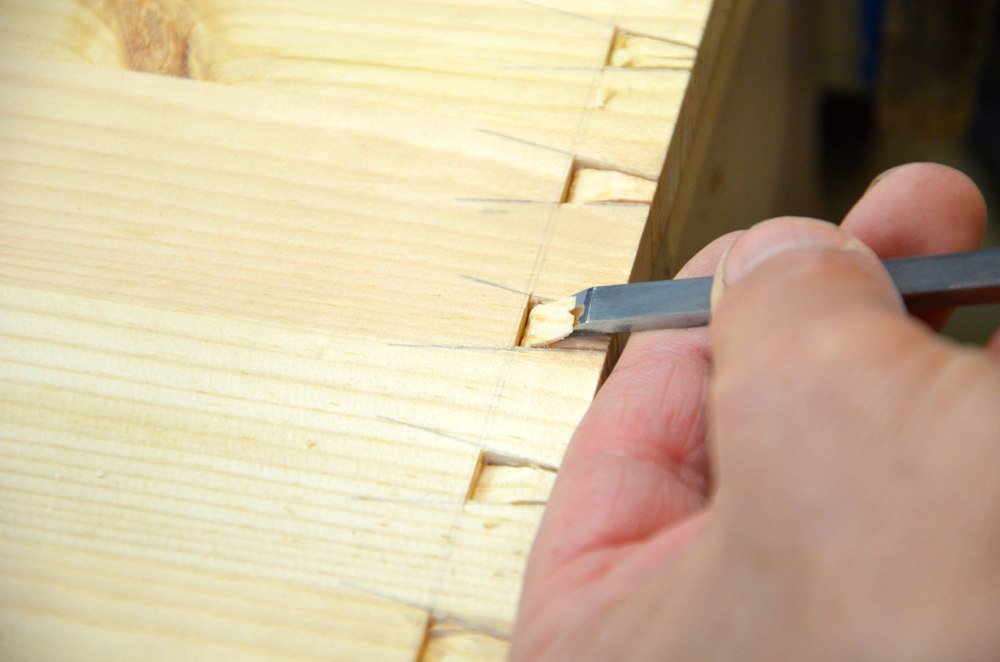
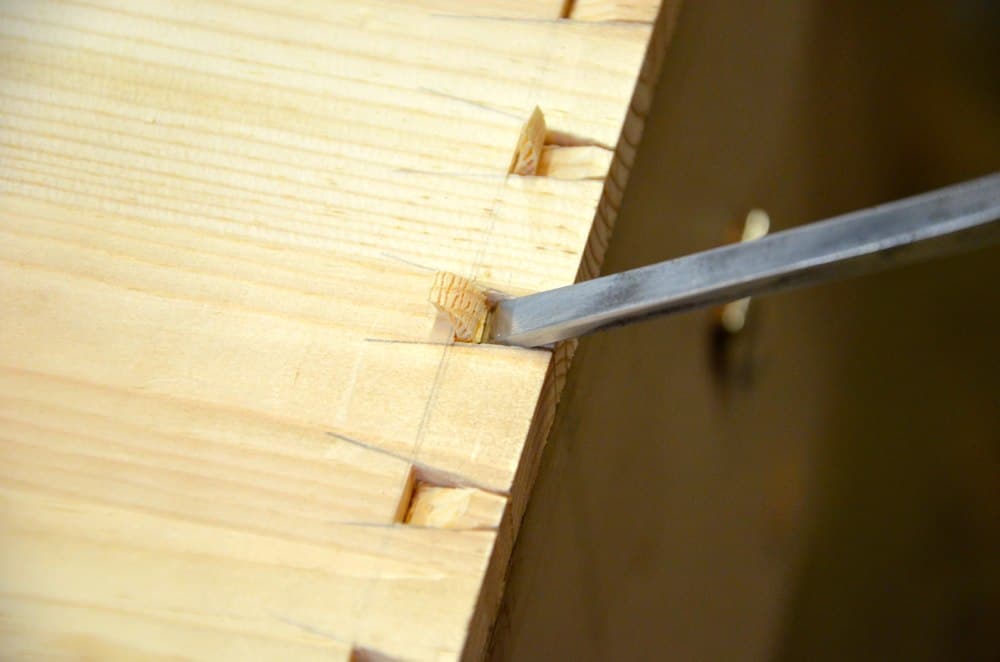
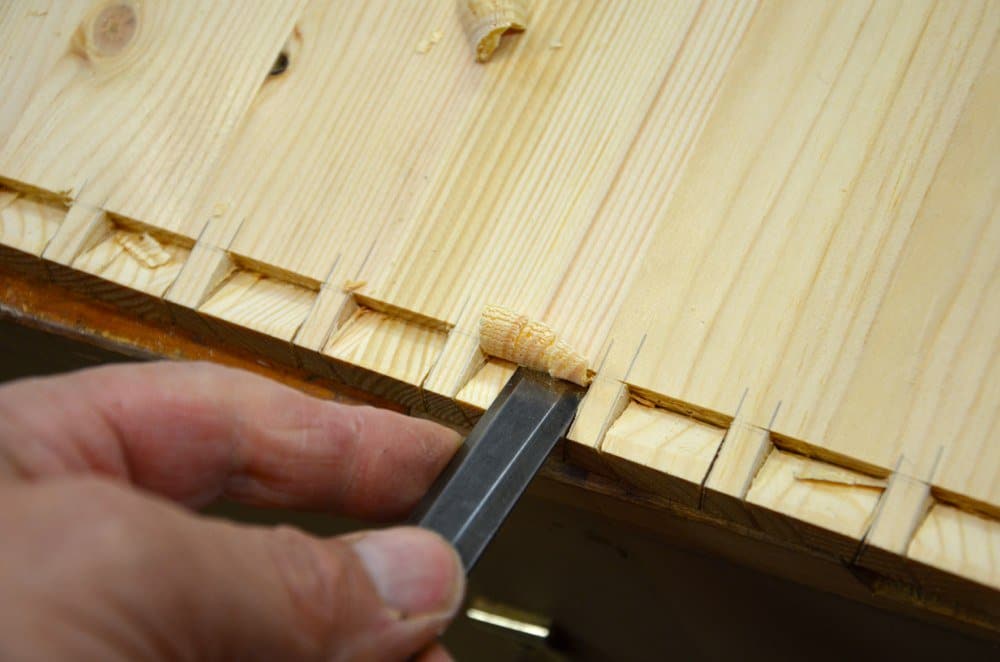
From here on it’s chop and pare as shown. One thing you should watch for is that the knifewall isn’t shifted by tapping too hard. or allowing the chisel to twist. Tap gently and work from both sides to meet in the middle. leave the outside rim of the tail level and incline the chisel down to the wall. This prevents the wood from tearing at the root and pulling out the fibres.
With all of the tails cut it’s the same step as in the previous blog where you sharpen your pencil and trace around the tails onto the pin piece. Cutting out the tail recesses is the same process of knifewall and pare and chop.
The soft faced hammer really works well.

Glue both pins and tails and the bottoms of the recesses. This helps to lubricate the assembly.
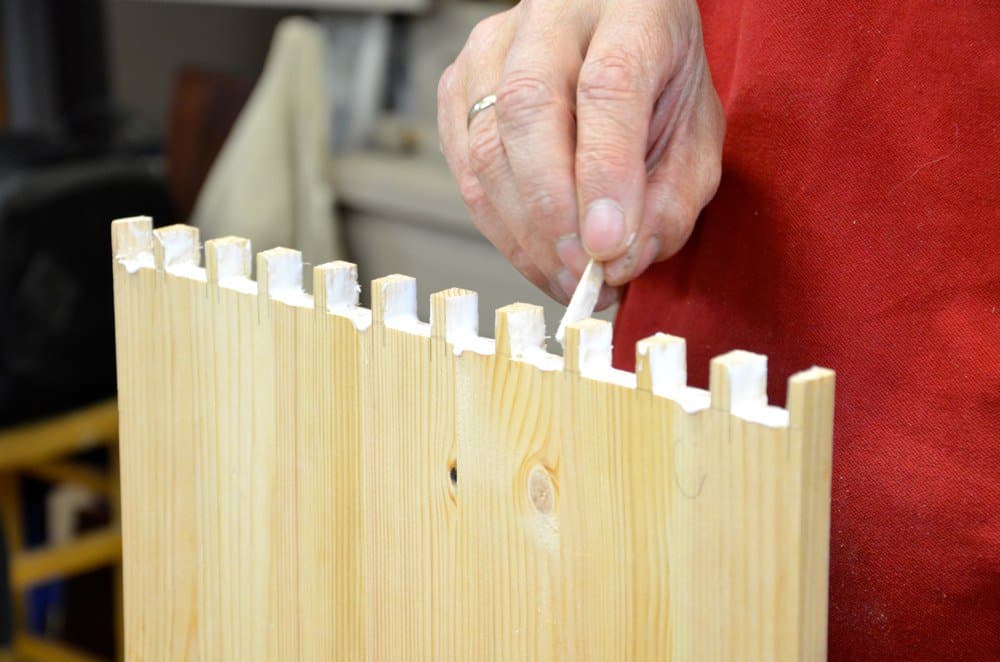
Gluing up must be efficient and of course both corners must be done at the same time once the opposite corners are glued up. Work quickly as the wood expands with the moisture from the glue and any delay allows the gaps to reduce.

When the box is together I measure the internal corners to make sure the distances are equal. If they are then the box is square.

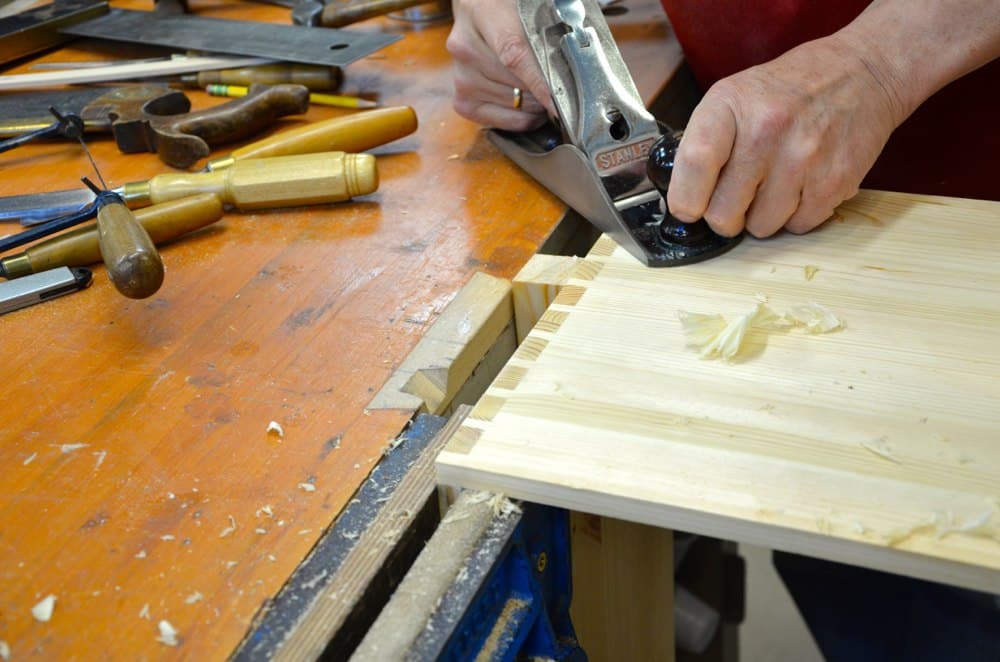
Planing with the plane skewed does no damage and I work away from me towards the top edge.
The two boxes are more comparable now.

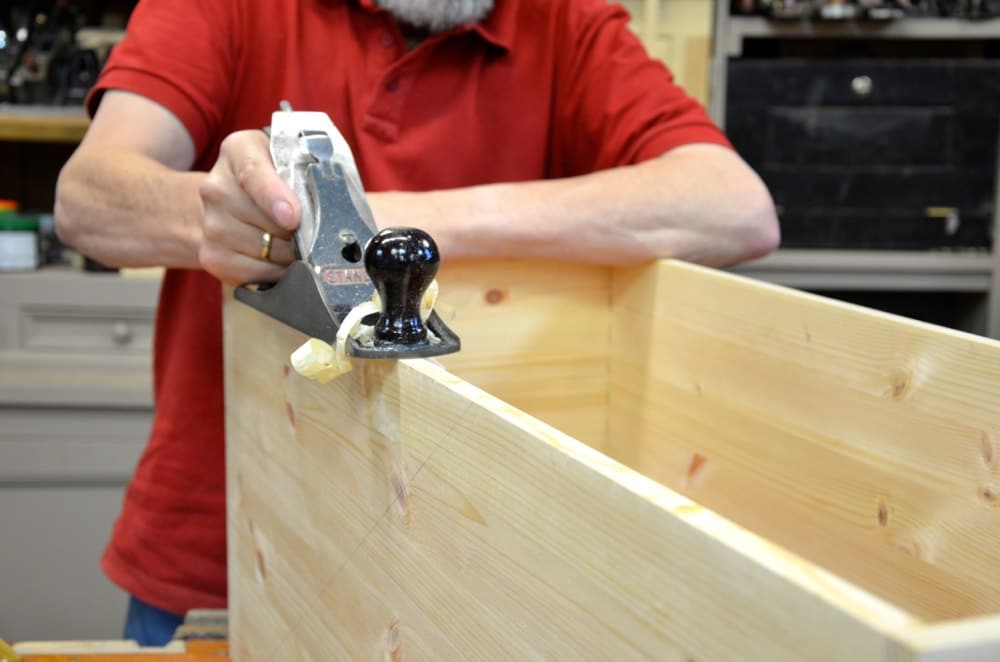
Remove the nubs and plane the surrounding area flush and level and true.
I plane the rim level and flush with the #4 smoother.
Here I use a bullnose to remove the inside arris from the corner. It’s my favourite plane for this.
Hello Paul,
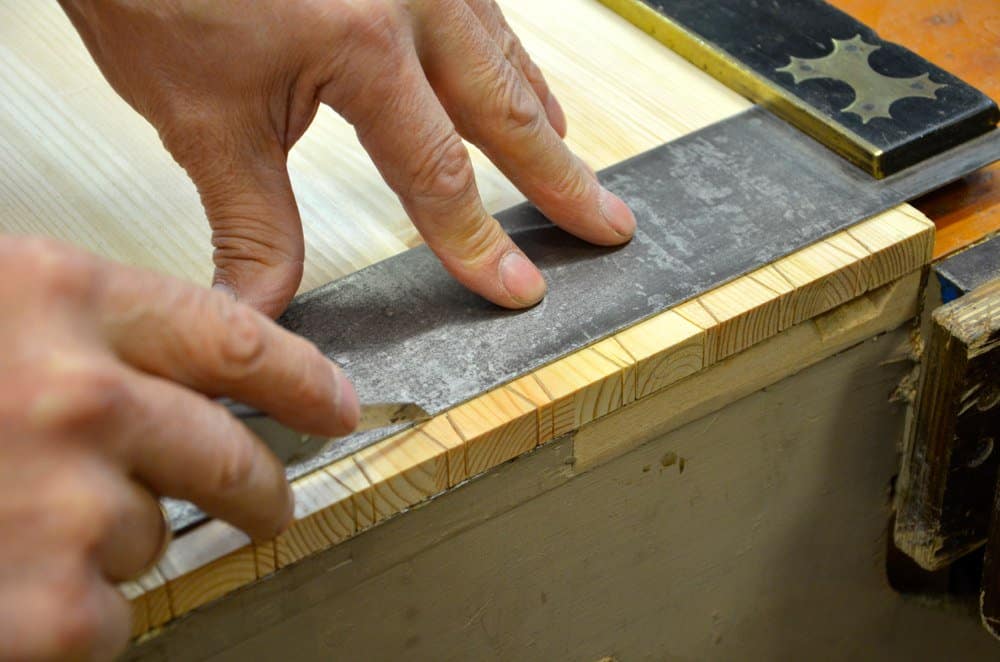
I was wondering if you were using a longer than usual square?
If so, how can i manage with just a regular 300mm square?
Kind Regards,
Ivo
Buy a bigger square or use a straightedge with a square or, if you are indeed dead parallel, just work from both edges.
Dear Mr Sellers. I realize this post is a bit old now but wanted to comment that I fell into the advise of using a fret saw from other YouTube channels. I was just making simple box joints for a drawer on my son’s toolbox in cedar. Trying to chisel end grain in this wood was a nightmare and I believe the method you teach would not have crushed the end grain fibers nearly as much because the fibers are supported by the waste wood as you chop down little by little.