How to sharpen traditional wooden spokeshave
For more information on spokeshaves, see our beginner site Common Woodworking.
This question comes up fairly often and this is the how-to that works best. It works on the modern versions of blade-as-sole spokeshaves equally well. It’s not a difficult task but the tangs get in the way of conventional bevel-up sharpening, as you might with planes and chisels, so it’s is easiest to be done bevel up.
Making abrasive paddles
Typically sharpening work is the work of a narrow abrasive whetstone. Because the traditional spokeshave blade is not necessarily dead straight or flat but slightly curved along the length and slightly hollow on the flat underside face, a narrower stone works well. An inch or less works fine. Most likely you won’t have one and so it work well to use abrasive paper on a wooden paddle like the ones shown.
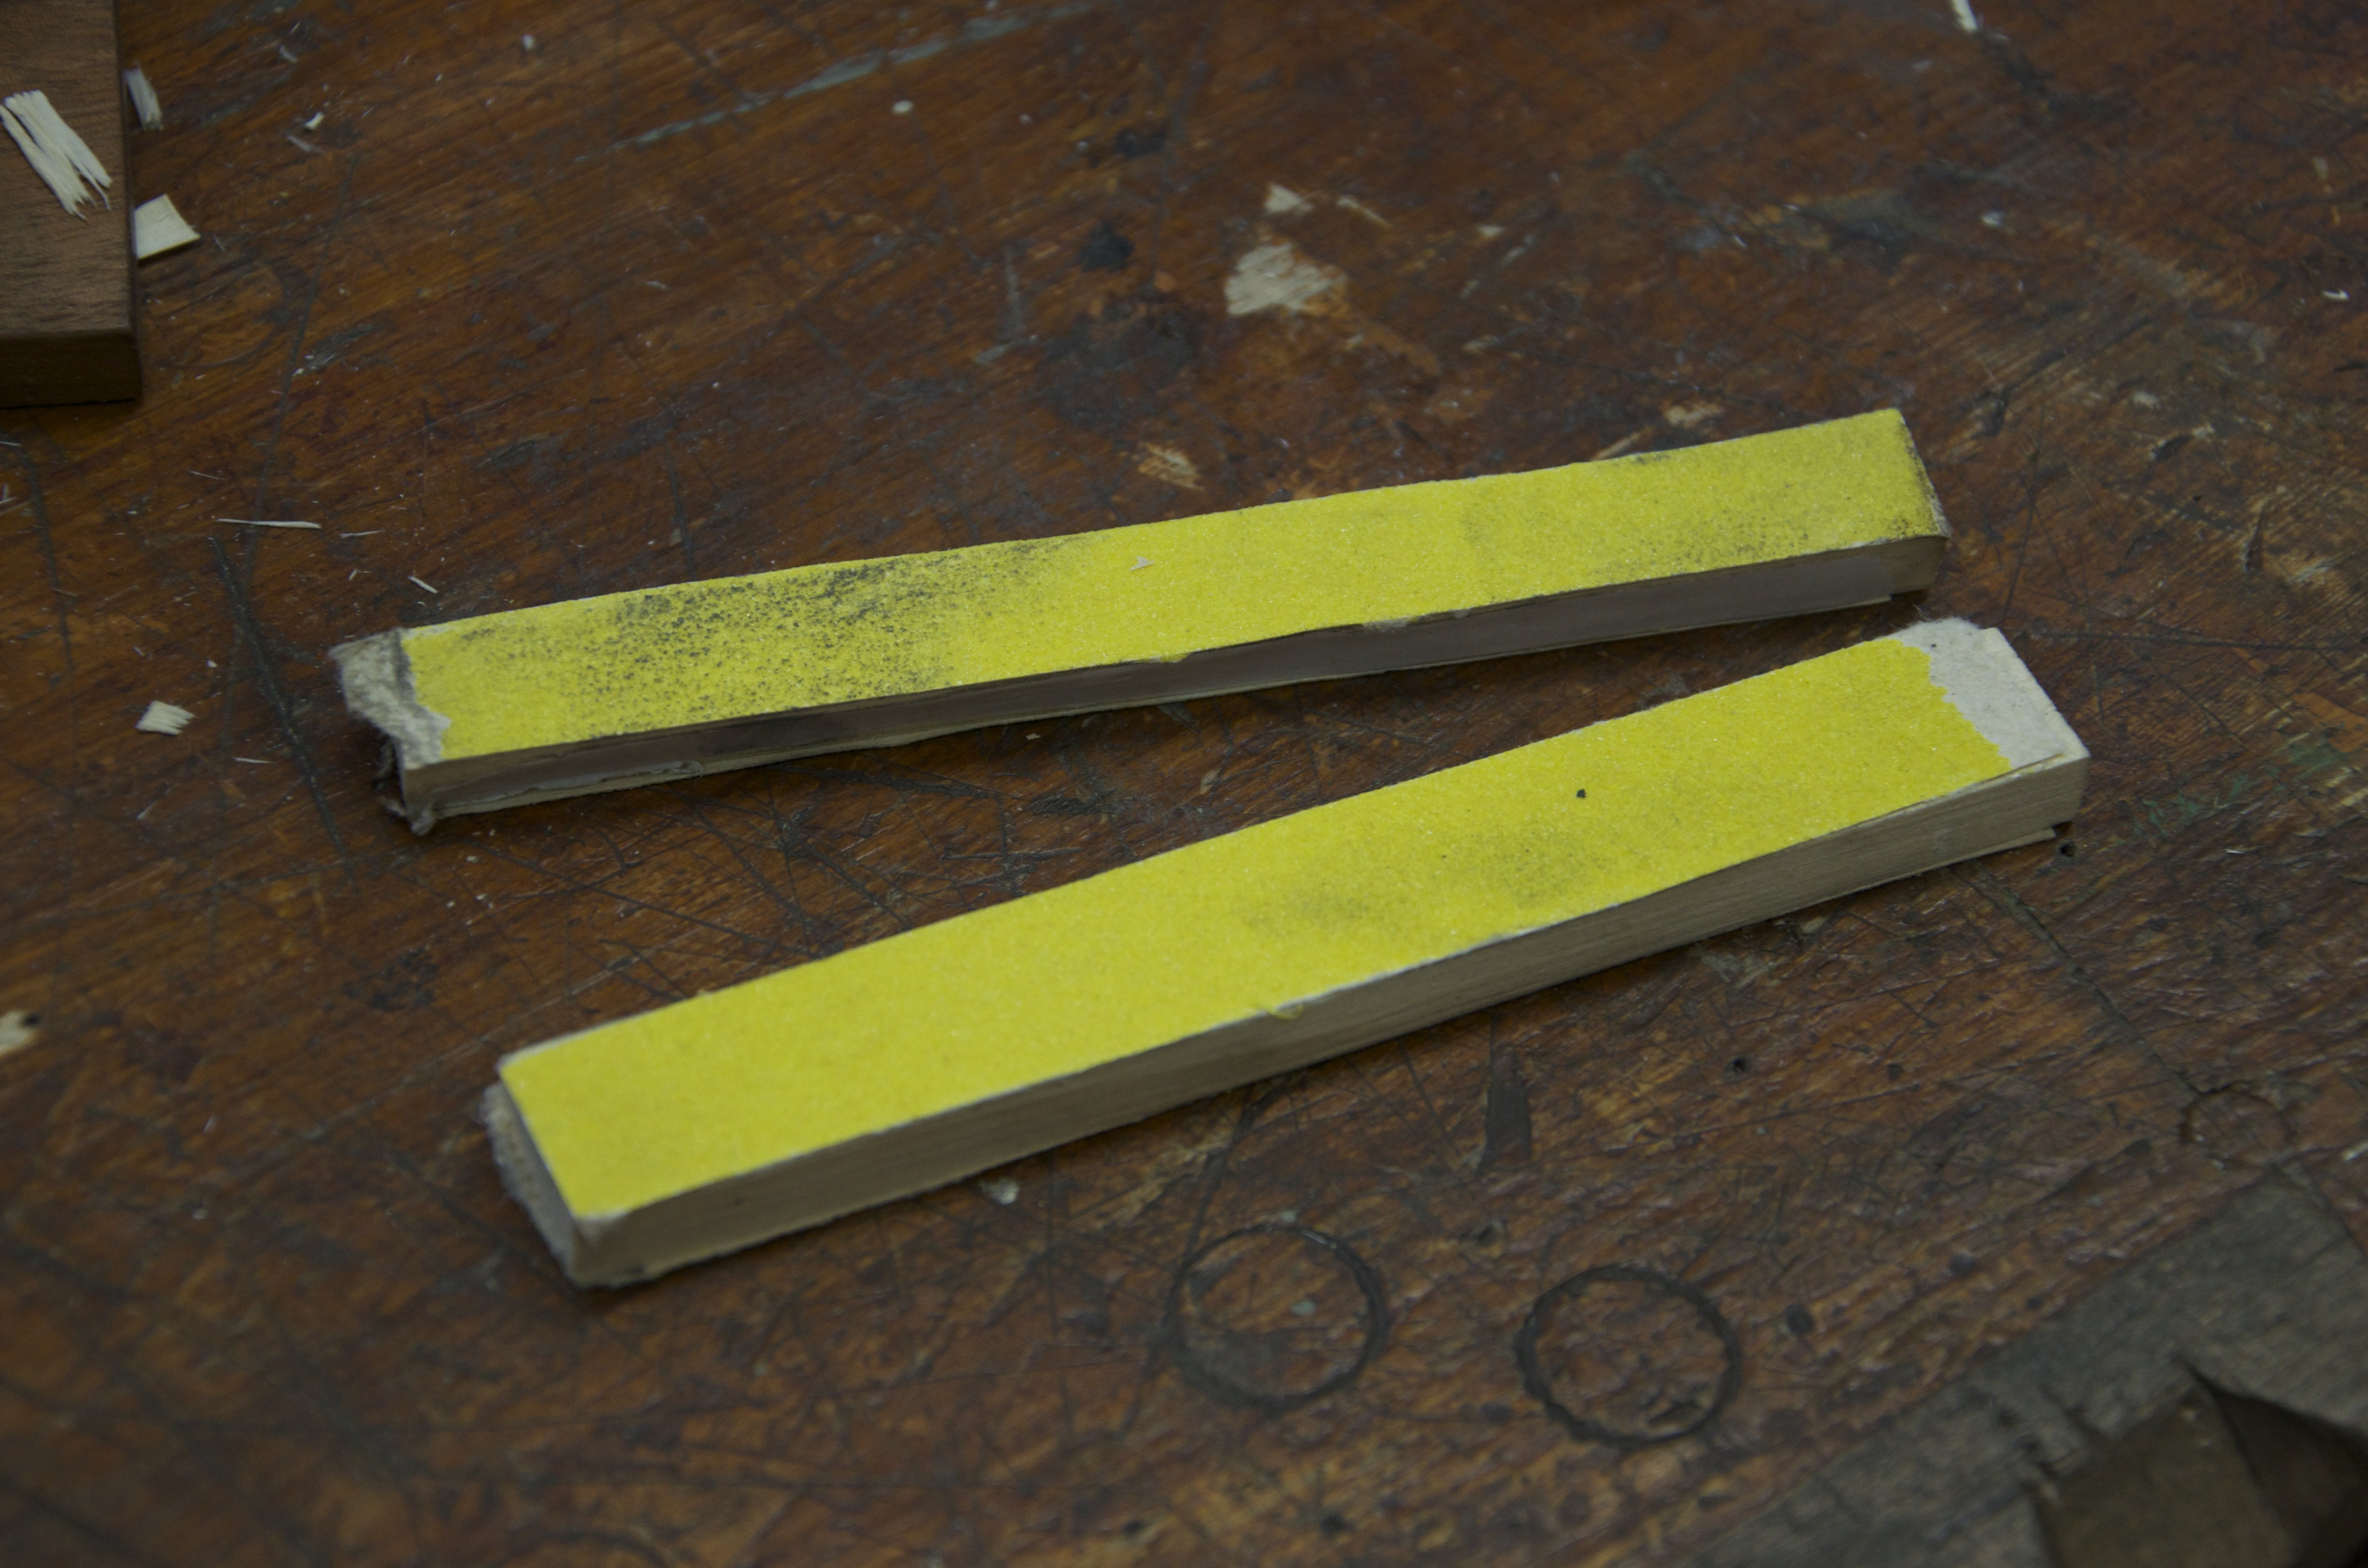
First you need to make the paddles, which are quickly made with strips of abrasive paper adhered to thin paddles of 6mm x 20mm x 175mm (1/4” by 3/4” by 7”) long scrap wood. I use double sided tape such as mounting tape to attach the abrasive and I do both sides of the paddle for economy. The yellow paddle is 120-grit. This is coarse enough for corrective work but for most work this may well be sufficient for establishing a cutting edge too. I keep one spokeshave with a blade with a coarser sharpening for the roughing out work. If you have only one spokeshave then you can simply hone to a more polished level as needed. You can use finer grits of paper to refine the bevel. In my case I used the EZE-Lap diamond hones in medium, fine and superfine grits. That’s somewhere around 400-1200.
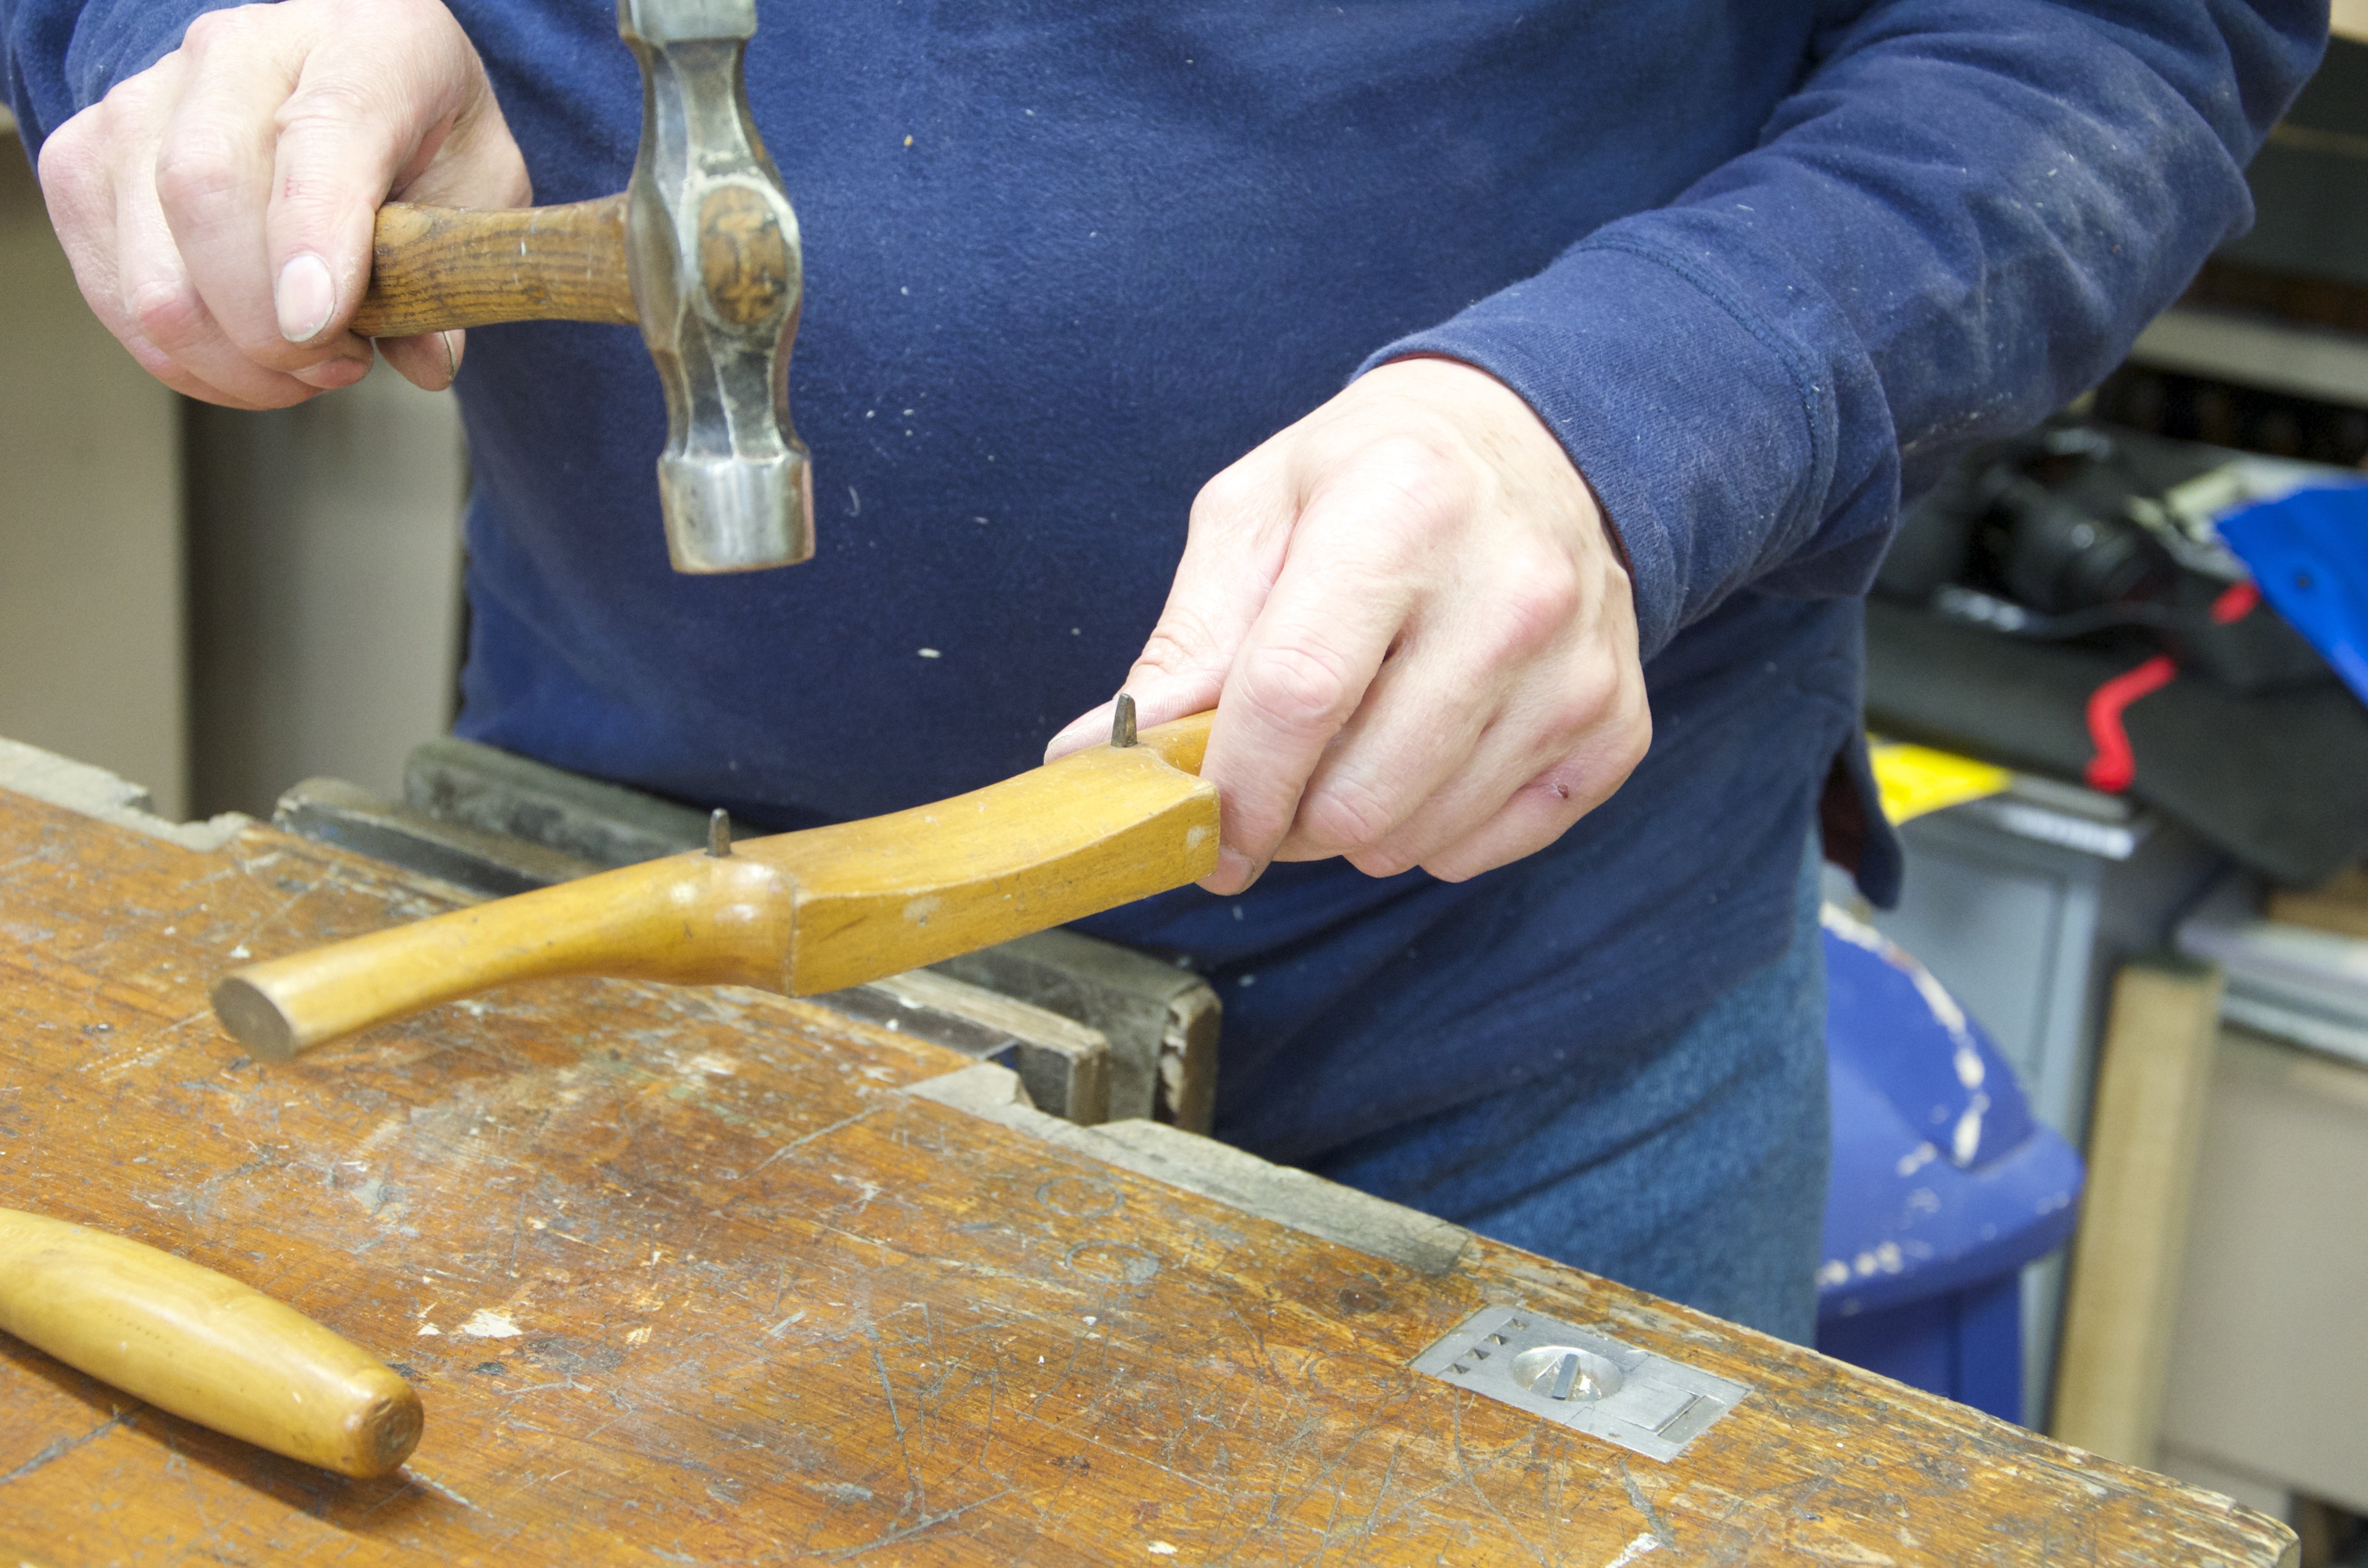
To remove the cutting iron by tapping the tangs evenly alternating from one side to the other until it’s free.
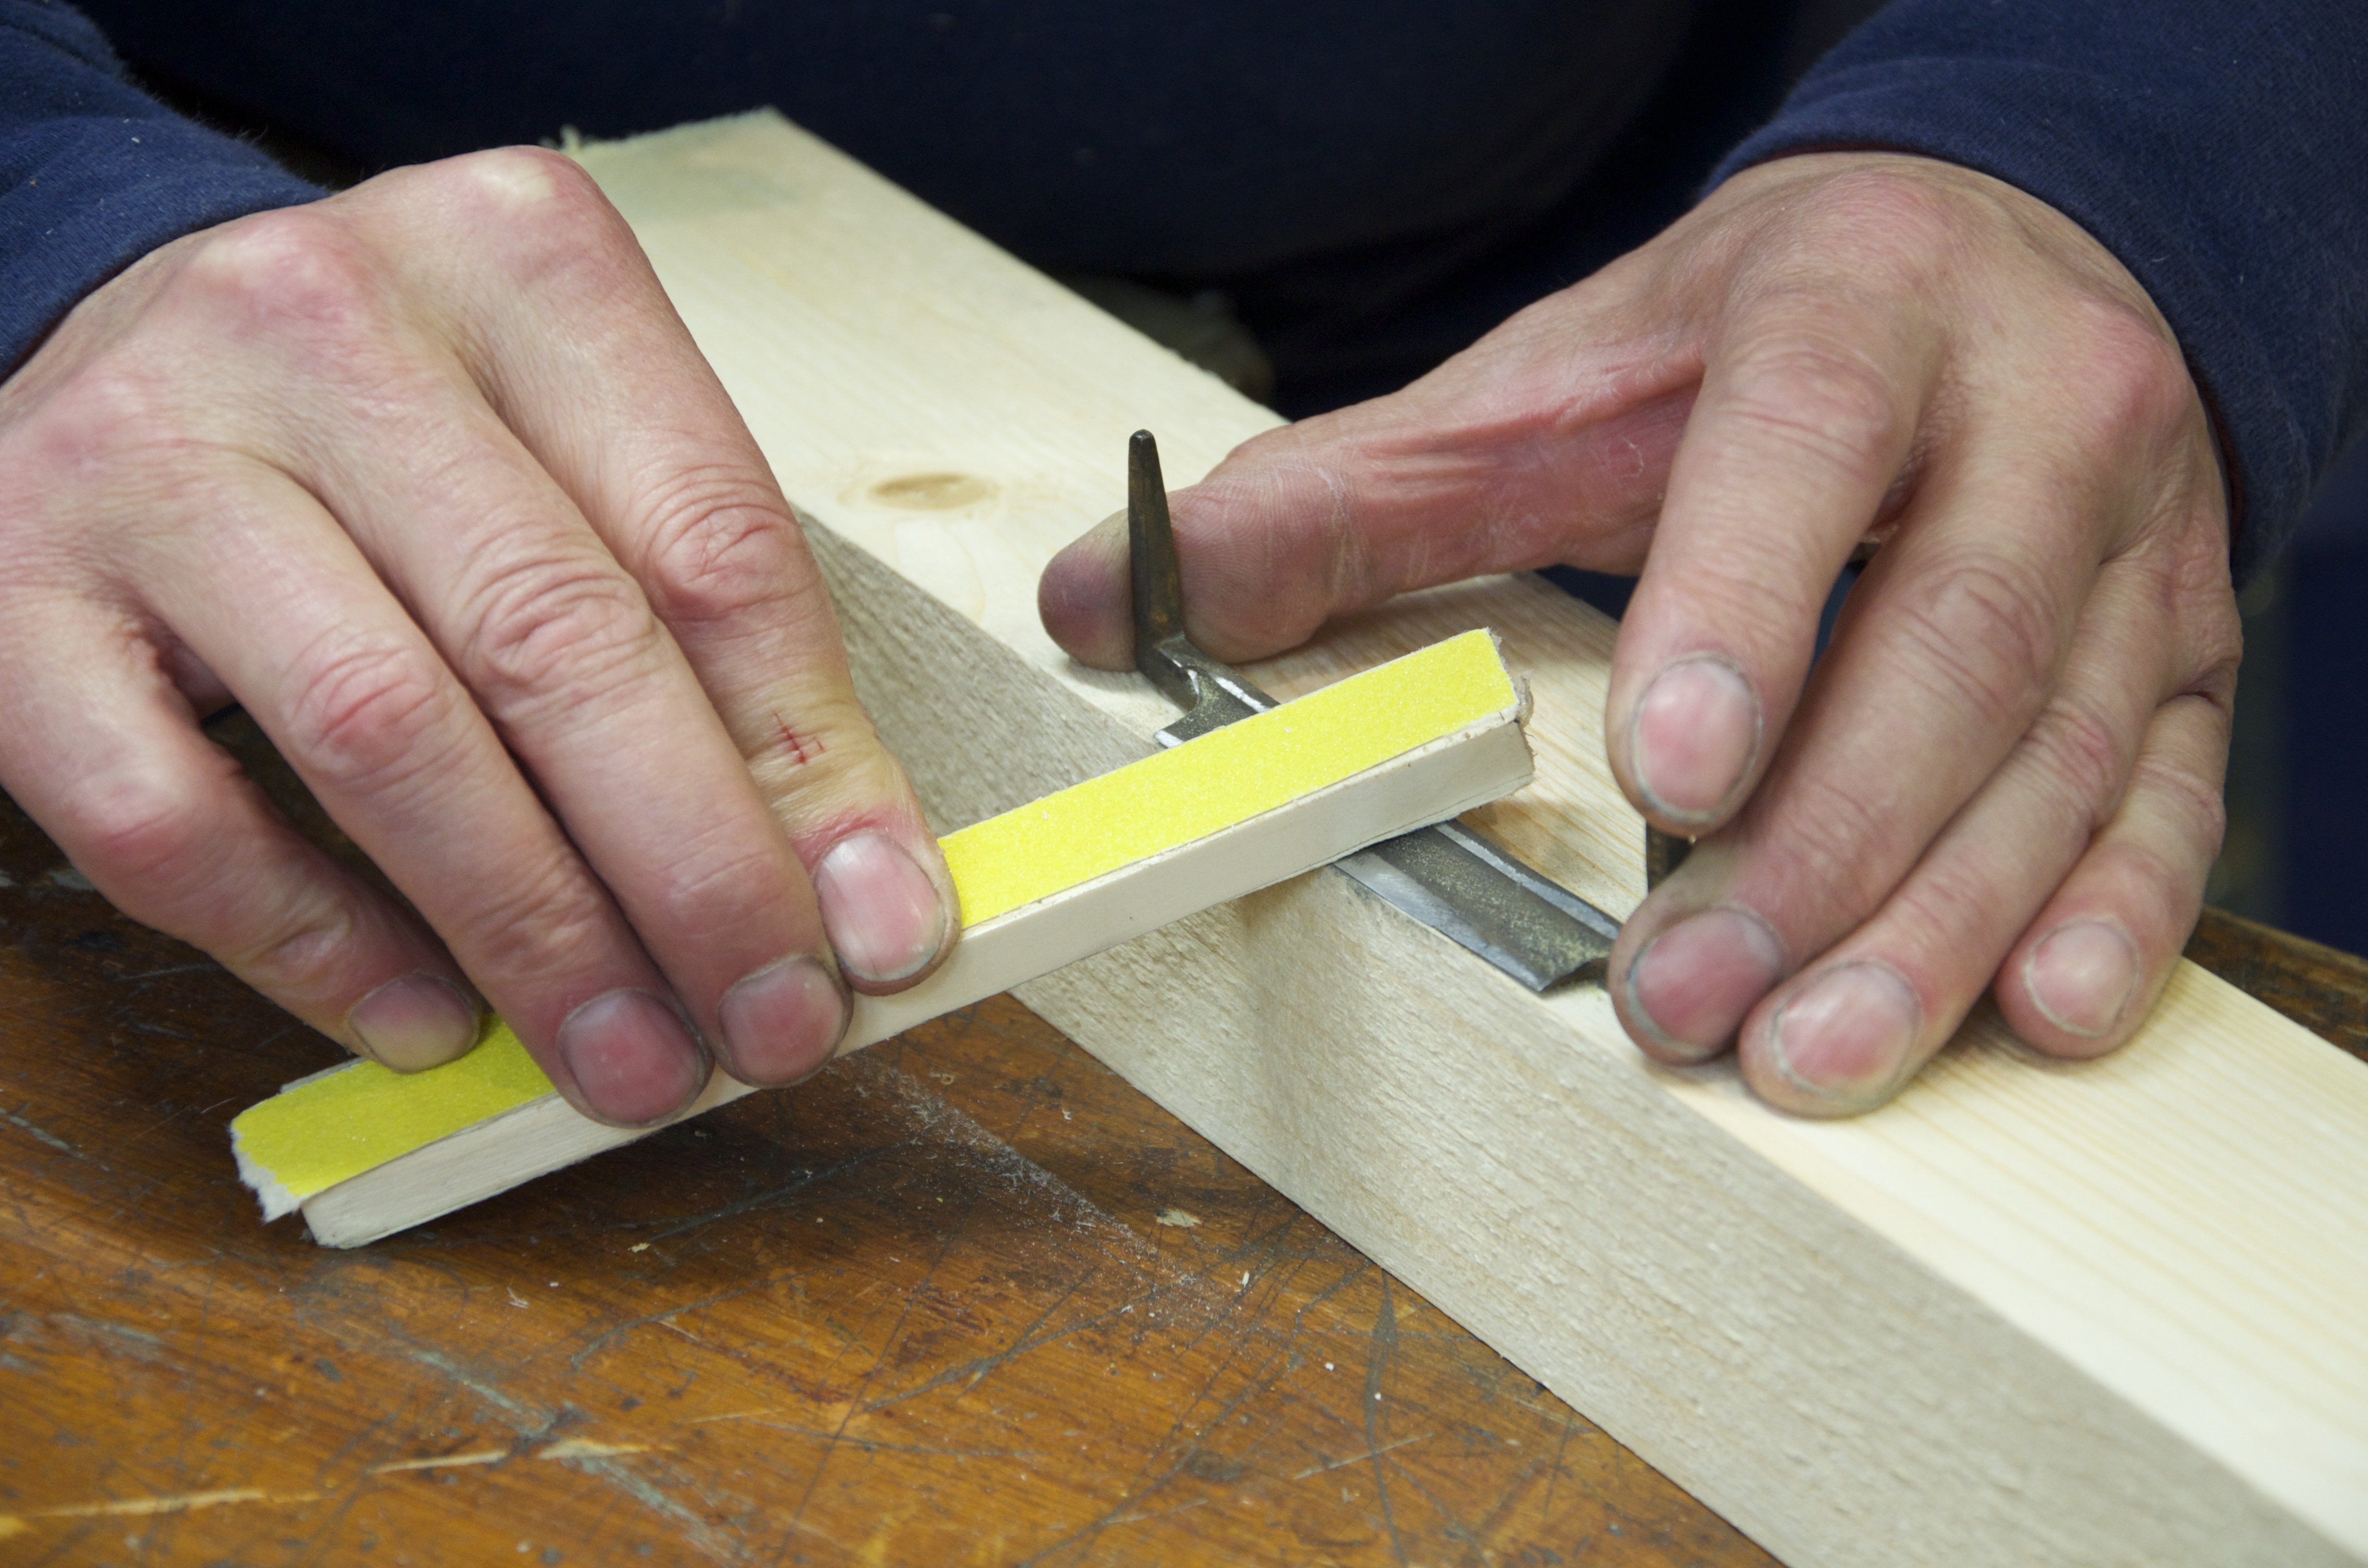
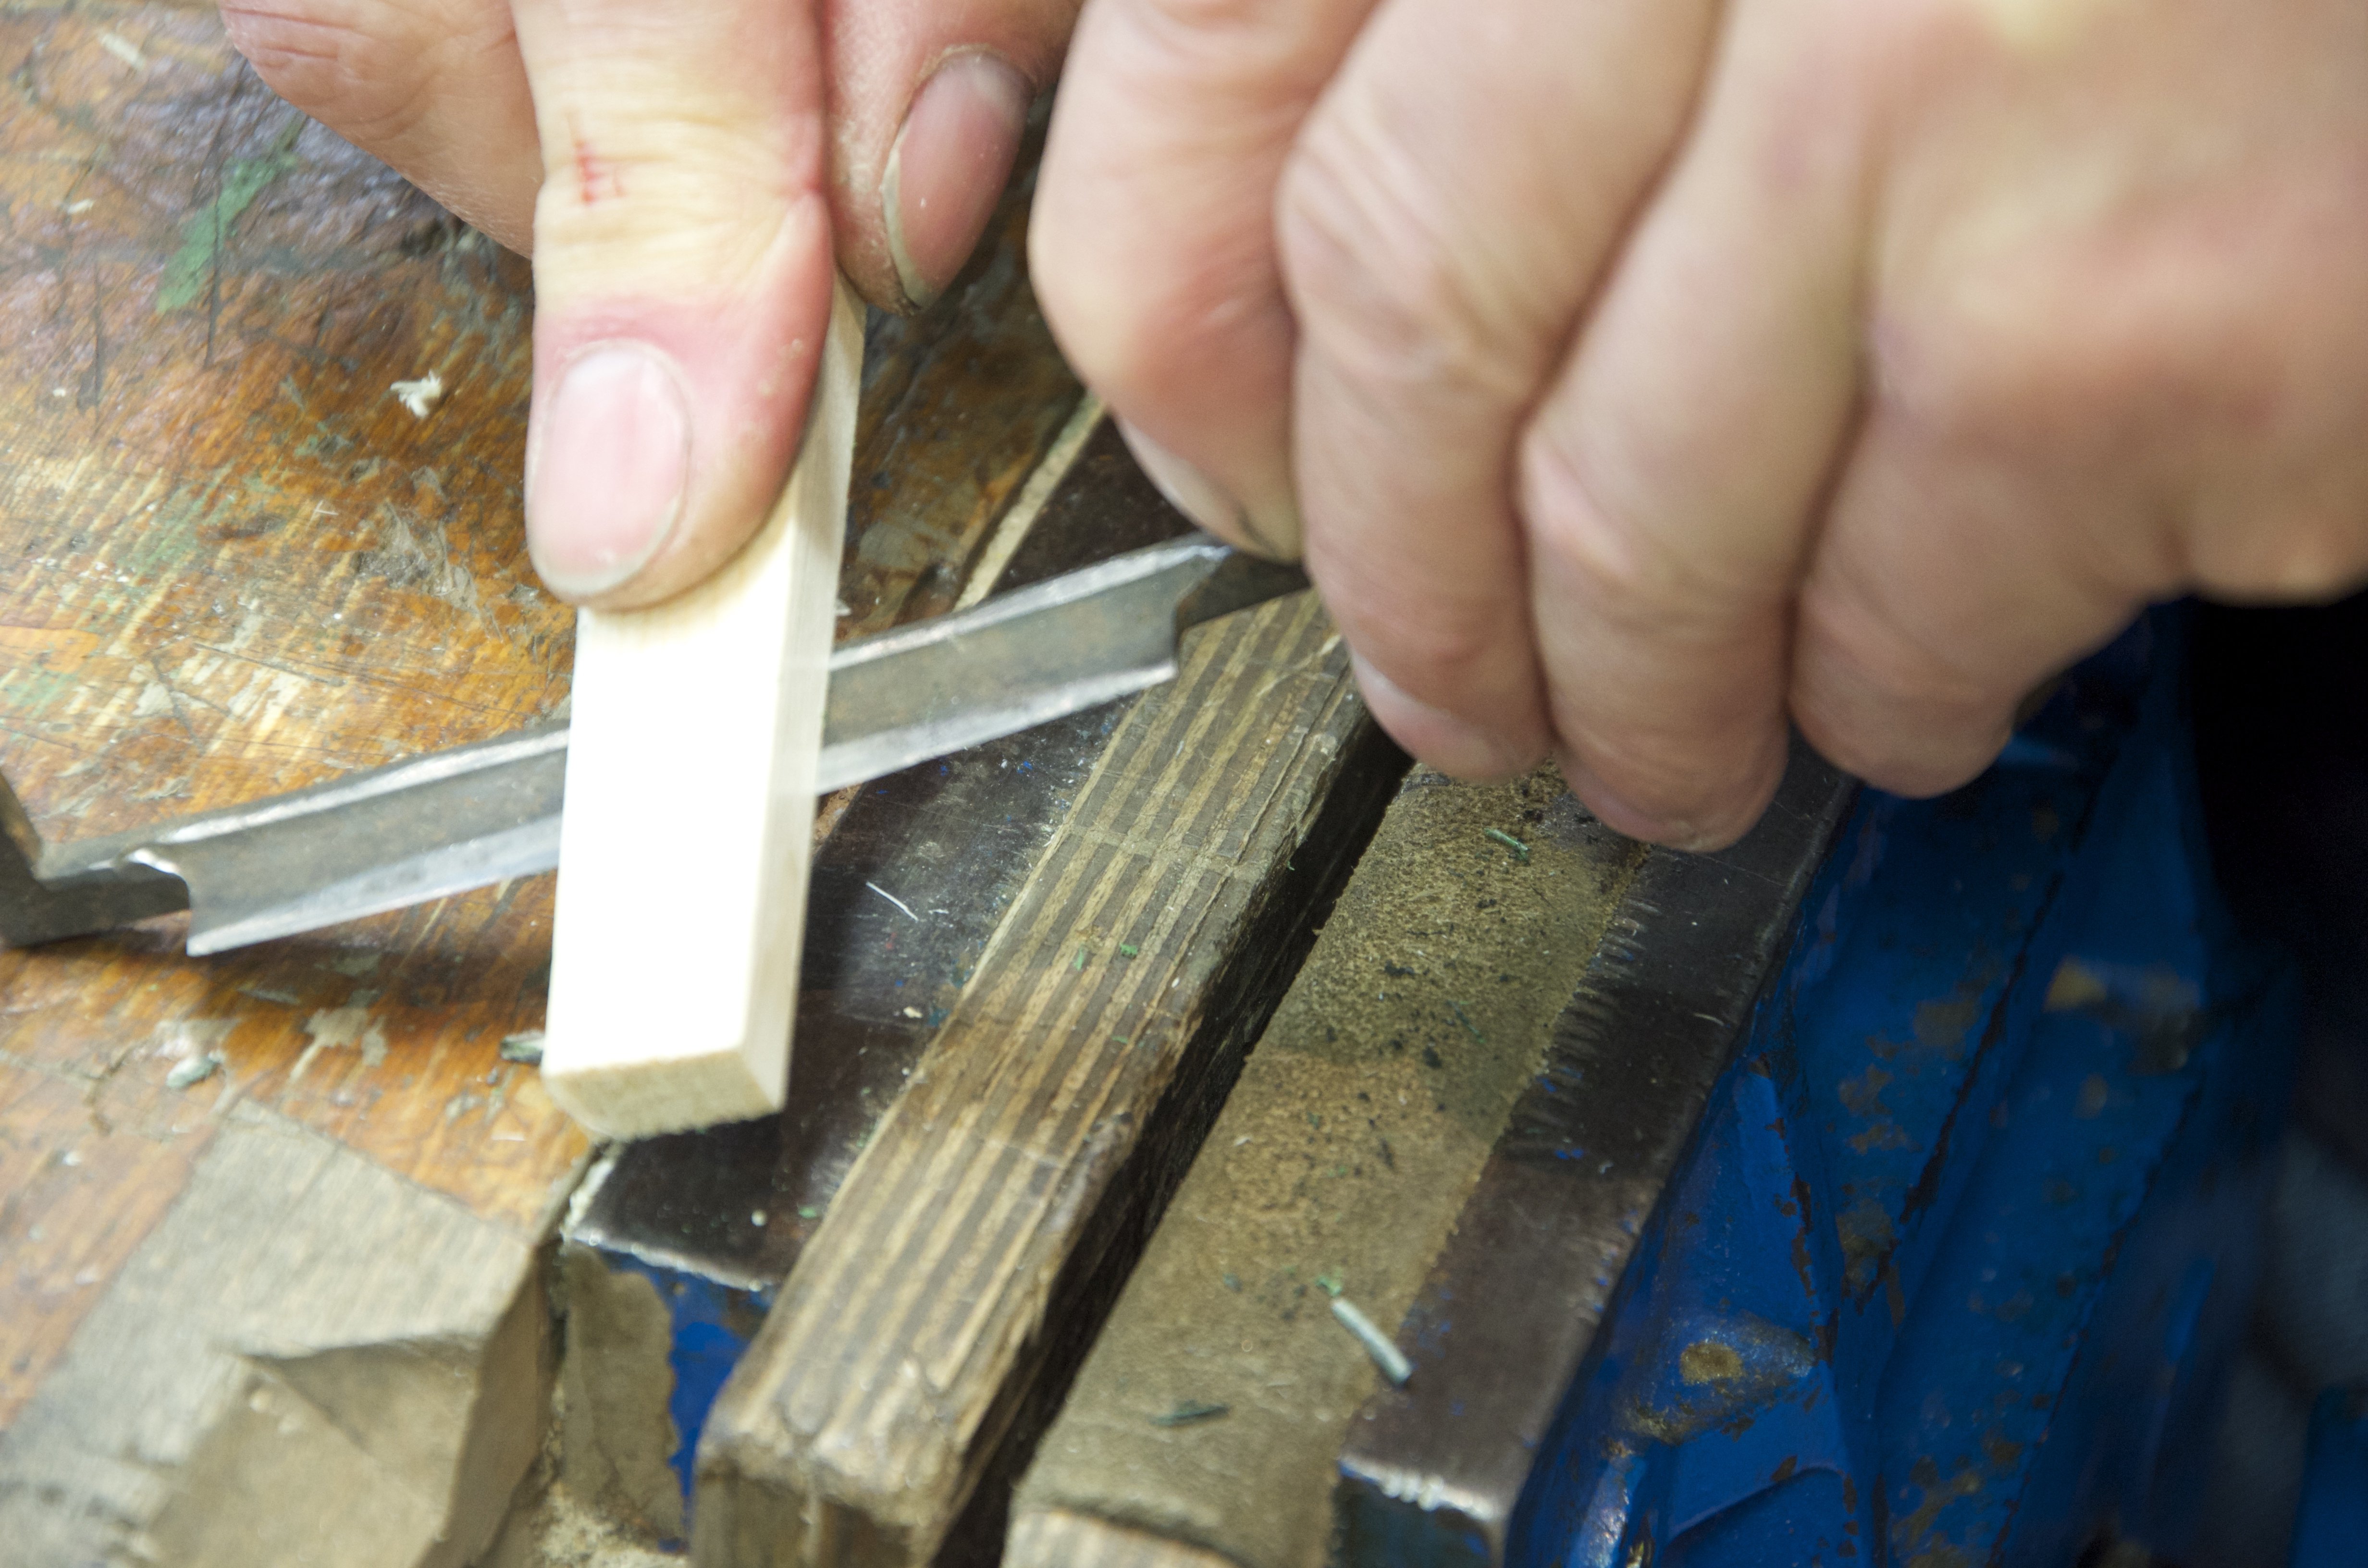
How much the blade has already been sharpened affects the angle of presentation of the abrasive paddle to the blade. You must first establish the bevel angle for presenting the abrasive paddles to the steel and then grinding away is quick and simple. Place the blade on a support block as shown with the cutting edge aligned right on the corner edge of the block and then place the paddle of abrasive on the blade as shown and with the opposite end on the bench.
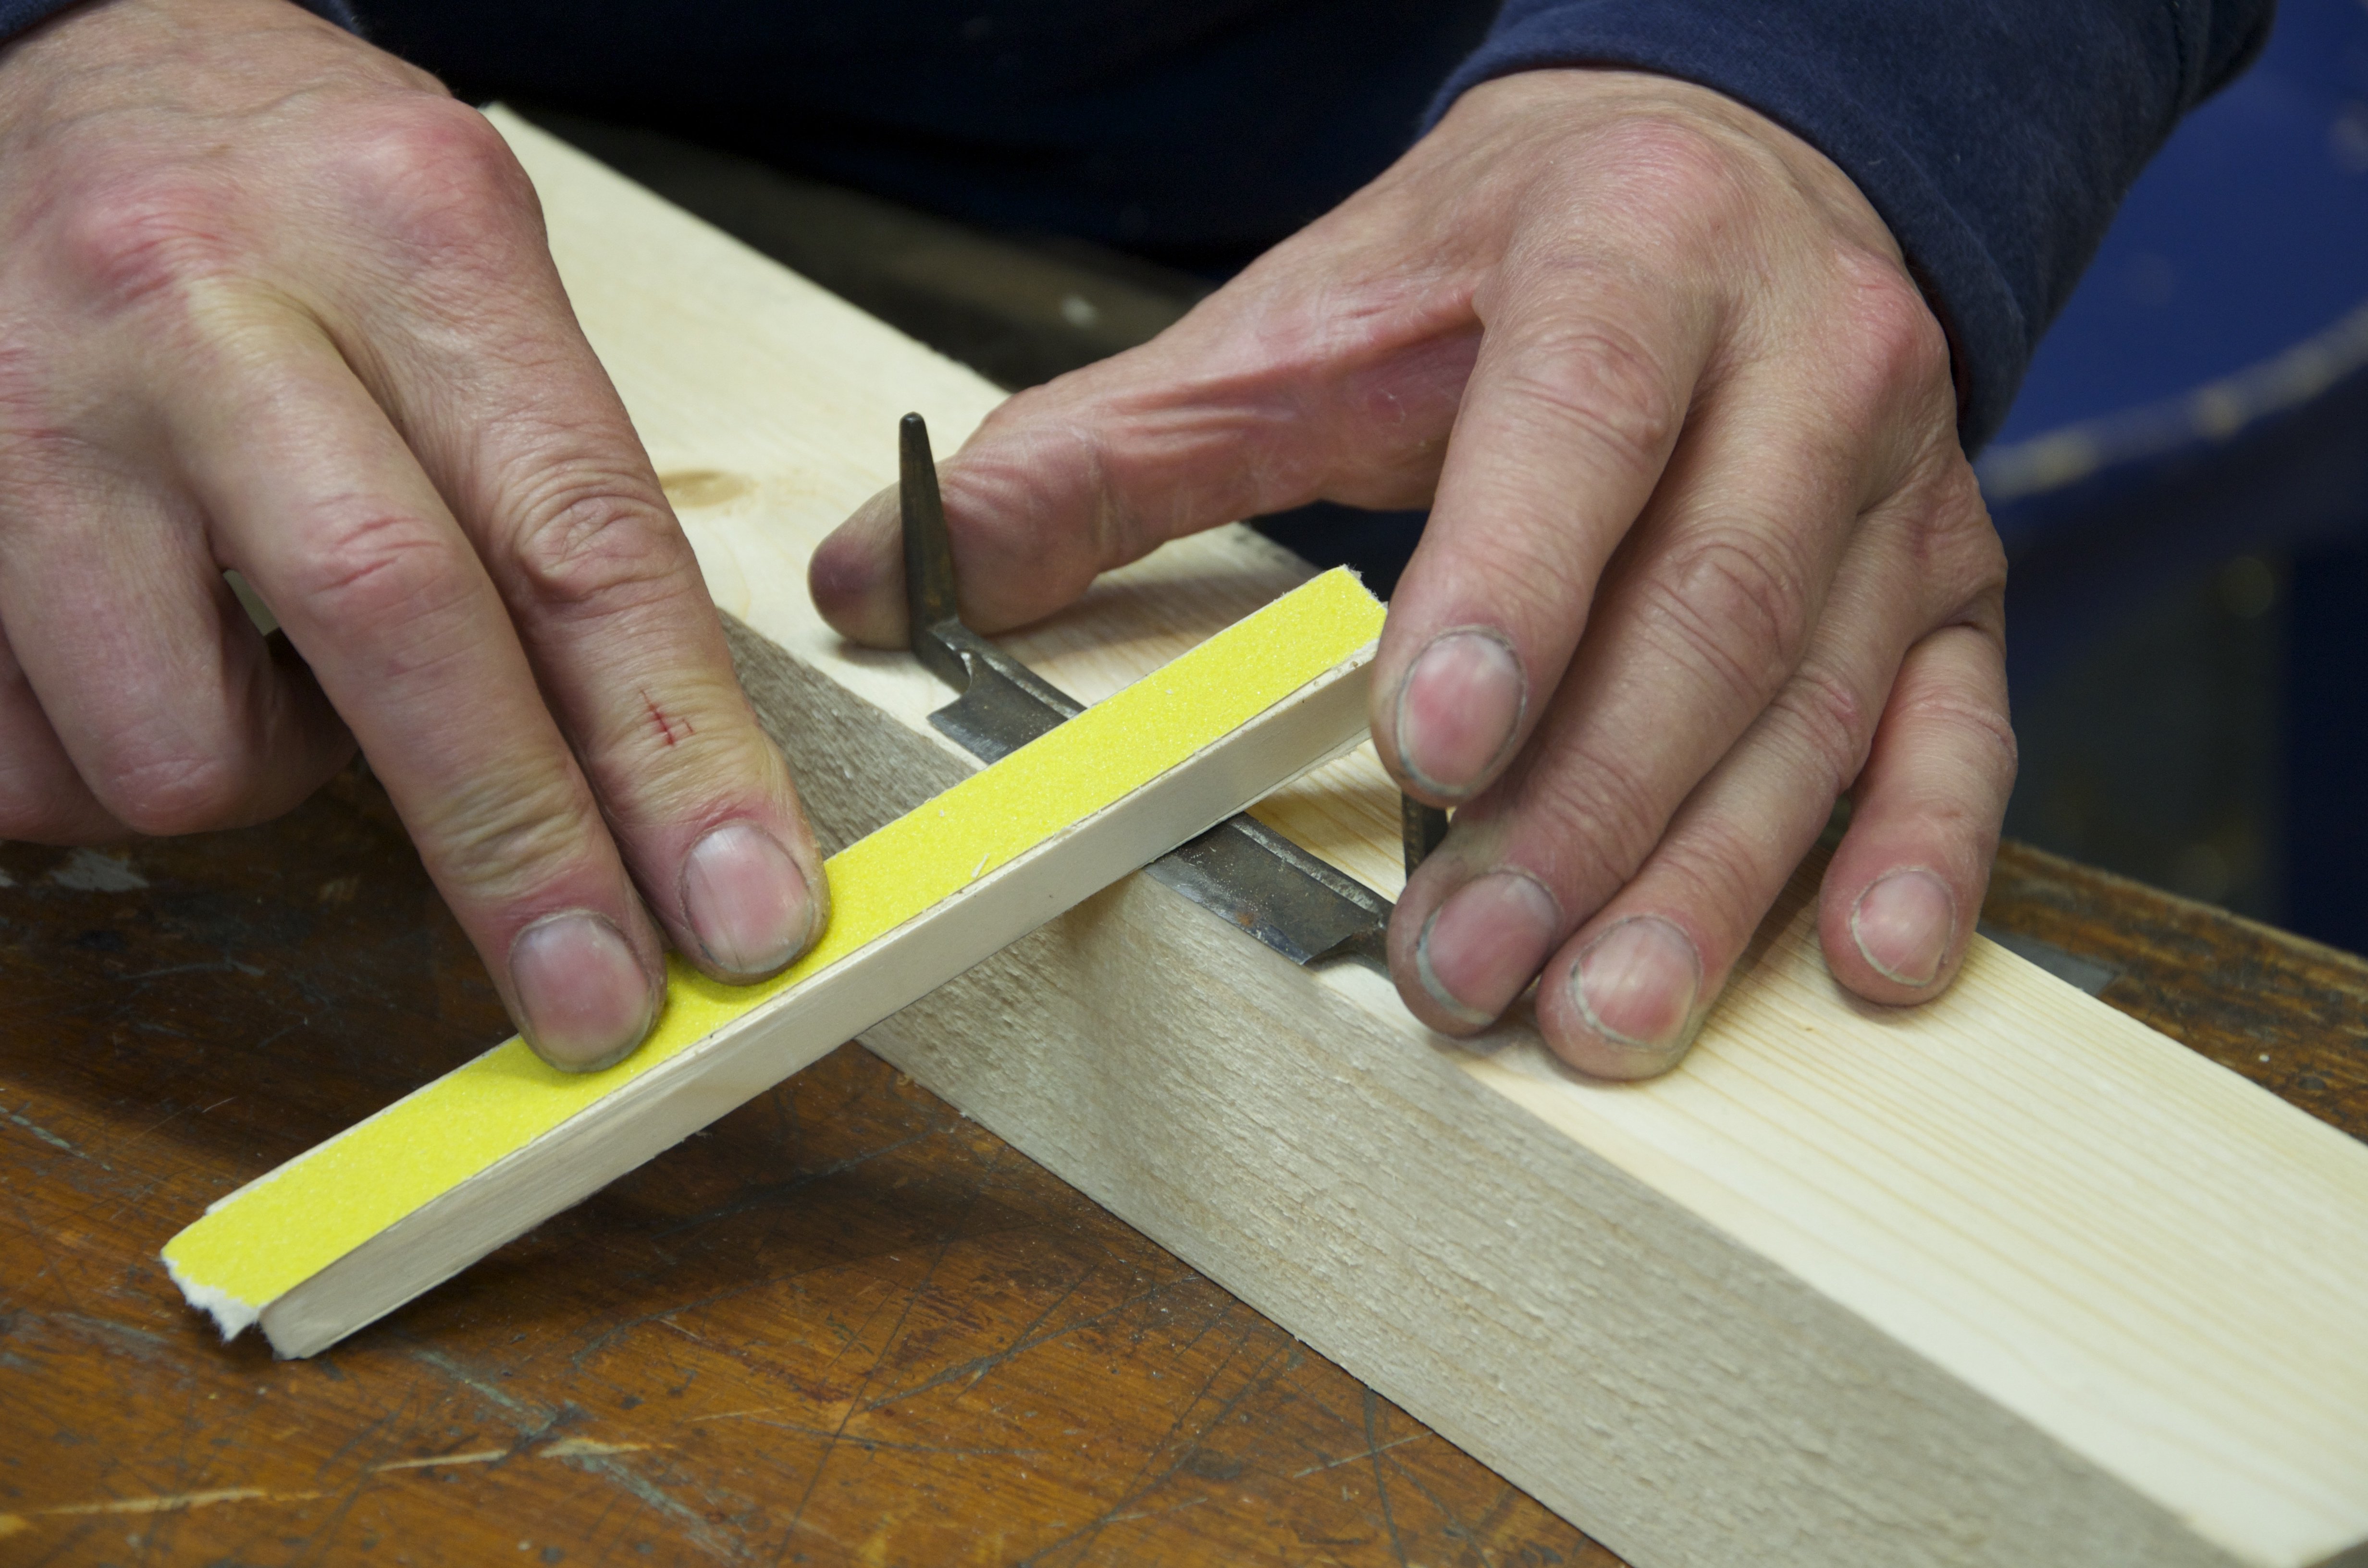
To determine the general angle of presentation move the paddle forwards or backwards against the cutting edge without abrading until the paddle hits both the back edge and the front edge of the blade simultaneously.
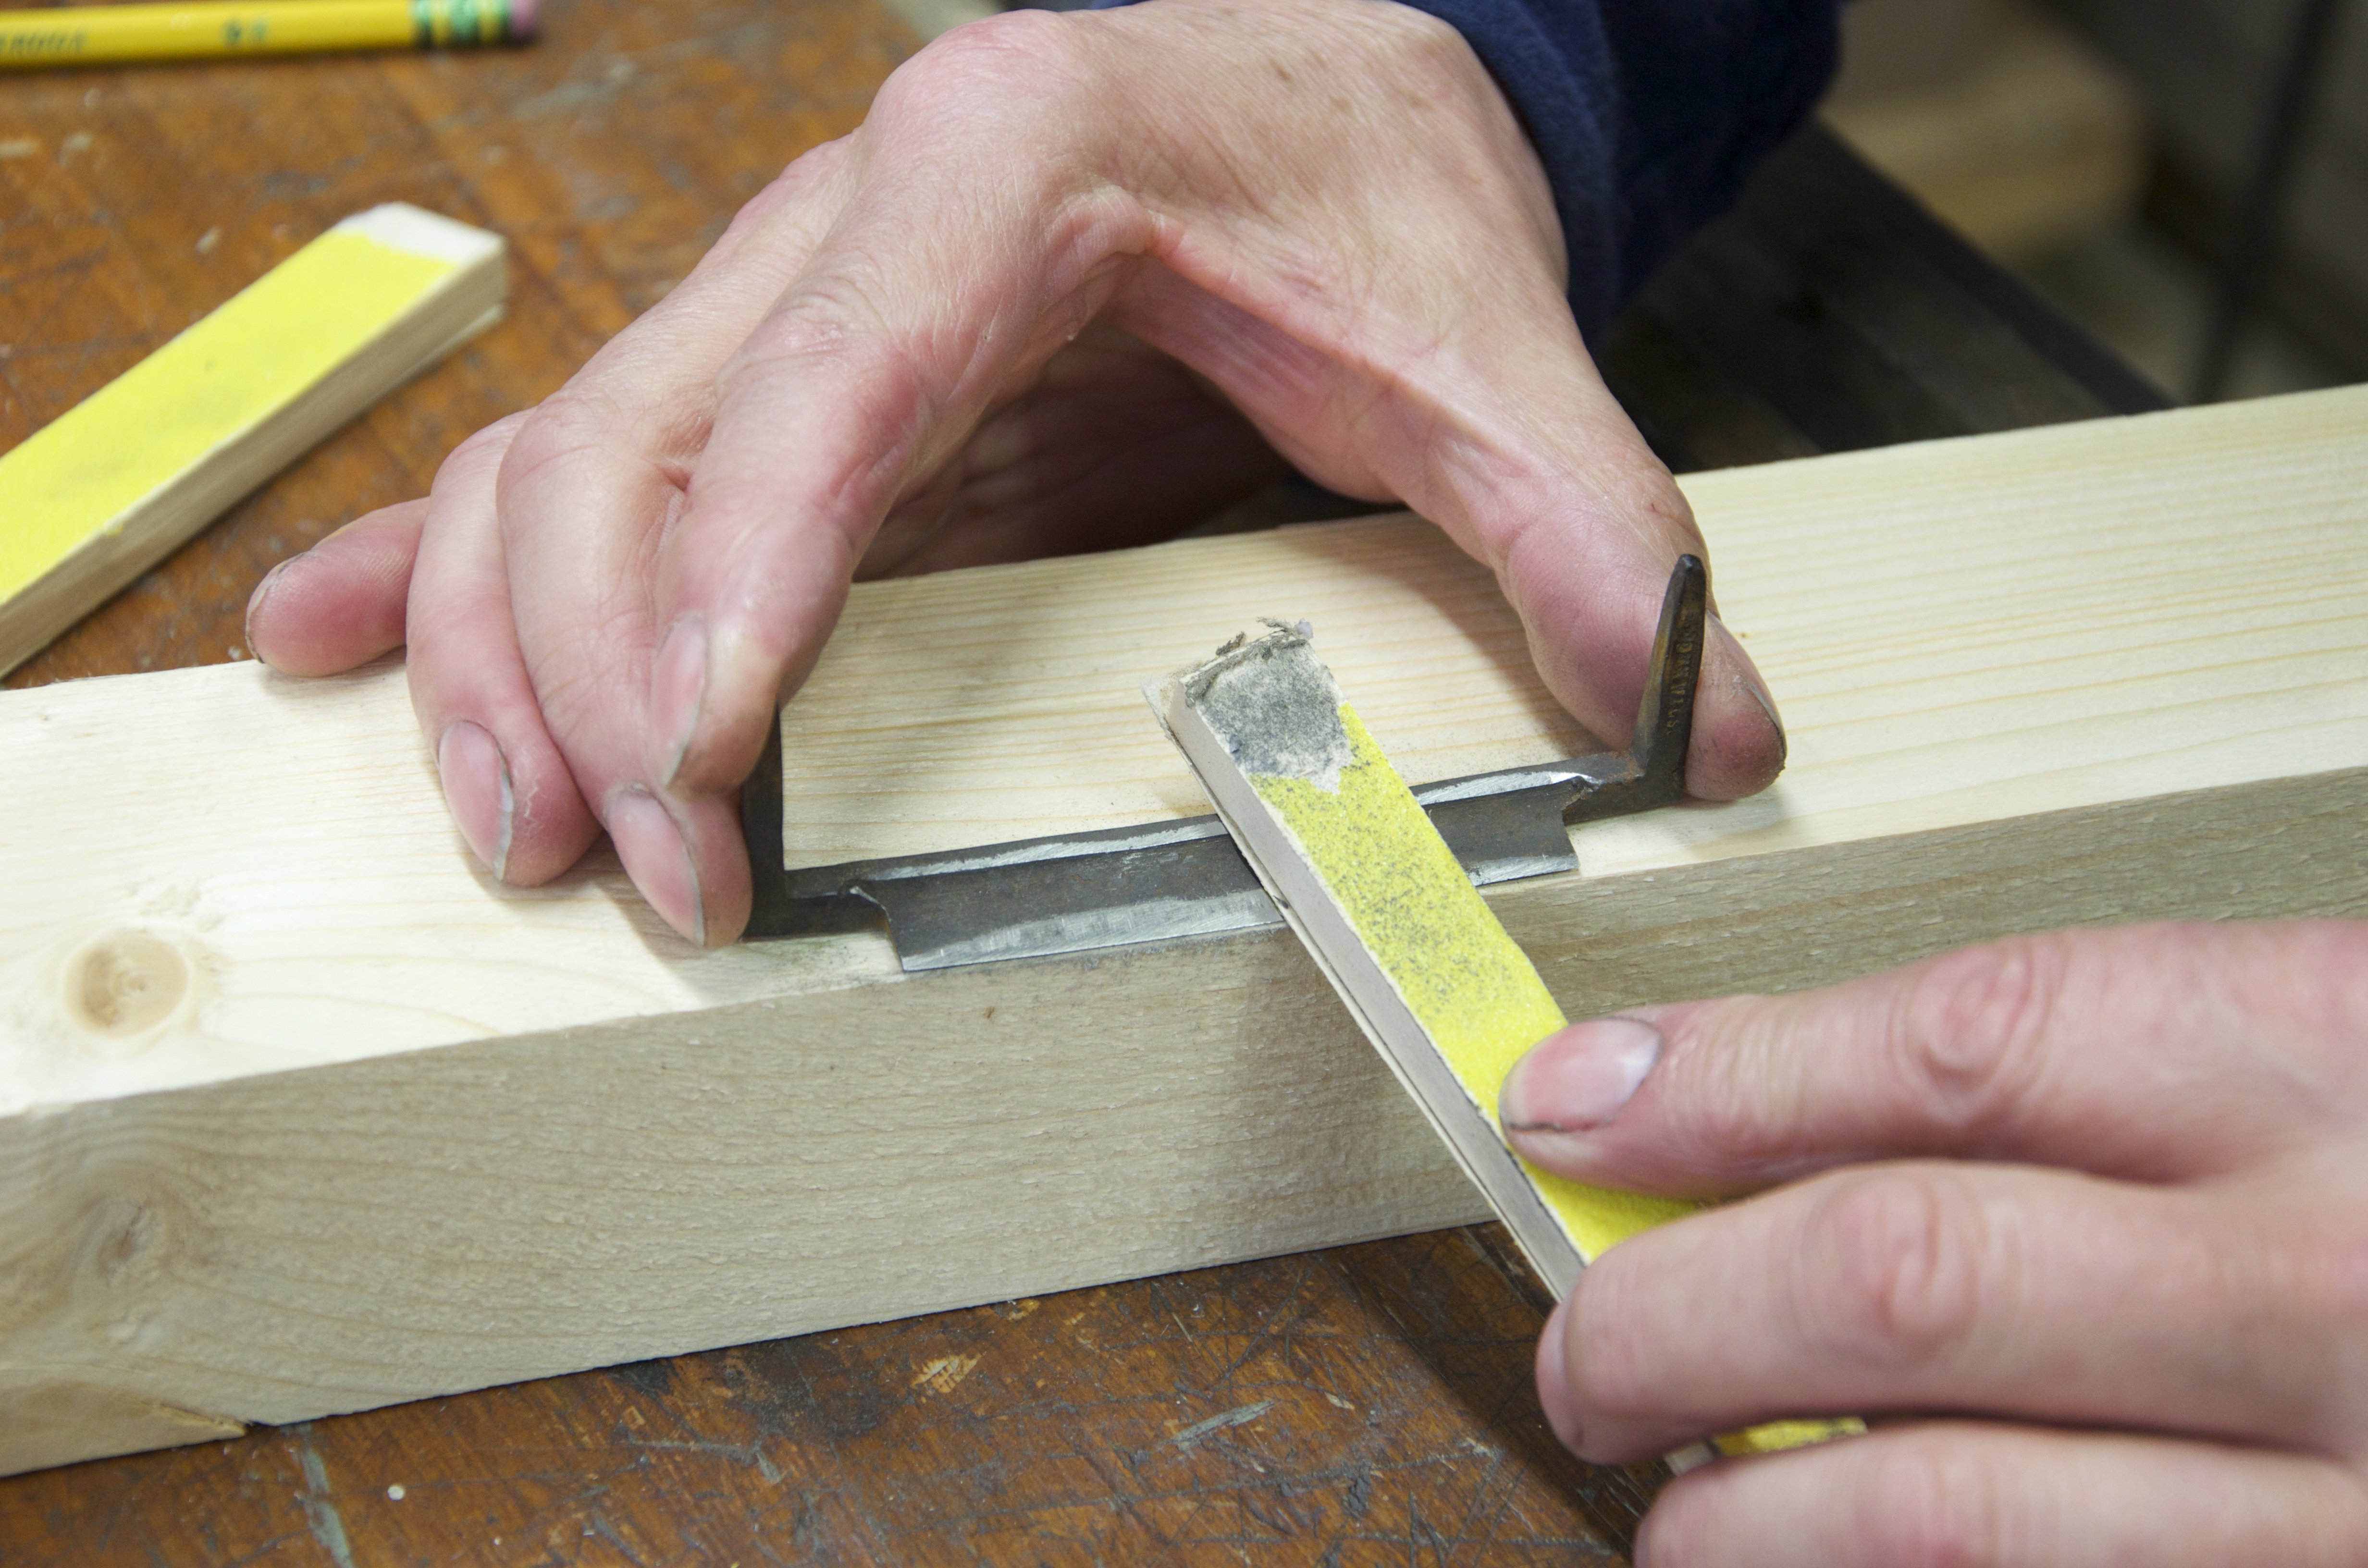

Move across the bevel from one end of the cutting bevel to the other using these circular motions until the whole bevel is evenly abraded. This will establish a slight camber to the bevel and by carefully watching the bevel it should be nice and symmetrical too. Keep going until you feel a slight burr to the opposite, underside of the cutting iron, along the full length. Work as evenly as possible if the bevel is in good shape. If it’s way off, apply more strokes to even out discrepancy. Generally, even a bad iron takes only a few minutes to establish the bevel correction.
It’s worth mentioning here that so far the work done including making the paddles is not more than ten minutes.
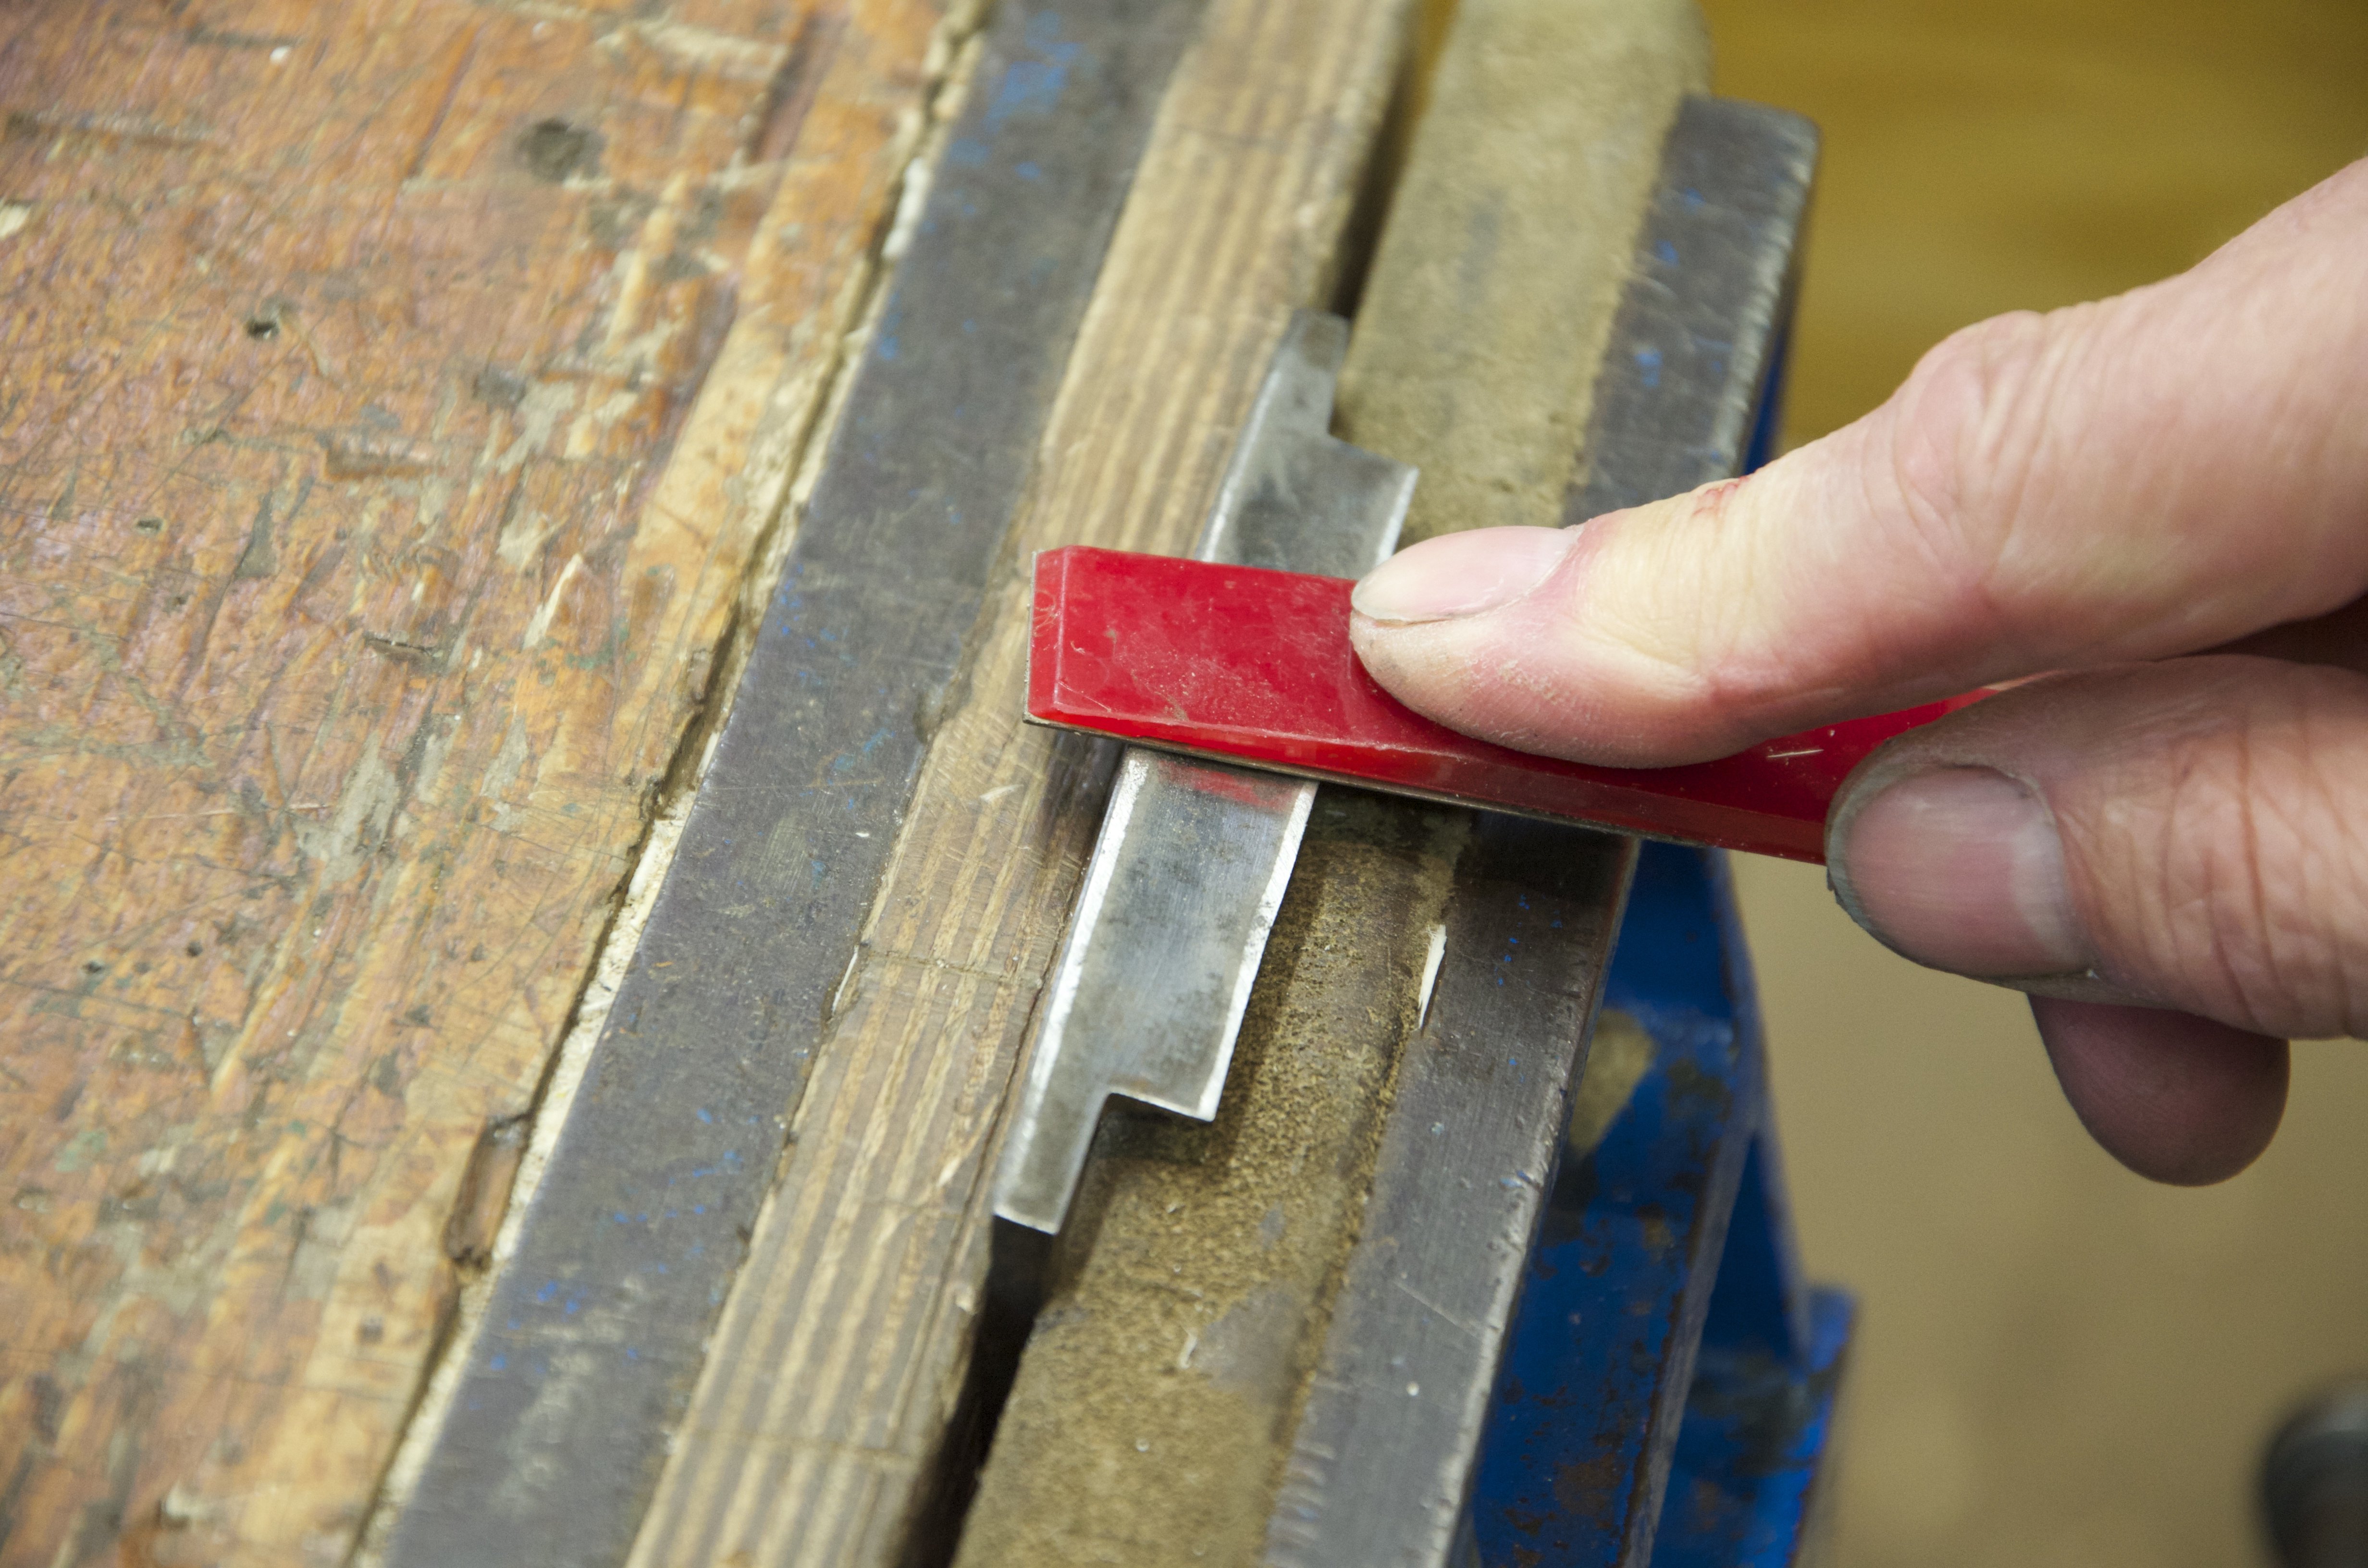
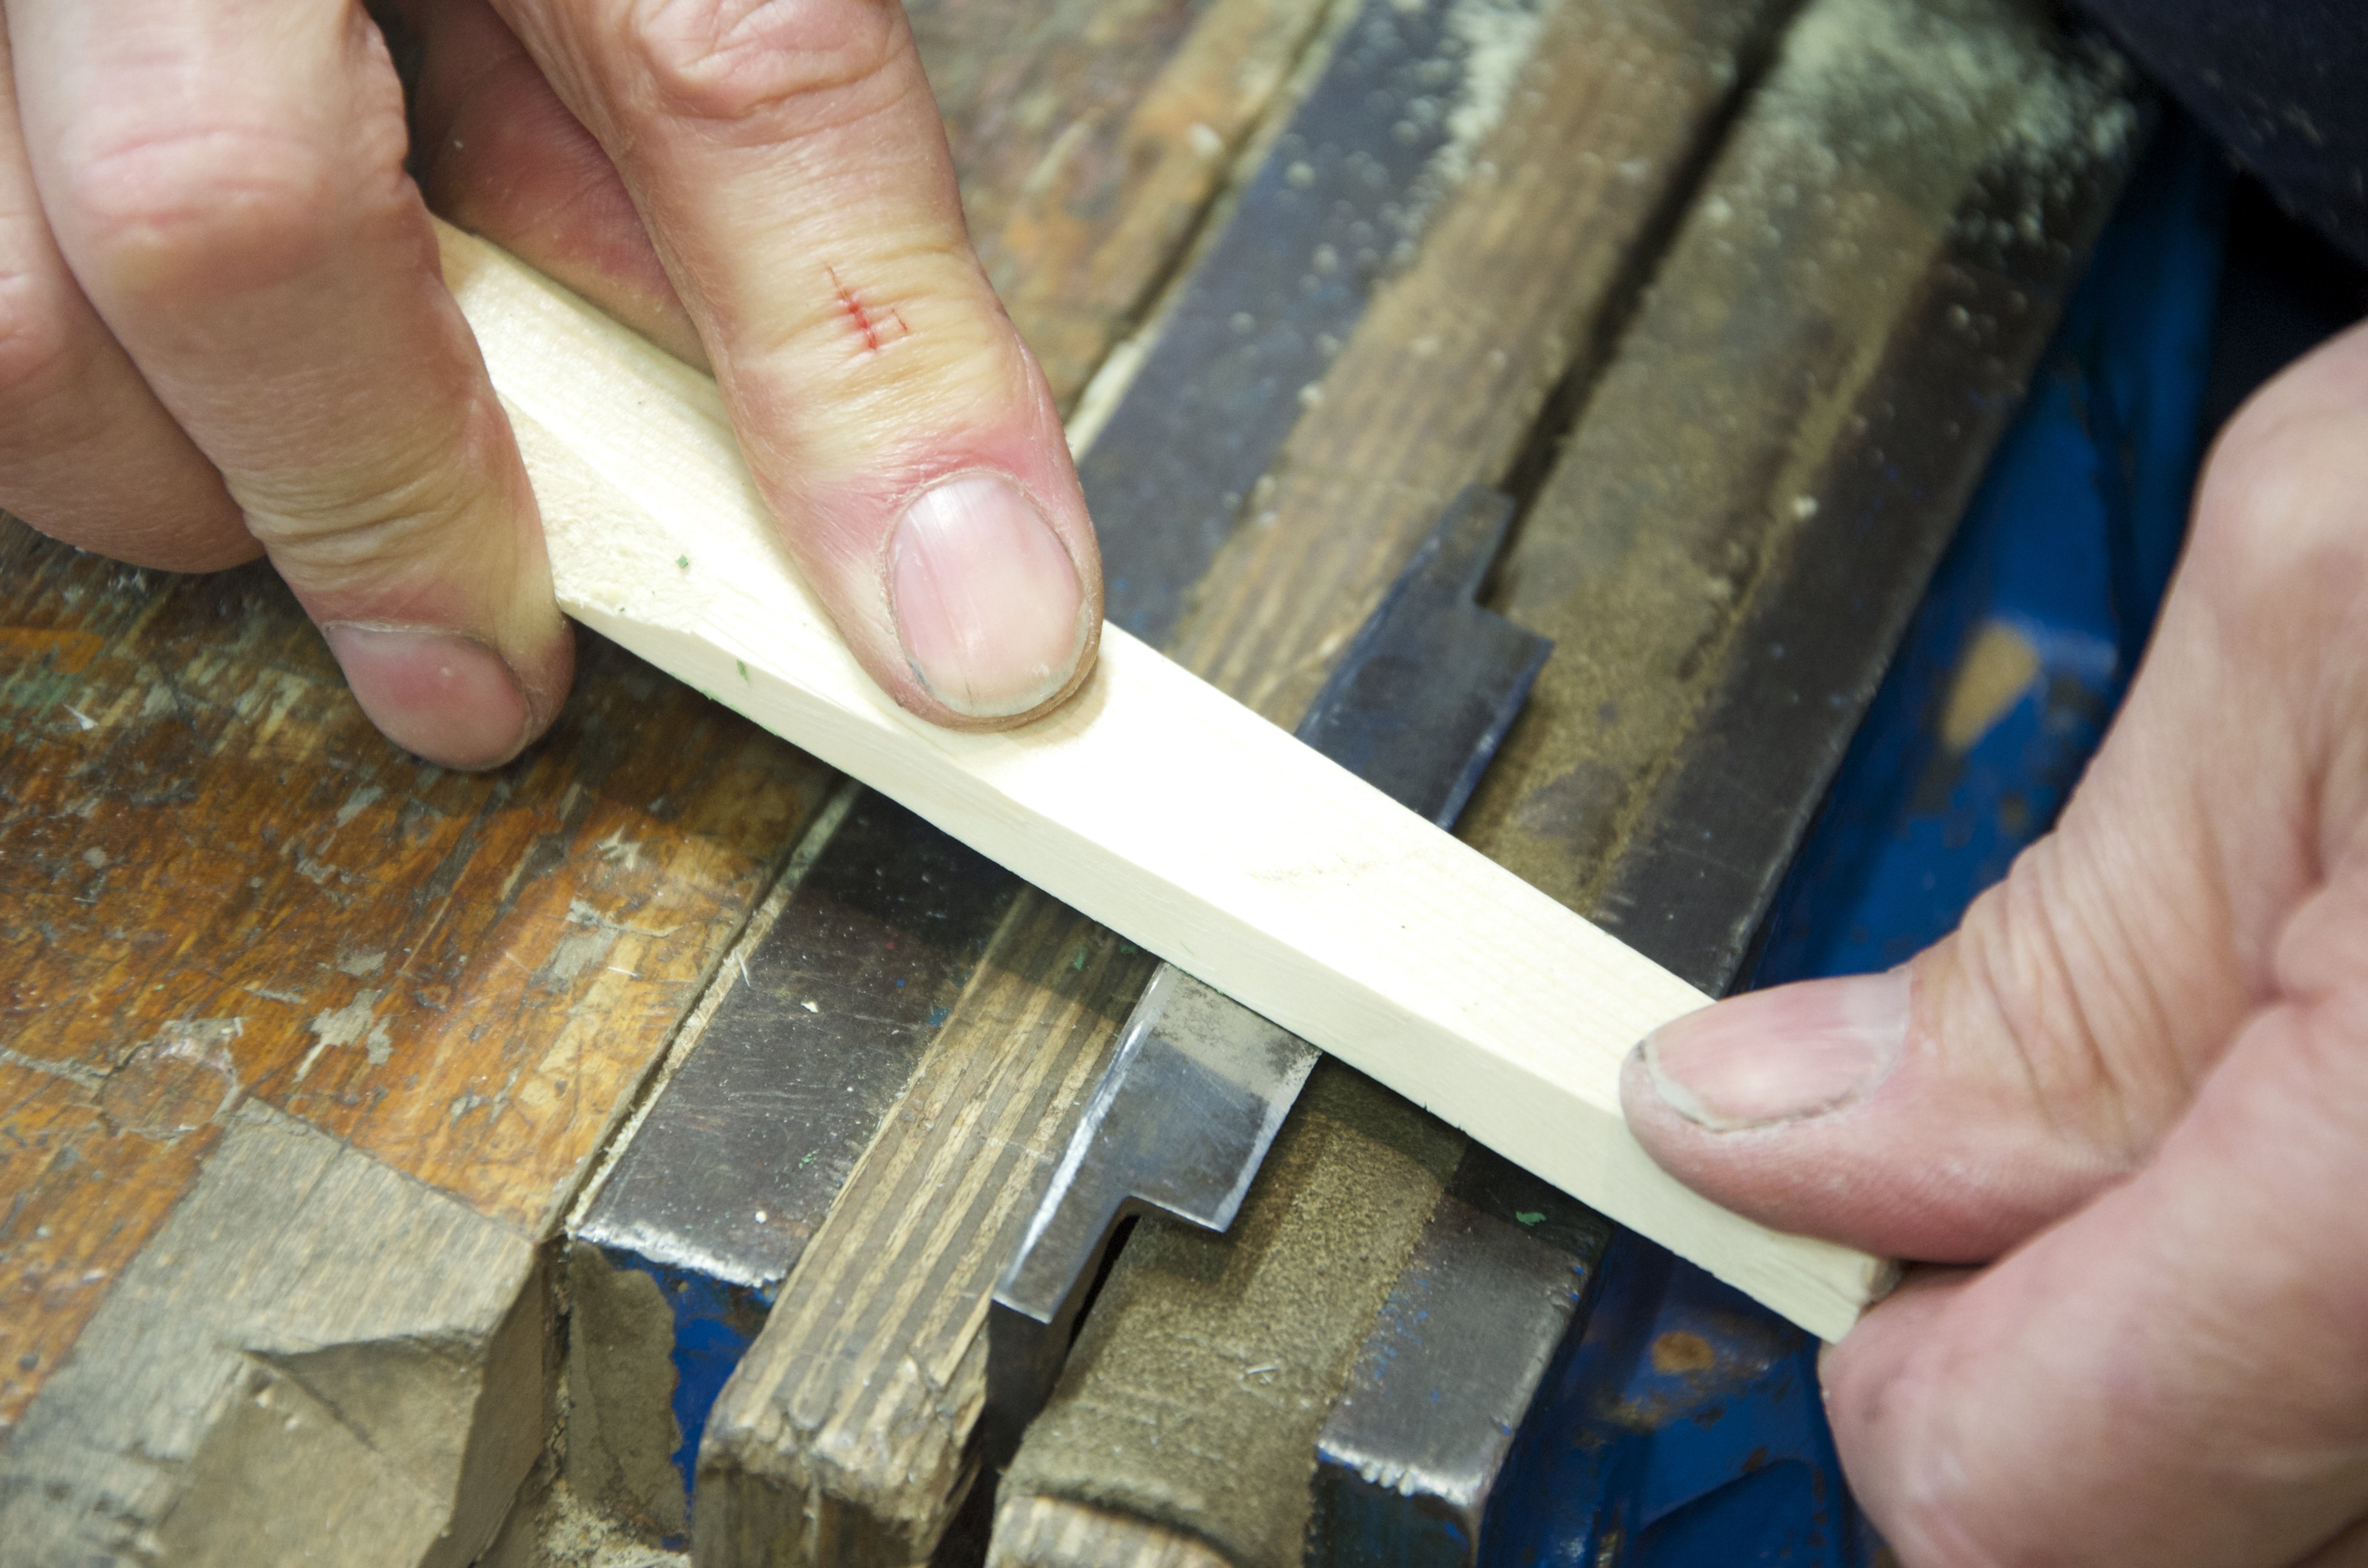
Subsequent honing continues using finer grits of paper on paddles or the EZE-Lap diamond hone. Do both sides of the blade. On the underside keep the honing as flat as possible, spanning any hollow there is as shown below.


The opposite side of the blade, the flat face, often needs surfacing too. This usually means abrading through surface defections until the surface is clear of pitting and broken edges. Use the same sequence of paddles but not the leather strop.

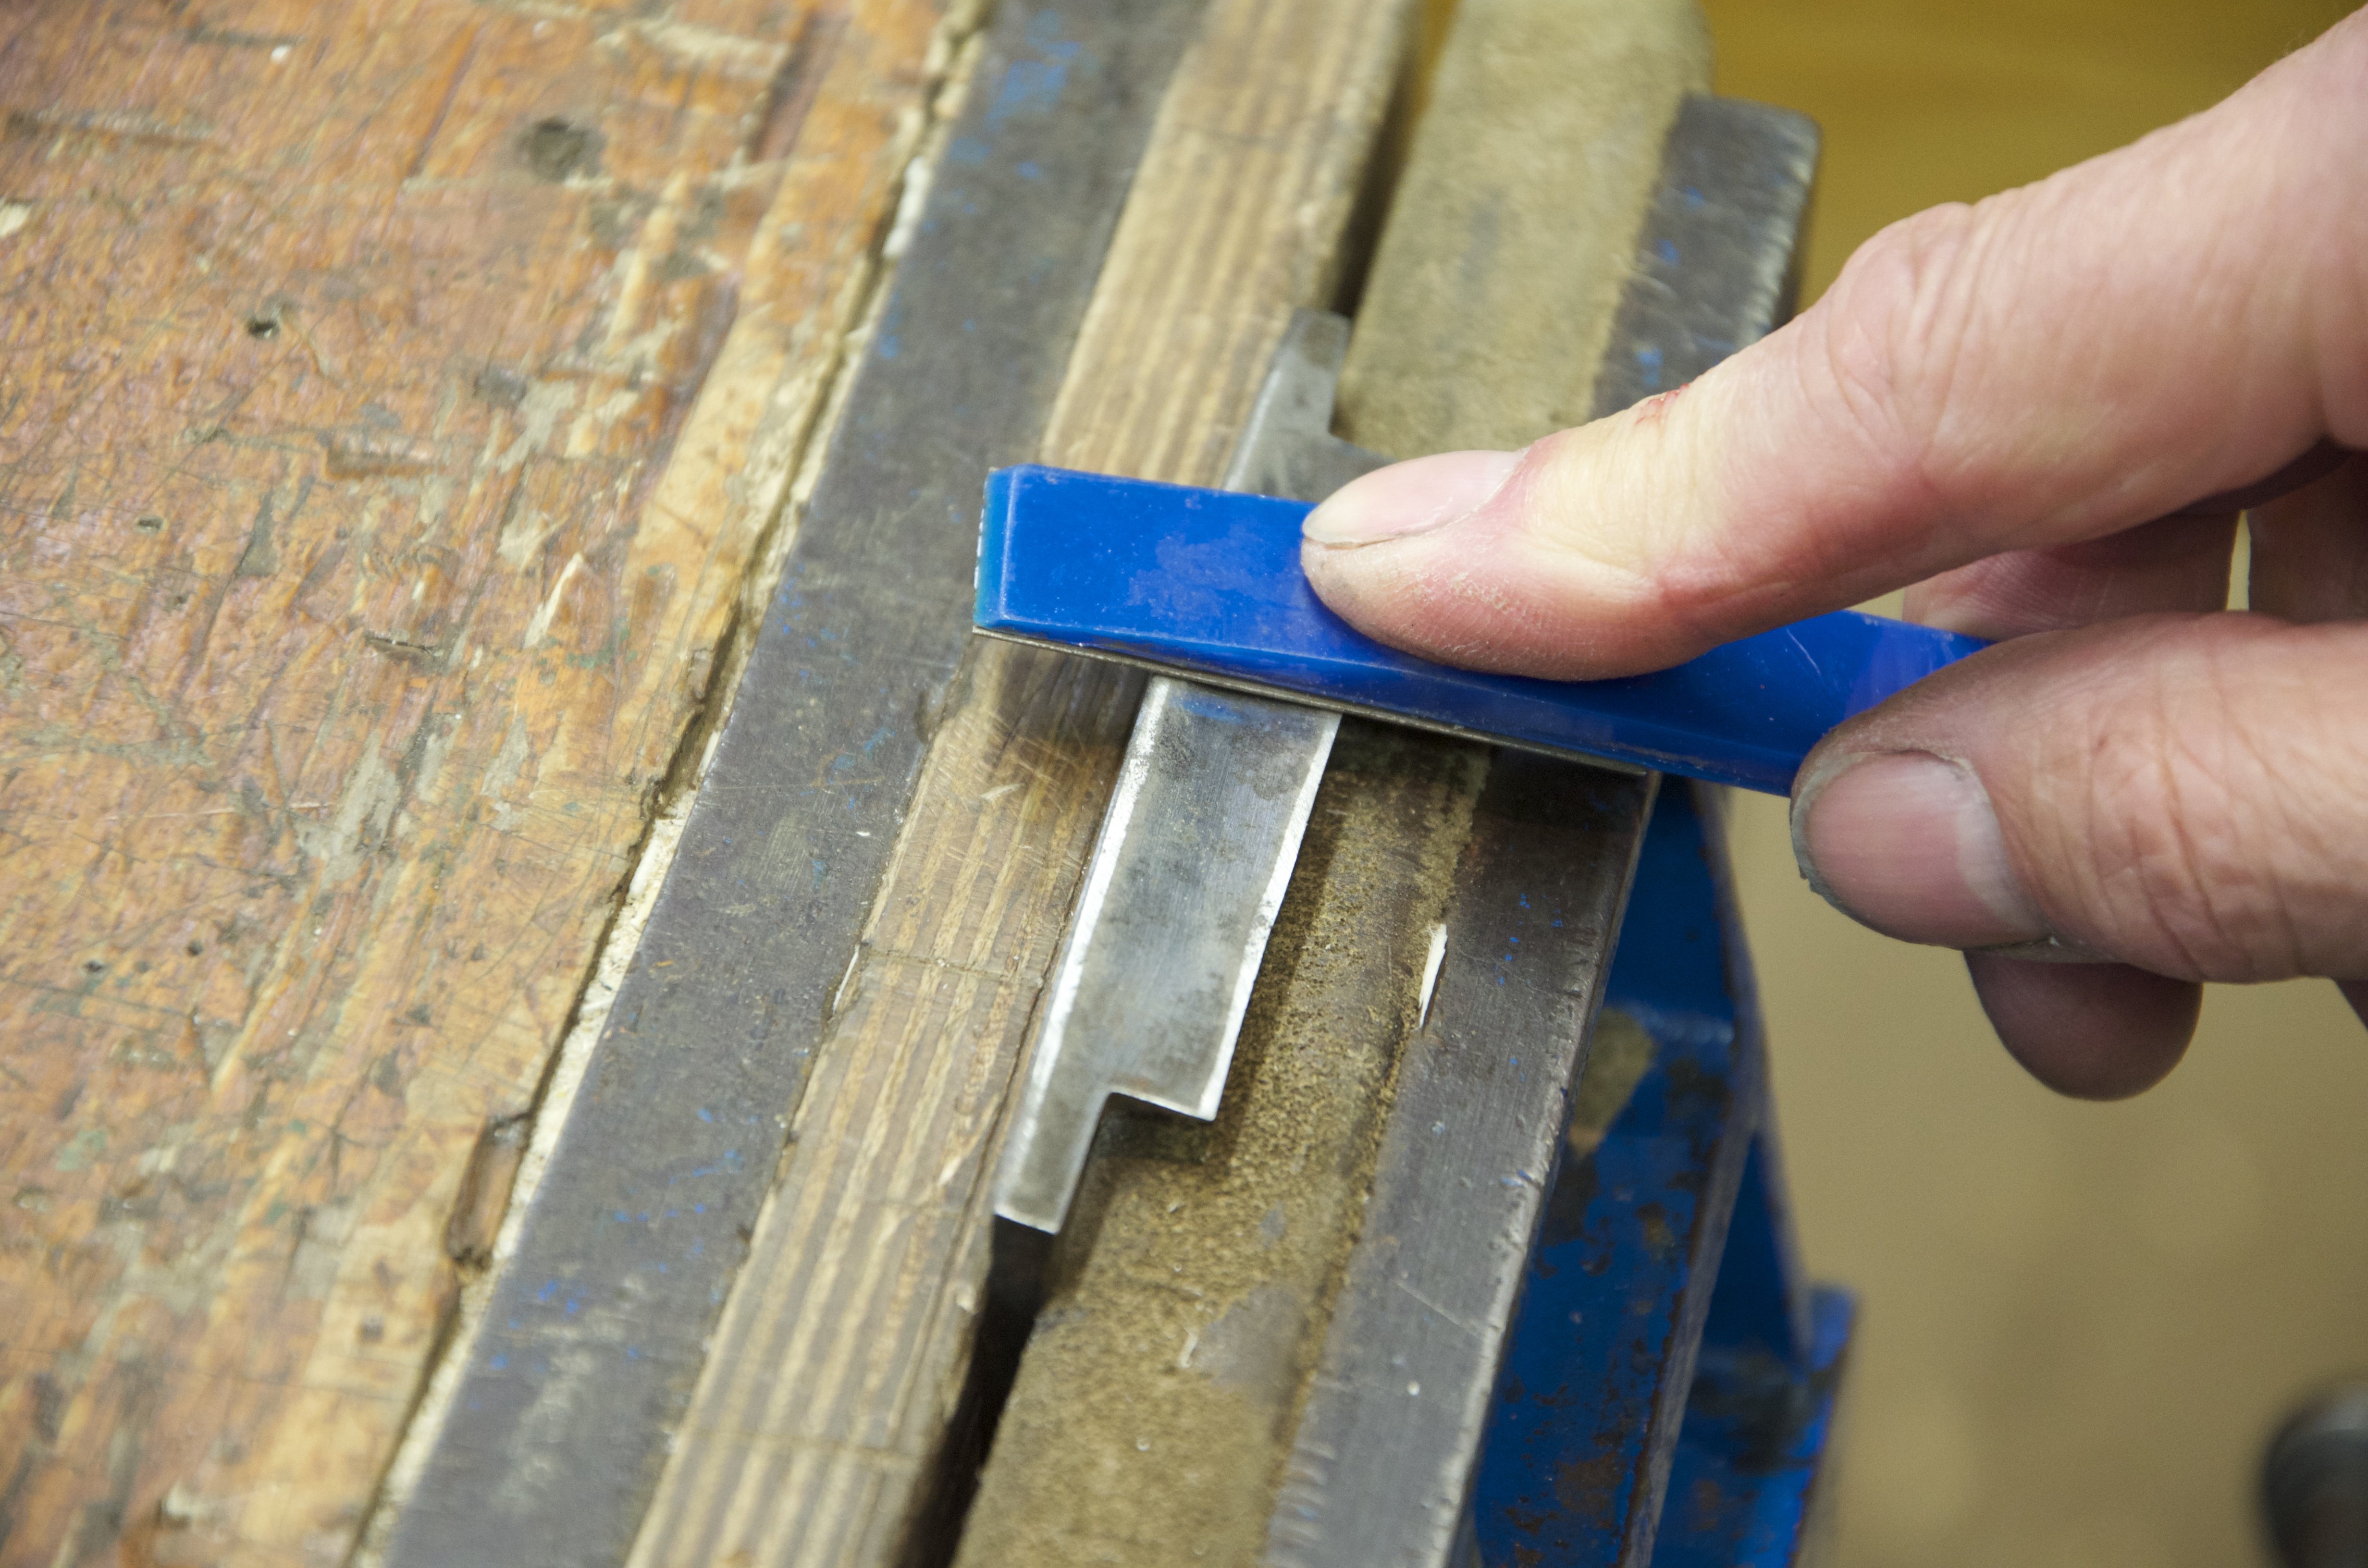
This time use a piece of flat wood charged with buffing compound. Push the paddle flat across the blade in one direction only, otherwise the cutting edge will cut into the paddle.
Usually around 30 strokes works to polish out the blade. From here on it is unlikely you will need to do this again. It’s a one shot restoration process.
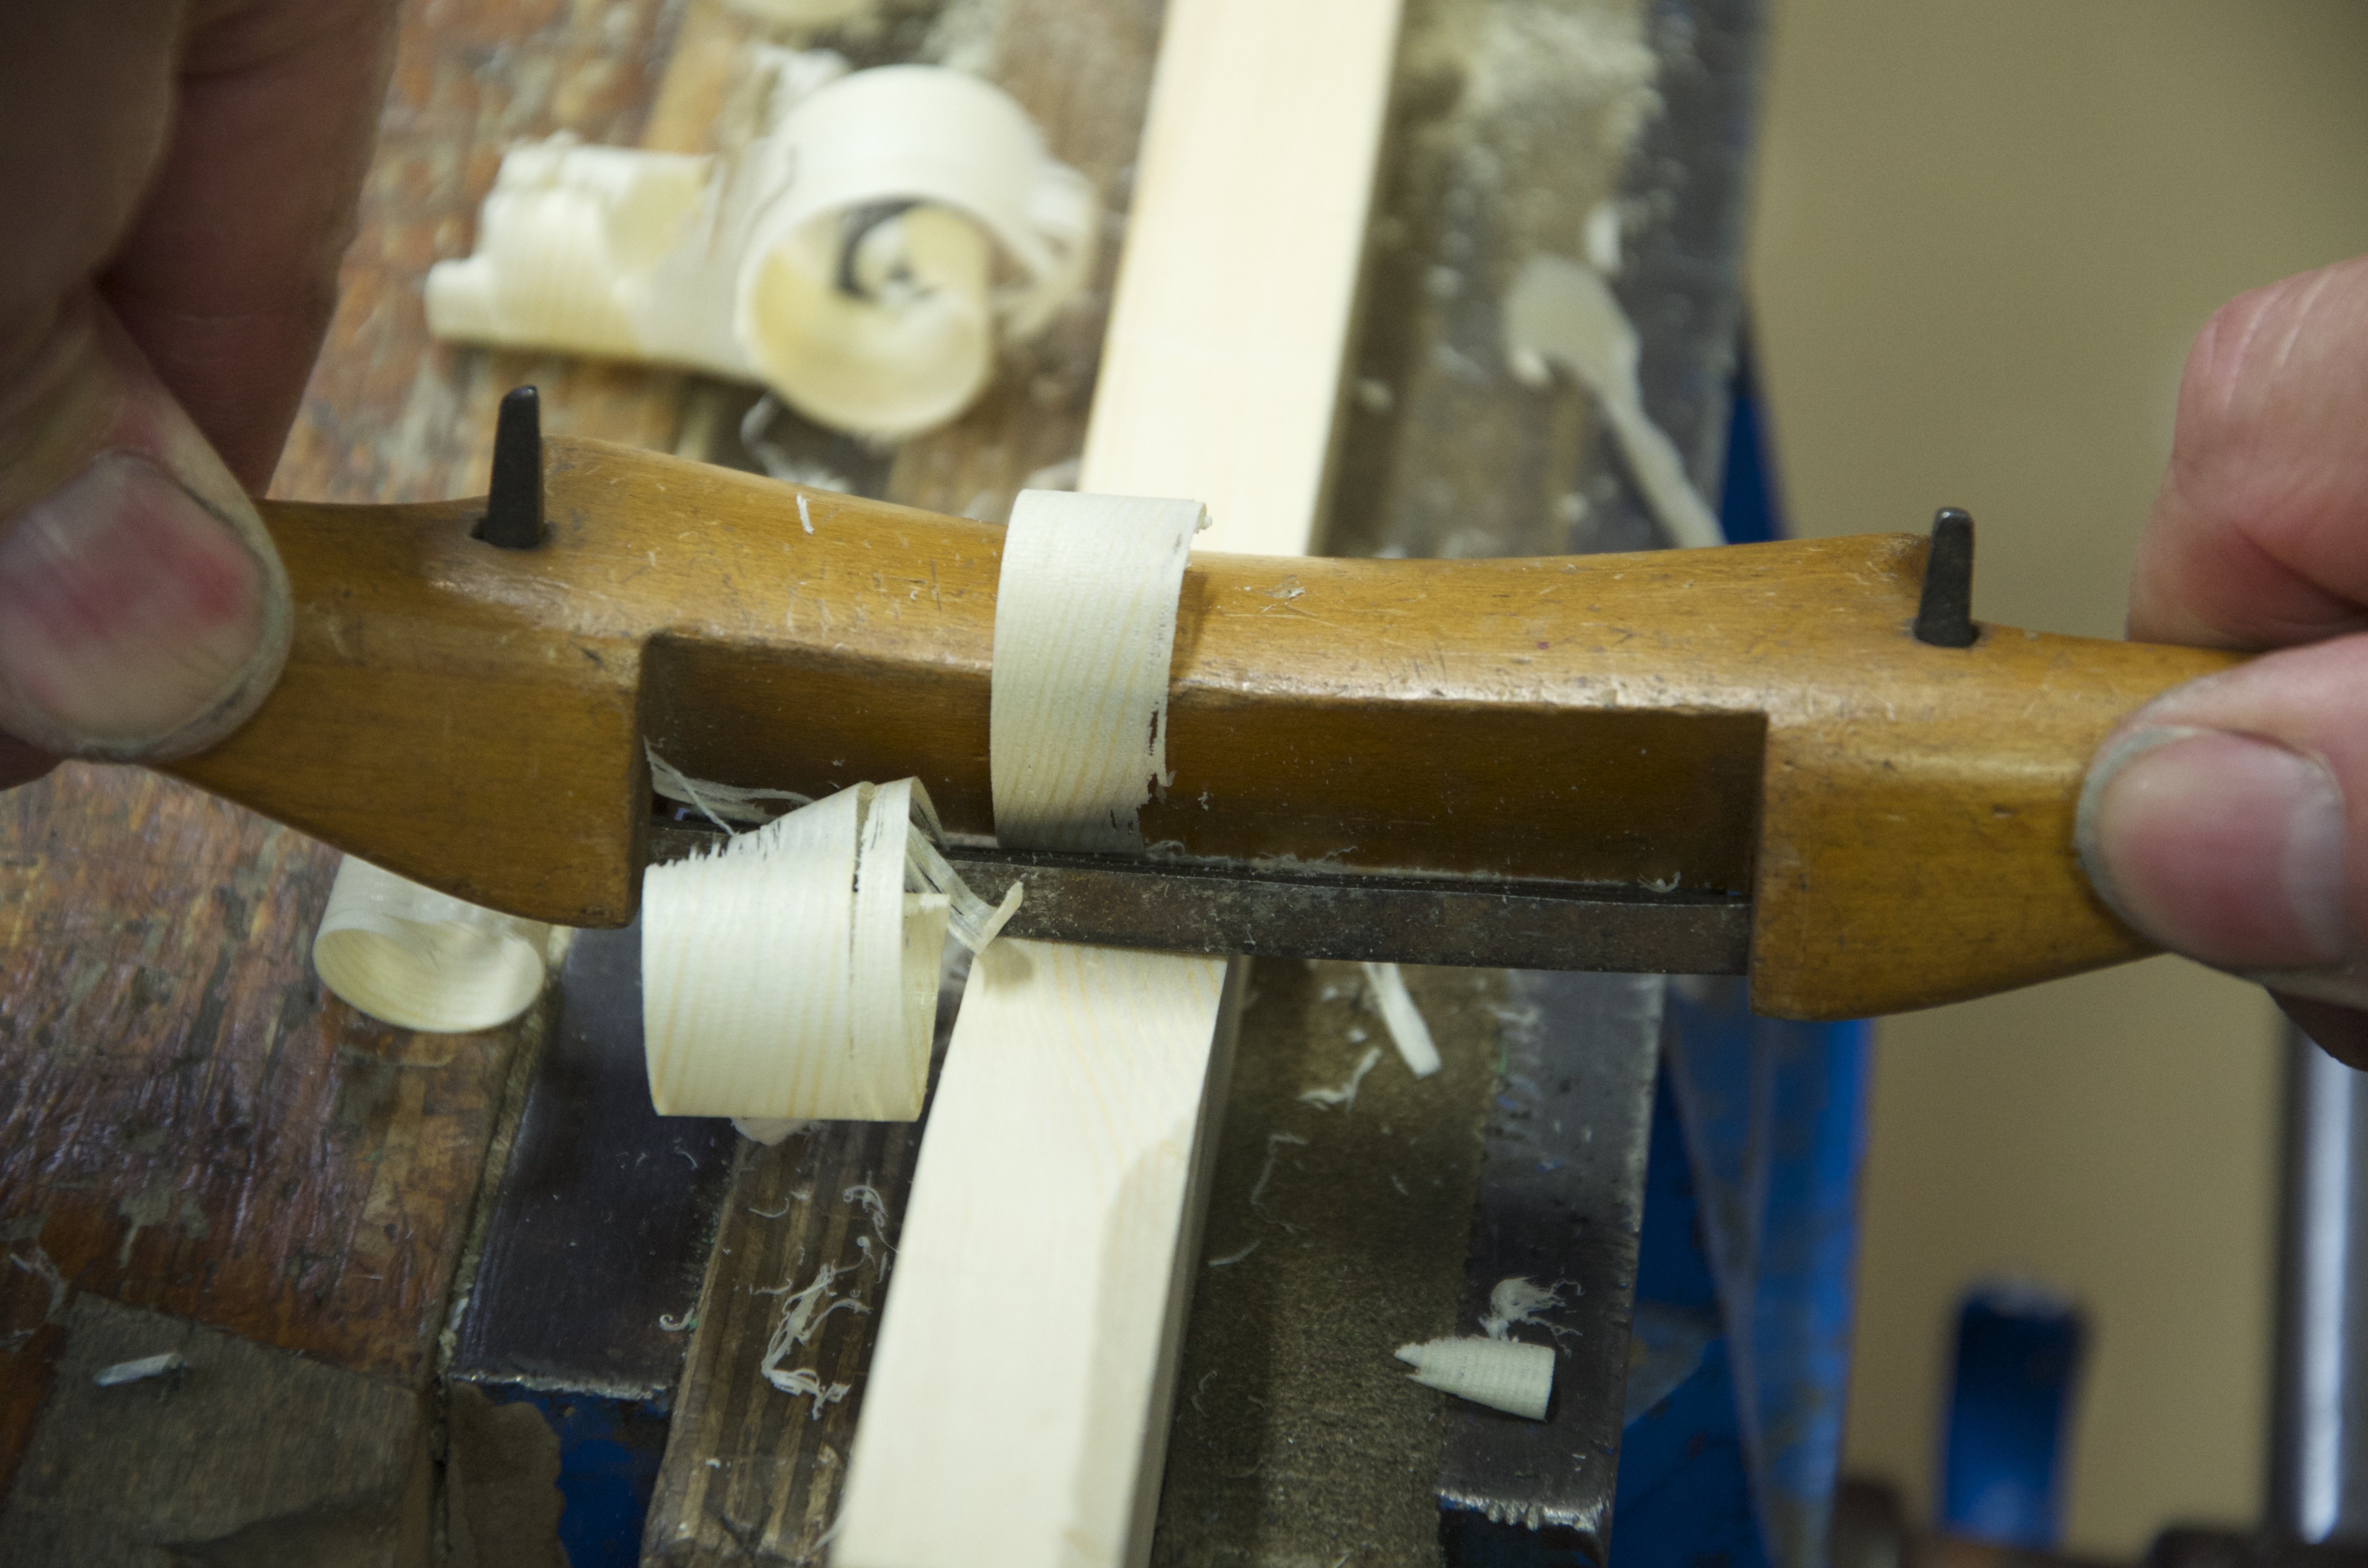
Tap the blade back into the spokeshave and start work.
Hi Paul. I’ve recently acquired a rather lovely travisher, which is obviously similar to a wooden spokeshave in most respects except that the blade is curved. Do you think the same sharpening method would work with it? I suppose I’d need to fashion some paddles with a curved face to sharpen the inside of the blade.
Yep! Just the same with a radius close to but slightly tighter.
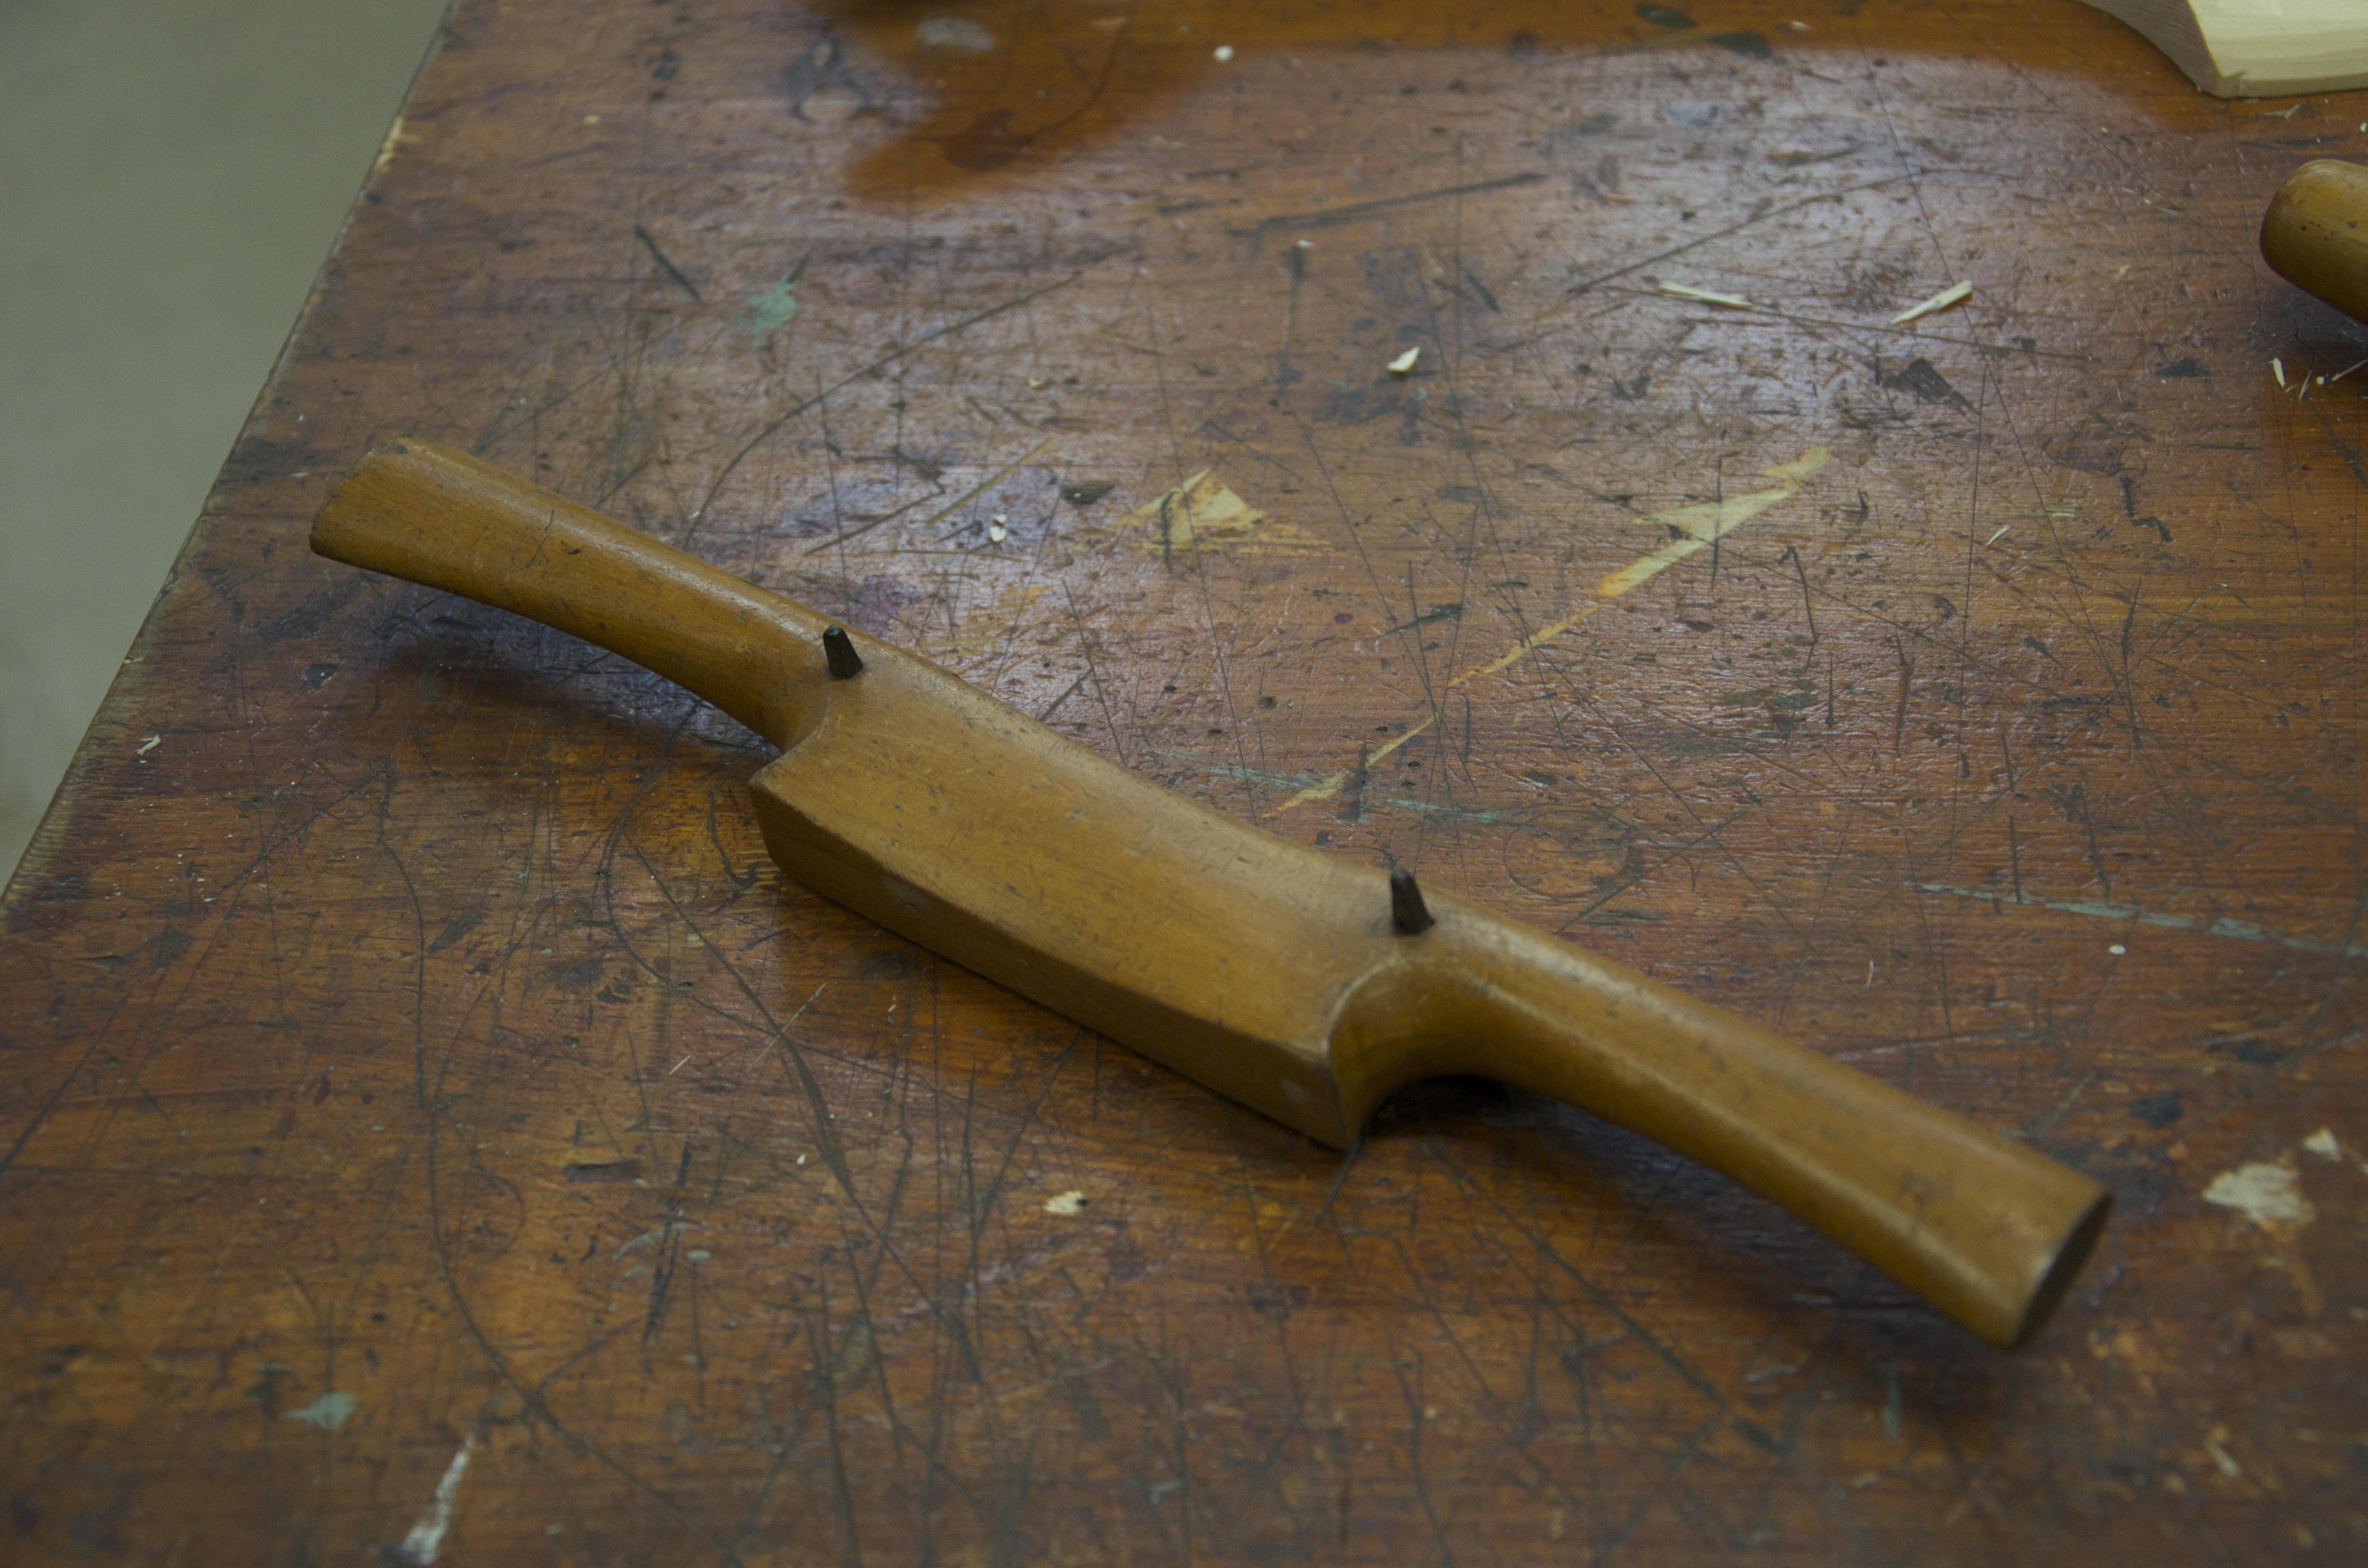
How best to tighten the tangs in the wooden handle?
Don’t try bending the tangs! Often the tangs and the blade are always hardened and smacking them with a hammer or squeezing them in the vise snaps something somewhere. You can plug the hole and recut to size or glue in a small piece of wood to one side and then pare down to suit or you can heat the tang on one side and bend under heat by tapping.
I have had results with taking brass screws of apropriate size, cutting them shorter and filing them flat. By drilling a small hole in front of the tang you insert the screw and tightening them up against the tang. In effect you have created a grub screw clamping the tangs at the chosen depth.
I have also taped the tangs with masking tape this thickening the tangs ever so slightly.
I acquired a wooden spokeshave in a tool collection I bought, it seems in good nick but isn’t sharp. Thanks for your timely guidance.
Thanks for the idea there Dewald Kruger. I think the wooden spokeshave is my favourite tool of all, I have about six or seven of them now, and can’t resist buying good ones I see.
I have used the same technique on a badly worn spokeshave blade using a power-file. I do not own diamond paddles, and I found that the blade was too hard to remove a lot of material – the abrasive paper would wear dull too quickly. The power file I used has a narrow abrasive belt (10 mm), and I just raised the blade support in the vise to compensate for the greater length of the power file. I made sure the blade does not over-heat, and got the job done fairly quickly and with good control over the angle and consistency of the edge.
Now I am replacing the wood sole forward of the iron with a fresh piece of boxwood, as it was very worn as well. I am looking forward to using the tool after many years of owning it and not knowing how to restore it. Thanks for the technique, Paul.
If a blade has been worn more in the centre than the edges is it still usable this way or is it best to have it ground straight across ?
I must admit I have read many people who say old wooden spokeshaves are not really worth getting or that if they have any faults they can’t really work well……..can most wooden spokeshaves be restored if they are reasonably good condition ?
I am considering the Veritas kit but have 2 wooden ones to be restored that have very good bodies as far as I can tell and haven’t seen lots of use.
Another one of those misinformation things, they work better than any modern version hands down, total balderdash.
Plenty of misinformation out there ! That’s why I prefer to ask the question here 😉
I have tried a friends well sharpened wooden spokeshave against my 151 and although I think my 151 works great I much prefer the feel and action of the wooden version and have decided to get mine ready to go.
Do you think I should make the cutting edge straight or is the more worn area in the centre not a problem ?
Thanks Paul….
Are you talking about the wood or the blade?
The blade is worn more in the centre…..so it’s curved along the cutting edge
Really, the only way to resolve it is to sharpen up and see how it feels. It could be rounded because of overzealous or inexperienced sharpening. The larger gap this creates can be both advantageous and a problem but combining this one with a second, closed throated version gives you versatility.