Edge planing square–To tilt or not to tilt…
…That is the Question:
Hello Paul,
I attempt to try woodworking with whatever time I have, but I can not get the hang of it. I have watched countless videos and spent hours on hours on end shaving to square wood, but I can never get it perfect. I have purchased a used #4 plane, a Starrett combination square, a Veritas router plane and chisels from ebay. I learnt how to sharpen with your videos. I even watched countless hours of your videos on squaring and edging, I just can’t get anything perfect. Do you have any advice? I do not want to give up trying to learn some woodworking. I enjoy hard work and feel like there’s always something to learn, but at times I feel like it’s not going anywhere. I thank you for your time and reading this in advance,
Regards, MB
Answer:
Yes, it can be a trial for many people in the beginning and even after what does seem like endless hours of planing to practice, square edges and ends can seem to be elusive. The important thing is indeed stick-with-it-ness. Former British prime minister, Winston Churchill, who said, “Never, ever, ever, ever, ever, ever, ever, give up.

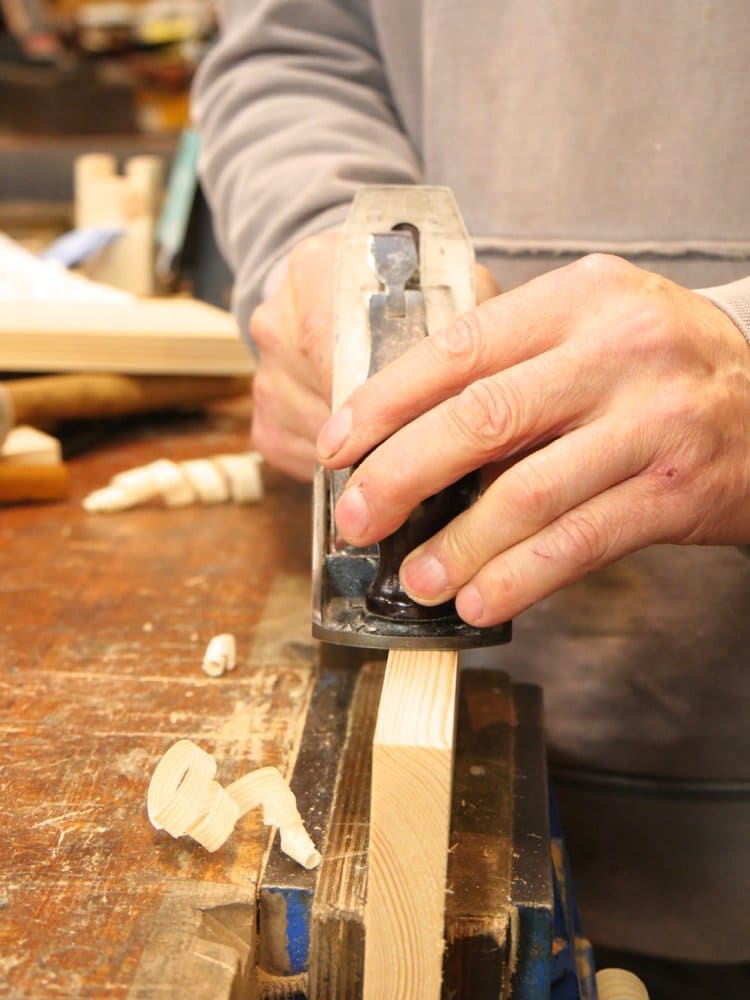
Assuming the plane is set thus, the edge of the wood plays its part too on what we are trying to accomplish. Always remember that different woods offer different levels of resilience and indeed compressibility. A heavy dominant hand, arm and shoulder will or can cause the plane to press into the wood and whereas one stroke might make little difference, successive strokes is usually where things go wrong. What happens is the wood compresses under the pressures/weight of the plane and upper body and the surface springs up ever so slightly into the throat which is why we should rely on the plane’s sharpness to effect the cut and not overhead bearing down on the plane. A sharp plane pulls itself to the surface. At last people are grasping this reality but it has taken me a long time to get this across. If a plane is miss-set by one thou then ten strokes in the same plane and positioning creates a bias ten times that one thou. I first knock off all of the high spots to get the edge close to straight and, if it is obviously out of square, take off the high side too. But I am not trying to fully square at the stage; just correcting the obvious to get me close to a true starting point.
This is the point where we often try to do two things at once and that is square the edge and straighten the edge. Focus first on straightening the edge. You can get this with the #4 just fine by eyeballing along the corner and taking out the high or highs. Instead of taking full length shavings and relying on the sole, start in the centre of the high, take a short swipe and with each stroke elongate the stroke slightly. Keep checking by eyeballing or use a straightedge if you have one. Once you get to what seems straight, back off the iron to take super thins and refine the closing cuts. 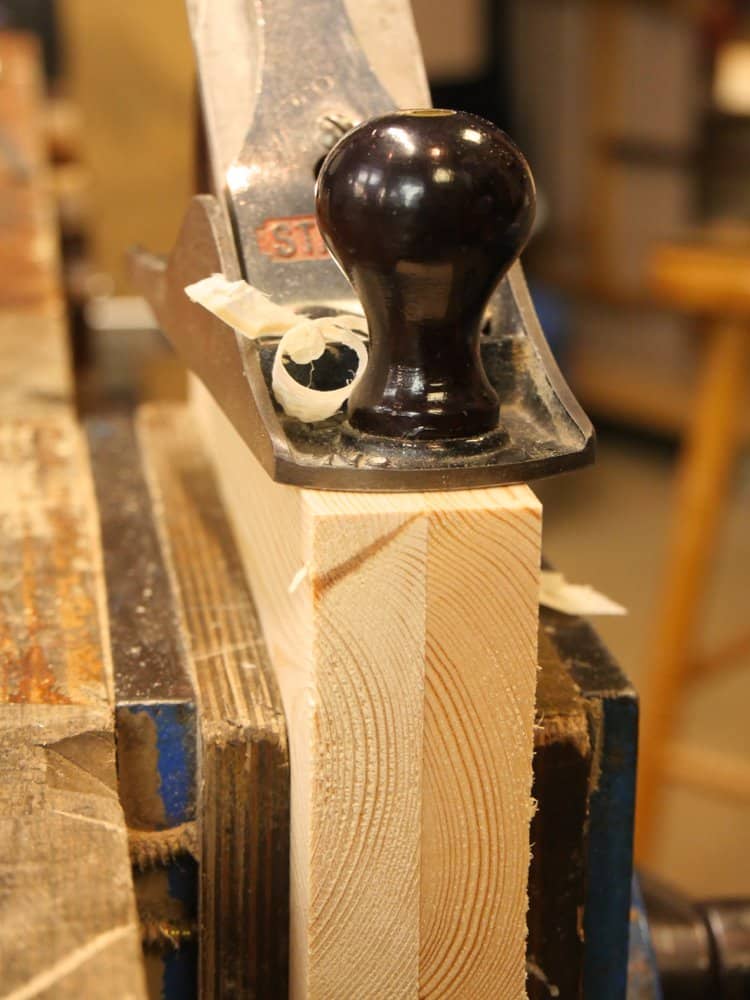

You can now focus on squareness.
If as you say you are planing out of square this is of course something we all do from time to time no matter how good or experienced we are and we must correct this bias. Most books, articles and information says you must lean into the work to oppose the bias by tilting the plane but that rarely really ever works in my view. It does seem logical but it is rarely controllable and not really the thing to do.
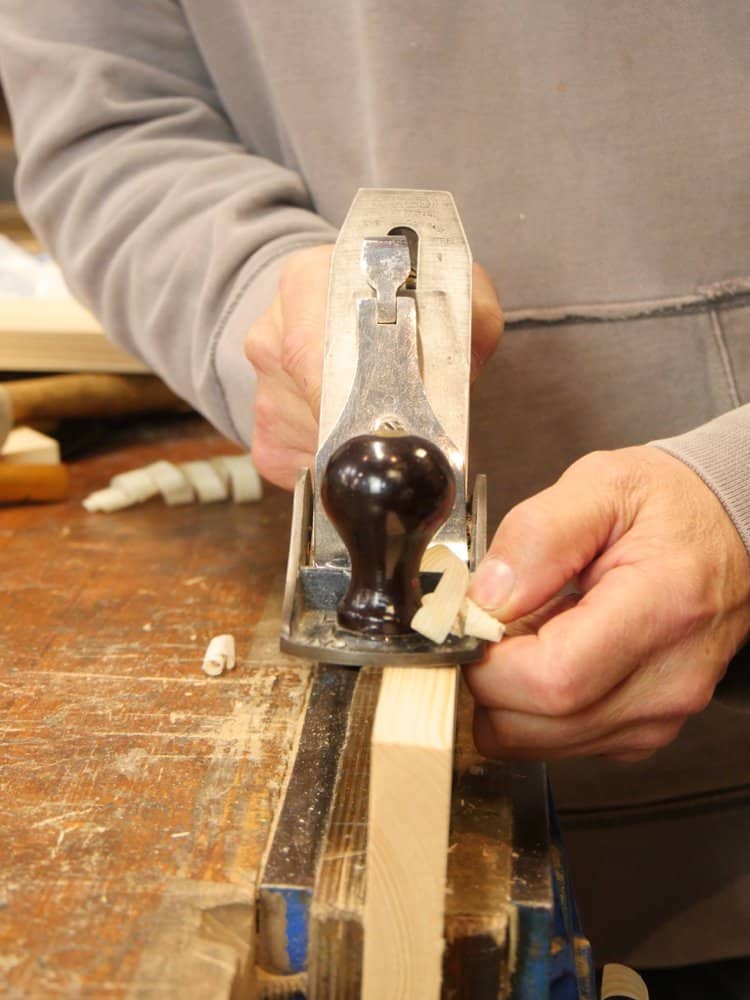

Now then, that said, if you want to you can add extra width to provide a carrier for the plane and that is simply adding say a 2 x 4 to the wood and clamping it in place. This serves as a training aid. I have used this with belt sanders for sanding the ends and sides of tables to stop the sander from tilting out of square or indeed digging in unevenly.
I would like to echo what Paul has said, you really do have to just keep trying. Don’t be disheartened, we all do it wrong at times, and I still sometimes end up making the wood smaller than it should be, and have to start again. It’s very easy to make ‘one last pass’ and find that it’s gone out of true, and then you have to correct it all over again. As Paul said, start with straight, and then go for square. Don’t attempt both at once.
One thing though, in many cases it is only the face edge and face side that need to be ‘correct’, as that is where you will be referencing your joints to. If you look at old furniture, you will often find that hidden surfaces were never even planed at all, and remain rough sawn! I’m not ashamed of slightly out of square surfaces that will never be seen.
Don’t give up. I could never saw square, for fifty years, until I learnt it from Paul (the knife wall is the key)
Hello Paul, one thing to add which was causing me some problems last night. I was trying to square an edge but it wasn’t working out. I centred the iron as you suggest above but it was easy to go out of square. I noticed that the camber wasn’t centered on the iron and the peak was slightly to the left. While the edges of the iron were centered the middle wasn’t causing me to rapidly loose square. Just something else for us new to this to look out for!
John
I only use cambered irons for roughing off say in a roughing plane or scrub plane. otherwise I keep the iron straight and square and round the outer corners a little and that is better than any crowning method as far as I can see. Worked perfectly for 50 years. It can work for you too.
Great article again Paul. But I still have 2 questions.
When you shift the plane to the high side, do you make sure that the low side isn’t touched? I only round the corners of my blade and the bulk of the blade is just straight. I guess you must move the plane so far that the rounded corner will above the low side to make sure nothing is removed there.
second question is that often the edge is out of square in different directions along the edge. How do you deal with that?
Thanks in advance.
Nope. You just take two or three shavings over to the high side and then with each stroke move over to centre.
The points Michael and John are making are really important and caused problems for me for a long time. Paul sharpens his irons straight but with just the corners rounded. If you sharpen yours with a camber that goes all the way across, then that affects how you get square. If a cambered edge is applied to an edge and if the high spot on the camber is not dead center on the wood, then you will plane an angle onto the edge. Some people use cambered edges deliberately to square stock, moving the camber left or right as needed to change the angle of the edge. Charelesworth is an example. Their camber is fine so it takes a couple passes to change the squareness of the board and this gives them control. Then, when they take a final pass down the center, yes, there is a very slight hollow across the edge from the camber, but it’s a thou or fraction thereof and doesn’t matter. So, decide how you want your iron to be. Hold a straightedge to it to see what you have. It’s shape affects what happens when you try to true an edge. I’ve done both methods, both work, both have advantages. I find I get in less trouble with Paul’s flat iron approach. Of course, nothing is perfect, and even a “flat iron” probably has a little camber on it, so keep that in the back of your mind. Take a look at your shaving when you are off to the side and see if it feathers edge to edge across the shaving. That will tell you something about your iron.
I’ve also had a problem with this, so……I bought an old wooden rebate plane on ebay(£8) and
made sure the sole is at rightangles to the left hand side(I’m right handed). Then I screwed a bit of MDF to the left hand side. This is the same length as the plane but deeper and projects about 4″ below it but you can alter that to suit your situation. I added a dinky little knob to hold onto. Just hold the MDF guide to the side of the board and the plane will square up the edge.
It works a treat.I straighten the edge with a long plane as taught by Paul. Oh by the way, sorry for mentioning MDF in polite company. You could use a bit of wood. Tom
Here’s a little trick I figured out, don’t know if it’s widely used or not, But i take a small perfectly square offcut and drill a small hole to insert a piece of chalk (or charcoal) at right angles to the piece, I run that along the edge like a marking gauge and it shows up any high spots quite nicely.
The key word here is relax. If it’s going awry, stop , take a deep breath, relax the shoulders, take a light grip on the plane and try again, and try not to press down so hard.
Remember, it’s the plane (or the saw) that does the cutting, you just move it backwards and forwards.
I still struggle with planing square because my body mechanics always tend to lean left. I subconsciously put more pressure on the left side of the plane, and I have to continuously fight this tendency (mucks up my sharpening, too). This is another thing to keep in mind. Just like sawing, it’s not the tool its your mind-body interaction with the tool that creates the end result.
If you are out of square in different directions along the length of the edge then you have not straightened the edge yet.
Hi MB (& Paul),
Just want to add that from my own personal experience (if you’re having serious problems with squaring edges and ends) first check that the sole of the plane is flat and then that the blade edge is sharp all the way across and is aligned parallel to the sole. If after getting all that right you’re still having problems holding the plane square on to the work then my suggestion would be to use a Shooting Board to guide the plane. All the best & persevere!
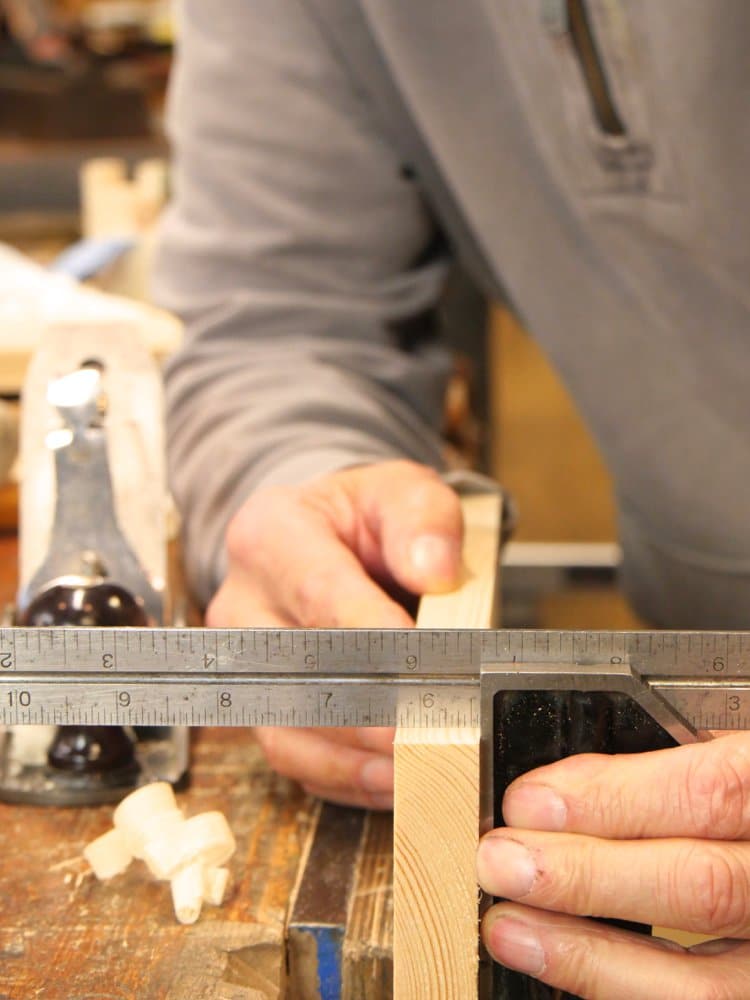
MB, what works for me is to make a pencil or knife mark on both ends of the piece with my square. I check it often to see if I am planing square to it or not. If I notice I am planing at an angle, I would normally take a few controlled passes on the high side, using the fingers on my left hand as a fence. This sometimes creates a subtle “peak” in the center line of the piece, which you can then remove with a few light passes. I mark both ends because sometimes I am off-square only on one of the ends, and thus the correction has to be somewhat local. when this happens I mark with a pencil the high areas I want to focus on. I have no idea if this would be “Sellers-approved” technique, but hey, it works for me.
I’m also having a bit of a problem with this, and it’s driving me nuts. After reading this post, and the discussion, I headed out to the shed to try to analyse the problem, turning a load of 20mm thick pine to shavings.
My edges generally end up higher on the left side (I’m right handed). If I try to correct like Paul describes, I may get it right at the start of the stroke, but it will twist towards the end leaving the right side higher. This is what I tried (not necessarily in that order).
1. I found that my diamond stone had a belly, leaving the edge of my iron slightly hollow. 10 minutes with a flat stone fixed that. That improved the shavings, but still not square.
2. The edge is parallell to the sole. Shavings are equal on both sides. Result the same.
3. The sole is lapped flat on a high precision cast iron surface plate. Result the same.
So, I’m thinking the plane is not the source of this problem, which means I am.
4. My grip is not the problem. It is relaxed and I am pushing parallel to the surface. I’ve even tried to not grip at all, just push with my palm and guide with the fingers on my left hand.
5. I tried to position my body so my underarm is parallell to the movement. That improved things somewhat. This helped in the sense that now I generally are high on the left at the beginning and on the right at the end of the stroke.
So, while I managed to get things a bit more straight, I could not remove the twist I introduced. Any advice is appreciated, but I suspect it’s all down to practicing.
Kjell
You know, what I wrote is from my 50 years using a plane six days a week 50 weeks a year. These are the things I concluded because they are what I do at the bench. It seems that most people expect to master the plane after a few hours planing when any skill takes time and not necessarily practicing on a piece of wood but on real projects in real life situations. I suggest people new to planes make a planter or a shoe rack. Plane the rails and build. Instead of expecting these perfect pieces of furniture make picnic tables and give time to develop.
Practice, practice, practice….. now that our weather is finally turning I will have more shop time. Working tonight on some carry trays in oak, I had good opportunity to use the advice above. A freshly sharpened plane makes such a big difference.
Thank you Paul for another reminder to let the plane do its thing. What impressed that on me the most was your demonstration of pulling a plane with a cord attached to the front knob…no downward pressure what so ever and still nice shavings.
Real projects is indeed what I do.
At the moment I am making furniture for my shed. The work bench is finished, the tool cabinet almost so, and then comes a step stool for my children (so they can get up to the work bench and start building stuff), and a stool for me. All of these pieces are good practice, and not very critical when it comes to final appearance.
A bird feeder is also planned, as well as other less critical projects.
But I also feel I need to just practice on scrap from time to time. Focusing on just one aspect of the technique at the time, building muscle memory.
Anyway, thanks for tons of good info, your videos are excellent.
Kjell
That is a golden nugget of information that I will hold onto forever! Thank you.
Sorry keep forgetting that when I hit the reply button on a smartphone it doesn’t put the comment in the right place. Some weird bug on this blog. Anyway I was responding to this:
“If you are out of square in different directions along the length of the edge then you have not straightened the edge yet.”
Practice Practice Practice. and pay attention to what’s different when you go askew.
Practice time is key. I struggle with making square edges. I built a poor man’s jointer to aid me while I develope my hand planing skills.
It’s a flat surface with a strip of 80 grit paper and a 90 degree fence. When I fail to achieve a true edge with the plane, I use this jointer to straighten things out so I can move on without destroying my work piece. I get a little better with every try. I get a little better with every try.
A post like this, and the following discussion is really helpful. Some time spend practicing the various techniques didn’t do much good at first, but last night I went out to true up some pieces of wood. That’s when magic started happen. Things just came out almost dead square. Well within tolerance for what I needed
Kjell
Glad to hear that Kjell. After 50 years I still love my working. Don’t know how I would be with enforced retirement. Probably would not be a good retiree.
Hey guys,
I don’t have any machines, so I mill all my wood from rough sawn with planes. At the beginning is hard because you don’t have the sensitivity hence the practice advise, is a great one(workbench and joiner’s tool chest phenomenal skill builders).
One thing that had happened to me a lot, and no one said yet, is that the reference face wasn’t a good reference at all, if it is slightly twisted for example every time you run your plane on the edge and straighten it, your square will tell you that you are out of square, and no matter how hard you try to correct it, when you make your “final full length” pass you start all over again.
Mateo
That’s a _very_ good point Mateo, and reinforces the need to always start by flattening your face side before going near the edges – and use your winding sticks! I find that needs doing even with PAR (machined) wood. It has often moved or twisted after the machining, before I bought it, or in storage.
Paul, Let me ask you this When you sharpen your Plane Irons do you work on the 30 degrees first. Lets just say Im changing from a flat bevel to the 30/20 degree micro camber that you use. would you focus on the 30 degree first and then start dropping down to the 20 degrees or do you start dropping the whole time your abrading the iron. I ask because Im still having a problem with more metal is being abraded from the center of the blade than the sides so I have to manipulate the process by raising up ever so slightly , one side at a time. And I have four or five sets of Diamond stones . course,med,fine, and all do the same thing so it has to be something that Im doing.
but Im watching carefully to make sure that Im not placing all my pressure in the center of the blade. I put my fingers in the same place that you are. Can you think back did you possibly ever run into that scenario?
And what to do about it. I do a pretty good job doing it the way Im doing it but I am getting a camber across the width of the blade. I would like not to have that for these very reasons of squaring up edges.. Thanks
Chris
Winston Churchill, who was the toughest man of his century, also said, “When you are going through Hell, keep going.”
If ever there was a doctoral thesis on hand planning, this particular blog is it. I’m 75 and beginning with my Grandfather in the late 40’s and early 50’s; through my father and uncle’s; through my high school shop teacher; and my lifetime experiences…this is how it looks and feels…this is HOW it is done. Thank you Paul.
I’ve had a completely different experience from many of those here. I started last weekend on my first project ever which is a small work bench which will have drawers underneath. I’m using Douglas Fir because it’s inexpensive here and I have flexibility on the quality of the finished bench (knowing I’m going to have growing pains). I started by planing the legs to dimension and the first thing I noticed was how iridescent the planed wood became as I planed. The first side took me a while, I won’t lie, to flatten it perfectly. The second side took half that amount of time and the third side cut that time in half again. Each leg went faster and faster as I began to understand how deep of a shaving I needed to take and the direction I needed to go.
Next I cut the 4 X 4 inch legs to length. The first cut made me laugh it was so cockeyed, at least a quarter of an inch out of square. Well, it took forever to plane the end grain but eventually I got it planed and square. Just as before the second cut was much improved but the final two were cut nice and square barely above the line. I really only needed to clean the fuzz to finish them off.
As I finished each leg I stood them up nearby as I worked and when done I noticed every one of the legs were standing on their own, perfectly vertical and perfectly the same length. I smiled to myself and thought how wonderful it was! I just want to say thanks Paul for the great coaching I can’t wait to get to next part where I’ll be doing some mortice and tenons!
Hey Mateo, I have the same problem. Ive been working on that issue all night tonight and I think whats happening is the iron is not as straight as it should be and so I’m not getting the same thickness shaving across the width thus causing it to not be flat again when you take that final pass. I stopped using a honing guide and started free handing when I started Paul’s Method of sharpening. I really like the degree of sharpness and the way the micro camber feels in the cut, but Im only getting it right about 50% of the time which is extremely frustrating for me. Im spending a lot of time in front of my Diamond stones these days. Lol
I’d like to add a couple of points to this invaluable conversation: (1) grip on the handle: Paul’s advice to relax is spot on but devilish difficult to adhere to because the design of the handle actually invites a firm grip (especially when you hit a knot or difficult grain) and a firm grip can twist the plane off-level. If I’m going wrong I remind myself to ignore the shape of the handle and send the fingers of my right hand straight forwards, pushing the plane with just the web between fingers and thumb. A few passes like this installs a scrap of “muscle memory” which helps get me back on track. (2) use the legs. Once the plane is in hand, the urge to propel it with the muscles of shoulders and arms is virtually irresistible. But for many, probably most, of the lengths we’re planing it’s perfectly possible to move the tool with the muscles of the legs by simply transferring our weight from the back foot to the front foot, which brings the whole body forwards, in which case the arms and shoulders are there to control and direct, not to propel. Different, of course, with longer lengths when you have to walk the plane along anyway.
Really interesting idea, Gavin. It’s like an automatic square machine…I’ll have to try that out one day.
As I have planing trouble similar to many of those described it is a relief to hear I am not uniquely cack-handed.
Recently, for a bit of fun, I started to use a wooden jack from a house clearance. Suddenly my planning has improved, it might be the lack of weight, having no levers / moveable frogs, the lovely old steel or just a bit of luck. Having in the past bought a new LN, fettled (or perhaps ruined) a Stanley #4 this is the best tenner I’ve spent for an age.
On the grounds that pride and fall are near neighbours, having typed this I will probably find that my planing goes to the dogs again but at least I know that it can be made to work.
If you’ve seen the latest episode of the assembly table (episode 4), it would seem like it was produced after this discussion. I’m sure it was a coincident.
Anyway, Paul does spend some time there on how to square an edge. It’s a plywood edge, but the technique is still the same.
Kjell
Lucky you! (You must be a ‘natural’. Long may it continue.)
Offshore Organbuilder (there must be a story there) – I think what I was trying to get at is that I worried about getting everything just right and every time I went wrong I went back to fussing about the tool. I have yet to discover how to fuss about a wooden plane: sharpen it, use a small hammer to tap it until it cuts equally across the mouth and go for it. Strangely, I think that when trueing up an edge I find the lack of weight helps the control. Looking back up through this thread, the tote design and lack of a front handle may even be part of what makes it work. But in any event – in my case it is a matter of less fuss and more practice – at least until it goes wrong again.
Robert