Magnetised Saw Sharpening Holder
For more information on saws, see our beginner site Common Woodworking.
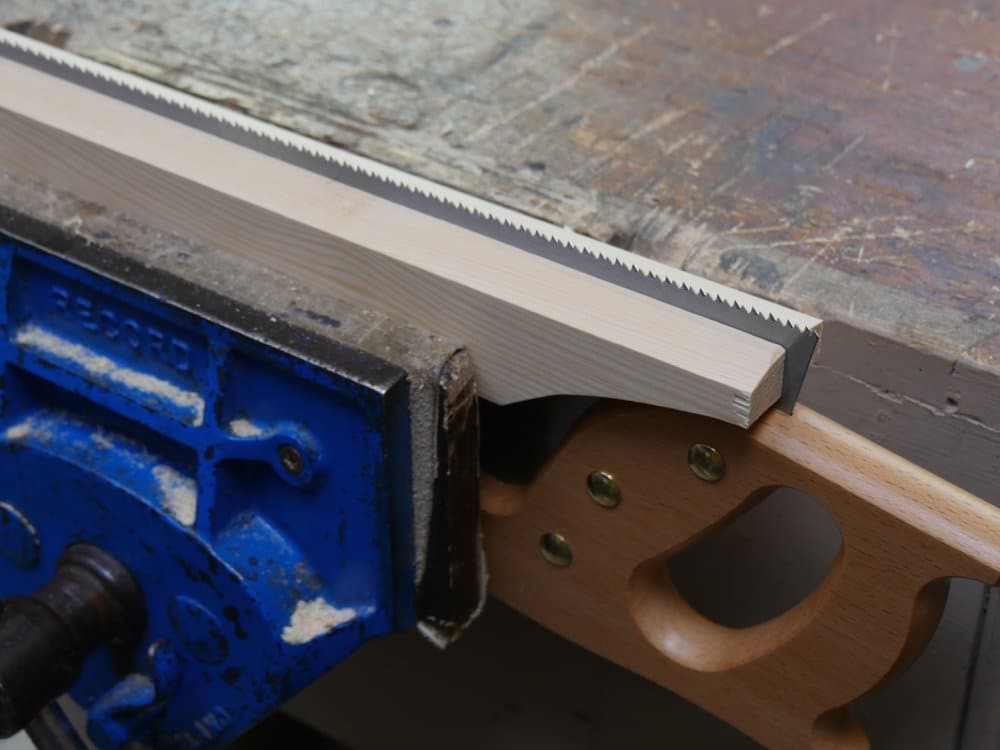
First I used stock I had, which is 22mm (7/8″) by 45mm (1 3/4″) and in my case I made the holder 710mm (28″) long, which takes all saws up to my longest saw of 660mm (26″). The thickness of the combined two pieces should allow the handle of the saw to fit into the bench vise for securement at that end of the saw when filing. It’s just more solid.

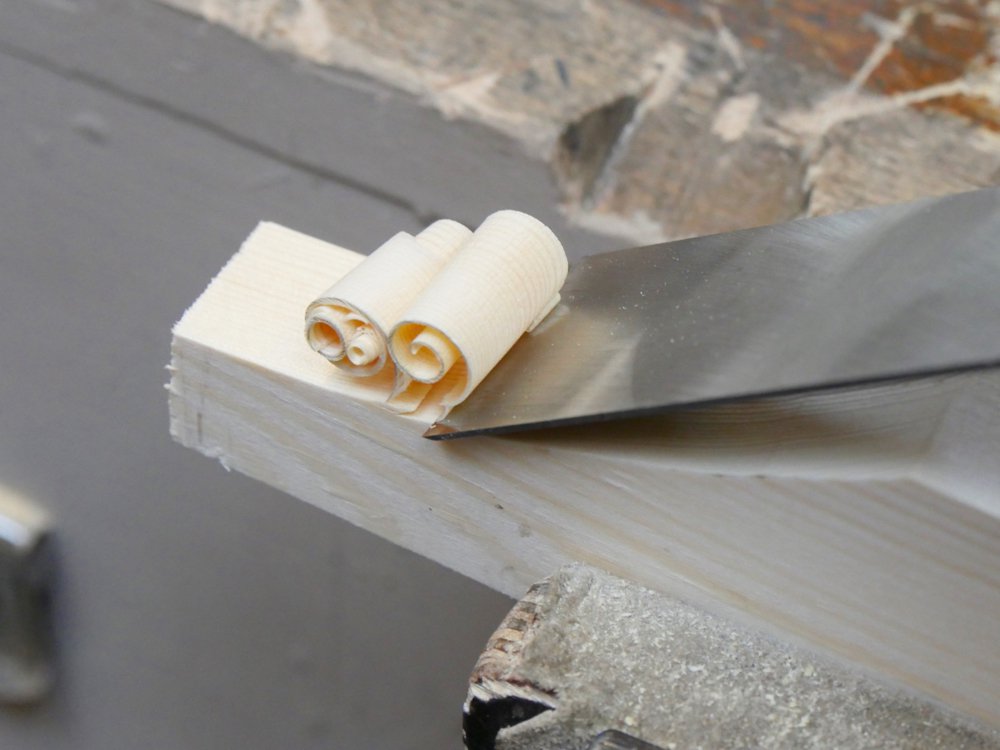
I cut the usual scallops to the ends of the pieces as shown to allow clamping up to and including the heel of the saw. Using the chisel bevel down firstly to remove the bulk of the waste and then refining the cut to smooth out any remaining undulation works well and negates the need for a bandsaw or coping saw.
The screw is centred 25mm (1″) from the end of the holder at the opposite end and centred between the top and the bottom (see 5th image below). I drilled a 5mm (3/16″) hole through the one piece only. I used a larger 38mm (1 1/2″) flat bumper washer but any washer over 20mm (3/4″) and up will work fine.
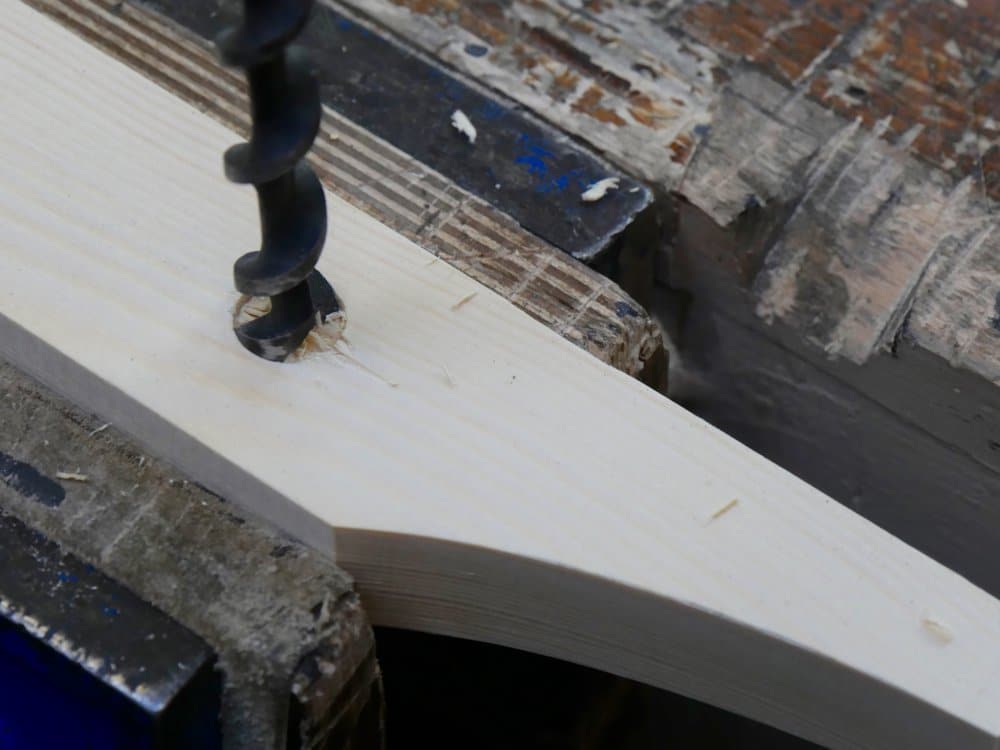
I used three round magnets 12mm (1/2″) diameter but any diameter larger than that will work. Start by boring a shallow recess the depth of the thickness of the magnet near the arch cutaway as shown. I made my first recess 100mm (4″) from the end. The other two are 200mm (8″) on centre. 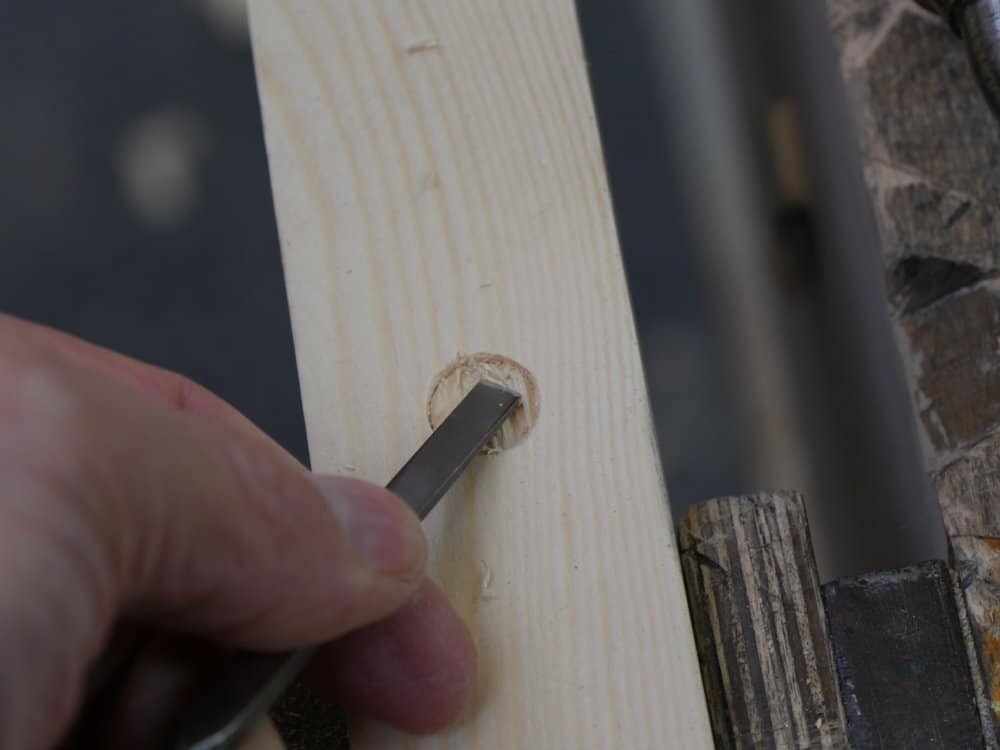

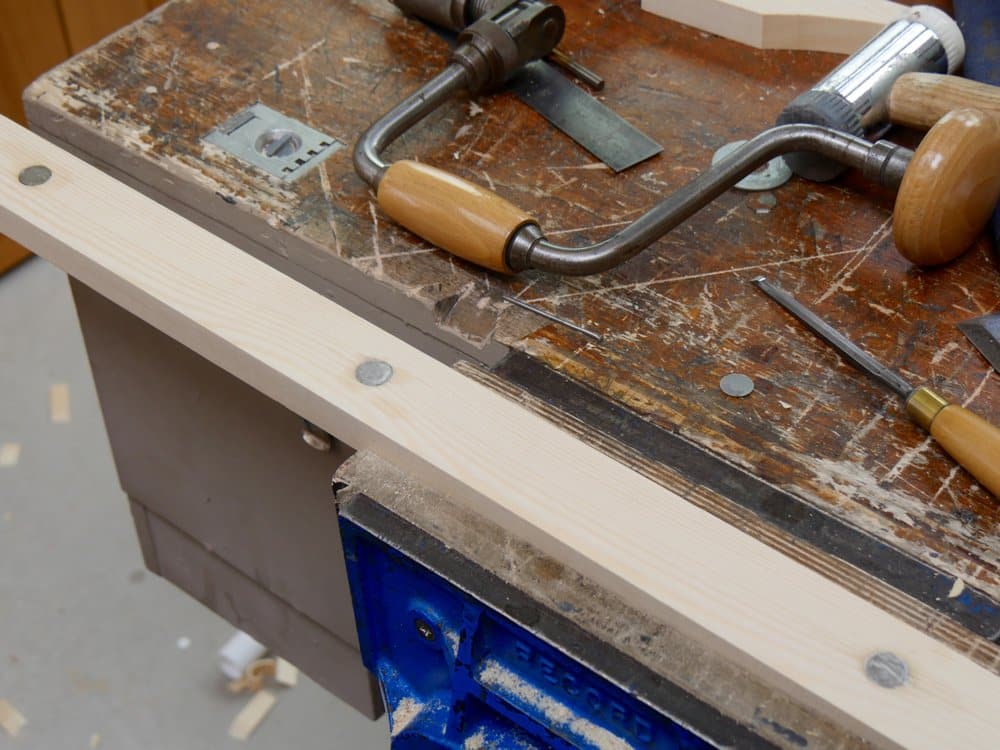
Assembly is just a matter of placing the washer between the two rails creating the holder and cinching the screw down fairly tight. If you prefer you can change the screw for a bolt and nut but just a screw is fine as it doesn’t need tightening or slackening to use it.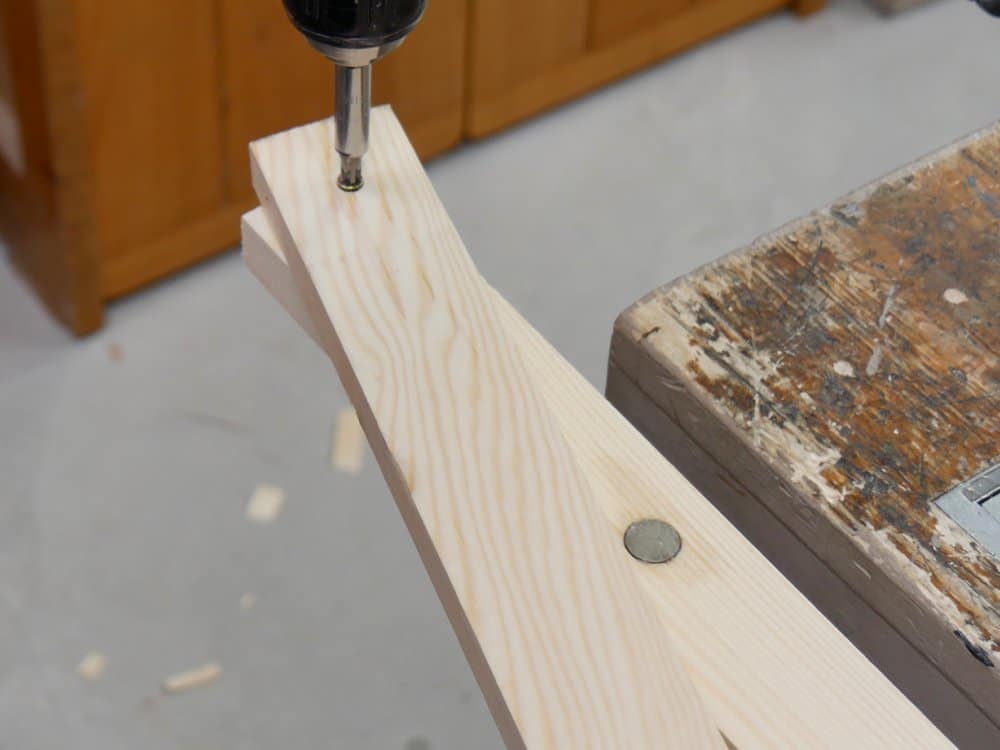
Now you can use the holder as is, but I like to bevel the top edges away from the meeting line of the two pieces. This is a practical step as it allows a little better access as the handle of the file and your fingers near the end of each stroke with the file.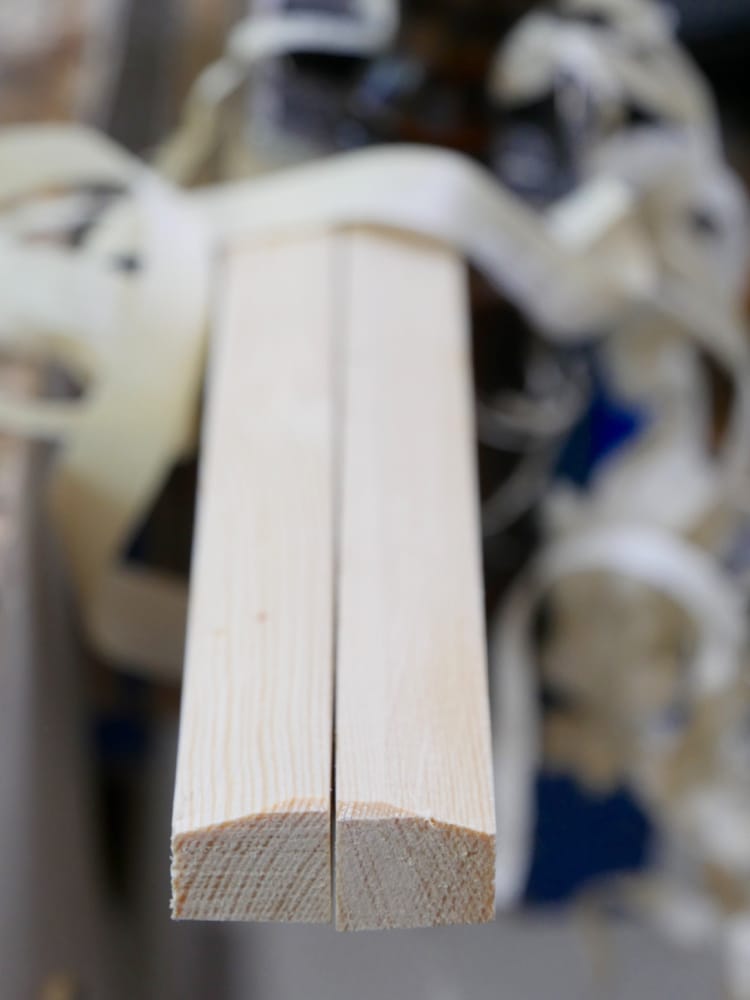
Once made, pull up the non magnetic side, slide the saw into place and register the height you want above the top edge of the saw teeth. 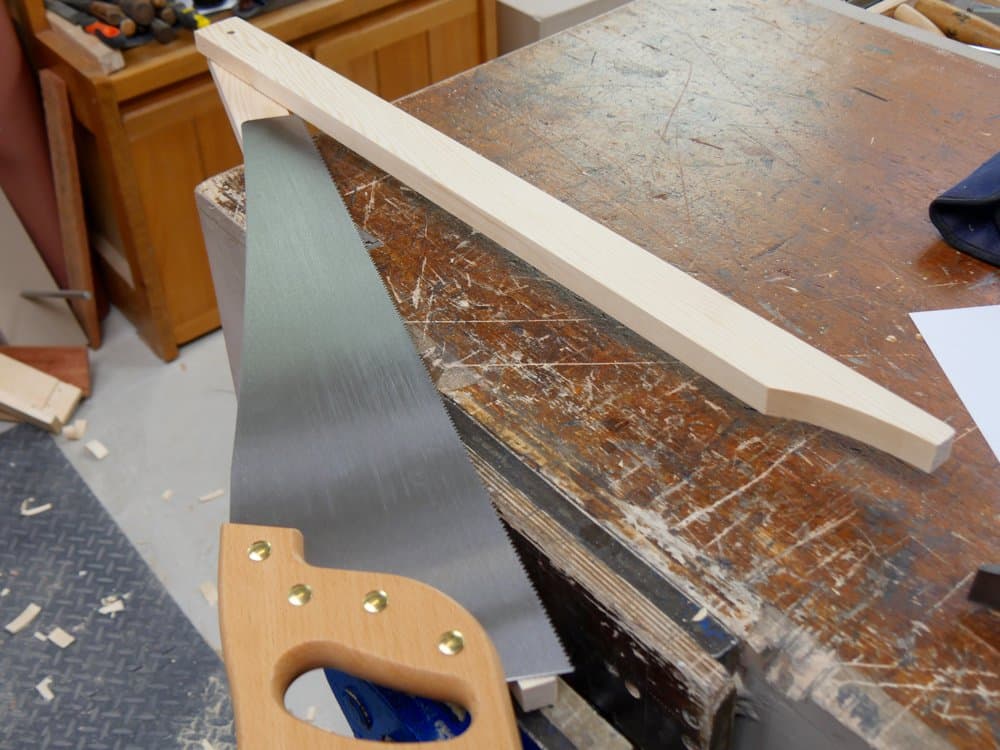

Well done as always, you are a true gentleman.
btw I was born in 1961 and have been hands-on all my life, plan on staying with hand tools.
What a great idea! since I haven’t made a saw holder for my vise, I find myself trying to hold two pieces of wood to either side of the saw while adjusting it in my vise…I think I need about 4 hands to accomplish this with any degree of success.
Adding the magnets immediately makes this a much more viable method for those without a dedicate saw vise.
Thanks for sharing, I will most definitely be implementing this in the near future.
Dear Mr. Paul Sellers,
The magnets are not a good idea. It will magnetise your saw, wich will stick to your steel grit from filing wich will result in sticking steelgrit to your file. But I do admire you on advocating filing your own saws.
I still think it is a good idea for aligning the saw. I haven’t had any issues with this at all, but then my magnets are not too strong. I have filed my saws for fifty years now and still file the same ones I began with as an apprentice.
Dear sir,
I filed 150 saws last year, and a batch of probably 15 of them were filed fife years ago with the help of a plastic attachment to show the angle off the flame needed in them . They were crosscutters for treetrimming, so they needed flame in them.This was attached to the saw by two small magnets, diametric no more than say 1/2inch. I still have them magnetising the steel from the filing, so I do not want to outwith you. But you can easely test by holding the used file near the steel grit if you want too.
Open to hear all considerations, Henk. It’s another point of view.
Even if the steel becomes magnetised, it will not hold it for long. When my students in a physics course magnetise an iron nail with neodym magnets, it only lasts a few minutes. Besides, it will lose the magnetism instantly if you tap firmly the magnetised metal on something hard.
Henk,
It would take prolonged contact with magnets to magnetize a saw. Sharpening process is relatively quick. Should not be any problem as you indicated.
Best!
I look forward to seeing the new sharpening videos
Ok it’s time…Paul Sellers’ tools are so sharp, Chuck Norris goes to him for a shave.
Sorry
I’ve bought several Dovetail saws and a Disston panel saw off EBay as part of my tool collection starting my new hobby and all need sharpening. This will help do the job perfectly.
Thanks Mr S
Are the battens hollowed? Otherwise there’ll be hardly enough clamping power outside the vise. One could use longer battens (longer than the saw) and srew them together.
Cheers
Pedder
I think people might be complicating what started out as overtly simple here. It’s strange how we tend to do that. This works. Something that works so exceptionally well can become suddenly complicated. The answer is they are straight, not hollow and not round. Placed in the vise starting at one end, you sharpen until you feel a little extra vibration at the overhanging end, slacken the vise slightly, and move it along the length of the vise jaw. Repeat as needed. The saw is firm with every stroke and we need nothing more.
Is it really more complicated to drill two holes for screws instead of 4 holes for magnets? 🙂
What???
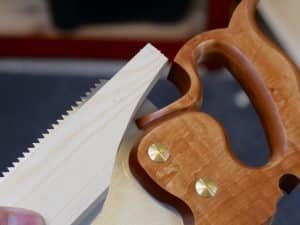
Paul, what is going on with the saw tooth pattern on that saw? I have seen it on several saws, including some in posts on Masterclasses from folks wondering if they had a wonky saw. It looks like “cows and calves.”
Aha! Phil and I were discussing this today because we were looking at the new video on sharpening crosscut saws. The teeth are all exactly the same height. In the image the teeth look different heights because the fleam side alternates between the teeth so you see only one side with fleam every alternate tooth. Because the fleam is bevelled it creates the illusion of one tooth being bigger than the other. In the video we just made we show this clearly.
Interesting. The pattern does seem to disappear in the second photo of the saw.
I posted a blog to show and explain the difference, Mike.
Just in time for the next saw up for sharpening. Have I thanked you profusely lately?
Lee Valley sells the magnets. I’m a wee bit cautious about 3/4 inch magnets because of theit pulling power.
Quote LV: “Strength of Our Rare-Earth Magnets:
“The maximum direct-pull strengths you can expect of our rare-earth magnets when sandwiched between two pieces of steel are listed here.”
Magnet Size Magnetic Strength
1/4″ x 1/10″ 2.5 lb
3/8″ x 1/10″ 5 lb
1/2″ x 1/8″ 9 lb
3/4″ x 1/8″ 22 lb each!!!
1″ x 1/8″ 30 lb each!!!
So, if I used three of the 3/4 inch guys, it would take 66 pounds to separate them from the blade. I think I’ll use three 1/2″ magnets. and if need be add one or two, so I won’t have to include a two-foot wrecking bar to my saw-sharpening kit.
(or, for that matter, having dreams about newly sharpened saws flying across the shop. — shades of the movie “Carrie” for those of use who remember it.)
Yes. Mine are just magnets not rare earth.
A magnetised file can be “degaussed” (like the old CRT TV tubes).
The process is as follow: use an electrical spool (through a low voltage transformer supply)
Put the file in the spool up to the handle, switch the transformer on, move the file slowly out of the spool until you are about one meter away from the spool. switch off the transformer.
This only works with a real transformer with alternative current output. It will not work with a battery charger.
The spool should preferably be done with enamel insulation. A thightly coiled wire with synthetic insulation will not allow heat to be dissipated and will burn if used more than a few seconds.
As the electrical resistance of the spool will probably be very low, an electrical resistance should be placed in the low voltage circuitry to limit the current to a value acceptable by the transformer.
Let’ say you use a door bell transfo with a 8 Volt 10VA output, the acceptable current is 10:8=1.25A . An automotive 12V 15W bulb should be more or less ok (15/12=1.25) as a resistance.
Don’t put the spool near other electronic devices, credit card or other things sensitive to magnetism.
The spool produces a sinusoïdal magnetic field which change direction 50 times/s (60 times /s where you use 60Hz electrical supply) while passing through zero. While taking the file away, you ensure that the magnetcic field to which the file is submitted becomes weaker and weaker leaving a very low residual magnetism if any.
If you are not sure about what you do, don’t do it.
Sylvain
Maybe a big whoops. Corresponding with an expert from TGIAG (they make most excellent saws and stuff), a very nice fellow pointed out that when you are finished filing a saw, what have you got in addition to a sharp saw?
Answer: metal filings.
Paul, does this happen to you, or is there a magic Sellers solution to piles of filings stuck to your magnet?
None, but my magnets are inside the holders so when done you lift the holders and saw from the vise and the filings fall away. Even if the filings do go to the magnets, and they don’t, surely you just pinch them off. No more comments from me on this folks. i spent a little too much time on a non starter from the beginning as there was no problem from the start.
Now if you can just do something about that ugly saw handle.
What’s wrong with saw stocks, I started as a joiner apprentice in 1957 there was
around 25 joiners, all used the stocks . You could use them on site propped up against
a wall or something solid, and placed at the right height for eye level.
I still have a set in the garage, but I must admit my eyesight makes it easier to use a throw away saw now.
Not always as convenient as two sticks and no one was dissing any other method, Brian. It’s important to be open about new possibilities i think.
As usual … Brilliant!! I swear Mr. Sellers, you have more ‘common’ sense (which seems to be getting less common by the day over the years) than the next 100 people I will bump into. Your website and multiple series of programs has as much to do with teaching us all how to think, or really in my case un-think much of what I have learned over the years! Keep up the good work, and thank you and your crew for all your efforts and hard work. There always seems to be a certain amount of whinging no matter how incredible the concept or the post?!