Sharpening Your First Crosscut Saw–Part 1
For more information on saws, see our beginner site Common Woodworking.
Introduction
I have written this blog post for those who have crosscut saws that need sharpening. It is not about restoring a crosscut saw (even though sharpening is a restorative process), but for those who bought a crosscut-pattern saw and dulled it through normal use. Restorative work for neglected and abused saws is a more advanced level of saw sharpening I may present later. Along with this blog we have created a new video which is in the edit phase now and will be posted on woodworkingmasteclasses.com for free shortly. In the mean time you may want to sign up either for the free subscription or paid membership. I suggest the free subscription as this also gives you access to a mass of tools and techniques videos as well as methods of work and more. Here is the link. Once you are signed in as a free subscriber you can always upgrade for the project videos when you feel you are ready to tackle any of the projects that match your skill level.
Sharpening crosscut saws
It’s not complicated to sharpen crosscuts but effectively it becomes a little more complex for a couple of reasons, so I think I can explain why here and then follow up by showing the video we just filmed which should be ready sometime in the near future.
The difference with crosscuts

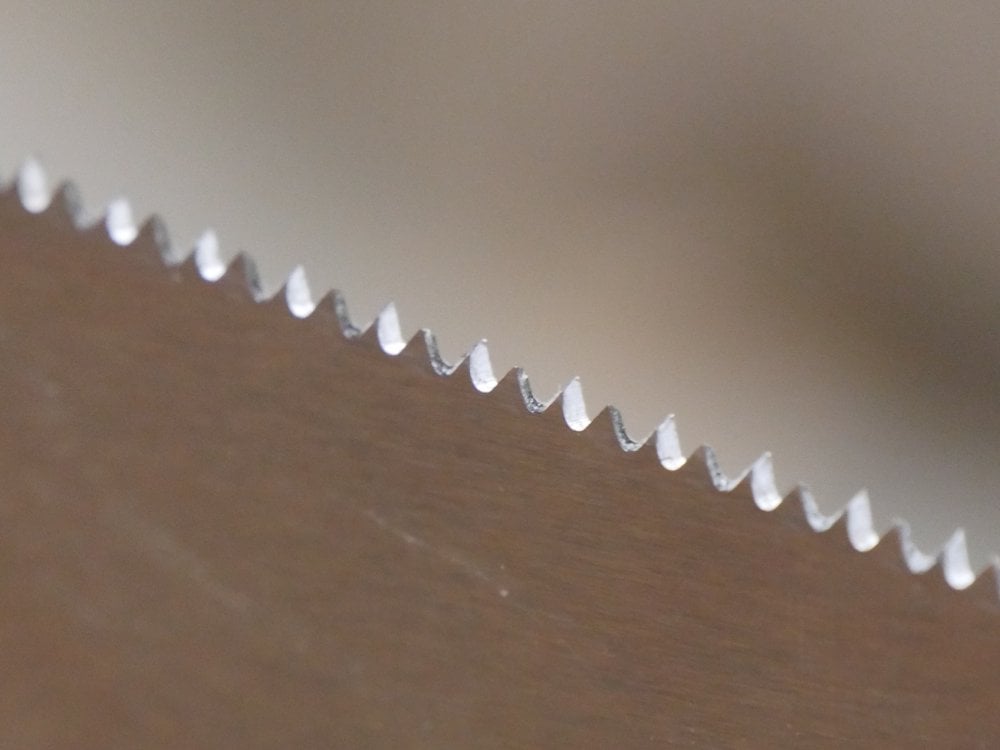
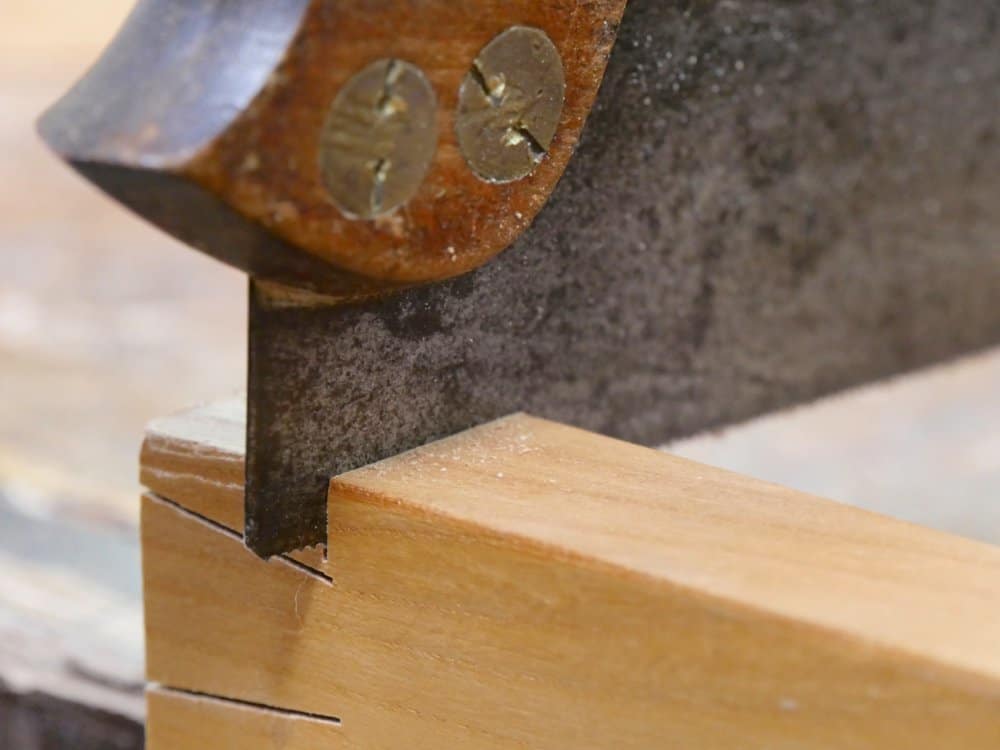
Crosscut saws must be sharpened from two angles on the insides of the teeth instead of just the one angle square across we use for ripsaws. In other words the ripsaw tooth or teeth are sharpened with the file held at 90-degrees in both directions, which is holding the saw file square to the plate along the line of the teeth and then square to the verticality of the saw plate when held vertically in a clamp or vise.
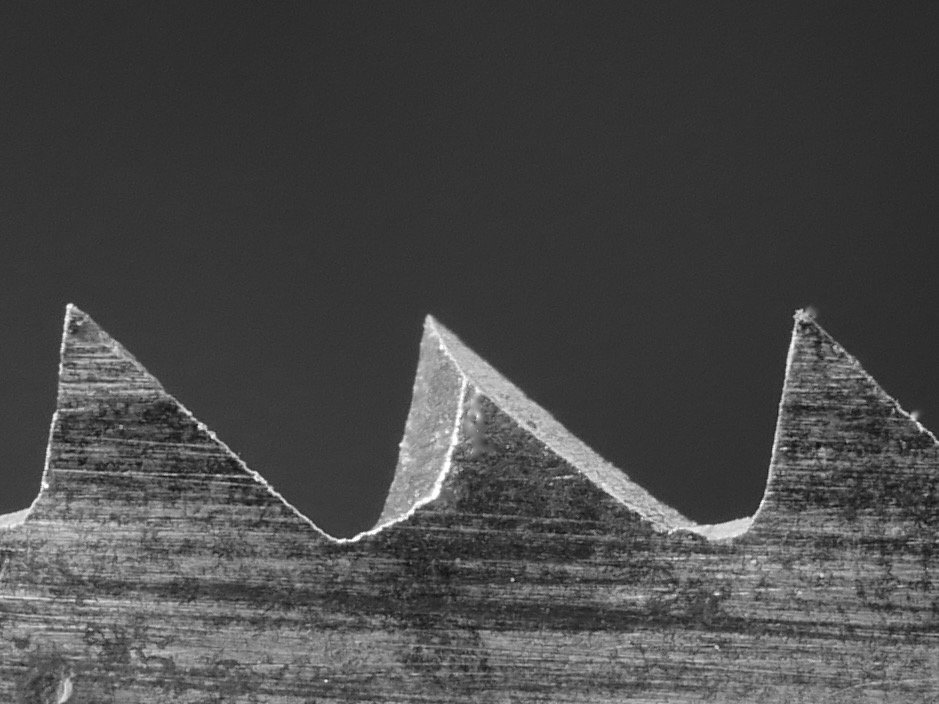
That means the file is level and square as the file stroke passes across the teeth. Because of this required bevelling profile to the crosscut teeth, when we file teeth, we must create a bevel to each side of the individual teeth, effectively creating the pinnacle or fleam tooth . By angling the file to an angle in relation to the back and front edges of the adjacent teeth, and because two of the three facets of the file cut the steel with the same file pass, we effectively develop two bevels to two separate but adjacent teeth at the same time.

That means that we sharpen the front of one tooth and the back of the other. 

The second dynamic that makes crosscut sharpening more complex is that, though the tooth size can be the same as say a ripcut saw tooth, the amount of steel left in the tooth or teeth after fleam-cut profiling of the teeth is significantly less. Because of the bevelled angle we are developing, when the tooth is completed, we have effectively removed a significant amount of steel from the tooth; without doing the maths, perhaps as much as half. It’s here then that we meet one problem head on. On smaller toothed saws such as back saws of different sizes, once established as a crosscut, it is all too easy to file out a whole tooth with a single stroke. This happens all the more the thinner the saw plate. That’s why, in the reality of daily life using saws of different sizes, it is very practical to determine which saws you will use for what and sharpen to task. Any saw with teeth smaller than say 10 points per inch of saw length is best sharpened for a ripcut pattern. With very small teeth and especially in thin plate stock it is very easy to file out a whole tooth even with a light and partial pass. Let’s look at the reason for sharpening backsaws primarily to a ripcut pattern now. Just to add clarity for the reasoning.
Rip or crosscut pattern––Which to choose?
Taking a look at the majority of our joinery work, and joinery is very different than saw ripping and crosscutting boards, most joints have significantly more ripcutting to them than crosscutting. This is especially the case with the two most common of all joints, the mortise and tenon joint and the dovetail joint. The sides of dovetails for instance on a double dovetail will have four long facets along the grain and only two crosscut facets that we need the dovetail saw for. 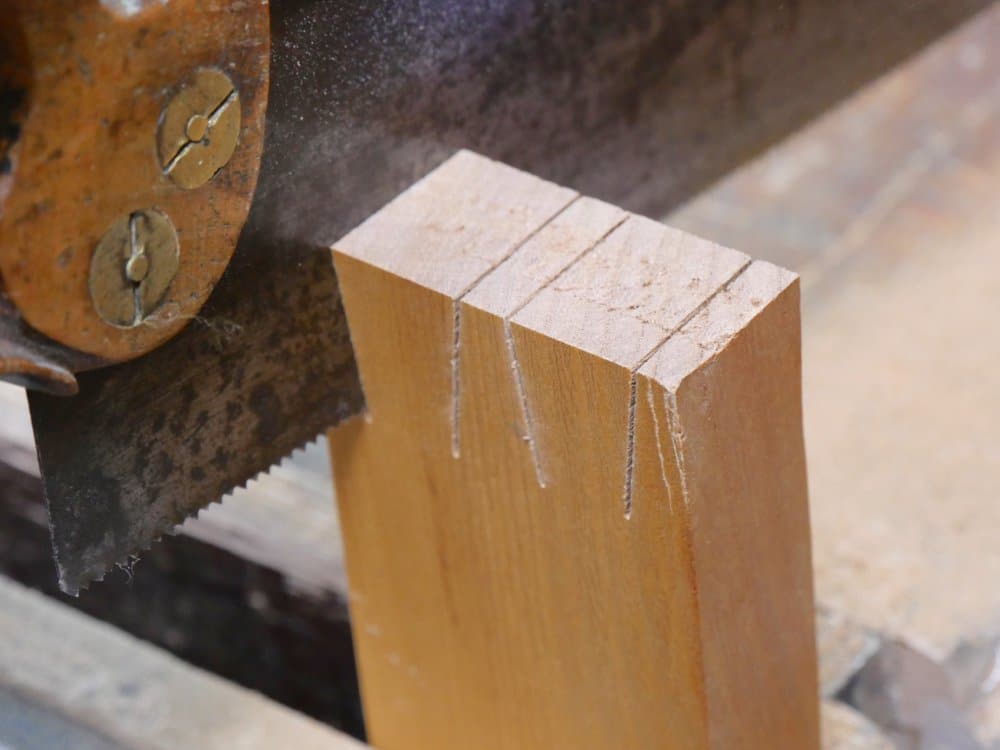
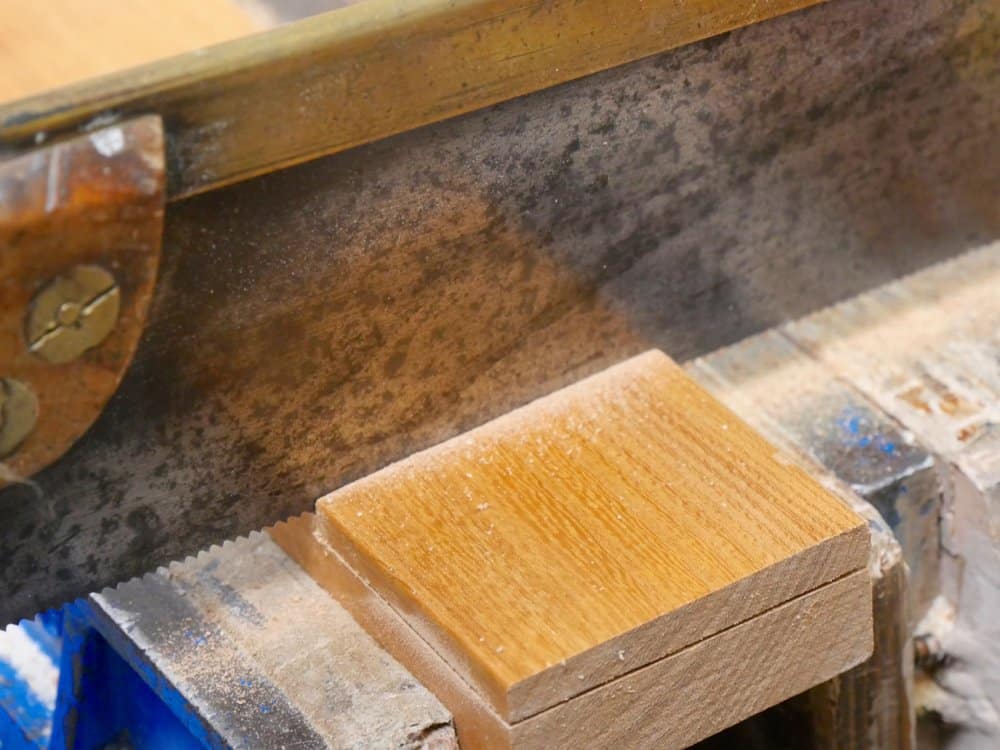
A tenon to the end of a coffee table rail as shown here has 6.18 square inches of long grain ripcutting to each side of a single tenon to form the cheeks using a tenon saw to cut them. 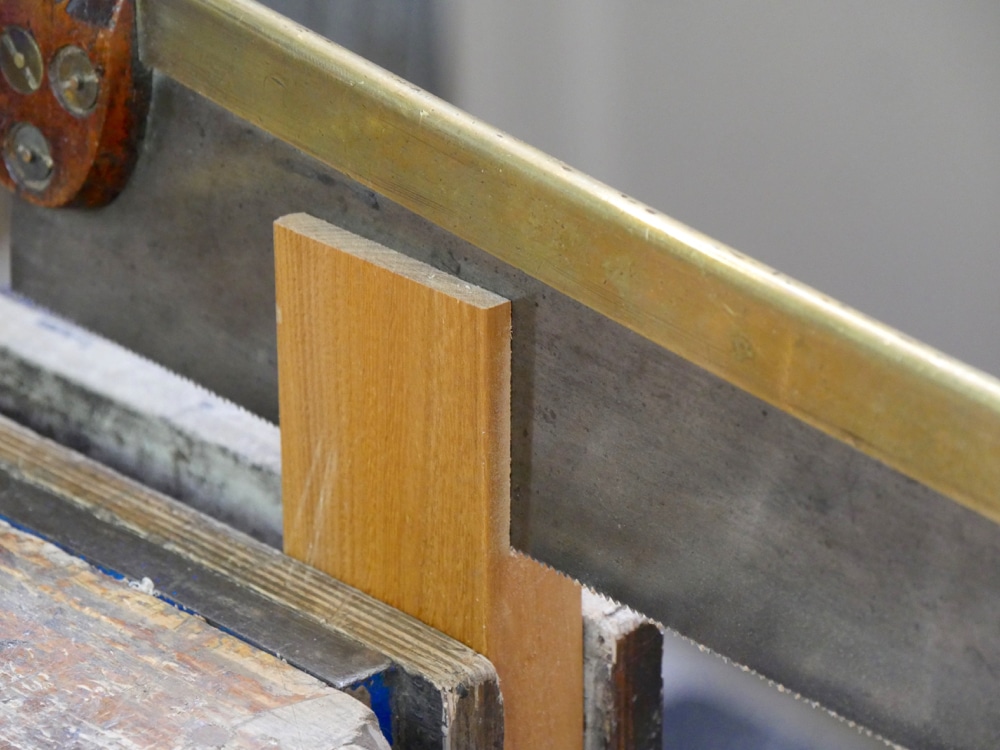
On the other hand if you were crosscutting wood to length on a large scale, which most people are not, there is a real case for a crosscut saw as the majority of your work might necessitate keeping such a backsaws to a crosscut pattern. So I think here I rest my case for sharpening the majority of joinery saws such as tenon and dovetail saws to a ripcut pattern and not a crosscut one.

In my view it is best to sharpen saws with larger teeth than 10 PPI (points per inch) to task, which means having say one 7 PPI saw for ripping and and another of the same tooth size for dedicated crosscutting. Mostly I choose this as a general trade pattern because the teeth are more commensurate to the wood grain we are cutting. Smaller teeth will readily crosscut and ripcut with the ripcut pattern as standard tooth pattern in joinery saws. The smaller the tooth, the less the saw needs to be dedicated to crosscutting. With larger teeth it becomes much more problematic and so we generally dedicate the saws to task. To sum up, saws with small teeth, 10 PPI and more, will readily ripcut and crosscut, whereas teeth 9 PPI and less struggle if not dedicated to cross- or ripcut patterns.
Now we have the logic we can look at the practice of the actual sharpening. Look out for Part II shortly.
After watching some of your past videos and blog posts, this one tied it all together for me. The light bulb just came on. Now as I look for good back saws on eBay, I know to ignore whether or not it’s rip or crosscut. What I really need to know is how many PPI, is it straight, who made it (and when if possible), dimensions. With your instruction, I can always correctly sharpen it to task. Another skill that puts me in the drivers seat. Thank you!
Before reading this blog post I have never thought about sharpening my own saws. I am continually trying to learn new skills and techniques. I have just started to read your blog but I am really enjoying it. Thank you!
Wait until you see the video we’ve done.
Once again you have made sense in a world where internet-forum heroes claim that you have to have a saw specific for every single type of cut that you make, which would mean a dozen or more saws.
Your years of experience that you are sharing with the masses are very much appreciated, showing that with only a few saws you can do pretty much everything that you need to do to create something out of wood.
If your book is half as useful as this blog post, then I am in great shape once I receive my copy.
Thank you again Paul. I have sharpened all my saws rip pattern using your earlier advice, and found them very satisfactory to use – much better than putting up with a dull saw. I have in the past attempted cross cut pattern (with fleam) and made somewhat of a mess of it. As a friend once commented, cows and calves. You have given me the confidence to try again, and with a clear target in mind. I need only ONE! Concentrate on getting a good cross cut saw at perhaps 8 or 9 PPI, and use that only for reducing stock to length. The other saws will work great for the joinery, or for ripping to width.
I nearly had a go at doing this earlier yesterday, but got sidelined by something domestic… I’m glad that happened because now I’l wait until I’ve seen the video.
Great timing… and no doubt it will prove to be another great lesson!
Thanks,
Regards,
Matt Sims
Well it all makes sense
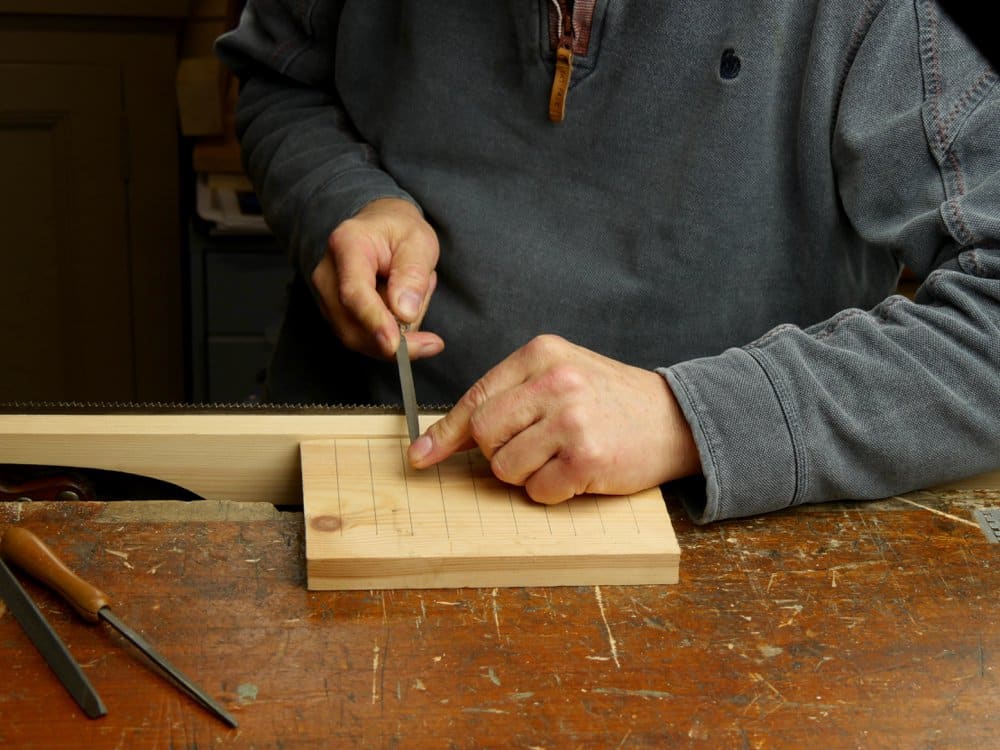
I see that Paul is using a flat block of wood with pencil lines drawn on to the correct angles for filing. This looks a good idea, if I’m correct it can just be slid along the side of the saw vice/bench vice jaws as you progress along the length of the saw. I like that idea, simple but effective, especially if you are new to saw sharpening.
Hi Paul, thanks for this detailed post. You have now dealt with both the rake and the fleam angles, but have you ever had any use for filing sloped gullets?
I don’t know what a sloped gullet is, Johan.
Hi Paul. In the ‘council of perfection’ you can find elsewhere on the internet, sharpening for cross cut includes fleam, horizontal angle of the file, rake, the verticality of the front face of the tooth, and also tilting the file slightly in the vertical plane to slope the gullet and also the top of the tooth, so that each tooth has a slightly pointed top to help cut the wood fibres at the side of the cut. Maybe this is why I failed to successfully file cross cut in the past.
Aha!!! We called that the “dropped hand” and there are many other twists and turns along the road of saw filing too, but I will always steer people toward what happens in reality at the bench in the day to day of life. Most people will end up like me trying different things to get to a new level of expertise. My work is getting people off the conveyor-belt mentality of machine only woodworking and providing the building blocks to build on a good foundation. Perhaps we=hen that work is completed we can start tackling some other things.
I’ve followed your advice regarding rip filing my joinery saws and it has served me well. The only time I’ve wished for a cross-cut saw was for cutting wide house trim (mostly base boards). Otherwise, there’s always a knife line to control whatever splintering might be caused by the joinery saw. I’m looking forward to the video though because I do want one decent cross cut panel saw and I have trouble sharpening them. My impression is that inaccuracy filing a cross cut leads to it cutting curves much more so than for a rip saw. For a rip saw, not cutting straight seems more a matter of having a bad tooth set.
Ed, I don’t think that this does make significant difference to the ‘run’ of the cut. I think you will enjoy the video too. At least I hope so.
Hi Paul
Having sharpened a fair few saws with your rip filing method with varying TPI’s, I still find it difficult to crosscut with them. Especially my 14tpi dovetail saw, it wouldn’t start correctly and chew up the grain on the crosscuts. Eventually I had to file it with a little bit of fleam to get it to work. Is there any reason why this could be?
Thanks
Hard to say without seeing. most likely the pitch is too aggressive; e.g. the front face of the tooth too vertical. This often depends on the saw itself and you can micro adjust by making the rake slightly less aggressive by adjusting the file. The difference is usually in the weight of the saw itself but it can also be the aggression of the user. On brass backed saws and especially the old ones, the brass adds significant weight to the saw that you generally do not get with more modern makers.
Re-toothed this evening my Disston 26″ , 8 TPI cross cut…or better. It was a cross cut saw. Now it has got fresh teeth with points on the same line, circa. I will wait your video before i fleam file the teeth..too high the chanche i mess everithing. To reform from zero 184 teeth took me a week. Great lerning experience but it’s better i wait for your video
It will be up on woodworkingmasterclasses.com Monday evening at 5pm “if all goes well and the creek don’t rise.”
I converted a 16″ No. 59 Sheffield silver steel to 9 tpi rip. It’s the hardest saw I ever filed. Problem came when setting, teeth just snap off. Anyway I refiled it again and it’s the best dovetail and tenon saw I own for 8/4 lumber. Just can’t add any set. Have you run into this before?
Thanks for the detailed explanation of sharpening. I have a number of old saws and I’d like to get them working again.
One note: the link woodworkingmastecasses.com is spelled incorrectly in the article. With the missing letters readers might not be able to find what they are looking for.
Fixed now. Thanks
I have 2 panel saws (they came in a lot) 20” long, both 10tpi (both disston d8). I sharpened one that was in a fairly good condition (just a little bent) and it’s working great (ripcut pattern, it crosscuts very nicely too), but the other one had some missing teeth and some bent too, but I had the impression that it was the teeth more than the saw itself (not sure yet). Anyway, I want to leave it as a 10 tpi crosscut saw (makes me sad just seeing there, maybe it can become a functioning saw), so I will be recutting and resizing the teeth as Mr. Sellers shows in his video. I do however was wondering if anyone here know at what point do I sharpen it for crosscut. In the video Mr. Sellers give the shape for the teeth and near the ending, at 25 minutes and 38 seconds ( https://youtu.be/mTqZTGPPRj0?t=1535 ) he starts to refine the teeth. I think that would be a good point to start sharpening for crosscut, but I’m not sure. Maybe it is needed to completely make it a ripcut and after that transform it into a crosscut? Not sure, I’ll appreciate any help.
PS: Double post??? Also, sorry for my terrible english