On Vises Part I
Bench vises
I’ve installed more vises through the years than I care to even think of counting, well over 200 I suspect. Add to that those I have coached in the fitting of them and it would triple that number because I used to teach a workbench making course to 16 students at a time, which included installing and fitting vises. Spanning five decades of periodic workbench making you inevitably discover different aspects and nuances that improve the workbench in terms of functionality and quality. Those who follow my blog will note that I have tried different things and recently I installed a couple of vises in two new bench builds made from reclaimed materials. A vise I recently settled on as a decent workbench vise is the Eclipse 9” bench vise made by or for Spear and Jackson UK. I bought mine via the Amazon jungle and had it delivered to my home here in the UK. I also checked around in the USA and with Highland Woodworking because they have sold these vises for a number of years and have rated them as worthy of stocking. This is one in the range of vises they stock and so they are available there in the USA from them.
Quick Release Means Quicker Holding Power too
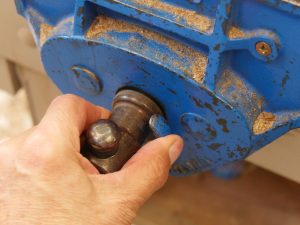
I am not sure why they called these vises quick release (QR) because the lever does not release the vise jaw from its grip but the handle itself. The QR lever facilitates a slide of the jaw without winding so it’s not technically quick release so much as quick slide. Regardless, in or out, the jaw moves equally well against or away from the wood being held and is extremely fast when it comes to anchoring the work or releasing it. With a single clutch of the spring-loaded QR mechanism the jaws move readily. I suppose in many ways I am indeed stuck on the QR versions with the lever adjacent to the vise handle because I find it the most practical and the longest lasting of any vise type I’ve encountered.j Remember that I am used to vises lasting problem free for around 100 years, even though I may well have only been one of many users throughout the life period of an old vise. 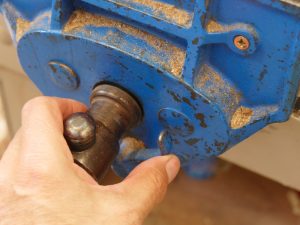
Installation
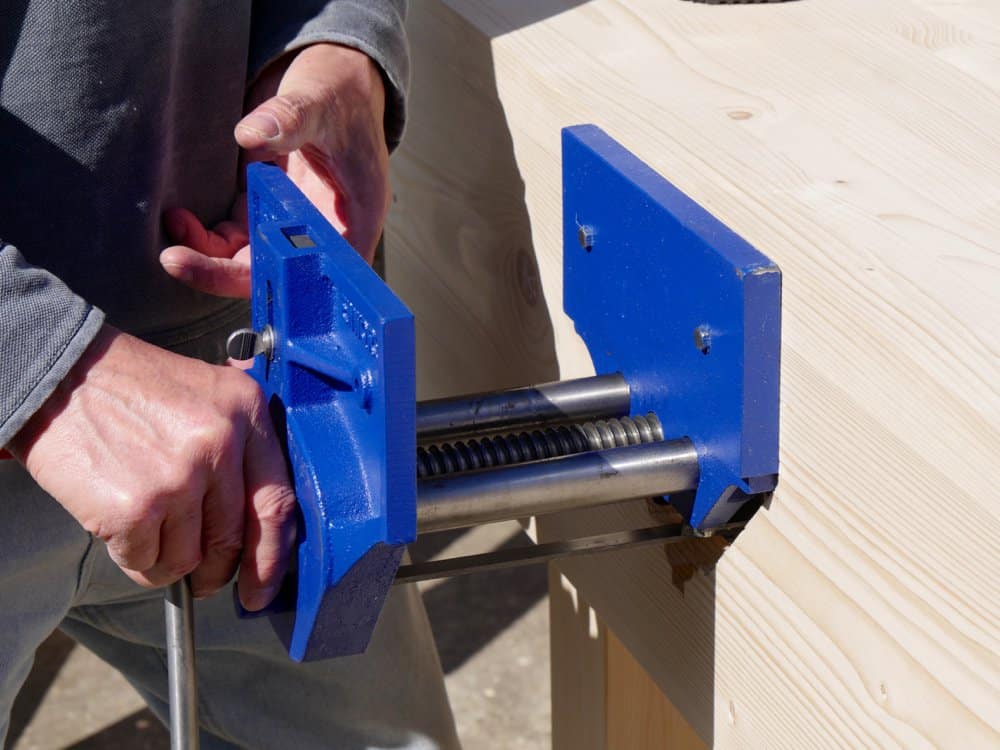
In this series of steps and pictures I have used hand tools instead of say a jigsaw. Jigsaws work great too if you own a decent one like the Bosch I have had for 20 years. With a series of holes, a handsaw and a chisel it takes about 15 minutes to cut out the opening to install the vise. There are no complications or idiosyncrasies to it but there are small details that make them perform perfectly and that’s what I want to cover here.
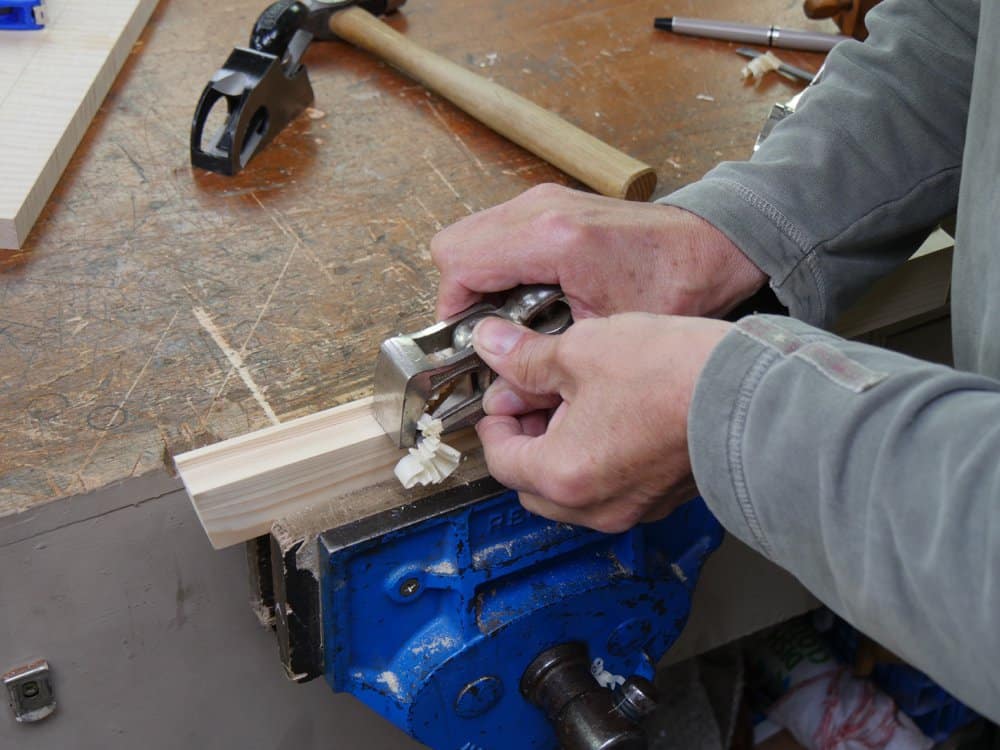
For the type of woodworking we woodworkers do we do need something totally immoveable, solid in weight and holding power and indeed efficient in the transfer and release of power. Mostly the vise is of course used for holding wood for operations like planing, sawing and creating joints. 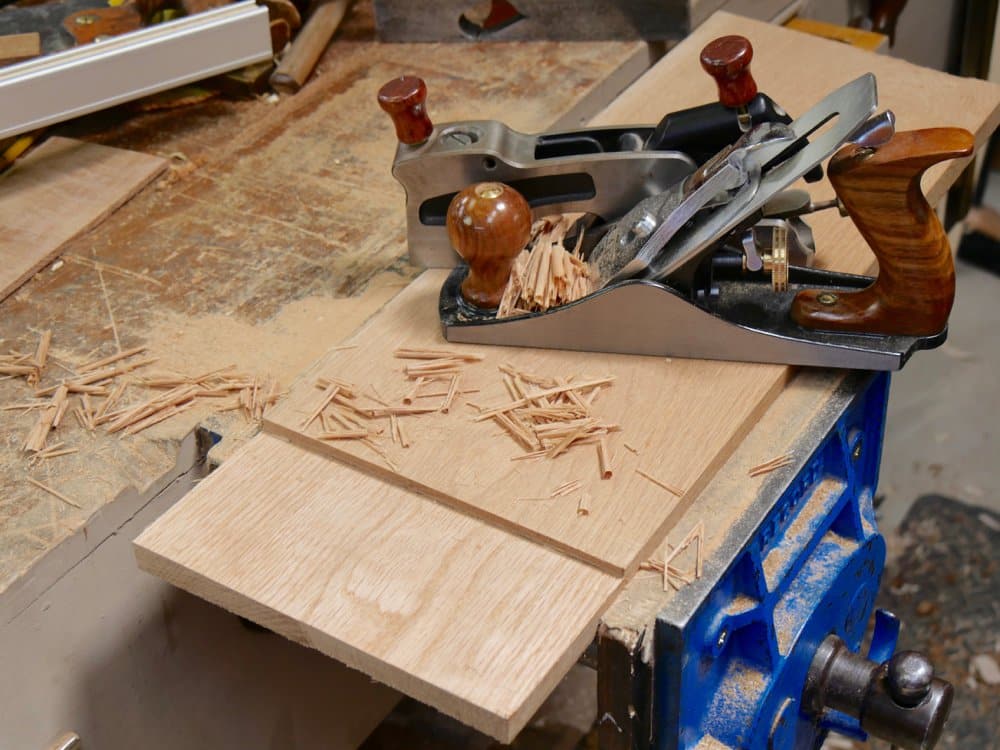
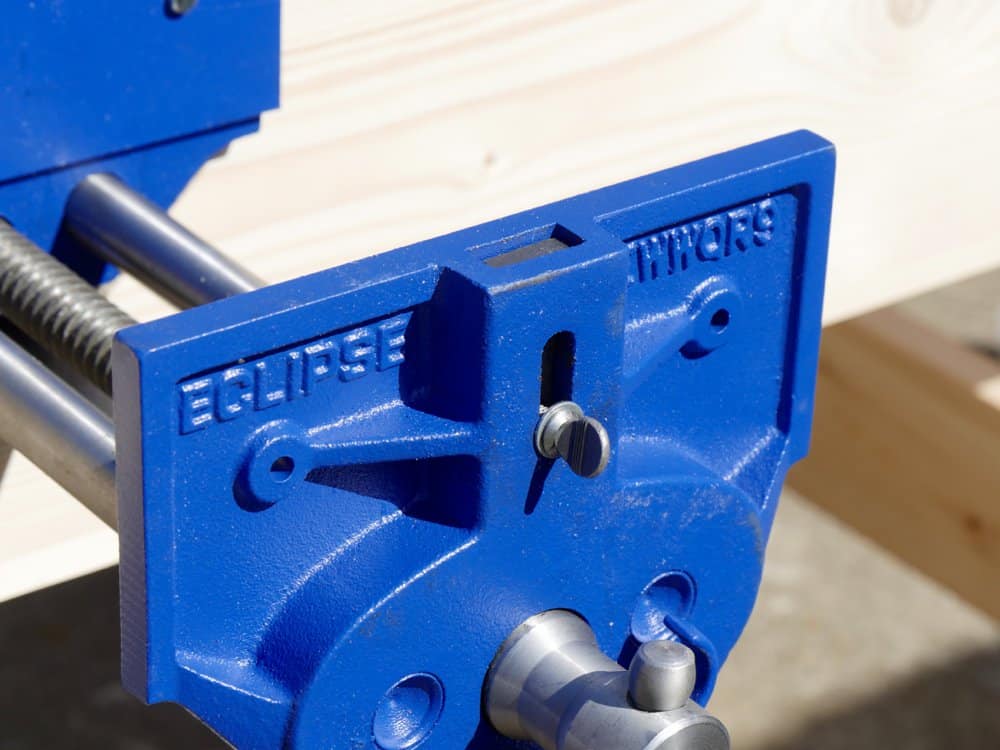
This vise is described as a 9” vise, but they go smaller and larger. Smaller ones can work well for children but for most adults the 9” will best take care of their needs. The larger version, the 10”, is also a good choice and what holds a lot holds a little. You might consider whether you have the upper body strength to handle the larger vise. Most men and women will have a weight to strength ratio capable of working the 9”. Going to the 10” may take more shoulder, upper arm and indeed finger-squeezing strength, but how you measure this is a matter of trying the vise somewhere. Not always possible and most companies will shy away from returns because of shipping costs. A 9” vise has always been large enough for me. Perhaps this is a good guide?
Making the opening
Because the vise is made from cast iron and steel, with no lightweight metals used, the vise is indeed heavy. Because it is large, awkwardly shaped and uninstalled things twist awkwardly during handling and this makes it clumsy to handle as it twists in the hand unexpectedly until it’s fully fitted and anchored to the workbench. 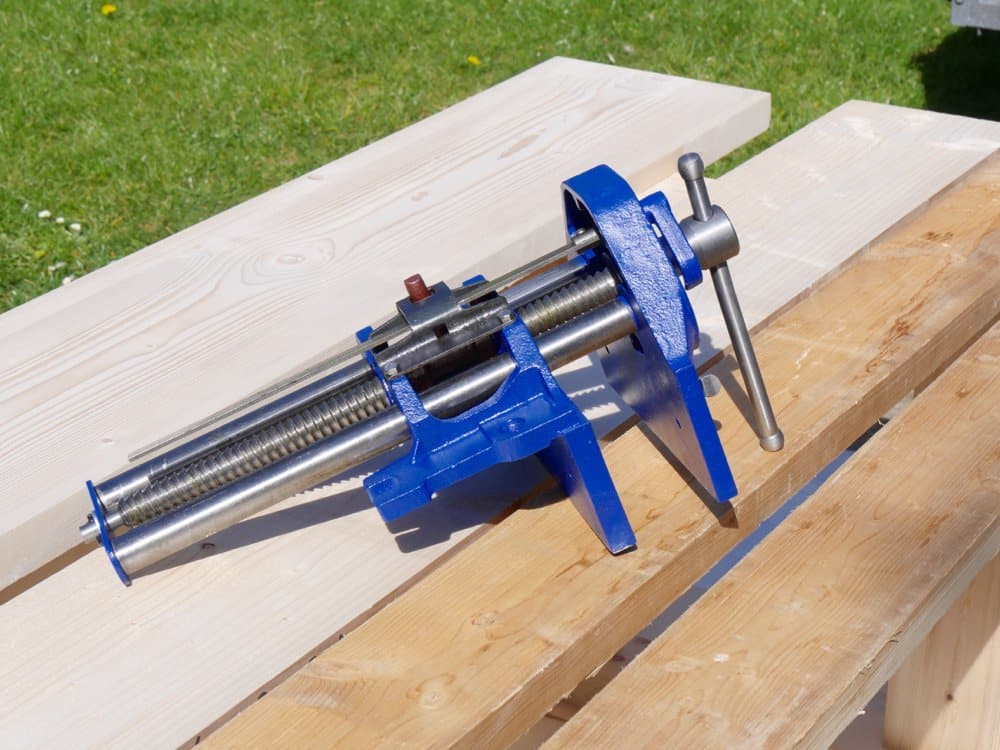
Many people seem disposed to recess the face of the rear vise jaw flush with the corner of the bench and then add a 1 x 4 the full length of the workbench to have a flush-to-the-corner straightedge along the length of the workbench. For some unknown reason of substance it’s “so they can clamp work flush to the bench for maximising support.” Whereas I don’t deny some may find good reason for this, I have yet to find a reason of real value, even for edge jointing work, so perhaps for me it is more the rarity than the norm because we generally edge joint much of our work in short lengths relying only on the vise and not longer than say three or so feet long. If we do need to we simply add a packer and clamp away without hindrance. Much better to have the vise jaw lining the width of the vise plus say an inch each end and have the real benefit of being able to grip your work throughout any process you care to name be that overhanded or underhanded. Now then, that said, if you do want the long edge feature you can always screw on a planted jaw in there and keep it in place until you need the long edge and remove the jaw. Two screws will work to hold it in place.
The vises may well arrive with oil on the exposed bare steel parts and especially the parallel bars, screw thread and handle. Painted parts inevitably get their share of excess oil too, so it is a good idea to wear rubber gloves and handle the vise straight from the plastic bag with a wiping cloth. Taking it all off with the cloth will leave the exact amount of lubrication and at the same time sufficient protection.
I found it best to lay the bench onto its back face for layout and cutting the recess. Working overhead to start out makes everything simple and easy to do. 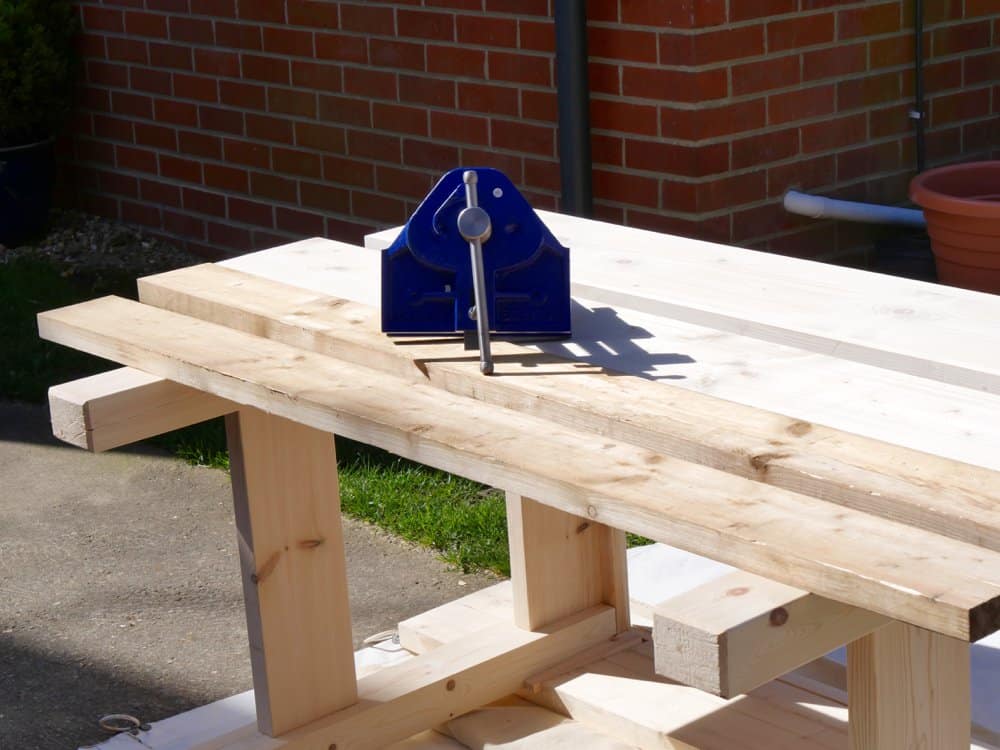
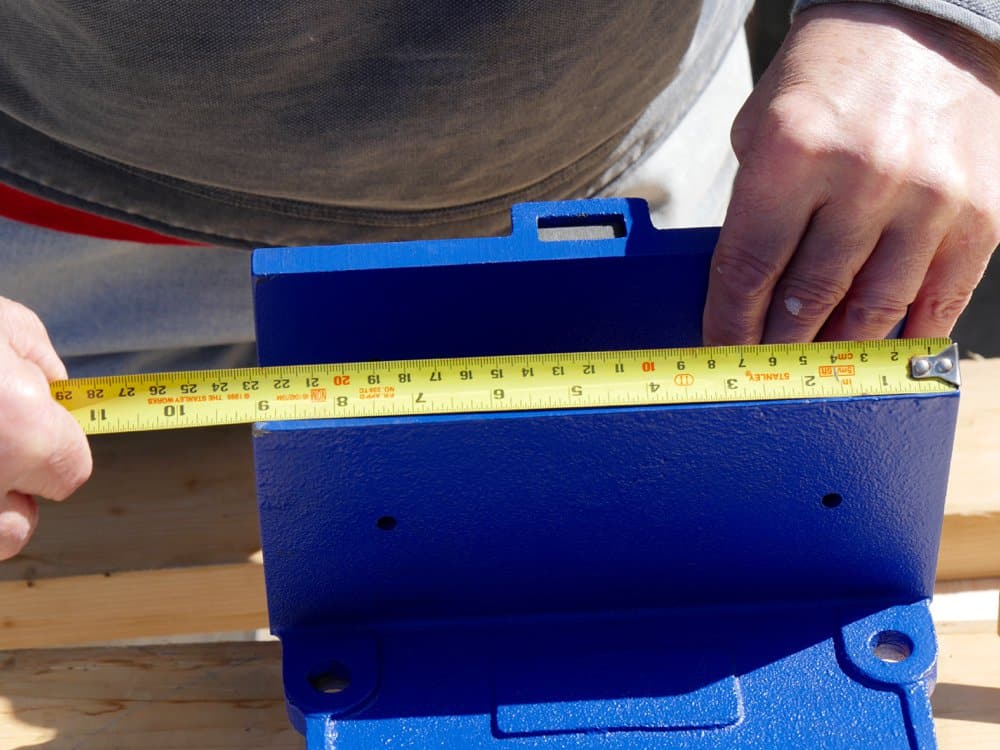
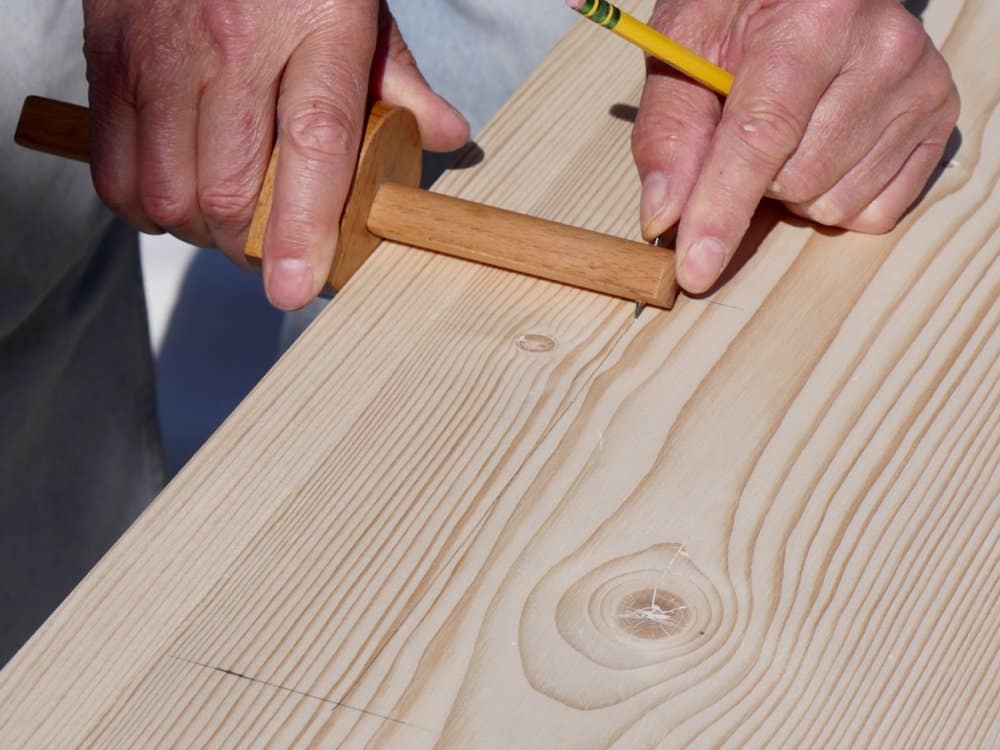
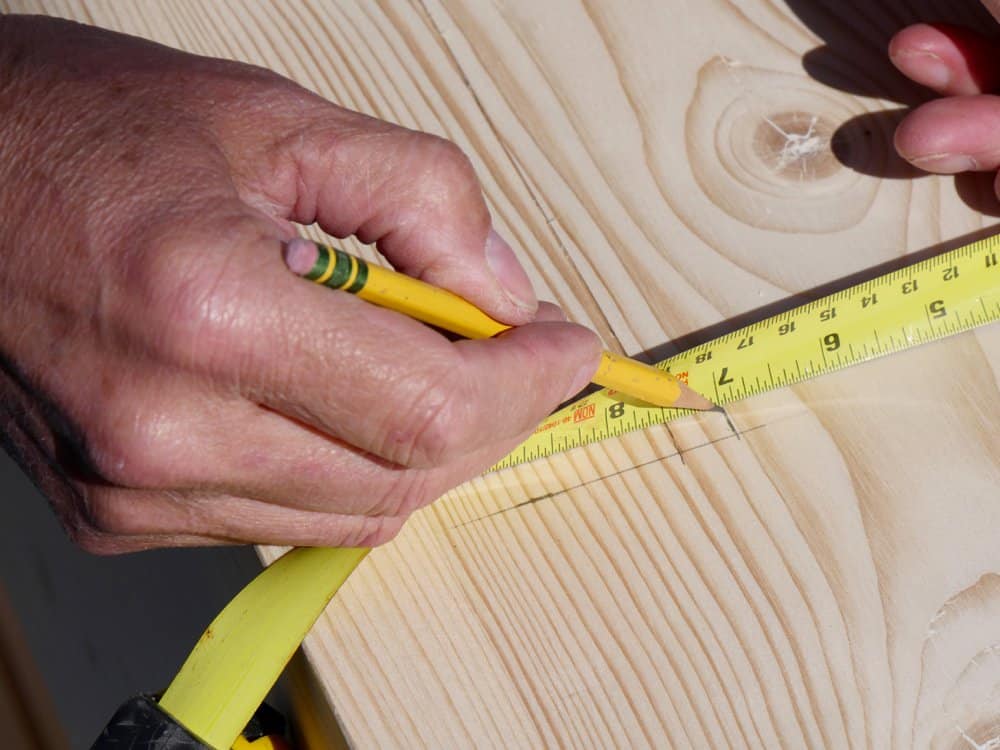
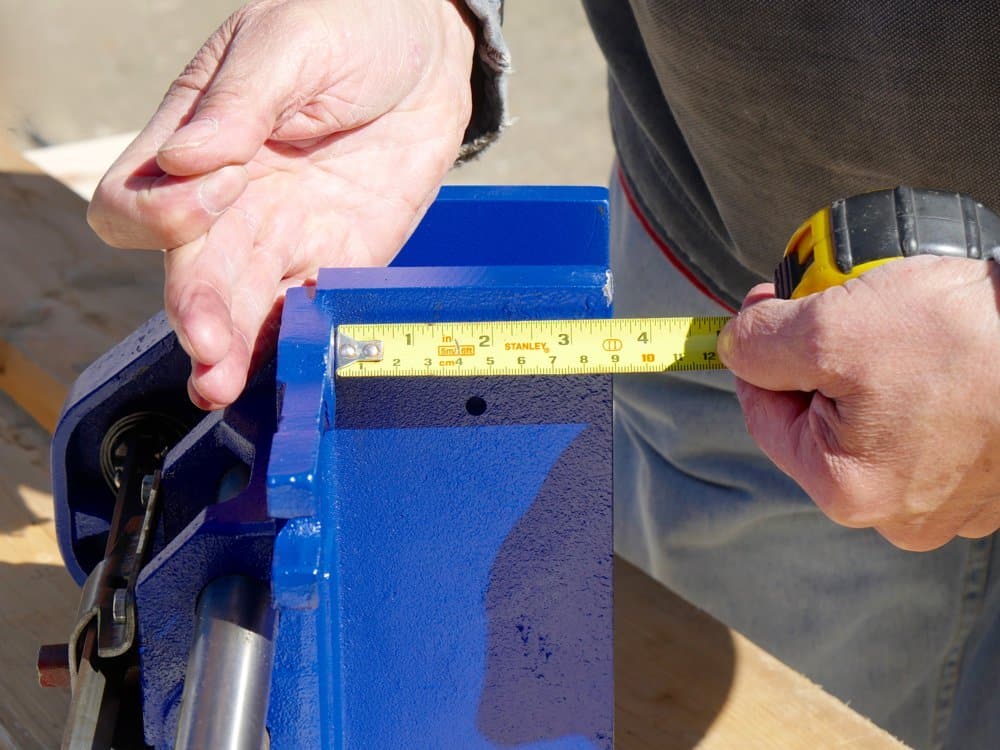
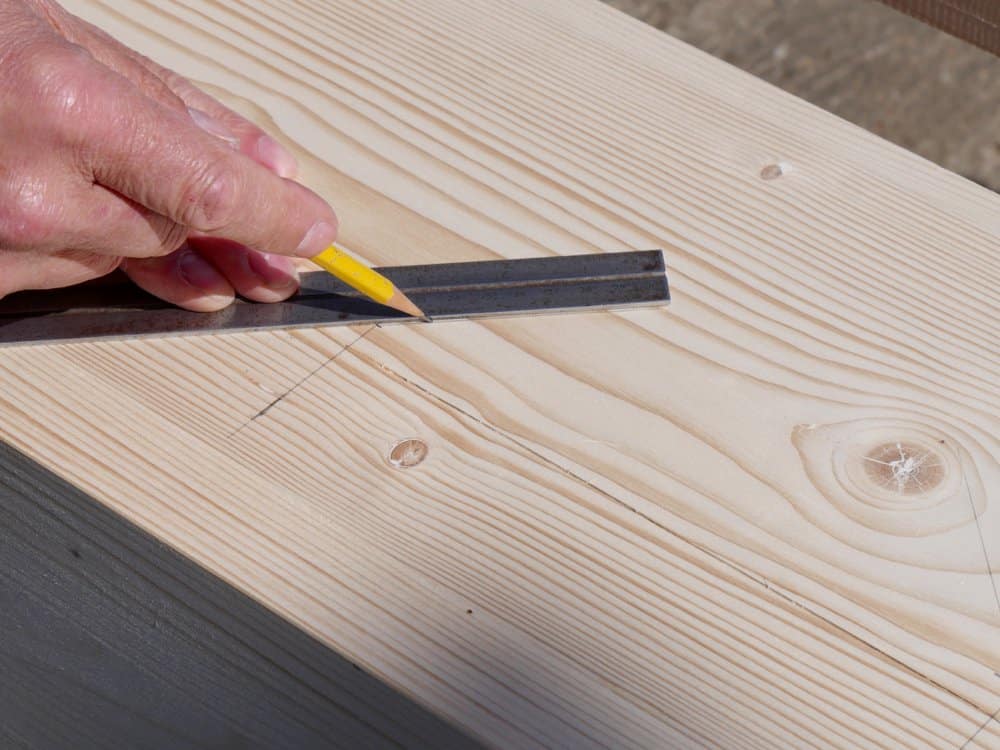
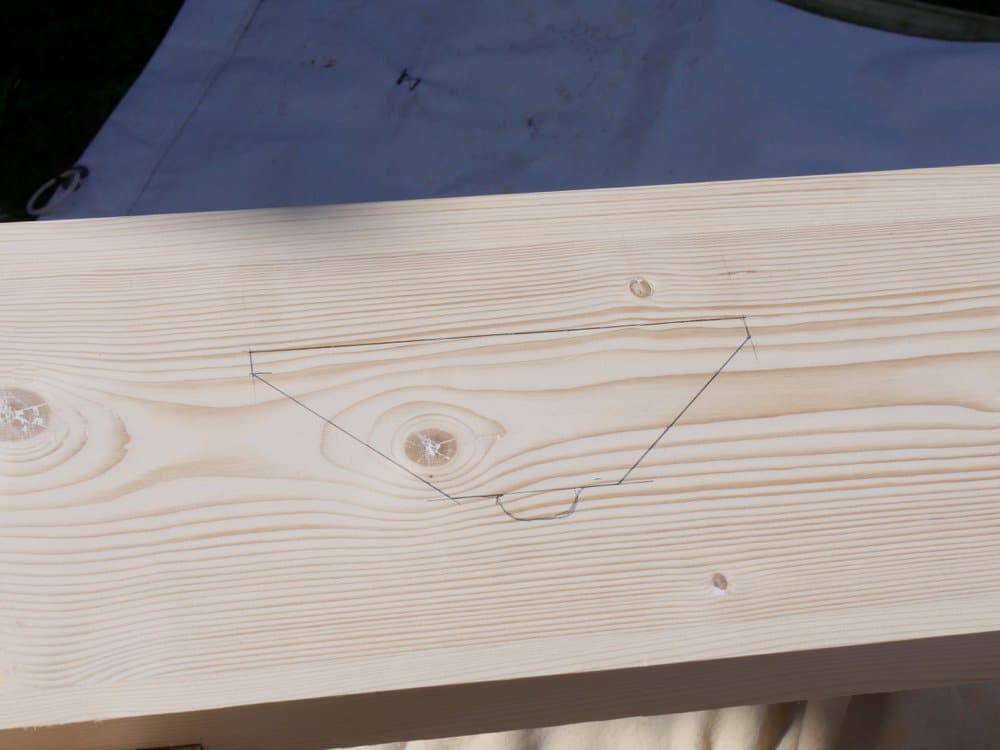
Marking out the whole position gives you a visual to work to.
More shortly.


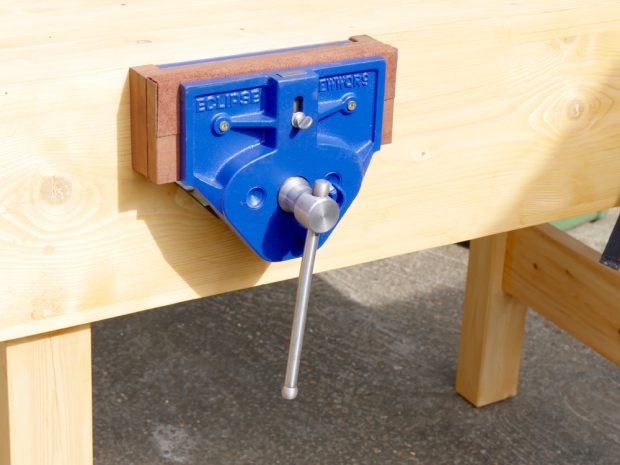
The lever on my Eclipse was too tight for me some days(arthritis). I backed the spring off one notch and it is much easier to manage. It still has solid engagement with the threads. I highly recommend the adjustment.
I have been using the 10″ vise for about 2 years now. I don’t have anything to compare against, but I can’t see myself switching to anything else. My only complaint is a small one. The adjustable dog doesn’t seat below the top of the jaw. It only protrudes by maybe 1/16″, but it bothers me enough to remove it.
They are only mild steel and can be readily filed down that 1/16″. I might take even 1/*” off with a hacksaw so that it sits even below the vise jaw. Shavings get in there anyway so often they end up sticking above. The extra 1/16″ off makes it good.
Hmmm….The one I just got Christmas/birthday has the dog over 1/4″ proud. They seem to be growing.
I there from Portugal,
My fist bench look like a table with a very smal vice 🙂
So I’m planning my 2nd bench, very similar to yours and I start getting the hardware, and I got a “Woodworking Vise Type 53ED with Quick Release Mechanism” but the Quick Release Mechanism, do not have the a dedicated button, works by the turning the handle counter clock wise.
Q:What is your opinion on this type of vices QR, Master Paul Sellers?
Obrigado(Thanks)
Augusto Campos
Reverse releases work as well as the squeeze type as far as functionality goes and as far liking them goes I do, but the ones I have used seemed to fail after a relatively short period of use so I don’t generally recommend them.
Thank you.
(The invitation, for you to visit Portugal still stands :D)
One day.
Mr. Sellers,
Thank you for suggesting this vise and for all the informative details! It comes at a particularly useful juncture for me, as I’ve been waiting for a few months for Lee Valley to restock their quick release steel vises.
Perhaps I’m anticipating a new post in your series (please forgive my lack of patience, if so), but previously you spoke quite highly of these Czech vises sold by Lee Valley.
How would you compare them with the Eclipse you reviewed today? I share your mindset on evaluating tools: quality matters, no doubt, but also the general comfort in use – your thoughts would be greatly appreciated.
Many thanks!
I just answered this to another comment so I copied my answer here. Hope that’s OK. Reverse releases work as well as the squeeze type as far as functionality goes and as far liking them goes I do, but the ones I have used seemed to fail after a relatively short period of use so I don’t generally recommend them.
Thank you!
Many thanks Paul for this discussion. Do you have any experience or knowledge with this twin screw quick release vise? I’ve been eyeing it for a while but can’t find many real reviews on it which always worries me. I know it is expensive. I just want to know if it works well.
These vises work fine. Personally I have no need for the twin-screw mechanisms and the comments about them allowing clamping parallel has never been an issue with any of the Record-type QR vises and they need no support if indeed you do clamp off centre at all. I also like the depth from the bench top to the mechanisms of the Record type vises, which is often nearly 4″ of total solidity. Sometimes makers allude to problems with other maker’s problems like they did when they started making planes and said their planes eliminate chatter normally associated with other planes when they never chattered in the first place. It’s a bit like saying when did you stop doing this or that in front of someone else when you never actually did do this or that. It’s hard to diffuse. I could see if you are making a particular specialist product over and over that a different vise type might be necessary. As you said, it’s not cheap. You could buy three other vises for the price one perhaps.
Hah! That reminds me of the idiocies of spice marketing. You can now finally buy black pepper that has no MSG! Implying all the other brands might for some weird reason mix MSG into their pepper. Won’t be risking that, no sir not me.
I’ve got one of the York vises sold by Lee Valley (listed as Quick-Release Steel Bench Vises) and step 1 of installation should be to disassemble the QR mechanism and completely de-grease all threads and moving parts because they were heavily contaminated with metal filings and shavings on my vise. After that grease, reassemble, and continue the installation.
After restoring a record 52 1/2″ QR. vice. The thought of oiling/greasing the threads and rods, I pondered that oil/grease would over time collect metal particles. Thus perhaps grinding into the threads etc. So I elected to heat paraffin wax, and thickly coating both rods and threads. That was approximately 5 years ago. This has worked for me to this day, not requiring any further coating. Just my two cents, cheers Peter
Peter, paraffin (i.e. candle) wax is an inspired choice 🙂 I switched to using it as chain lube on my racing bike last year after reading a comparison of mainly expensive, hi-tech lubes in Velo News concluded that plain old paraffin wax was best for performance! It has proven to be excellent: I only need to lube it once a year and it is really, really clean – any contaminated wax just falls away and it it clean to touch, so no oil stains over clothes, hands, etc.
I agree with you about grease. Old grease can also dry and seize. So, until now, I have used oil rather than grease on my vise. I will switch to wax now 🙂
Outstanding tip. Been looking for a cleaner alternative and this sounds like it. Bravo Peter.
Ta for that, Paul. I’m assuming that as you have recommended the Eclipse (S&J) vise, you believe it to be a lifetime tool, in which case the £98 it sells for on Amazon is as cheap as chips. But, if we went down the Ebay route and wanted an old Record or Woden vise, how much would you pay for one of them? And also, what model numbers would you go for?
I have Record 52 1/2 E vises on some of the school benches and a couple of my own. These you should pay around £60 to 85 for these days.
When I built my bench, I originally purchased a (rather expensive) Jorgensen vise. However, when I tried to install it, I found that the screw/lug/mounting surface flared out 1.5″ on either side which rendered it nearly impossible to install anywhere on my bench that would be useful to me (who would want the vise to far in the middle of the bench)? So instead, I traded “down” to the Eclipse which mounted simply on the left side of my bench and which works as well as anything I have known (which isn’t much). I like the lever release vs. the Jorgensen which seemed to be more of a “lift and slide” action vs. the Eclipse that just requires a conveniently located finger squeeze. I feel even better about it since you used it in this example! No need to spend an extra $100+ for something I can’t tell a difference in, functionally speaking.
Dear Mr Sellers.
1st Thanks for this practical approach and for finding this vise – being more widely available.
2nd considering a very tight budget would you recommend saving for this one or is it ok to buy a screw and make a “Nicholson Style” vise?
– I acknowledge it is a very different way of working, and until now I manage with clamps, a planing stop and dowels on the aprons.
– If this will generate to much controversial please ignore.
All the best
I would save for a QR vise. They are so worth it.
Thank You sir!
You must be a mindreader.
I have been trying to decide on a vise all week and today this article turns up.
The 9″ has now been ordered – 105 Euro on Amazon – and will be installed this weekend.
Many thanks for the very timely article.
Keith
Hi Paul,
For years now I’ve had a Record 52 1/2 E vice waiting to be fitted to a dedicated woodwork bench in my garage. I’ve use plenty of them in the Joinery shops I’ve worked in over the years and have always found them a strong & reliable vice, even the one’s worn from abuse. All these vices have been mounted on the left-hand end of the bench.
Being predominately Left handed I have adapted to working with this setup for “Righty’s” (like most of us “lefty’s do). I have been told, and read, that having the vice on the Right hand end would be better/easier for me to work. But having never worked on a bench with a right hand vice I have no experience to confirm if this is correct. Can you, or some other “lefty” who has worked with both setups describe how this is better. The only left handed woodworker I’ve seen on YouTube is Shannon from Renaissance Woodwork, so I can see there is some advantage.
My other question is whether having a “dog” fitted to the vice is a necessity or not? All the benches I’ve worked on never had them. Also can these be retro-fitted to a vice which is without one?
Hi Peter – from memory Paul has covered off bench dogs, how to make your own dogs from a broom handle, how to retrofit a vise to take a dog, how to drill dog holes square to your bench, a little metal stop from veritas etc. Run a search and you’ll find it all. I think he’s done that more for people who ask about bench dogs rather than using them for himself. Not a fan of holes in the bench to get stuck with shavings etc if I remember correctly. It’s a personal thing I guess.
Peter – I’m a lefty, but I mostly tend to use saws and planes right-handed.
Generally then I will work right to left when planing, so a vice on the left works for me. If you predominantly use a plane with your left hand then you might find a vice on the right to be better.
You can add a dog – search for Paul’s video “Retro fitting a Non-Dogged Vise”. I did the same, though I’d have to admit I’ve yet to use the dog and generally just follow his technique of using a long clamp in the vice.
I already installed my vise in my new (larger) bench, but I’m pretty excited by this new serie.
By the way, I don’t know if you are going to cover a “troubleshooting” section in this serie, but I have a related question.
I have an old Parkinson’s Perfect Vise, with what I think is the first QR mechanism. Only problem though, while it clamps beautifully on the “left” side, on the “right” side (the side of the lever). If I try to clamp tightly on the “lever side”, the lever tends to move and, eventually, release the pressure (it basically jumps out of the thread).
I was thinking of making a tilted jaw to maybe try to avoid the problem, but maybe I’m missing something here…
It sounds as though some brute used the vise inappropriately and forced some aspect of the mechanism. This will happen from time to time and with any vise type. I have never owned such a vise but I have seen them from time to time. Some people keep a shallow wedge near to hand to even the pressure on the jaws after this has happened.
Hey Paul thanks for all the knowledge. What kind of vintage vise would you recommend.
https://paulsellers.com/2013/03/add-vise-on-bench-vises/
Thanks
So pleased you are doing this and you can recomend a good new vice that doesn’t cost the earth. I was looking on eBay for an old one however I live in Guernsey Channel Islands and shipping costs a fortune. Really looking forward to part 2 thanks
I received the 10″ vise as a gift from my son Seamus while we were in a Woodcraft store in Massachusetts several years ago. Bigger is better, right? I installed the vise into the workbench while it was lying on its side. After installation I could not lift the bench upright by myself. I finally managed to stand the bench up on the vise end but needed to attach a long board with clamps to the legs to stand it upright. I can’t figure out why I waited 30 years to tackle building a workbench. I guess no one made building one as accessible as Mr. Sellers has done. Nothing compares to the work holding power of this workbench. If you have been relying on a B&D Workmate, use it to build a Sellers bench ASAP.
Paul, As probably don’t remember, I asked you about vices about seven months ago. You promptly advised me but I had no luck with a local search. Your new series on the Eclipse has reexcited me. Thank so much. John stark (from the island of Hawaii)john
Glad to have helped, sorry for the delay though.
Hi Paul,
You’ve already answered a couple of questions concerning the CCW quick release mechanism. I hope that you don’t mind another one.
On my Czech vise from Veritas that you have reviewed in the past, I’ve noticed that it releases after 1 CCW turn. In 1 turn, the vise doesn’t back off far enough to easily remove the work. This means I pull the face out every time I go in and out of the vise. It would be nice to be able to back the vise off enough to remove the piece without having to engage the quick release. I hope I’ve described it clearly enough. Did you get used to this? Is there a correction/adjustment?
Of course, thank you for sharing your knowledge with us!
Sincerely,
Jason
All of the quick release vises have a point where the mechanism seems to falter between two points in the pressure being applied and different makers have slightly different issues. You do get used to holding onto the workpiece until certainty takes place and the wood is caught or secured. I am thoroughly convinced of this one thing absolutely though. The quick release vises are the very best vises ever made and no others come close.
The screw in the vise pictured above appears to be ‘artillery’ thread, which is rarely used in other mechanisms. It would seem to me that a better choice would be a vise with standard acme thread, because if either the artillery screw or nut became damaged, it might be difficult to find or make replacement parts.
(By the way, in American-speak, a vise is a thing that grips tightly for you, and a vice is a thing that grips you tightly.)
I just installed a 10″ eclipse QR and I so wish I had seen this before hand. It was pretty rough and took much longer than I expected. Of course, if I were more experienced, it certainly would have helped.
However, now that I have it installed, the metal bars are very hard to slide. I can only imagine that I have it bolted too tight, or off-kilter in some way. Before installing, they slid very easily, but I can only get them to slide now by pushing against the workbench while pulling the face of the vise. Any thoughts?
I think I may just pull it out and try to re-install it in another place on the bench.
Also, the quick release attachment releases while trying to unscrew the vise more than around 5 inches. I think it is related to the binding of the bars.
The question is never usually just one. If the two guide bars are misaligned you can sometimes loosen the nut if it is held by a nut and not a split pin at the far end of the bars. This keeps the twin bars parallel in operation but it varies from maker to maker. Are the bars in any way deformed or defective? Is the vise old or new, secondhand, rusted?
Commonly, is the vise seated properly on a truly flat surface and behind the front jaw affixed to the bench; is that flat too. Cinching the bolts that secure the vise to the bench when these are not trues will distort the casing and cause the bars to twist.
The 5″ distance can be cause by the above too.
I think my problem was because I took the vise apart to mount the back plate, and then put it back together. After looking closer, I discovered that I put the back plate (the one that goes over the guide bars and screw) upside down and it caused the screw to bend. This is a new echo vise I received for Christmas. I wasn’t very happy with the job overall so I ended up removing the vise, and turning the bench upside down as I should have done the first time. Mounting it this way proved much easier and now it is functioning properly.
Hi,
I have a record 53e that I restored and works perfectly with a small problem. The quick release sometimes sticks in the closed position meaning that the paw or casting is against the threaded screw. Any ideas?
Thanks Kevin
Hey Paul. What kinda need of vise do you have on your bench? Is it an eclipse 9 in.? I live in Texas,ever think coming this way? Let me know,I will show you my shop. May God bless!
Dear Paul,
Would you have any advice on how to ease the vise mechanism that might a bit hard to turn ?
Regards,
Jeff
Help. I took my 9in eclipse vise apart and can’t get the QR part back together in a working manner.
I was given a vise that looks like this Eclipse vise. It also looks like a Yost 9-inch vise. My vise has a broken quick release spring. I have tried finding this flat “clock spring” but have been unsuccessful. I contacted Yost to order a replacement spring but was told they do not sell parts only complete vises that are shipped assembled from China. Do you know of a source for this spring?
Thank you,
David
Just some other kind-hearted soul with a comparable vise but broken.
Hello Paul, what do you think about QR 7 inch vise? Is it good enought for most type of work? I know it is a bit smaller, but my workbench is a bit smaller too.
Hi Paul, the Eclipse back-plate casting doesn’t seem to have any strengthening fillets/shoulders at the back, as the (old & new) Record vices do (e.g. https://i.pinimg.com/736x/21/9a/ab/219aaba44c1f67aab15ef1c207713271–woodworking-vice-hand-tools.jpg ). I expect that makes fitting the Eclipse more straightforward but doesn’t it also make them much weaker (prone to fracturing)?
I have old and new both with and without fins and both held up fine after years of use so I don’t know, you can over think things. I have a Woden vise with no fins and it’s massive and it’s in its hundredth year of full time use.
I just received my Eclipse vise from Amazon today and was surprised to see they’re now made in China. Have you heard of any problems with them since they moved their manufacturing?
I’m sure it will be as good if not even better. It comes with a guarantee/warranty I am sure.
Hello Paul. Mny thanks for your quick reply and for the detailed information. Have to work it through in my brains as i am a true amateur and the language in such specific area takes time to fully understand. fortunamy projecttely its no immediate action need, as i am engaged with my curr4ent project of building quite a complex tool cabinet but always look for this workbench project and have to gather all information i need to what i need of hardware.
Already have the wood stock of huge good quality roof beams owned by my neighbours old villa about 100 years old which has been wrecked off and i got it as a gift.
so i will try to make something useful and needed for my future woodwerking projects, to start with a workbench.
Your advices and descriptions have been very useful.
Will give you notice of (apparently next year) potential proceedings.
PS you are a marvellous teacher who very much cares for his students. Thank you again
Regards Franz