A Shaker-style Dresser 2

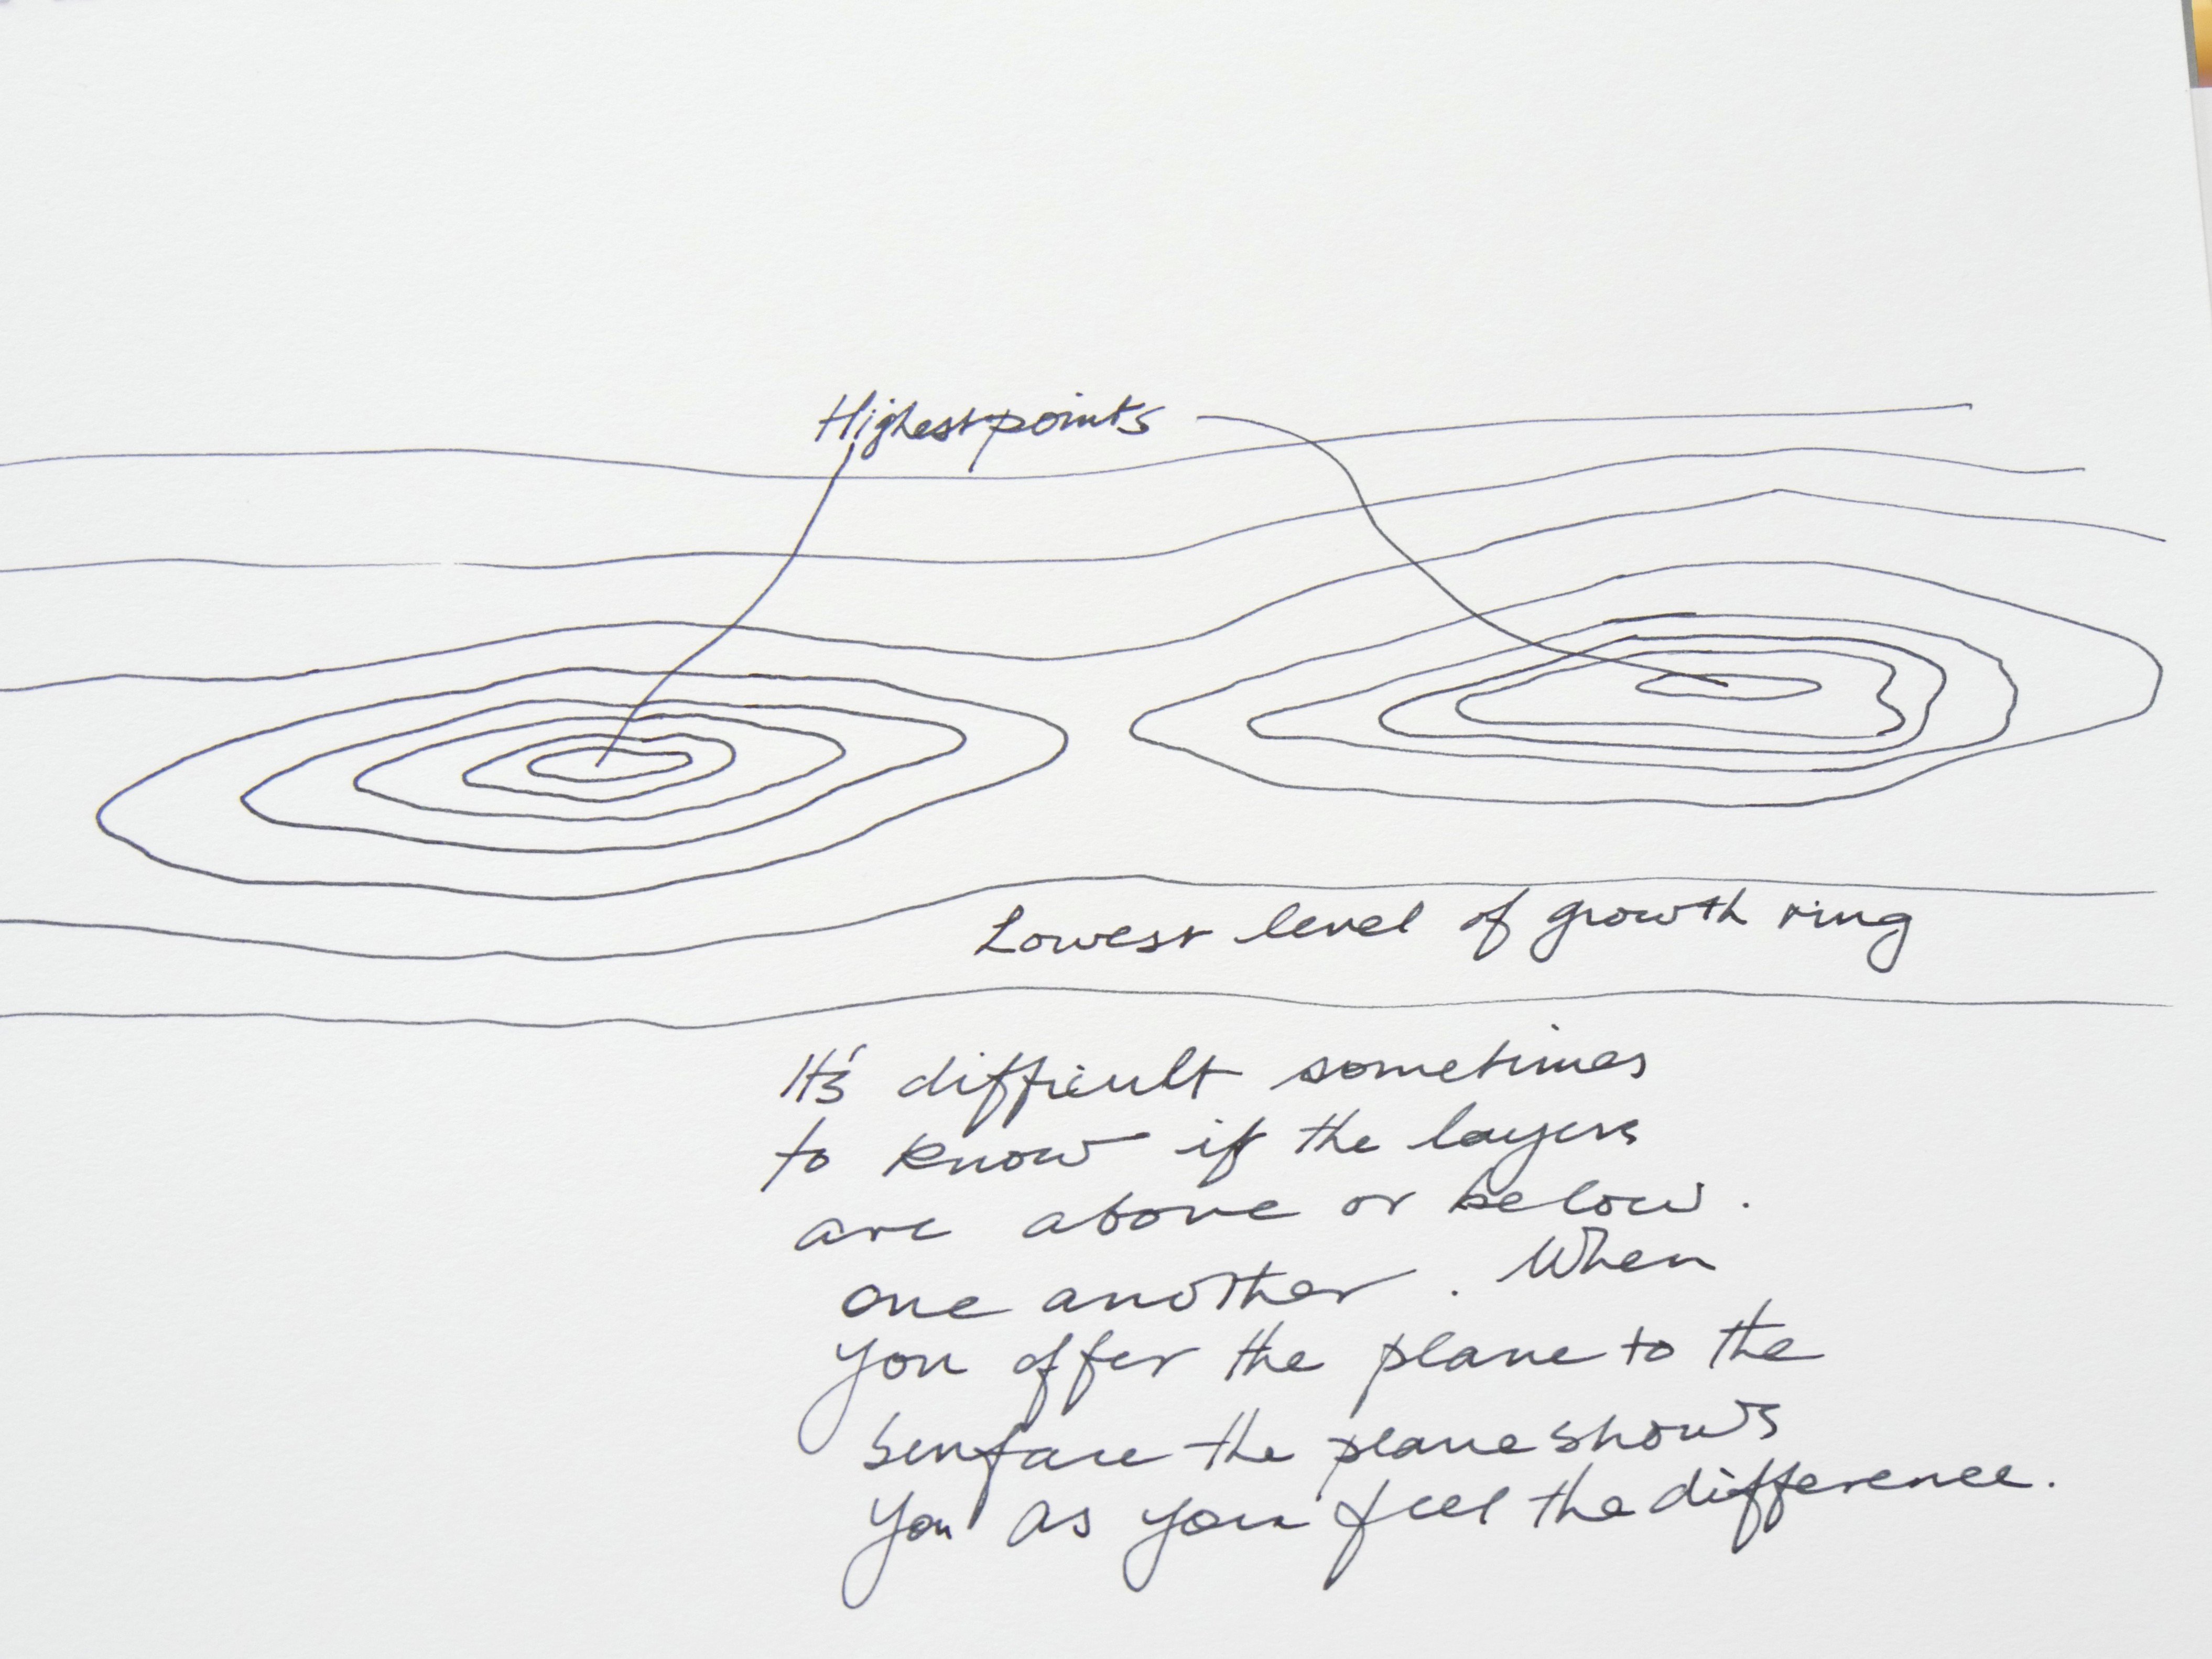
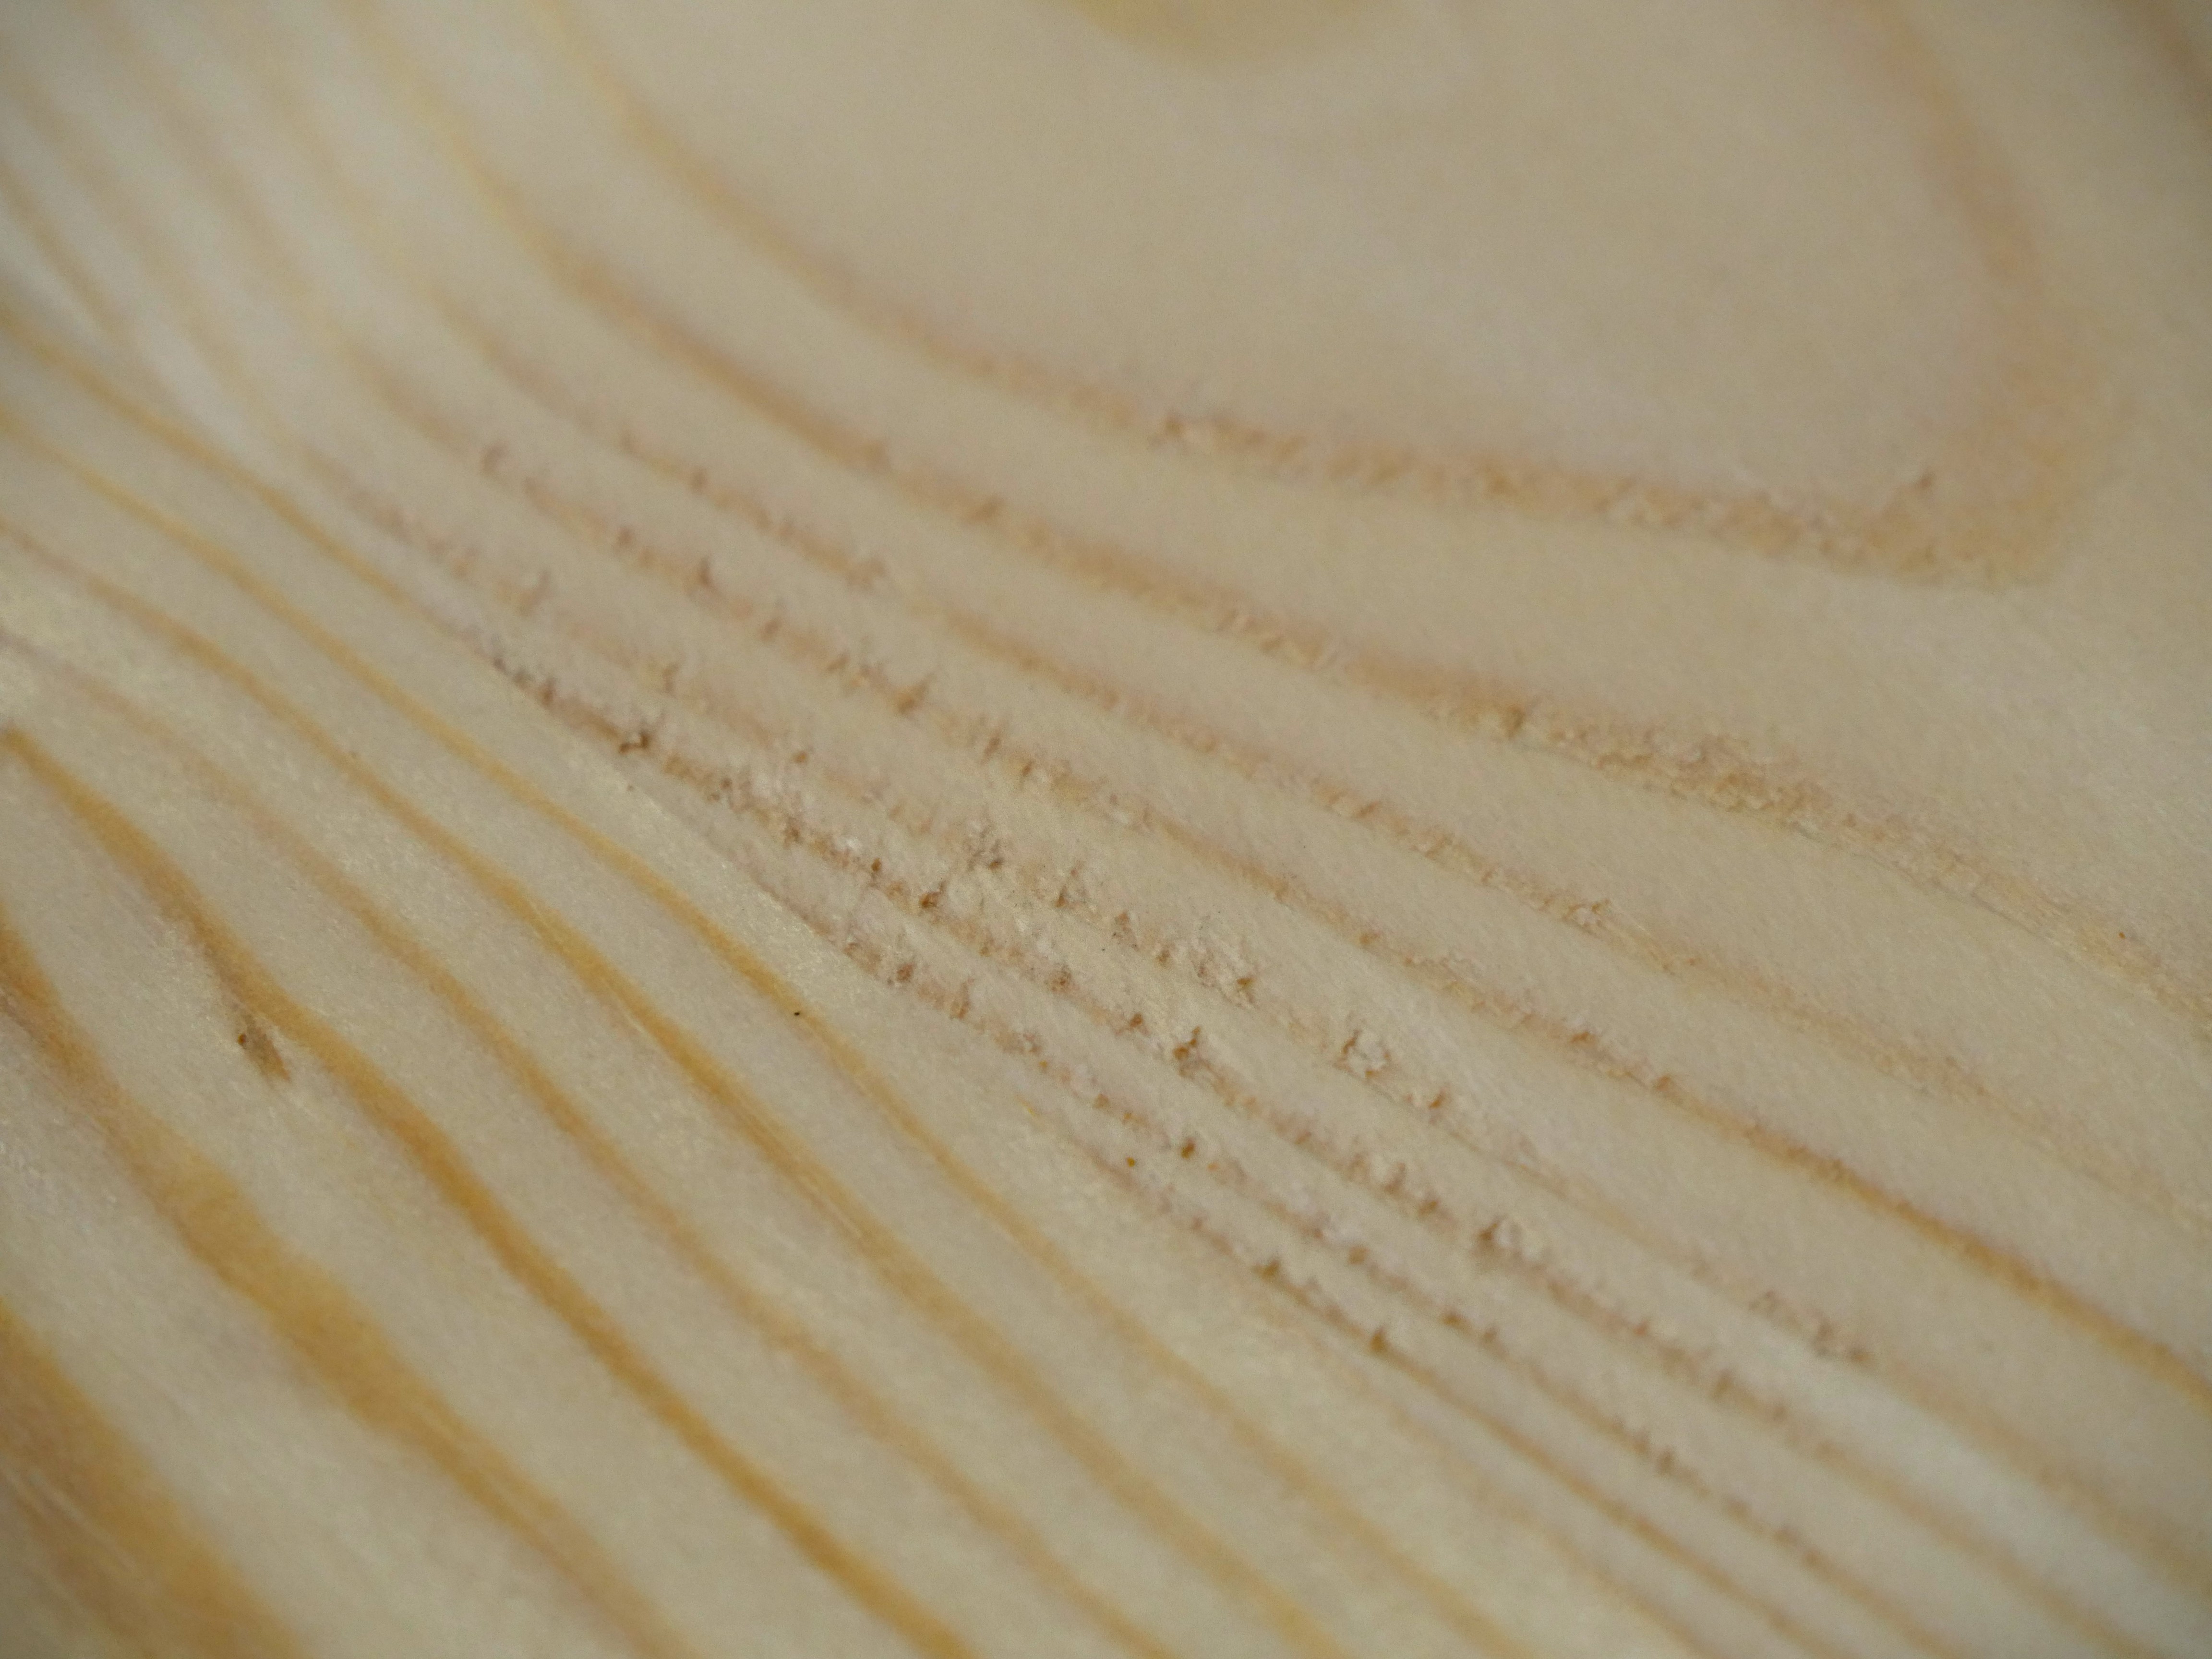
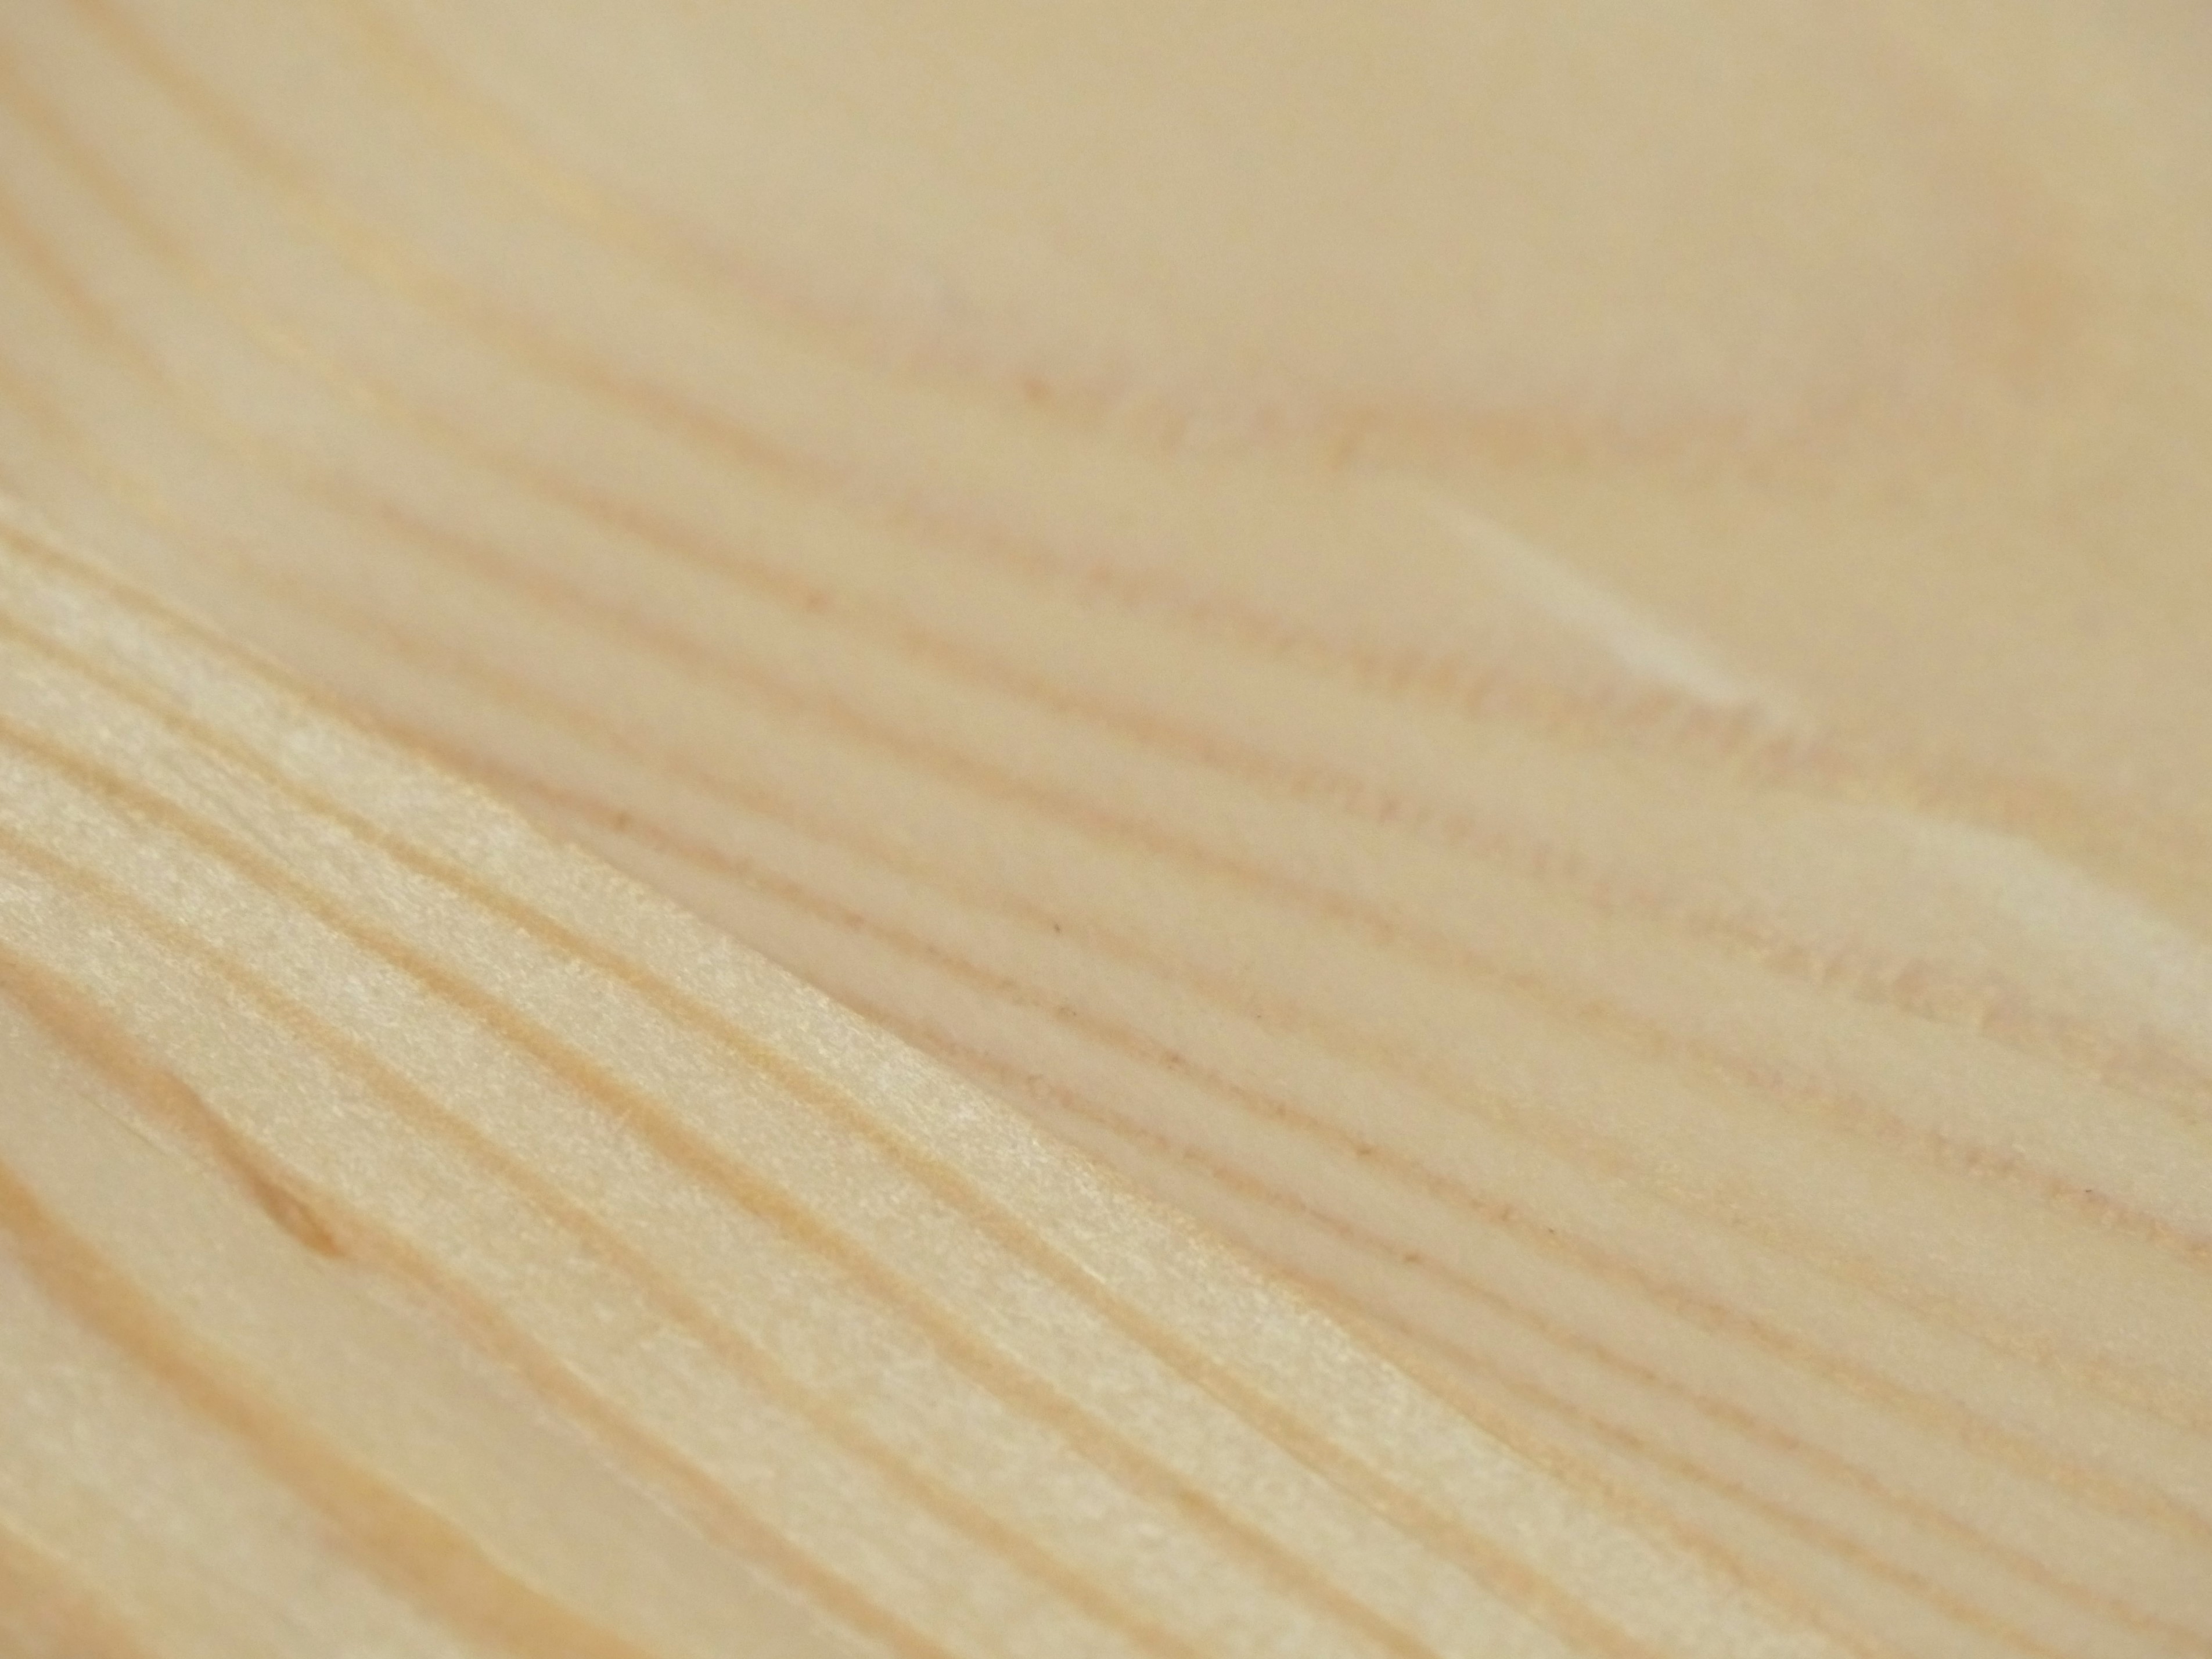
These two images show the same section of the panel with before and after shots. The first (left) is using a regular plane iron on a standard unaltered #4. The torn grain is obvious to the right of the joint-line. A few strokes with retro-refinement of the iron to a York-pitch resolved 95% of tear-out issues (right).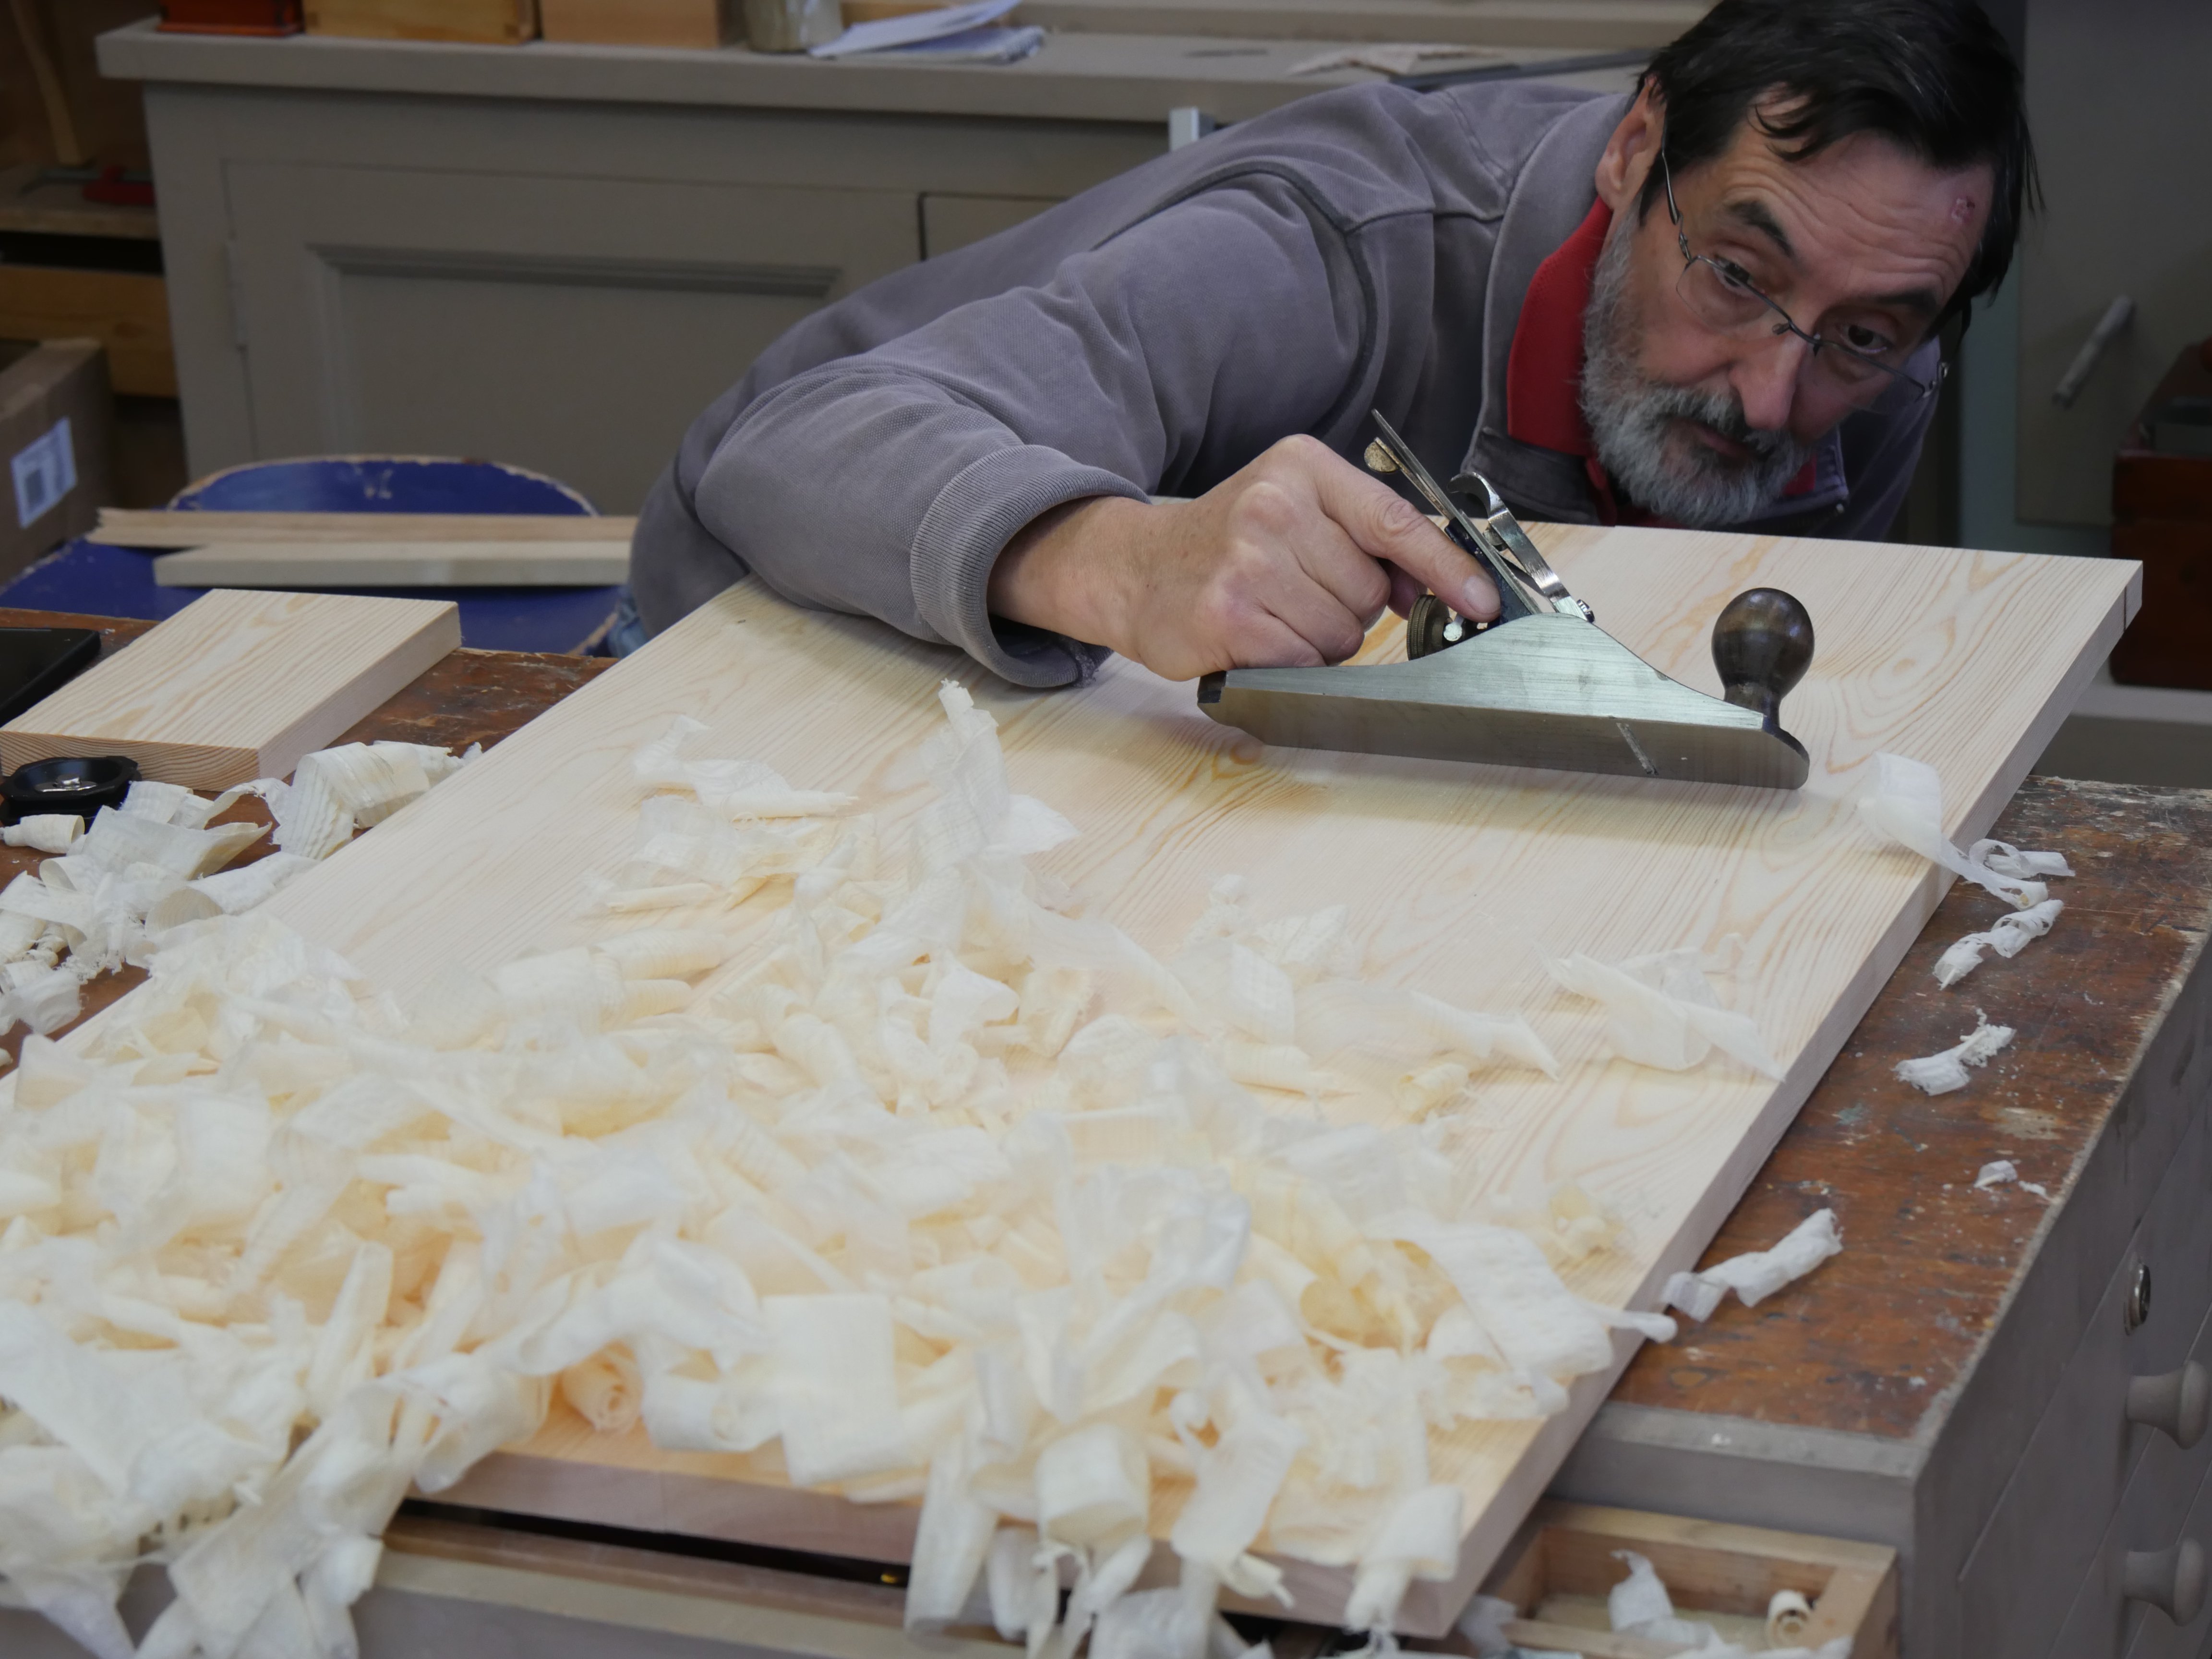
So, I got both faces of the three panels planed in fairly short order and there was zero tear-out in any of the panels because I used the poor-man’s York-pitch. Of course the true York-pitch is where the cutting iron is permanently bedded at 50-degrees. I am now ready to start working on the joinery for the carcass but I am making my drawer divider frames because they will be part of the carcass joinery.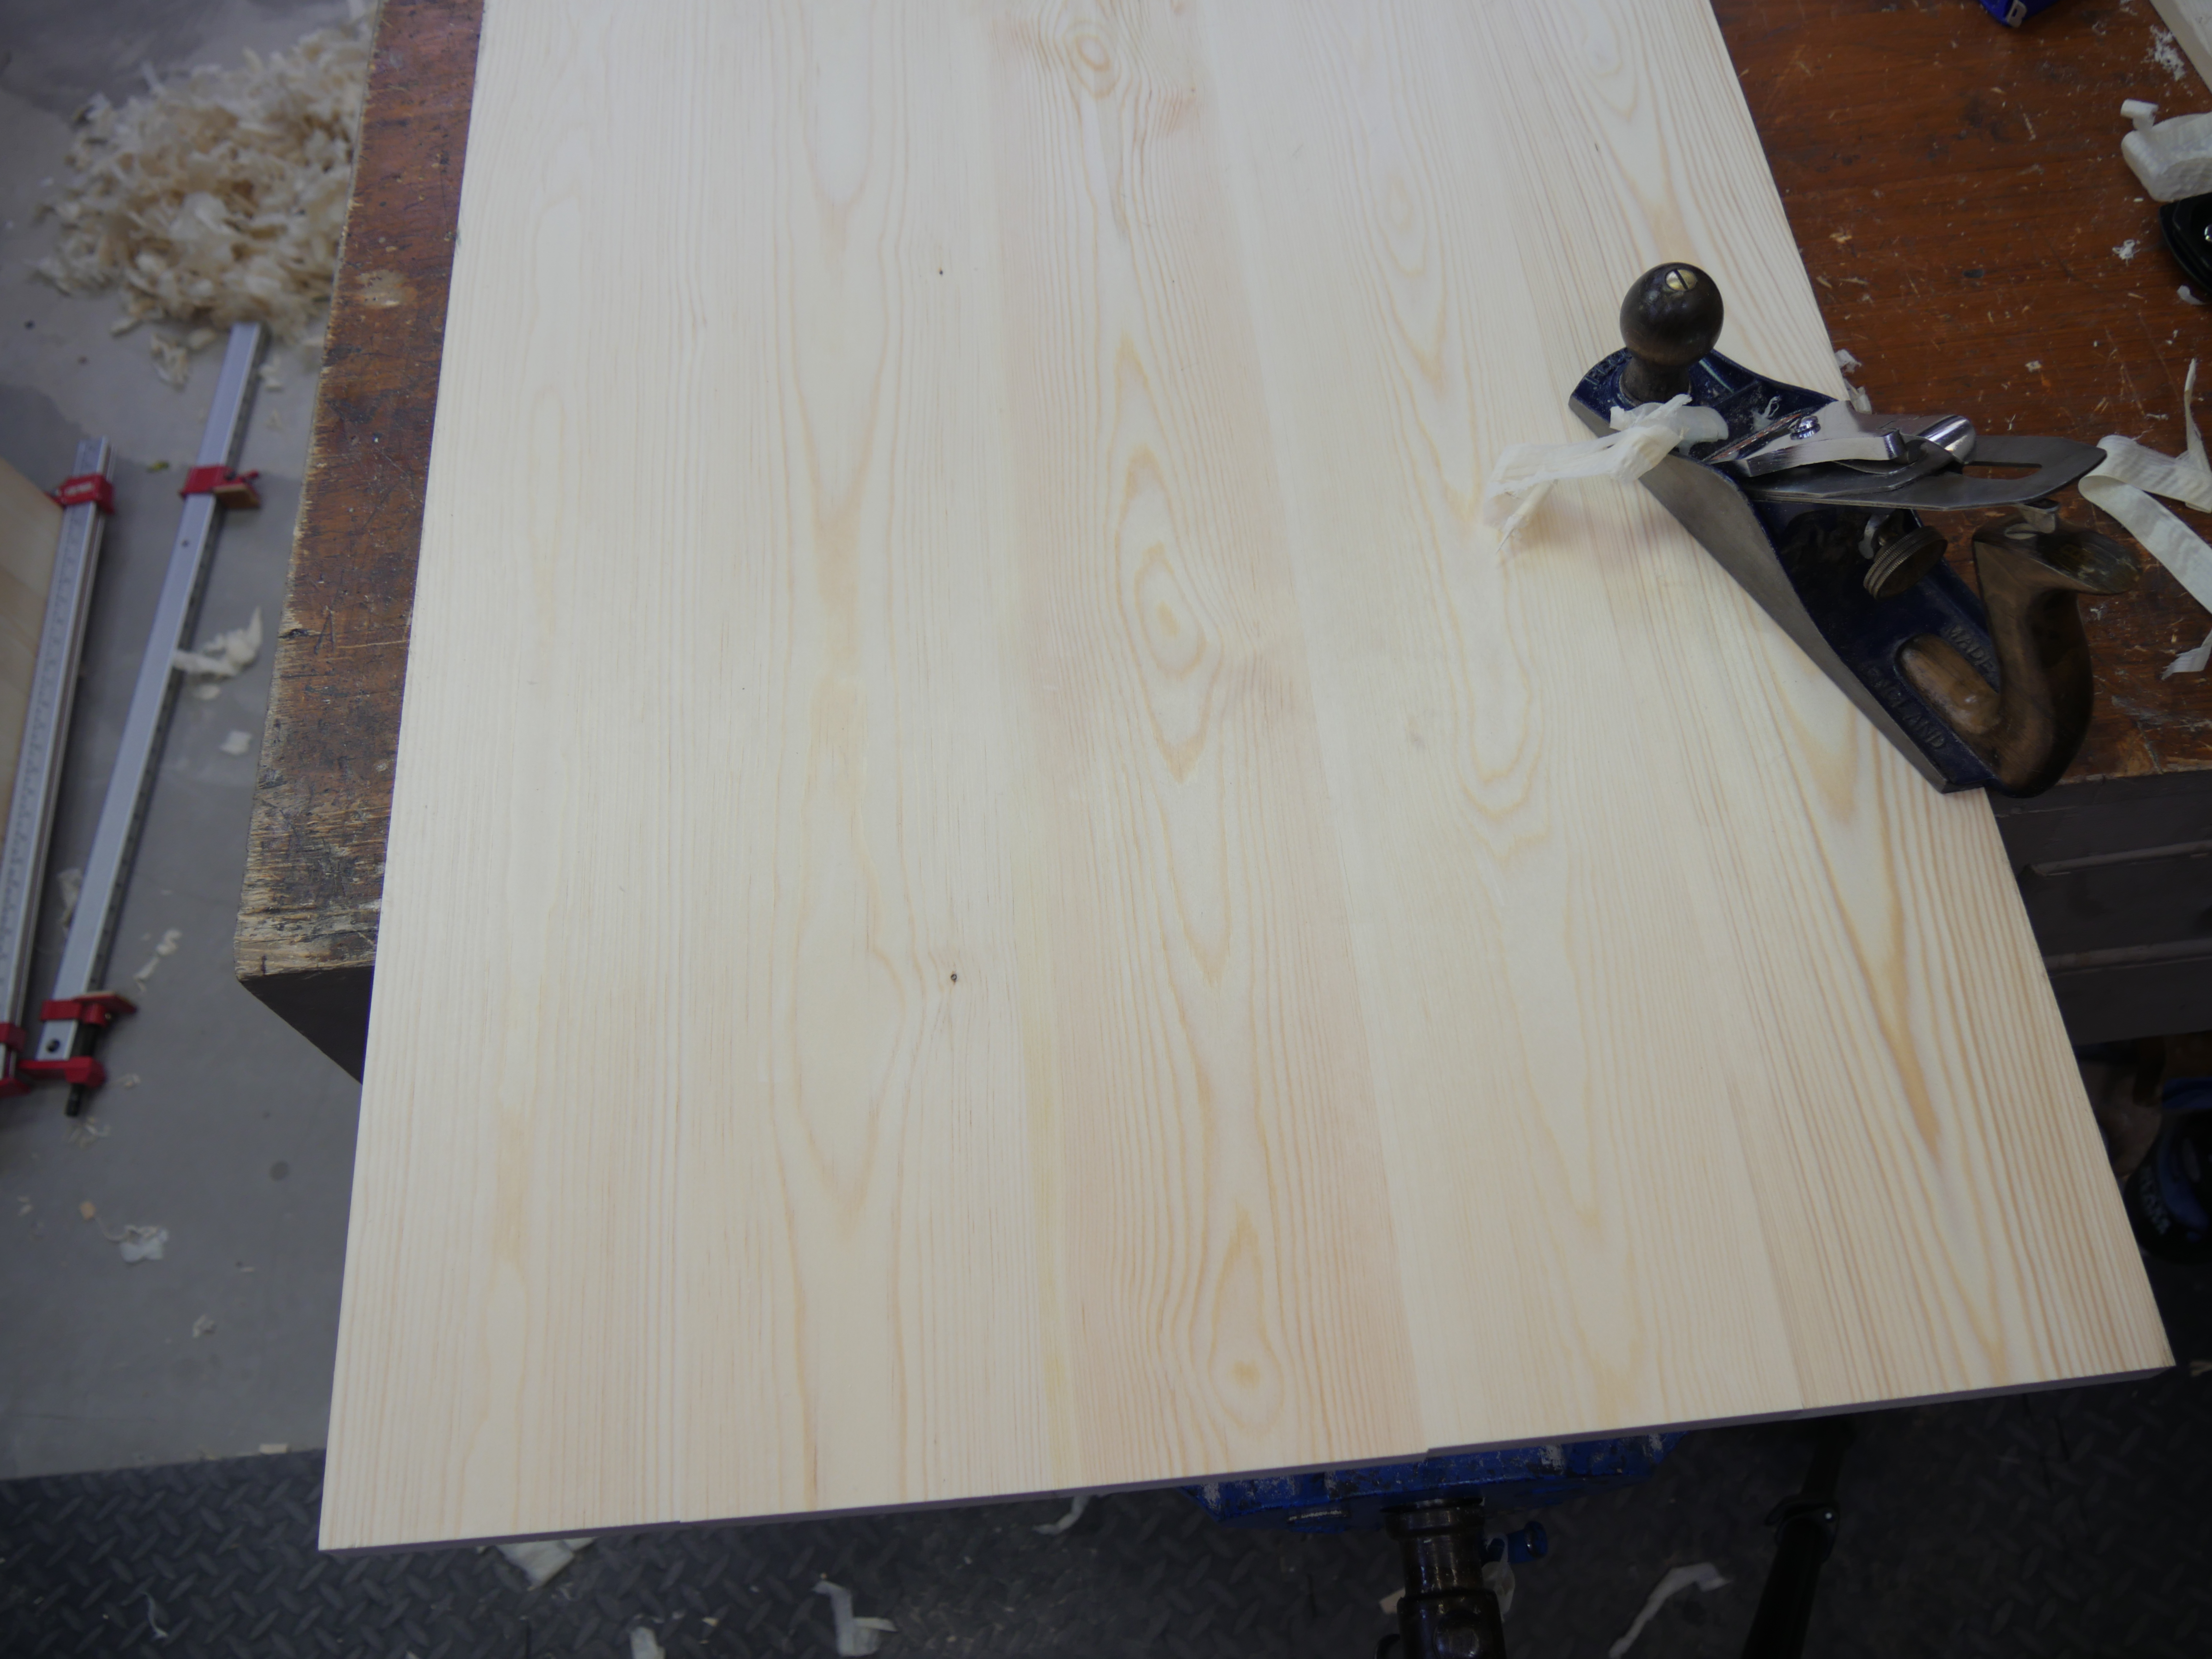
Paul,
Isn’t the sharpening technique you describe generally accepted as the “Charlesworth ruler trick? ” Thank you.
Nope, it was around a century or two before any “tricks” were needed.
Paul,
Thank you for the reply. Is there a down side to making this back bevel a regular part of plane sharpening? Again, thank you.
A little but perhaps not really enough for great concern. On bevel down planes the cutting edge does not last as long as the steeper the pitch the quicker edge fracture takes place. Many planes were made to the steeper pitch with the bed compensating for the tapered cutting irons of old so that the top or flat face of the cutting iron being then presented at 50-degrees. The steeper the angle results in a higher degree of wear as said, but that’s only when it is a bevel down plane presentation.
I think David uses the micro back bevel for sharpness, not necessarily to deal with tough grain the way Paul does.
In the hands of an expert like Mr. Sellers, yes, but I cannot get the flatness I want with the short sole plane. I respectfully submit a #6 combined with a jointer excel at obtaining a flat panel with the least amount of error. I can see a beginner getting in trouble rather quickly using this technique.
Paul, the Charleworth back bevel is only a degree a 5-10 degree back bevel is required to emulate the high pitched frogs.
Thanks Paul. Two questions:
1. Why not just use a frog that is 50 degrees the whole time in a plane?
2. I know from your prior blogs that the USA big box store pine is different than the pine you use in the UK. What type of pine should I purchase from our good lumber yard to duplicate the type of pine you are using in this video?
Sincerely,
Joe
Eastern white pine works very nicely but it is a tad soft. That said it was favoured by the Shakers for projects like this, but that was in an age when people respected furniture and workmanship. Actually, the Home Depot used to stock what they called a premier grade pine so I don’t know if they still do. It was pretty nice stuff if not little expensive though.
Thanks. Not that long ago I purchases a board the premier grade pine from Lowes (nearly identical to Home Depot for most items). It was an 8 foot long 1×12. It cost $40. There were no knots in it. I made two of your clocks from it and had plenty of scraps left over to keep my daughter happy with what she considers custom building blocks. In fact, she is delighted if I take one of the scraps and cut an end at 45 degrees.
The lower 45-degree works better most of the time.
Hi Paul,
The before picture looks very familiar, so I’m looking forward to trying out this little modification. When you say “Now push forward with the cutting iron inclined by about but no more than 3-4mm (1/8″) off the plate”, is that just one push? Is that enough?
Exactly, not hard and more a sliding stroke only and no more. It is a nano-micro and needs no more than that, takes a nano-second and the result is amazing. We are planning a video for it very soon.
Hi Paul,
Where did you get that Pine from? And have they got any more!?!
Regards
Paddy
I used Travis and Perkins but I am not certain if they always have this as a grade.
Oddly in the news last week, T & P are ‘re-organising and restructuring’ at the moment, but what type wood did you stipluate when you ordered It?
Our local T & P only stocks low-grade builders’ timber.
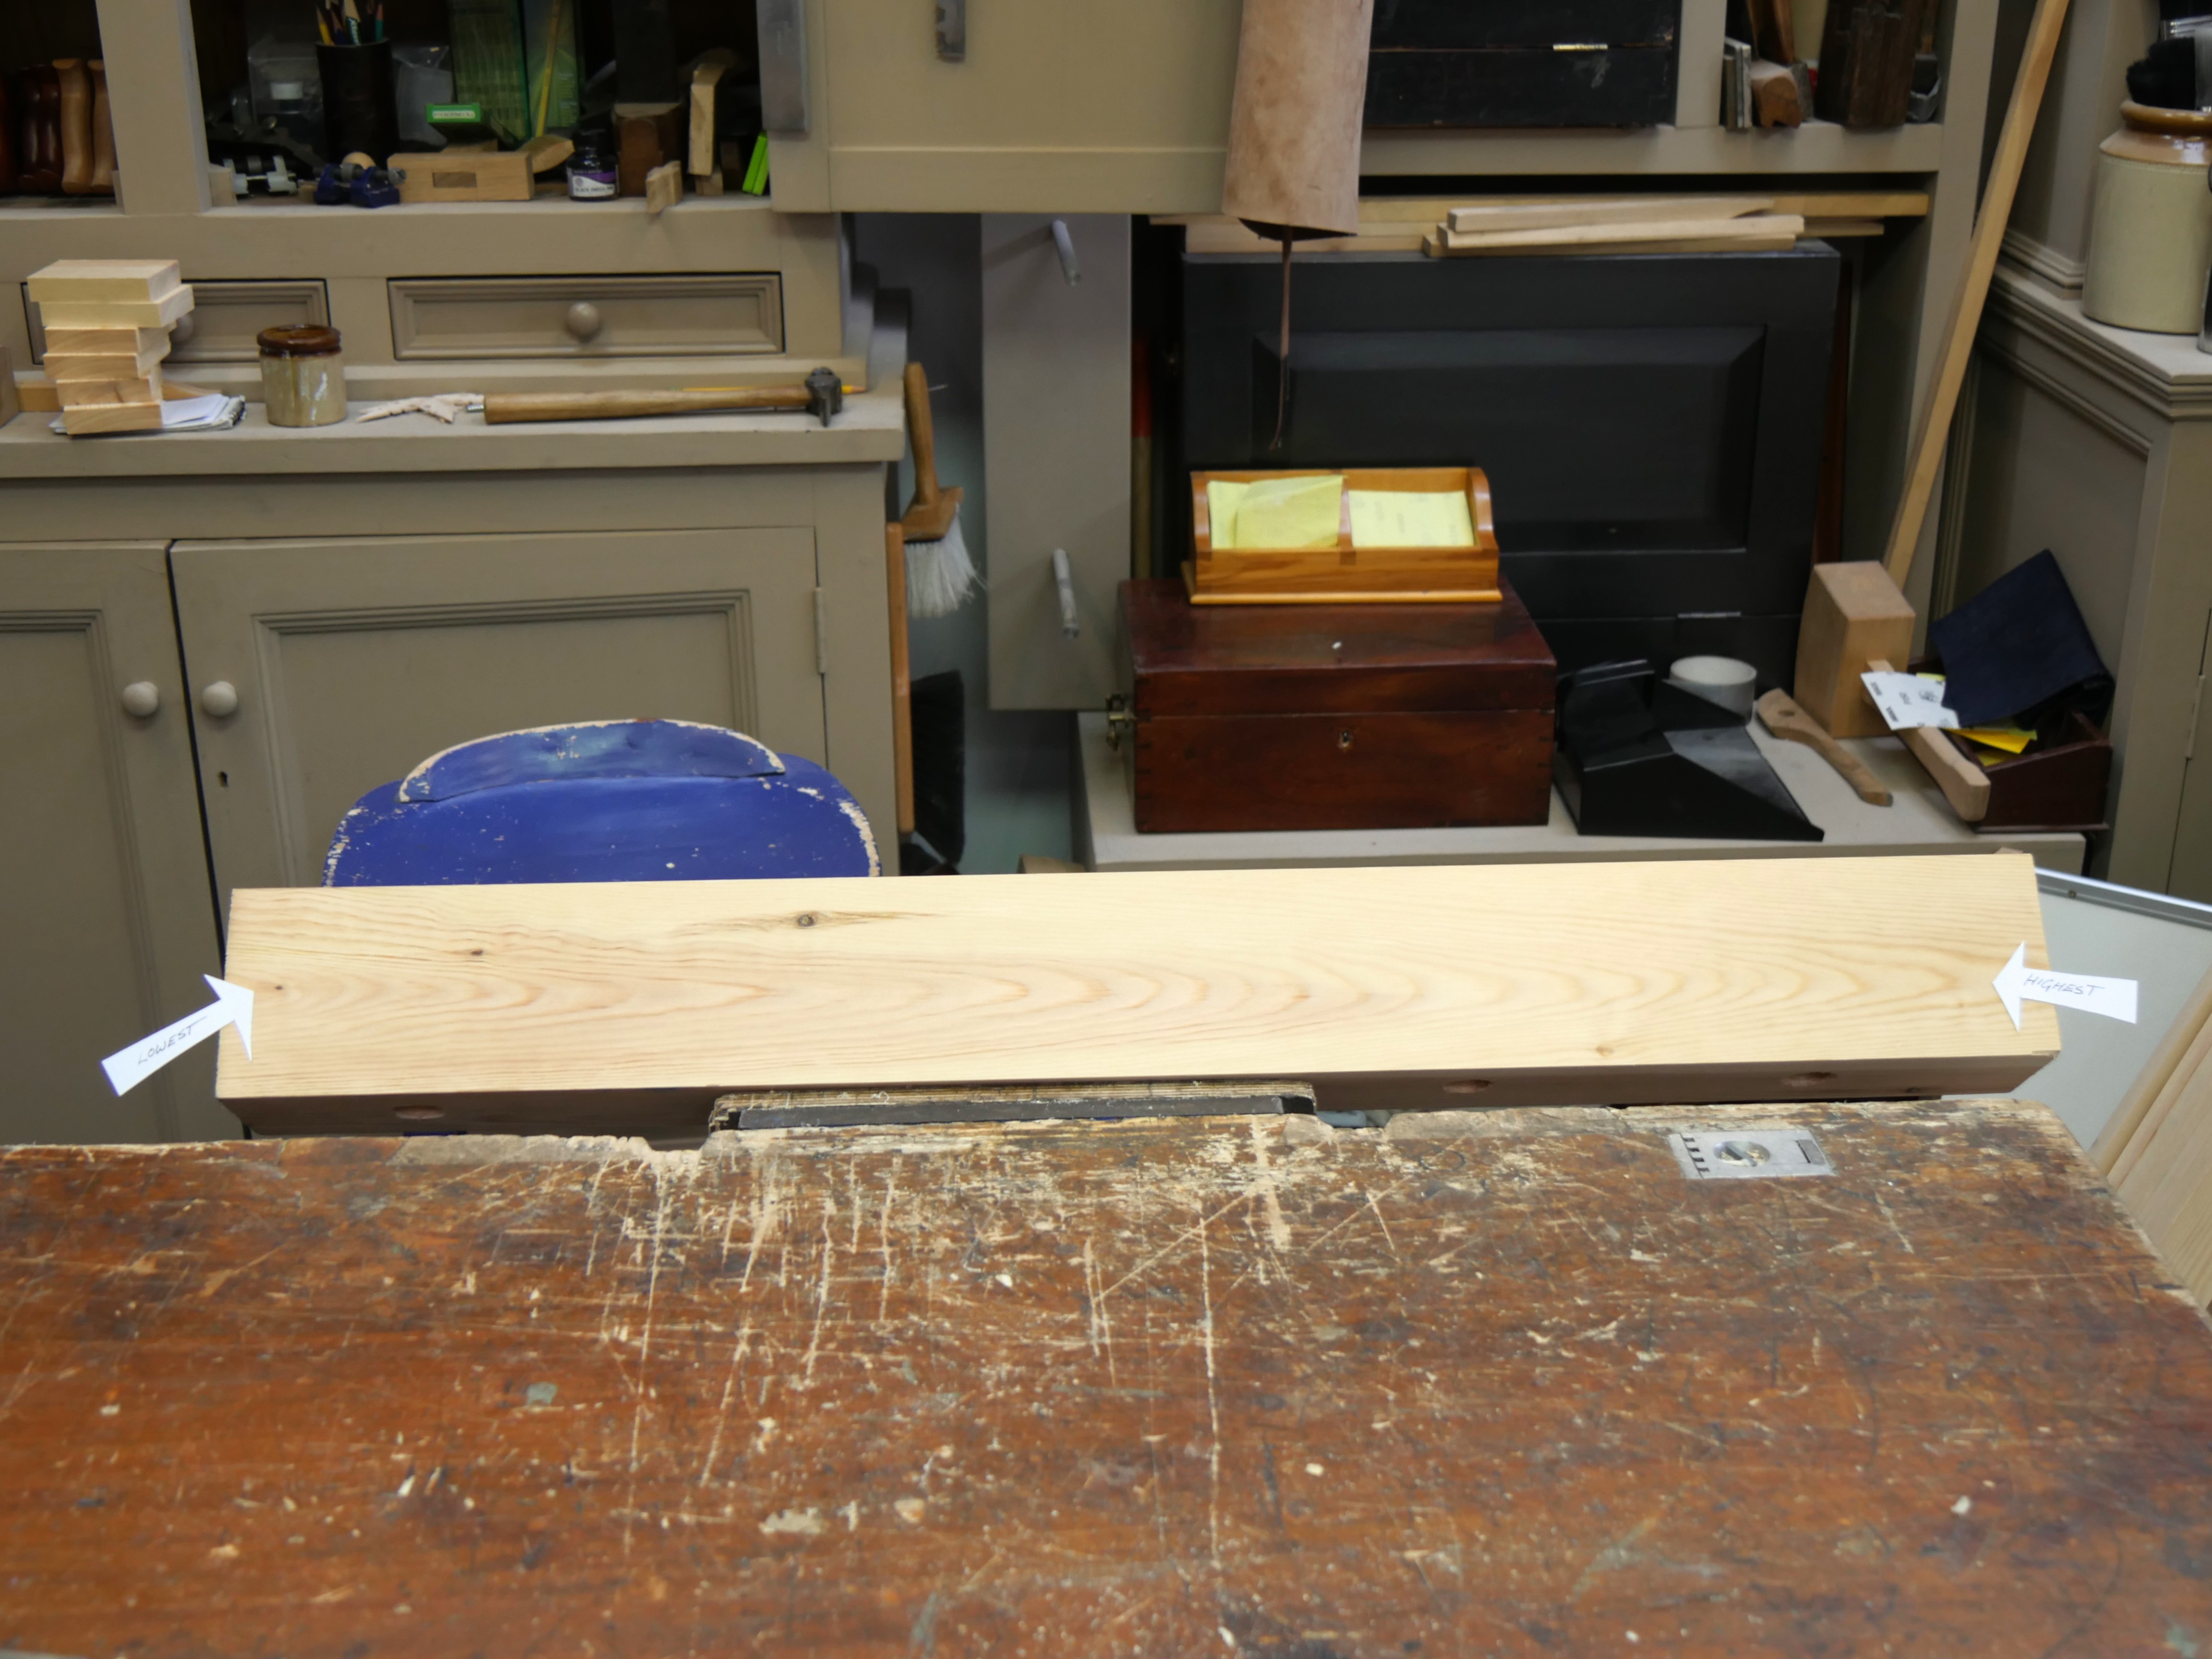
If this is a Shaker-style chest, would said Shakers have used sliding dovetails……. it would be an advantage to include this type of joint as part of the structure which has only been touched on before in a stool top.
If not, I’d be interested to see it crop up in the future. Food for thought!
I didn’t think we only touched on it. We did make two full length and width 10″ sliding dovetails for the stool as I recall.
Why not simply flip the blade over–bevel up?
Paul,
I just tried this York Pitch method and it worked perfectly. thanks for this little tid-bit of info.
Perfect.
This blog made me surf the web for additional information on York-pitch as I knew nothing on the subject. I looked through a couple of other blogs and came across an article on cap iron setting. It is called How to Make Your Bench Plane Perform At Its Best by David Weaver. On YouTube there’s a good video which that article is based on. (The link in the article didn’t show the video) I gave it a try and must admit that it works. I had a board that I just could not plane smooth even with a newly sharpened iron with a very shallow setting. I followed the instructions and was pleased to get a tearfree surface.
Paul-
Once again you have answered the question I was going to ask about a plane. I am working some rough pine and need a York pitch. you had mentioned doing the poor mans pitch before, so I was going to ask how, but you have already answered.
my clothes have been on shelves and baskets for longer than i can remember after repeatedly attempting to repair dressers in mdf stapled drawers and carcasses falling apart. i have refused to buy a garbage dresser and this is very much part of where i saw the value of woodworking at a young age. have considered buying an older dresser just to see construction techniques cause i was never really quite sure on something so large and then dreaded the thought of trying to glue up and flatten large solid panels.i do believe i am capable of designing and tackling such a project from what ive already learned from your offerings but ill be glad to have this upcoming series. i have wondered for some time if you would be including this type of project in your videos and am very pleased to see them coming.
Master Sellers, I would like to know if there is any way you could give us a rough idea of how much lumber we will need to purchase for this project. I just found your posts about this and hope that I am not too late for you to see this so far down the page.
I posted on your master classes forums but I don’t know if you have time to frequent them. So please disregard if you’ve already read this.
My wife would like me to build 3 dressers for my children, I will be building this I am almost certain of it. So we would like to go ahead and purchase some lumber for it as Oak, Aromatic Cedar, and Birch are all on sale this month. I know you won’t be able to finish the video before this is over and that is fine of course, but we would like to take advantage of the sale (Red Oak @ $2.15 / bf seems too good to pass up, likewise for the aromatic cedar.)
Thank you sir, you have served as the single greatest inspiration to my aspirations of woodworking and I have learnt more from you than anyone.