Sharpening Router Cutters By Hand—Simple Works Best
I like simple, unfancy, non-invasive sharpening methods as most of you reading my blog and watching my videos will know. Simple things, simple systems that are not at all simplistic but work effectively and efficiently. So I strive to find them—not just for me but for you too. A question about router cutters and how to sharpen them (not machine router cutters but hand router plane cutters) comes in often enough to show that it is a struggle for most people to achieve a good sharp and square edge to them is not without a struggle. If you have super-strong fingers it is less of a problem, and I do, but if you don’t the chances are you will create a two-directional camber to the bevel and this creates a problem for establishing a cutting edge parallel to or coplaner to the sole of the plane. This then results in an uneven or marginally stepped surface over the routed recess. For much of the work we do that might not be so important, but when we want a recess as flaw free as possible it is.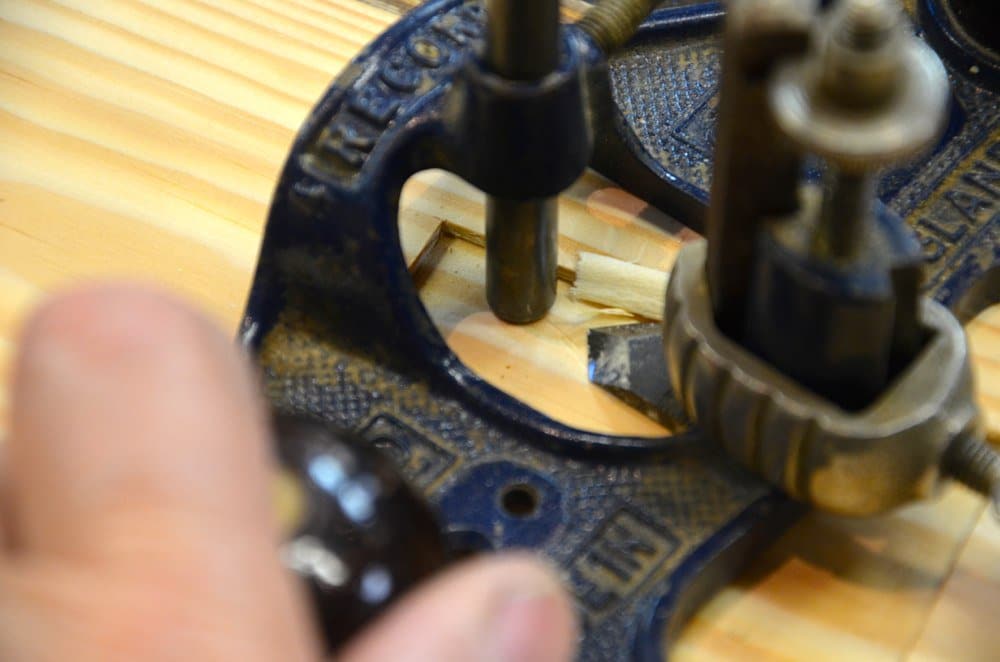
If you need to know how to establish the presentation of the cutting iron parallel to the sole face go to a series on the router plane that includes setting up for a perfect finish to the recess surface here. It’s one I really worked on and developed and used most of the content of for my last book, Essential Woodworking Hand Tools. Developing the bevel is where people mostly go wrong, so I developed another sharpening method that works for developing the sharp edge and also works for maintaining the cutting bevel square to the edge so that the bevel does not undermine the work you did in developing the parallelism of the cutter to the sole. I perhaps might have considered including in my book but it will work here to tell people just fine.
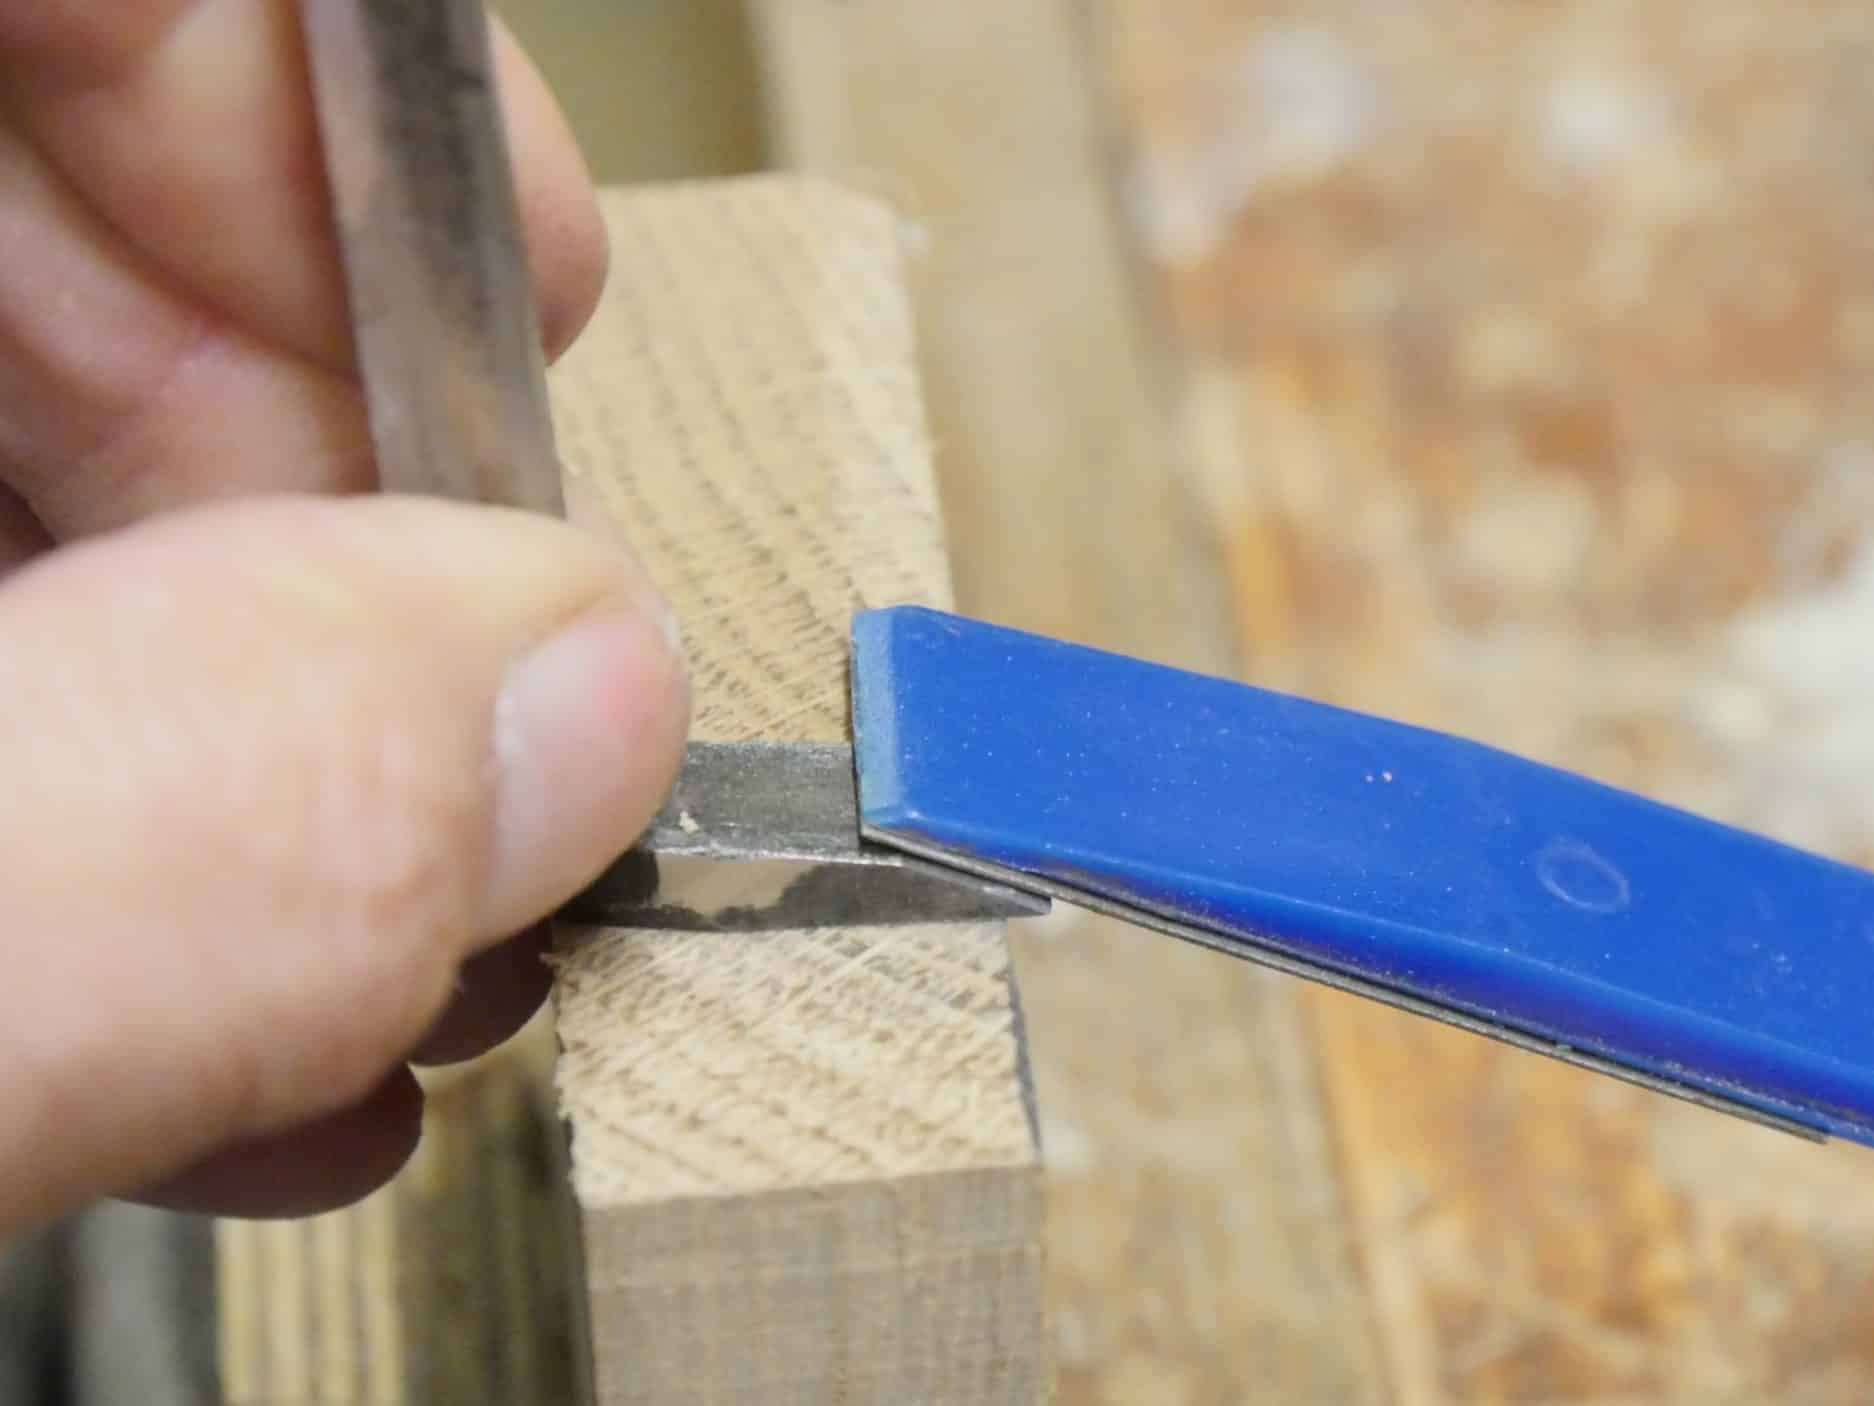
The method I now recommend came from my work on establishing and maintaining the correct angle for knife-blade sharpening here. By adjusting the height of the ‘table’ using the vise you effectively determine the bevel you want depending on the work you are doing.  Raising the table steepens the bevel, lowering the table makes for a shallower bevel. It’s dead simple and highly effective. Though my process for sharping knives went through an evolutionary process over the years, the best yet was the latest one I ended up posting on in a blog post above at the beginning of January this year.

Distances
—— 
Amazing. Thanks Paul I could get the cutter fairly good with your previous method but this will make it so easy to do. I never achieved a sharpness that I was happy with… this will definitely work for me.
Hi Paul. Does a spear pointed cutter only touch the wood on its tip?
No, the side bevels cut and they cut clean into corners and such.
Hi Paul,
I bought the diamond paddles based on your recommendation and they work great. Only problem I’m having is, I’ve been restoring a spokeshave per your restoration guide. While filing down the bed with the diamond paddle, it’s gotten clogged with paint, gumminess, etc. Any advice on how to clean and dislodge the debris in the paddle? I’d tried scrubbing with a wire brush but that hasn’t worked. Any tips?
Yes, wire brushes is not to kind to the diamonds. Probably better with a solvent for oil-based paint or even Nitromors paint stripper-carfu;y applied of course.
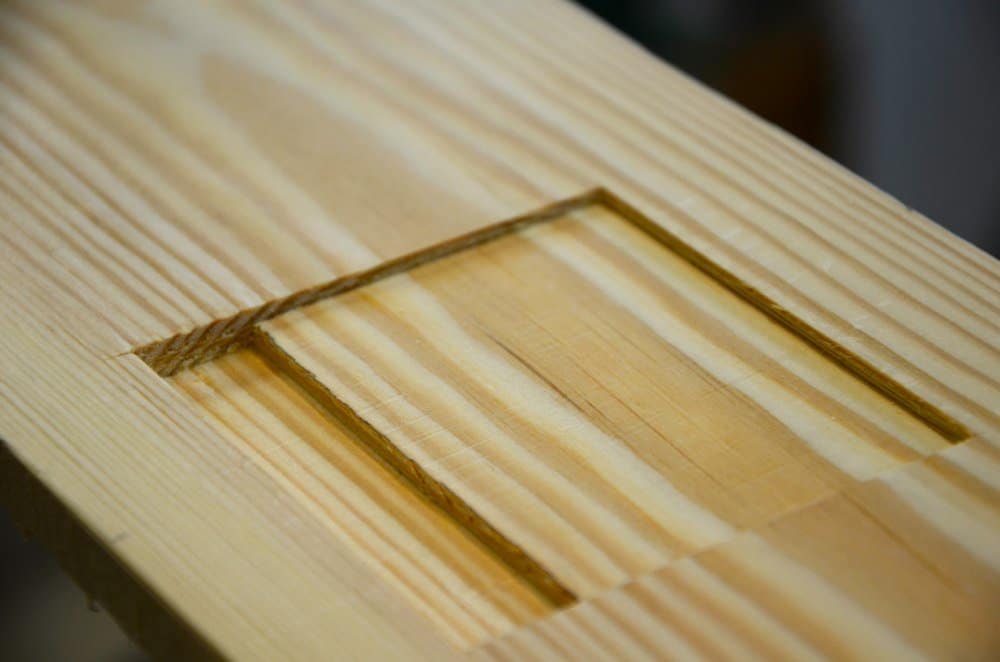
You said “I bevelled the adjacent higher surface to allow the sharping hone access across the whole bevel without tripping. ”
I don’t understand this sentence Paul.
Tripping on what please?
In the picture above you can see the corner is taken off where the blade sticks out a bit. It look like it’s at the bevel angle. If not the blade would need to stick out more so the paddle doesn’t hit the corner of the step down.
Sorted. As soon as I tried a ‘file’ on the iron, it is clear that the bevel is needed to clear a path for the file
once past the iron itself.
Otherwise the edge catches / stops the file.
I was lucky and I have a 2 for 1 sharpening jig now. The scrap I used to make my knife jig was long enough to make a router cutter jig on the opposite end. I marked the knife side with a blue marker, and the router side with a red marker. One small scrap of wood makes two helpful jigs.
Hi Paul…
Brilliantly simple…. or it should be. Even trying this method I haven’t quite got it!
This is crying out for a video I think. Any chance of that?
Regards,
Matt
I’ll definitely will try that! I’m even thinking of making a slightly deeper platform to make sharpening small chisels easier.
That’s another thing I just can’t get right.
Any tips on that ?
Do we sustain the same 30° bevel angle that we commonly use for chisels and planes with the router blade?
Yes. We generally shoot for 25-30, Alan, but 25 works fine and even a little easier into the wood.
The 05P3803 (1/4″) has a bevel angle of 30° and the 05P3804(1/2″) has a bevel angle of 25°. The angle of the bottom of the blade to the horizontal is 85°.
So the sawcut should be off square to compensate?
Hi Dave,
I’m late to the party but who knows it might be useful for someone else who will read this later.
The thing is the angle the diamond paddle creates to the bench isn’t strictly set, it’ll vary when you move the paddle and so it doesn’t matter that much at what angle the cutter edge is represented to the bench top, you’ll just compensate it by moving the paddle closer/further to/from the platform/jig. So the step down can be cut perfectly square and it shouldn’t affect the process.
Paul also mentions the variability in the angle in the last paragraph:
“Because the sliding of the hone on the bench top is moderately variable, so that you use the whole surface of the diamond hone, the bevel of the cutter develops a very slight and almost indiscernible camber, which in my view is perfect.”
I have always thought that, intuitively, it seems more logical to apply the sharpener to the tool (eg as in honing a scythe) than the reverse (flat stone and chisel or plane iron). The problem in both is to ensure a correct angle during the process, but your method here for router plane irons seems to suggest that a similar way could be found for chisels and even plane irons. I shall try it.
RD
Paul,
Tried this today on my small Veritas router and it works for me, though it’s not as easy or as sharp as sharpening chisels. Maybe that’s experience.
About the stropping – I found it rather difficult to strop the a small surface with the stem being in the way. Do you use the leather side of the strop with the cutting edge trailing the stroke as much as possible or is there another technique to use here?
Kind regards,
Mic
Actually, the Veritas router planes have a cutting blade which is removable from the stem. So I find it easier to remove the small blade for sharpening.