Safe Key-ping…Or One For the Kids
In need of a safe, inconspicuous spot to keep a spare gate key, I made this fake nesting box. It could be a permanent nesting site for cavity nesters too, with a little modification. Though I have never forgotten or lost my keys in all my 68 years, things could one day change. A Masters key safe works well for many situations but can draw attention to its location. The advice that came with the key safe is to conceal it where possible. The nesting box works well because it’s distinctive and attractive and weatherproof too. My first thoughts were for a fall-front followed by a lift up lid and that would work but I wanted access that gave my largish hands room to punch the buttons, squeeze the clasp and allow the drop down access door of the key-safe to give me more open access. Flipping to the right answered all issues for a right hander.

Additionally, the tri-sided geometrical shape gave strength with a stable design sufficient to resist distortion through atmospheric changes in humidity. There’s no joinery in this, just butt joints with screws or nails.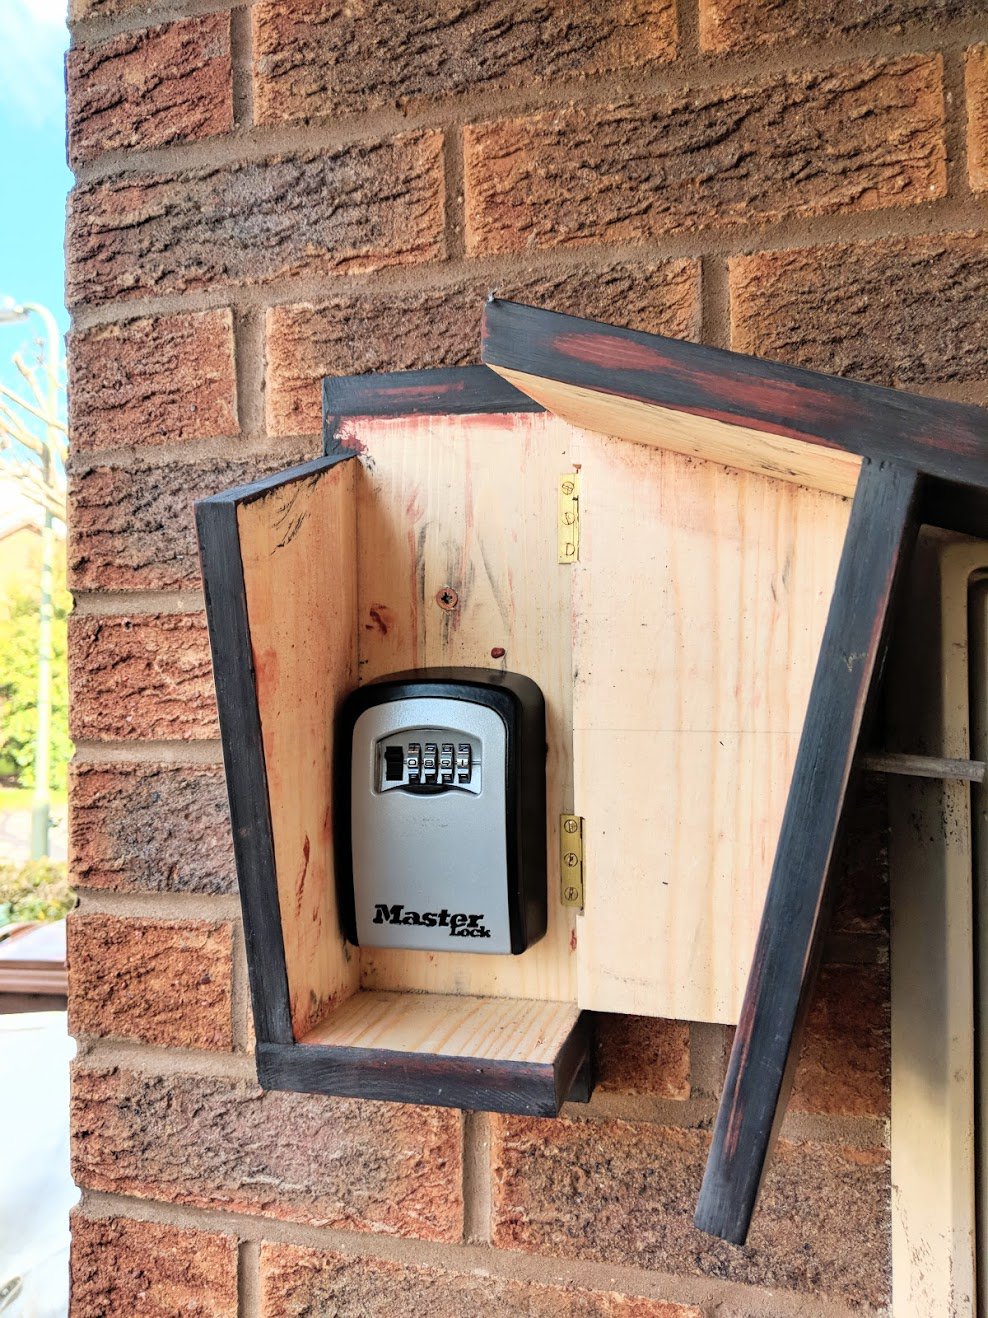
The size of this nesting box is good for wrens, titmice, chickadees and other small cavity nesters. You can scale the box for larger species and size the hole to preclude or include whichever you want. 1 1/2″ for Bluebird, Chickadee 1 1/8″, Titmouse 1 1/4″, Nuthatch 1″ to 1 1/4″. Place 5 to 10 feet from the ground for any and all except the wren house which has a 1 1/8″ hole and should be placed 3 to 10 feet from the ground.
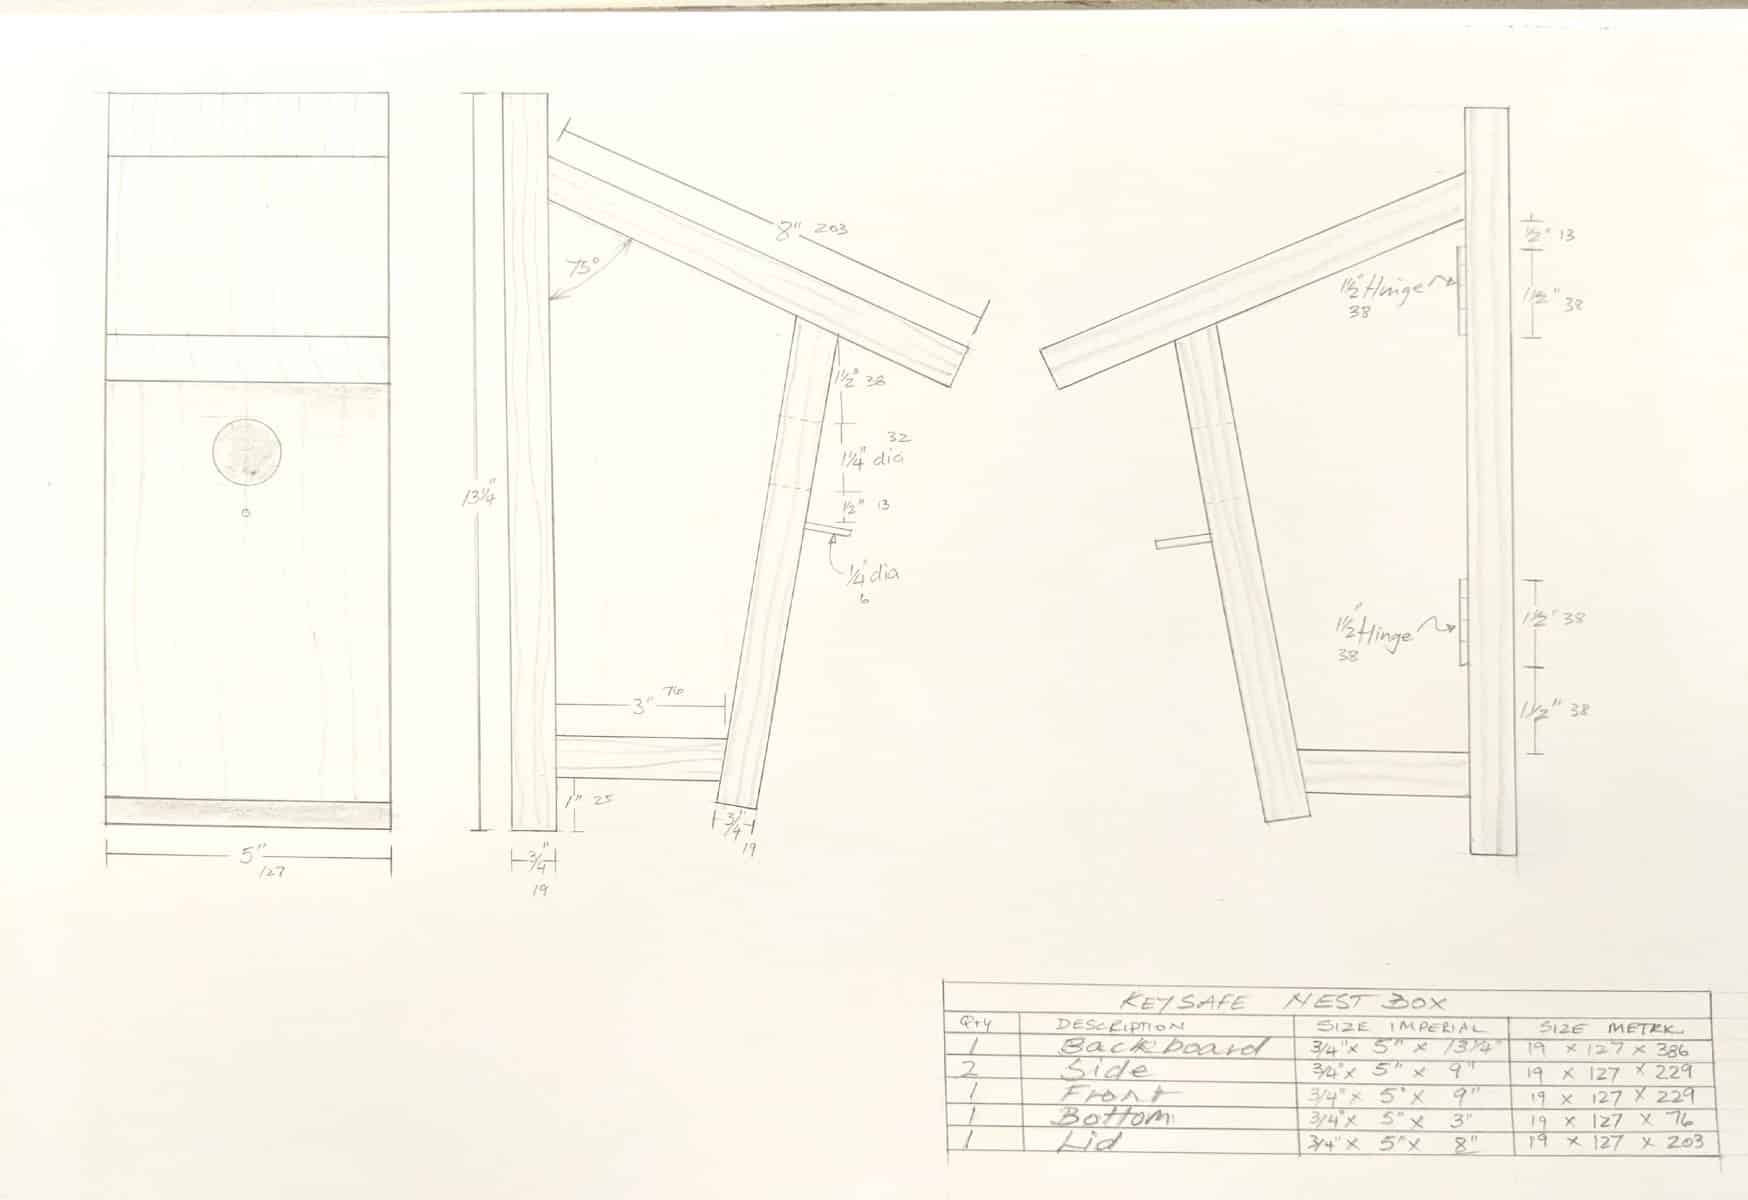
The Plan
This project has no joinery so it’s simple to make and though I have screwed the parts together it can be glued and nailed too.
One board of 3/4″ x 5″ (can be slightly narrower or wider) 52″ long. Pine is great but any softwood will work too.
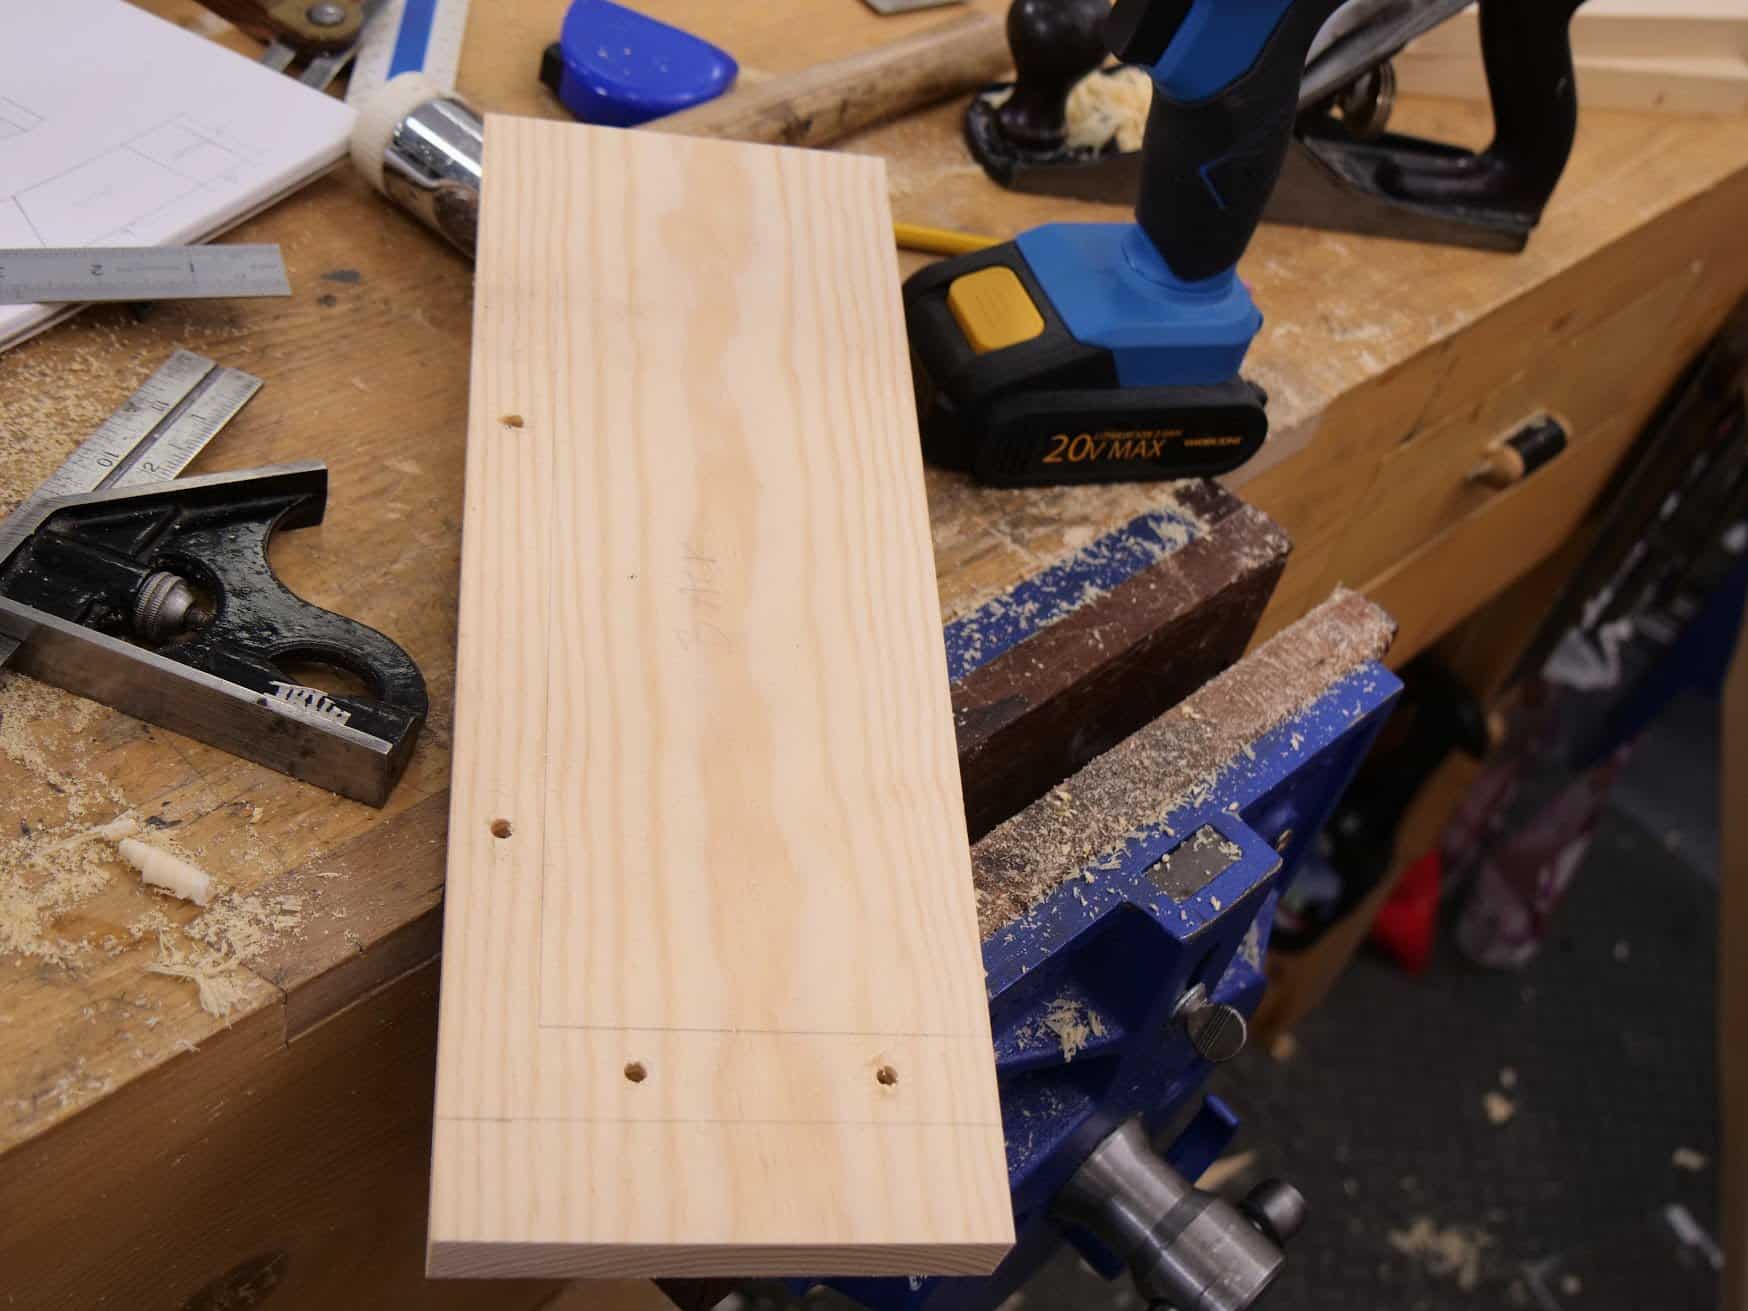
Layout the cut lines as per drawing. Leave about 1/16″ between the knifewalls and knifewall all the way around to prevent splintering. For the side pieces you can use a single cut to cut the two parts at an angle of 75-degrees.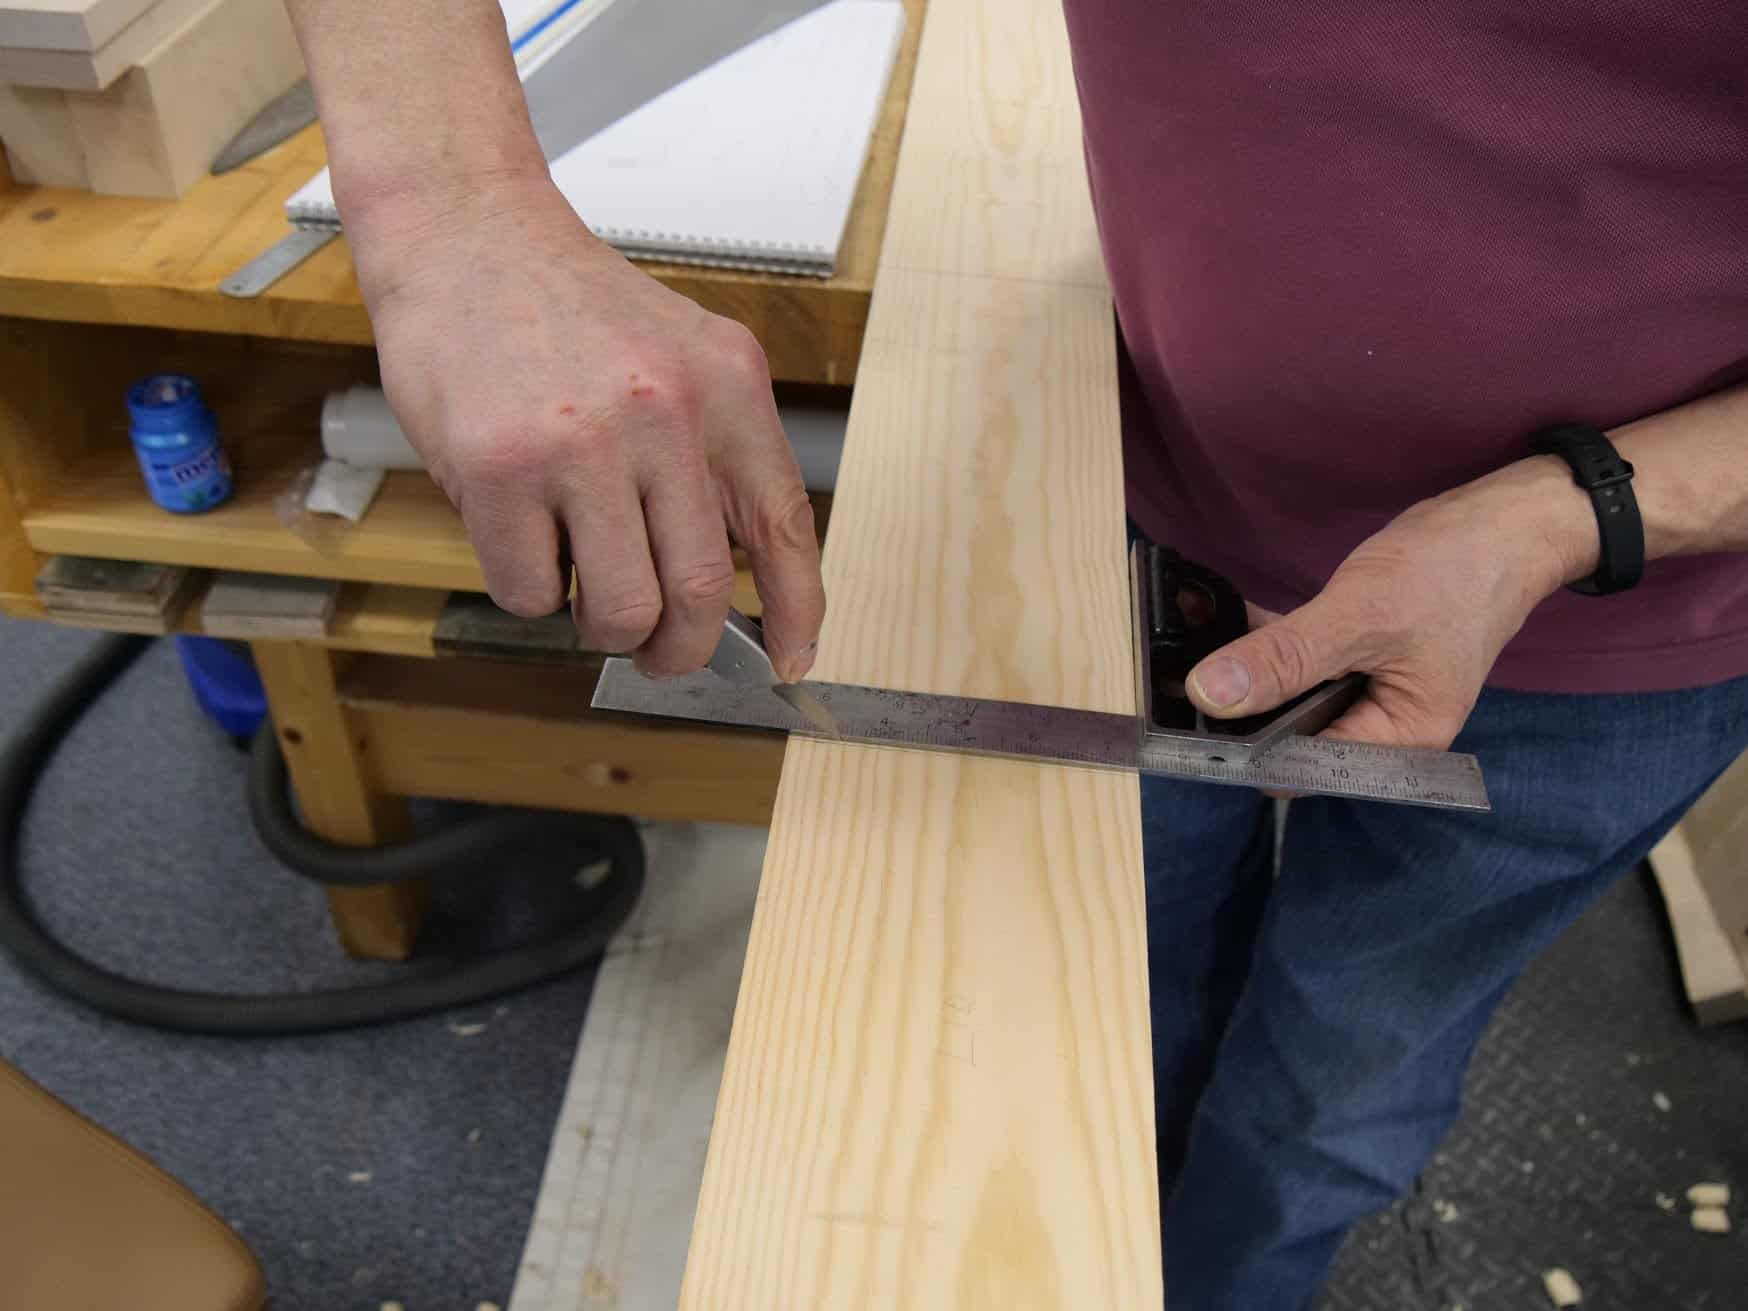
Cross cut the pieces using a crosscut handsaw.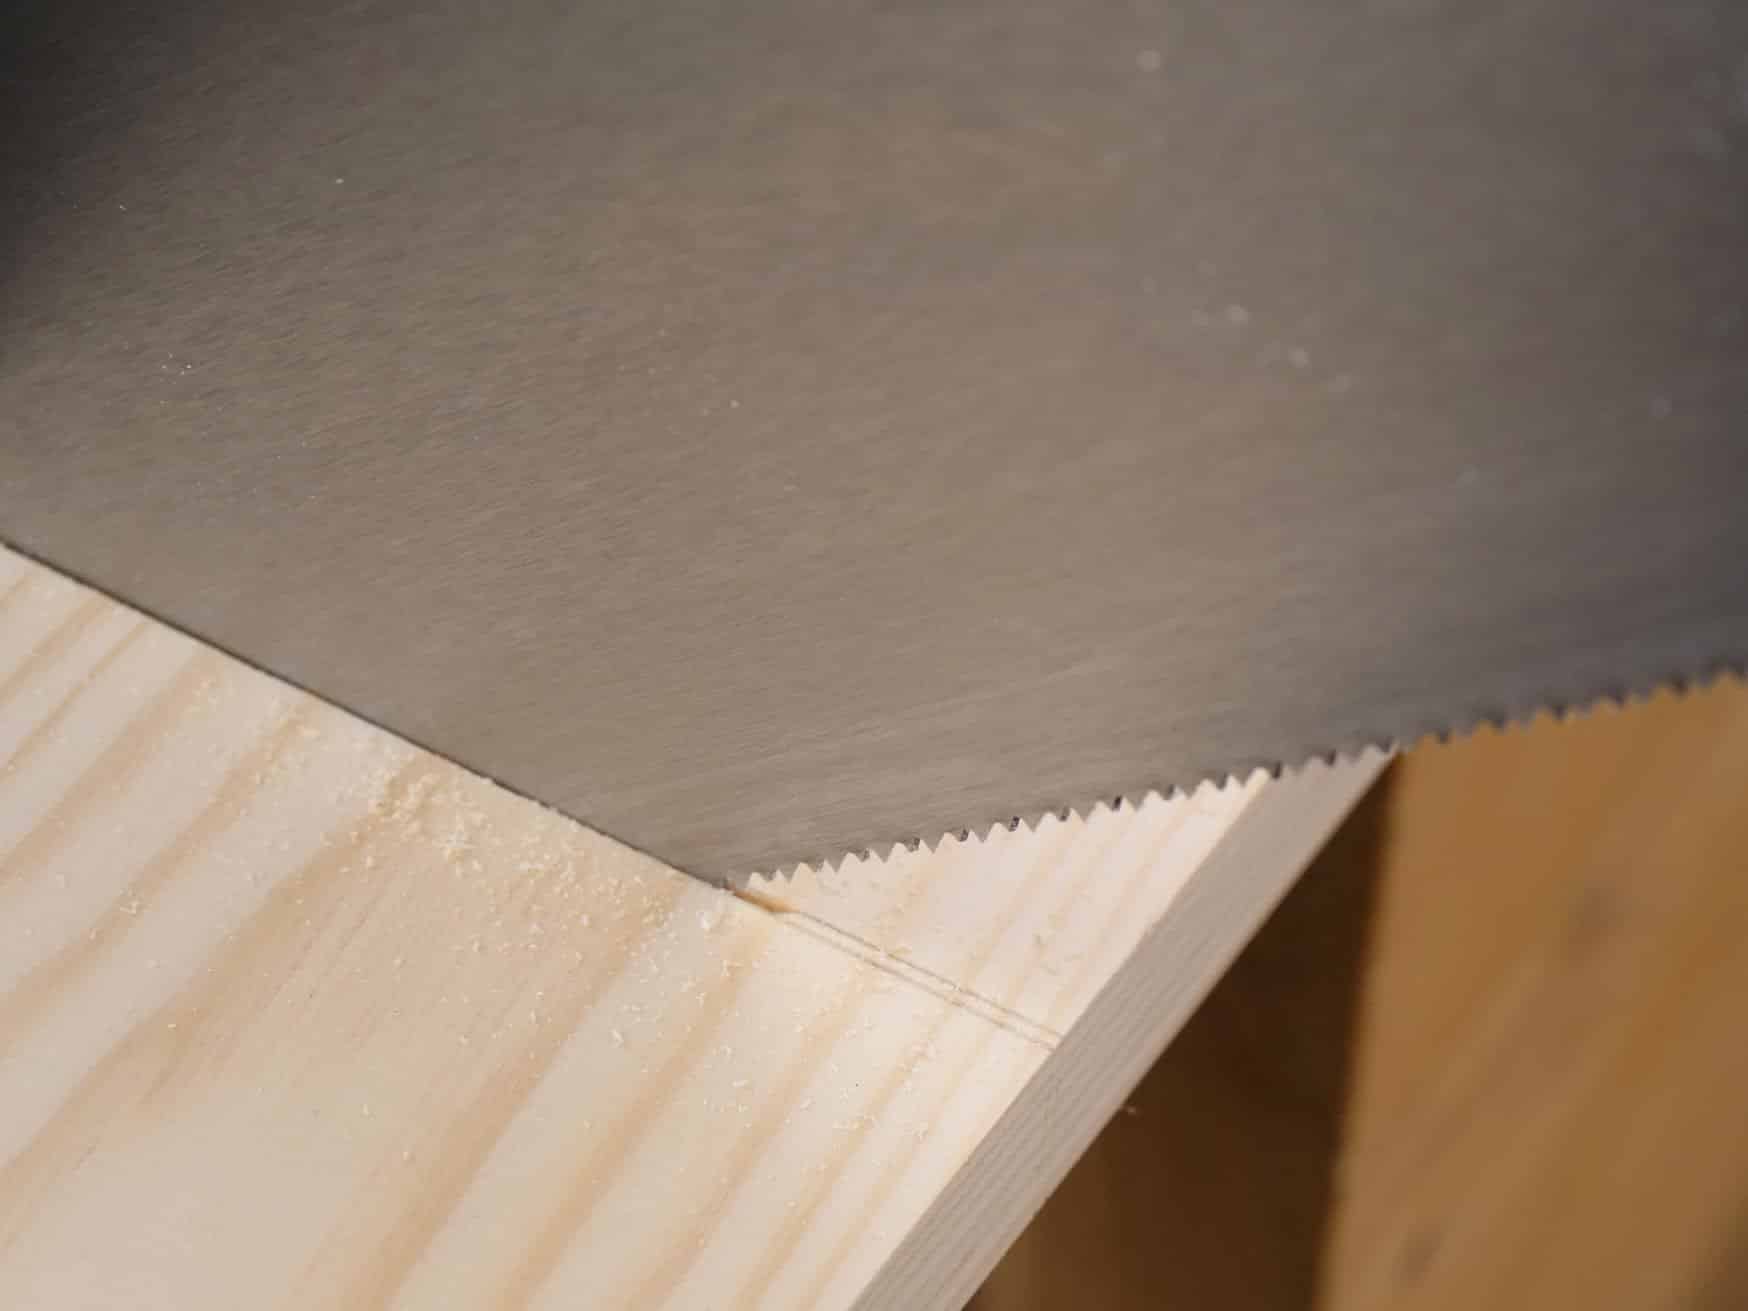
Plane the end grain of each piece cut to the knifewalls. Remember to work in towards the middle from both sides to prevent blowout!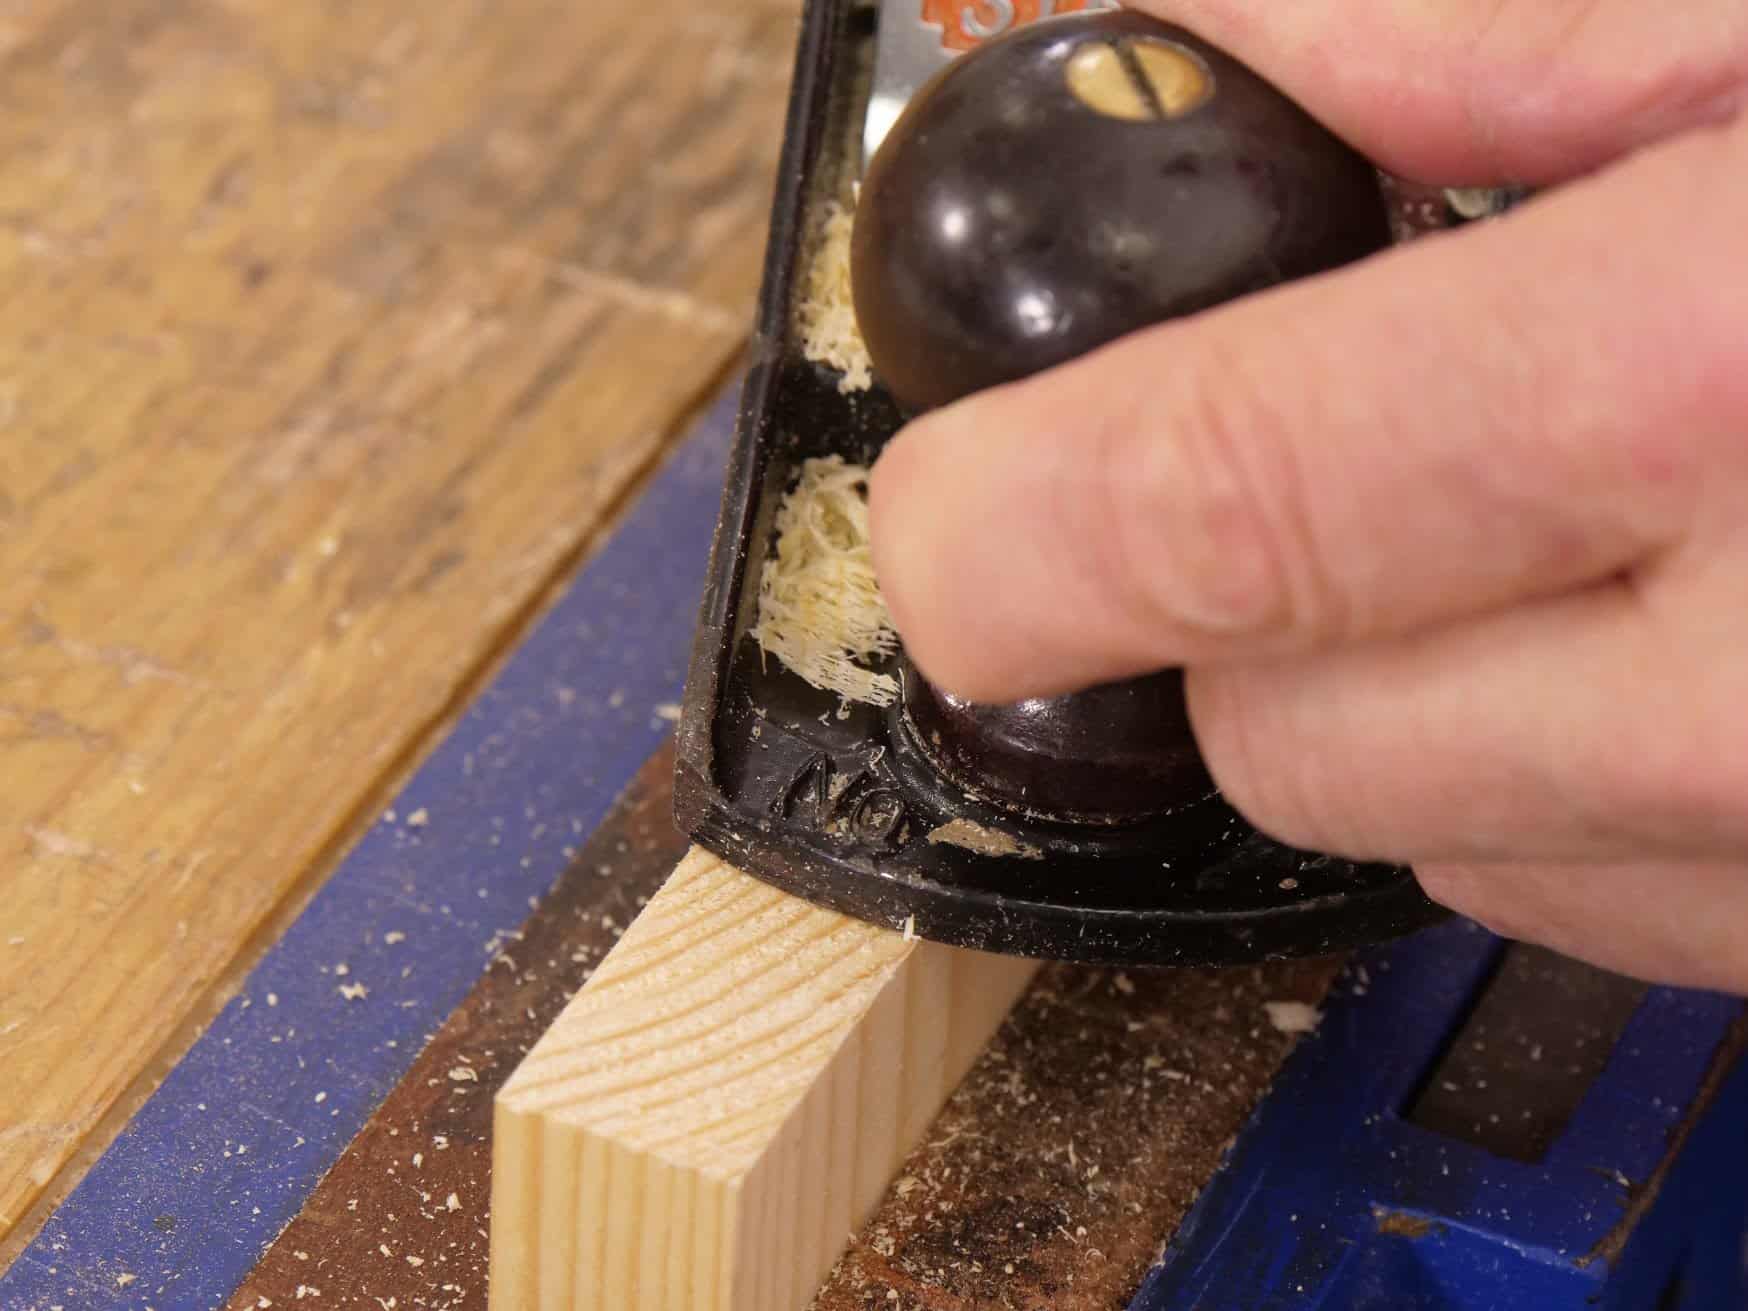
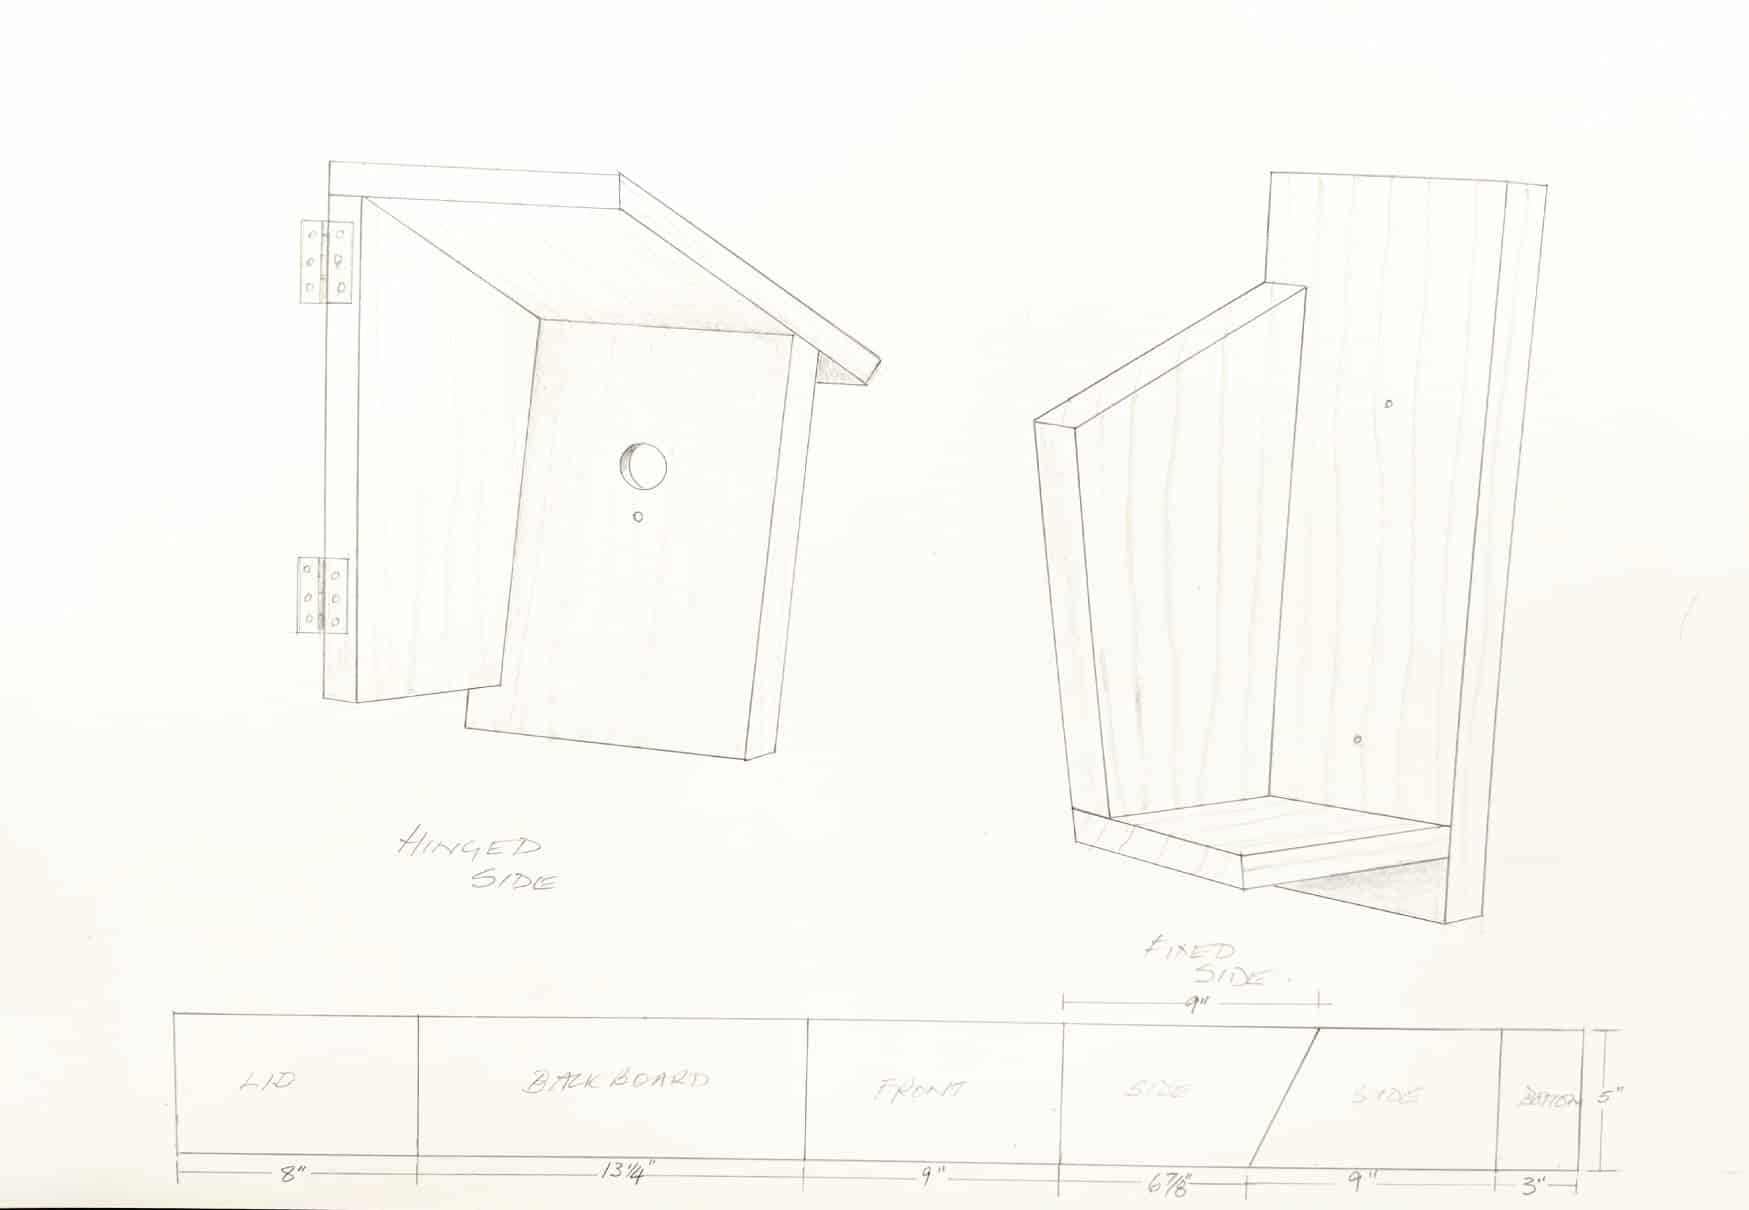
The side pieces are the two with the 75-degrees roof slope. Cut two at once by reversing one after the cut.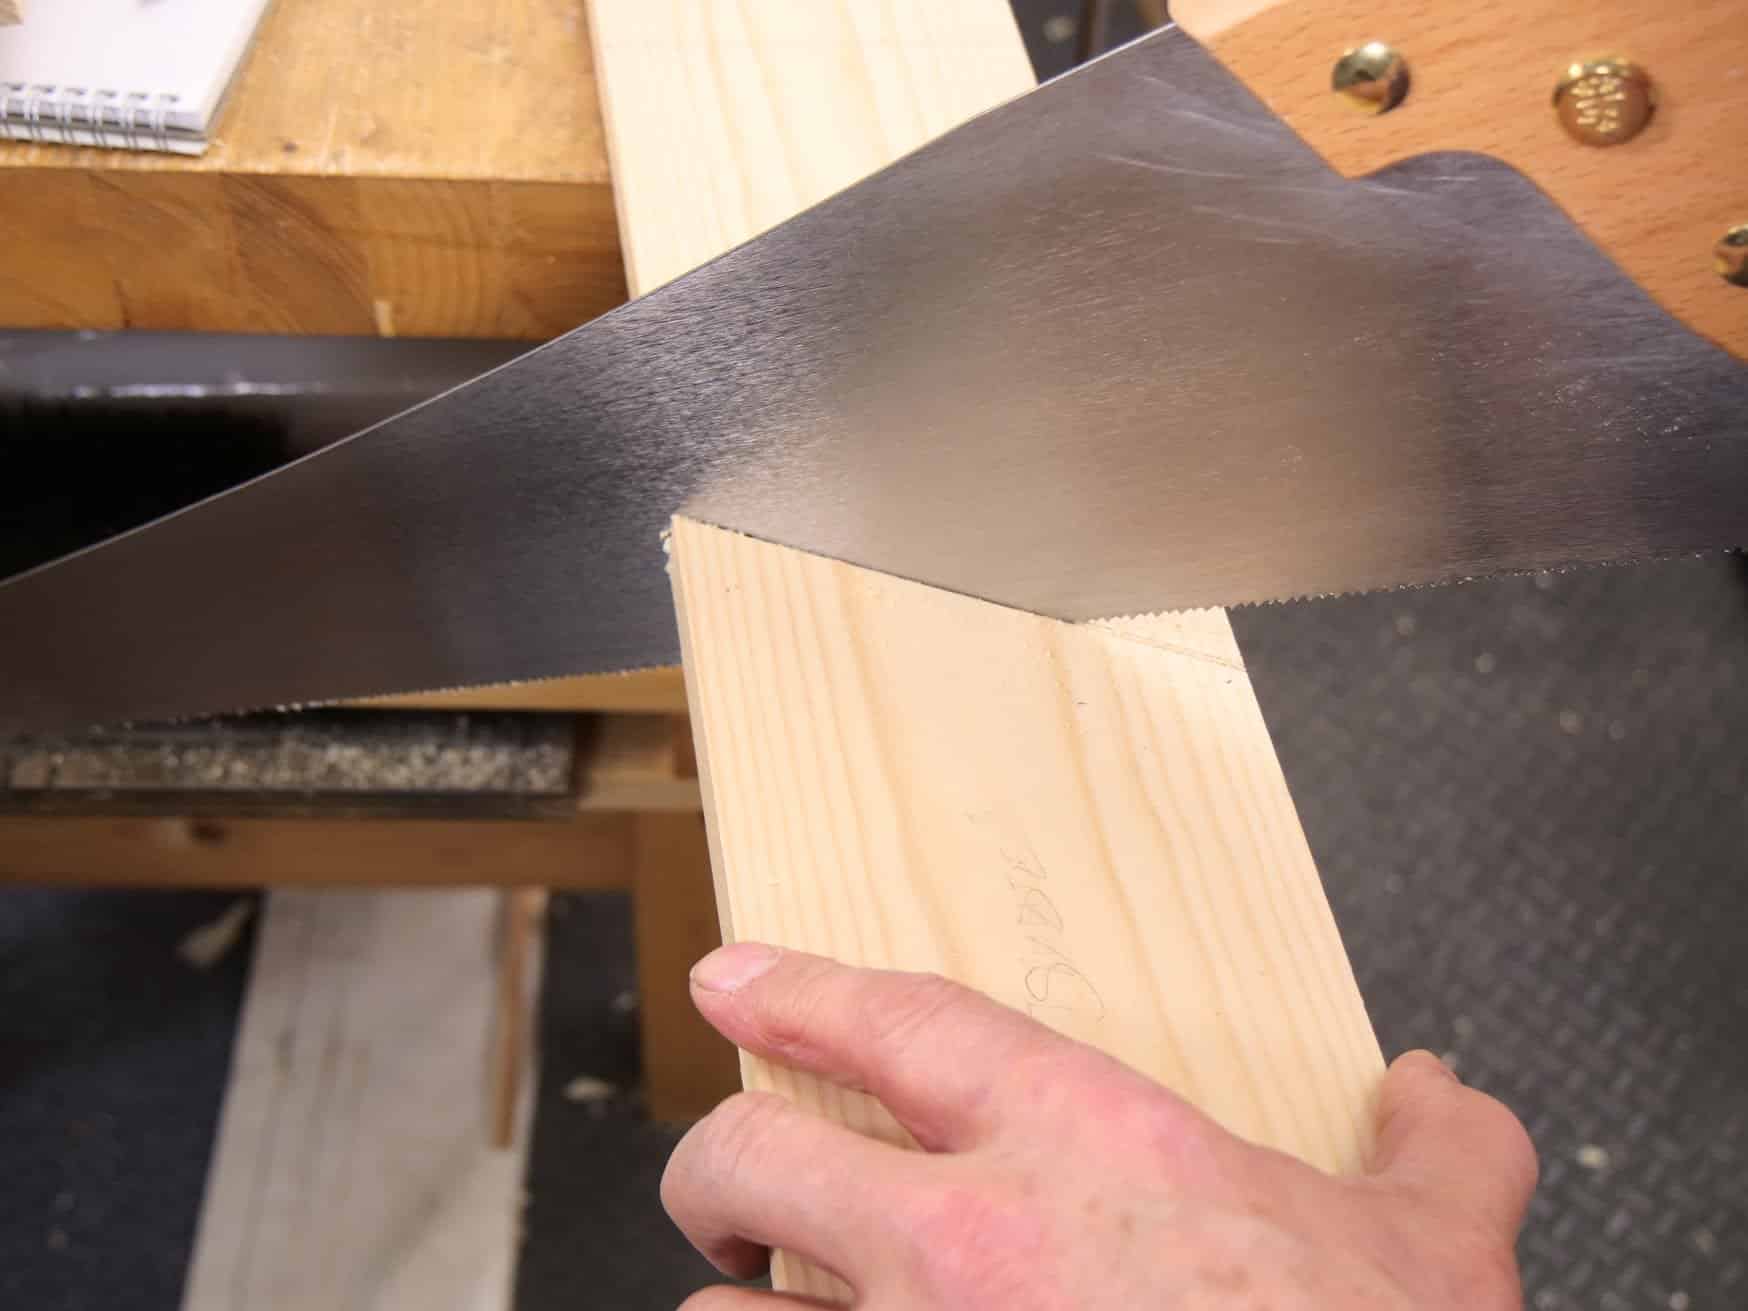
Here’s the stack of six pieces ready for assembly.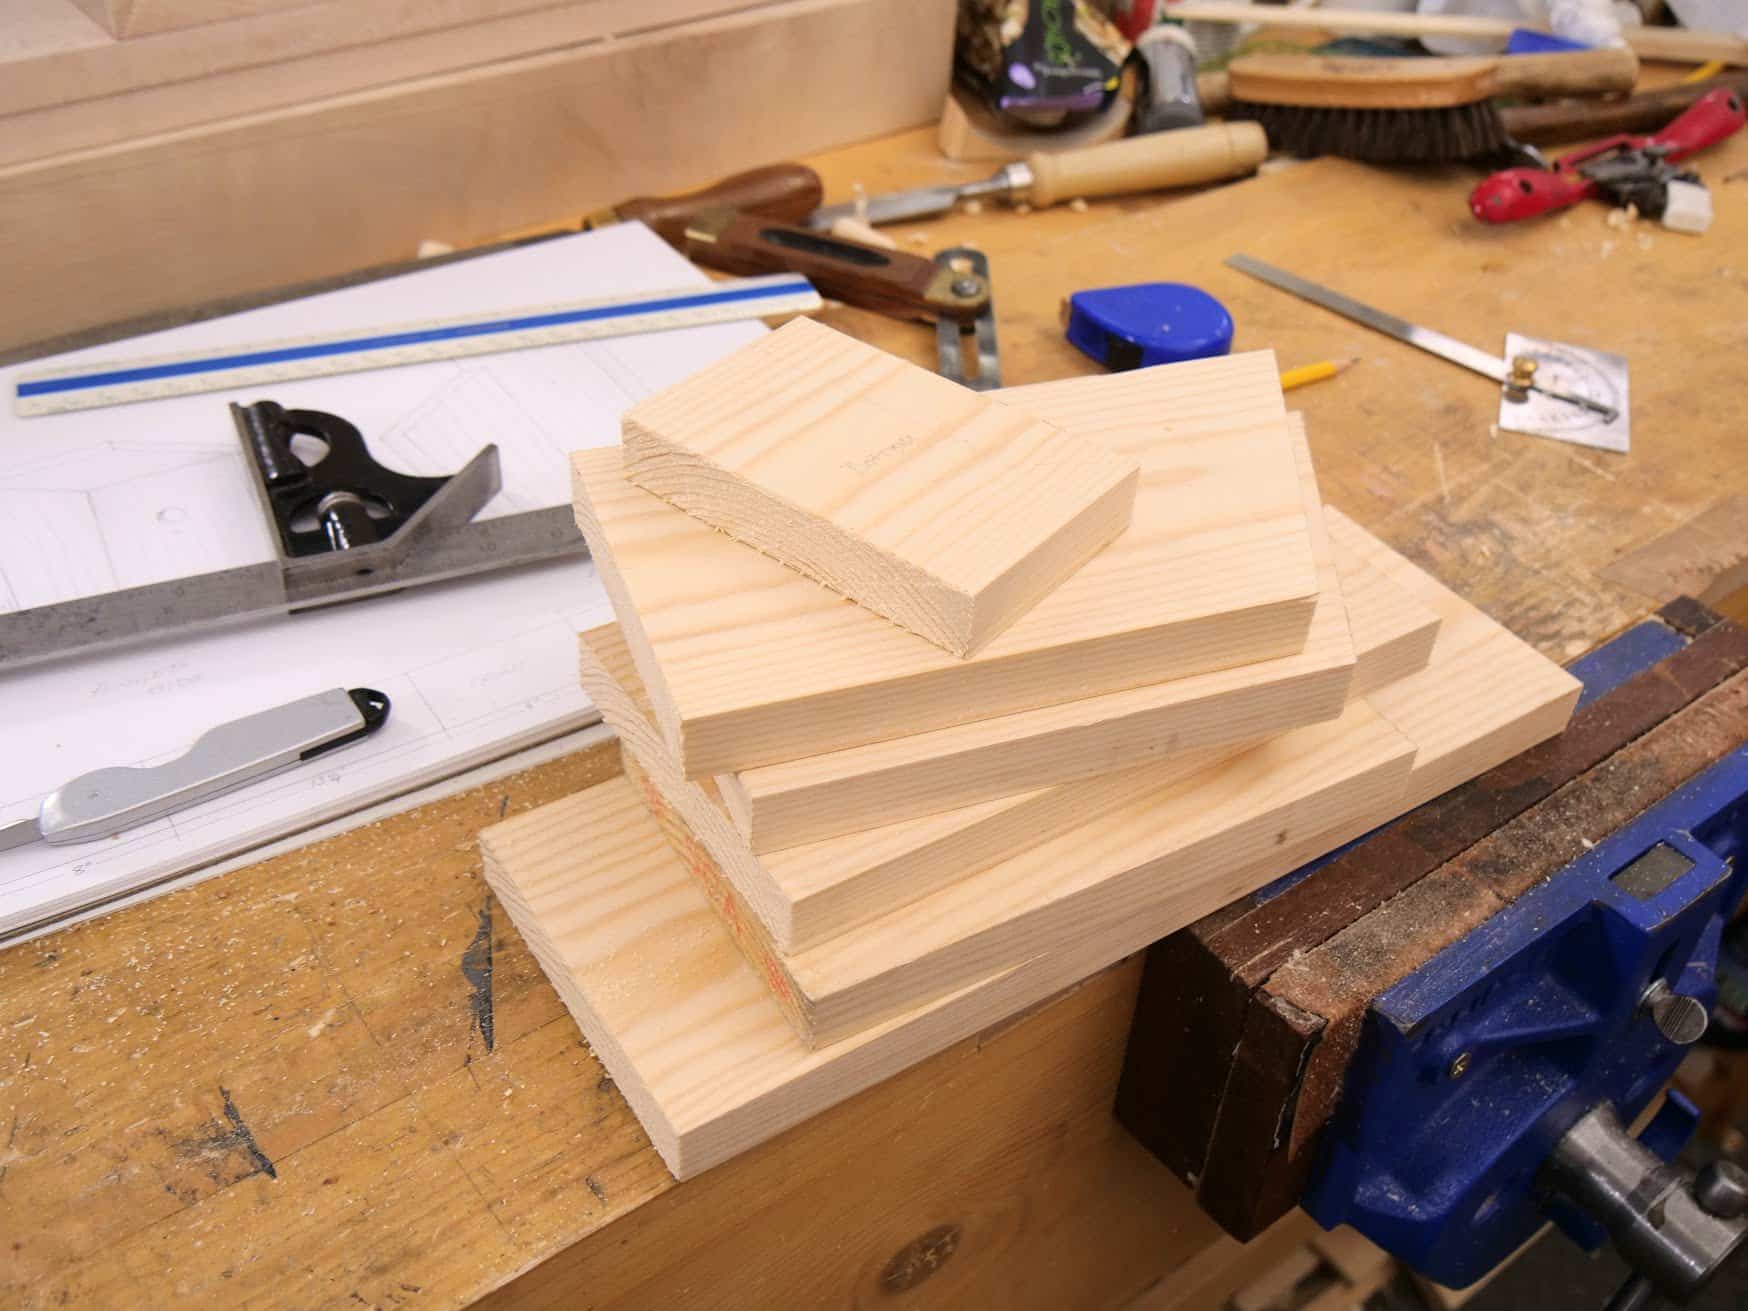
Place the the bottom piece flush with the back edge of the side piece and make a mark. 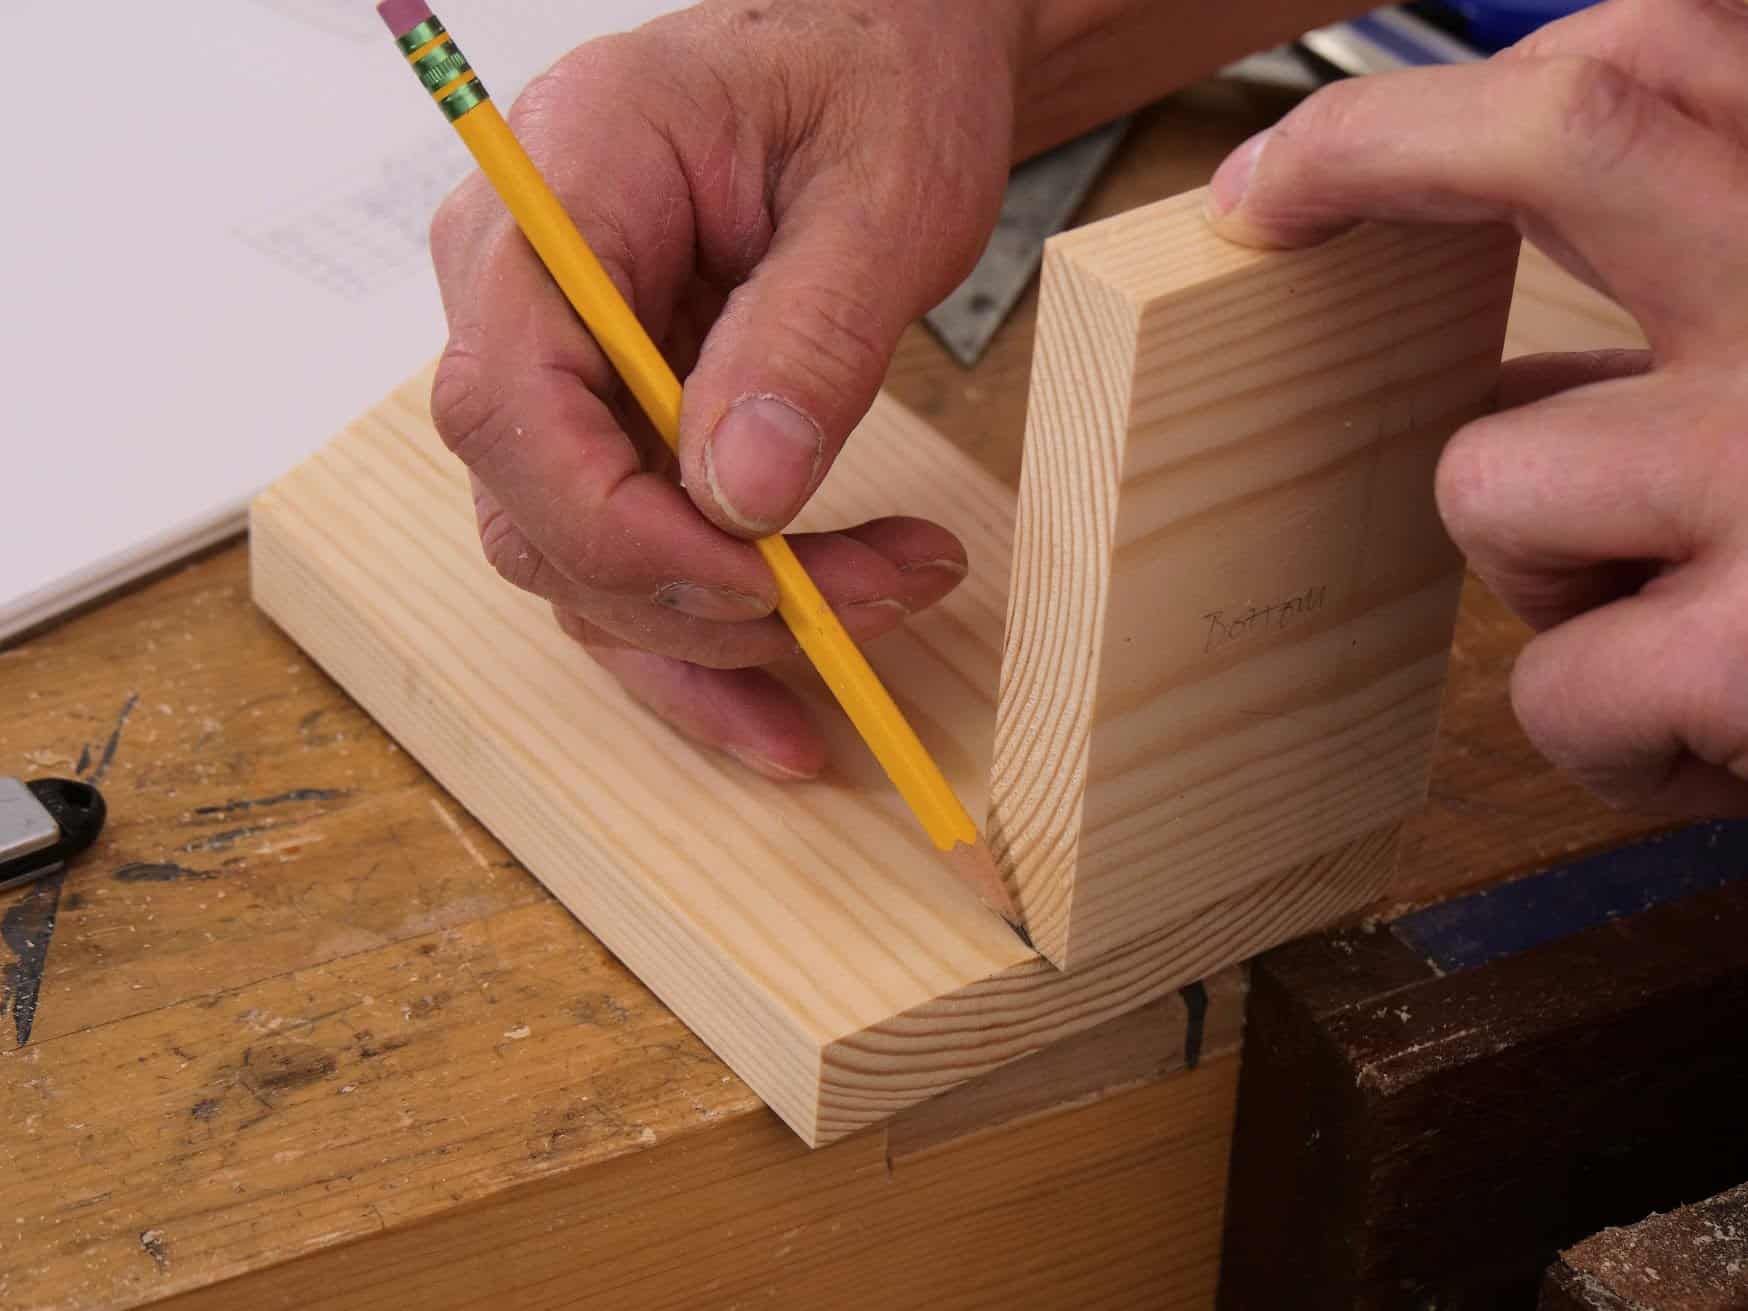
Join this point to the front sloped edge at the front and repeat on the second side piece.
Rip down with a ripcut saw or a crosscut saw.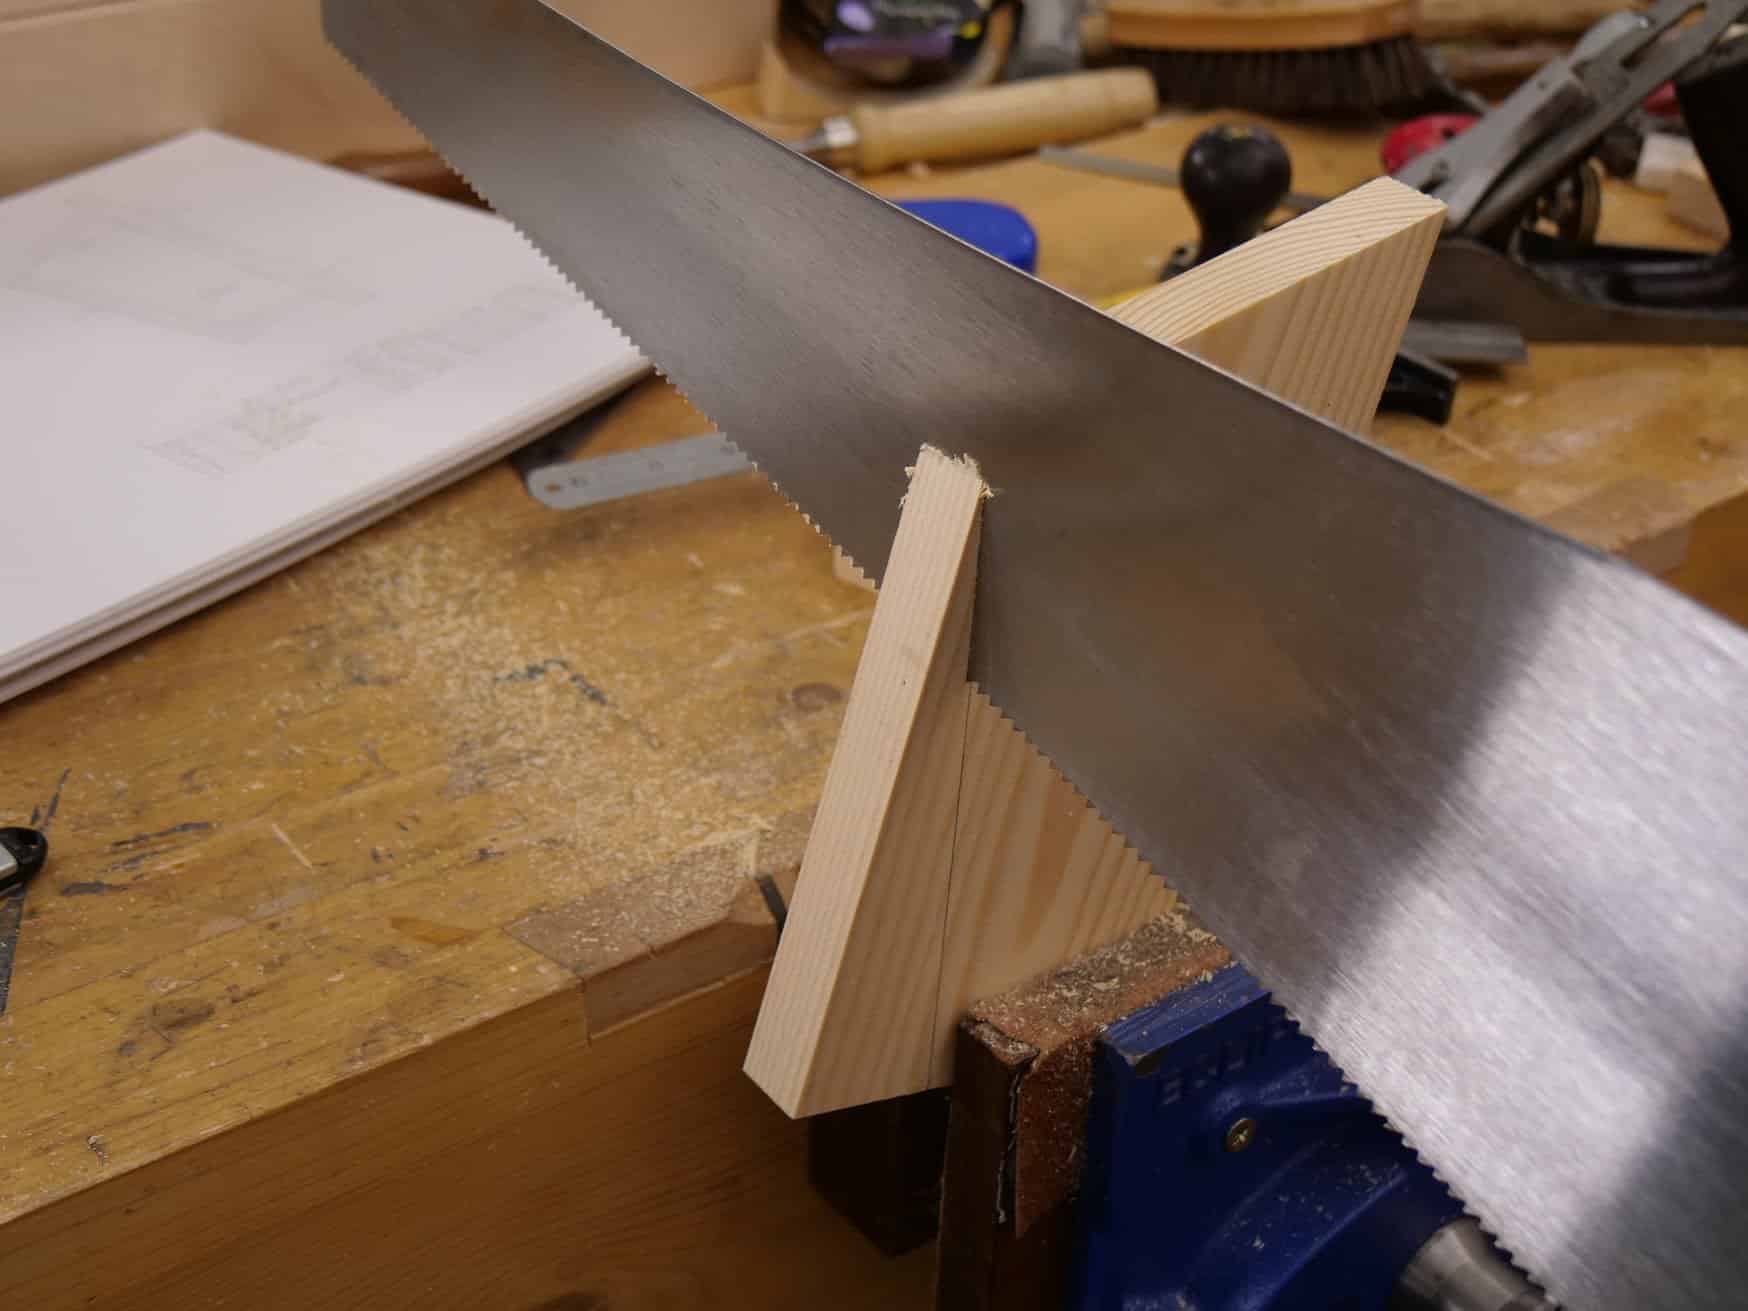
Plane true and square the front edge to both side pieces.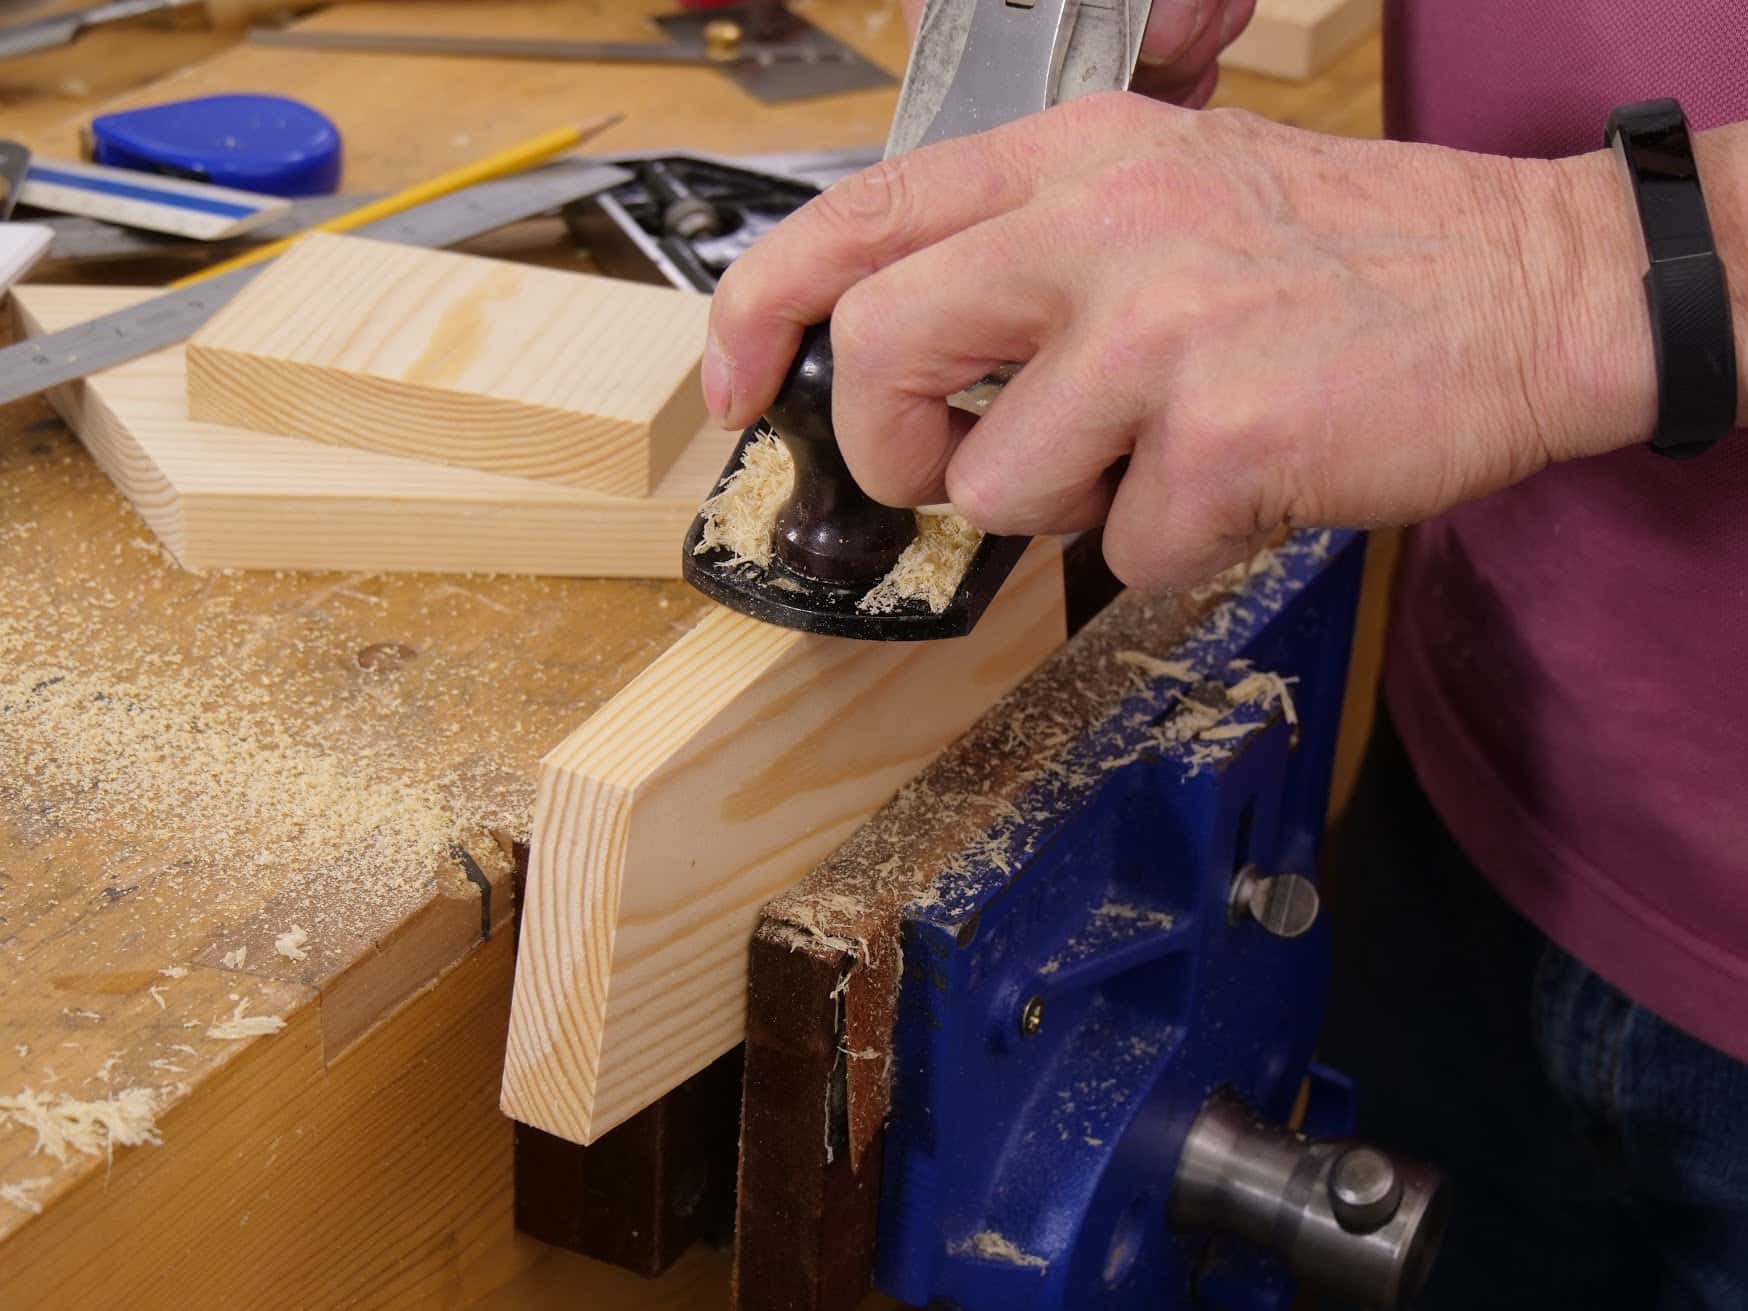
Now pick the pieces for the non-hinged piece. One side piece, the bottom piece and the back piece. These three pieces will be glued and screwed together.
Place the side piece in the vise bottom edge uppermost and place the bottom piece onto the side piece.
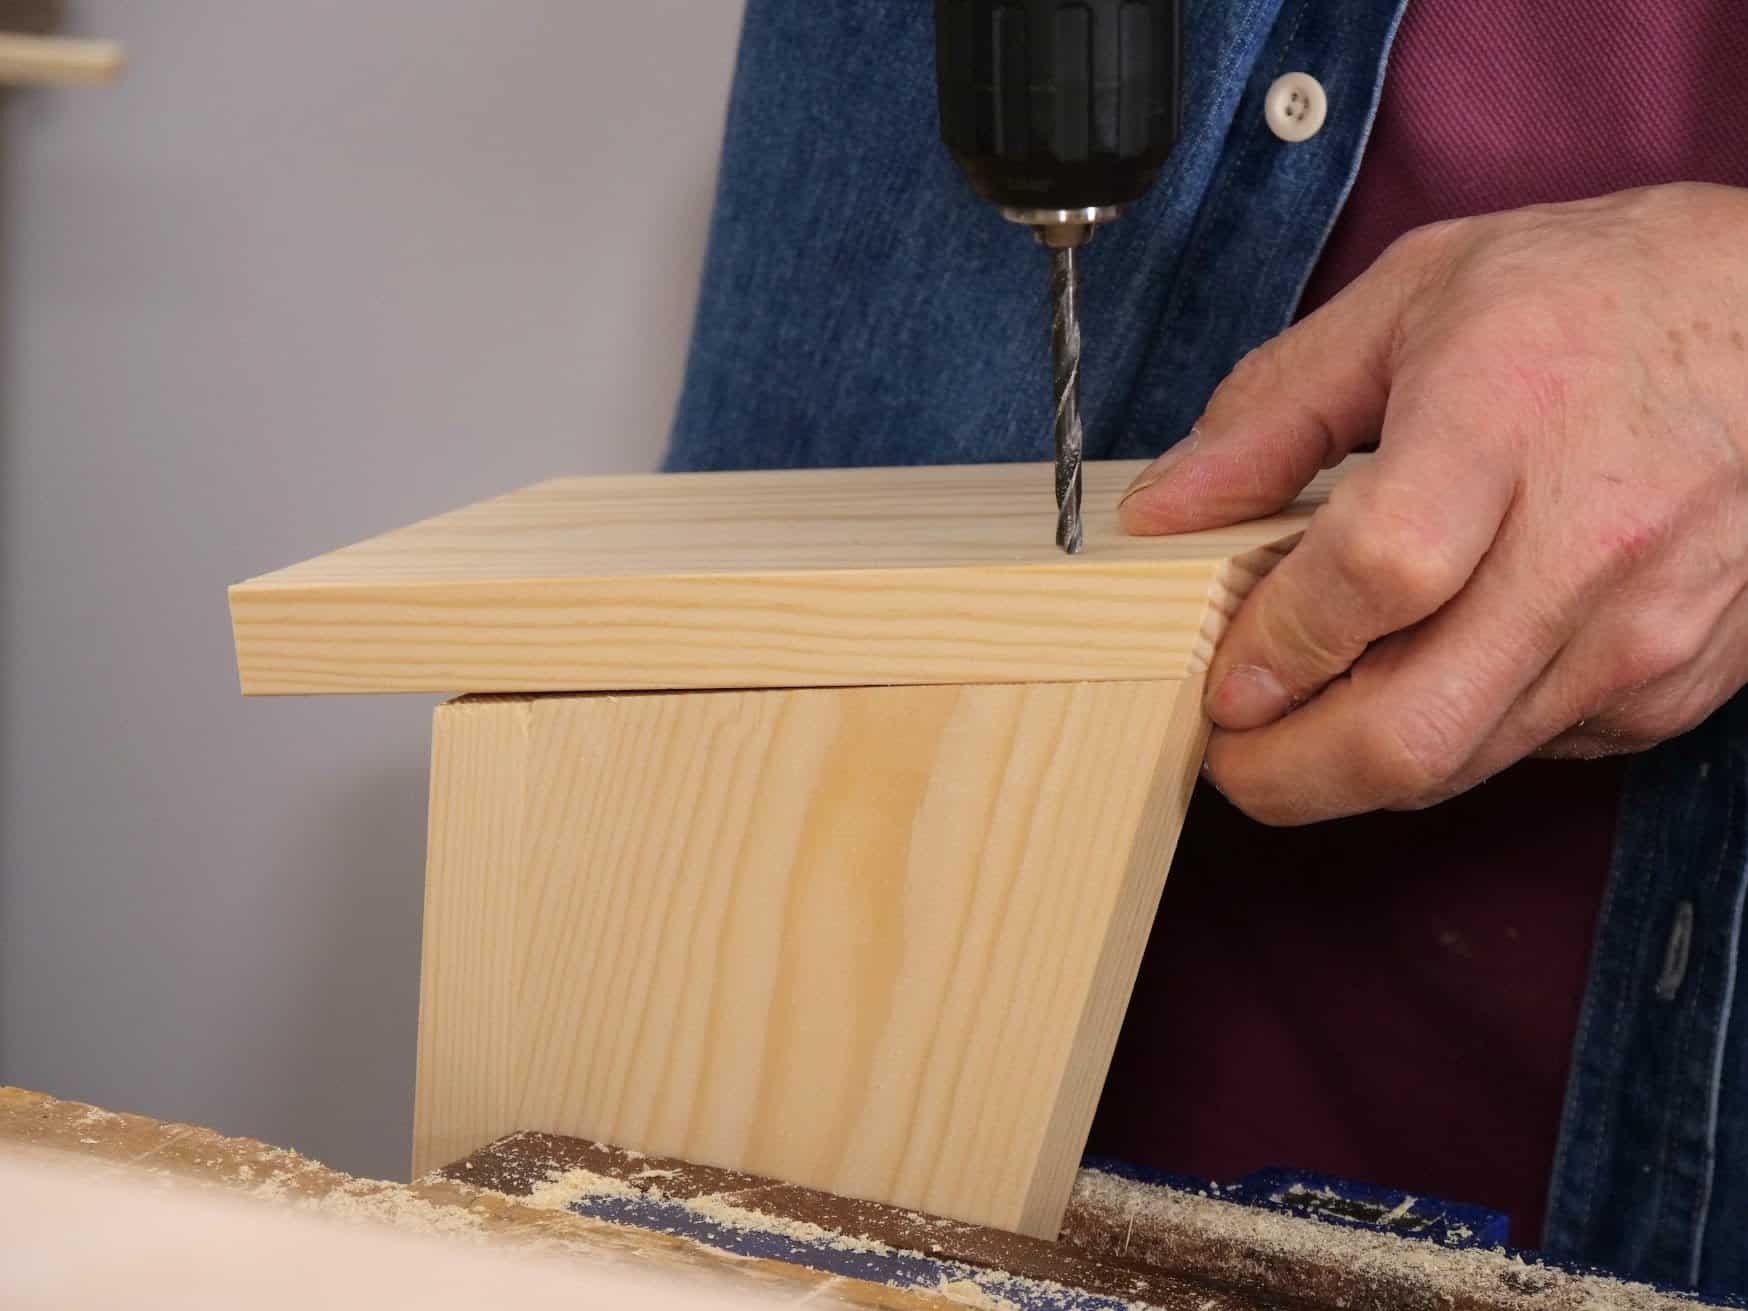
Drill 2 3/16″ holes for the screws.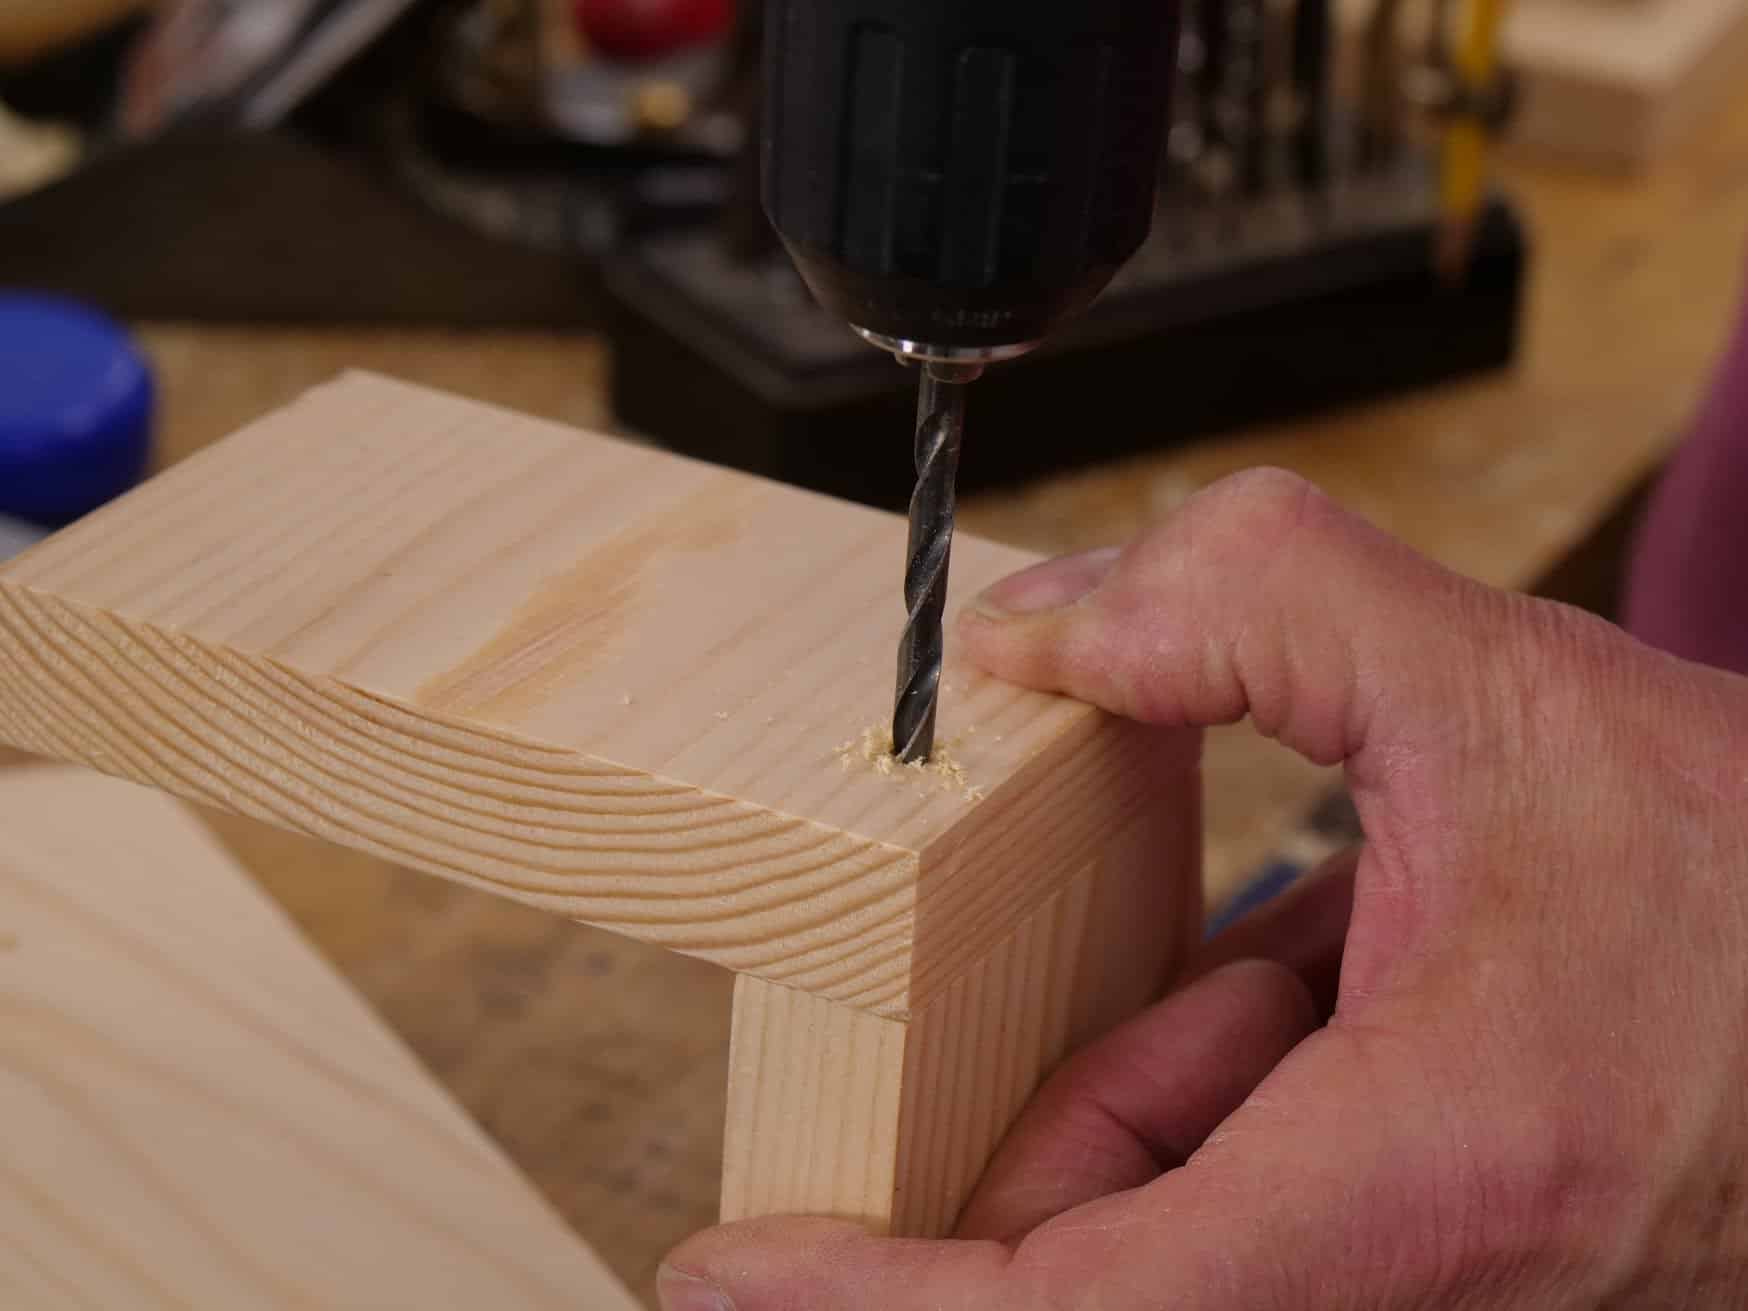
Glue and screw the bottom to the side piece.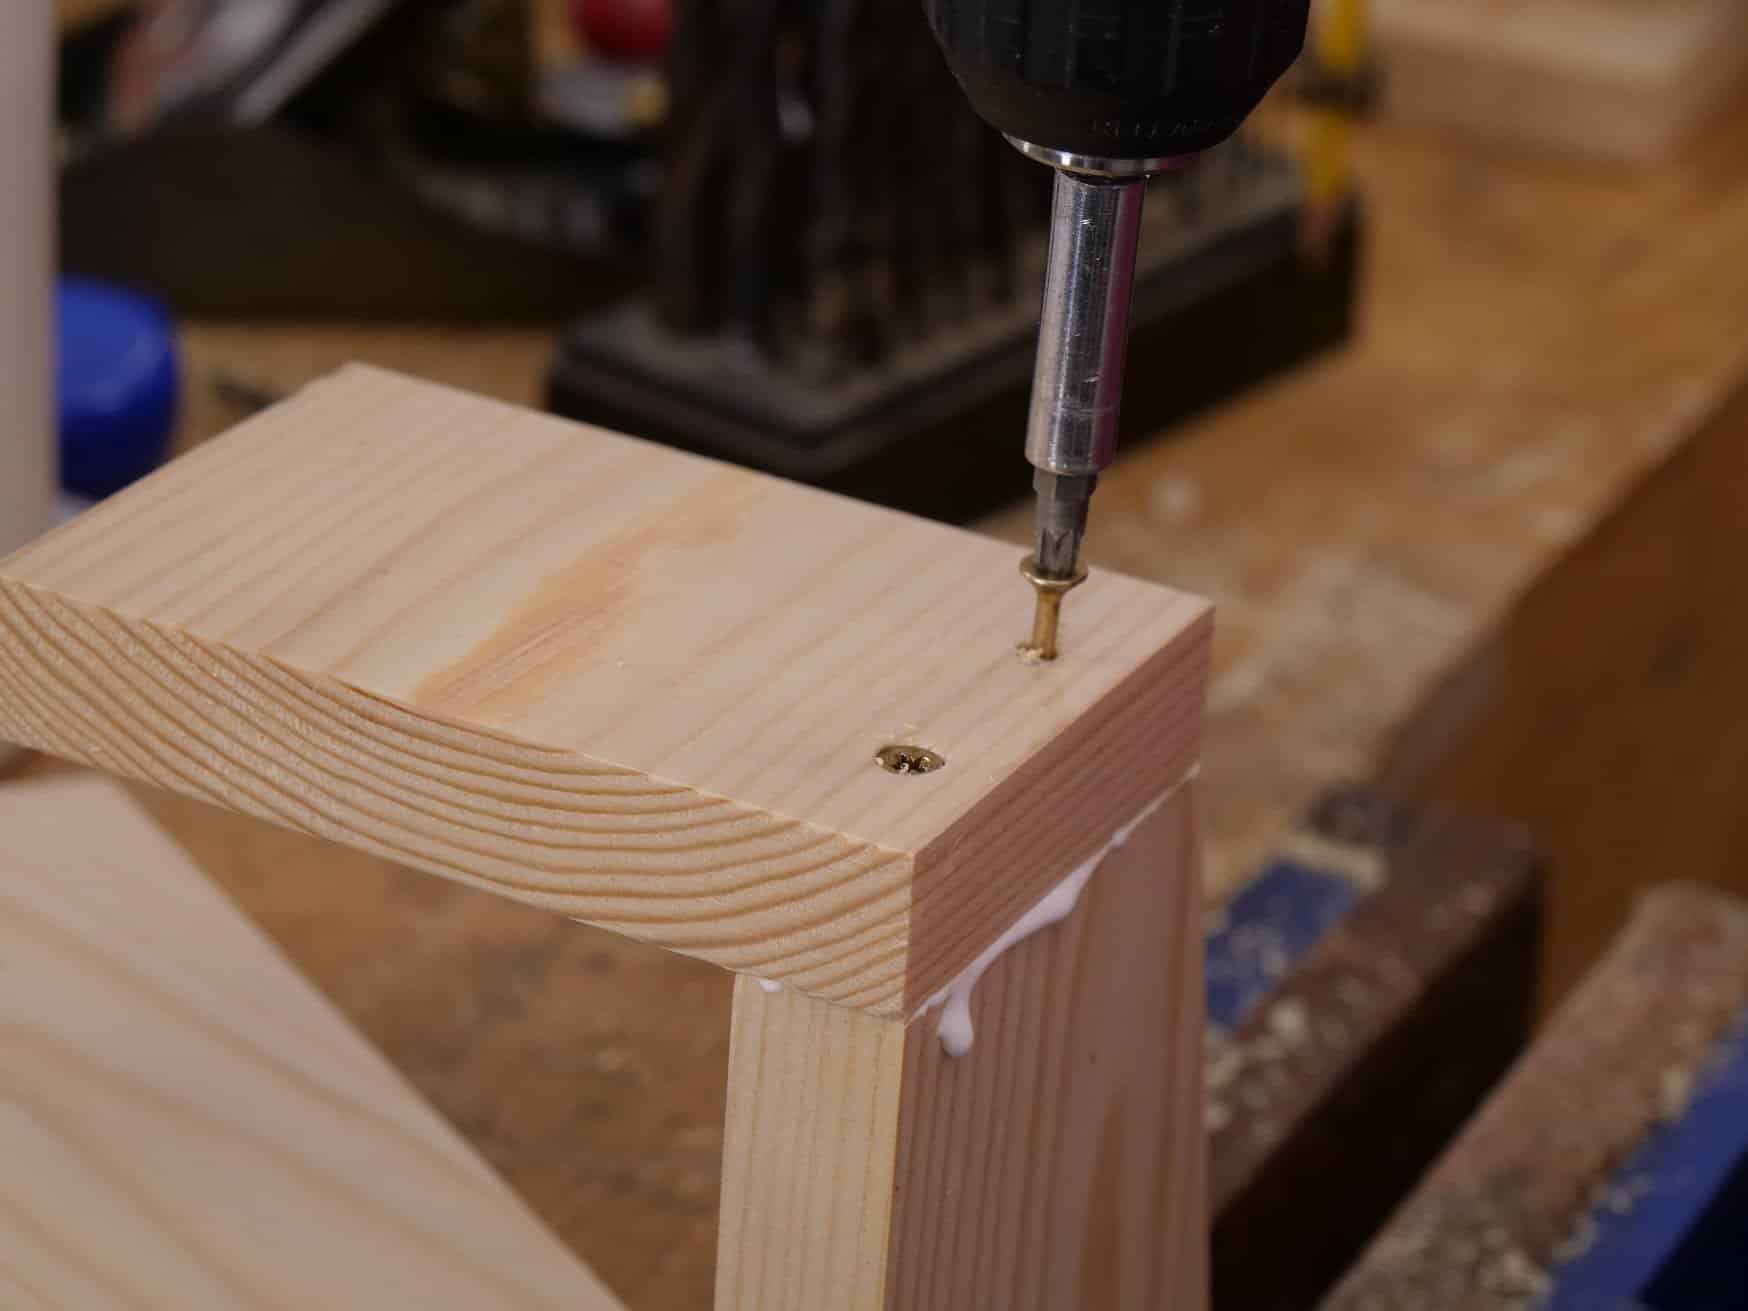
1″ up from the bottom edge of the back piece.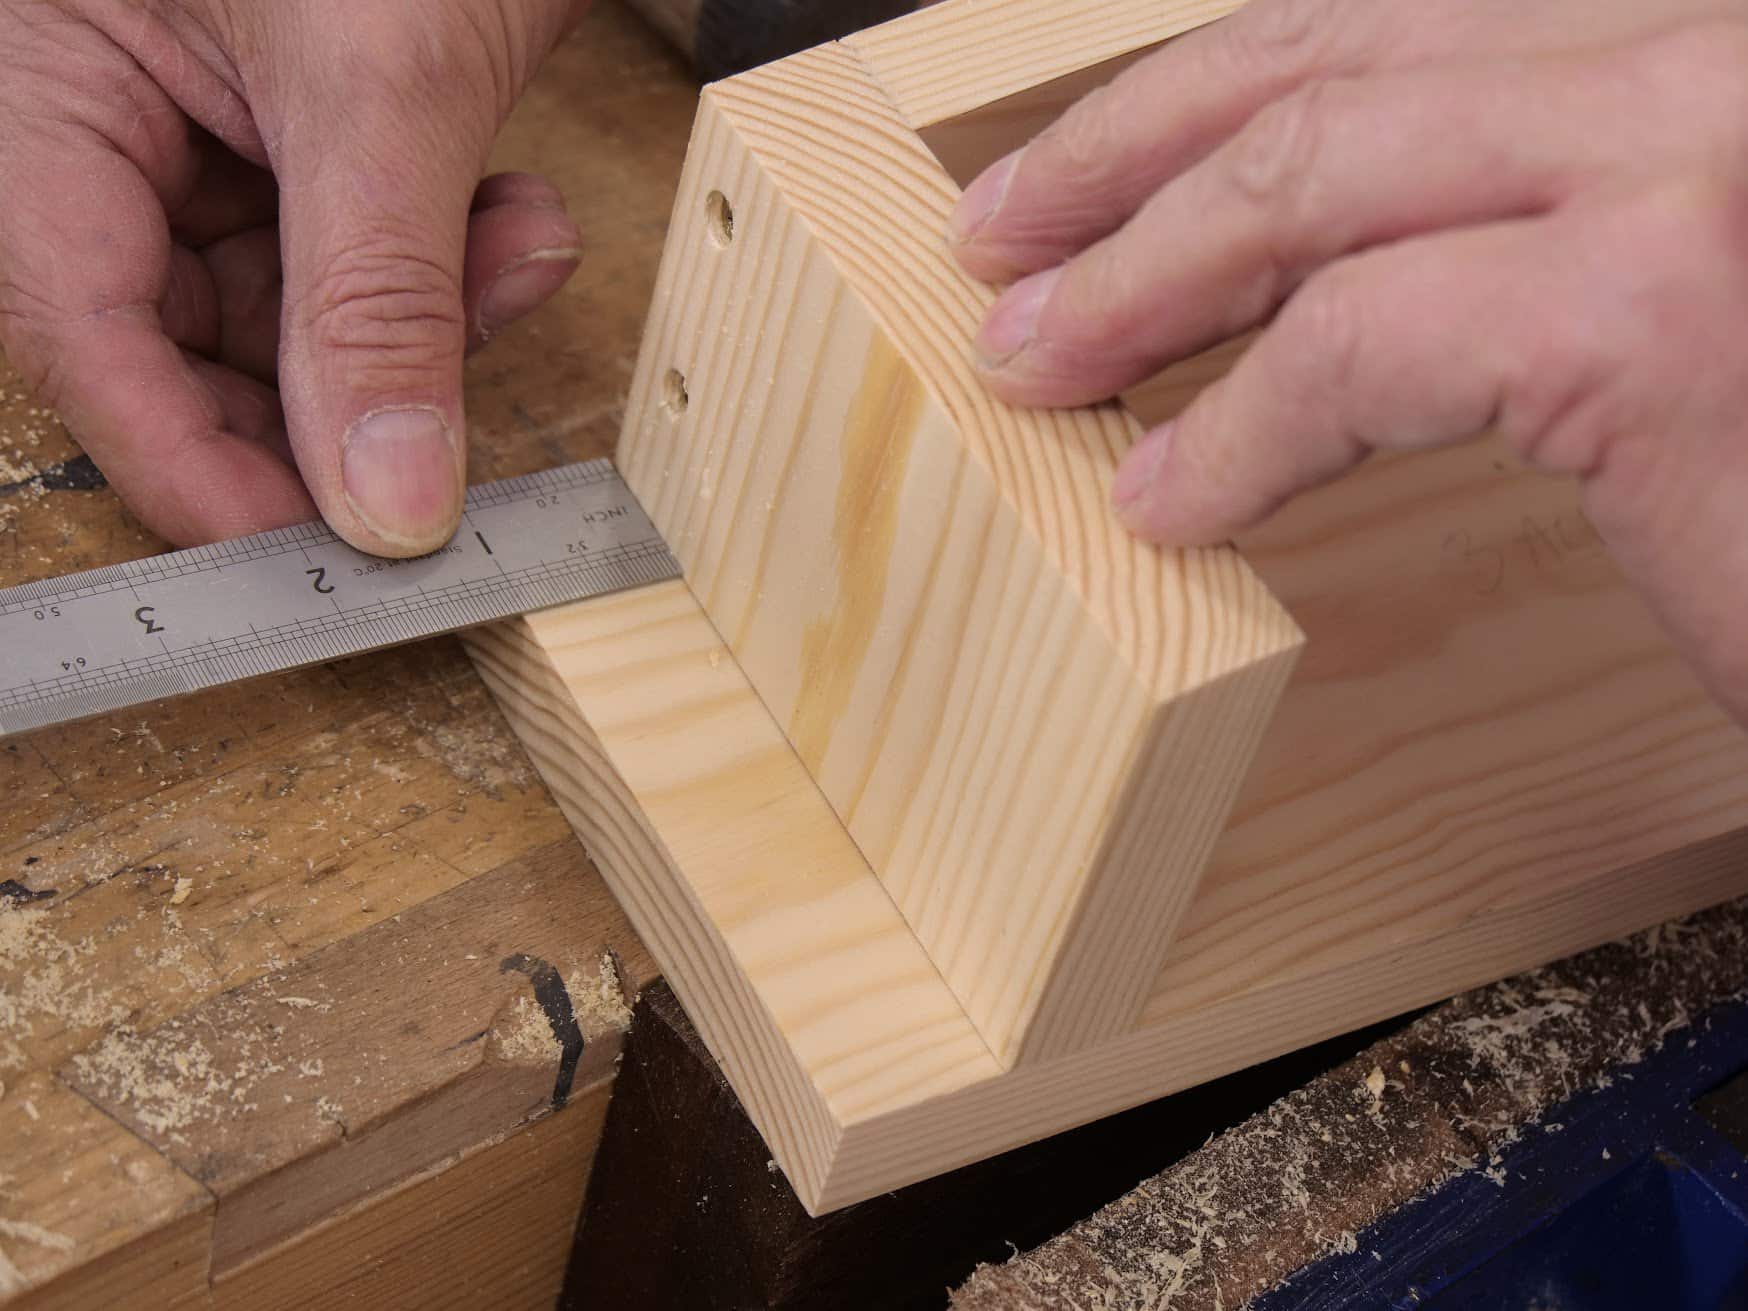
.
mark the lines showing the inside of the position of the box to guide your hole drilling.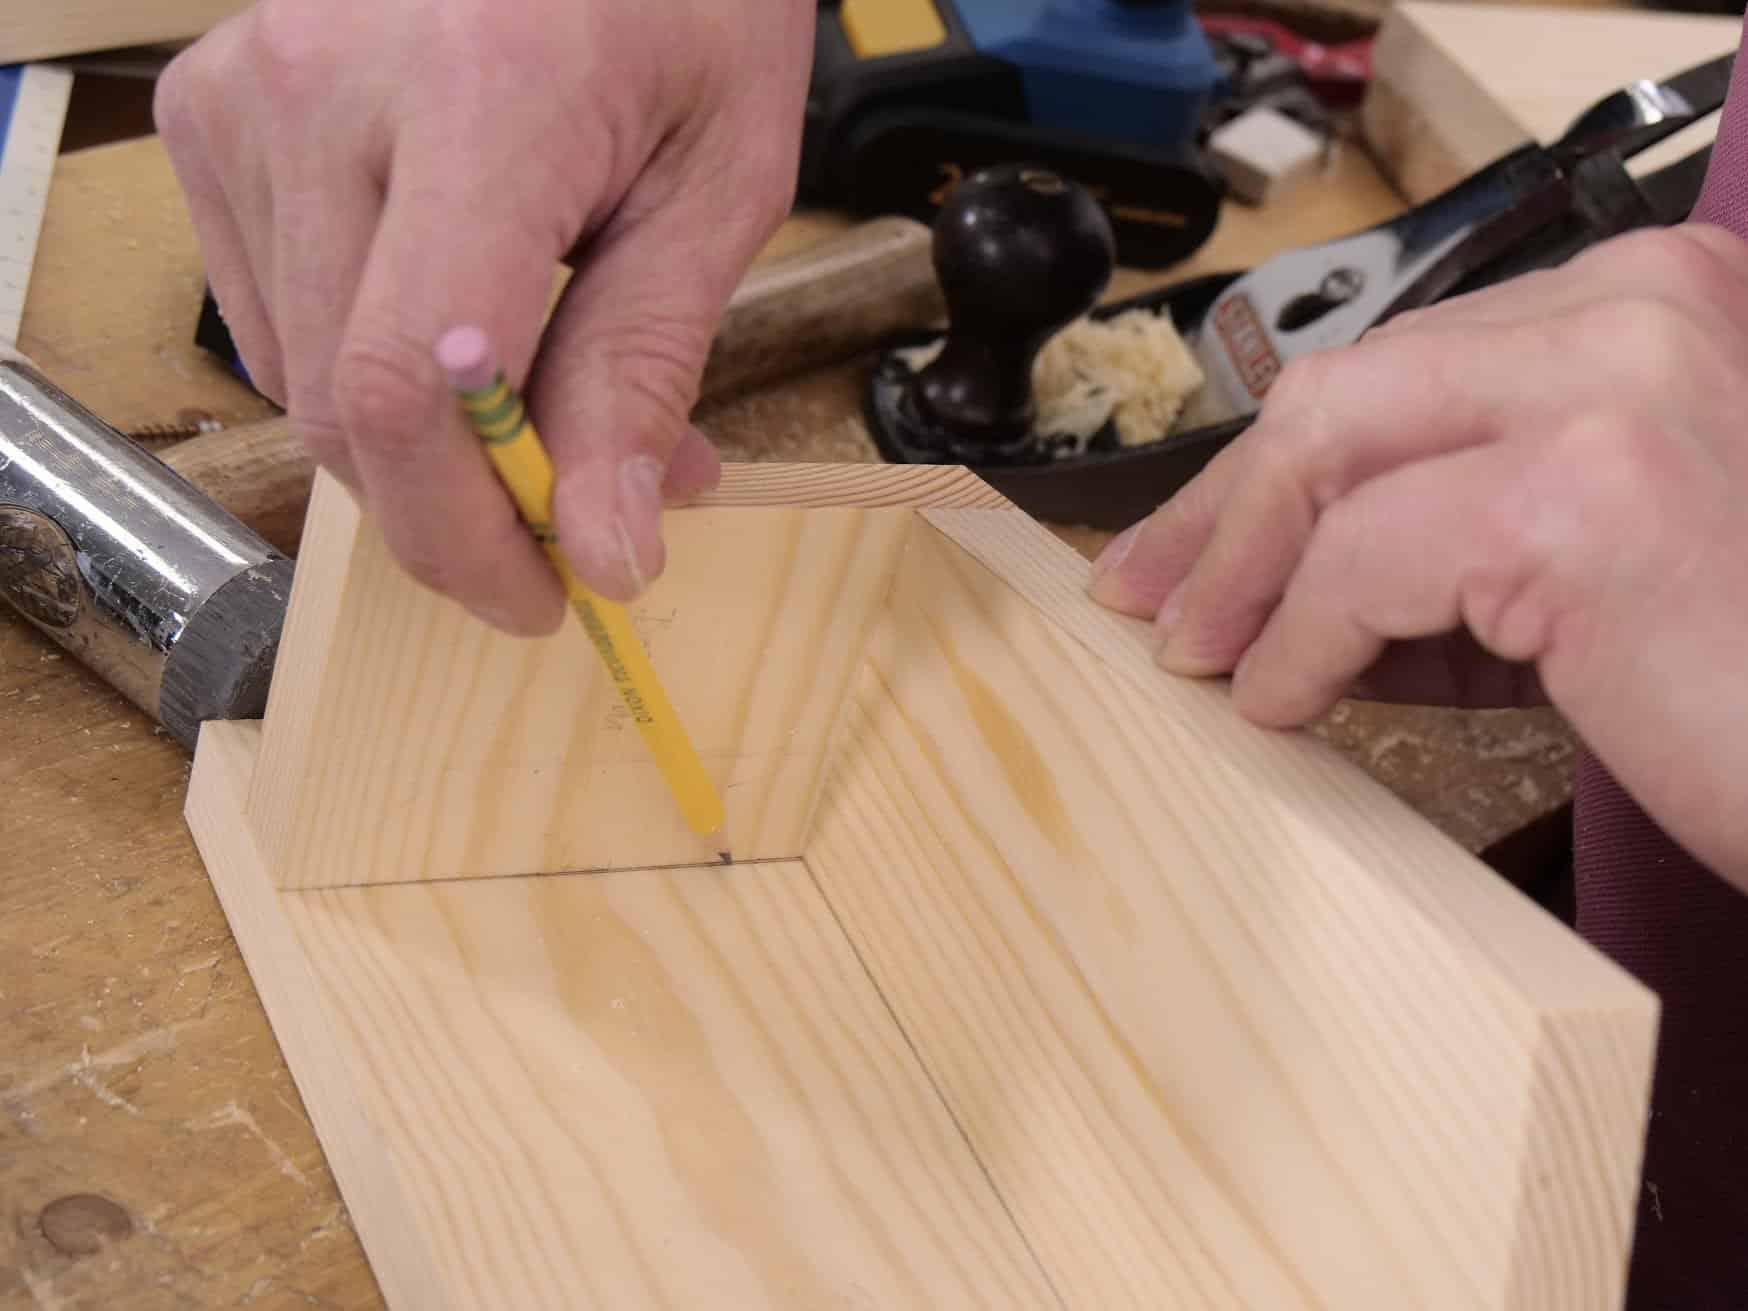
Pre drill 3/16″ holes as shown.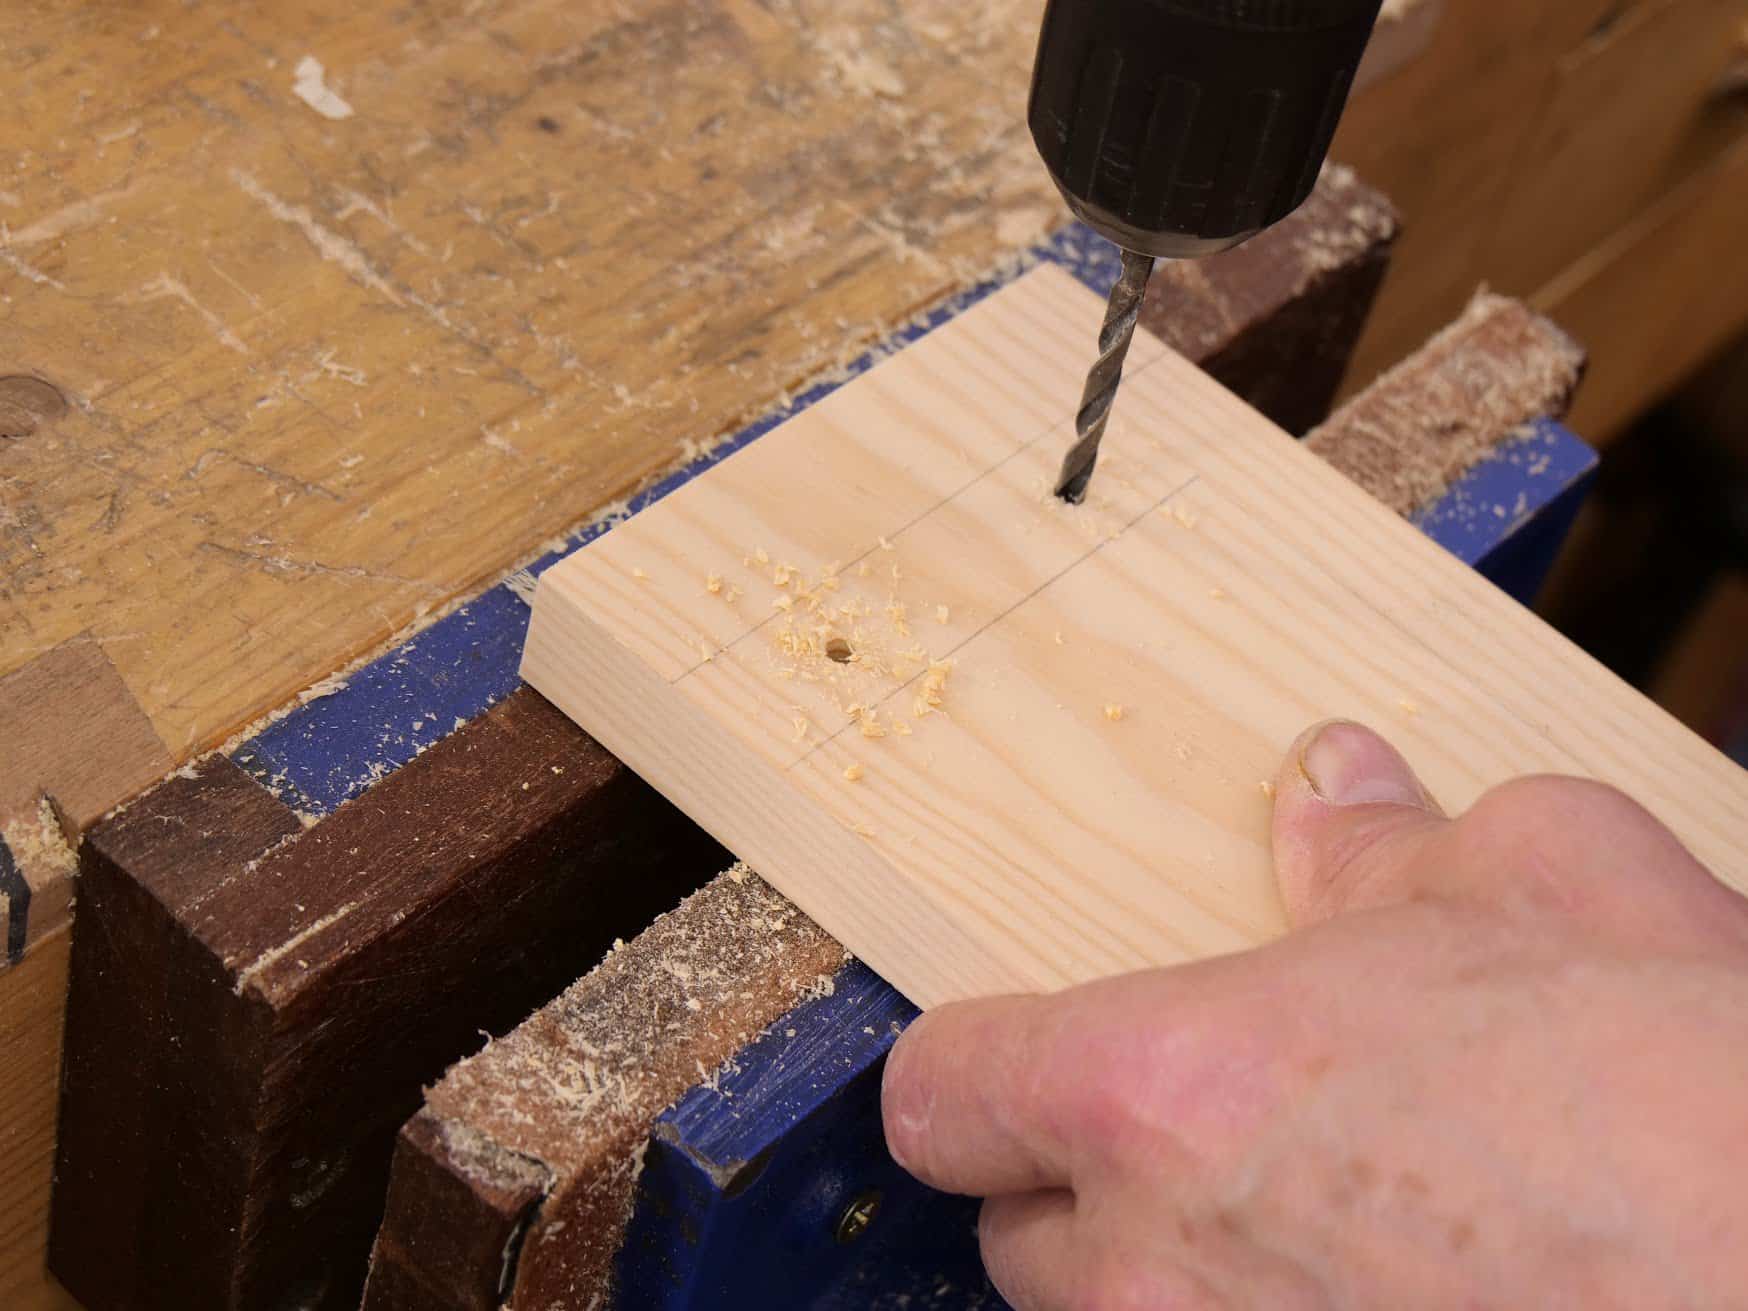
Screw through the back of the back piece into the box side and bottom. The bottom piece is 1″ up from the bottom edge of the back piece.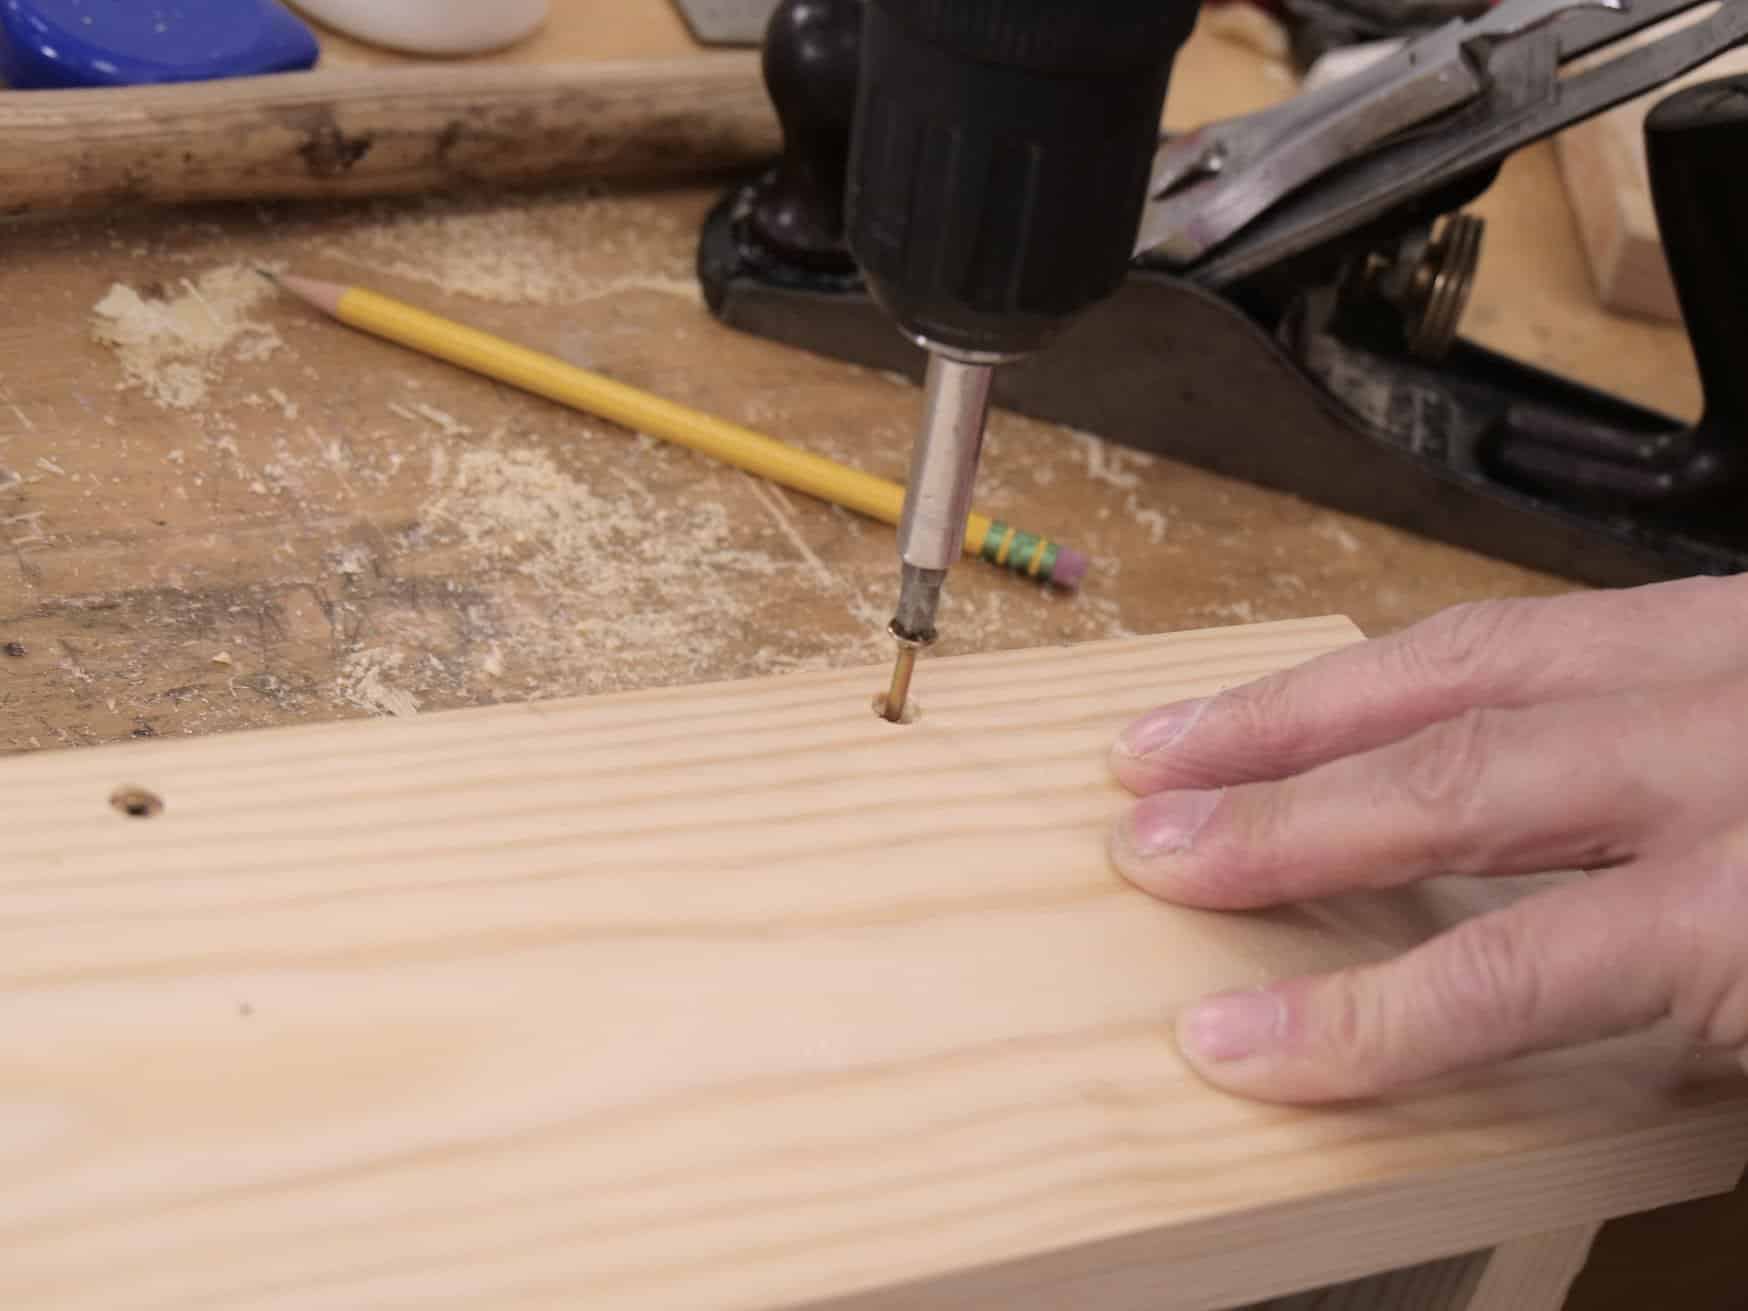
Hinged section
Now attach the front piece to the side piece with two screws. Plane the angle to the front piece top edge to follow the rake of the side piece.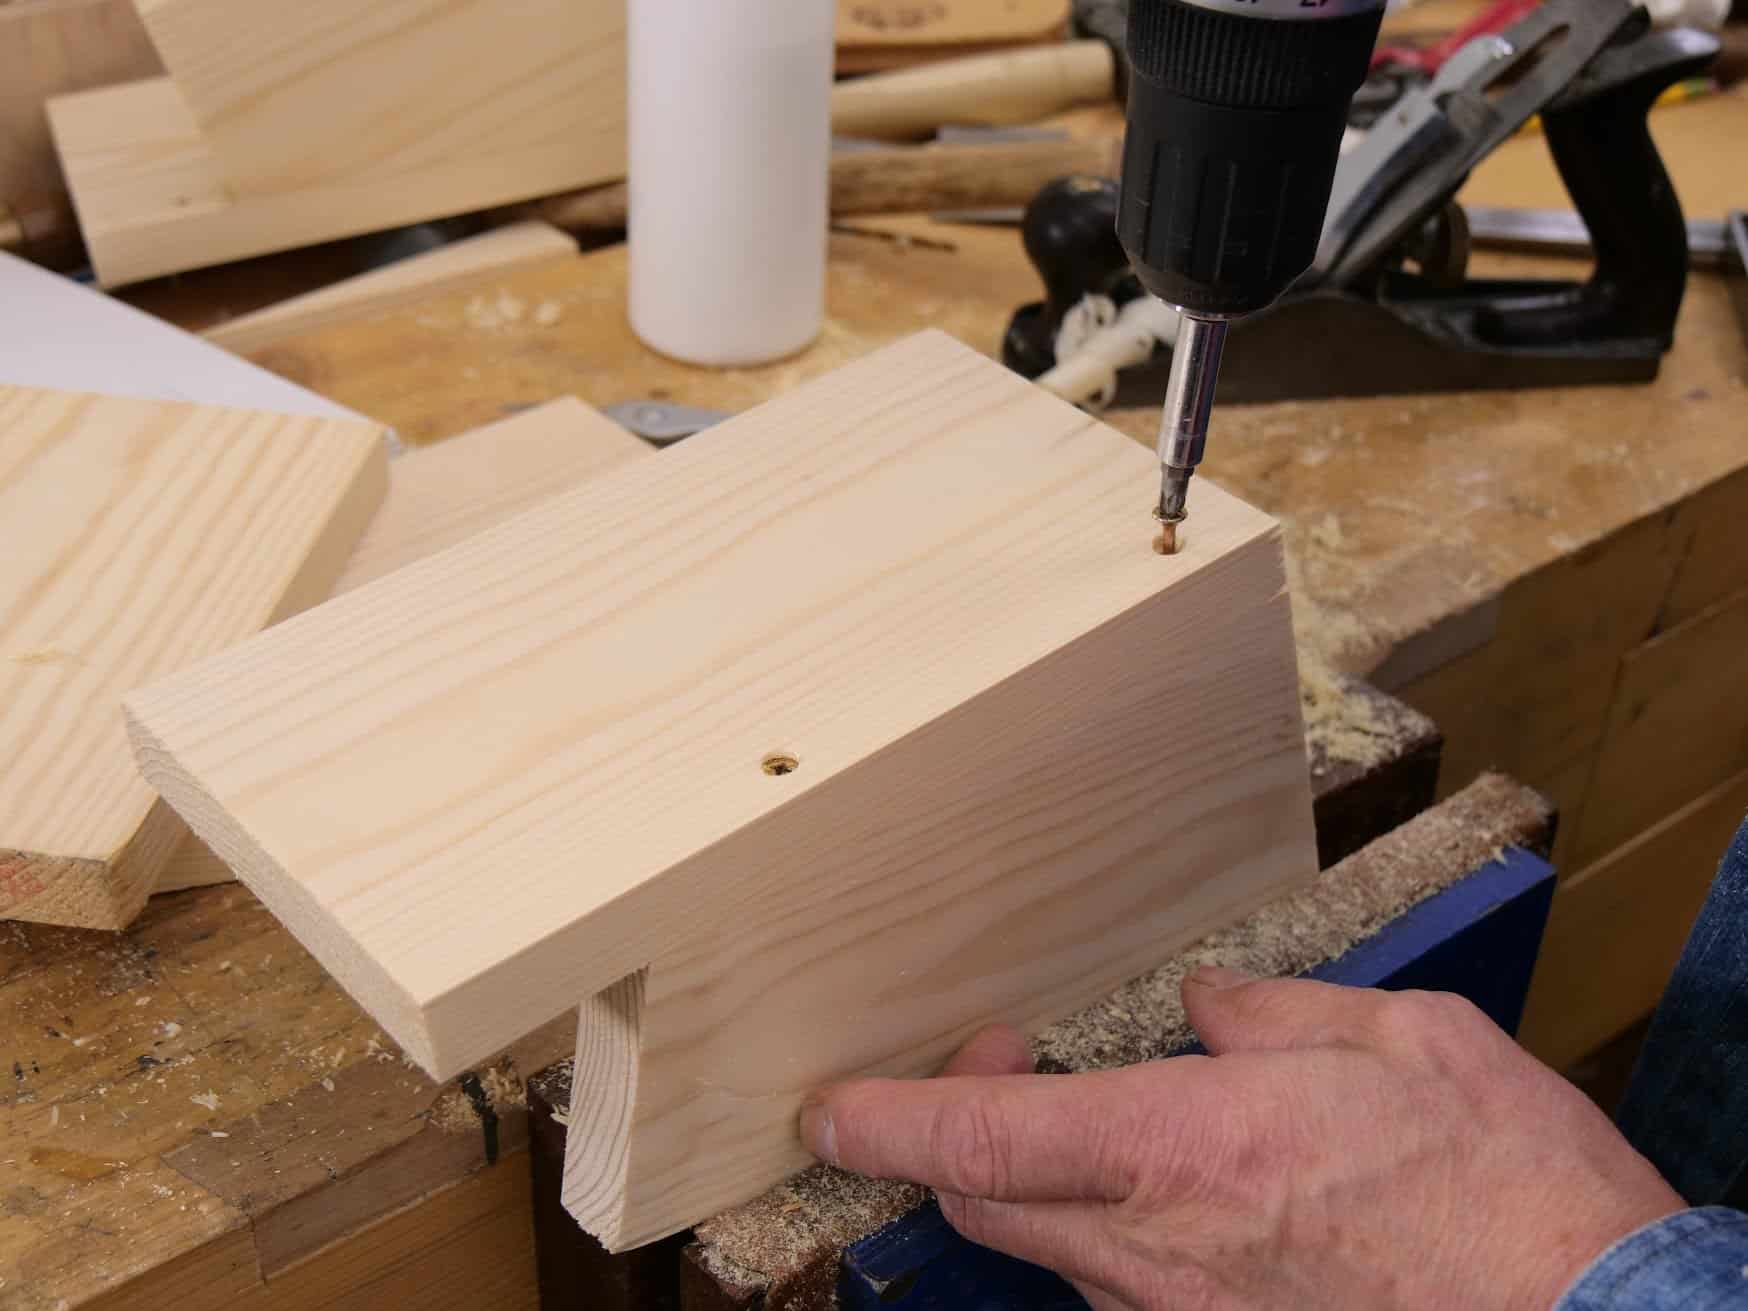
The lid must be beveled at the back edge. use the preset sliding bevel with the same setting as before to get the angle. Use a knifewall as normal.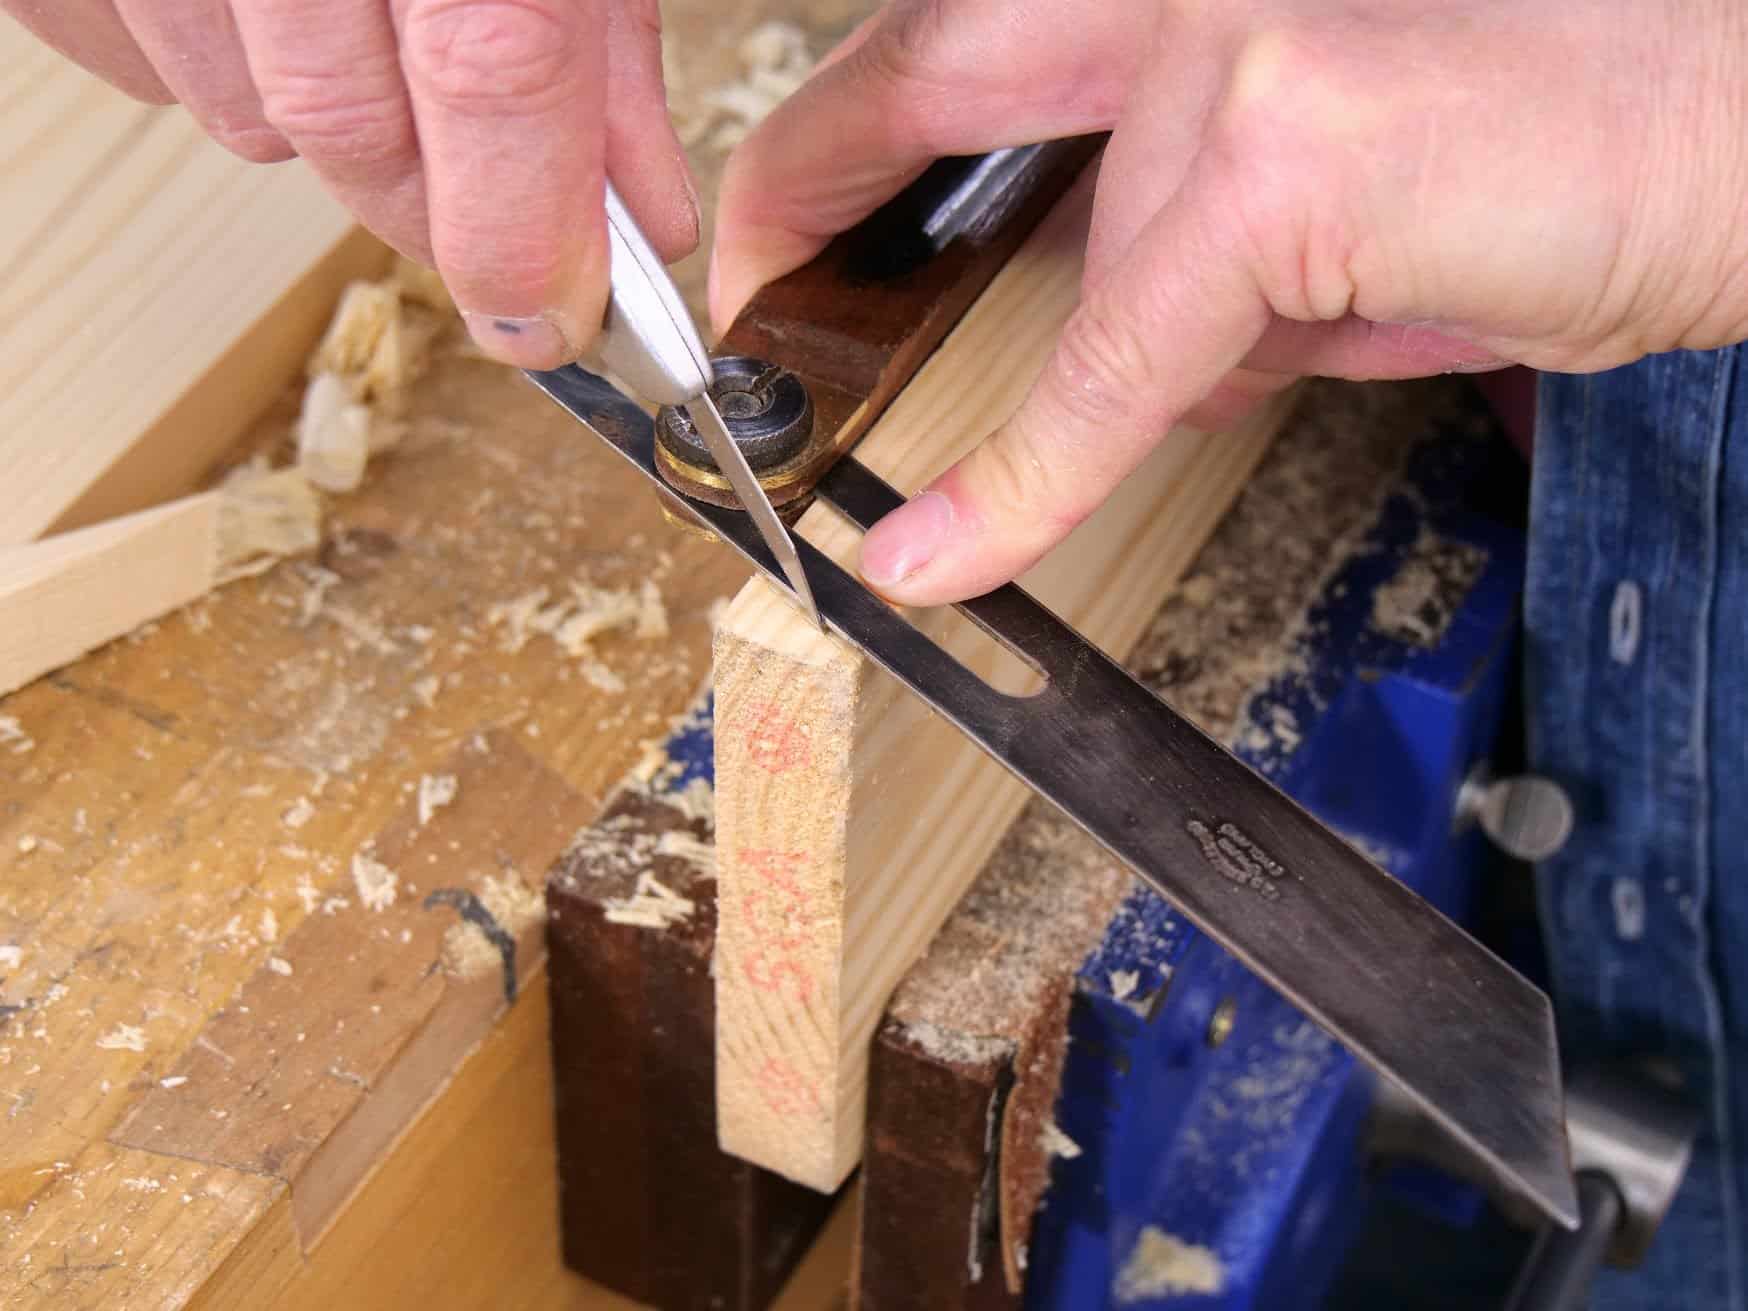
Crosscut the angle on the lid piece.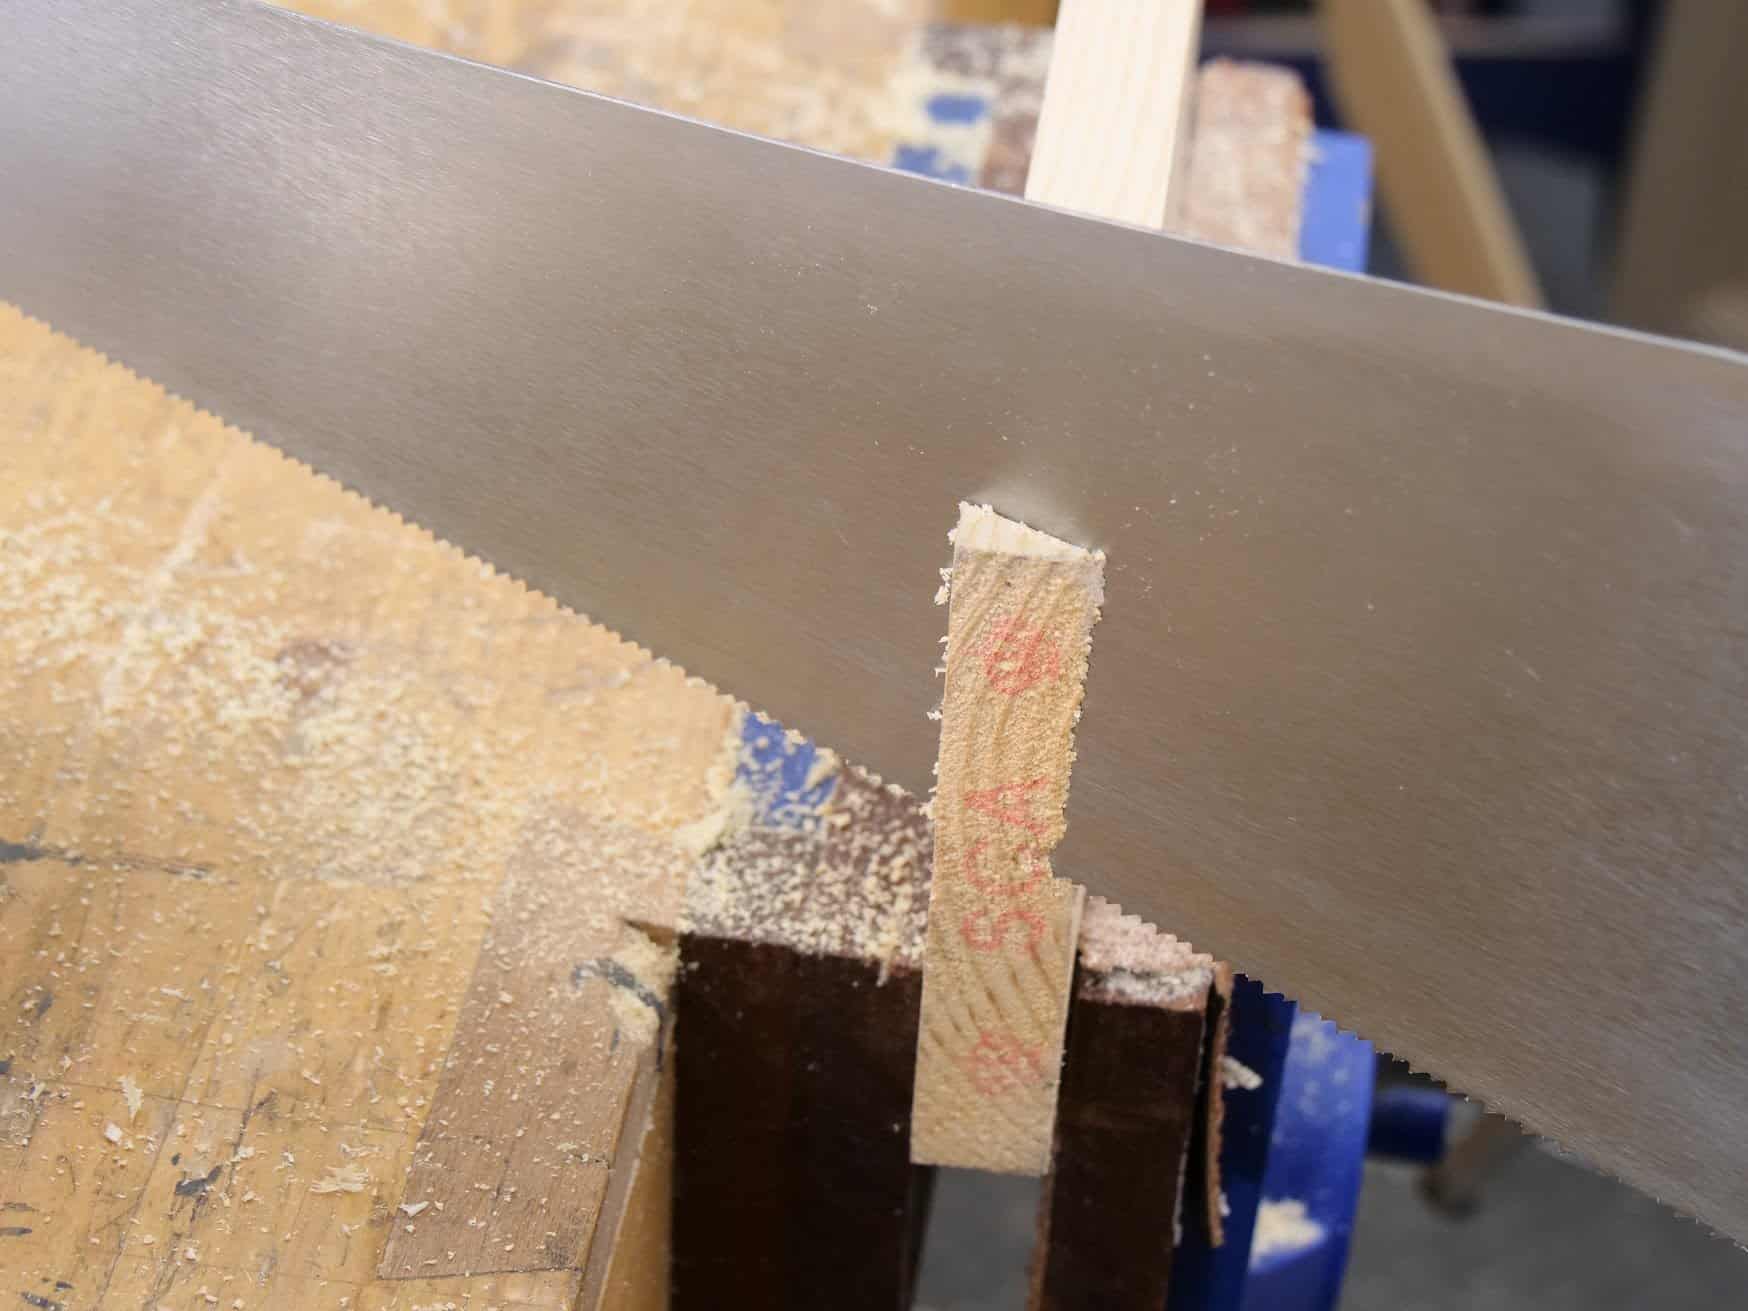
Plane as needed.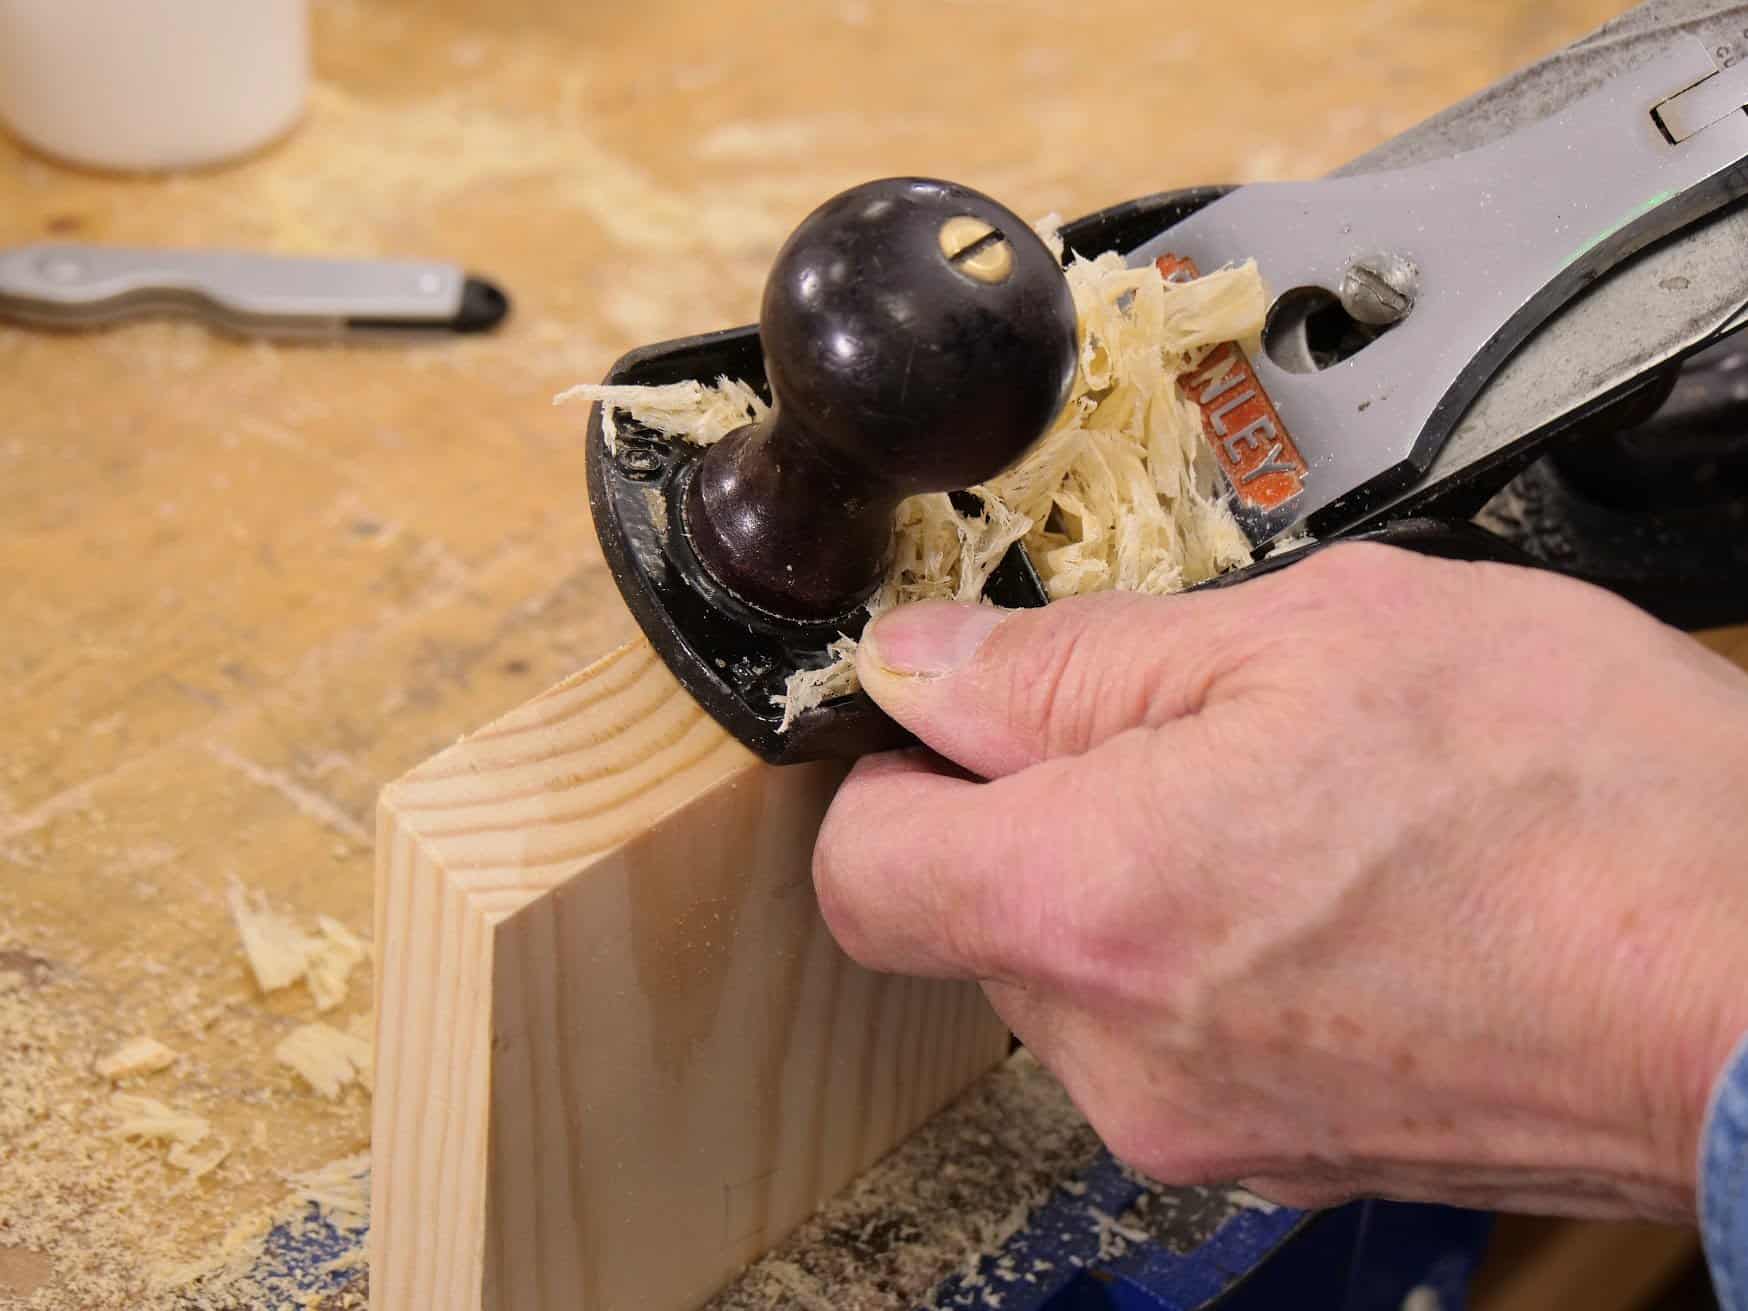
Pre drill 3/16″ holes through the roof into the top edges of the side piece and the front piece. Glue and drive the screws.
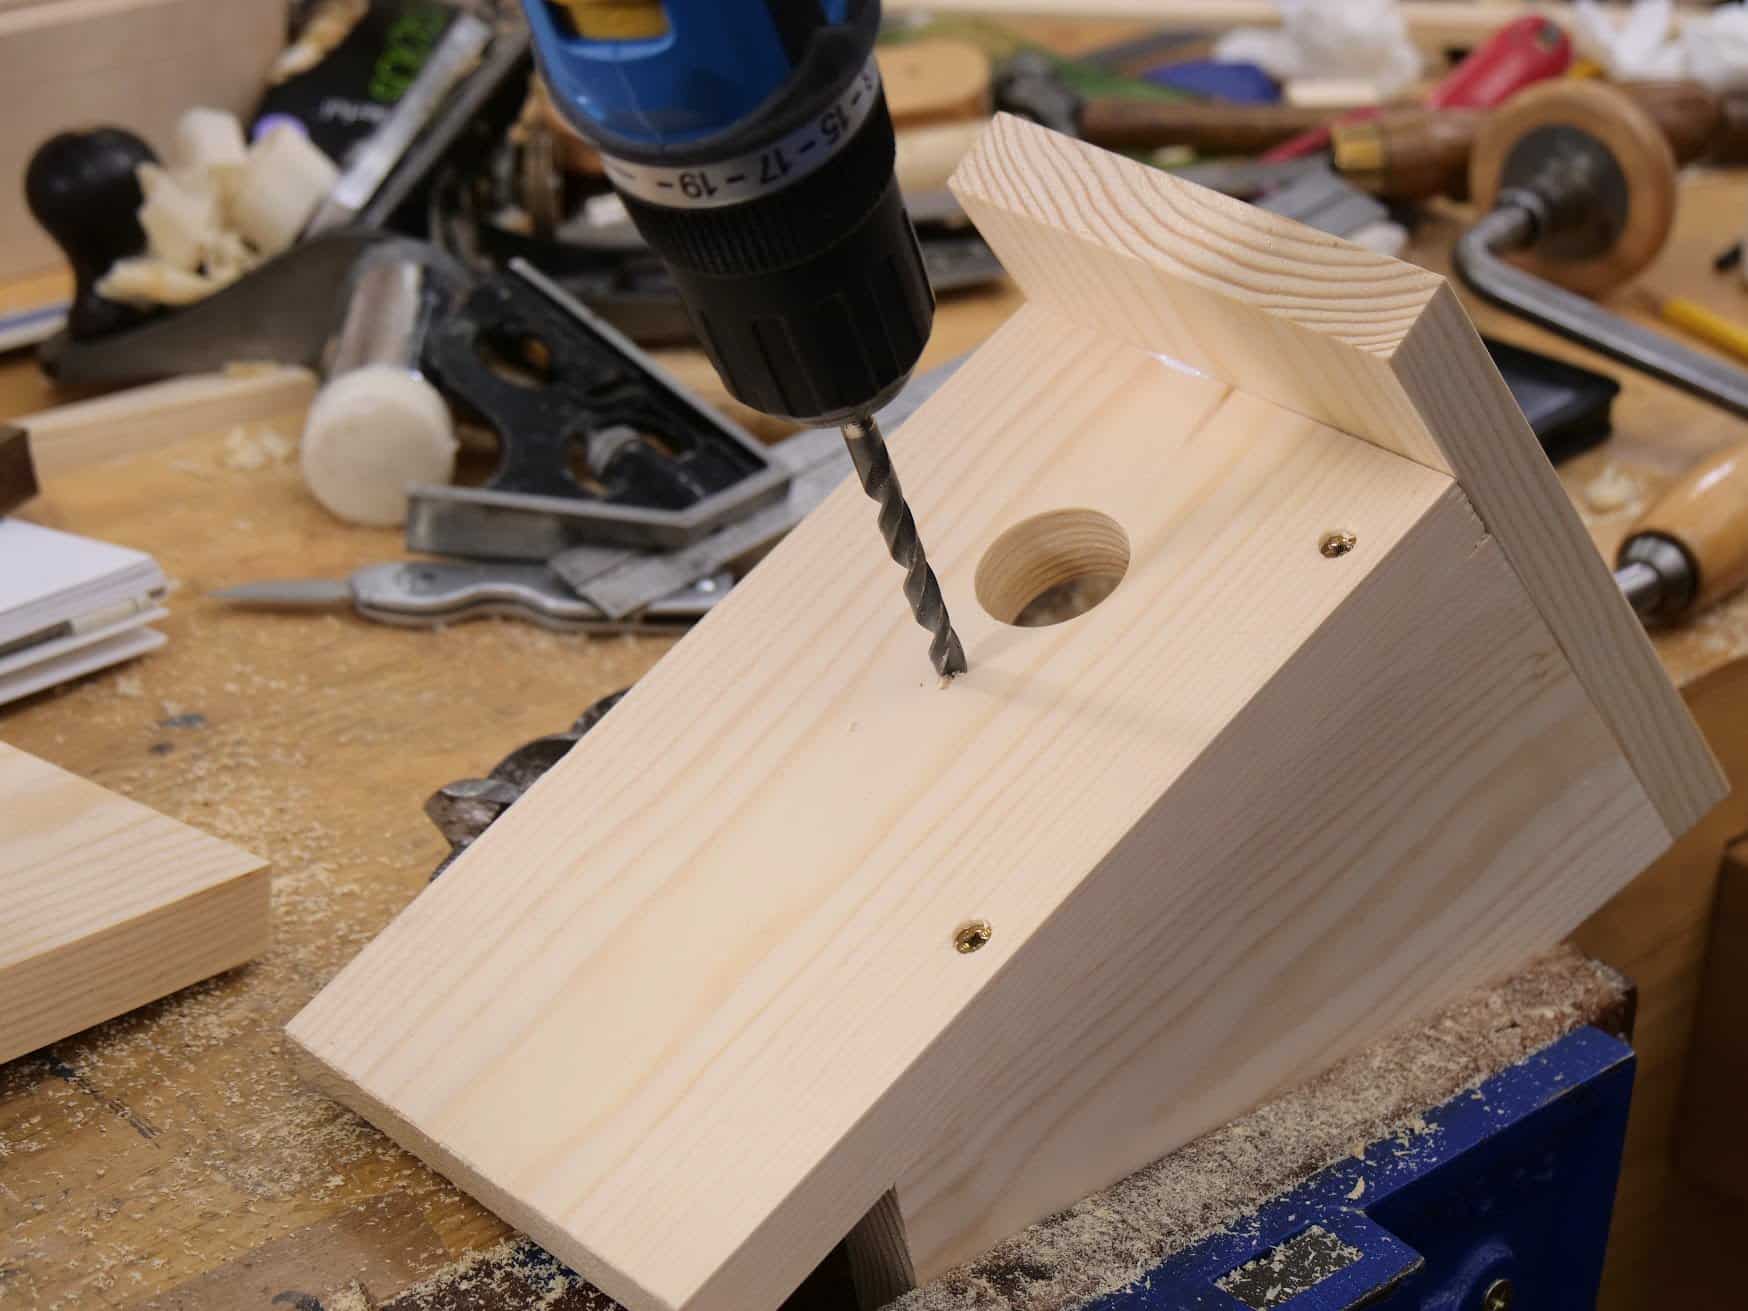
Mark the position for the hole centre on the front piece 2 5/8″ down from the underside of the roof piece and centred from either side.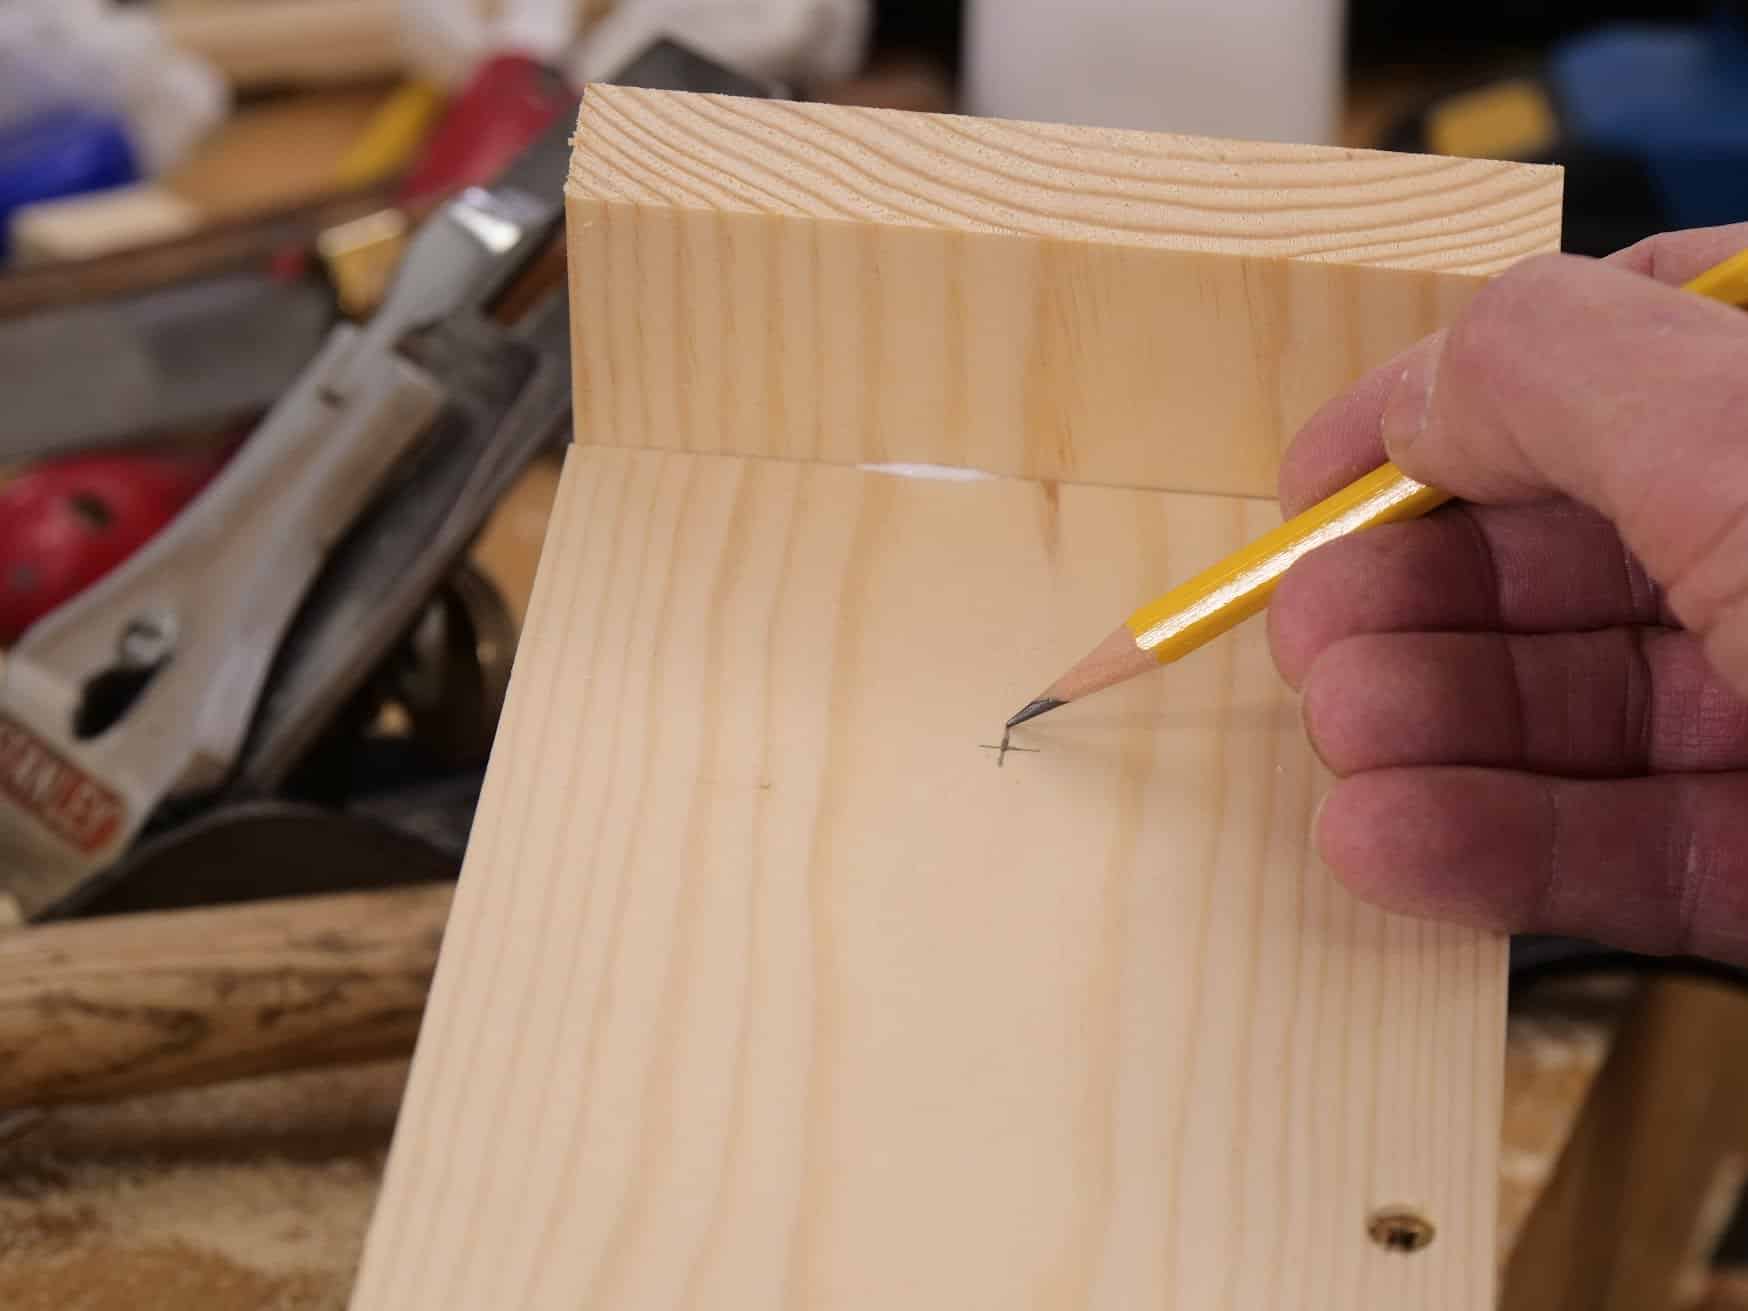
Use a 1 1/4″ bit to drill the main entry hole. You can drill only part way if you will not ultimately use the nesting box as a bona fide nest box and blacken the entry hole.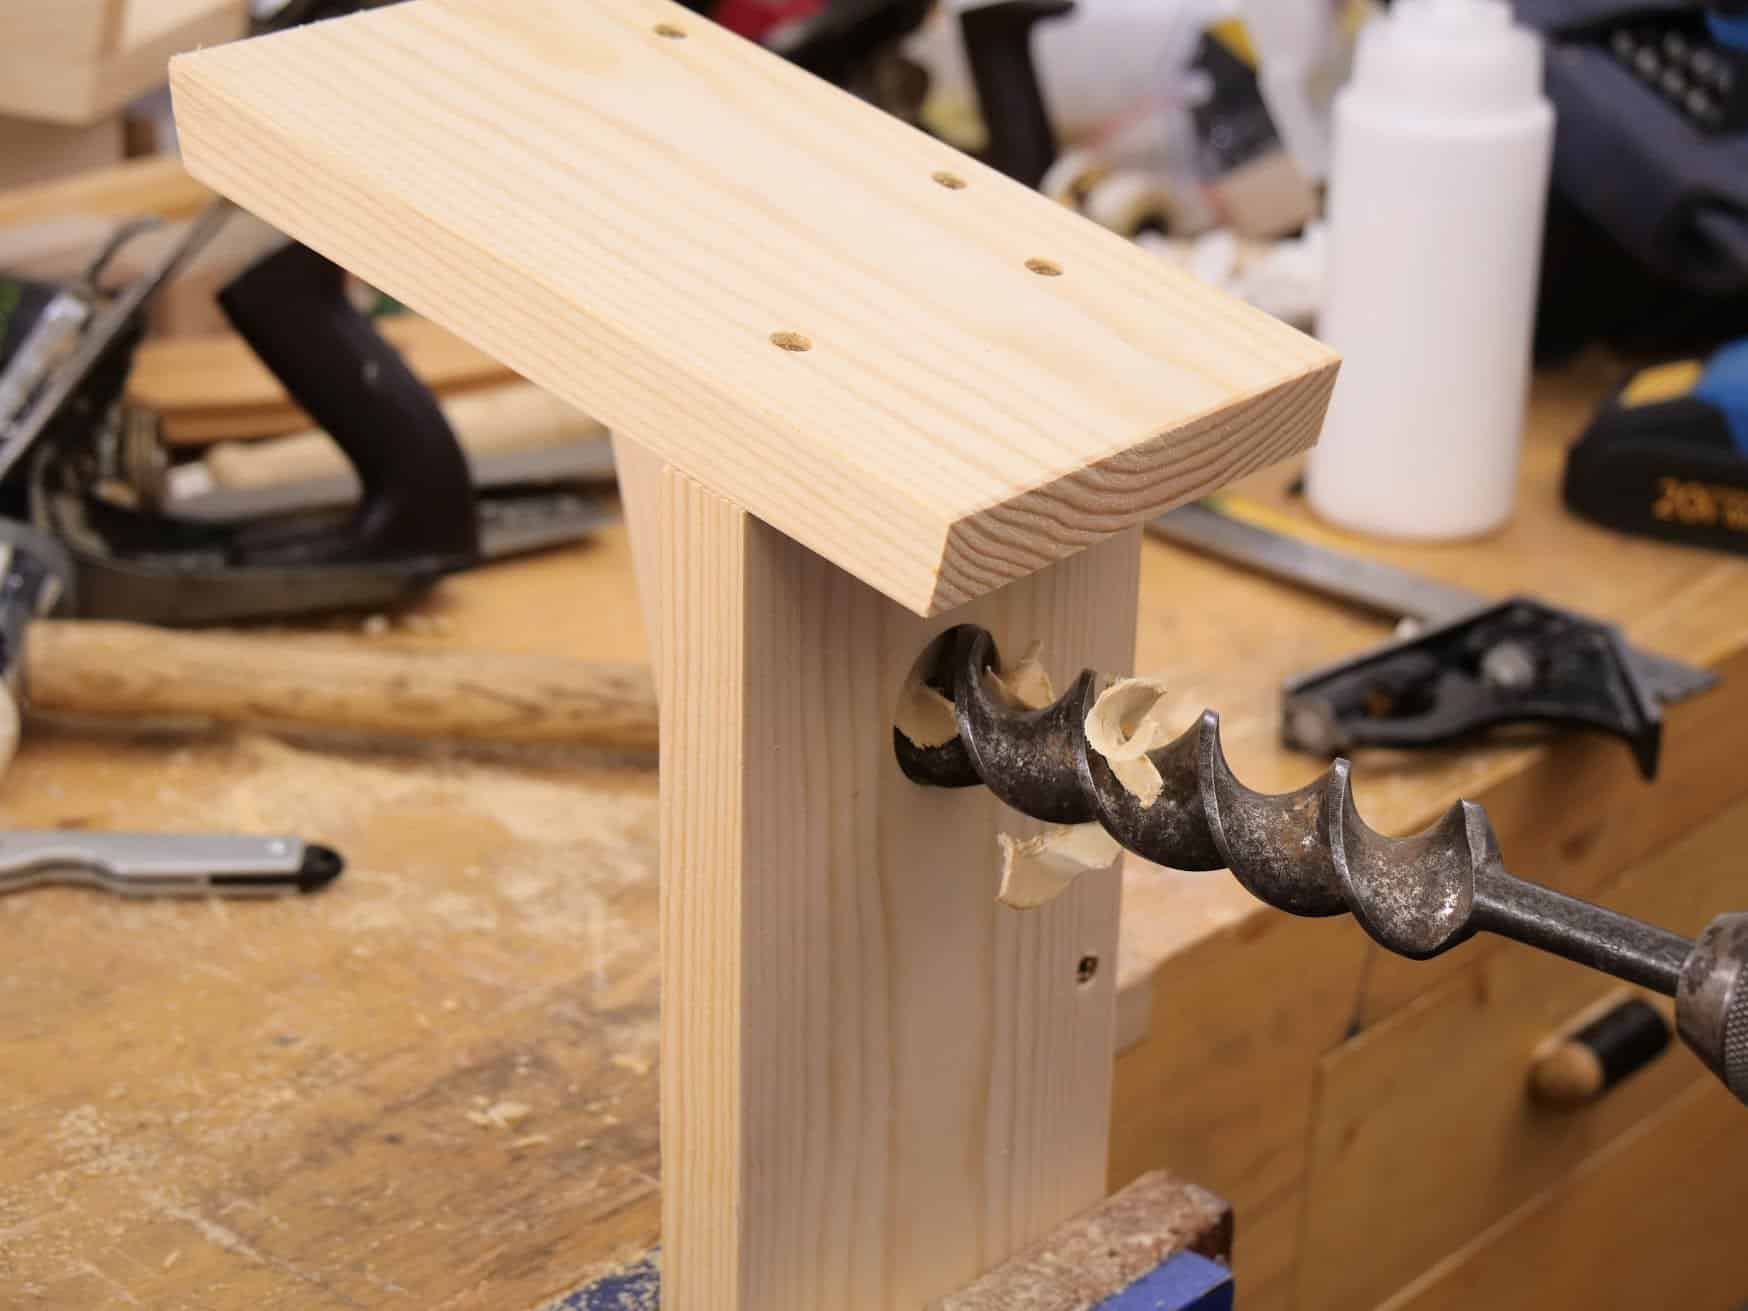
Hingeing the front unit
The brass hinges are hinged only into one side and not both pieces.
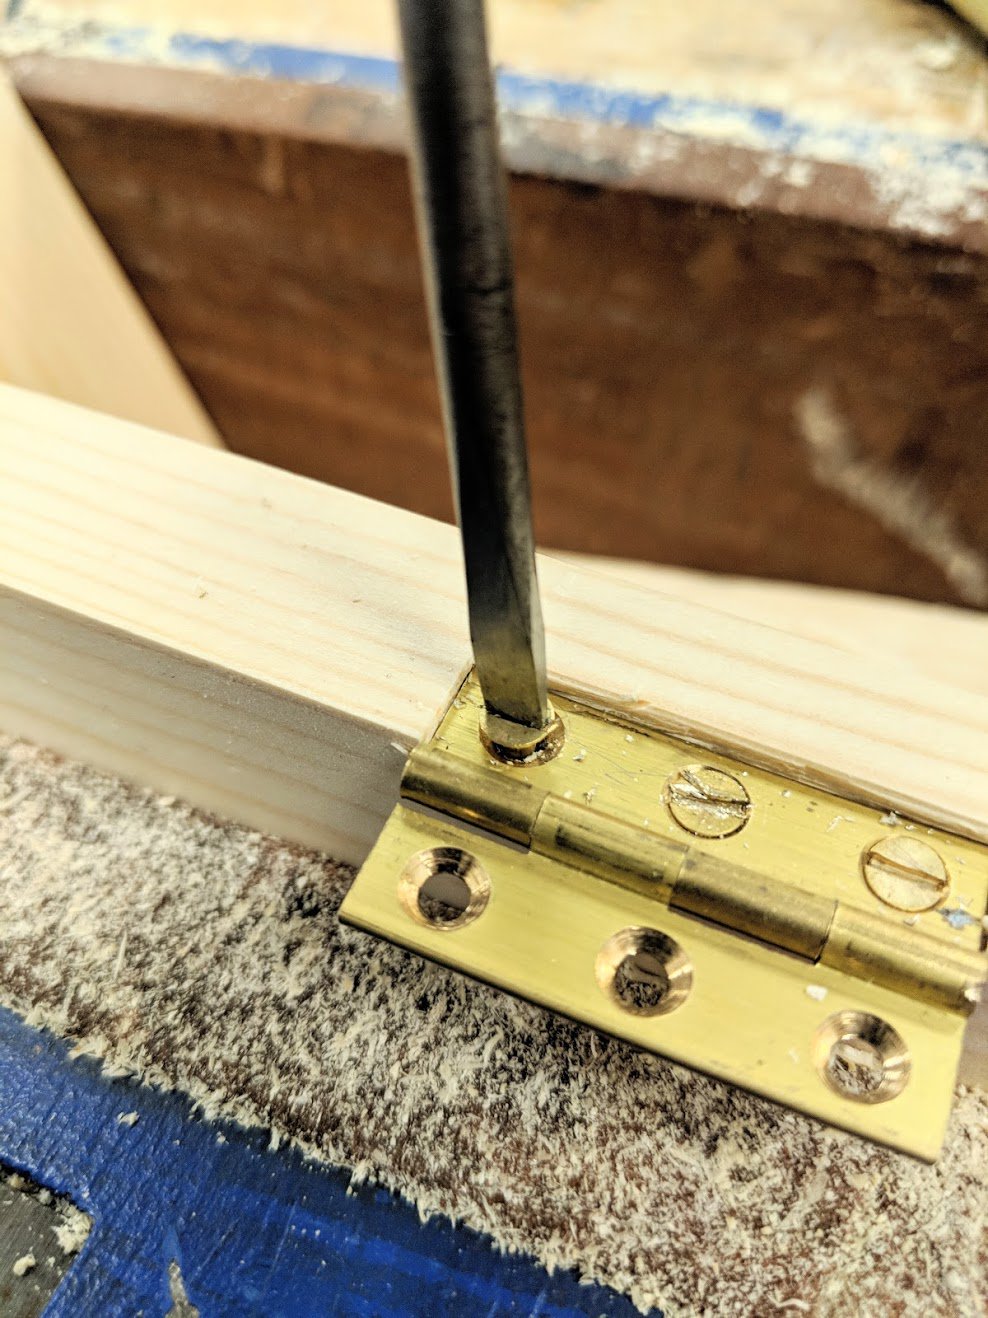
The top hinge is position 1/2″ down from top edge of the side piece and the bottom hinge 1 1/2″ up from the bottom edge. Place the hinges in position and mark around them with the knife.

Set a marking gauge to just under the depth of the knuckle of the hinge. This will mark the depth of the hinge recess.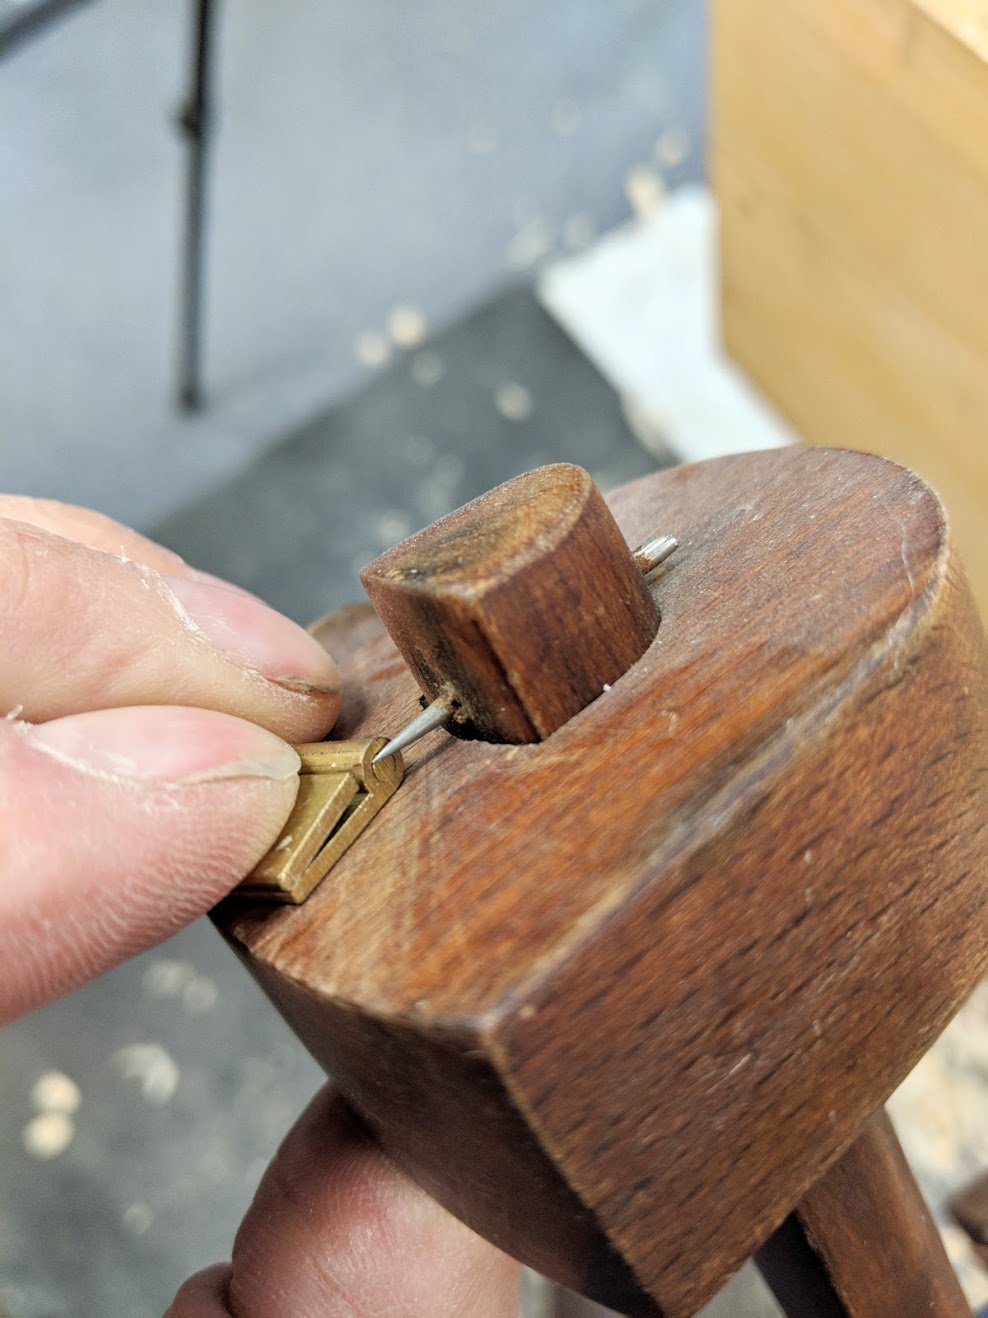
Mark the depth onto the outside face of the back edge of the box side.
Remove the waste.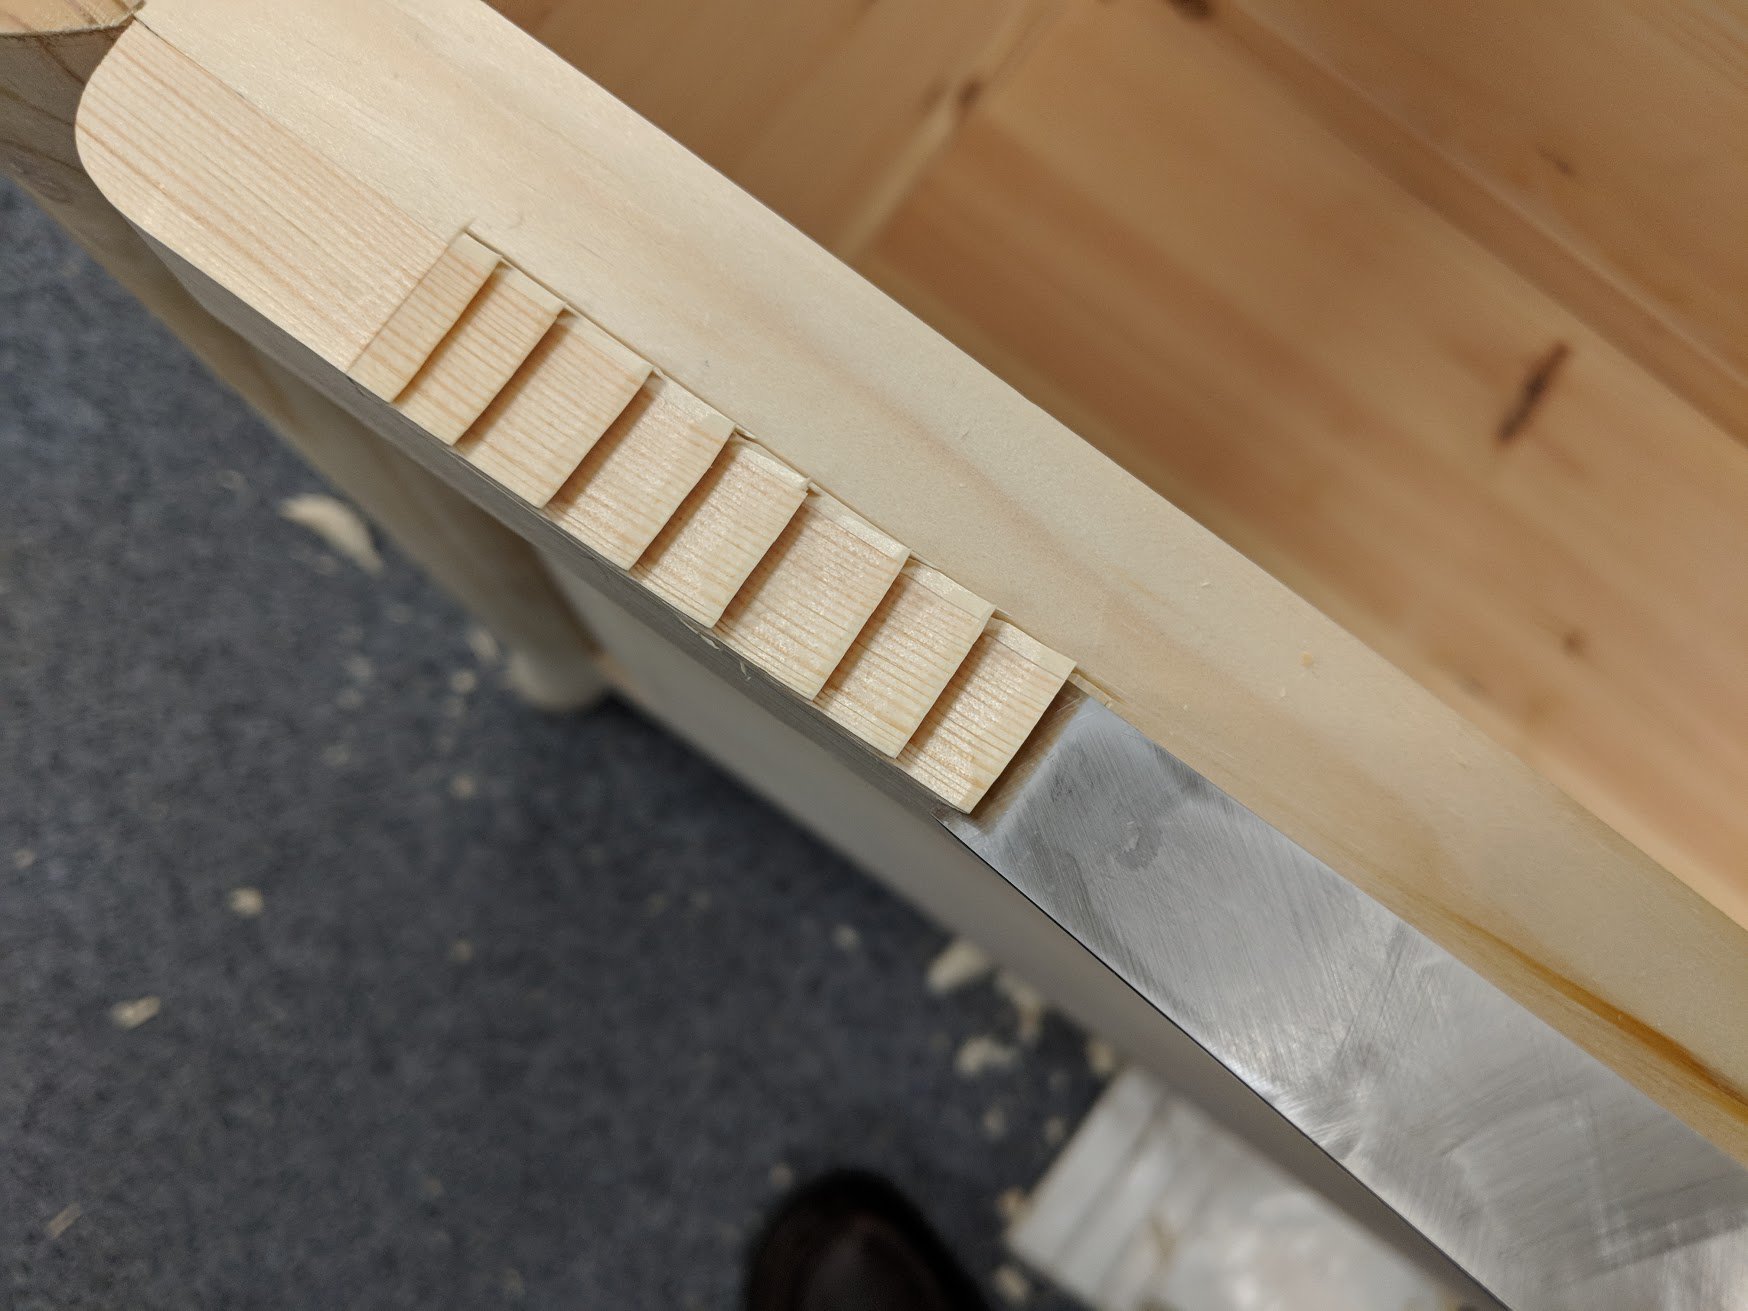
Secure the hinges with screws. Use an awl to start the screws.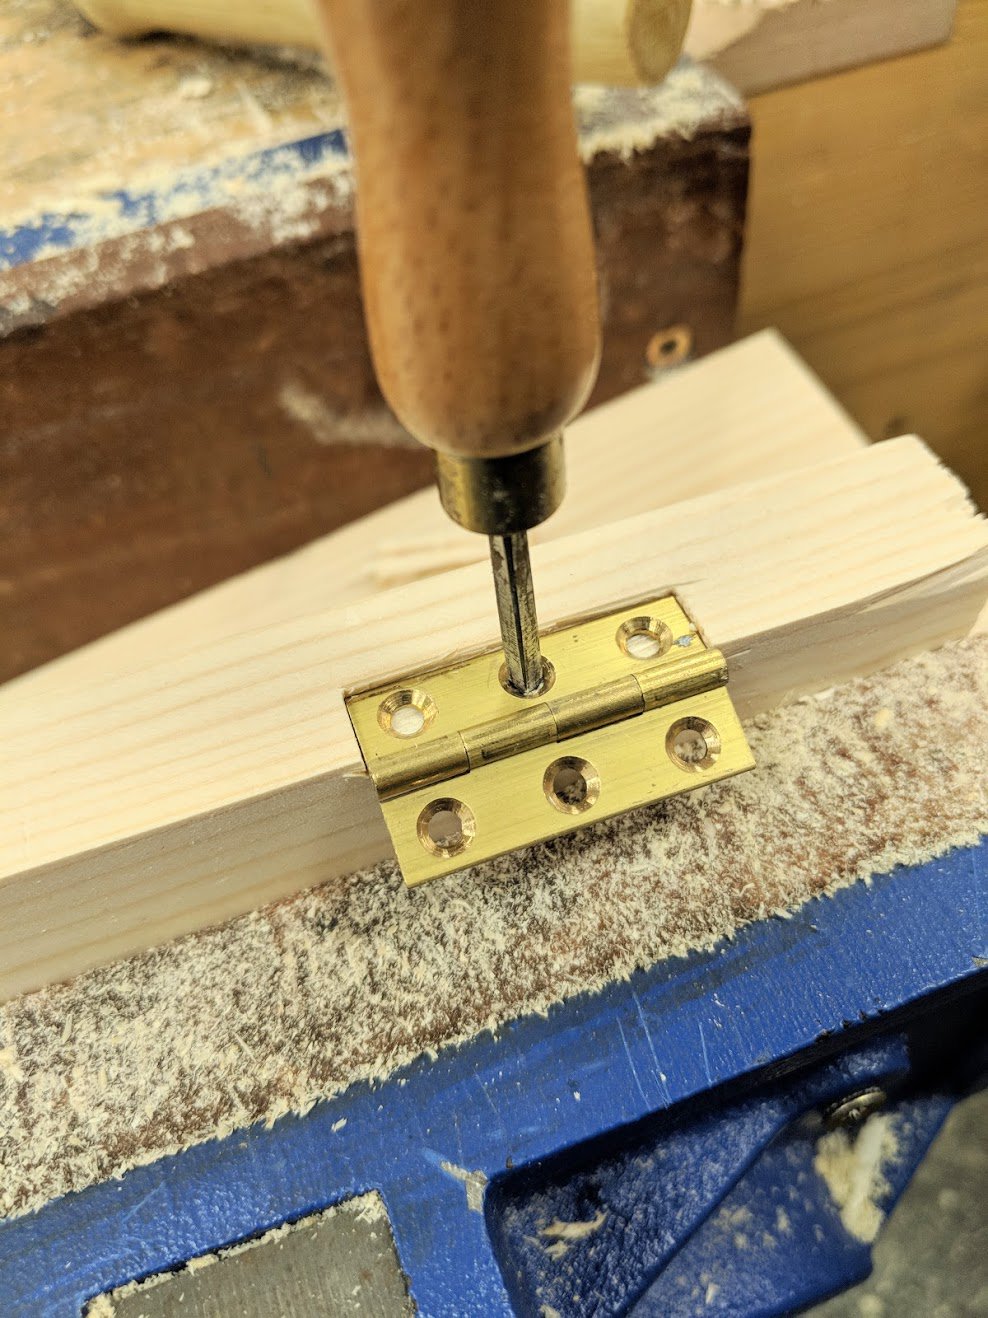
The hinges are not recessed into the back. Simply marked and screwed.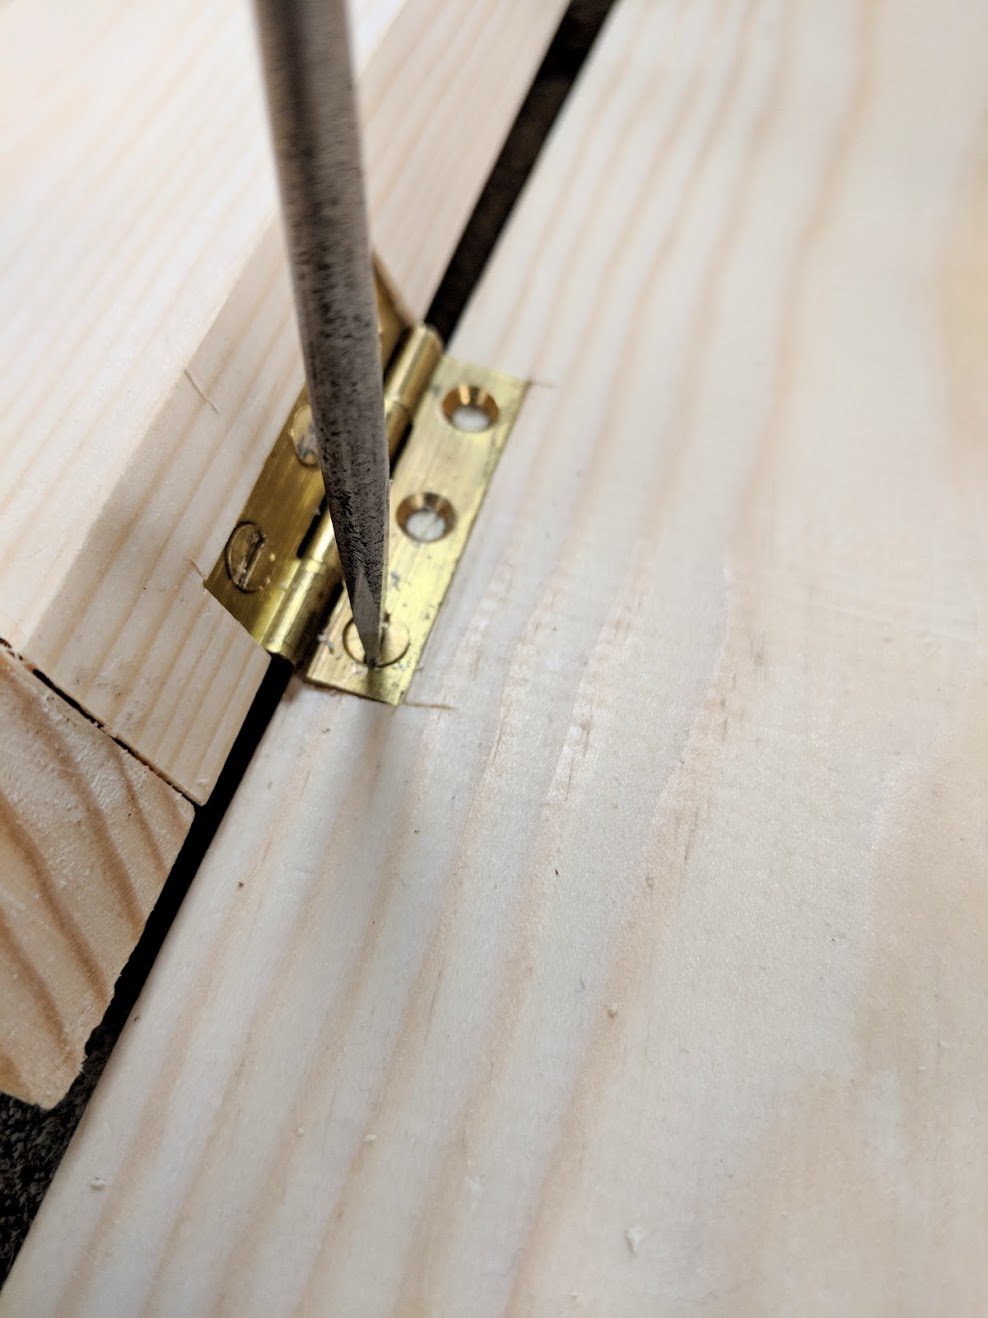
You can add a perch or not, up to you.
Drill a 1/4″ hole half an inch down from the bottom edge of the entry hole and centred in the width.
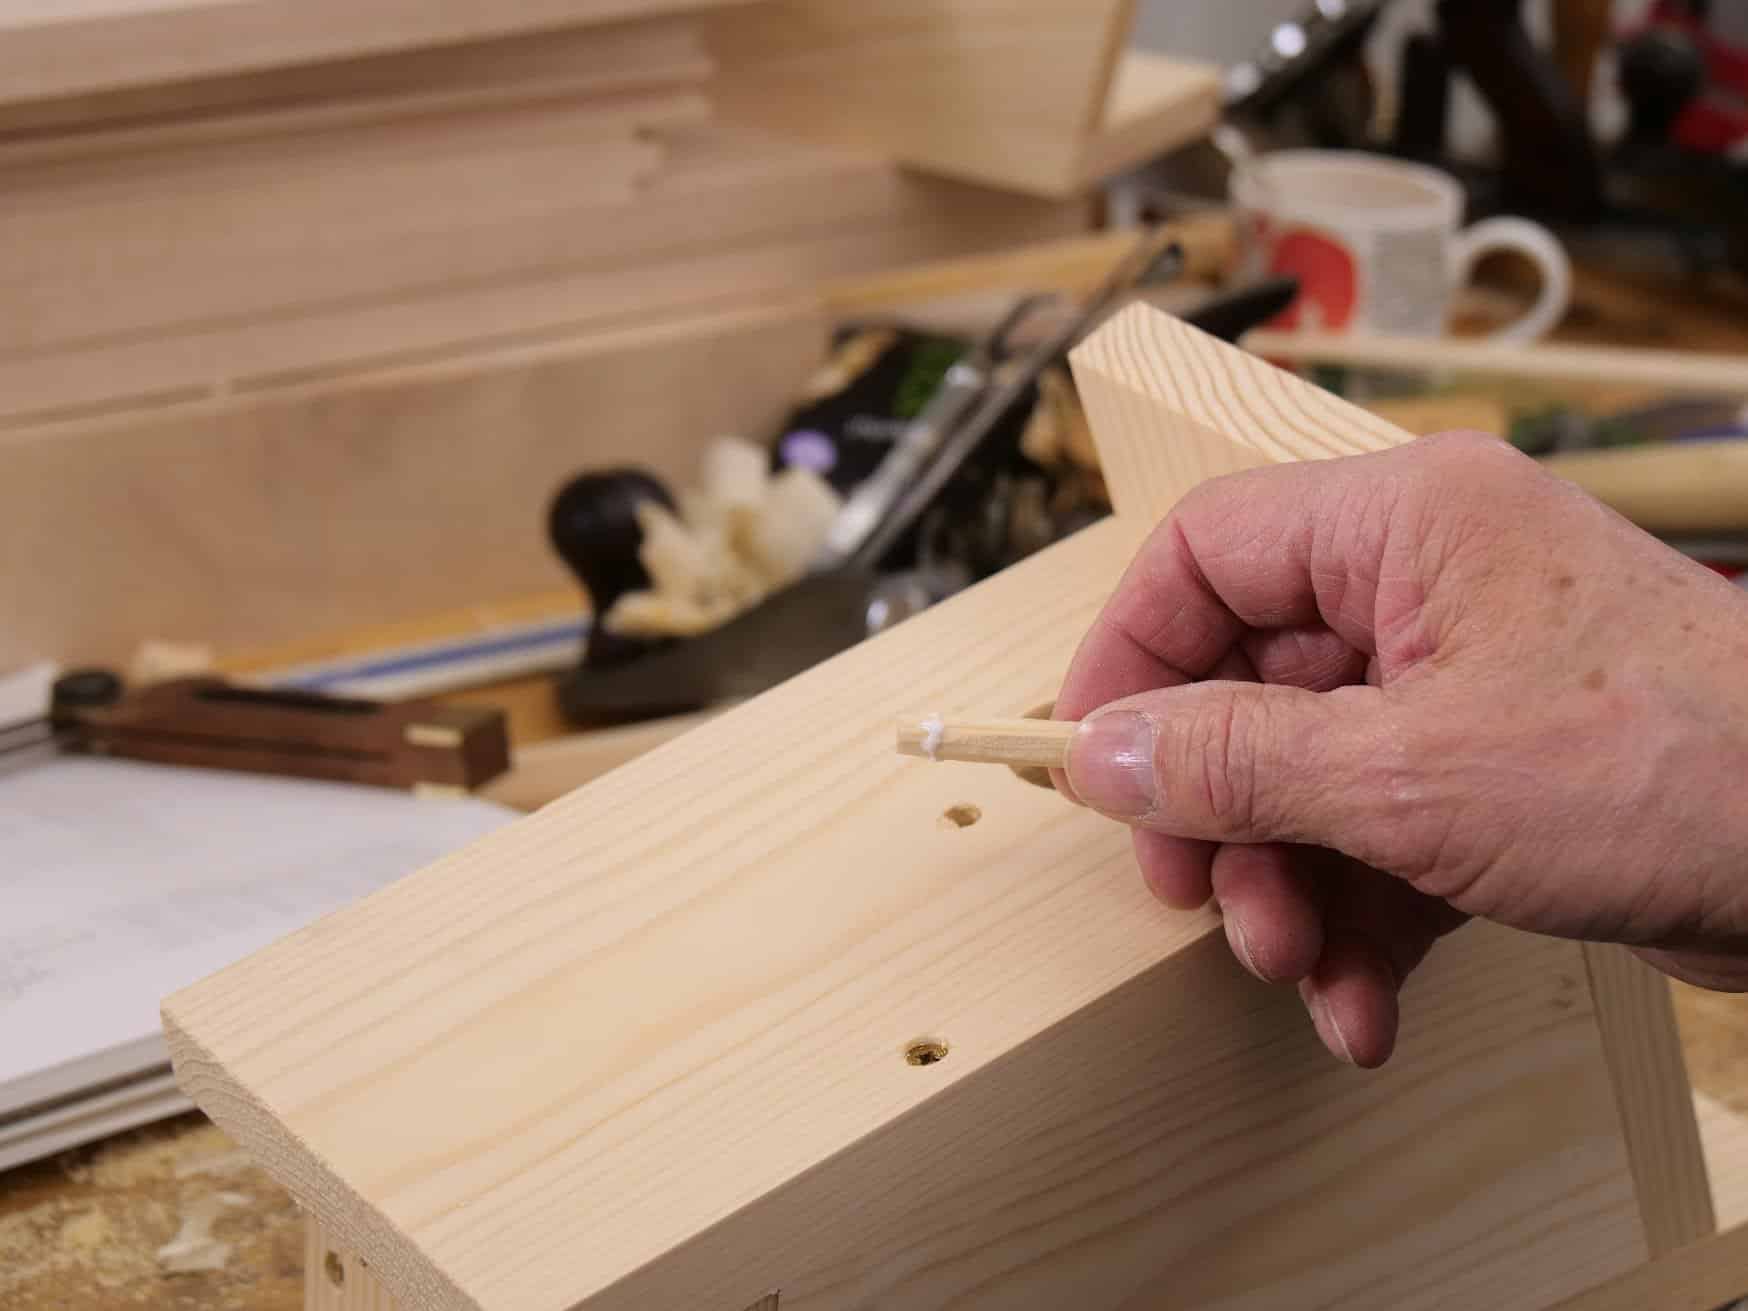
Fill all the screw heads with wood filler and leave to dry before sanding.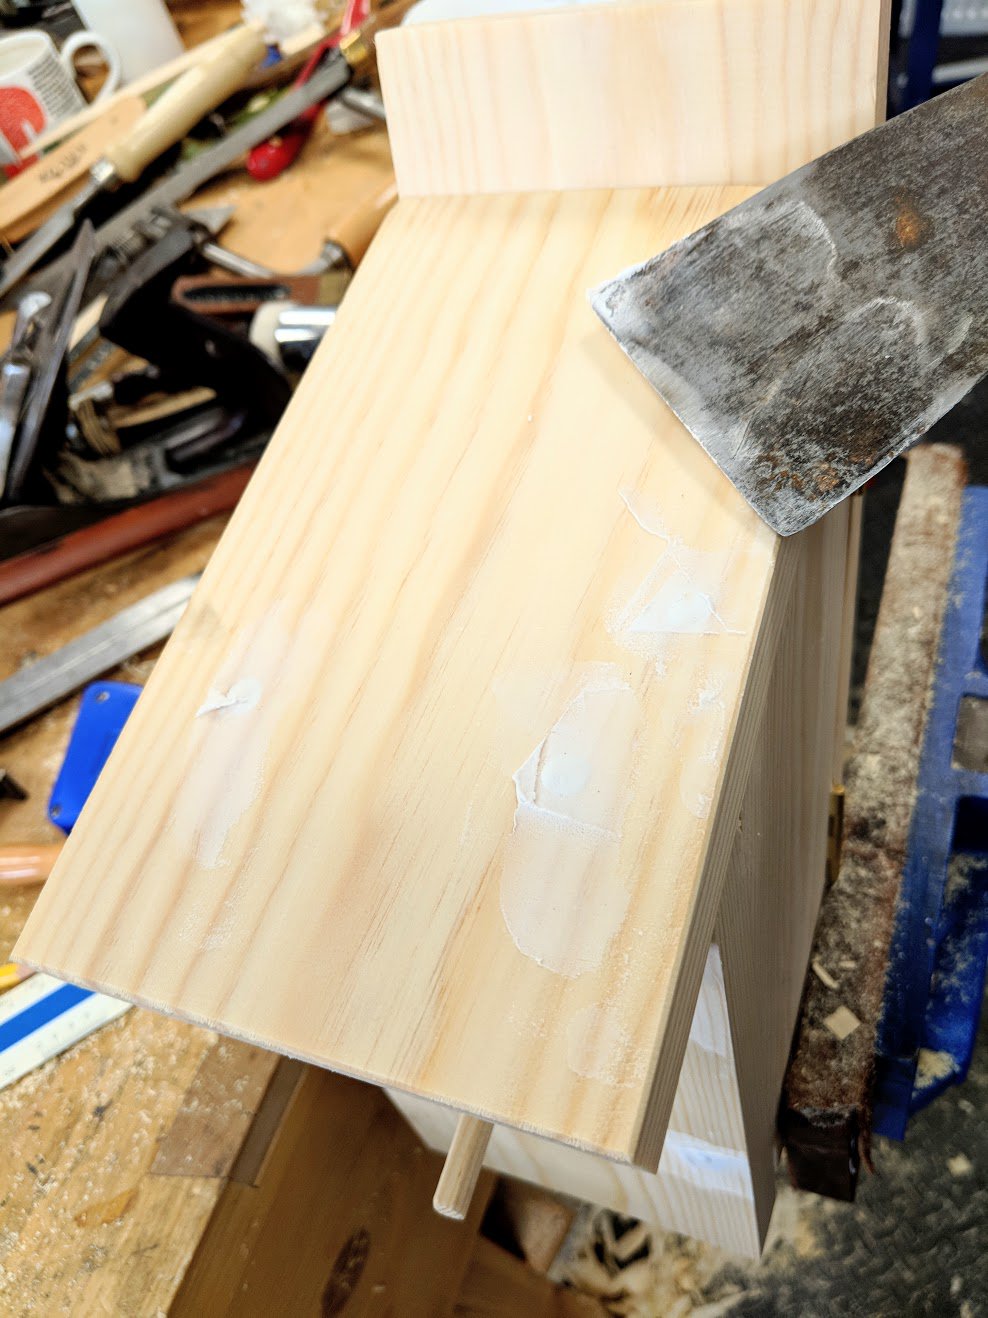
Finish
On one of my key-safes I used a base coat of chalk paint in barn red followed by a second coat of granite black. That’s the one at the top of this article. I wanted to sand through. The last waterproofing was two coats with an outdoor water-based varnish. Sand smooth between coats and on the last sanding between chalk paint and varnish sand through to the depth you like.
My second one I used a tin of outdoor finish by Ronseal, walnut. 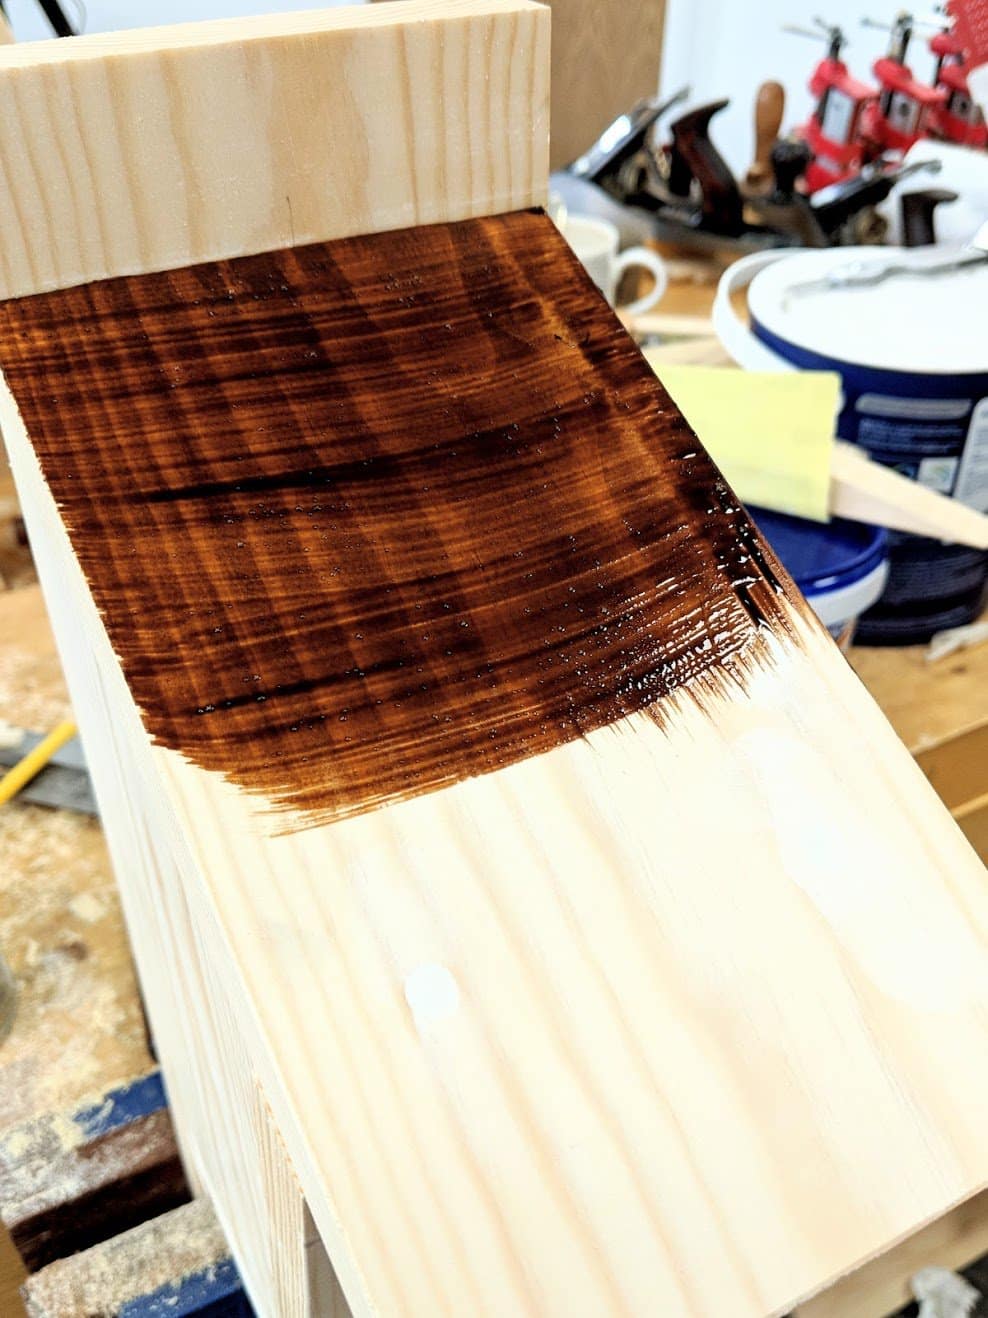
Fixing
Drill two holes, on toward the top and the other nearer to the bottom, through the back to secure to a tree, wall or shed or post and secure with two screws.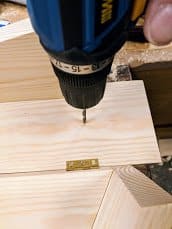
I like this idea, thank you.
What are you doing if a real bird occupies it? ?
Now there’s a key issue. You’ll usually know if it’s occupied or someone is taking up residency. In that case you’ll have to defer to the rights of the birds to squat in your invitational spot and get a locksmith out for your house. It is also the case that nesting is part of the ritual premating condition and old nests should always be removed. In my case, law or not, I would remove the old nest at the close of the season anyway, law or not.
I’m sorry to say this Paul, but in the UK it is an offence to disturb an occupied nest, one in construction or to interfere with eggs.
A bit inconvenient if said oiseau is in residence when you loose your keys for the first time in….. how long?
That’s why I added the caveat not to bore all the way through the entry hole, but thanks for the info.
Perhaps a small patch of metal window screen wire painted black and attached inconspicuously at the rear of the hole would prevent entry?
Neat idea!
Nice simple project. Perhaps a magnetic catch to keep the door closed? It appears that water could drip into it at the top rear and at the hinge side. Perhaps some minor amendment to preclude this?
Noooo! Moisture is as important to a healthy brood as the air we/they breath. This is exactly the level of provision they need and nothing more.Let’s keep the simple simple I think.
I would have thought of taking a scrap of metal screening and put it inside the entry hole, perhaps bending it into the enclosed space and painting it black. Same effect, but the burglars in our neighborhood are quite clever and the extra depth would still keep the birds out.
One would be burglar started to pick apart the leaded glass side panel next to the door. Our Labrador alerted us to the break in attempt by hiding under the bed.
URL=
(Pardon; simply could not resist it. This is the USA, after all)
That is why I love labbies so brave
Why does the tri-sided design make it stronger?
Triangular, pyramidical shapes are the strongest geometric patterns.
I placed a single plastic painters pyramid under each leg of my workbench on prior to installing mobile castors, without issue….my guess the bench is over 400 lbs . (Paul’s YouTube version). I would love to prove with my photos, however, I can’t seem to do this here. So, Yes! Pyramids are indeed the strongest geometrical shape.
For a “bona fide nest box” (as Paul put it), I think it’s preferrable to omit any varnish or other potentially unhealthy product. Instead, I’d put a wider roof on the box in order to protect the contruction from the rain. That would obviusly mean the design would have to be changed a bit, at least if it’s supposed to be fixed to a wall. However, trees are often more suited to the needs of birds. Whatever the case, I like the simple yet elegant asymmetric construction.
More traditional designs (german/french/italian text): http://www.vogelwarte.ch/de/voegel/ratgeber/nisthilfen/nistkaesten-fuer-hoehlenbrueter
It’s a key safe holder, folks, not a nesting box!
They all forgot. lol
er……
“The size of this nesting box is good for wrens, titmice, chickadees and other small cavity nesters. You can scale the box for larger species and size the hole to preclude or include whichever you want. 1 1/2″ for Bluebird, Chickadee 1 1/8″, Titmouse 1 1/4″, Nuthatch 1″ to 1 1/4″. Place 5 to 10 feet from the ground for any and all except the wren house which has a 1 1/8″ hole and should be placed 3 to 10 feet from the ground.”
You said it! It ain’t a nesting box!
Thanks Paul,
Another great idea and beautiful workmanship. Keep them coming.
It’s a good idea. I’ve had a lockbox in the garage for over 20 years with a key and enough money to pay for a taxi should one of my children find themselves in difficulty and need to take a cab home.
The deal was that they were to use the money only if they were in trouble, afraid or sick, that if they used some or all the money they would tell me (so we could replenish it), and that I WOULD ASK NO QUESTIONS.
It worked well and was used two or three times over the years. They are both grown and gone now, but there’s still can fare in that box. You never know…
Great idea, Paul. I’m going to utilize this. Interesting to note those who do not pay close attention to your directions and immediately get on the “Do not disturb the nest ” bus, when in all practicality you would block the hole anyway. If not birds, there would be a good possibility of a wasp nest inside if left open. Thanks for sharing your knowledge and skills.
How about dribbling a little green and white acrylic on the perch for a touch of realism?
Great addition!
Can anyone recomment a source for brass hinges in Europe?
Ebay suppliers go from vintage secondhand to brand new solid brass ones beautifully made. This has proven efficient, fast and reliable for me. You may need try try the UK site here