The Meaning of Economy
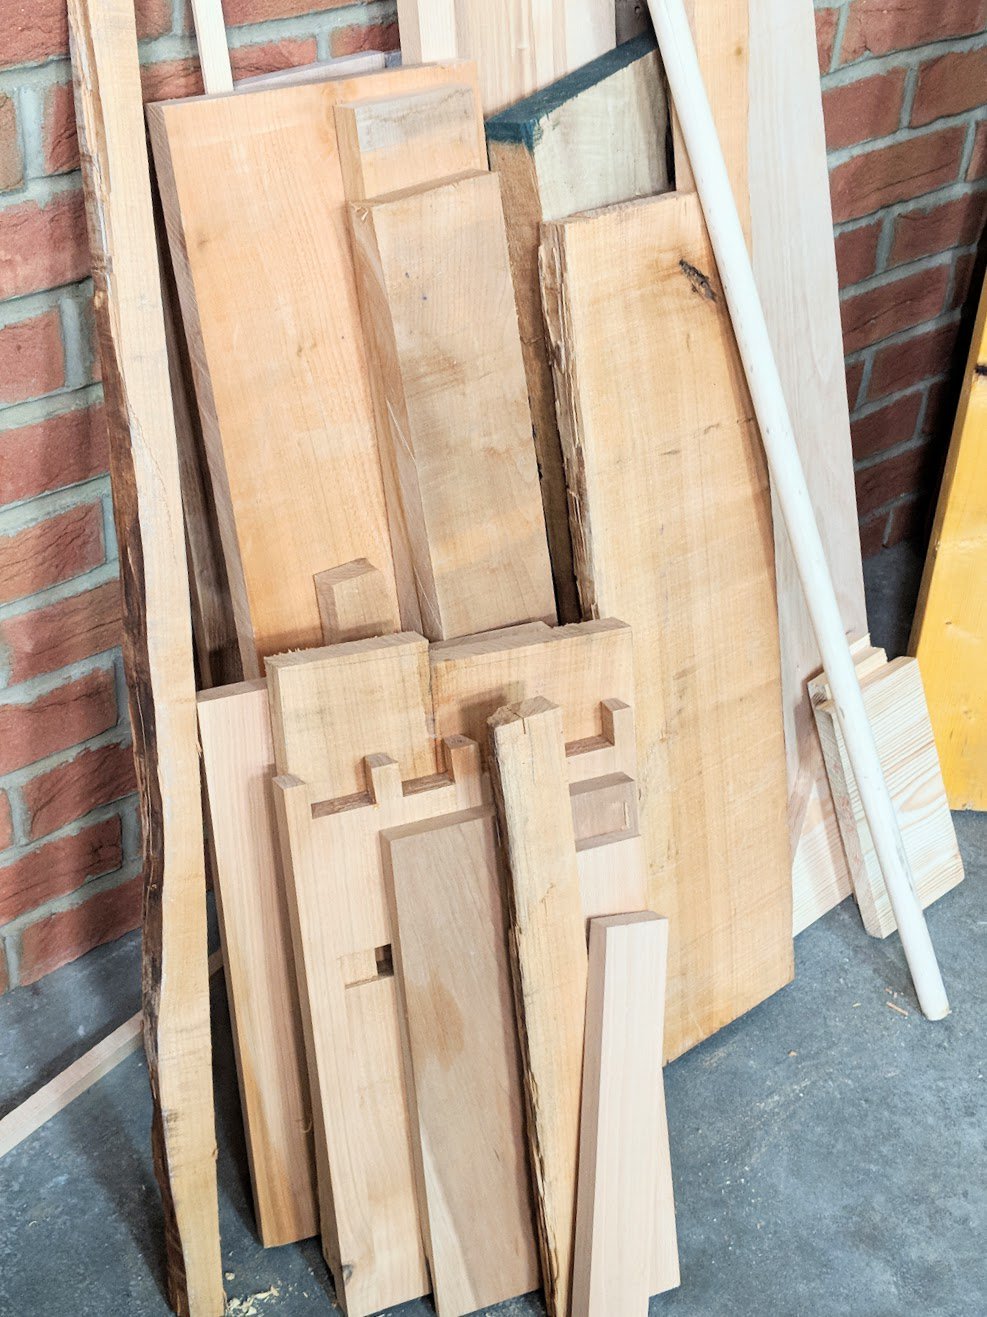
Storing my wood
Our economy’s different than business economy, more sort of domestic, kitchen-like, gardening-like economy. We work in different realms of domesticity and woodworking has always been part of my family and domestic life. Never distinctly sawn off as somewhere I go to from. Oh we still have constraints, but it’s not so much to do with bottom-line profitability in money so much as profiting in freed time, freed space, a sense of freed wellbeing as it might well be called today. There’s something real about it. It’s not an other-worldly ethereal body control but the tangible freedom real work and working itself brings. Economy of this kind, lifestyle craft as an art, is about saneness, redeeming time in the core value of work ethic. A place to sweat and stretch the whole body in working by working your mind, your emotions. The economy of the whole releases you and your time to become that punchy activity that results in decisive action without the hindrance of the world you might be trying to leave outside your creativity. Let’s look at a small aspect of it. By doing that, we create our own sphere of economic creativity. It’s both liberating and empowering as long as we don’t over engineer it.
Saw stowage
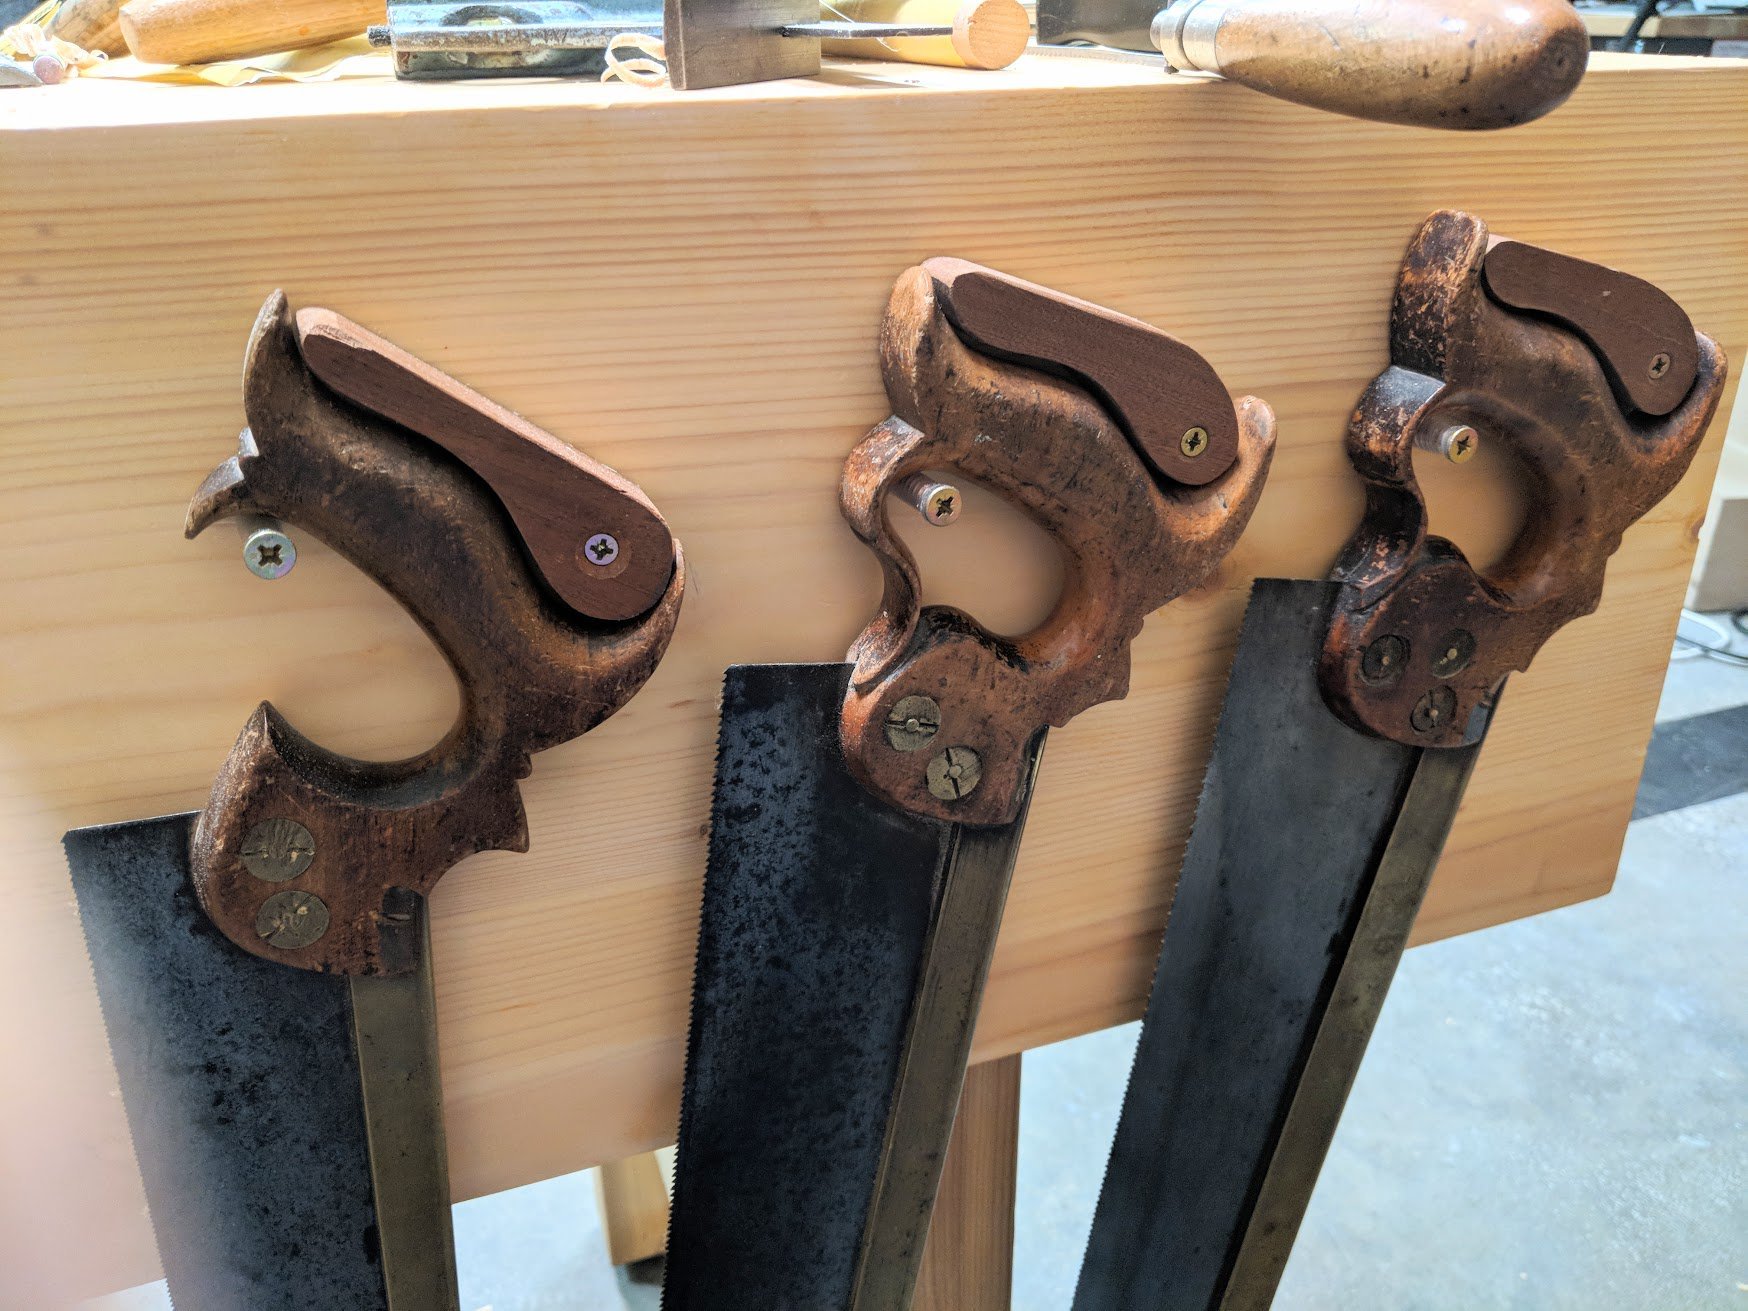
I use three ways to keep my saws. Working economically in our home workshops means not having to make too many manoeuvres to make things work efficiently. My saws hanging to my right hand gives immediacy when I need it. Three saws, three sizes all with backs is my joinery answer. It means they are pulled to task in a split second economy and they are indeed replaced there in the same time. This alone frees my benchtop from clutter and believe me, having half these saws out at any given time soon takes over the workbench top.

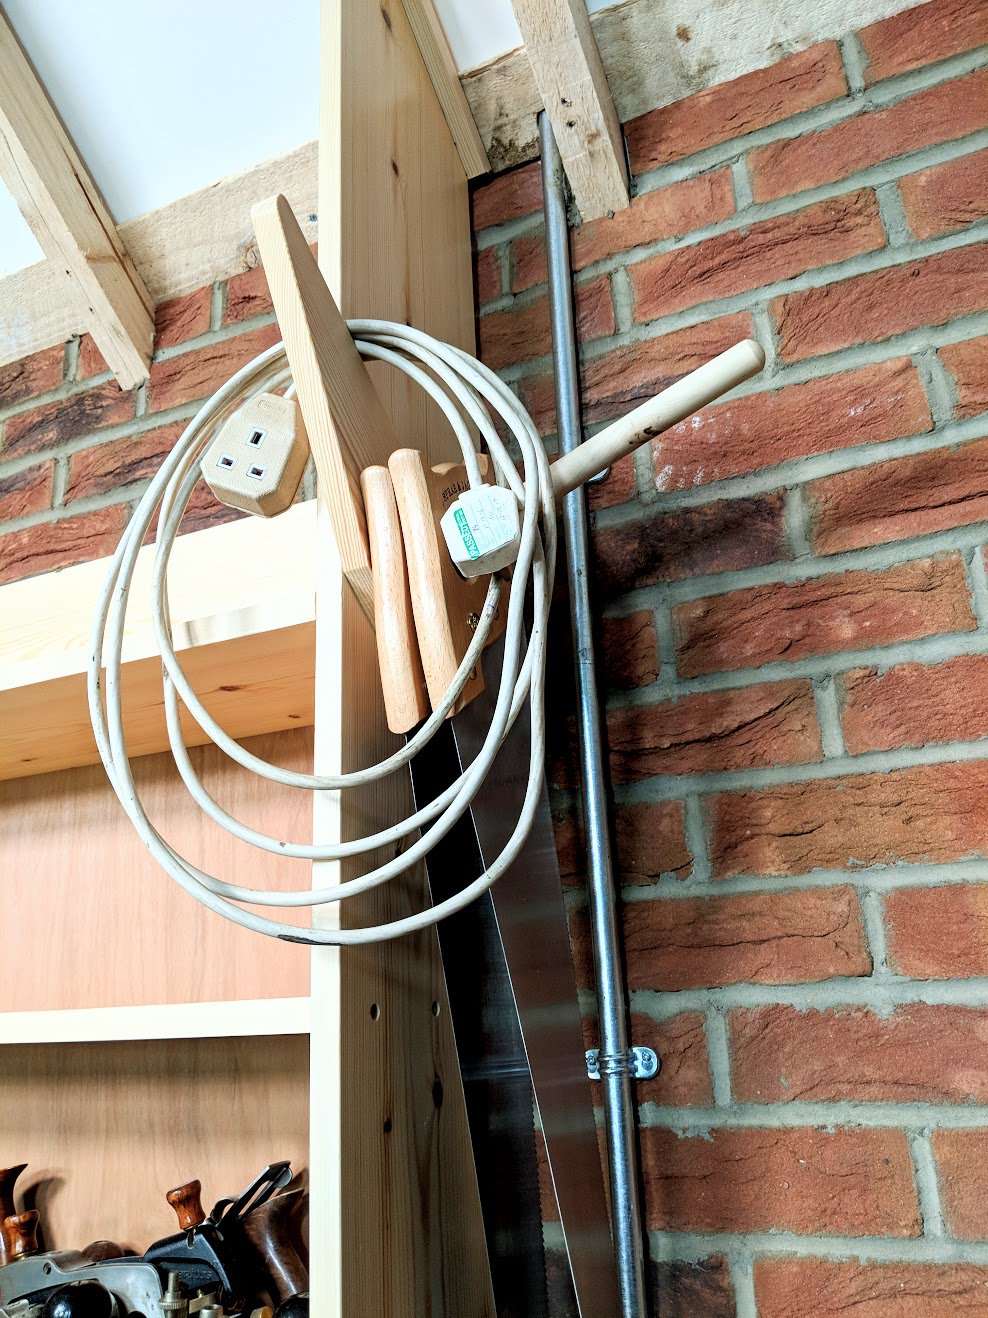
For my handsaws, which are generally used less, I hang them from a sloping 7/8″ dowel. I love my handsaws and I usually hang three or four but at the end of the day I rely on the two newish Spear and Jackson saws shown, a 7PPI ripcut and 10PPI crosscut. I can also use this type of holder for electric cords, rope or whatever else.
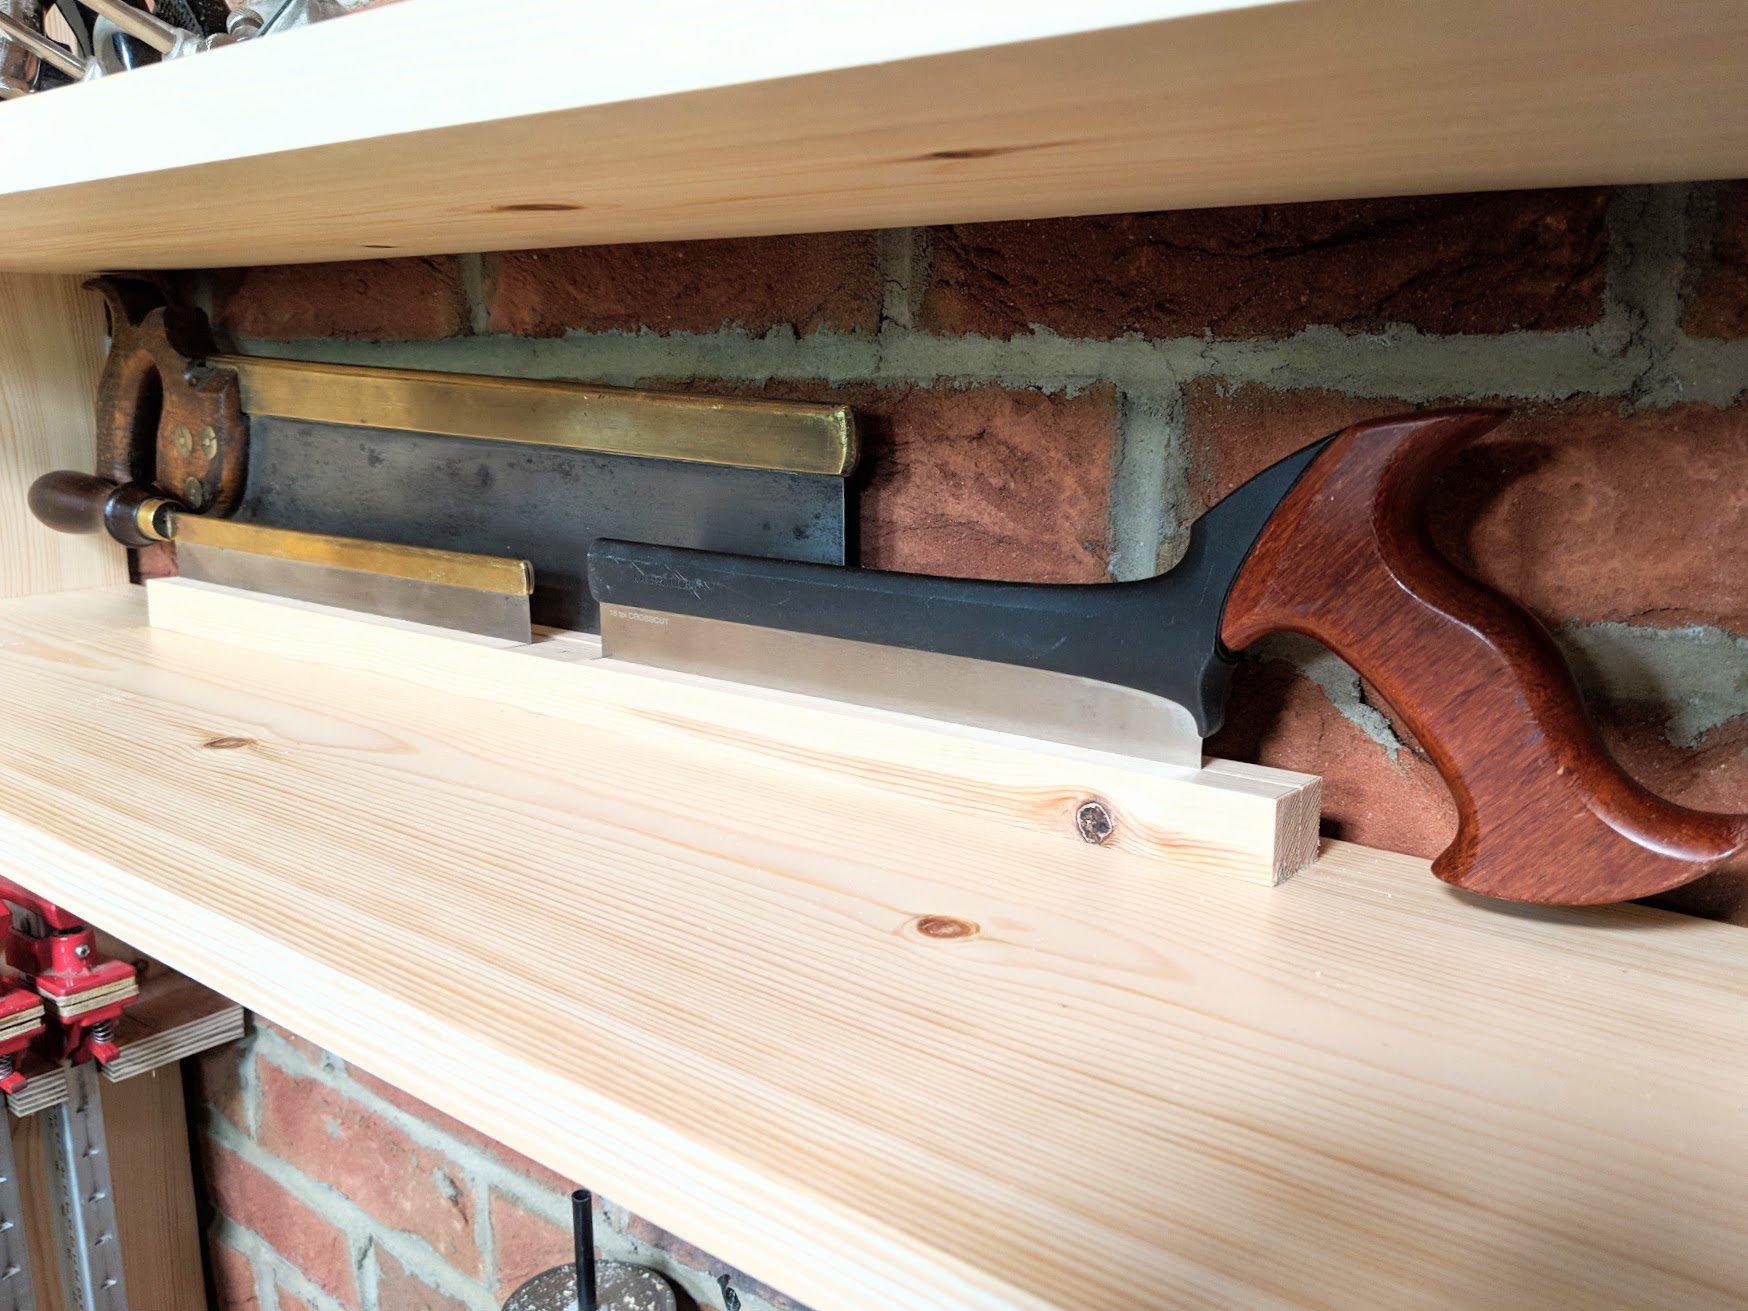
The third one happened by accident mostly. I slipped a small gents saw into my saw sharpening strip one time and saw how it stood there upright and taking less space. Putting this to the back of a shelf for my lesser used saws made good sense to me. In this case it was my 16″ tenon saw, my Veritas 10″ backsaw and my 10″ gent’s saw.
Clamp stowing
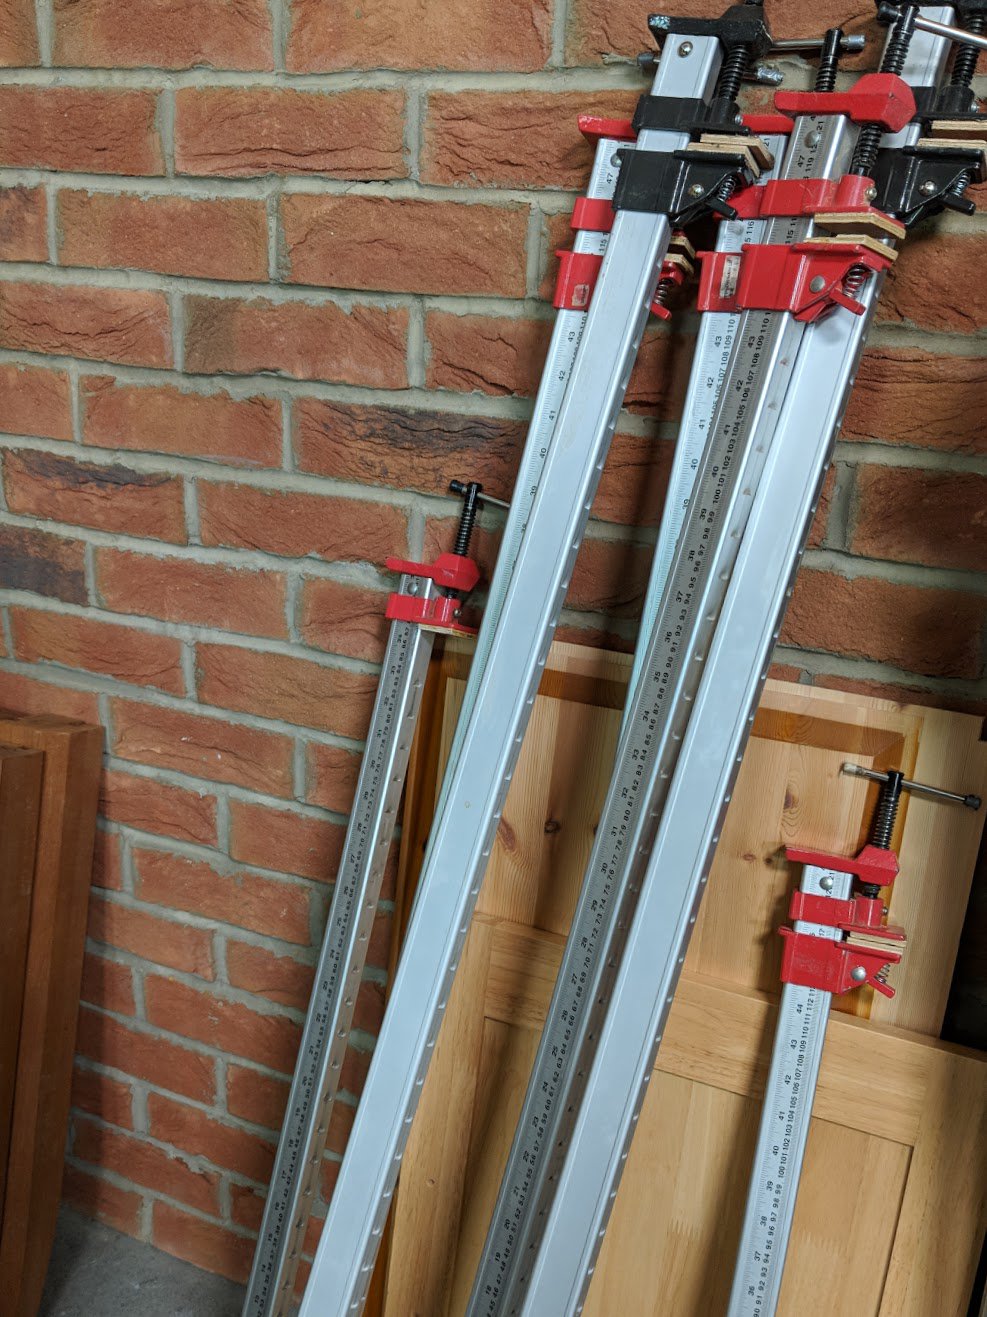

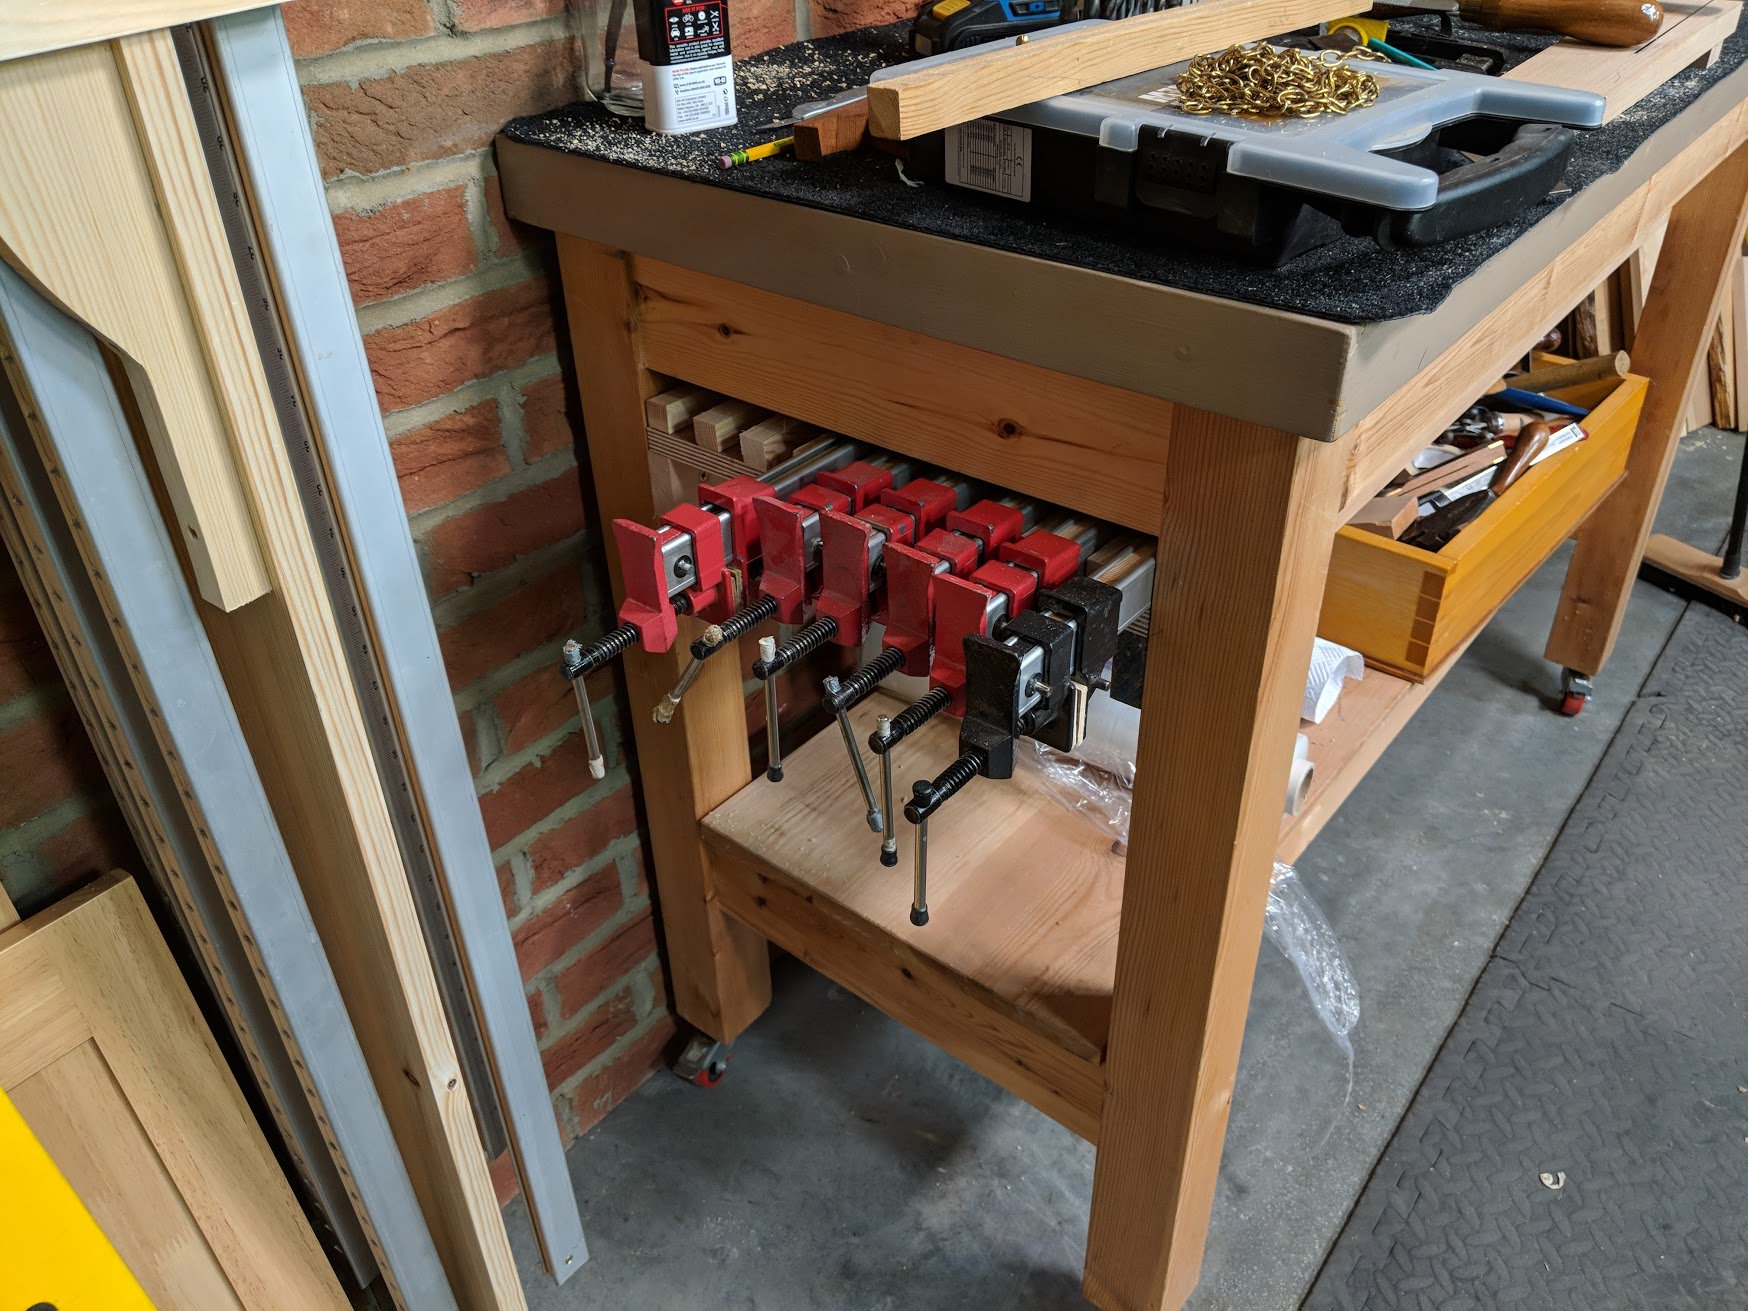
The same is true of clamps. Here they take a massive footprint during a project. Yes, you pull them off a project onto the benchtop and it builds up, but when you have a home to stow them in it improves your sanity. Here they are stowed discreetly yet accessibly with this simple under-counter addition. Some of you feel that my wheel around cart was an ideal way of stowing but not really in a garage; too big a footprint. I have those for the school, to wheel between workbenches, not my home garage workshop.
Smaller clamps I am still working on yet.

Think shelf
This and other narrow shelving came from an improvement I made to our home kitchen years ago. Beneath the upper cupboards and above the countertop is a valuable corner you rarely even see or notice. By running a full length narrow shelf 5″ down we could keep the kitchen smalls like condiments and coffee mugs, caddies and such, freeing up larger flat areas fir larger containers and dishes. Here I have my nail caddy and my sandpaper in an arm’s reach.
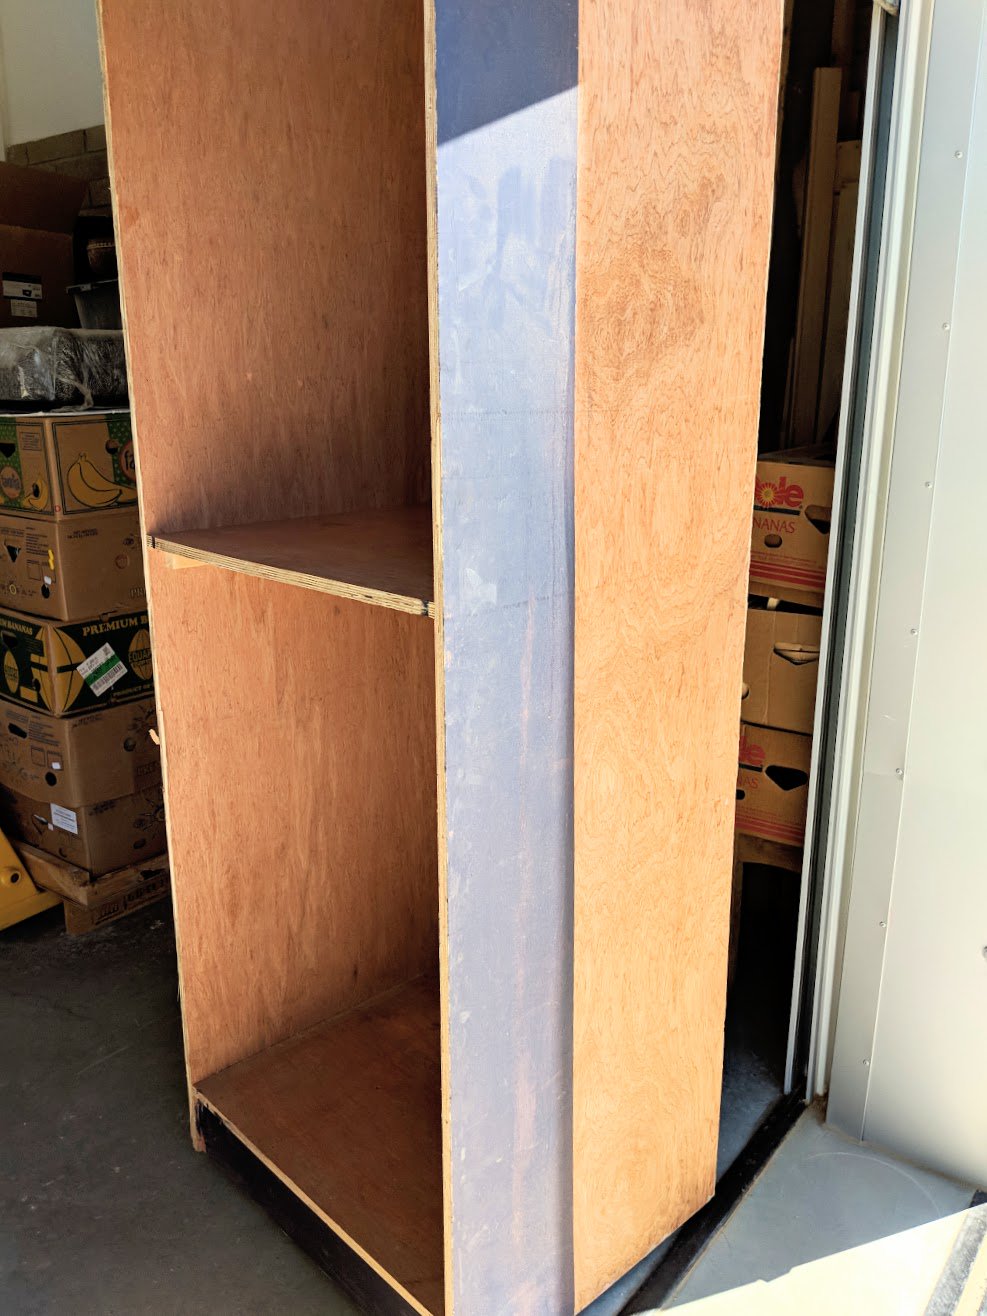
Repurposing
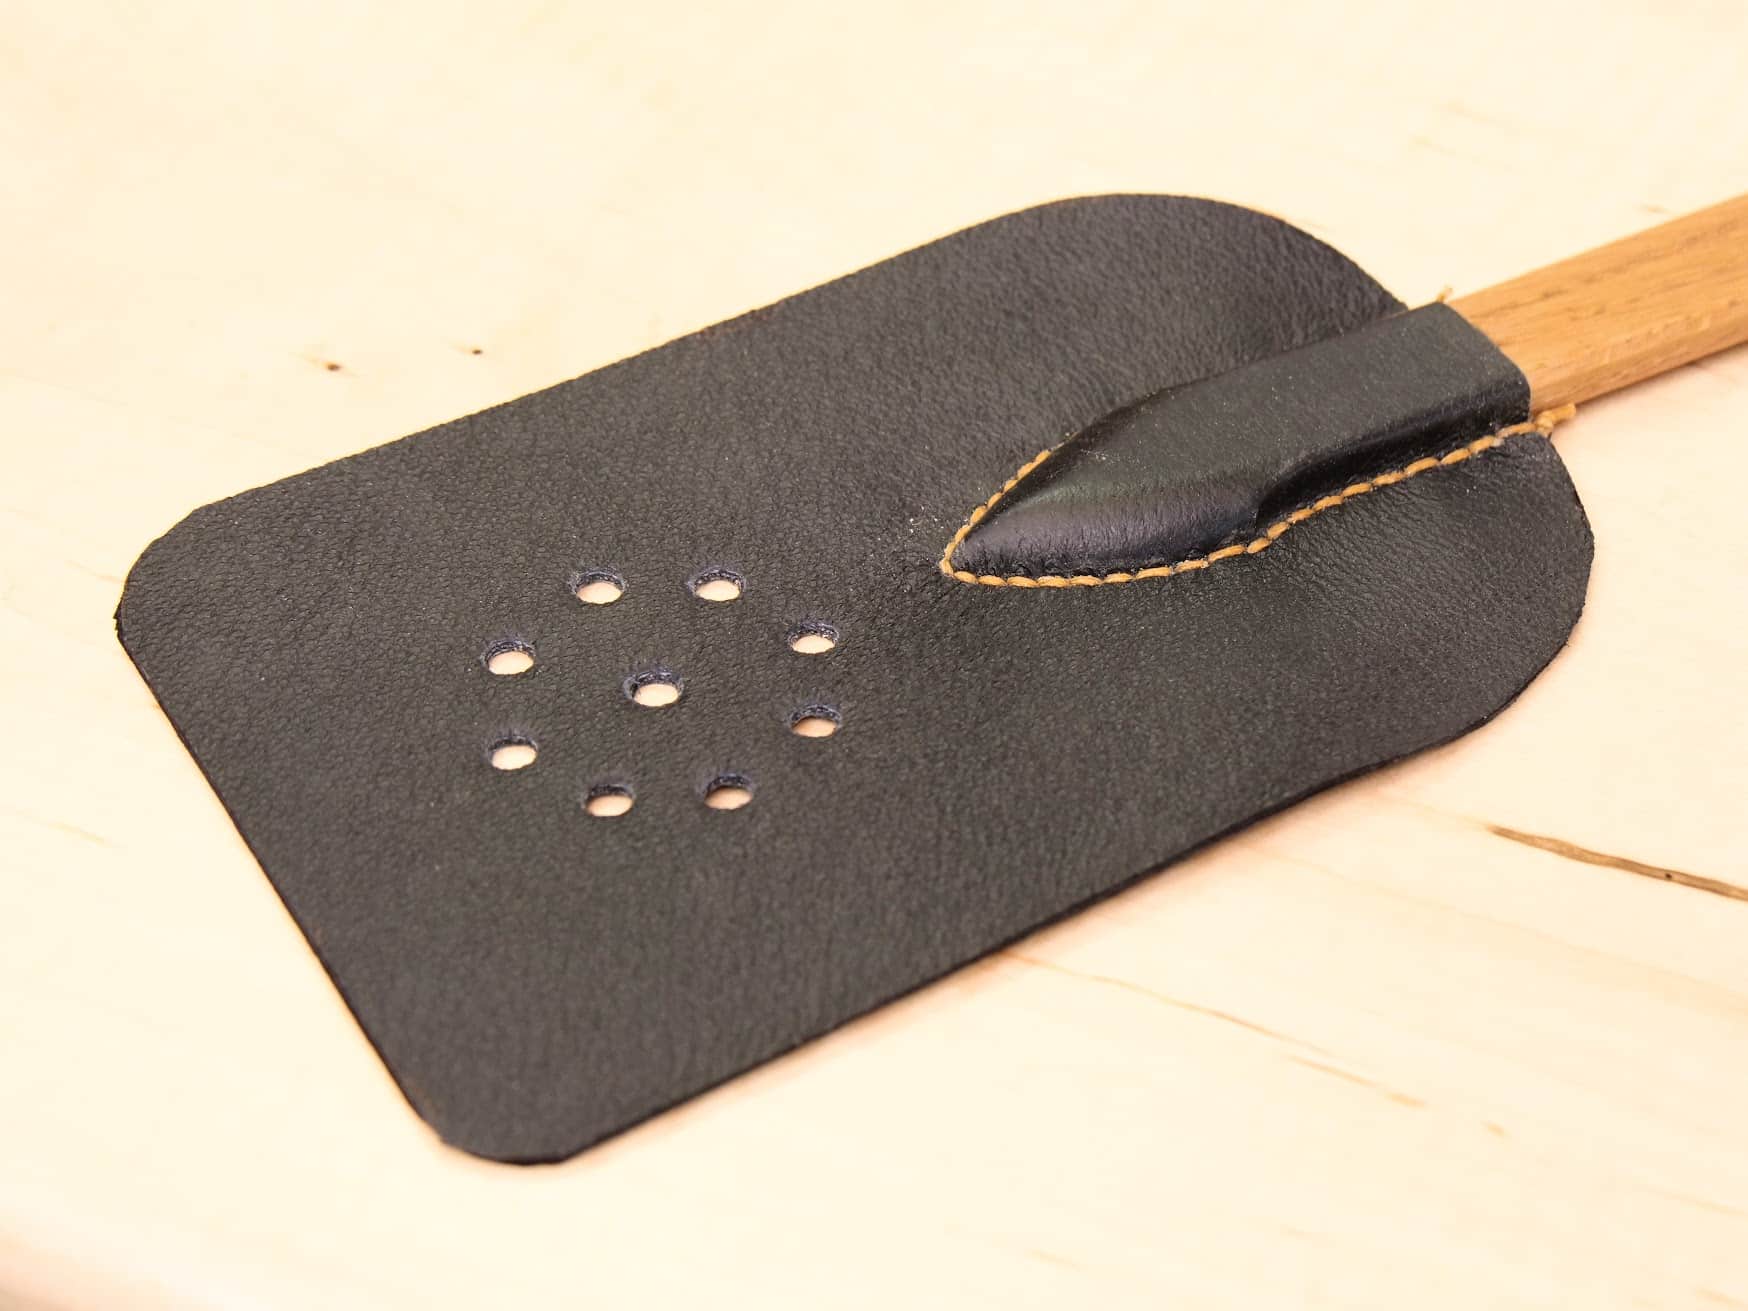
Using what I have has been a theme thread woven throughout my work. Economy is important, time and money, materials and equipment, they must all be used responsibly. My dad saved every nail and screw in jars and rarely bought either. Often time it is more economical to buy in than to search for a missing piece, especially when it is so quick and easy to order via the internet and have it delivered by the following day via a Prime account. I made a point, no pun intended, of using up screws withdrawn during the dismantling process of the move in my restructured projects for the garage workshop. Plywood and bench tops, workbench leg frames and so on have all been put back together and to good use. This coming week I attack the wood storage in my garage. Small scale workshops where an individual maker works alone or with one other usually means that every offcut is kept, stowed and brought out when it fits the purpose. To the small entity a square foot of cherry at £6 becomes a cutting board for a wedding gift or Etsy selling. Suddenly it becomes worth £30 and you increased your wages. My fly swats are another good example. I have sold hundreds of these through the years and they were all made from strips of wood of no use for anything else and the leather offcuts from upholstering my rocking chairs made the swat part. In many cases it’s not the cost of the goods but the inconvenience and breaking into the work flow to go buy. Ever given away something that at the time seemed worth just pennies to someone only to find you had to drive to the store to buy another pack? Someone breaks a small component and you spend an hour resourcing the replacement! To them it was just a tiny thing. For you it was time equals loss of income.
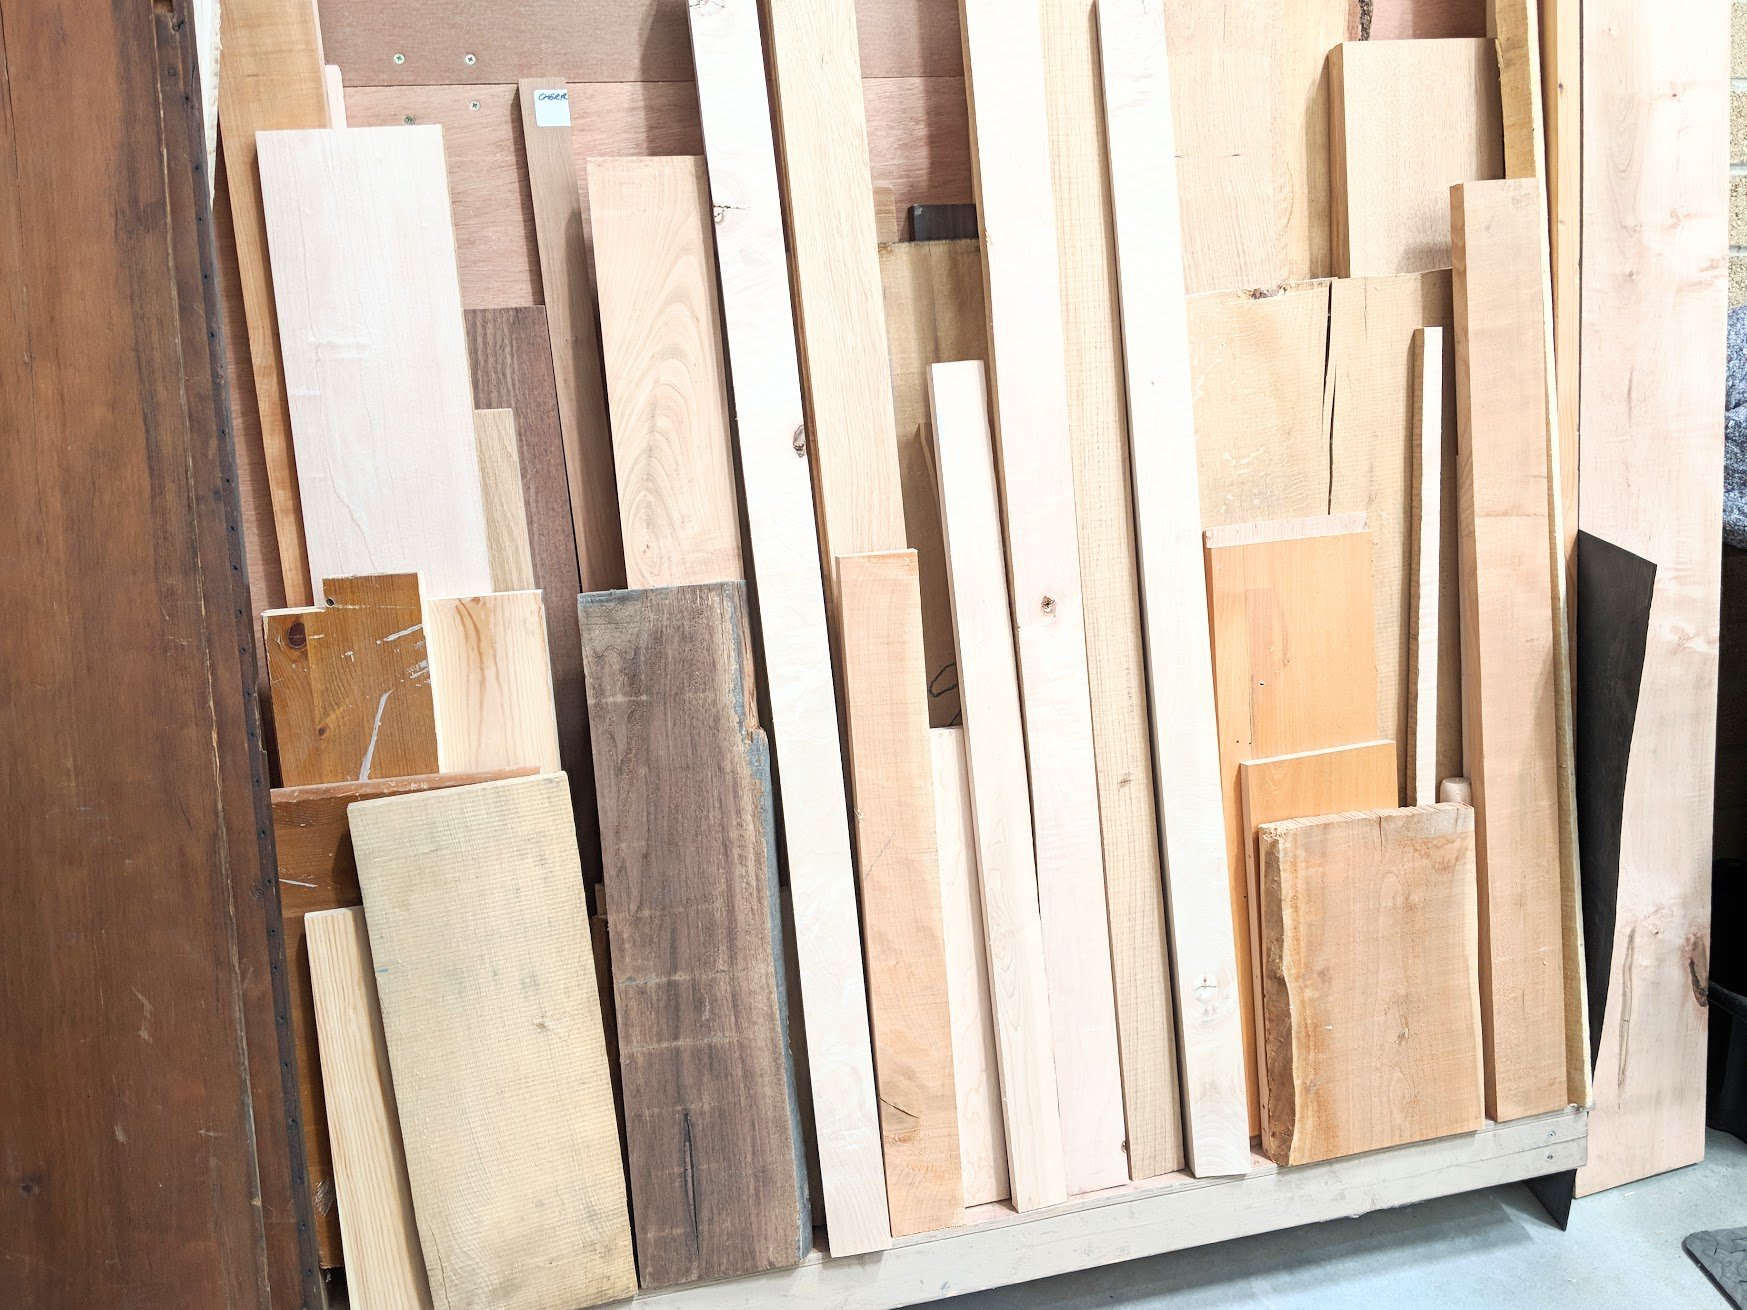
I have some former plywood cupboards I want to repurpose by reshaping, and retrimming and adding shelves and dividers. My reason for mentioning offcuts is simple enough. Short lengths often clutter up and when floor space is of a premium it readily increases its footprint with each offcut saved. Vertical storage maximises efficiency when you have only limited space, but more than that, efficient stowage means easy identification and retrieval. Most of the time a good storage system for wood means you can see at a glance were what you need is. Also, though we do make videos for teaching, this is still very much my main making workshop; the extension of who I am and my creative workspace. I’m settled on my system because of convenience and simplicity. With boards, beams and sections mostly stood on end I can easily tilt boards to free up the one I want out.
Looks like time for a Saw Till instead of a dowel rod peg
Not likely. My saws are in use minute by minute six days a week.
2 saws on the same dowel rod, you have to take one to reach the other, and take off the cables. It’s not very efficient. Because you have only 2 big saws, you could put dowels on the both sides or make 2 short dowel rows for one saw only.
A saw till could be as simple as your 2 sharpening strips, you have shelfs around already, just put one strip on the shelf and one on the wall, arrange saws vertically, easy to take and put back, no need for a separate construction.
Nope! This works exceptionally well for me without over complicating simplicity and functionality as well as perfect economy and it will work well for others for more reasons than I’ve given. There is only one cable and if you look carefully you will see that it is not on the dowel at all.
It’s up to you. I had a similar setup 2 saws on the same dowel, it was difficult to reach first saw every time, I have to use two hands to get it, now I store them vertically like in a saw till, just used 2 strips of wood, one on the wall one on the shelf, and it is easier to use.
For smaller saws I have your setup nr. 3, but my shelf is opened on the side, so it is easier to get and put the saw, in your case you have to move them to reach your tenon saw
It is, really. I’m not sure that we don’t face these kinds of first world issues in our daily work. The left hand lifts away both saws at once and together, the right takes the one needed and the left returns the unwanted to the rod. 5 seconds max and on to work. I love the simplicity of it.
Paul doesn’t have just two big saws. He has many, many saws.
Paul already has a trolley for HIS clamps – this solution is for YOUR clamps. These solutions are for you to identify with, so you have ideas that you can adopt or adapt, for your own needs.
Paul’s more likely to reverse his car into that ‘garage’ through those double doors on the right, than need that extension cable. It’s part of the ‘theatre’. It’s there to add realism. Paul doesn’t need an extension cable in a newly-built, custom-wired, warehouse/studio/workshop.
Thanks Paul. I am always curious about these things. Since, you’ve been doing it for 50+ years, you have a strong feeling for what works. As such, I listen.
Keeping things to save time to not to have to go out and buy or order made me smile. A good friend of mine got tired of the corporate world about 20 years ago and moved into the handy man/remodeling business. He’s very sharp. He ended up buying one of those vans you often see with plumbers. He has it filled with all kinds of little things such as flappers for the toilette. That way, when he is at a customers house to do work and other little jobs crop up, he doesn’t have to make an hour trip for a $5 part. He worked for himself and time was his most precious asset.
Love it. Great post Paul
There is real skill in improving efficiency, or in a more “Seller’s” way of saying it (I think) – establishing harmony between the work, worker and work space.
Do you know of the Japanese system of 5S or 5 Whys?
5S is a set of simple rules that help you fit with your environment, and 5 Whys help sustain and improve.
5S
– Sort- ensure there is a place for everything and every thing it it’s place, eliminate obstacles
– Set In Order – arrange the work-space for maximum efficiency
– Shine – clean the tools (e.g. sharpening), keep the bench tidy, put stuff away and clean the work space before, during and after work as needed.
-Standardize – for me this is about building in body memory, one definition “do without being told”
– Sustain – look for ways to make the other S’s natural, harmonious, look for better ways, consider the goal
Five Whys are for improving 5S – it’s simple ask why five times to get to the root of the situation. For example:
1) Why is the dove tail sloppy – bruising of the edges, edges not clean.
2) Why are the edges bruised? Because the chisel is compressing the wood beyond the knife wall
3) What is the chisel compressing the wood? Because it isn’t sharp
4) Why isn’t it Sharp? Because I didn’t sharpen it.
5) Why didn’t it get sharpened? Because the sharpening tools were hard to find, and I didn’t have the discipline.
5 questions led to the conclusion that I need to clean up, put the sharpening tools near by and focus on paying attention to how the chisel is cutting.
Liking all your ideas and tricky solutions, but something not mentioned but visible in a picture, perplexes me.
Your bench is on casters, how on earth do you keep it solidly in place when you are working.
Perhaps it is fastened to the wall when you work and released when you want to move it around.
JIM
I believe that is an auxiliary table with locking castors, not meant as a workbench.
The castors lock and the bench is immoveable when locked. Solid!
Good query here, Jim. I wasn’t sure which bench you were talking about at first. On my main workbench I have castors too. I wasn’t sure about putting castors on it at first but amazingly the castors only lift and swivel so pressing a lever to each castor with your foot lifts the bench 6mm off the floor. You move the bench, turn it or whatever, and then set it back down onto its legs. The other is more a table for putting useful equipment in daily use and tools when I want to declutter and give room on my main bench. It’s the same height as my workbench so i can add it to the end or indeed turn my bench around as an extension if needed too.
I’ve found the ‘Y’ shaped screw-in tool storage hooks really useful for storing clamps. They’re cheap and available from lots of places. I’ve got quite a tall workshop with some high shelves to store little used items and I’ve screwed these into the edges of the shelves – just reach out and they’re to hand.
Not craftsman made, using up old wood but cheap and quick.
any chance we could get some close ups of your saws? Im wondering what exactly you consider acceptable pitting
Great post, Paul. This kind of workplace layout might save you from a tendinitis or worst. As a dentist we are taught at about ergonomy, specially about economy of movements, so I can’t agree more about your system.
When you work doing repetitive movements they have to have the least possible amplitude.
That is why you have the thing you’re working on at 12o’clock. The most used tools between 1 and 3 o’clock and the less used between 9 and 11 o’clock. Between 4 and 8 is almost a no-no. This avoids making movements like rotating your torso or extending your arm behind you and makes the work faster and more efficiently, second by second.
My Grandad was a cabinet maker like yourself, and he used to store his G cramps hanging from a dowel, similar to how you store your hand saws, but connected at both ends, like a wardrobe hanging rail. Hopefully, this might provide some inspiration as to what to do with your smaller clamps!