Designed Teaching for New Woodworkers
Question:
Hi there,
I recently came across your website and blog which looks full of really useful information and advice on woodworking.
I just wondered if you have any recommendations for a beginner and what I should be focusing on at this stage? I was planning to try out some local courses where I can learn some basics about woodworking and furniture making. There are obviously many resources such as books and the internet which I can use as well.
The main issue I probably have is a lack of space. I live in a small bedsit in London so don’t know if I can realistically do much at home and buy items such as power tools. One furniture maker I asked suggested taking up marquetry but I haven’t looked in to this yet.
At this stage I’m just looking to get in to woodworking as hobby and build a bit of confidence, even if it’s just doing some really simple projects. Any advice would be appreciated.
Kind regards
Felix,
Answer:
Hello Felix,
Your question and quest will no doubt resonate with hundreds of others searching for training so I posted it here to answer it as well as in the comments section of my blog.
Many moons ago I began teaching woodworking to young children who came in the evenings with a parent. Over two decades I had the kids about three nights a week from 7-9pm. As a result of that I gained insights on training others in woodworking. Added into the equation that I also had full-time apprentices coming in for years and you get the picture moving into to teaching and training young adults. In my 40’s I began to train amateurs from my workshop because so many visitors stopped in to my open-house workshop. They too said that they wanted to learn from a bona fide craftsman. Eventually my passion for teaching and training and leaving a legacy ip people paralleled my love of furniture making and woodworking as a whole. Eventually I began writing books too, but even so, it was still too stymied for me because I knew that if I wanted my craft preserved it would never be in the so-called professional realms nor in the colleges and universities. It had to be in those that sought craftsmanship for the sake of their love and passion for it. I had to broaden my outreach and the only way I saw that I could do that was through the amateur woodworker who had the dynamism to pursue their craft against any and all obstacles. and not for money at all.
The good thing was that having trained literally thousands of woodworkers hands on in my classes meant I had not only the skills as a craftsman furniture maker, woodturner and woodworker, but the honed skills of a craft teacher too. Combining the two spheres from my personal growth as a crafting artisan and a trainer of children, parents and apprentices too meant I could also expose my work to a worldwide audience of like-minded enthusiasts if I could set up using the internet as a new to me platform. I began transferring my knowledge first to my first blog posts. The audience seemed to grow overnight. Joseph and I began videoing my work. We used YouTube as a sounding board and eventually we had well over 320, 000 subscribers. Combining that with the Paul Sellers blog outreach, Woodworking Masterclasses and now Common Woodworking meant a dream was coming true for me. This was the reality that the best way to preserve my craft was not only in a book and video but in teaching hundreds of thousands of amateurs what I had been given through the early years of my life. The best is that it has become a reality and people know it as much as I do.
From those early beginnings of one on one we now have my youtube channel, the Paul Sellers’ blog, Woodworking Masterclasses and Common Woodworking all of which channel my energies into the teaching of both new and seasoned woodworkers from every background regardless of anything.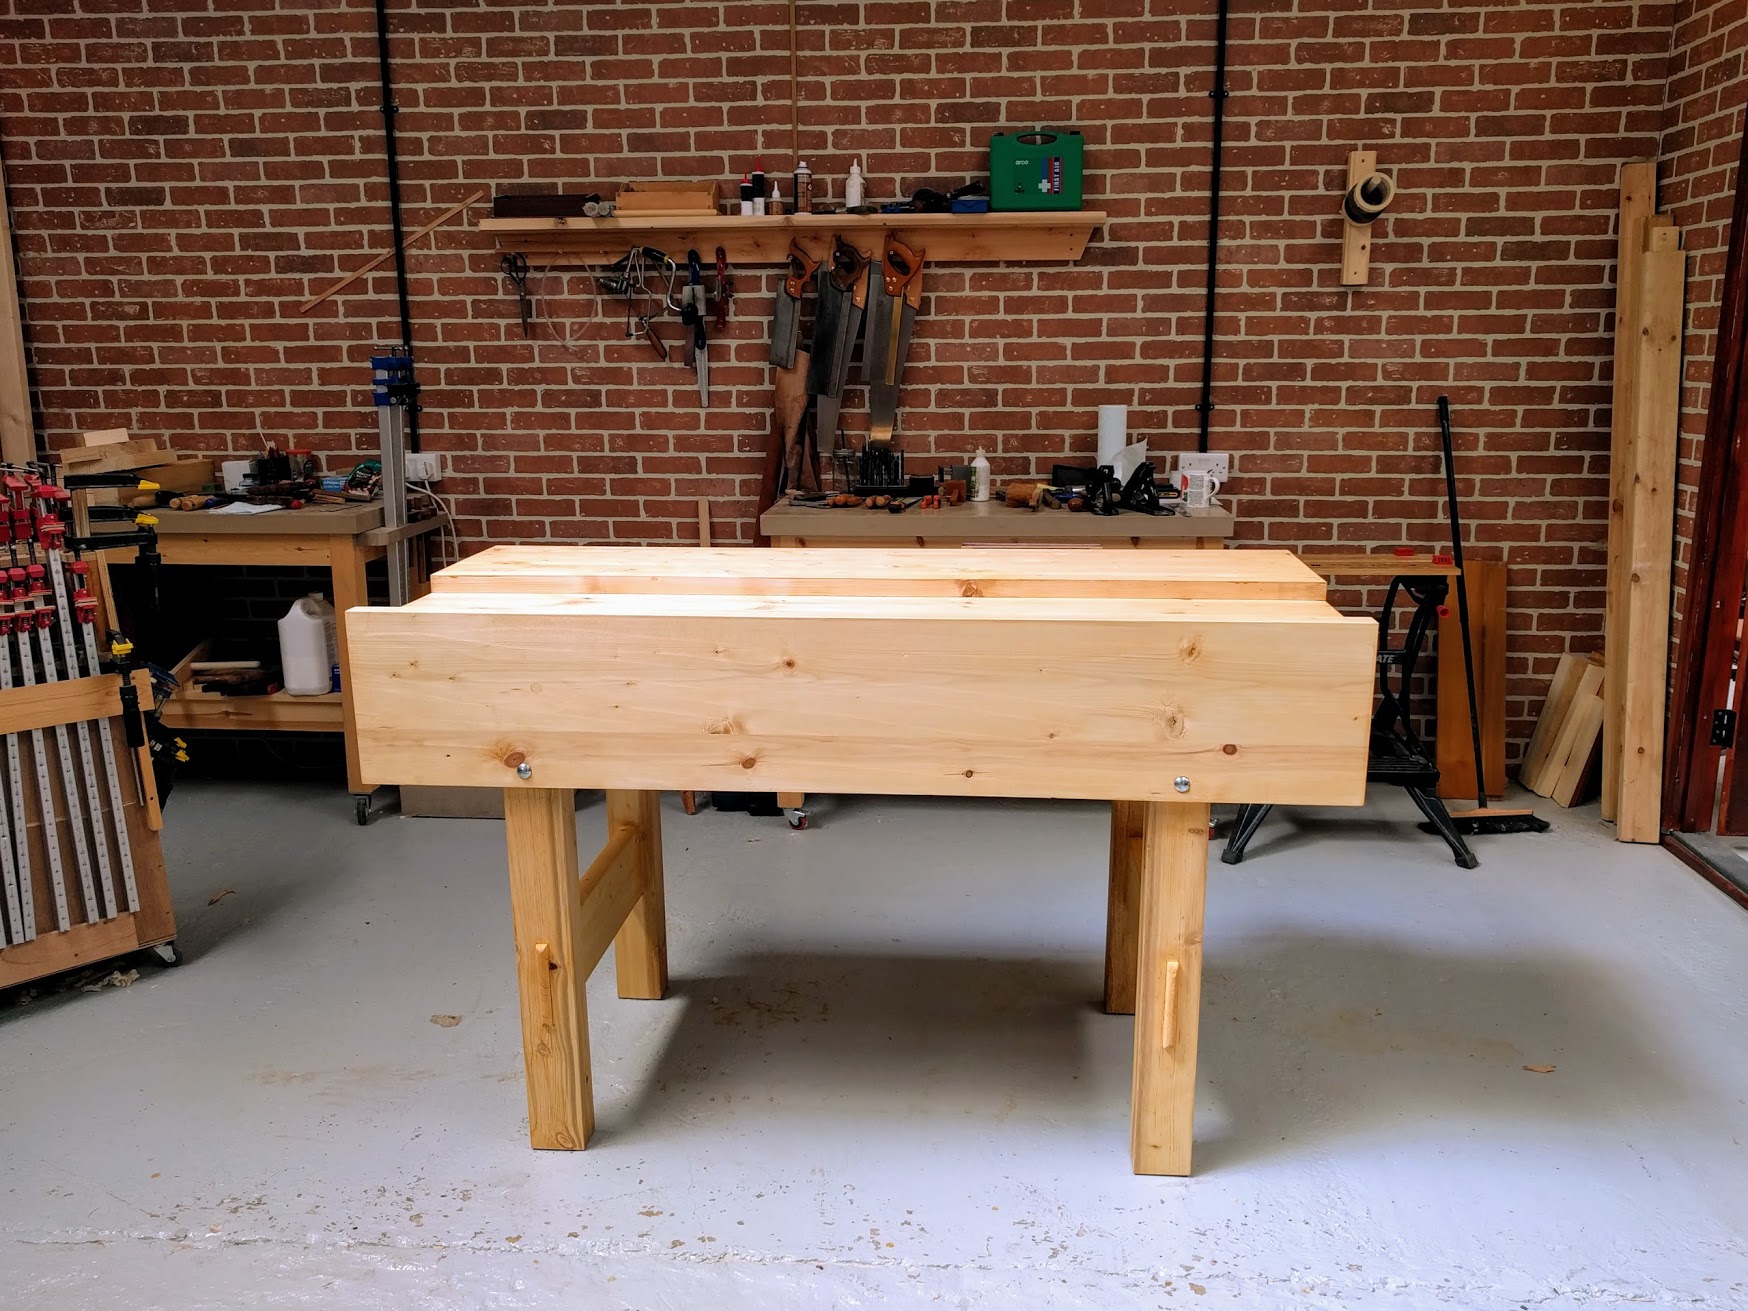
You are of course right with regards to your personal situation. Personally, I know that you’ve already found the best place. If you use the search button on my blog you will find all you need for both very beginning material and then more complex things to enthuse and inspire you. Power equipment is not the way forward at all either and is a ‘no-way’ place to go in a small bedsit and anyway should be a last resort for any new woodworkers as it is not skill-based so much as industry based. Hand tools can be used in confined spaces and some people I know do do just that. Conscious of their neighbours comings and goings, they can get time in when cars disappear from neighbour’s driveways and return later. You need so few hand tools to get started too, that’s the big plus. You can also make a slightly smaller version of my workbench by following the making here. Above and beyond all of that, we have our very latest site designed specifically for you, the new woodworker, called Common Woodworking. It has lots of stuff about the tools we recommend, exercises to help you and then some beginner projects designed for hand tool woodworkers to develop the skills and confidence levels.
Best wishes for your future goals. Using my methods of hand working and following the courses, anyone can be a skilled artisan. Oh, I should mention the free subscription to our Woodworking Masterclasses too. Its certainly one of the most expansive hand tool sites on the web and it was specifically designed for people like you too.
Answer
Get signed up now, you can’t go wrong from here.
Highly recommended
Felix,
You have landed, feet first and with great accuracy, at the right place.
Sign up, open the door, and enter the real woodworking realm!!
And as for being able to ply your craft in a bed-sitter: go for it. Hand woodworking is way more neighbour-friendly than using machines (just wear soft-soled shoes and don’t go chiselling mortices in the middle of the night!) and more-or-less dust free as the only force on the resulting shavings and wood crumbs is gravity.
Follow Paul, and you won’t even be using sandpaper too often.
Several years ago in Melbourne (Australia) we had, on a community TV channel, a weekly hand tools woodworking show* and one series of programs was filmed in the corner of an upstairs spare bedroom with the presenter at a smallish – but solid – bench, and including the bench I think he worked on a few projects for that series in a space of no more than 2m x 1.5m (6’6” x 5′). And as Paul has said: ‘you don’t need a LOT of tools’.
Have fun.
*Steve Hay, “Woodworking Masterclass”. Yes I know…….not sure who grabbed the title first, but it matters not: teaching and learning are not a competition.
I’ve followed Steve and Paul……both excellent…..would be great if they could somehow combine and work together with their teaching i.e. One each side of this wonderful world Australia and England ??????
John UK for Steve and John2V for Paul
Hello Felix,
I’m also a beginner woodworker, and I don’t have a reserved space for practicing. I have my bench in the living room, and it’s the only way I have to pursue my dream of a skilled woodworker… Things don’t last forever, and I’m sure this will be a temporary solution for you. Just adapt your needs to your space and your neighbors, and you should be fine.
Regards.
The reply’s and Paul’s answer sum things up, you can do real woodworking in your situation here are some more suggestions:
– Get Paul’s books, there is a method to the madness! Really there is a natural order to Paul’s courses starting with things you can make and be happy with now, like spoons, spreaders etc.
– You do need some sort of vice for safety and sanity. Paul has several videos that demonstrate using a WorkMate style workstation. They fold up so you could store the woodworking space behind the sofa.
– Try the clock, I had know idea what I was doing, but followed along (and remade pieces till I got them ok). I ended up making a real clock – this really built up my confidence!!! Plus I got a clock!
– As you grow consider joining one of the many maker spaces. These are like co-opts for people who like to make things. Many have tools like bandsaws and lathes which really do help out some time. Plus space!
Good luck
Hey Common Woodworking folks – I think you could pull together a few existing video’s focused on this post. I’m thinking a series of projects starting with an absolute minimum of tools and space and then growing. Think of the real person who is considering taking the plunge. They have no tools, little money, little space, what should they do?
For example you could start with spoons, spreaders … with just a workmate (or some sort of vice), gouge, chisel, rasp and saw.
If you added a plane, you could make the clock with just those tools.
I know you guys will come up with better idea’s but I think Common Woodworking should show beginners how to make things without a huge investment. Things you can make without a router and plow planes 🙂
Dear Friend. The woodworking workbench in the youtube series (both) and the one in the books are the way to go I think. Download the PDF that’s available in this blog so you can get the list with the tools you need (you choose: the minimum ,the highly recommended and the recomended).
That bench is a course by itself and is the most important tool you’ll use in fine woodworking.
It took me about 5 months to completion using spare time after work and family, you may take less or more, it doesn’t matter.
Hi Felix,
I’m a beginning woodworker and I’ve been doing it for three years. I have been using just hand tools and have been very happy. I can’t find any classes locally. Paul Sellers is basically my main source for how to. In terms of space, I have a 24″ wide by 8′ long bench in the garage. If the car is still parked in the garage, as long as I have about 3′ behind me, I can work just fine.
I am looking to build a bench for working inside the home as it is too hot to work in the garage during the summer. I plan to build a bench that is 24″ wide by 4′ long. That will be plenty of space. For tool storeage, much will sit in the tool well and I will build a tool chest that is about 30″ long x 16″ wide x 14″ high. That will be more than adequate to hold all the tools I need.
From my perspective, what Paul says and teaches ally works. My first project was those iconic simple tool holders (free content). After three of those where I felt a bit more confident I then built the clock Paul has on YouTube (free content).
I don’t have any power tools. Though I can dimension wood now by hand, I prefer to buy what is called S4S (square four side) lumber. For the first few projects starting out I used it as well as I lacked the confidence to dimension my own wood.
If you can take some local class that is great. If not, you can go quite far with what Paul teaches online.
Sincerely,
Joe
Bedsit, is a big constraint, space, noise, dust.
Sawing, tapping and chopping are very noisy, alternatives should be used.
There is no alternative for many people. I would still go for it carefully and try to work when neighbours are out. Dust is only minimal using hand methods too. Easy to keep on top of.
I am working in the attic in a space about 2 m X 2 m wit a “Paul Sellers” type of workbench (hand tools only).
A Workmate is helpful for home repair but frustrating when used for planing wood.
I have used one to build my P.S. workbench (“Workmate 2” bought about 30 years ago).
It was much more useful when I had laminated the workbench top. I used the workmate as the base for the laminated top, providing a knock-down workbench to build the leg frames and aprons of the final workbench. (Added mass and height benefit).
This might be an interesting interim solution if you need a workbench which must be knocked down after each working session. In that case, a “Moravian workbench” which can be knocked up or down in two minutes is probably the way to go (google “Eclectic Mechanicals Moravian workbench”).
Whatever final (1st?) workbench you do, the laminated top can be (re)used for it.
Sylvain
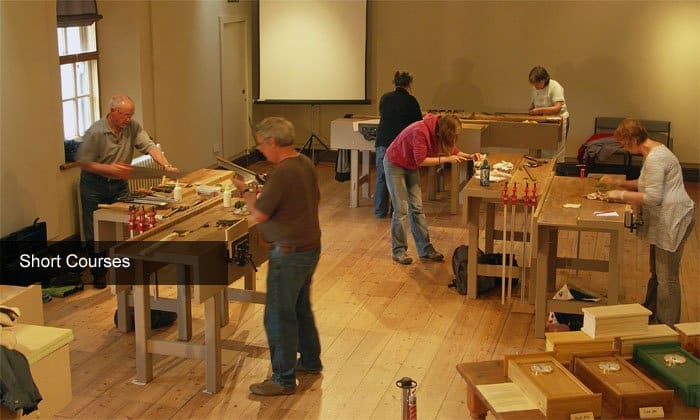
If have the time and money available consider short courses wit the likes of Peter Sefton or Chris Tribe. Over a week you can be taken from beginner to producing a piece of work to keep. I did Peter’s beginners course and made a letter rack however we covered everything from tool sharpening, this was a real revelation to me, I discovered what sharp really was, stock preparation by hand, several joints including dovetail, mortice and tenon. I followed this up two years later with a weeks course with Chris Tribe in Ilkley where I made a wood working bench, this was a very busy and physically demanding week even using machines working with large pieces of beech and laminated sheets of MDF is tough when you are not used to physical work, I do most of my work from a PC. My local further education college also does some night classes. Don’t worry too much about your own workshop yet, try a few things out elsewhere and find out what you like then you can start investing in tools and space. Search around where you live for local courses and taster sessions. Be warned though once you start collecting tools and playing with wood it can be an impossible habit to break. Good luck.
Ive just discovered Paul’s site myself. Ive been hooked from the start. I spent the last quarter of 2018 building a largish shed at the end of the garden (10 x 8 ft). It was a challenge as ive never done anything like that before – but I really enjoyed it. Once complete I googled workbenches thinking to get some kind of table and vice just to tinker about on as I often restore furniture. Then I discovered Sjobergs work benches which I must admit I kind of fell in love with it. That got me thinking. On YouTube, I googled a few things – how to make a rack for garden tools etc. I had been pondering buying a power saw etc but felt a bit uncomfortable with having such a ‘scary’ device in a small shed. I then stumbled upon Pauls videos. I got it immediately. No ‘Tool Duals’ or ‘power tools with rock anthem soundtrack videos’ but a clear passion and understanding of his chosen material. I was sold. I just know I want to do this – and develop my craft skills. I’m a designer by trade, so it feels like a natural move. I’ve invested in some good quality tools – some new, some usable vintage (in itself fascinating), i’ve signed up to the website and I’m just waiting for this workbench to arrive. My first challenge will be to build the drawers and shelf that goes under it. Can’t wait!!
So anyway, good luck – regards the space, I also watch a video about a Japanese woodworker who was describing the process of preparing a Japanese plane. He was a real expert, but what amused me was that he was filming in such a confined space. This didn’t hinder him at all. His vice was attached to a window sill! Passion overrides any practical limitations.
About your neighbour,
– consider buying 4 square meter of cheap laminated floor and the better laminated floor underlayment with a high Impact Isolation Class (IIC) rating you can find. Place your “workbench” on it.
– if you work during the day, ensure he is not a night shift worker;
– babies have to nap most of the day;
– invite him to a demonstration;
– offer him your first dovetailed box;
– use very sharp chisels, you will only need light tapping to make mortises;
– …
Sylvain
He can reduce noise for mortises if he bore the holes first, then, with a sharp chisel it’s possible just to push without tapping.
I never know where I fit in the middle of a room full of woodworkers. I was born into a family of woodworkers and I’m 69. I’ve been an avid enthusiast for over 50 years. My experience is primarily with power tools but my retirement condition warrant that I learn hand tool woodworking. My available space is extremely limited as I live in a senior subsidized housing community.
I’m guessing you are in the USA, Bob. Such a shame you din’t learn the right way around with hand tools as your primary method because of the decades you would have had with hand tools complemented a little by the donkeys of woodworking, machines. None the less, it is never too late. It should be compulsory for retirement and senior centres to have a woodworking centre too. Alas, though some do have woodwork workshops for residents, most do not. Not enough money in it for residential care.
Paul, like Robert I’ve used power tools most of my life, but after watching your channel I am making the transition to hand tools for crafting, whilst still planning on using power tools for ‘donkey’ work like breaking down sheets, milling and rough sizing. I’m about 5 years off retirement and spending that time creating my workshop and accumulating tools. I’m luckier than most as my workshop area is about 7 x 7 m. Looking forward to the future … and Robert hand tools are a joy!
I wonder if people in apartments could use a shaving bench. the bulk comes from a persons weight and the take-up less room
Not really suited to this kind of woodwork, mostly spindle work really. Well suited to a percentage of chair making though.
I started my woodworking in a tiny London flat. I used a workmate style bench and worked on the balcony. It’s helpful to find some way to weight the legs.
Tool wise, I found most helpful: square, marking gauge, knife, sliding bevel, no 4 plane (watch video on plane rehab), eggbeater drill and bits, screwdriver and bits, chisels, sharpening equipment (first sandpaper and tile, then stones), chisel mallet, clamps, glue, coping saw, tenon saw, big saw, sandpaper block. Also brushes, glue, finishes.
Good luck!
Hi Felix, my workspace is a 125 cm x 230 cm shed. A workbench and a tool cabinet in front of me hanging at the wall where are all my hand tools and obviously no machines. That’s all. I can say with no doubt that if you make small works with hand tools you can make everything you want even in such a small place.
I have been struggling to make it work in my living room too. After a couple of months it is starting to get more comfortable. However, I will still be using workmate only, just no space for a workbench of any kind that I have heard of to date. The biggest two issues with workmate are it’s lightweight and lack of proper vise. I have solved the first issue quite easily by using body building weight plates. I have used 3 2×8 pieces which fit apsolutely perfectly in the space above the footrest, no need for resizing one of them. On top of them I put some weight plates that I have found through Freecycle. Problem solved.
As for the vise, I have found on YouTube a video how to install a woodworking vise on a workmate. He is using Irwin Record 6 1/2 inch vise, but I am guessing that any vise can be mounted the similar way. I’m waiting for mine to arrive and after that I don’t expect planing, or any other woodworking task to be a problem.
As for the woodworker’s collectives, groups, co-ops in London etc, I would also very much interested in joining. It would be nice to be able to learn together with other amateurs. And I guess have somewhere to chop those mortises. That mentione by Paul made me giggle, because I caught myself recently with my chisel and Thor hammer at 11:30pm.
the bench-top of my workbench under construction clamped in my Workmate:
http://lumberjocks.com/replies/3952553
After each working session on the other elements of the workbench, I would lean the bench-top vertically against a wall. Very small footprint.
Sylvain