I Designed A Plywood Bridge
It may not seem like me: you might well be surprised, but my history with plywood dates back to my earliest recollection of woodworking with my dad in 1960. I know! Time passes when you’re having fun! That was 59 years ago! It was springtime when I sat on the kerb outside my house. Trucks went past every few minutes loaded with household rubbish piled high. Just open truckloads. I happened to look up and a different truck went by and I saw a truckload of what looked like pure white wood. Stockport’s town dump was a block away from my house within a triangle of railway tracks–‘the bottom field‘. I raced pellmell down the street to the dump to see what it was just as the truck swung around in a big arc and dumped its huge load. The bulldozer, a massive thing, took the plywood before its blade to the cliff edge of the mountain of refuse and shoved the pile in a single push. Running home and out of breath with the run and the excitement of it I knew somehow that this would be a prize find. Waiting for my dad to come in from work I could scarcely contain myself knowing that he too would feel the same as I did.
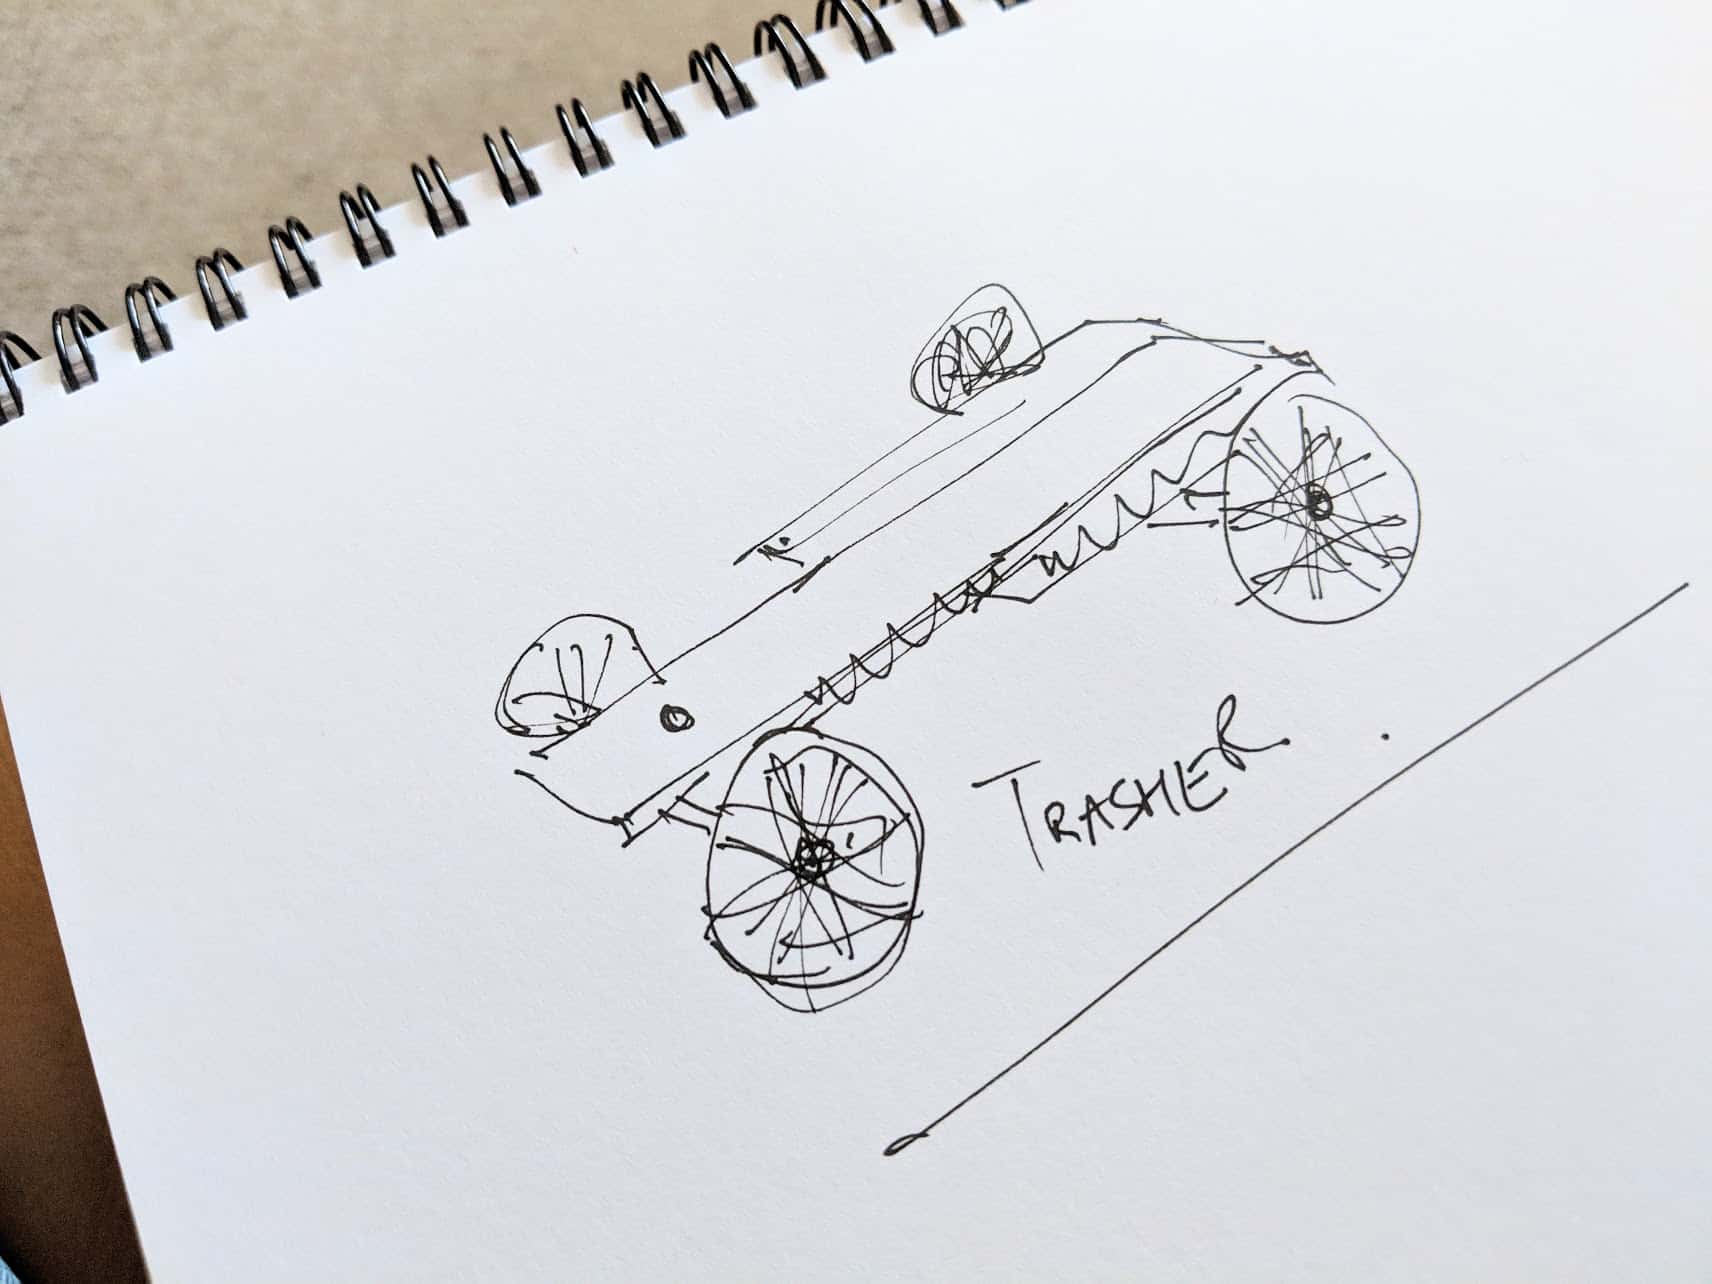
Now a trasher is not a common term but to me it’s a four-wheeled cart made from old pram wheels and some abandoned mahogany tabletop pieces; it is not someone who trashes things for wanton vandalism. I don’t know where the term came from beyond my dad but he called it a trasher so trasher it remains. As a kid with my brothers we’d find the steepest cobbled street and let go.
Of course this came into being long before making things from other things was called upcycling and well before it became vogue and boutique. We waited until after five when the dump men left the site and off we scooted with me on the trasher pulled by my dad. In those days there were no protective barriers and no safety signs or warnings either. The dump was unfenced and unrestricted. Unhygienically dangerous though it was, this rat infested mass was my playground on up through my teen years. For some unbelievable reason Stockport County Council took my nature world from me with the first truckload of Stockport refuse. My 300 acre sanctuary of catkinned pussy willows surrounding my ponds and springs became a cesspool of toxic waste and no one, no one, complained. This flat field with ponds filled of frogs, newts, toads, ducks, moorhens and coots gradually disappeared beneath an urban sprawl of waste. No more the field vole and the weasel, the kestrel’s home and the skylark high overhead. Eventually it became a hill piled high, covered with dirt to create an artificial hill. I didn’t altogether understand what was happening. I did know it seemed so very wrong!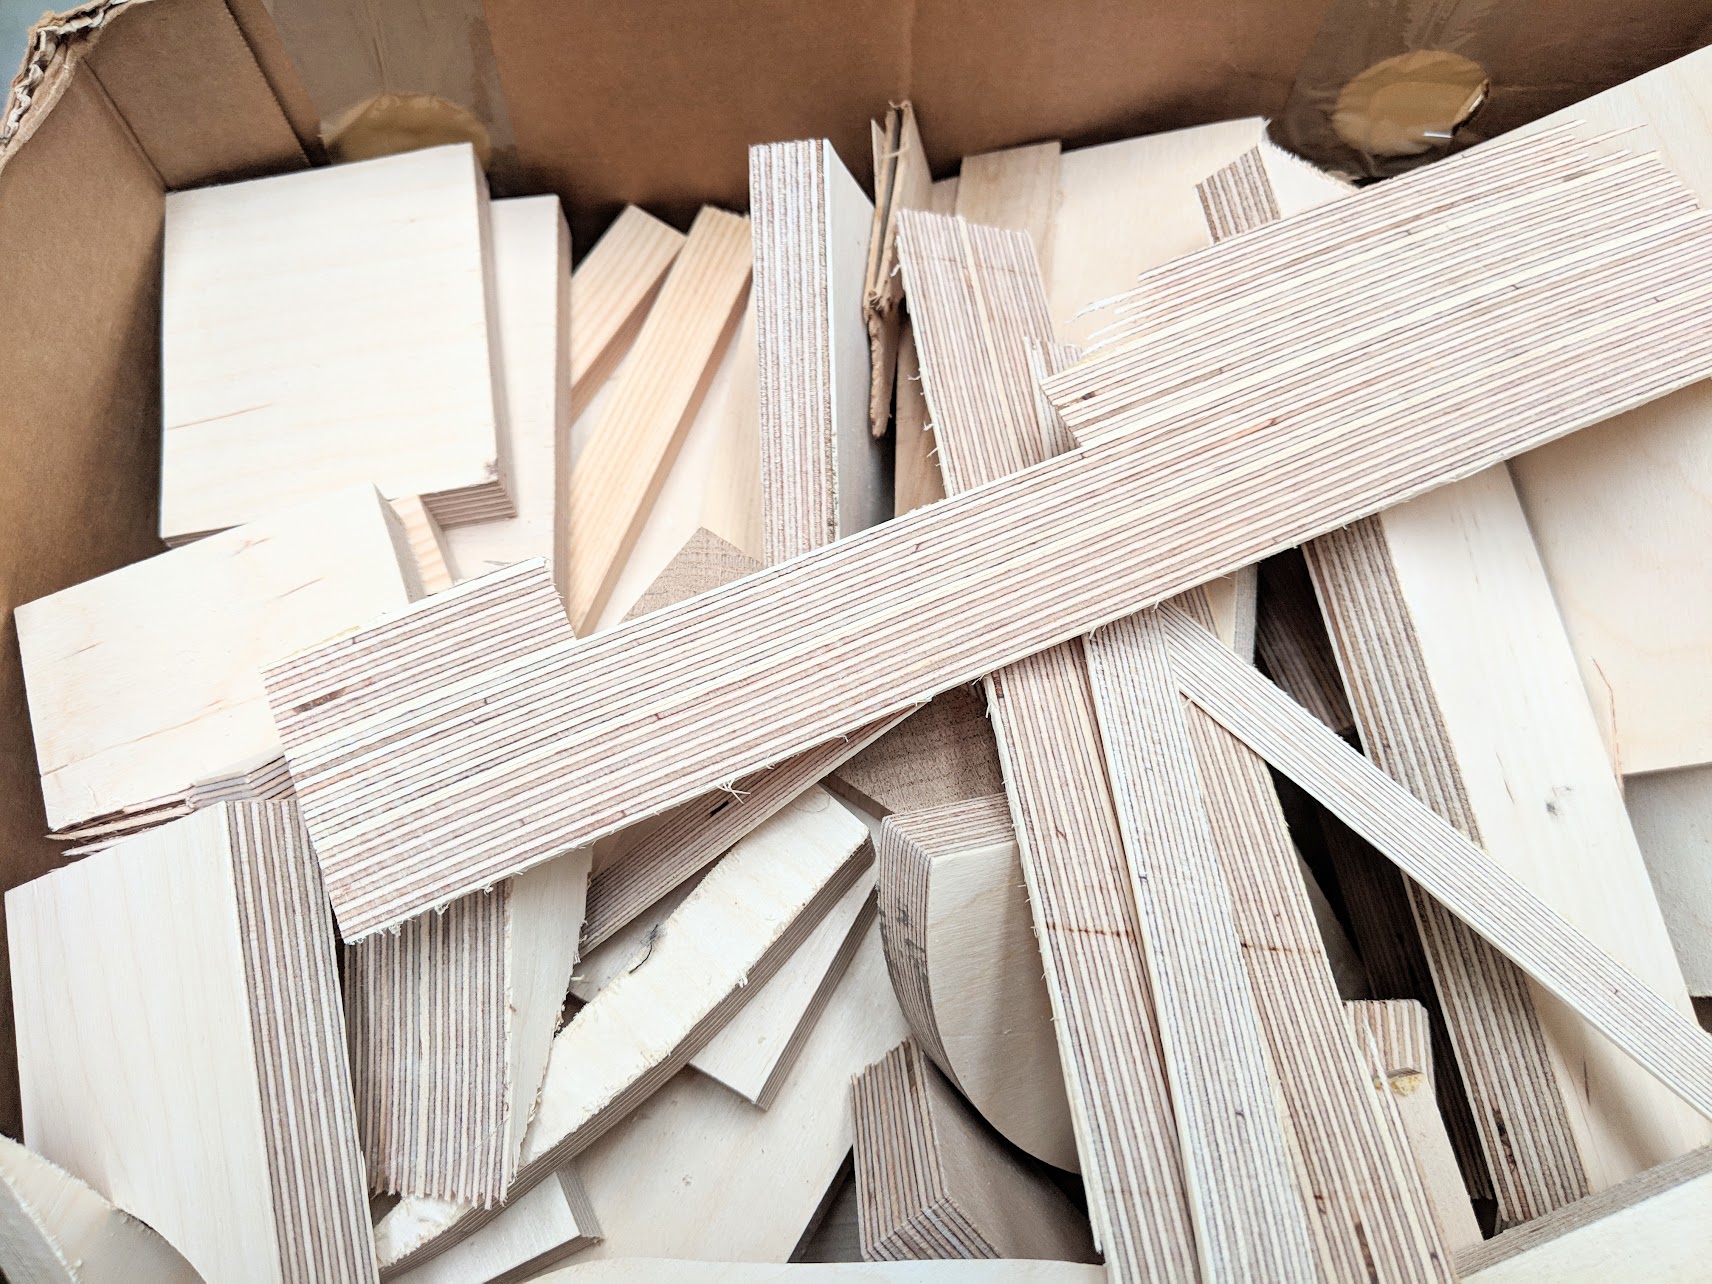
The wood was birch plywood strips up to but no more than 4″ wide, half inch thick. Clean offcuts really. I didn’t know what plywood was until that moment of loading, but there was a mass of it for the taking. We loaded up the cart in neat piles that took all the pulling power my dad had with me pushing from the rear. Though my dad was no woodworker he set to with handsaw and hammer and nails while I watched the glue bubble slowly on the kitchen stove in a double burner made from a pan with a tin can inside. Once the glue started to drizzle slowly off the stir stick I waited for my dad to say it’s ready. With the narrow strips cross cut to length my dad glued and nailed the sections into tee sections that formed stems, feet and rails. He glued the sections and I held them from sliding with the glue in between. The glue dribbled from the joint lines as soon as he clenched the nails over on the inside faces. The long drips, hardened off, remained there and were never cleaned off. When we’d done my two sisters had bedside tables painted light green and pink (cans of paint from the same dump) to hide the nail heads and glue runs. I was so proud of my dads abilities!!!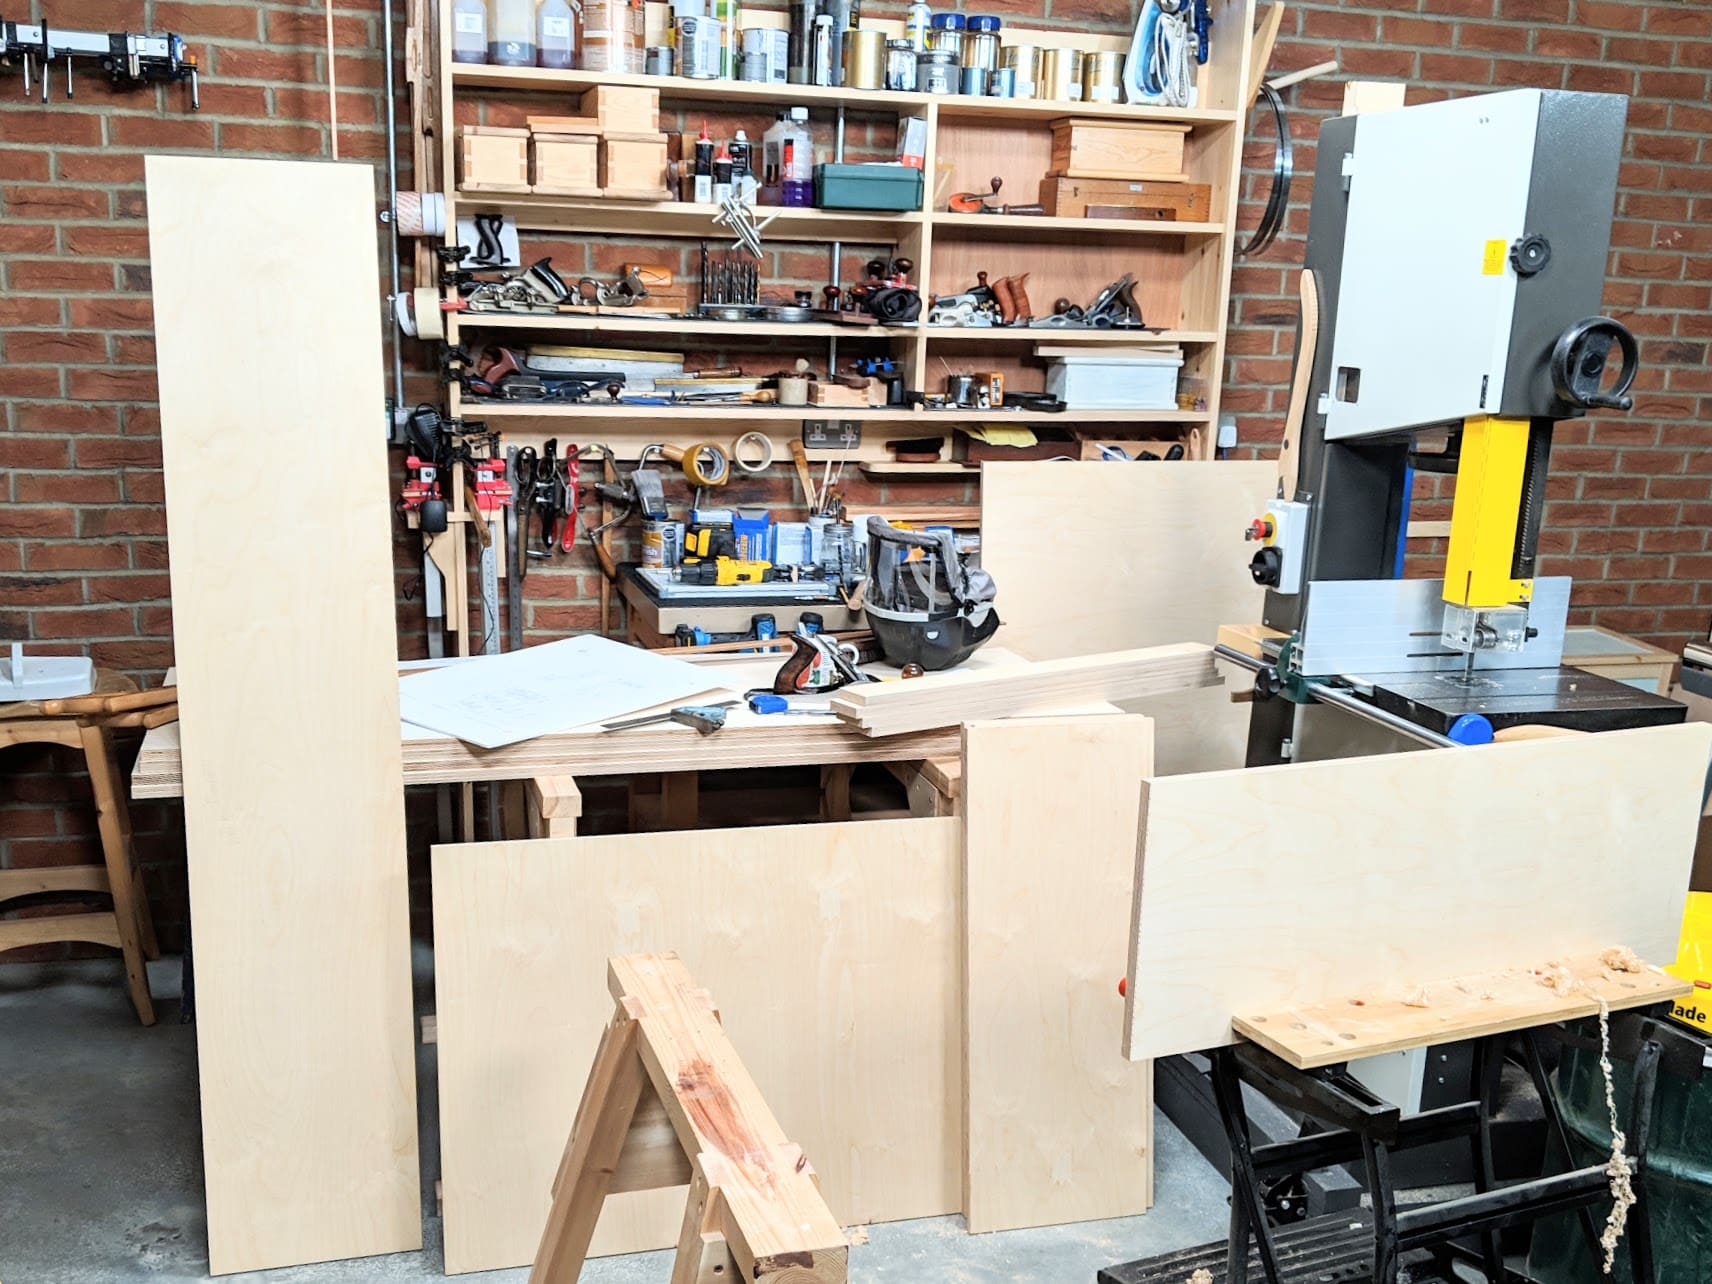
I have always quite liked plywood. Its wide expanse of knotless beauty and stiff rigidity seemed somehow to defy the natural propensity of wood to expand and contract, shrink in the wrong places and split into problems where and when you least want them. I am too old to accept MDF for obvious reasons. It is the most insidiously hideous material under the sun, along with pressed fibreboard, chipboard, oriented strand board (OSB), flake-board and others. These past few weeks I have been developing an idea I first thought up many years ago. I’d shelved it for most of that time because it seemed counterintuitive to my ambition for woodworkers to rediscover what amateur woodworkers enjoyed in the early half of the last century–working wood, hand tools, the developing of skills. I don’t really know what happened during that same period but in the 1980s it seemed to me that I was visiting more and more benchless and toolless workshops. By that I mean the types of workbenches used were now lowered assembly benches, often without vises and such. These workshops had half a dozen machines that replaced hand tool operations—but did they really? No one I met seemed at all bothered at all; until I demonstrated using hand tools that is. Was I witnessing the demise of hand work? I think I was, going off what I saw. People seemed to be losing not just the skills and the significance of hand tools but also their own dextrous development in using them. Today I feel we may have turned a corner, primarily because the internet provides such an excellent platform for the little guy like myself. Oh I know there is a lot of junk to filter through to find the needle in the haystack but it is worth it when you need it. More and more woodworkers are discovering themselves. They, you, are becoming the modern day woodworking artisan. This is a most marvellous thing and icing on the cake would be if it could just keep spreading into all sectors.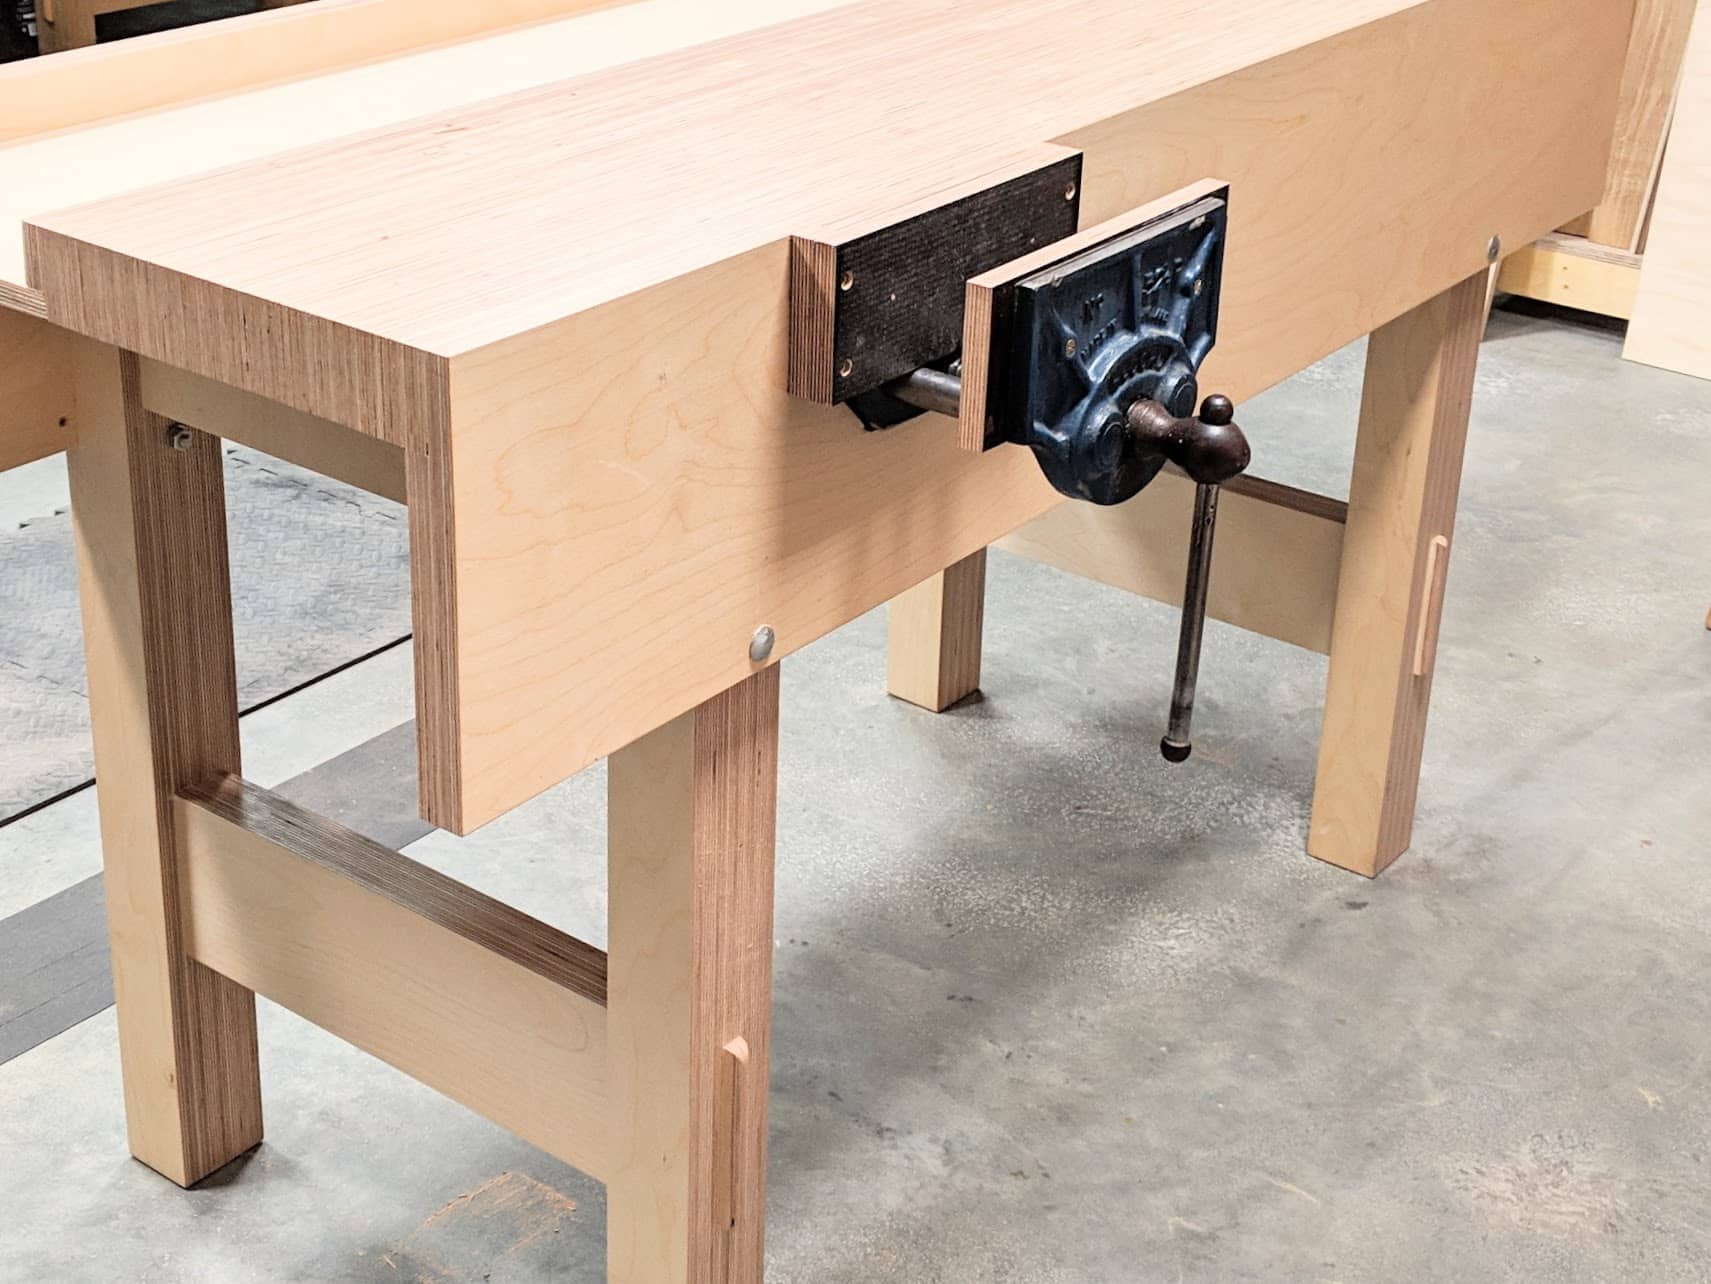
The thing that separated plywood off from the pack was that hand tools can, with the slight skewing of different tool techniques, work really quite well with plywood but will never work well with other so-called engineered wood or boards. I can plane and saw plywood by hand and even work chisels to chop mortises, chisel out recess and pare surfaces. The important issue is be prepared to sharpen more often than with ordinary wood. This week I made my second workbench from plywood. It emerged from two and half sheets of 3/4″, 13 ply, birch plywood boards and follows my design for an English-style joiner’s workbench that’s well suited to joinery and furniture making. My success was creating a workbench without too much if any hand cutting of joinery yet having the same intrinsic strength and value of actual joinery throughout. It is in all essence a fully jointed workbench with housing dadoes and mortise and tenon joints yet no chisel touched either of the two joint types in the cutting of them.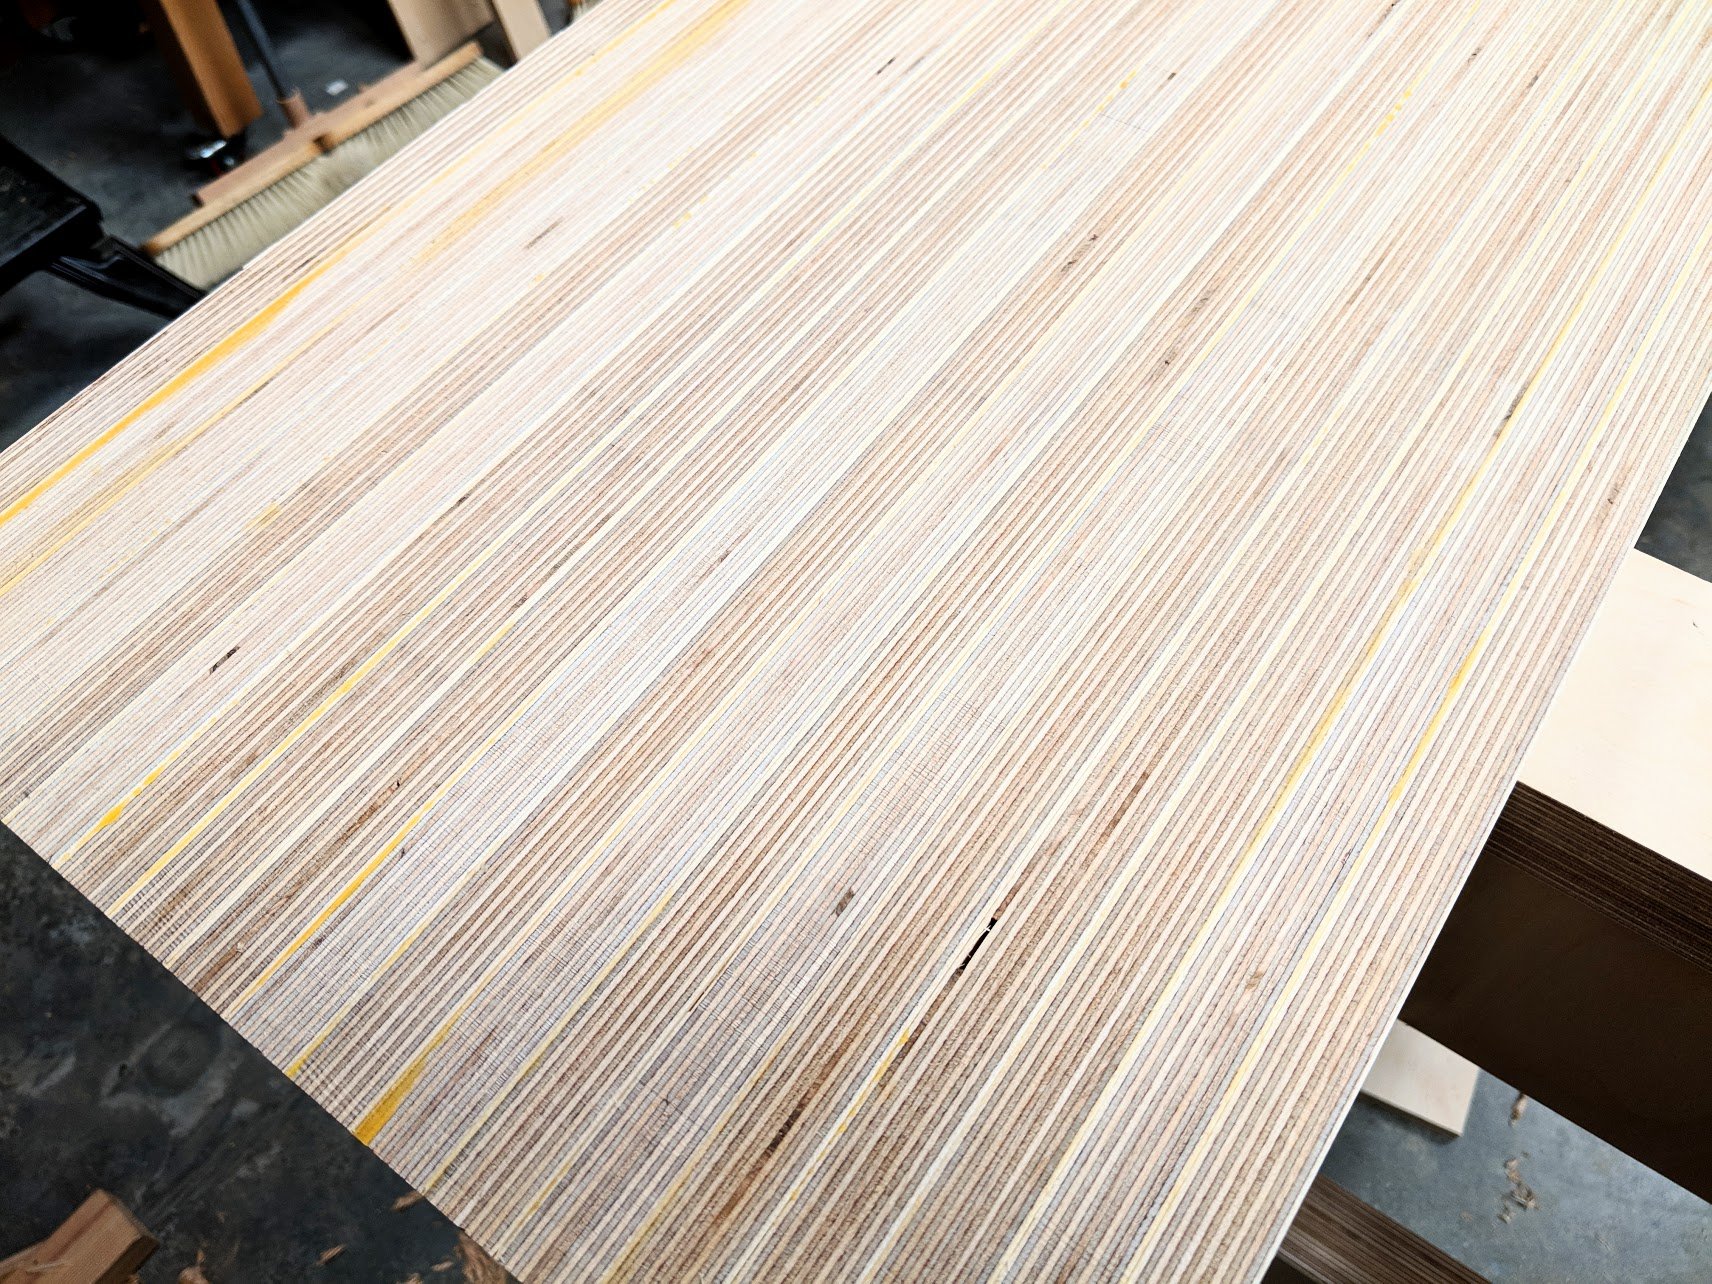
Now the bridge.
Before anyone jumps on me for making a hand tool workbench using a machine, I think that there is good reason to. Because machine woodworking is a completely different form and sphere of working wood than woodworking with hand tools, the one is not remotely the same as the other. People who use machines often distance themselves from the reality and efficiency of hand tools and hand skills without ever realising the wonders of using them. Of course the same can be said in reverse except for yet another reality and that is that the majority percentage, perhaps as high or higher than 90%, of woodworkers, simply cannot have machines for them to use for a wide variety of reasons including cost, space, environmental unsuitability and several more. I have often had professional full time woodworkers in my classes who attended degree courses for years but had no more skill in hand work than the raw beginners working on benches alongside them. That has proven to be more common than not. That’s mostly true of woodworking teachers at university and college level also who had only a very minimal knowledge of hand tool woodworking.
Just as a bridge spans two distinctly opposite land masses to connect them, so too my newest workbench makes the connection between machine methods of working wood and hand tool methods–perhaps even the old methods with the new. In a matter of a few days, you can have a workbench you will not only be proud of but one that is as functional as any bench you might ever need. But you might want to continue through the whole project without a break. It takes about two hours to rip and crosscut the component parts into stacks for the bench top, aprons, rails and legs. With the measurements given it takes about three more hours to glue and clamp them into laminated sections. Fitting the leg frames should take half an hour for each one and gluing them up is simply enough for a 20 minute task max. Assembling the whole does not take too long either; an hour should do it. What does take time is planing and sanding to a good level. Maybe I should allow two hours for this. In a long day you should have the bench together. All that is left is the vise installation, an hour, and applying finish, two to three coats, another hour.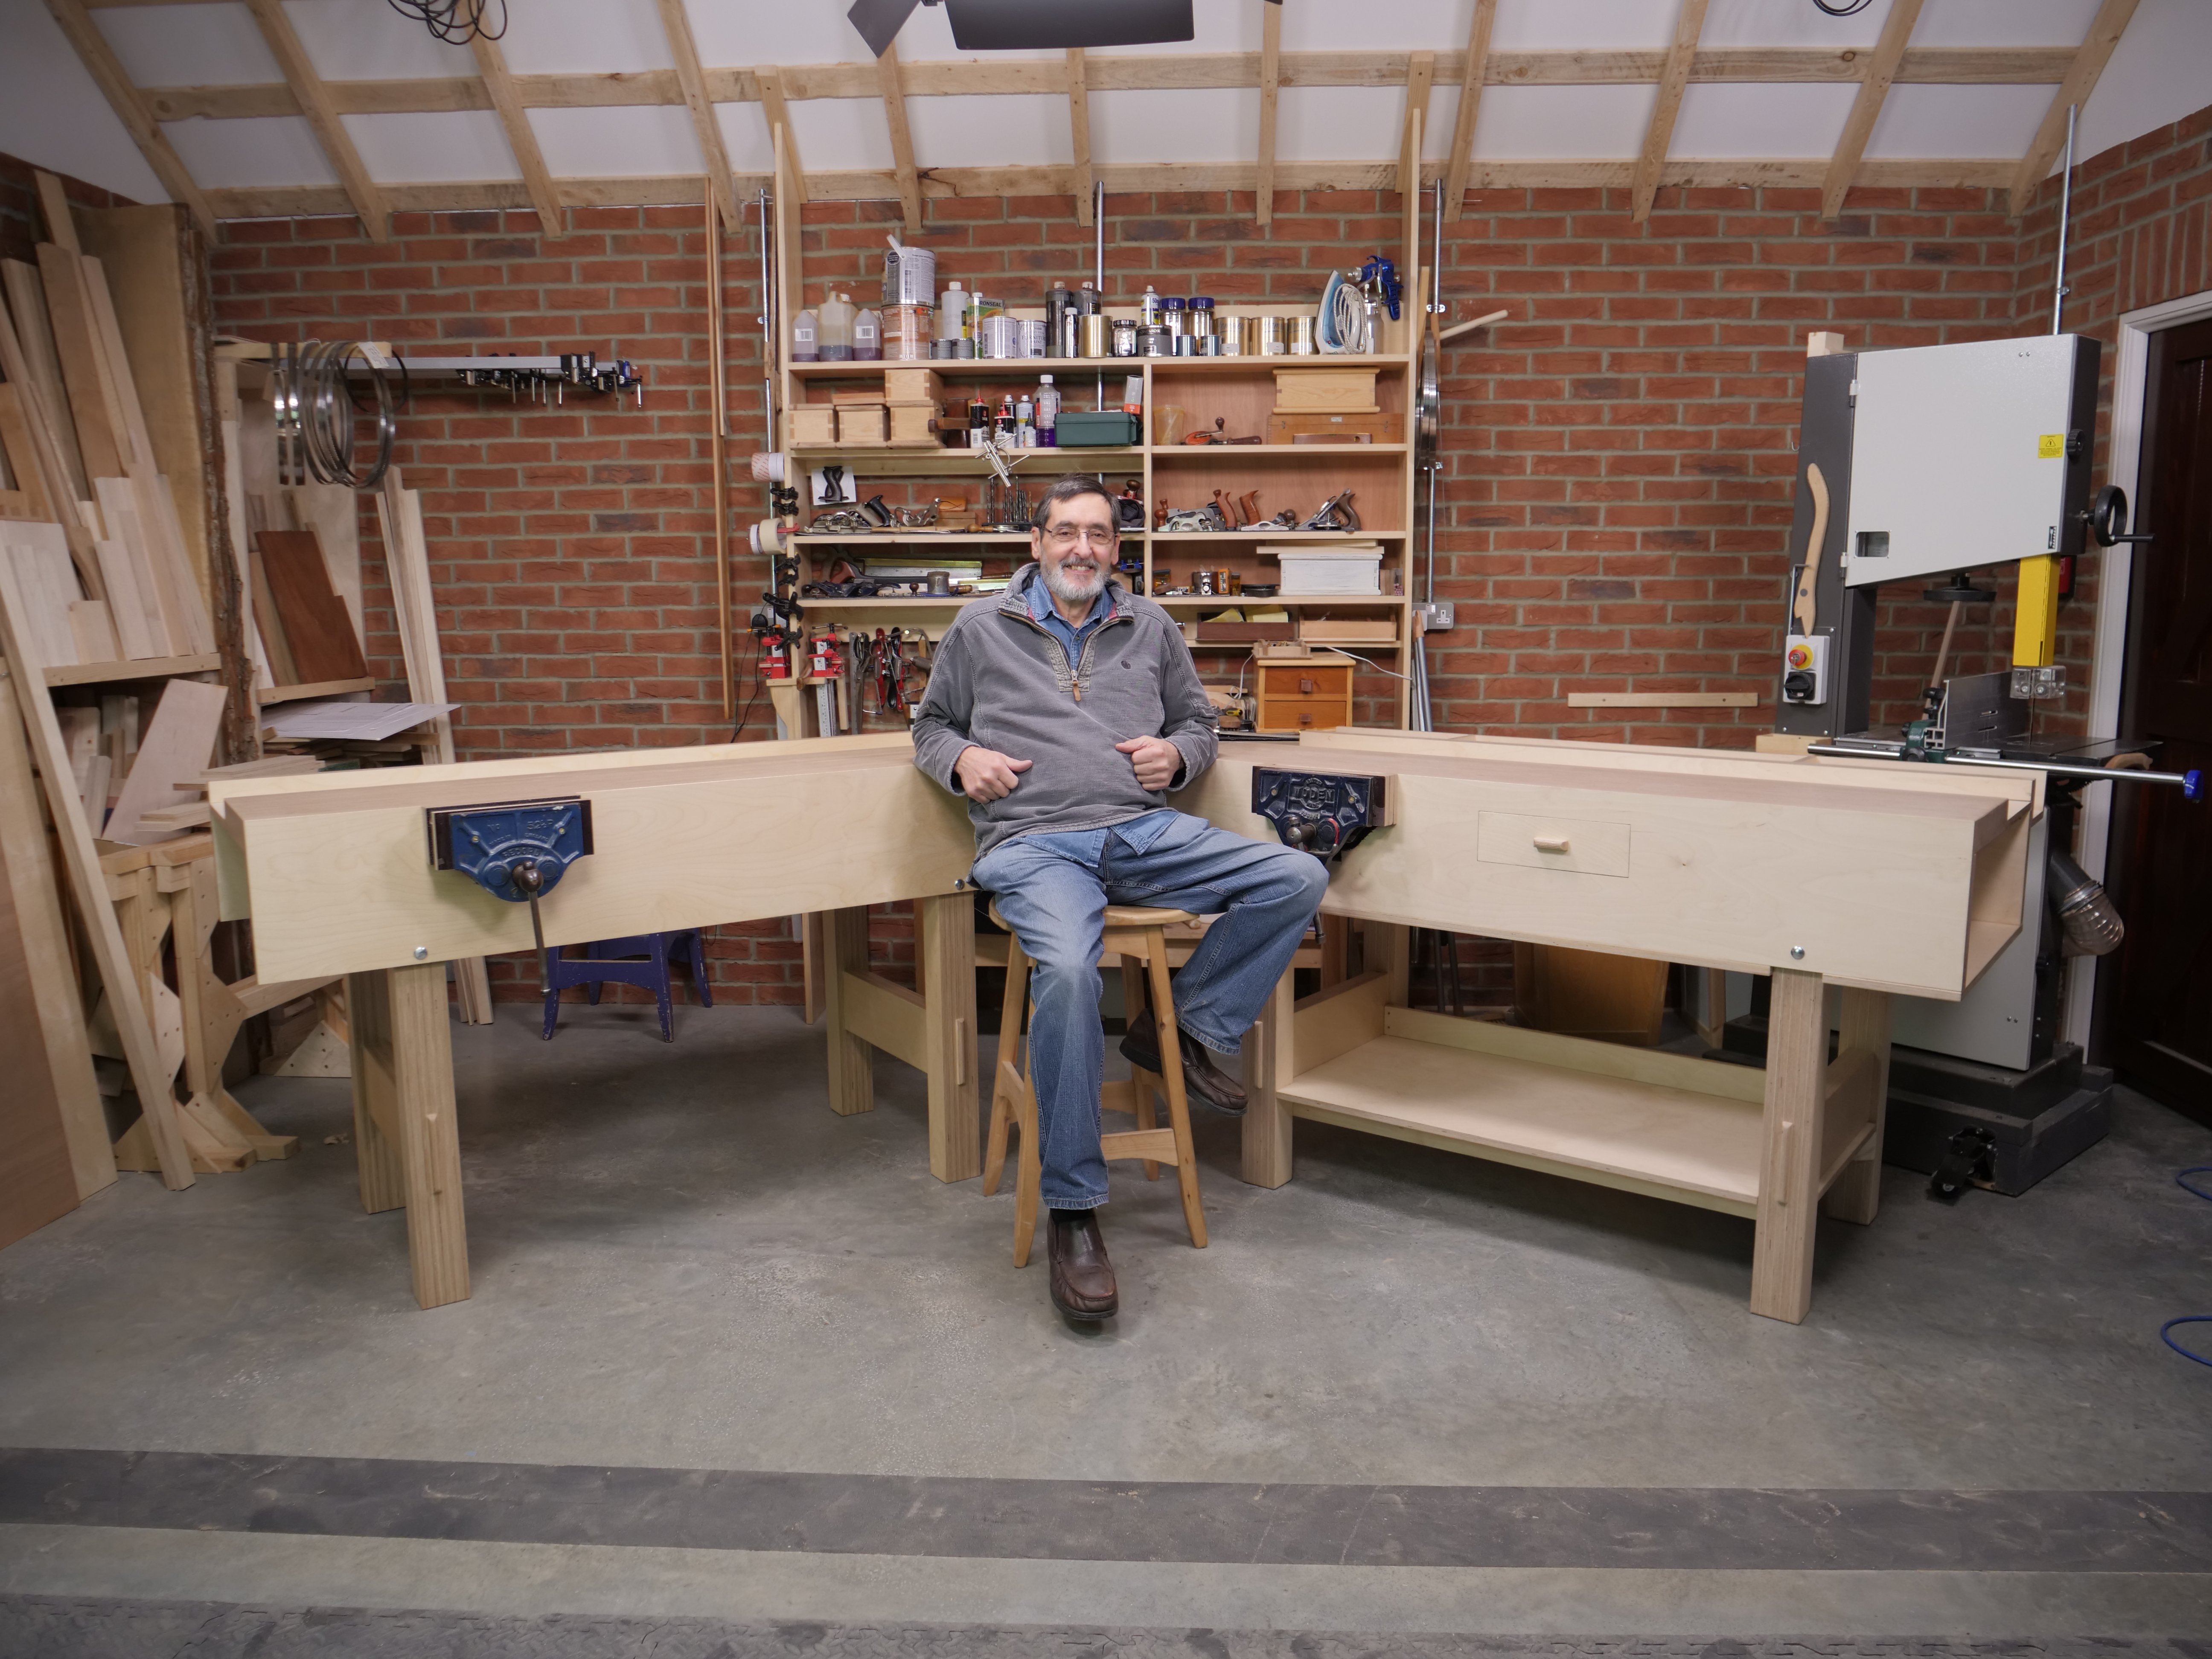
We used to call them bowgie’s and went far and wide to find pram wheels, we had a small slope we could go down must have been 1:4 or 5. Then for one Christmas, I got a metal car boy was I made up.
Hello Paul,
Another excellent article full of interest and humour. I too like and respect Plywood, and agree that it is often the best choice for some projects. I’ve just stripped down the carcass of an old wind-up gramophone dating from the 1920’s, and yep, the wooden frame is ply covered in Rexine. ( As a side issue, here in Stockport is a wonderful old company called Ratchfords, which is over 120 years old. They sell bookbinding materials which replicate Rexine as well as canvas and buckram. Great for those who love restoration)
To get back to the subject, I like your notion that hand tool users should not be dismissive of power tools or products such as plywood. All have their place, it’s simply a case of different disciplines. I am first and foremost a hand tool person for which I feel a real ‘connect’ and a sense of following a tradition. I also feel a greater satisfaction using hand tools as opposed to machinery, however and job done properly and the result of your own ingenuity is a satisfaction. Keep up the good work.
Steve M
Are you going to post the details of this new bench Paul?
Much more than that! We have filmed the whole series for YouTube for free and it will be going out shortly!
Thank you very much Sir. I will be looking forward to seeing your new bench build video.
Excellent. It’ll be interesting to compare the two.
Theoretically, the plywood bench’s top could be a torsion box…?
Not really, I think. Too much bounce. With the ply there is no bounce wherever you pound on it.
Looking forward to seeing some machine safe working practices from you.
Thank you so much Paul. My son and his family moved into a house with a small garage. He has been talking about building a work bench. He will love this.
You’re a saint in my book of wonders.
Thank you for another great post! I think that the alternative method to build a strong bench will help people with relatively little time and limited access to solid wood, as I’m sure it preserves many of the great attributes of the original design (stability, useful tool well, ability to dismantle the workbench for transportation, etc.). Of course, the trade-off is missing the wonderful learning experience which building the original design by hand is. I must say though that I am also curious as to how the worktops holds over time, given the exposed end grain.
I fully agree that there is a place for good quality plywood, such as the birch plywood one can find relatively easily in the UK (The lower hardwood/marine/construction/trade plywood which one can easily find in DIY stores, and which is often made in the Far East, is a whole different kettle of fish, and often not that much cheaper).
While it is very satisfying to work with solid wood, including pine, quality plywood saves a lot of time given its “straightness,” uniform dimensions, lack of visible knots, and stability, be that to make panels or -increasingly- beam like materials, and it finishes quite well. I think it has its place with ‘mixed applications’ as well, some times with a strip of solid wood to protect (or hide?) the edges, and can be a real problem solvers for the non-experts!
Thank you for this inclusive approach to ‘real woodworking’
I feel that the benchtop will work as well if not better than a solid top, even in maple, oak or similar hardwood. The importance of good grade cannot be overstressed, but it is relatively inexpensive when amortised over say a hundred years which I feel this bench will last. It seems to me more solid than any solid wood workbench I have worked at simply because of the cross ply lamination throughout. As an example, if I lift one corner by 1/8″ of an inch, the opposite side lifts about the same. It is however very heavy so to some that might be a negative and to others a definite plus. I have not weighed it yet but will calculate the board footage to see exactly what it is when I find time. Another plus is you do not need a fancy bandsaw either. I could have made this with a £300 version and it would have cut the whole as efficiently as my large versions, no problem.
Paul. What was the approx cost of the plywood to build the bench?
£250 I think.
– Now some DIY stores can cut your plywood sheets with a CNC machine. You would end up with a flat-pack workbench.
Just glue it and start to use your hand tools.
– End grain should not be a problem. In some aviation engine maintenance workshops, the ground was paved with wood in such a way that the grain was vertical. It would limit damage to costly fallen parts while being resistant to heavy trafic.
Sylvain
I worked in a plywood factory as a young man. It’s a very interesting process. Not one speck of sawdust from the raw logs was wasted. Even the bark was used for boiler fuel.
I think this is a valuable feature of plywood: it’s a rather efficient use of the raw timber. Albeit I believe it requires as input only the very best quality trees.
I have no problem with harvesting as long as it is from a sustainable programmed source.
Interesting project…I will carefully follow the future videos.
I’m interesting in how to fold playwood to create some toys for my daughter. What about this?
Pual, thanks for the enthusiasm with which you transmit your passion!
Gianluca
Plywood itself is not generally foldable or even much bendable unless very thin. To make bent components you must layer the layers and bend as you glue the layers bending to a form and then vacuum pressing or some other force to conform until dry.
Very interesting, Paul.
But I don’t think I will be following this build.
I have made a workbench according to the 2012 videos just before the availability of the new videos, so I won’t make another one (in any foreseeable future).
I will nevertheless follow this build because I will certainly learn new tricks.
Sylvain
Well, there is so much that we put out there to try to meet the needs of everyone so you will still have plenty to look for. This one is free and was filmed for the specific reason of getting people new to hand tools to get started using what they have and are used to. Currently I am making a prototype for an oak garden bench.
A bit off-topic: Any idea when we will see more on that garden bench? I’m particularly interested in the final stage, finishing.
I’m currently working on an oak garden bench as well. Haven’t made up my mind yet on the finish…. I want to keep the natural oak colour, but I also want it to be weather resistant and (relatively) low maintenance. Any input is welcome.
I am working on the prototype now, but have you thought about zero finish? It will silver but should last.
Actually, I didn’t, but will be considering it now. I still have a long way to go, still in the process of cutting and dimensioning the parts (only power used is for the electrical light ;-)). Then there’s a lot of tenons to cut and mortices to chop,several tens of them. So the stage of finishing is still a long way to go. Will put an off cut outdoors to see how it develops. By the time my bench is ready, it’ll be spring.
I am so looking forward to the new plywood workbench video series. Thank you so much for another interesting and “exciting” project.
Over the years your hard work and generosity have given us the choice now of three workbench designs. Your original “garden” workbench with central tool well between two work surfaces, a workbench with a single work surface and tool well to the rear that will fit into a smaller work space and now a plywood version that will allow a quickly built workbench to be had, perhaps within a day or two. Brilliant!
Your “Trasher” reminds me of similar carts that were made in my youth in NW London. We tended to call them go-carts. Pram wheels were always highly sought after for this use. Most were simple constructions with a scrounged plank to bridge the two axles. The front wheels/axle were mounted on a centrally pivoting cross board sufficiently extending to allow one’s feet to rest on the cross board between the main plank and the front wheels and thus allow steering with the feet. An old seat squab from a chair was often fixed (nailed) to the main plank to afford a little comfort to the seated driver. I saw and indeed owned a version that was braked. A clever system of rods and linkages (made out of plumbing or gas pipes etc) all below the main plank, linked a central brake lever that protruded through the main plank between the drivers upper legs and a piece of timer situated at the rear that was arranged to slide forward or back a couple inches to make contact with the rear wheel solid rubber tyres when the brake lever was pulled backwards by the driver. Very effective it was and it meant we could descent quite steep hills with some chance of stopping in time at the bottom. Oh happy days.
Up here in Leicestershire we called them trolleys
Interesting project Paul. Looking forward to watching plywood workbench video series!
Any issues/concerns with water, moisture or liquid spills? Seems like any time I have plywood that gets wet/damp, especially when it goes unnoticed a few days (i.e. in garage), the plywood delaminates and takes on a mind of fits own. I had a nice plywood and hardwood Armoire in my bedroom for many years, looked great. I put it in the garage with the intention of selling it. Well a few weeks later the edge banding peeled off in places and once the end grain was exposed it started delaminating in a few spots. I am in the process now of salvaging the maple door frames and moldings etc. All of the solid wood is fine.
Good quality waterproof plywood should not delaminate.
I have no previous experience in woodworking and have been learning to use hand tools and I’m often looking at other types of making/construction in wood and thinking how can I apply my skills to doing something like that. These are things like house carpentry, kitchen cabinets, etc.
In particular, there are often projects around the house that don’t need to be anything fancy and also require wide components where plywood would be ideal. Having a path to do that sort of thing with hand tool skills I already have would be very valuable. I think it’s something that’s been missing from the a lot of the content that’s currently available.
This is very interesting. I have not thought about the bench being heavier and stiffer than a hardwood bench. I do look forward to watching the video. Thanks
Hi Paul,
Great read as usual. I have been thinking about building a second bench to use as a general purpose type bench (I previously made one in the style of your original bench) . I will probably use the new bench for assembly and general “pottering” about. If I make the plywood bench I think i will put a larger piece of plywood flat on the surface. This will give a more easily obtainable flat working surface as well as being replaceable if screwed and not glues down.
Many thanks for your inspiration!
Hi Paul loved the blog and your use of plywood many fine furnitture makers have beenuseing plywood for over a hundred years and as for power tools people like myself who are entering there twilight years find that iI am using my table saw and band saw more now as the hands no longer grip the saw to well and I have to adopt another way of doing my cuts I have found that you can embrace new methods of wood working without feeling you are not betraying the old masters but are evolving in a changing world I carved out a train by hand for my great grandson hand was very proud of the finished work as was he I then made a car using a band saw and was just as pleased with the finished project as was the boy both items are cherished and loved and will last for years and I hope they will still be around for his grand children to play with
I remember building a few down hill racers fifty some odd years back. They were a great learning tool for working with what was at hand, and wonderful exercise in pulling them back up hill. Thank you for bringing back fond memories. John
Wonderfull memories of these carts which we called billy carts, made from whatever we could scrounge from the local dump. Where we lived during WW2, the downhill road crossed the main road where trams also ran, and we had someone standing at the intersection to warn us when the trams were coming, and many times we whizzed across the main road with only inches to spare in front of a tram, and the driver and the conductor let us know in no uncertain terms their opinion of our reckless behavior while our mothers would threaten to take a big stick to our backsides.
I new there was a good definition of MDF, “It is the most insidiously hideous material under the sun”. I completely agree.
Merci pour ces leçons de menuiserie contreplaqué. Y a t’il des plans pour cet astucieux établi construit avec cette matière? Ou quelques dimensions, pour se faire une idée des pièces à couper. Merci.