Prepping Wood VII
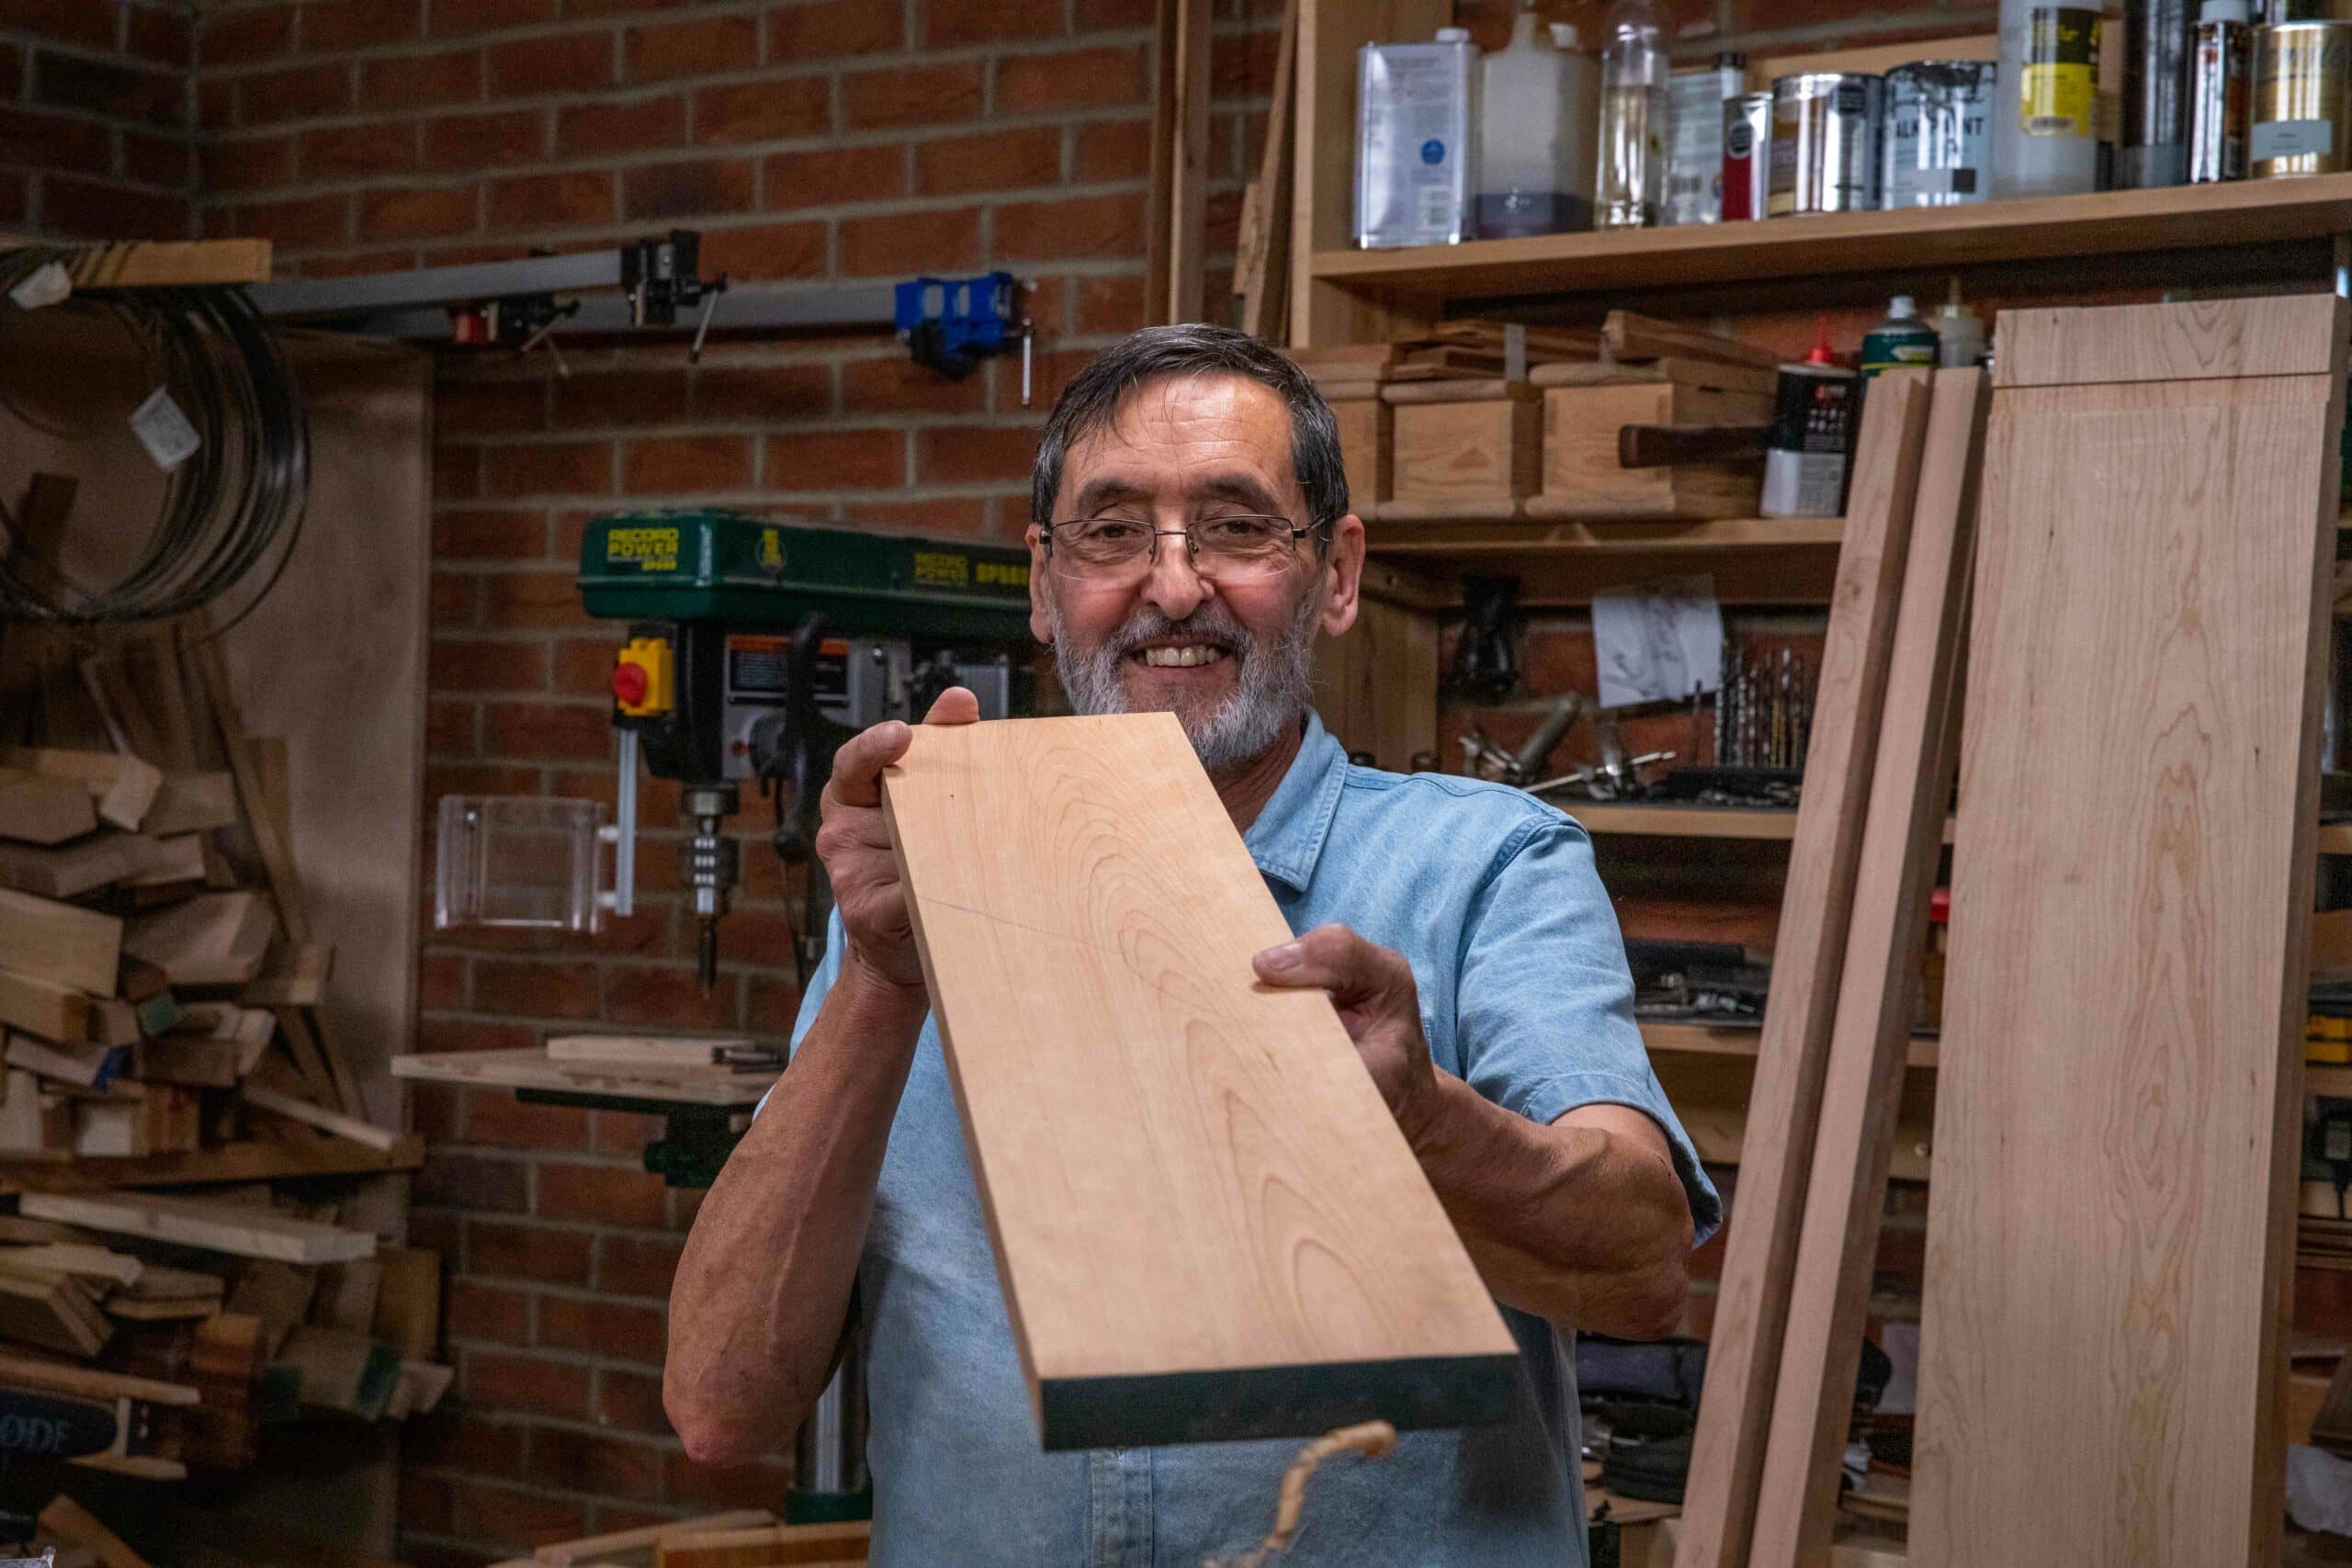
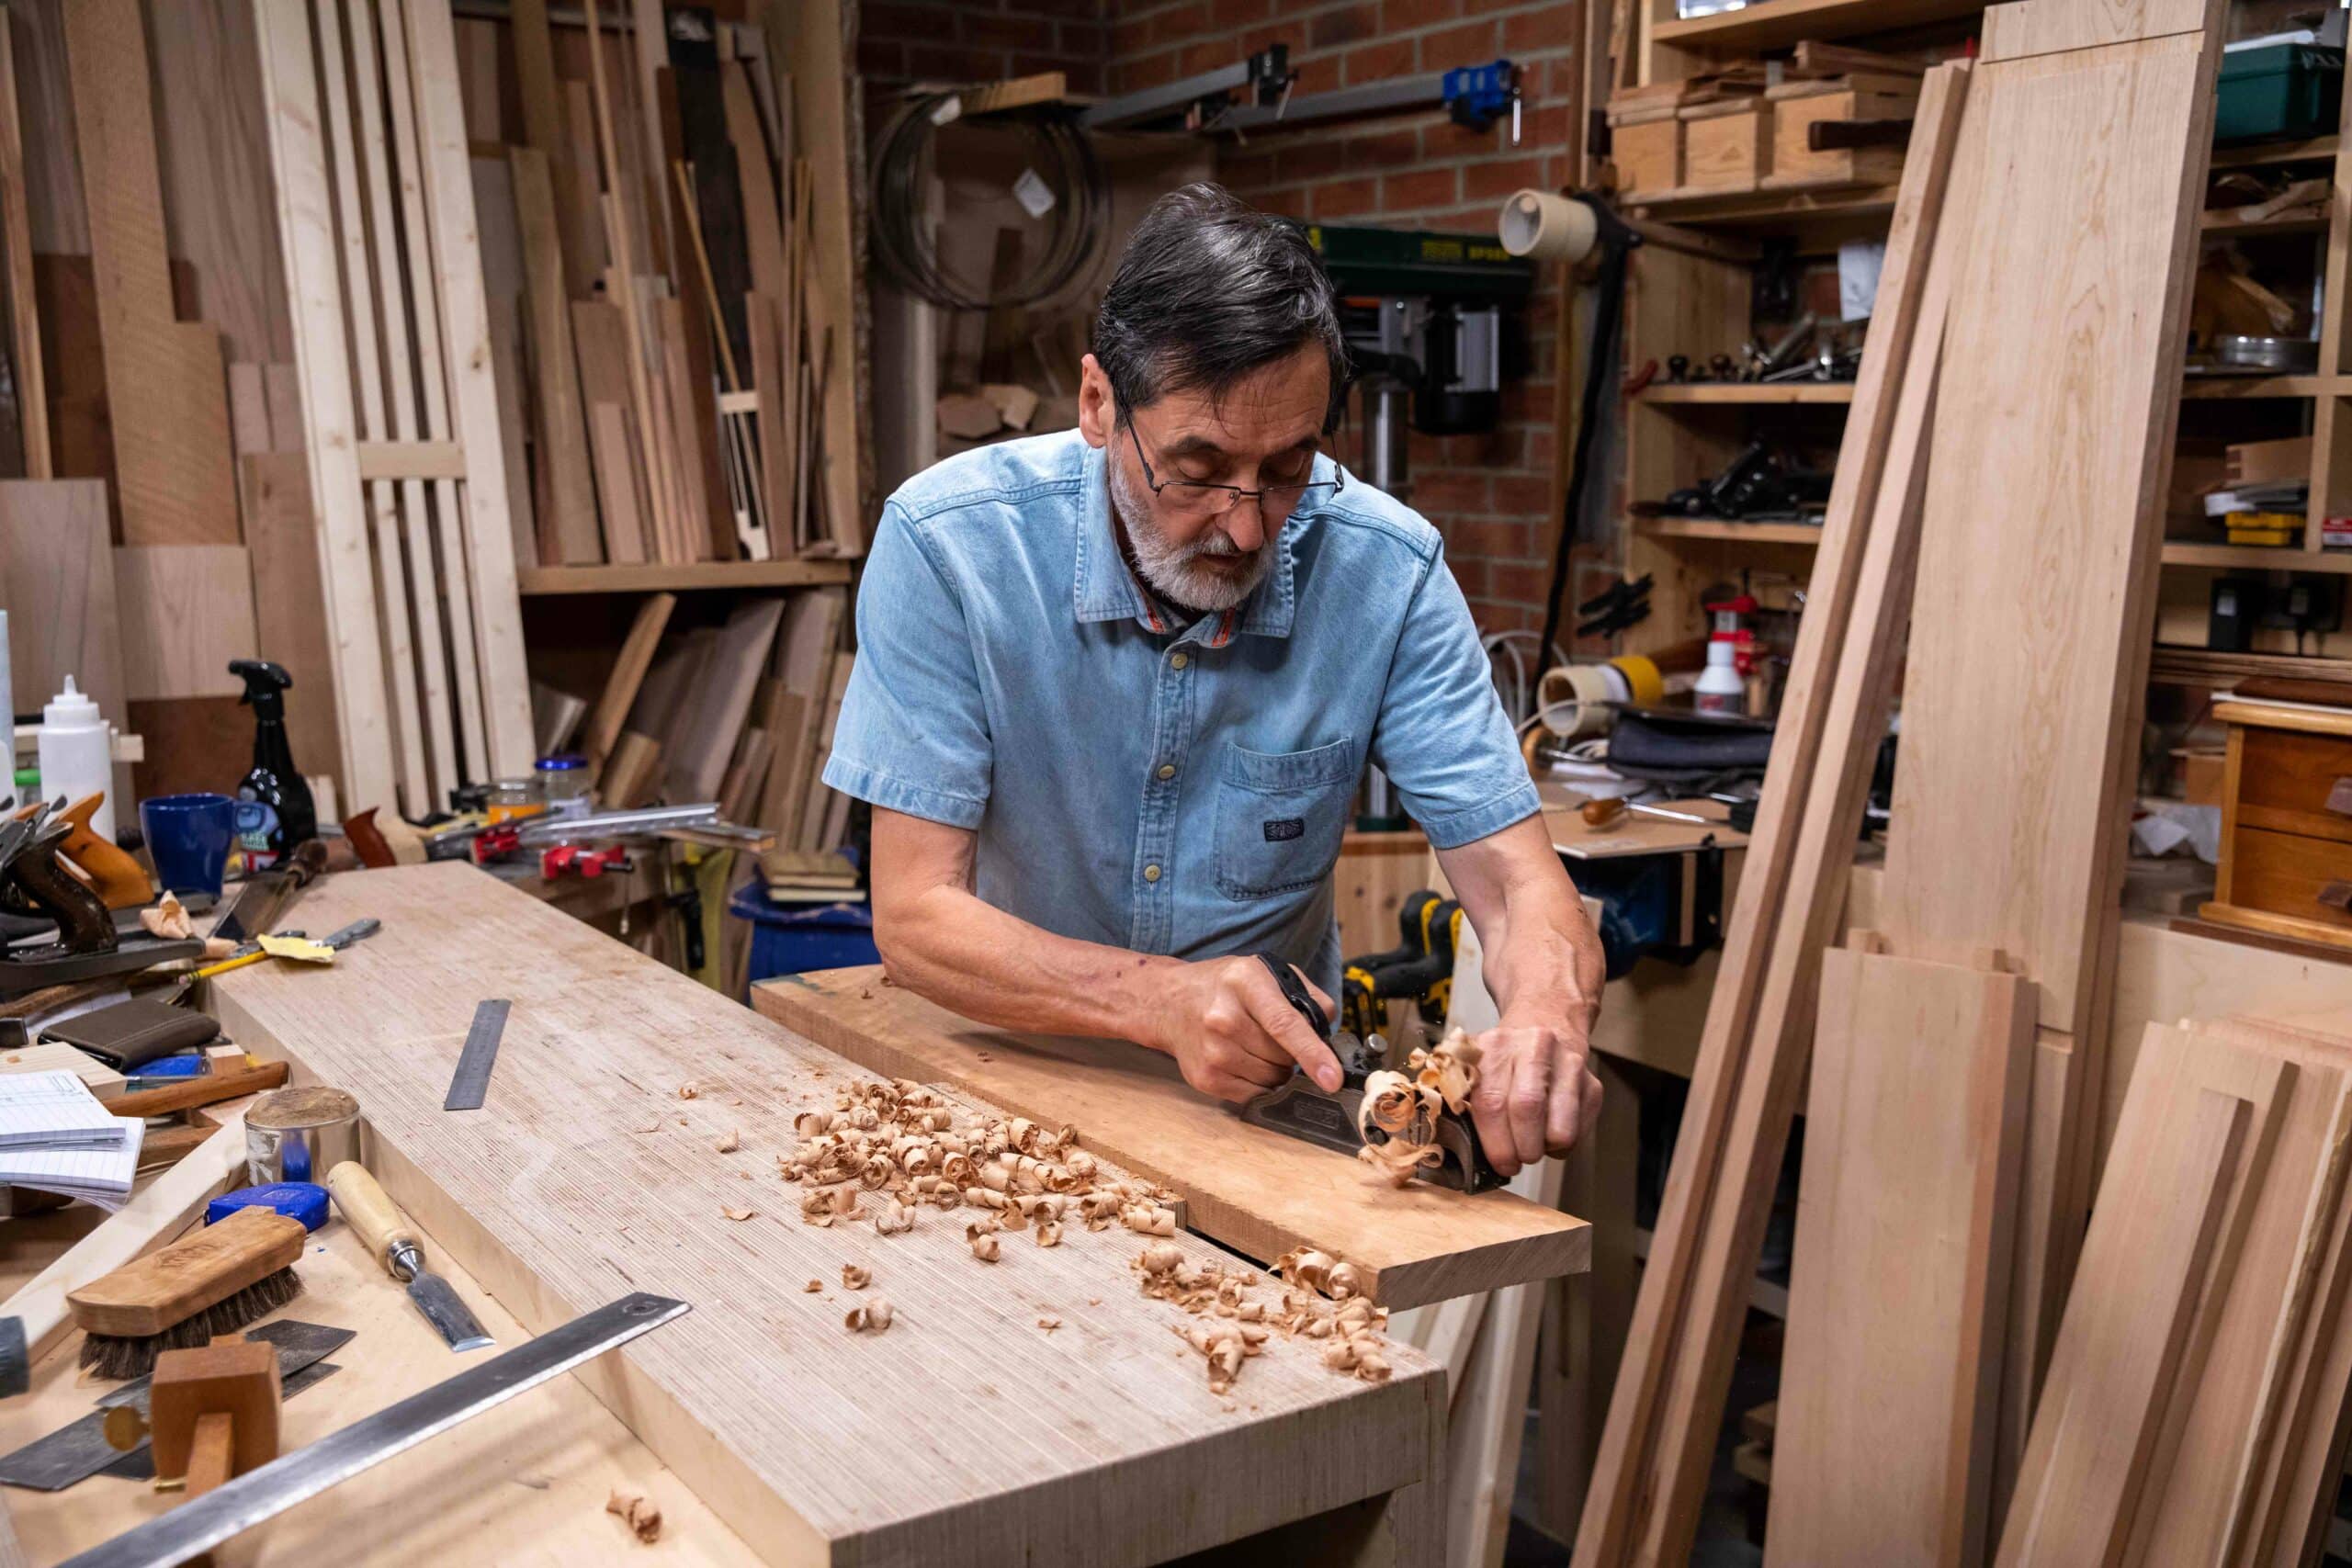
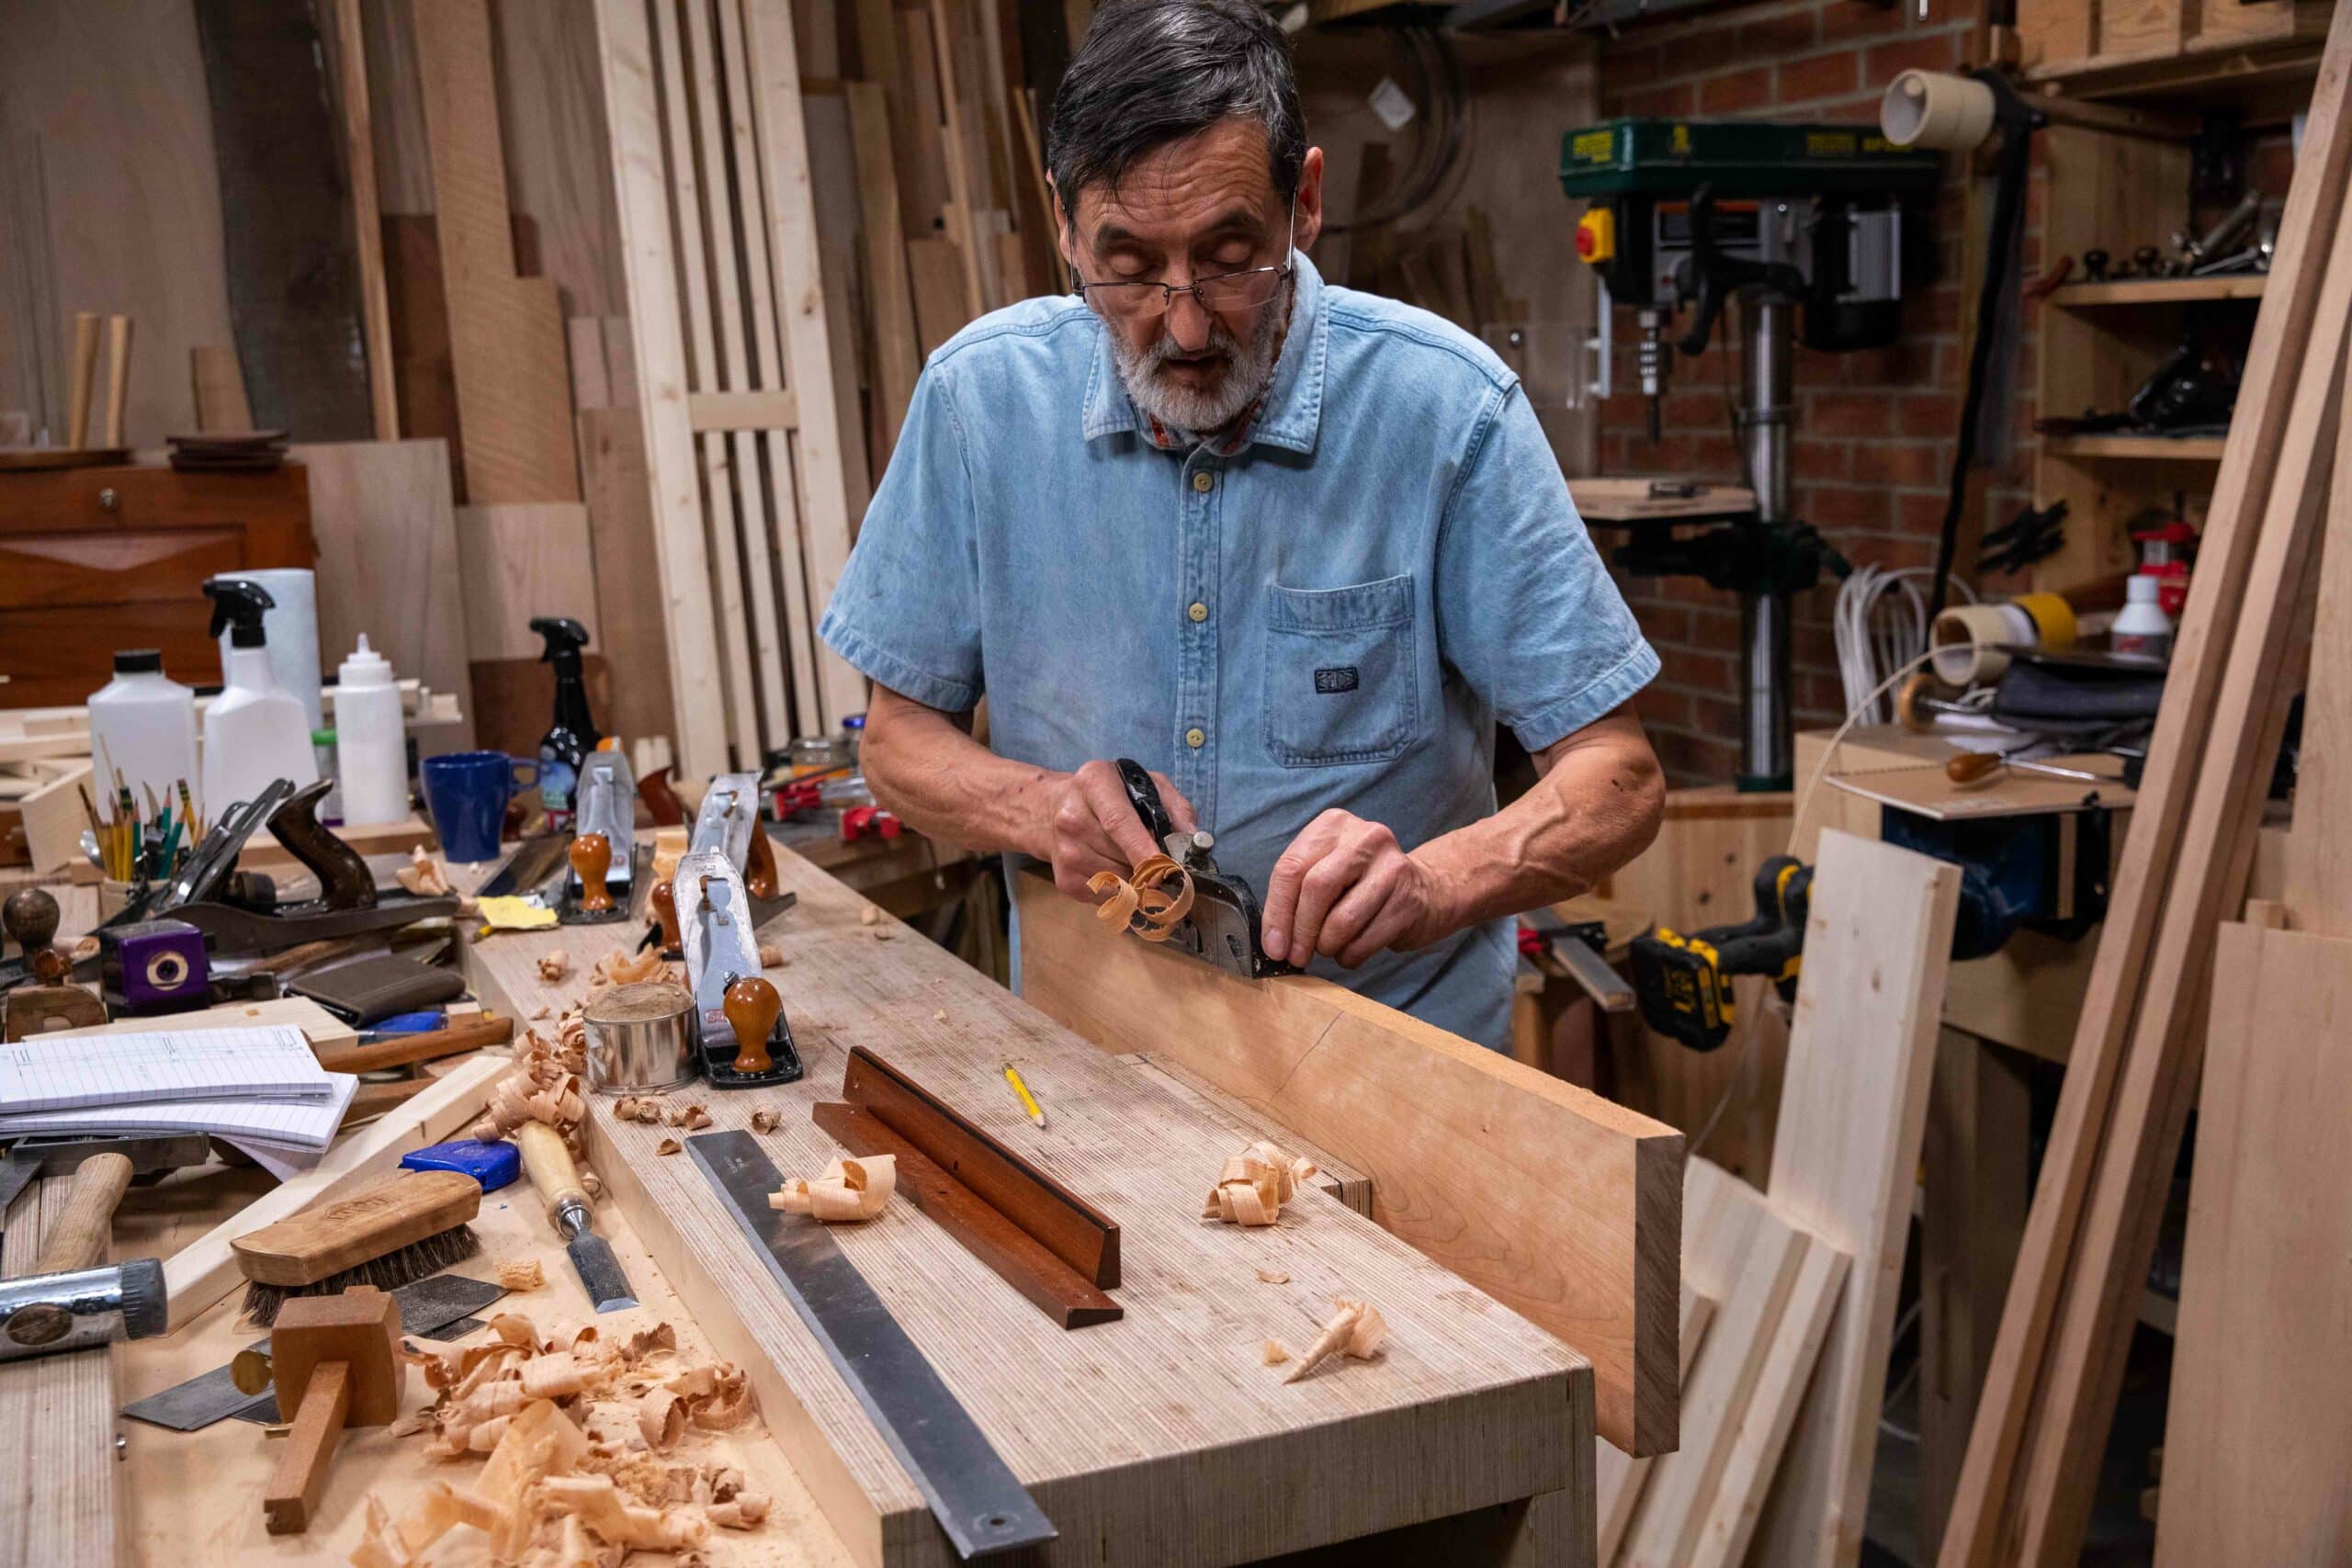
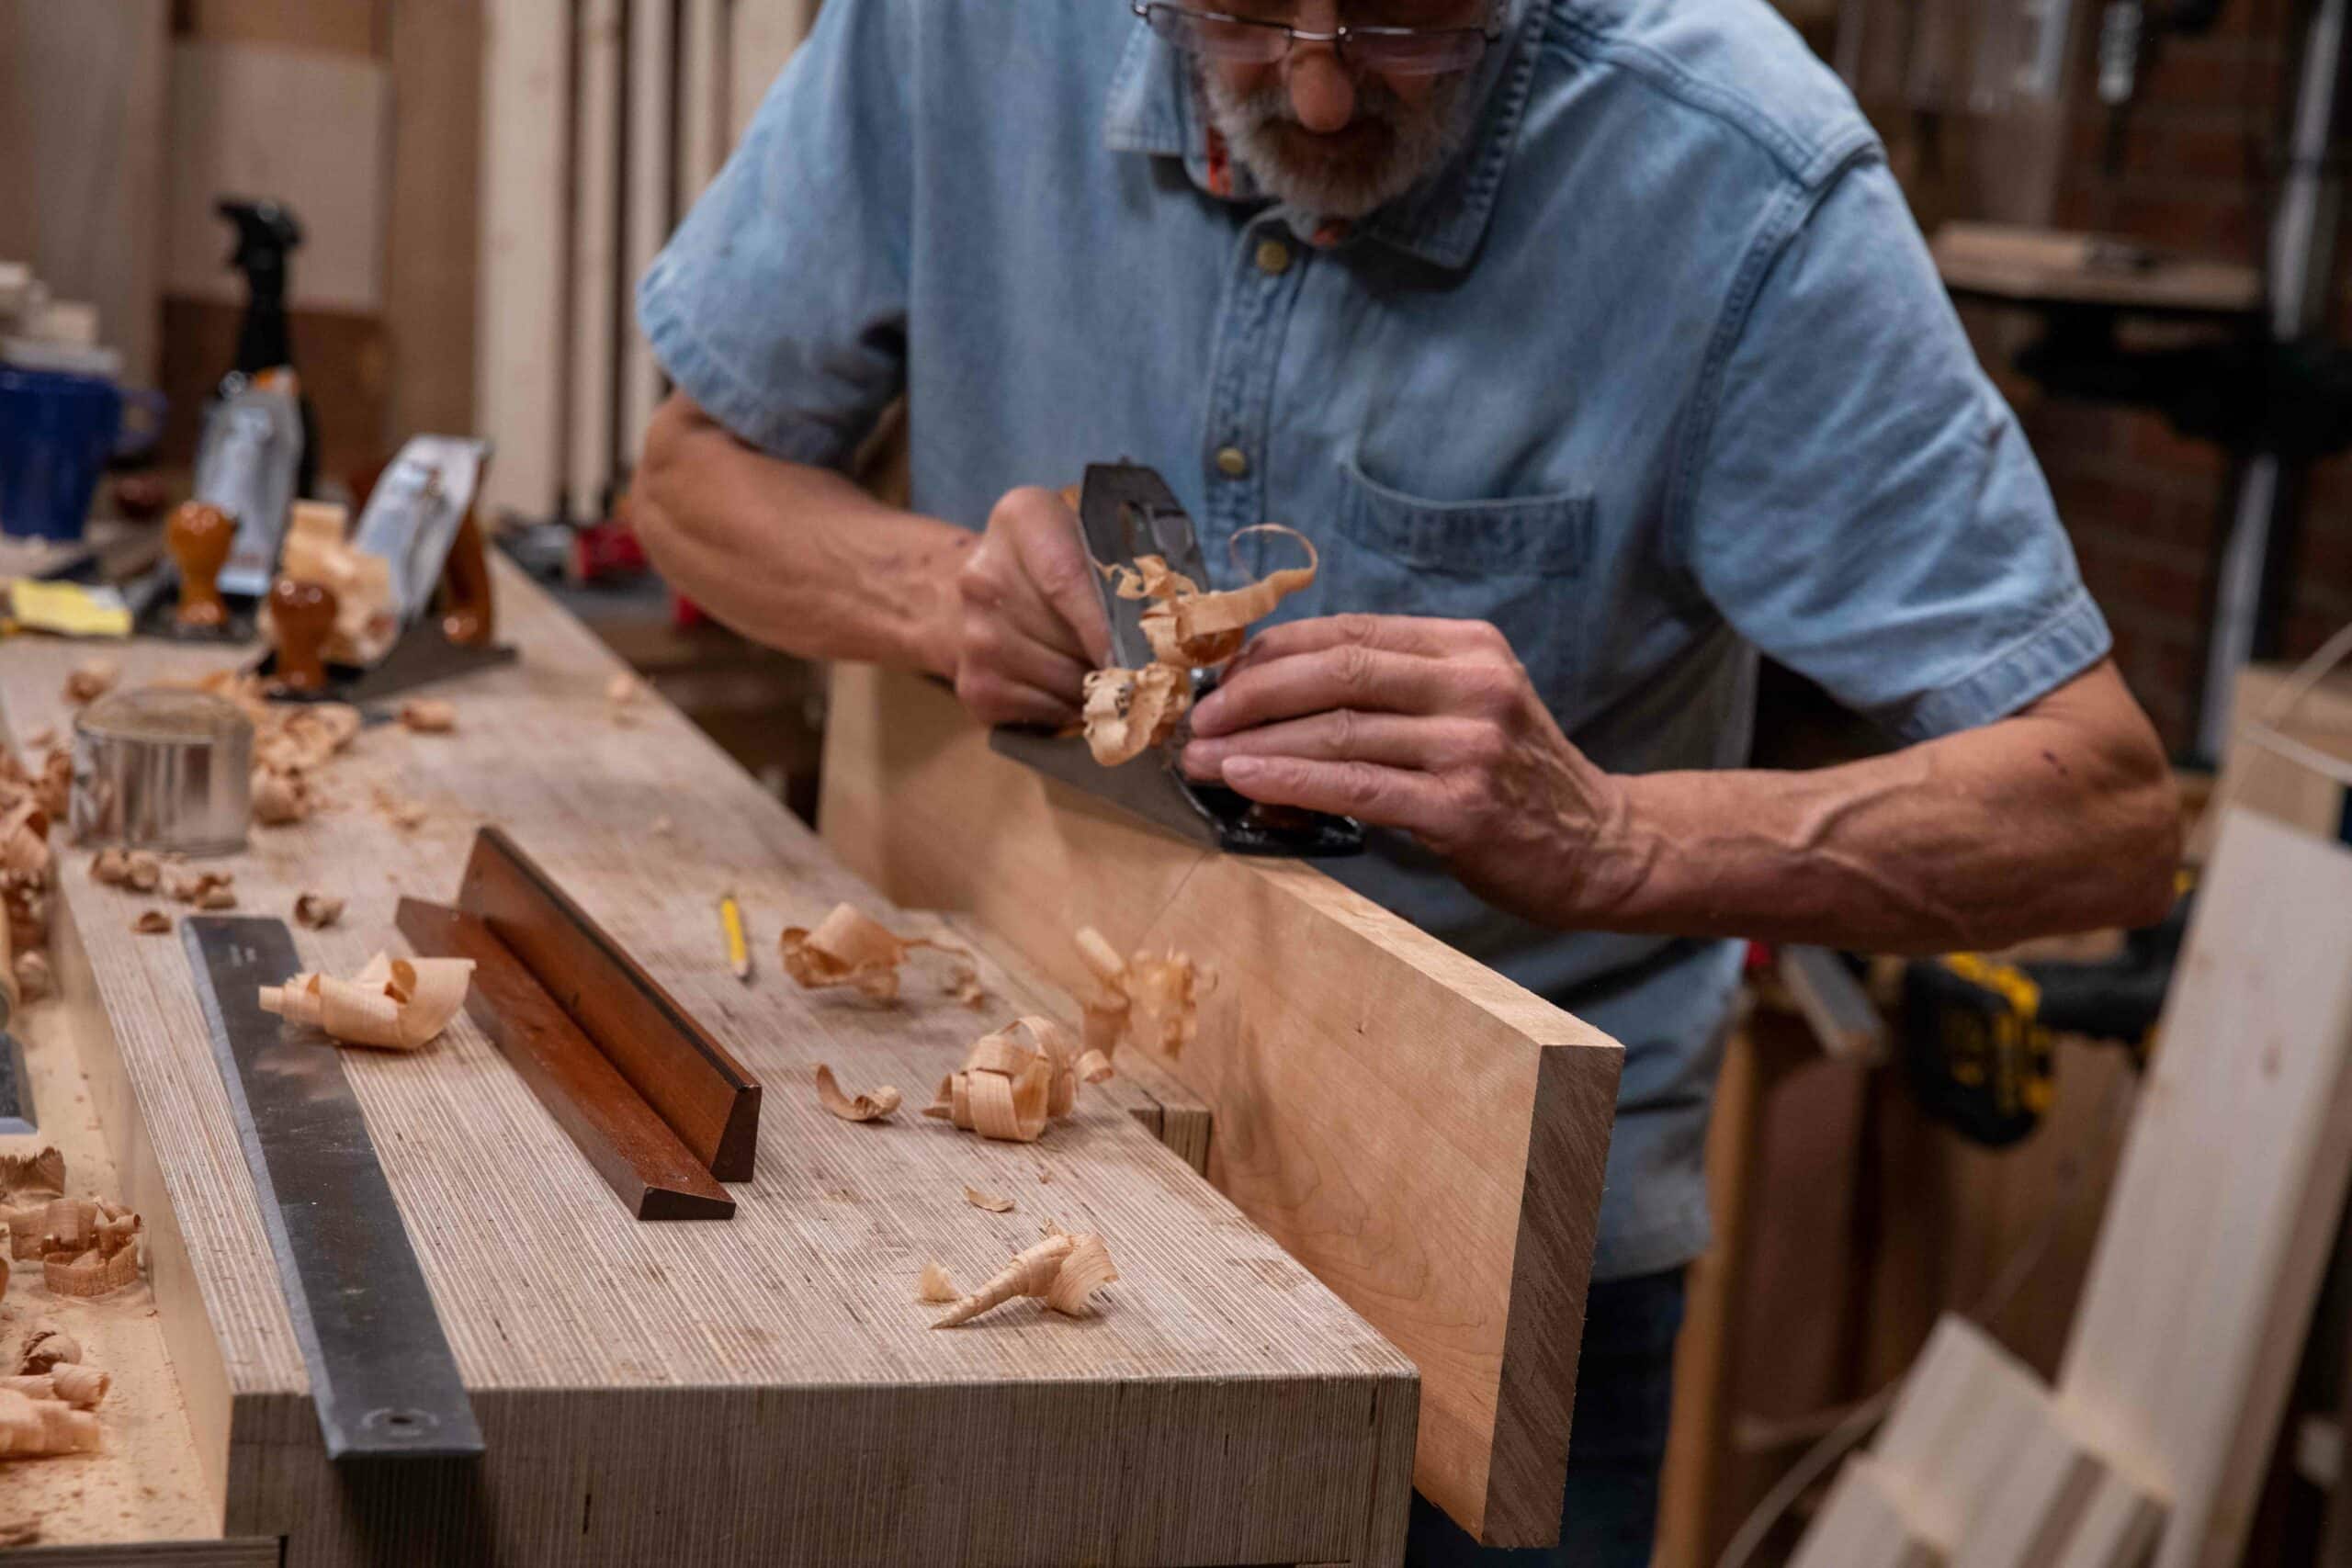
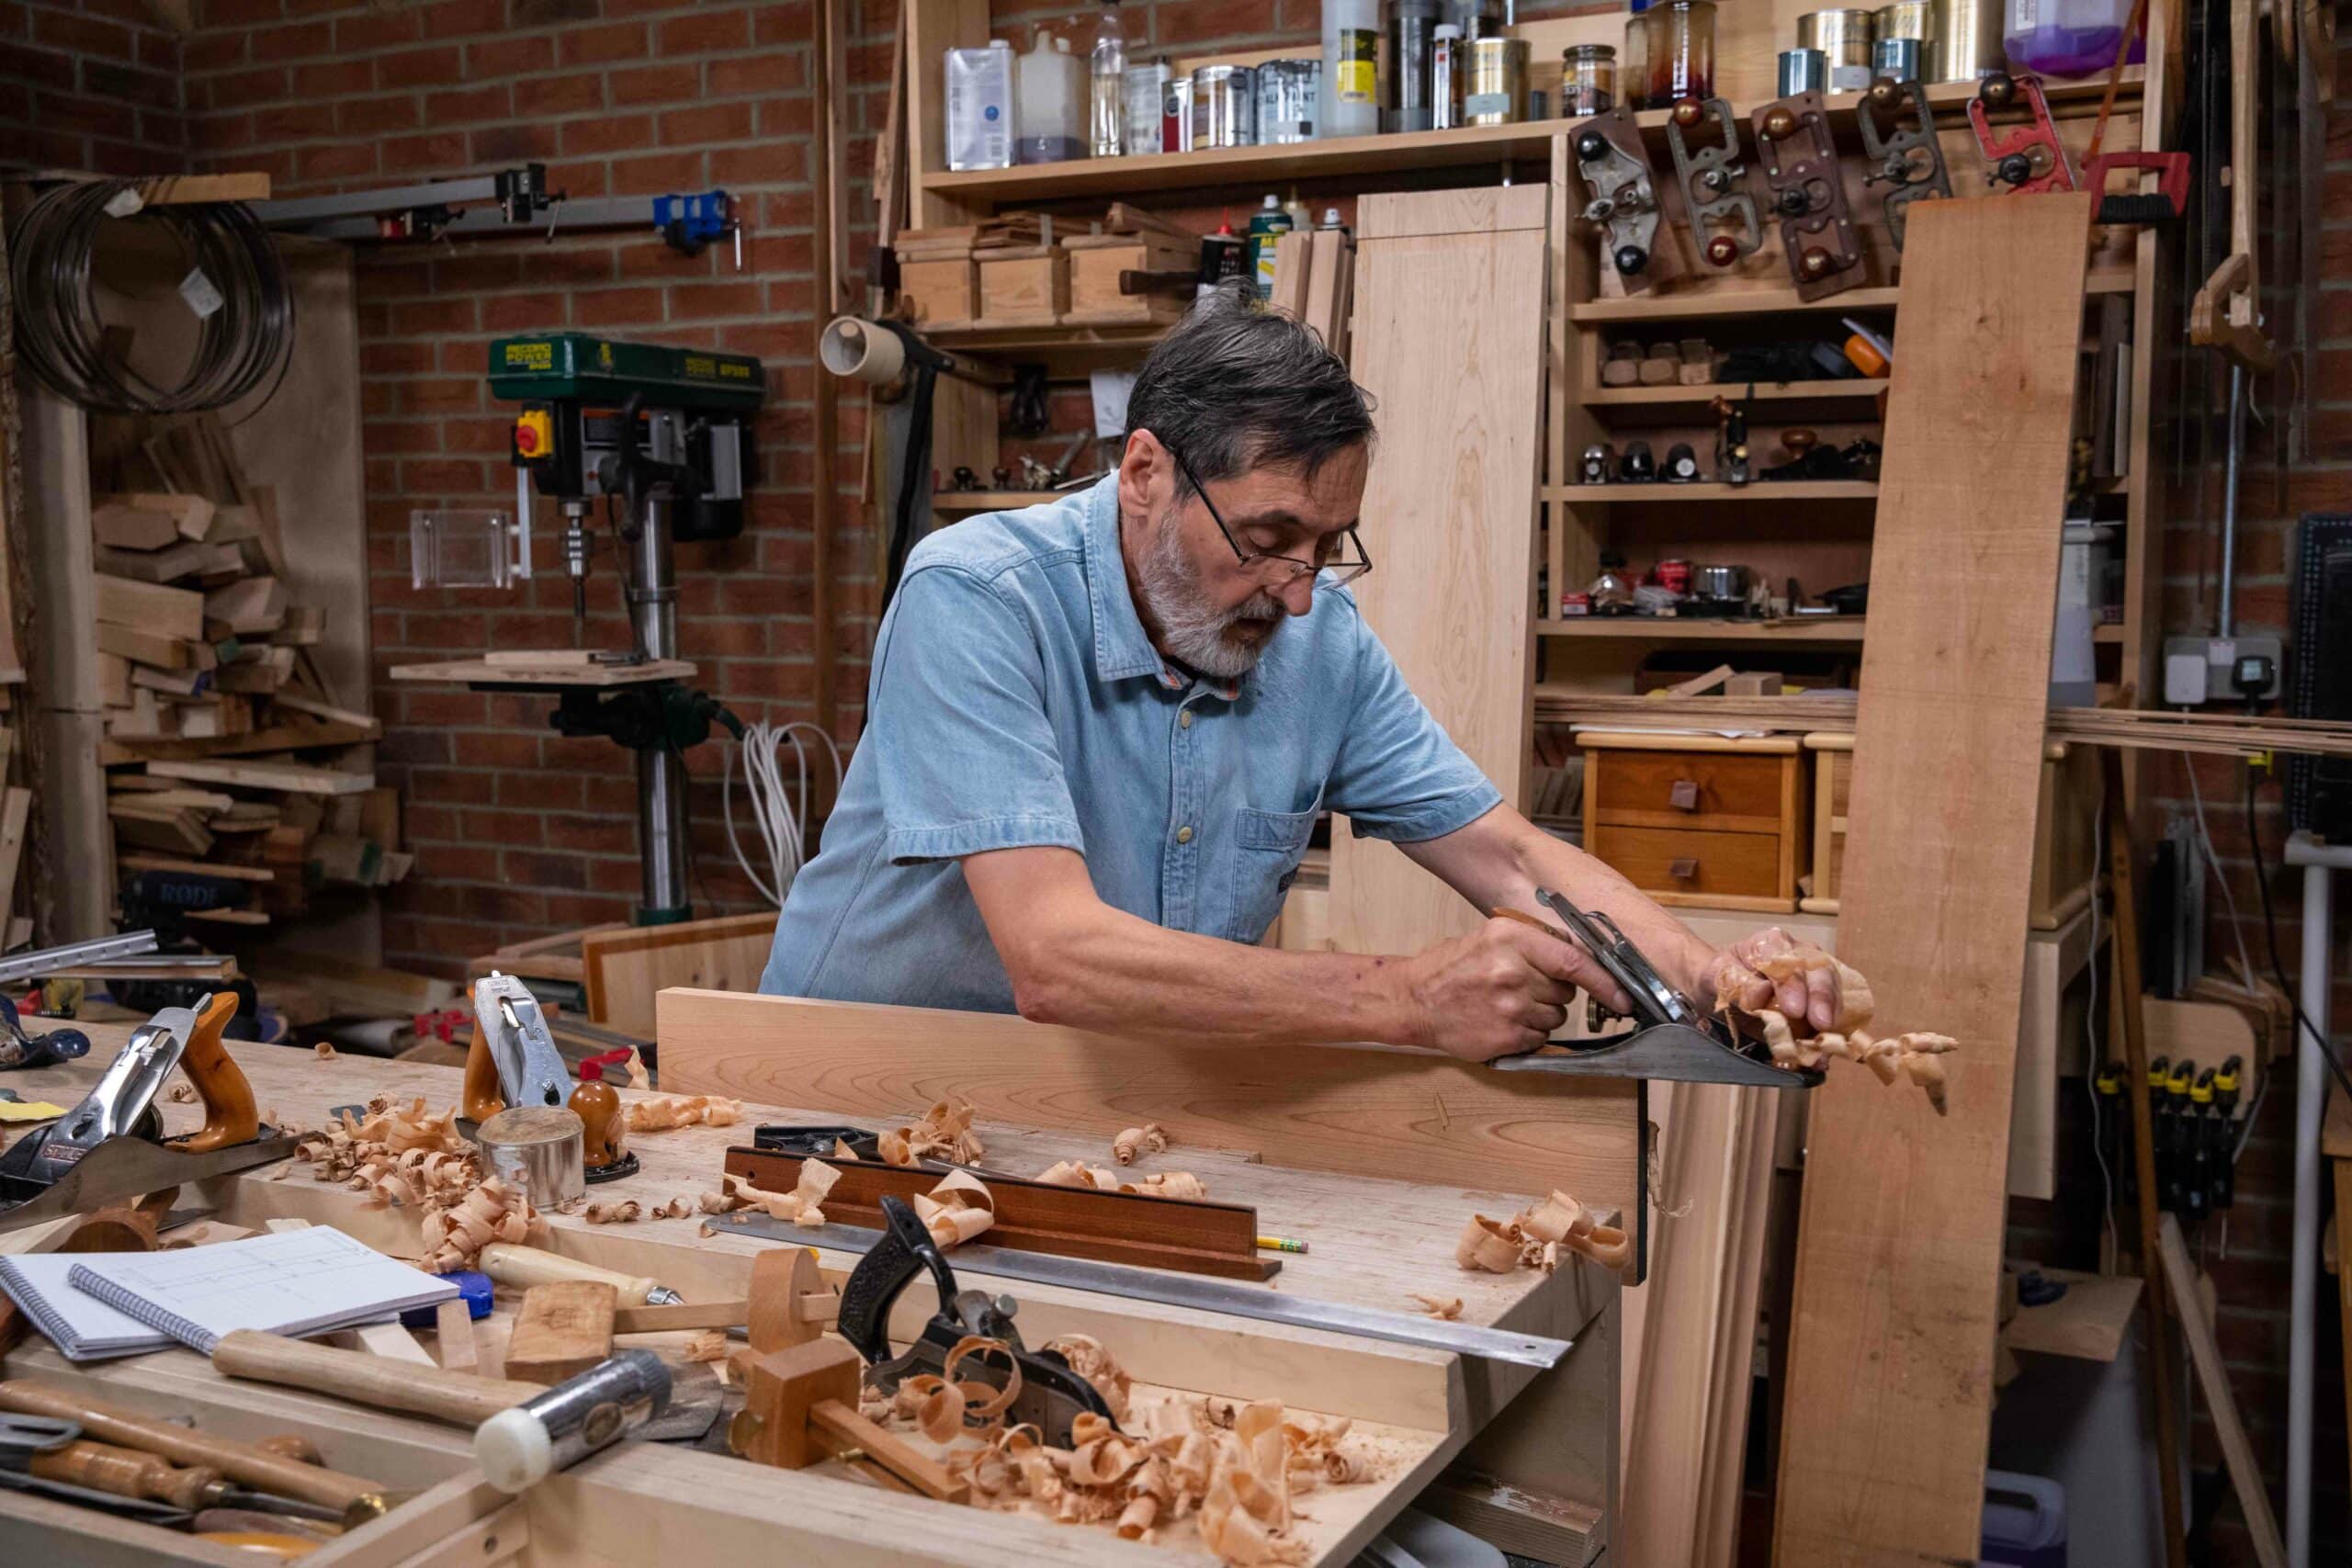
Finally, we arrive at the workbench with wood. The sawhorses get stowed, wood is rough-cut to width-cut and length-cut and stacked alongside the bench. It’s here that I pull out four planes for possible use in the next few minutes and then for hours. My diamond sharpening plates are to my left hand on a shelf at the end of my bench aprons. They are always there and totally ready for use alongside my strop. The pieces are roughly marked out with the name of the part and my cutting list is there on the bench for referencing. I have done my groundwork in identifying and noting, selecting and rough-cutting. Now it’s time to take my exercise.
I am never sure why so any machinists are disparaging about hand planing wood. I have faced adverse comments at every show I have presented at through the decades. Two things generally occurred, one, someone says, “Why not just use a planing machine? It’s much faster!” Laugh, laugh. The assumptions are many.
a) Why would anyone want to do it by hand?
b) Everyone can own a machine shop with tablesaws, planers, bandsaws, drill presses, mortise machines and more.
c) Everyone has the space to house this equipment permanently.
d) No one would want to use hand tools or have the skills to dod so.
e) That I am promoting something archaic that no one wants.
f) That machining processes are n evolutionary advancement.
g) Hand tools are outdated and primitive.
h) Hand skills can never match machining methods.
i) That machining wood is the same as hand working.
k) Everyone worldwide has the privilege to be able to own machinery and a machine shop.
I could likely give 20 more but I will stop there. We did the survey, found out what people had to work with. We are a solution for the majority.
The second annoyance is when someone walks up to MY bench and lays MY plane on its side. Neither of these two people types can ever understand yet think that they know something I don’t when it is always the other way around. Oh well!
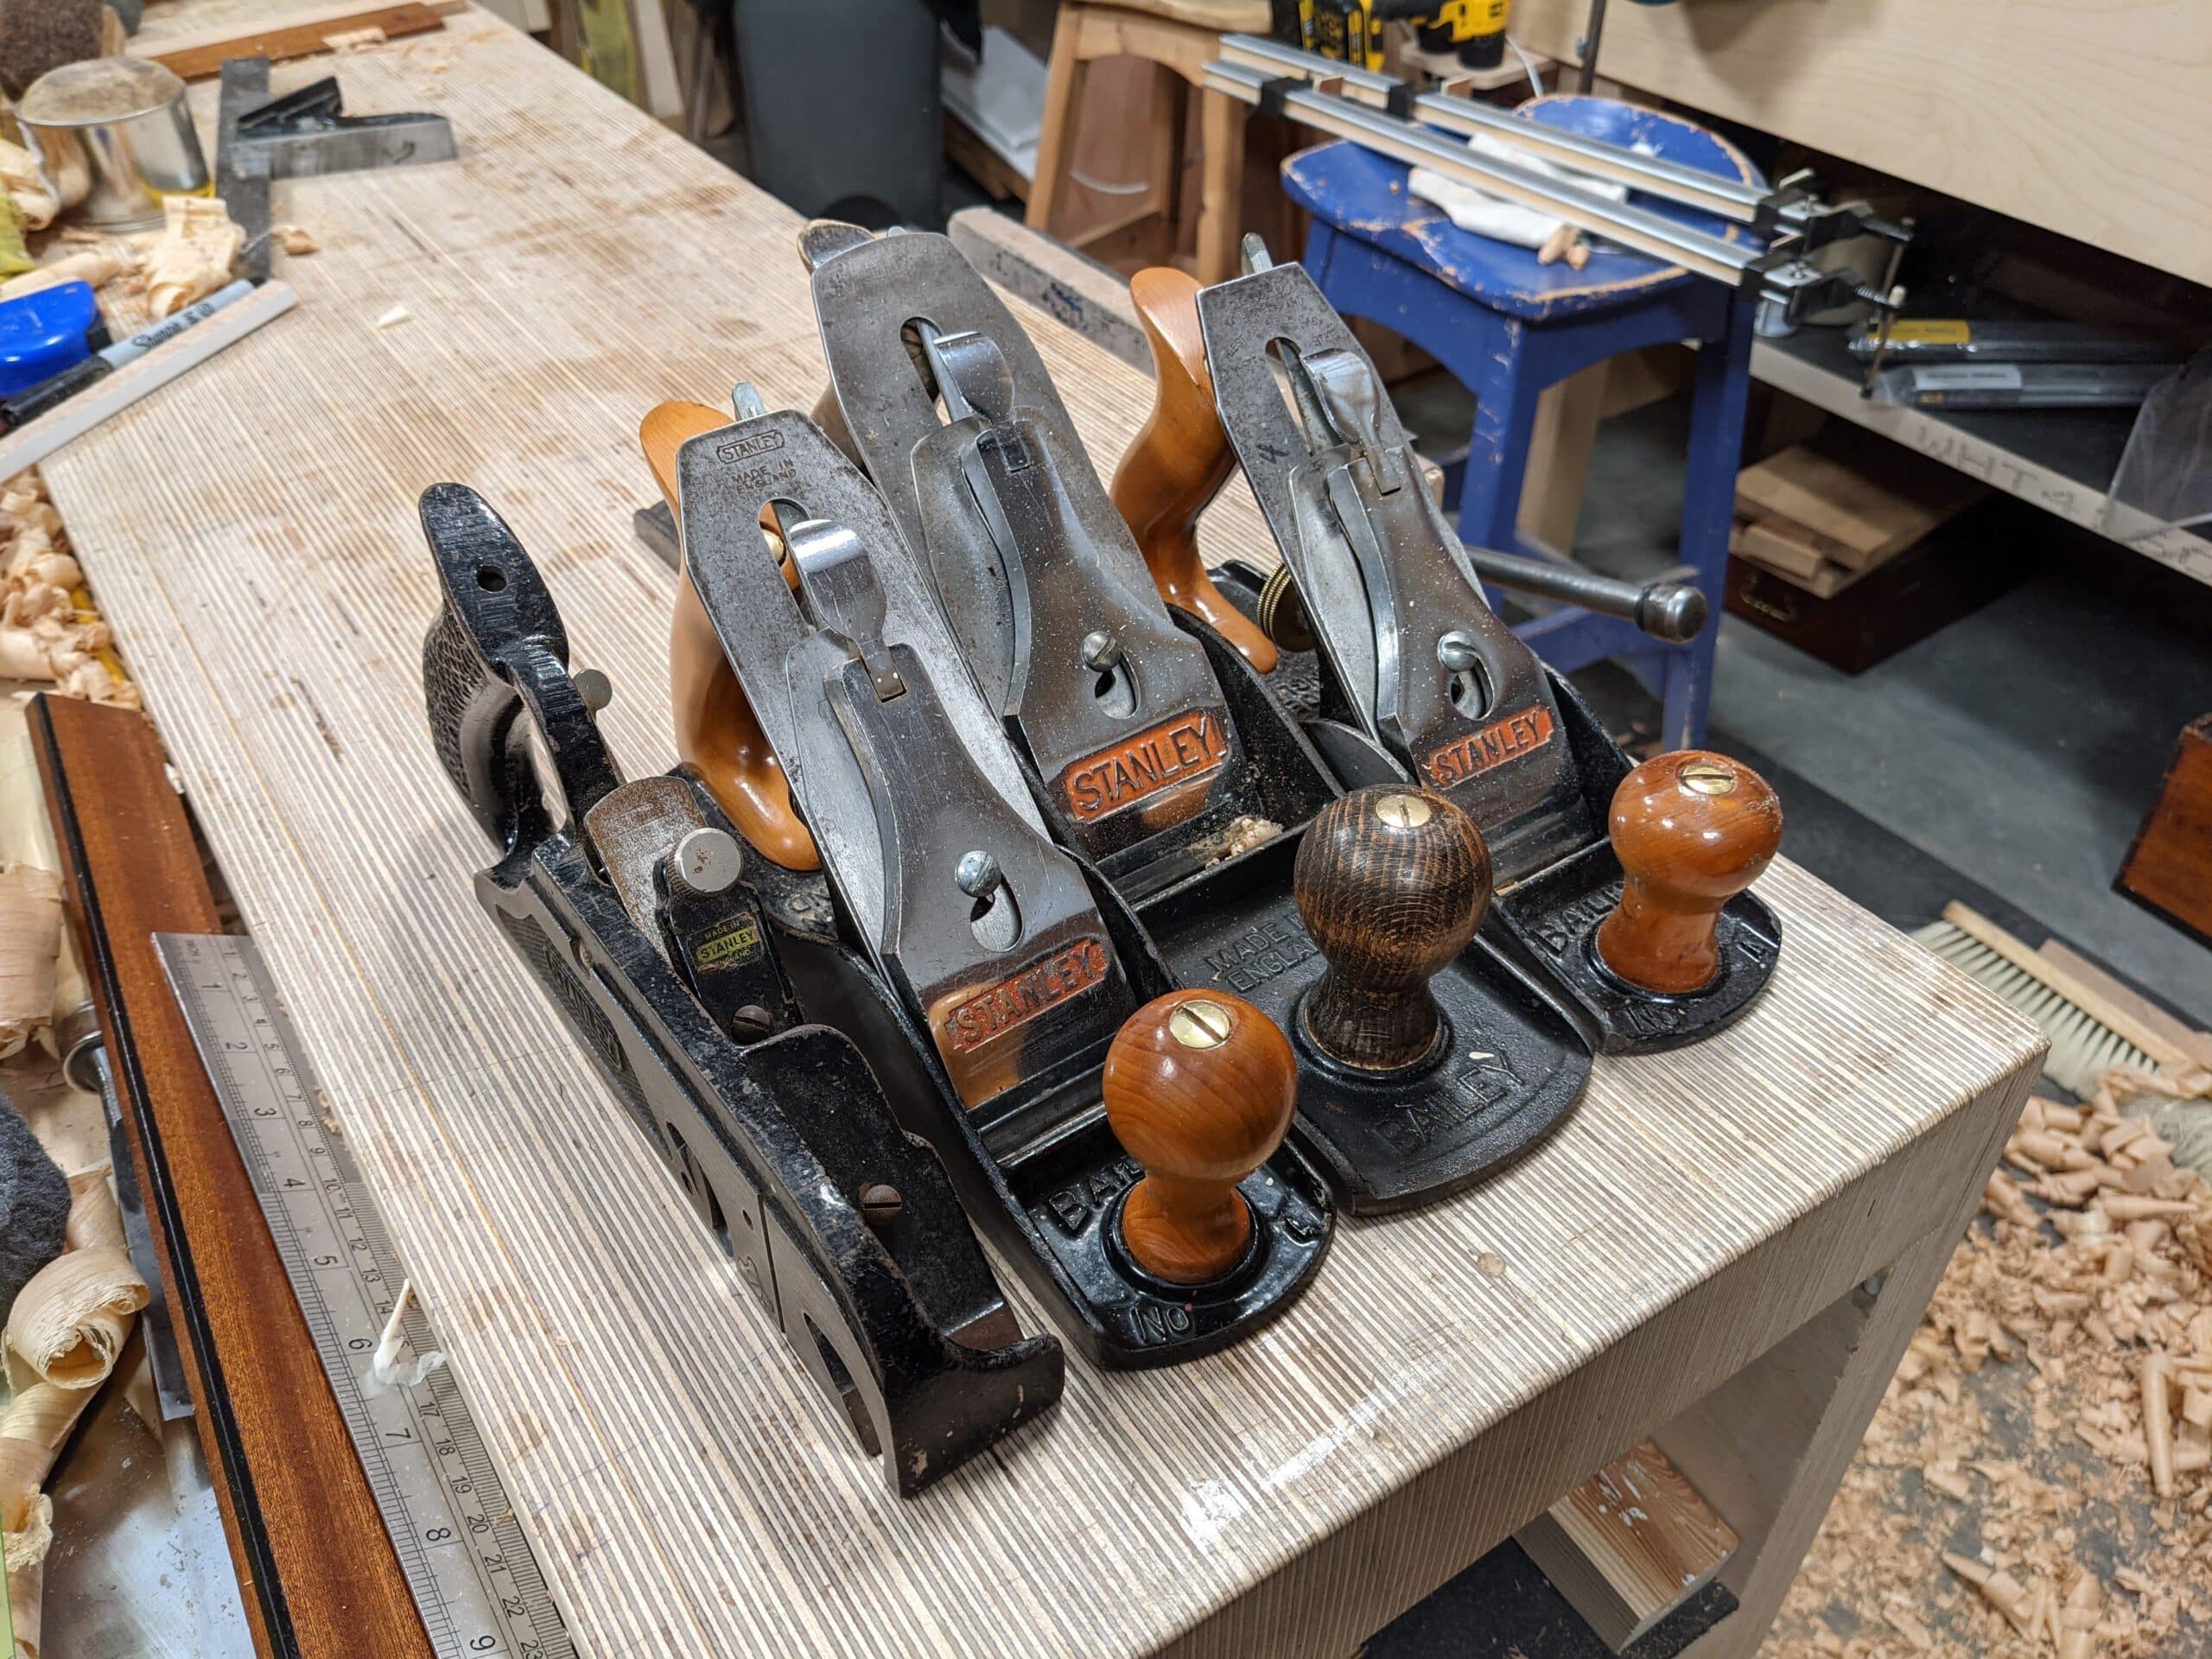
Truing up wood demands at least one sharp, well-set, well-maintained hand plane to get the best from our work. Beyond the plane or planes, we need a decent square, pencil, sharp knife, straightedge, and winding sticks. Let’s look at the planes as our first ‘doing tools’. In my case, I have dedicated planes but, if that is too much of a luxury for many, you can use different plane irons in a single plane or planes of choice. My arsenal comprises my first level scrub plane which is a Stanley #78 rebate, rabbet or filletster plane, all the same plane with different names. Any make will work. No fences or depth shoes are needed and no snicker cutter for cross-grain cutting is needed either. My second plane is a second-level scrub plane which is a Stanley (or Record or other) #4 smoothing plane. These two plane types are my planes to tackle rough-sawn surfaces from sawyer or millwork, cambered and convexed surfaces, twist and other surface defects. I also rely on a #5 and a #5 1/2 bench plane.
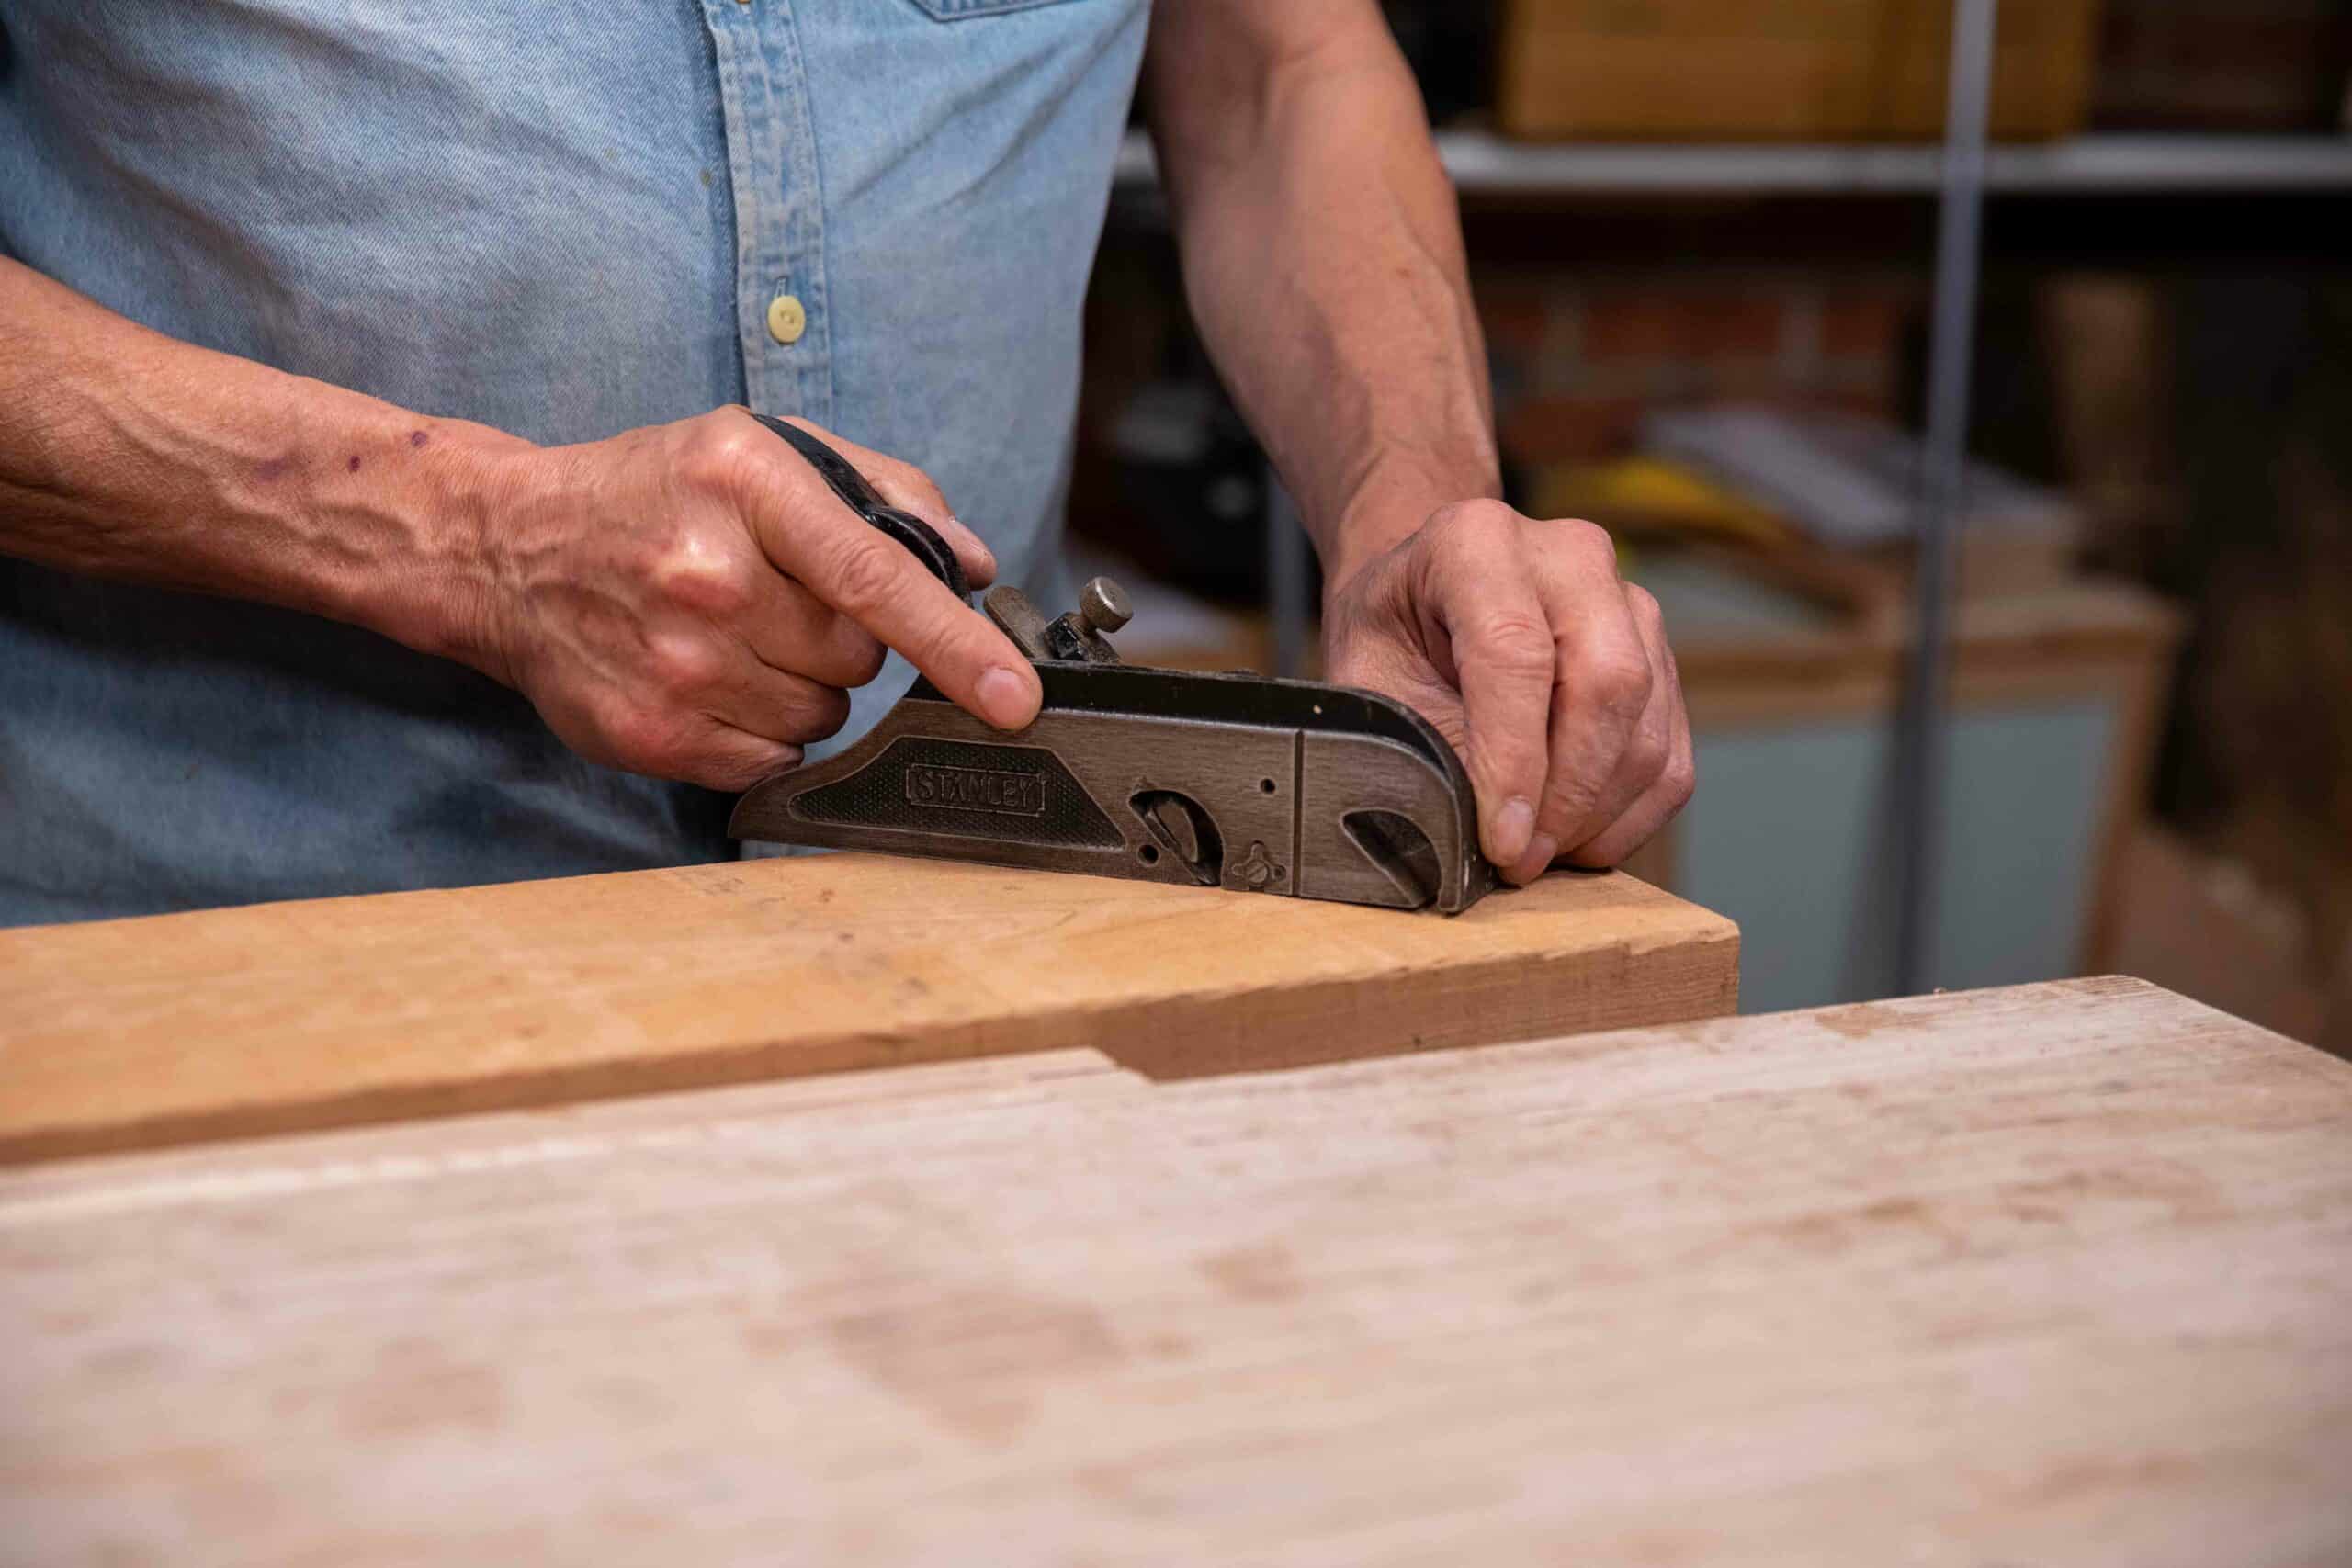
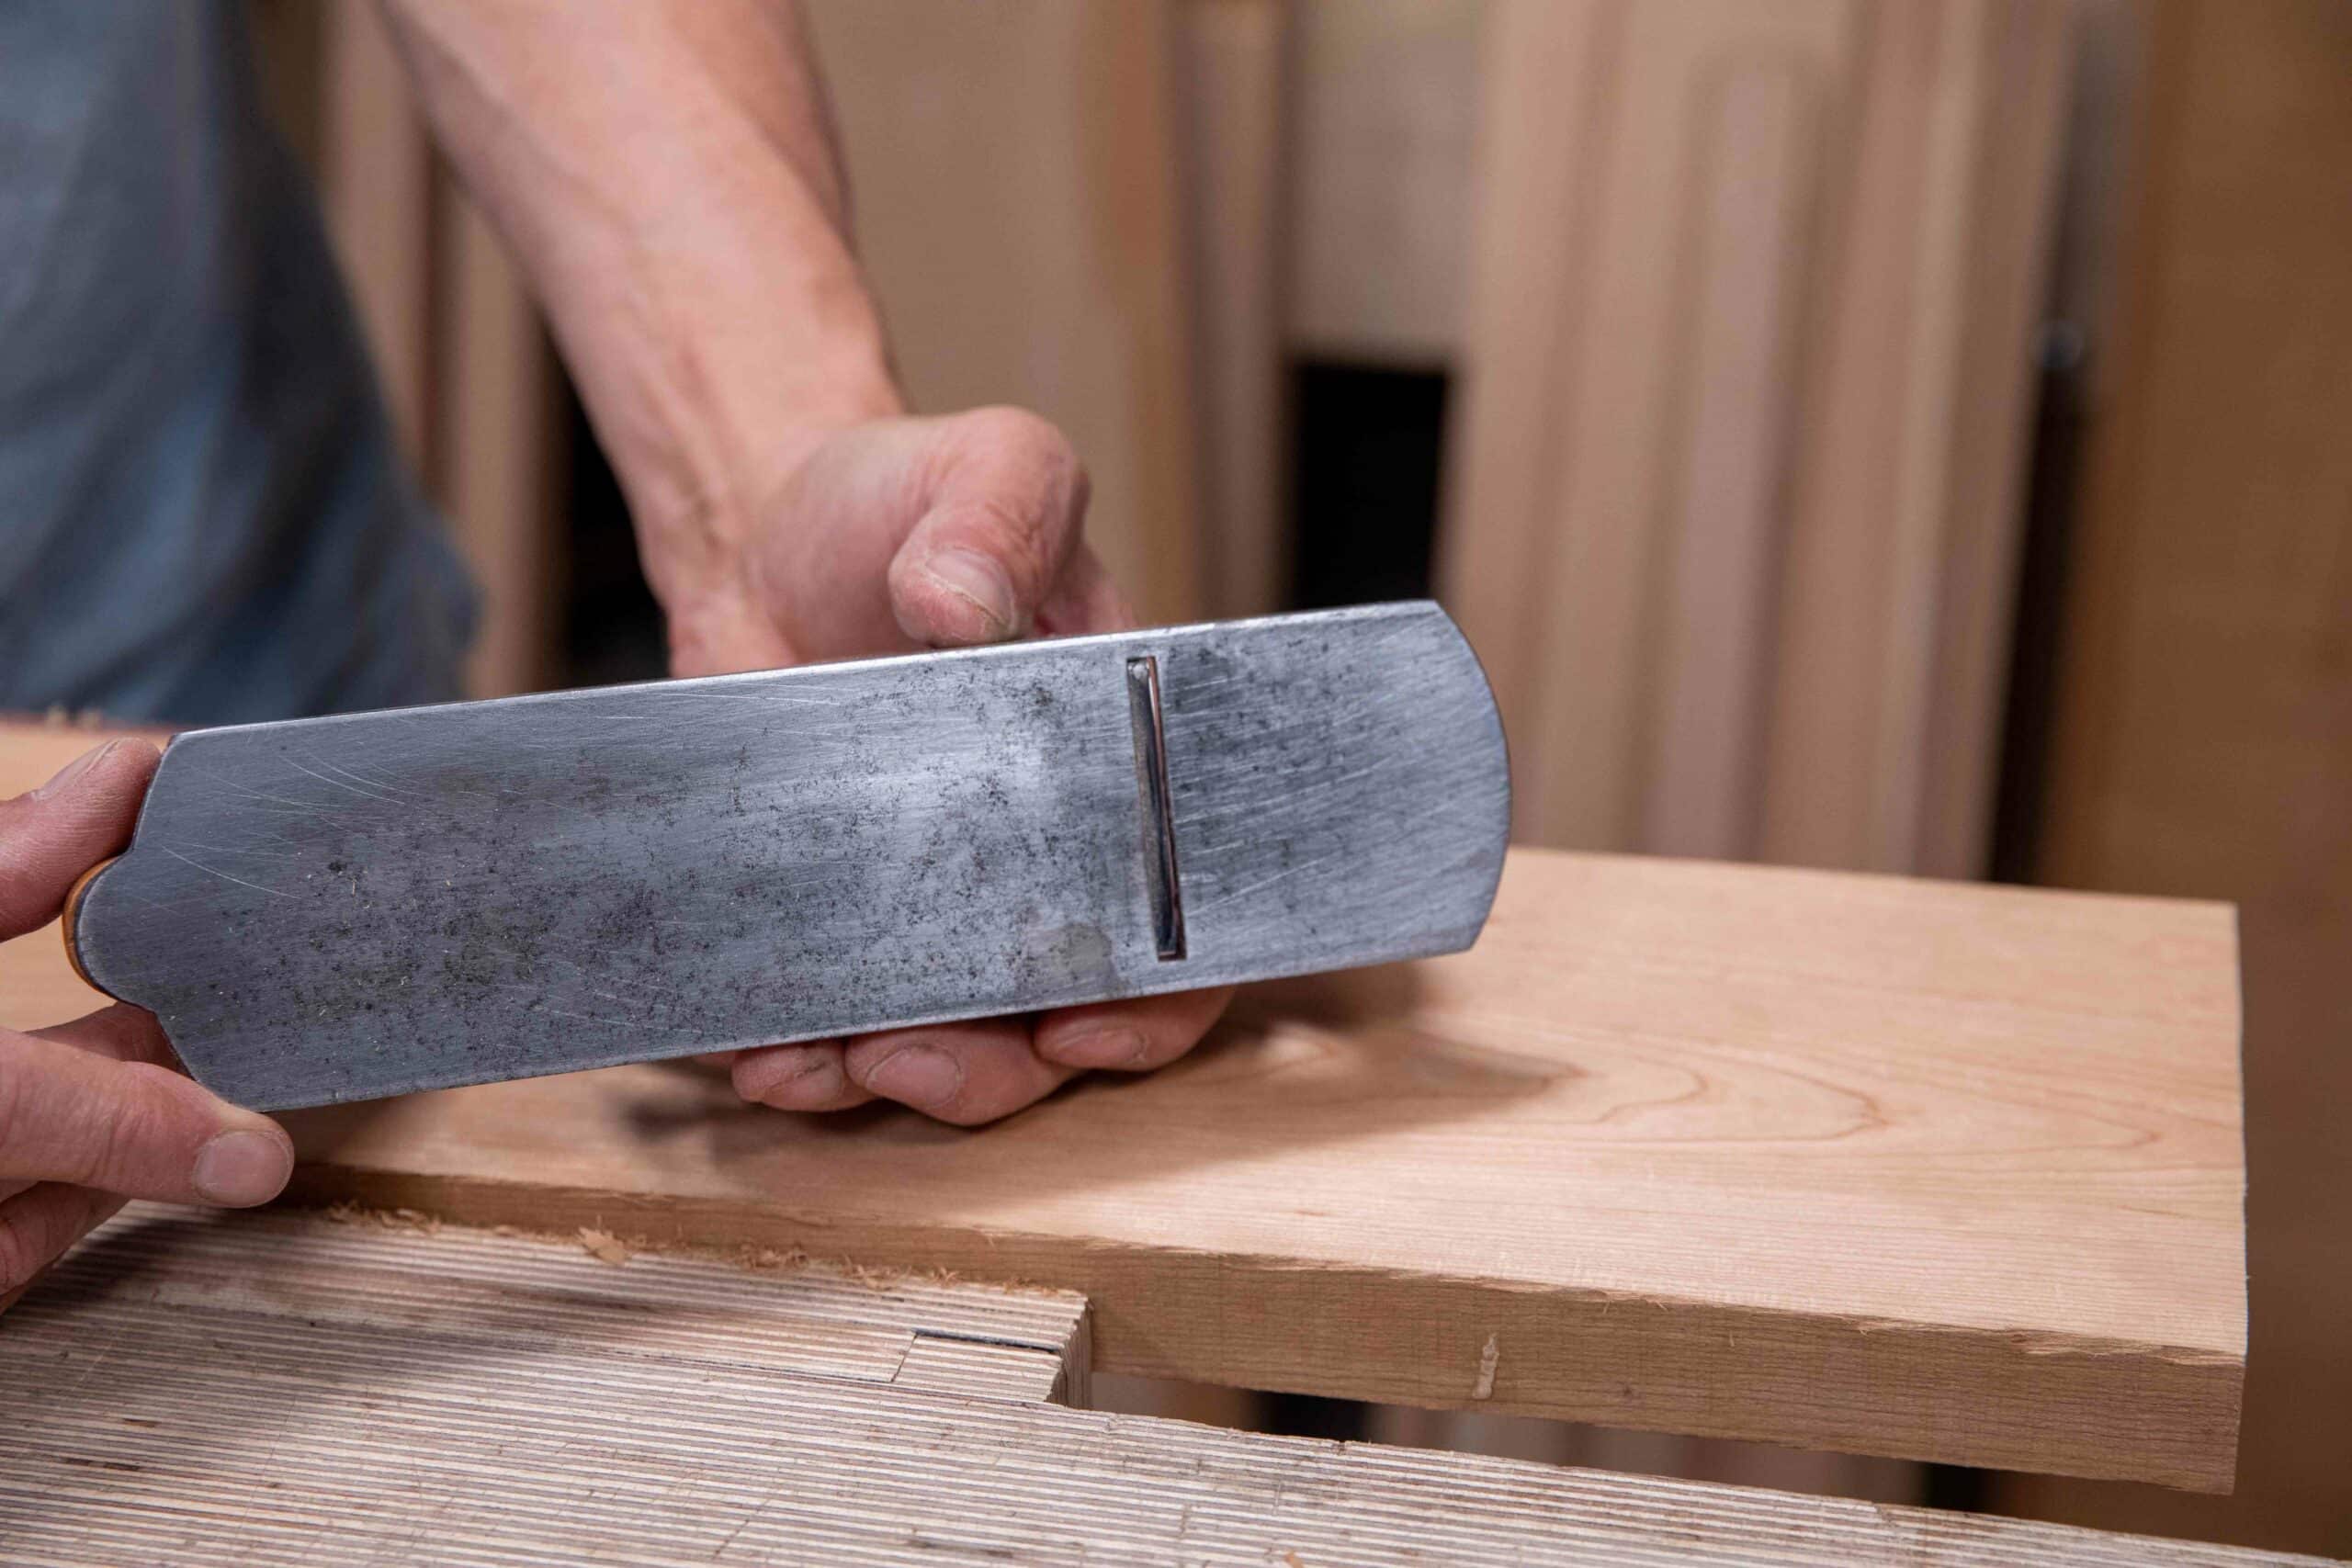
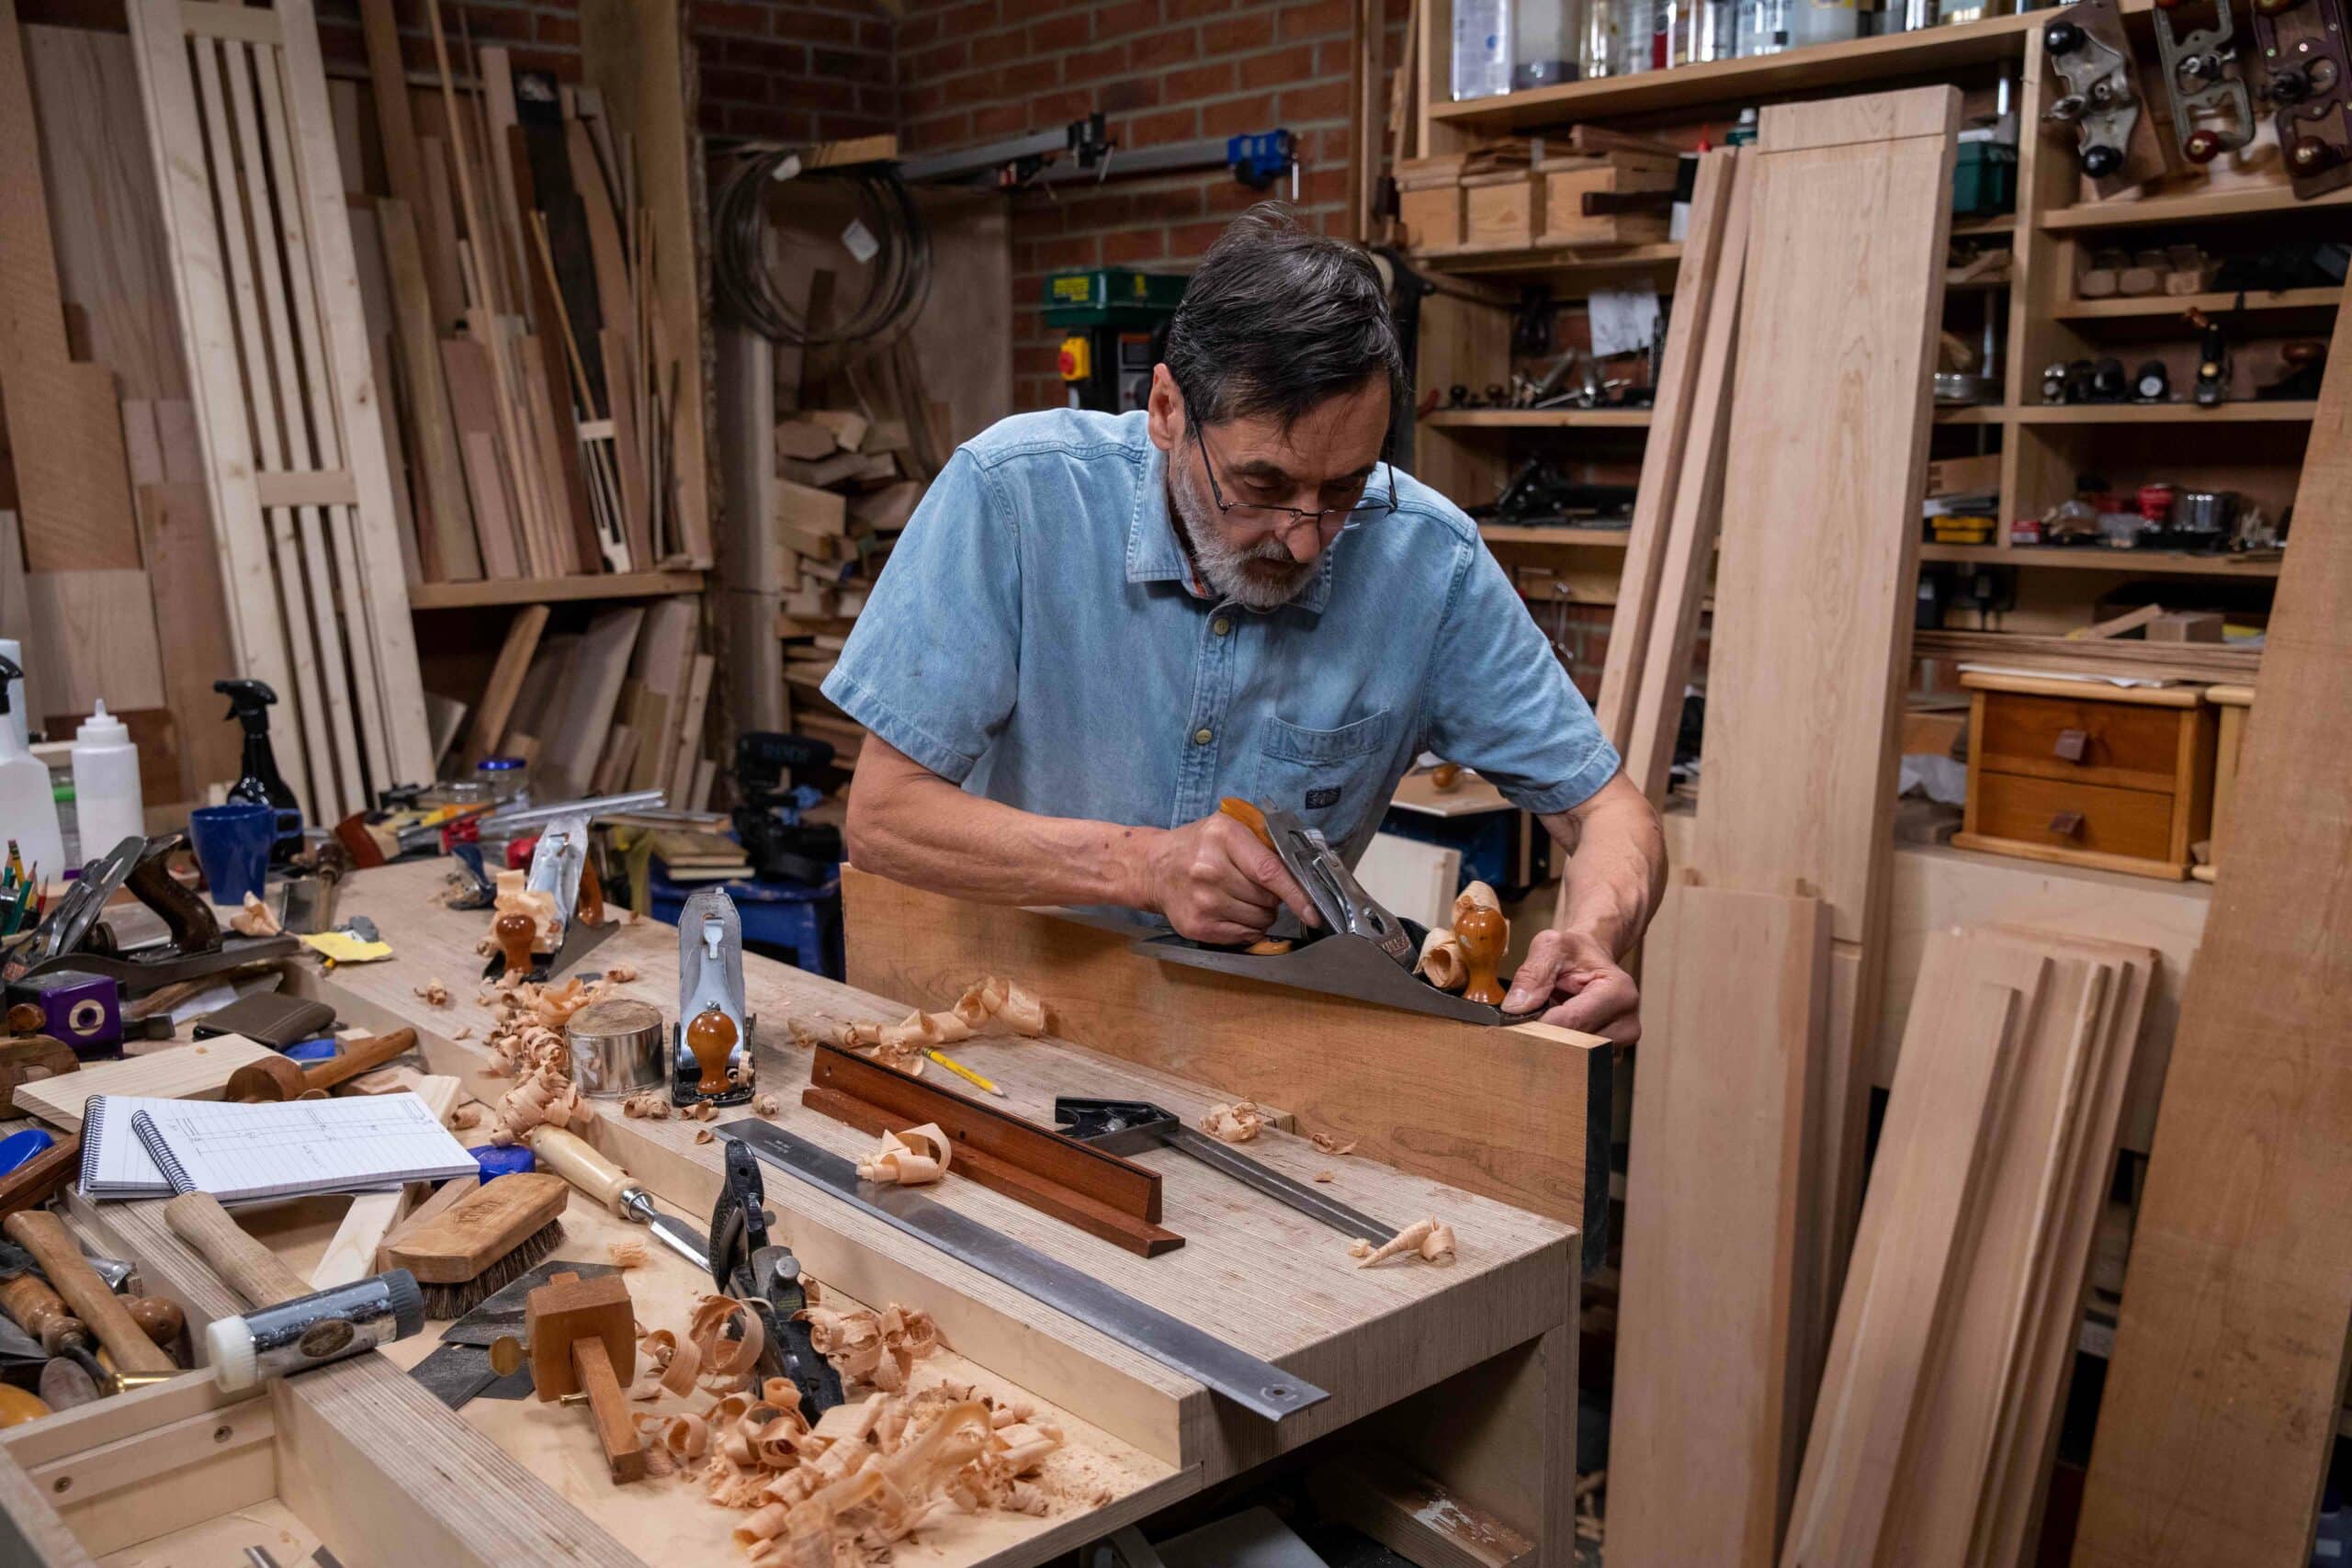
Let’s look first at the #78 plane as the first plane for tackling heavier defects like cambers and twists. Some years ago I sold a Stanley furring plane for £1,500. Now, this was well over three decades ago so that was a lot of money for so ugly a looking plane. You can read me here on this plane type for interest.
The purpose in scrubbing off surfaces is two-fold: One, the rough-sawn surface of much bandsawn millwork can be very coarse with deep undulations resembling a ploughed field, and, two, getting down an eighth-of-an-inch or so even across a wider width goes quickly with the heavy scrub action this plane gives you. Removing as much as a millimeter or more deep between the intermittent high points and the lows every inch or so from bandsawn boards can be tedious without a cambered iron as narrow as this one is. My #78 scrub plane strategy tackles the opening of leveling faster than any other hand-planing method and with considerably less effort. To bone up on converting the #78 plane iron go here for a ten-minute education watch.
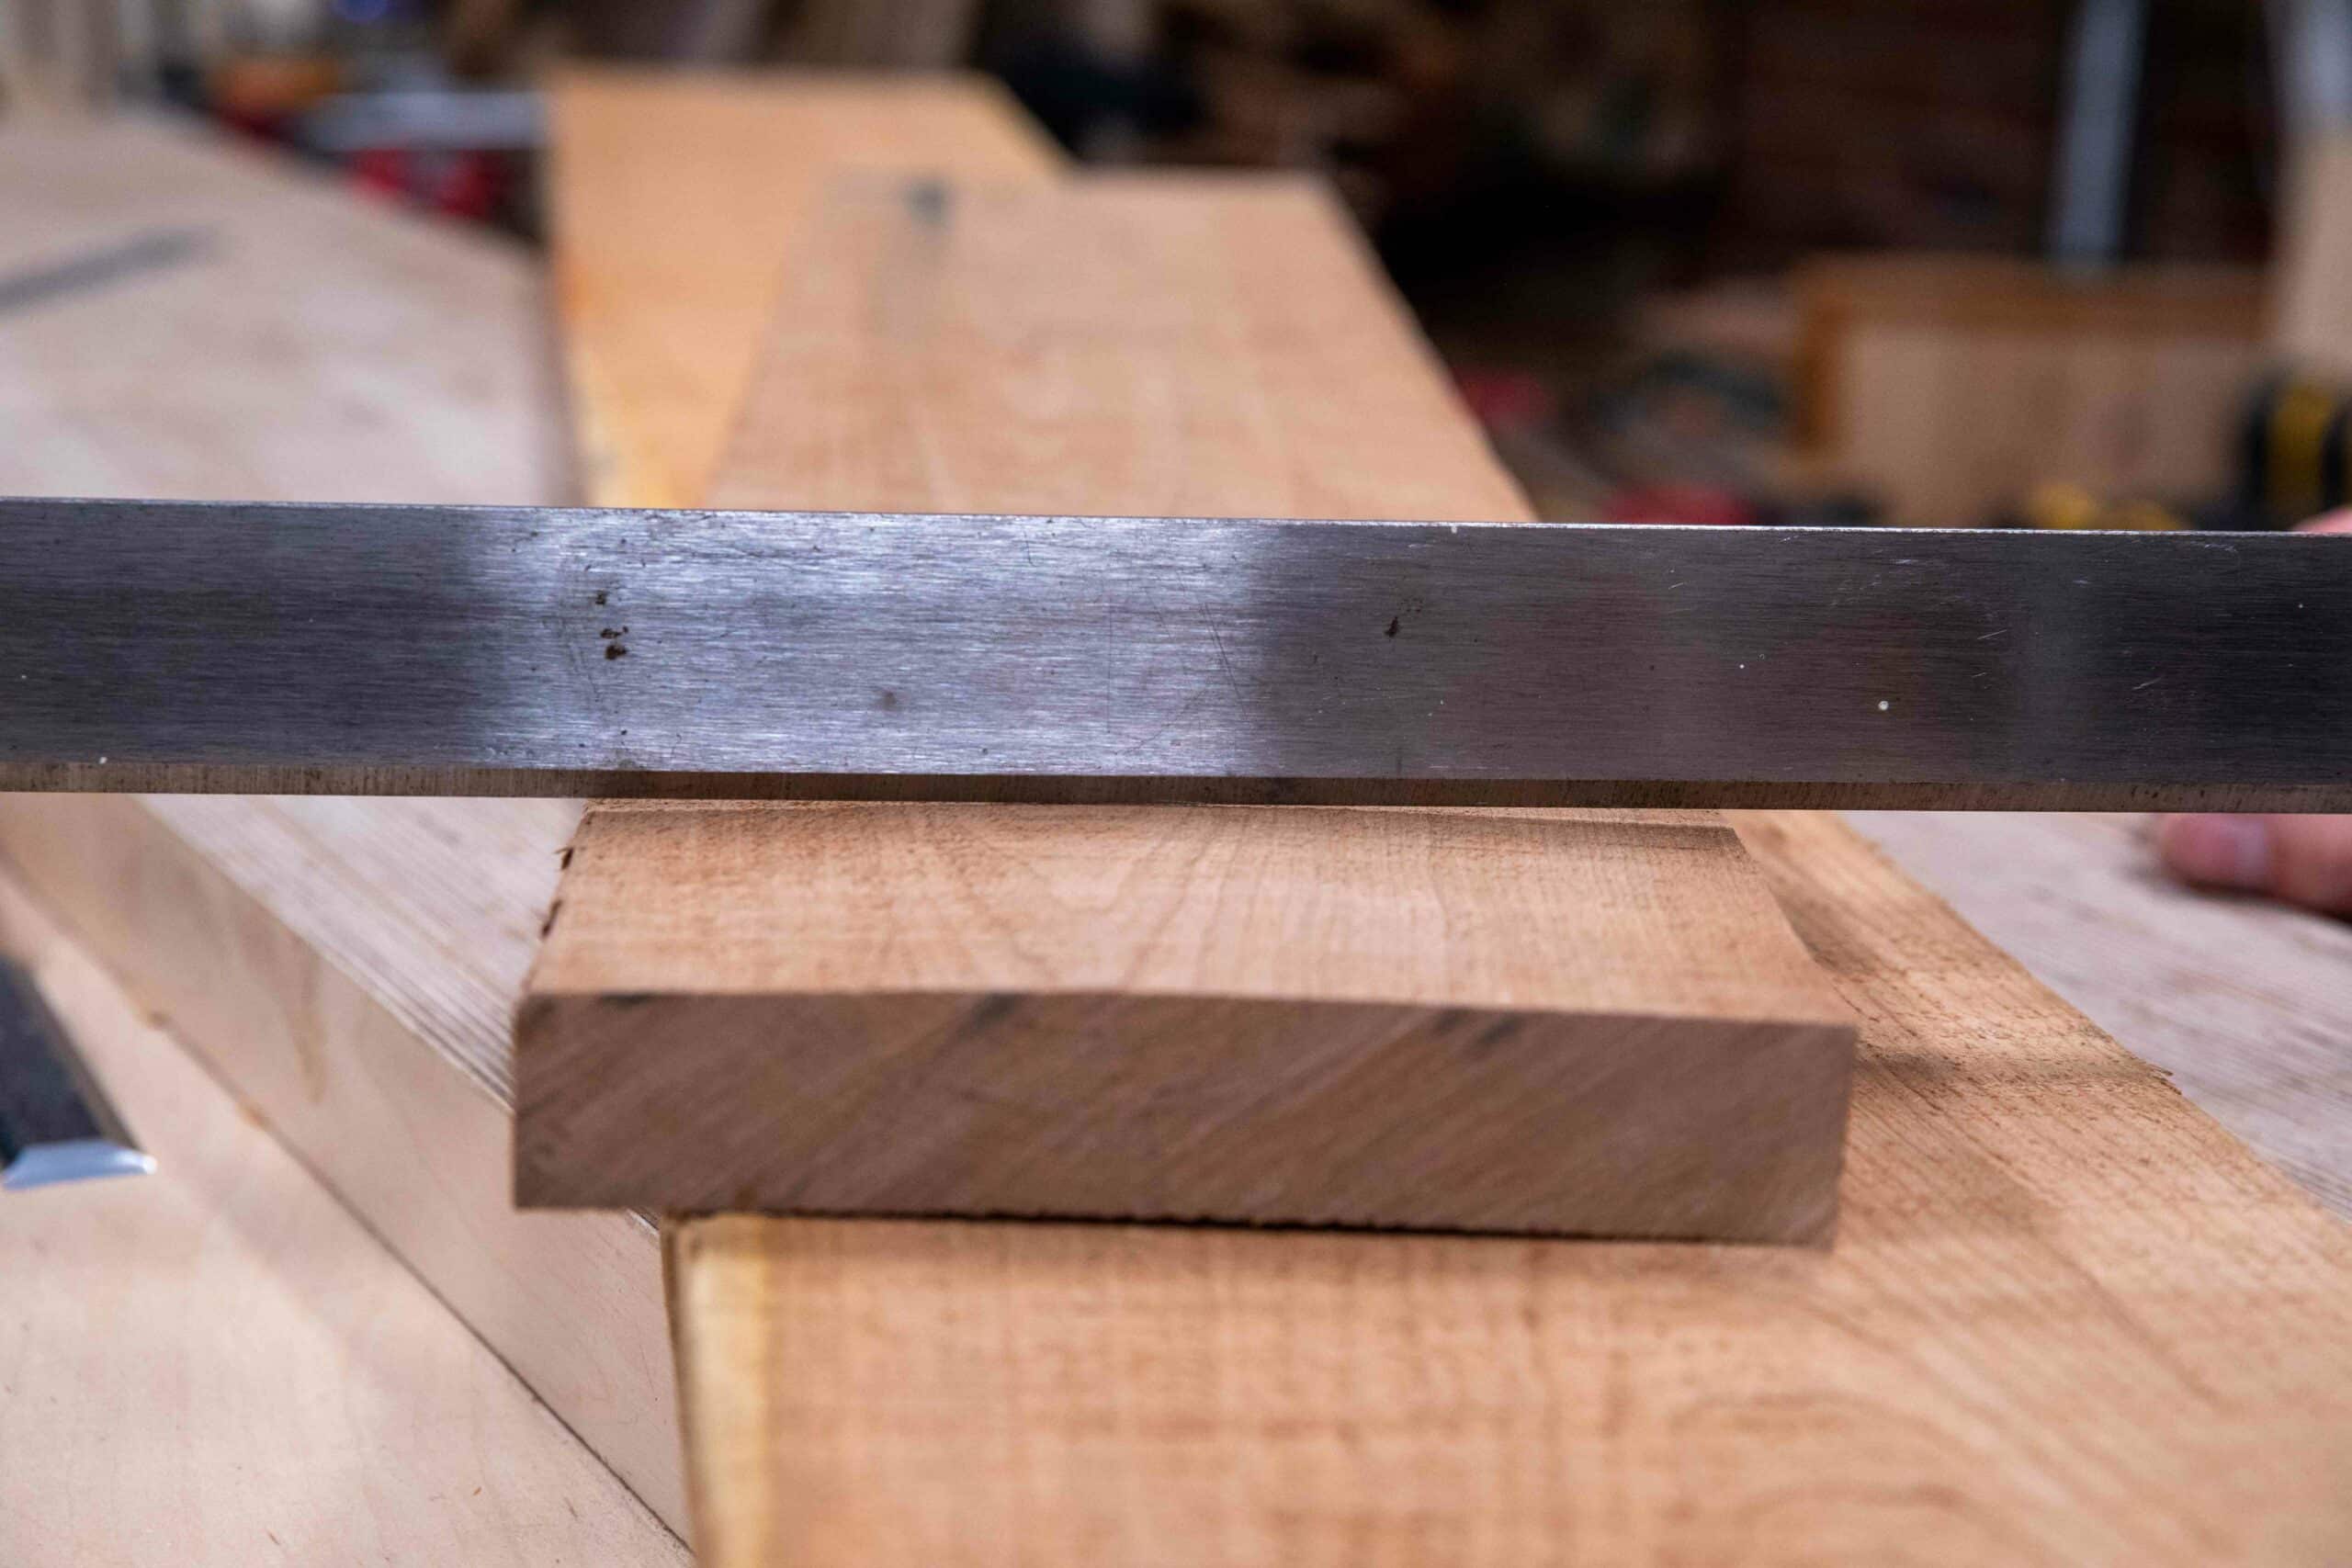
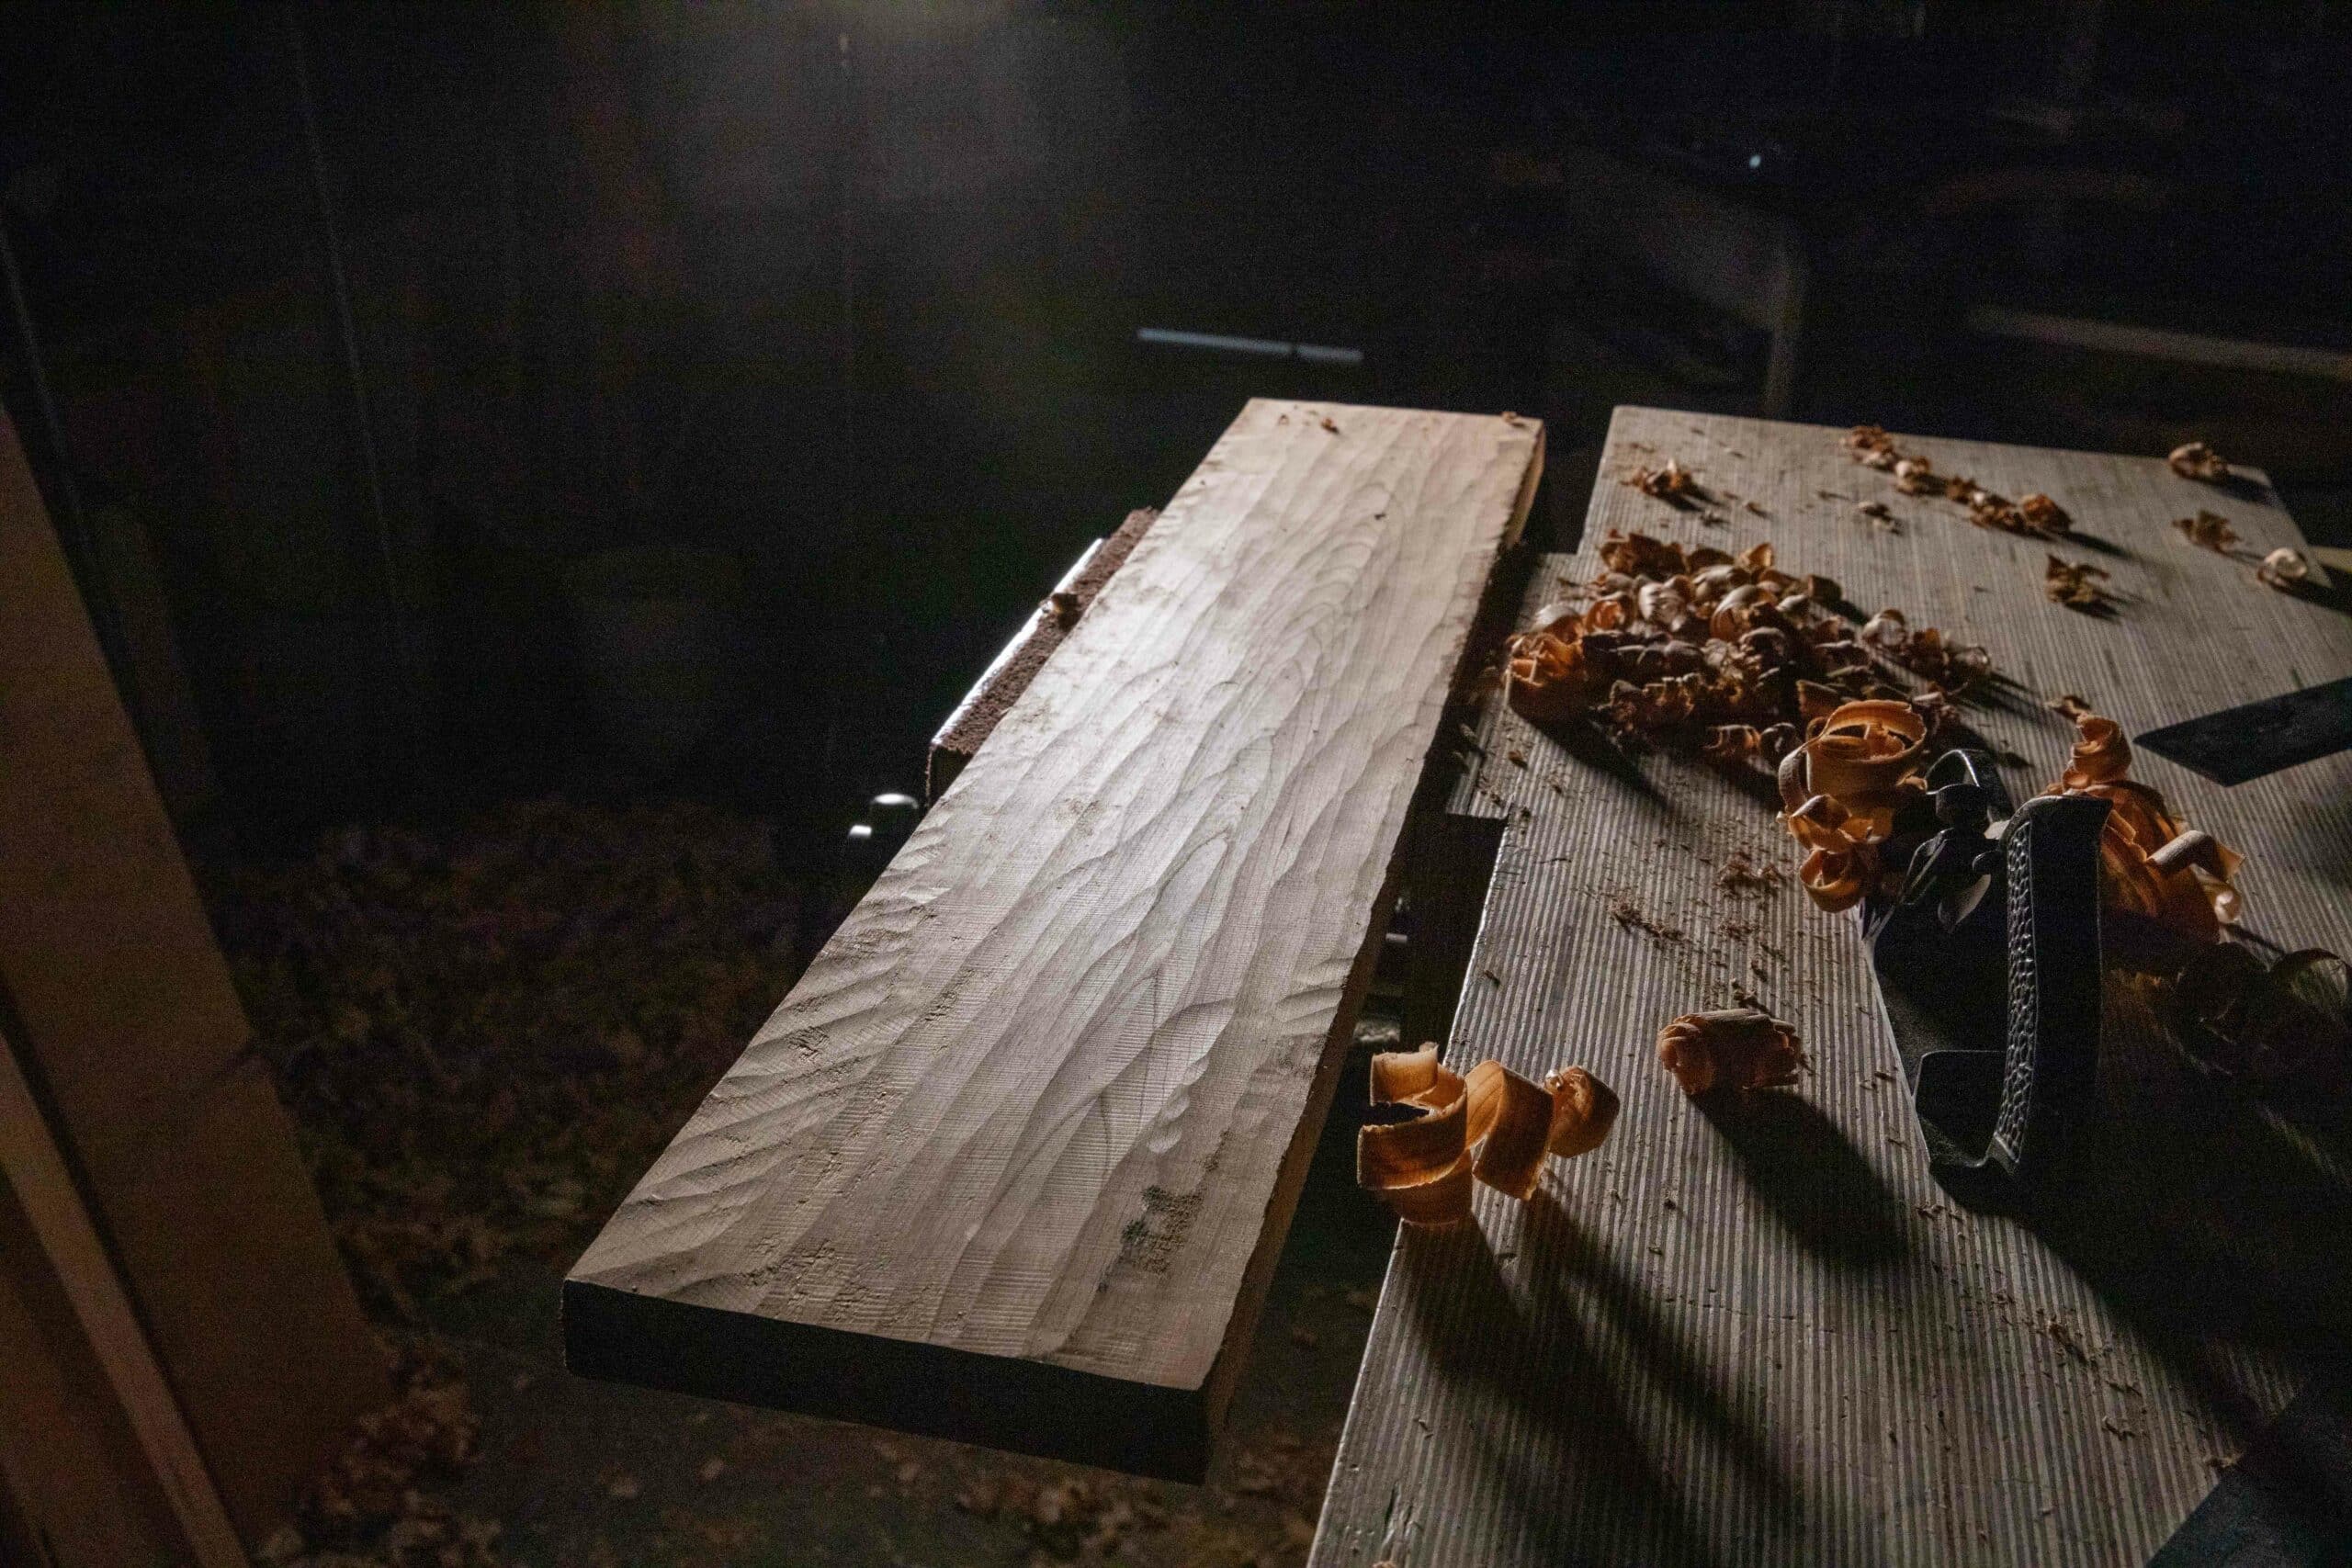
The two pictures show the two sides of the same board. This is cup one side, camber the other. I generally prefer to remove the camber first but you can work either side according to your preference. In machining a board this tends to be done the opposite way with the camber uppermost on the surfacing or jointer bed. That’s because it is easier to take advantage of the outer points of contact afforded by the outer extremes of the board with the surface of the bed than use the camber down and risk rolling as you progress through the full length of the cut.
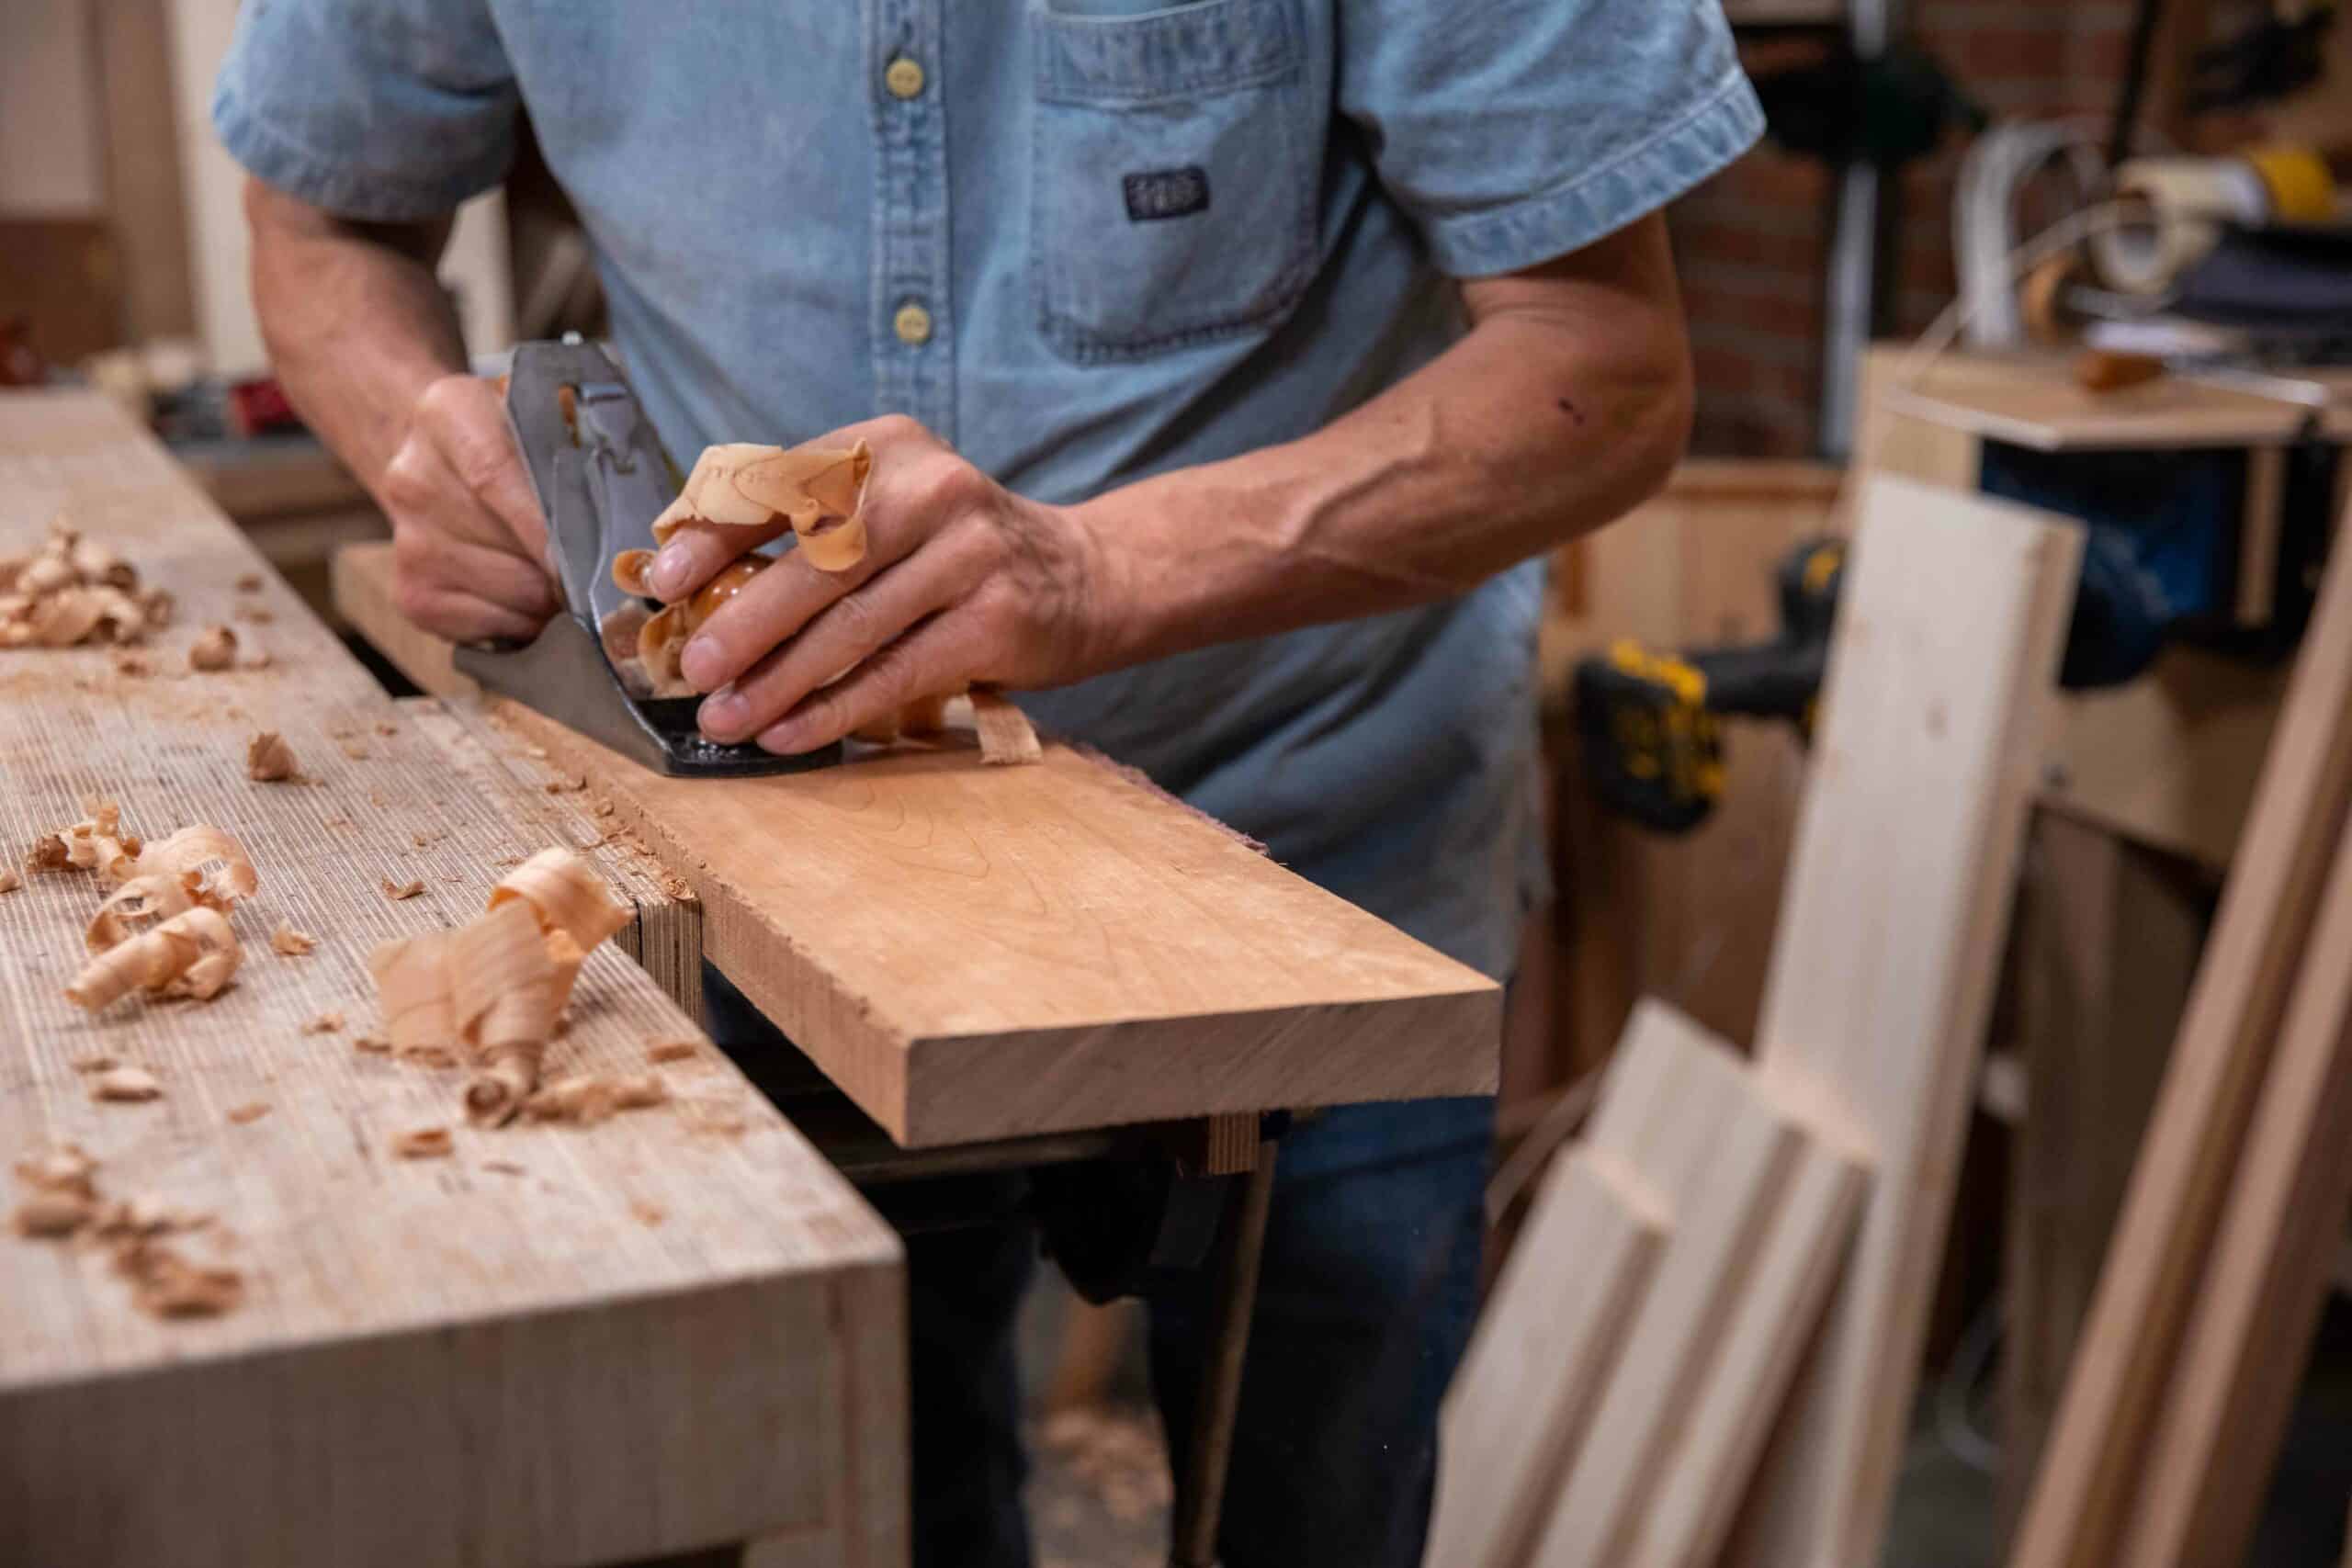
Start out at the end of the board and work backwards uniformly and overlapping the strokes as you go.
The initial result from scrub planing with a number 78 planing diagonally looks like this:
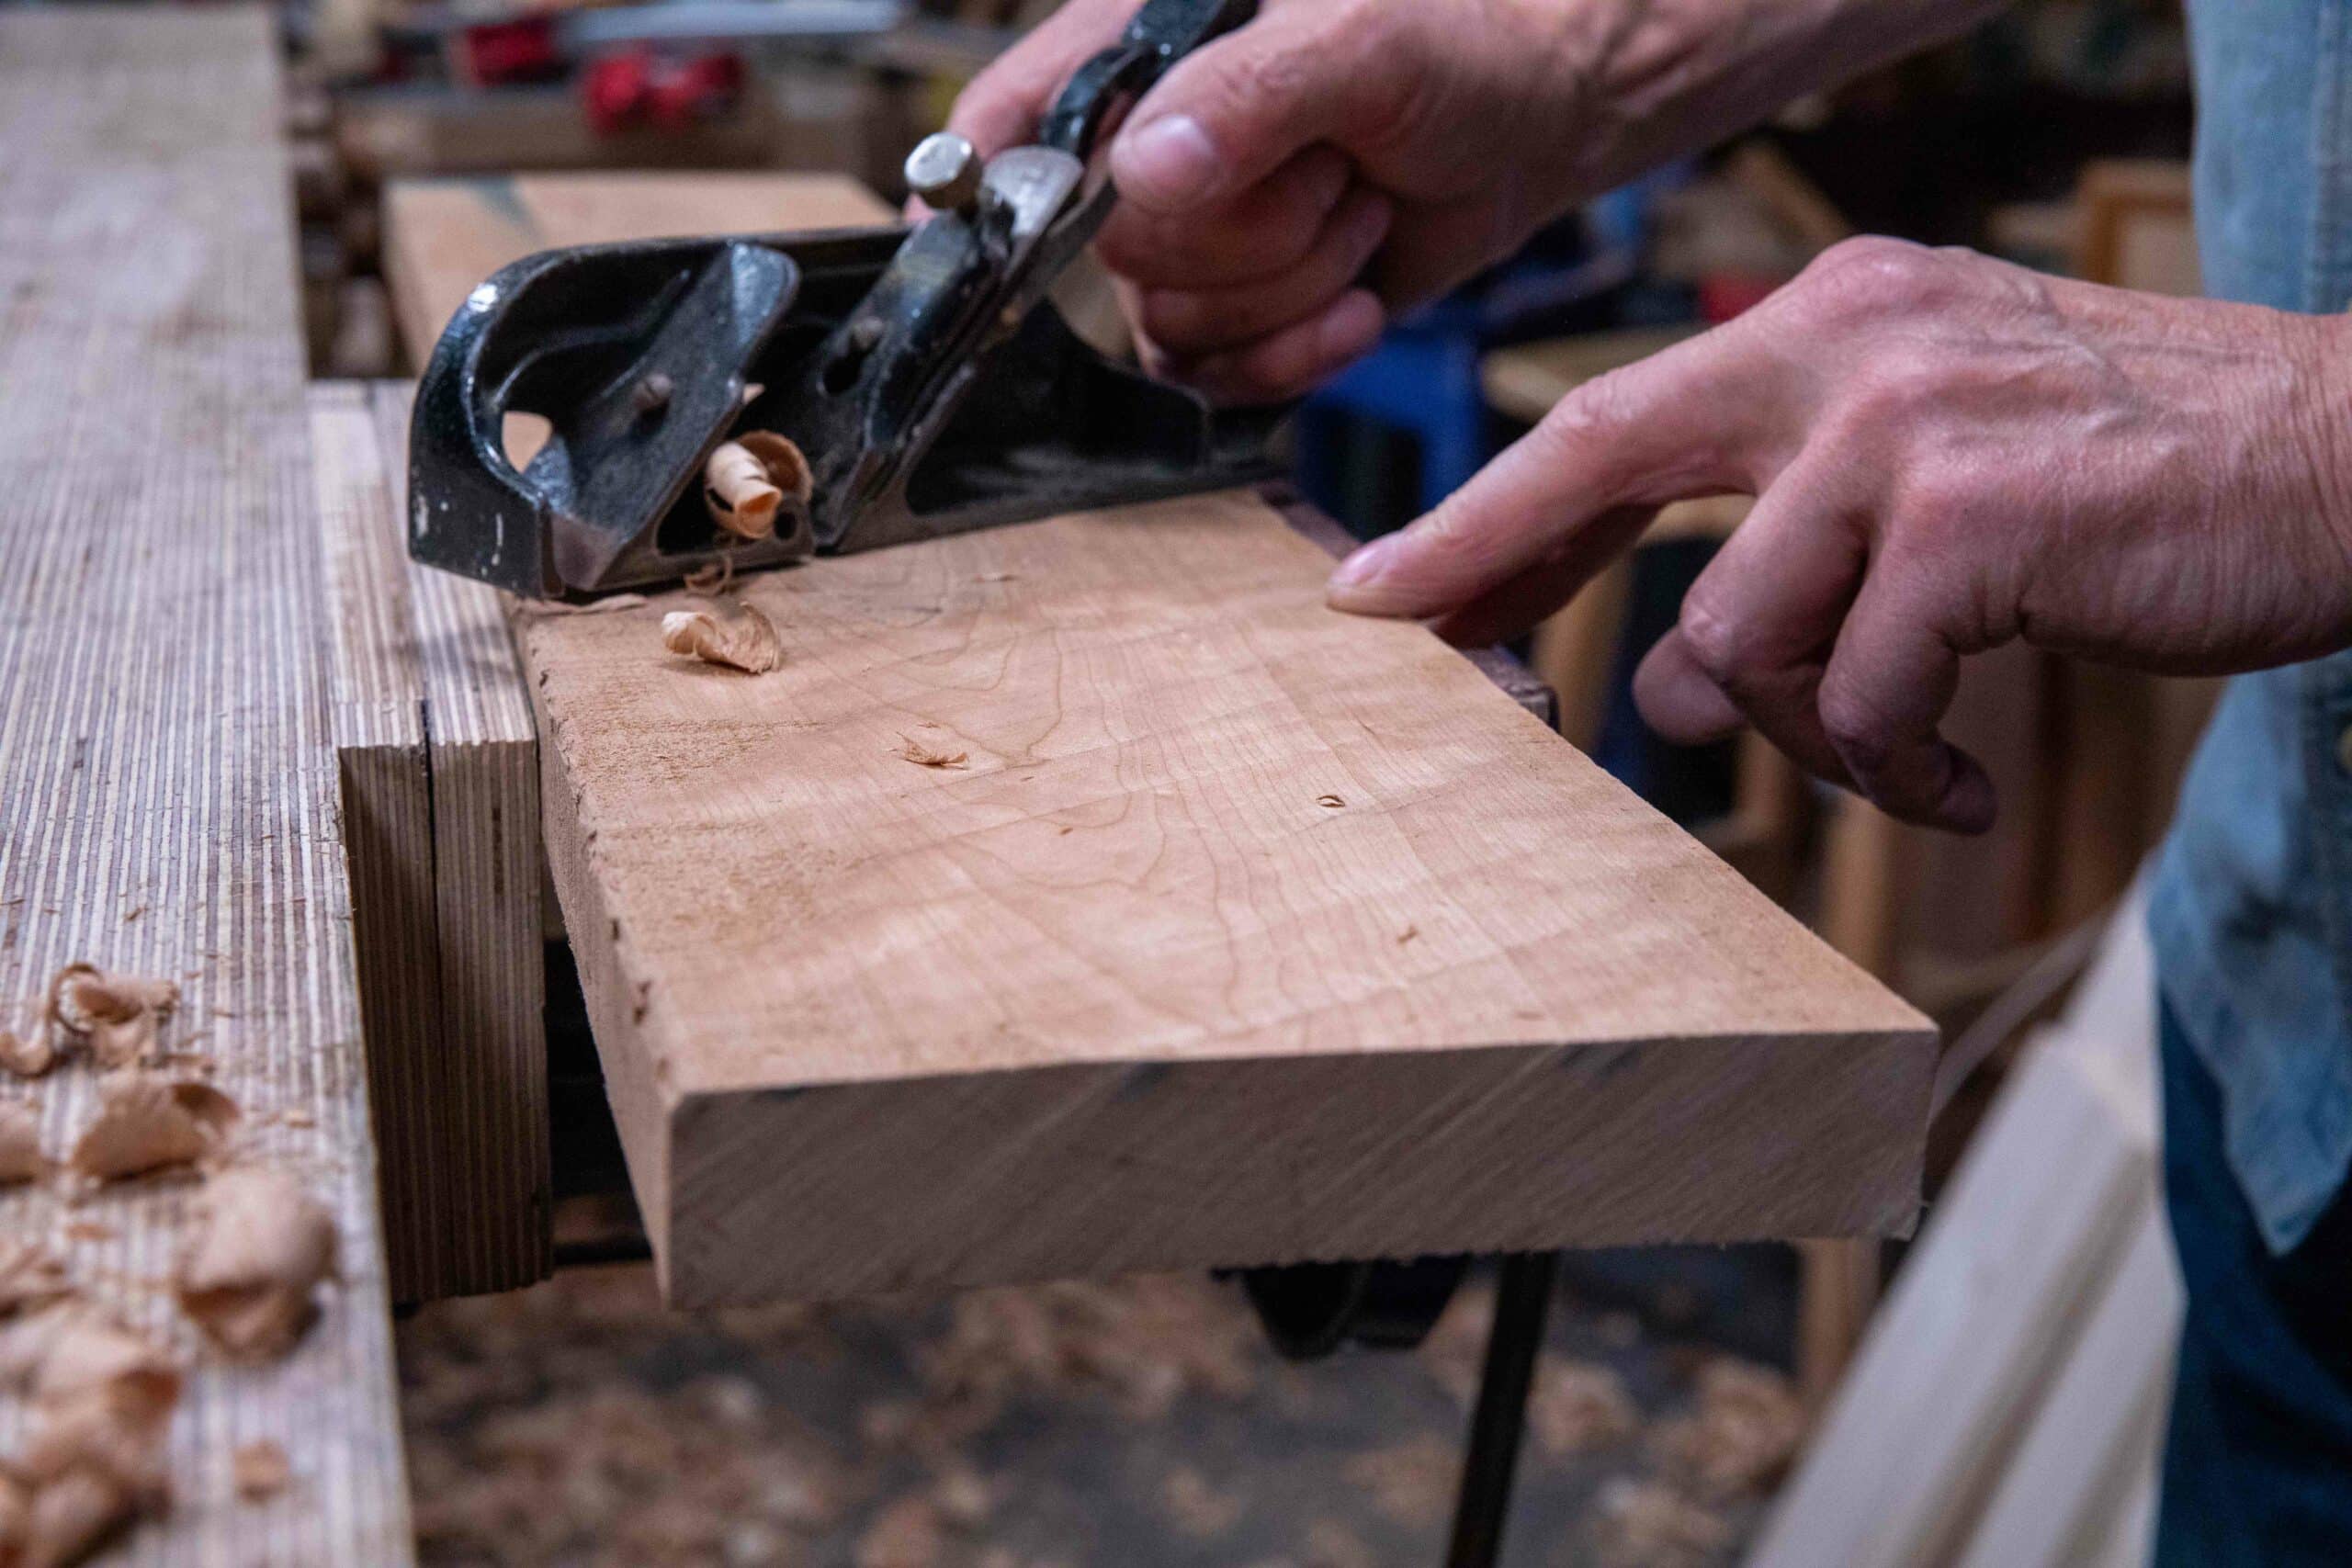
At this point we have succeeded in removing most if not all of the camber. The surface is exaggerated by the light positioning but I wanted to show the results. We are now only a few strokes lengthways from a leveller playing field.
The #78 plane plays a key part in my roughing down work and I rely on it for this area of wood preparation more and more these days because the effort and energy lessens the work with my other planes. Remember you don’t have to have two planes too. You can simply buy in a second plane iron and swap them out.

At this stage of planing, about five minutes maybe, my wood is looking like this. You can still see the hollow side below which I deal with soon after surface planing and ensuring my first surface is trued and not twisted.
Using the lights once more, you can see the long-grain undulation alongside the tangential planing. This all close enough for the next step. If the board looked particularly twisted, I would continue with the #78 scrub plane to reduce the high points more.
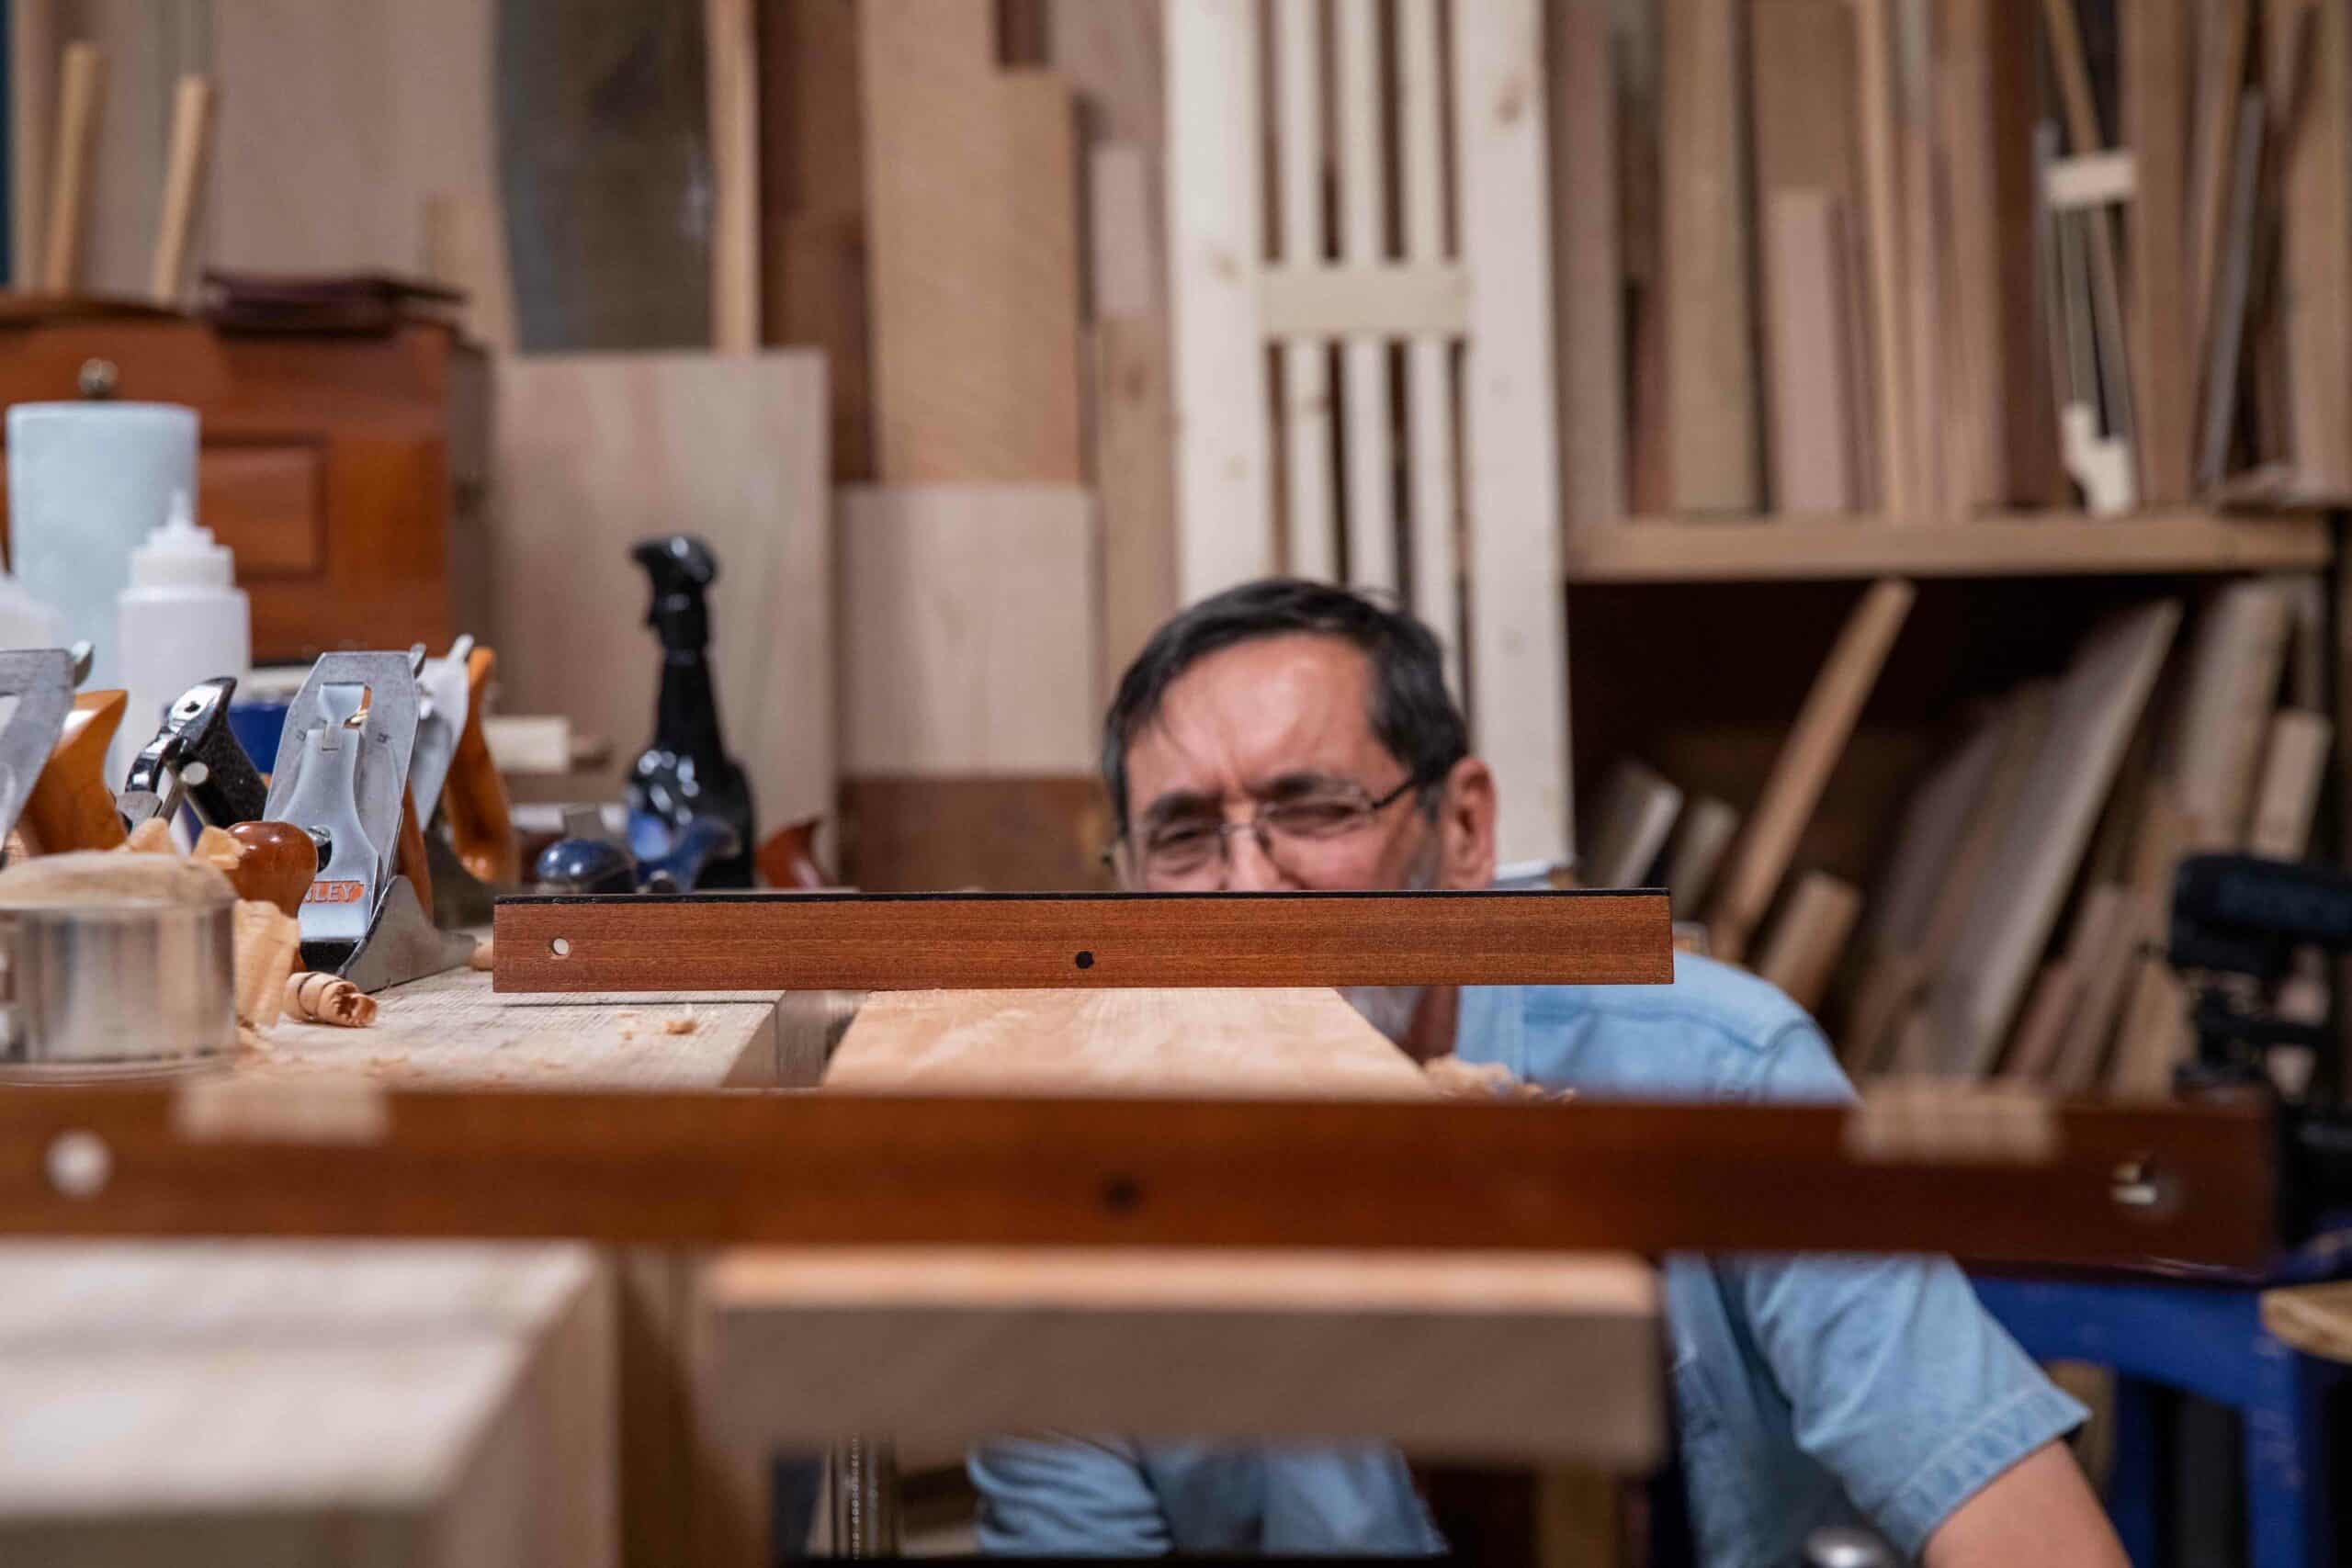
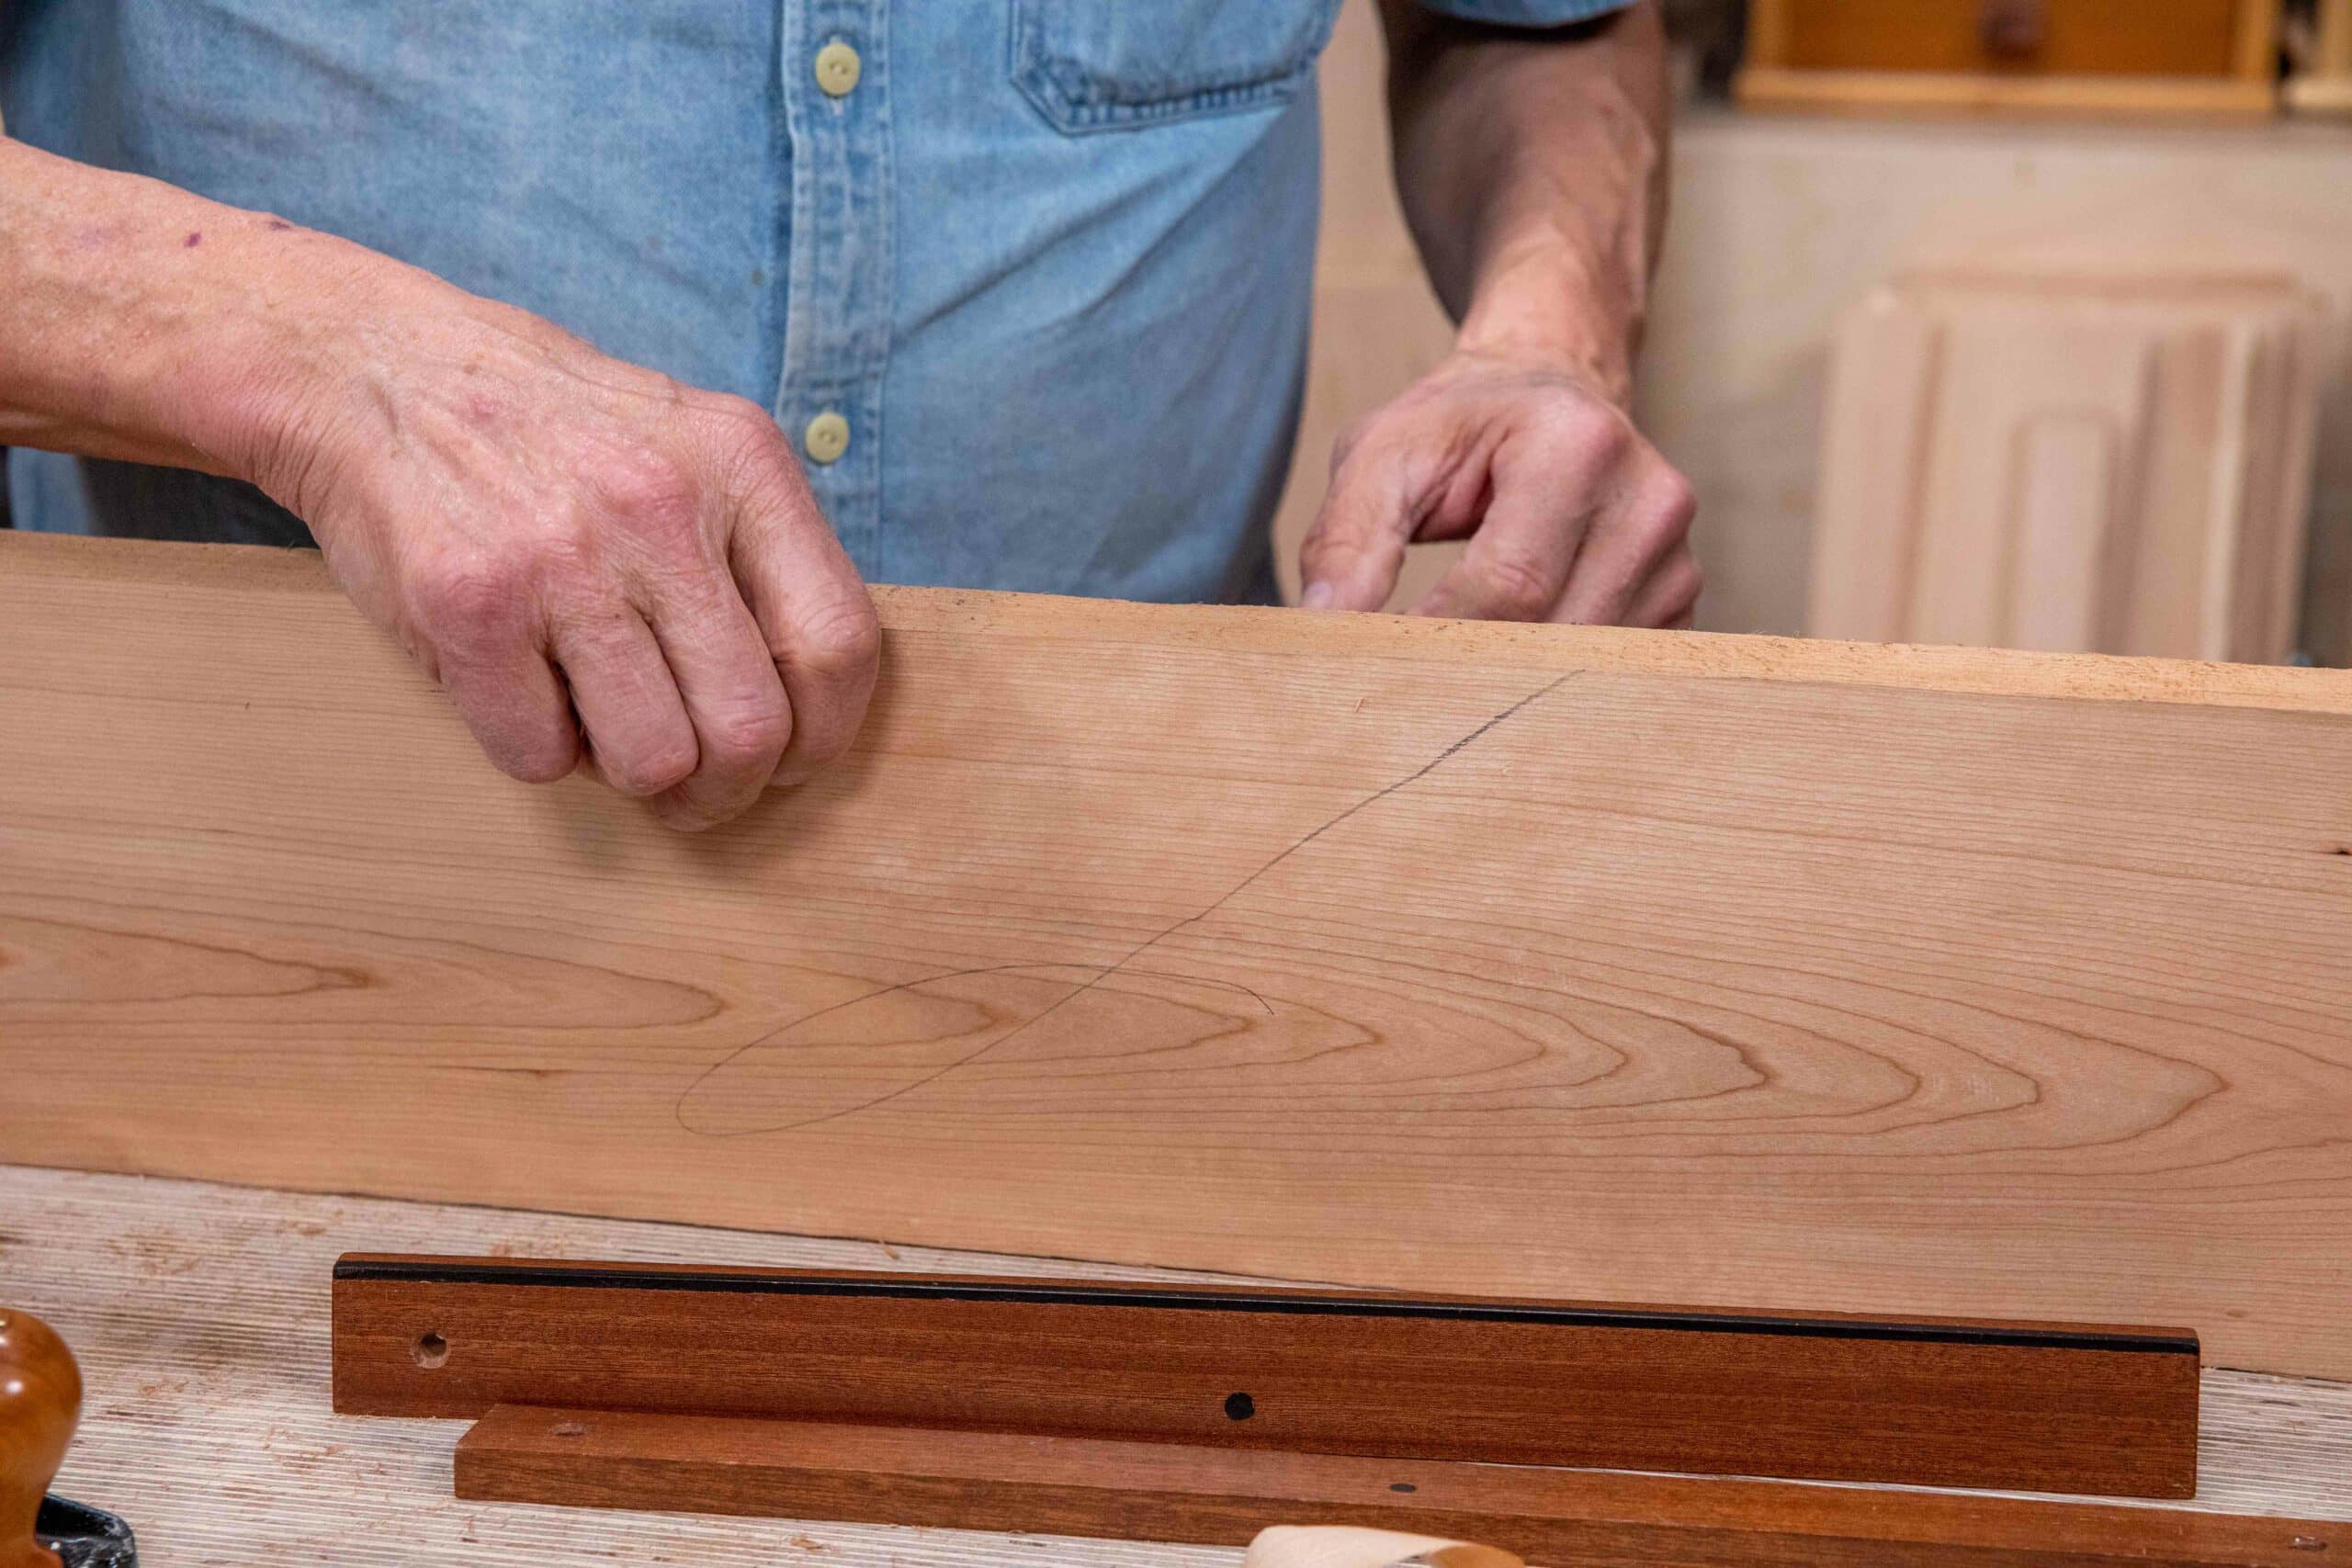
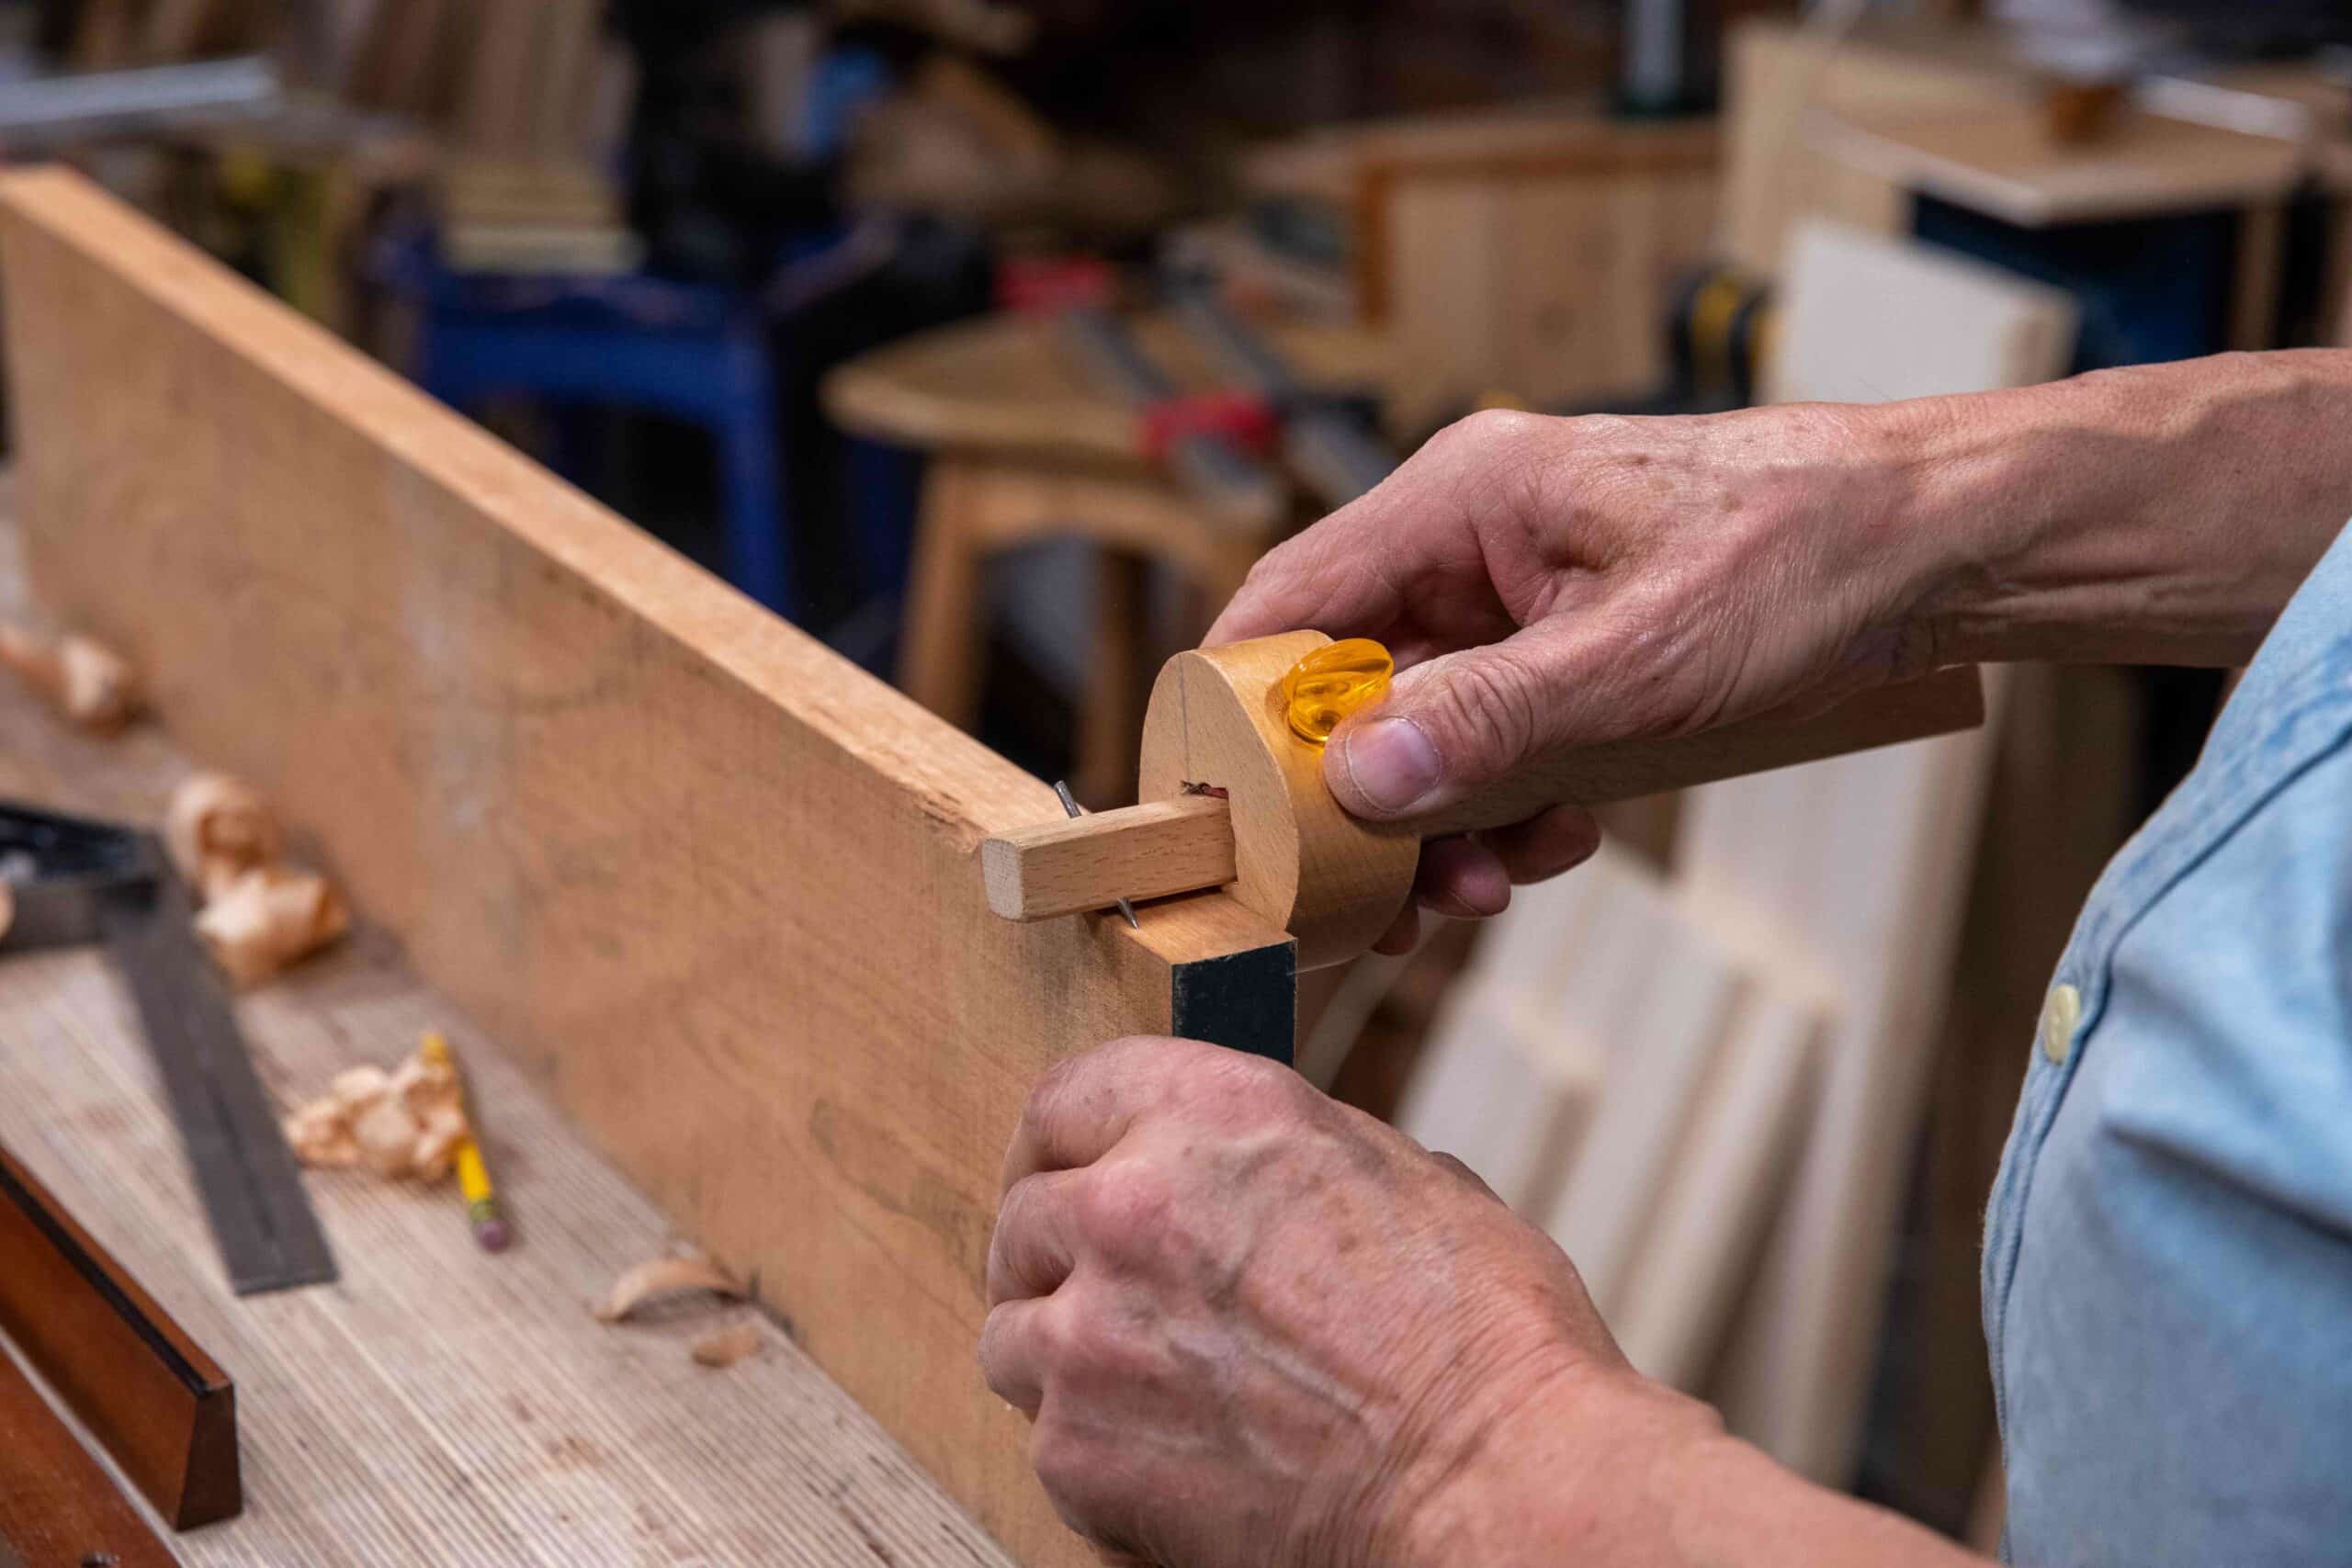
It’s at this point that you must establish whether you have any twist in the board and to this end we usually rely on two parallel sticks of wood we call winding sticks. When the face has been flattened and the camber is gone, we can still have a twisted board. Placing the sticks at each end of our cut pieces, we can sight-align one stick to the other to see if the two look parallel along the top edges of the sticks. If one sights high at one side or the others the wood being planed is twisted. The sticks obviate discrepancy by magnifying what we see. In my case my winding sticks are 16″ long and my wood is 8″ wide. The distance divides into the sticks twice so what I see in the sticks is a magnification twice the actual discrepancy. If the wood was 4″ wide, the sticks would magnify the discrepancy by four times.
My #4 Stanley converted to a scrub with a shallower sweep to the camber of the cutting iron begins its work following up from the deeper profile of the #78. You will be surprised how easy this plane is and how much you will rely on it as you progress the flattening and truing process.

We work 95% of the time with or along the grain. Here again, remember you don’t have to have two planes, just a second cutting iron assembly to convert the cutting iron and the cap iron (sometimes wrongly called a chipbreaker by Americans) to a cambered radius.
Be patient with your work, your wood and your own body. Build up to it if you are not used to this kind of work. It takes time and thought to think through how you are working, how the wood responds to your new-found techniques and then too, to better understand your mind and body in symbiosis.

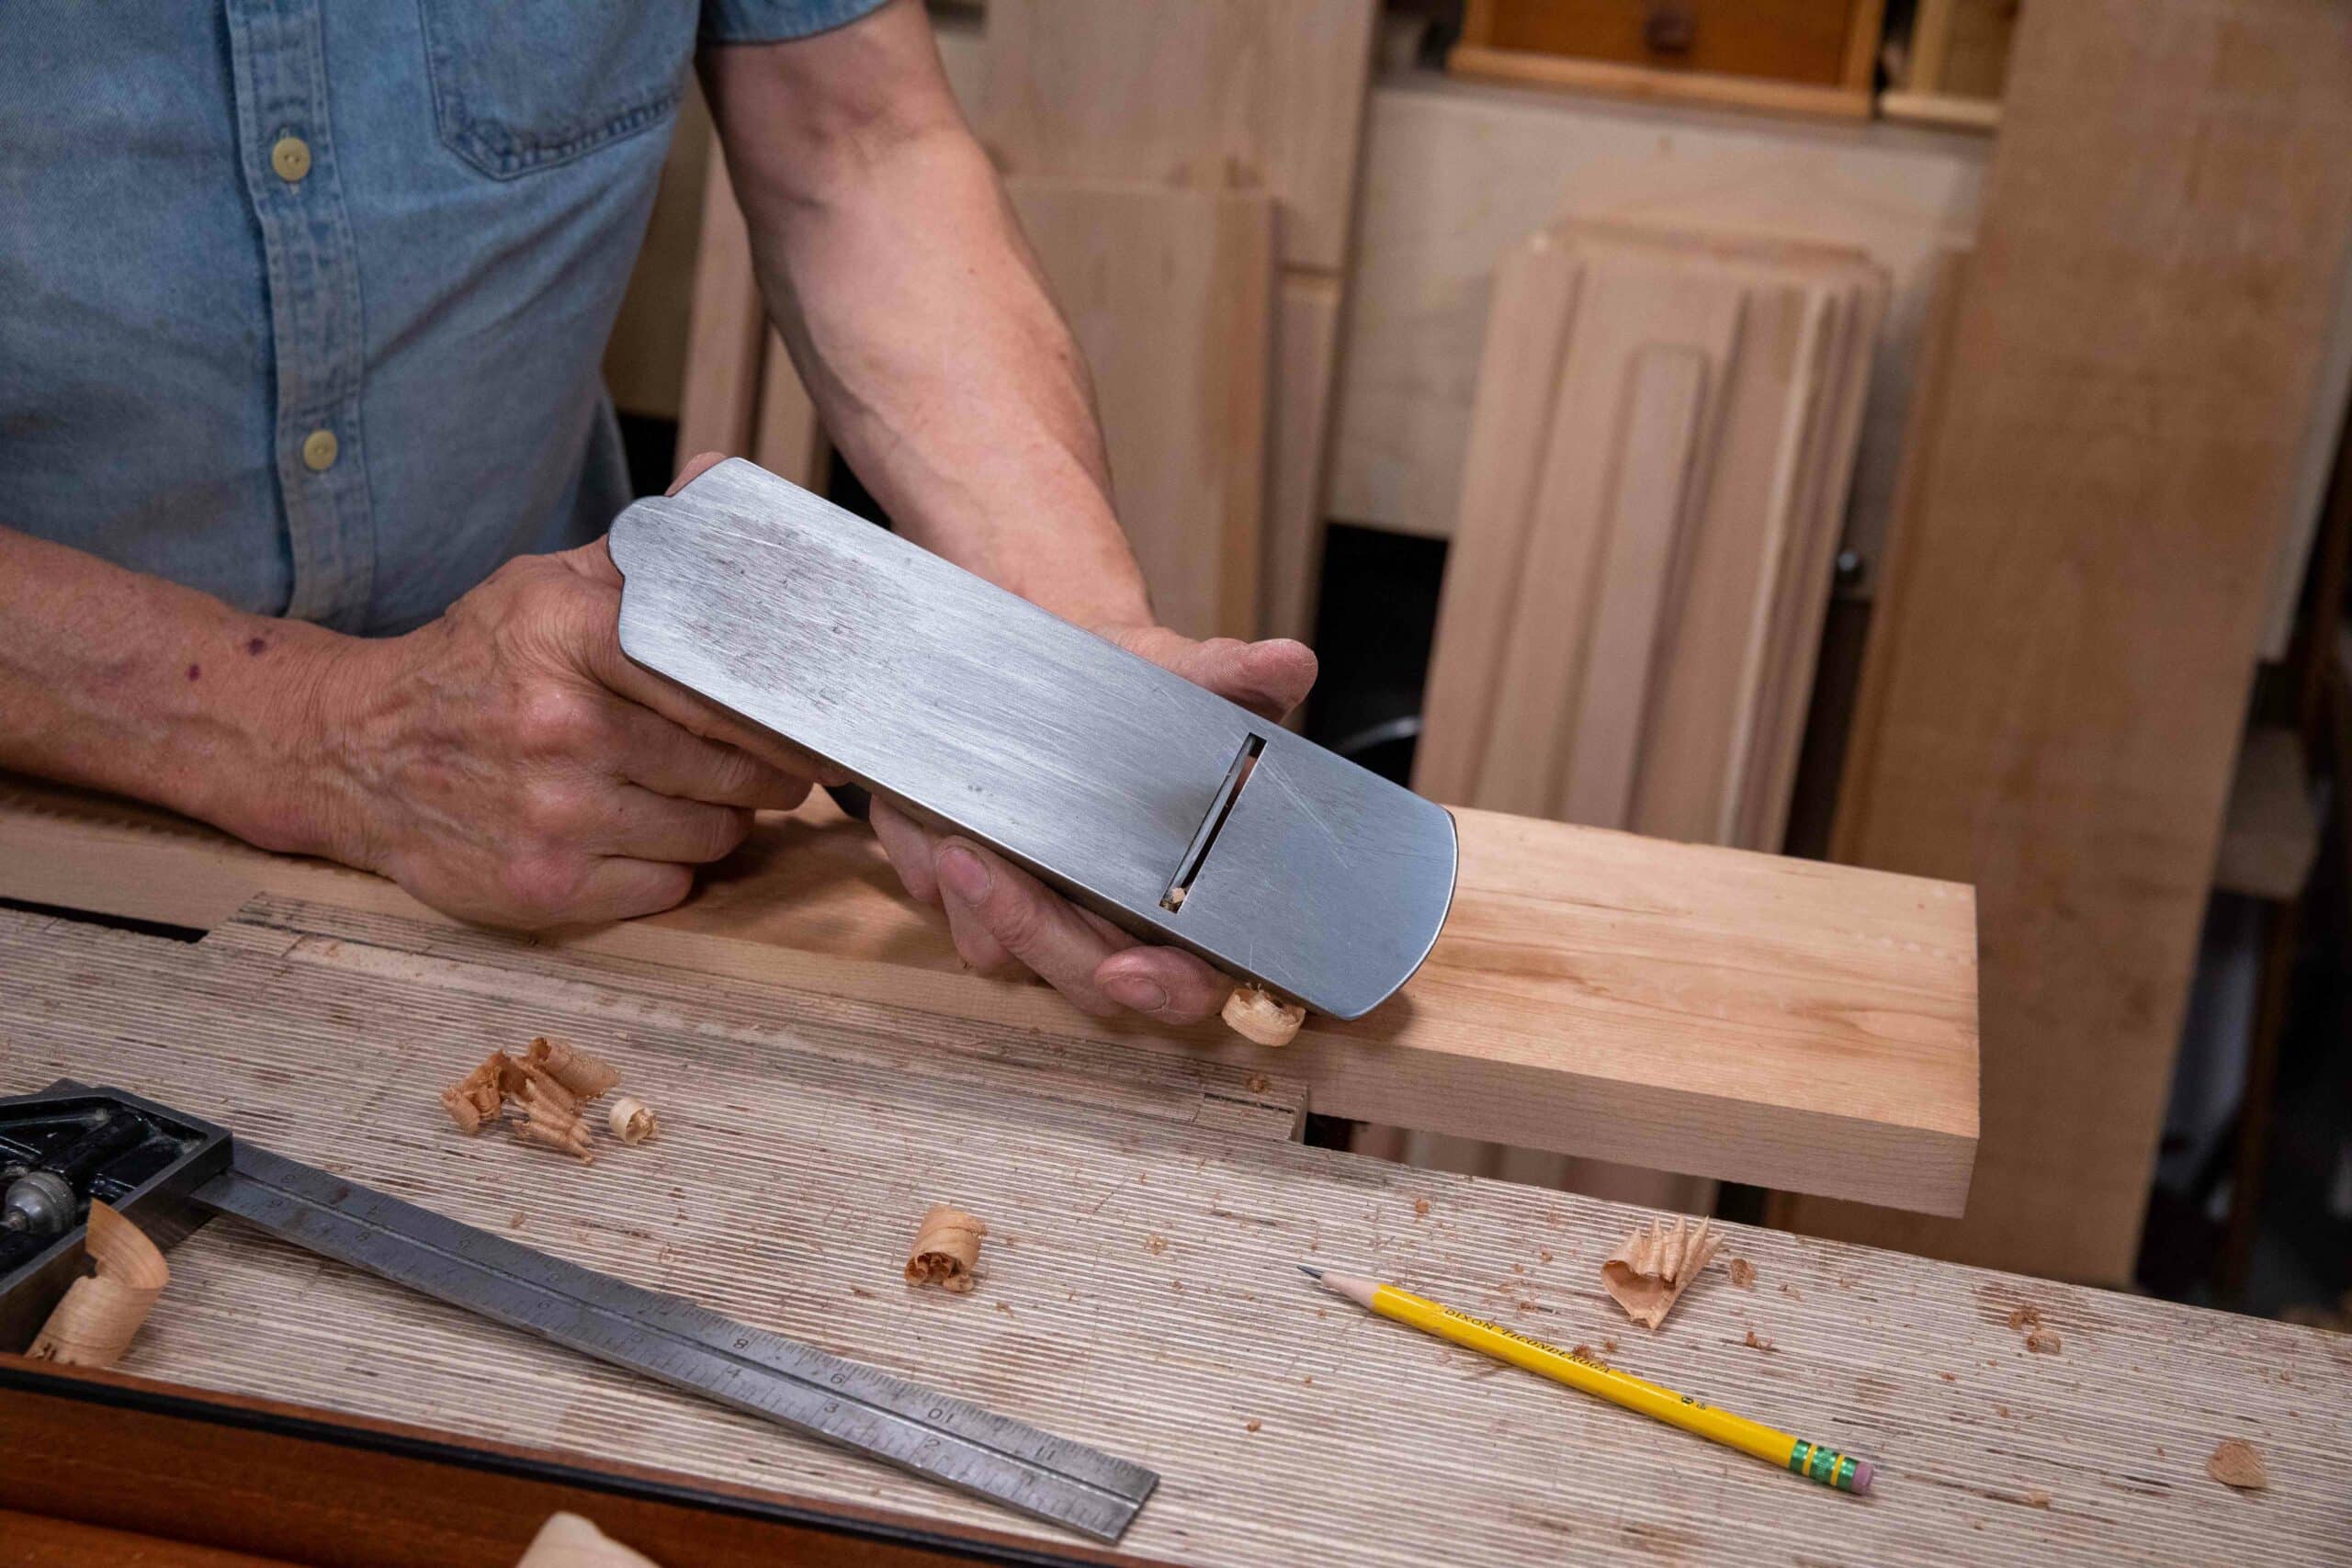
Use the corner of your plane sole to cross check for flatness across the board as you work down the surface. It’s quick, accurate and effective and its been done by crafting tradesmen for centuries.
Following the #4 lighter scrub plane, your board will look like this below. Using the lights to exaggerate the undulation is stunning but we are indeed much nearer to the finished board than you might think.

Once you reach near level with minor undulation, check again for twist with the winding sticks. (You can make your own winding sticks by following me here. but remember two straight and parallel sticks of 1″ by 2″, sixteen inches long will do the same thing.) You will need to do this several times.
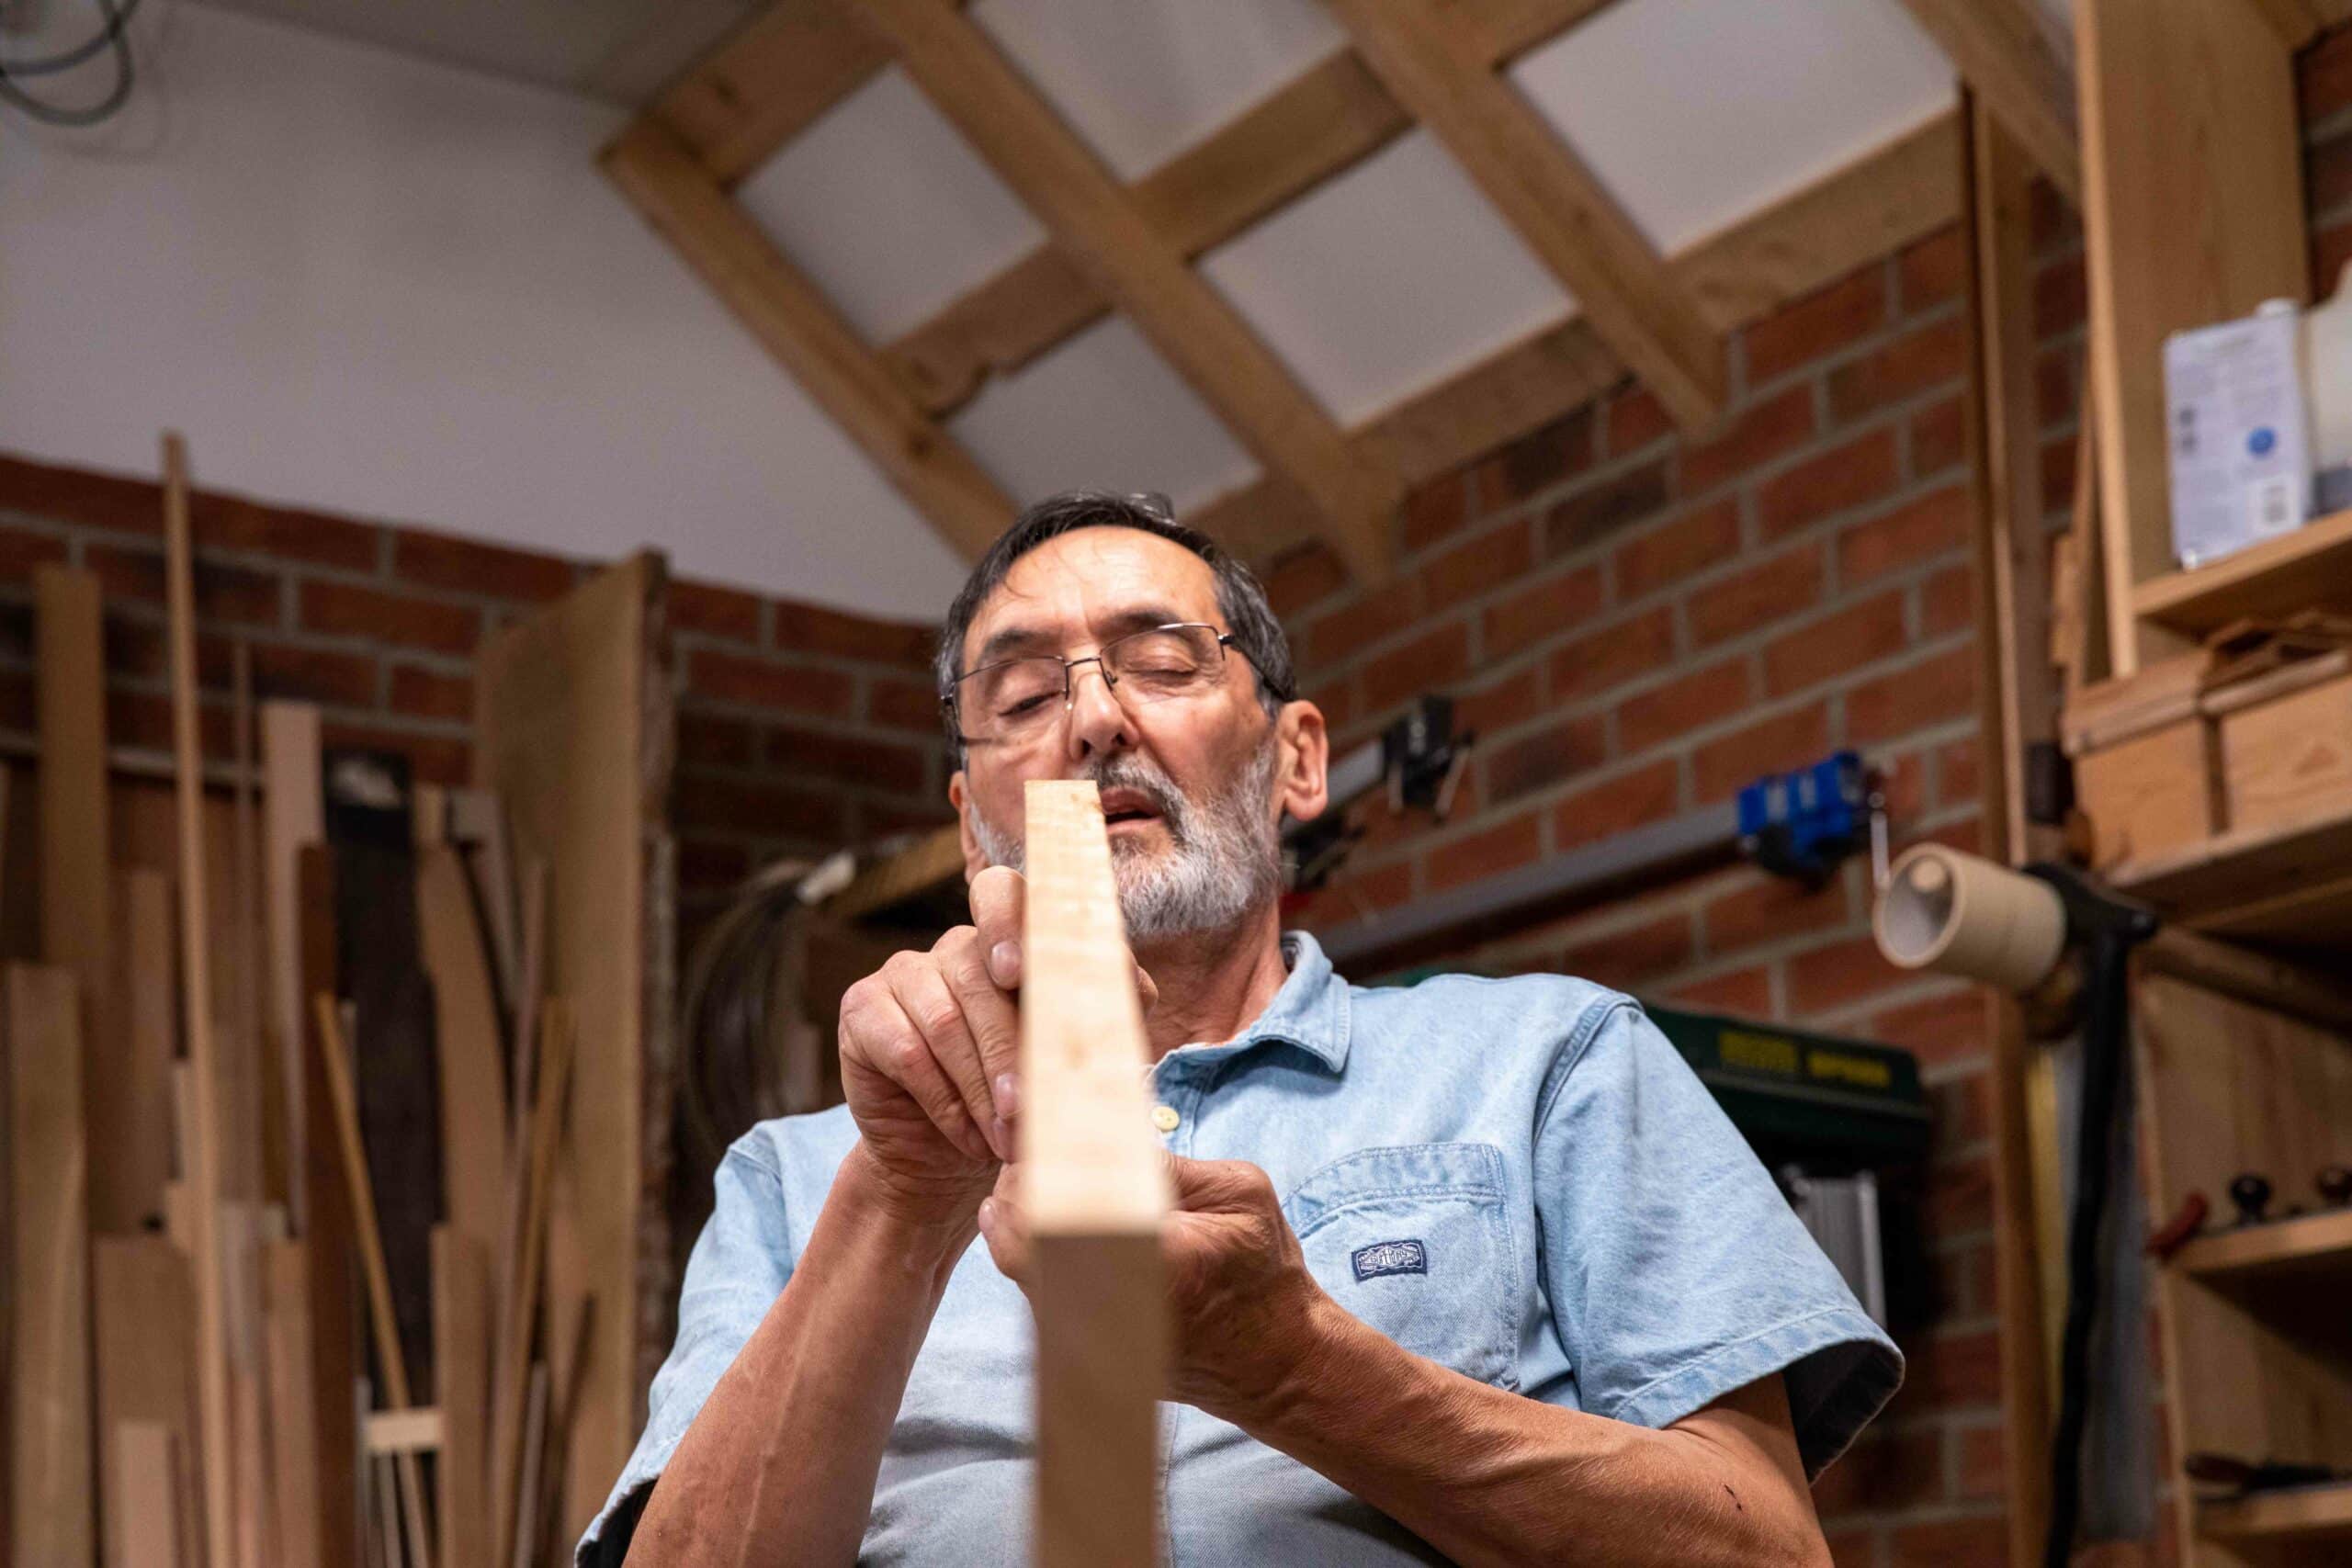
Also, remember it is necessary to eyeball along the corner edge of the board to see if the surface you are planing is straight or curving like a bow. If it is curving you must remove the bow between the two ends so that it is straight. There is an art to this and you must start somewhere; it might as well be here and now. Also, remember it is ultimately best to train and ultimately trust and rely on your eyes rather than the plane’s sole alone. A plane tends to follow curves and the user the path of least resistance.
Sighting along a corner edge will help you determine if a board edge or face is straight one or both meeting that corner are out of straightness in some way. Any discrepancy will need correcting with the plane. This is often done by trial and error until that final swipe comes and you are satisfied.

By now you will have removed any twist, cup and bow from this whole surface. That being so, use one of three planes to conclude the flattening process. You can use the #4 smoothing plane, as I am doing here, or the #5 or #5 1/2 jack plane. The surface of your board will feel like glass now.

You now have a truly flat surface that you will identify with a face mark. This is one of two faces or a face and an adjacent edge that you will use always to reference your square or and gauges to.
Now we can focus on an adjacent face or edge. No matter the size of stock, we always mark a primary face with a face mark as shown above. This is a cursive letter ‘f’ and the lower art f the tail always points to the adjacent face to be trued and used as a secondary reference face in all layout from here on. We must now true this face-edge.
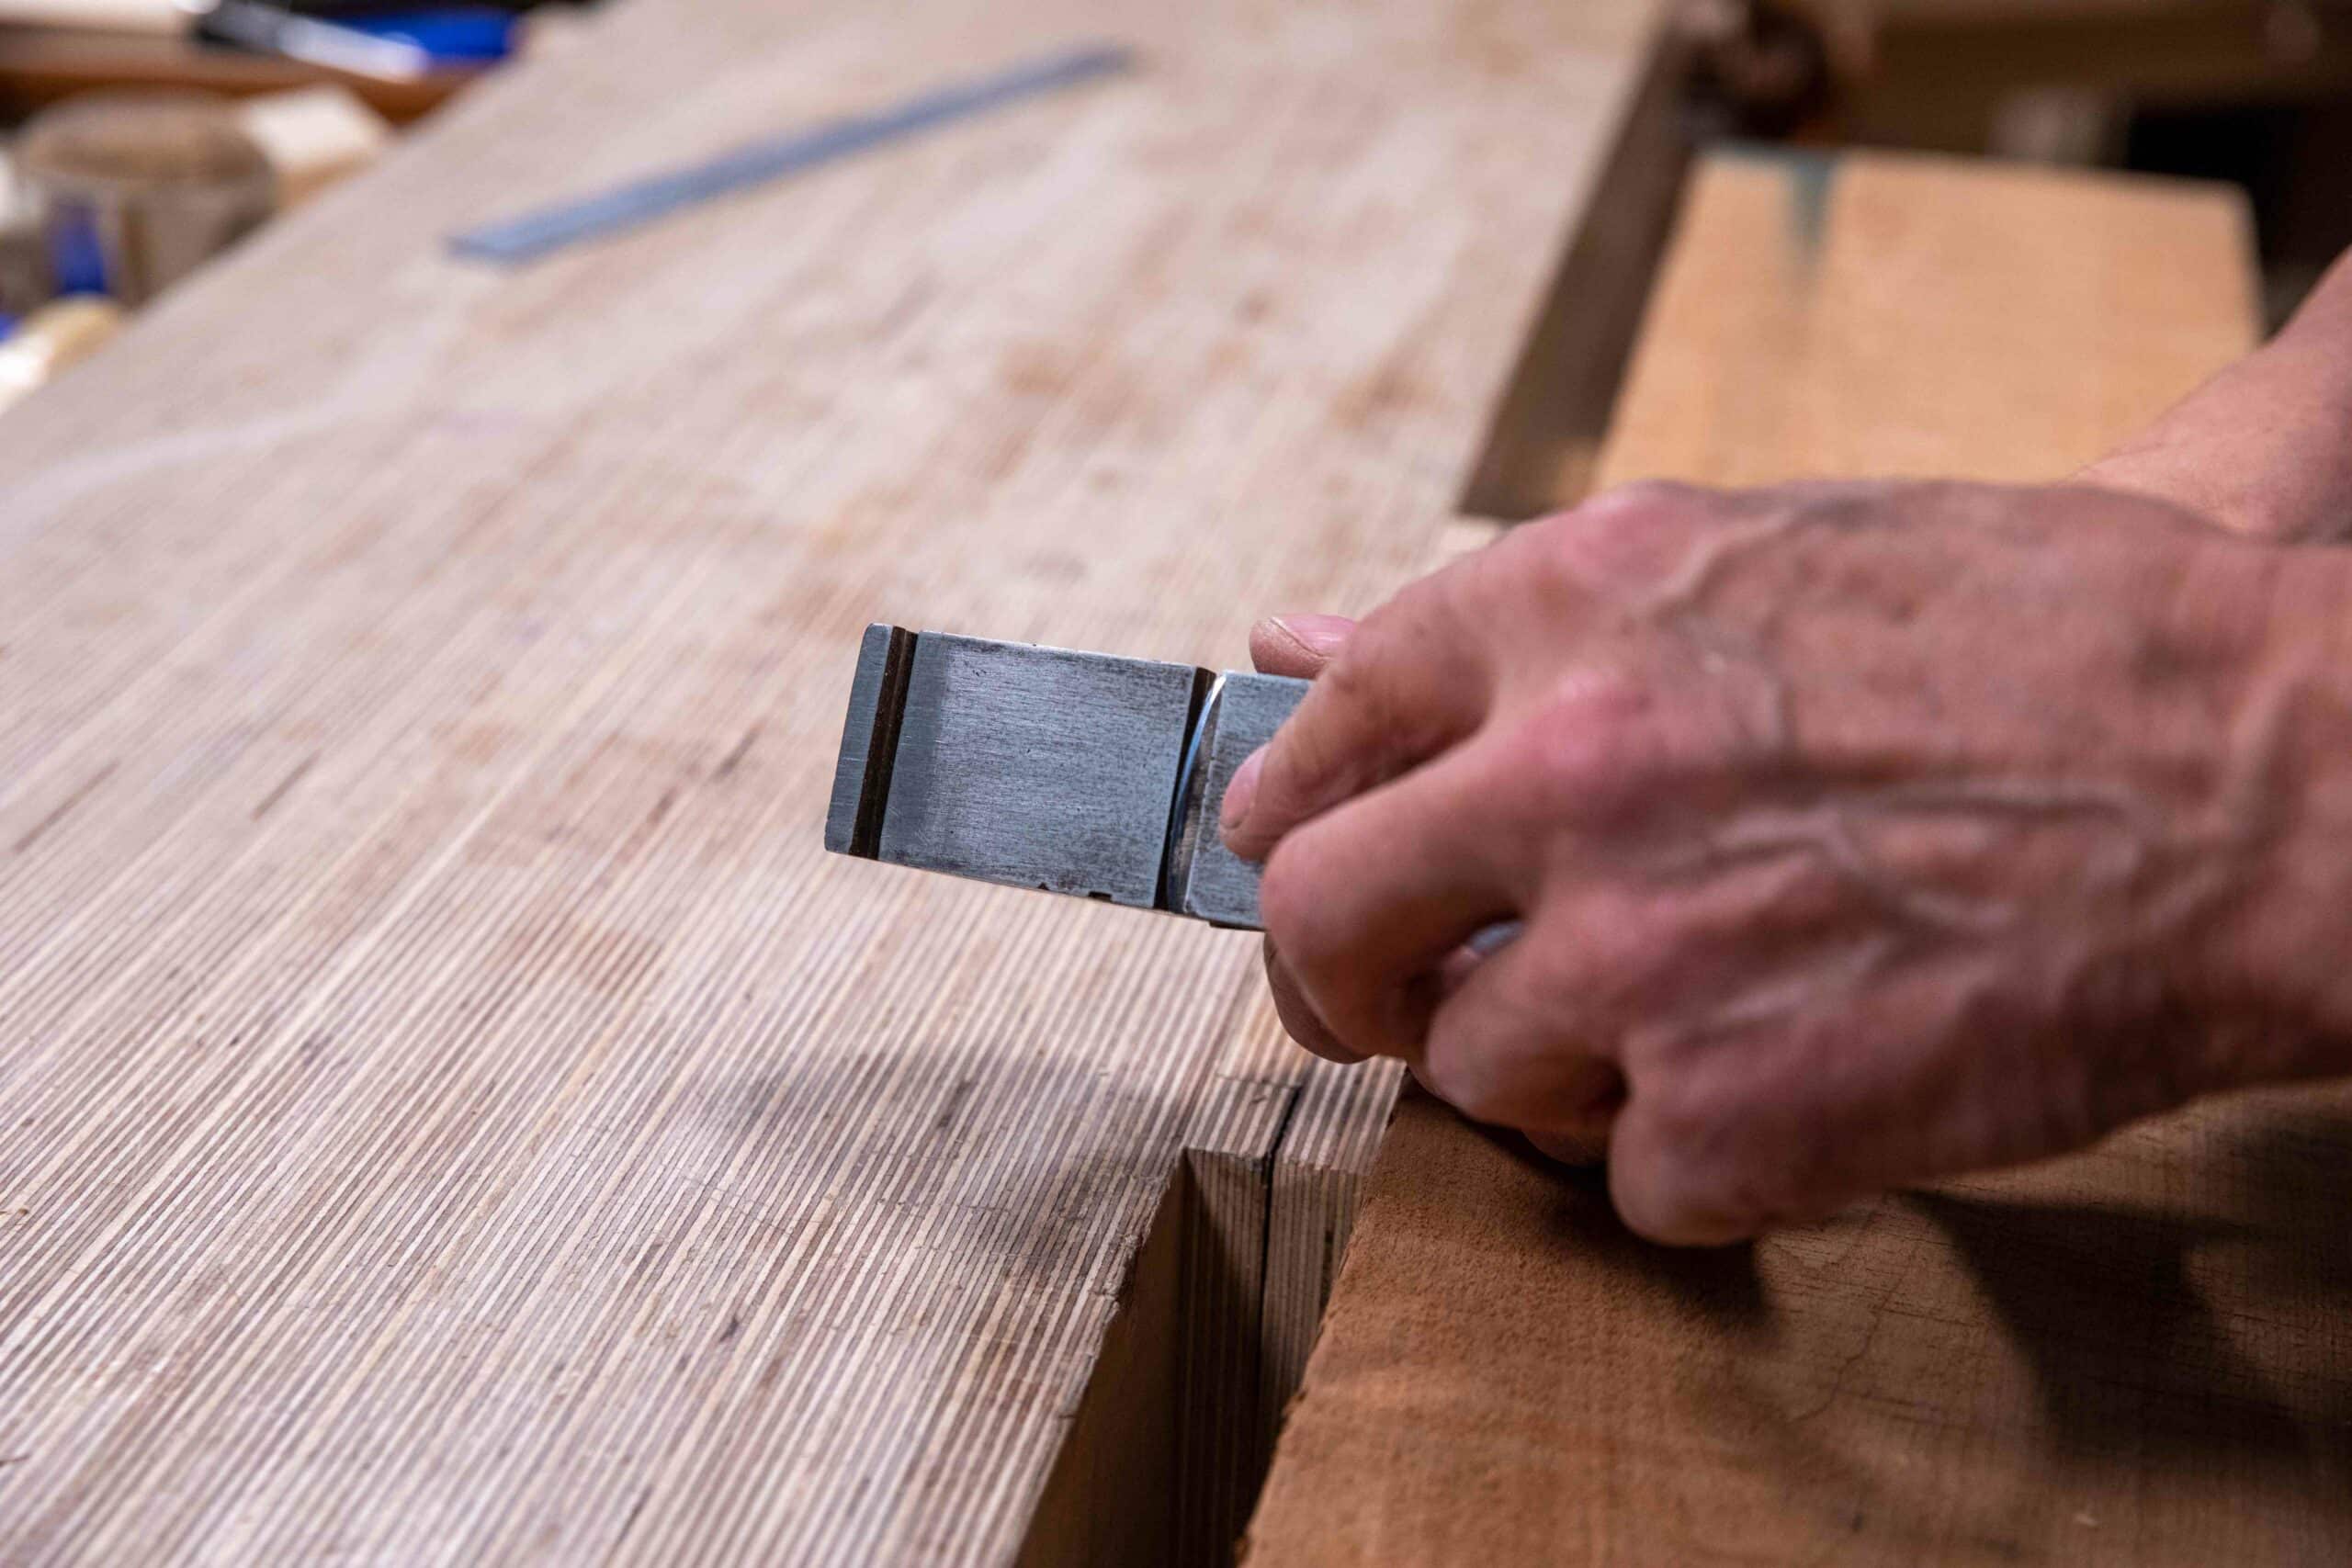
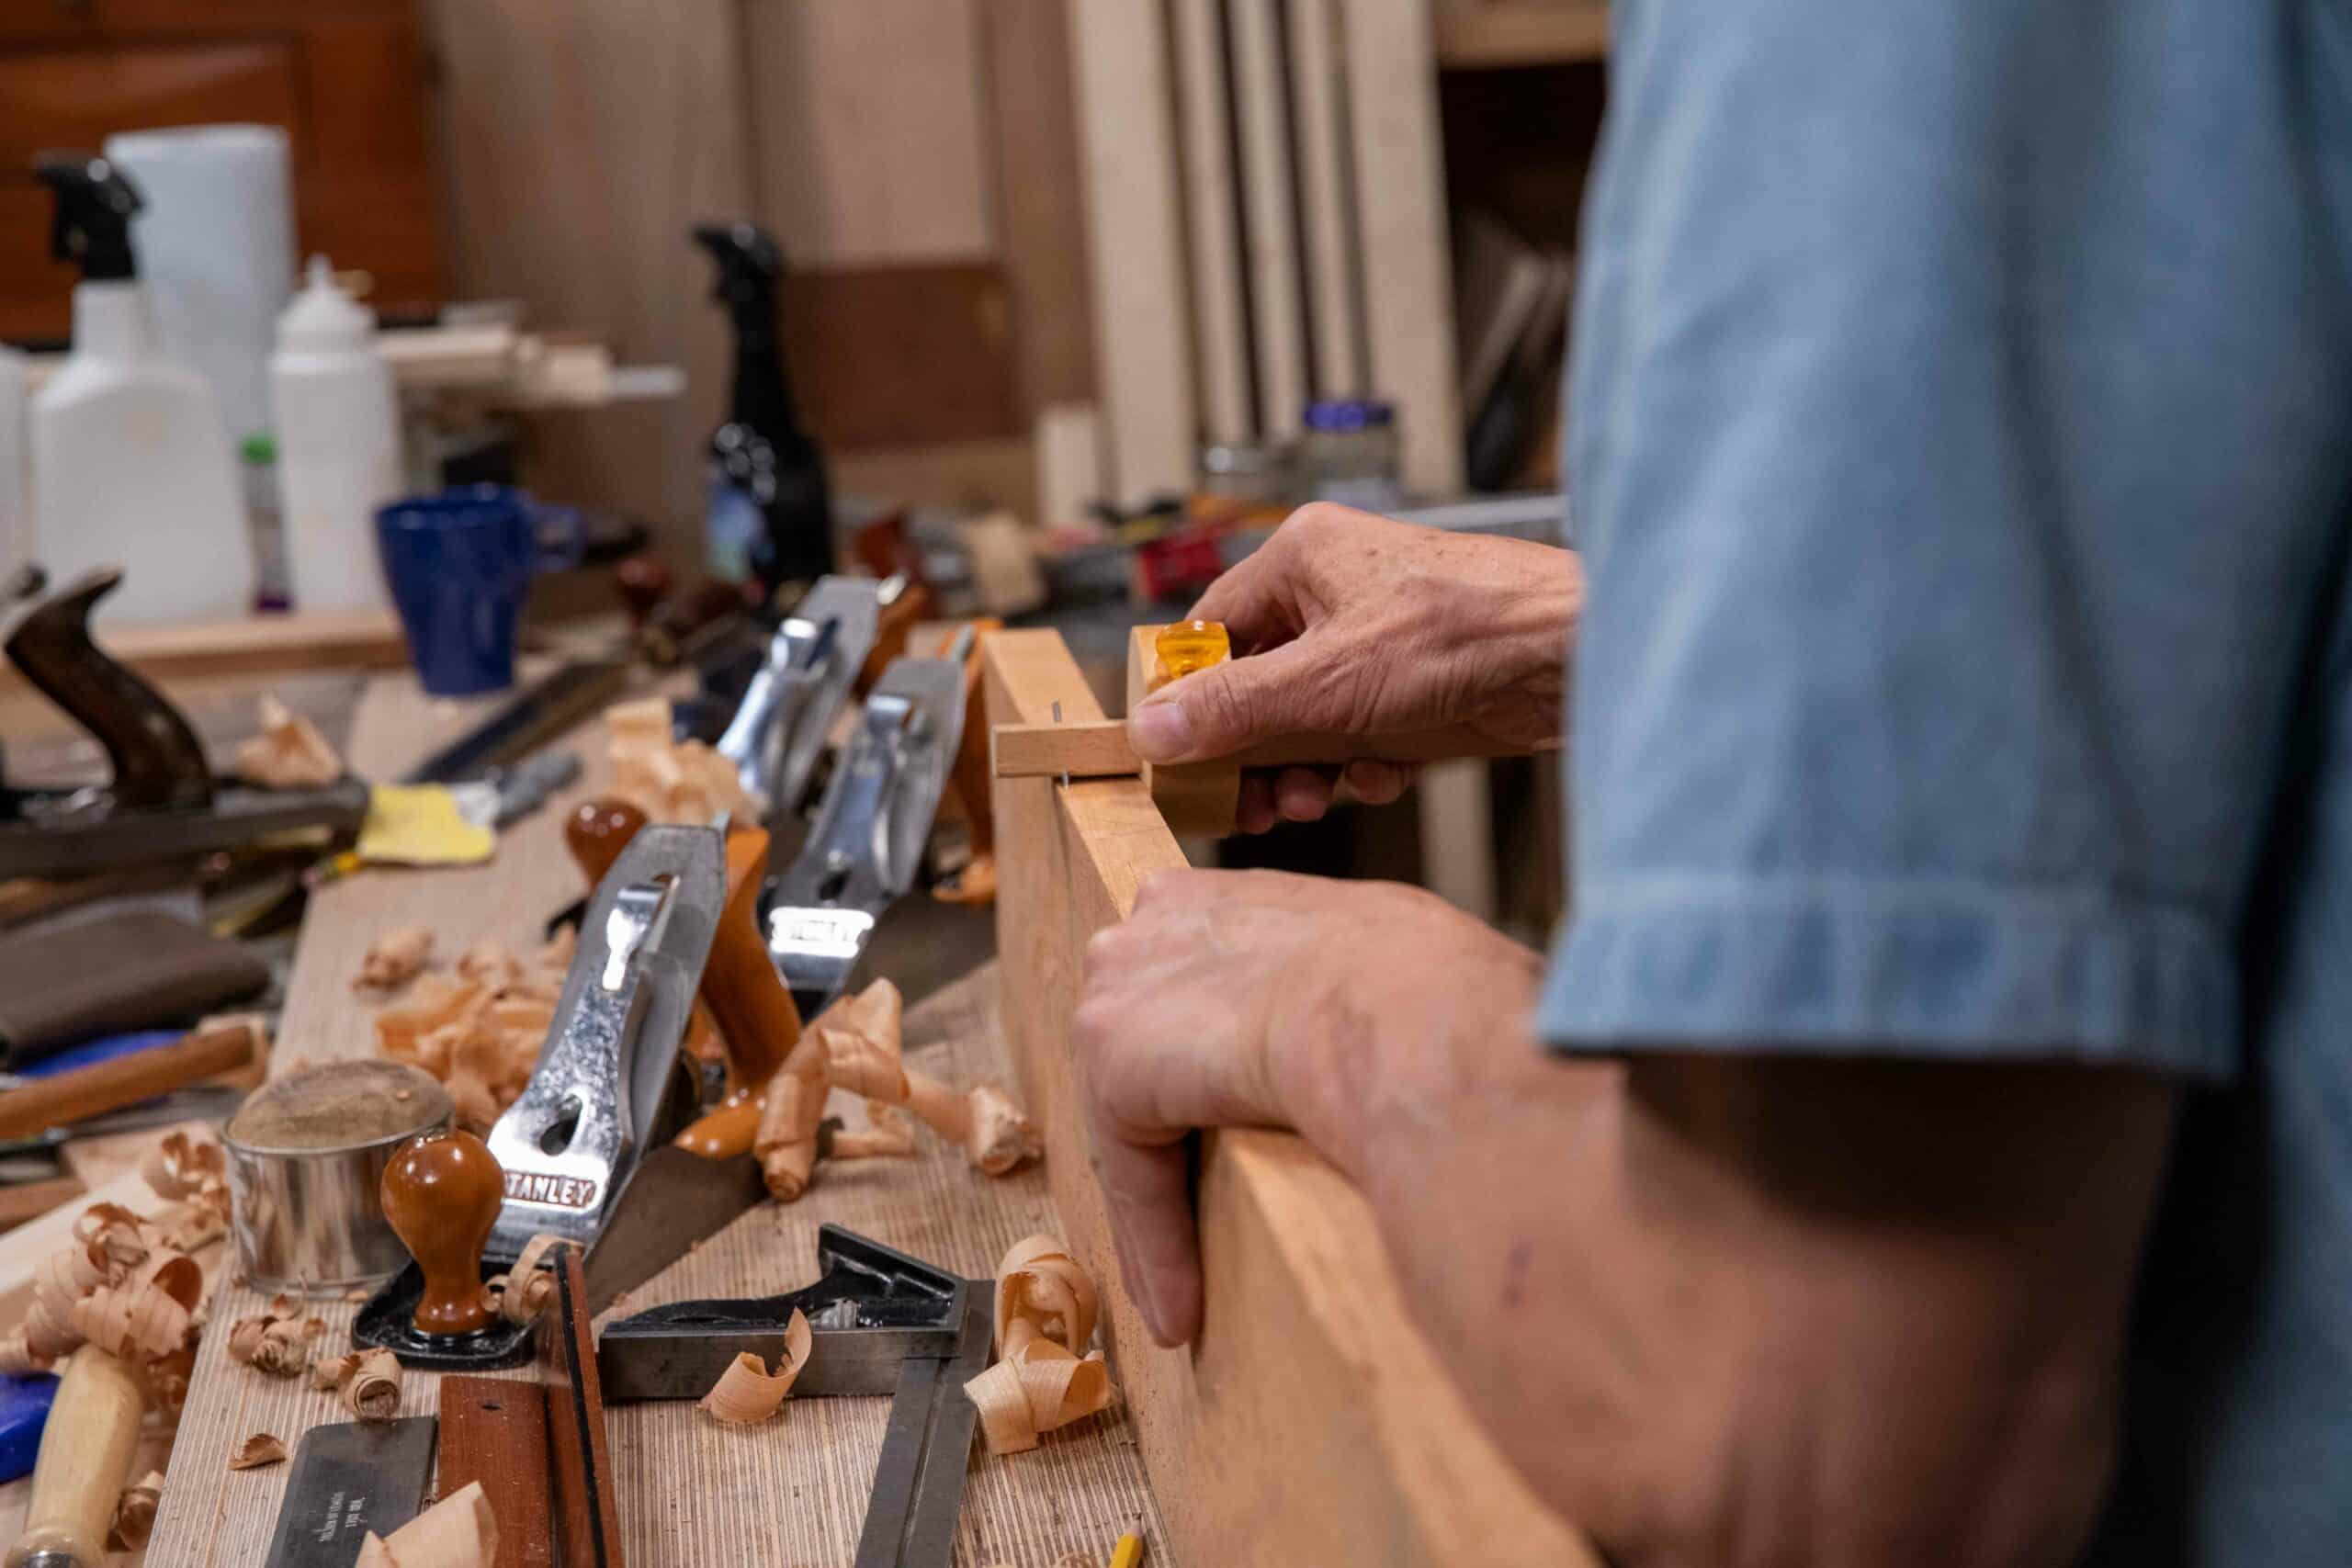
I still use the #78 even for the narrower edges. It removes bandsaw roughness in a heartbeat and makes subsequent planing with my #4 scrub or my jack plane so much easier and the subsequent straightening and squaring work goes quickly too.
Here (below) I have switched to my lesser-radiused #4 scrub plane to further refine the edge.
Its an amazing thing even now to feel that sense of accomplishment in a finished planing job like this. Remember I have done this thousands upon thousands of times over the past 56 years.It never grows old!

Here I have decided to follow on with a longer plane, the #5 Jack plane. This does not have a curved iron installed but you can use a #4 scrub iron in a #5 jack if you want to or need to for a slightly heavier performance.
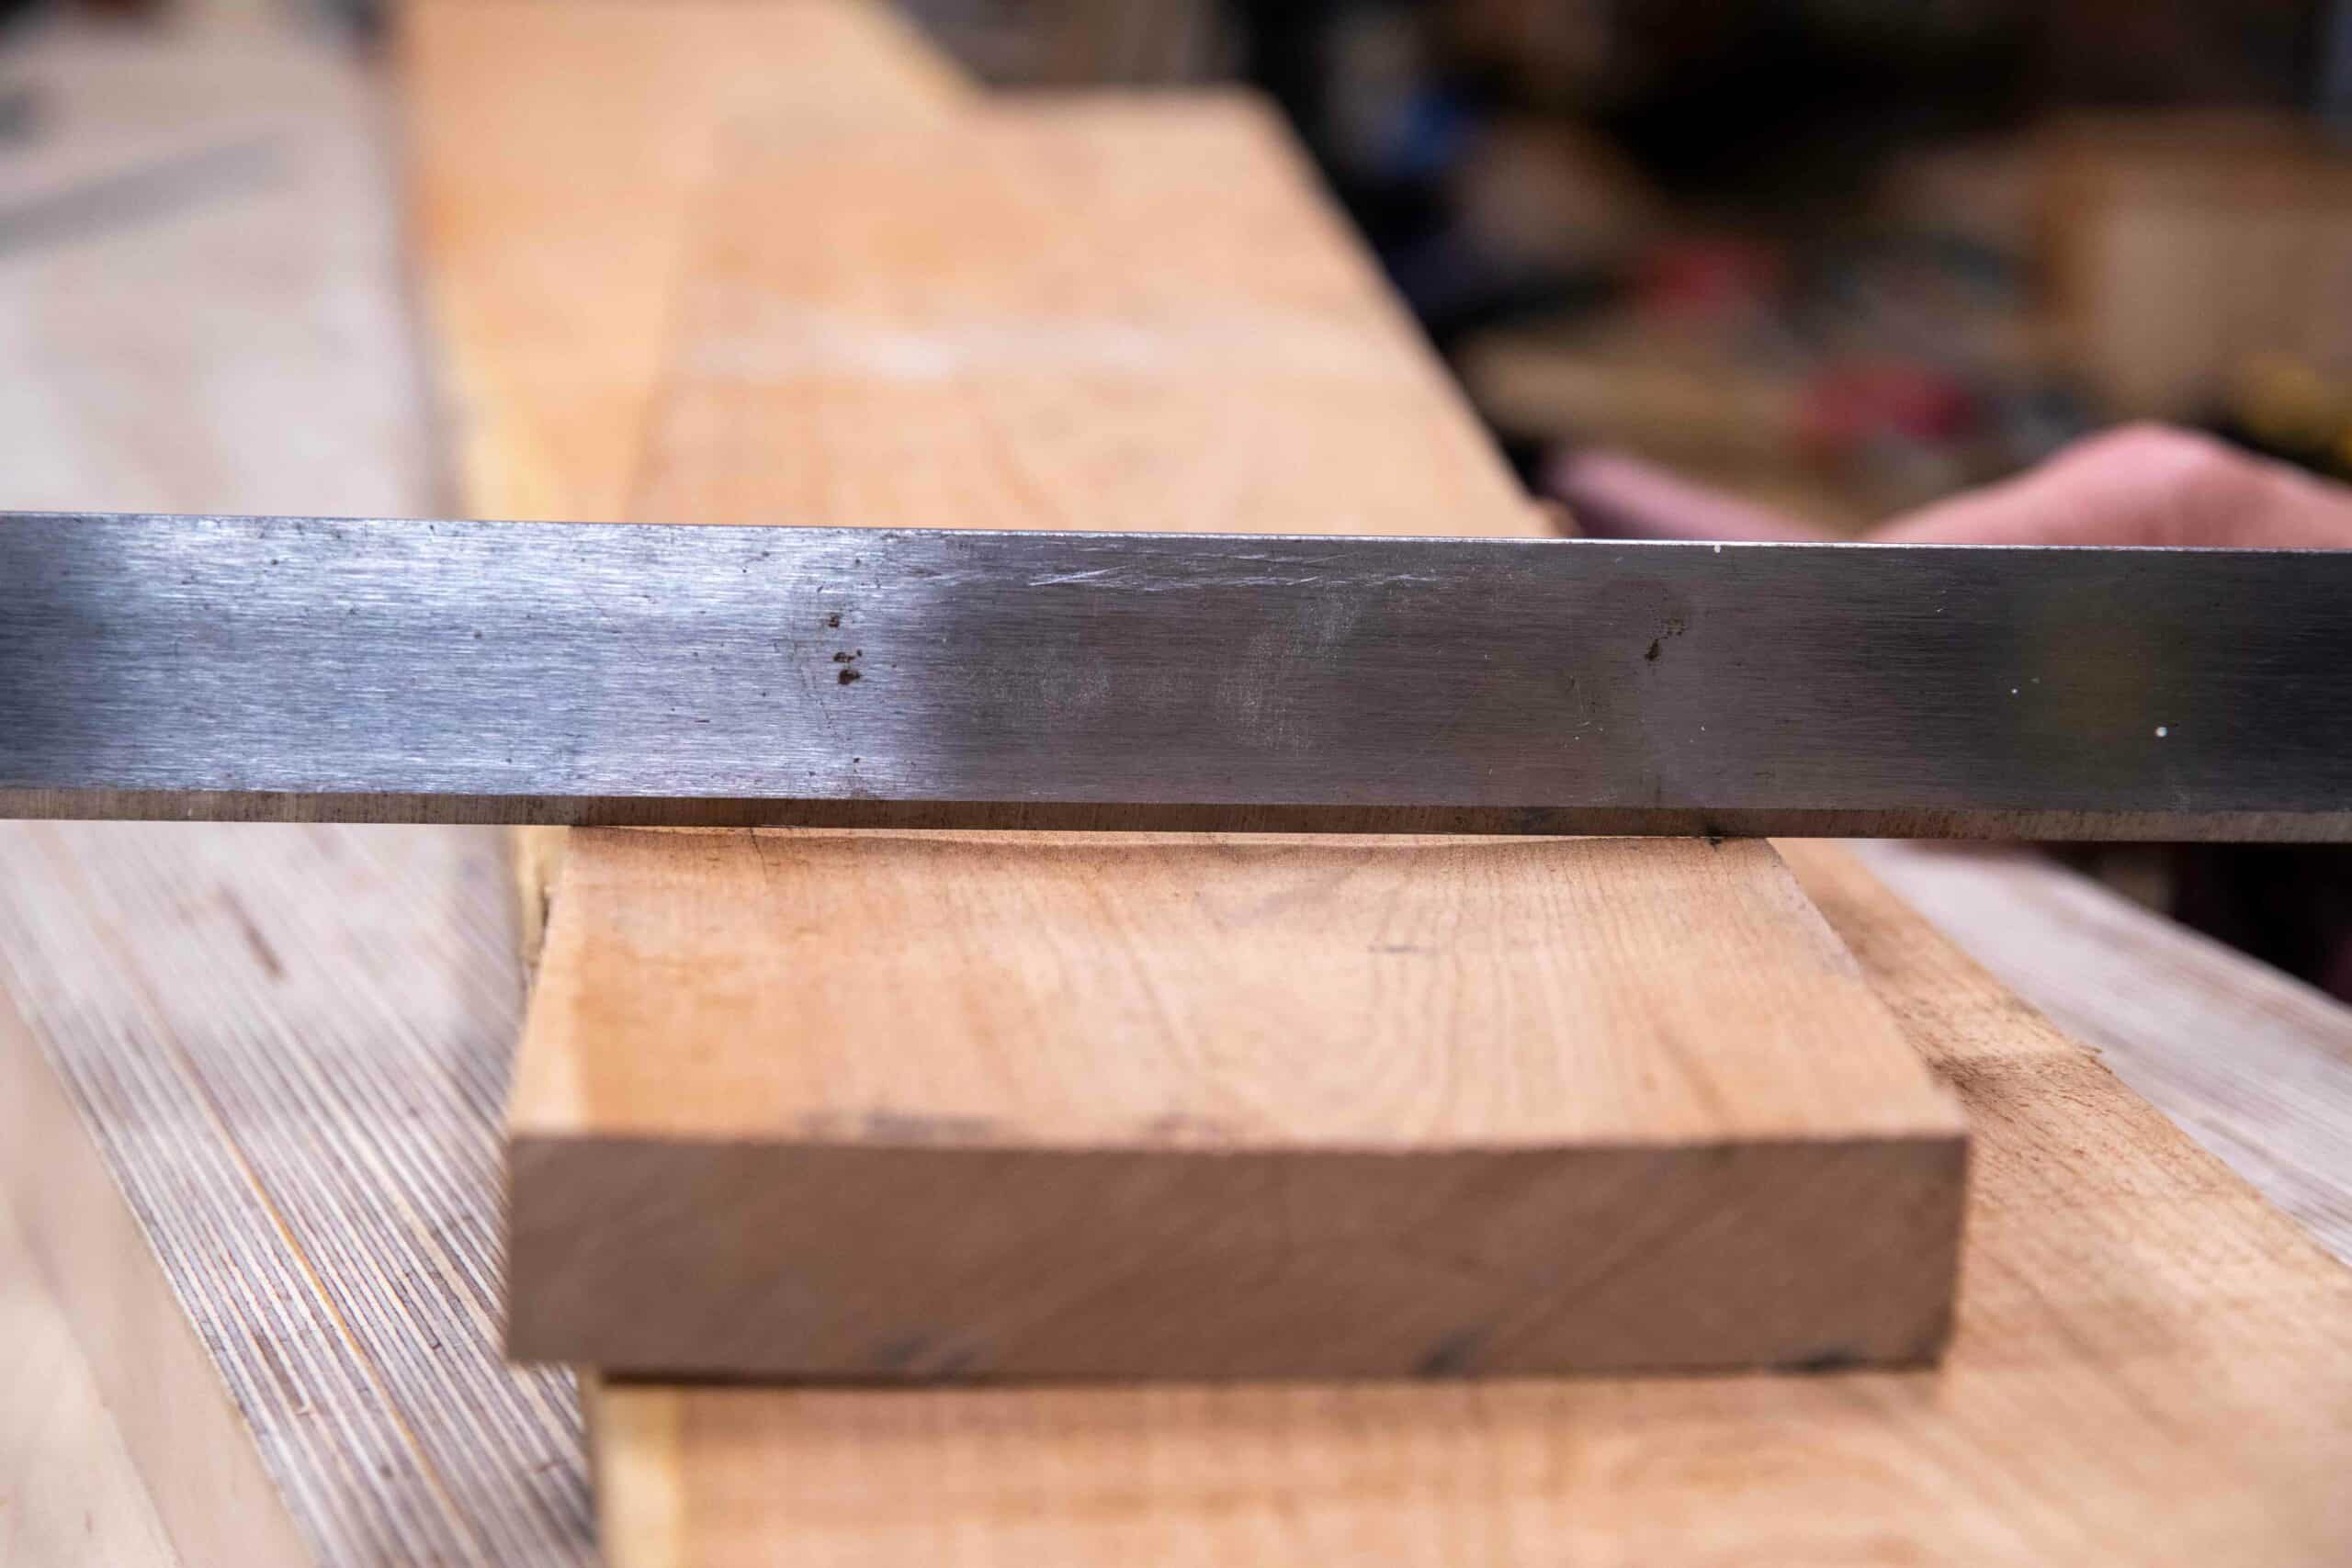
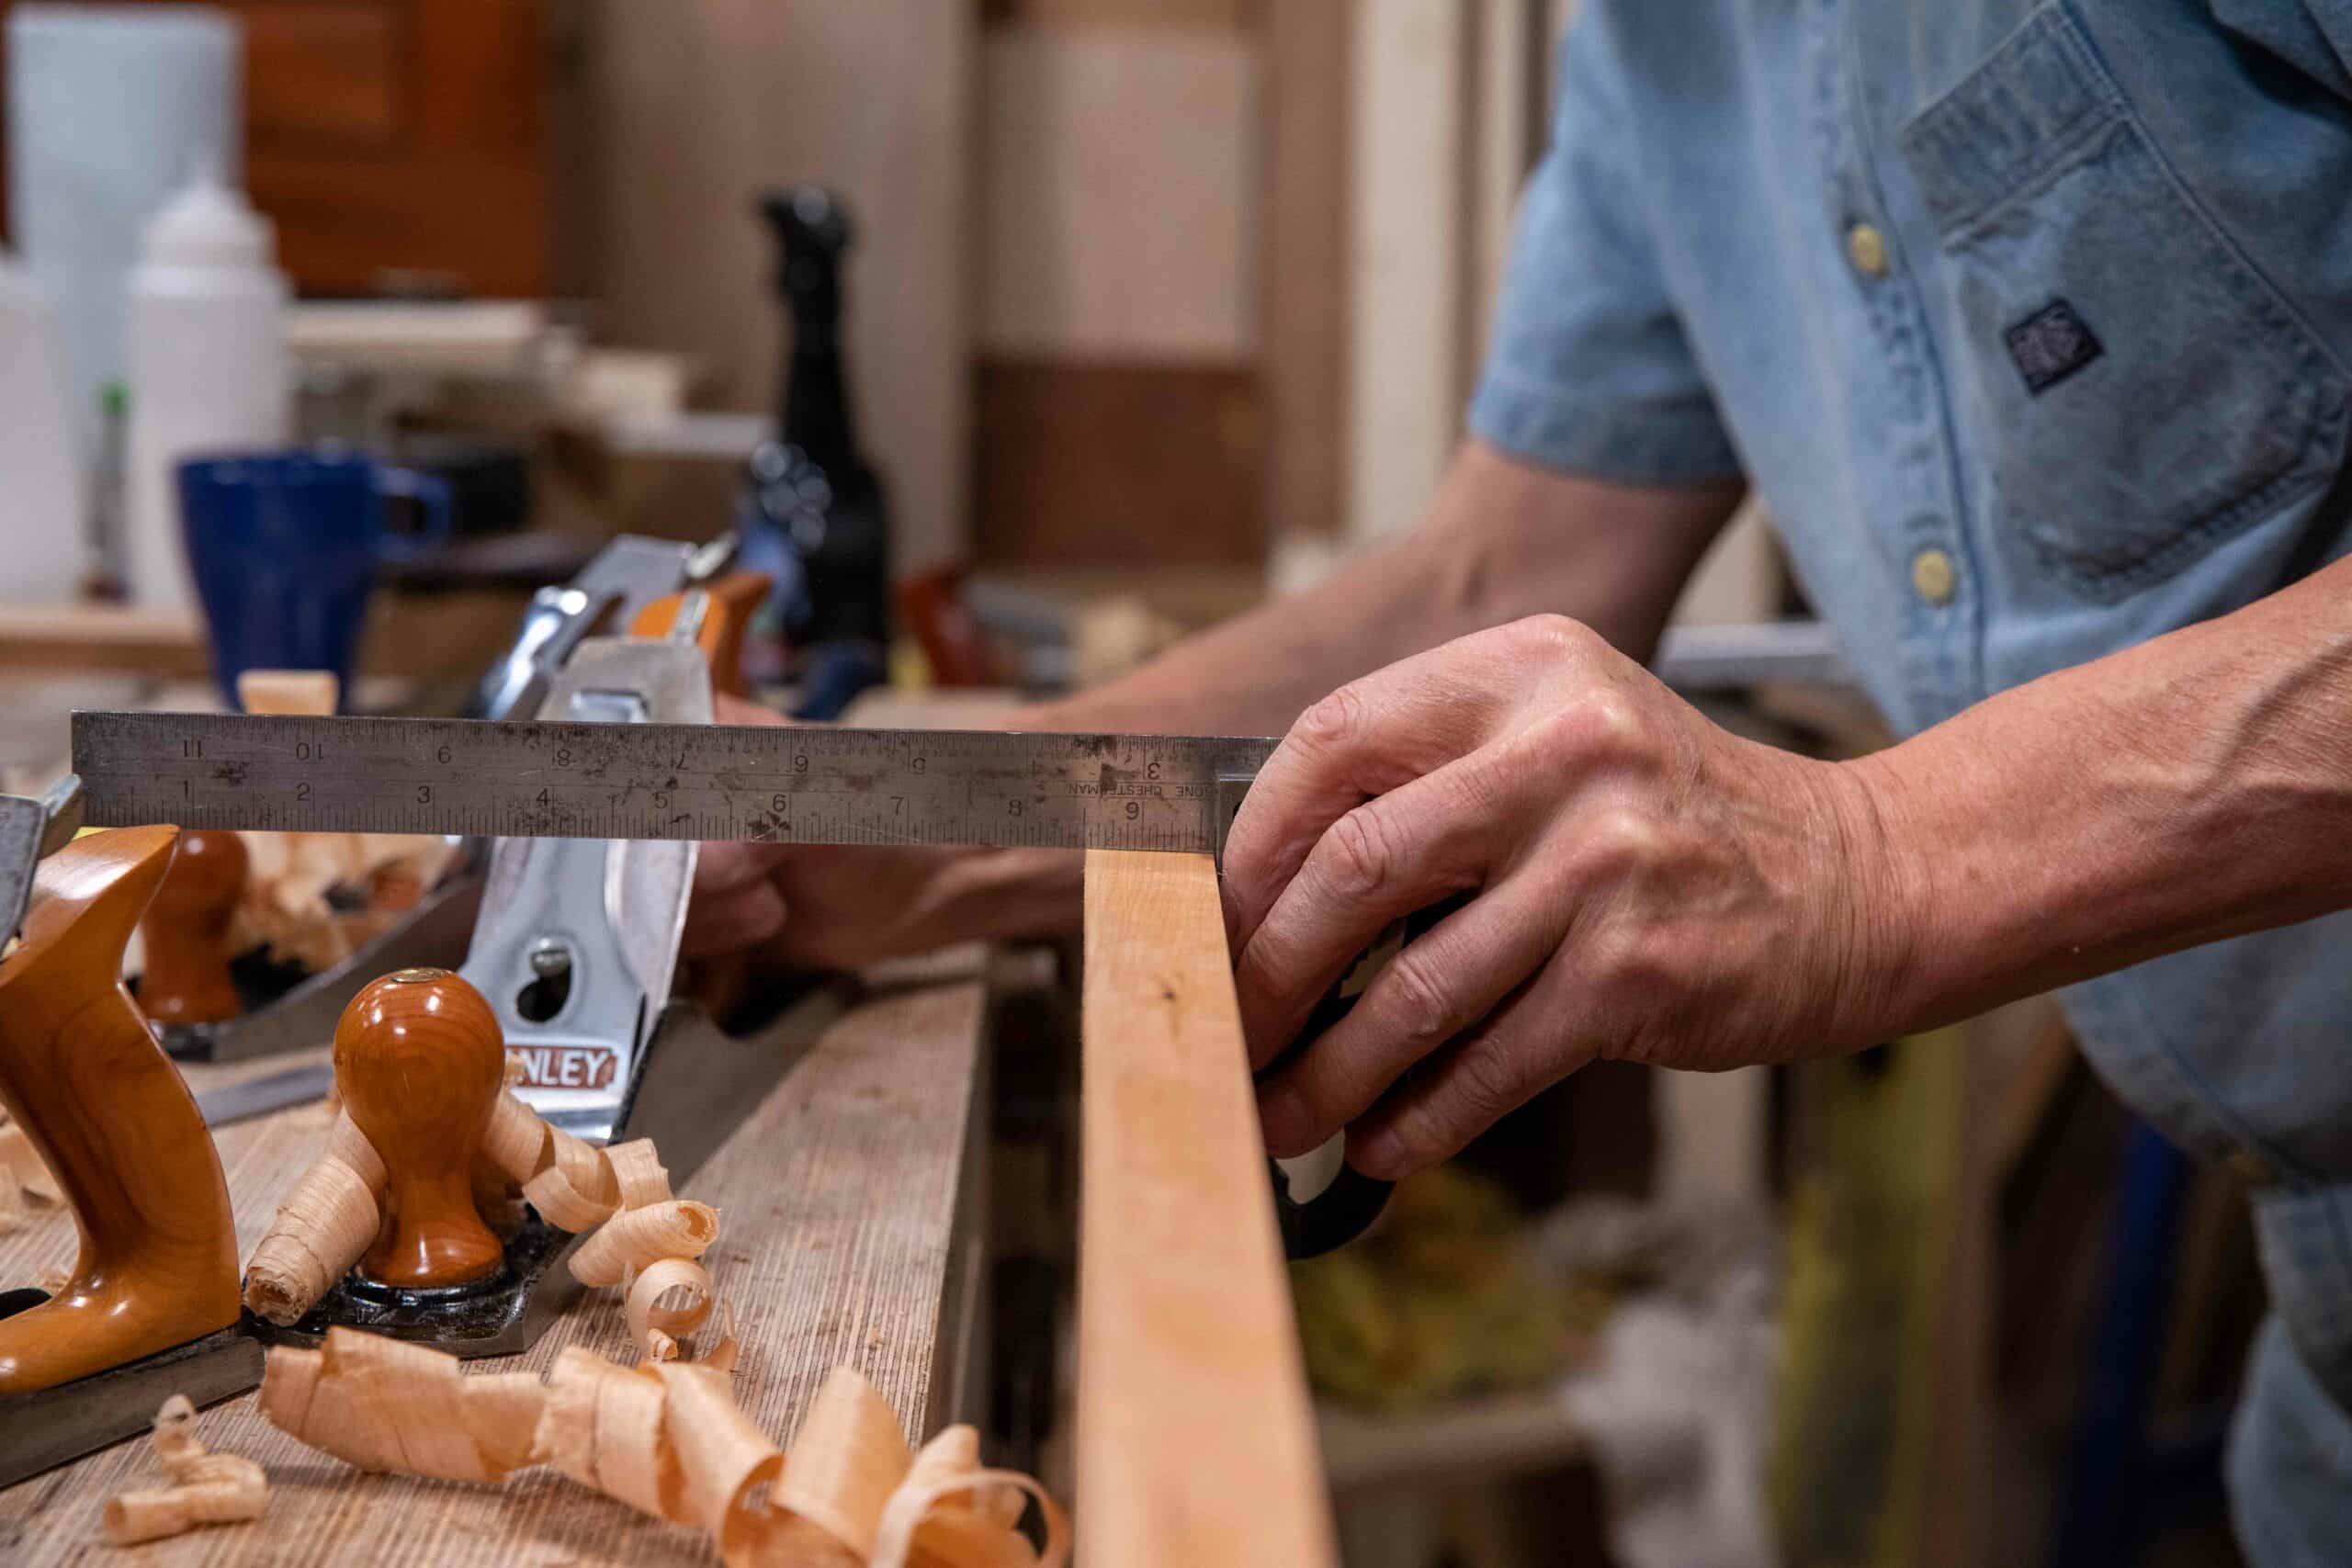
Once this is concluded I use the square to check for squareness along the length. Sometimes, less today than ever, I need to correct discrepancies at this point, sometimes not.
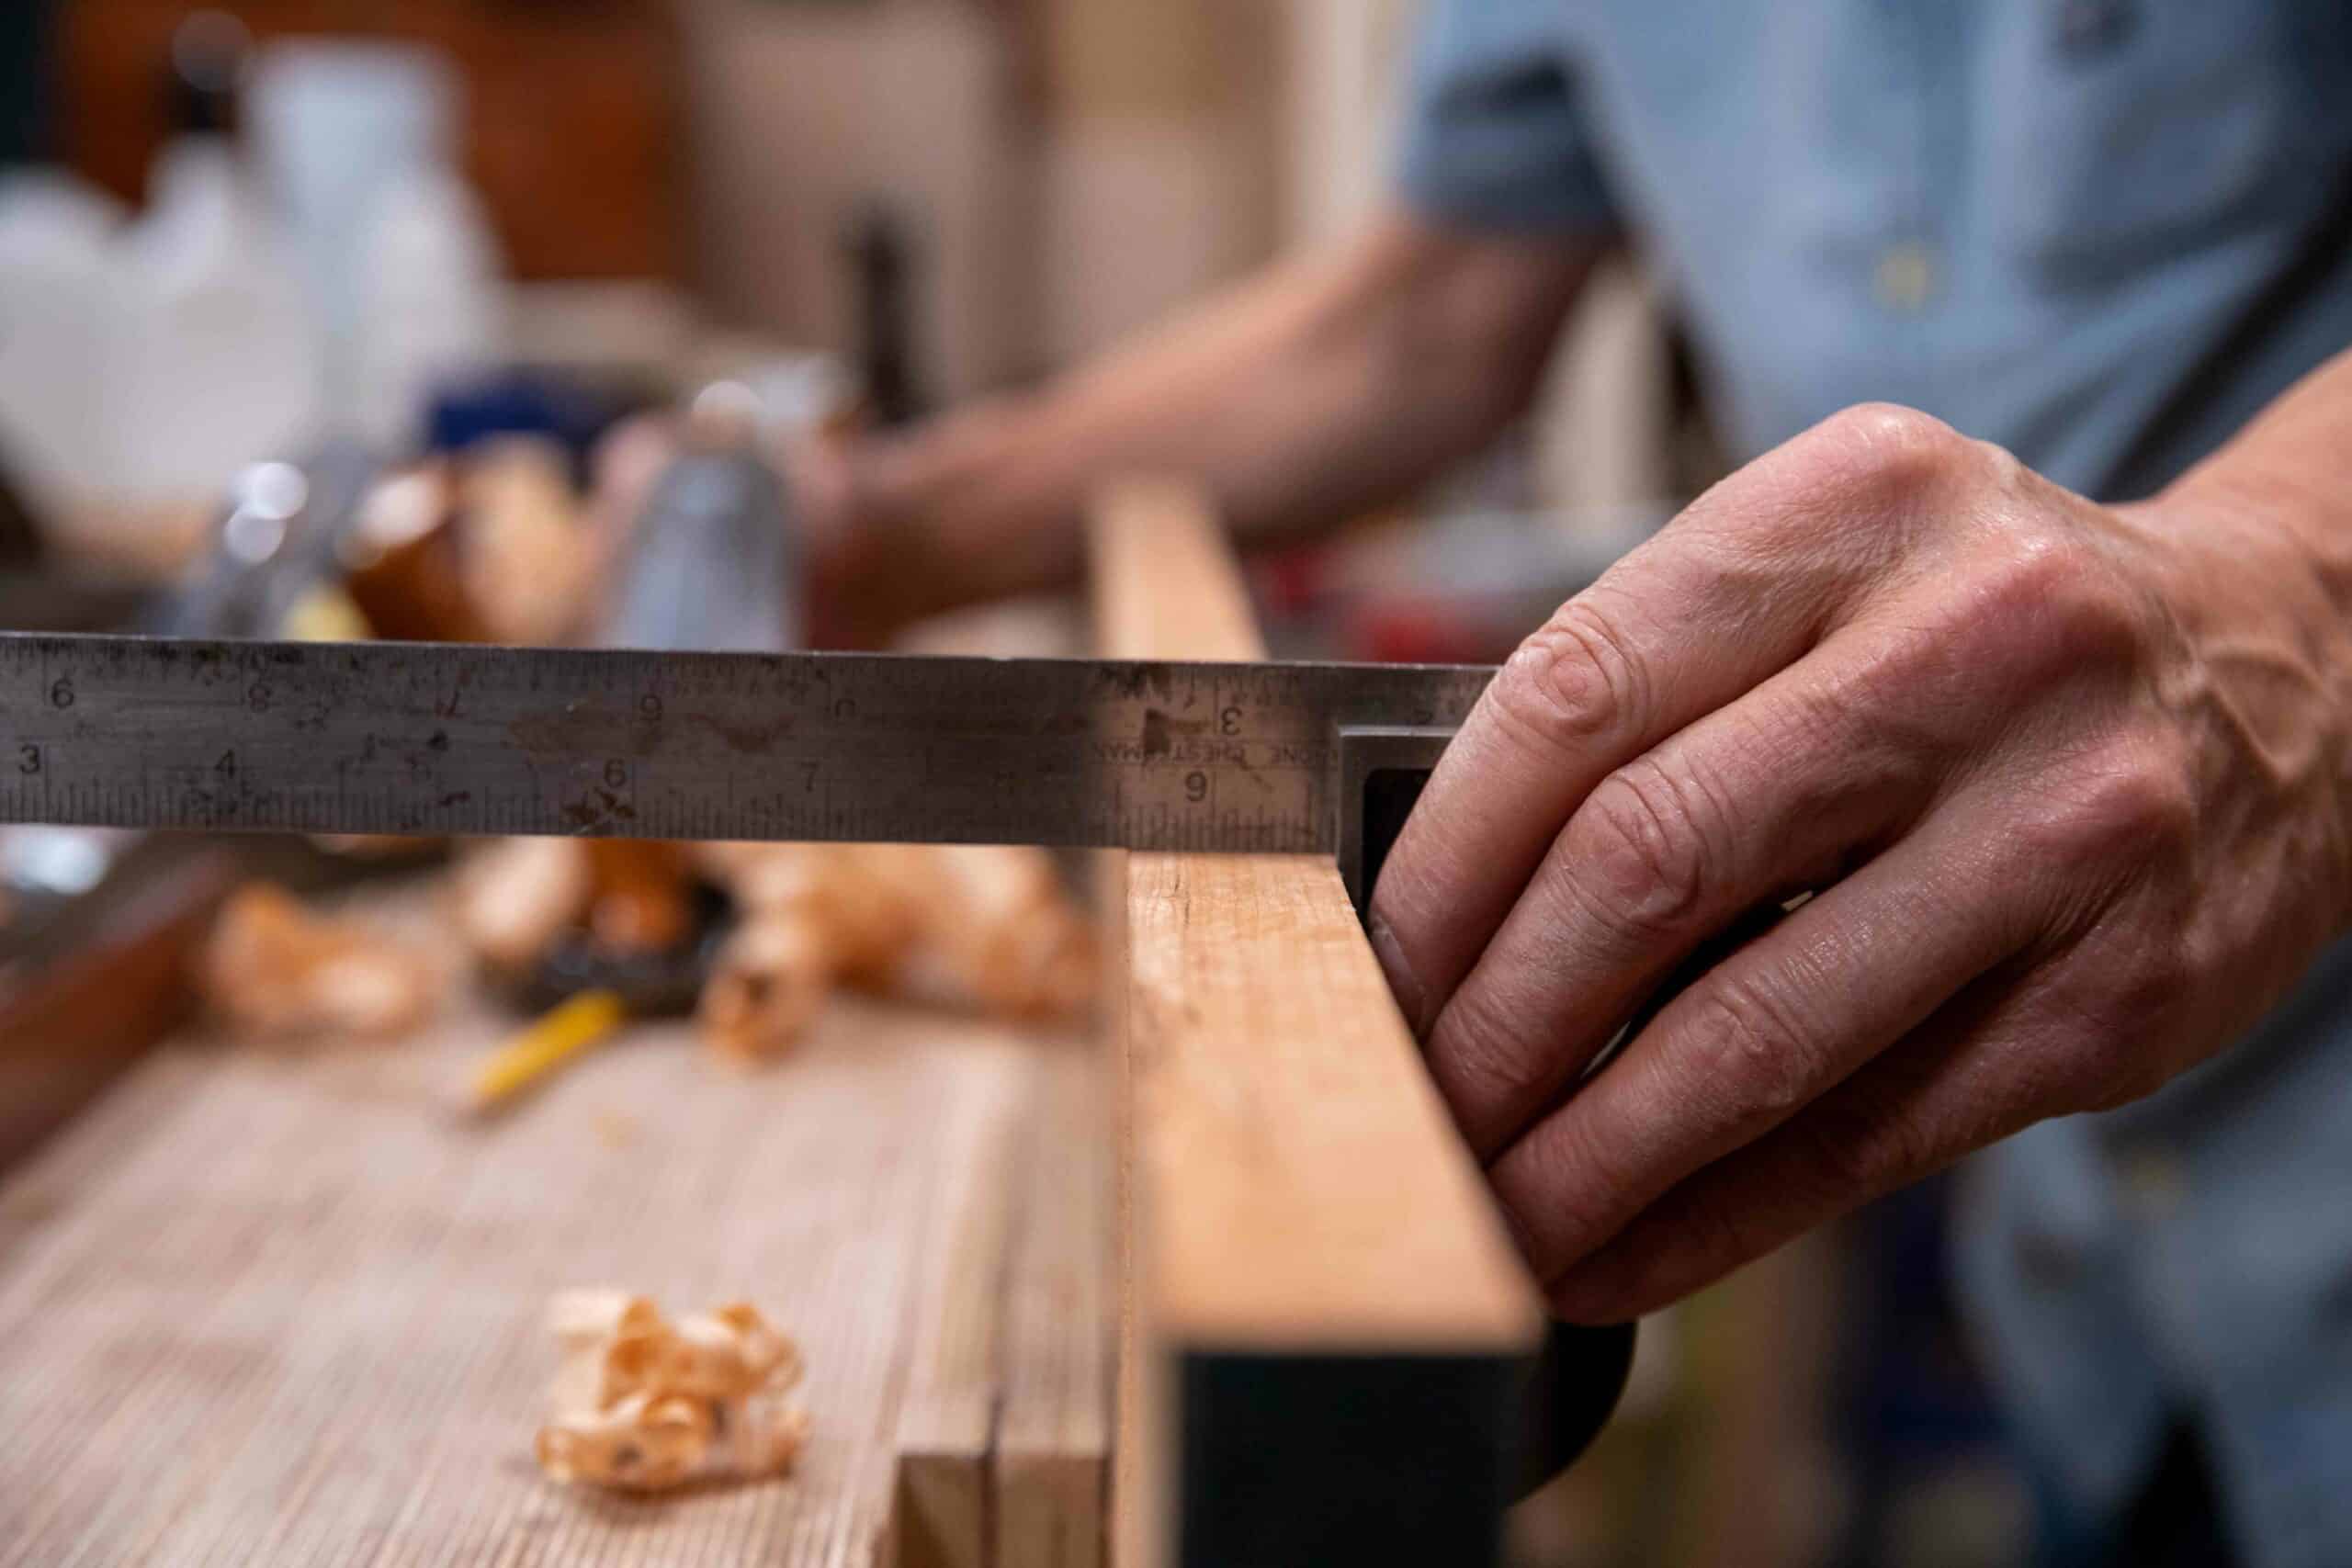
I check at different points along the edge just in case I tilted off somewhere a little. For correction I do not tilt the plane but place the plane off centre so that the plane overhangs on the high side and the cutting iron is roughly centred on the outer edge of the edge. This compresses the fibres beneath the plane on that side of the edge and the surface springs up into the cutting iron by a thou’ or two. It works!
Once square and sighted for straightness, I apply the identifying face-edge mark.

With these two faces trued, proven and marked with the face mark and face edge, I can rip or plane the opposite faces and edges parallel to the two planed surfaces. Before I do this, I mark the thickness and width using a marking gauge or penciled lines if the width is too much for a gauge to be used. Technically this is only necessary if planing to width or sawing.
Even if I am using the bandsaw with the fence guaranteeing the parallelity, I often use the gauge lines to help me note if there is any drift taking place and of course I must still plane down to the finish line subsequent to ripsawing.
Using the bandsaw to parallel-cut to the now newly trued face means that any cup, twist or bow that still exists on this opposite face will be automatically removed as the board passes through the bandsaw. Without the bandsaw cut, the board must be planed or sawed by hand.
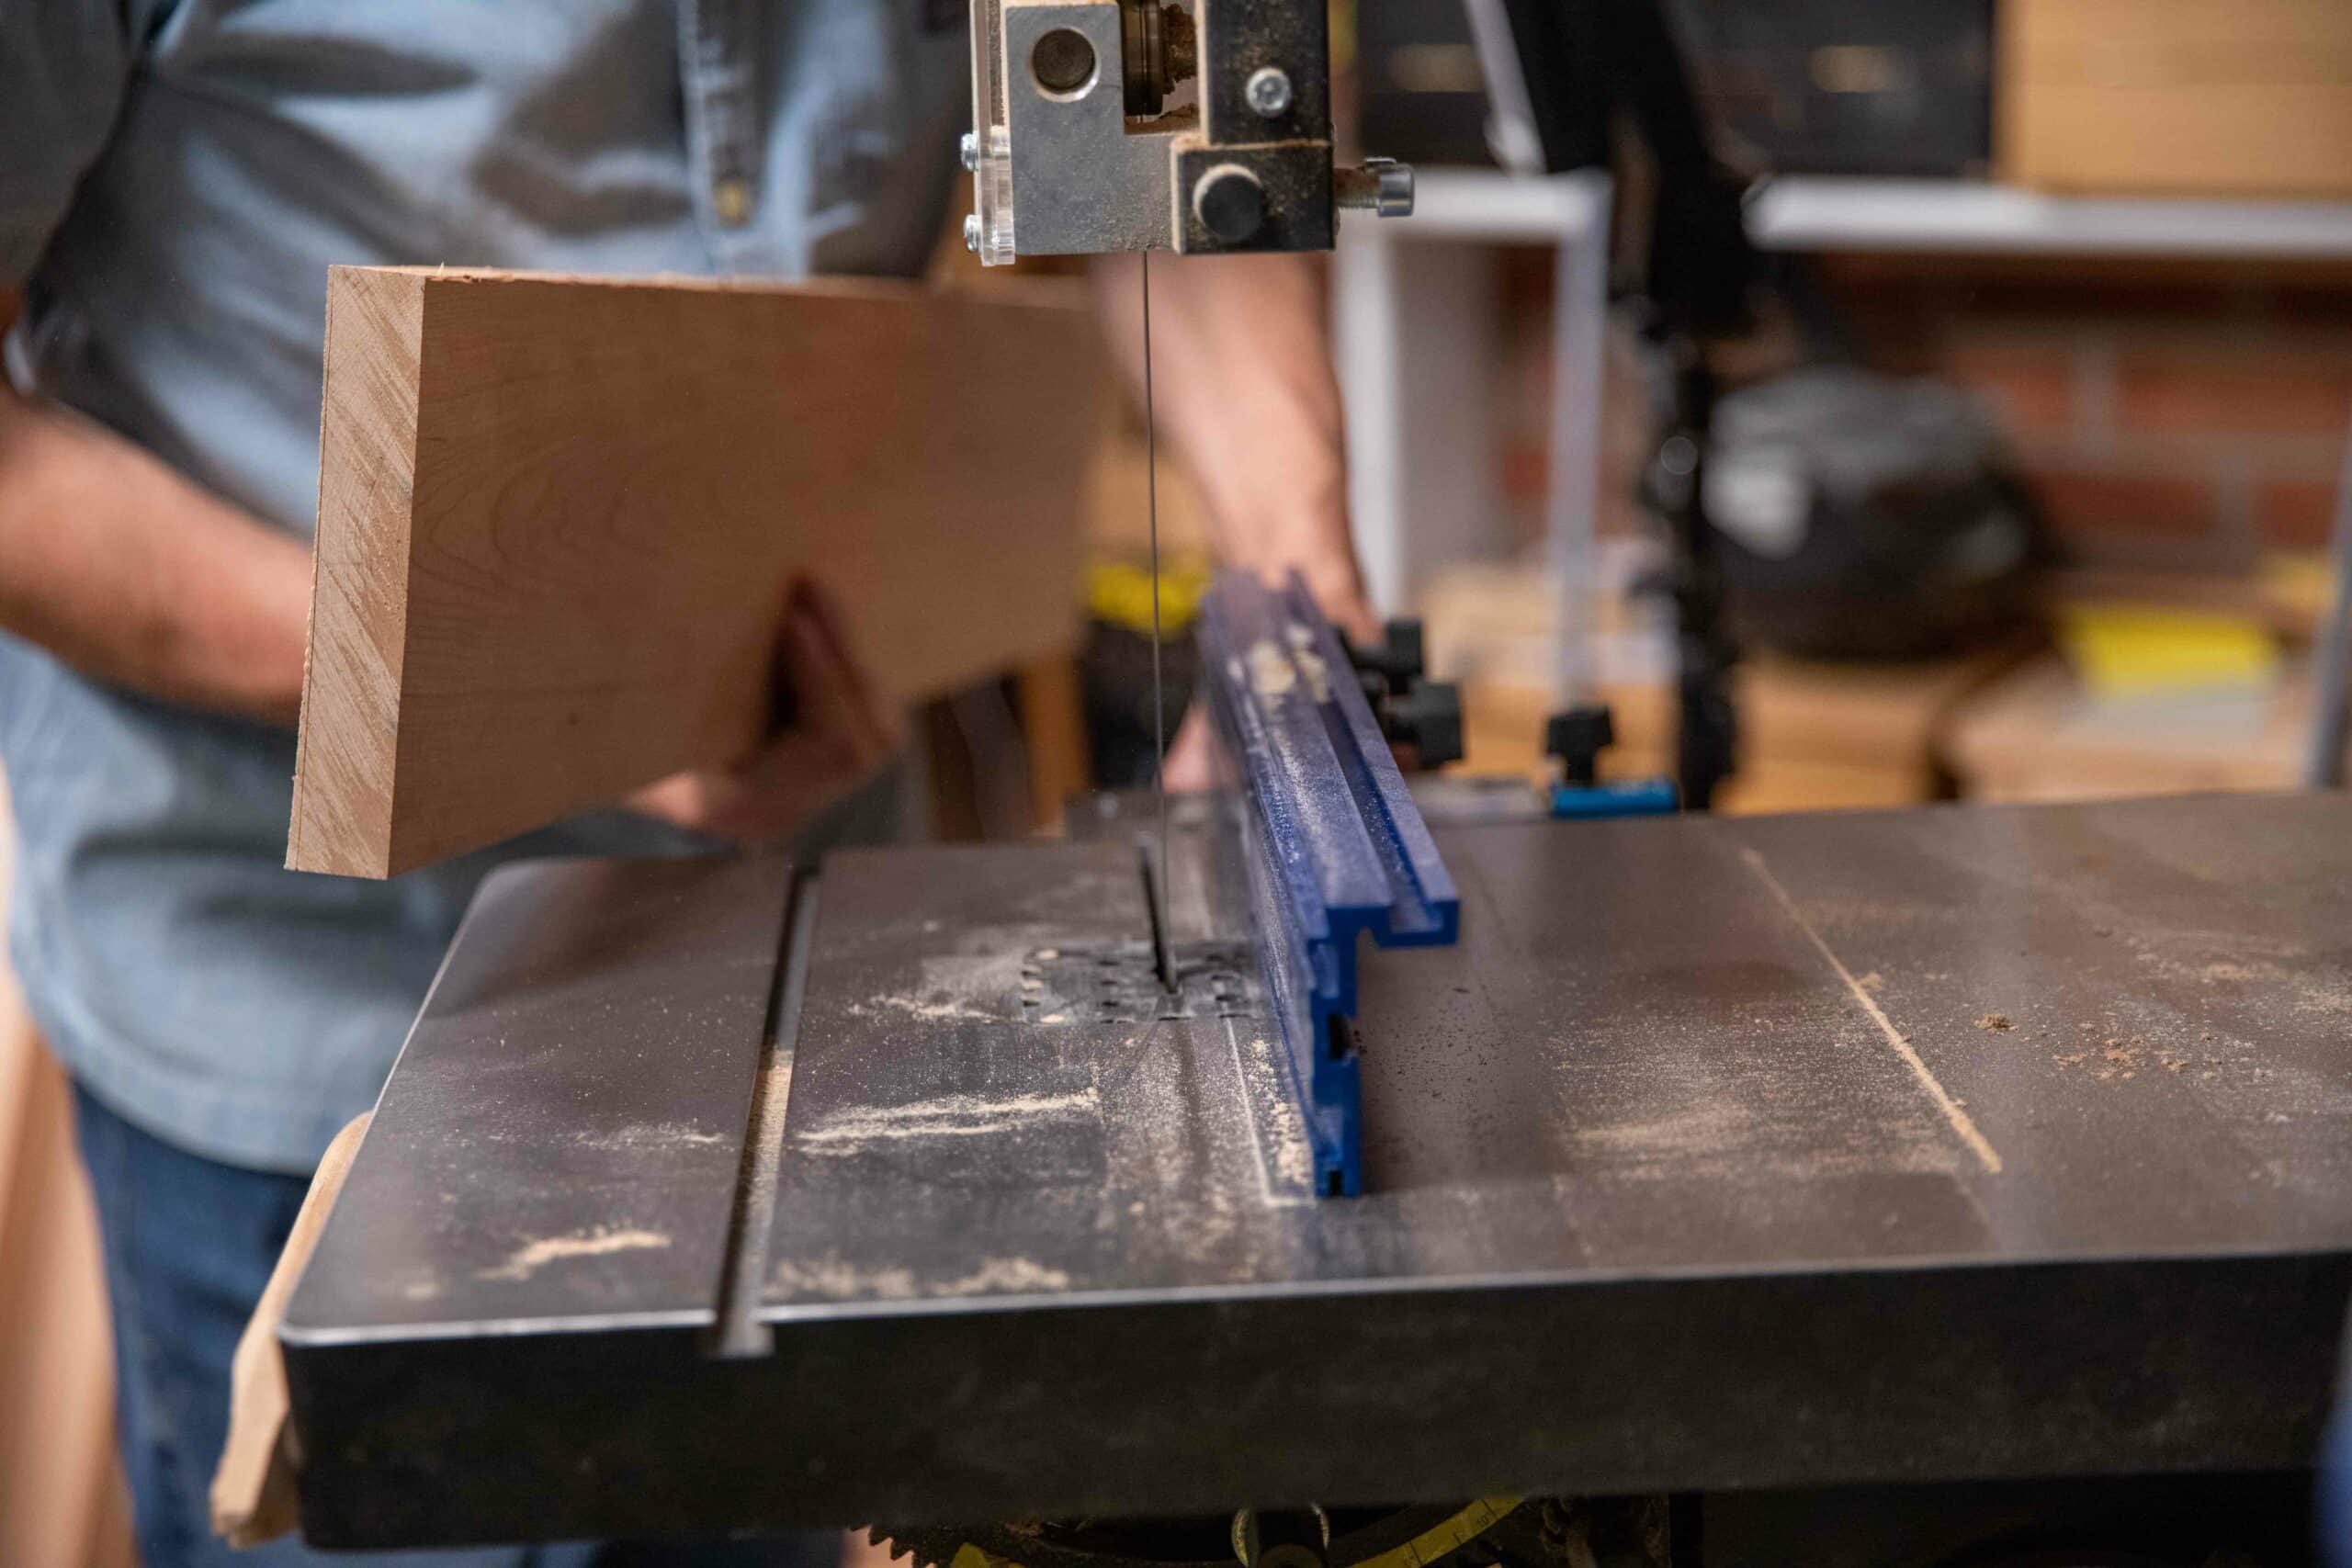
The bandsaw is essential for me in the handwork that I do. Ripping wide boards 8″ and up wide is both tedious and physically hard, especially if its several feet long.
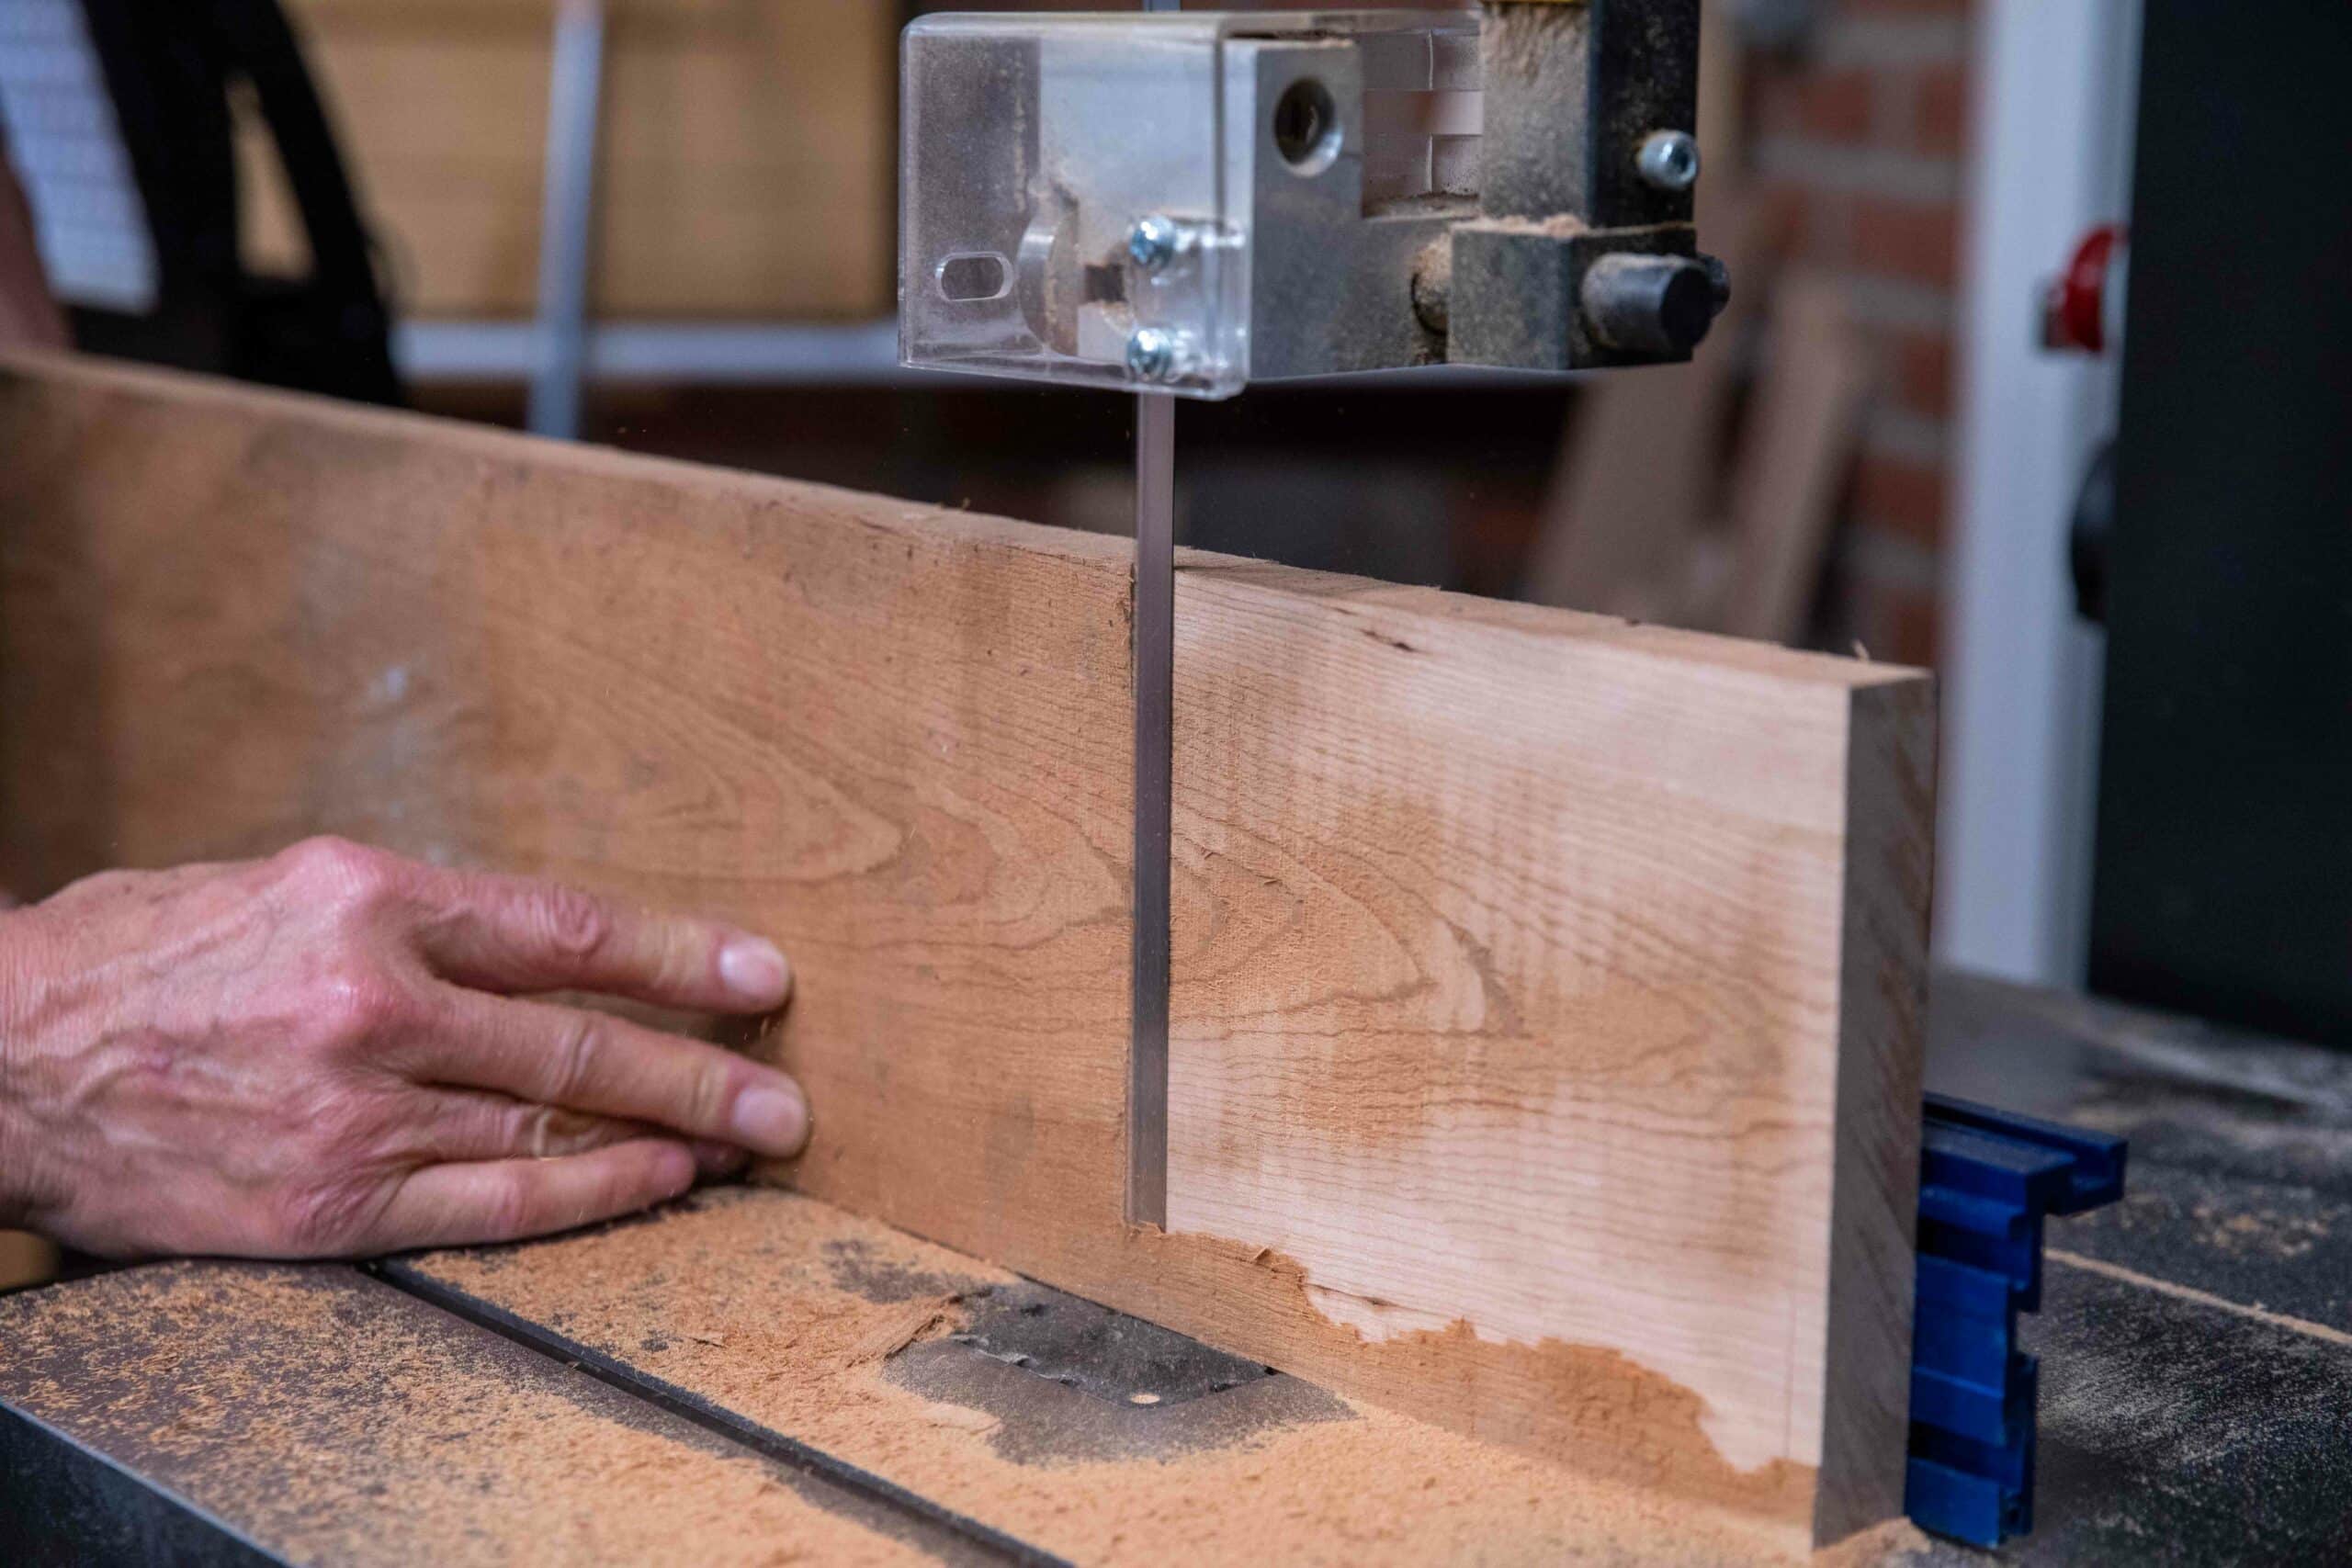
Here you will see the discrepancies removed by the bandsaw, making the process of subsequent planing much less tedious and needing little more reference checking than looking at the gauge lines from the marking gauge.
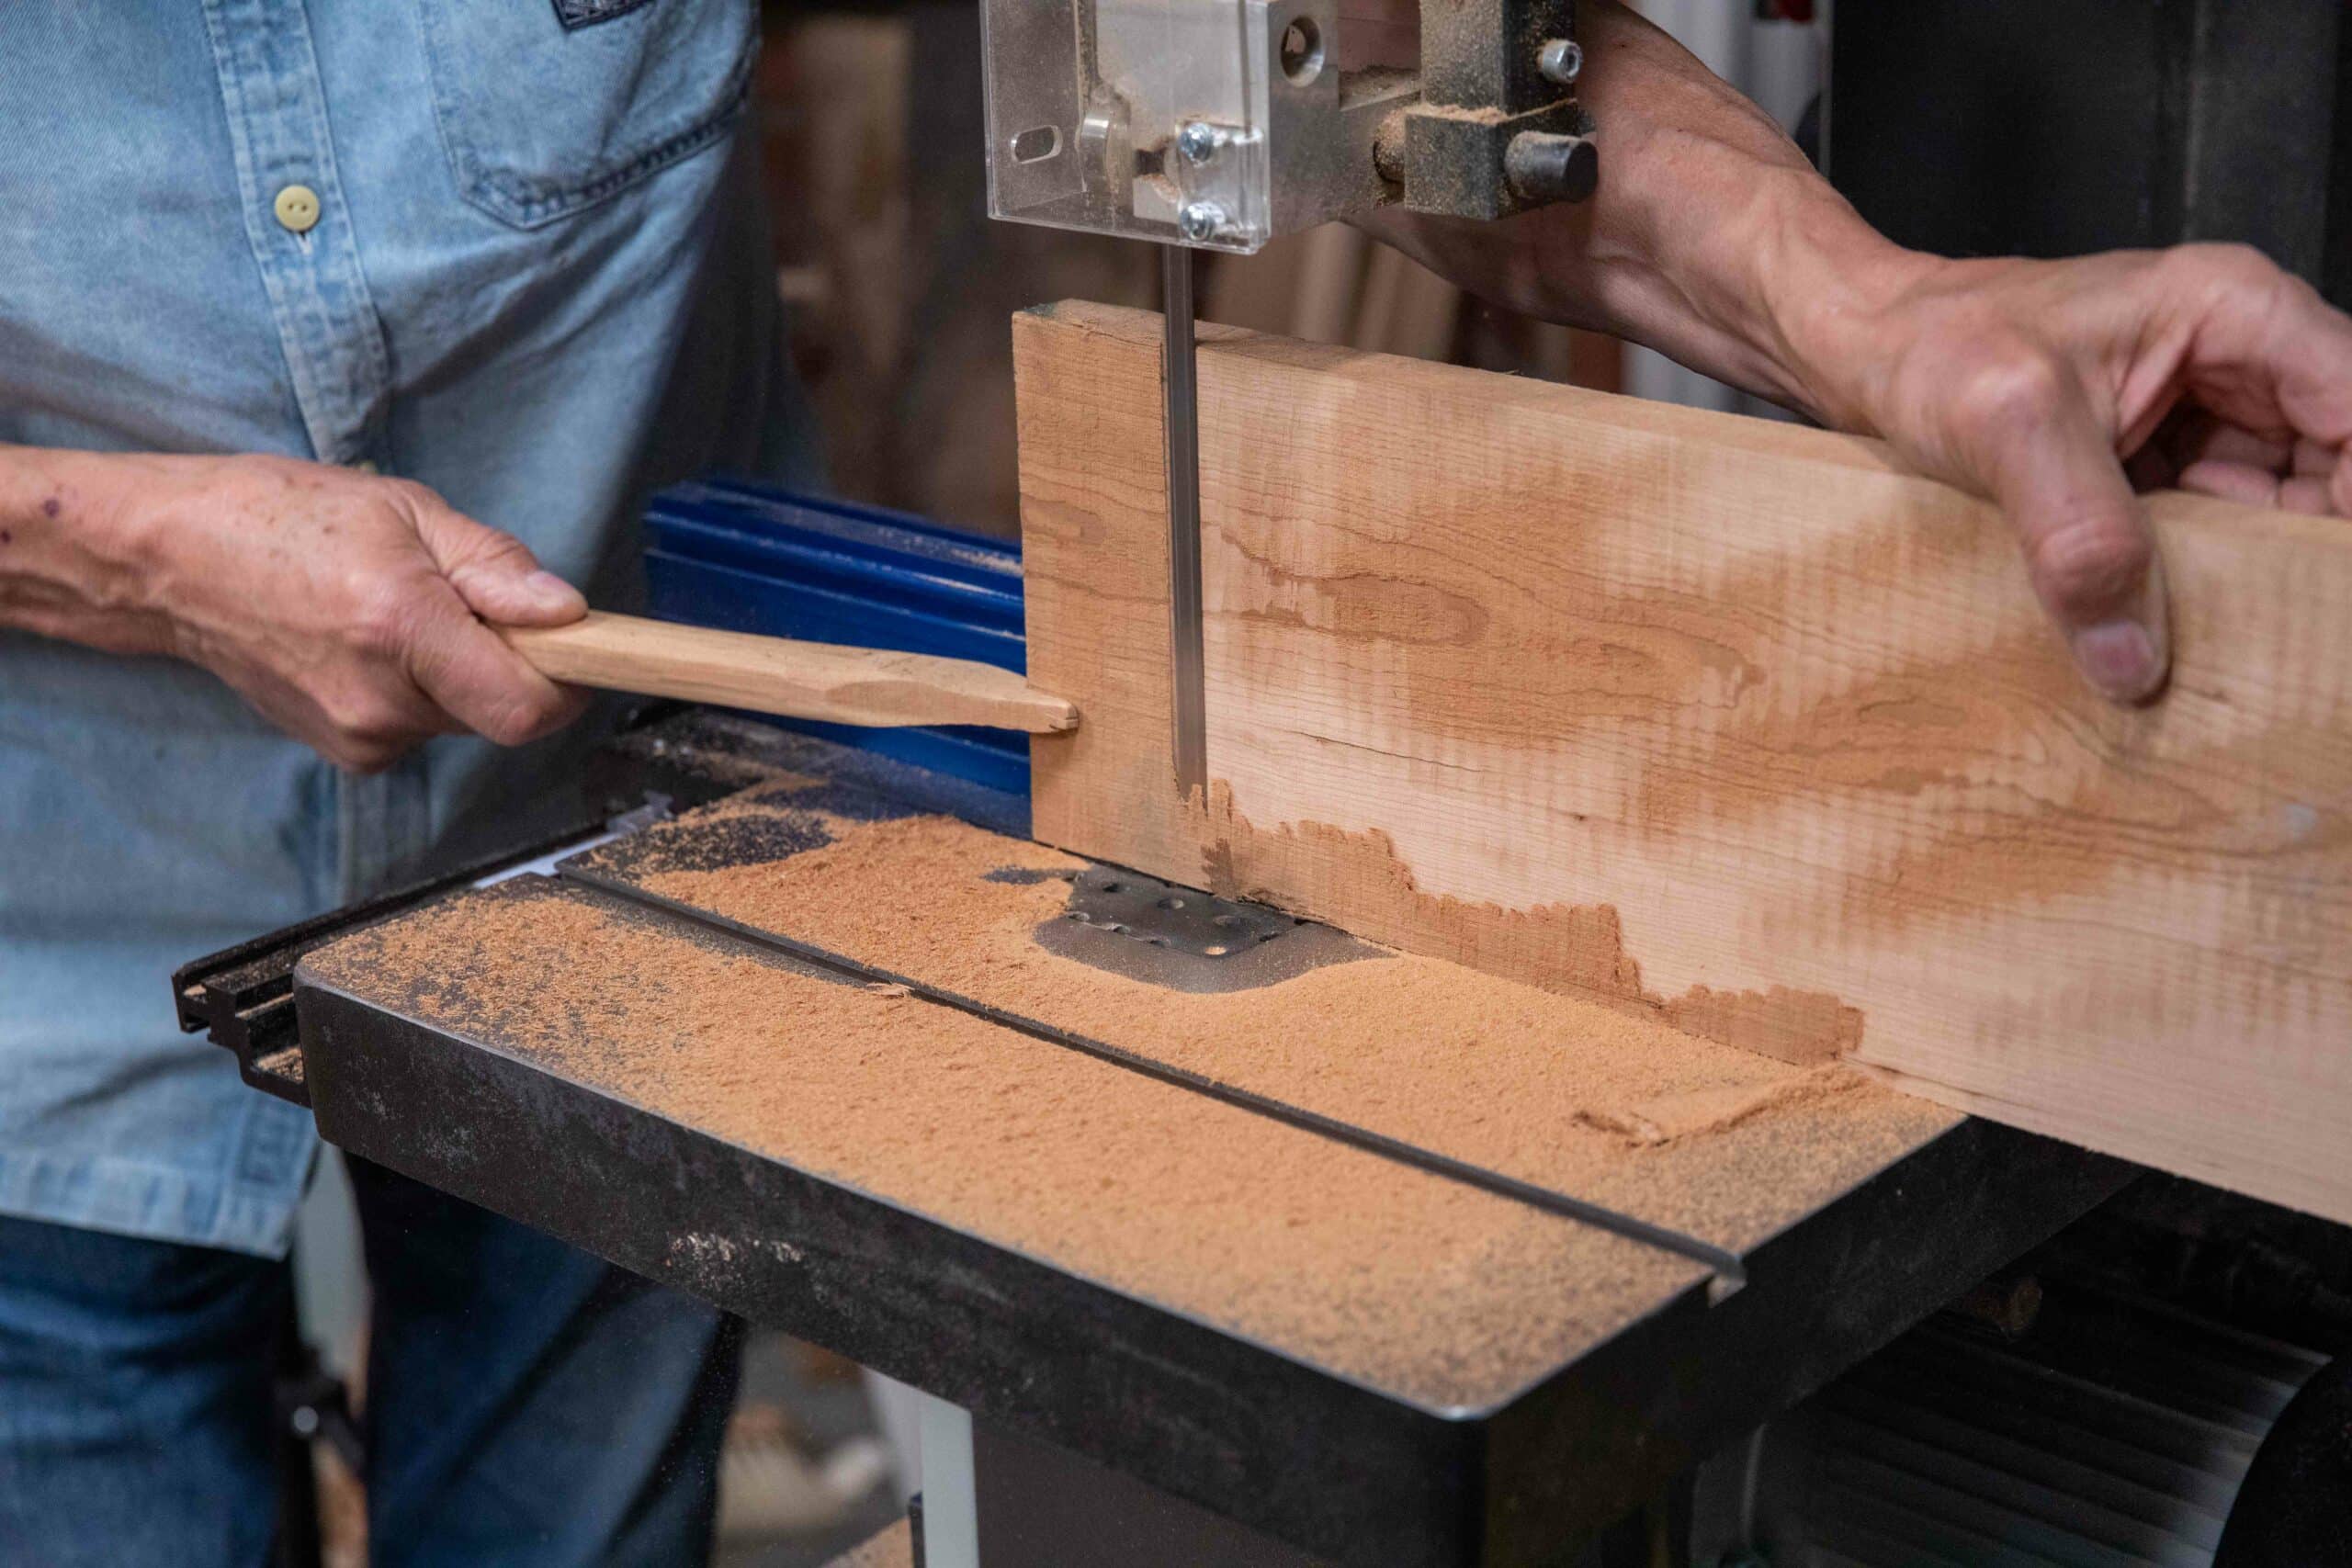
It’s worth noting here that the vertical bandsaw stripes are from the original commercial ripping and not the bandsaw work I am doing. This shows that the subsequent bandsaw work I am doing is actually taking off the coarser work of the mill it came from.
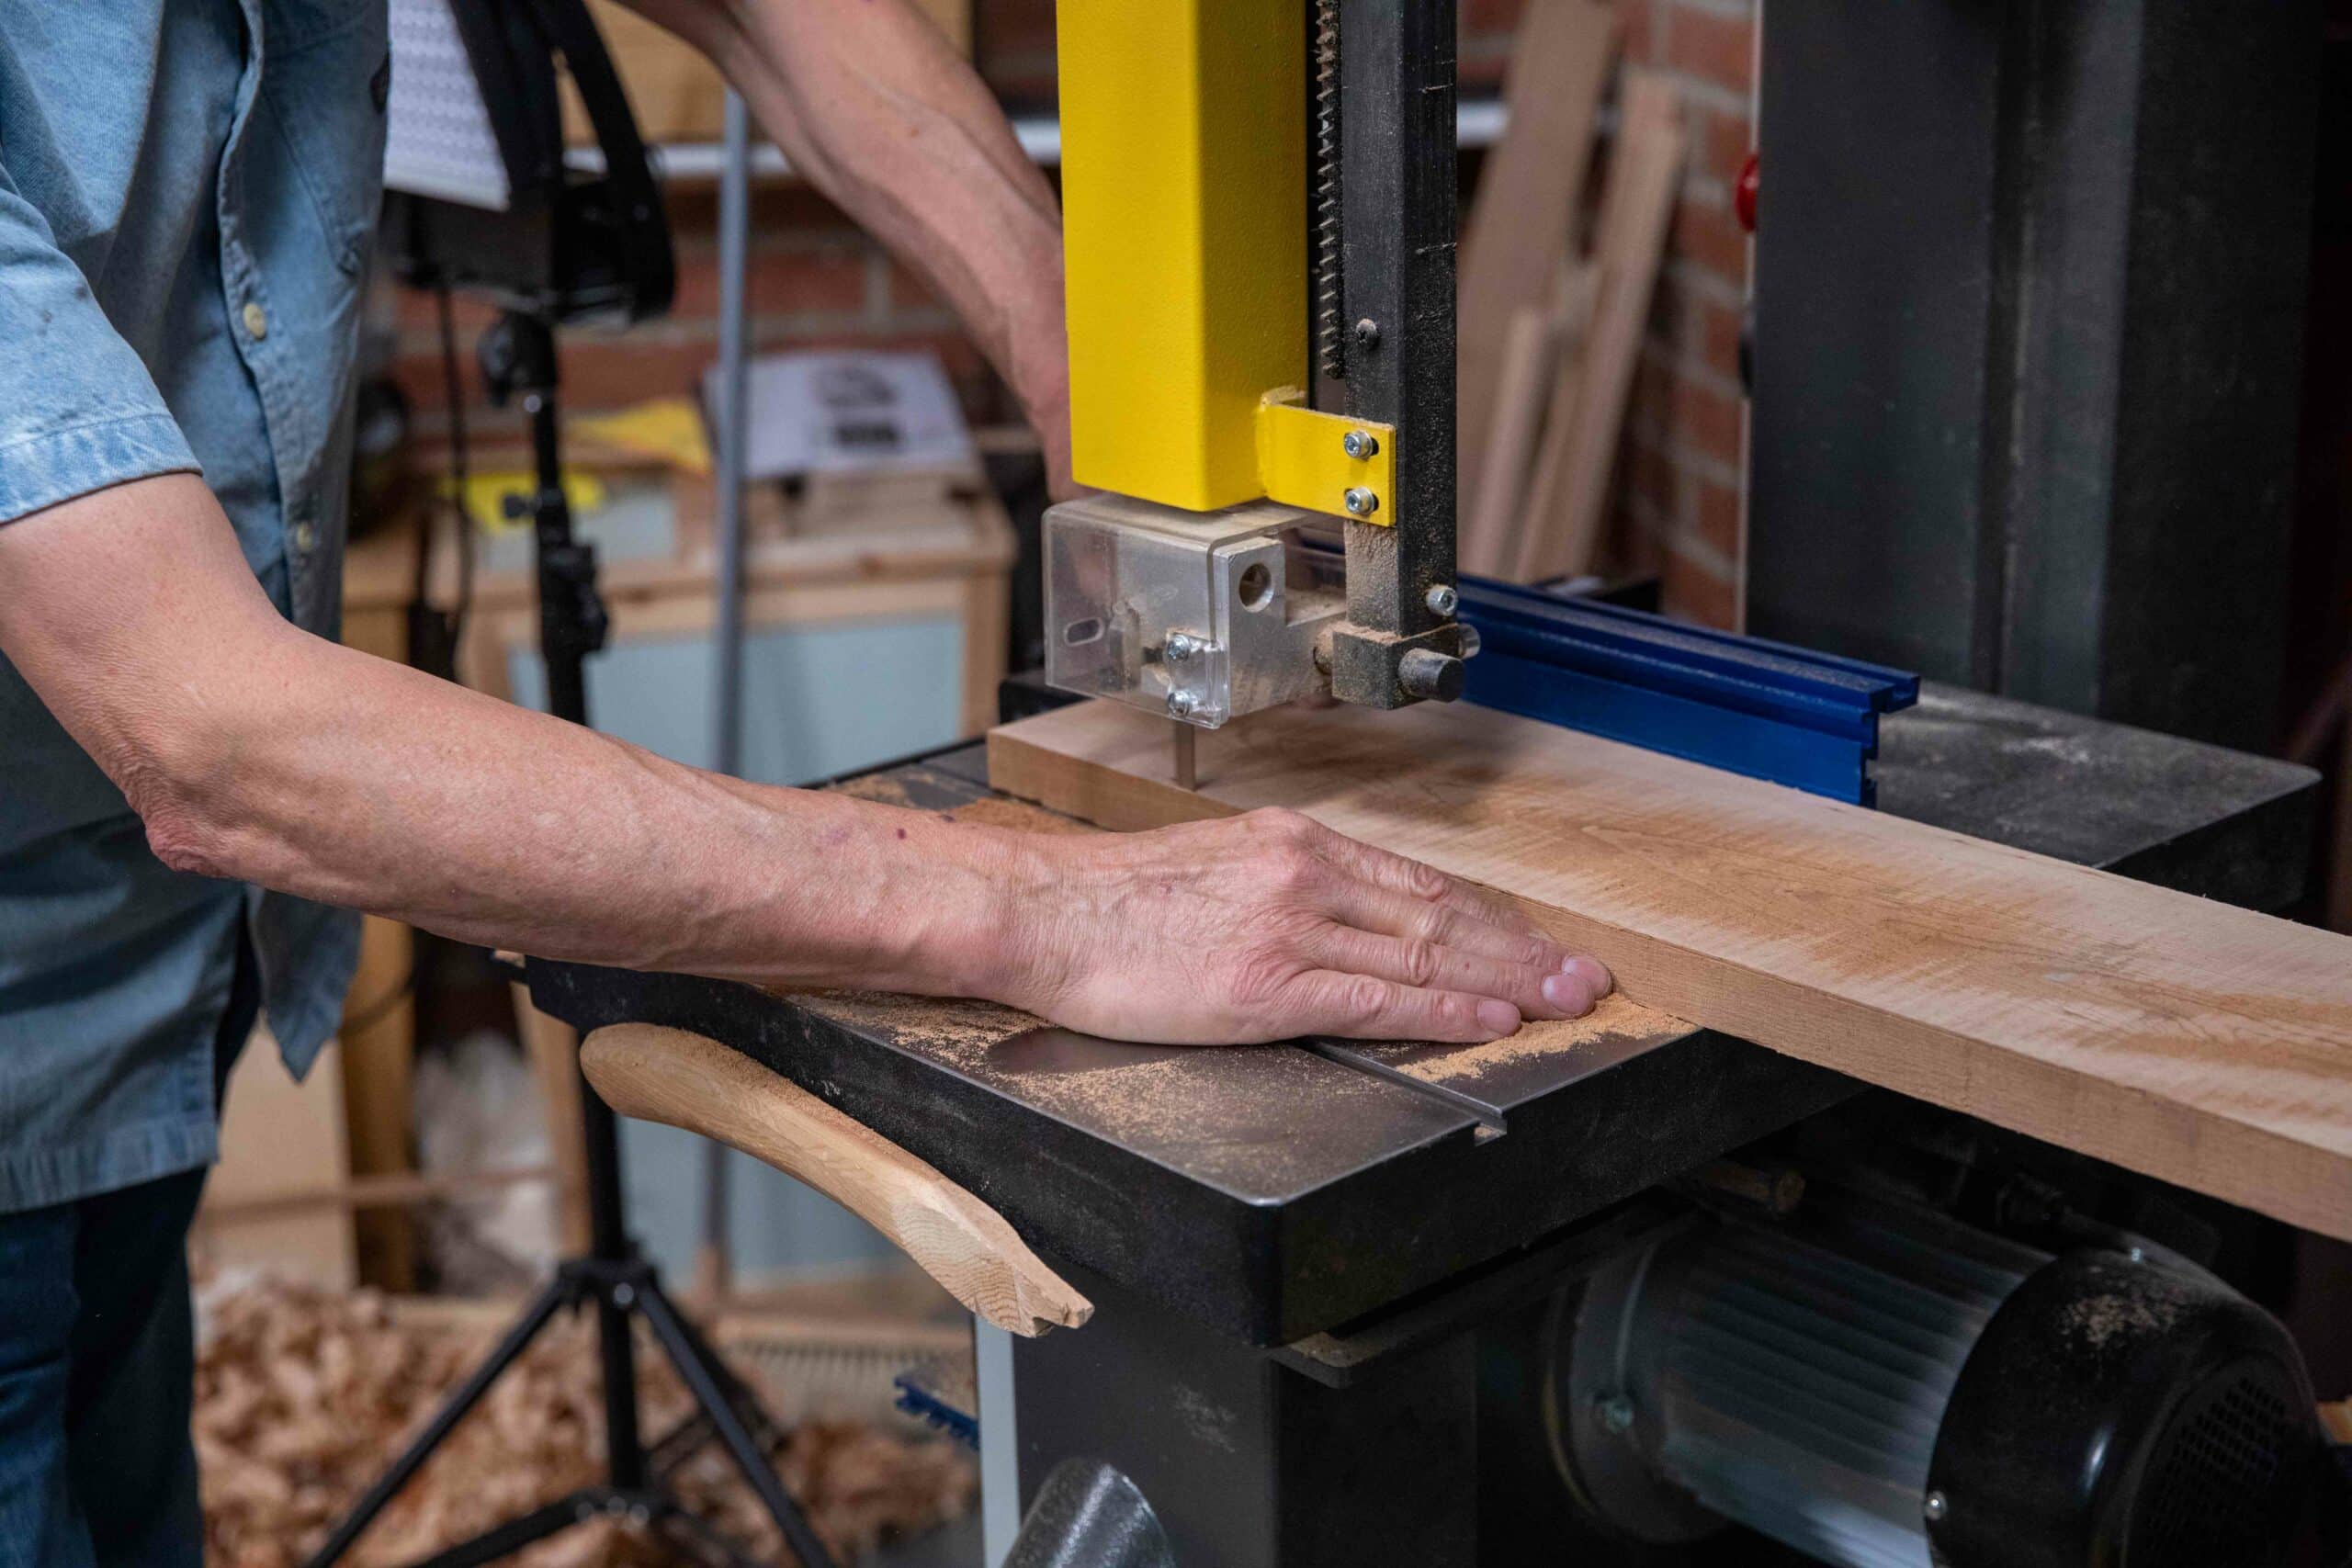
I can now rip to width also. I leave on about 1/32″ for plane work.
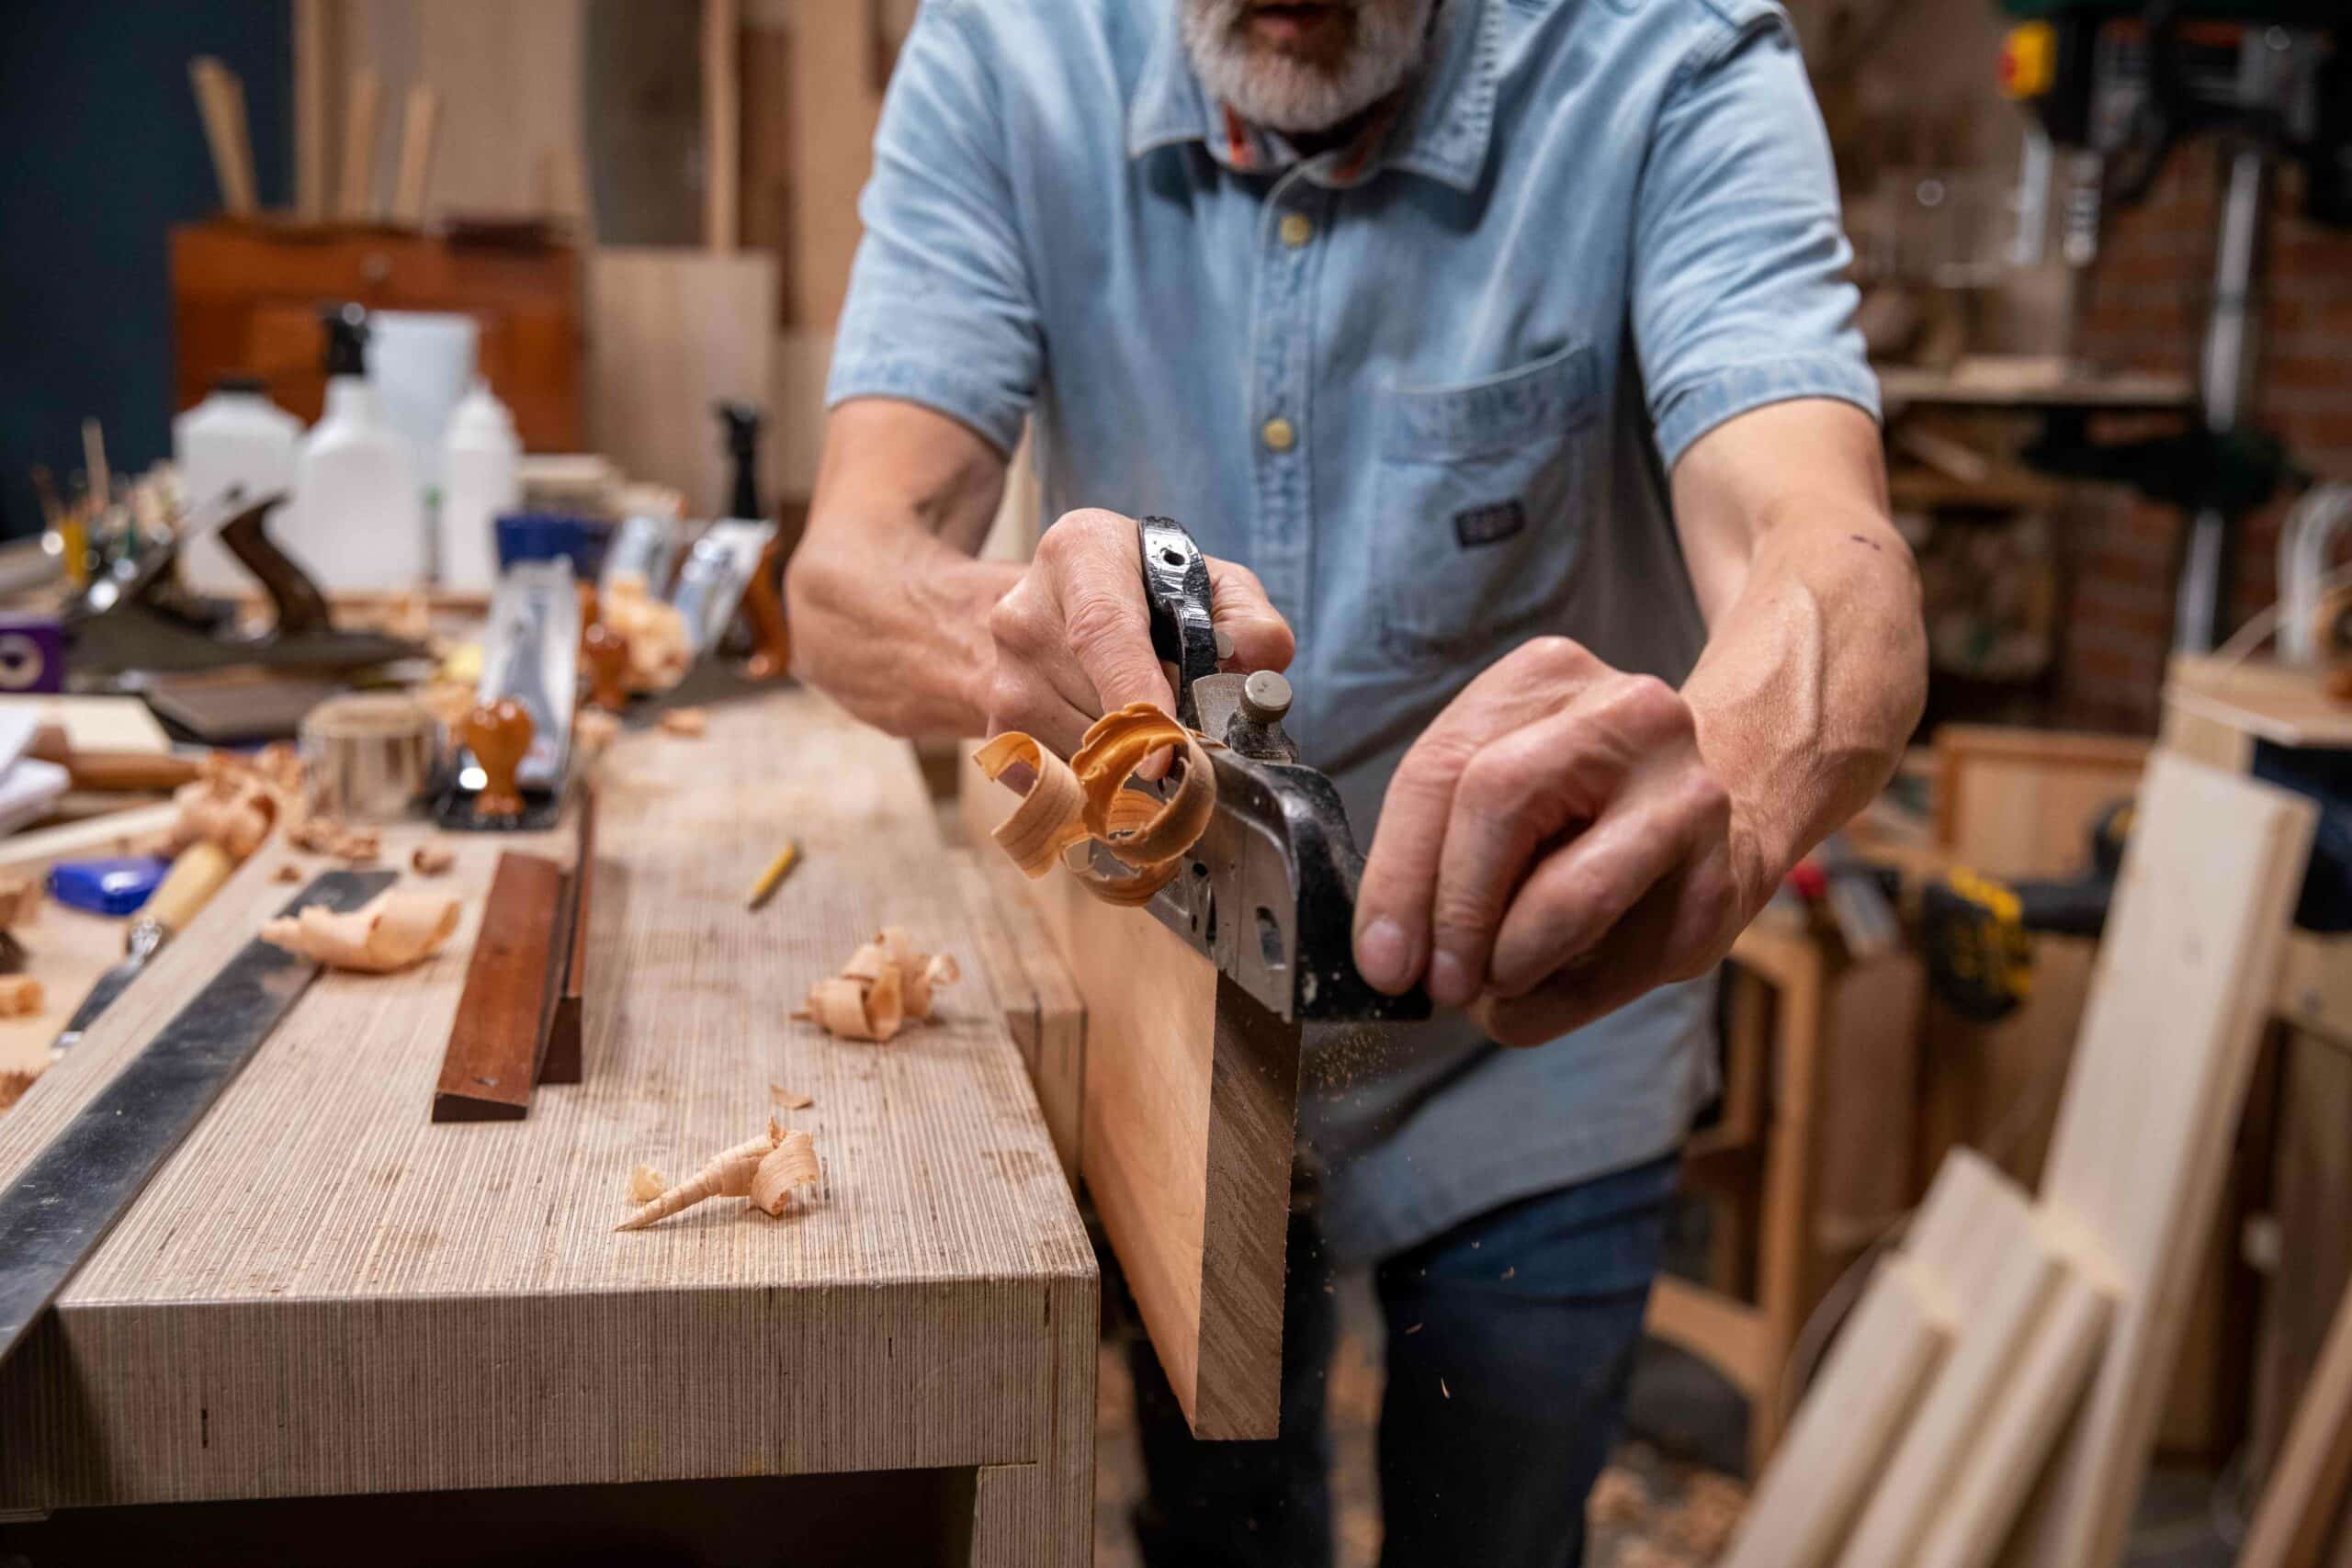
Back at the bench now, I can surface plane using the lighter scrub in my #4 scrub plane. This takes only minutes and a very few strokes.
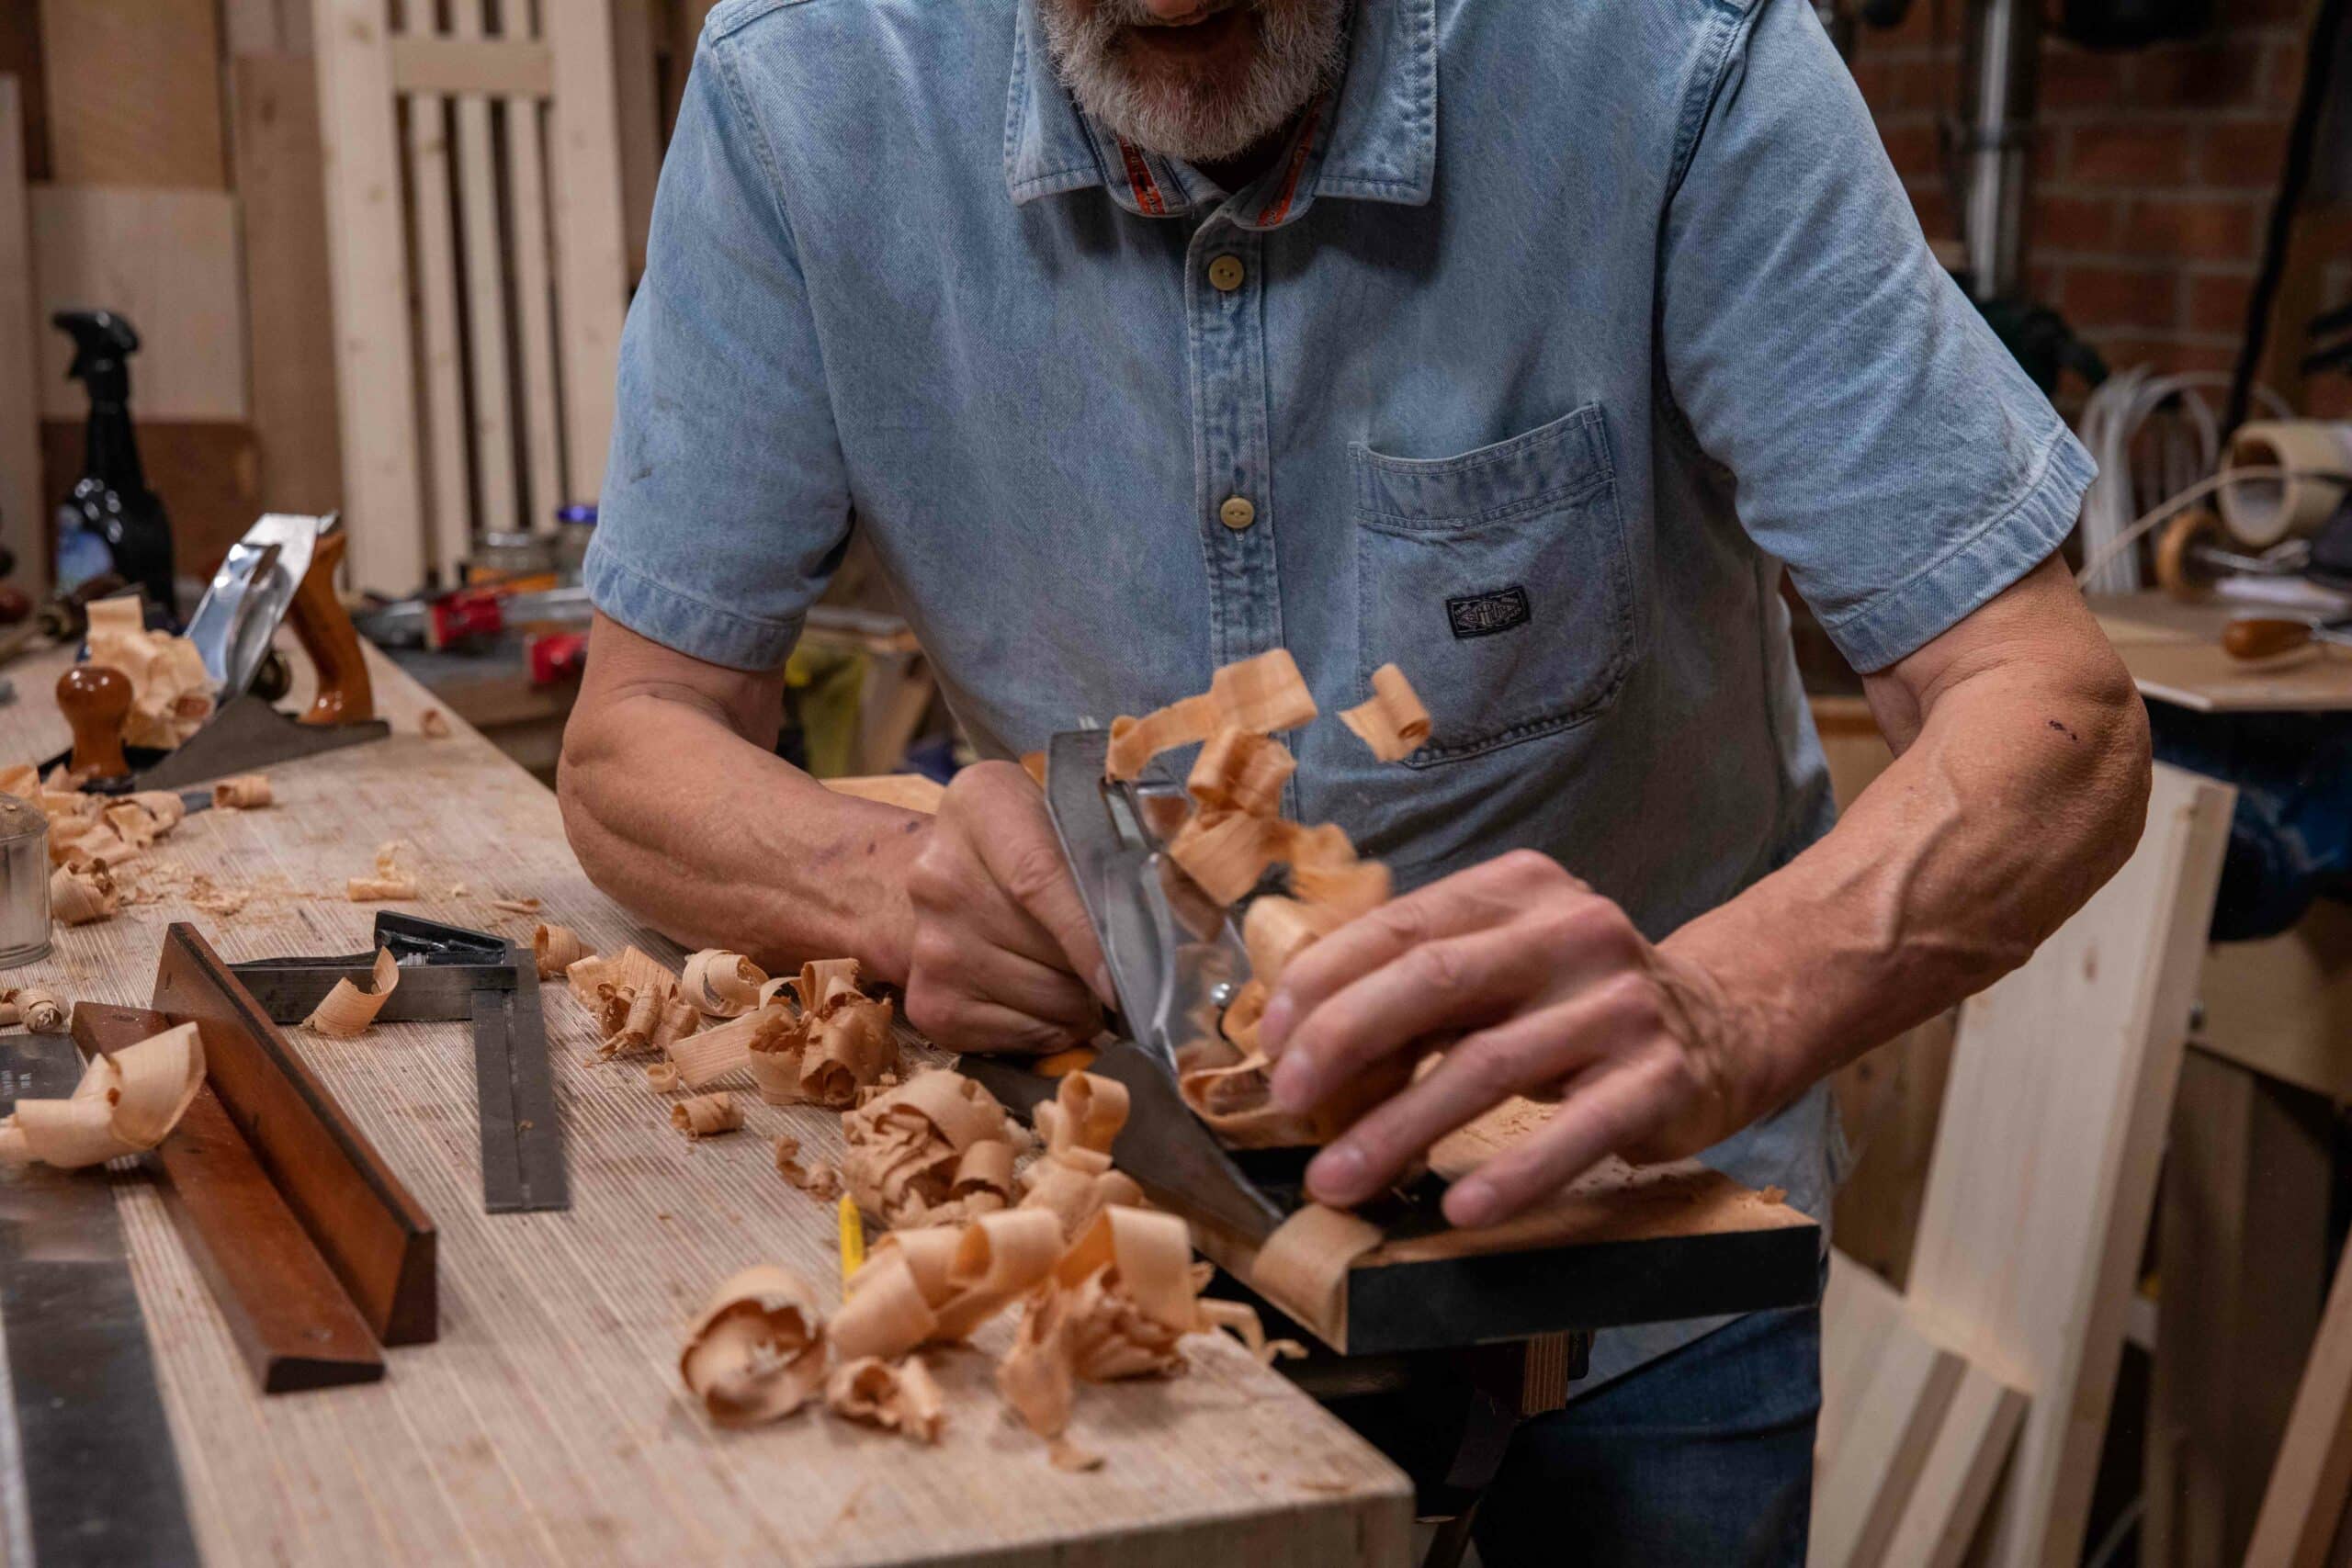
Long strokes only now as there really are no highs of any consequence to take down.

Now I am on the final edge. The smoothing plane snugs to the board and I am feeling good for the workout. Oh! See those boards as panels behind me, ten of them? They were all hand planed from rough boards and I loved it!
The above steps and the steps in the previous blogs in this series ‘Prepping Wood’ are the steps I take in every board or beam I work with to initialise them ready for subsequent work such as panel making, making tabletops and joinery. It’s the same for all sections of wood going from 4″ by 4″, 1″ by 2″, 2″ by 12″ and 3″ by 6″ and all of these and a million other sizes in various lengths up to around eight feet long.
This may be my longest blog post top date. I make no apology because what is said and photographed, drawn and explained needed saying. There is yet another blog post identifying with this blog series…just for good measure!
Hi Paul.
This is one of your best blogs on wood prep. Great detail and with the photos to help. This all takes time so thanks for doing the blog.
Richard
I was pleased to see your choice of the Stanley #78. My go to plane to start is my Millers Falls #85 (a timeless competitor to the #78). A great multi-function tool.
Thank you Paul. I tend to over think things and always seem to find the hard way of going about things. This clears up a pile of questions and unknowns for me.
Thanks again
Charles
Thanks Paul for your fantastic blow by blow description of selecting and preparation of timber ready for making your next furniture masterpiece. Having worked as a joiner/cabinetmaker most of my working life I recognise your methods. But like many others in the trade, machines did the bulk of the work. Now in retirement I work mostly with hand tools, but find my heart condition (low blood pressure) prevents me from being too active planing a board in this manner. Now days a minute or two of activity soon has me resting for 5-10 minutes. Oh well, no rush, I have all day. I can see I’ll be converting the old spare #78 and #4 blades to a scrub which may well help in this regard. Thanks once again for your inspiration to us all.
Thank you Paul for the information. I will watch the video on the conversion. Out of curiosity, what camber (either in radius or how much iron removed from end to centerline) do you use on your #78 and #4 scrub planes?
The curve on the #4 cutting iron is 8 3/4″ and on the #78 it is 2 3/4″. I have another blog post coming out that covers this too.
Nice post! I sold my jointer a while back, as I prefer to plane edges now. I have a planer but not helical cutters so the blades have nicks from use. Once you get a hand plane working, it really does change how you do certain things. I hate sanding but now look forward to hand planing for jointing and visible surfaces, what a great trade!
Paul, When removing twist on long boards/surfaces using winding sticks as guides do you remove the twist at the extremities then move the far winding stick in and verify all of the twist was removed at several locations along the board’s length?
I struggled with this during the laminated bench build (2×4). I would remove the twist at the extremities then find I missed a large section in the middle. I eventually ended up with a bench that is ‘flat enough’.
This is why we must sight along the length for straight lines once we have lowered the high points at the ends to eliminate the serious defects of camber and then sighted twist at the two extremes, end, and opposite end both align with one another. With these points now mutually inline via the winding sticks, you will see that there will be some curve, large or small along the sight-line along the corners on each side of that surface unless indeed you took this out in reconciling the twist by planing long but partial strokes towards the opposite ends. It becomes instinctive and intuitive to us the more we sight-test using the eyes. Imagine this. if the twist is removed at either end and the winding sticks align (as the stars, we hope!) striking a line with a chalk line or straightedge and pencil will create the line we aim for. Done to both sides, and cutting to those lines with the plane, we will have a straight and true, flat-faced, twist-free board.
Thank you, more practice for me.
That straight line with a chalk line after removing twist, what a good idea for long board!
Spot-on timing! I’m in the process right now of laminating and levelling the benchtop of my PS bench and facing the issue of how to remove the substantial amount of wood to get rid of the rounded edges of the studding that I used. Today I converted my #78 and it works a treat. On the issue of twist, I also had a penny-dropping moment when I drew the end of an eight foot length of 2X1. I then rotated the end a bit clockwise to indicate twist, and it becomes obvious that the new “level” will have to be level with the lowest corner of the top surface. If you achieve this over 12 to 18 inches from that end, and do the same at the other end, you will have a hump in the middle of the length to remove equal to the amount you took off at the ends, in order to make that whole surface flat. Seems to me that you will always have material to remove around the middle of the length after addressing twist at the ends to restore overall level. Hope that makes sense!
Paul,
You are always extremely thorough in your explanations. That, in my opinion, is what makes you such a great teacher! You answer, the yet to be asked question, with decades of knowledge and understanding. Thank you.
Paul, I have been using an old #26 transitional with an 8 in. radius on the iron as a scrub plan. I do this because I saw on another channel that they were well suited to the task and, they truly are. But, am I using that plane to its full potential? What are your thoughts?
P.s. you have inspired me to start my own blog detailing my projects and the lessons I learn along the way. Thank you sir.
Thanks Paul, excellent post. I have been looking at a how a bandsaw might help during wood prep and this made it quite clear.
I enjoyed reading this series of post and picked up a lot from it.
I do wonder if you would prepare all the wood before the start of a project or for example first prepare the boards for the outer box of a chest of drawers then when that is done prepare the boards for the drawers themself?
The reasoning behind my question is that I don’t have a lot of shop time to get everything done within a day and have run into the wood moving over night.
It is a good idea to break down your project into subunits. The main outer carcass being primary and the drawers being made after, to fit when the carcass is constructed.
Thank you for you response.
I’ll give that a try on the next project.
Thanks for the post Paul. Great info. You didn’t elaborate much on jointing the length of the board edge. Do you use a longer straight edge for this process? The longest plane I own is a jack for this. I’d love to read about your technique using the smoothing plane. Would be a great help to me.
I simply sight down the length, Scott. Thankfully I have a good eye. Edge jointing two pieces side by side too pretty much guarantees two straight edges if you bring the one round to the other after planing them together because doing that you cannot plane one round and one hollow in the same procedure. If they meet perfectly then you have a perfectly straight plain. I certainly do not advocate long planes for this process. No plane I ever came across longer than a Jack stays flat. It always moves according to temperature.
What a great resource this is.
Prepping stock by hand is an art in itself, and never becomes less important. I have found, as with other aspects of woodworking, that things improve together – I get better at sharpening and setting my tools, and at the same time more sensitive to the plane and wood underneath. You also start to develop a sense of what a square edge feels like beneath the plane.
Thanks Paul.
What a great series this has been! So many of my questions answered. Many, many thanks.
Hi Paul,
sorry for an off topic question but i do not seem to be able to leave comment to your older blog post.
I have a question about sharpening stones. I have about dozen of various unused stones that belonged to my granddad. He was a glazier and I suspect they were to be used for smoothing the sharp edges of glass after cutting. I would like to re-use them for sharpening my woodworking tools. None of them bear any marking at all, they were made in late 70s, maybe early 80s and behind the iron curtain. Probably east Germany or Czechoslovakia. None of them have any traces of oil, perhaps because they are unused. That’s all identification I have.
The question is, how to find out if a sharpening stone of an unknown origin requires oil or water as a honing fluid?
Thanks for laying out these steps in fine detail and pictures. I know you have offered this information many times before, but being new to this, I still get something out of each post/video. Huge appreciation & can’t thank you enough.
This blog series on buying and preparing wood is widely welcomed as the abundance of comments shows. Obviously I wasn’t the only one who needed it badly.
Many thanks for this series and of course for all the rest of your teaching.
Until now I have been using “planed” big store boards. But then starting a woodworking journey by prepping rough wood would have been trying to learn a new language by first learning grammar; not very motivating. I am ready for it now.
GREAT article, Paul! Using the band saw to remove the bulk of the work was indeed a golden nugget for me. It was one of those “OF COURSE!!!” moments. 🙂 And it is a very, very good example where a machine would be a good choice. Donkey-remover.
Being able to use a hand plane to square a board is great fun. Recently I made a small side table with handtools only, except for the initial dimensioning on the thicknesser and a few rip cuts on the band saw. After planing the end grain of the table top square to an edge, the time came to bring the top to its final width and make the edges parallell. After marking (I used a steel ruler and the knife to mark the width, in place of a marking gauge), I planed to the line. The edge was a wee bit tapered.
When I took that last swipe to remove the line, it was time to check the diagonals to see how I did.
Perfect. The diagonals are within .5mm to eachother – less than the level of uncertainty in the measurements, from what I can determine.
I am in no way a skilled hand tool worker, and _I_ did that! It makes me proud. No machining would give me the same satisfaction. Routing the edge would deliver a crisp and clean, square edge. But it is skill-less work, pushing a squeeling thingamabob along a straightedge. Not to mention the router… 🙂
I am still very new to this, but one thing that helped me a lot was to practice turning pieces of fire wood into small boards. I didn’t worry about mistakes, and it felt like an adventure! (Roughed things out with an old draw knife.) Oh, and using a cambered blade in a no. 5 as intermediate between a coarse scrub and a smoothing plane was an absolute revelation! (As I said, far from expert, and just haven’t tried it in a no. 4) The narrower cut moves through the wood so much easier, and it seemed to make the overall process more efficient and faster.
Excellent teacher (and I’ve had some real dogs!). I too enjoyed the detail and clarity. Thankyou.
Thank you Paul
Great timely post for me as I’ve just been doing stock prep for my living room cabinet that I’ve started. The tip to use a chalkline or straight edge on long boards after truing up the ends with winding sticks is brilliant.
I’m using some lovely piranha pine which i believe is now unobtainable but was given to me by somebody who had it in his garage for 30 years and I’ve only just enough for my plans so can’t afford to mess it up.
I haven’t got a bandsaw so doing it all by hand and eye using the skills that you have taught me and the tools that you’ve taught me to sharpen etc so I feel confident that i can do it now on this bigger project with this precious wood having practised on smaller projects. It’s going to take a while but every day i make some progress even if its just a little bit, it doesn’t matter i’m in no rush, just enjoying all of the little victories along the way.
Having said that I do want a bandsaw saw though,
The Stanley #40 scrub plane is not expensive, maybe $80 on ebay, made for the job. Any reason why you don’t use one?
I just looked on eBay and the two available were way over £120 plus £30 shipping to UK. That’s a good enough reason not to for me. And how many are you saying that there are available? Is the US eBay as accessible to the rest of the world as it is there wherever you are? How much is shipping from your world to mine? How do I return it if it is on another continent? Would you risk buying one from eBay US if you live in a Siberian village or somewhere in a remote place in Mexico? These seem to me to be better questions to ask because I think you would find the answer immediately in any one of them, Ken. We cannot assume that the wealth of one country or region or the expanse of secondhand woodworking tools is accessible, available and then affordable to all.
This is great article Paul with a lot of details and I appreciate the pictures very well made to accompany the explanations.
I’ve been following your blog and videos for years and they really help a lot. Still there are a lot of things that I had to learn with practice. The most tricky for me was (and sometimes still is) understanding how to deal with wood flexing during the stock preparation:
– Clamping a board (even 1″ thick) in the vise can increase cupping and cambering so that when you release it from the vise after flattening, what used to be a camber becomes a cup.
– A bow on a thinner stock becomes straight under the weight of a plane and you cannot plane it off successfully. And more generally planing thin boards that flex under the plane
– When you need a board absolutely straight and when it will be straightened in the final structure
This is purely my experience but I believe it is not unique and it could be very helpful to cover these considerations in one of your articles.
Hey Paul
I have question you might have answered tons of times I’ve searched to see if I could find where you might of with no luck I have a no4 Stanley plane that’s my largest plane is that sized plane good enough for a shooting board all the other woodworker videos I’ve seen say you need this large and expensive plane for squaring up boards but I’m not wealthy enough to be able to afford those thank you Geoff
It’s mostly what I use and have done so for 50 years with no real issues. I would say that the length of a jack plane can be more helpful for the longer miters. Lots of woodworkers have lots of disposable income it seems so they do tend to buy into the biggest and the best syndrome to find that ultimate sweet spot once a year with a special plane.
Hello Paul,
What tolerance should be achieved (or is generally acceptable) over a board once dimensioning is complete? Flatness within 1/1000 inch?
Should we aim for the the same tolerance on all sides, or just the reference face and edge?
Kind regards,
Pete
No, nowhere near1/1000 inch. I can often see some thin line of light through a straightedge on the wood revealing a slight camber or hollow or both. You must remember that wood is constantly moving according to the surrounding atmospheric moisture levels so will swell to create hollows and rounds that we can do absolutely nothing about. We just strive for the best we can and then work with our joinery accordingly. Once the joints are in place wood becomes constrained to a great degree and we really are preparing the wood more for the joinery rather than permanent flatness. I generally accept that paraplaning by machine usually gives good parallelity, depending on the machinist’s tolerance levels, but for most woodworkers hosting permanent use of a machine like this is prohibitive and for an amateur making one piece of good-sized furniture a week or a month, unnecessary unless they have a physical constraint on them. That means the two reference faces is good enough, the other two is a close-enough decision we must make.
Let me say this too: with social media now so prevalent online, the gurus are out there and it gets ever harder to find any realness. Anyone saying that they work within thousandths of an inch in their work is unlikely to do so. I have never seen any crafting artisan work to such tight tolerances in the day-to-day of woodworking.
To put it in proportion, the EH101 helicopter for instance has a general machining accuracy of +/- .25 mm or 10/1000″ (a good machining tolerance on machines that CAN achieve much better.)
Sorry for butting in here.
+/- 0.25 mm
I guess this is for non-working surfaces (I mean not for axle in hole for example).
Although metal is generally seen as stable in ordinary life, dimensions change with temperature.
The Anglo-French Concorde aircraft, for example, was expanding significantly in flight (about 30 cm) due to temperature rise caused by high speed air friction.
This blog really takes me back to my School days, when I had a wonderful teacher of woodwork, Jack Hargreaves. His methods of preparing and finishing were the same as yours, and largely how I try to approach my own work today; though with the addition of a couple of power tools.
I learned more recently, when I came back to attempting joinery again that he taught me almost everything I know, just not everything HE knew…
Thank you for this article. It has been so very useful, in particular the advice to use a #78 plane to start. Earlier this year I made a coffee table from American White Oak. This was the first piece of proper hand-tool woodworking I had done since I left school (early ’60s). I found the wood preparation very hard going with a No 4 and a No 5 1/2)
I got hold of a #78 over the weekend, put a camber on the blade as you describe, and was astonished at how much easier it was on that ‘first pass’ over some White Oak.
Hi Paul. I’ve been near-sighted (i have myopia) since I was in 7th year in school. I learnt woodworking with your teaching while using contact lenses, and never had any issues when assessing the flatness or trueness of my stock. Then i got tired of all the care that contacts require, and switched back to glasses. The matter is that now I get barrel and cushion distortion and that makes it difficult when preparing stock. I don’t know if this is because my nearsightedness degree(about -3.0 in both eyes), or just bad quality optics(crystals)
The question is, do you have any optics brand when choosing tour glasses? Do you experience what I do at some extent?
Thanks for everything!
I have this problem with my progressive focal lenses.
Although it is only in the direction right to left or left to right but not while looking from near to far along the board.
Those are lenses for all activities: from reading to car driving.
You might want to discuss this with to your occulist and maybe have an other pair of lenses specially adapted to wood working (from near up to 3 m?).
It is not so much the brand but how the lenses are grinded/polished for your eyes particularities.
Thanks! will contact him
During the final cutting to width on the bandsaw, the comment was made to leave on 1/32” extra for planing (far smaller than I have been). Is that also true for the final cutting to thickness on the bandsaw? Is there a trick to getting that accurate of a cut, especially on the thickness cut? I have an old bandsaw, but even with a brand new blade struggle to accurately cut a straight line within 1/8”.
Thanks for such a wonderful guide, this really opened my eyes to how to prep wood faster and more accurately.
Auckland, New Zealand remains in hard lockdown due to the Delta variant of the Covid virus. I don’t have much wood in the shed, but I do have some spare lengths of macrocarpa, left over from making raised gardens for my wife. These lengths are rough-sawn, but before reading this I’ve used a number 4 (occassionally a 5) plane to produce wood I can use to make a small table with. It’s been very satisfying, particularly when one can hardly leave the house and only food stores, petrol stations and chemists are open. I’ve finally got the skill (thanks, Paul) of setting my planes up correctly; the sound of fine shavings coming off is very satisfying.