More On My Router Plane
I think that this is worth saying. My new router plane reduces the cost of owning a lifetime tool to the cost of a few short hours in the shop making it and the price of a half-decent restaurant meal, probably less. Of all the hand tools worth making yourself, I consider this one to be the most worthwhile. To help you to understand this further and so you can clearly see what I mean, I plan to make one of my standard hand router planes all the way through using the kit of metal parts we supply without me taking a break until it’s done and in use. The challenge details will follow soon but the idea is to show exactly what it takes if I stop talking and get on with what I do best. We thought that this would be very helpful for everyone to watch so that the sequencing is clear and so that you can see what I do to make everything happen efficiently and economically as I go. Anyway, that should be both fun and interesting and for another soon-coming day, time permitting.

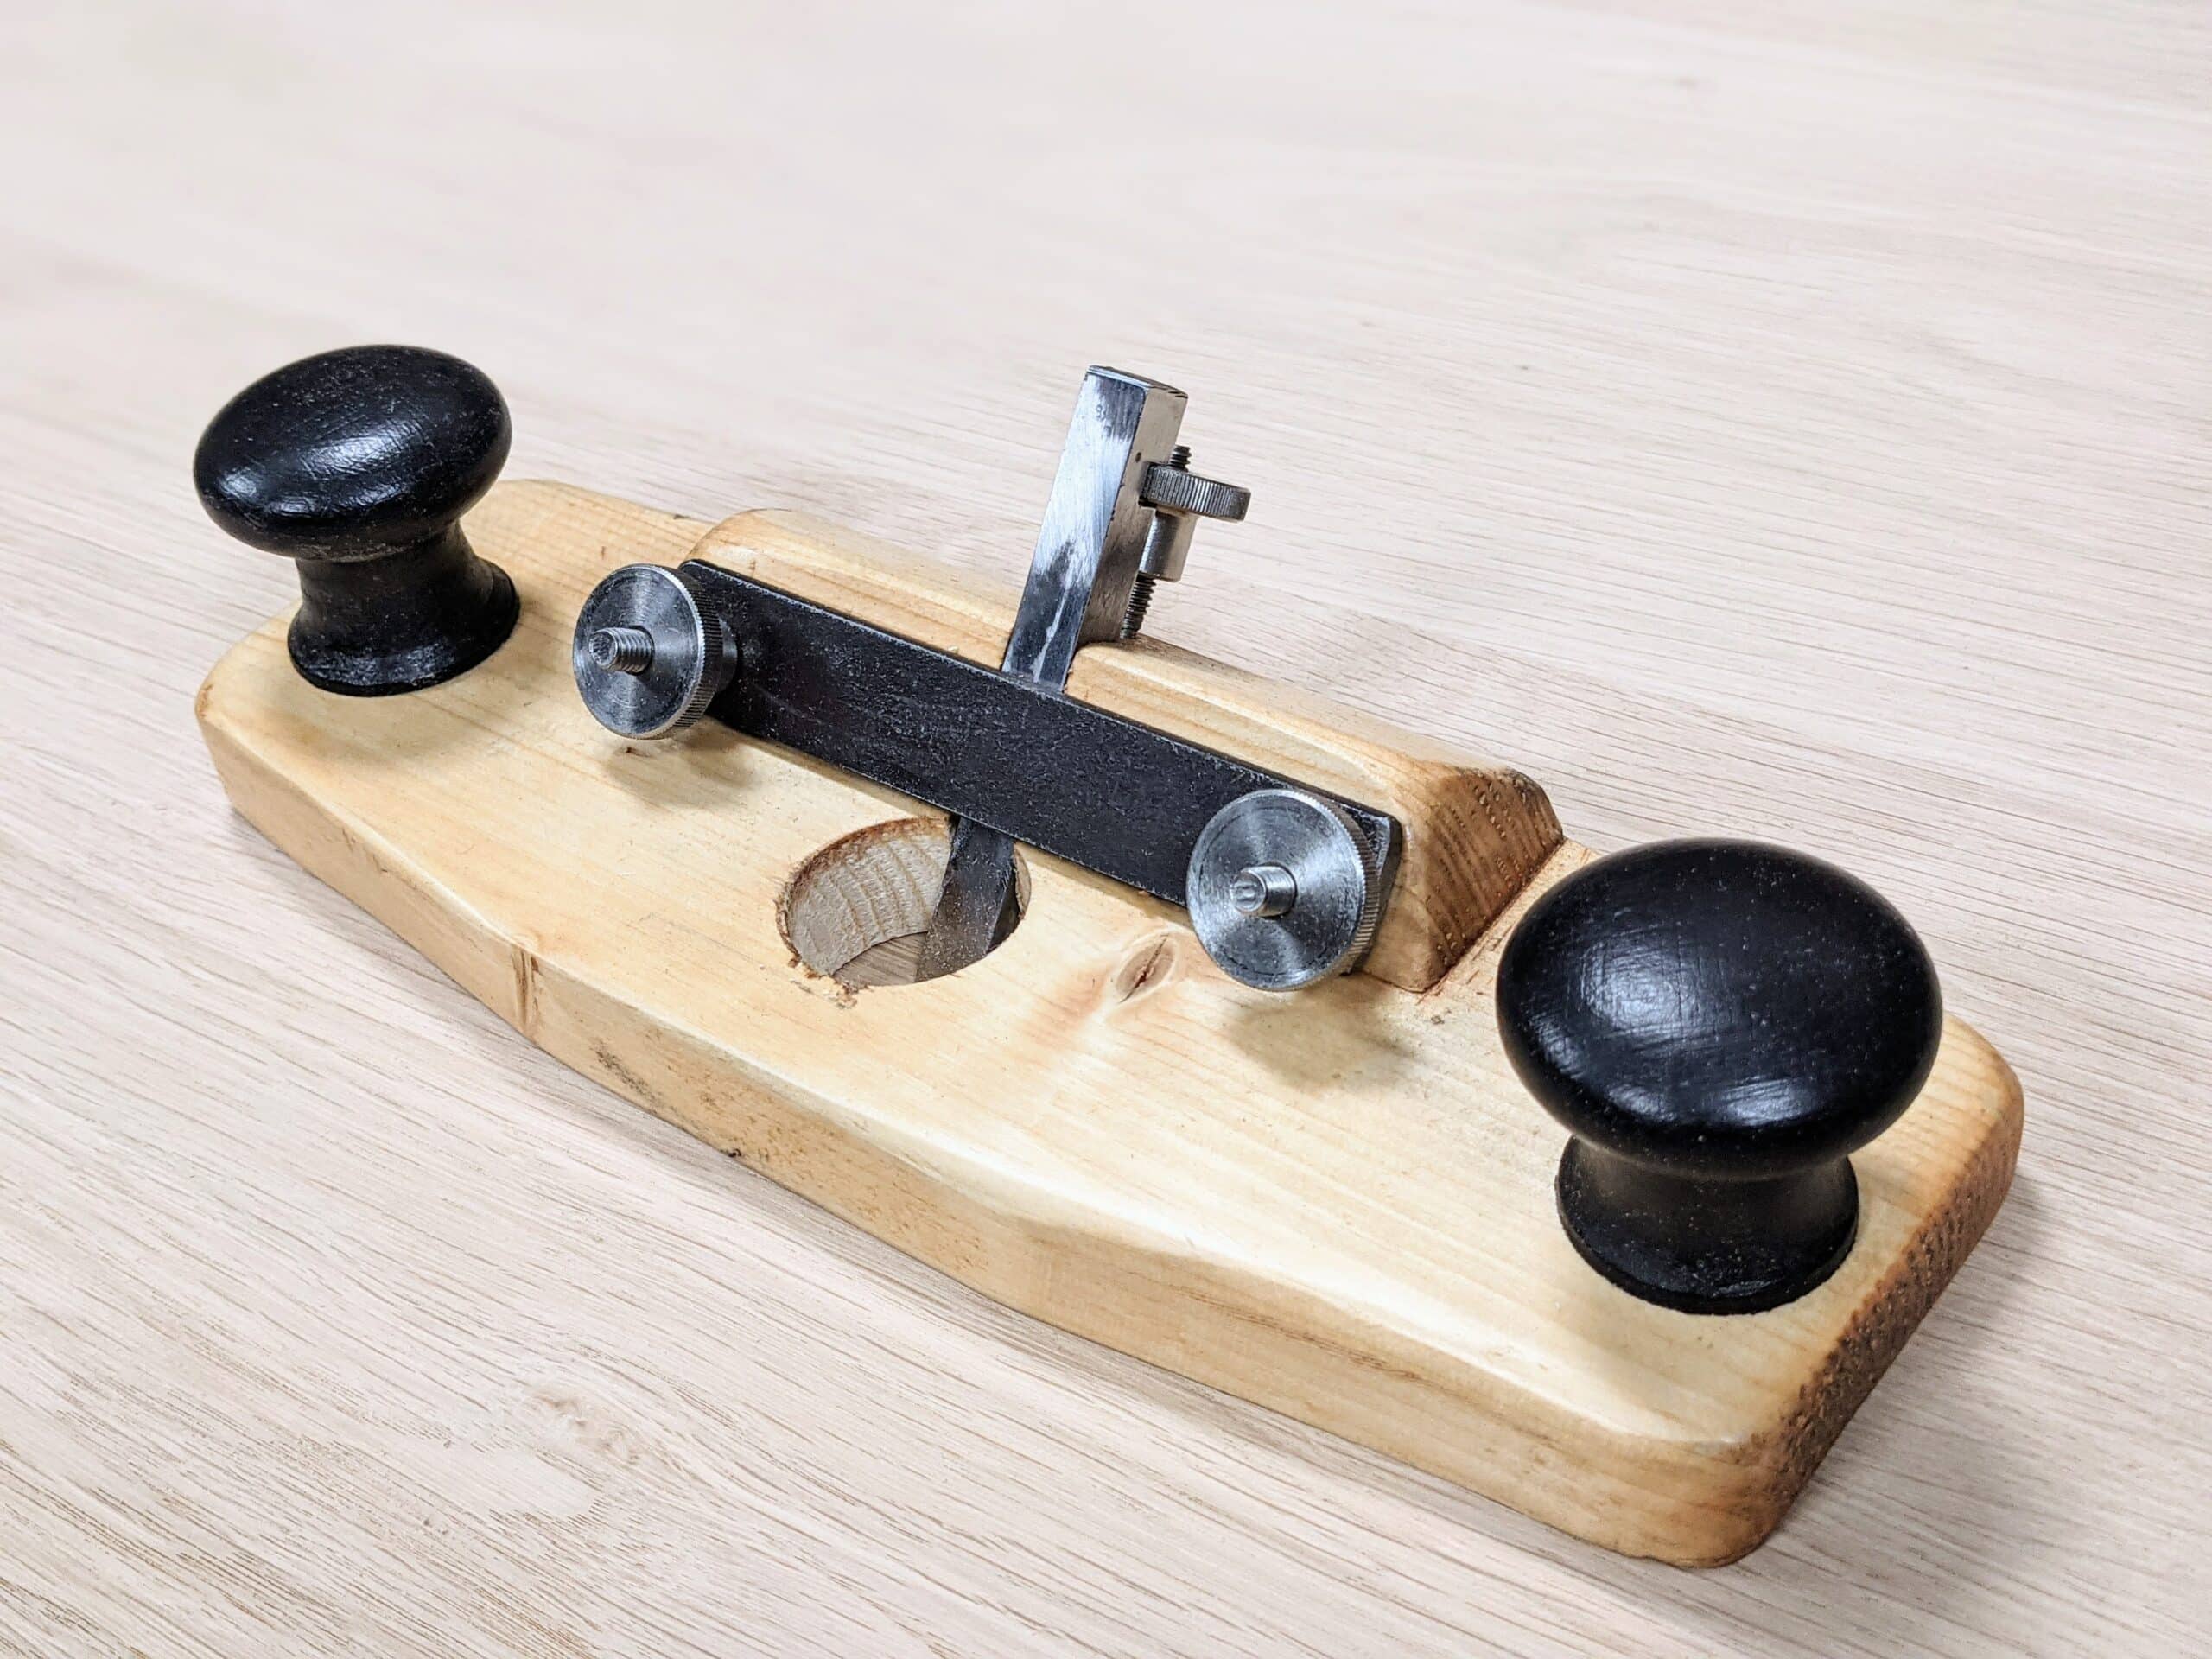
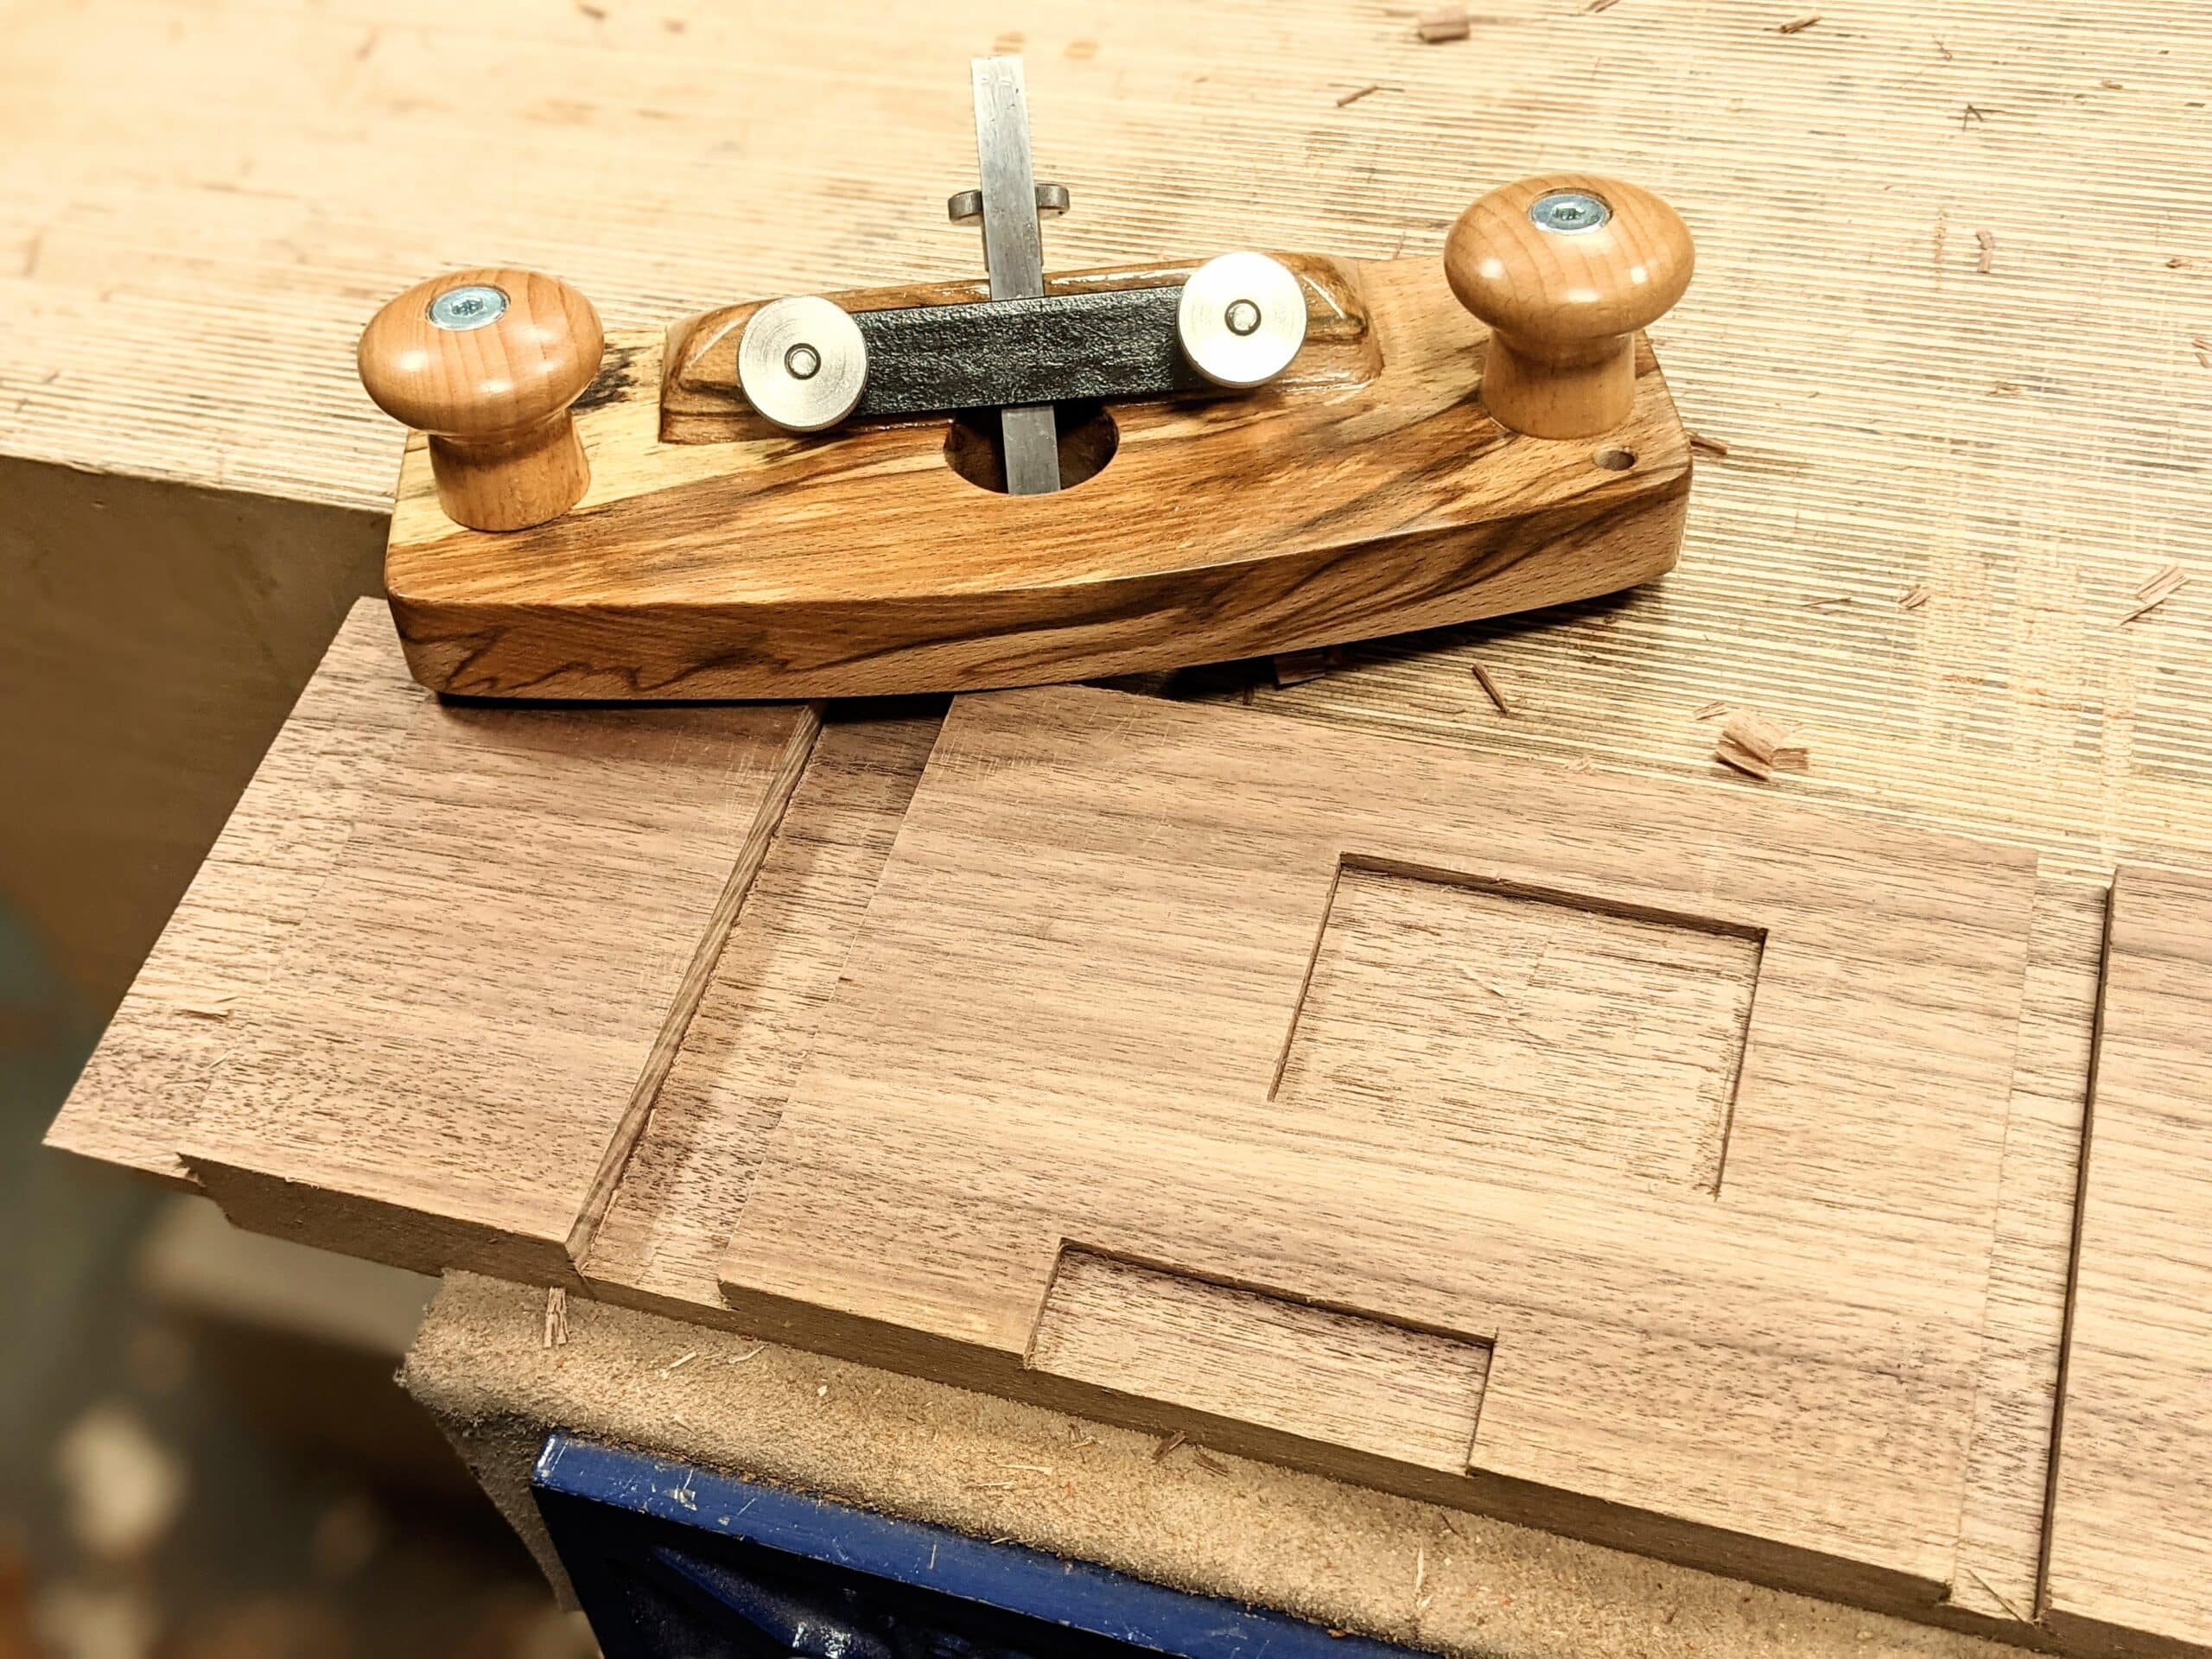
I made my plywood version to counter the snobbism surrounding tool ownership that is creeping into woodworking. Some planes have become works of art and that’s nice but I am in the realms of a maker getting the work done with highly functional works of art that represent a different type of workmanship and a different type of attractiveness.
way. I like it very much.

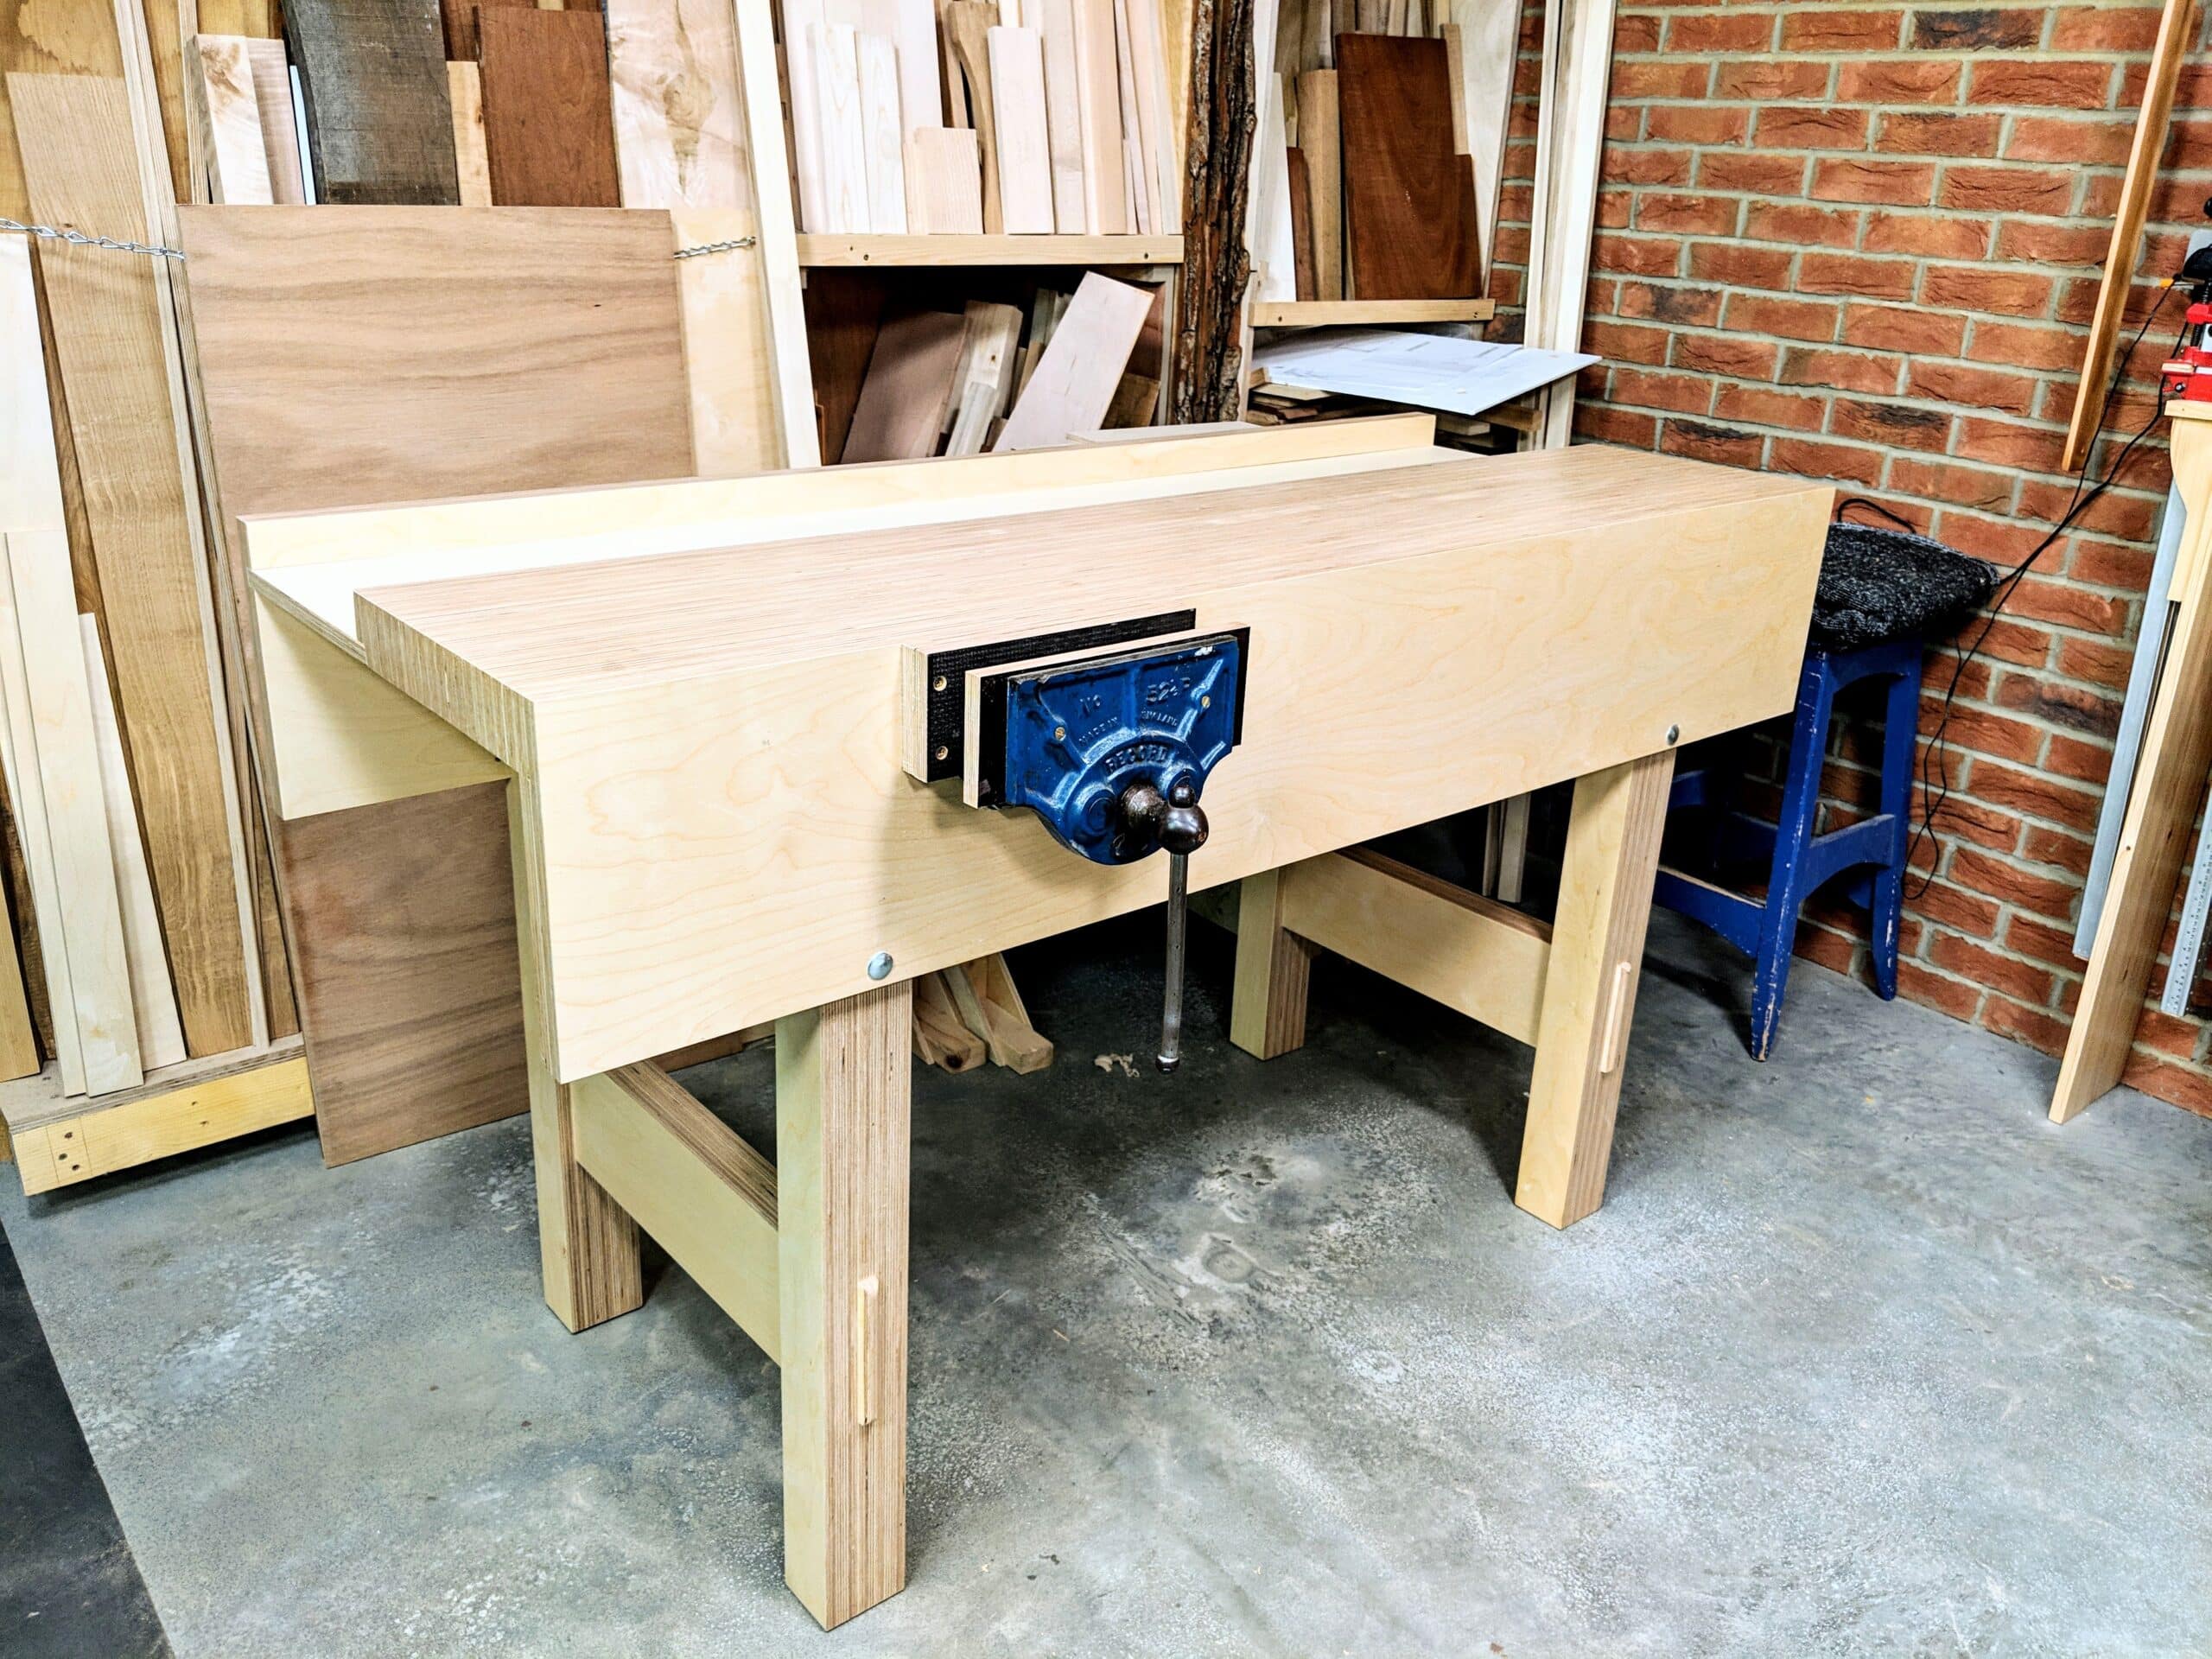
My plywood workbench did the same thing and punches above its weight in the daily use in my workshop. I am not into pretty workmanship (though I appreciate it most of the time and there is a place for it) so much as functionality first and by that the fullest of attraction. Truth is this, I want a bench I can gouge by accident when I slip with a saw or a chisel and one I can drive a nail into to describe an arc for a rocking chair rocker. If I spill paint, oil, glue or whatever, I don’t want to panic. I just want to wipe up the spills and get back to it. So here is a tool that parallels my intent to simplify and counter pretentious snobbery yet something that truly works. Will plywood hold up long term? Probably, possibly! Does it matter that much? I expect a 10-20 year lifespan if I am careless with the plane, but I will not be. The only part that could be in jeopardy is the sole. This 15 ply Baltic birch plywood is the one engineered for lining working van floors, hence the texturing for an anti-slip surface. The other face is silky smooth. Of course, it’s not cost-effective to buy an 8 by 4 sheet of 3/4″ plywood to make a single router plane so you will need to be inventive in finding your piece. Start with eBay. I have seen inexpensive panels for just a few pounds. Also, you could consider the sole to be replaceable, add a wear plate of brass or reface it later.
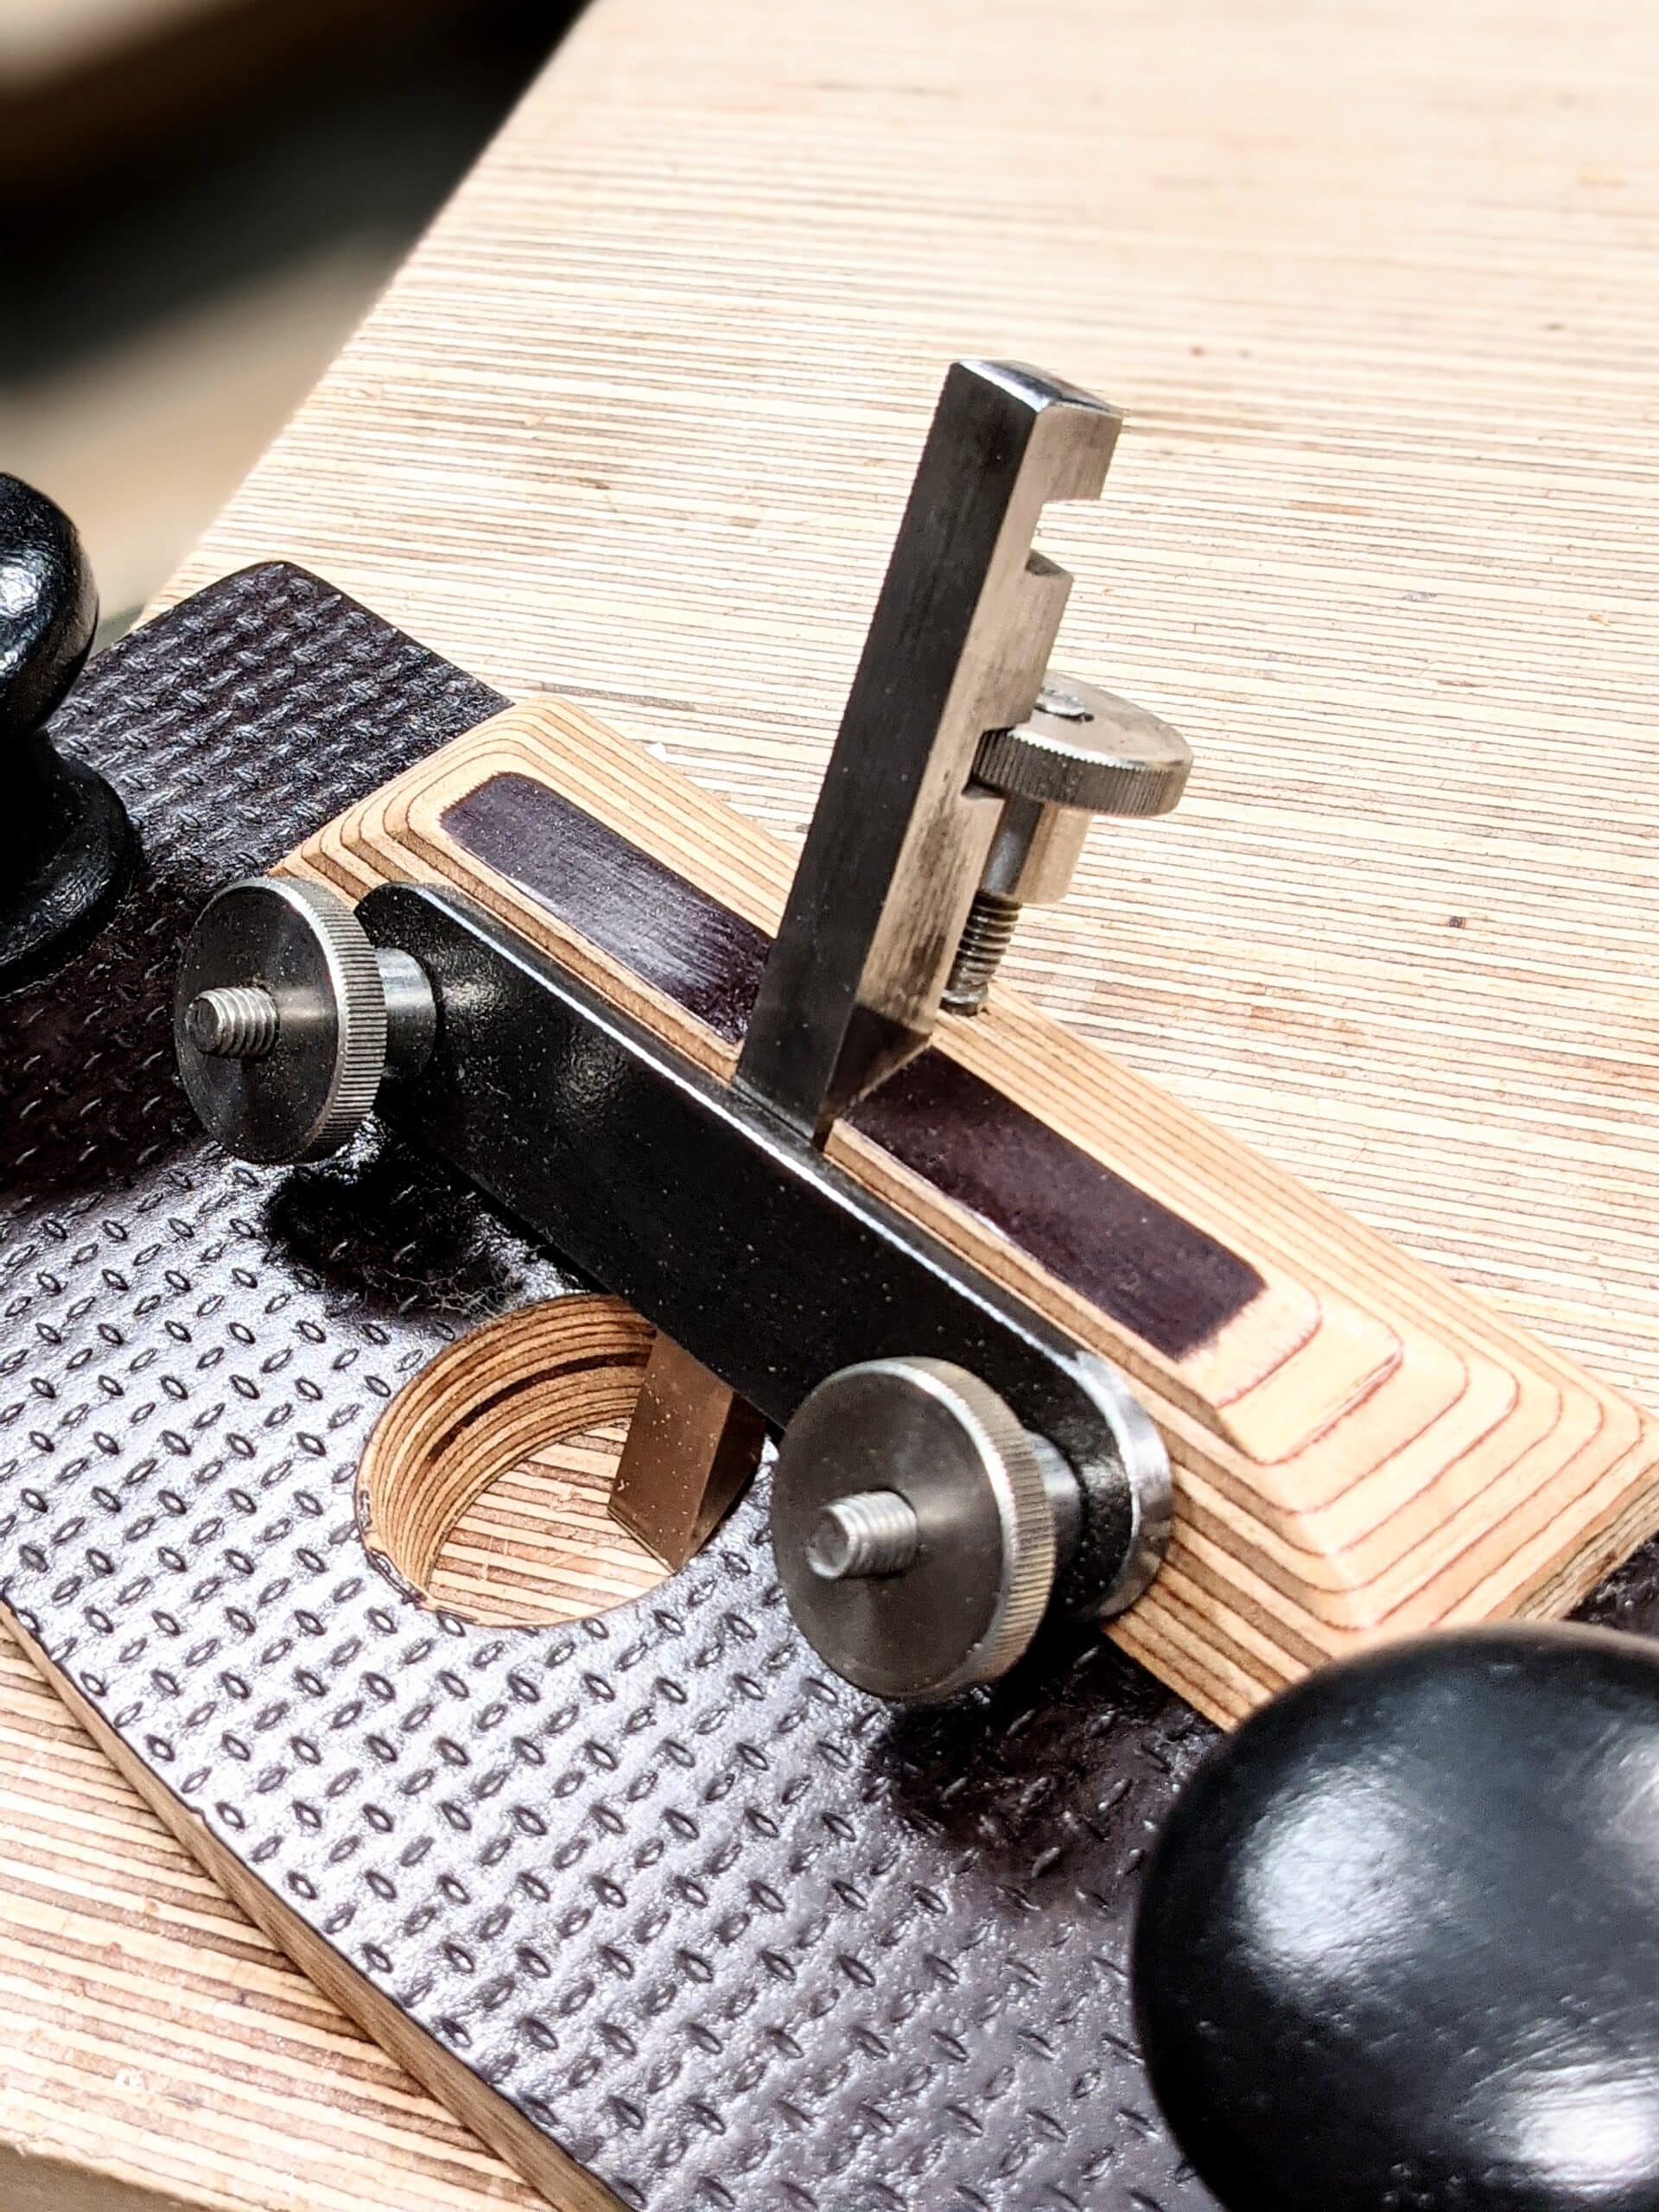
When I was making the first plane I took a two-by-four offcut (top pic and third from left above), lopped it down to 10″ and then made the angled upstand and glued the two together. The thing for me in my world of designing and making is that I have always made the pieces I make inside my head before the physical work begins. These rehearsed actions in my head allow me to even arrange the tools I will use on my then ‘virtual’ benchtop so that as `I rehearse I can pick up the tools I will use to make sure that I have them all. That way, when I’m rehearsed so, I can just go for the real thing knowing the sequence of everything beforehand. Before too long, what I make is sitting or standing there in front of me replete with joints, shapes and so on. Ninety-five percent of the time everything works. I have picked my mortise & tenon sizes along with the dovetail types and sizes. Recently I was asked if I followed the so-called ‘thirds-rule‘. Not usually, I answered him, as a rule, it doesn’t work for most stuff so I never even contemplate it and have never adopted it as a rule nor knew any of my mentoring craftsmen as full-time makers making any reference to such a thing even though for some frames we do end up with something like that happening. This rule generally works with doors and panel framing, so, for 95% of the work woodworkers and furniture makers do, the theory doesn’t hold; table legs, chair legs are usually of unequal proportion when it comes to rails and legs, etc. How could it work? So too other pieces we make like tables, benches, bench seats and so on. Think about it. Look around your room and make mental notes. How many mortise and tenons on your furniture pieces follow the so-called thirds rule? On most tables, for instance, we push the mortise to the outer faces of the legs to increase tenon length in the rails to the maximum, for added strength.
My first output worked as well as any of my router planes but I knew that it would. It was mostly a matter of logic but then most good ideas and solutions are. I quickly added up the numbers and the presentation angles to establish the optimum cut and then tweaked my endeavour at the bench. In the past, at different times, I have often relied on my poor man’s router version I introduced to the wider world via the world-wide-web when my first bench-making escapade into videography went online. This was where I made a complete workbench in my back garden where the squeal of school children in the playground next door and the seagulls overhead cried out as I planed my bench parts. Ever since “`I was a boy, not owning any kind of dedicated router plane, I had to be more inventive, so I used a poor man’s version for a number of years, but, as it is with many things, when something works we tend not to make changes and things carry on in a make-do-and-mend mode. It was then that I used it for truing up tenon cheeks even though no one I ever saw had done so and it has never been referenced in any books until I began teaching the technique in my courses and then online. I like this kind of innovation. Serendipitous synchrony! See a problem, be a solution. It gives me a buzz to think that hundreds of thousands have and will be watching me make a fully adjustable router plane with a cluster of ordinary hand tools and that they too will indeed own their own router planes in the future. How about that!
Going forward, my hope is that we can keep moving our work with woodworkers forward through the work we do. This was a major step for me, simply because `I was sending people to eBay and premium makers to fill the gap and that was causing a shortage for everyone because the premium makers could not now keep pace with demand, the vintage ones were being swallowed up by demand secondhand and everything was becoming overpriced generally. This plane solved all the problems completely and for not much money and effort. Even now, after just a few days, 70,000 woodworkers worldwide have watched the video. In practical terms, that has clocked up almost 18,000 hours of watching to date. So many of you let me know that you loved the videos and that you will indeed be making your own version even if you own metal versions or are still using the poor-man’s version in the day-to-day. So, I thank YOU for your encouraging support with this new step. I love the idea that these planes will start popping up in all of my videos from now on going forward.
Hi Paul,
One question I have is regarding the steel for the cutter – I can find HSS tool steel but O1 is more difficult to find. Would this be OK to use?
Thanks
I’m afraid I can’t really answer this. HSS is not generally used for hand tools and is mostly intended for grinding mechanically as in turning tools for lathework and such. I don’t know where you are but it is readily available in the UK (that’s still Europe) and the USA via eBay, etc, and directly from distributors as is in comments people have helpfully posted on my blog of late. They probably don’t have links because I don’t want to add the clutter but when someone just says ebay or McMasters or zorotools they do go up unhindered
Hi Geoff,
I made this router plane and used a piece of leaf spring from a truck. Heated it up straightend it out and re tempered it. Works like a dream
Not too accessible though, Dale. I know that it is easy with the right equipment, ie an anvil, decent hammer, a forge, good blacksmiths tongues. Oh, and then there is the leaf spring which will need consolidating and drawing out, probably hacksawing or using a hardie cutter and so on, gas-fired forge, coke forge, barbecue pit, maybe. Imagine you live in the inner city on the 8th floor of a high-rise with a spouse and two kids in bed and it’s 8 pm with neighbours either side, front and back, above and below, first.
Thanks Paul and all for the suggestions, glad I asked about HSS before I took the plunge. Living in Australia and unfortunately I’ve found a lot of places are only set up for wholesale and aren’t interesting in dealing with small orders. Like purchasing timber unless you happen to live near a good timber supplier (200km+ is my closest) your only option is expensive big box DAR stuff! Shall keep up the good search 🙂
Check out knife making suppliers.
Just as an encouragement to those who want to try, not a counter to Paul’s post.
All you need to work leaf spring, which is almost universally 5160 steel, is an angle grinder and a propane or MAPP gas torch. Besides every junk yard, you can also find it new at any steel supplier in various thicknesses.
Use the angle grinder to get your rough shape cut out. If you need to shape it, clamp in a metal vise, heat to bright red and tap it with a fair size smooth face hammer until you get the bend you need. Bevel your cutting end, but don’t refine it. Heat the cutting end to a bright red, specifically to the point it will not stick to a magnet. Immediately quench it in any warm oil (outdoors as there is a risk of the oil igniting, but no big deal, just put a lid on it). Be sure to stir it in the oil a bit for better uniformity of hardening. The hardened end should now skate on a file. Clean the oil off and bake it at 300 to 400 degrees in an oven for 2 hours. You will then be in the range of 50 – 60 Rockwell. If it is too hard or too soft, run the process again on the same piece (multiple quenches can actually be a good thing) with changes in time and temp to go harder or softer. You can now finish with file, sand paper, grinder or whatever and refine your bevel and edge. 5160 is a very tough steel and takes a beautiful edge.
Wonderful how knowledge works – one thing leads to another and doors keep opening. Thank you Paul and special thanks to Greg for pointing me in another unexpected and fascinating direction.
Pete T.
Brilliant idea Greg. The cost of all the hardware and heat treatable steel bar stock made this project an overly expensive non-starter for me (besides I’m perfectly content with my cheap poor man’s chisel router plane inspired by another Paul Sellers video). But your leaf spring idea makes this very, very practical with just a little more effort. Thanks for the leaf spring idea and also for the recipe.
What a great example of resourcefulness for the other readers of this blog.
Hello Geoff,
after a lot of googling around I have found O1 steel in the required size here, if this can help: https://www.ebay.fr/itm/182174193745?ssPageName=STRK%3AMEBIDX%3AIT&var=483901092335&_trksid=p2060353.m1438.l2649
Ships from UK, so your posting fees can be higher than mine.
Alberto
Thanks for posting this info.
I could not find 01 tool steel, so used HSS . it was a bit of a pain to shape etc ( on the grinder), but it seems ok. We will see when it comes time to sharpen,
Cromwell Tools sell something equivalent to O1 – you may have problems finding O1 in the UK as stell is supplied to BS or Din Standards mostly
I (stupidly) bought cobalt HSS, thinking it would be more robust and need fewer sharpenings.
It seems that as long as you are ready for more difficult machining and sharpening, there is no issue with using HSS. it’s just a LOT more difficult to work.
I have two billets of 1/4″ x 1/2″ x 6″ Mo-Max steel, which is M42 steel. Wondering is these would work – both in terms of the type of steel as well as the size of the pieces.
I’m certainly no expert hear but I think you could use it but would have to sharpen it with diamond for efficiently results. I do not know if you can access MSC industrial they have many options for steel.
Hi Geoff,
I went to amazon and searched for “O1 Tool Steel bar stock” and it came right up. It is in imperial and not metric, but I made the other and it was delivered the next day. I have heard the high speed steel more difficult to work with but I don’t really know. It came from Starrett and cost over $30 but if I can actually get a this thing built I will be happy.
I hope this helps!
Hi Geoff,
You certainly could use HSS, but you will need to grind the bevel onto the business end. HSS will hold its edge very well. You will also need to use a grinder to cut the slots for the depth adjusting screw. There is a work-around this: you could braze (or get someone elso to braze) a small piece of HSS onto a mild steel shank of the same section. You will then be able to saw and file the slots in the MS shank. I have successfully made lathe tools this way for machining steel. At brazing temperatures the HSS hardness will not be significantly altered. Hope that helps.
O1 will work and it is easier to heat treat than some other steels. We used to use it a lot for die blanks. A2 is maybe a little better choice but requires more knowledge and is harder to heat treat. I have made knives from both and the A2 is a little easier to get to 60 rockwell. 1095 (file steel) will work and hold a keen edge but you have to draw down the shank or it might break. Both 1095 and O1 are oil hardening steels (which I suspect you already know).
HSS will be fine to use, but you will have difficulty working it. The bevel will have to be ground from scratch, and you will also need to grind in the depth adjusting grooves. A way around this second problem is to braze (or get someone else to braze) a short piece of HSS onto a piece of mild steel of similar section. HSS will not lose its properties at brazing temperatures. I have made several lathe tools for machining steel using this method.
Hi Geoff,
I made it from HSS steel and it works fantastically. Thanks so mich for sharing this wonderful project with us, Paul!
Hello Paul,
I was wondering what thickness of plywood you used for that router? I know you recommend a 1 inch thickness for main body in the plans.
Thanks for all you do.
It’s technically 19 mm but 3/4″ in real money.
I have a Stanley and a Veritas and I’m nearly complete on my first Sellers router plane and I’ll probably use them all regularly. What I like about the Sellers plane is that there is no special hardware. Many of the make your own router plans I’ve seen use either a Veritas, Lie Nielson, or Bench Dogs cutting iron. Those irons work fine but they aren’t always available.
I’ll be interested in seeing the video of you completing one end to end. I’m probably about an hours or so into mine and that’s taking it pretty leisurely working on it on breaks from other projects.
Geoff, if you don’t have a local source then Graingers or the sources Paul mentioned have O1 in many different sizes.
I hope to make several of these routers, thanks for the plans Paul.
Dear Mr. Paul
Previously I made a couple of router planes using veritas blades.
But with this design for the same amount of money of 2 veritas blades, I can build more and suited to the task.
May I suggest you share your findings of the construction of smaller router planes – like the around the 1/8″ and 1/4″ blades for small inlays?
The size for the thumbscrews would be M5 or M4?
Thanks for your time
Hi Paul
I see you didn’t bake this iron in the over like your did with your plane blades after heating and quenching. Is that a worthwhile step here if you have the time?
Good morning Paul,
Thank you Paul!
You are always encouraging and inspiring!
God bless you.
Tim
Does “we supply” mean the kit of metal parts is now available?
I’m getting on with the wood working, fingers crossed for a metal kit soon….. thanks for the suggestion that we may get an update on this soon.
Thanks Paul
How can I purchase the metal parts now that you are providing them?
Stuart
Sorry, the kit is not ready yet, but you can go back to the blog post two blogs back and add your name to the list for a notification when we make the needed progress.
A link please. I searched the blog but didn’t find the list
Alan, it is “the best router plane is born” post. Right at the bottom of it.
i got metal hardware for one plane from belmetric.com gor 24 including shipping and tax in usa
The tool steel was harder. A few online source wanted as much or more for shipppng as the price of steel
Best i could come up was onlinemetals.com ( someone on paul’s blog site provided me with that source) Also USA
part number 12467 —18” for $36 including tax plus $8 for shipping
more than i expected to pay
knobs i am stealing off some old furniture. Us hoarders don’t throw much away.Lol
Maybe other better prices for tool steel out there but my sourcing searches ran the gamut from this low price to $128 for 18” including shipping and tax.
My Paul Sellers Router plane is close to completion – it’s amazing how quickly it all comes together! The metal parts were fairly easy to source, though due to pack sizes I’ve ended with more than I need. No matter, I’ll just make more planes! A friend I recently introduced to Woodworking Masterclasses is also going to make a router plane, so I can help him out with parts too. The 01 steel in 10mm x 10mm size I found the most difficult to source, but in the end got it from Rennie Tool Company in Stockport if that helps anyone.
Mike, that helped a lot!!
Trying to find steel in Sweden proved almost impossible – in spite of our fame for it. As a private person the best I could find was 180 Pounds for a one meter bar.
I ordered from Rennie for the price of a cigarette butt and a dime, hopefully taxes after brexit won’t hit me too hard……
I don’t know if it’s allowed, but I did finally find the 10 mm 01 steel at Grangers. It is sold in 18” lengths, so if you have use for the left over steel it is a source. Issues I’ve found is the components can be purchased but having to purchase multiple items at a time puts the cost of a router by 2 or 3 times because of quantity restrictions. In my case if I build a couple of planes(2-3) the cost is a lot more manageable/ plane. If you can scrounge up some things such as the metal flat plate & wood it helps. In my case I had to buy the wood & metal in minimum quantities. About $22. The thumb nuts & hanger bolts about $20. If I purchase 10 mm 01 from Granger about $36 + shipping. I still haven’t found handles that are the appropriate size to finish. ~ $8? Washers etc were ~ $4. I would suspect close to $100 to build 2 complete planes. $100 if I only build one+left over materials. I bought components off Amazon. Wood at hardwood store. Flat metal stock at Big box store. Still don’t know where I am getting 01 10mm steel. I tried internet, EBay, but came up empty for 01 10 mm steel. I’m sure that some are better shoppers than I am, but I shopped the choices I could find & that’s what I came up with. Hope that helps some of you. If anyone has found a good source for the handles I’d like to know.
What a strange thing.That great big USA and you cannot buy a pack of ten beech door knobs for £10 in a big box store like the UK’s equivalent of Home Depot, B&Q DIY.
In the U.S. I would use 3/8 inch square steel instead of 10mm. McMaster-Carr sells an 18 inch bar of 3/8 inch square O1 tool steel for $26.62 plus shipping. You can Maple, hickory and birch cabinet knobs from Home Depot, that I think will work. You need not follow Paul’s plans exactly to the letter, other materials will work too.
I struggled to find knobs with the dimensions specified too. I found and ordered some on Amazon that’ll be fine, but prior to that I’d already started making some from a length of old bannister rail using the method Paul showed us for making a front knob for a No.4 plane. They’re nearly finished and don’t look too bad at all. I’ll be able to use the Amazon ones on the next one I make.
If you have a lathe you can turn them. If you don’t I certainly can.
Wilkinson’s (wilko.com) sell a 4 pack of 40mm beech knobs for £3.75.
Are these kits coming soon? If so I shall hold off my shopping.
Hi Paul,
I am ready to get started on this Router project it looks great.
I have the wood but can you please tell me what length the screw bolts are they look about 60mm long and the metric thread are they M5 or M6. I didn’t hear sizes on your videos,
Kind Regards
John
Hi John
If you download Paul’s build plan there’s a detailed component list with all the sizes laid out already.
Looking forward to hearing more about the kits, as the minimum length I can find is 18″ 3/8×3/8″ O1 bar for about $25 USD +S/H/Tax. For those looking for a supplier, I found Hudson Tool Steel Corporation with both Eastern US and California locations, as well as online ordering. (I selected precision ground for the options, but they have standard ground with looser tolerances as well.)
I just went to Hudson Tool and they now have a surcharge on under $150.
If you have a “local” location, they might wave that, and it did not appear in my cart when I was shopping, but have not made a purchase yet. Thinking about contacting them to see if they have any scraps at my local location…
Thanks to those who responded. I found handles that I could order from big box store. More in the $3 range instead of $~$8. With the information you gave on the 01 steel($26), & $3 handles price comes to about $80 – $85 for 2 routers $85/2 = $42.50/ router if if build 2. That’s doable in my case. Hope this helps.
I currently have 3 router planes but I can’t wait to building your version.
Bob Wallace
For those who can’t-find/don’t-want-to-buy the knobs, have a look at Paul’s video “plane front knob”.
It is done without a lathe.
If you don’t live in a SI (Système International) country, adapt the dimensions to the nearest local equivalent.
Would the steel from an old chisel work for this?
Yes, more than likely.
This must be the bargain of the year. Thank you. I just need to hear about the kit for metal parts and hope we know more before Christmas. I’ve made half a present so far….
You mentioned that you are selling kits with all the metal parts. Can you please give a link to the order page?
Thanks,
Dan
Paul, I have largely prepared the body and knobs and now I am champing at the proverbial bit waiting for the metalwork kit. Can’t wait to get this working! Thanks Paul.
Yeah baby yeah! More diy tools please!
With the 1″ tall sole I find that no handles works great so I elected to skip them. My thumb/index notch wraps around the bed piece, thumbs seat right behind the blade on the back of the plane body, and my fingers wrap over the front edge. I like the feel and control better than being up higher on handles (compared to my metal router plane). And I can always add handles later if I choose to turn some.
Although it took a fair bit more contouring with a rasp and sanding to get the feel right. I made mine from a scrap of highly figured sapele. Not the best choice but it is beautiful. Waiting on the longer hanger bolt for the adjuster to arrive tomorrow.
I found O1 tool steel on Amazon (36″ long 3/8 square stock for $68). Hanger Bolts and knobs were less than $15. Going to test out heat treat tonight.
Make sure you have a magnet. Without a pyrometer it is near impossible to get the proper temperature. O1 steel is not as forgiving as mild steel is.
You are introducing an issue that really I have never found to be a problem. Yes, the magnet can and does help, but I have often heated to high temperatures on very light and sunny days where colour could not be seen and have always ended up with a hardened blade. Also, if it does happen that the steel remained softer, you can simply start over.
Paul,
It is a pleasure to see that you have gathered a community around your body of work and lifetime of experience. Thank you for sharing!
Are you now offering a “kit” of metal or assorted parts for your personal router plane design? I responded to a poll concerning interest in such sales, but I have not yet seen any links available. They would be a great addition to your “It’s not too early” list of gift ideas article.
Thank you.
Hi Paul,
I’ve watched your router plane videos and want to make one. Very excited to do this. I’m having difficulty getting the O1 tool steel. Will you be offering kits? I live in Canada.
Somewhere I remember being asked if I would be interested in a kit of the hardware for the router plane. How soon will this be a reality?
John Domville
Elmira , NY
USA
Found 01 tool steel 10 x 10 x 300 for £13.99 plus £5 for delivery from Zoro in the UK, think they are also in the US. Am half way through making three planes , one for my grandson, and can’t wait for your second video.
Regarding O1 steel supplies, I am currently clearing my late father’s toolmaking workshop and have a small stock of various sizes of this steel (known as Ground Flat Stock).
I don’t have the exact 10mm size that Paul suggests, (closest is 3/8 X 1/2) but if anyone is doing something a bit different, I would be willing to cut an appropriate length and post in UK.
Thinking I could put an ad on eBay if there’s any interest?
NB Paul I hope this isn’t trampling on your toes, last thing I’d want to do after all the helpful content you’re providing!
Steve- where are you located? Excessive shipping being the reason I ask. Thanks, Randy
Thanks again Paul. Great teaching/learning piece. Capital of you to share your hard-earned wisdom with us. One request: please follow through with the metal parts collection being offered— even if you have to invite a third party partner to handle the sale/delivery logistics, which may be a distraction to your main objective. I love playing with wood, and appreciate the design and assembly you’ve shown, but really don’t want to start training as a metal worker as a side hobby to my woodworking hobby. Lazy? Perhaps, but I would like to get on with a wooden router plane I can use on shaping wood. Either way, Thanks. Nick
We will soon have the router plane kit together, Nick. I’ll keep everyone posted on progress.
I thought that I had gotten the correct steel,. but it was not correct. It was so hard that a hack-saw would not cut it. A community did square cut it (15 minutest to going 3/4 the way through then the snapped it with a hammer blow), and then told me to grind it to the correct angle. I realize now before grinding that the steel it so hard that drilling though it is likely impossible. I will go back to Amazon and try to find the correct steel. By the way, the wrong steel that I got was NGe “Lathe HSS Tool Bit, High Speed Steel Square Tool Bits, Turning Grinder Cutting Bar, Fly Cutter Mill Blank.”
I am in UK, West Midlands.
What kind of glue did you use for the phenolic resin plane?
I managed to get some 3/8 square x 12’’ key steel from Cromwell’s in the uk for £5.80 , just hoping it will harden okay
Hi, Paul,
I m looking to build a plane til that has a slanted back wall, and thus requires cutting a dado across the top and bottom frame members at 5°. The original plans call for ripping the dado using a dado blade on a table saw, with the blade set at a 5° angle.
It would seem that the same result could be done with a router plane that has an uneven thickness base (abouit 3/4″ thicker on one side than the other for a 10″ wide base. Which do you think would be easier: fabricate a screw-on secondary base that would go onto a wood router plane such as yours, or build the plane from scratch with a varied-thickness sole?
You could just superglue a sub-base on so that when done you can pop it off. Two or three dabs and some accelerator will do it.
Hello Paul, et. al.
Most of the questions in this string have been about finding the correct steel for the blade. What I have found is that the basic cost for the correct steel for the project is about $30-40 US. I have made a couple of planes using chisels as the blade and the work decently, although I don’t like the tapping method of adjusting the blade. The point of my comment/question is; has anyone tried using a morticing chisel for the blade? You can get a good one for about $20 and won’t have to worry about grinding the bevel or hardening the blade. Anyway, I am going to try it soon and will let you know how it works.