Retoothing any Saw
You can change the tooth size of any saw to suit the work you intend to use them for or, in my case here, remove them altogether and start over if after high levels of misuse, abuse or neglect, plain sharpening ‘just won’t cut it‘. Looking at these teeth makes you wonder how things can go so badly wrong. This one has to be my worst sighting yet I must say, but seeing it on eBay I knew it would make a great saw and it has. The test for a new saw, to see if the steel is tempered correctly and not too thick in the plate, is to pass the saw tip into the handle hole. This is not really a good idea on exceptionally short saws like this one, but bending it was done to see if a new saw springs back and keeps its straightness when released.
I have always had a keen interest for short saw versions no matter the maker. Many children’s saw versions were made of good steel with pistol grip handles. This is a longer version of the short saw range at 18″ and I just bought a vintage Disston one that is 15″ 10ppi so I am looking forward to that one coming in. This is a fun time for me as my granddaughter loves being in the shop with me and I gave her her toolbox last week so one of my short saws will join the tools she is starting to get together. She’s just three.
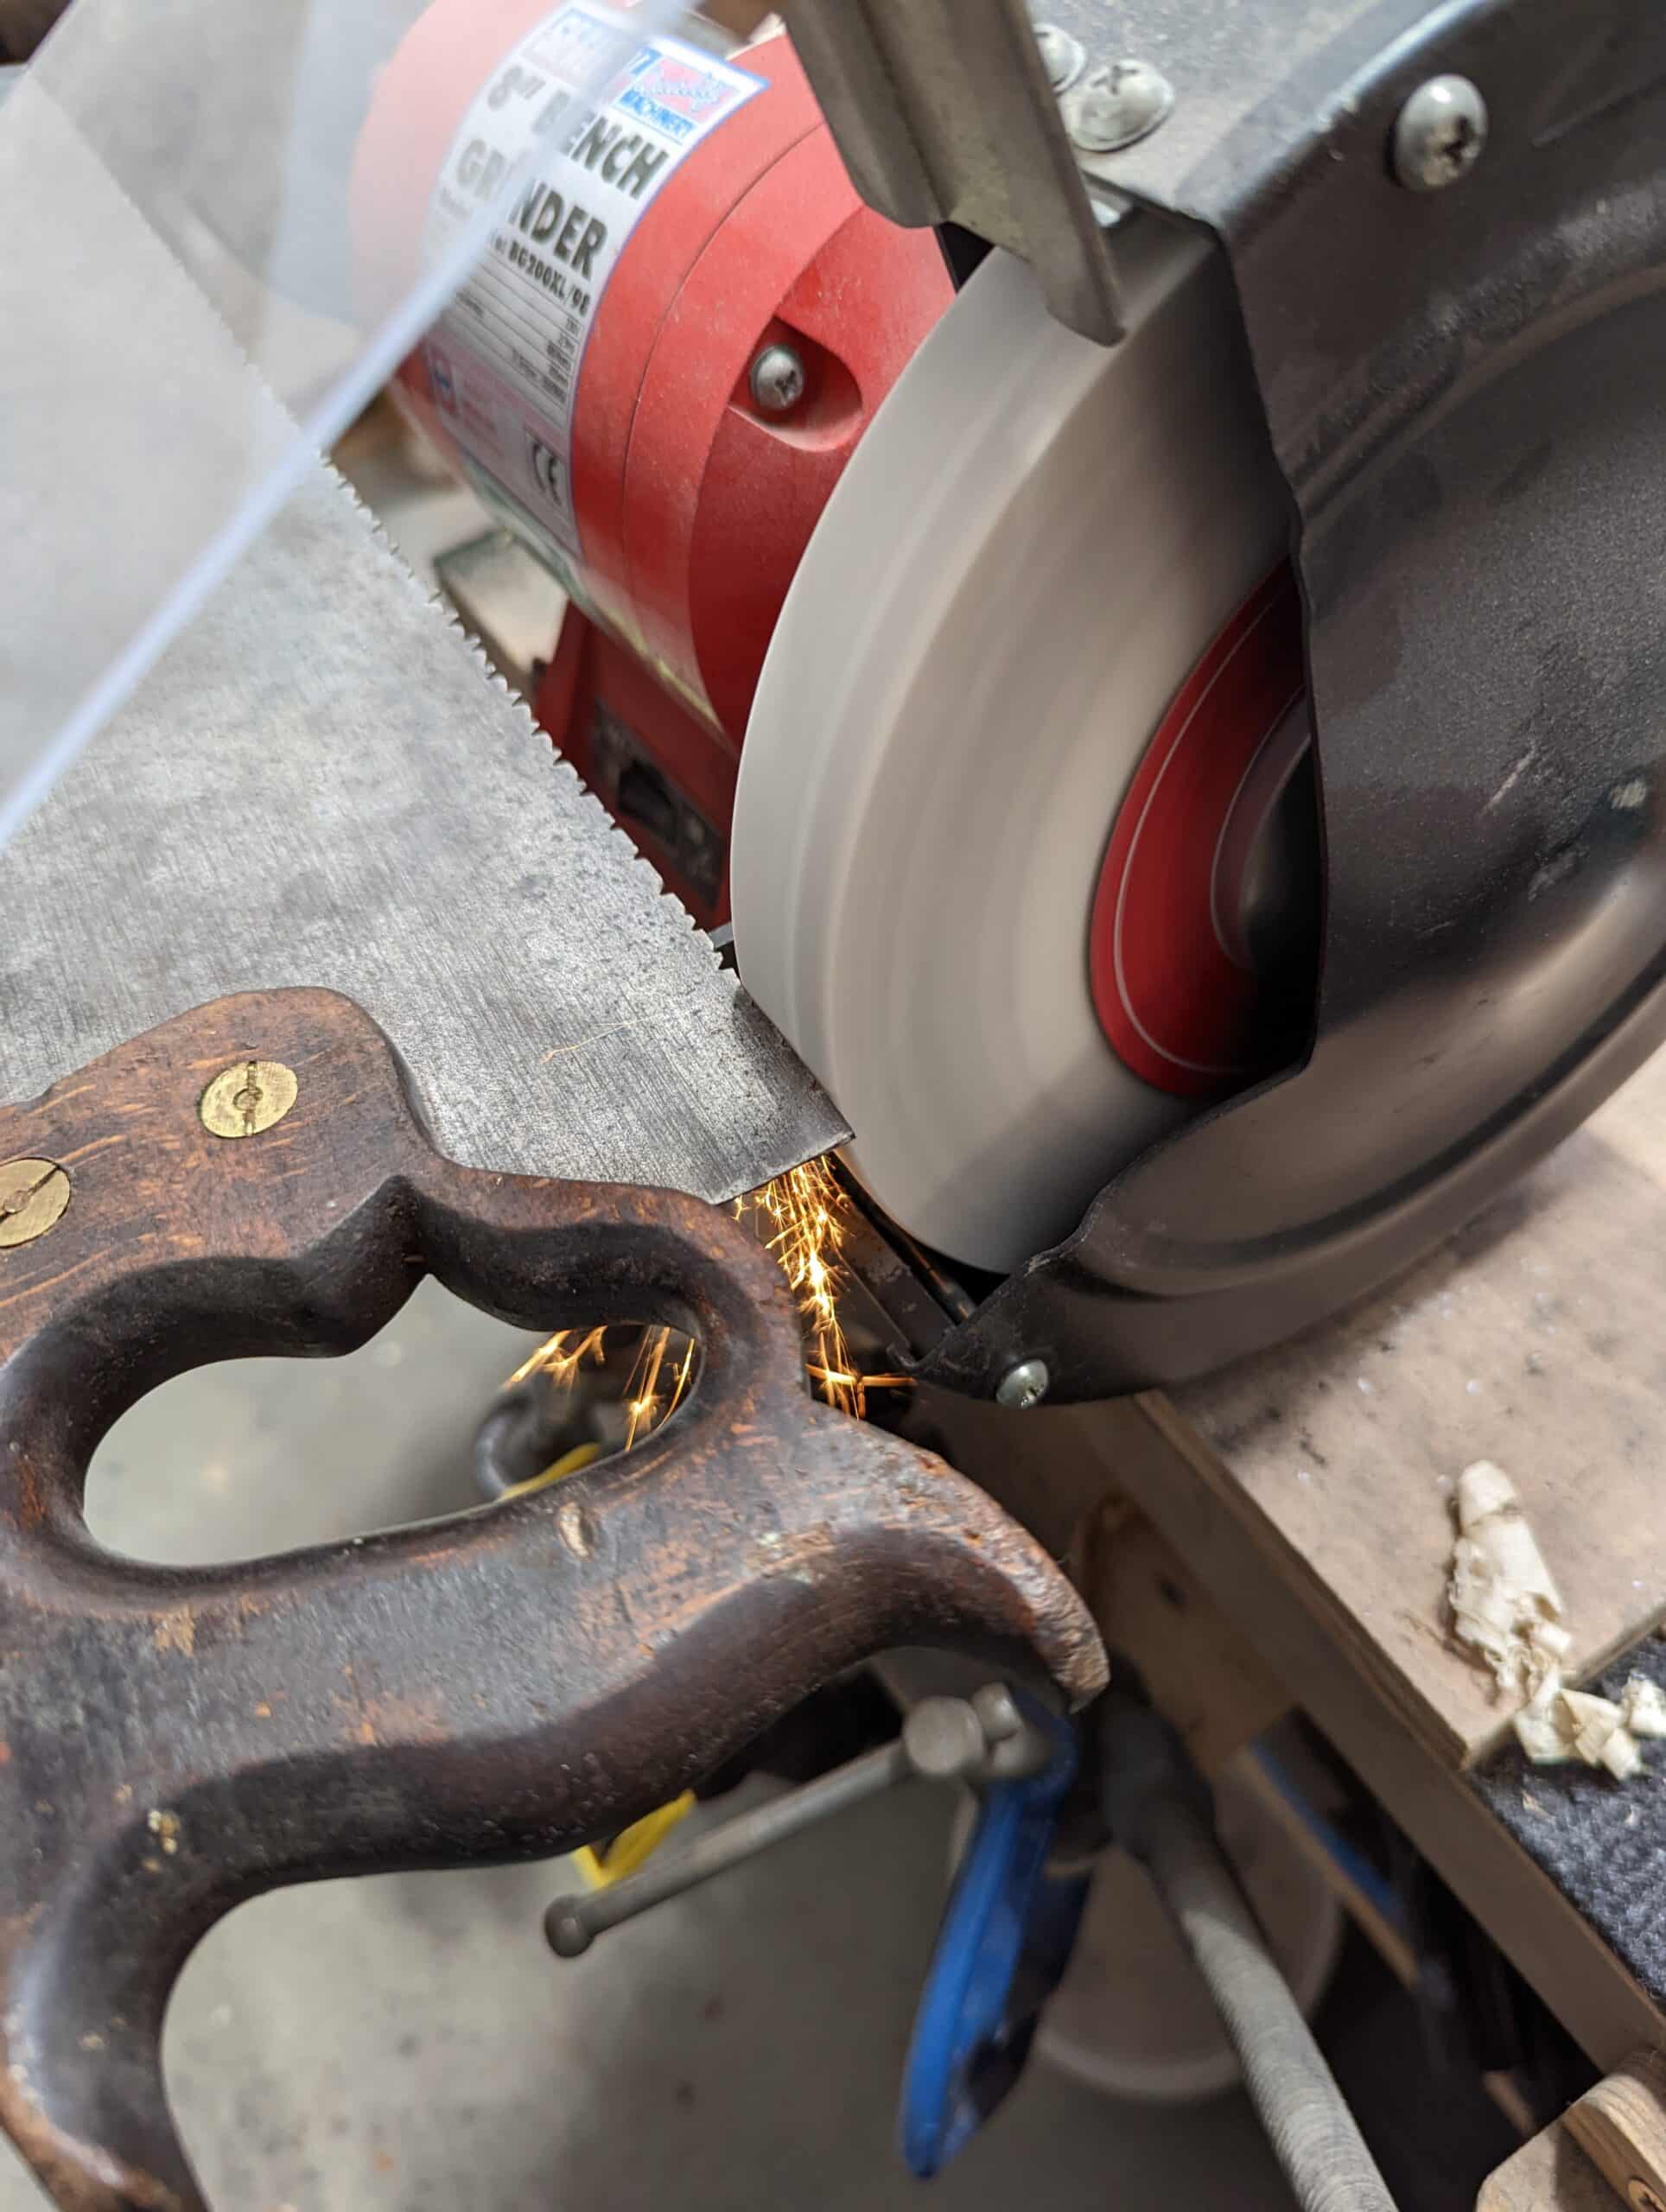
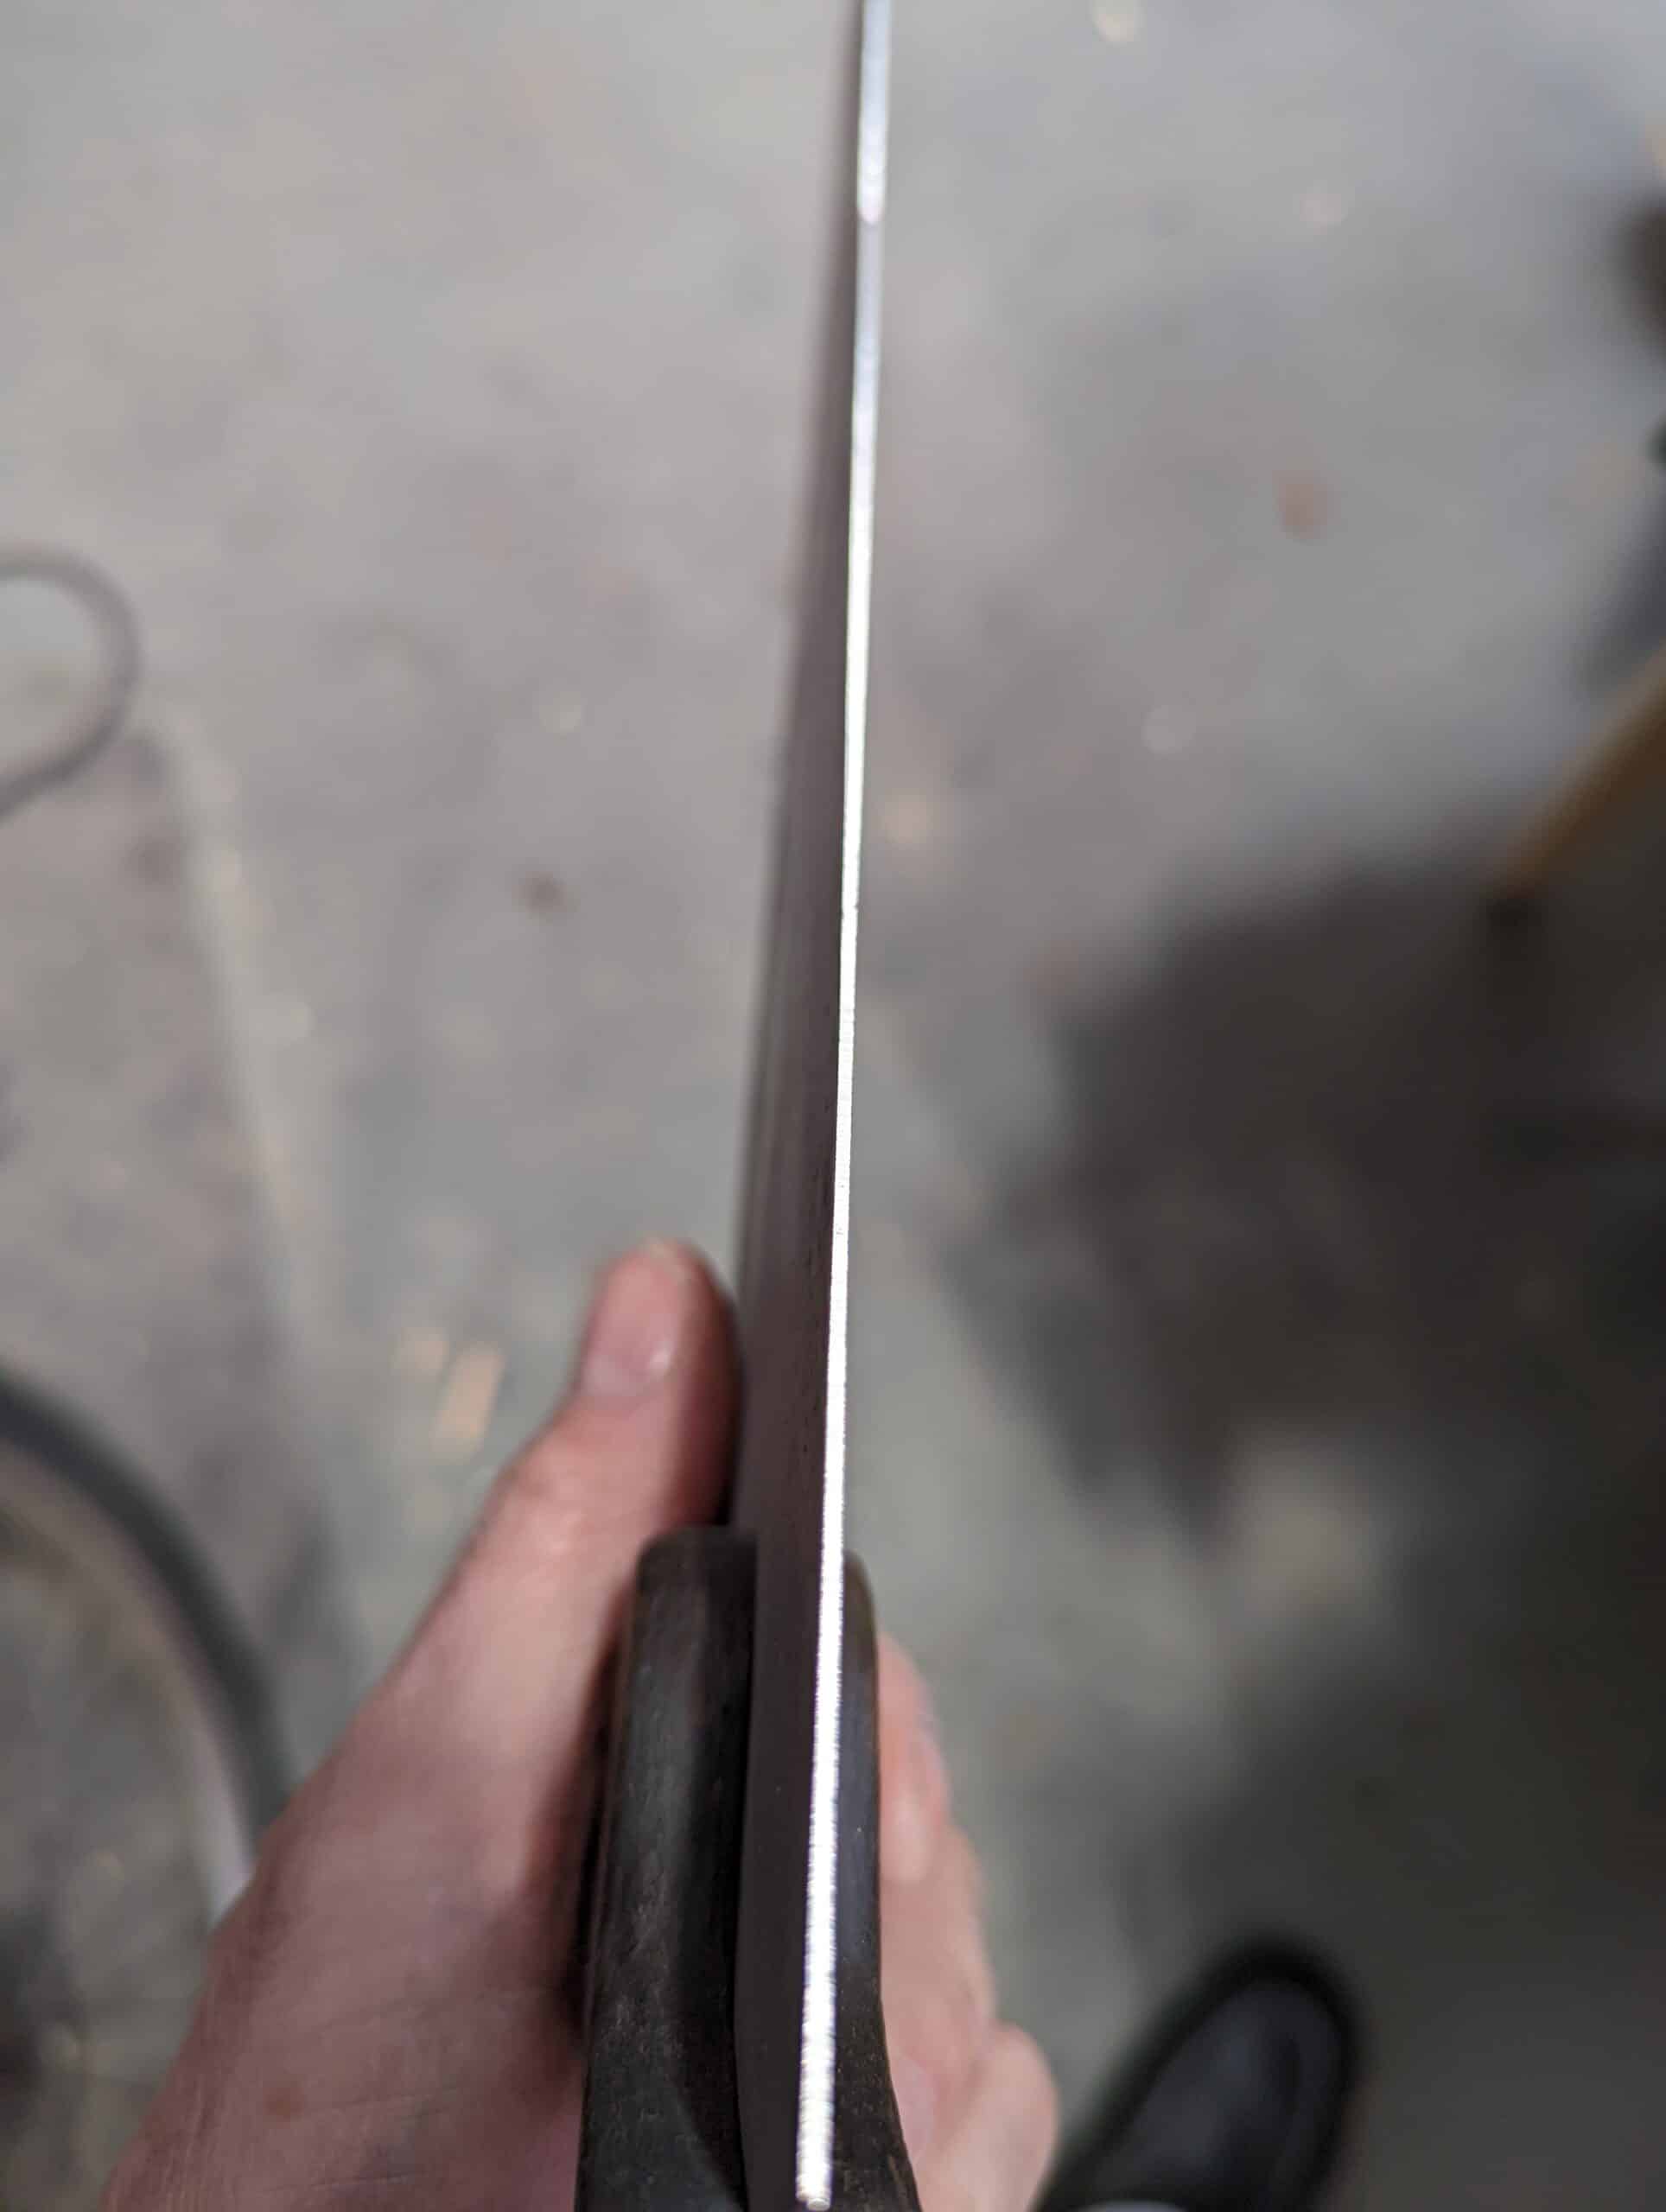
I cleaned off the surface powdering of rust with a quick sanding with 1200 wet-and-dry abrasive but dry followed by a quick wipe with my rag-in-a-can oiler; it feels better in handling. Filing down to the bottoms of such deep gullets is too much so I used the grinder which took only a few steady passes to remove them completely. To then refine the line further I ran a file along and sighted to get ever such a slight camber or belly of 4mm or so. With a short reach, the bench handsaw benefits from a slight belly this way.
Use an engineer’s ruler (rule US) with increments of 20 or 10 to the inch. And divide a half-inch by 3/4″ stick of slim wood into marks of 1/10″ with a knifewall for a few inches.
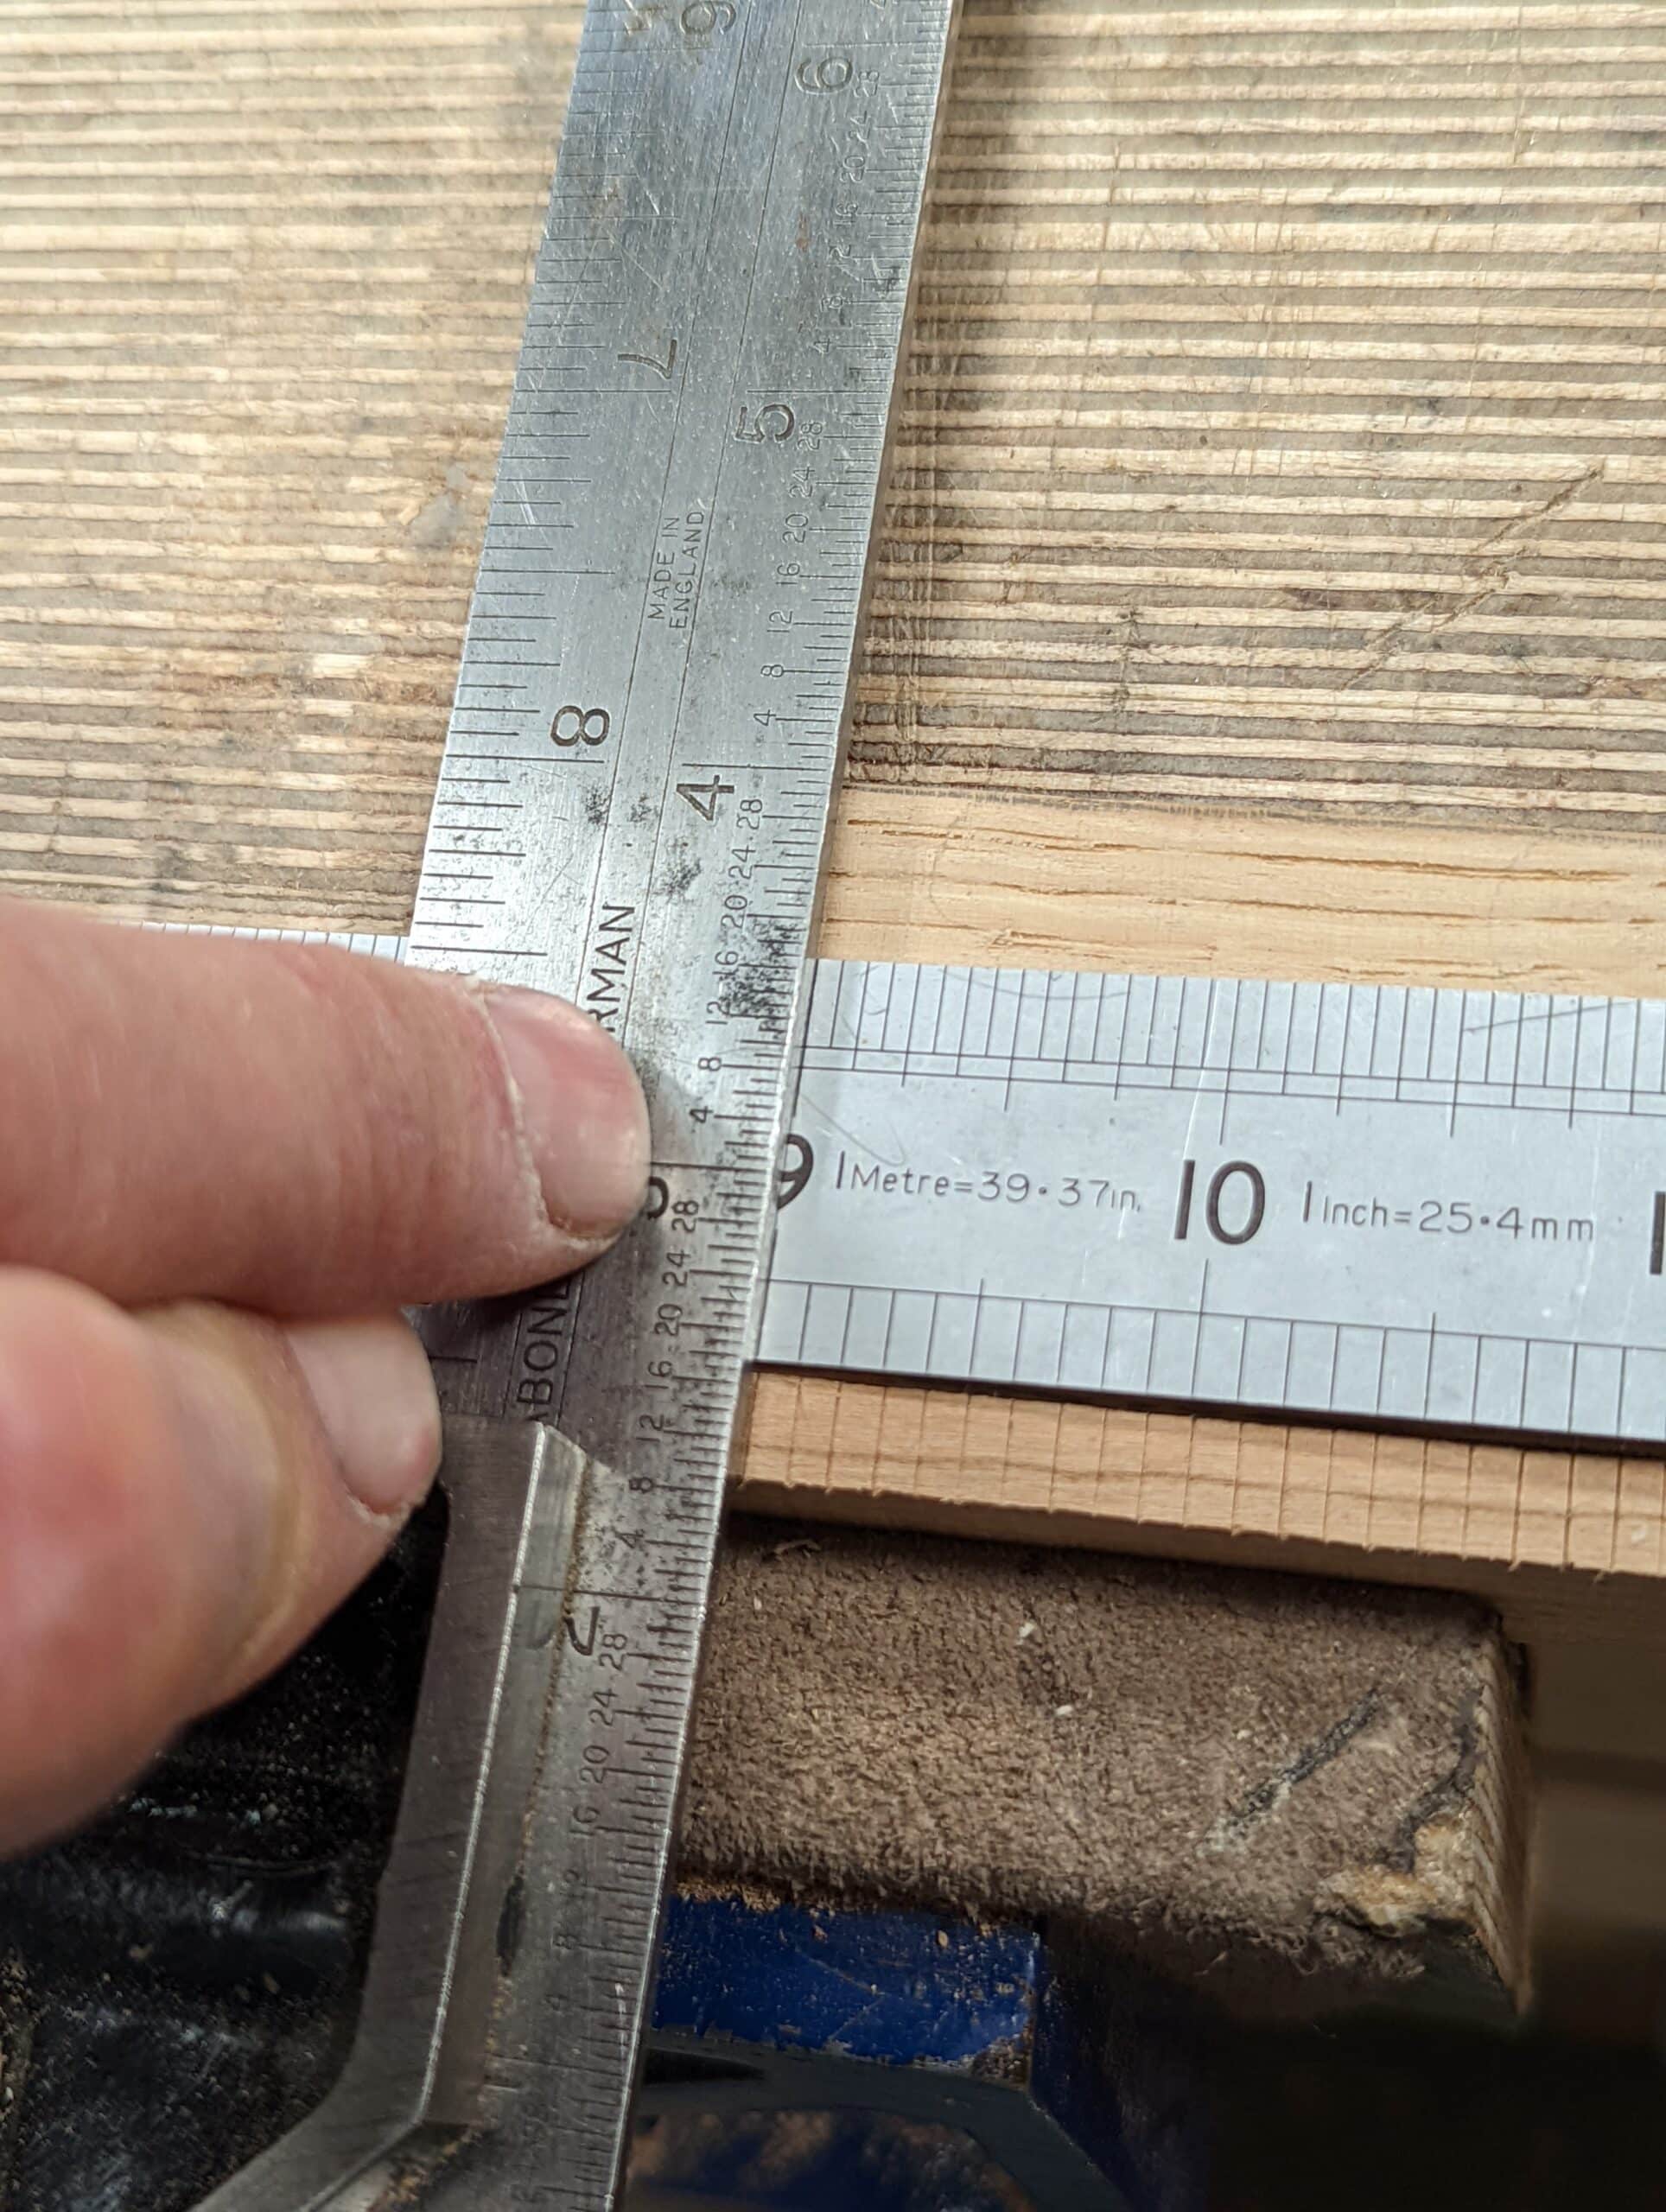
No need to do the whole length as you can simply move the stick along using the notch as an alignment registration. Run a small saw kerf alongside the knifewalls all on the same side of the knifewalls. A single stroke deep is enough of a depth.

Clamp the guide alongside the saw plate so that the wood is a mil above the edge of the steel.
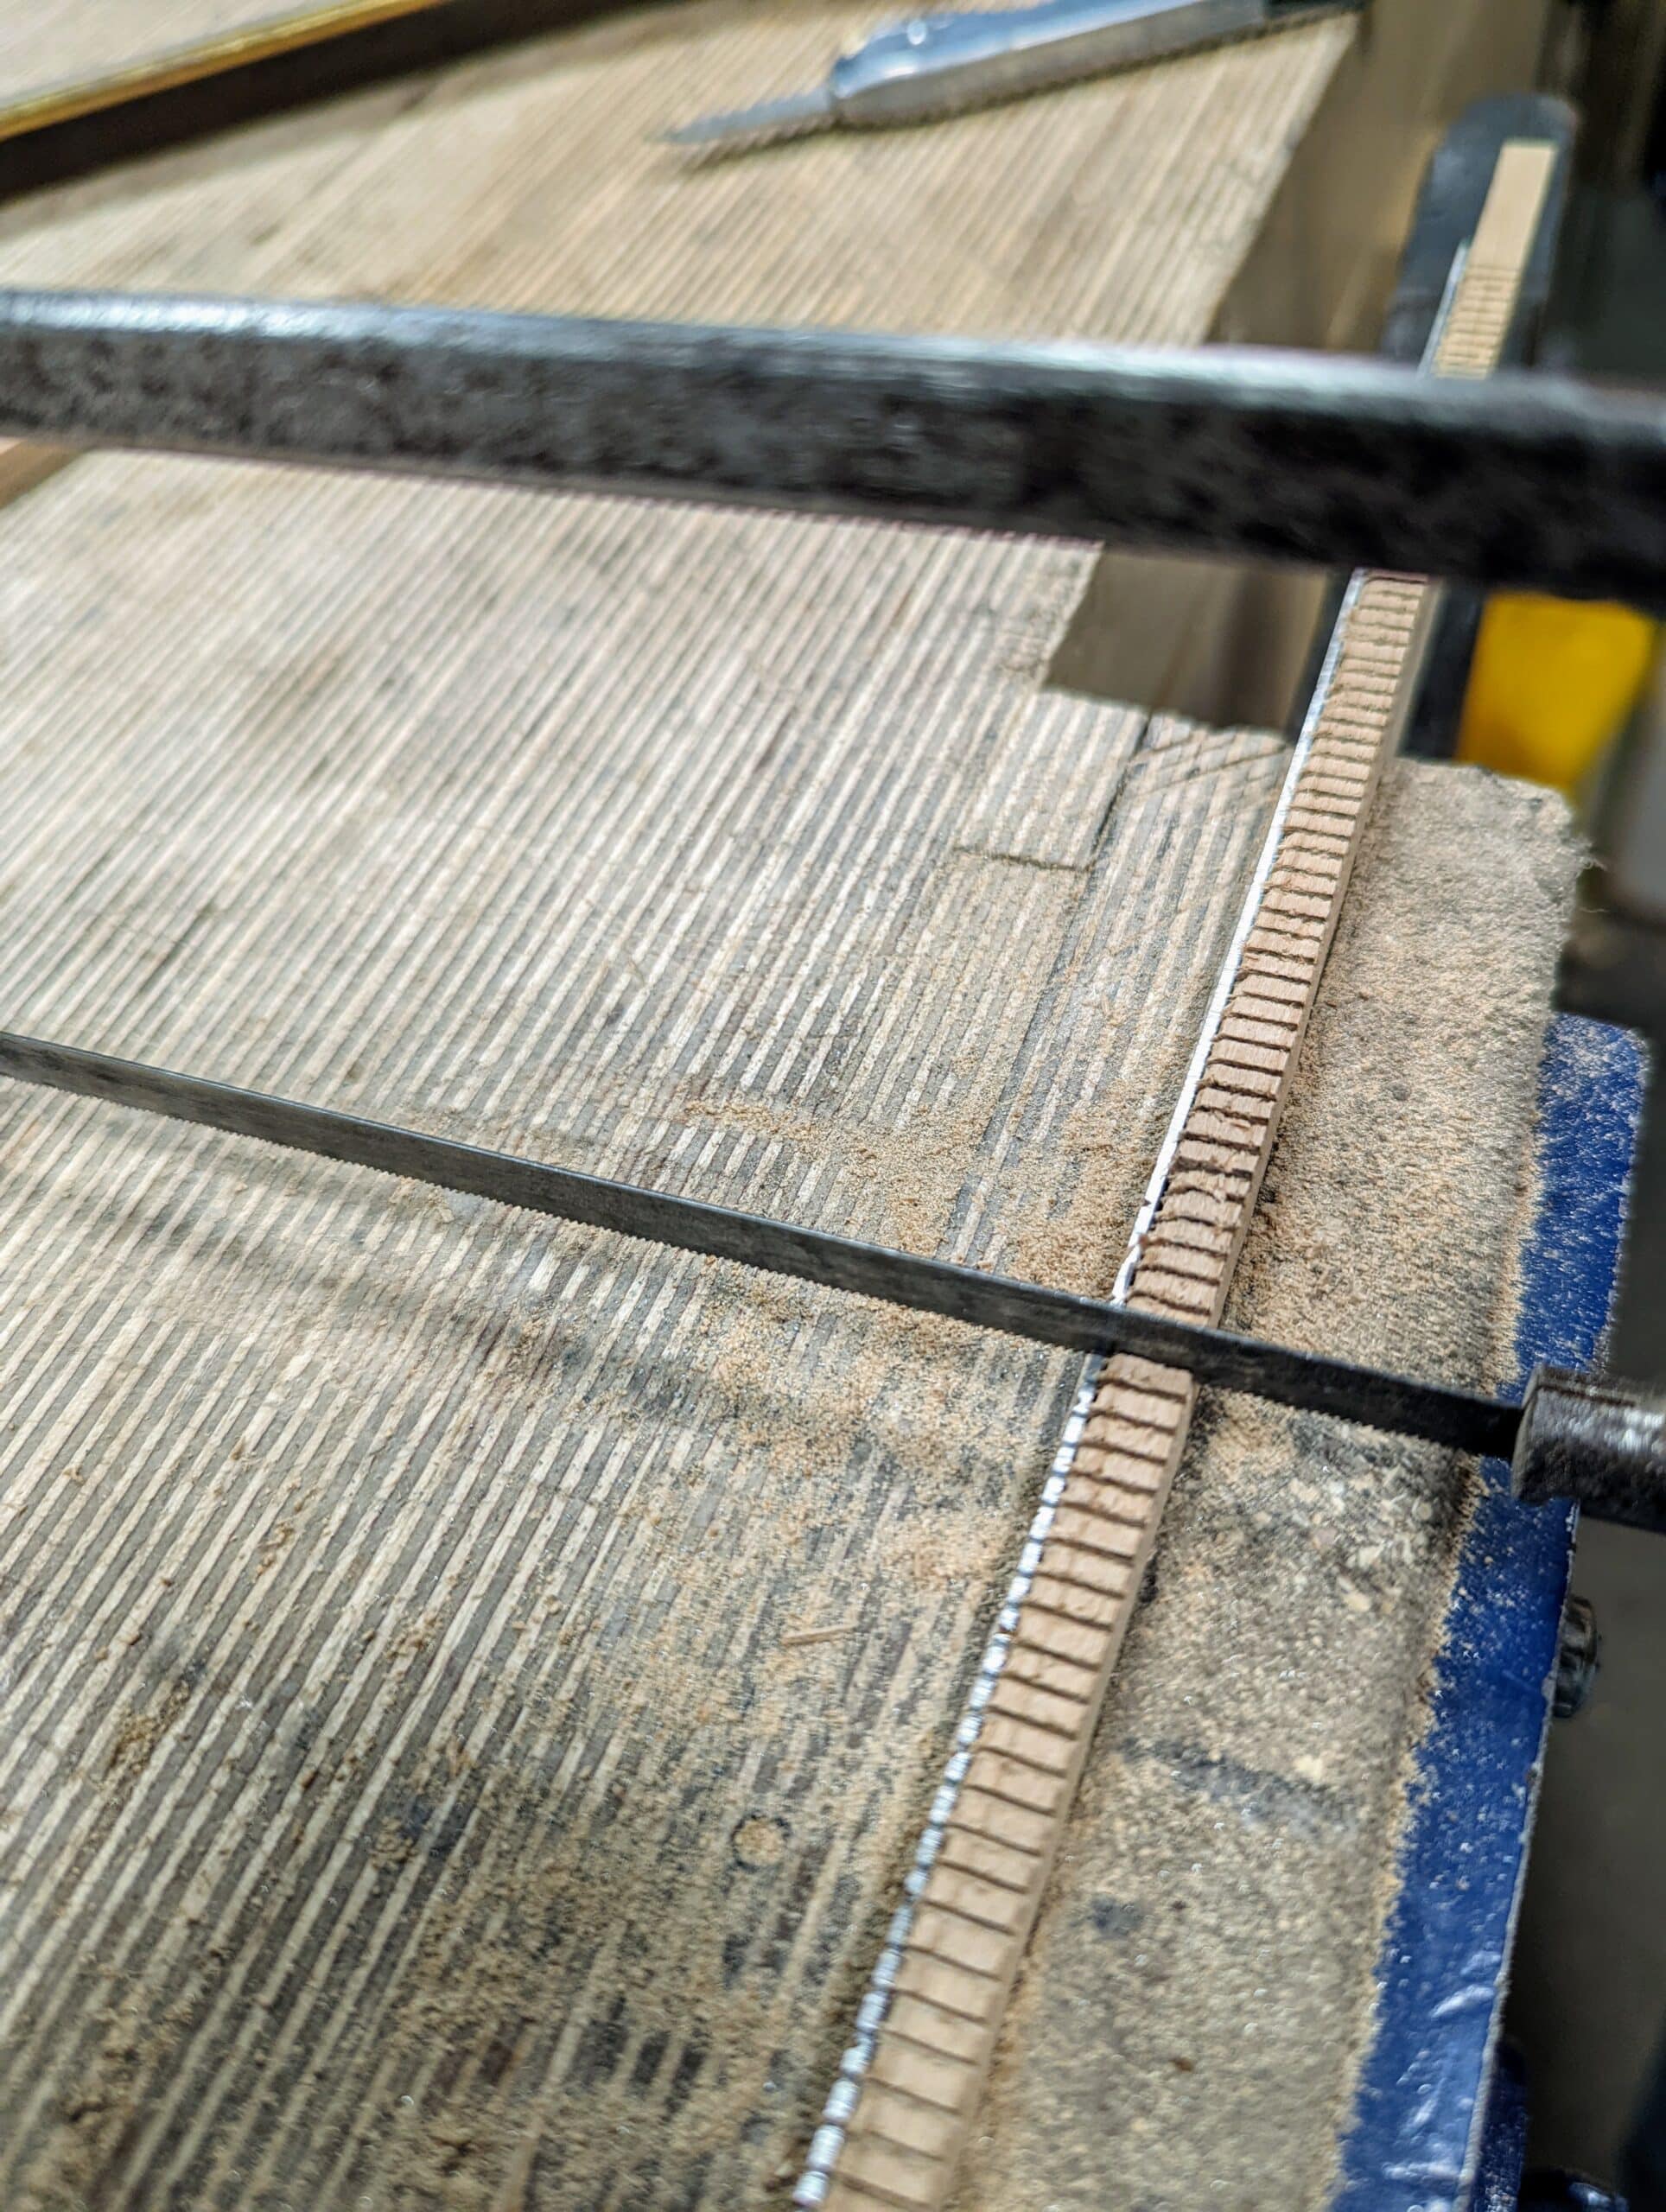
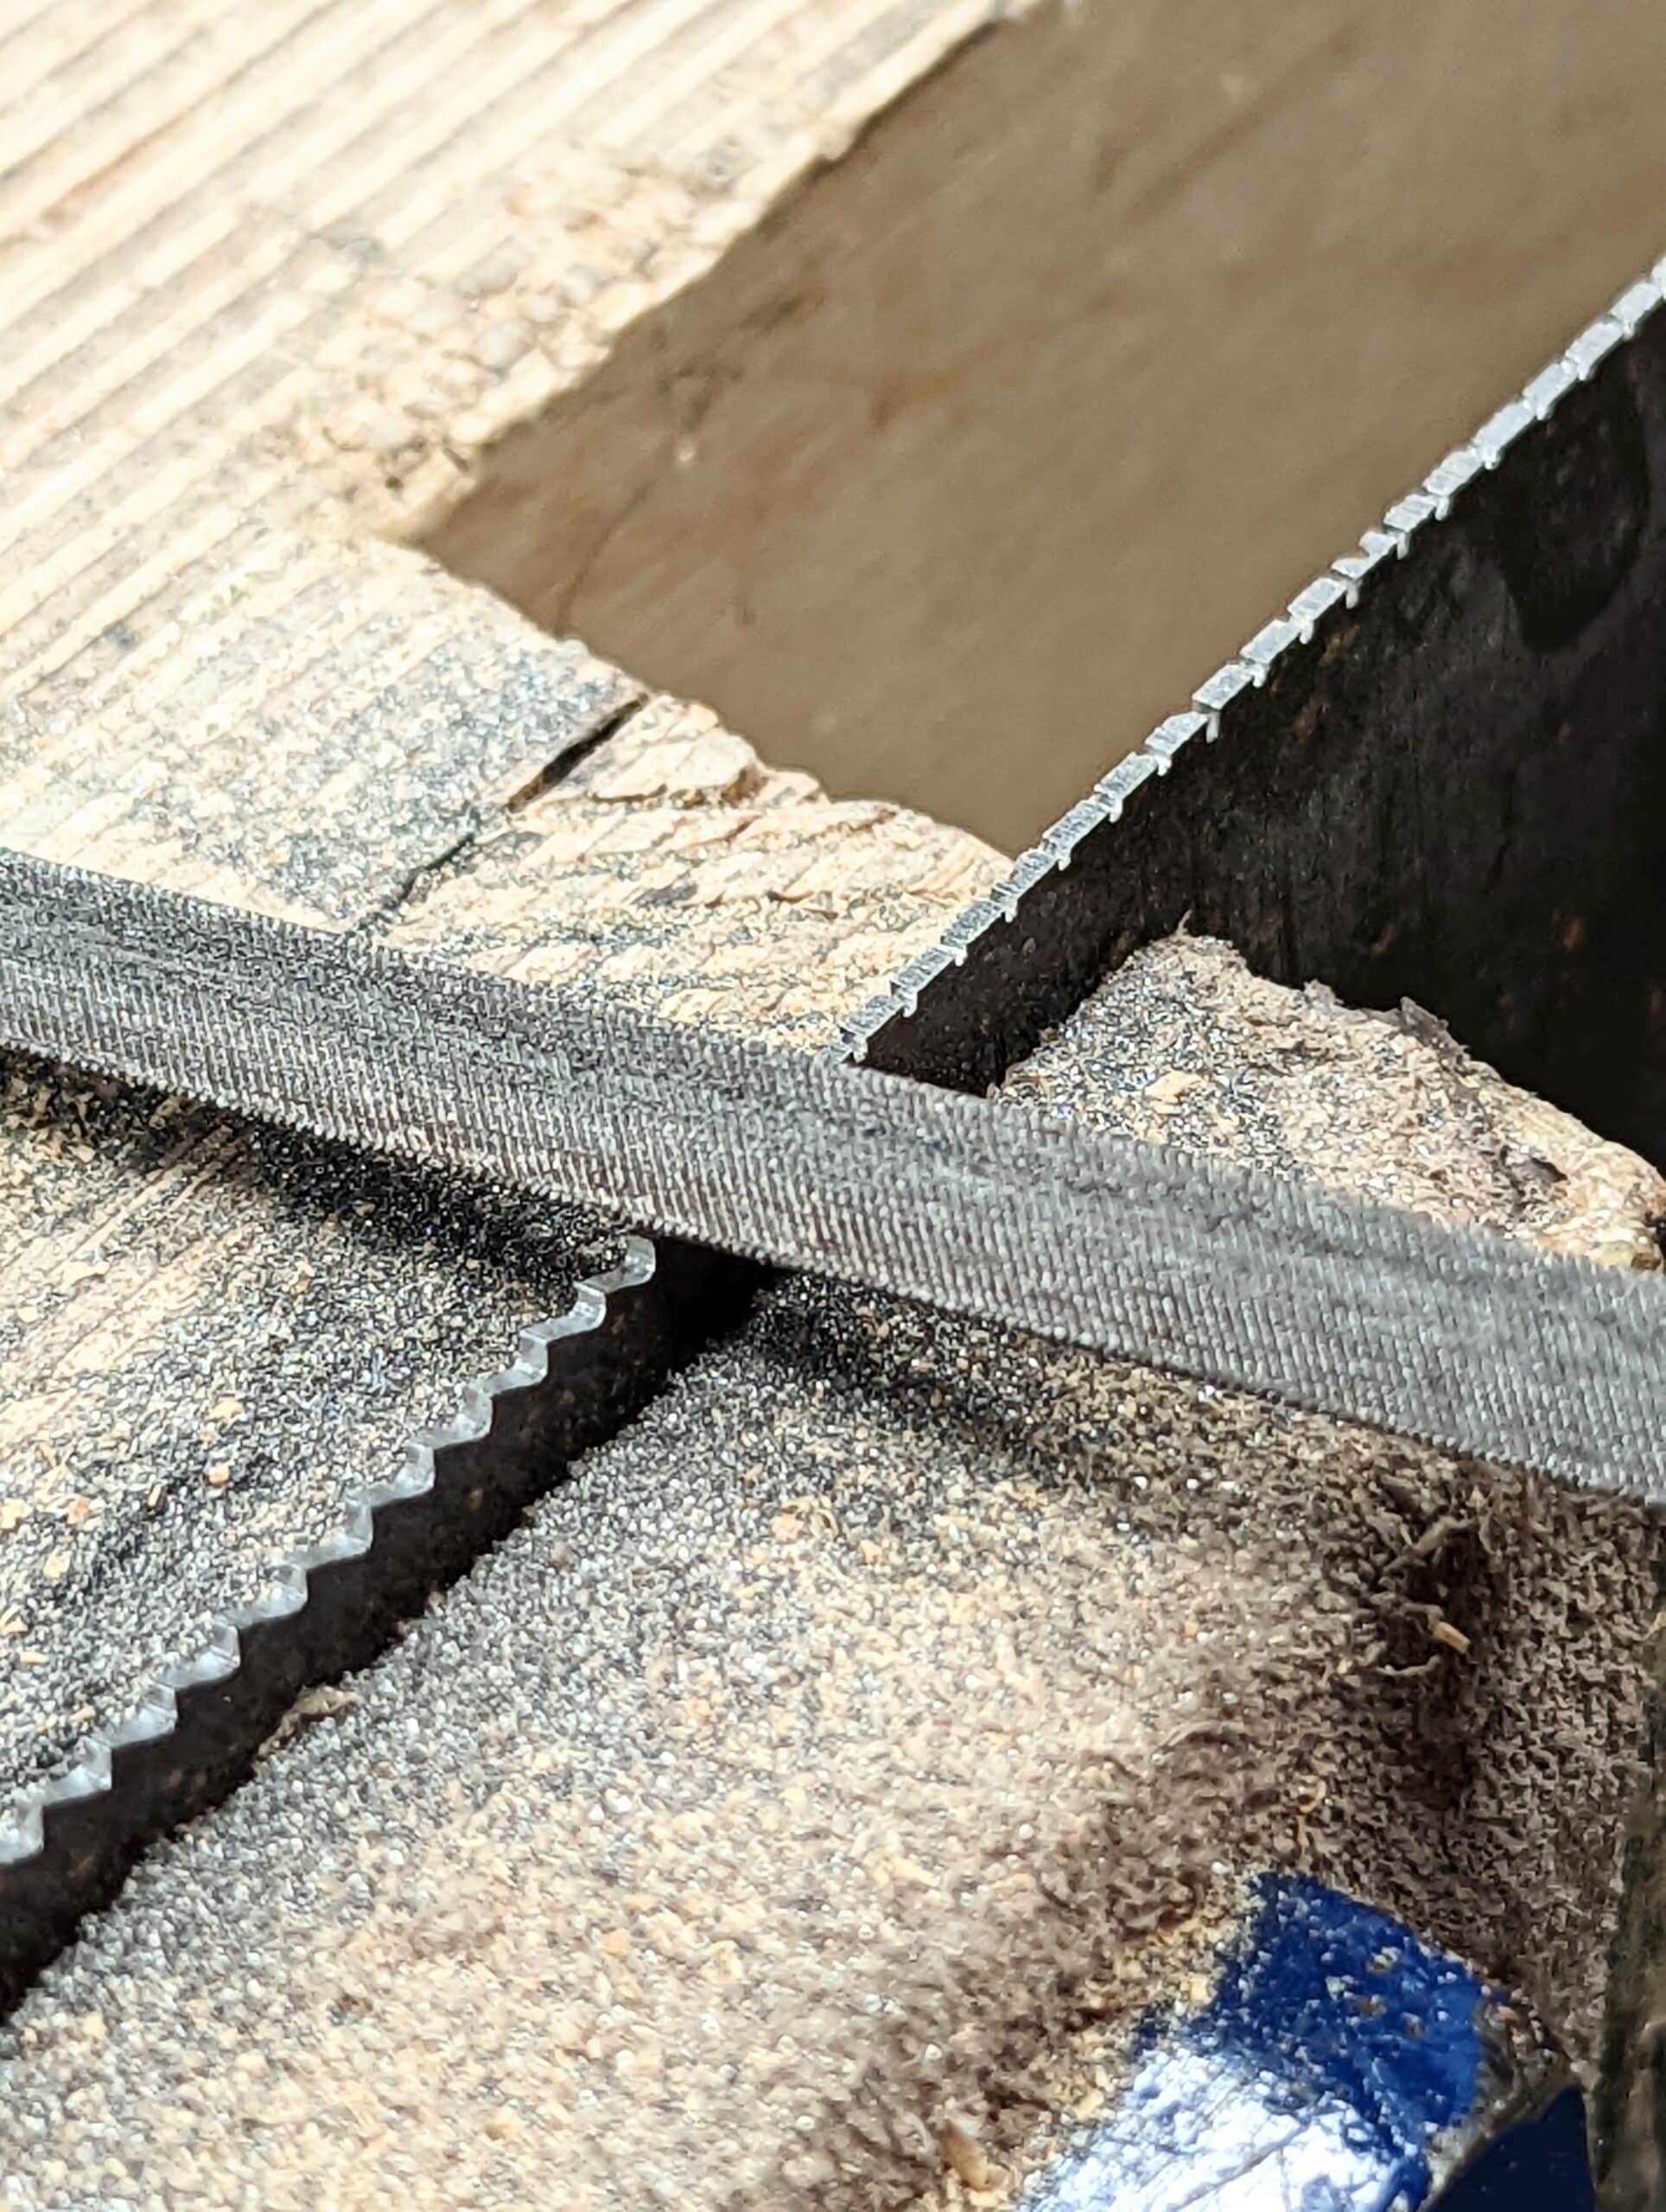
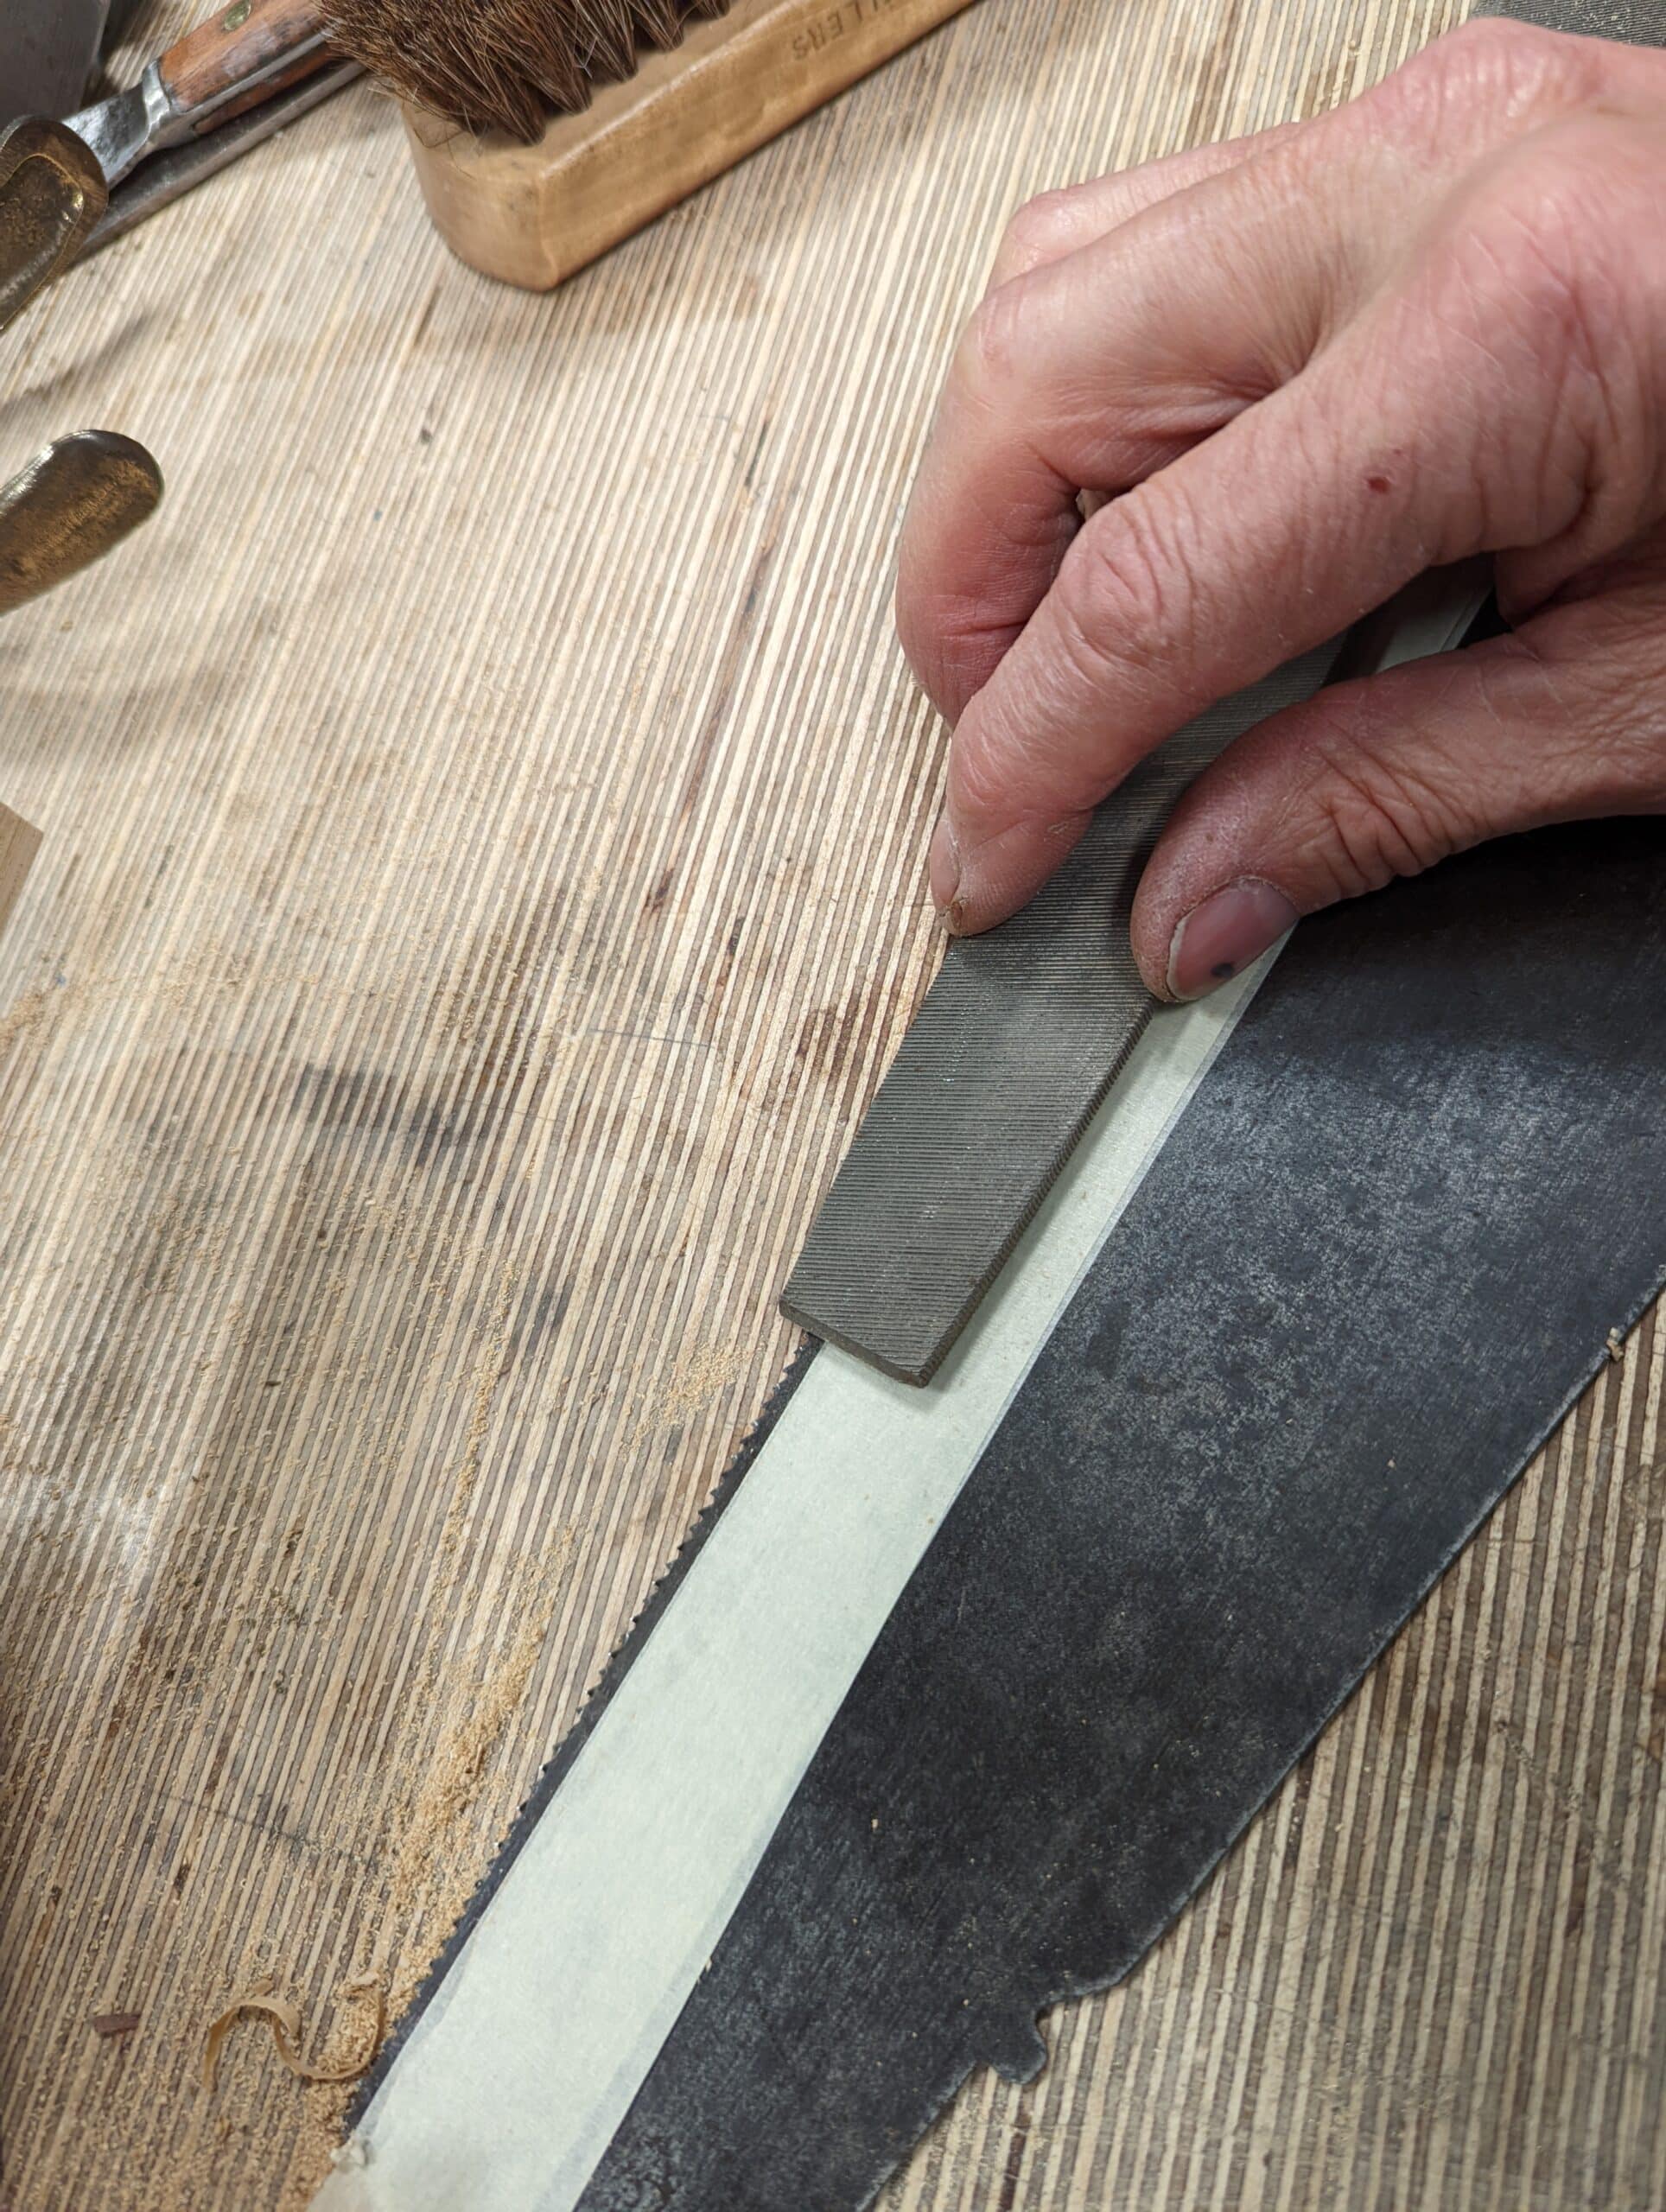
With a junior hacksaw, make a single pass into the kerf of the wooden guide and into the steel. The depth needs only be a small amount as this is purely to register the file at the precise start point in the steel.
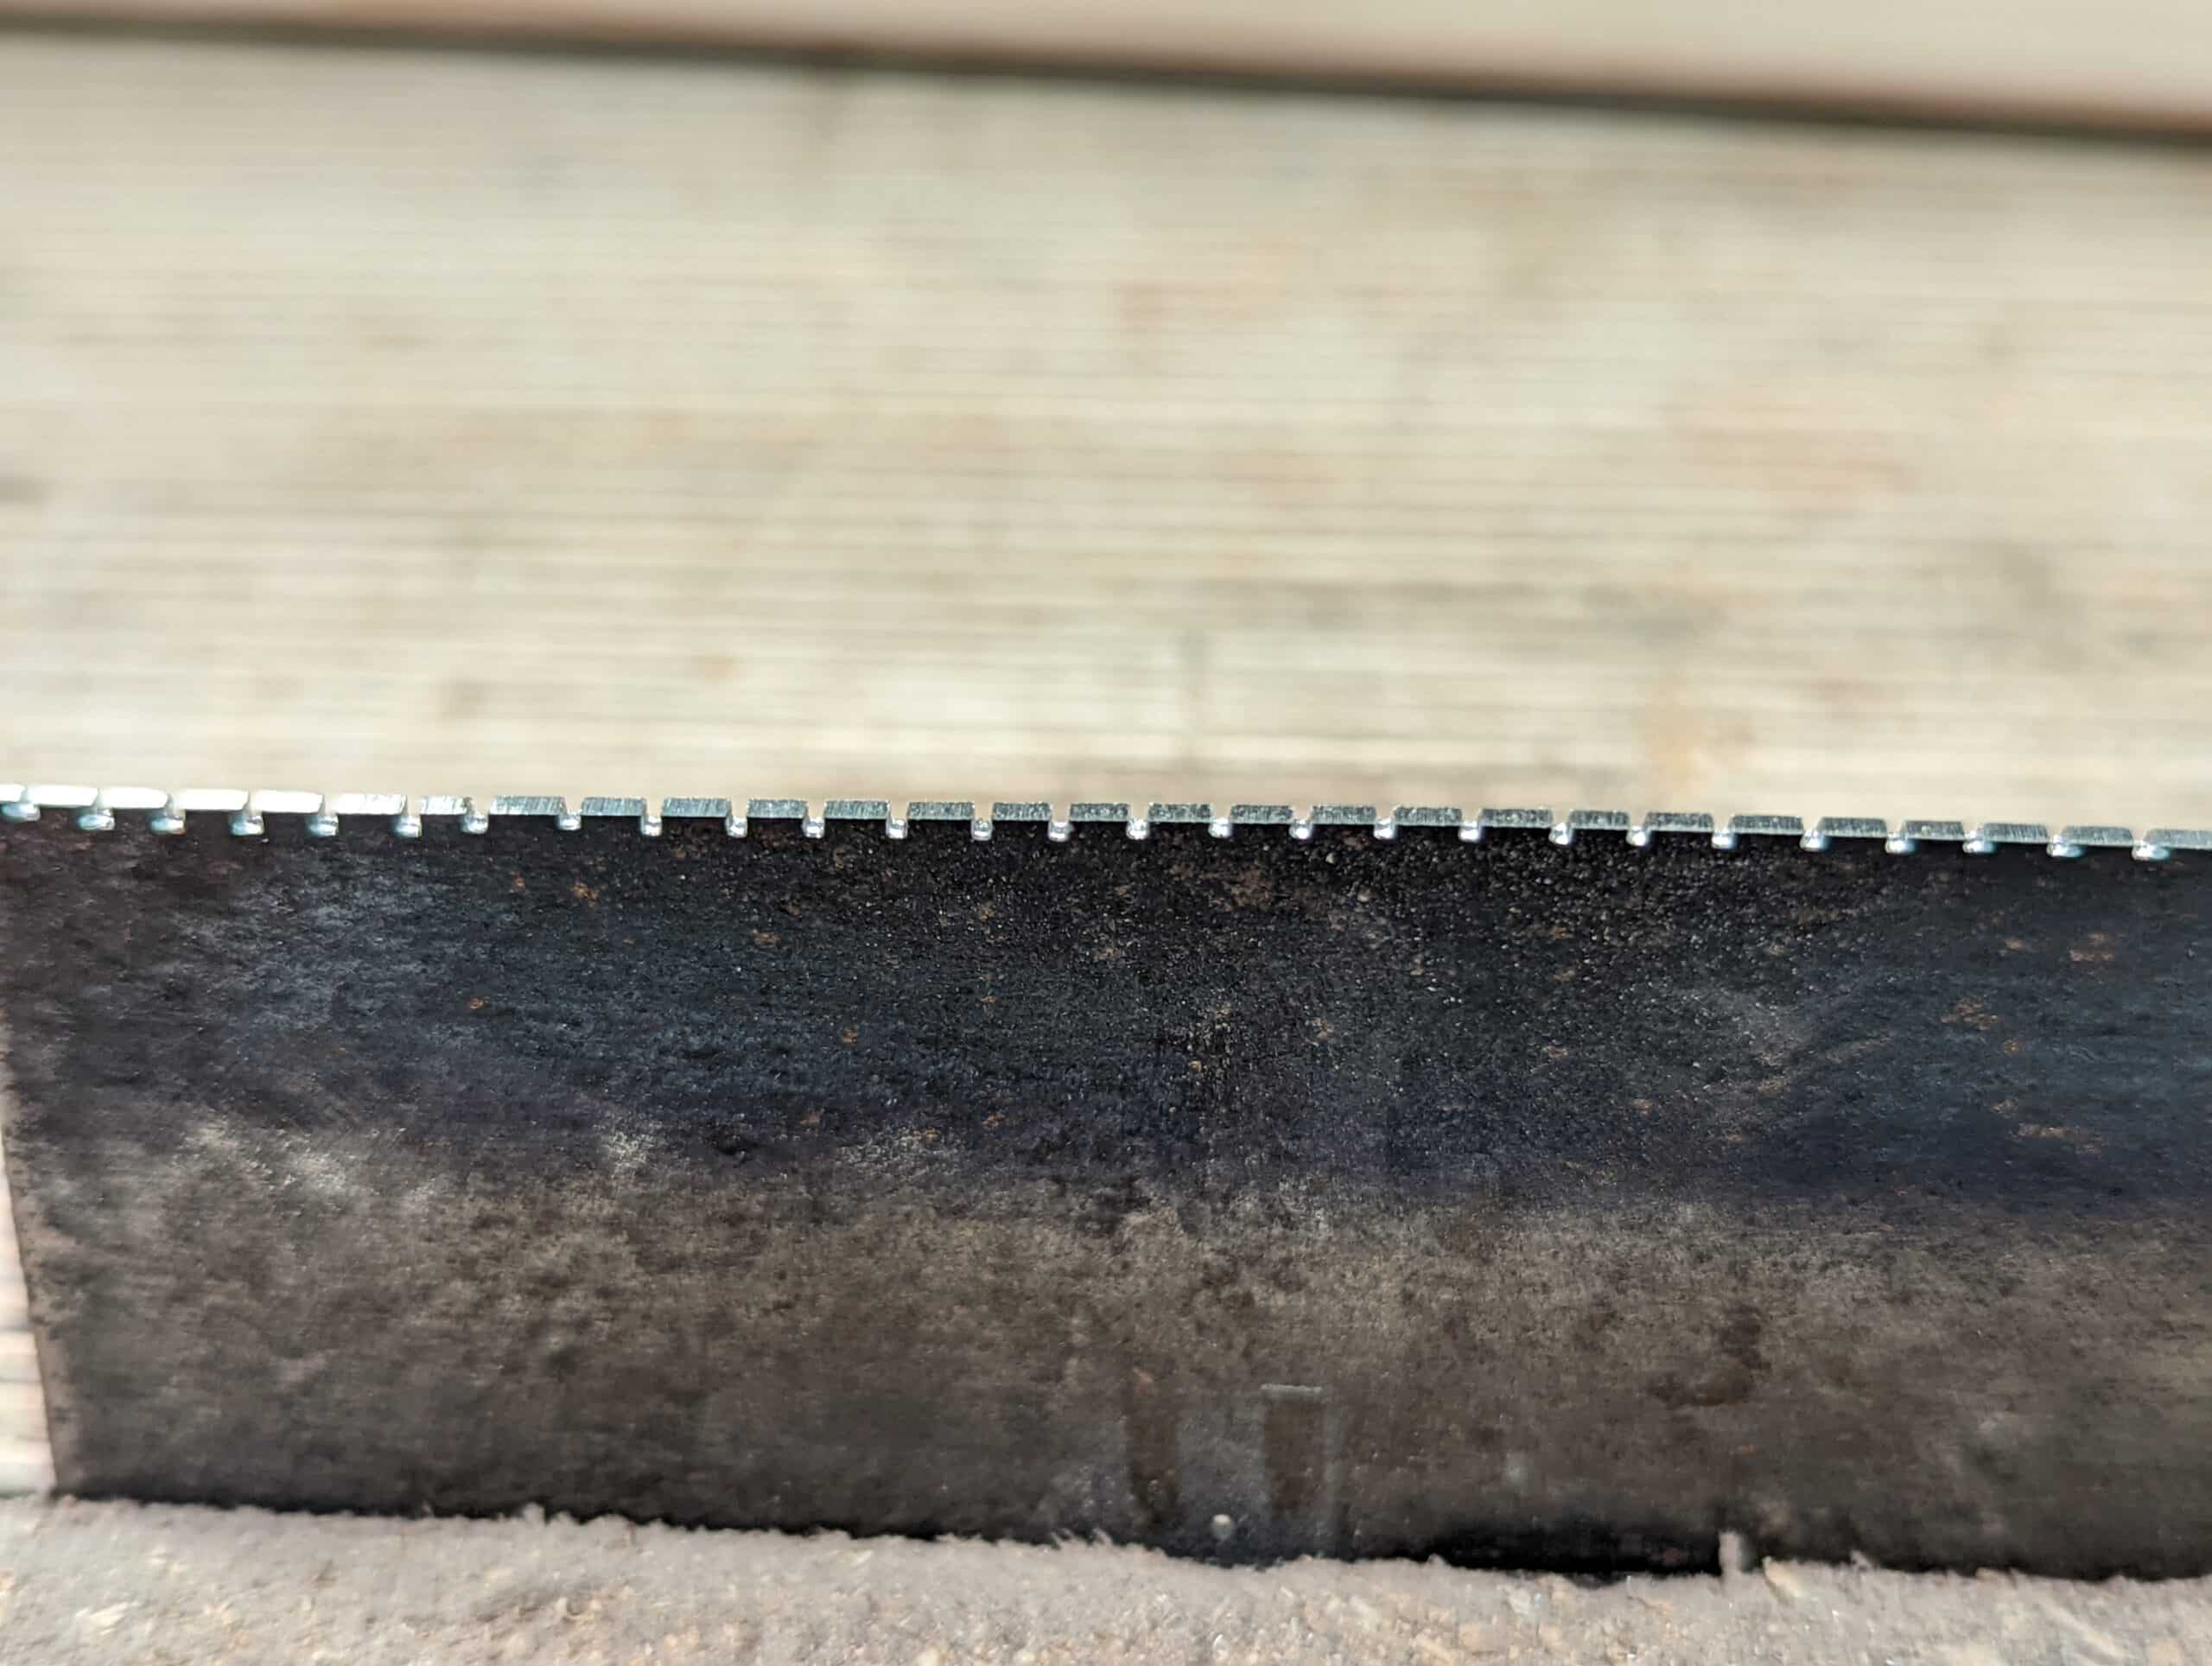
Move the guide along the saw from one end to the other until all of the notches are in place.
Once done, you are ready to deliver the file strokes needed to add depth to the notches and develop new saw gullets. Niow, it takes a little time to get the rhythm of filing together. Three things count. One, the amount of pressure applied will become more confident stroke on stroke so five strokes at the beginning of the first few teeth might need only four once you get going. You will gauge this by how soon the file cuts take to reach the tip to create the new tooth. Two, the length of stroke may well change with confidence levels of growth and general positivity too. What you will aim for is the established number of strokes, the length of the strokes and the amount of pressure you are applying. Strive for consistency throughout and you will not go far wrong. The next and final issue will be the angle you present the file to the steel. Remember that practice does make perfect, it also makes permanent so bad habits are hard to break. Take your time, check ther flow and the shape and everything else as you go. We will sharpen this for a standard western saw rip cut as that is a popular way to go for smaller saws. No matter, even if you want a crosscut, you sharpen first to a ripcut to define the tooth profile exactly as you would for a rip cut. Then, once the defining is done, you sharpen for a crosscut profile by filing every alternative tooth at an angle, but that is not what this is about.

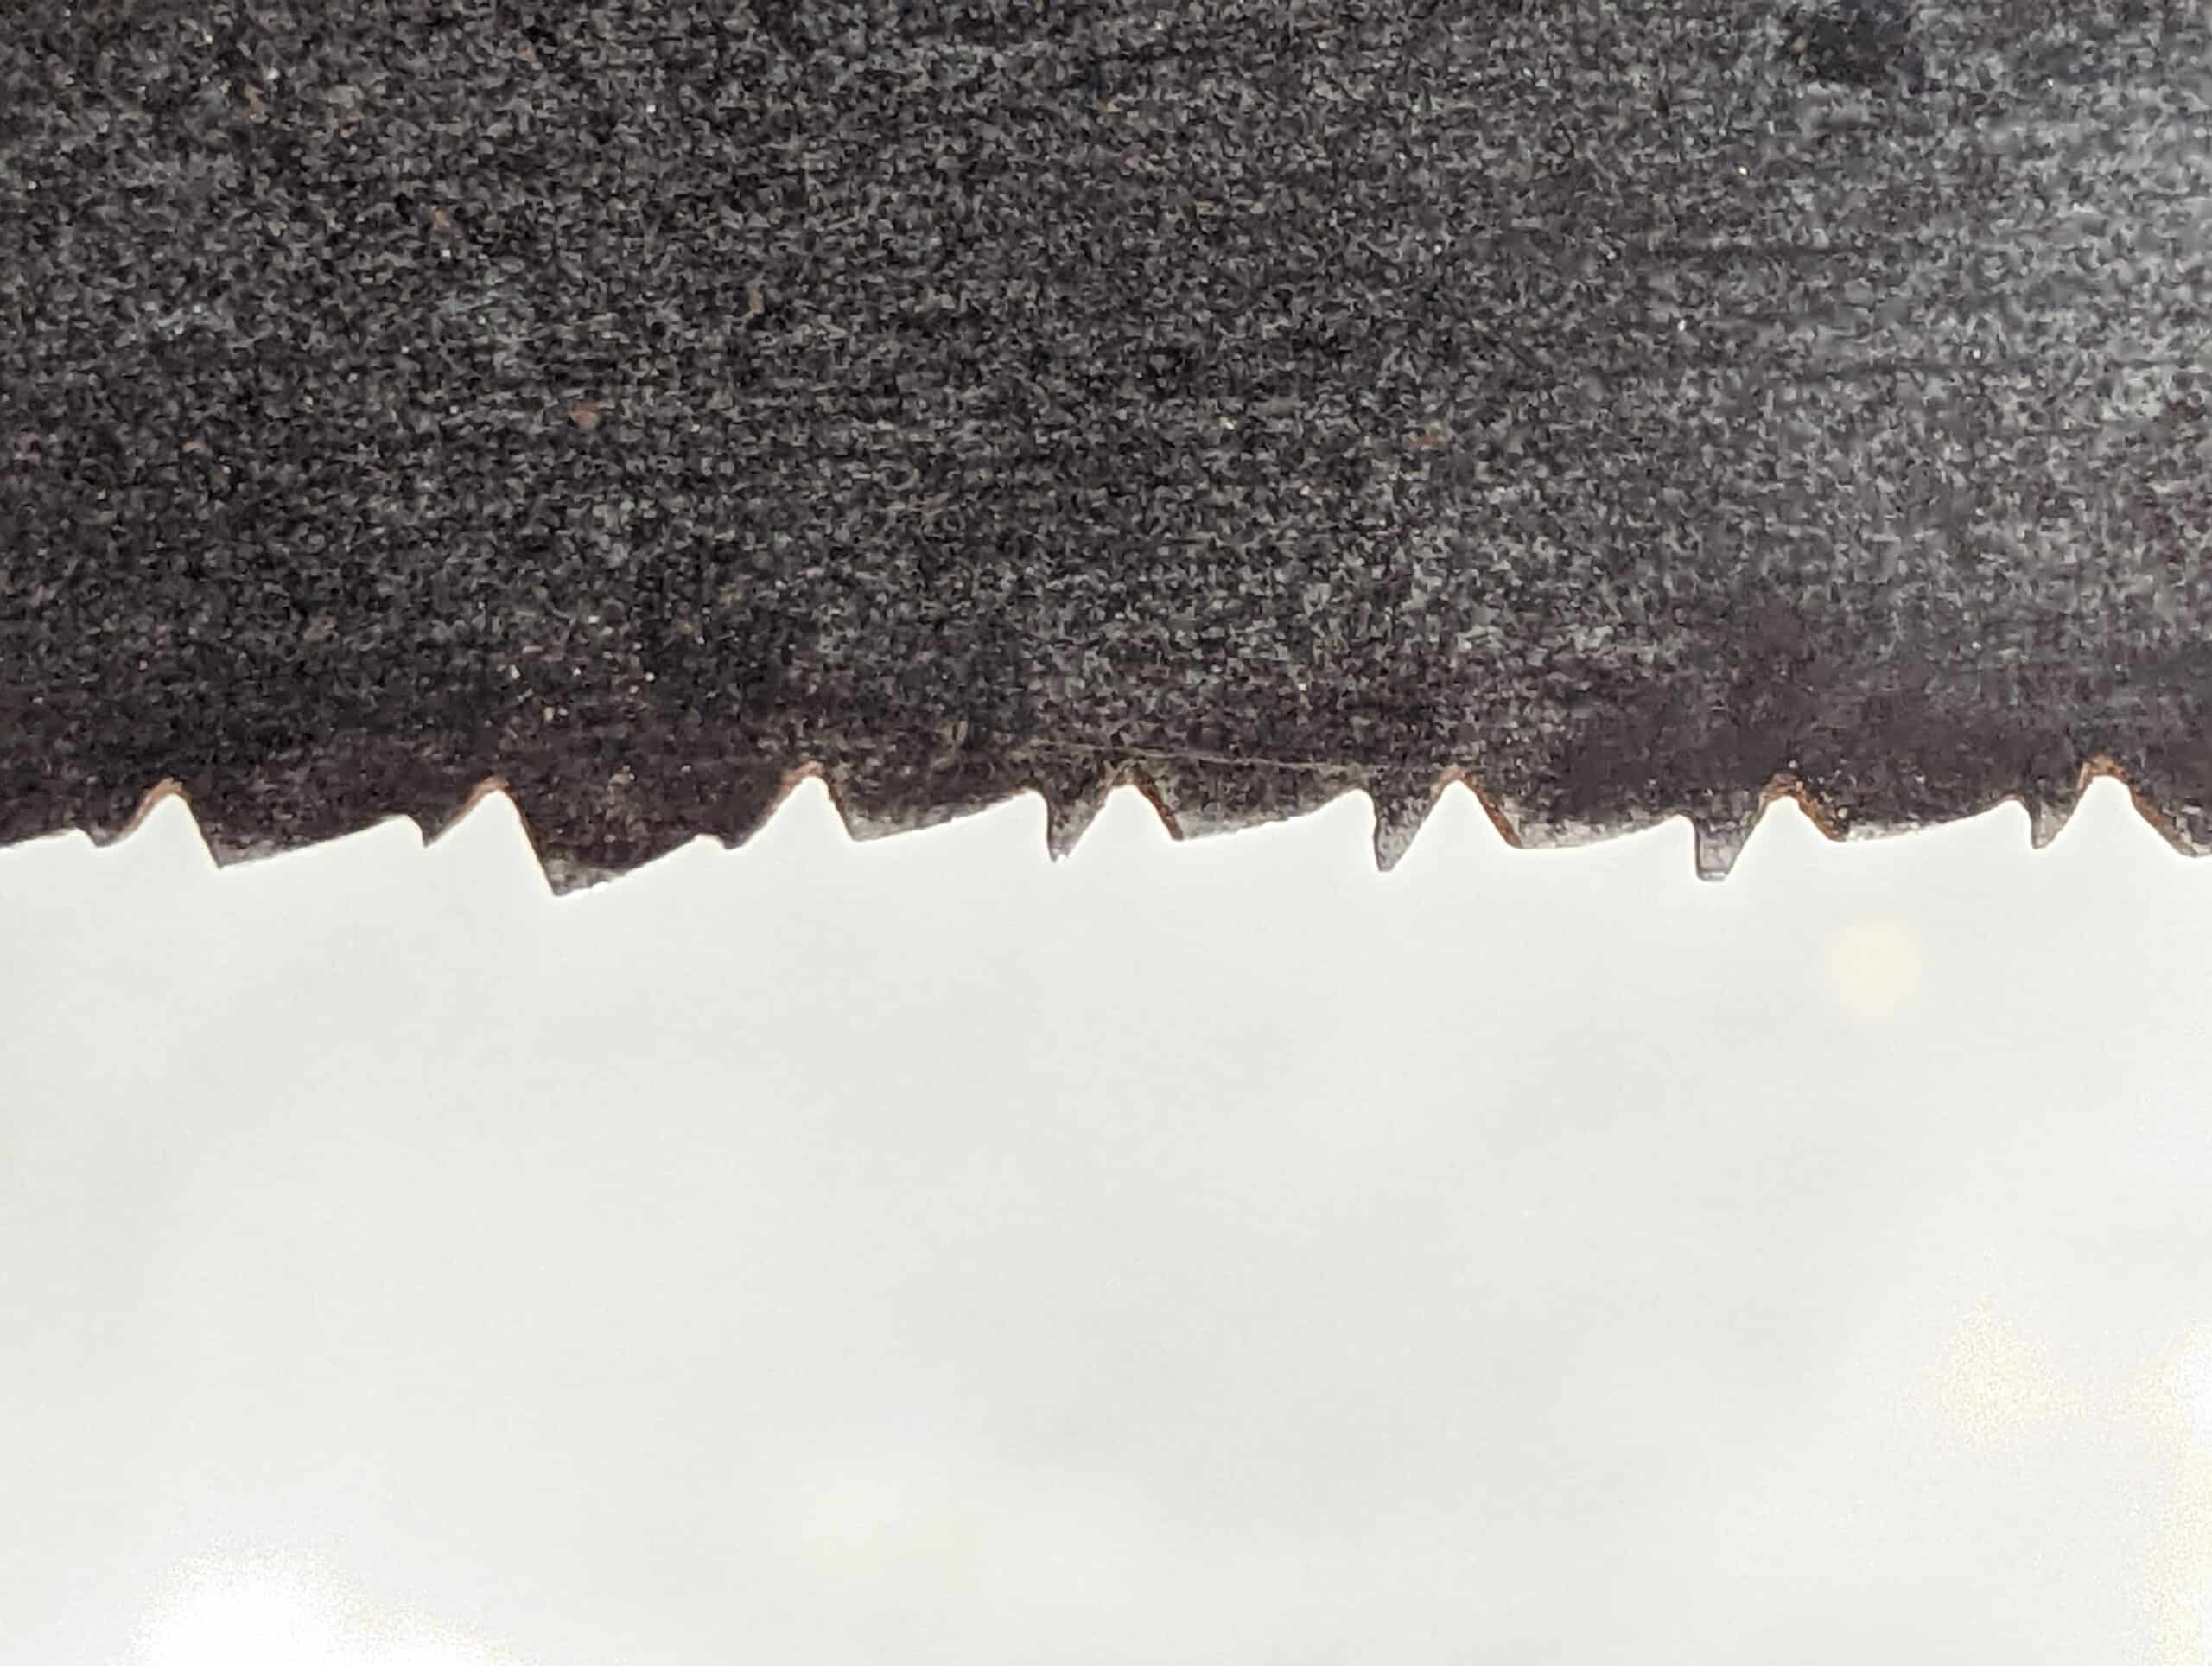
Once you have a certain rhythm, count the number of strokes you are taking and file the strokes as regularly as possible. I found in my plate the file strokes numbered four. That took out the last entity of flat spot to give me a cutting edge. The number of strokes will vary according to the pressure, length of stroke, thickness of steel plate, file type and so on. Too many variables to tackle beyond just doing it. The important detail in these file strokes is the angle of presentation. Because the notch has nothing to do with the angle we must rely on two things, establishing the angle we present at and then keeping the angle as we progress through each notch. Look at the drawing and aim to pitch your saw file at the same or similar angle. The more verticle the front of the tooth, the more aggressive the saw will cut. The more level the top face of the file is, the more passive the cut. Somewhere between the two works great. So ore a slight lean forward if you will. And remember you can always change this in future sharpenings or correct it if you feel you are too aggressive or too passive.
After filing comes setting which must happen because the saw will bind no matter how much muscle you have.

Once set I put two strips of masking tape, one on top of the other, and skim off the sides of the teeth with a flat file. The unifies all of the teeth at one level perfectly.
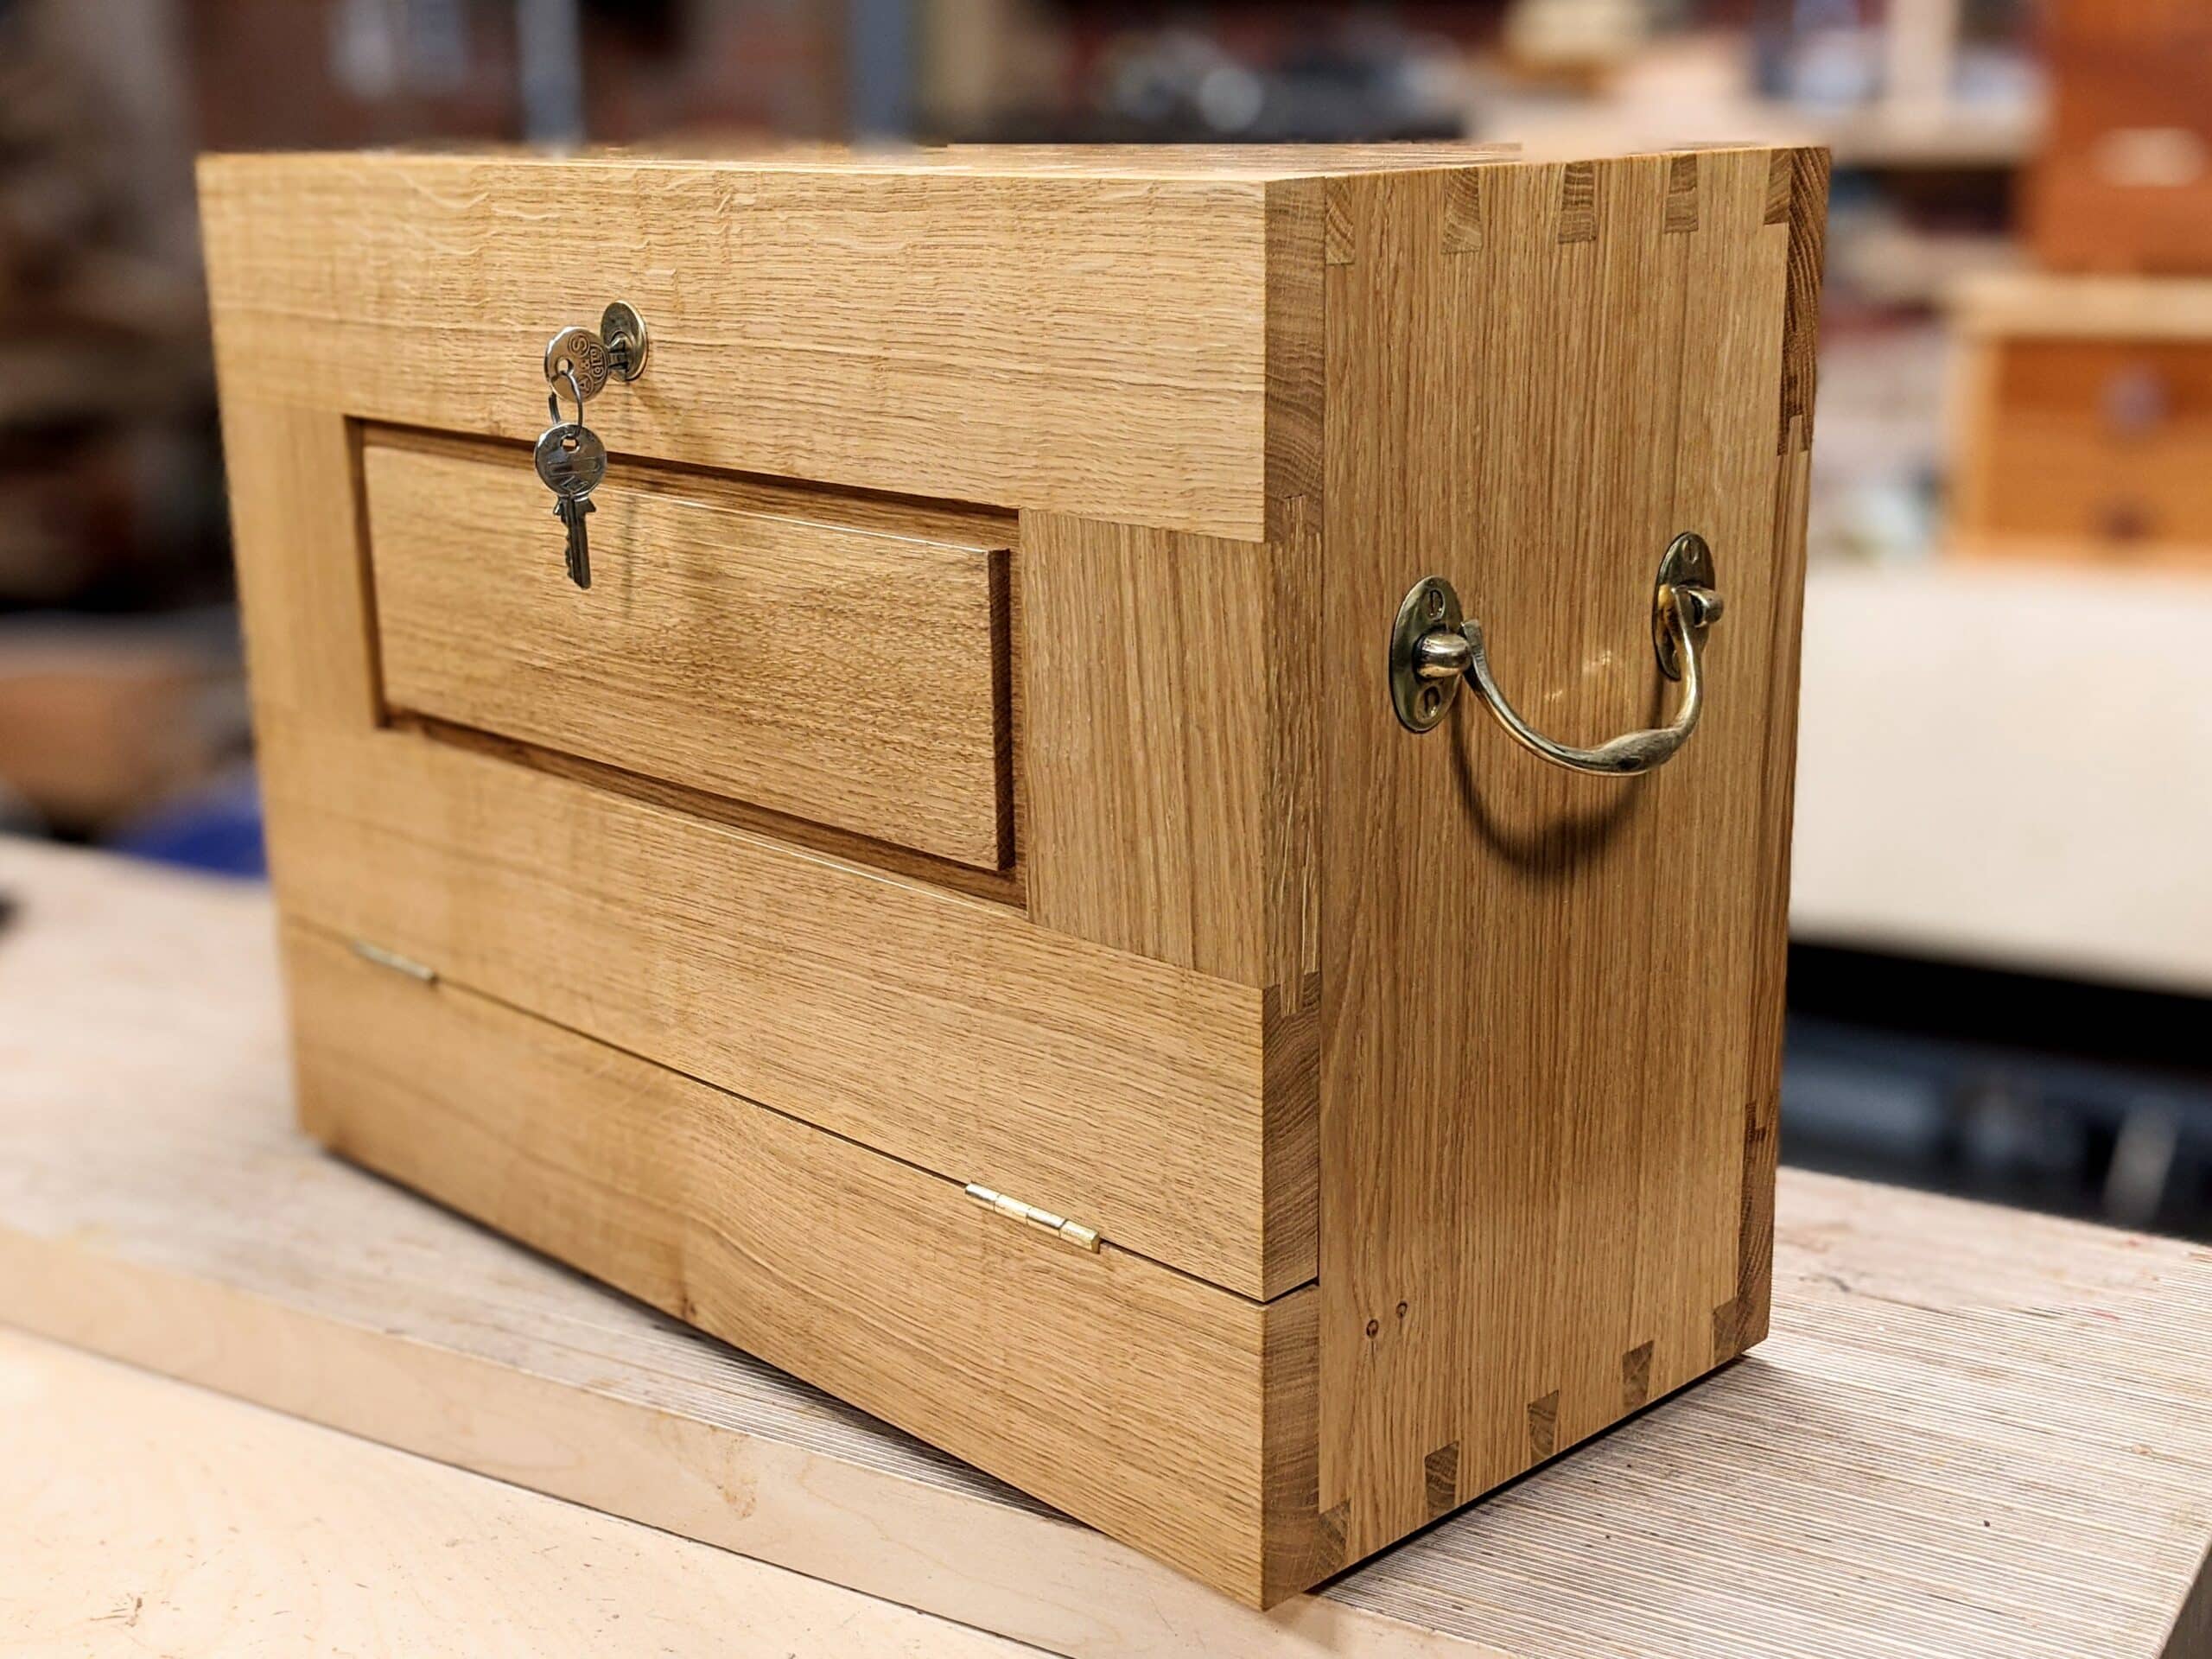
Once that is done the saw is ready for use. I did improve the handle by degunging it with solvent and steel wool. I then waxed it with furniture polish.

Tightening all of the split nuts secured the handle to the plate nicely.

The whole process was under one hour.
Thank you for the interesting post, Paul. I should do the same on a 14 ppi tenon saw. Do you think it should be possibile because of the smaller teeth? I am not sure to be able to do that. Thanks. Giorgio.
Yes Giorgio, just make sure to use the correct sized file. I’ve never done one from scratch like Paul does above, but I’ve resharpened my 14tpi saw several times with great success. I’ve even done my 20tpi gent’s saw with a needle file, and it worked quite well. I’m no expert either, it was just a case of trying it and it worked. I do need to make a saw vice though, as I just did it in my normal vice, which worked, but it was an uncomfortable height.
I finally bought a sawset and used it today. My nephew found a Disston panel saw on roadside waste pickup, and now is set could cut 115×35 rafter ends with it just now. Cuts straight down the line. Really cool
Very smart method of transferring pattern onto wood is demonstrated by Paul here. https://youtu.be/mTqZTGPPRj0
Find a 14tpi hacksaw blade and whack onto wooden guide piece to get impression of correct increments. Then finalise with tenon saw as above.
I’ve been around for a while, but I don’t recall any mention or discussion about the files themselves. Please explain the choices and why. It is always a problem for me. Example: I think in the past I have tried to use too large(5″ double taper) for putting 11TPI on a dovetail saw. I seem to end up “crowding out” the teeth as I go down the length of smaller saws. Perhaps filing too aggressively?Too large of a file?I am grateful for what I have learned from you , but the saw sharpening is coming up short somehow.One of the difficulties of not learning in person, I suppose.
The correct file for 11TPI is 6″ xx-slim.
You want to choose a triangular file that is big enough so that all three sides will wear evenly as the file is rotated during the sharpening process. Measure the depth of tooth and select a file with a width that is slightly less than twice the tooth depth.
But I think you are correct that you are being too aggressive light strokes will do the job.
Oops I meant slightly MORE than twice the tooth depth
I cover this in-depth in different places but the best advice I can give is to pick a file where the flat of each file face of the file is a fraction wider than twice the width taking measurement or guestimate from the bottom of the gullet to the top point of the tooth. This will mean both sides of the file are used equally and will wear then to the same level. The length of the file will usually be commensurate to this width so a small narrow face will usually result in a 4″ file and a wider ones between 5-6″.
I have always found your restoration videos to be inspirational and oh so very satisfying. I do hope you’ll manage a quick 1 minute video explaining what you did ( using these stills ) and then showing how it now works.
Your previous videos showing restorations of planes, saws and chisels are videos I return to on a regular basis.
I found the your remarks on using a grinder interesting. Can a simple jig be devised to assist in holding a long saw in proper alignment against the grinder?
You don’t need a jig. Just pass it along the grinder as evenly as you can. There is nothing to it.
Alright, I shall give a try on a practice saw and see if I can do it. I had just never thought about using a grinder.
Sharpie along the edge and strike a line with a nail; this will give you a visual aid (no need to grind all the way to the line if you strike it too far in on the blade, just maintain an even distance to it along the length). Useful for keeping a somewhat square edge on irons, too.
As for the saw, you’ll file it flat so the grinding does not need to be dead perfect. But sometimes we need a bit of training wheels to gain confidence. 🙂
Good morning Paul,
You are a Master at restoring that handsaw! Well done!
Best wishes.
So a quick look online got me to a free template guide for any TPI you might wish for.
Seems to me you could print what you wanted for your selected TPI and spray adhesive or tape it to your saw blade. Or you could tape it to a piece of wood to space out your teeth and then make your template from there. There are even free downloadable templates for progressive teeth dependent on saw length. Mr Blackburn is very helpful and has a lot of information.
My old eyes and inexperience make laying out tooth spacing by eye a long tedious process.
Next time I sharpen up a saw I’m going to try blue painters tape over the teeth so I can see where I’ve been.
I also use the blackburn.com templates and tape them on with painter tape.
The advantage of Paul’s approach is that it provides a physical guide for the first file cut. As someone whose close-in vision isn’t as good as it used to be, I think I’d like that.
Thanks Paul.
I have a non-collectible Disston saw that is in rough shape. I want it to be used for aggressive rip cuts in long rough wood. How many teeth per inch would you suggest I convert it to? I have plenty of other saws for finer rip cuts. The sole purpose of this is when I have a six or eight foot board I need to rip. As of now I don’t have a bandsaw so this saw will be what I use. I do have a bunch of long wood and am moving to making bookcases, etc which will have longer pieces.
Less important but interesting info. My father gave me this Disston saw that he used to keep in the back of his 56 Ford F100 pick up (my dad still has the pickup and it’s been restored three times now: first in 1960s, second in 2000, recently because a big tree fell on it and crushed it). The saw sat outside for about a year and is in rough shape. I want to restore it for use.
Many thanks.
I just recently did that with a disston, converted it to 3tpi and it just eats wood like a starving dog. It doesn’t take near as much force to use as it looks, and no less accurate than my finer saws. I’d suggest hollowing the gullets a bit to keep sawdust from clogging for thicker pieces, but probably unnecessary overkill for thinner stock under 2″
Thanks Jeremy. I had been thinking 4 TPI but will likely go with 3 TPI based on your experience. The biggest challenge I face is that I don’t have a grinding stone in my shop but my dad does and I think he would get a kick out of seeing part of the restoration occur.
OK, THIS is the video I’ve needed. I have collected a couple nice looking saws that I wanted to restore and use… but exactly HOW has always been the question. Armed with this post… off I go.
“Video”.. I’m so used to typing that I couldn’t type “post”.. and then, although I tried to edit it… apparently I couldn’t manage that before I posted it. 🙂
There is a video of Mr sellers using this technique on YouTube…
It’s not exactly the same. I think that this method is better by its simplicity.
Funny, I just did this on Saturday. I have a hollow catalpa trunk that I wanted to slab but no Sawyer in town wants to come near it,. So, after remembering seeing your video a couple years ago, I took one of the 6 10 pointers I have been meaning to restore and converted it into a 3 point. The only thing I did different from your method was use a chainsaw file to hollow out the gullets some more, and that thing is just hungry for wood. Managed to cut through 15″ of a 12″ thick log in about 5 minutes with surprisingly very little effort! The only hassle with the project though is that I can’t for the life of me find a saw set, even ebay has little to offer, so I used a pair of pliers since my usual hammer and punch method just made the saw laugh at best.
Is there any particular term or word combination that would help in finding a decent saw set online? It seems to be the one tool that has eluded me for years…
Ace work. Putting new teeth on a saw is no easy task for me to do. Just not the sort of thing I’m good at. Repetitive consistency is something I struggle to do. It’d take me more than an hour just to make the guide jig. Realistically the whole job would take me days. Because the first few times I did it wouldn’t work out. I know because I’ve done it.
Paul- I can save Mr. Sellers from responding by doing so myself, just follow the above instructions and it will be OK. It’s a process gaining confidence, and iffn you never try, how can you succeed? It’s only an inexpensive saw and a file we’re talking here. And EGO. Success guarantees better Ego. Trust me
Paul, you refer to a belly in the edge – does this mean that the tooth edge of the blade is concave or convex?
Cambered, convex.
Whenever I have tried to use this method – as described in a video some time ago – the hacksaw doesn’t cut the steel of the saw plate. Do I need a different hacksaw blade? I used bahco junior hacksaw blades, and just watched the teeth of the hacksaw fall off as I got to the saw plate.
Cheers
W
Ah! Yes, some saw plates are too hard to cut with a hacksaw and some cannot even be filed though this is rare. The method works on 95% of saws though.
Hi Paul.
I came across one of those hard plate saws and by the time I finished marking and cutting and filing, it looks just like your Himalayan beauty.
Before you marked and cut and filed it, that is.
I wonder if it”s jagged enough to cut ice blocks?
Great stuff.
All the best, john w.
Paul,
Hello to you and your team of skilled craftsmen and craftswomen. Prior to the pandemic I was on the swing shift and my home projects were being delayed one by one. Today I’m back on the mid shift and I’m going to tackle all my projects one by one starting with sharpening my saws. The only tools I’ve been sharpening are my gardening tools and I think of your YouTube videos which have helped me immensely. Thank you and looking forward to creating useful things at home and work. Reggie
Paul,
You say, “To then refine the line further I ran a file along and sighted to get ever such a slight camber or belly of 4mm or so. With a short reach, the bench handsaw benefits from a slight belly this way.”
Does this apply to crosscut, as well as ripcut?
Matt
Yes, matt, it’s mostly because we have a short arm sweep in more restricted spaces but also because we often use a more arcing stroke for various reasons. We also have 14″ tenon saws that are always straight so having a variance is always helpful.
Thanks!