Needing a Plough Plane Cutter?

I ordered in a piece of O1 flatstock 3mm (⅛”) by 15mm (⅝”) by 500mm (19 ⅝”) just in case. That way, when I need a piece of tool steel it’s there ready. Today, I needed it. You never know when you might need a new cutter, customised 1/16″ chisel or maybe a small knife blade you can’t buy off the shelf or on eBay, do you?
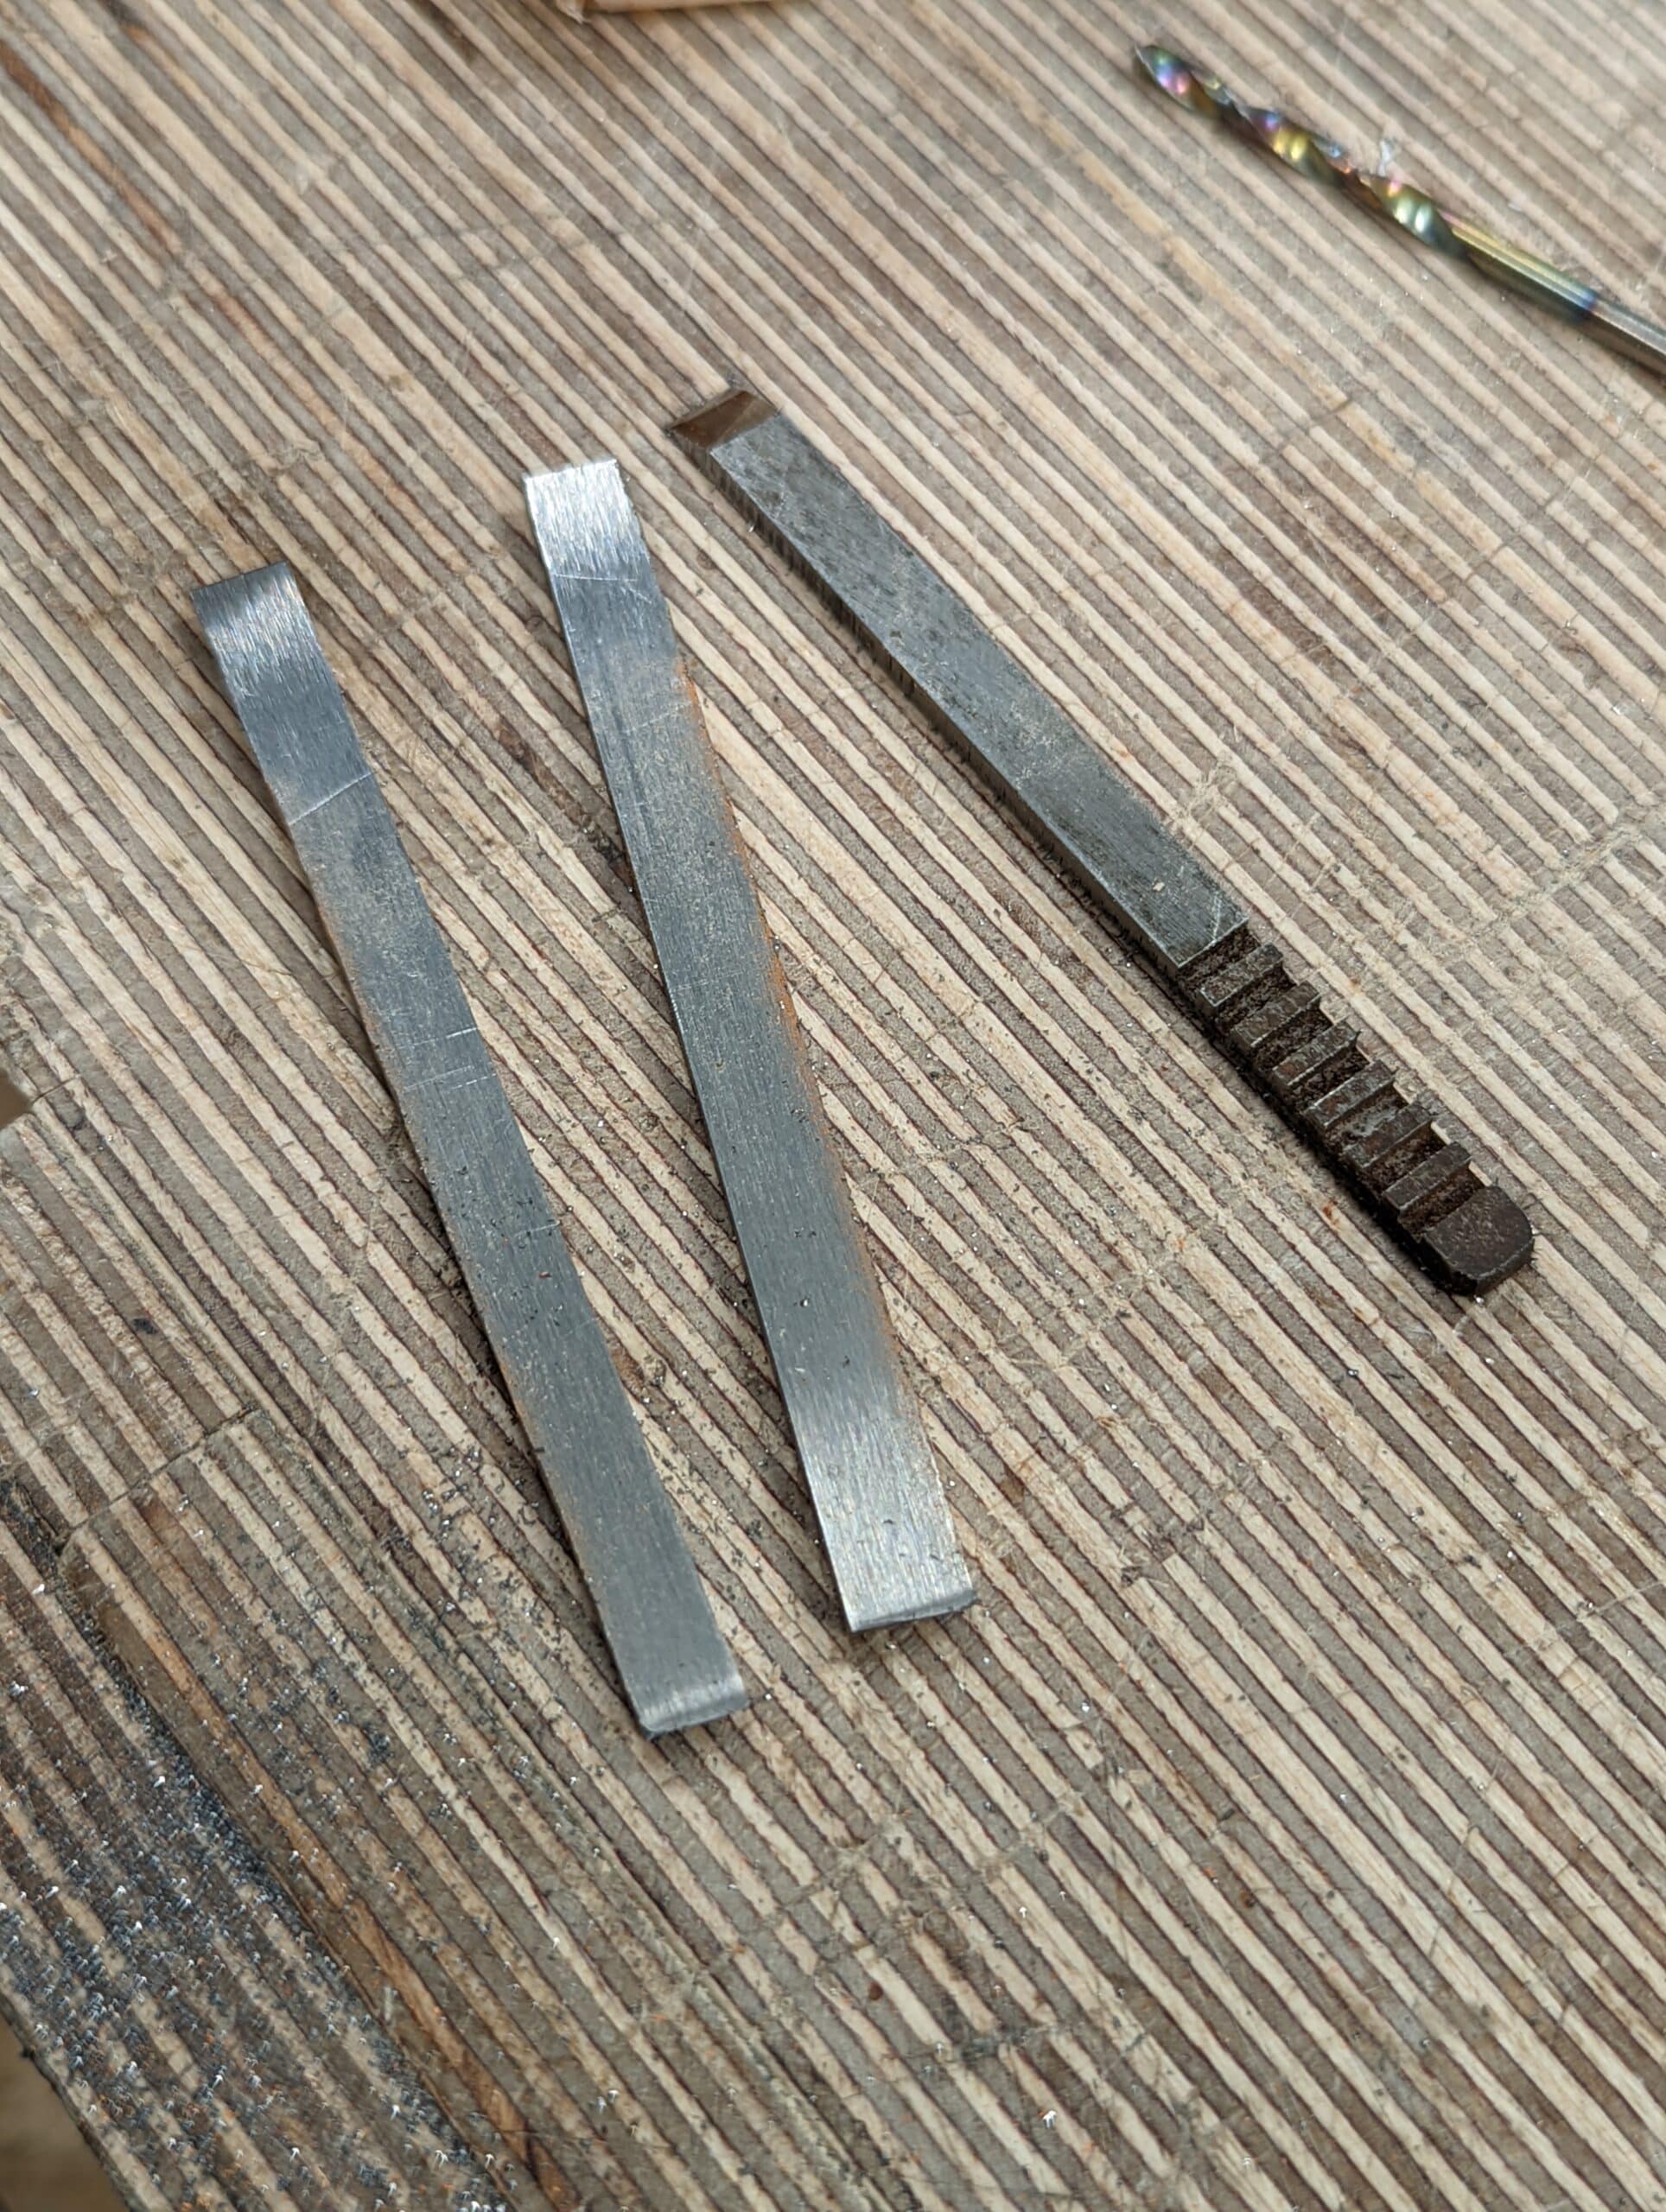
The plough plane cutter of 9/32” didn’t exist for my Record #044 so I took a hacksaw to the steel, cut the width plus a bit and then filed the rough side straight and true and then trapezoidal just a hair. To cut the steel with the hacksaw took three and a half minutes. To file the 25º bevel took 50 file strokes with a 10″ flat file so about a minute and then to double up two hacksaw blades in the hacksaw and slide out the grooves for the adjuster was a minute a piece, no more. Technically, I only needed the one groove, remember, but I went ahead anticipating I’ve got at least 30 more years of woodworking in me as I am only 72 years old yet. Joking!
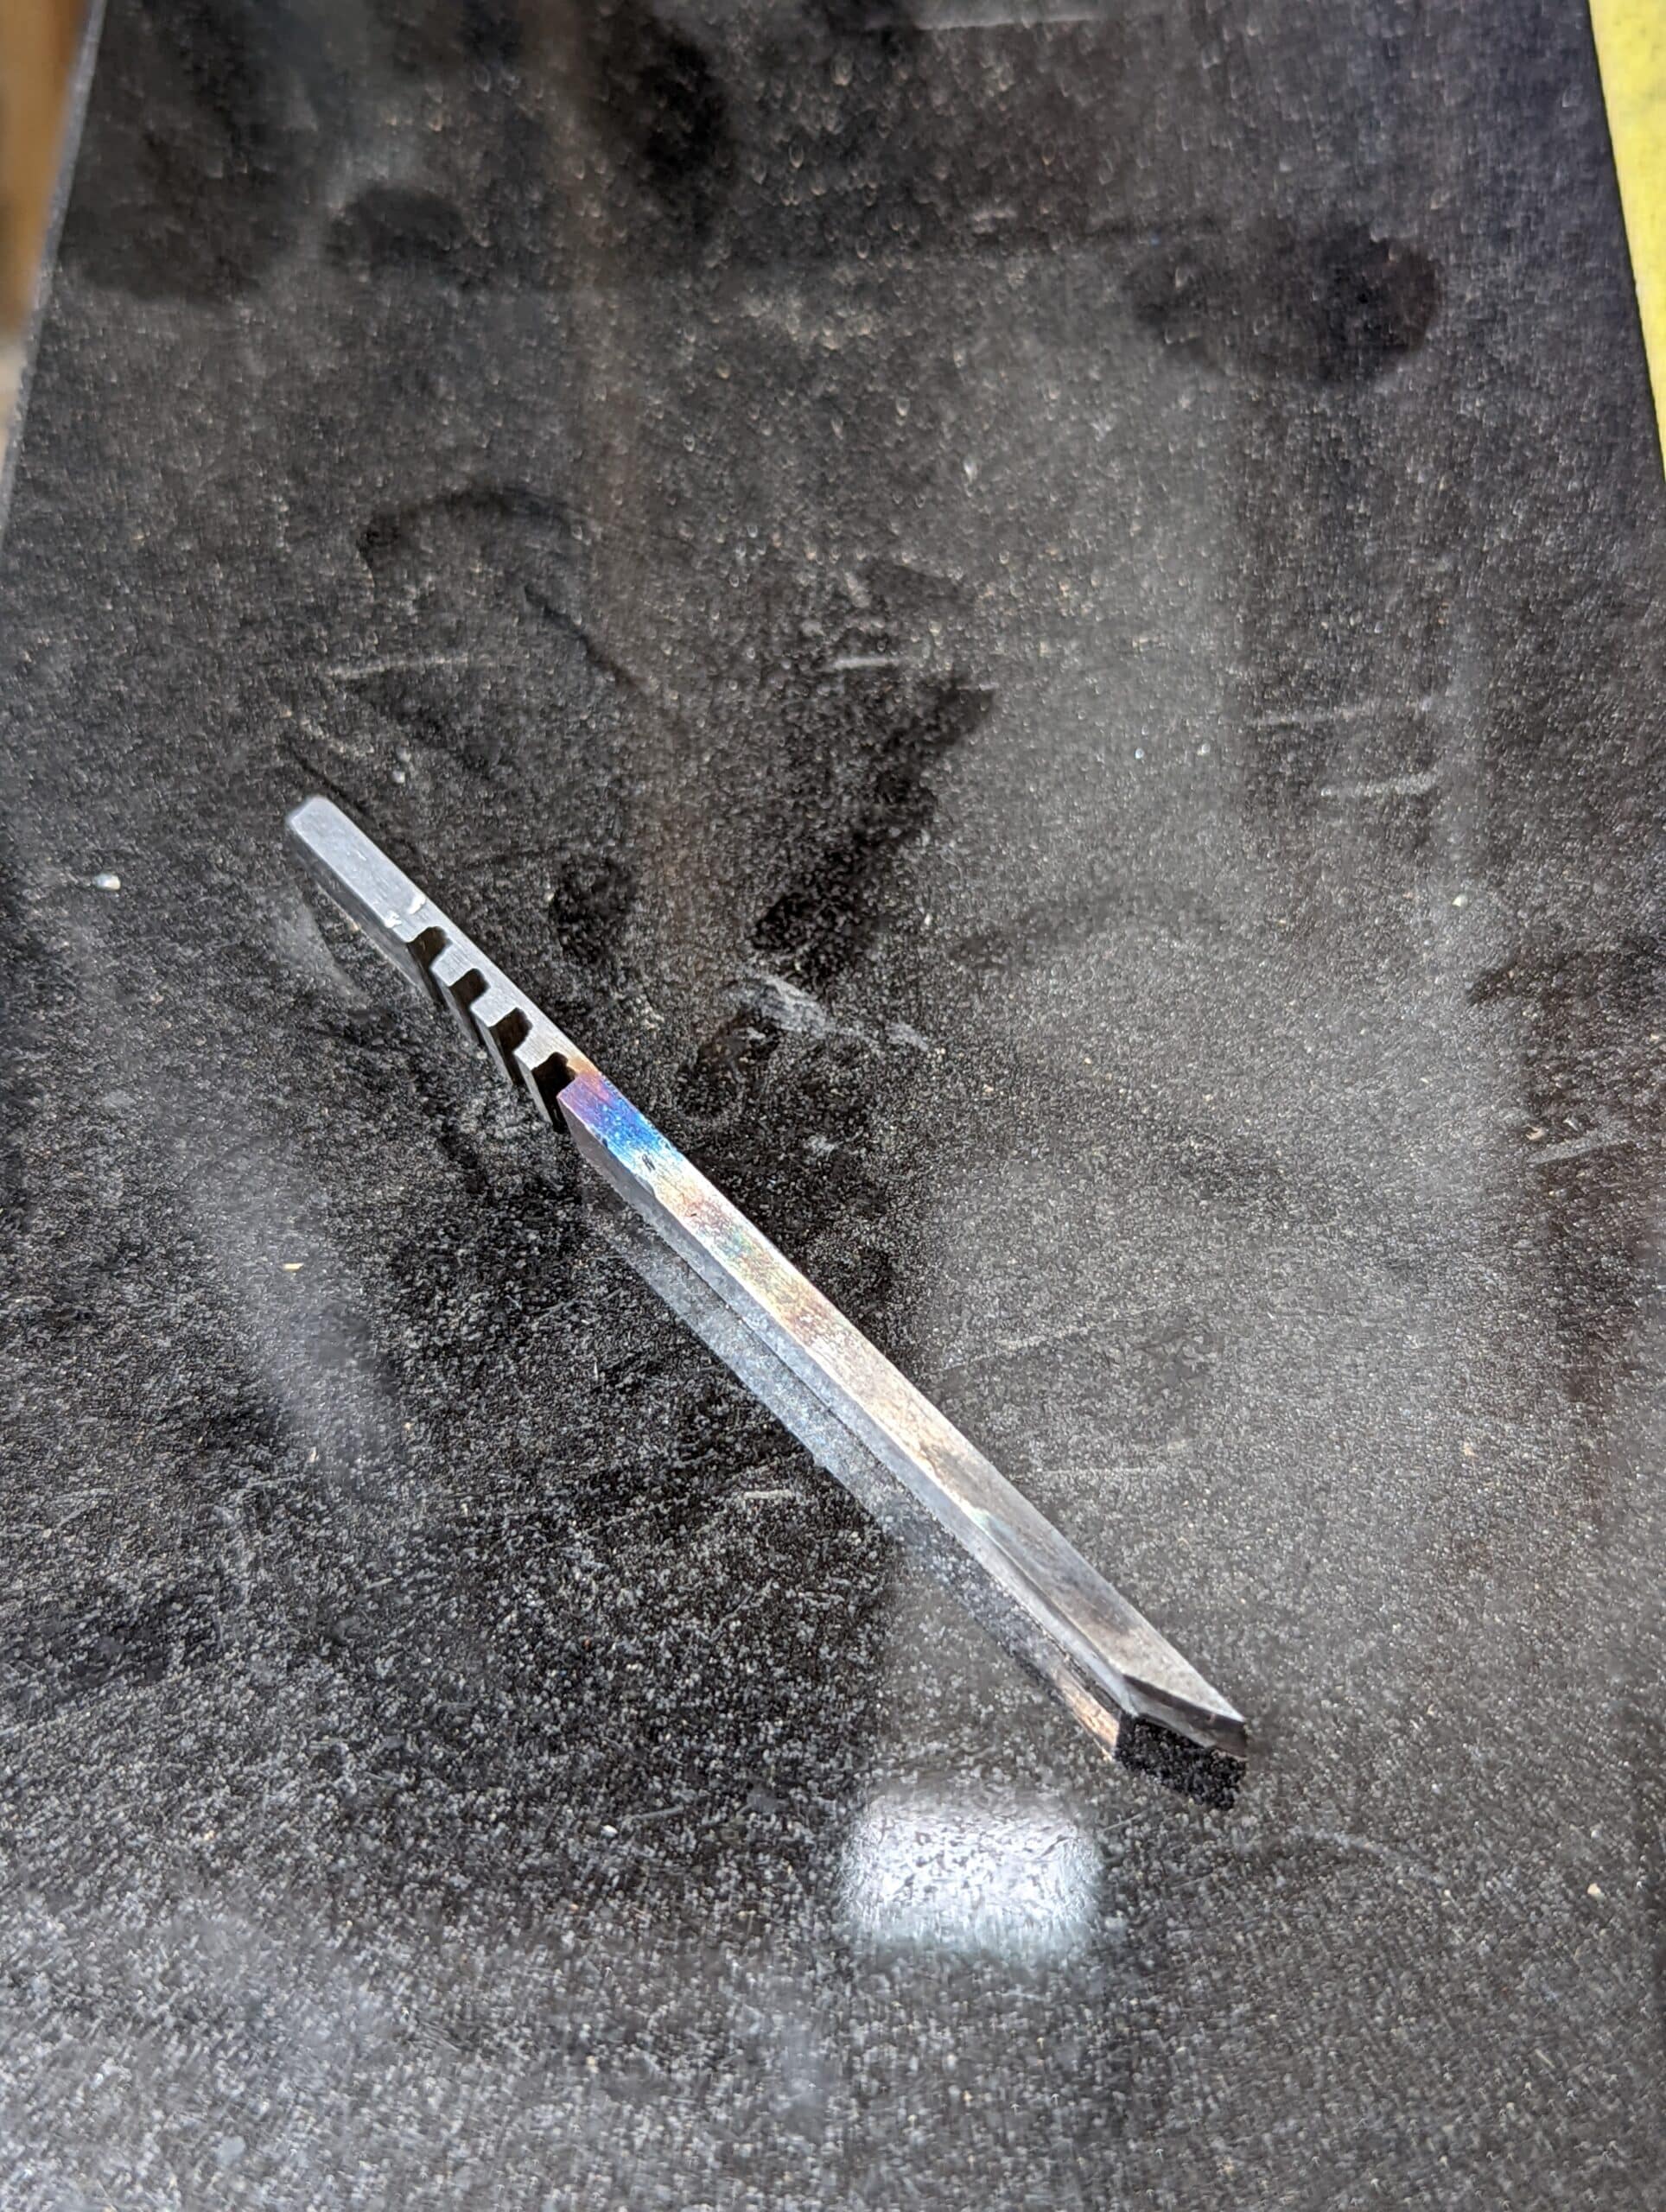
Anyway, the hacksaw trick worked fine and I had a blade made ready for hardening with the blow torch.
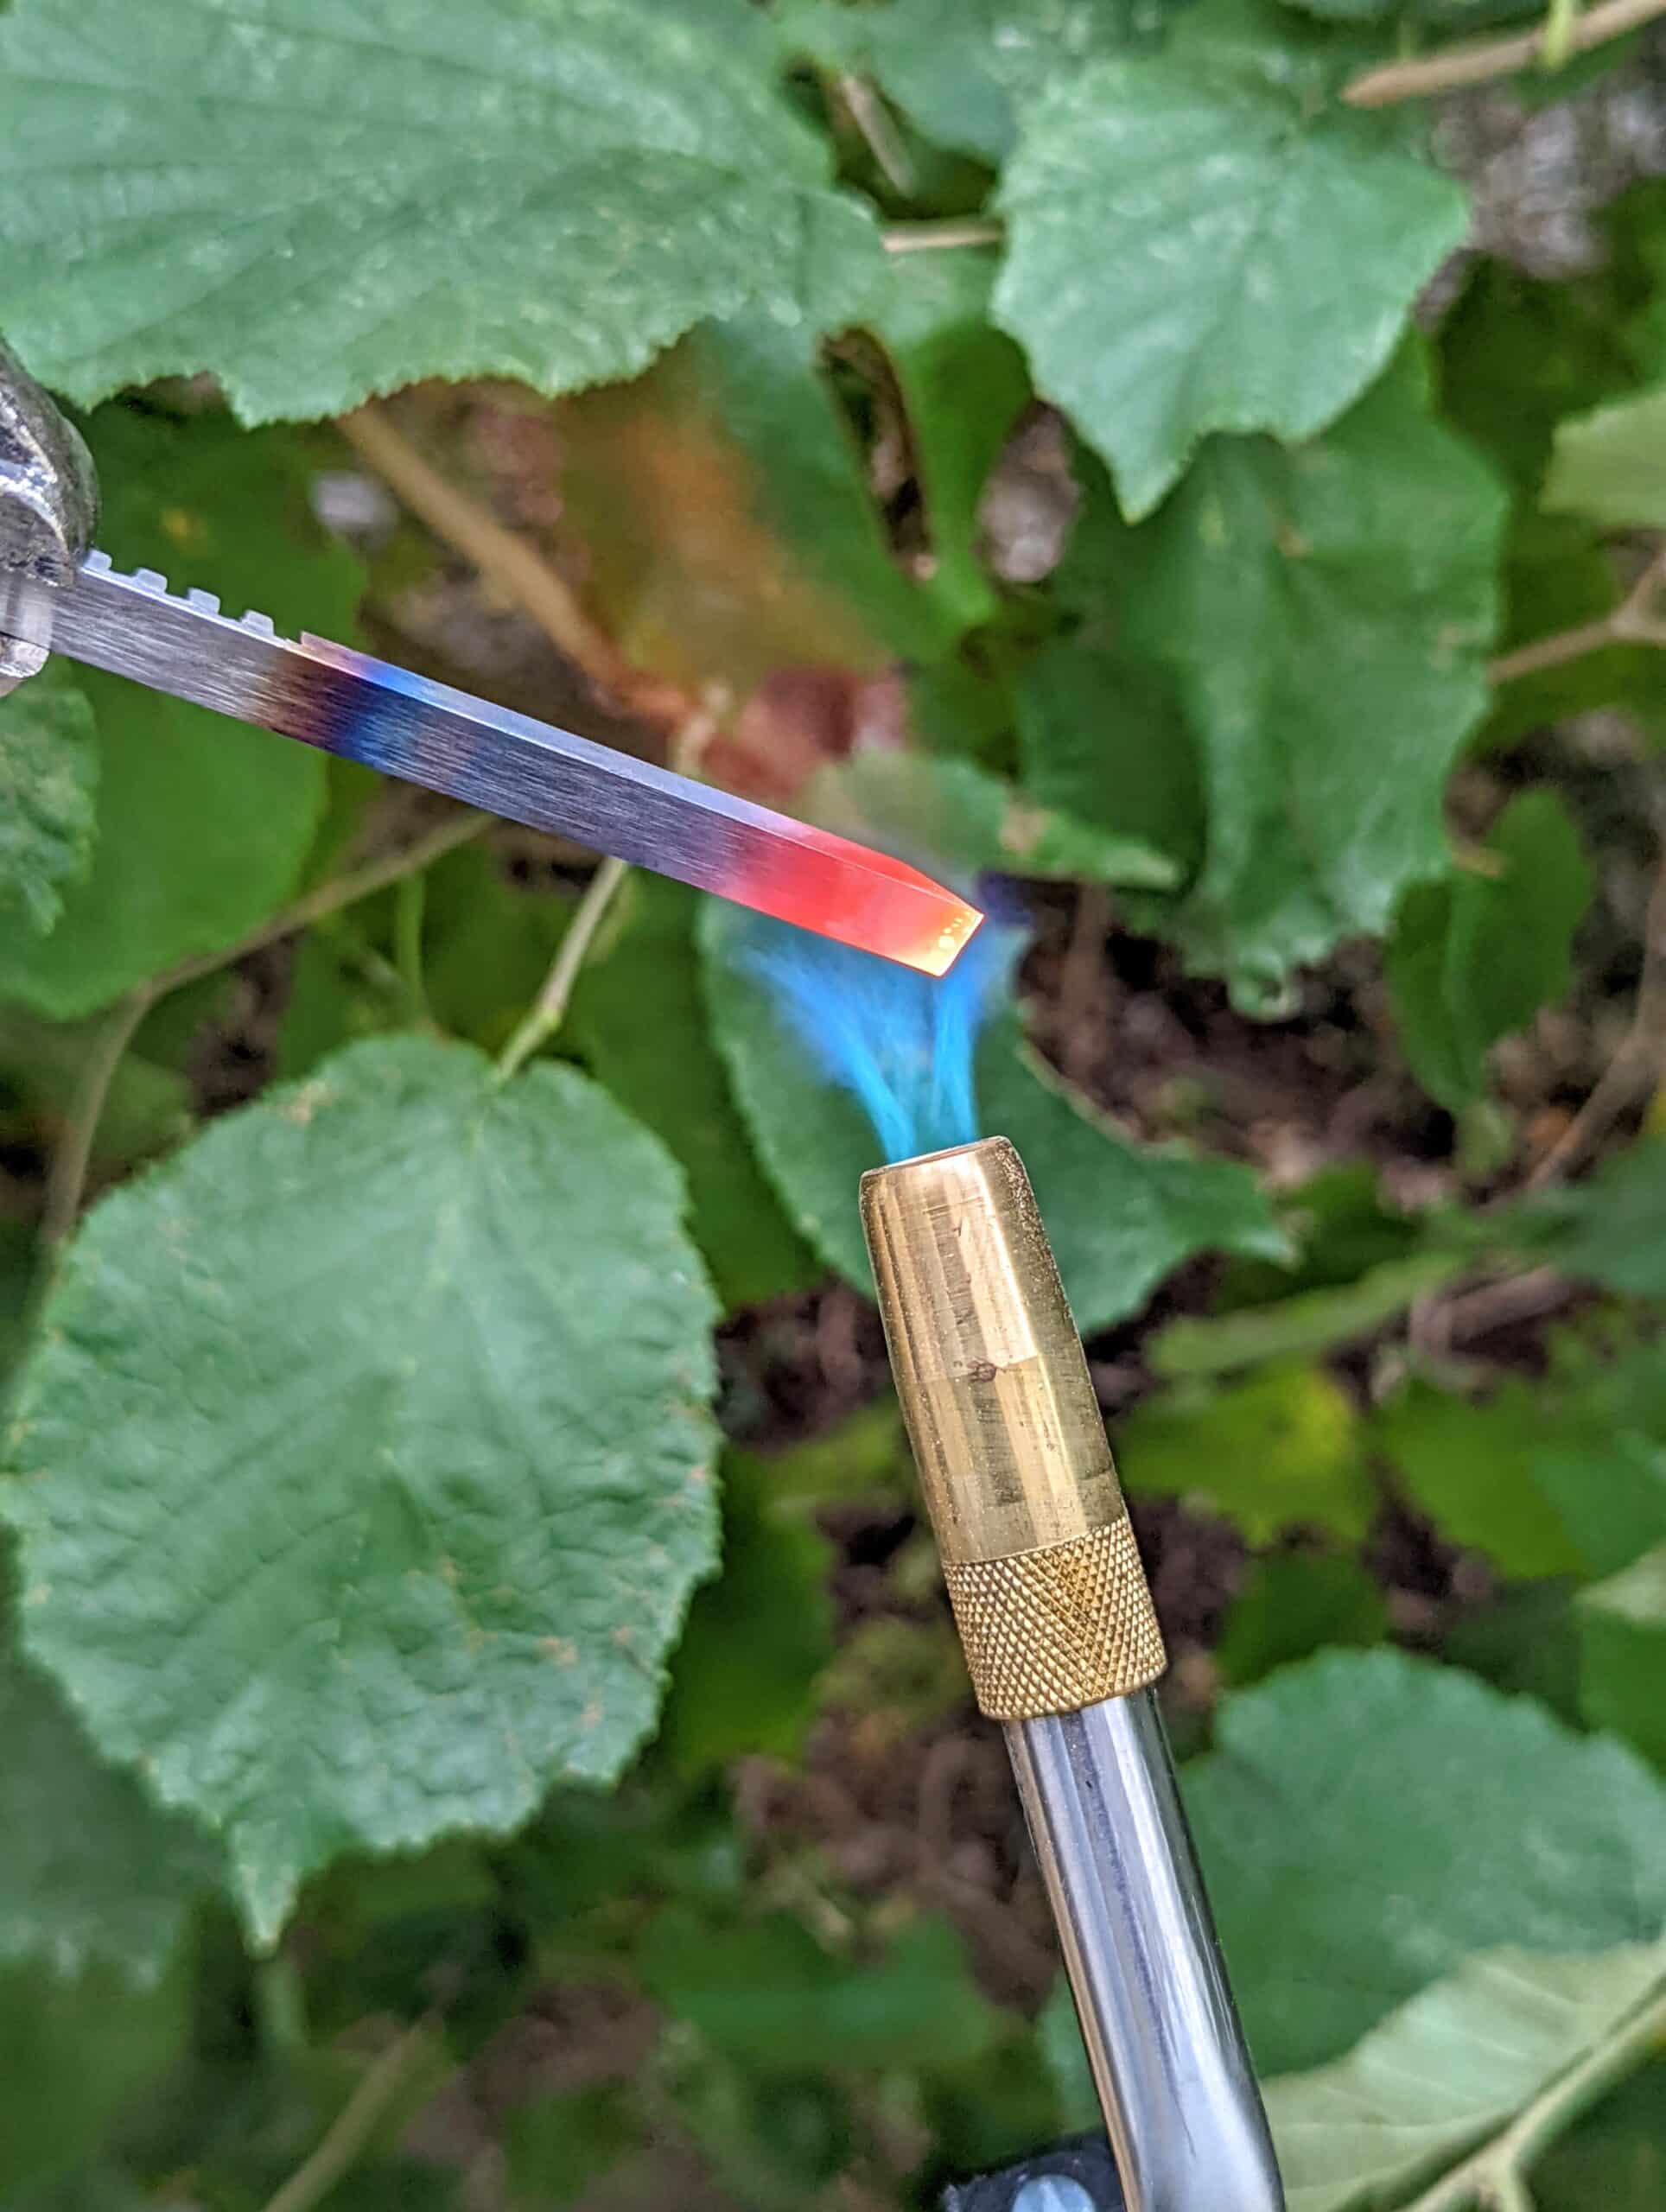
Steel that size heats up to a good red in less than a heartbeat and before I knew it I had a blade made in not much more that 15 minutes tops.
It looks to me that the steel I bought is enough to make 12 different-sized cutters for a set. That’s under £20. It will likely take you 15 minutes a piece so that’s three hours of work altogether or you could just make one a week for twelve weeks if that’s what suits your time allocation. Personally, I think it’s worth it. Cutters go for between £8-12 plus shipping.

Your approach to solving problems without an arsenal of machineries, but with a lot of skill and ability is life-changing!
This cat is a doggone blacksmith, too. Where is his red cape and tights? Haha
Good Morning Mr. Sellers.
The essence of being a good anything is to understand the subject in the round.
If you don’t know what makes the engine of your car go suck, squeeze, bang and blow you are just a steering wheel attendant. To be able to make additions to, and or modify a tool to your needs is fundamental to the way craftsmen worked for centuries, the ones who were good at this became tool makers, the ones who were best at selling what they made bought out the smaller firms and the accountants and mass production did for the rest.
Then along comes Mr. Sellers! a piece of 01, a blow torch, hacksaw and some oil and in less time than it takes make a sarny and a brew he is back at the bench doing what he loves. No airmiles, no balance sheet, no backorder just woodshavings and a smile.
Much love and live forever Sir, our great grandchildren will have much to thank you for.
John Kenlock.
Where did you procure the tool steel stock ?
eBay. Search O1 flatstock and choose size best suited to you.
Or you can try 1080 or 5160 steel which are both easy to work with and harden.
Thanks for this answer. Now I know where I can obtain the steel for, your router plane. I have been wondering how I can finish making it. Kindest regards Geoff Maddison
Thanks Paul. A year or two ago, I bought some O1 steel and a few different dimension brass pieces (round and rectangular). Provides a lot of flexibility for tools or augmentations for furniture I am making. Just seeing it sit there means I have potential (like extra wood in the shop) and that in of itself adds happiness to my life.
The subject is of course doing things by oneself but in any of your subject there are always additional little gems.
1. “filed the rough side […] and then trapezoidal just a hair. ”
To have a lateral relief angle (as on rebate plane irons) I guess.
2. “double up two hacksaw blades in the hacksaw and slide out the grooves”
Aha! Some kind of dado stack then.
3. I guess to make a 9/32″ iron and not using a side rebate plane , you intend to plough several meters of such grooves. Or is such side rebate plane too thick?
I once made a groove larger than my iron by ploughing twice, changing the fence setting in between. If I remember, when testing this, it was best to first plough the groove far away from the board’s edge.
Although it might not be feasible for a groove as narrow as 9/32″.
Some time ago i considered doing the same, but was put off by filing the groves. never thought of the double hacksaw trick. I bought a complete set of new ones , about £40. The 044 that I bought only came with one blade that someone had ground narrower, I have made “1/16″ ” chisels but from square section silver steel.
I like the two hacksaw blades mounted together trick. Nice!
Paul: I note that you heated the entire business end of the cutter before quenching… and thus hardening it. Did you temper the edge after hardening it at all? I have made chisels, screwdrivers scribes and such in the past, and have always tempered those edges after hardening.
Is this step unneeded for plane irons? What about chisels?
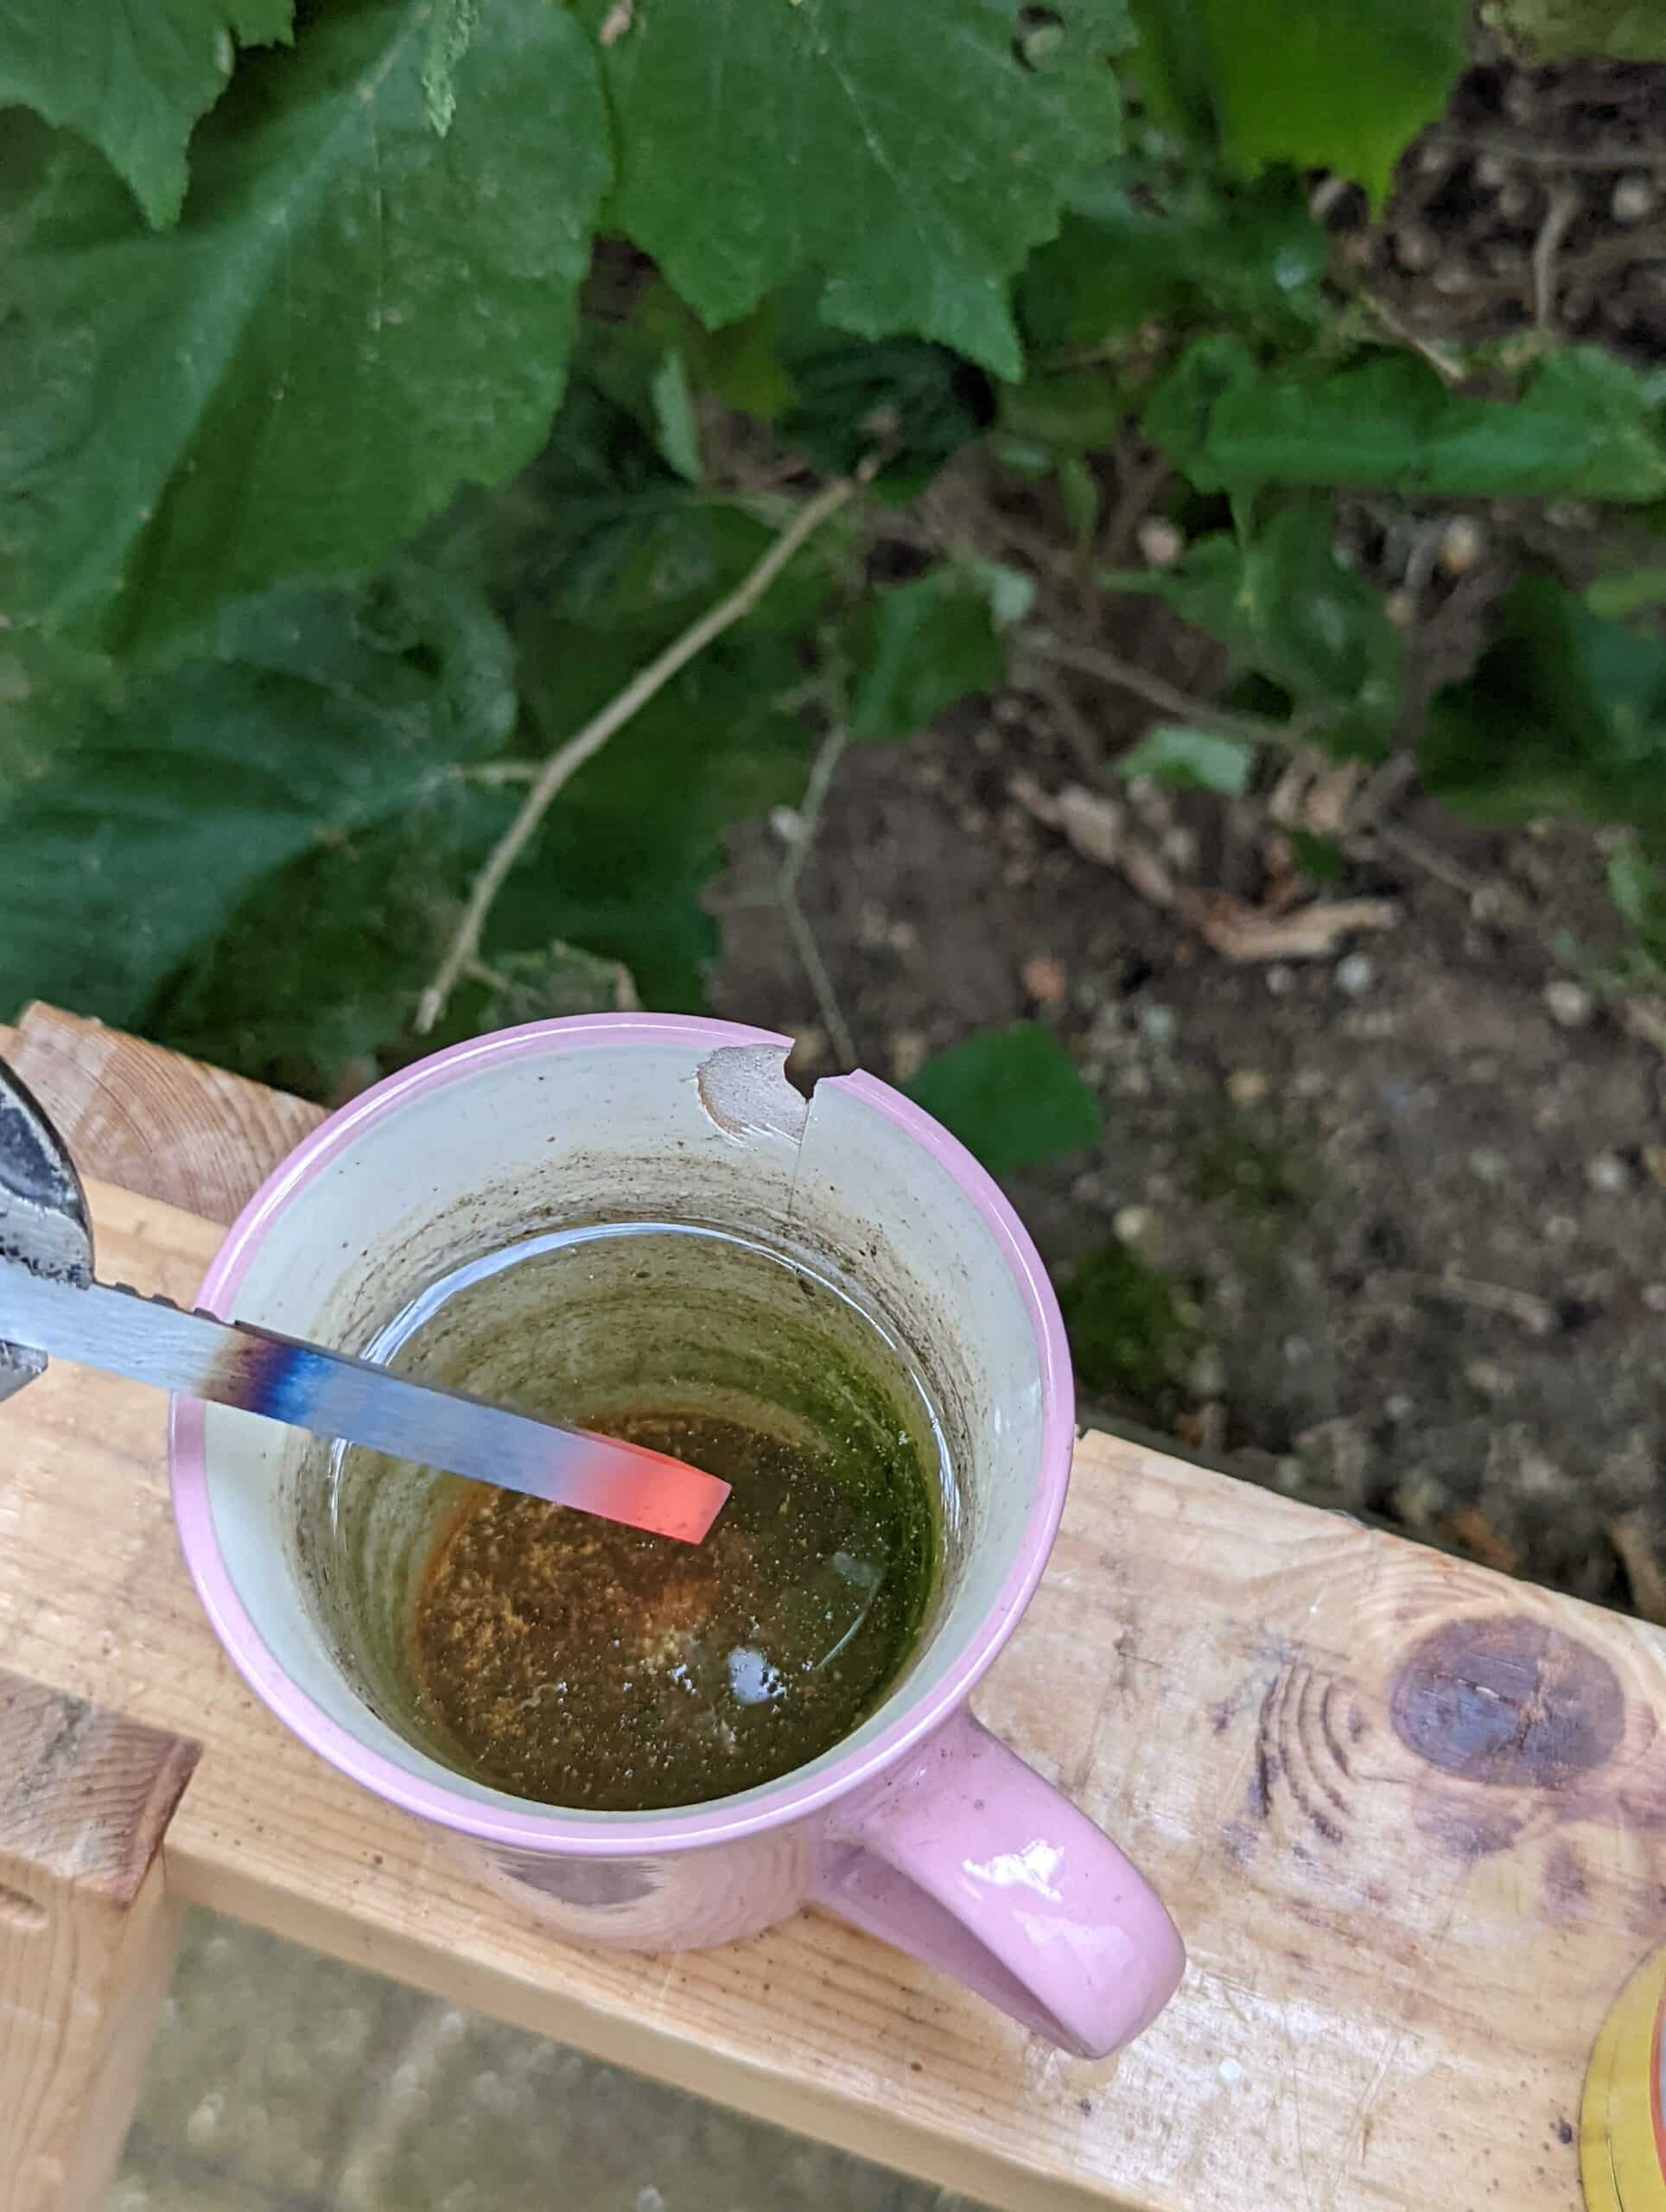
I have used the same method on many a tool such as burnishers, chisels, plane irons and other edge tools. I hear away from the cutting edge first to build the heat up so that heating the cutting edge area is not robbed by any adjacent cooler area. Then I focus on the business end to the degree that you see in the video before plunging in peanut oil, sunflower oil or just water depending on where I am and what I have access to. I have never known it to fail in any way so far. I do not always anneal the steal after and some might disagree with this but the hard edge seems perfect for small blades that see no impact beyond the planing action. With chisels, annealing is more important. So, to answer your question, no, I do not reheat or further heat. Just one heat to cherry red and plunge.
What you describe is tempering not annealing.
Agreed. Annealing (heating the metal to near critical temp then a long slow cooling) is the opposite of the hardening process that Paul uses, restoring the metal’s softness. I agree with Paul though, that given the woodworking application, tempering of the edge is not necessary. You could temper the very end of the cutter but it would make sharpening just a little harder.
No tempering actually increases toughness by reducing hardening making the post hardened steel less brittle and less susceptible to edge fracture. And I agree, it would make little difference in this application.
Tempering is a post hardening process, annealing is a pre machining process.
I have never used a blowtorch before, but I would like to give it a try. Hardening steel like this, looks as quite a satisfying little job. What kind/type of blowtorch should I be looking for? What kind of gas do you need? What is the price range?
GoSystem Quick-pro Power torch QP8088H with MAPP gas. This gets the heat I want without going to welding torches.
A MAPP gas torch is useful, although the gas tends to be expensive. I used one to braze a wheelbarrow frame, a decade ago, it is still going strong. However, this was on the limit of its ability, if I had access to an acetylene torch would always use instead.
I think I covered that. Mapp will do just about everything steel hardening without going OTT and more expense than necessary. My concern is always to keep things in perspective for an audience 95% of which have a tight budget, limited need for somethingnthey might need once every two years and so and so on.
Thank you, Paul.
I have the smaller Record 43 plough plane ….. how wide a custom blade will this take ? As the standard 3 cutters can be limiting 😒
You can make any size but most planes never went wider than 9/16″.
I would think that a 3/8″ blade would be at the outermost limit for a 43. I just went out and checked. the largest blade that comes with it is a 3/16″ and the blade seating area is 1/4″. I personally would try to obtain a larger # 44 or equivalent if you need to go larger. The 44 is a much more versatile plane. If you can have both, great. If not I would sell the 43 and get a 44.
Paul, thank you, thank you! Over the past 10 or so years, I have had an insatiable curiosity about woodworking. Your blog has provided with a LOT of good information! I purchased your router plane kit, and it has been quite a learning experience — all good! Your tutorials are outstanding! I made a couple of errors but learned how to recover from them, and today put the whole thing together — and it works like a champ! It still looks like something only its mother could love, but I will begin finishing it tomorrow! I am really proud of it! Thank you so much for sharing your knowledge with us all!
I have an almost unused vintage wooden plough plane of a local brand that works very well. It’s just bad luck that someone threw away all but one of the blades. Unfortunately they are much harder to make: they need to be tapered, and they must have a small groove on the back side, where they ride on the metal part that aligns them.
I think it would not be impossible for an amateur to make these irons to an acceptable standard. But I feel it is out of my reach for the moment.
Replacing them by any tapered plough plane irons does not work because every manufacturer had his own design with varying dimensions.
You can buy sets for not much money via eBay and if they suit the wedge you are good to go. If not you can either reshape the existing wedge if there is enough wood to do so or you can make a wedge corresponding to the set.
Thank you for your reply. It made me re-think the problem. It’s not the wooden wedge that does not fit. That would indeed be easy to adapt. It’s the position (rather than the shape) of the groove that runs approximately centered along the length of the irons. In the alternative blades I have, this groove /would/ ride on the metal plate that supports the irons just fine – if only it was at the same position as in the only blade that came with the plane. It must be off-center in one of the designs, or both but to a different degree. So the irons fit inside the throat in the plane body, but the groove is about 1 mm off of the plate’s ridge.
This opens up at least three paths to explore:
1. Get one more set of irons and see if they fit. Trial and error…
2. File or grind down the irons along their length so they fit the throat. They’ll be loose on the other side, but that should not be a problem as they are guided by the plate. Lots of work, and I don’t have a grinding wheel.
3. Open up the ancient new plane’s throat with a chisel. All irons will be loose. Boldly modifying this plane takes guts…
(4. Not an option for me: refile the plate’s ridge off-center so it fits a larger portion of the blades available).
I suspect I’ll take no. 3.
Ah, what a wonderful perspective: Finally being able to use this fine tool! I’ll probably stick with my british metal plough plane (one without the adjusting grooves that were sawed with the double hacksaw, so they would be even easier to replace). But I might give away the wooden one as a present or keep it as a bijou.
By the way, it’s a Lachappelle from Kriens, close to Luzern in Switzerland. They stopped producing wooden planes in the year 2000 or 2002 only. So possibly the new plane is not even that old.
What about repositioning the skate, the metal plate that creates the sole? Either shimming it or deepening the recess which may or may not be an option, or perhaps taking off the old plate and making another to replace it if need be?
Thank you
Hello Paul: another lovely article for those of us on a budget. Thanks for the detailed photo of the heat treating and description. The xx hacksaw is new method for me….. nice. so I’m still hunting for a spare iron for my #78 to make a scrub conversion. Here in Canada a stripped #78 is Becoming pricey…… but the iron has my attention. I can drill, file and shape it, the notches on the back are used differently.
What is your view on those cuts…..
cheers. Stay on the mend, just got over my C-19.
JerryWalker
Everett
Ontario
Technically you don’t really need the depth adjuster as you can hammer tap the depth. If you have an old file you can heat that with a blow torch or better still in your barbecue pit and let it cool to remove the hardness, file or grind a replacement iron which for a scrub does not need to be full width and you are on your way for an hour’s work.