The Taming of the Skew
‘The taming of the skew’ was once the title of an article or two written by a famed woodturner of the day three-plus decades ago. It related to his explanation of working with the skew chisel in woodturning. This man’s experience was from working as a full-time woodturner turning handles and knobs by hand and eye in the hundreds per workday. No special steels for turning tools, no fancy interchangeable chucks, just pure experience and skill. In the beginning life of anyone new to woodturning, skew chisels seem often to go more wrong than right. A catch at the long point instead of the heel grabs, jerks, digs and tears the grain horrifically. It’s very discouraging and may cause even the most determined to give up. The way you skew a skew chisel might be compared to engaging the wind and water in sailing, one disoriented sail can pull you off into a spiral out of control and something has to give. Avoiding disaster depends on devoted attention and concentration which in turn depends on sensing for direction through all parts wood and tool. So with the skew riding the tool rest at the exact right height and angle of presentation, the turner, ‘steering’ according to the felt or seen changes in grain direction, makes the minute shifts in angles of all kinds, minute by minute and second by second, ‘ride’ the skew’s bevel, alter course, depth of cut, pressure and more to swivel the cutting edge and thereby optimise the cut to create a finished surface requiring no additional refinement by sanding. Effectively, the experienced turner produces a planing cut that glistens and shines in a contoured mirror finish; the achieved coves and beads become the reflection of his skill. Remarkable!
It’s a surprising thing to me that woodworkers relate skewing the plane as a means of always optimising their cuts when any benefit is usually if not always negated by the diminished contact the sole of the plane has along its long axis and the long axis of the wood. In most cases, working with many a thousand students, this leads to lows and highs along the length and wood that is rarely successfully squared evenly. It’s also worth noting that we will also have less control in presenting the plane squarely to the wood to plane one face square to another if we skew the plane in any exaggerated way. Combining loss of registration over the length of the plane and then ending up with undulation and then too out of squareness, inevitably we end up with an overwhelming task of correction.
Experience tells me that skewing is mostly to do with poor teaching, wrong advice and wrongly interpreting what is actually happening. Inevitably woodworkers are told to skew their planes by someone who was taught to skew their plane and so it goes on. Mostly, any skew is to do mostly with simply conforming the plane presentation to the shape, size and comfort of our human form. T the start of the thrust forward starting the cut the plane will be square on as our dominant hand is beside the dominant side of our body. As we reach forward in the extension, the plane tends to skew slightly to match the shoulder position over the plane and then on into the outcut finalising the stroke. Rarely can we wholly plane head-on, dead-on with the plane square onto the long axis of the wood, at least for any extended period of time, into or away from the wood. I am trying not to be dogmatic here, just working from my personal experience through five-plus decades and then three-plus decades working with apprentices and students. It’s unfortunate not to have experienced woodworkers doing woodworking in the day-to-day anymore. My apprenticeship gave me serious insight into the working men of the age who had used planes daily for decades. Our modern-day gurus rarely work with wood from that perspective. It can be very misleading.
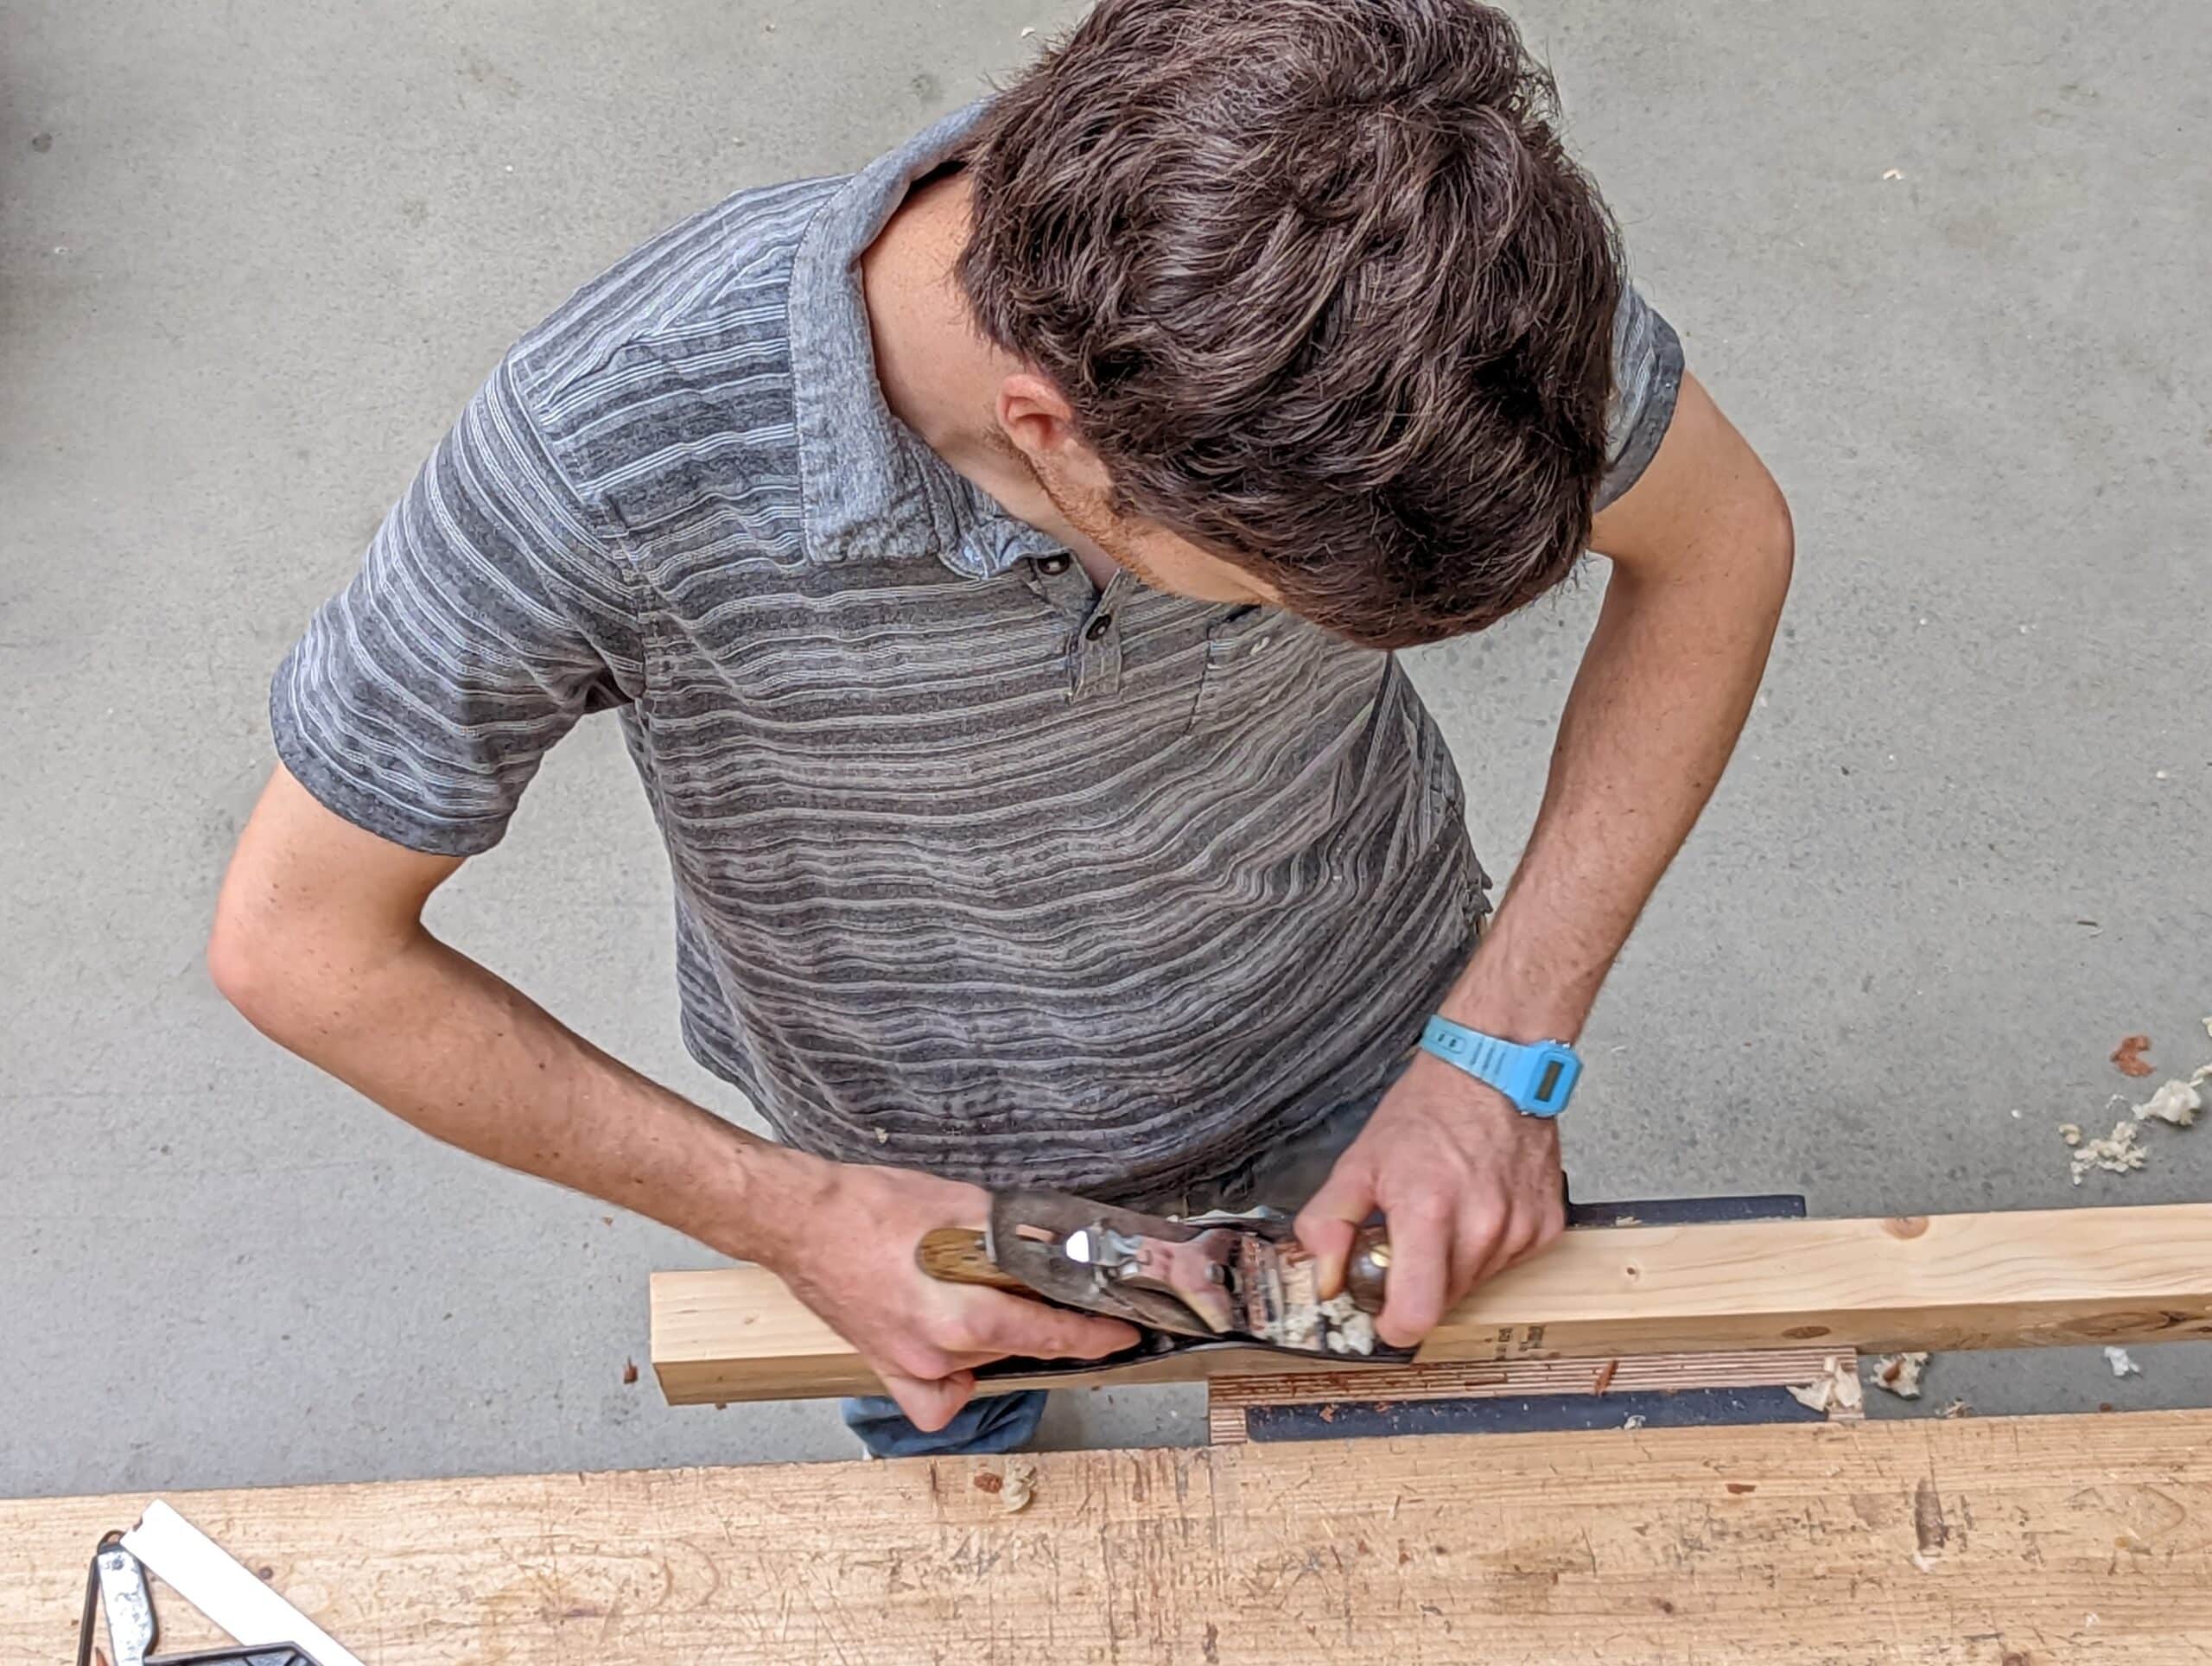
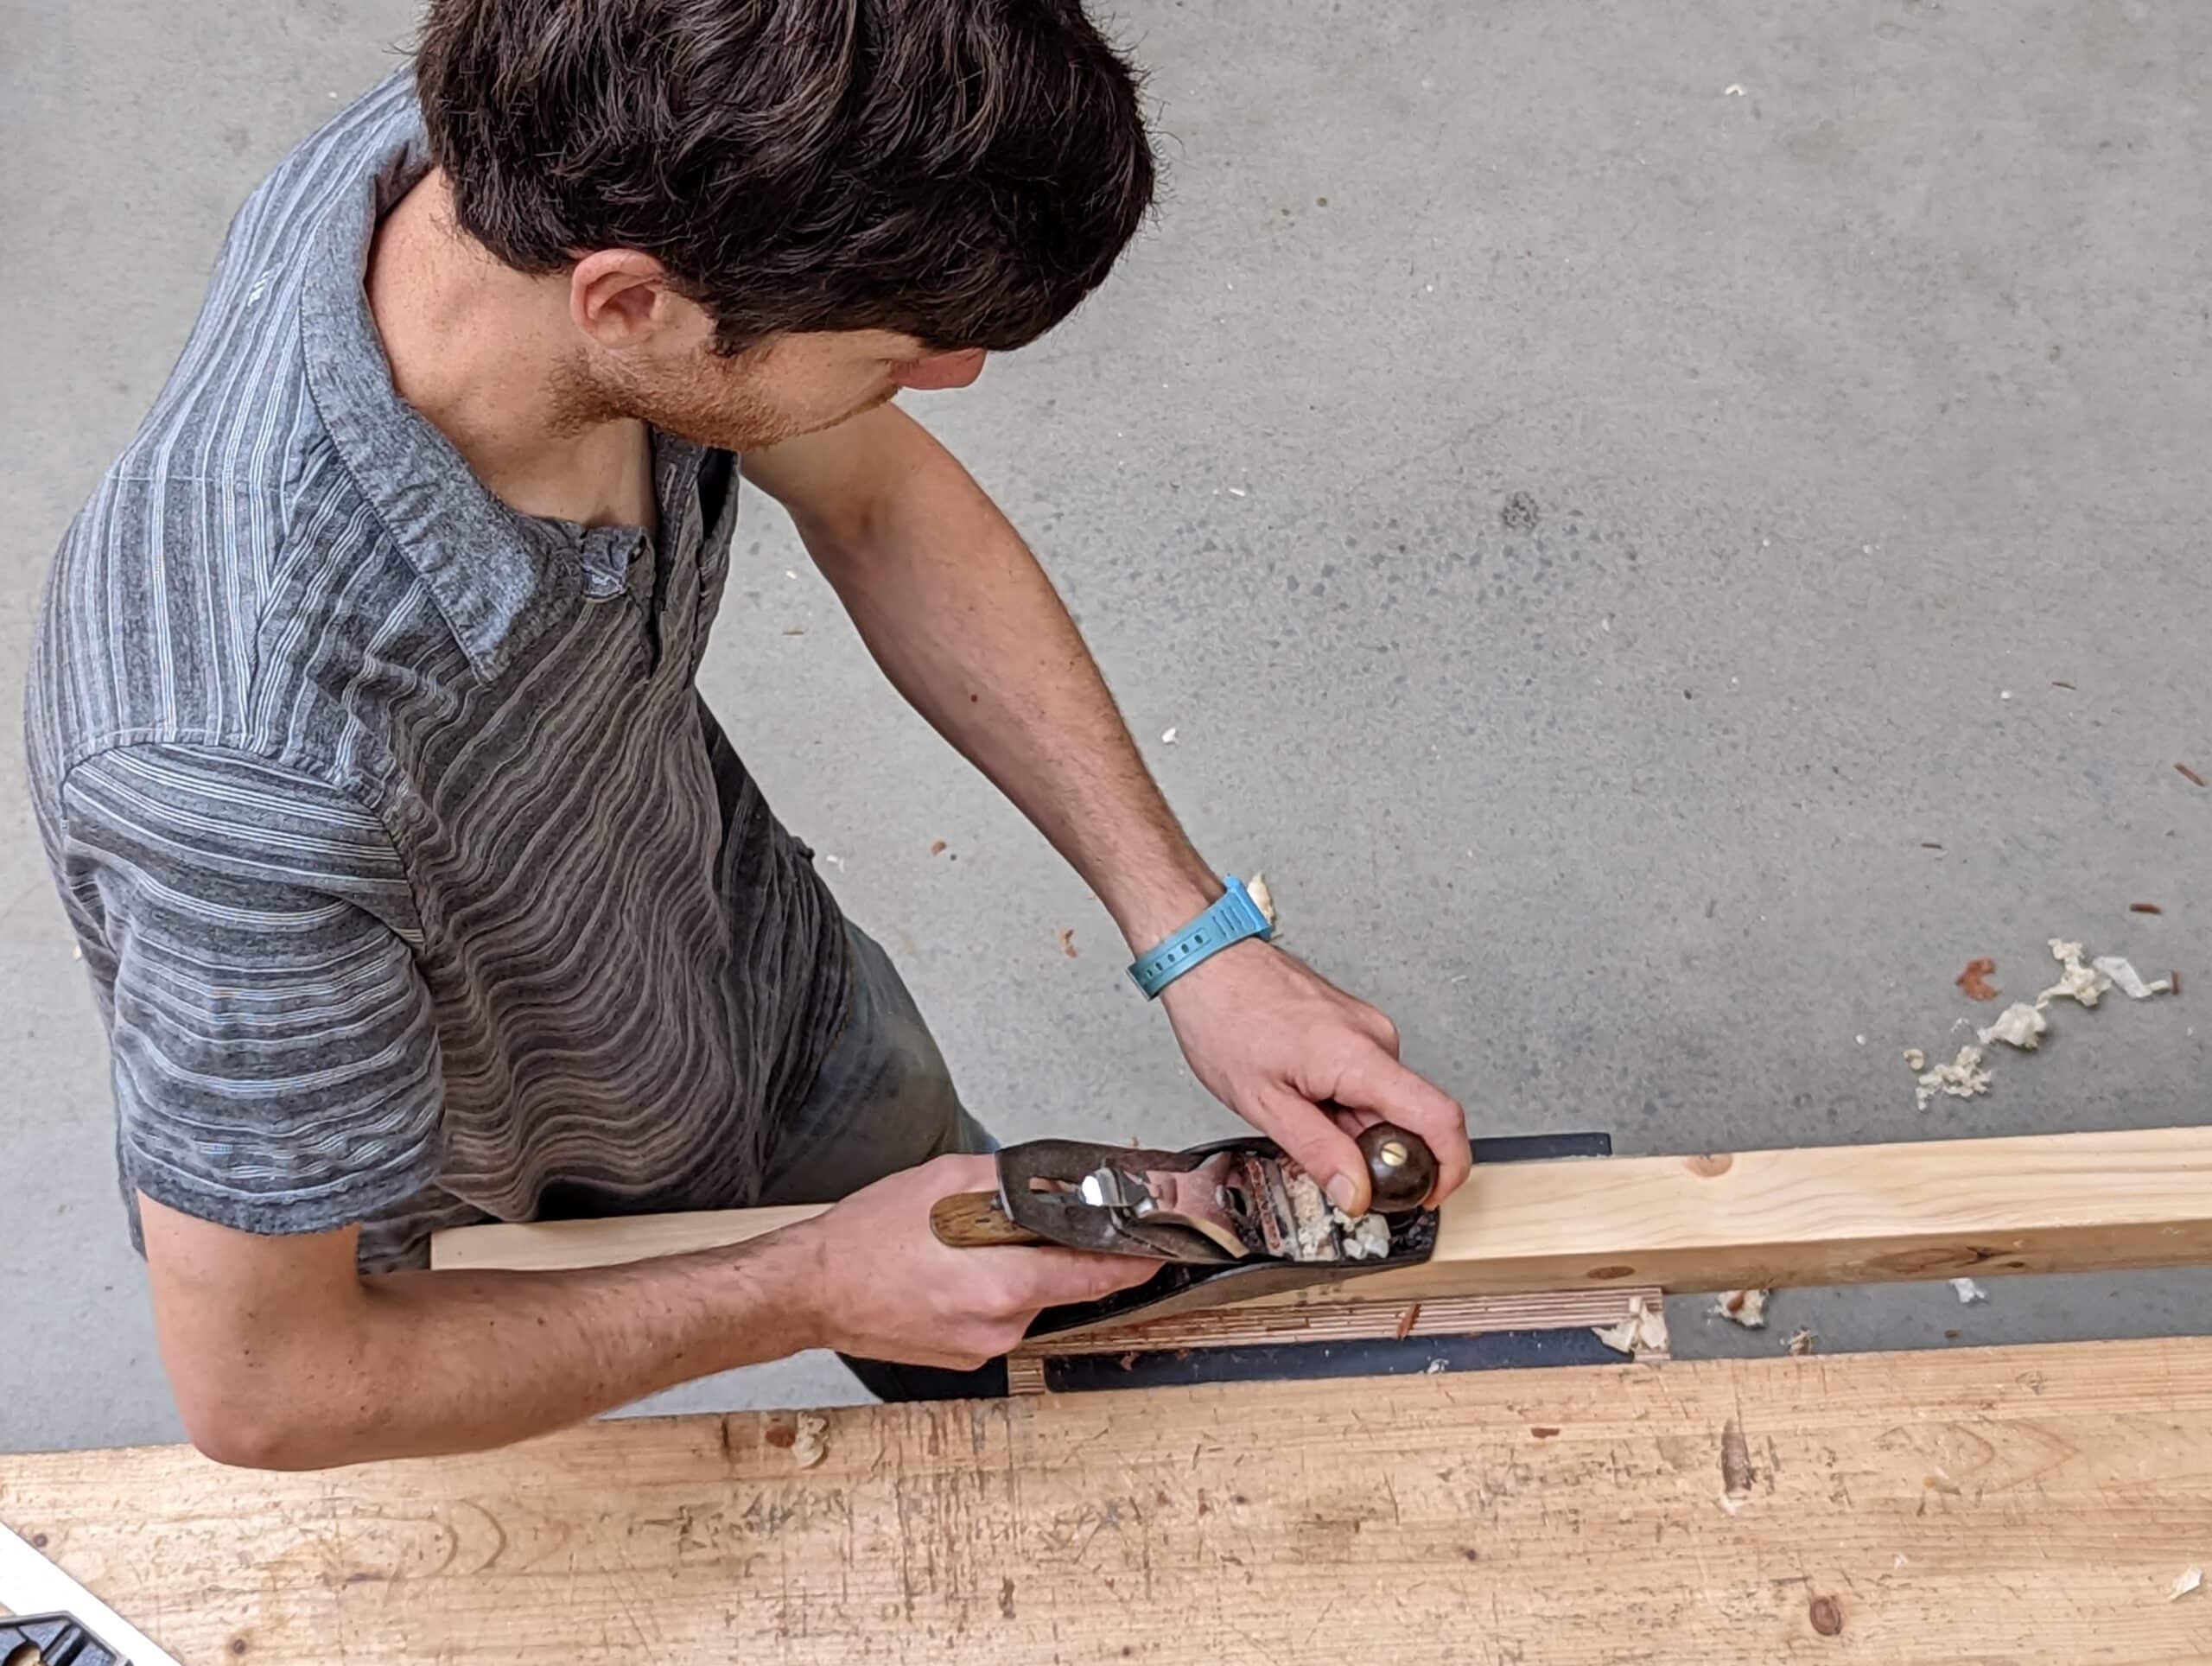
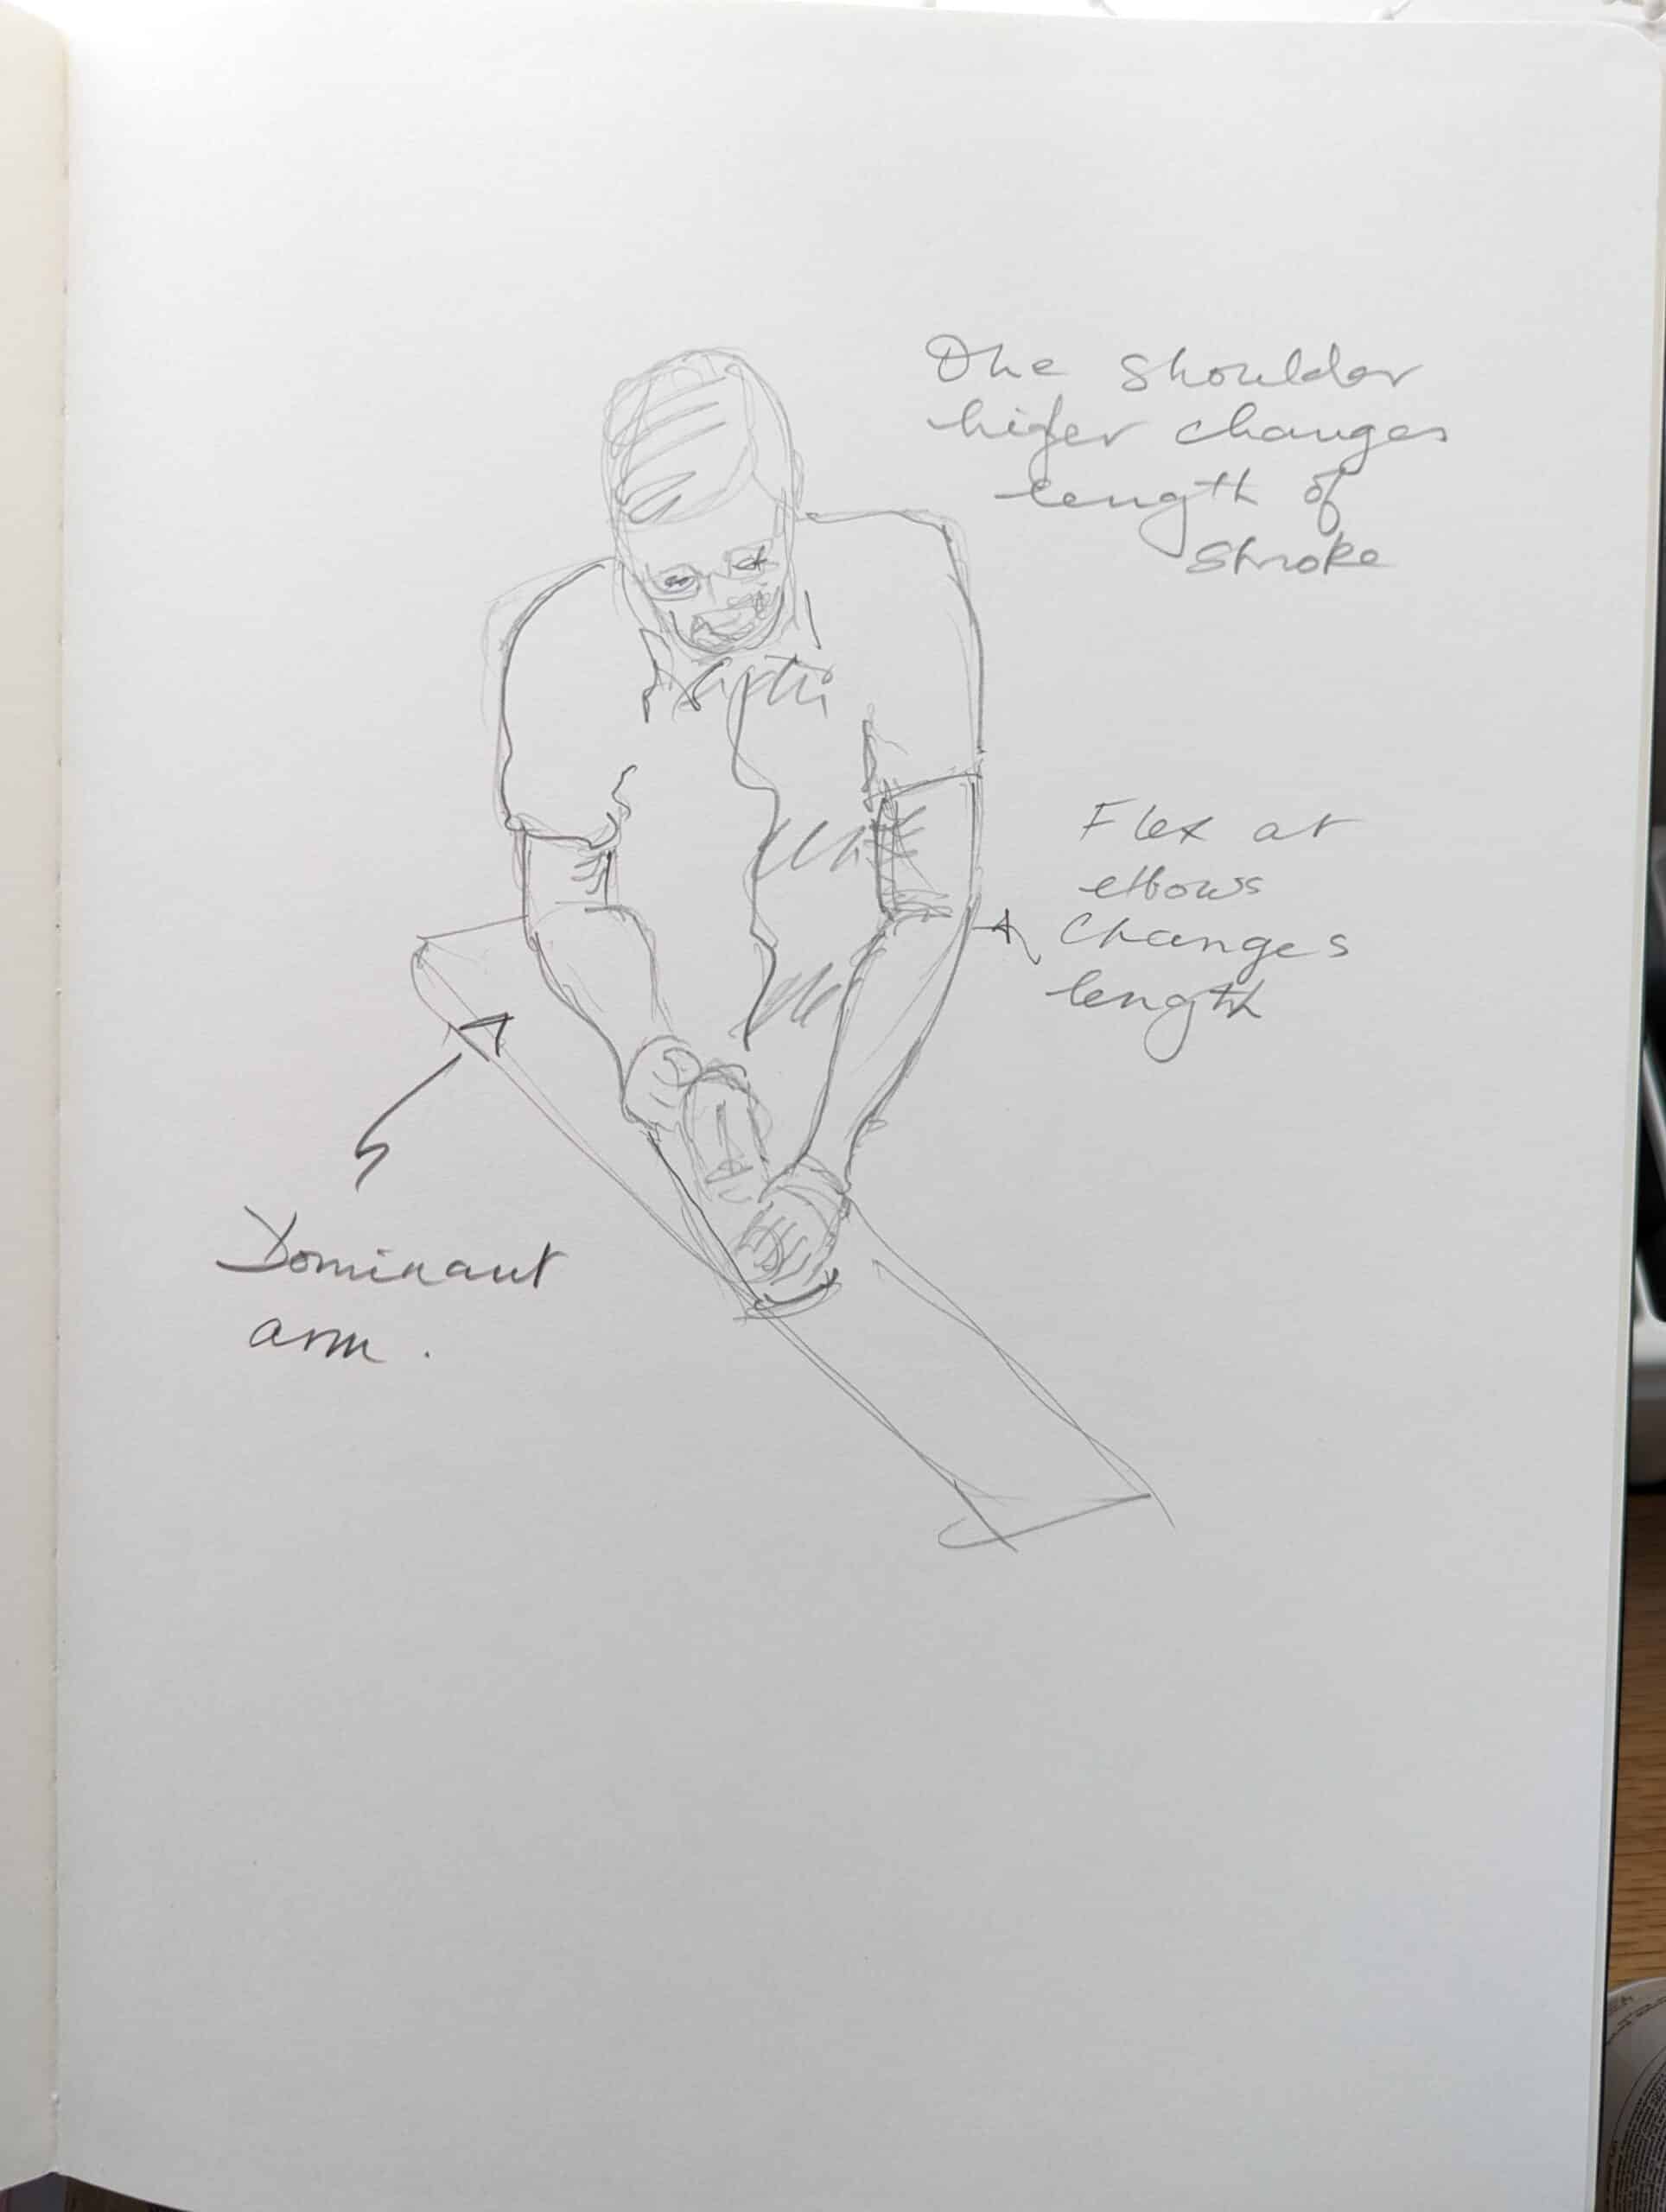
Watch most people planing and the plane is or should be slightly skewed naturally according to the dominant side of the body of the person planing. We rely on our dominant arm and hand as well as our whole body to deliver the power and accuracy to every stroke we take. But we should not mistake heavy skewing of the plane to be in any way an essential strategy to achieving a good or better finish. As I said, skews can be useful, but they are mostly to do with our human shape; overhanging shoulders to a narrower hold of the plane. In most planing work we can only deliver thrusts and direction, levelness, etc according to our arm-length strokes. The further we extend our arms and lean into the thrusts, the weaker the end of stroke engagement to the wood. In essence, we are transitioning from fore-pressure on the front tote with the non-dom hand to the heel pressure and gradually transferring pressure along the strokes we take. In the beginning, the pressure is slightly more on the forehand, at mid-stroke it is more evenly distributed between both hands and arms and then, as we extend forward and lean into the cut, the pressure is transferred to the rear hand and the heel of the plane. This is all about registration; keeping the plane in line, at a steady angle and with as even a pressure as possible yet without forcing in a bulldog way.
Only the sharpest of planes pulls itself down to the wood. Any slight dullness causes the plane to rise imperceptively in the continuation of the strokes we take. This leads to a rise or lift in the plane and an ever-thinning shaving. Take several strokes and our board width or thickness can end up slightly thicker or wider at the outcut end of the wood. When we plane wood, we usually, conveniently, plane in steps in accordance with our length of wood and the length of our arm stroke. We take a longish stroke, lift off the heel at the end of the stroke, step or move further along or forward and land the plane just before the end of the previous outstroke taken. We might well be talking thousandths of an inch off nearer to the outstrokes. This is a good reason for sharpening more often than we might feel by the dullness of the cutting iron. Our natural proclivity to leave sharpening to the last minute often undoes the quality of our planing without us realising that is what is happening. I think that this reluctance has more to do with knowing that once we remove the cutting iron for sharpening we must then reassemble the cutting iron assembly, reload it into the plane and reset the alignment and depth of cut. It’s no small thing until we have done it a thousand times. Perhaps Veritas has given us the closest thing to an automatic reset with their bevel-up planes. This company has a plane that has grub screws in the side upstands of the plane that aligns the blade in the plane and the depth-of-cut adjuster gives a fixed depth by using a hole for the depth adjuster to engage the cutting iron with zero tolerance. Unfortunately, the sharpening process alters the length of the cutting iron itself so it cannot be relied on absolutely for the reinstallation of the cutting iron, but it is a close second.

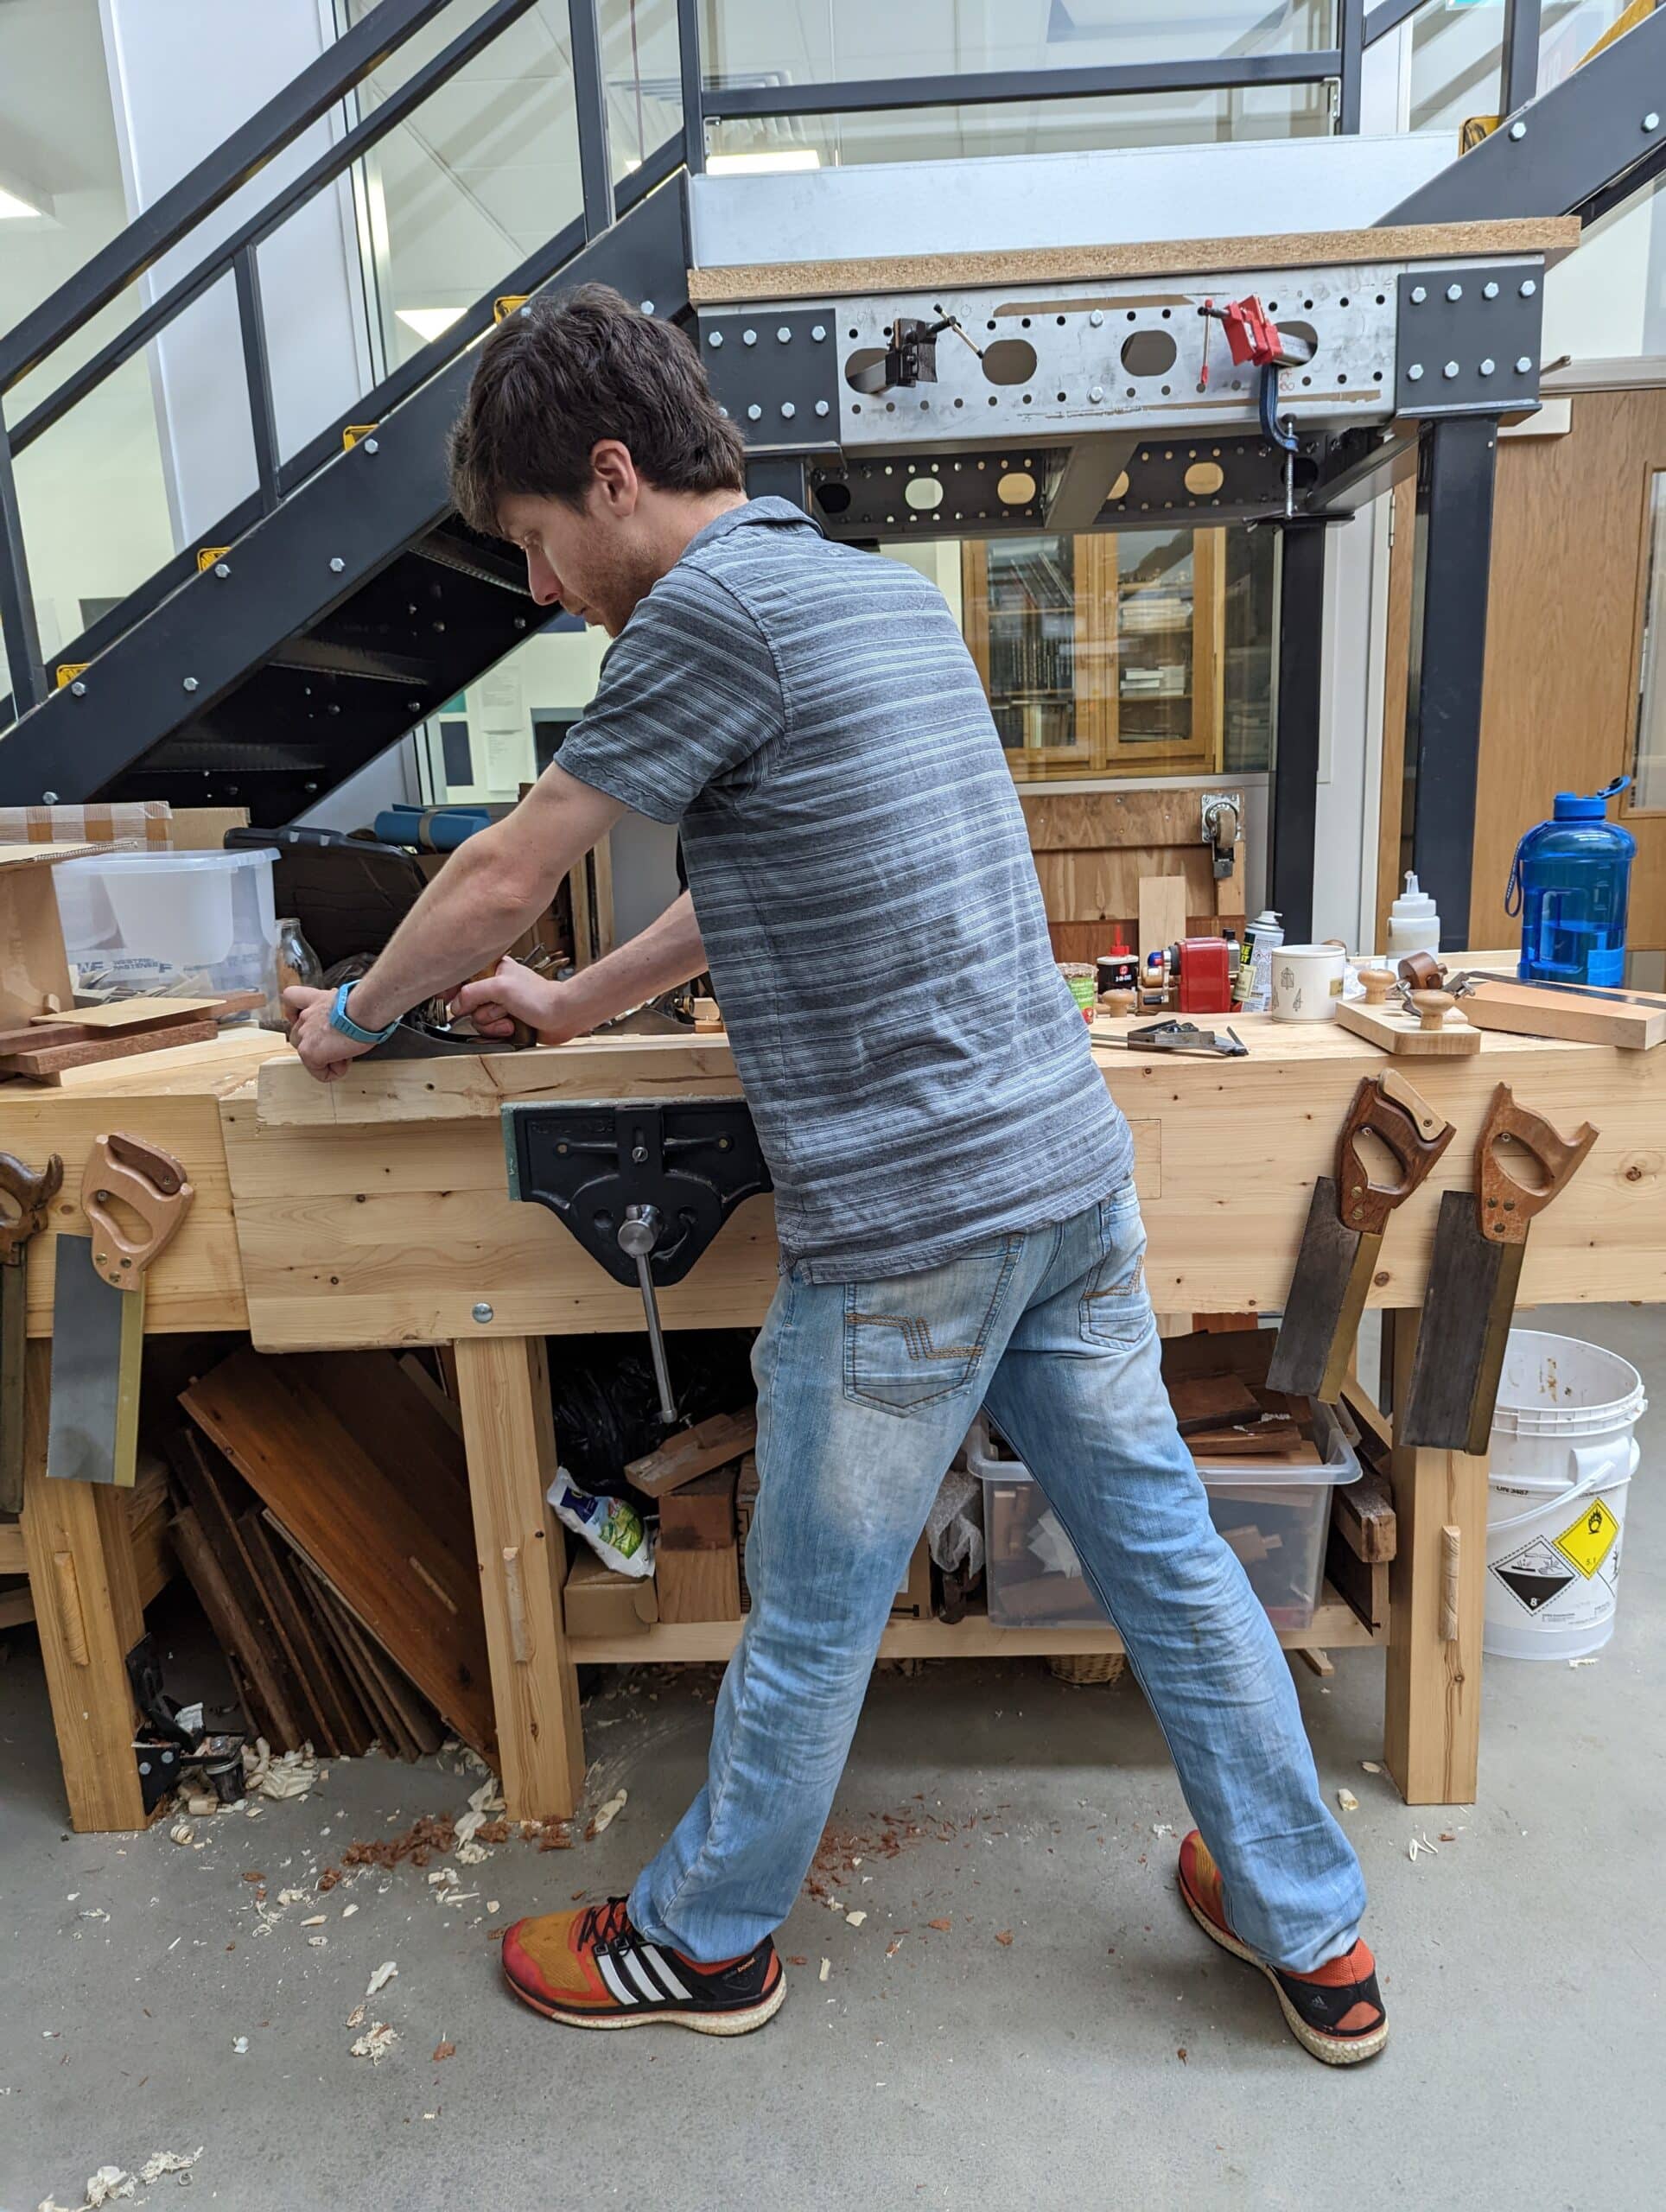
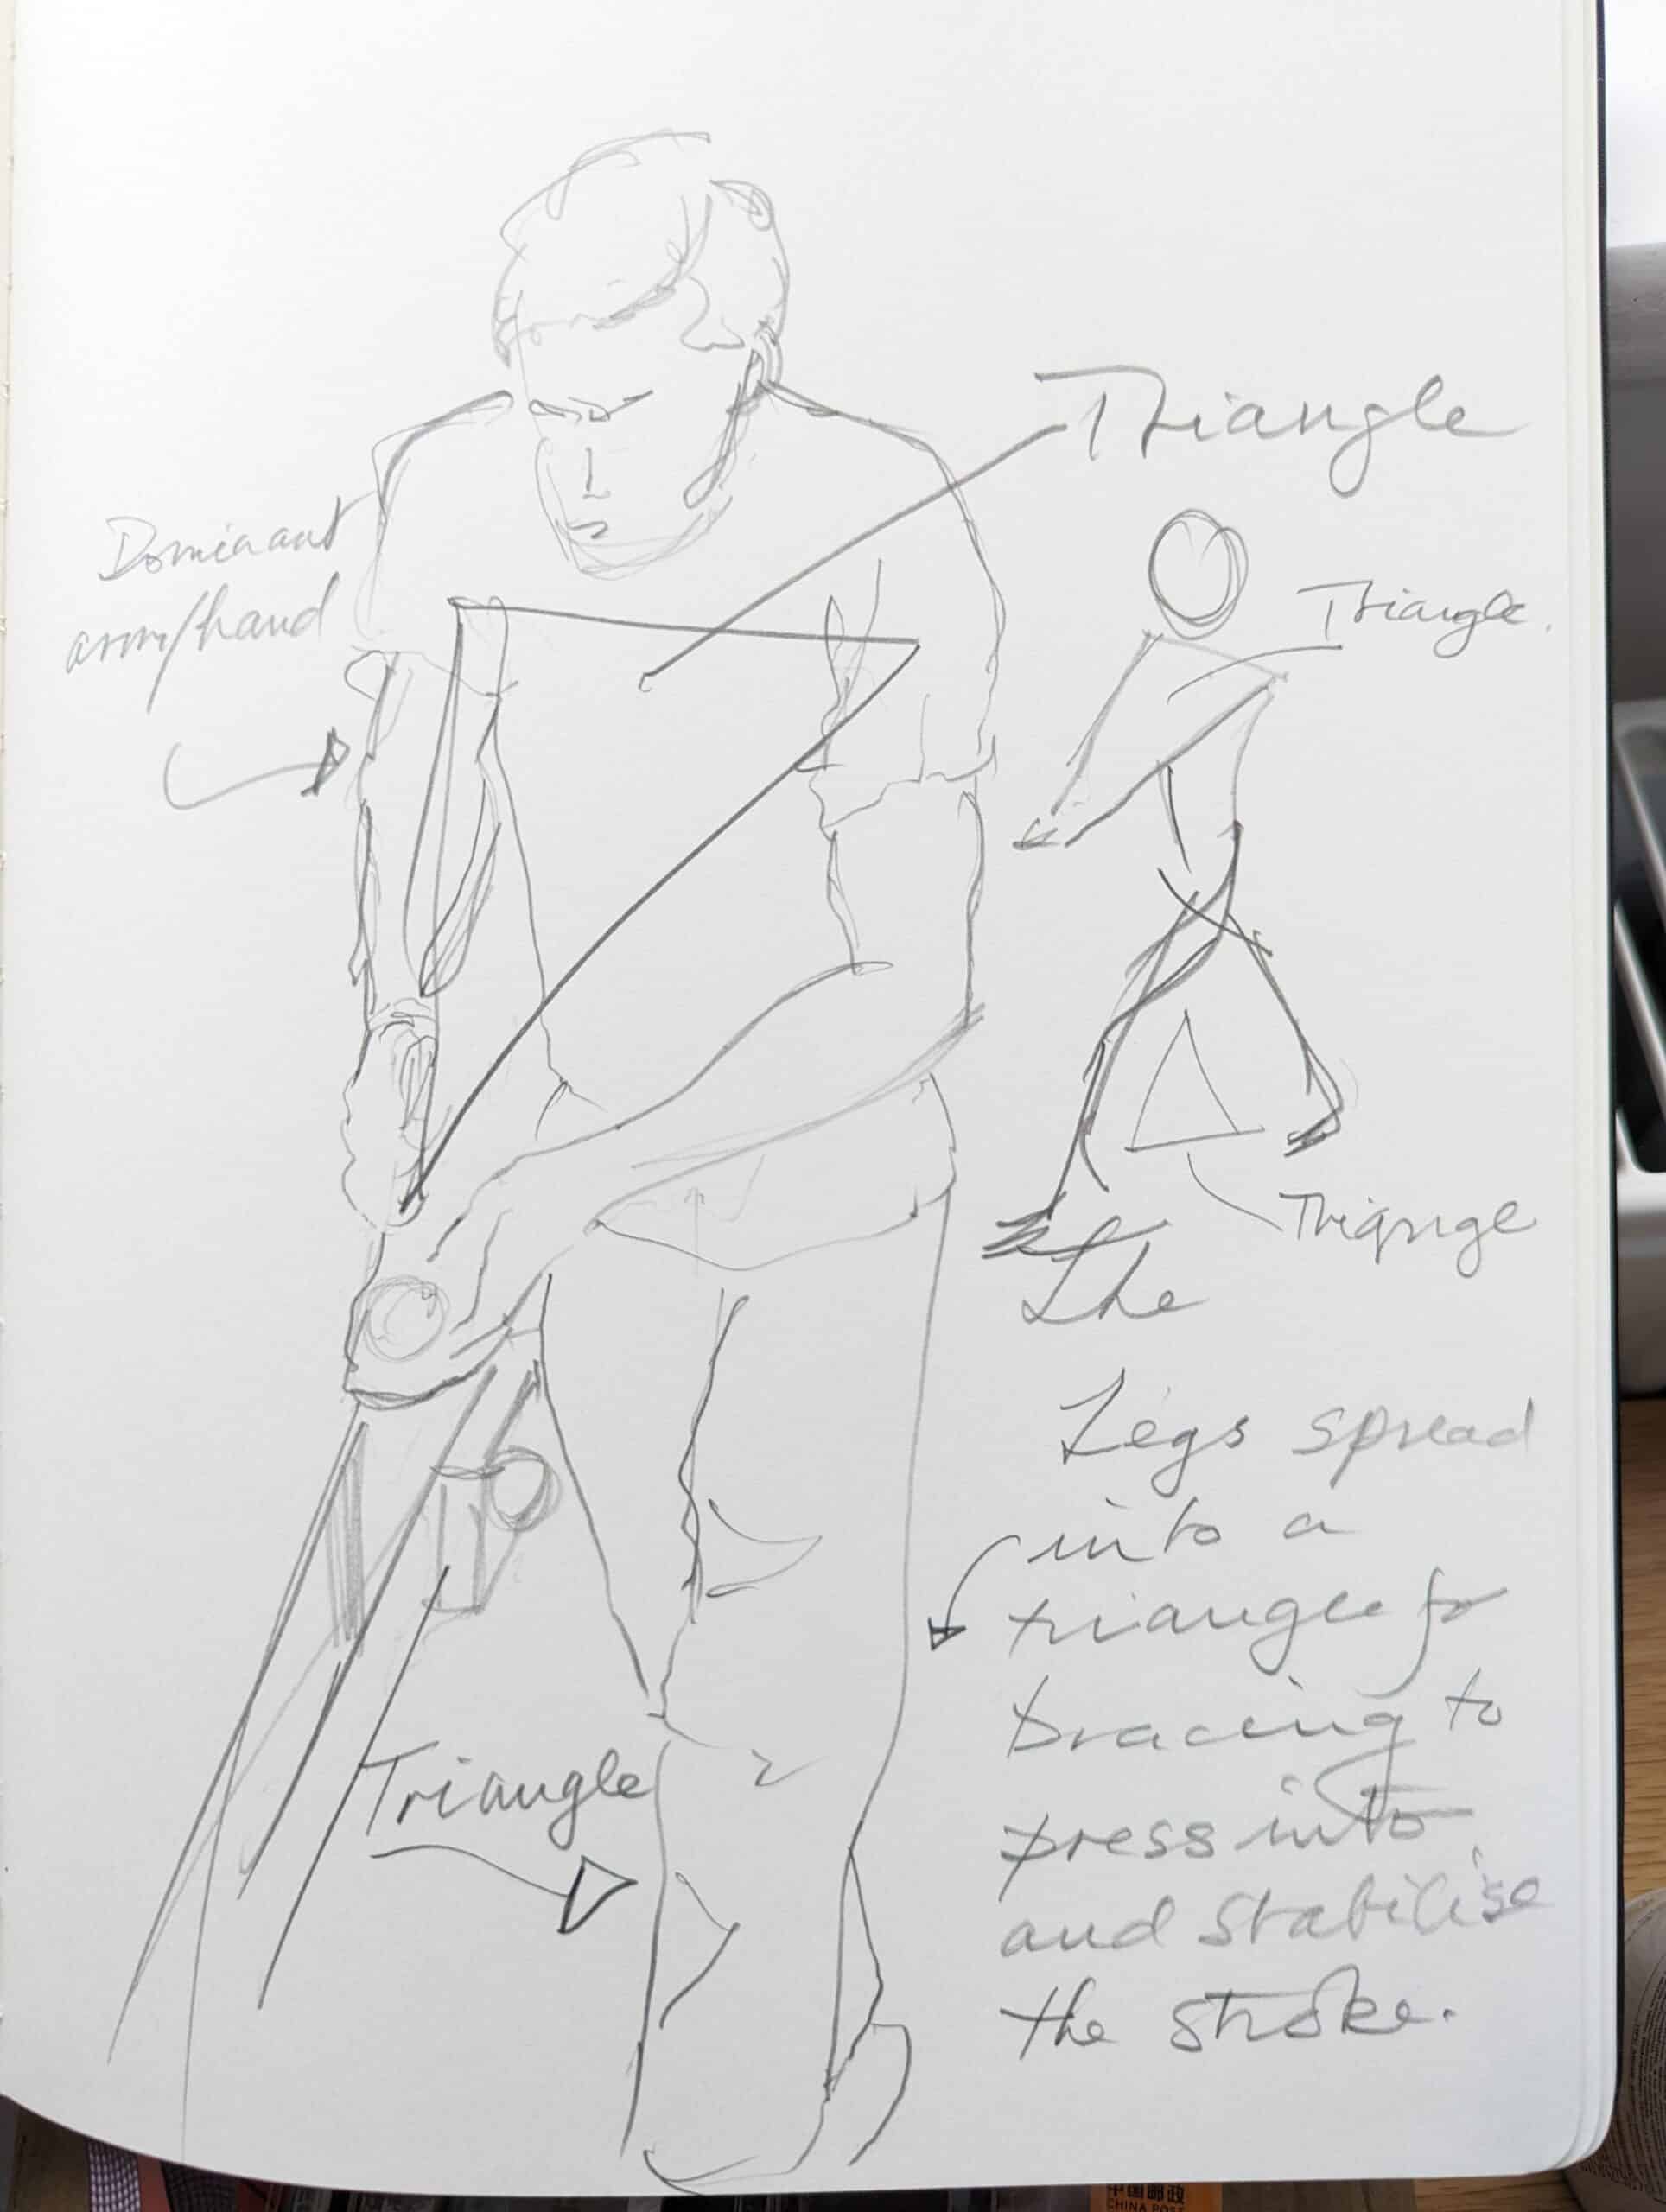
Try to relate to your body more as two important triangular frames linked through the torso. In one important triangle, absolutely adjustable, the hands become the pinnacle of the triangle linked by the held tools, could be the chisel, the plane, spokeshave, and then, by the wood, the saw where we tend to hold or pull against the wood with our non-dominant hand and the saw-holding hand while the extremes opposite the hands at the shoulder line form the base of the triangle. This triangle shifts constantly in shape by the lengthening and shortening of the arms and the expansion or extension of the shoulders through a folded elbow aligned with the shoulder according to how we need strain in our bodies in flexing to task. By slightly bending one arm and extending the other, we have the ability to change the triangulation and have one arm, in its fully extended position by several inches whereas the opposite arm may well be shortened very readily by the bending of the elbow. Perhaps think archer: this triangulation is very extreme but one hand and arm is utterly withdrawn to the back position holding the bowstring, where the shoulder twists with one extreme forward and the other brought back and the non-dominant arm is thrust to its most rigid position forward until it is locked in alignment to create maximum rigidity. We use such rigidity as a normal pattern when we start the plane stroke from the start into a long reach but not with the extended arm locked. As we move forward into the cut we also start to take a step forward and the second triangle is formed by the legs which both brace for adding pressure to the work of the plane in the upper triangle and also lower the upper body height to the work where necessary. On long lengths, we can walk into the cut for long lengths even in strides. We usually don’t have to do this though we do do it.
Now that we see the paired-off triangular shapes working in tandem with one another and instantly yet independently variable, perhaps it’s a good time to consider a trapezoidal shape with our upper arms because we, of course, have four bending points all of which we can rotate to suit the trapezium to deliver the most effective thrusts to our planing. This aids us in taming the skew and indeed achieving the levels of control we need to create the greatest level of positivity. We use the trapezoidal geometry only in our upper body working of the plane and we use it as much as the triangular one. We rely on its instant flexibility throughout all planing tasks as we sense the different resistances in the wood as we plane. Whereas with a newly sharpened plane the plane will cut into and through reluctant grain quite smoothly and effectively. It’s only after a few strokes that the edge begins to dull yet we must maximise efficient use of our time. To sharpen after every few strokes, and this happens with many woods such as teak, mesquite and others, would be uneconomical use of our time. Thoroughly impractical in fact. So we continue to use the plane for longer, many times longer, and as we do we counter awkward grain by often changing the orientation of the plane according to what we feel from grain. A skew in or from an opposite side but still in the same direction along the wood can resolve the issue we face and give a pristine cut. I’m not saying that we should neglect sharpening, but we do not have the luxury of the guru who sets himself up with a pristinely sharpened and set plane on a perfect piece of hardwood to take off the onion skins before a mesmerised audience. He’s not making furniture and he’s not working as a woodworker. He’s setting the stage for a sale of one kind or another, be that the plane, the blade, the sharpening equipment, the woodworking course or whatever.

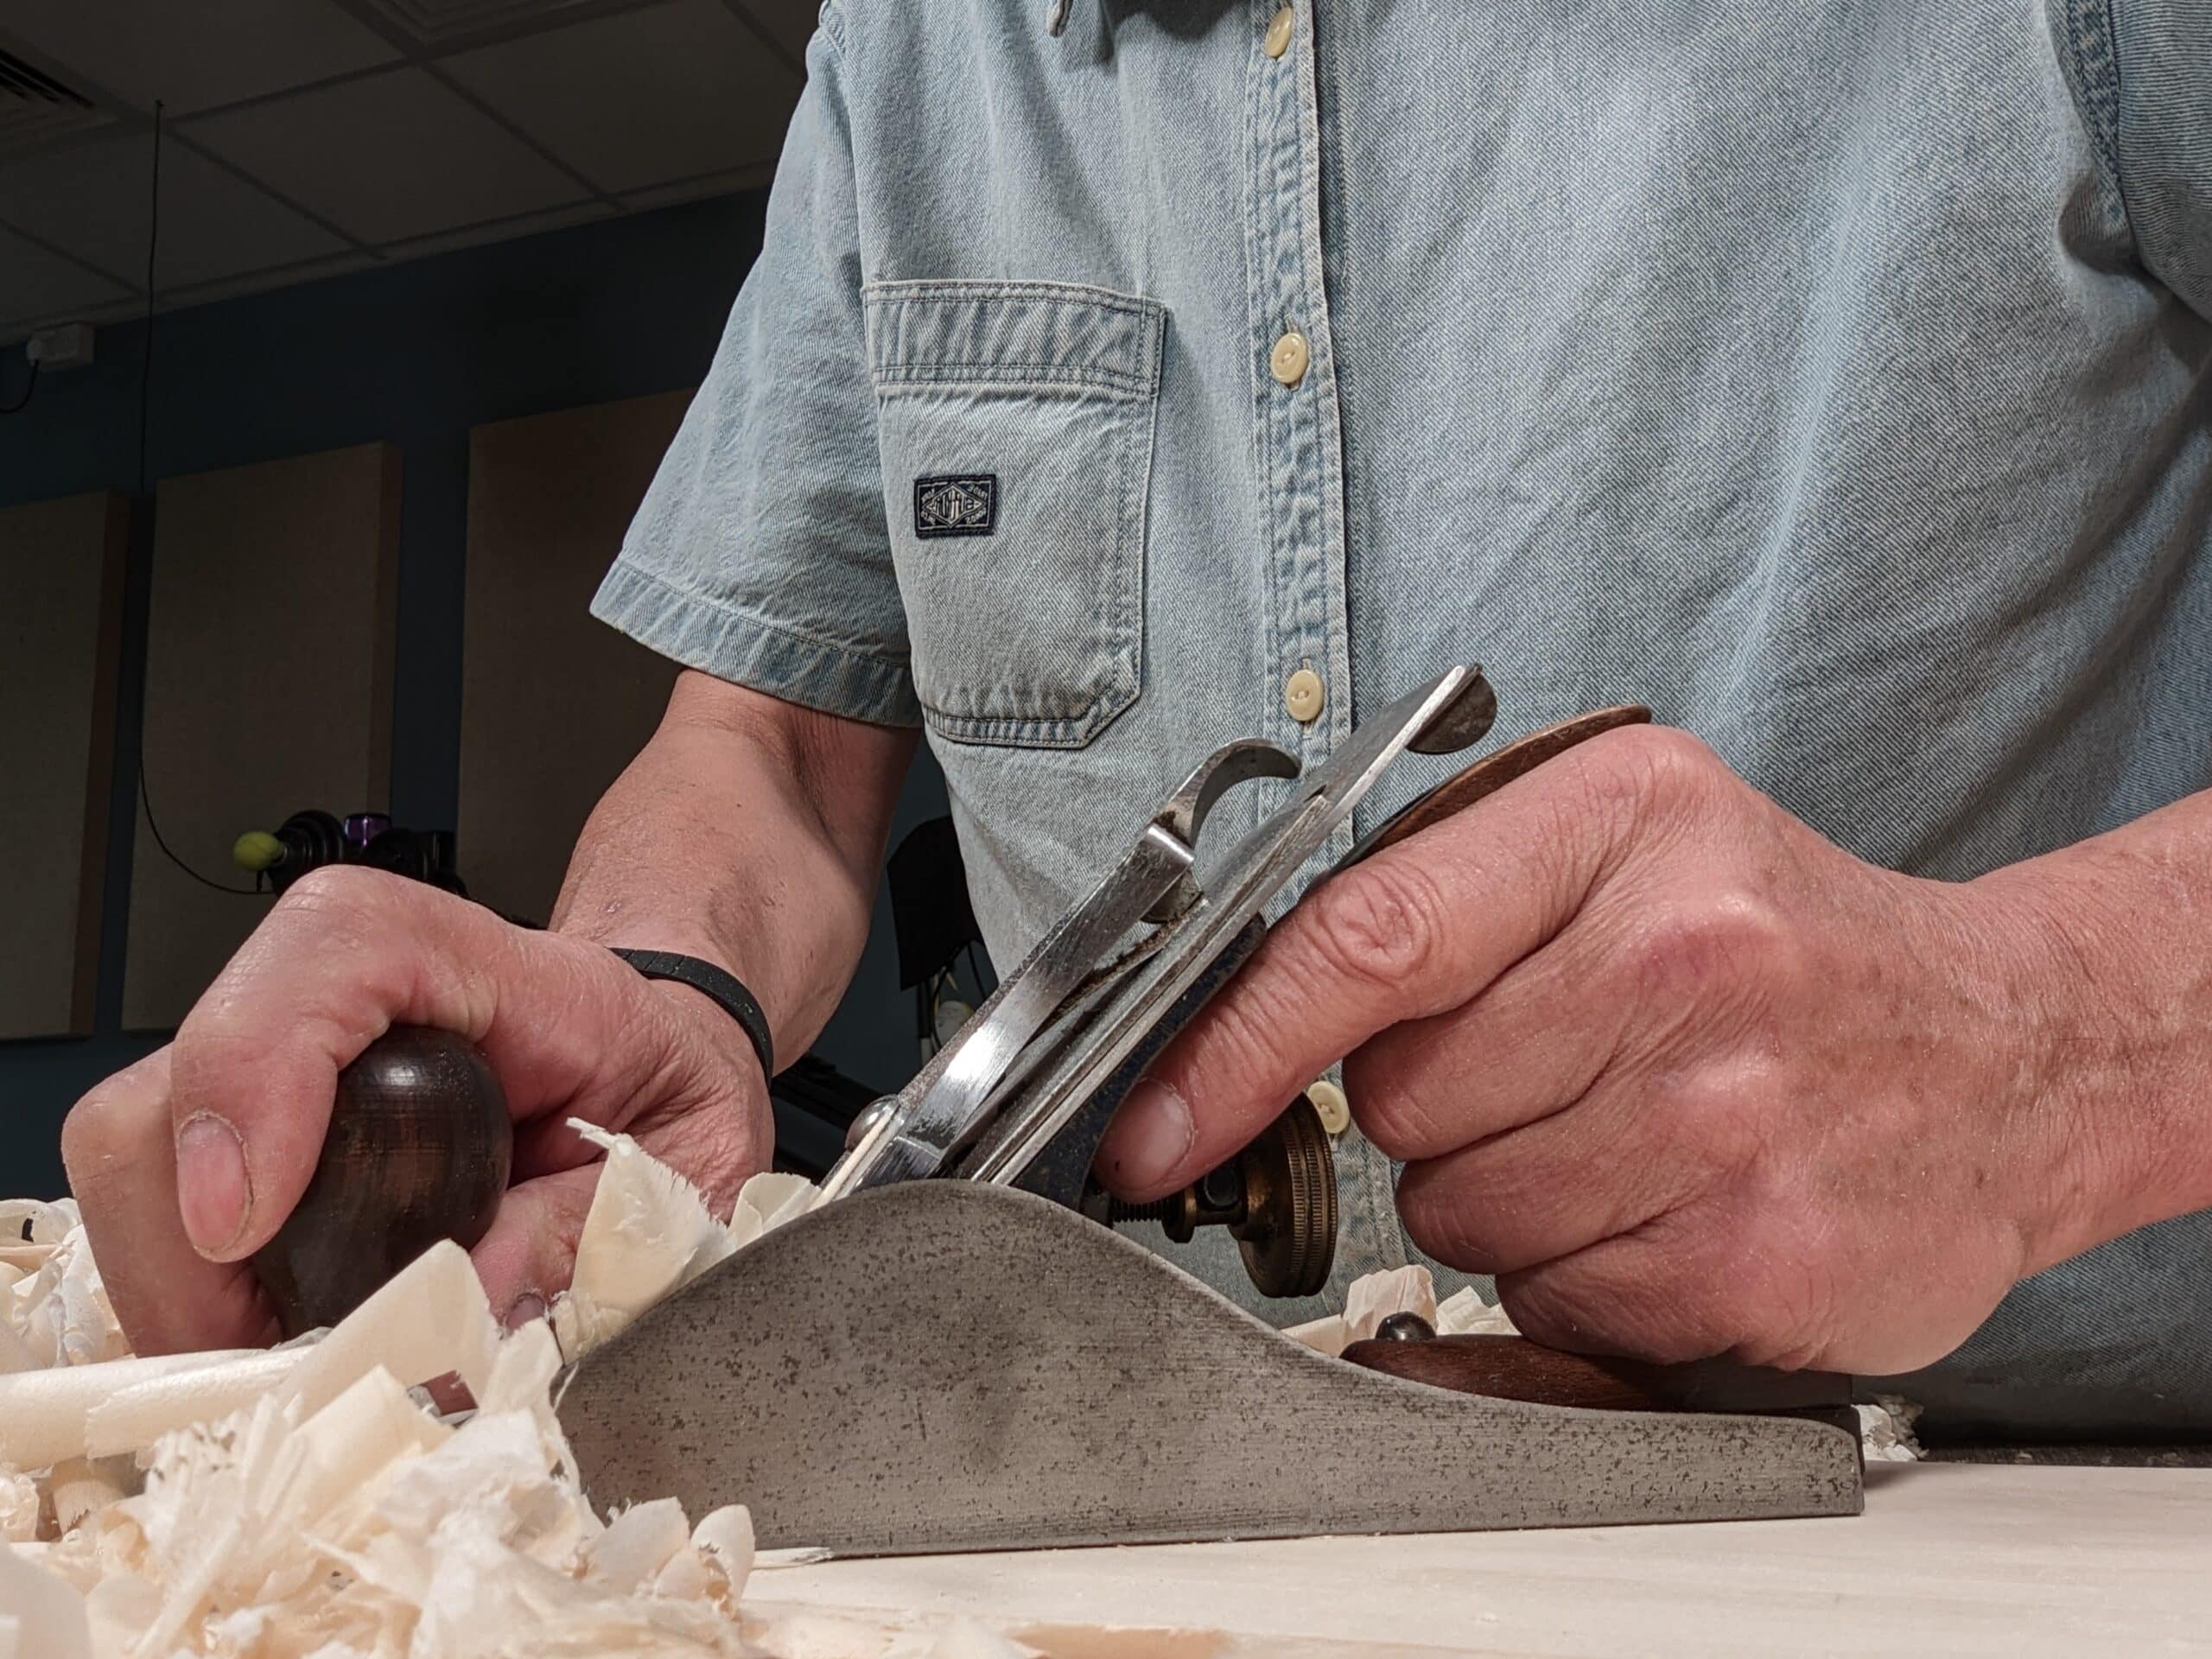
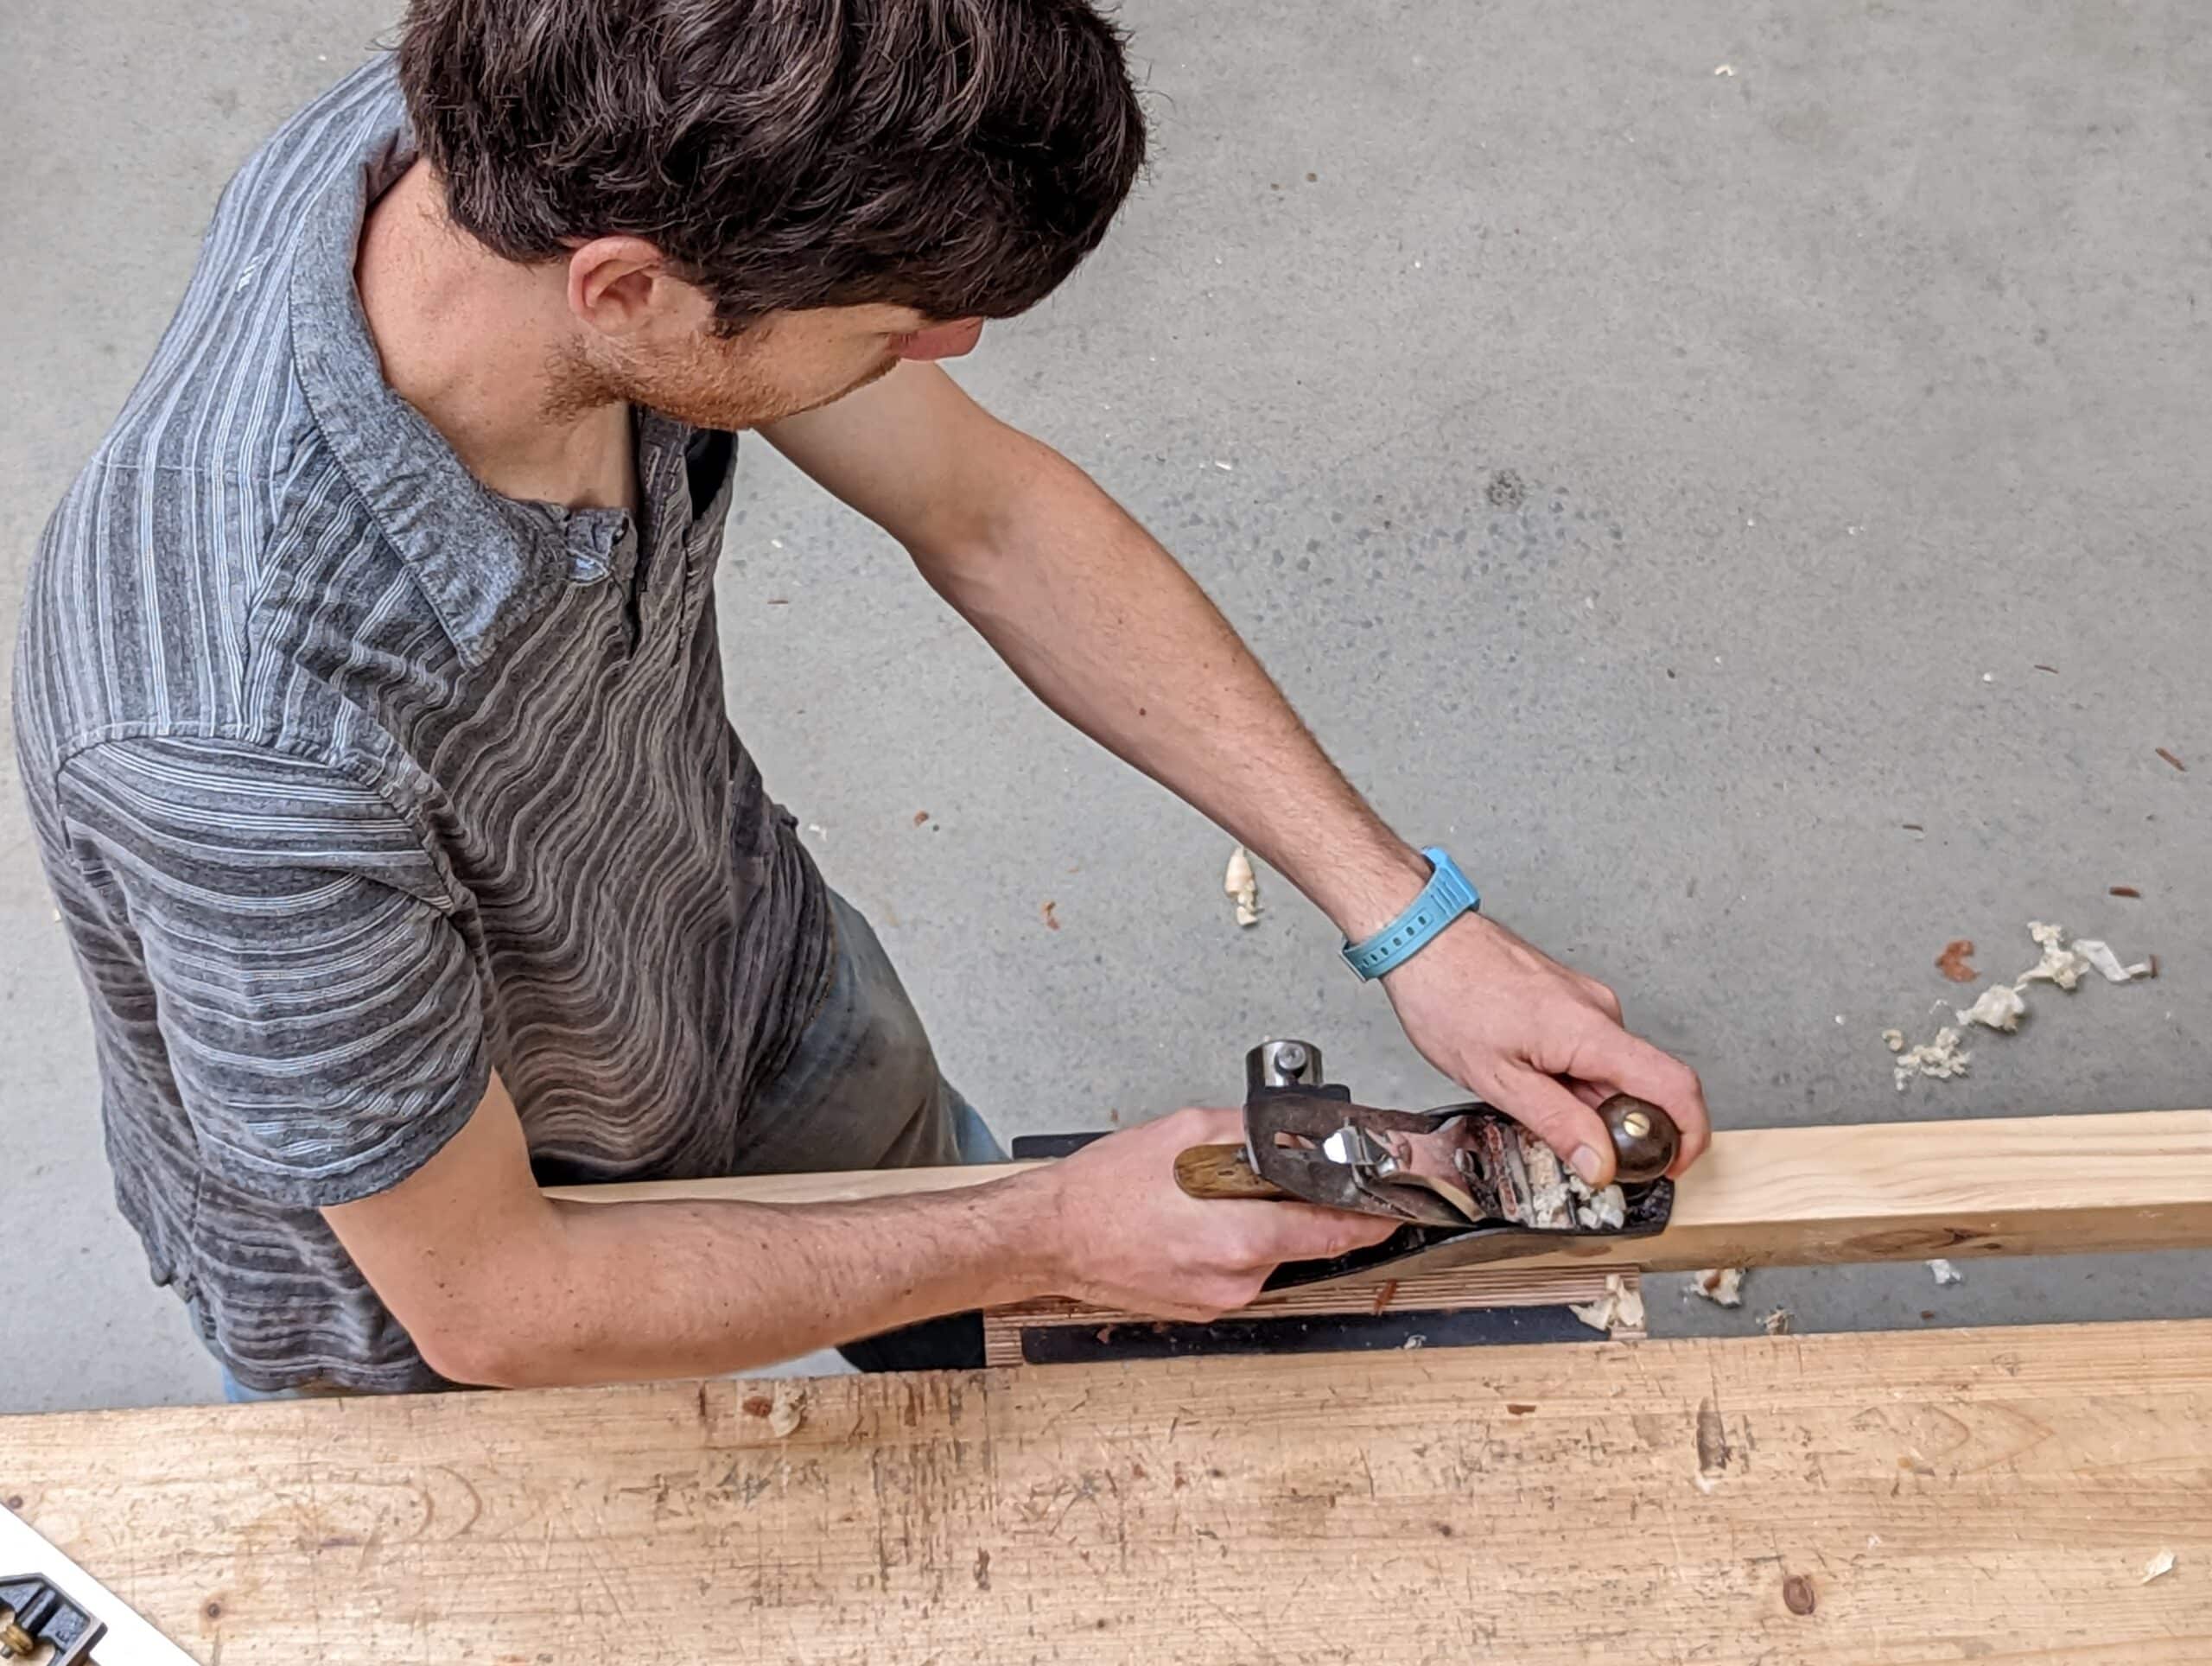
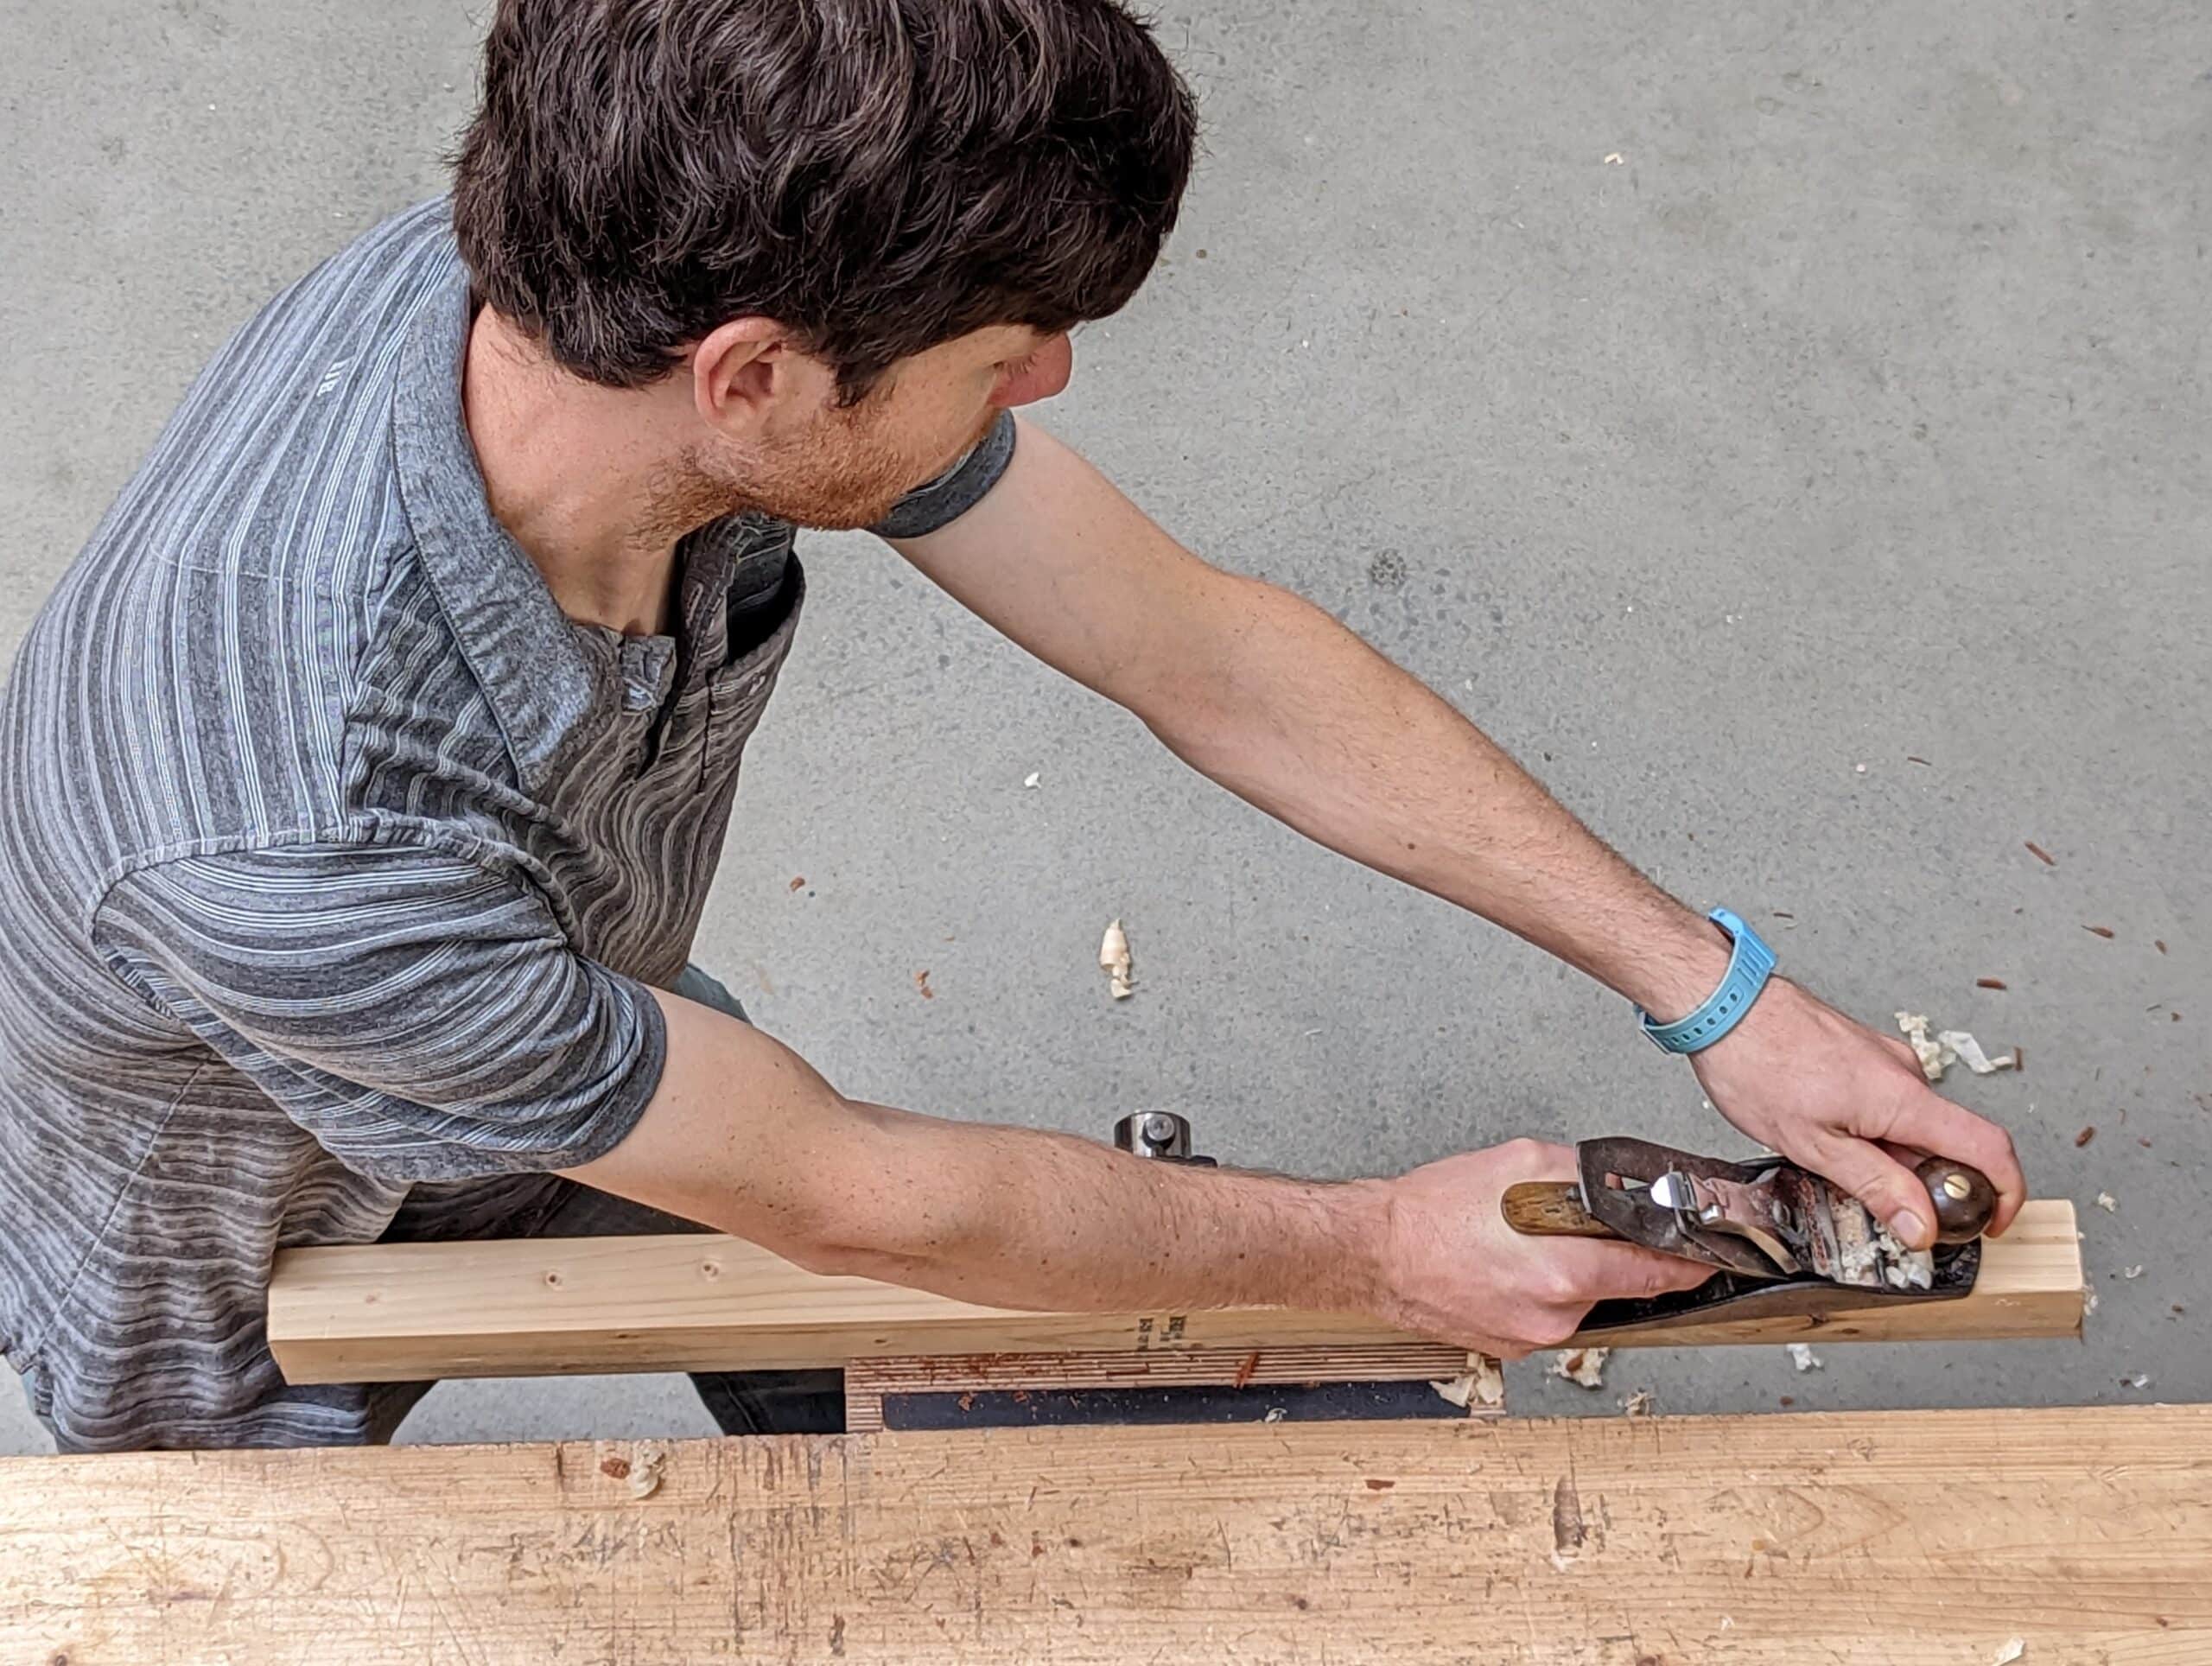
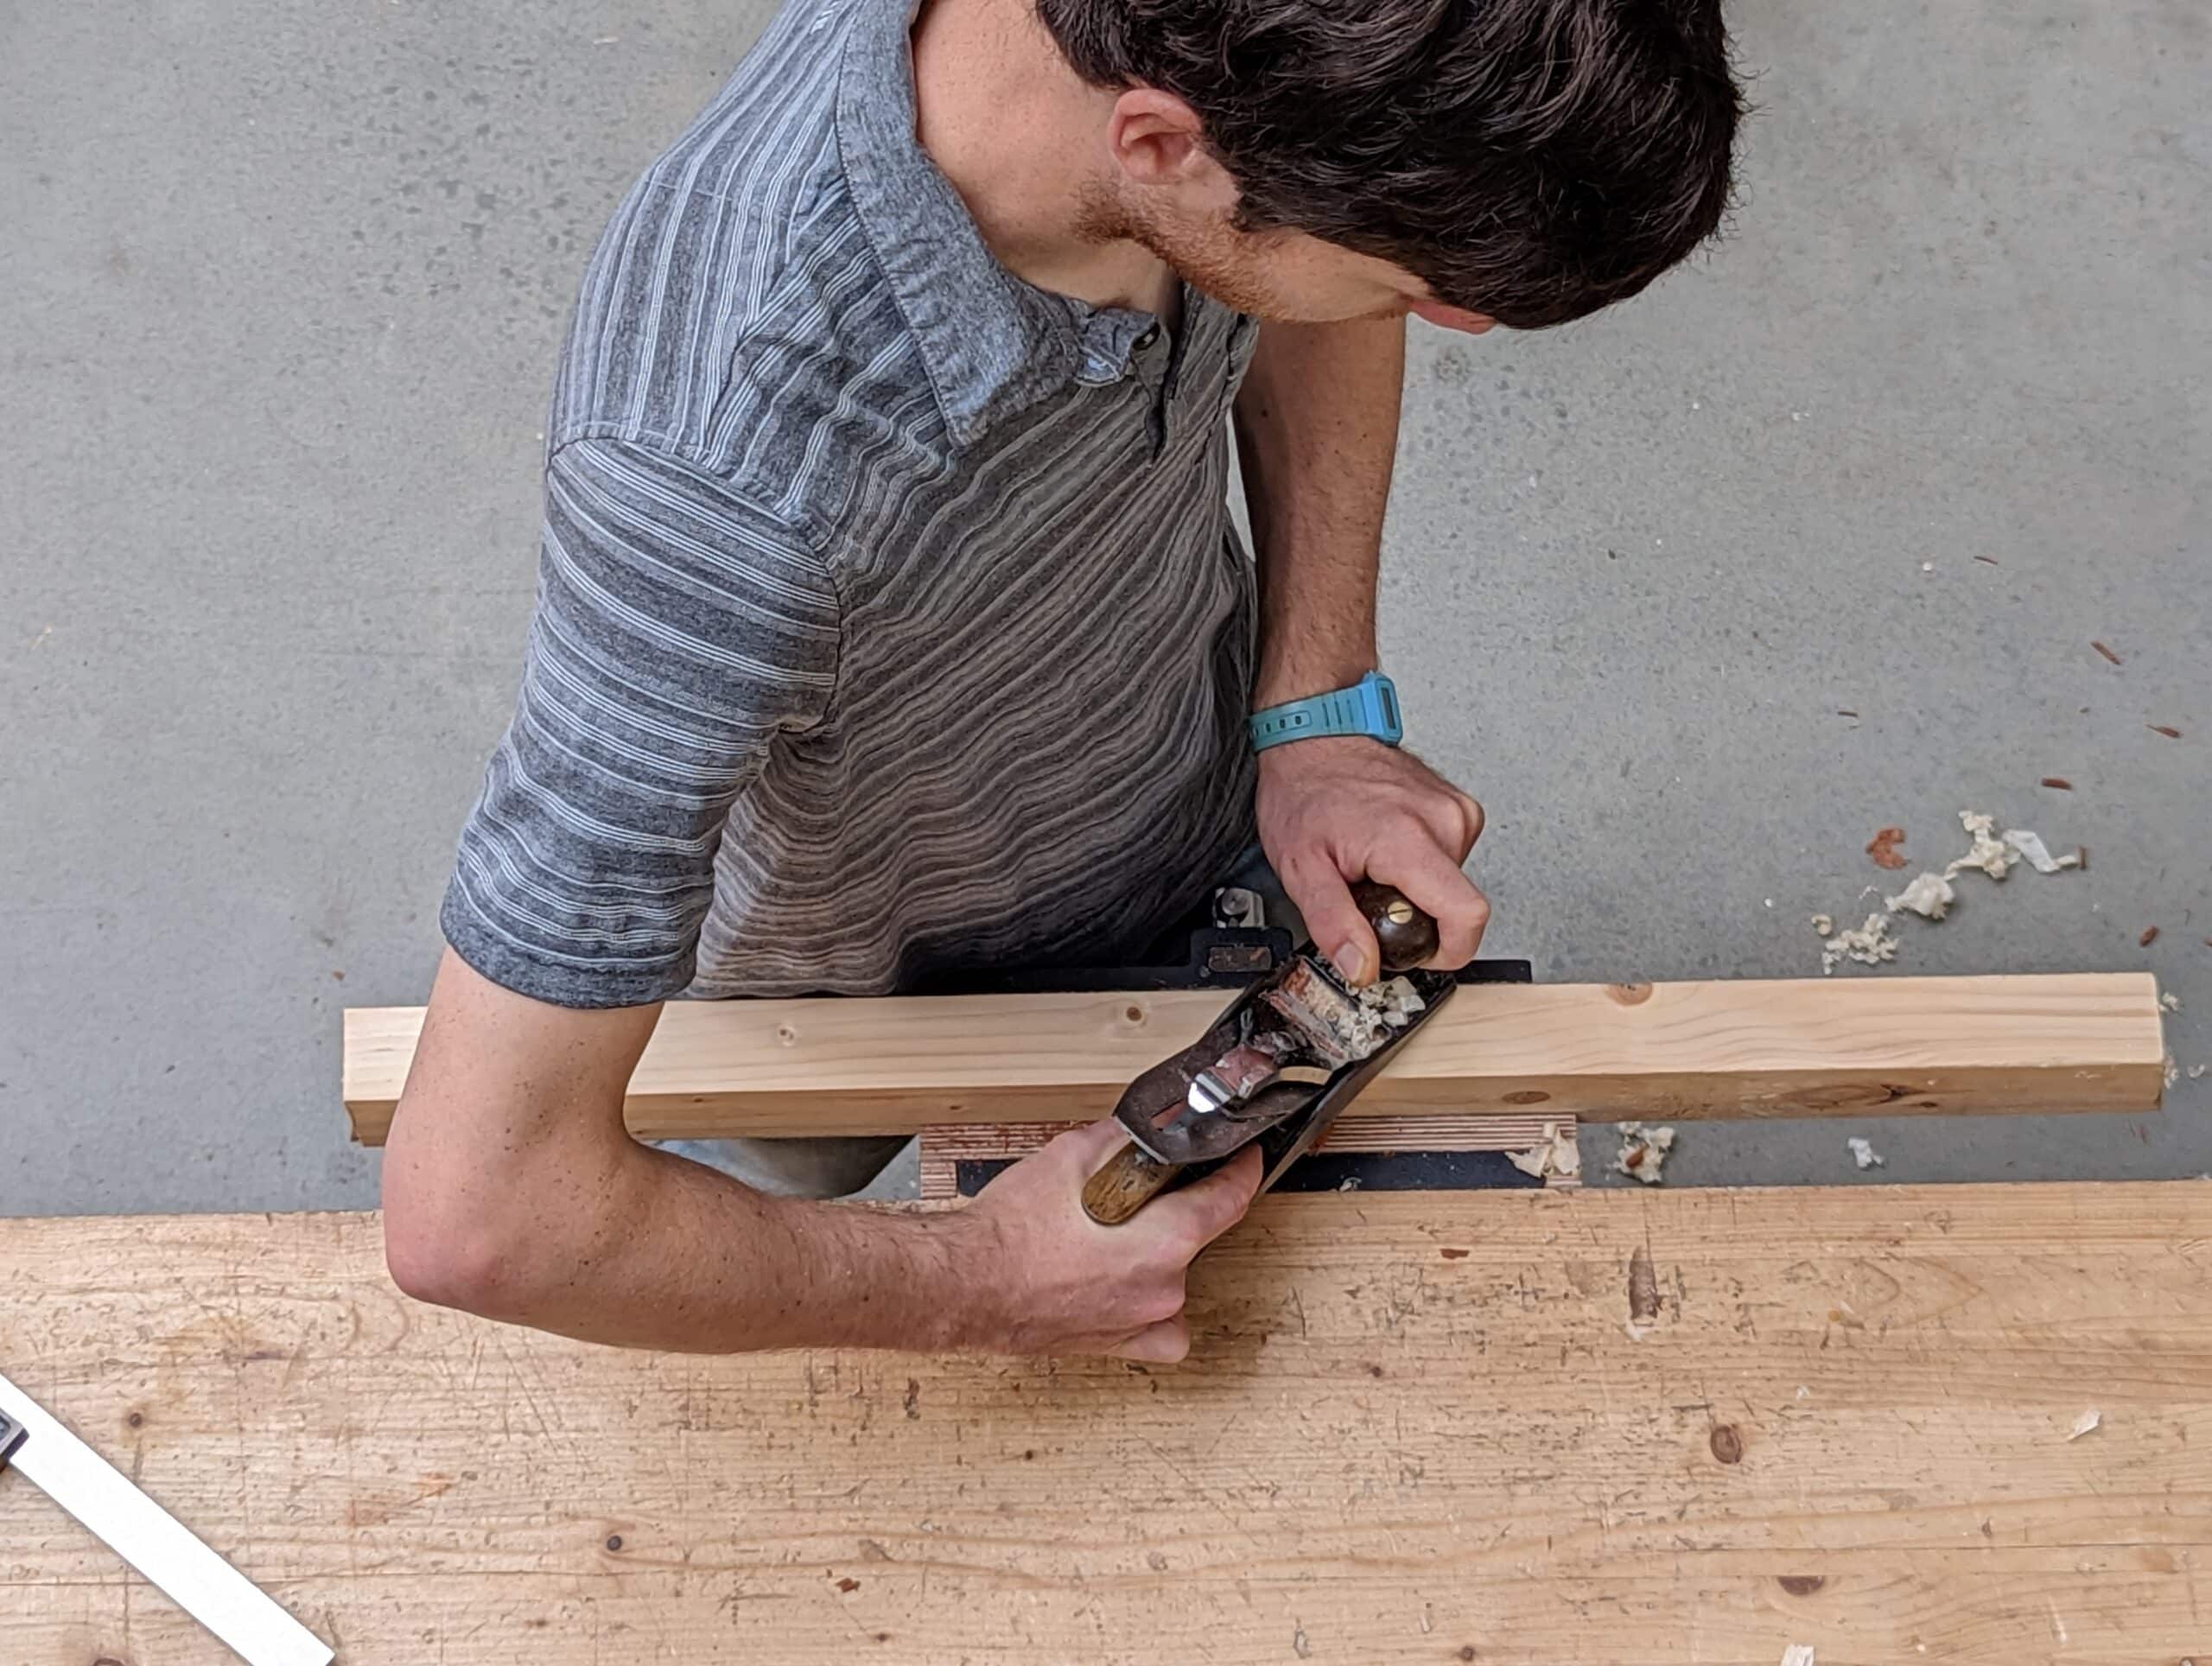
Because of our body shape, skewing the plane is more our adopting a natural positioning, an aligning act rather than an intentional modus operandi, something we naturally do to adopt a practical application of the plane. Almost every stroke we make will in fact be skewed but without exaggeration, as many seem wont to do and instructors even instruct students to skew in an exaggerated way. This is 98% unnecessary. The slighter skew of the natural body aligning is all that is necessary. The more we skew the shorter sole in contact with the wood and the more likely we are to plane out of square. Ideally, even when the plane is slightly skewed, we want the full length of the plane sole in contact with the wood we are planing.
It’s a rare thing to change hands and use our non-dominant side as an exact opposite unless we are truly able to use both sides equally well. Some people are able to do one thing well with their left hand and write with their right. Left-handed people often master doing things with their right because an item was only made for right-handed people. Generally, whether left- or right-hand dominant, we change the position and alignment of the wood in the vise or on the benchtop to match or suit our dominant hand-arm optimisation. When the vise is near the end of the bench we can retain the position and work from the end of the bench and so not move the wood. A right-hand dominant person generally places the vise to the left side of the bench when facing the bench. Securing wood in the vise and working from that corner/end of the bench enables him or her to place the tools to the right of the vise in the larger area when not in use yet close to hand throughout the work. Place a length of wood in the vise for planing means your dominant side will be against the bench and the wood being planed. Your upper body will be partially over the workbench and the work that way. Placing the plane to the wood surface with the dominant hand we can position it along the long axis of the wood without a problem, it’s when you bring the forehand into play to hold the front plane tote that the plane skews that slight amount. When we muscle up and apply greater force that the skew can become much more exaggerated. This is a bad habit and needs correcting early on as it can become permanent, resulting in lower levels of control for squareness, even cutting, straightness, etc. It’s all about balance and sensitivity.
It’s important to remember that skewing the plane often results in grain tearout. When the plane is inevitably skewed in the normal planing position the cut may go well until we meet rising grain. That patch of grain is often directional and the plane is head-on in its skewed presentation which engages the grain awry. Skewing the opposite way but in the same direction along the length of the wood would be the answer and would take care of the problem but in 99% of cases the grain direction is not obvious ahead of the cut and we have already made the pass resulting in the torn grain. This happens to everyone all the time and this is why it is silly to say you should have used this plane type or this frog pitch or a York pitch or whatever. The damage is done and we use a standard plane for 99% of our work because it always works for that percentage of our work.
Don’t be confused by demonstrators and content providers on social media. It’s tiring to read or watch accounts from people saying this plane works best or better than that or, if you do this, this will or will not happen. I know YT gurus will spend a lot of time setting up for a predictable outcome showing a plane working to perfection and especially if they are sponsored and selling. For those of us who actually make or made most of our lives, the story from a lived and long life in the saddle is very different. Choosing that figured grain that actually will plane better than straight grain and then spending half an hour before videoing tweaking the plane will always lead to fluffy onion skins wrapping around the wrist with each stroke. Here in the workshop, the making workshop, at the bench, making for a living, things are very different. There is no special set-up, you plane for a half hour and sharpen up again, you plane again and sharpen again. From this standpoint your shed or garage life is different. Here we cannot spend an hour sharpening and adjusting and setting every time. Such a luxury!
Do I relate to this post? I work with teak and a really hard red wood in Thailand. Sharpen, sharpen, sharpen…. And may I add Paul’s sharpening system makes it a quick and efficient process
Ah, teak! The enemy and destroyer of sharp edges. No other wood dulls tool edges like teak. Then plane strokes and back to the sharpening station.
When sharpening a plane iron, I saw you lift the iron’s left side while maintaining contact against the stone with the right corner of the cutting edge. You then do the same with the other side.
Is the goal to have rounded corners as in this blog picture?
https://paulsellers.com/wp-content/uploads/2021/07/PXL_20210702_103806109.PORTRAIT-scaled.jpg
Thanks
It is. It feathers the edges of the outer edges of plane swipe and eliminates any visible step down when planing side by side on wider sections.
Thanks, that will fix the step down I have been seeing!
Paul, a lovely article. Just at the peak of frustration at not being able to visualise the triangles you refer to, you add in the diagrams for illustration (although, what I visualised from your description was correct, so it worked too). Very helpful!
I have a habit of lazily skewing the plane in areas of the work when I can’t get round tearout. This is usually on knotty pine, and away from any areas of joinery where true flatness is not completely necessary. Since reading something somewhere recently though, I’ve taken to setting the cap iron with just a hair-widths blade protrusion and this has helped greatly in getting a smooth finish and removing tearout where tearout once lived. Is that a thing you’ve experienced, or just a lucky coincidence on my part?
Pine and knots will always be problematic but mostly because we have such variables in density which leads to softness against greater or lesser resistance/support fibre surrounding the spur or root of the knot. I cannot usually be bothered readjusting the plane for this so I stuff my fingers into the throat on top of the shavings and this achieves an identical or even superior outcome. Quick, simple, effective!
that makes sense. thanks for getting back to me Paul.
Could a wooden plane design somehow use the grub screw idea?
I know this post is really about planing, however, if anybody wants to see a real master of the skew chisel at work they should look for videos of Alan Batty explaining the skew chisel.
A superb turner who had spent his life at it, he made it look so easy.