ReHardening Your Plane Iron
I will start this blog by saying I am a full-time woodworker and that necessitates much part-time metalworking for several good reasons. This extension from my last blog is to bring you up to date on taking charge of to-soon-dulling plane irons be they new or old and described as ‘vintage’ on eBay to give them some kind of‘ old-is-always-better’ feeling in order to sell something that is actually way past its sell-by date and pretty useless. Though a few Stanley plane irons were laminated, 99.9% of the blades can be hardened from cutting edge to top tip so you can salvage old blades and make a variety of cutting irons and tools from them for peanuts if you so choose. This article is about salvaging a few years of use from a well-used plane iron, one that was never hardened enough, one that has lost its temper through overheating during grinding and things like that. Economically it is still worth doing even though a replacement blade might cost only £10 or so. I would say time wise rehardening took me no more than five minutes max. I have hardened my tool steels with all kinds of vegetable oil including olive oil with no issues.
There is no set distance from the cutting edge to where the steel will be softer in a plane iron from what I can tell. The men and women in the moment hardening tool edges and blades might be distracted and it is likely that he and she had never used the tools they make in their lives anyway . . . no matter who they work for on which continent. Don’t expect too much. I have met makers at high-profile companies who never strayed more than a few inches from one task on one spot on one part of the tool-making production line five days a week. It’s surprising what you can get people to do for the right money and the least responsibility, etc. But then there are circumstances where many just have no choice too — they gotta pay the bills, take care of family and so on. I have had those pockets of time in my life too.
On many a plane, the cutting edge gradually reached close to the elongated cutout ending in the hole of the cutting iron. I usually pensioned the plane irons off and installed a new one because the steel isn’t hardened all the way through and so returns to the sharpening stones came a little too often. When this happens it is, of course, easier to buy in new but there is a simple and quick enough alternative and that is to harden the blade right there and then. The pros are that you will most likely get an extension to your plane iron and that’s always a bonus. I suspect that most of you will not need to go through this as the basic plane iron will last most part-time woodworkers a lifetime. I have gone through at the very least 12 plane irons because `I have been a full-time, six-days-a-week user for almost 60 years to date. I doubt that there are many alive that have done the same if any. So why the article? There is a good chance you will come to that point in your plane and then again you most likely will buy a secondhand plane that is well used and the plane iron needs remedial action.
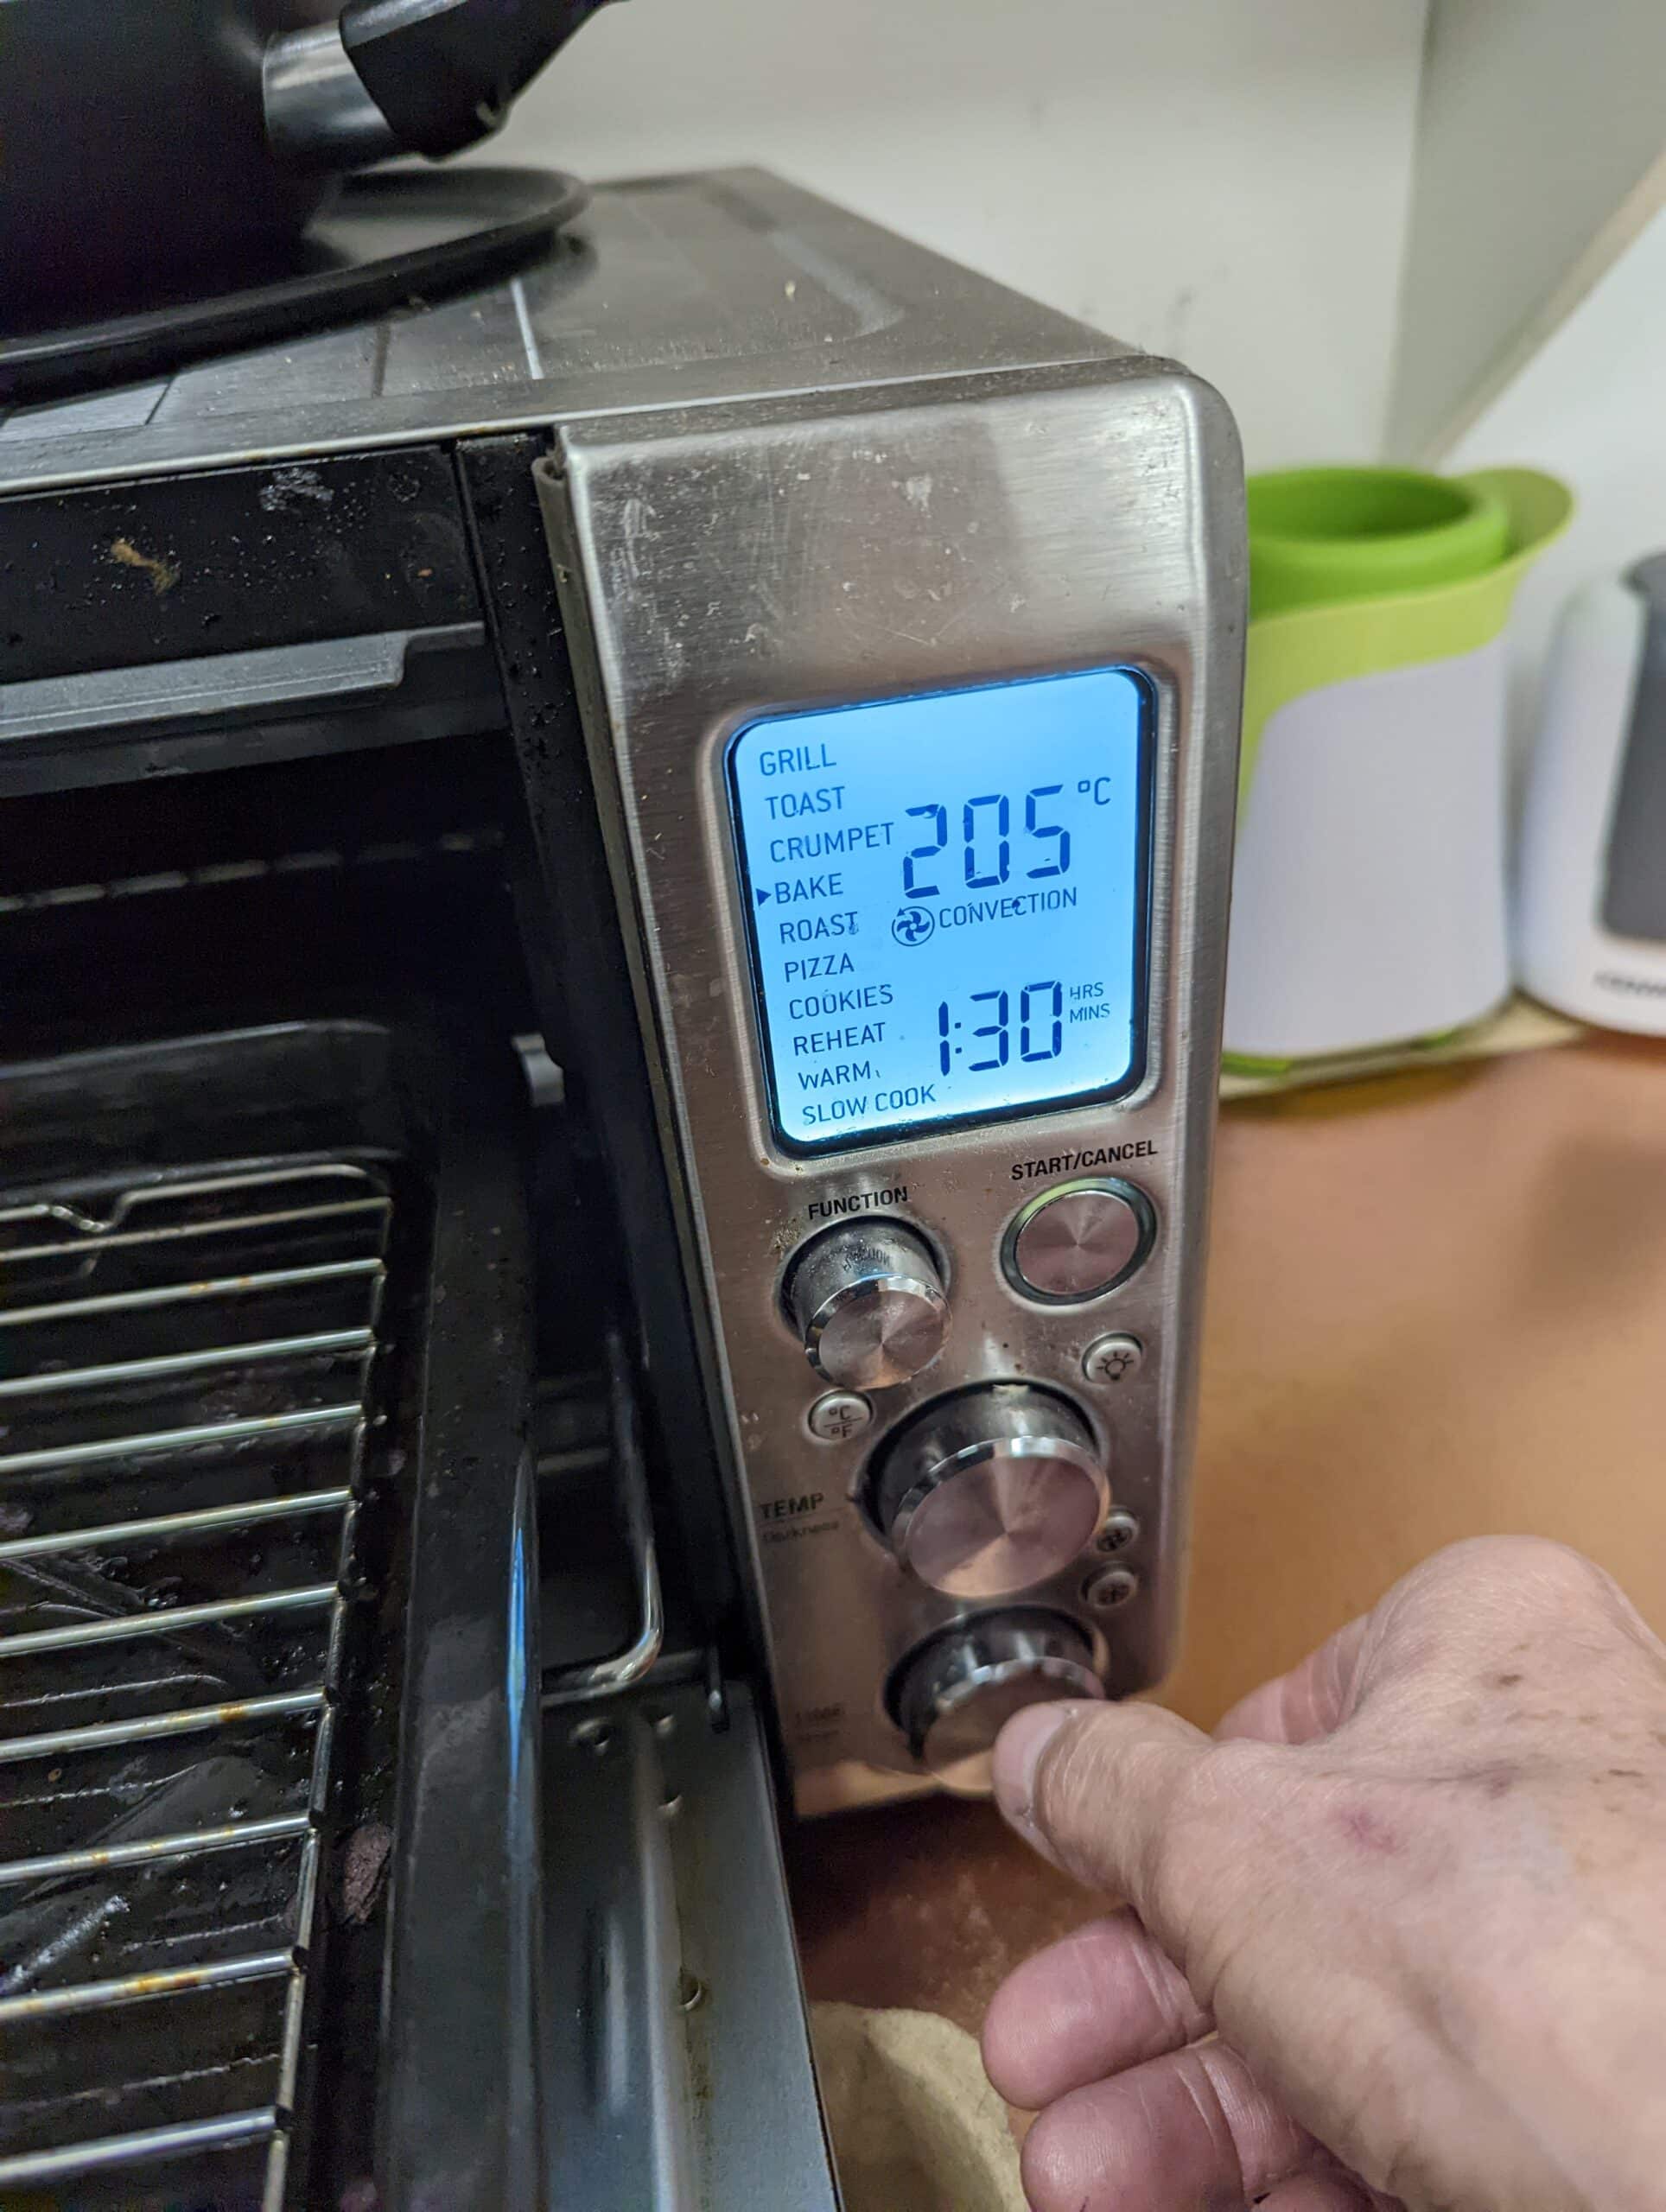
To know if the cutting edge is hard enough simply take a metal file to it. I say metal file because you might just take a diamond hone of some kind which will indeed cut any metal at any time, that’s not what we are looking for. The cutting iron of planes is first hardened and then tempered to detention the stresses in the steel after quenching. To harden the steel the blade is held in a flame hot enough to turn the steel to an even redness level that when plunged into oil or water (or with some steel alloys just the surrounding air) the steel will harden to the hardness of say a file. After that, the blade is usually tempered although `i have many plane irons I have made that are not tempered and they have never had an issue. As I said, tempering the blade relieves any stresses in the steel caused by the quenching after the initial heating. It’s a no-brainer really, we achieve this by simply placing the blade in a regular oven at 205C for an hour and a half and then do it a second time after its cooled back down to room temperature. I put a nut roast in at the same time so as not to waste the heat. The maxim that if a file can scratch your material, then your material is softer than the file and if a file cannot scratch your material, then your material is harder than the file works. The file did not scratch my newly hardened cutting iron when I was done.
To check for hardness a decent flat file will slide off the cutting edge when offered to the bevel or the side edge of the cutting iron. It is more likely that you have found yourself returning to the stones more frequently though, as happened in my case on this particular plane.
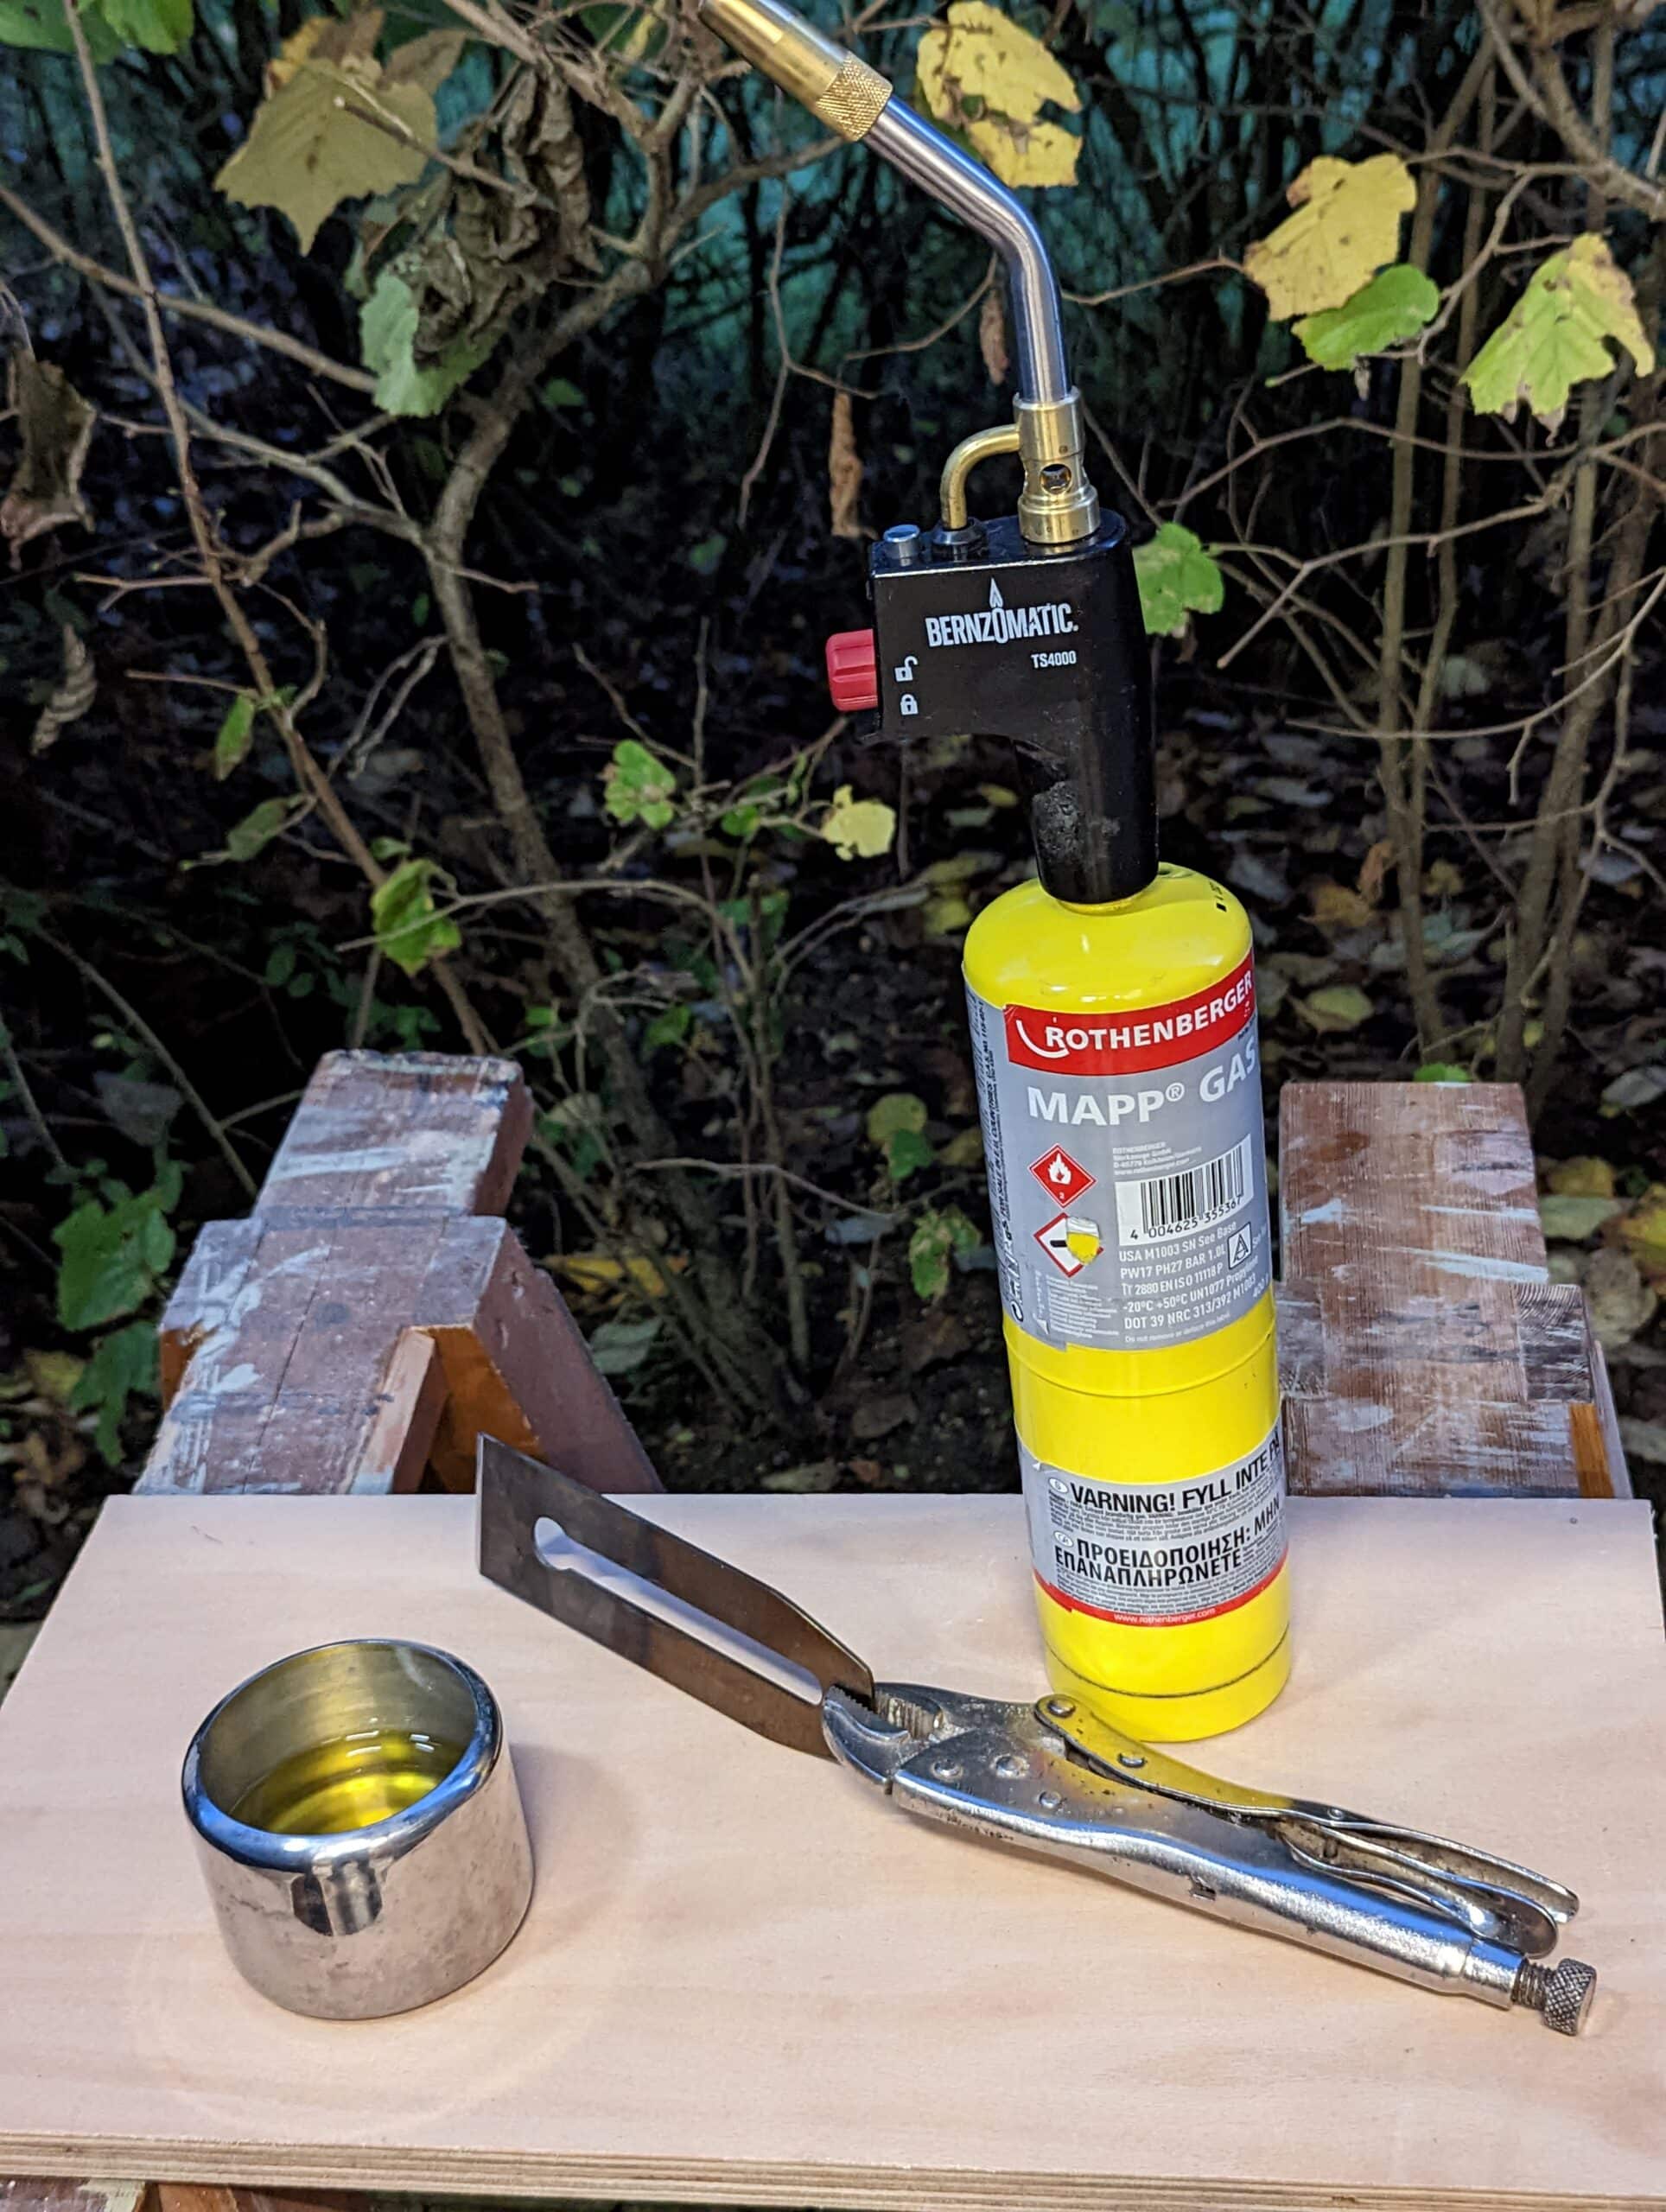
My setup is simple. A blow torch capable of heating the steel cutting iron to cherry red or a non-magnetic state: I just go for colour. It has always worked for me without fail. Also, the advantage of a blowtorch over a barbecue pit is localised heating where I need it. The locking grips reliably hold the blade securely throughout the heating and quenching process. In the sugar bowl, I used some old olive oil as it doesn’t usually flair up. The Bernzomatic TS 4000 torch is one of my best buys. It reaches the higher temperatures needed for hardening tool steel and has a handy instant on/off mechanism with no matches needed as it’s Petzo ignition.
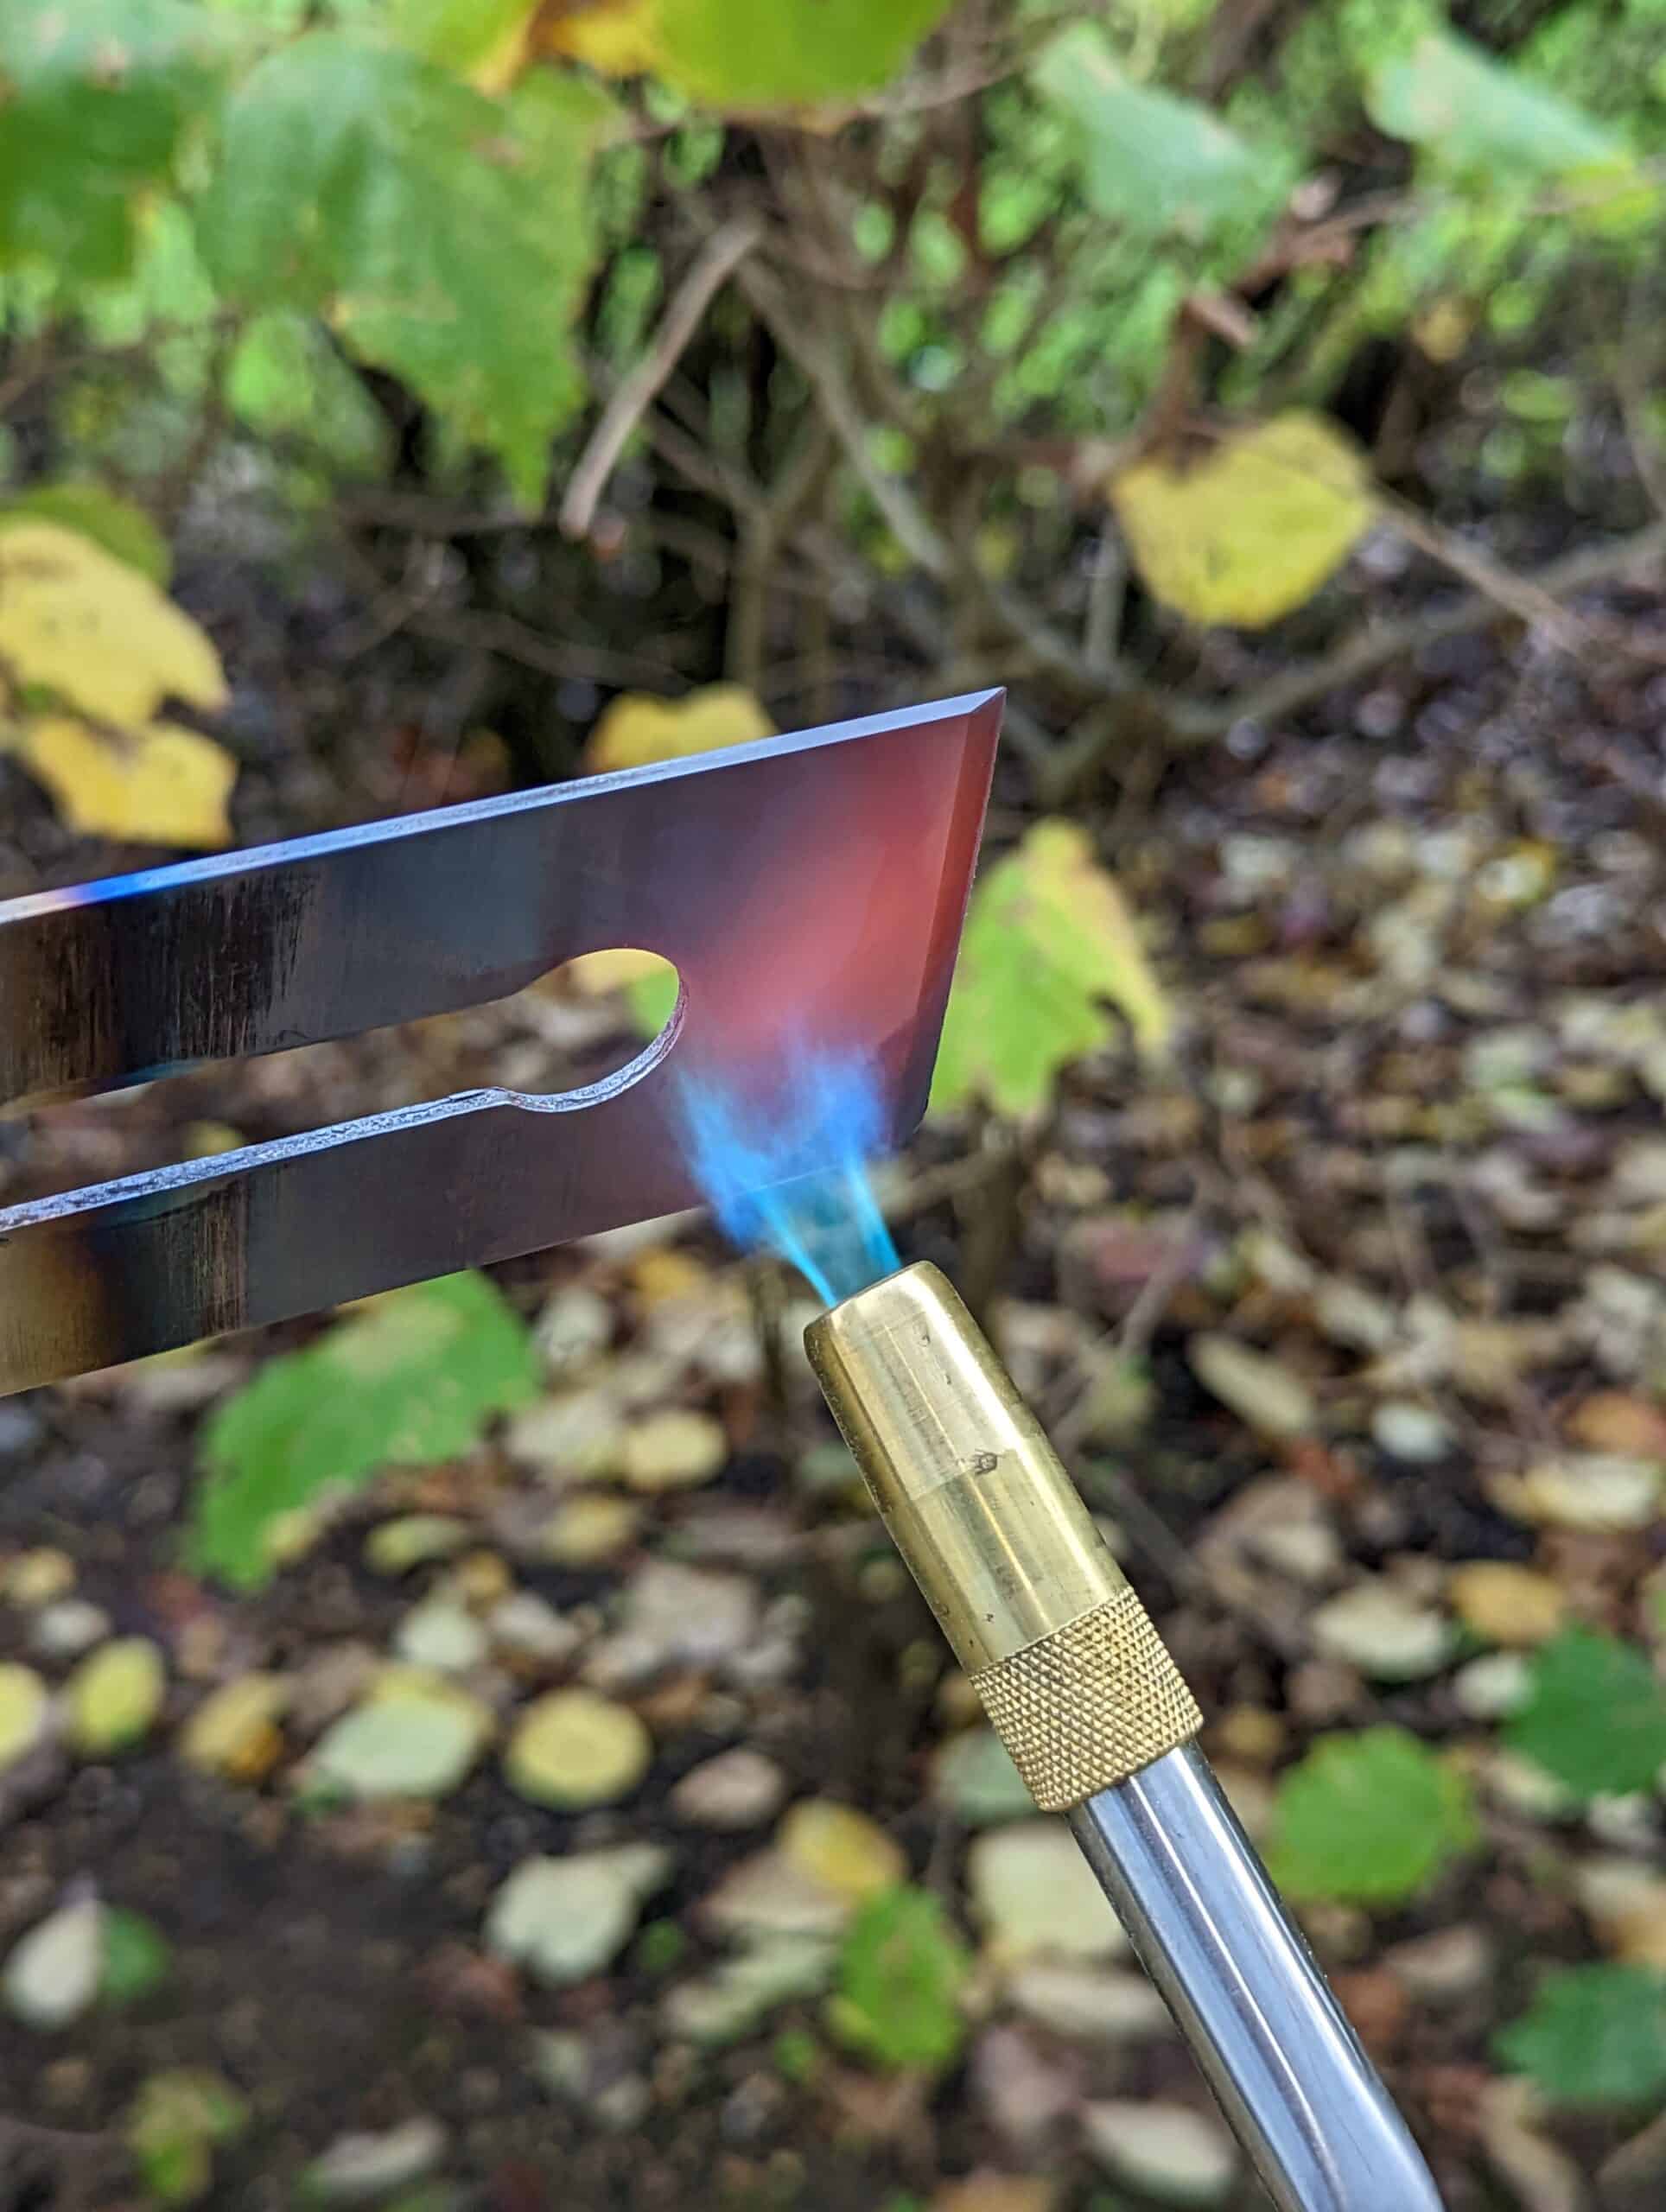
Heat the steel as evenly as possible to get an even hardness. This is not ready just yet but I am only a minute or so away from my cherry red. Make sure you look for colour in a shaded area as in full or strong light you might well be taking your steel to an unnecessary higher heat level.
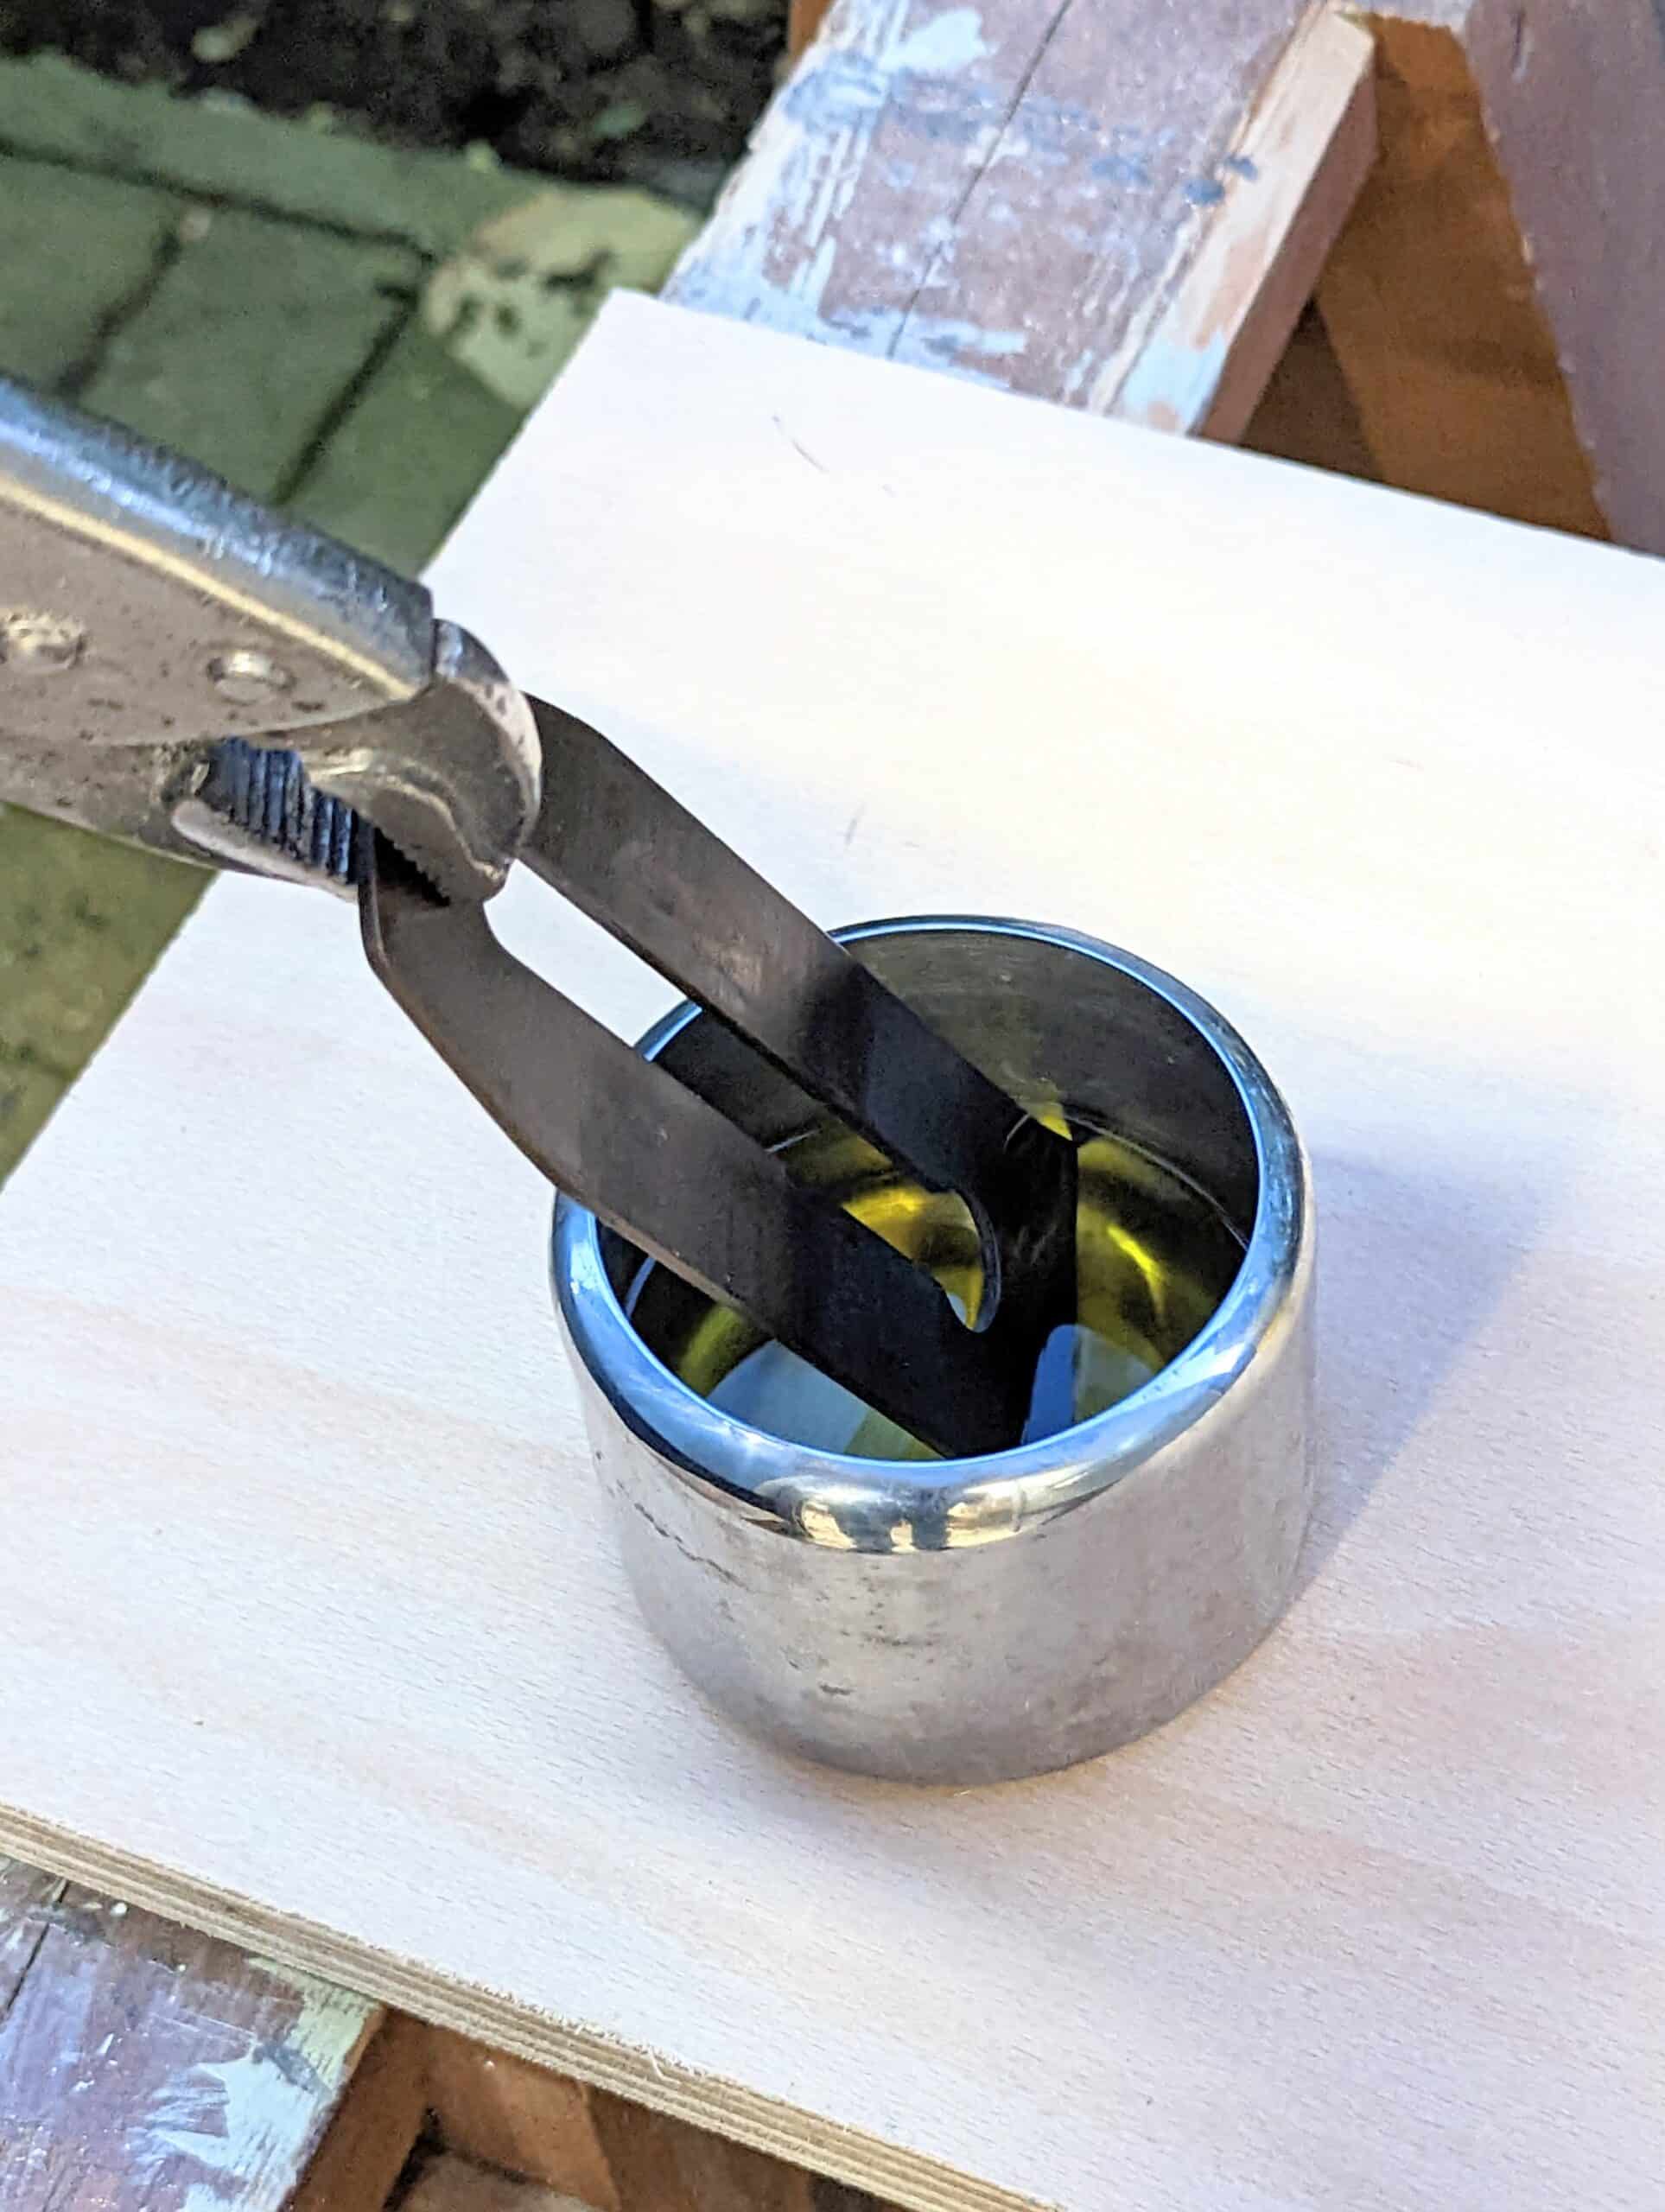
Plunge and hold for 15 or so seconds and then allow the rest of the blade to cool before handling. The plunging will only cool the plunged area and not the main body of steel which will burn you or wherever you place it if combustible.
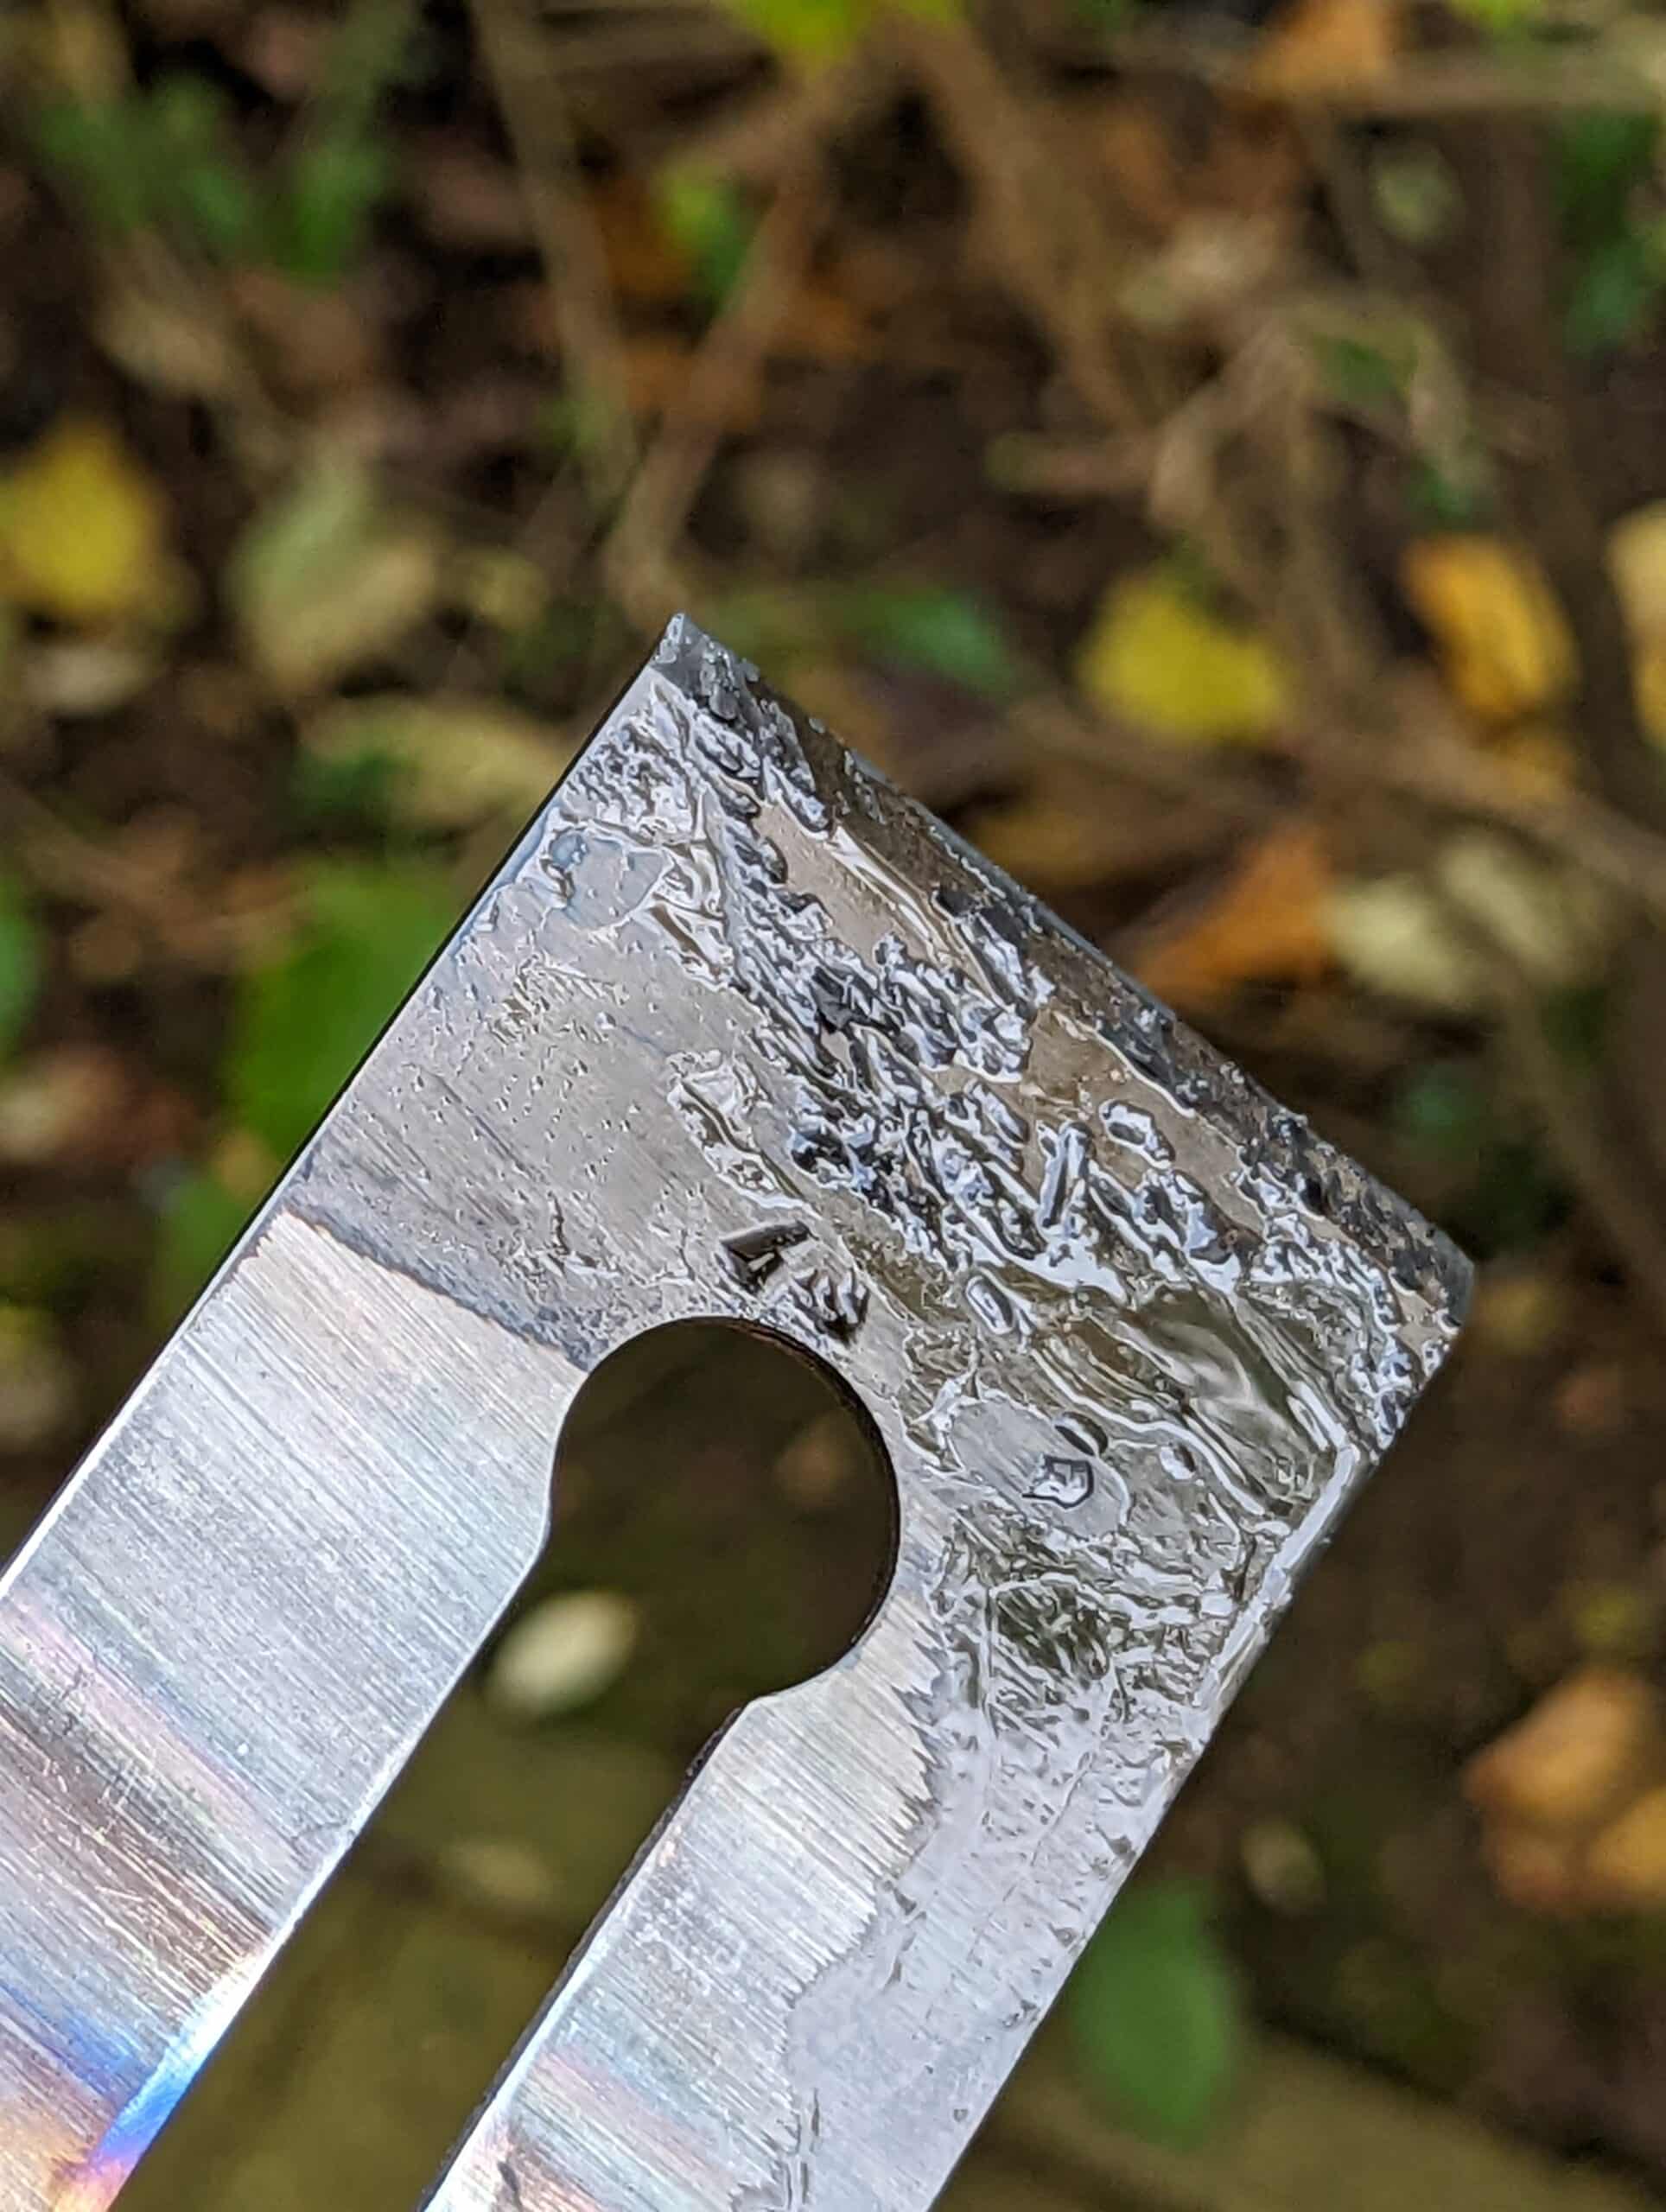
Discolouration and surface flaking from hardening and quenching are normal. It wipes off readily with a cloth or steel wool ready for clean up and sharpening with abrasive.
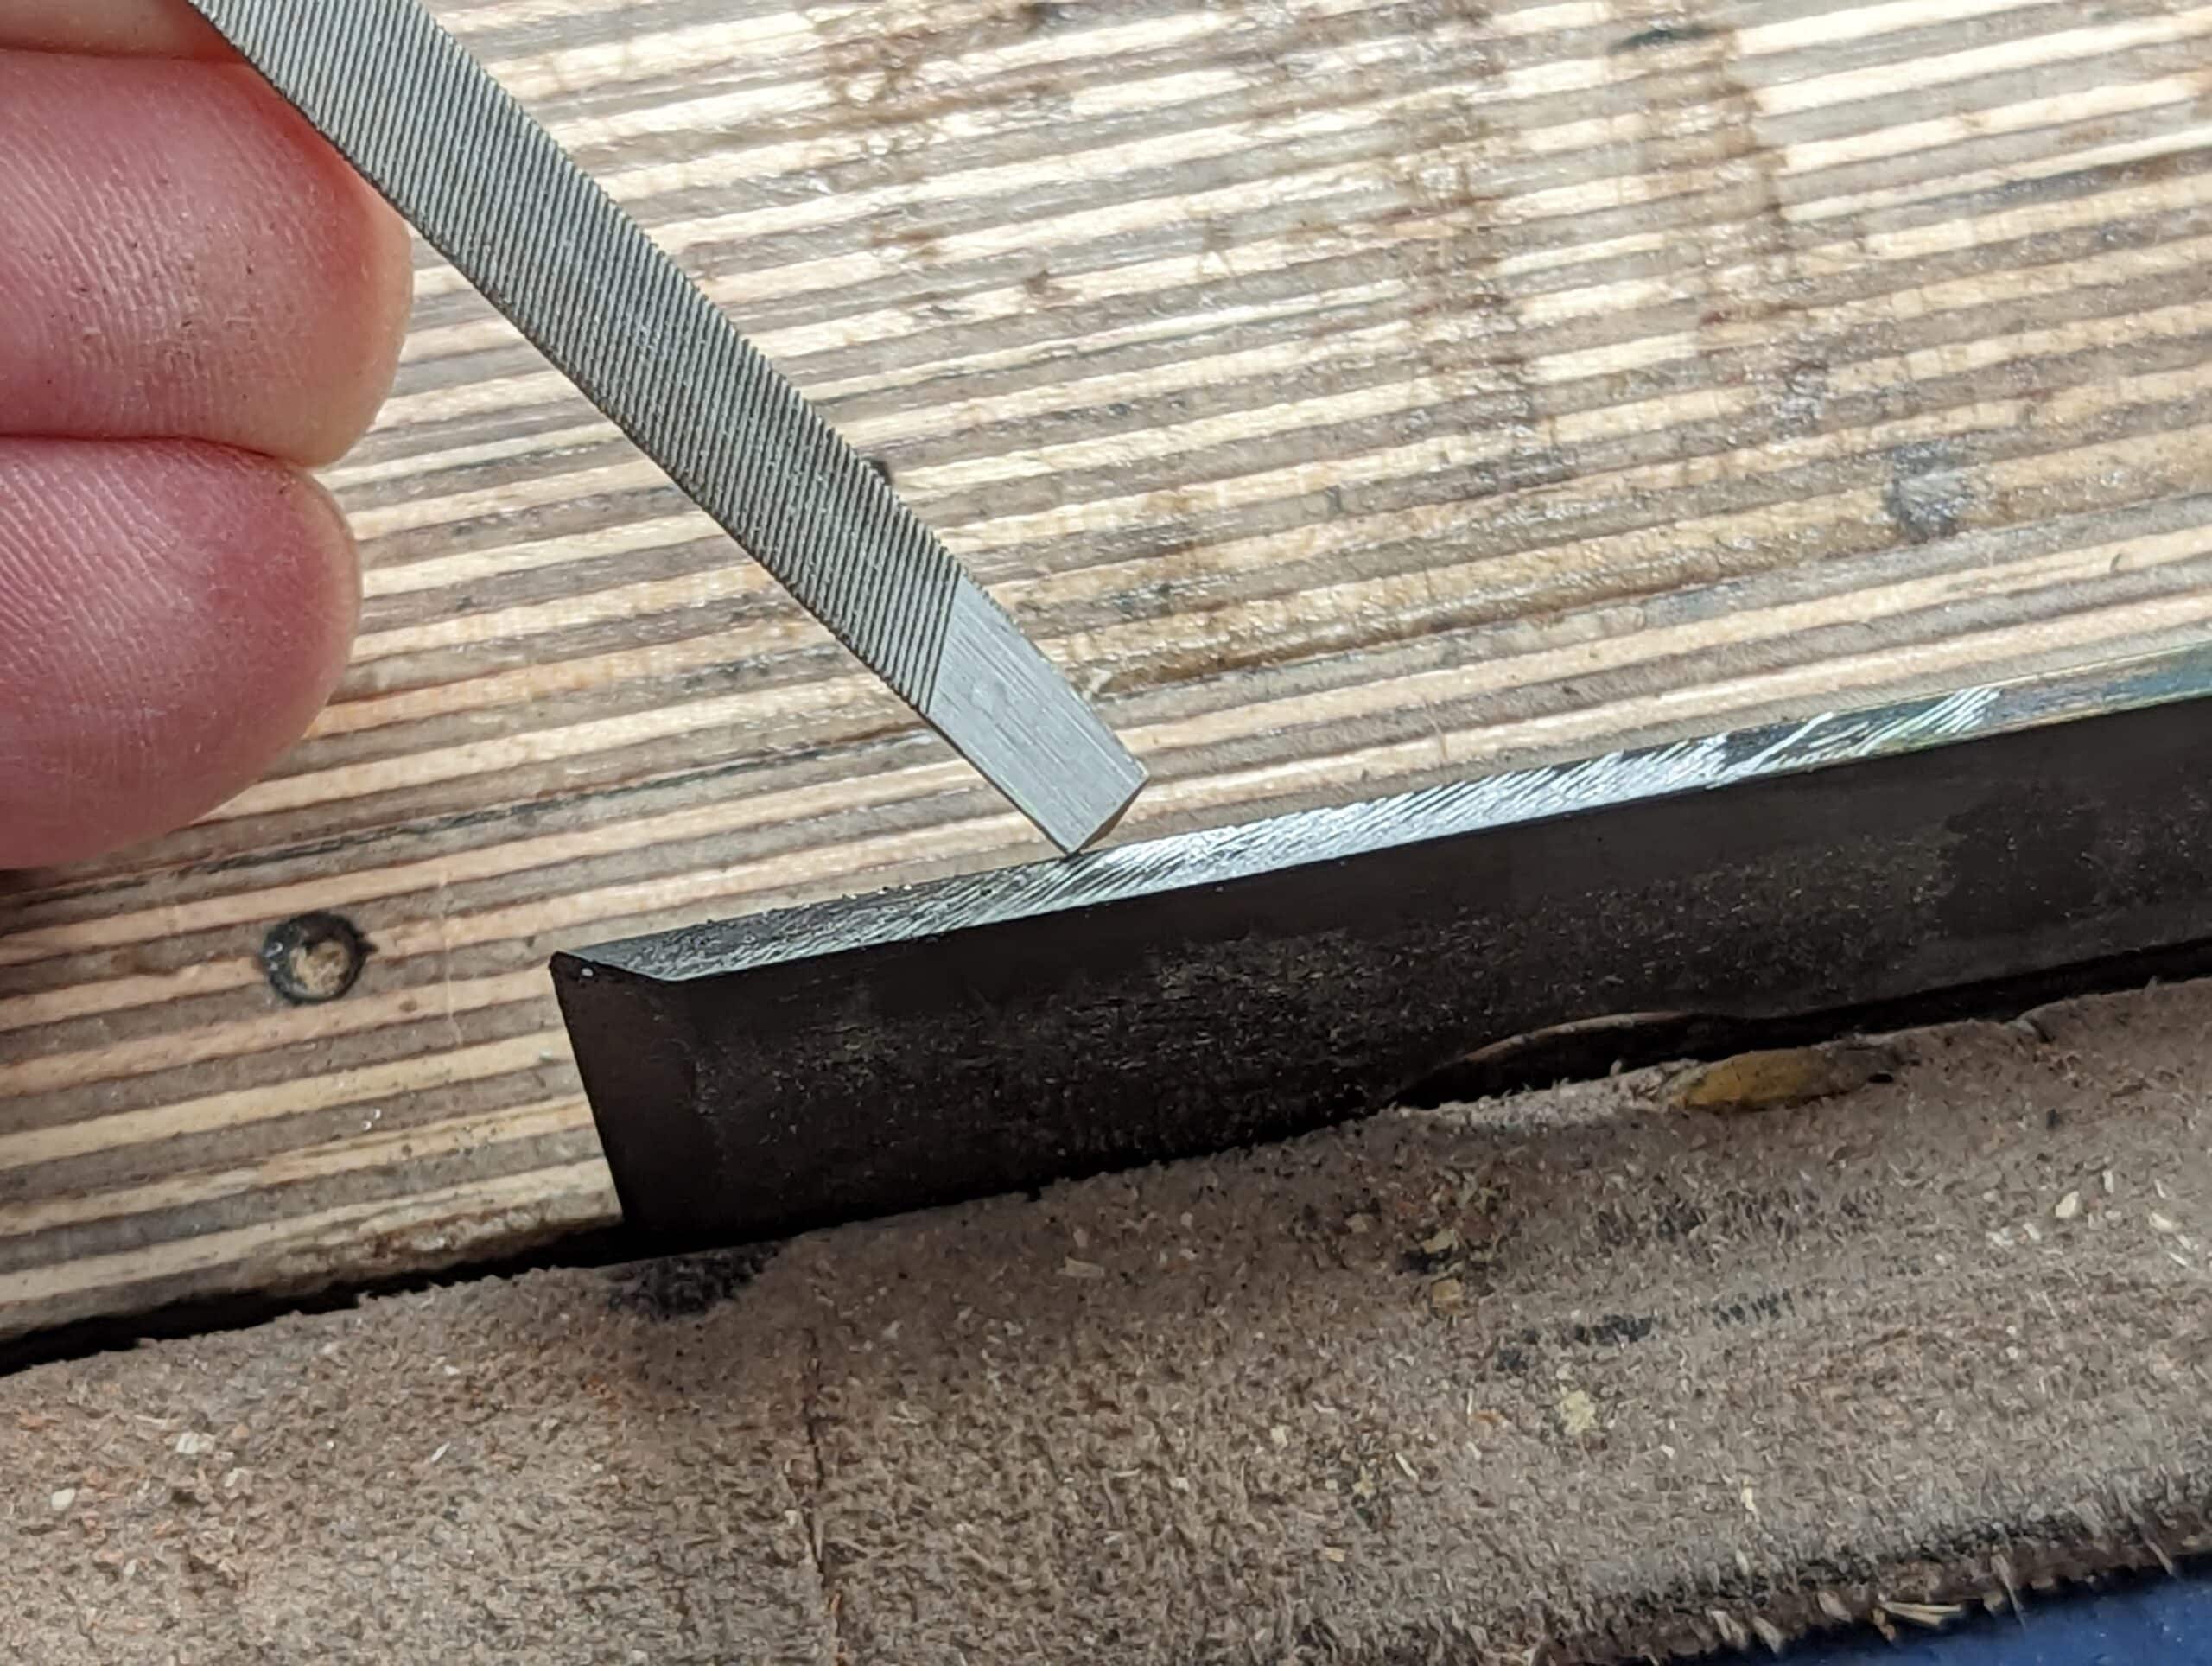
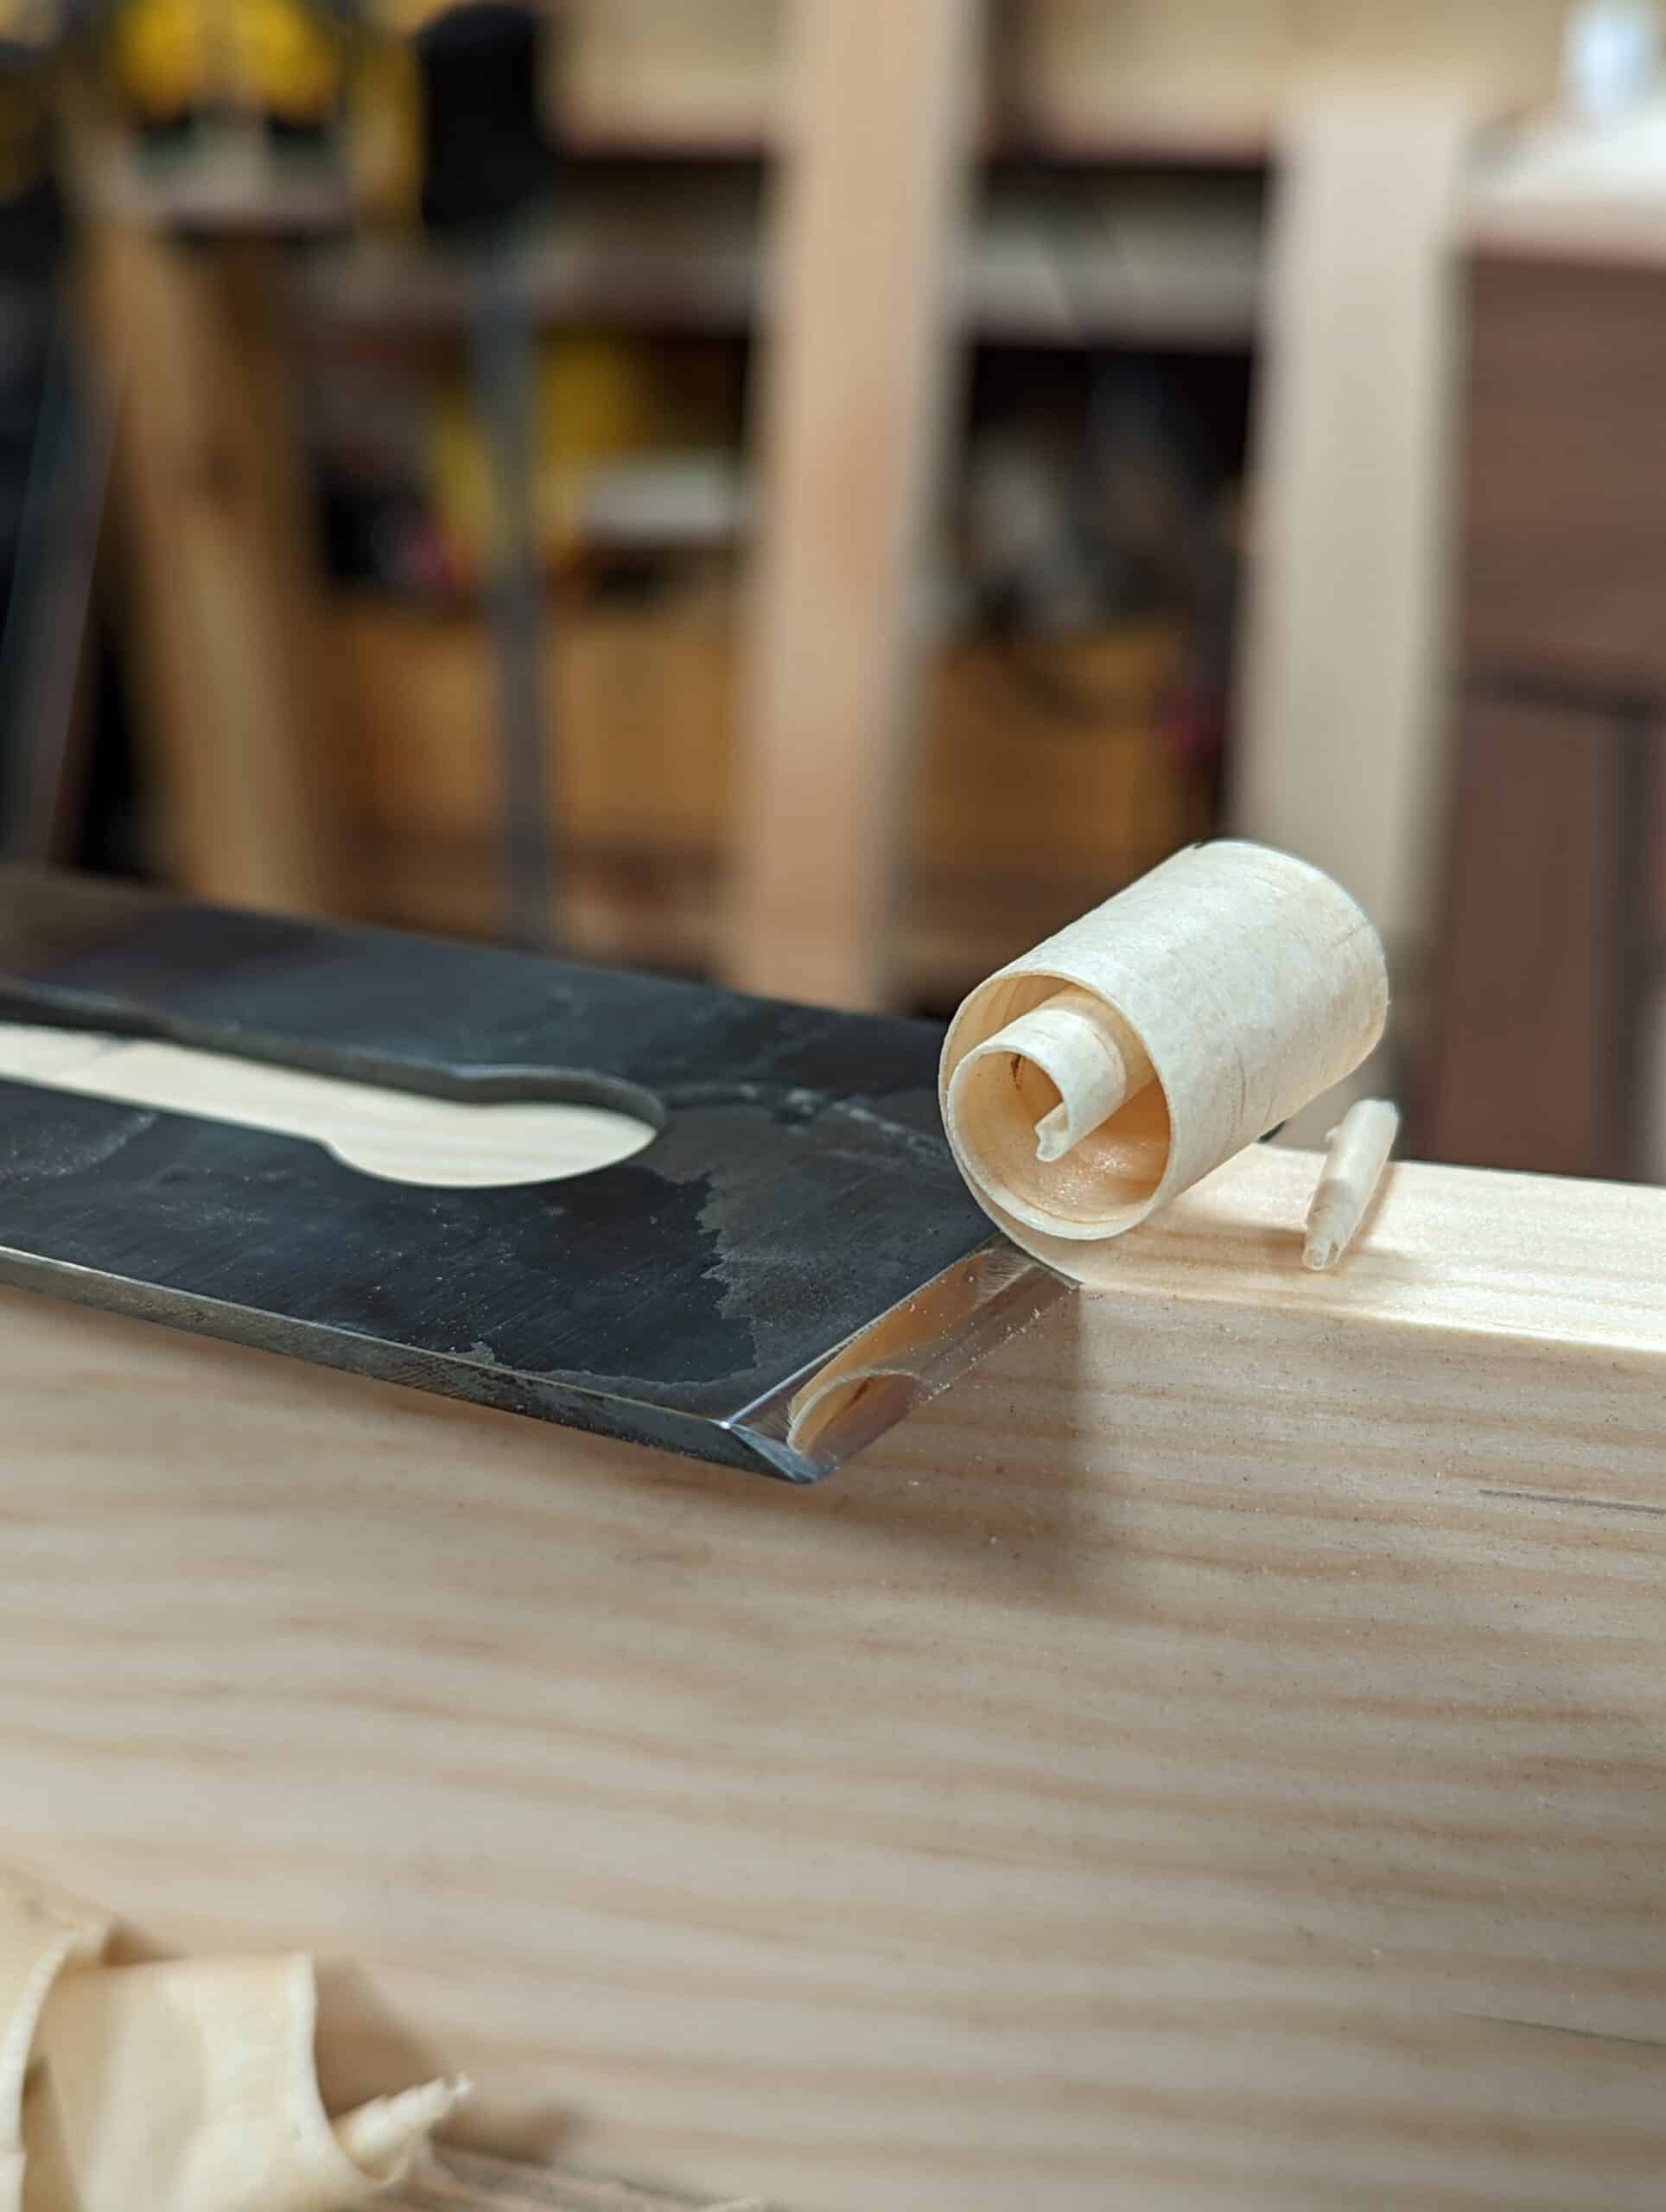
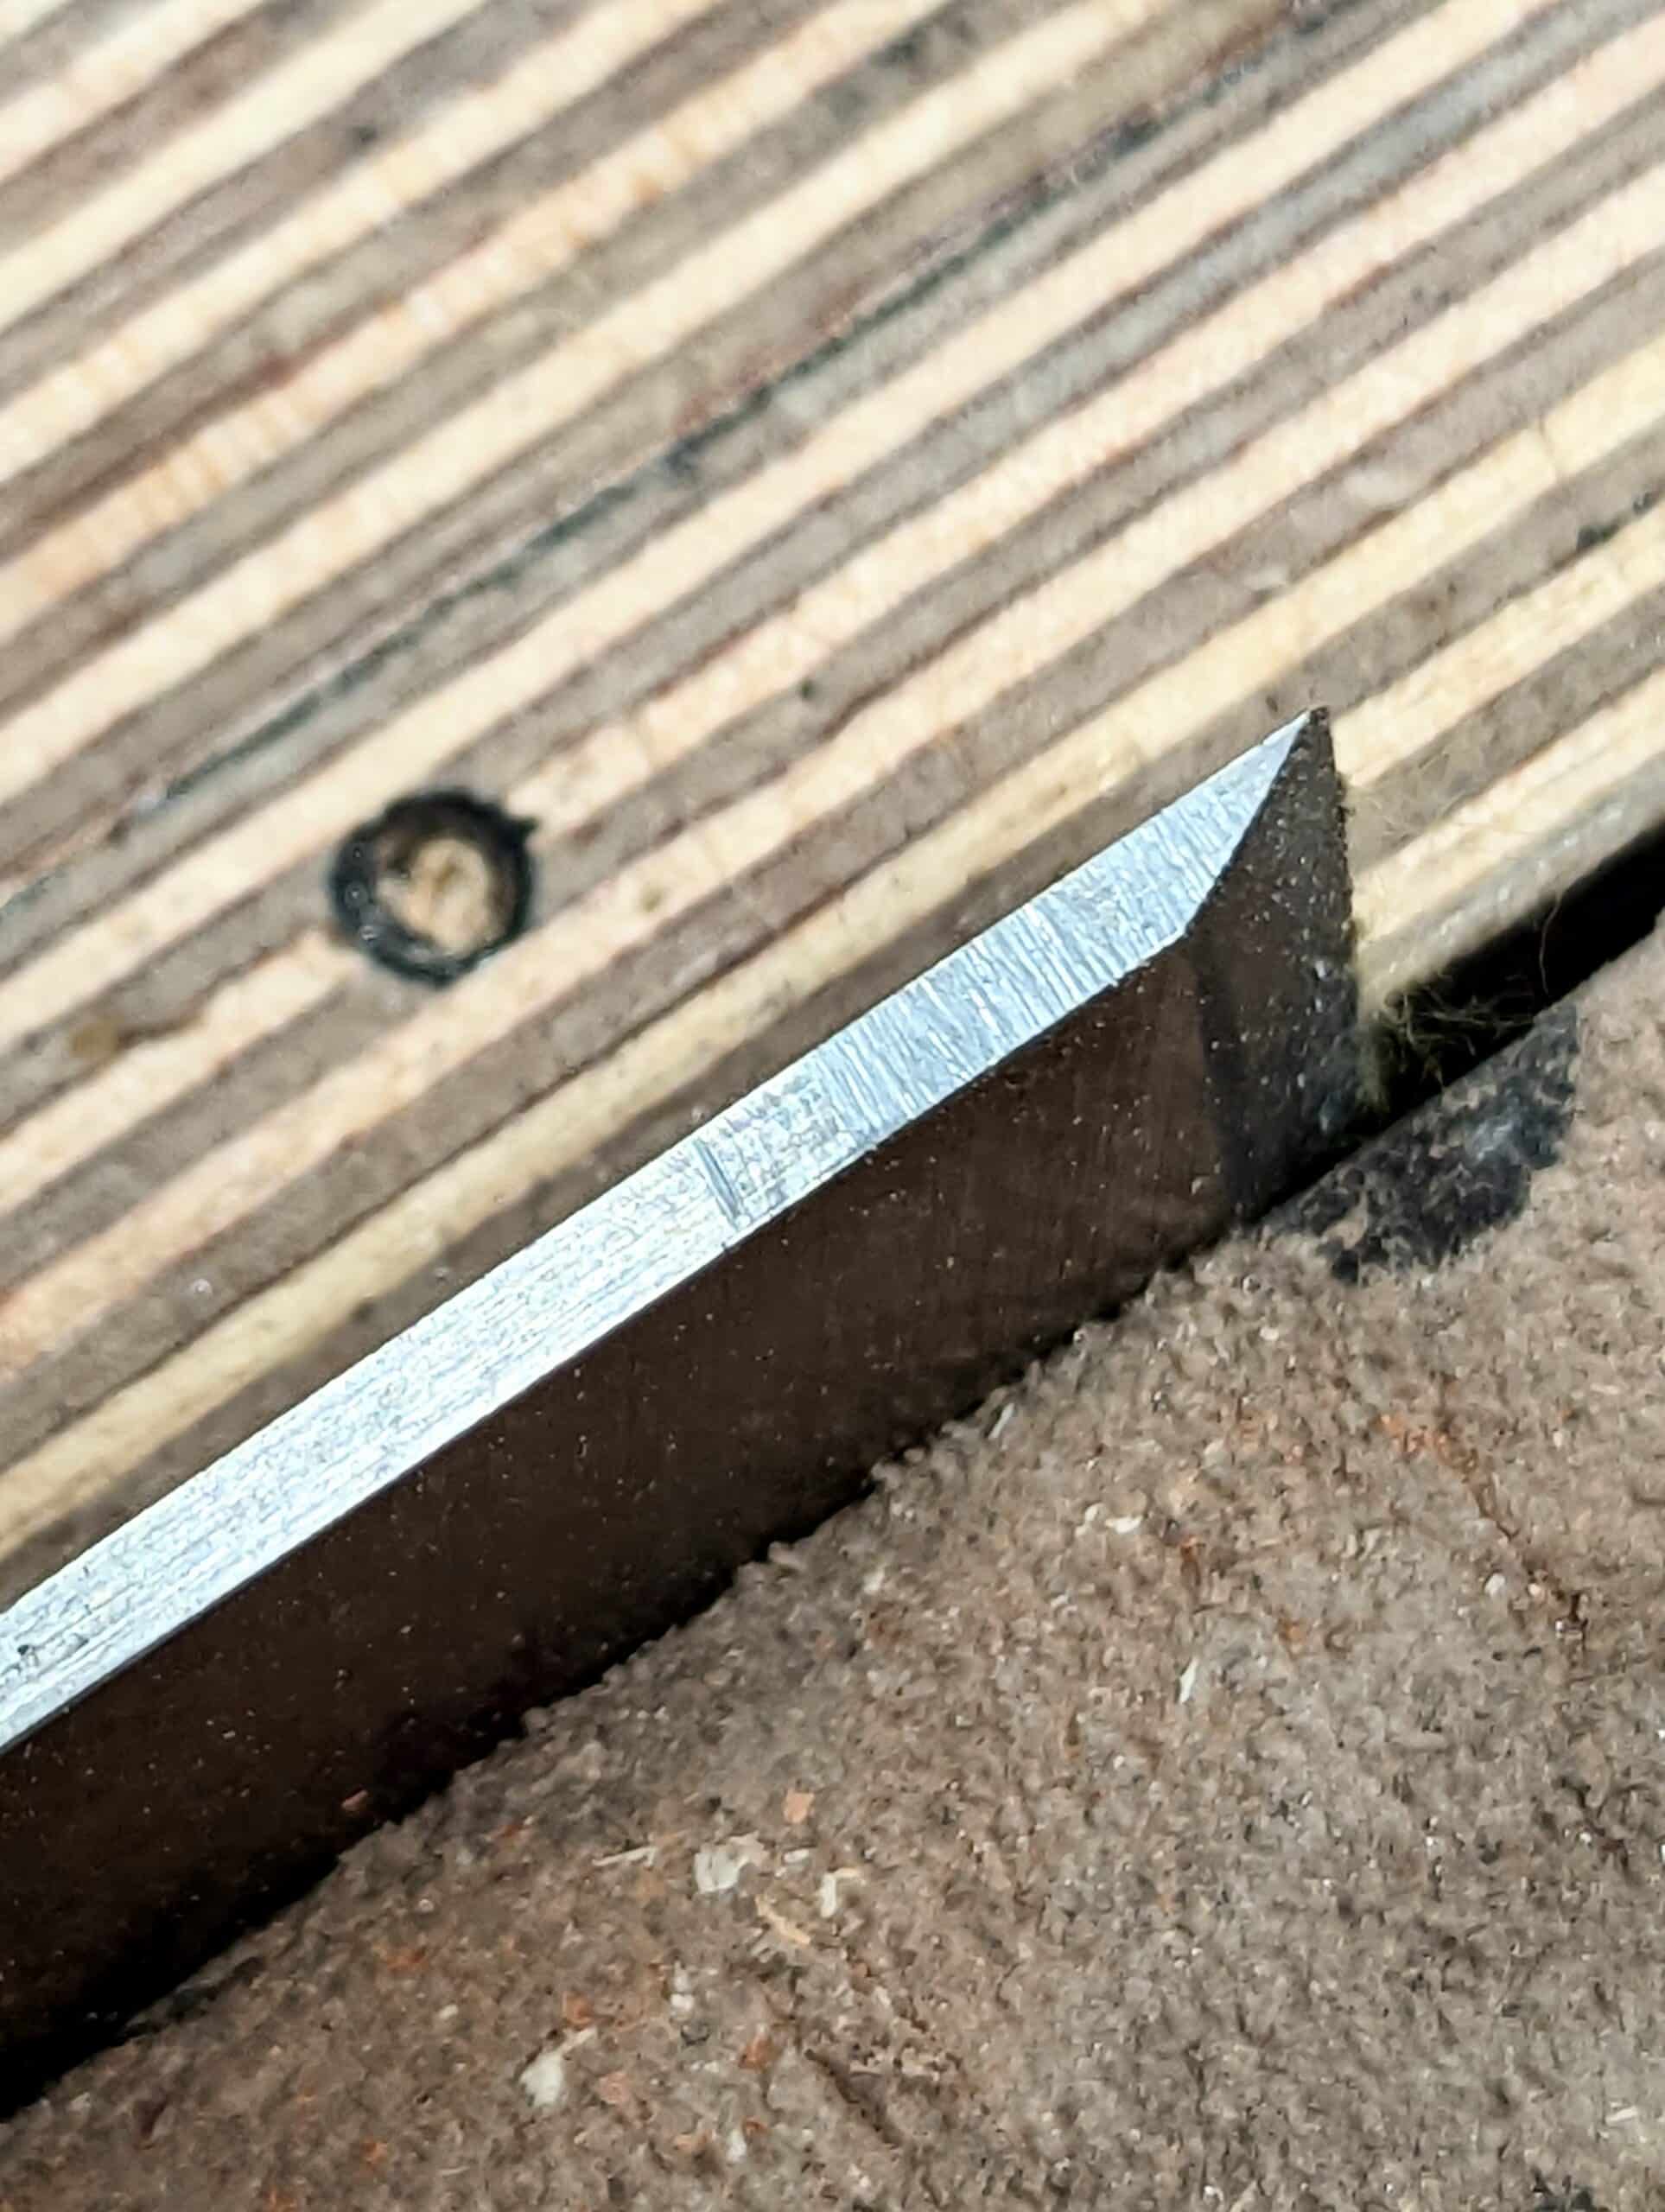
The file point on the side of the cutting iron shows the point where the blade changes from unhardened steel to hardened. The file just glances off without cutting anything more than the blacker oxidation on the last 3/4″. Just what we want.
The slight distortion into a minuscule hollow is not worth removing because it will disappear with subsequent sharpenings and you can see that the polished face does reach the cutting edge.
The next step is to temper the steel in the oven for 90 minutes. A domestic oven works perfectly well for this with a temperature of around 200-205C (400F for USA)
Repeat when the first heating has dissipated to room temperature, so two sessions in the oven. . .

. . . and don’t forget to capitalise on the heat by cooking a nut roast or similar.
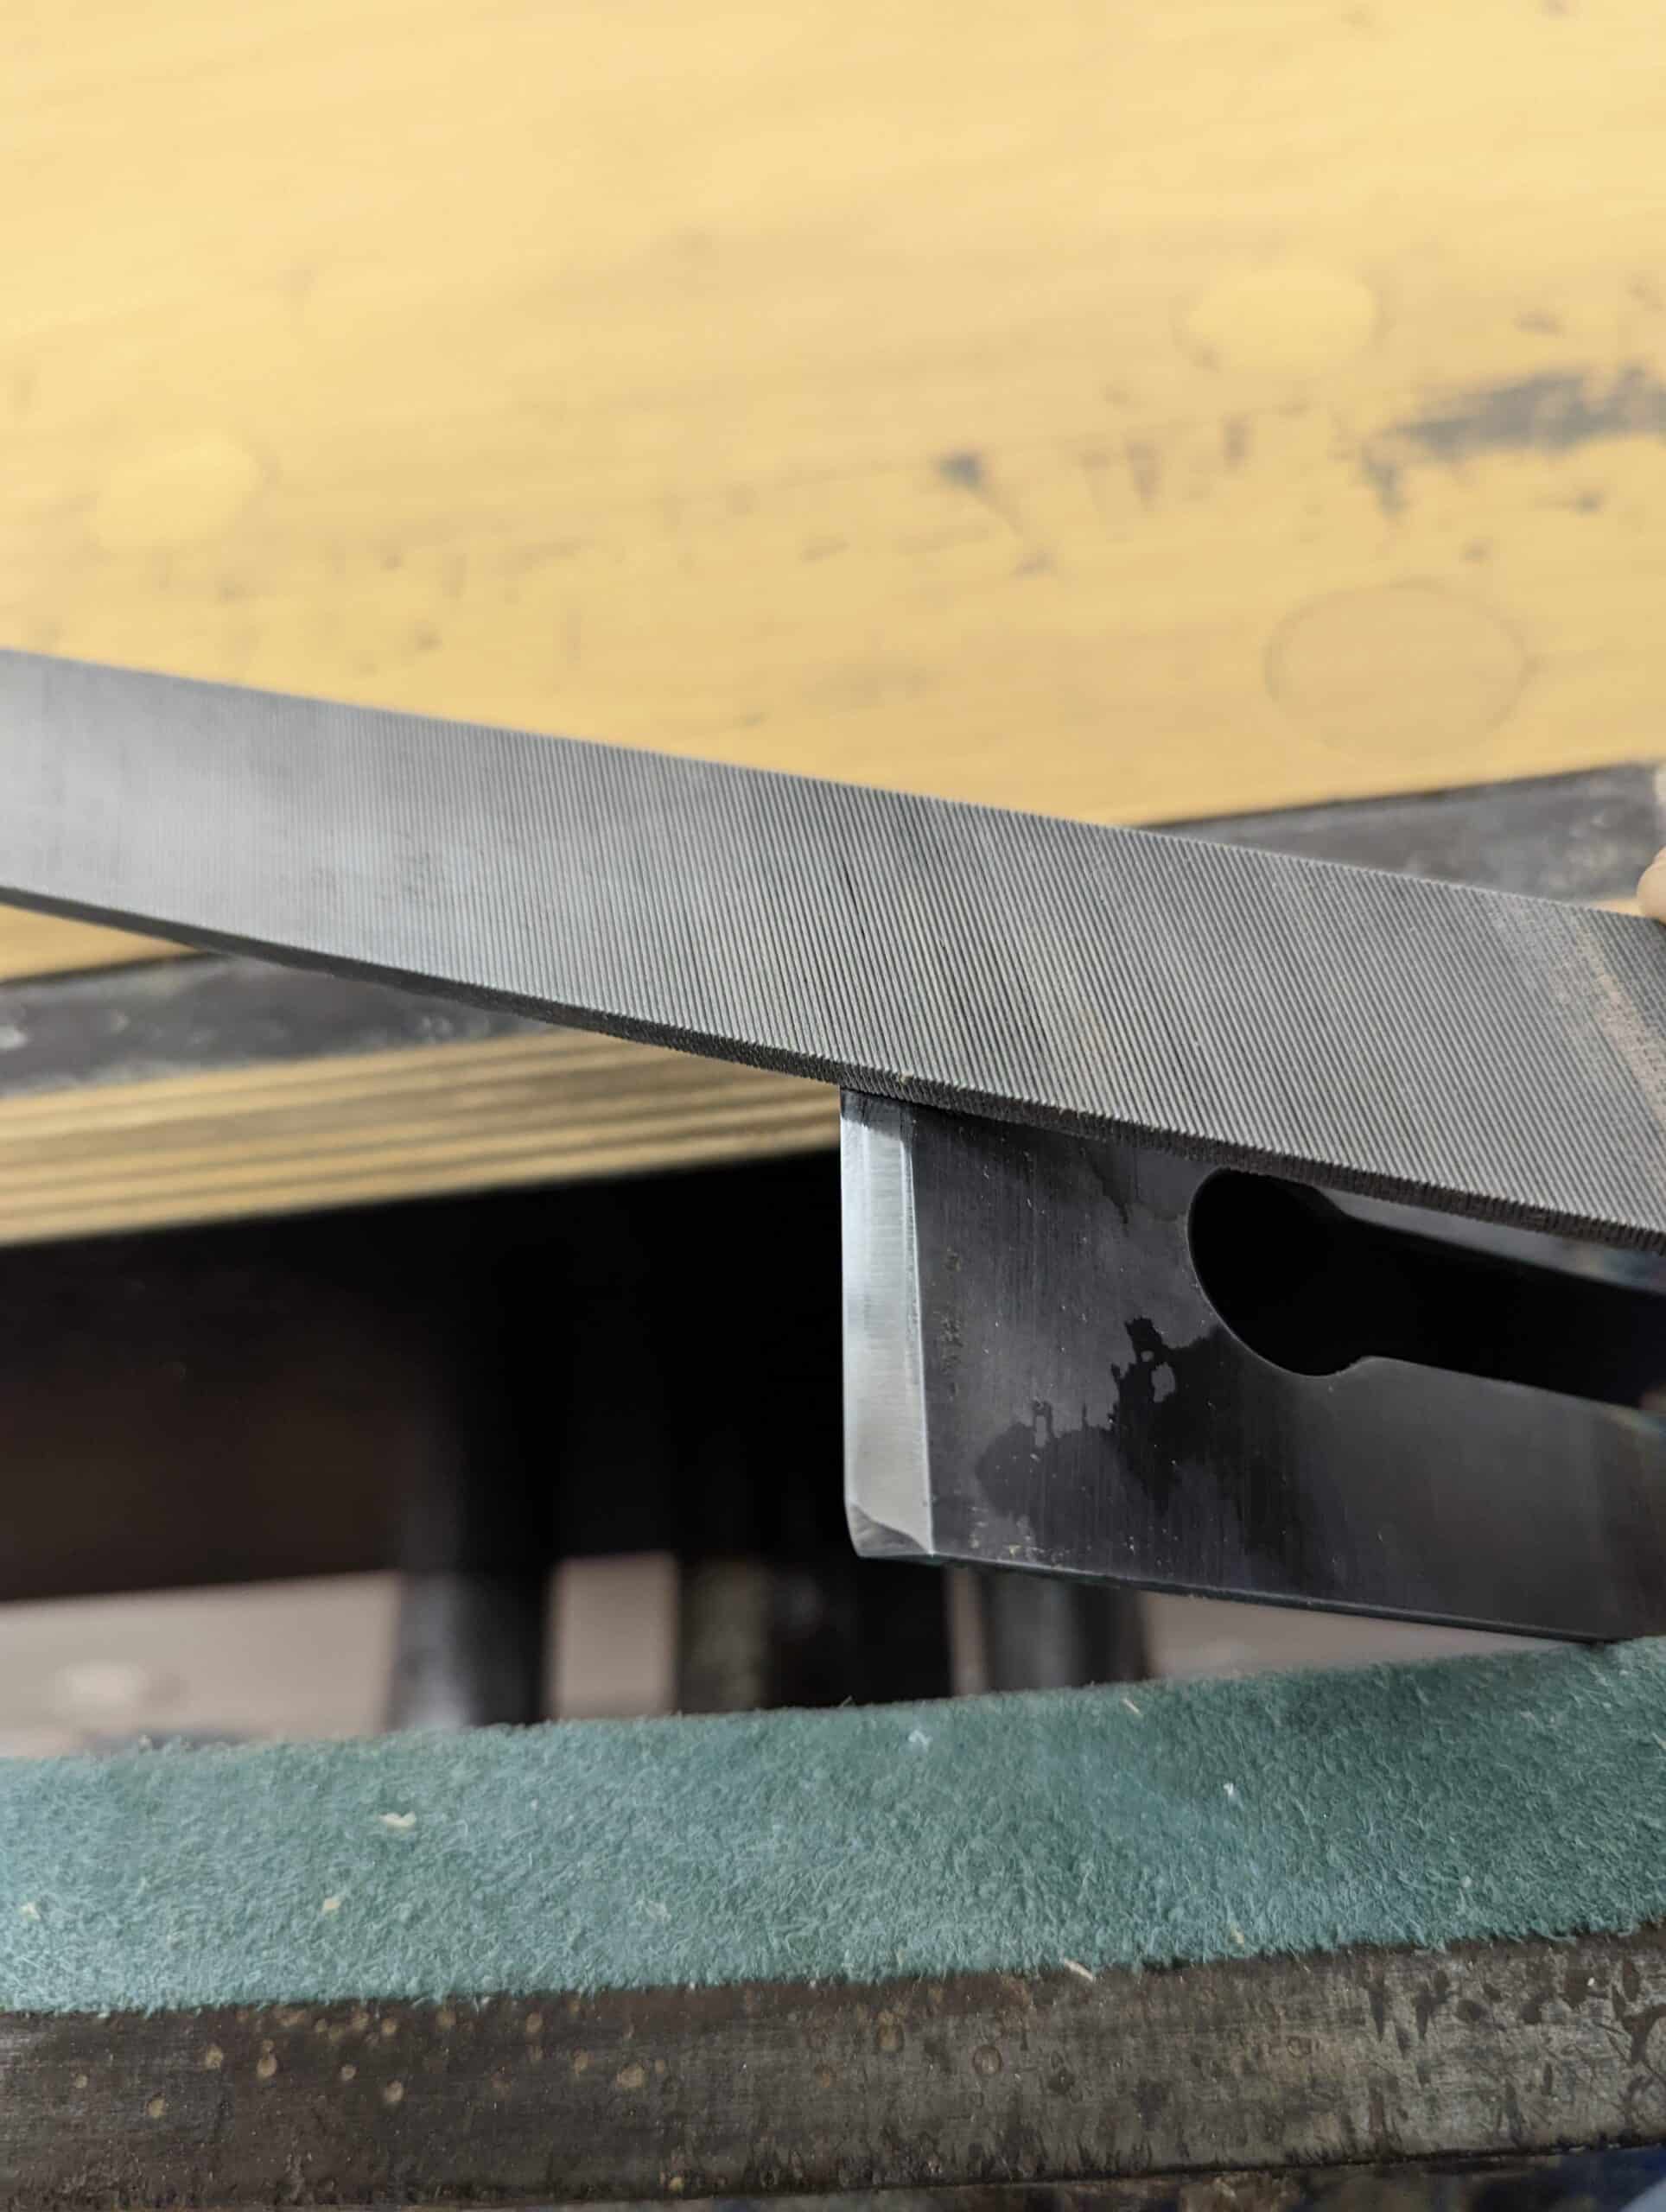
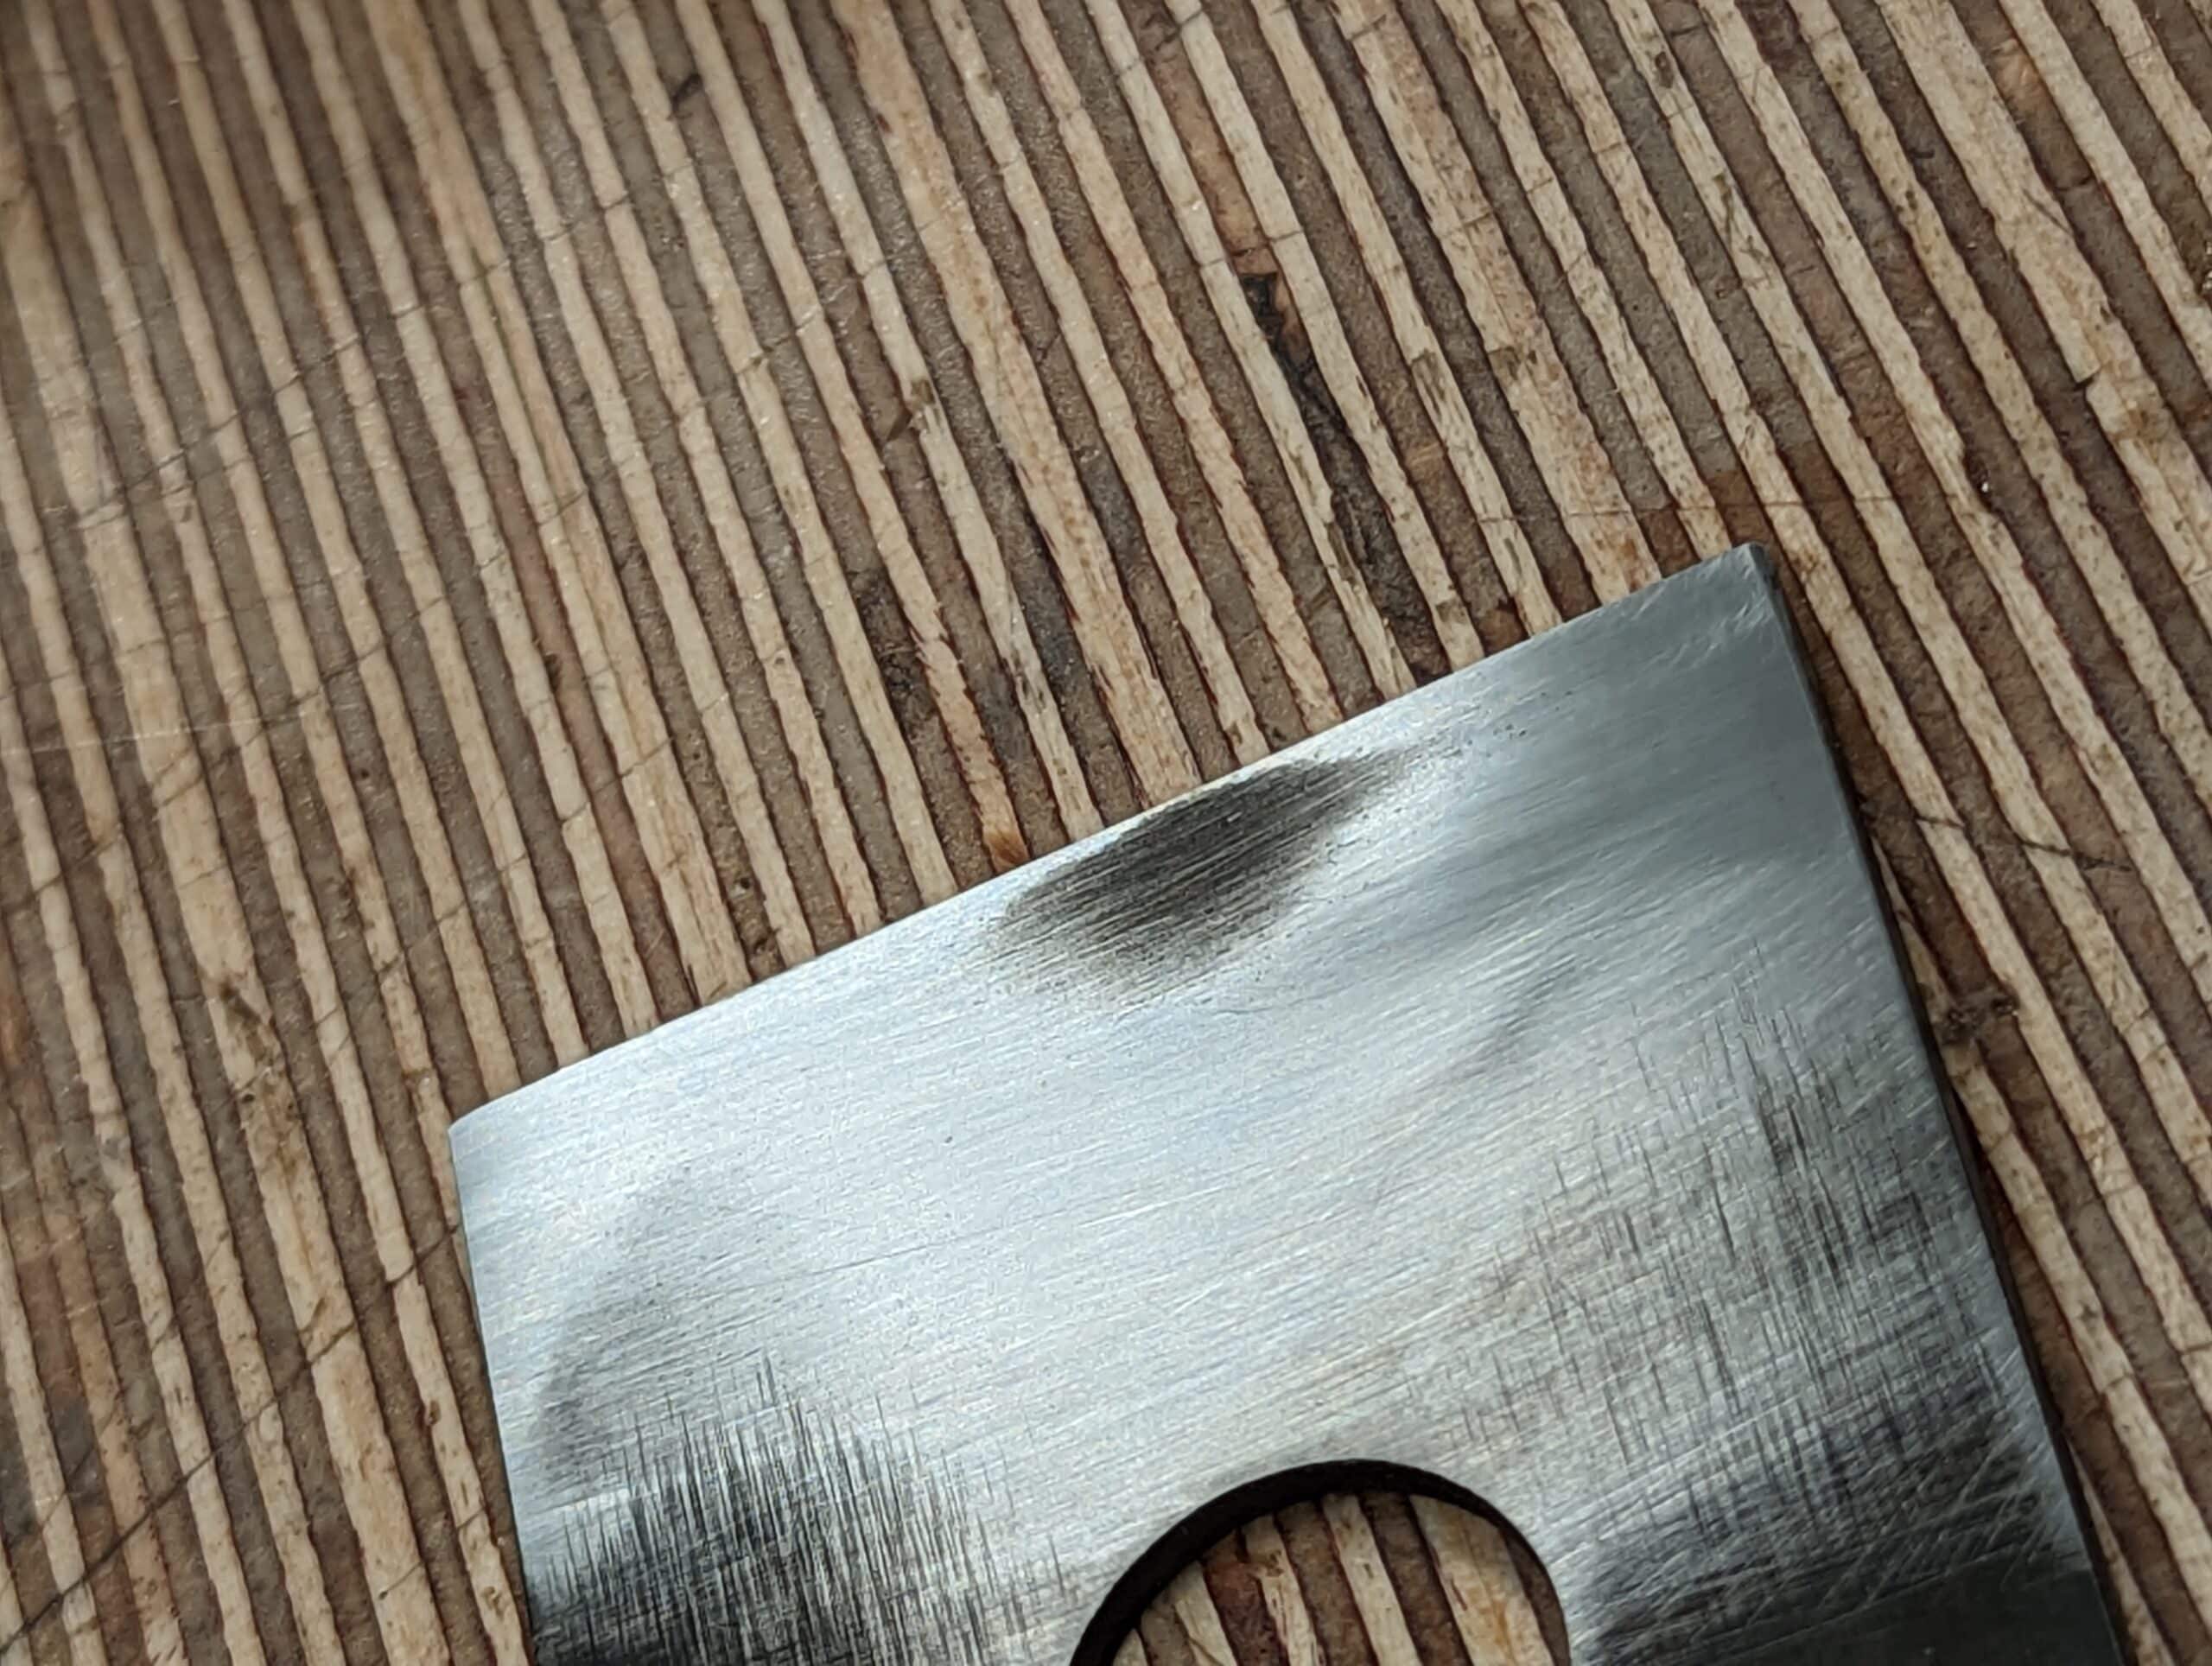
The file passes over the surface of the bevel without scoring it at all.
Hi Paul,
Will you tell us more about your nut roast? Maybe a recipe?
Thanks,
-Bill
Ha ha, that’s what I came here to ask too! In fact, I’m probably going to have to read the article again, as I’ve forgotten everything but the nut roast. We do think with our stomachs it seems.
Thanks Paul. I had bought some 1/16″ thick 01 steel to make a chisel. I don’t really need a 1/16″ width chisel but I wanted one and decided to make it. The hardening process you shared here was helpful. It’s straightforward and simple. I did buy the torch you mentioned. Likely will cook brownies for my daughter.
Does it matter how long after heating/quenching the tempering is done?
I’m thinking that it might be a matter of days, so as to make efficient use of the oven and do it when the oven is in use for something else.
And a second tempering might be a couple of days after the first.
Are these “delays” an issue?
Should sharpening be delayed until after the tempering?
Thanks in advance,
Matt
No, Matt. Whenever. Just don’t drop it on concrete. It can shatter like glass sometimes. And it doesn’t matter when you sharpen.
Thanks Paul!
Regards,
Matt
A rare instance when I disagree with Paul. It is widely accepted among metallurgists that tempering should be done as soon as possible after heat treating for the best results. This has been exhaustively researched in the industry. Having said that, will you be able to tell the difference at home with any test available to you, like the file test? Likely not. Maybe, maybe you would be able to tell if you do many test blades and use them enough to gauge how often sharpening is needed. Still, best practice would be to temper your blade as soon after heat treating as you can.
Thanks, Chad. I actually did and do mine asap but not because I knew of the difference.
I don’t think many people are going to have more than play luck with the process here, but it’s not uncommon to defer on tempering. Tempering quickly is more about reducing warp than it is chasing hardness. Cryo treated irons get their dip before tempering, and if you’re chasing hardness at home and get a good strong quench without significant warp, you can finish in ice water or toss whatever you quenched in the freezer.
I have lab results for O1 and 26c3, both done with this to chase hardness. O1 is on book results despite being done in a forge, and 26c3 is better than the commercial schedule. I’ve never gauged the warping difference because an extra point of hardness is more important to me.
https://i.imgur.com/xOz20Si.jpg
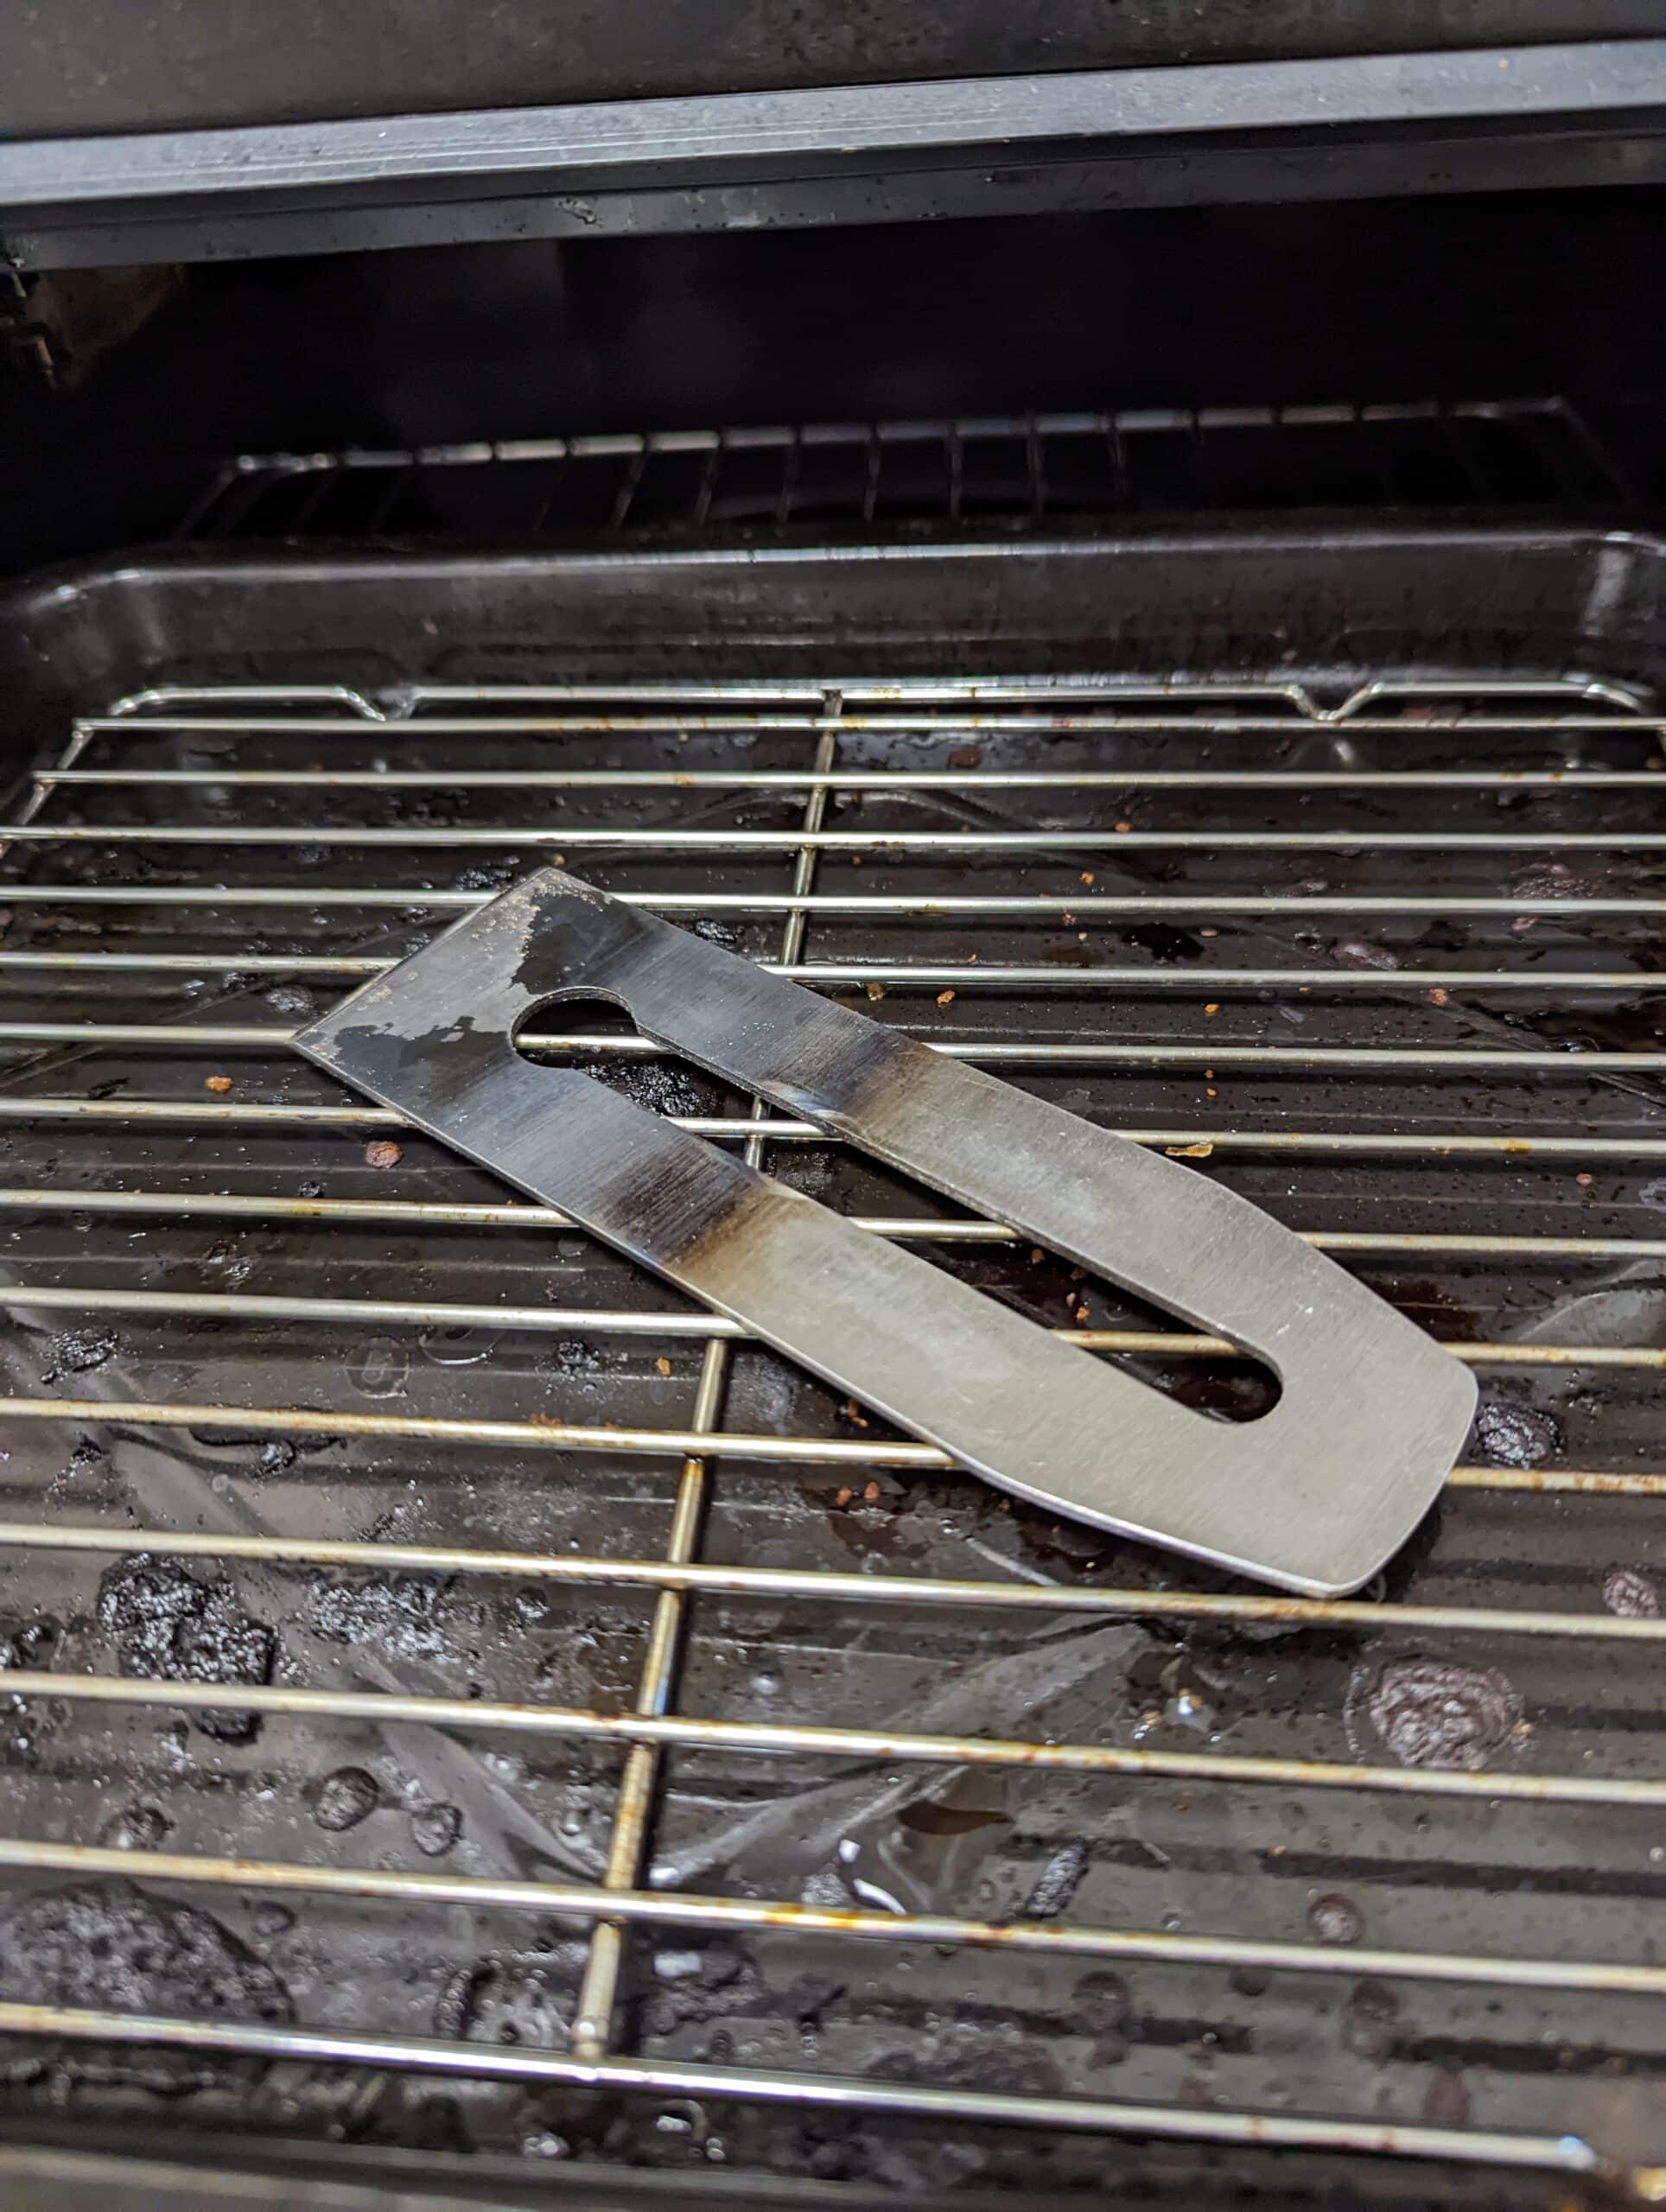
You can compare those results to larrin thomas’s page – I use only a propane forge and trained eye. Larrin did the testing. I scribbled in a bad 1095 result that I later had to fix by snapping samples and addressing minor grain growth (wasn’t hard). these samples are double tempered at 390F in a *stable* setup in a toaster oven (not just thrown on a rack as shown here – overtempering is almost guaranteed without shielding), but spent a couple of hours or overnight in the freezer before tempering.
I think basic toolmaking is going to be the kit of any serious hand tool woodworker, but it’s worth going a step further in some refinements than this article.
Would your recommend a saw file for a dovetail saw. I remember a brand you mentioned once but I have been unable to find where you mentioned this.
In searching for files, I found many different tpi for the files. Also I found many differences like slim taper, double slim taper, extra double slim taper, etc.
Thanks,
Bill
A 4″ extra, extra slim taper works well. Bahco is a good make.
I already had an old blowtorch but found the butane/Propane mix of the gas canister it used couldn’t get the metal hot enough. I replaced the torch with one similar to yours Paul that could use MAPP gas, which burns much hotter. What a difference – up to temperature on no time. Well worth thinking of if you’re going to be making or hardening blades.
Hi Paul, another great article, as an engineer with sixty years experience a little tip to stop the oxidation of the blade is to use some borax. When you start to heat the blade before the colours run dip it in some borax and then carry on heating up to temperature, the borax will melt and form a jell around the blade and as you get up to temperature will glow when you are at full red. when you then quence in water or oil the borax will come off leaving the steel blade shiny, like it was before you started. you can also temper by watching the colours run , a light straw to blue is about right again quenching.
Borax can still be found at garden centres and hardware stores.
I get borax at the grocery store. They just don’t sell it with soap because they don’t want people thinking it is soap. 20 Mule Power!
Hello Paul
I read your article with a lot of interest.
I ask myself whether your method is also applied for old chisels that I have recovered from my grandfather (who must be 100 years old or more). I find that they lack cutting edge despite a regular passage on the stone.
PS: Sorry for my poor English
You have nothing to lose and of course, you can localise your hardening by heating the first half of the chisel but then focussing the first 1/2″ to cherry red and dipping in the oil. It’s worth trying and there is little or no cost to it.
I have some very ild plane blades that I cleaned the rust off using vinegar and a lot of elbow grease. After some cleaning that discoloration is visible on them, i can see the “blue” part of the blade and to where it was hardened, fascinating! They were well hardened though all the way up the blade til the max chipbreaker reach is reached. They are old Peugeot blades and Swedish blades. I’ll try to upload a picture later. Its that small part of the cutting edge only, not the entire thickness that is hardenen, but all the way up til the void in the plane iron.
Thanks for passing on all your useful knowledge Paul. I appreciate it, as i’m sure many others do. Every week I find something new to learn.
This seems like a much easier and reliable method of tempering (for amateurs like me, at least) than looking for the blade to exhibit a straw color before requenching. Maybe now I can get some actual hardness into the NOS Record 073 I picked up recently that has an iron the deforms cutting pine.
Thanks for the article. You use the process that I have used except that I have never done the second tempering. Why is this necessary?
I have that same torch. Bought it to silver solder as it needs a higher temp and to replace the hated flint I’ve used all of my life (76′) doing things like sweating copper pipe under my house et al with that clumsy standard and after most of my life broke down and bought it for need and I’m happy I did. Really love the simplicity of your technique that I could have used as a boy making my own knives and using a barbecue. I had some the knowledge from reading encyclopedias about ancient weapons making and practicing with them but not enough back then (56′ or so).
Thanks
Dear Paul, thanks for a nother important lesson!!! a good teacher is a teacher for life! thanks for teaching me a new technique for making my self deepened in the woodworking world!!
For more information about how hardening and tempering changes steel, look up the Engineering Craft Studies videos online. Episodes 3 to 5, I think. Made by the BBC in the early ’70s, I don’t think they have been surpassed in making this complex topic understandable (although the haricuts can be a bit dodgy at times!).
I always did temper straight after hardening because it was convenient to do both processes one after the other – plus I was demonstrating Hardening and Tempering in one lesson. The only pause was to clean up the surface so we could see the temper colours form.
Looking into this I found that tempering ought to come immediately after hardening to reduce the possibility of stress-related problems (in the steel, not the person). Quenching cherry-hot steel puts the structure under a lot of stress and this can lead to cracking; quenching in oil rather than water is a “gentler” way of bringing down the temperature. Stresses are still present after cooling, and tempering helps to remove (or reduce) any that could cause the blade to crack.
We usually only tempered once, and quenched the steel rather than leave it to cool down slowly. The first tempering can cause undesirable changes to the structure of the steel which the second tempering removes, so for best results temper twice.
We had refractory bricks in a hearth to reflect the heat, which helped to raise the temperature more quickly. If you are struggling to get your steel to cherry red in the open, get a couple of heat proof refractory bricks. NB: HEAT PROOF!
Finally, H&S – If you use borax to prevent oxidistion, keep well away from the fumes.
Wait … so we’re not going to get the nut loaf recipe?