Rehardening My Plane Iron
Was it cost-effective to reharden the plane iron after its many years of service? Of course, it was! Of course, it wasn’t. What made it well worth it is nothing to do with a financial cost but something I see as an intrinsic yet immeasurable value: imprinting. I consider imprinting yourself into an object you have gained from for long-term benefit to be of significant importance to both you and others. Not all objects will have this. Others will be of highly significant happenings and still of great value and significant in your life but have not earned what a plane iron may have done by the use of it. As will others, I have objects and remnants of wood that I will keep and pass on when the time comes.
These hold valuable memories most might sweep away with the shavings, but they are deeper, much deeper than mere mementoes. The pine my hand made, round-both-ways plane developed specifically for shaping the inside hollows of Joseph’s cello front and backs is still in use but my main reason for enjoying it is thinking back to when we both made his cello., Another is the end of the turned column from one of the White House pieces and the extra ebony doorknob inlaid with a tiny remnant of President Harrison’s oak tree he planted back in 1889. I think I must own a thousand such things, along with tools I have pensioned off and to be used on special family pieces.
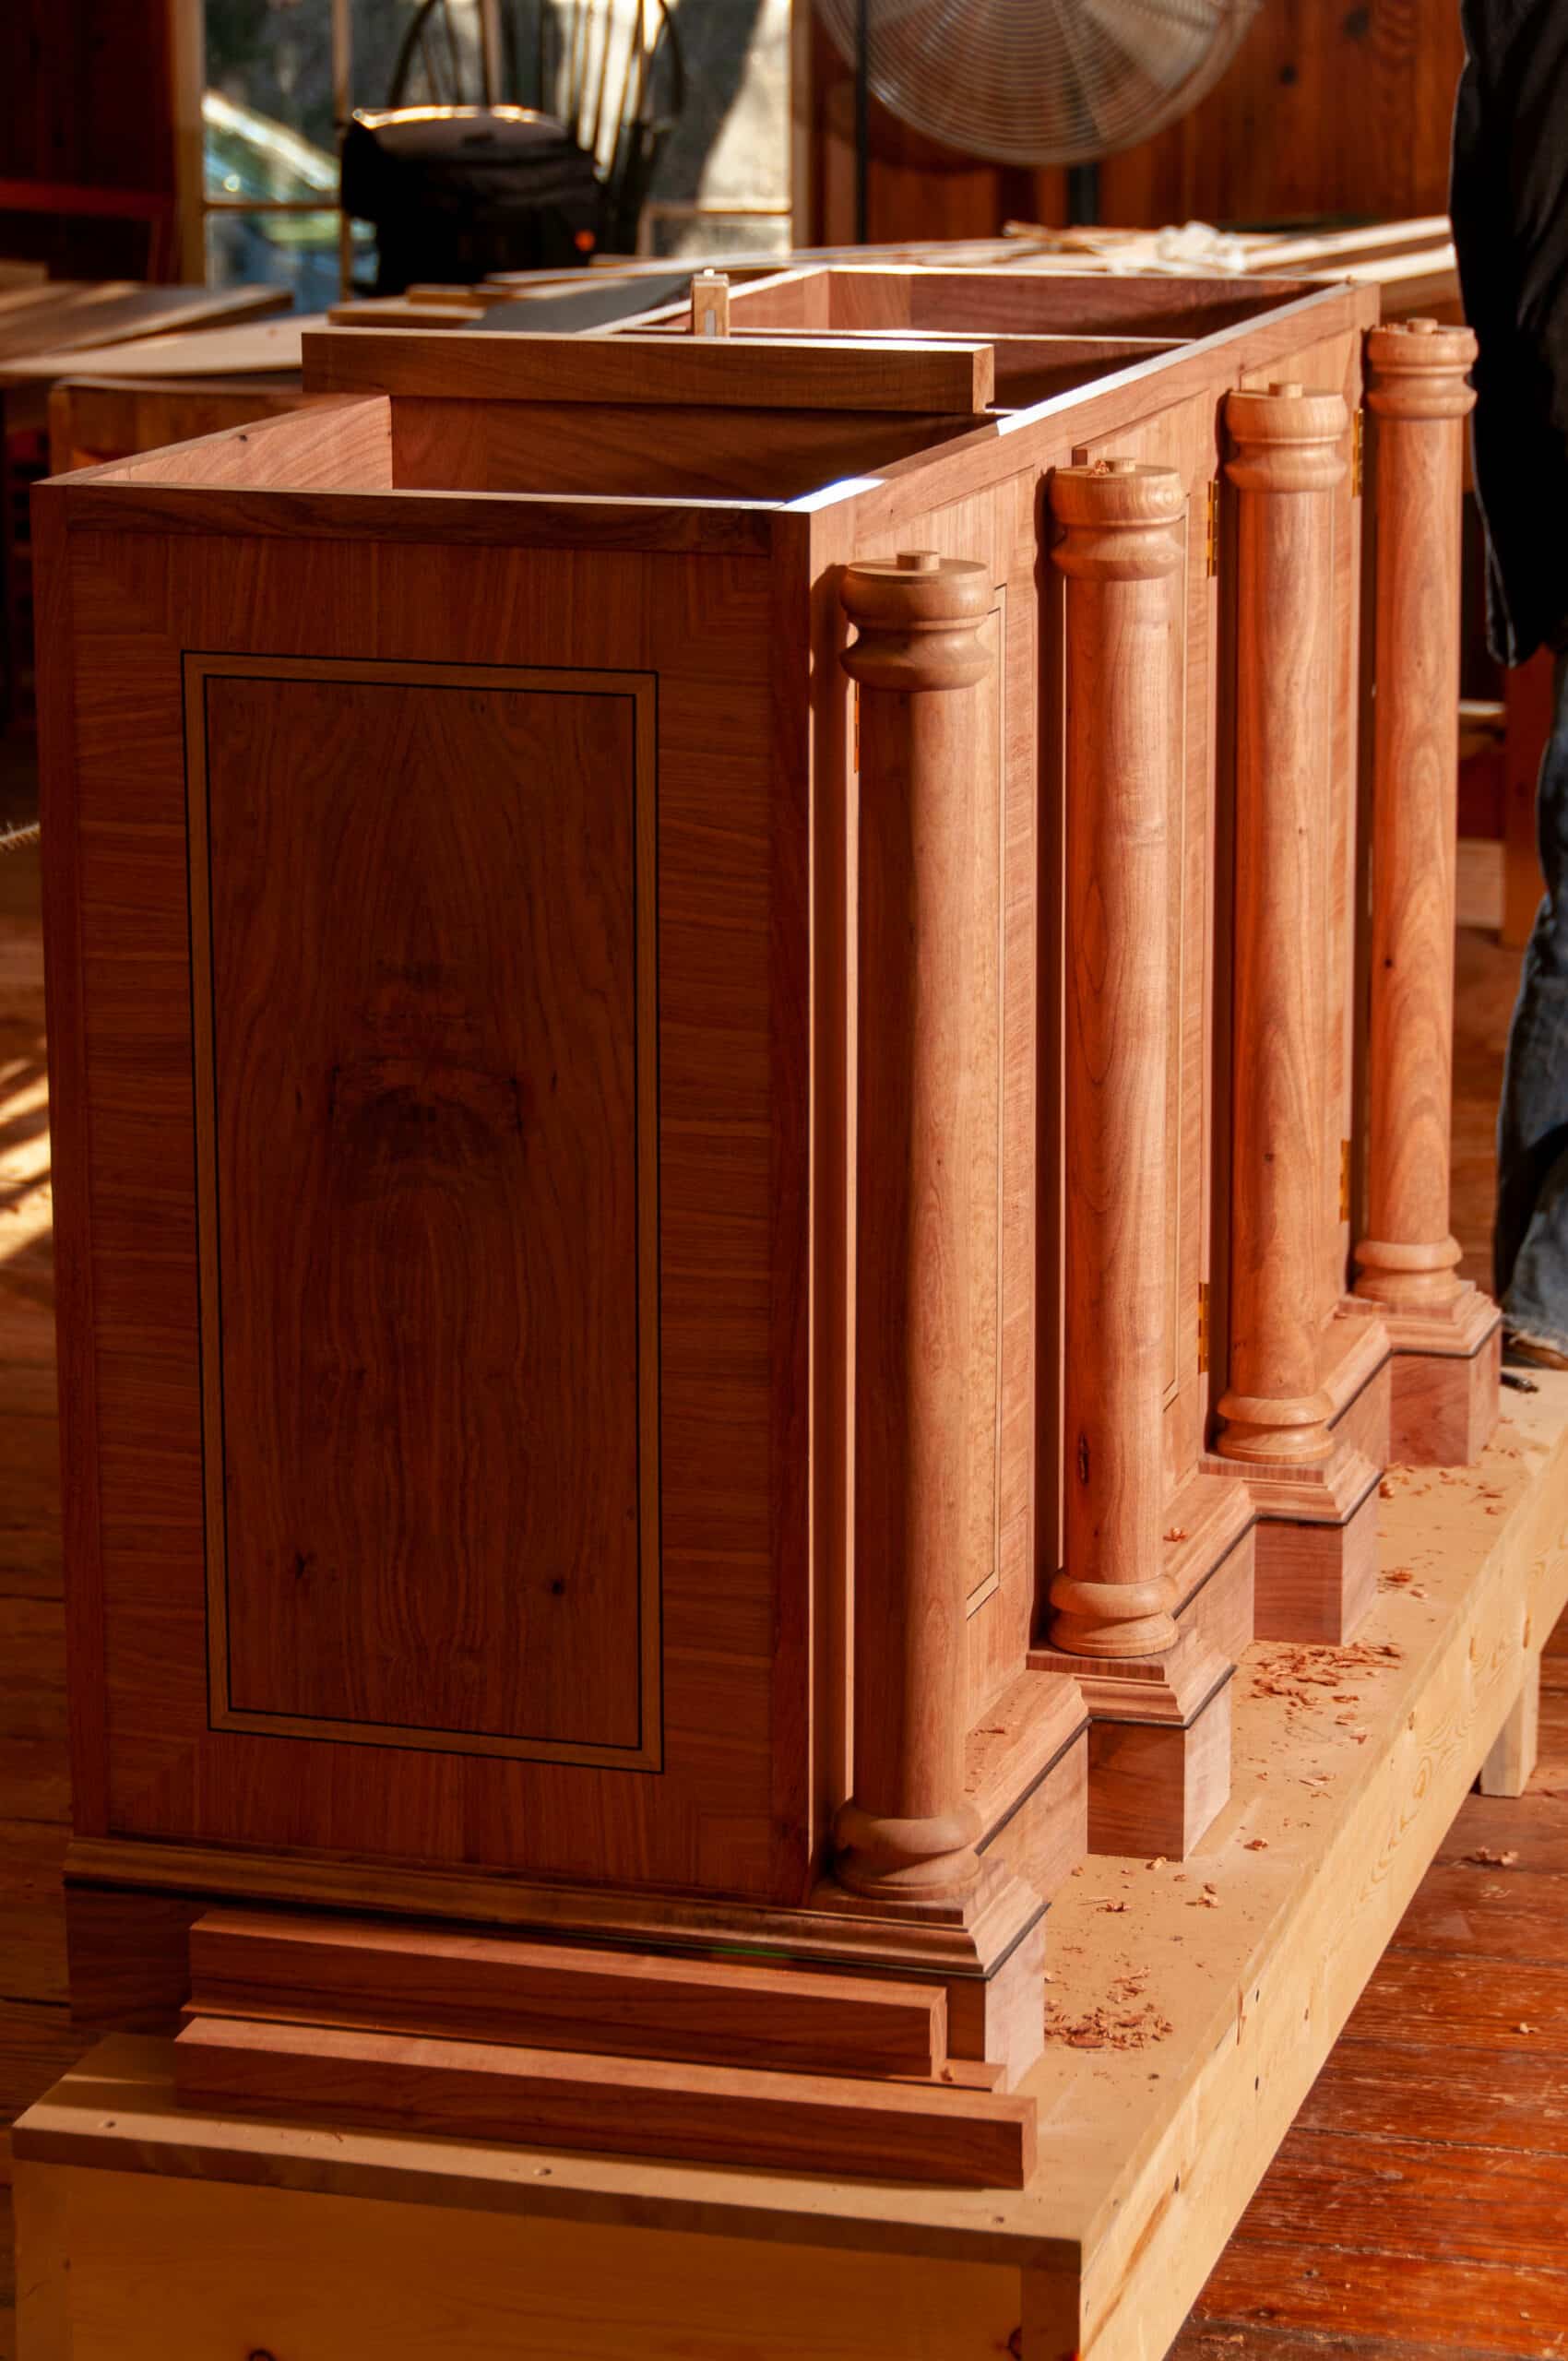
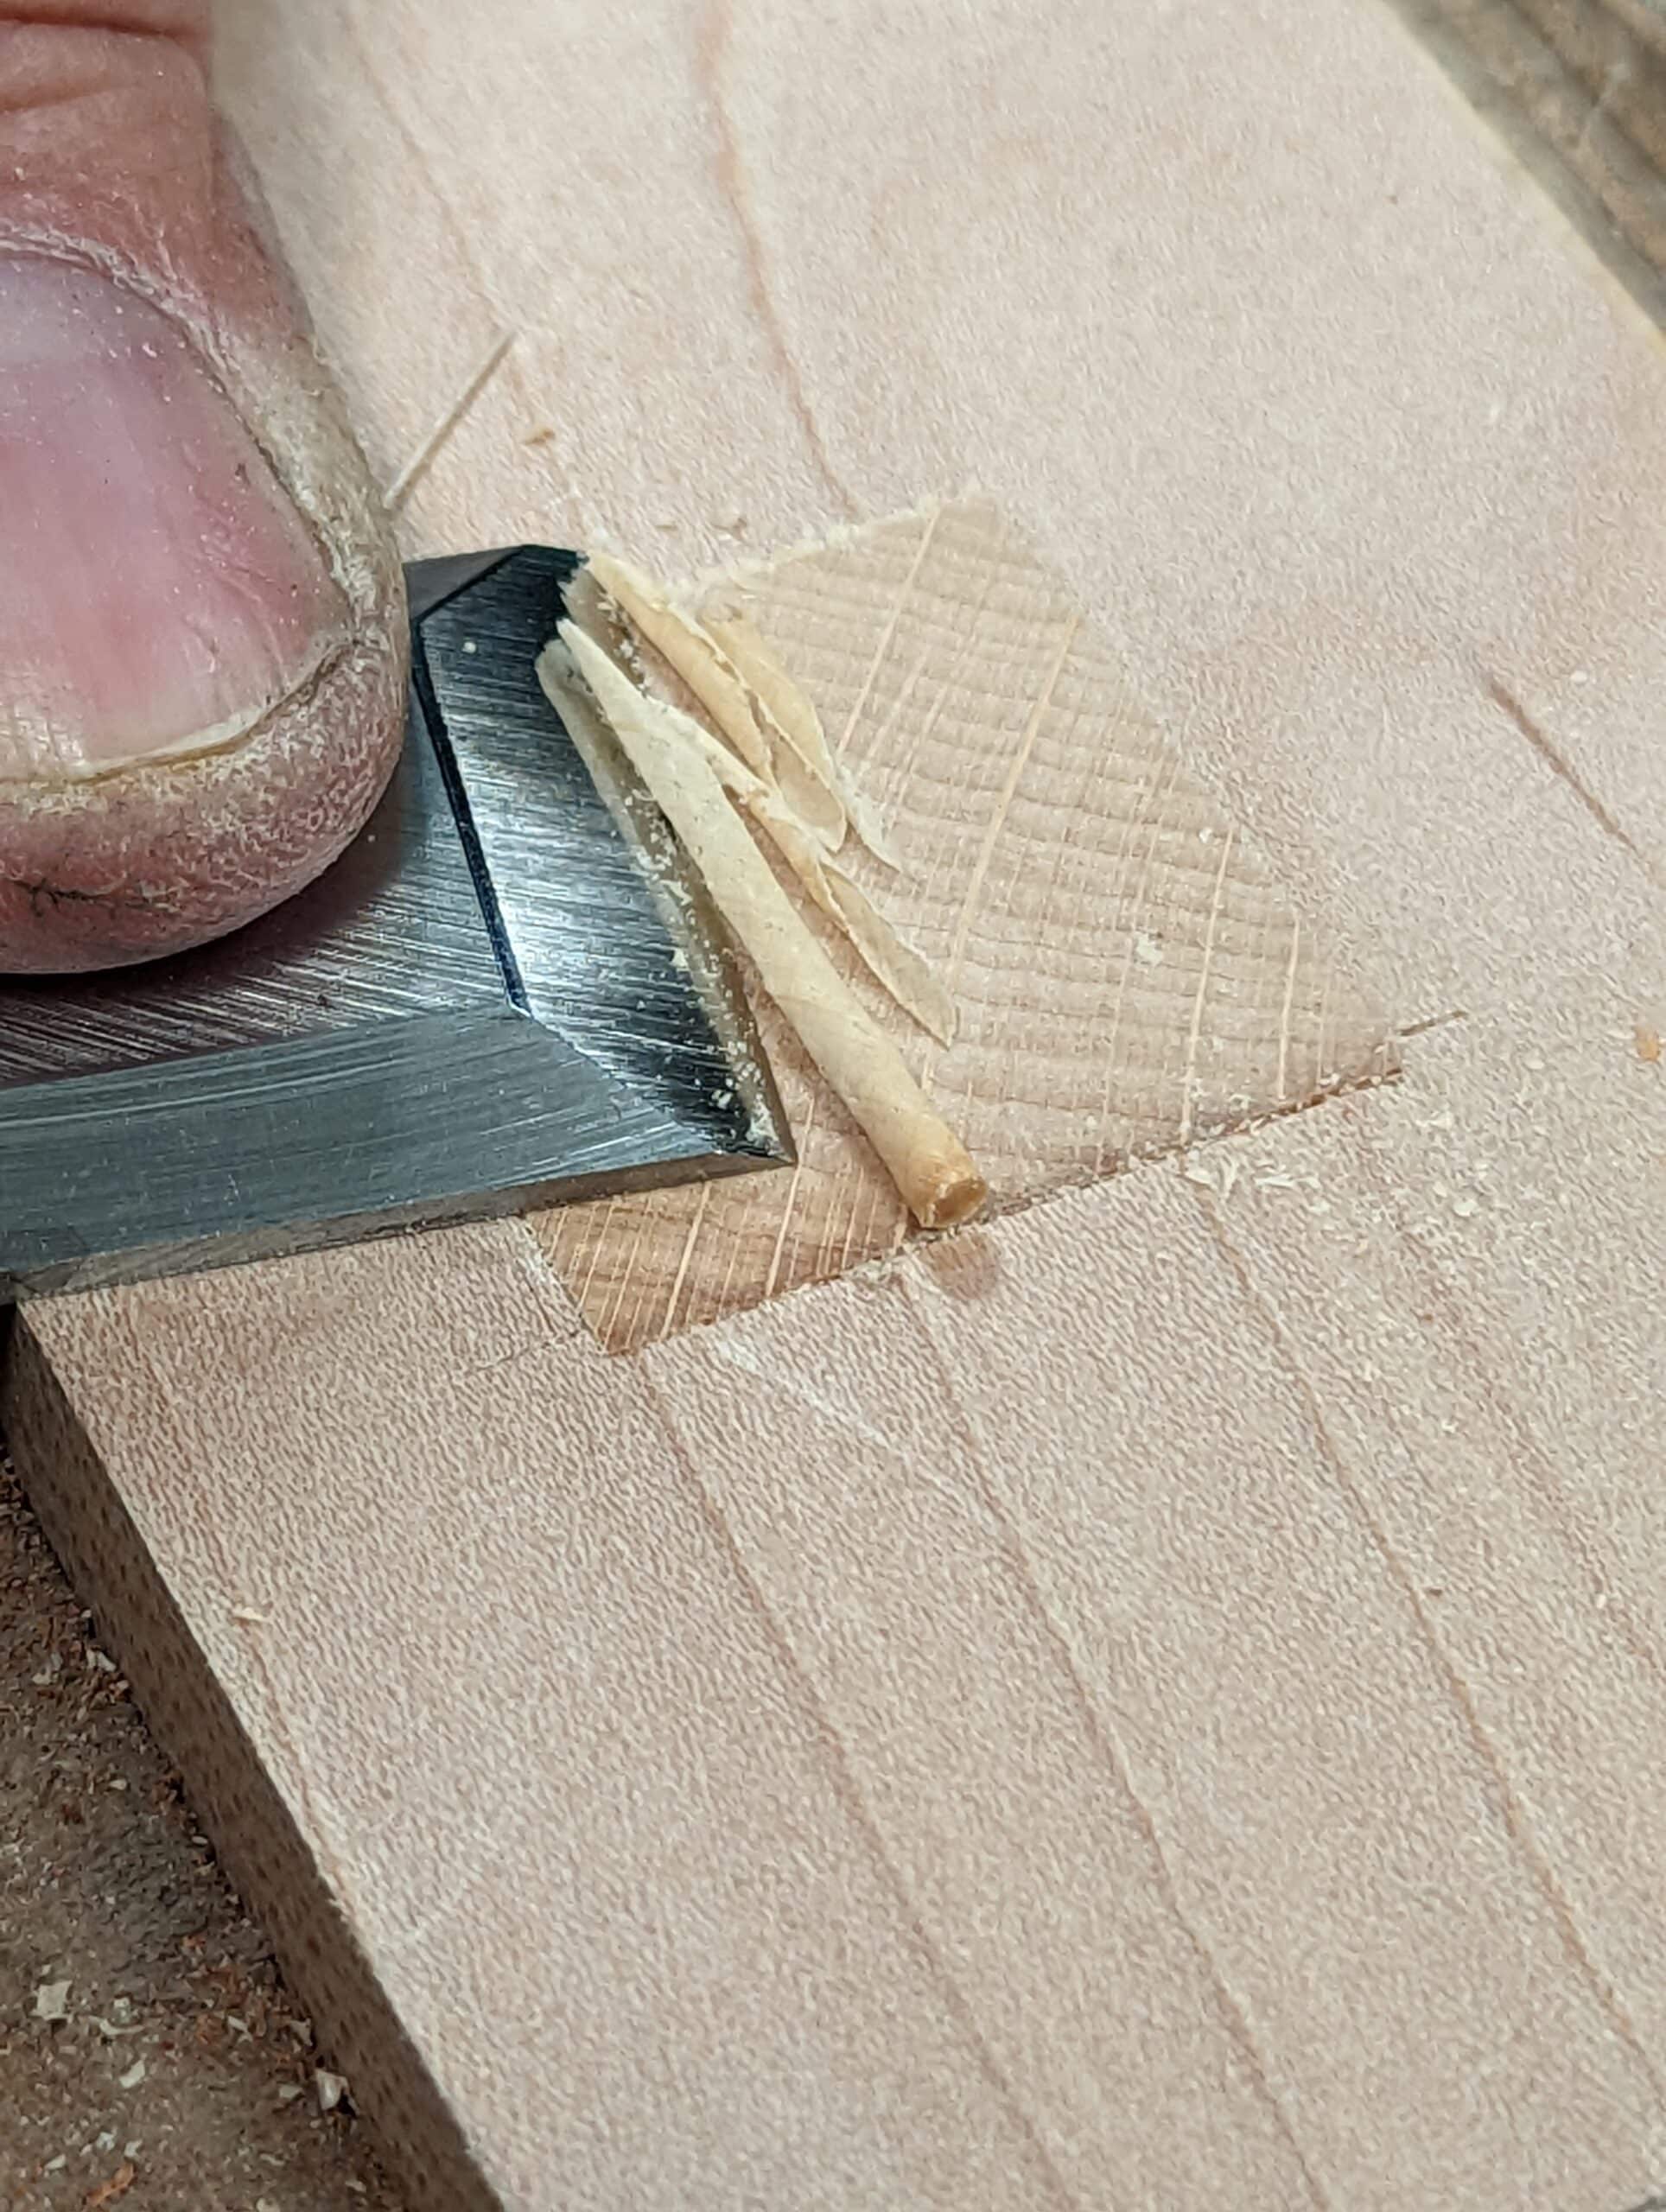
Since rehardening my plane iron I have returned it first to planing the mesquite on my cabinets and what a difference it made. None of the five planes I used held up particularly well and I include two North American premium plane makers in this too. Mesquite affects the cutting edges far worse than any wood I’ve ever used and know by many many times. The edges just give up, crumpling into a corrugated fracture as silica in the grain crunches the edges. I would say that it is an almost unique phenomenon to planing and chiselling mesquite but I know other less common and less used woods will be around in less temperate climates. After rehardening my now one-inch shorter plane iron the plane gave me the better service I’d hoped for with cleaner end grain surfaces many times over so for five minutes work it was more than worth the effort. After planing the end grain of mesquite many times along the tops of my doors, planing off an eighth of an inch of wood on one of the doors, I went on to plane knotted areas of sycamore with a glass-smooth success.
Of course, my objective is different than most. It’s what makes a difference to my world. One of my daughters-in-law made a comment a few years ago when she said what she admired about her husband was that when there was a need, he automatically thought make, repair not replace or buy first. Last week I needed something that would scrape the hollow inside of a shallow bowl shape half an inch wide and an inch and a half long. I grabbed a 3/4″ washer, filed a bevel around the edge and scraped the hollow smooth. If I did such a thing regularly then, yes, I would just file a permanent quadrant on the corner of a scraper.
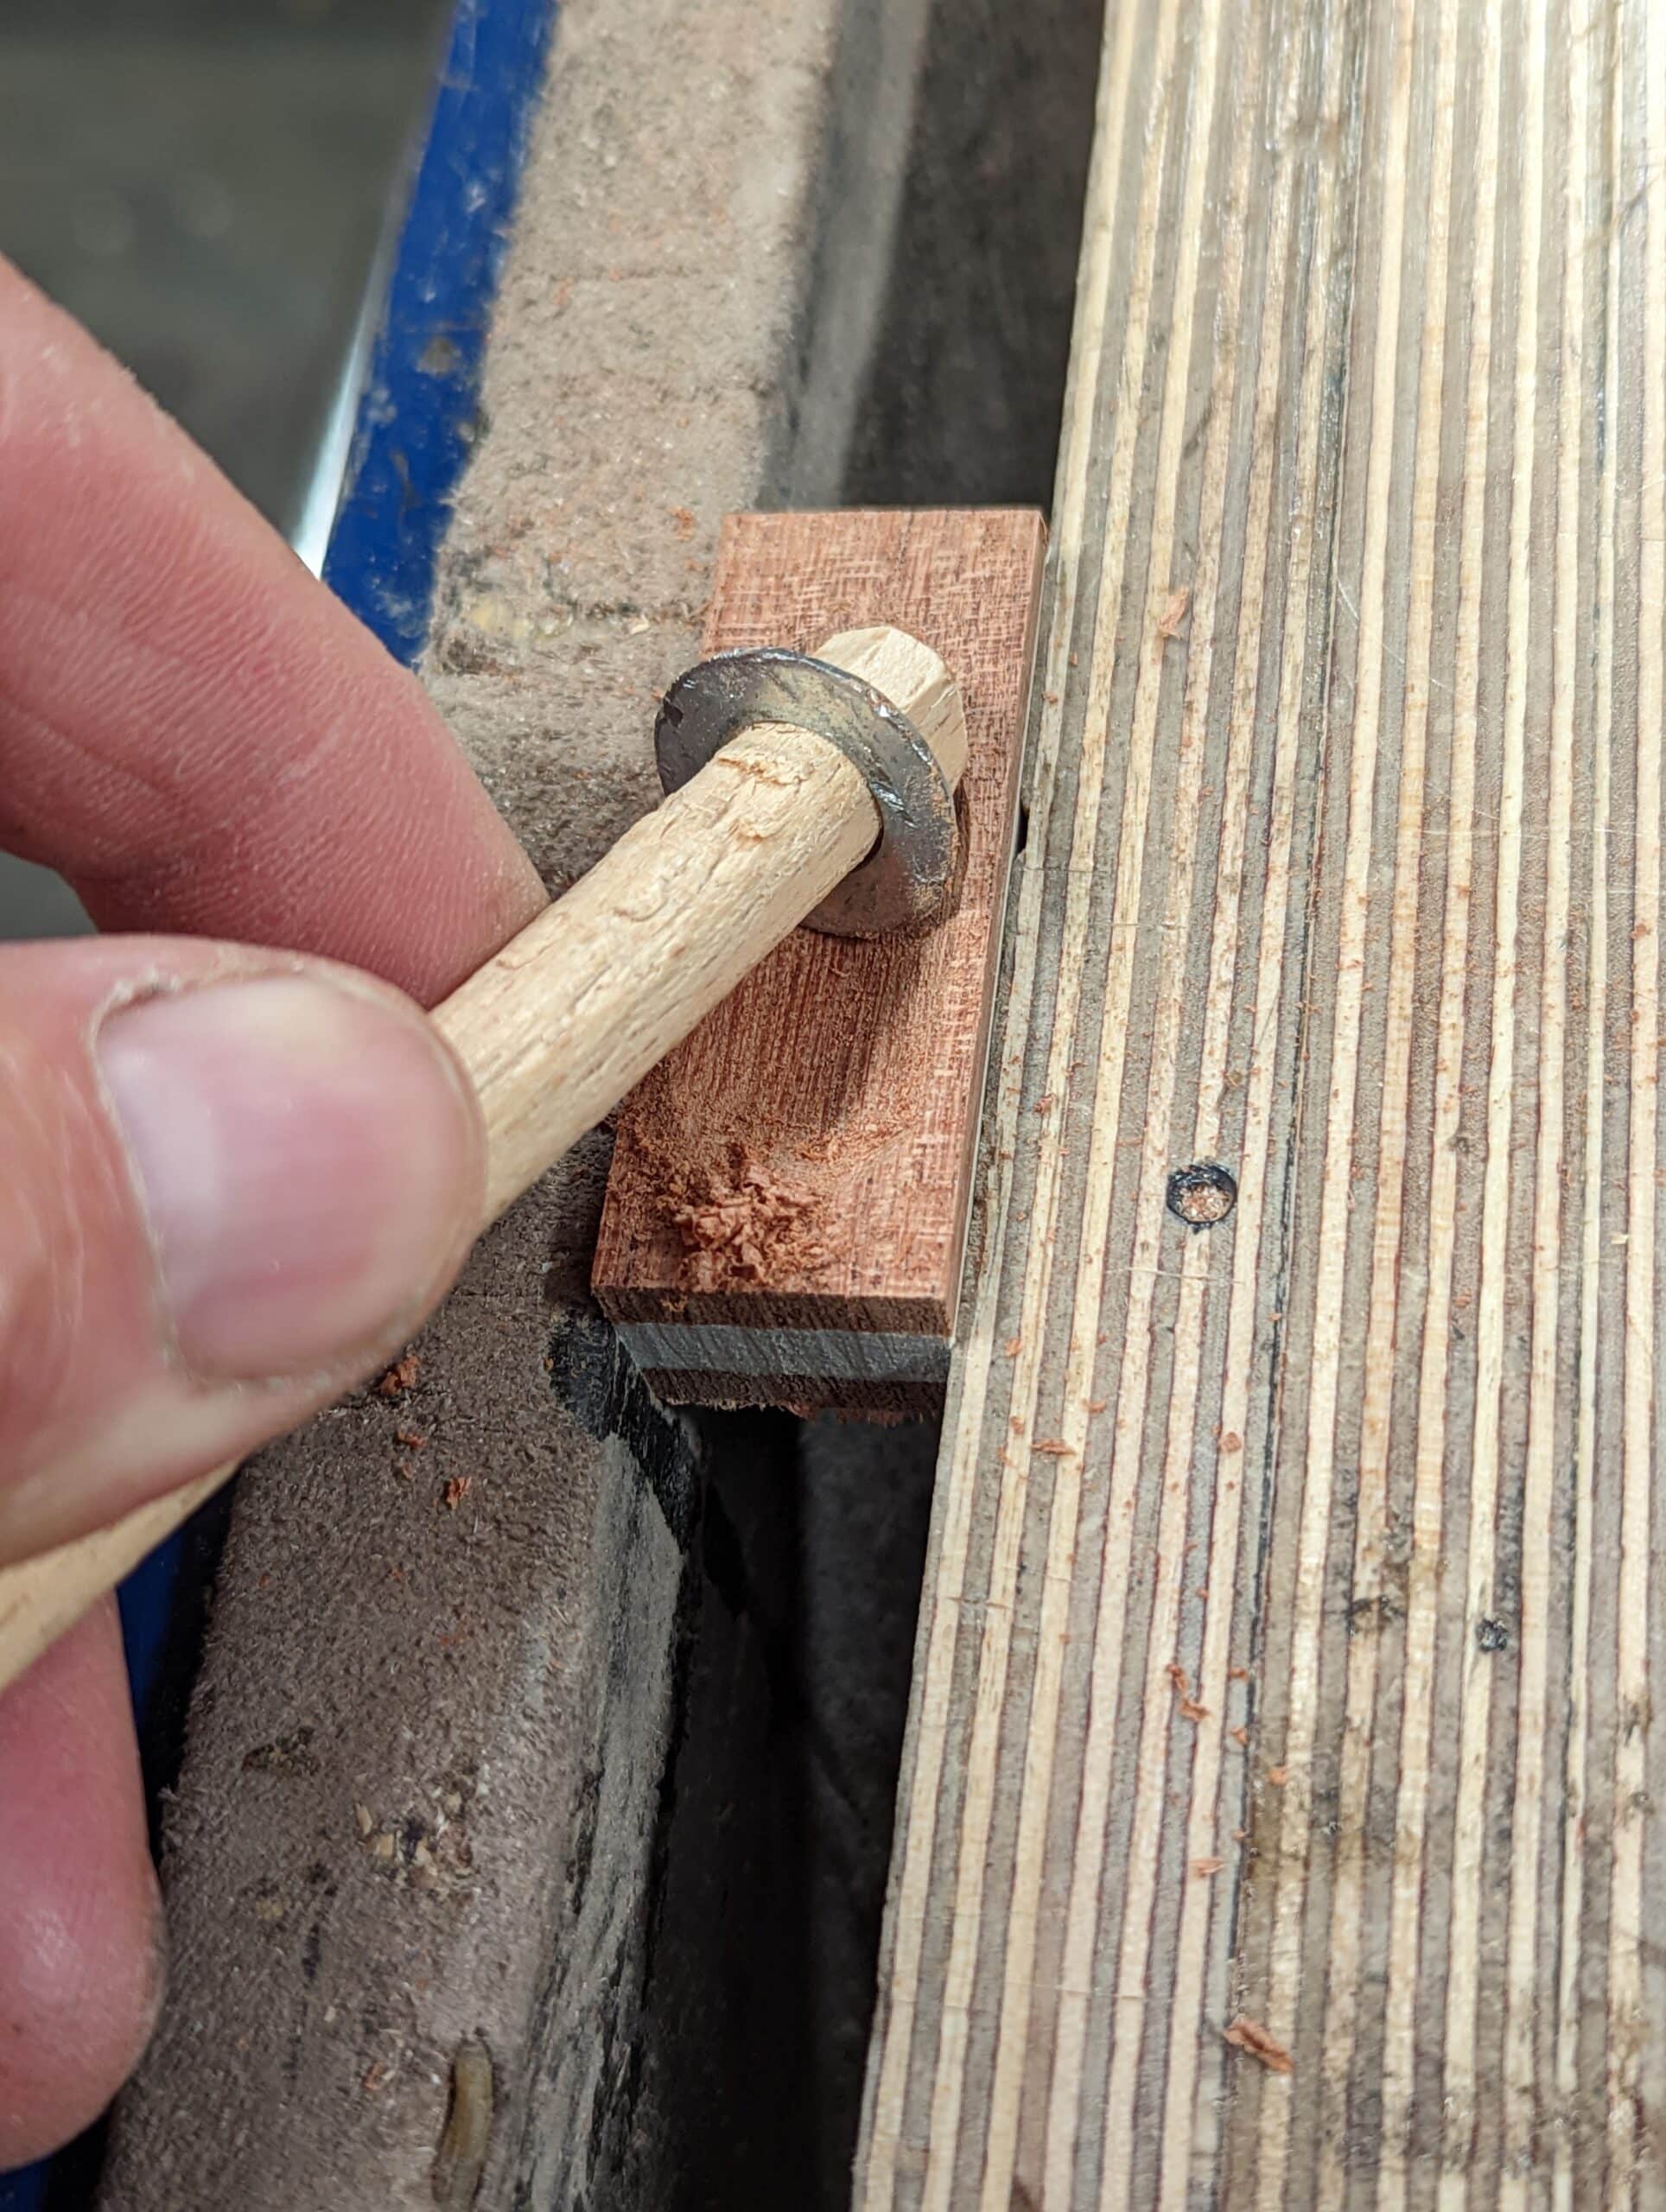
But I did something even more. I drove a square stick of wood through the washer hole which gave me a handle and I stopped just before the end with the bevel on the far side of the new handle. The step created gave me stop to pull against and I had a very decent tool to work with.
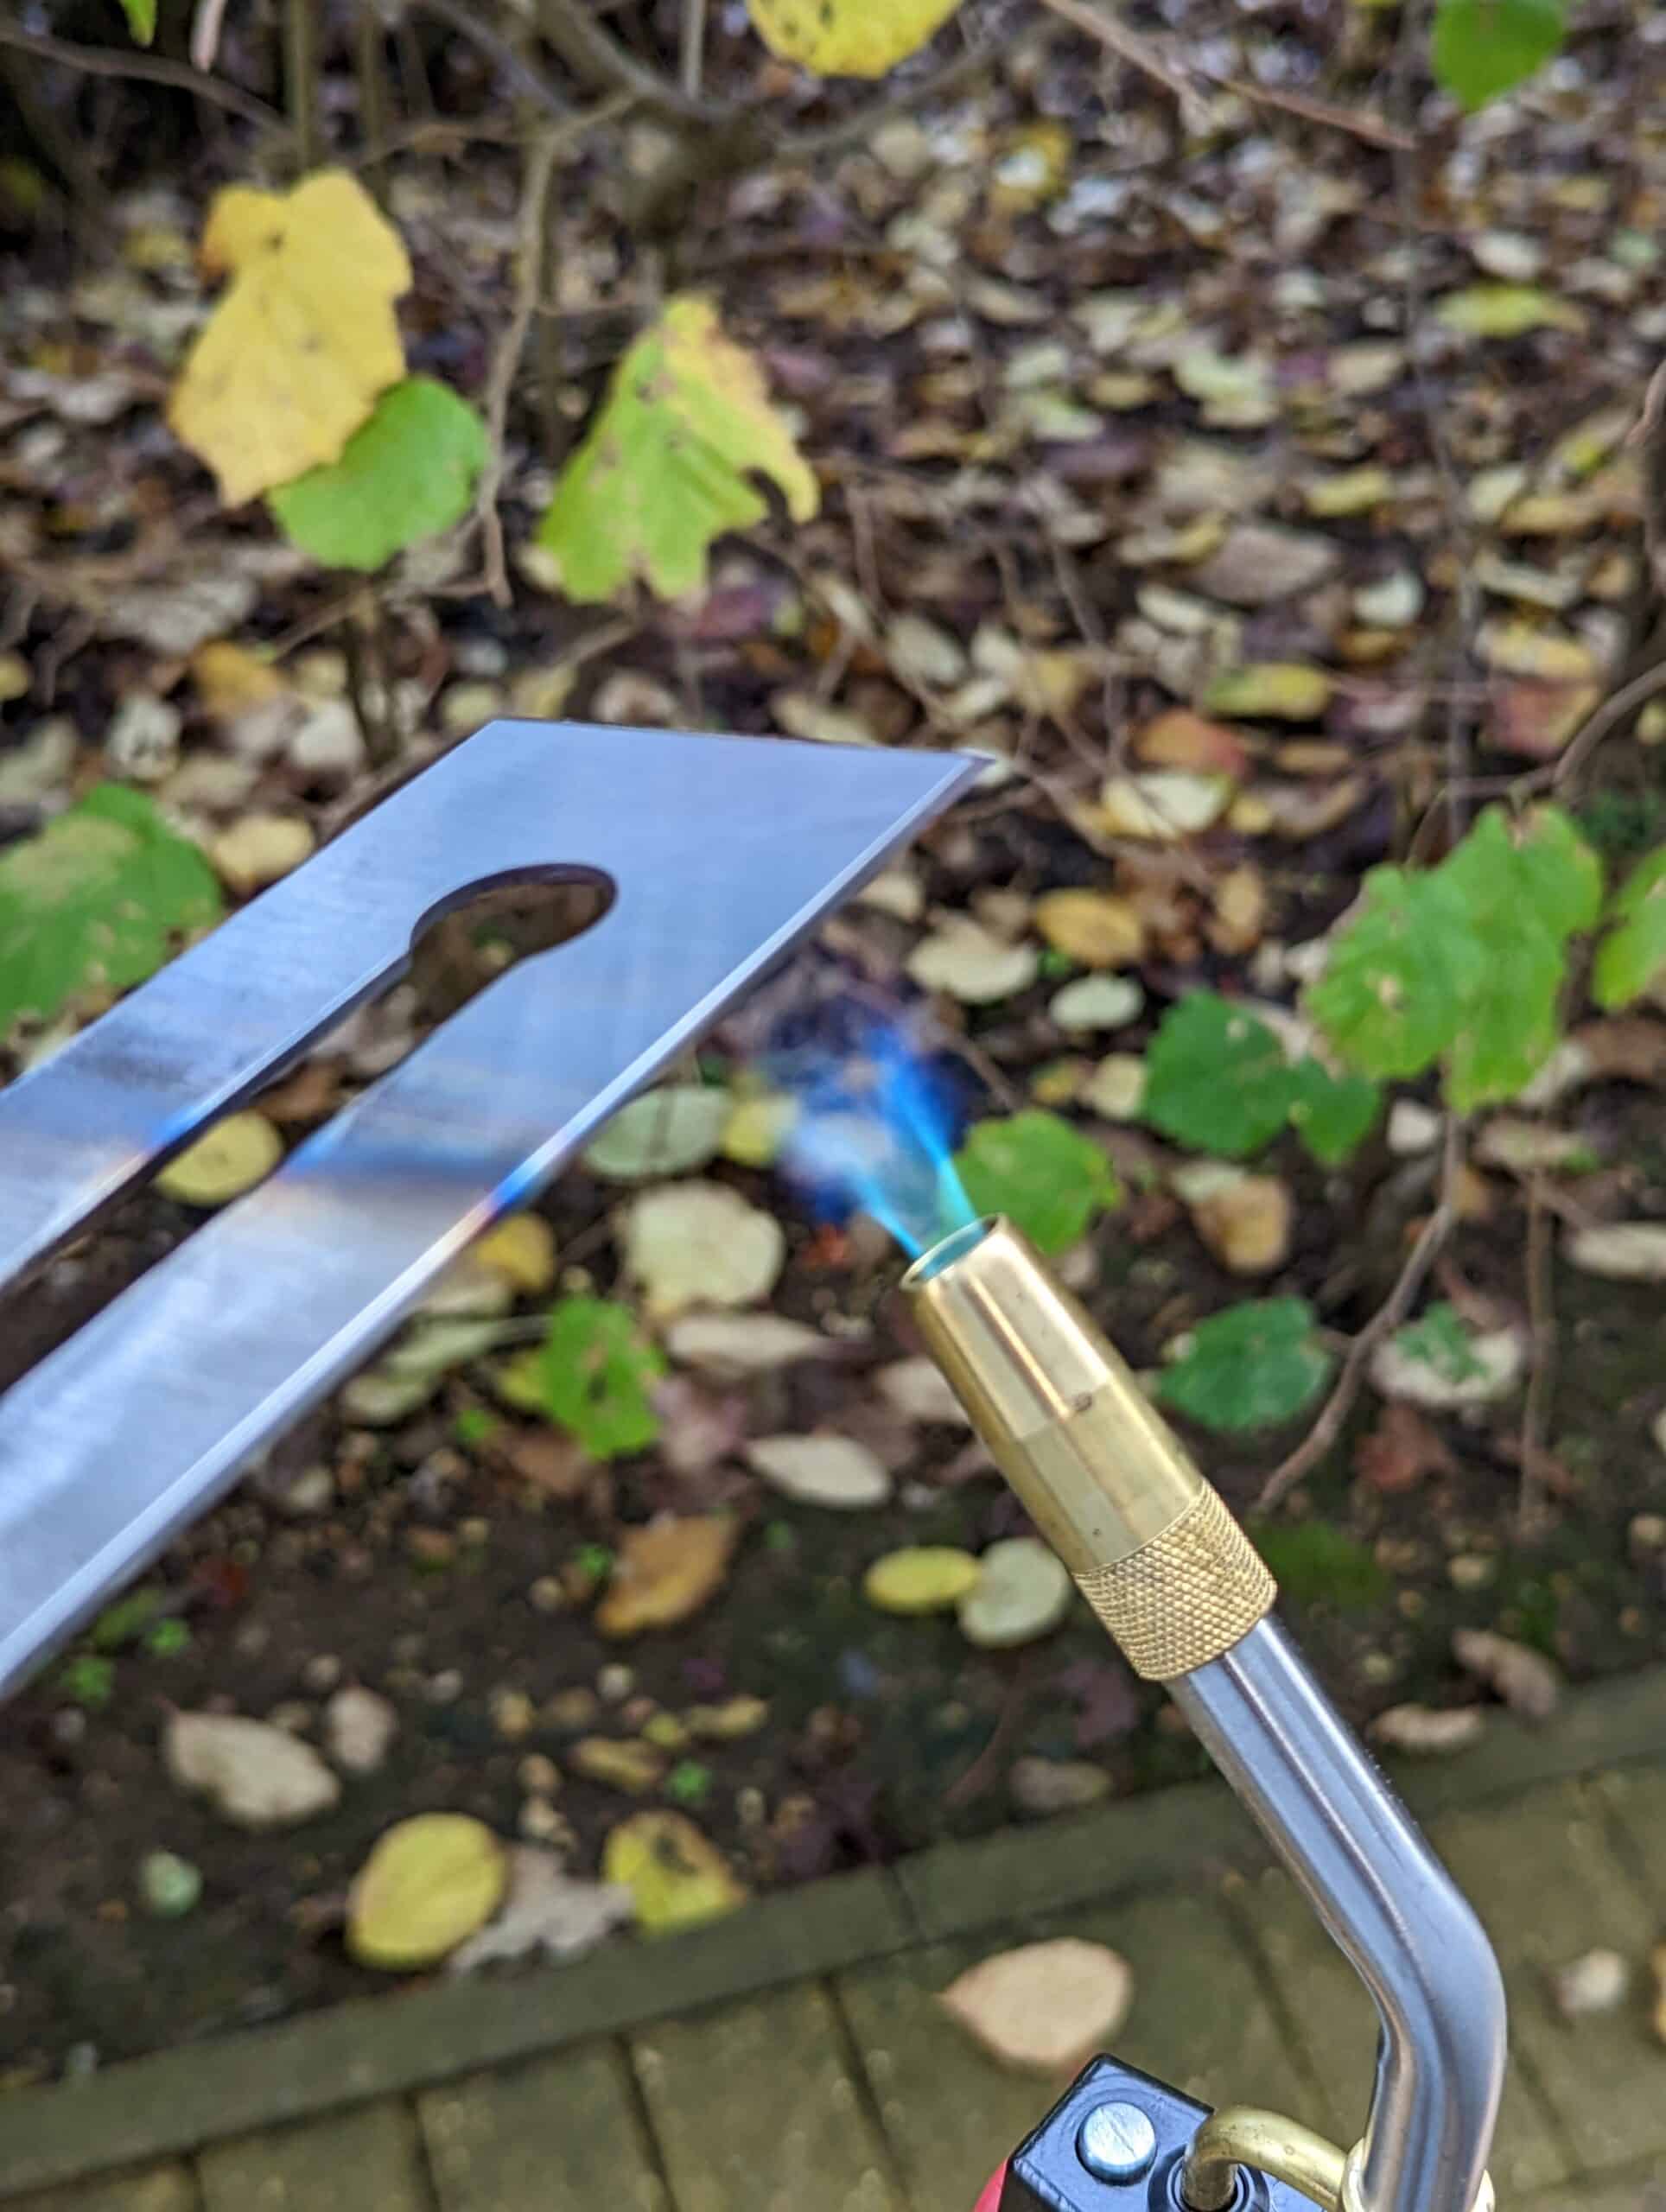
On the business of hardening and tempering. I have hardened in barbecue pits with charcoal, coke or coal using a hairdryer as a tuyere to get the temperature I need and have always had success in hardness. Sometimes I tempered the steel and sometimes not. I have tempered in the oven once and twice and have never noticed any difference. As it is with many things, things can get complicated by analysis alone and in your workshop making, shy of a new replacement cutting iron, the need drives and you simply harden the existing and get back to the real task in hand. When the need for strength is there, I would always temper and usually in two sessions of 90 minutes in close proximity to each step of hardening and then the temperings. Knives and chisels always need tempering to remove any brittleness and the risk of snapping. I don’t temper spokeshave irons but would if I had something else in the oven at the same time. Is tempering essential? Not really. Many things can influence your decision. Particular use, how much you plan to use it, what for, etc. Whereas I do value the input of metallurgists and engineers, they can and do complicate the intent of my output as do those who take my ideas and thoughts and add very complicated systems to it thinking they took a square frame and made a wheel from it. Why fix what ain’t broke? It worked exceptionally well for what it was intended.
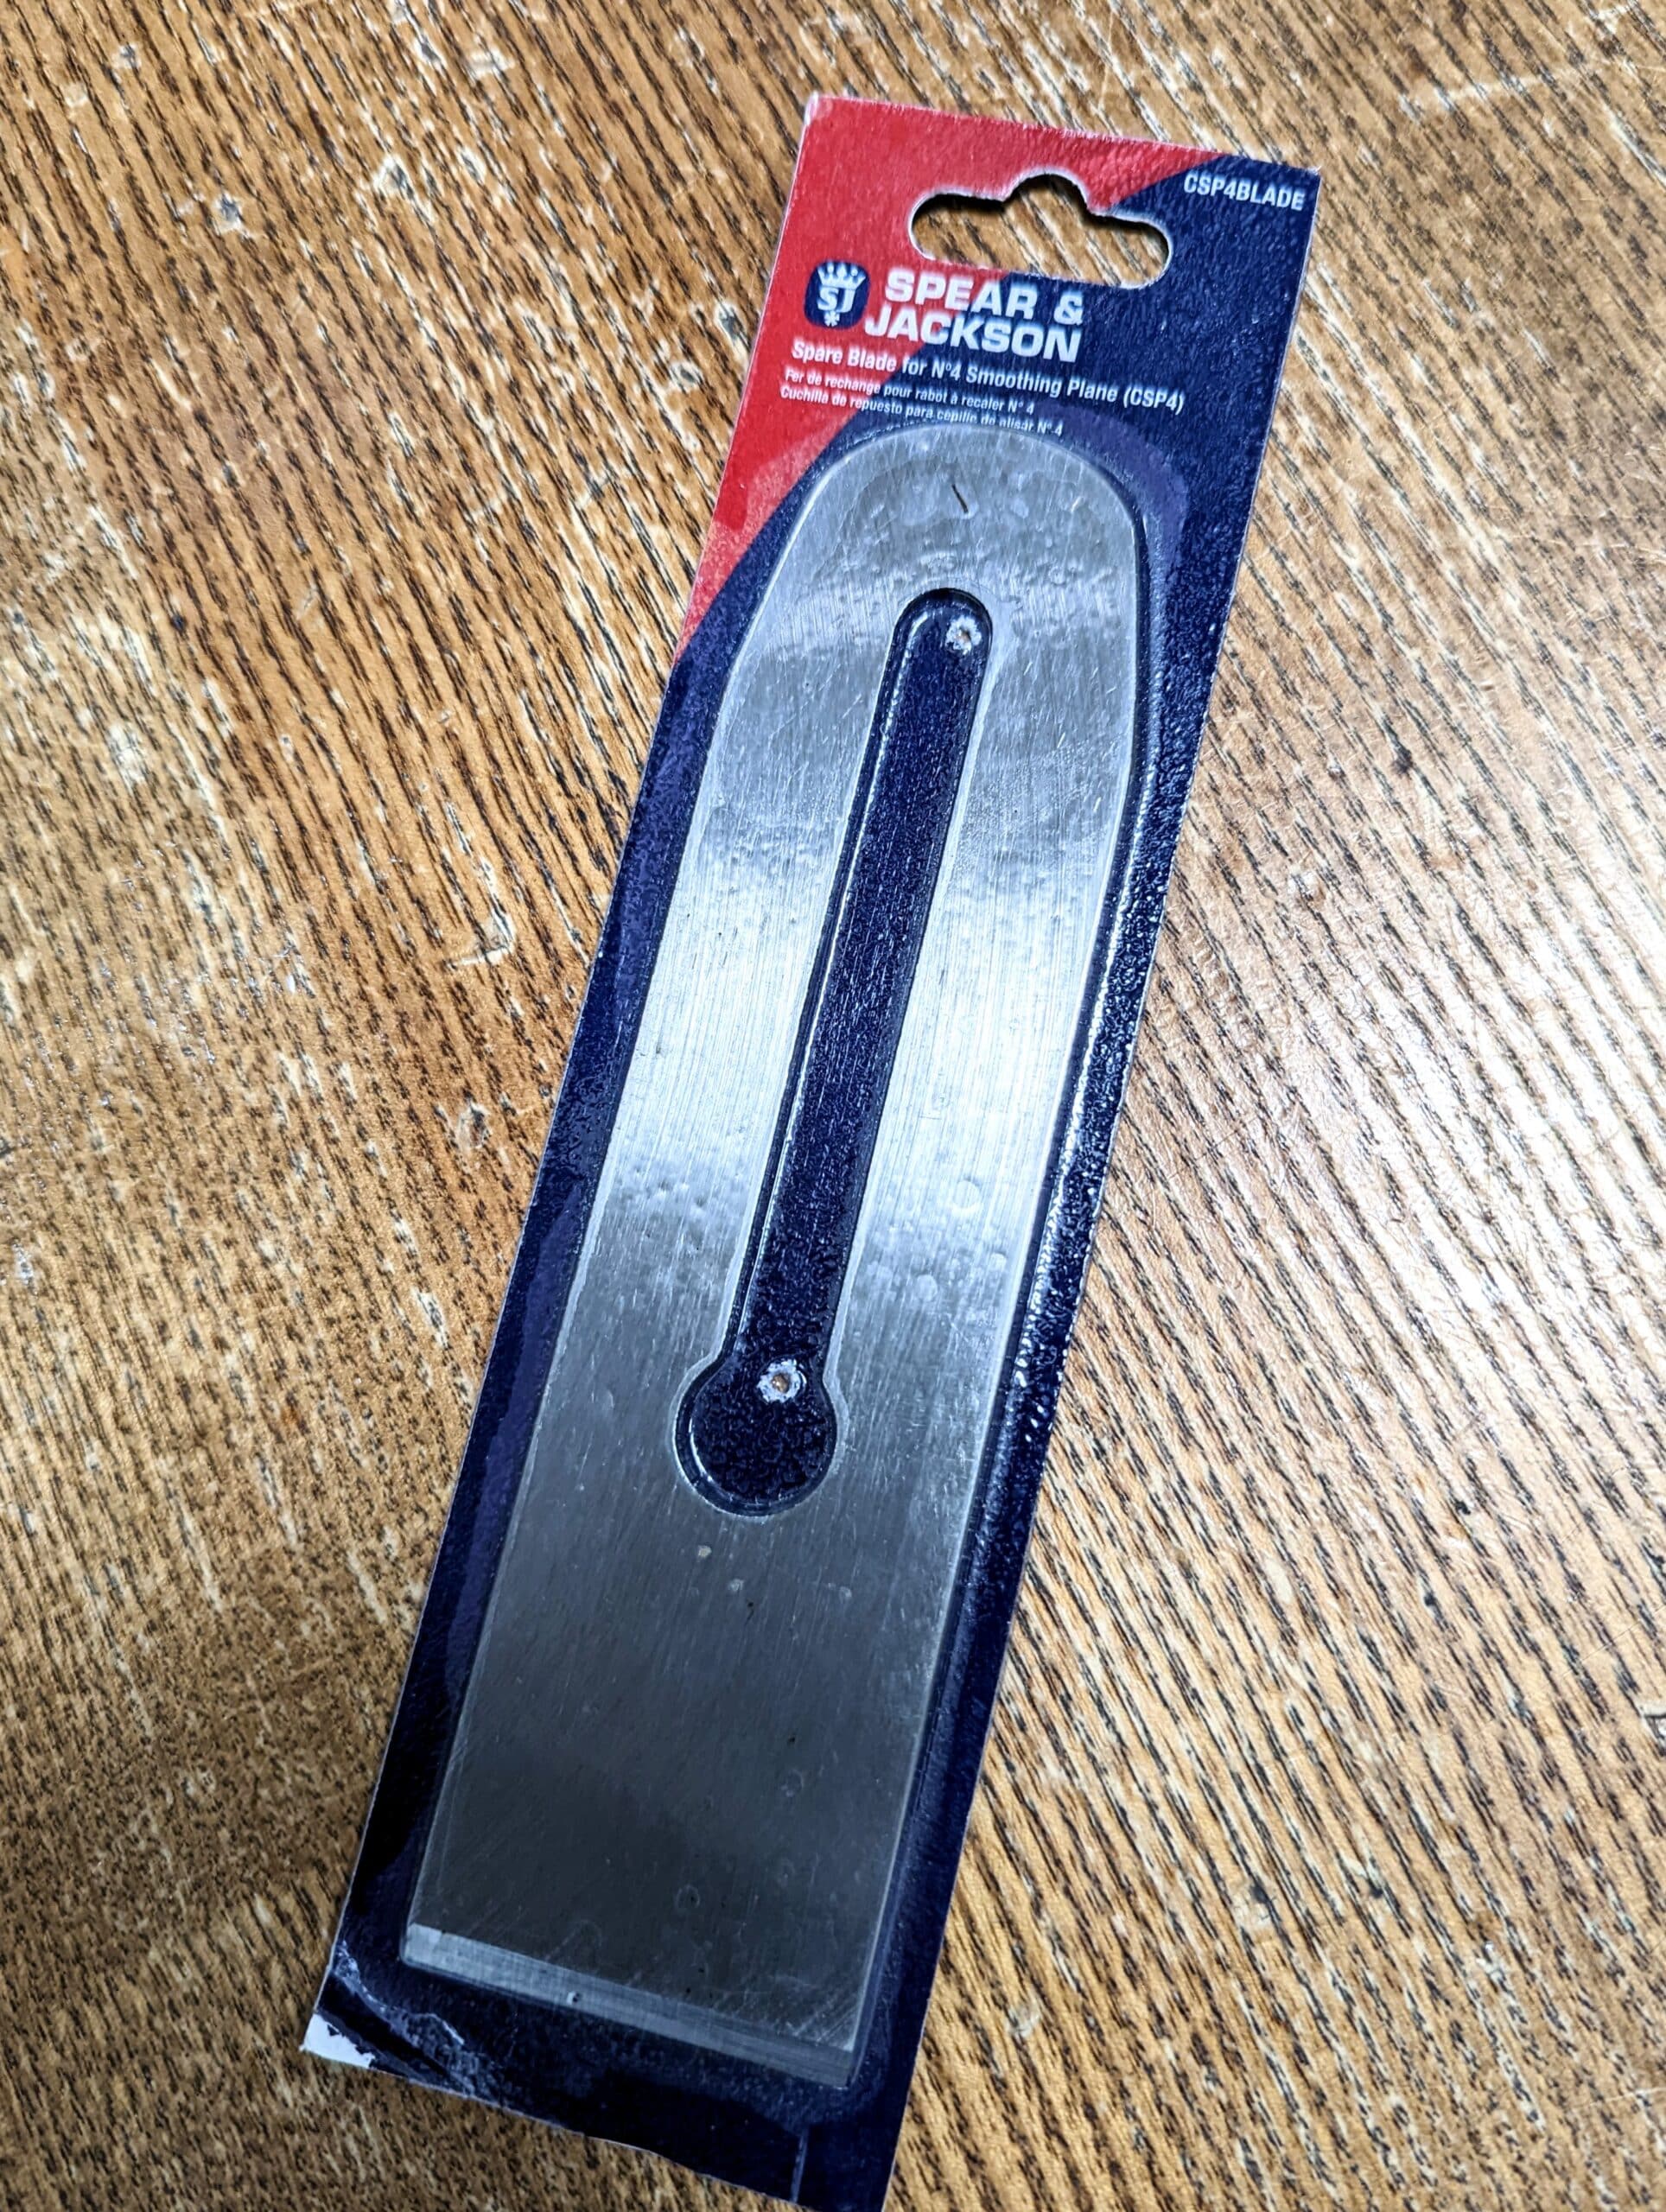
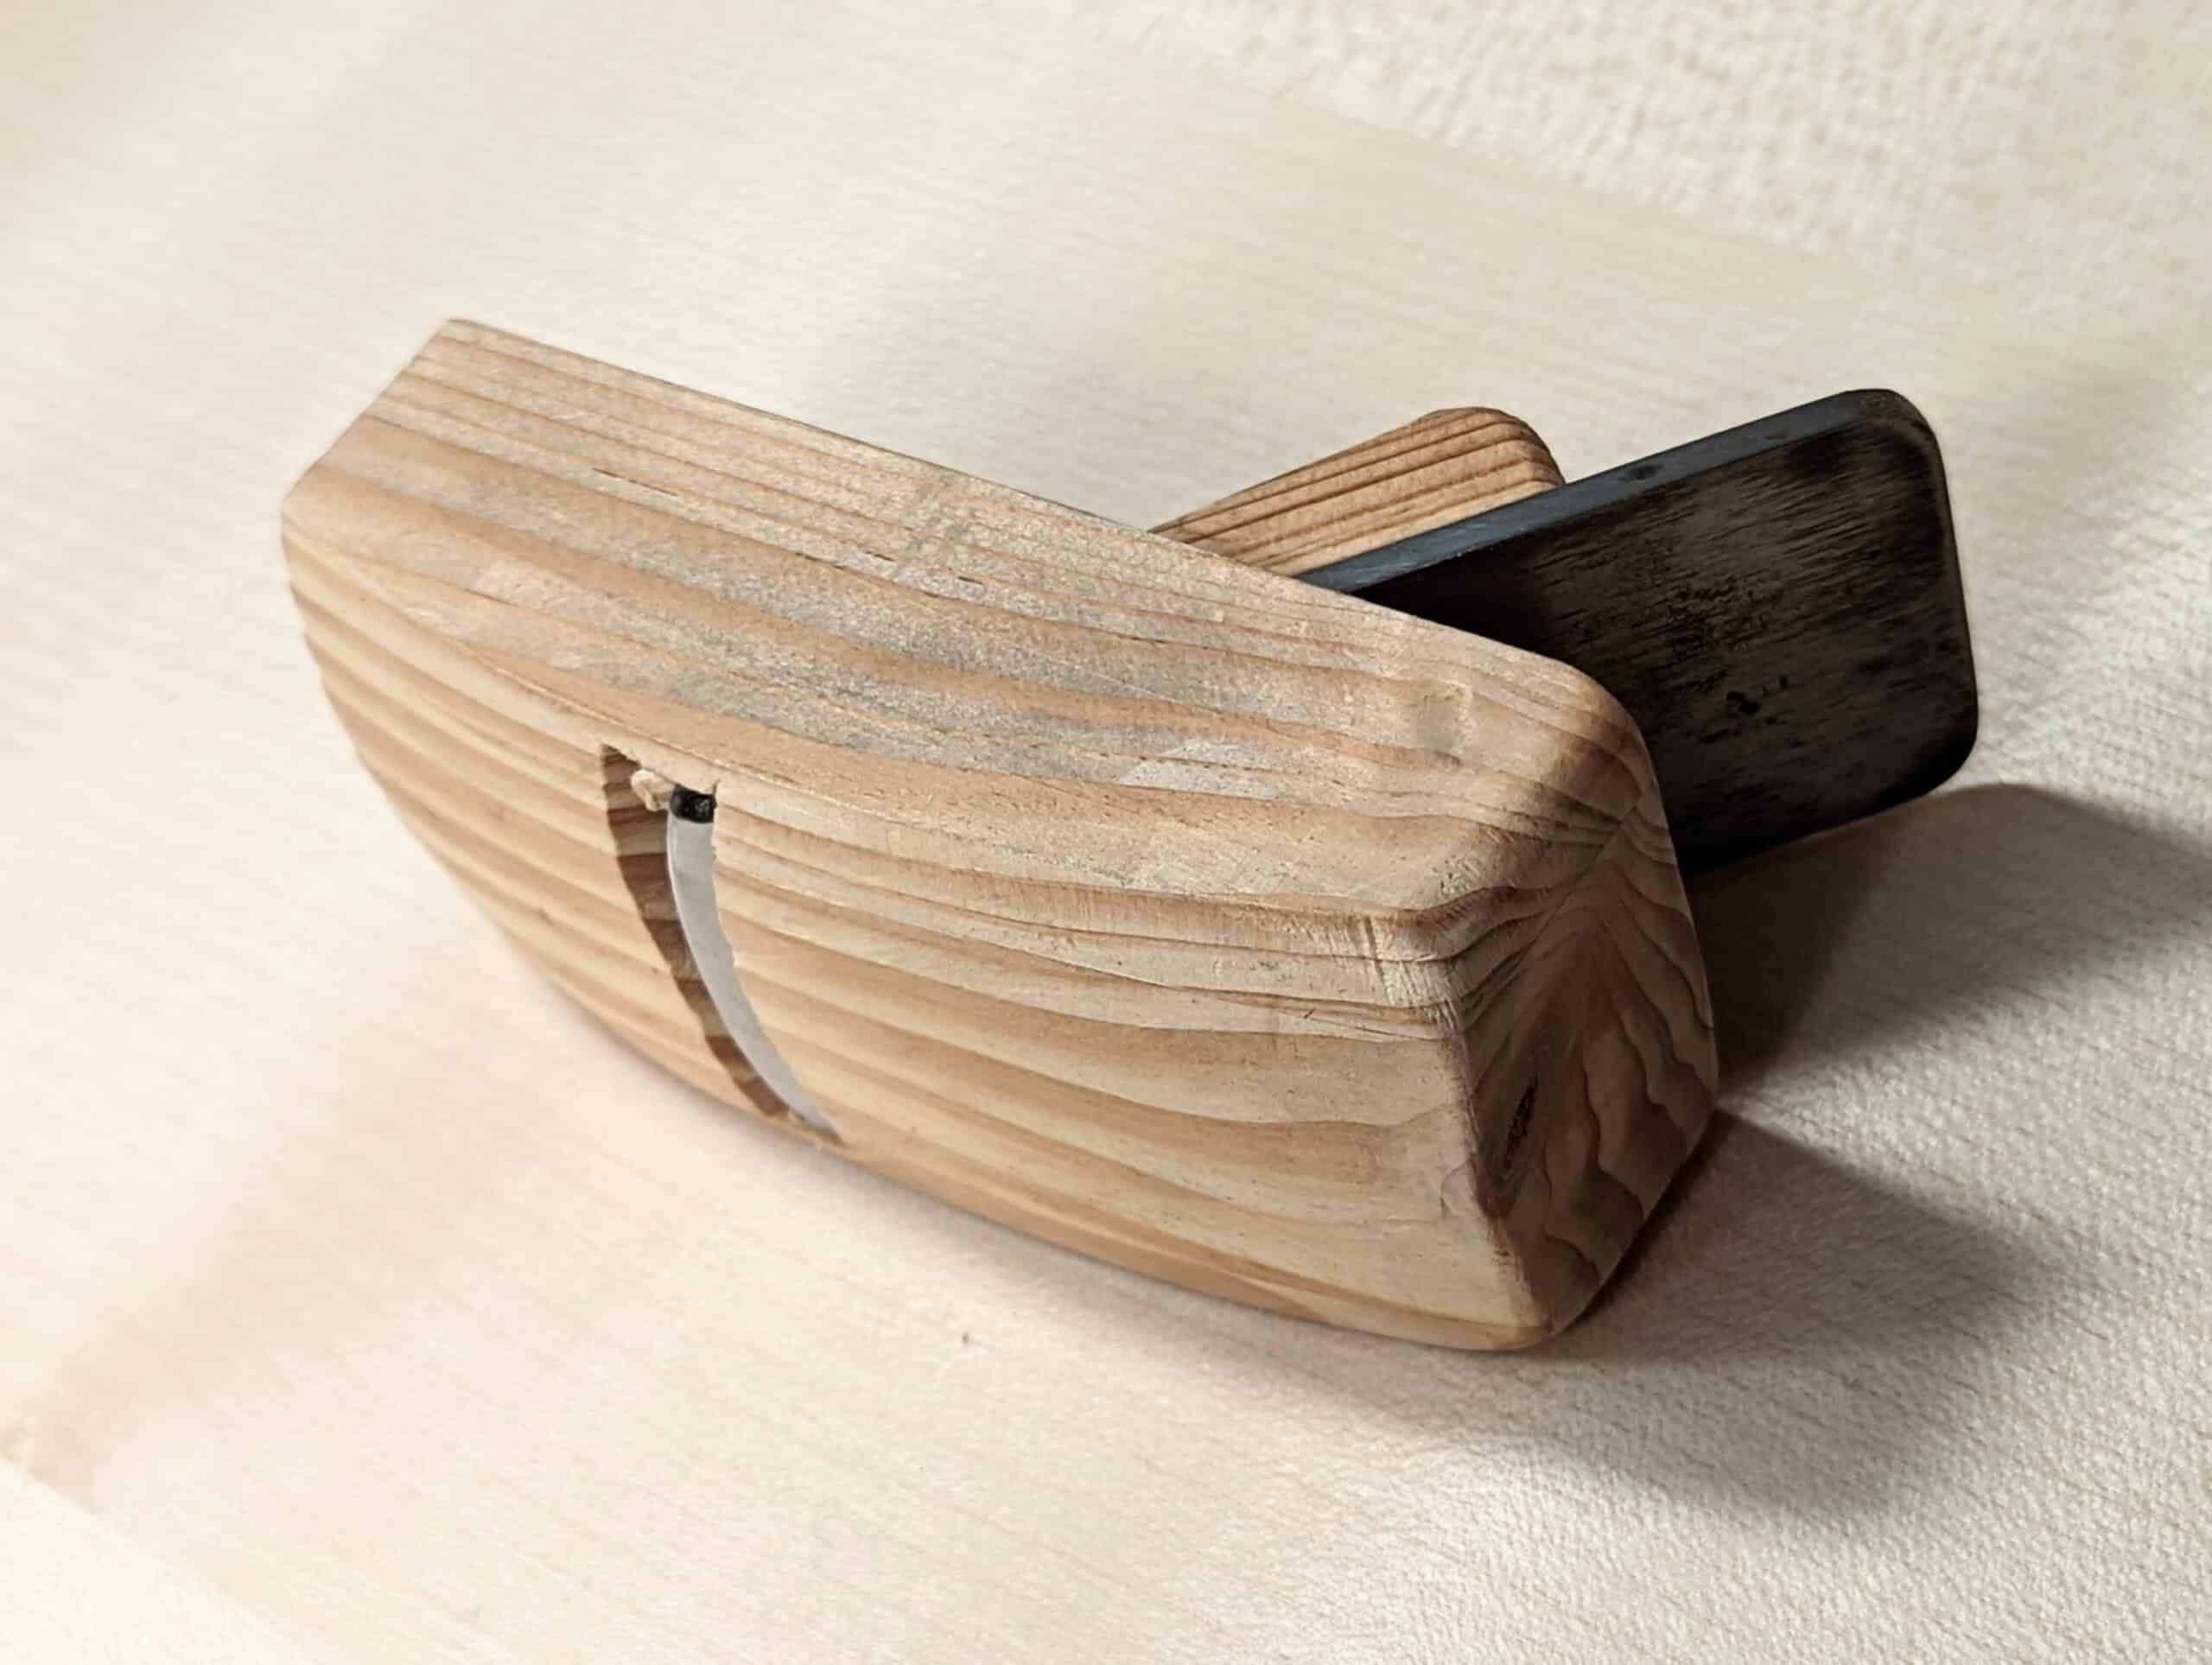
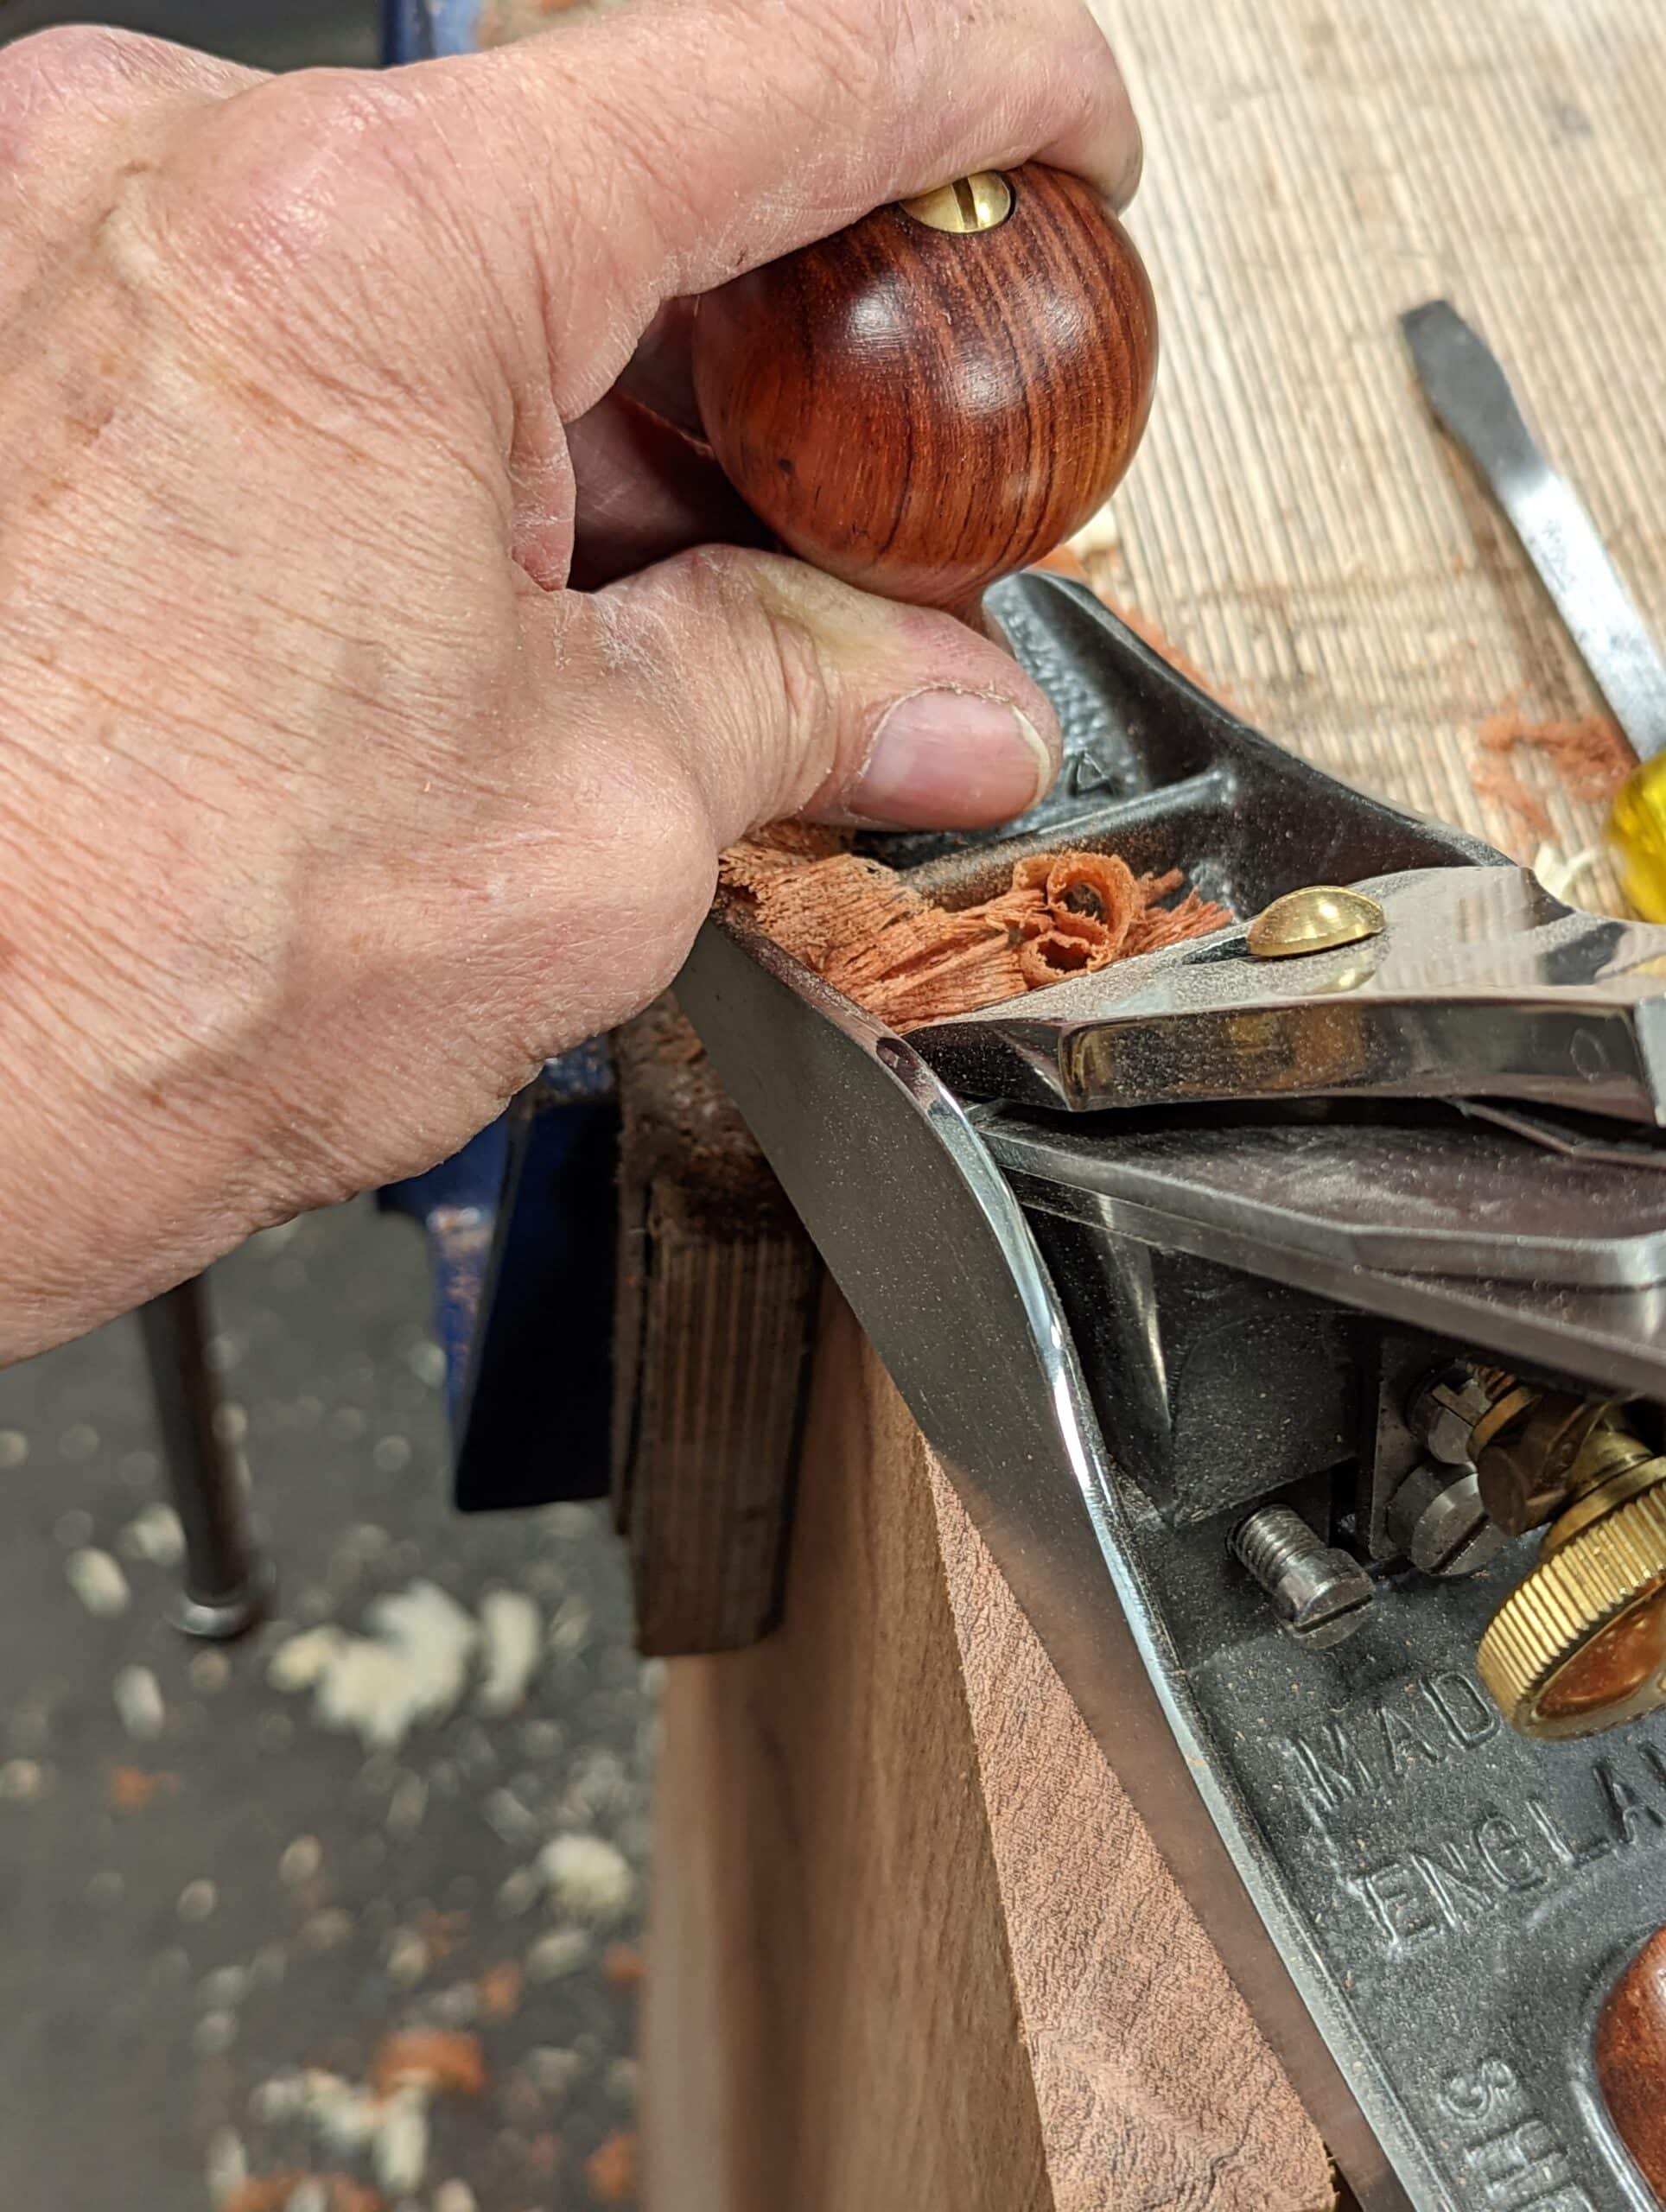
I bought a new #4 plane iron via Amazon that fits any of the #4 plane brands but is made by Spear & Jackson as its own replacement blade. The cost was £5.77 and I bought it to test it out. It was finished out fine and flat. The hardness seemed just right and was hardened for the first 1 1/4″ (30mm). I am still in the test-at-the-bench phase but so far it took and holds a good working edge. At this price, it is worth buying for the steel alone as other blades can be made from it. I am thinking half a dozen plough plane cutters, spokeshave blades, knives etc. Anneal it, recut, drill and shape it and you’re on your way.
Here is a consideration you should think about. You could expect a bevel-up plane to stay sharper longer than a bevel-down version. Somehow pushing the cutting edge more directly into the wood should even out the pressure on either side of the very edge. You should also expect a better cut because of the different angle of presentation. But where the steel cuts the wood is so minimally different, in theory at least it should make almost no difference. On bevel-up planes, with a strong bevel of 30º added to a 12º incline, you have 42º at its installed bed angle. Now those usually involved in selling the planes always, always (emphasis added) say that the bevel of the cutting iron is 25º and whereas that is what they say, generally, it is a half-truth. By suggesting that the plane has a lower angle of presentation and then having a primary bevel of 25º, you might get the impression that the plane iron bevel is indeed 25º and therefore is giving a better cut when an additional 5º incline has indeed been added with a second bevel at the leading edge of bevel to strengthen the cutting edge and so in truth, we end up back at the 42º. Using a 25º bevel on any plane is not too practical: that edge is far more highly fractious and is barely viable for the high pressures and impact planing that planing always incurrs in the day-to-day. Watch for these sleight-of-hand nudges in the blurbs and sales pitch. Most sharp cutting edges are not merely ‘worn‘ away as one hard thing wears away another, water over stone, that sort of thing, worn down, but more fractured away to result in more a broken edge across the width according to the knots and hardness hit head-on. You can see the difference when an edge is fractured away because the light reflects like glittering rather than a smooth line. So we see that a shallow bevel of 25º readily fractures in any plane or chisel, spokeshave, etc. But that does not mean we never use shallower bevels. Not at all! Where shallow bevels come into their own is when we use chisels at ultra-low angles in cuts and under relatively low and steadily applied pressure we refer to as paring cuts. This is where we lay the chisel as low as we can to the wood surface we need to pare into.
When we plane with the blade held in a plane or a spokeshave everything changes as it does when we use mallet blows on a chisel. I have gone as low as 20º for certain needs say for paring surfaces or using gouges in carving and such. The edge is very fragile at that low an angle and will not hold up to planing strokes or mallet blows but feeding pressures with the hands, arms and upper body maximise control of presentation and effort to expedite a felt-for cut. In a plane and for most chisels I never use less than 30º at my cutting edge simply because this has the intrinsic strength needed in the day-to-day. A bevel-down plane is always presented at 44-45º because it is indeed generally unalterable. So it’s just worth thinking about the dynamics of the presentation that’s all. Of course, the lower the angle of pitch the more inline the thrust cut and that does make a marginal difference. If the bed pitch could be 7º, I think that that could be the best but then the steel of the sole right at the back edge of the mouth would have no strength at so thin a point and would readily fracture and crumple.
Experiments are for establishing real value to our lives. Instead of relying on the views of others, we establish exactly what works best for us so its especially good in developing personal knowledge and ourselves. Many seemingly good reasons for doing things can be archaic and of no real value and I could quickly list a dozen off the top of my head ranging from plane types to scary-sharp type systems, the fallacies of bevel-ups over bevel-downs and vice versa. But of course, not too many people can test out or experiment with tools and equipment before they make a purchase or commit to something. Neither can we beg ten companies for planes to do an ‘Editor’s Favourite’ page or test ten plane irons to see which one is best for us. The fact is, many things influencing an editor’s choice are based on very little that matters in the reality of truer makers and not mere editors. My experience over the past 50 years reading magazines on woodworking is that their editors had little practical experience accumulated as makers. I’ve stopped reading them for health reasons!
Experiments and tries lead us into establishing practical methods and techniques. I have established many simple solutions to my work area, tools, and equipment that simplify life, yes, but they also make me more efficient. When I decided to remove tablesaws and planers, chop saws and mortising machines it mostly came as a result of how best to work with woodworkers who would or could never own such things, never own the space for such things and who would never feel safe or competent in that kind of world. I was shocked to find that that was indeed a massive percentage of woodworkers. when considered on a worldwide scale. But even in say the more privileged environs, many woodworkers sought skill over speed and wanted the experience of working more closely with the wood than machines could ever possibly allow.
I mark my bench with mark for aligning my plane irons to the honing guide that guarantees easy setting of angles for abrading with a guide. It works for when I decide to use a guide instead of freehanding and it does not mean that I always stick to those markings. I often go in between the two marks of 25º and 30º to give me a different angle and not necessarily slap bang in the middle. By moving the chisel edge further from the honing guide I can set a shallower angle without using a protractor and beam. It’s fast and effective and encourages me to indeed experiment with angles for cutting edges. Because of this, I truly understand the establishment of 30º as a truly practical bevel. At this, my chisel compromises resistance and the amount of effort needed to effect a cut. Changing the bevel angle on a bevel-down plane blade a few degrees one way or the other makes no felt difference at the cutting edge, but on a bevel-up plane, it makes all the difference in the world. That being so, we should then see that a paring cut with a chisel is also affected by the steepness of the bevel at the cutting edge. It’s also worth noting that if you happened to lower the bevel on a bevel-down iron from 30º to 20““““““““““`º the cutting edge would fracture all the way along its length because there is no back support where it’s needed right above and behind the main cutting edge.
More on this tomorrow or this week at least!
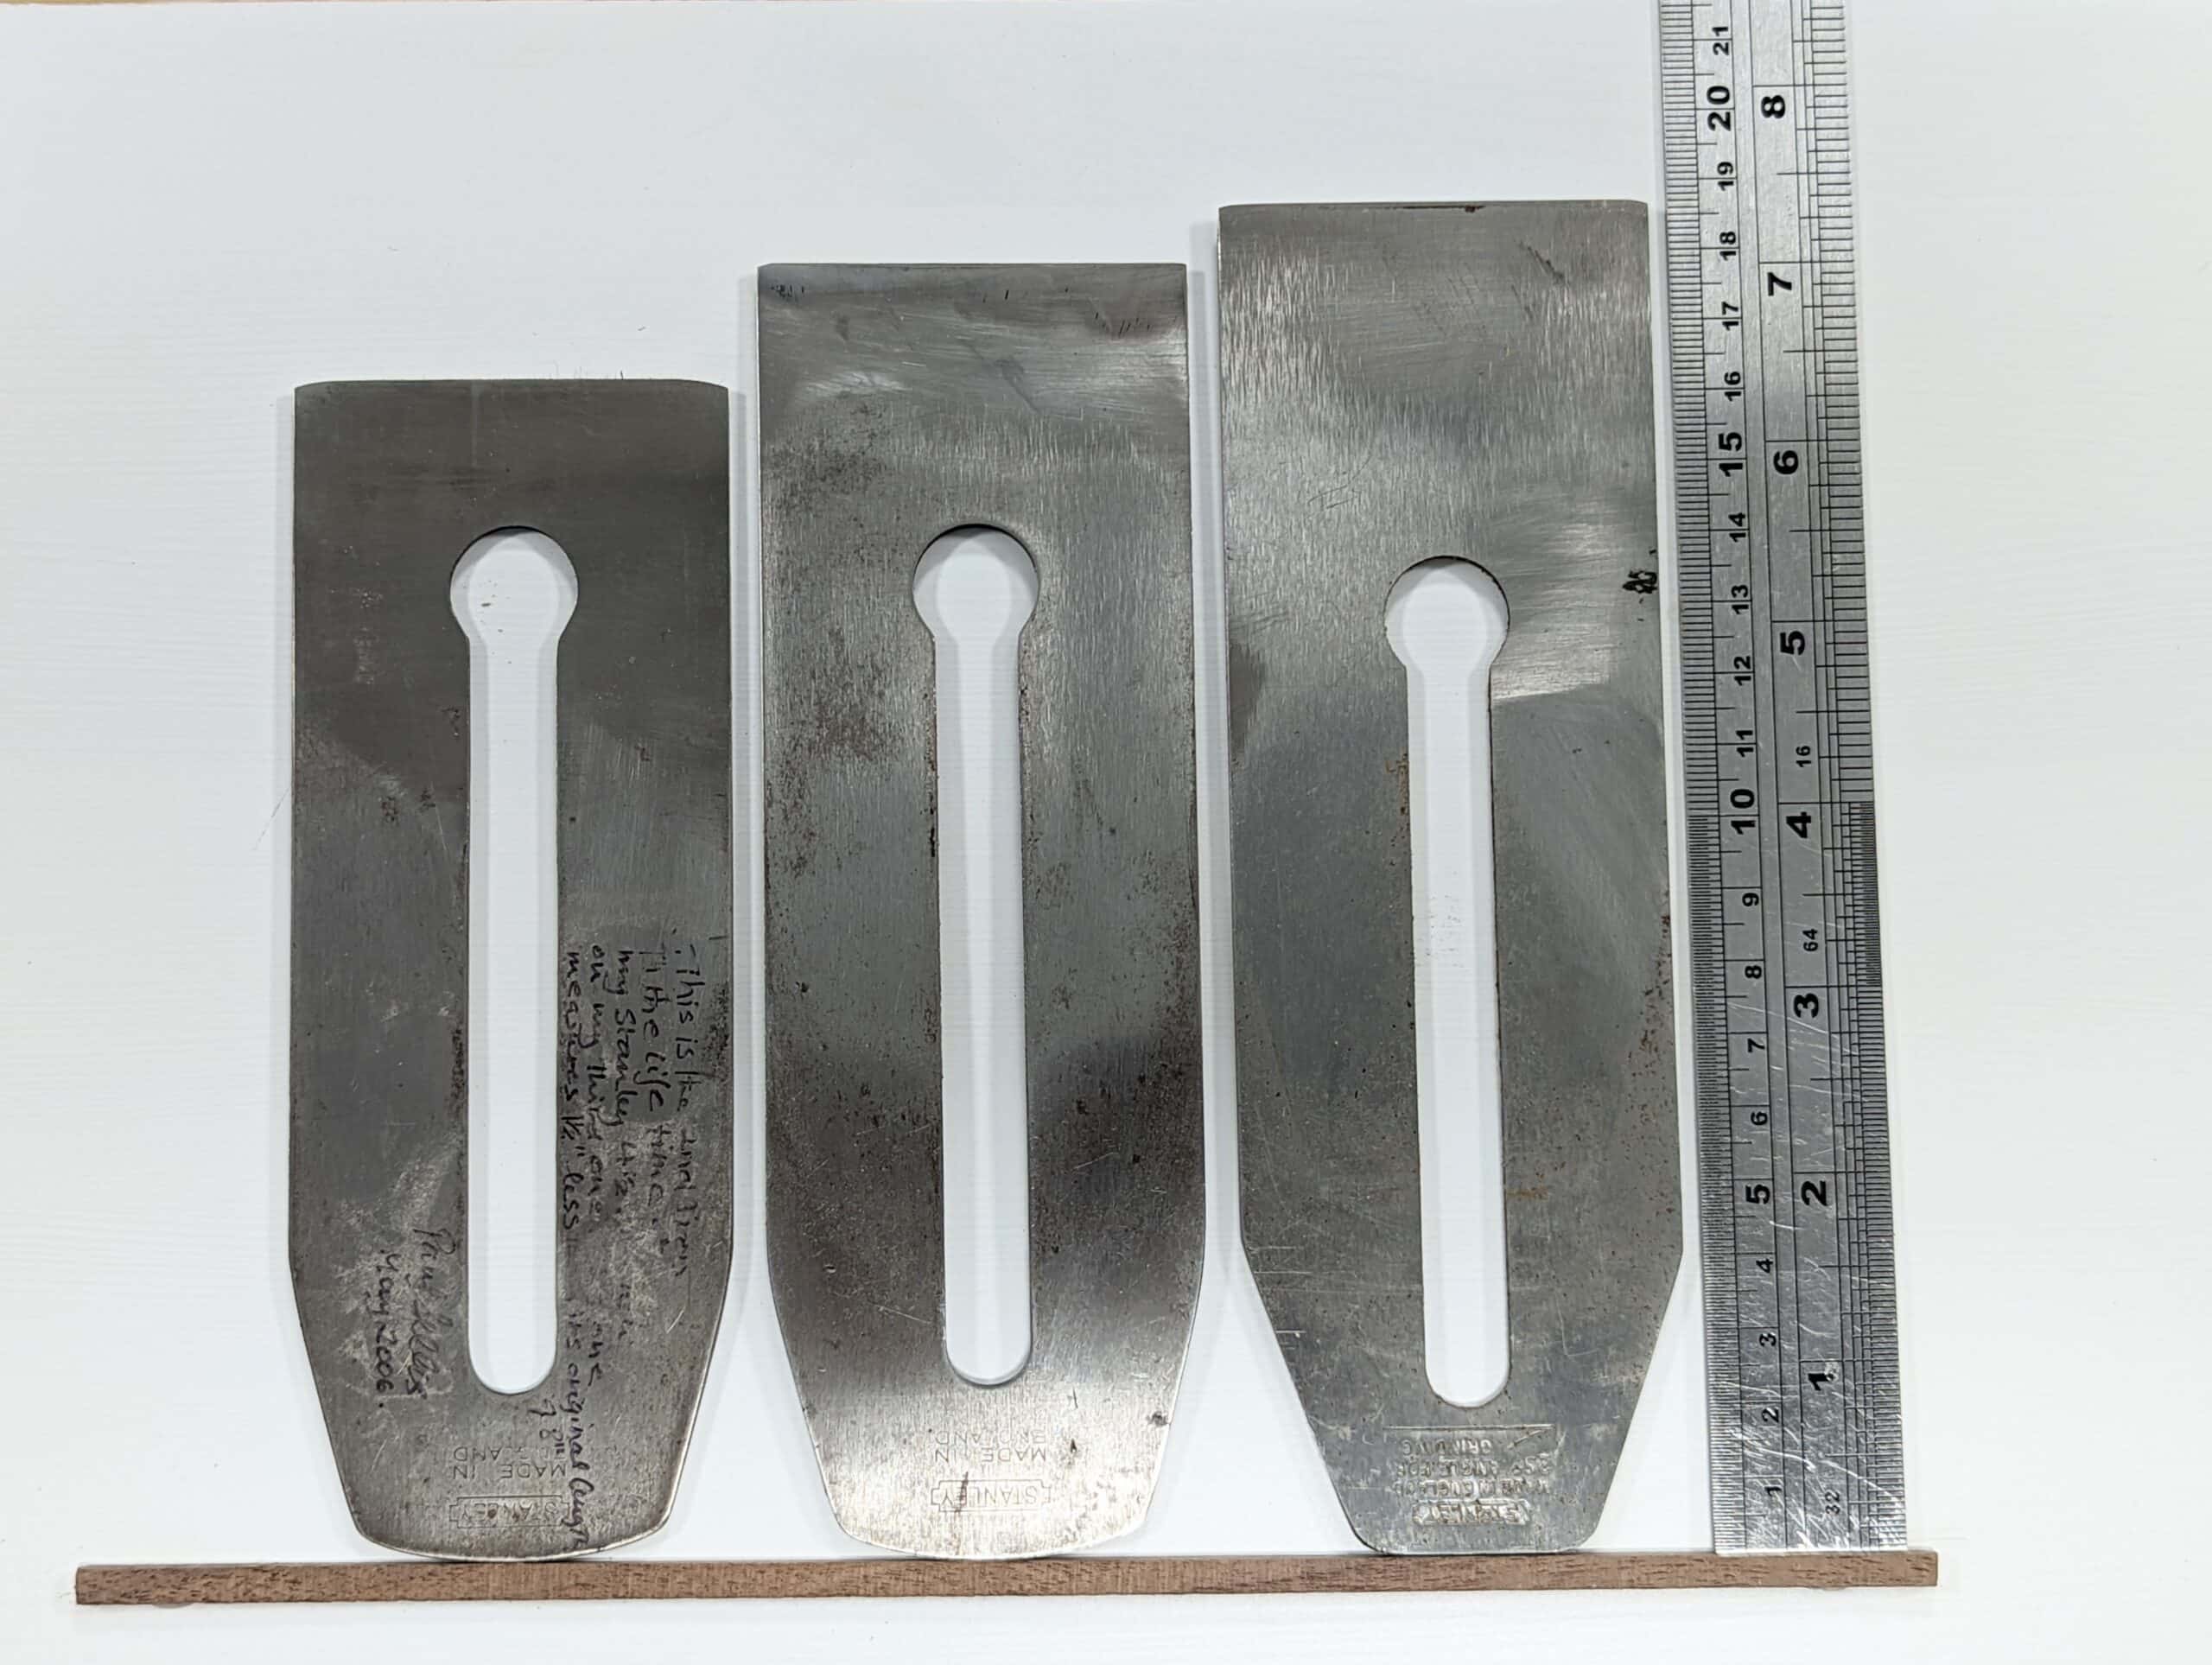
One question about plane irons I’ve been wondering about: Why do they have the hole for the cap iron screw at the bottom of the slot, towards the cutting edge?
Feels more natural to me to have it at the top so you can pull the cap iron away from the cutting edge to remove it and refit it without having to worry about scraping the edge. Instead of the awkward pull back, twist, push forward, then remove procedure.
Is there a trick I’m missing? Or is this one of those weird historical holdovers?
I normally insert the blade perpendicular to the cap iron and then turn the two to meet (once pulled away from the hole of course). I’m guessing that as the plane wears down, the hole would get closer to the screw (if the hole was at the other end), rather than further away?
On wooden planes the hole was above.
It must not be at the top for the correct functioning of the lateral adjustment on Stanley (and look alike) planes, so it has been moved to the bottom.
why would wooden planes even have a hole? I was always under the impression that the hole allowed for the chip breaker to be removed without completely removing the screw, just by loosening it…
The lateral adjustment goes into the cap iron though.
Was thinking the hole location was for compatibility with some older adjustable plane system, like Norris. Except, I’ve just looked at some pictures of them, and they have the hole at the top of the iron!
Out of stock on amazon.co.uk and twice the price on my local amazon site. And dieter schmidt sells replacement blades for 40+ Euro! For something that’s essentially a piece of stock steeel with a hole in it!
So, bought some O2 stock some time ago so I can make my own. Can’t be that difficult. 2 holes, 2 sawcuts and some filing. Heat, quench, use. Nowhere cheaper.
Would a card shaver aka scraper make a suitable plane blade? Now you have educated us, all I see are thick chunky blades everywhere.
Generally, they are a little too thin for a plane iron, Jeff
Yes I had hoped but…i figured they’d flex.
I hear what you say Paul.
In the corner of my shed I have an old Russian Lomo microscope, and being of a curious nature I look at a variety of subjects.
Plane irons and chisels show very different wear patterns depending on the steel and the material worked, but there is a constant, the edges all end up looking like rough combs after a bit of use.
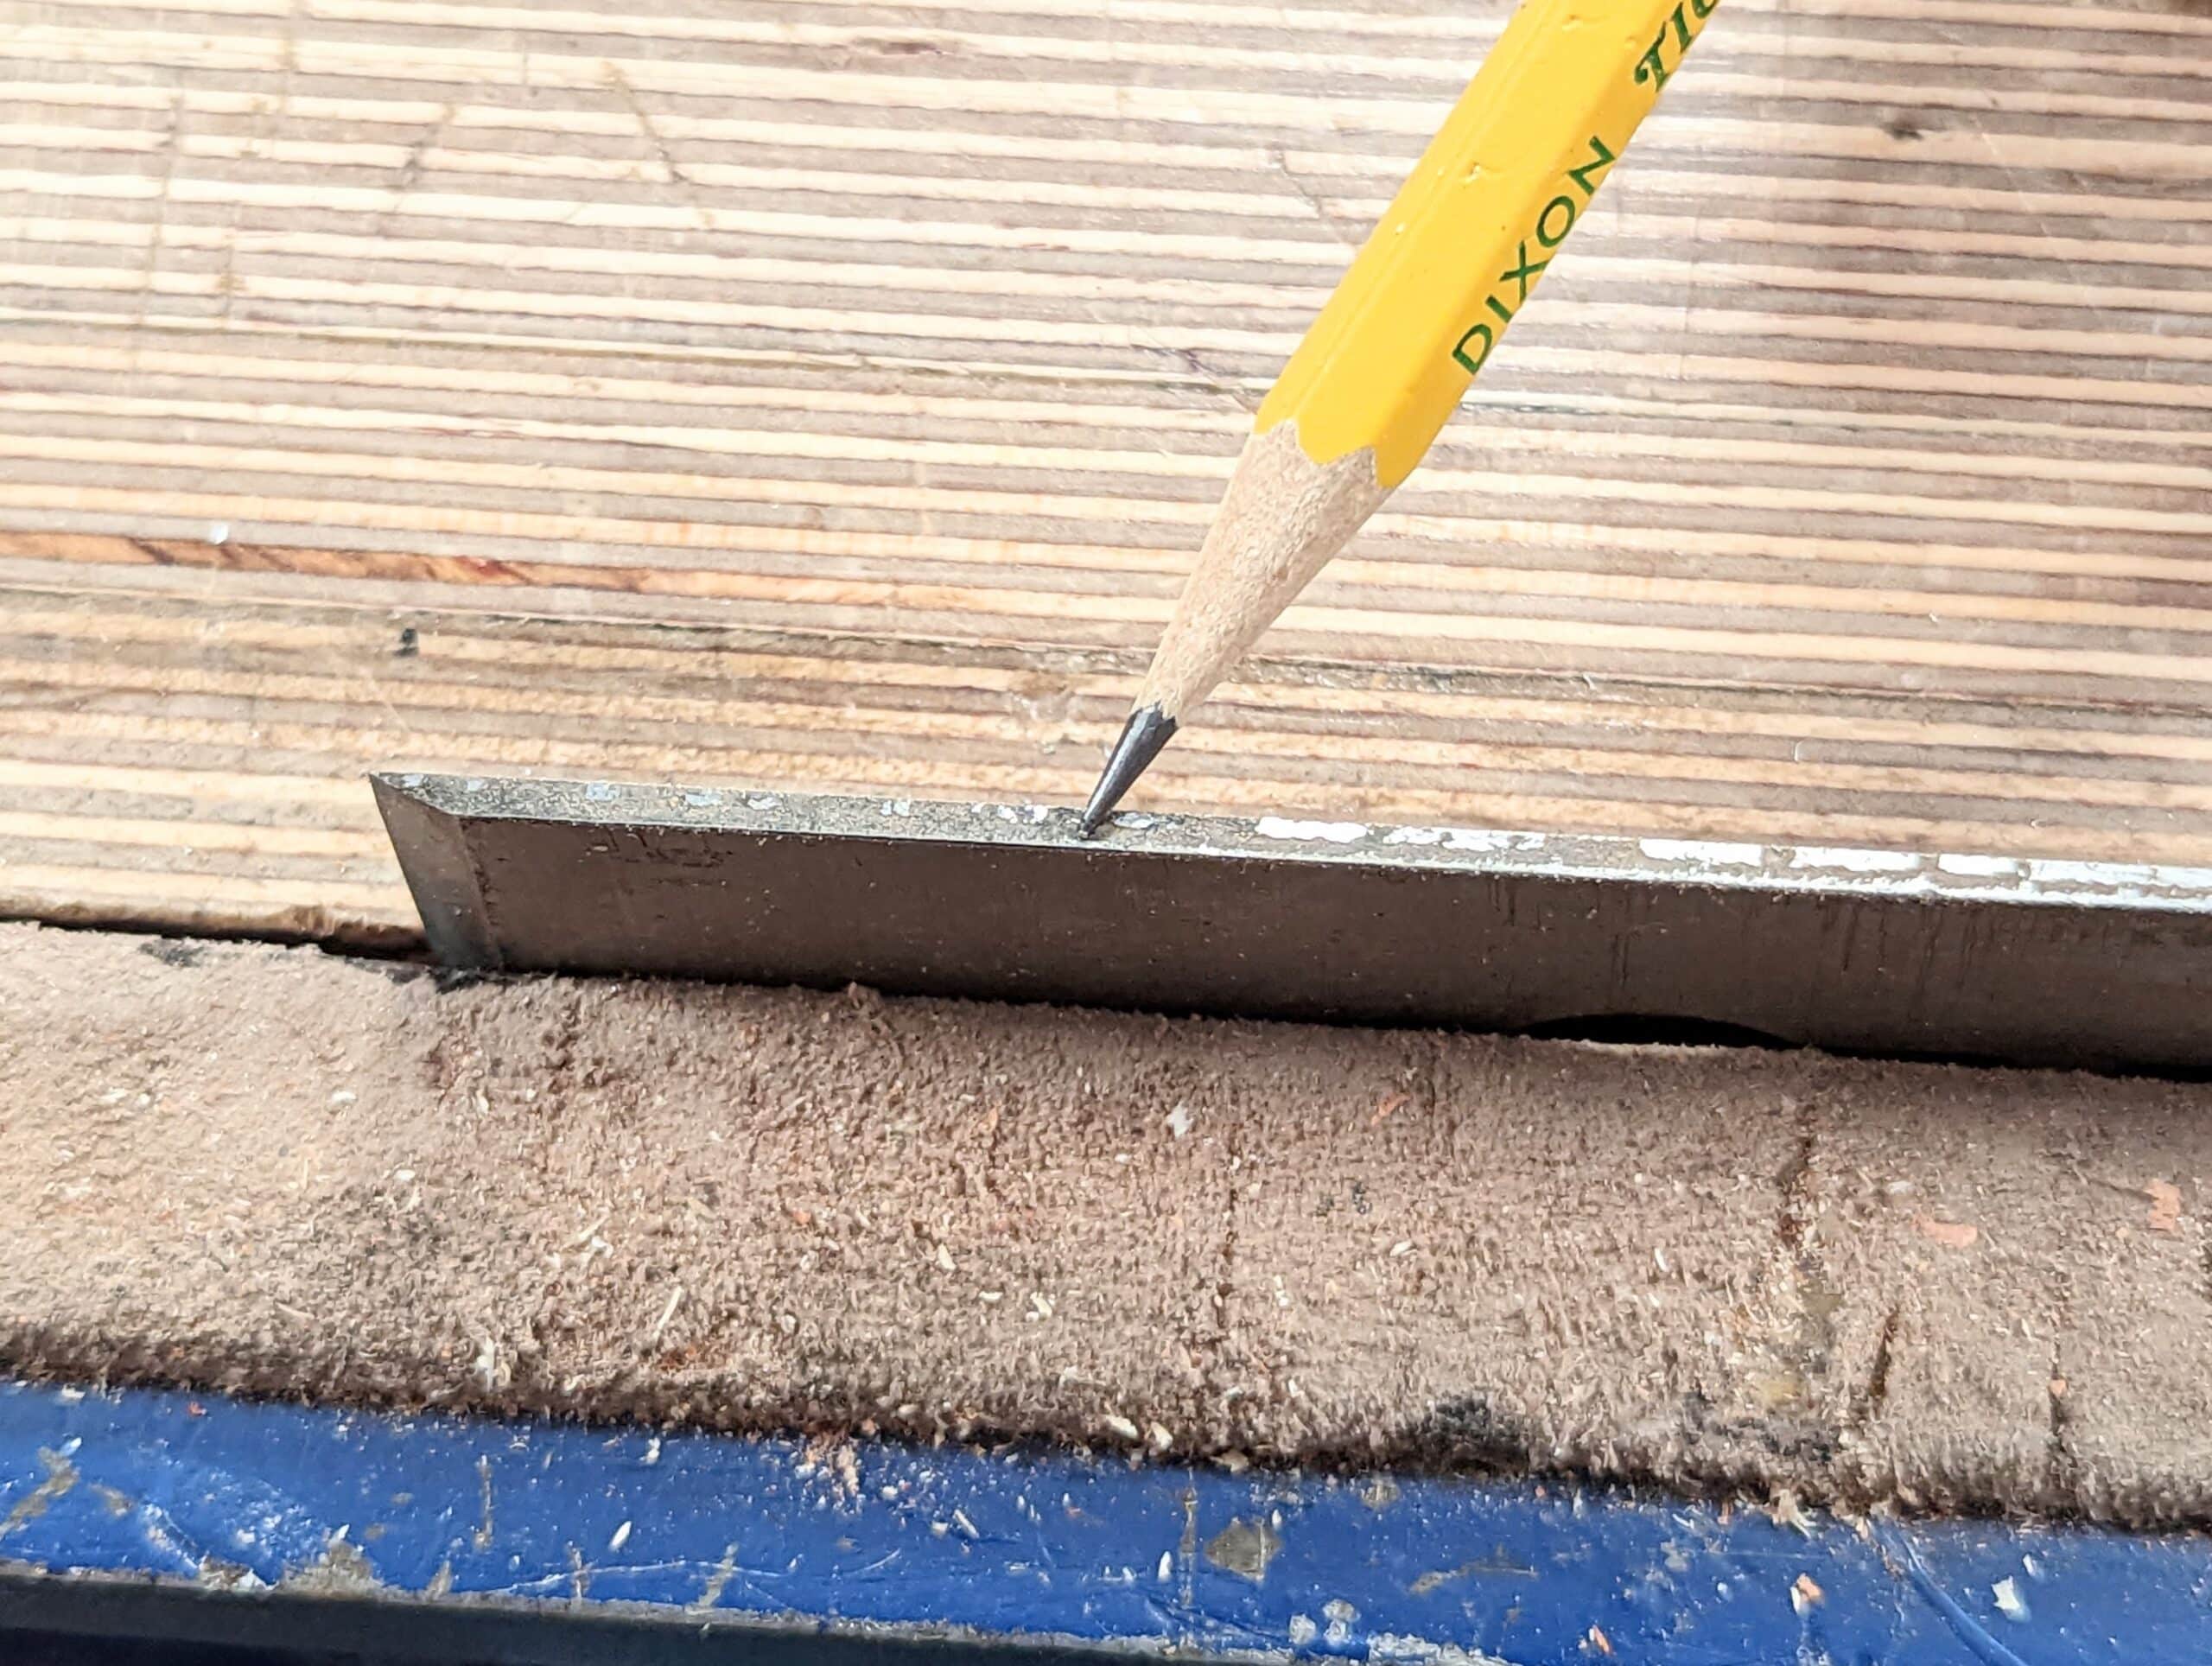
All of my life on every single plane type and every iron I have seen a certain type of wear where the edges have a consistent fine white line suggesting the type of wear where something firm and hard like water is rubbed along and over a surface resulting the thin white shiny line in plane irons. Think river rock for hundreds of years in the river with water washing over it shiny and smooth. Another type is the one I mentioned where the edge fracture is really obvious in chippings knocked out of the edge. This like when the river rocks are rolled over by the power of larger volume of water and with the crashing against other rocks the surfaces become fractured and look jagged, reflecting light in a completely different way showing uneven angular facets instead. Hitting knots is hard on a plane iron especially those that are dead knots; the crusty ones that crumble and crush but comprise particulates of hard gritty material.
I’ve never even seen mesquite but I’ve worked reclaimed Jarrah.
Now there’s a test of your steel!
It’s beautiful though.
I once watched a blacksmith in Indonesia making knife blades from broken truck spring leaves. Next time I see a broken leaf spring I’ll save it and try some experiments myself.
I don’t know if you’ve done it again, but the Amazon US price is $19.29, far more than just the exchange rate. I think Google is listening for when you recommend something and then alerts the sellers to raise their prices. Lol. Loved the article.
The Sellers-O-Meter strikes again. eBay has agents hanging on his every word. Amazon has a ‘bot stalking him. It would be funny if he said some crappy tool was awesome on April 1st and the price shot up 1000%. I kind of thought the Shinto rasp was a joke, but it turns out, nope, it’s a good tool.
I recently picked up a Stanley 79 side rebate plane at an estate sale, but the blades are missing. Any advice on how to make replacements from an old plane blade? Thank you for sharing your expertise!
Plane blades will be too thick. You could anneal a heavier card scraper to cut and shape it and reharden the first half inch for the cutting edge.
Lol, I was on the Canadian Amazon site when I posted that product price, not the American Amazon site where it is listed for $6.70. My bad.