More On Shoulder Planes
I own three but it seems now that the one I always reach for has become my favourite and that’s the Veritas from Lee Valley version. I like the way it’s designed and made and the presets with Allen keys to set the cutter laterally in relation to the long axis of the plane body. But no matter the make, shoulder planes have become one of the lesser-used planes in our arsenal. Mostly that’s because they were predominantly used by craftsmen making fine work in frame construction. There are two woodworking categories that have suffered the demise of fine woodworking relying on shoulder planes in the last eight or so decades — furniture making and shopfitting. Shopfitting seems always to shift with technology at a fast rate of knots. Plastics, laminates and metal-faced composites generally replaced wood but not because of cost so much as creating materials that are stable, machinable and dare I say, even skilless. We transferred from the more unpredictable solid wood that changed with the weather to use various engineered boards pulverised and pulped to produce a wide range of man-made substitutes. These materials were dimensionally stable and for the ever-changing world of shopfitting where the lifespan might change with each new shop/store owner, these materials were ideal. Add colour, a variety of grain prints, textures of choice and the outcome is often remarkably modern-looking and often amazing. Many surfaces have me not knowing if it’s real wood or laminate these days, and working such materials can only really be done using machine processes.
Go back 200 years and more or then less and you would see shoulder planes lying with bench planes on workbenches, shop and office floors under construction and also on temporary trestles set up as transitional workstations. Real wood was being worked to install 10″ deep mahogany or oak skirting boards, architraves, countertops and glass cases framed with moulding just run on the edges of boards using nothing more than moulding planes. Shoulder lines tested the metal of makers, qualifying their abilities to others on the job. Any flaw here would result in comments from the older men in control of the project: “Drive a horse and cart through that shoulder!“
Doors and panelled walls with glass as partitionings were always made on the bench in the workshop. In the 1960s and before, this type of work was all but gone. Very few specialist companies survived to take up the slack but the work pretty well dried up with the quest for the ever-new and brighter. Fasteners for plastic, metal and man-made engineered materials in sheet goods became ever more sophisticated as did the facings for such materials. It’s no real surprise therefore that there was no need for the joinery and no need for the hand tools they used either. The shop joinery became a fitter and so the question is do we need shoulder planes in our limited capacity in woodworking at home? Well, I think it is a matter of personal preference. I enjoy alternative tools and also those developed specifically for a particular application. I also like the idea of adapting tools to other applications beyond their intended design. The shoulder plane does that.
Whenever I make for woodworking masterclasses I always use what my audience is likely to use or have access to. I do not like sending anyone out for £300 plane — I think that that is important for me and for you. Of course, our work is 99% handwork so the shoulders for our tenons are always hand-sawn and pare-cut with saws and chisels to the knifewalls we first establish. Our aims are entirely different. We’re non-competitive and do not need to come in at the lowest price point. We have no need to rush our work as we enjoy the processes as much as the completion of it and that is because we are pursuing the development of skills. We are high self-demanding woodworkers. Rushing denies us the feelings we get from achieving good results working with our hands and bodies. We want hard work be that for mental and physical challenges or the unique physical workout this gives us.
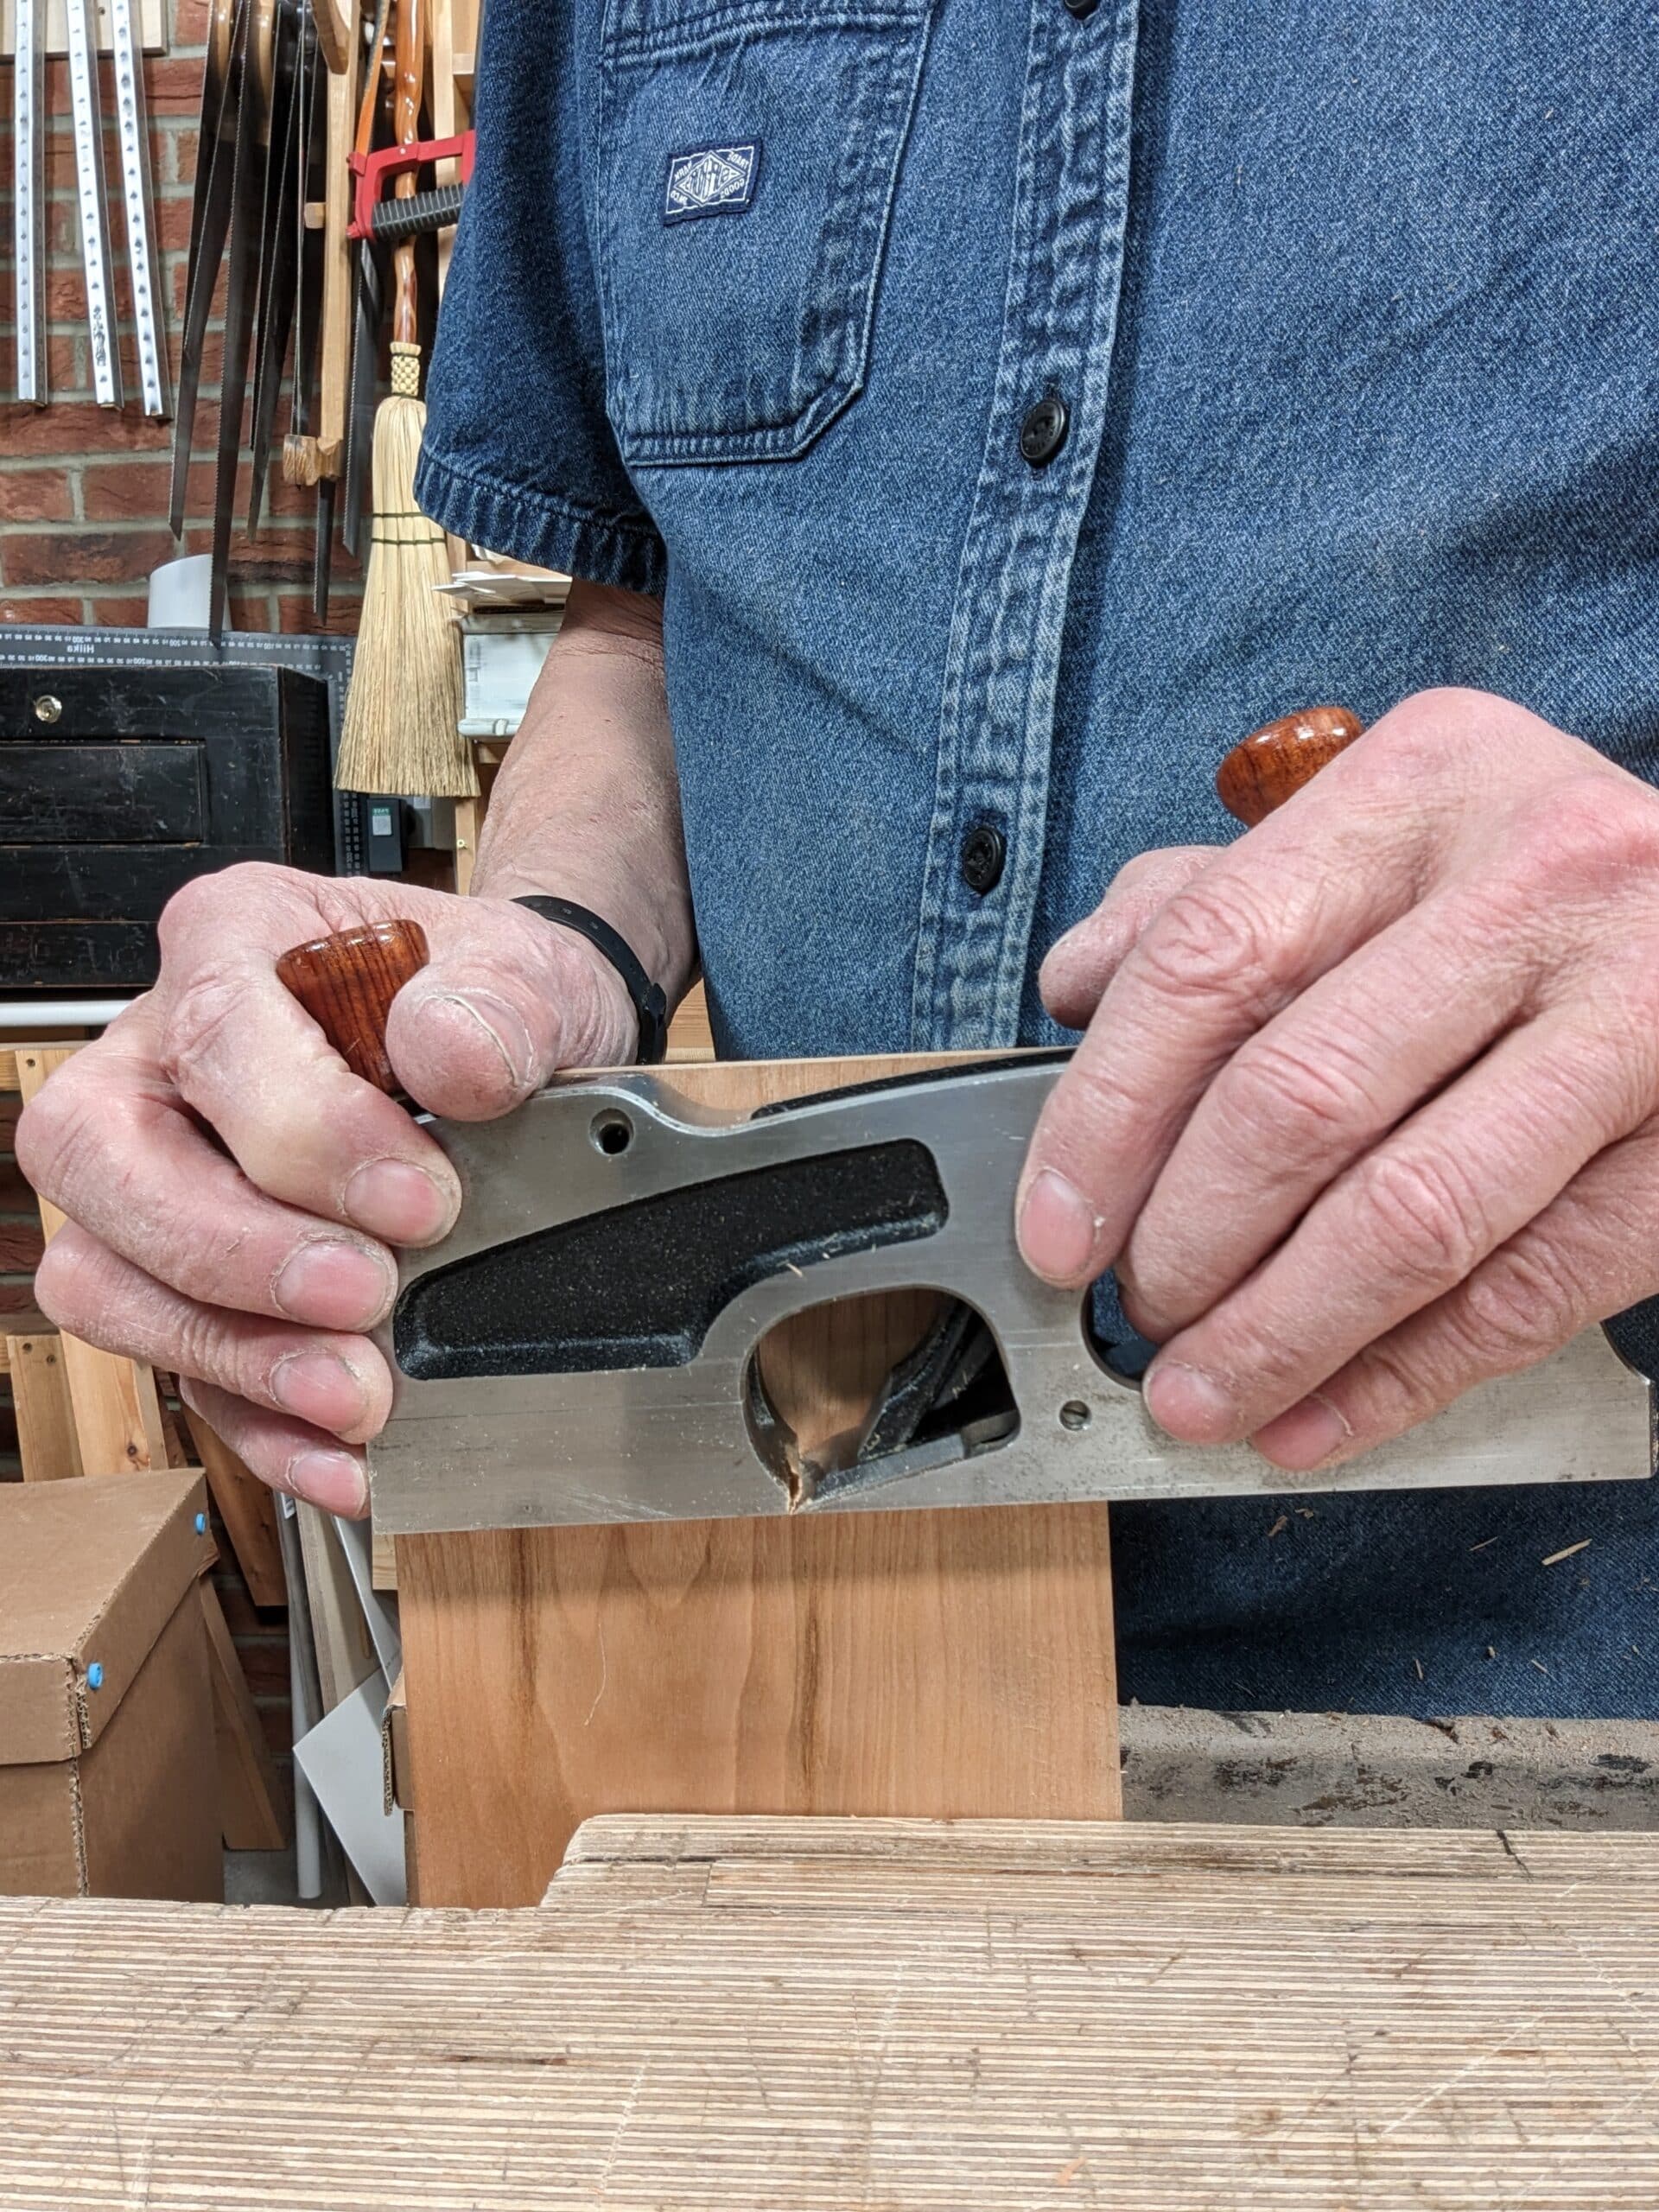
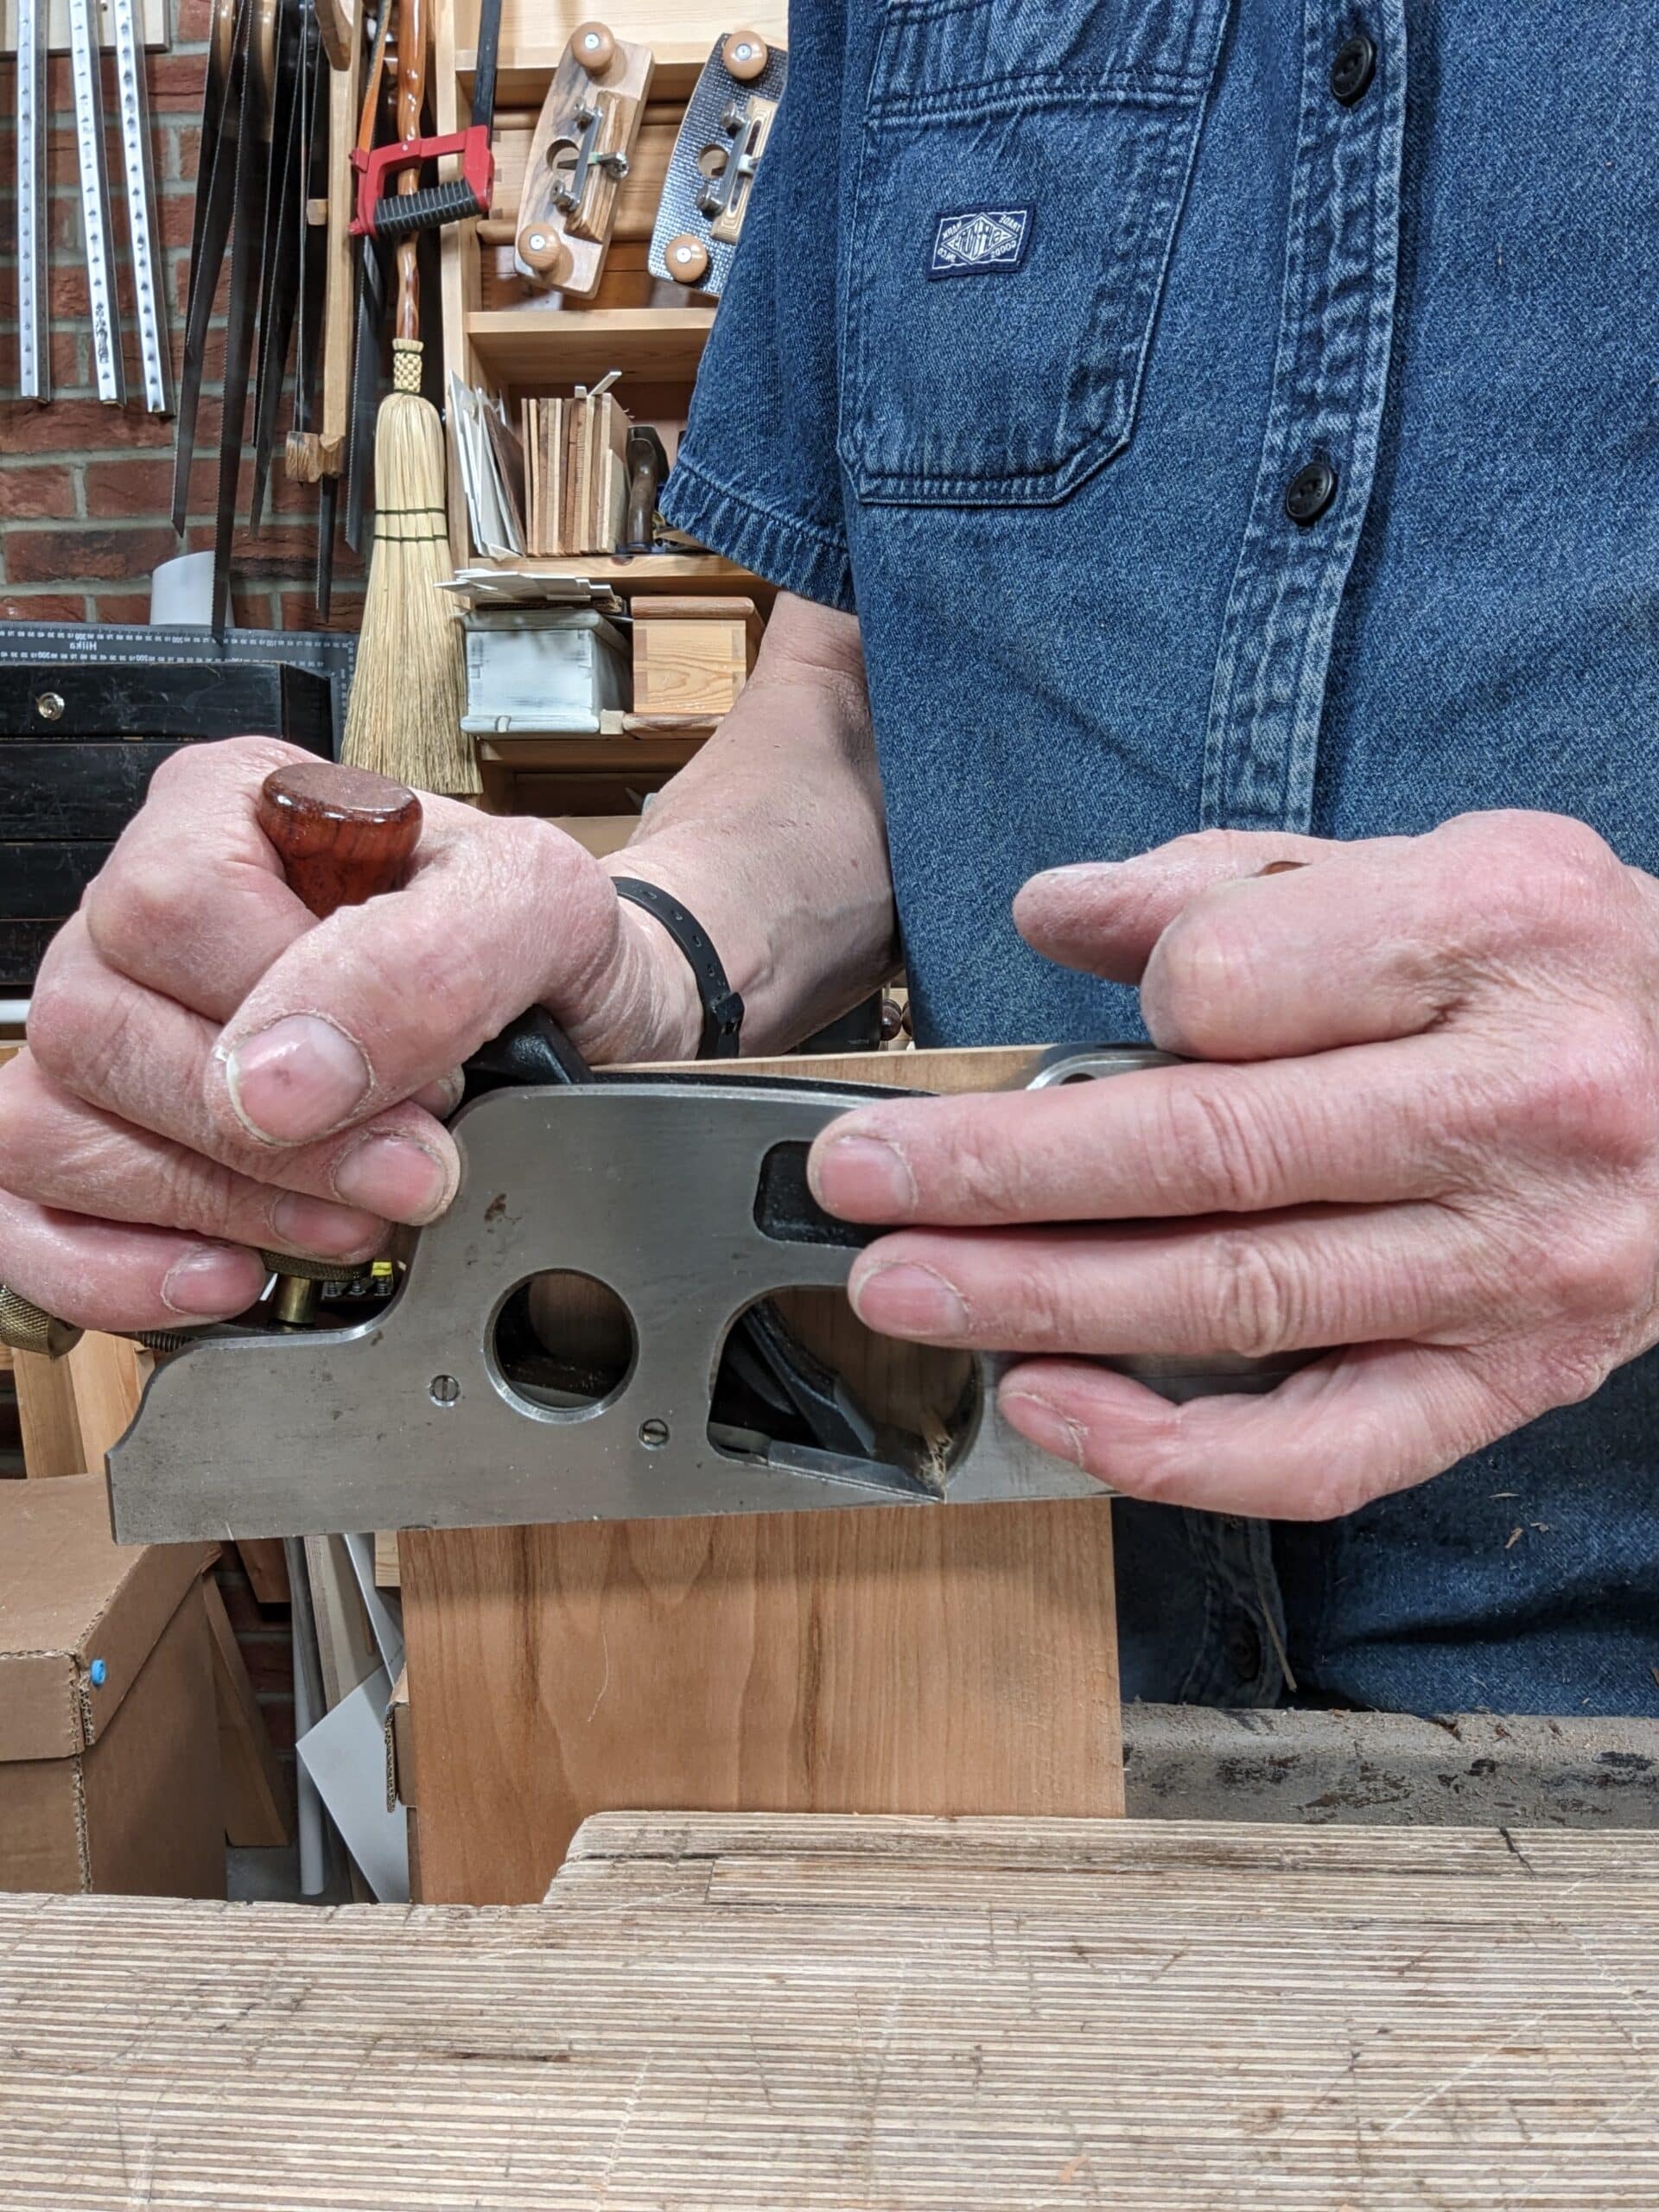
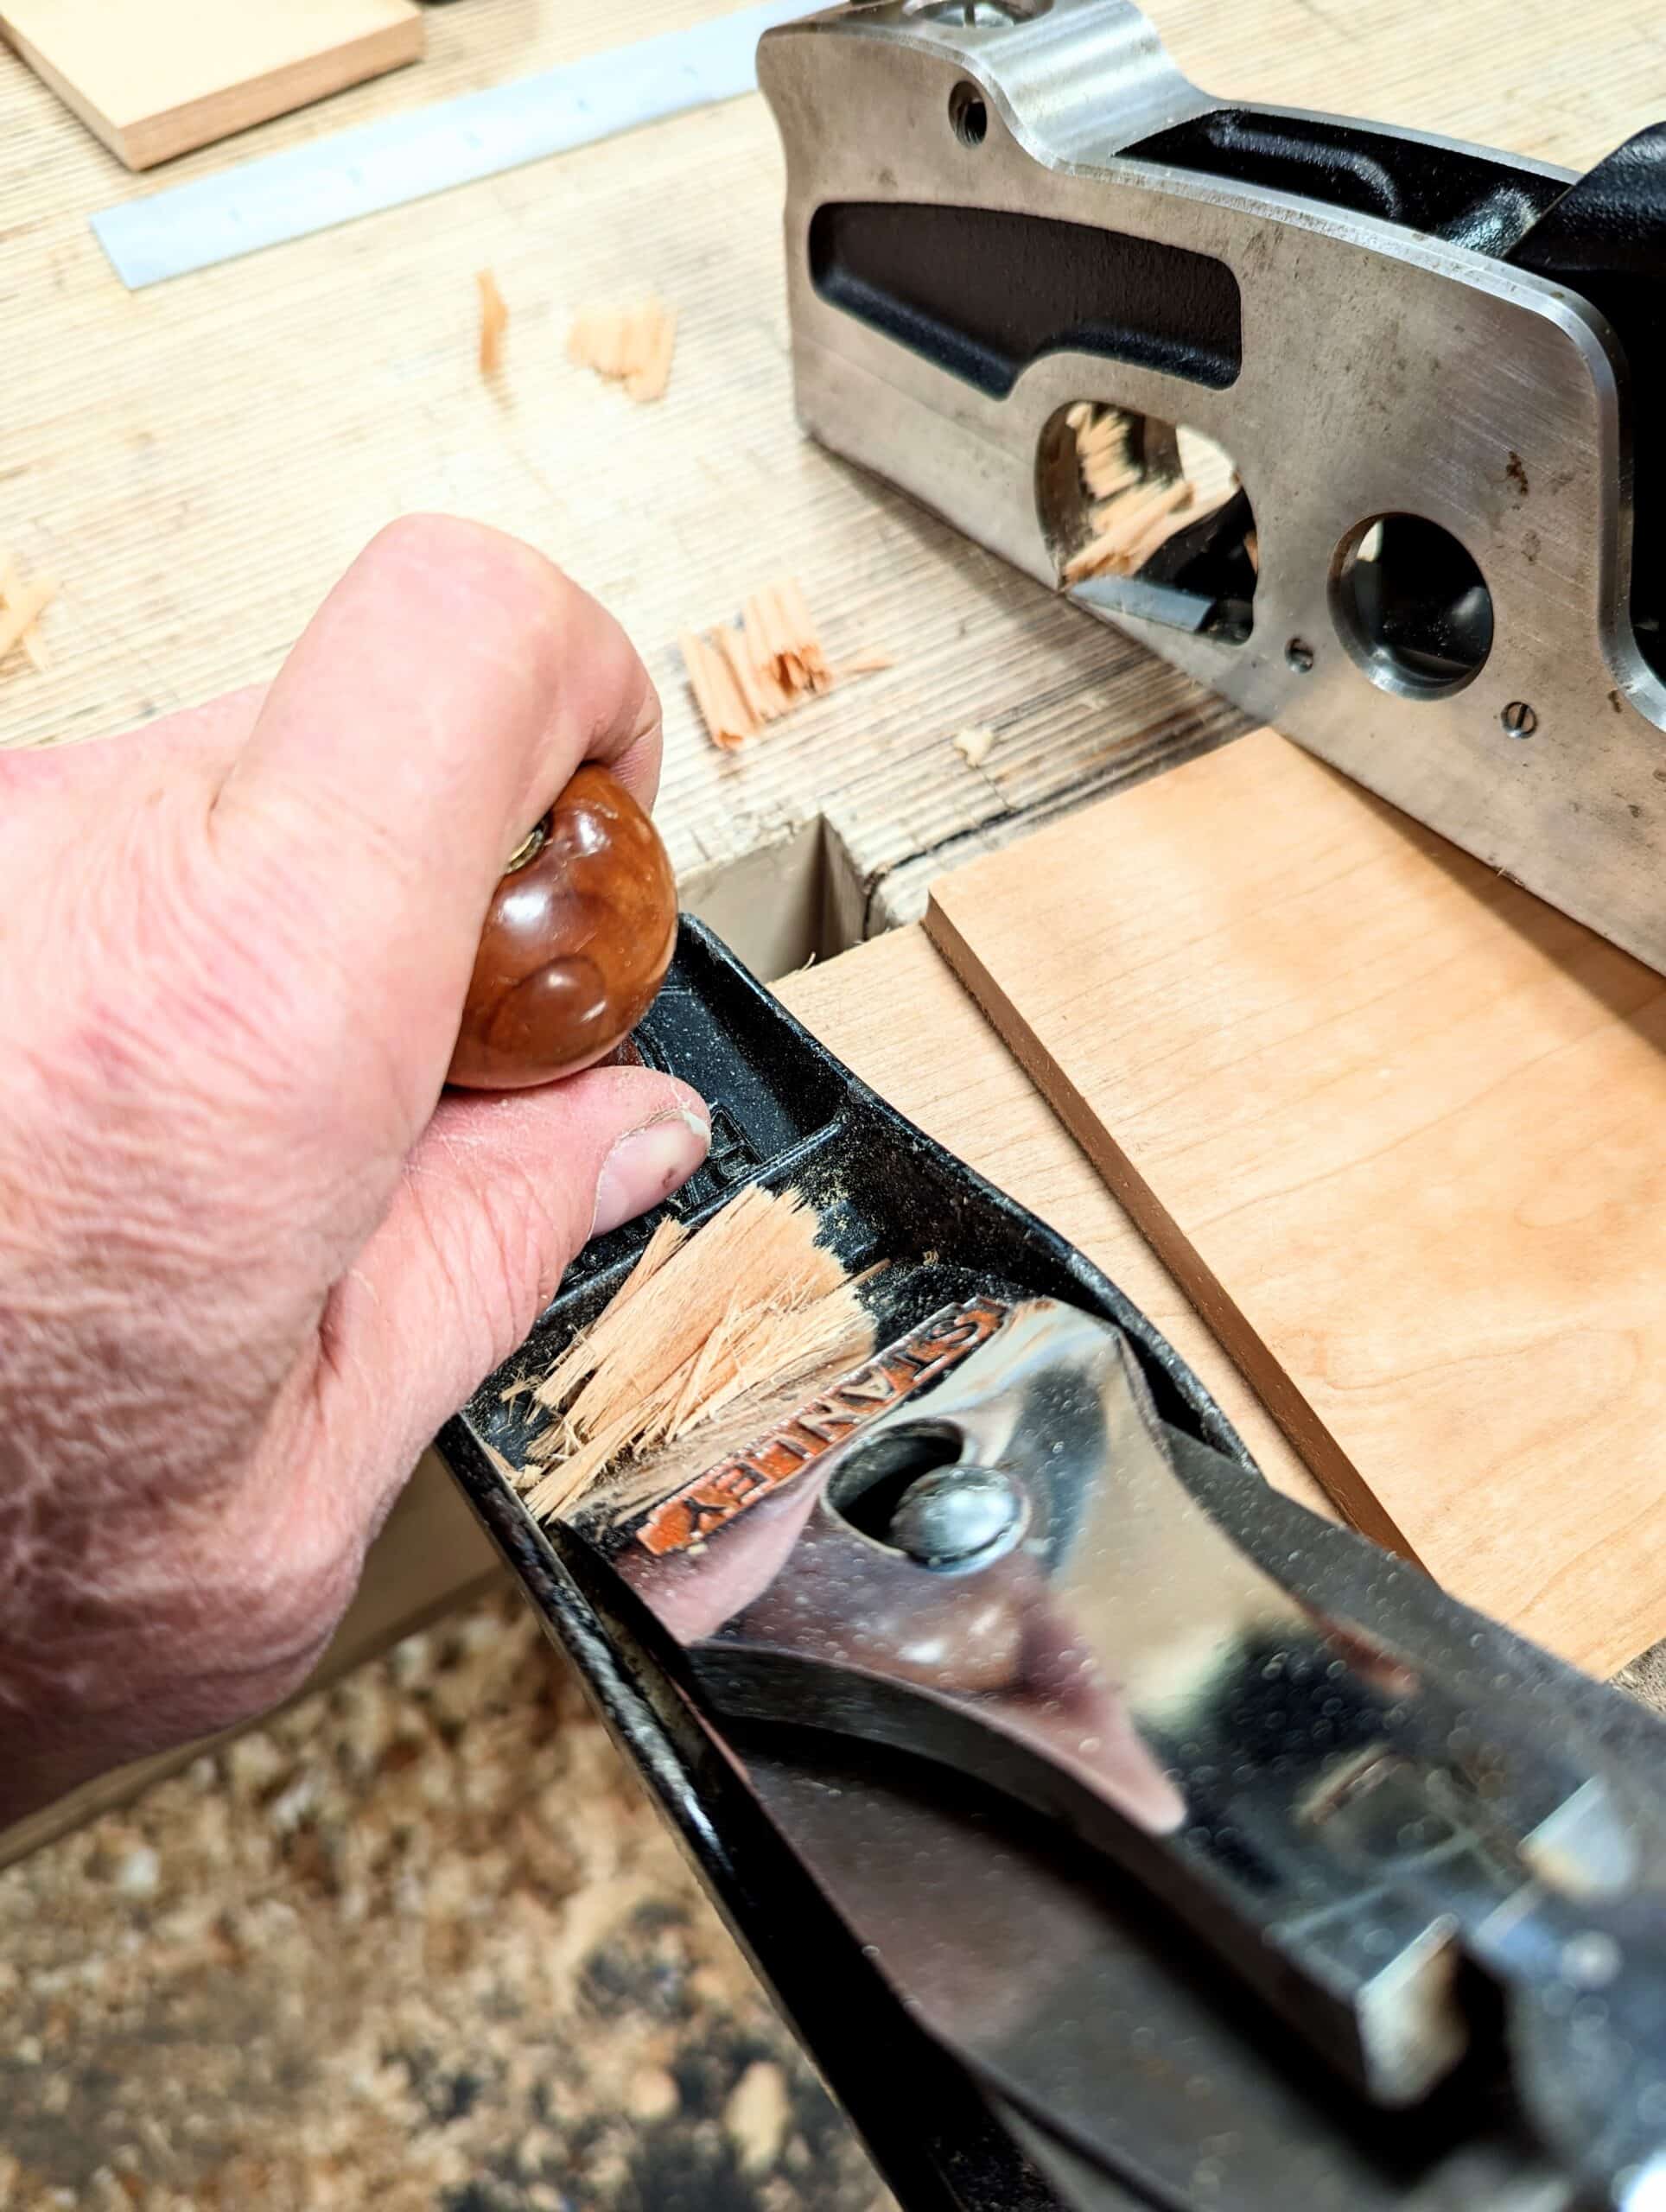
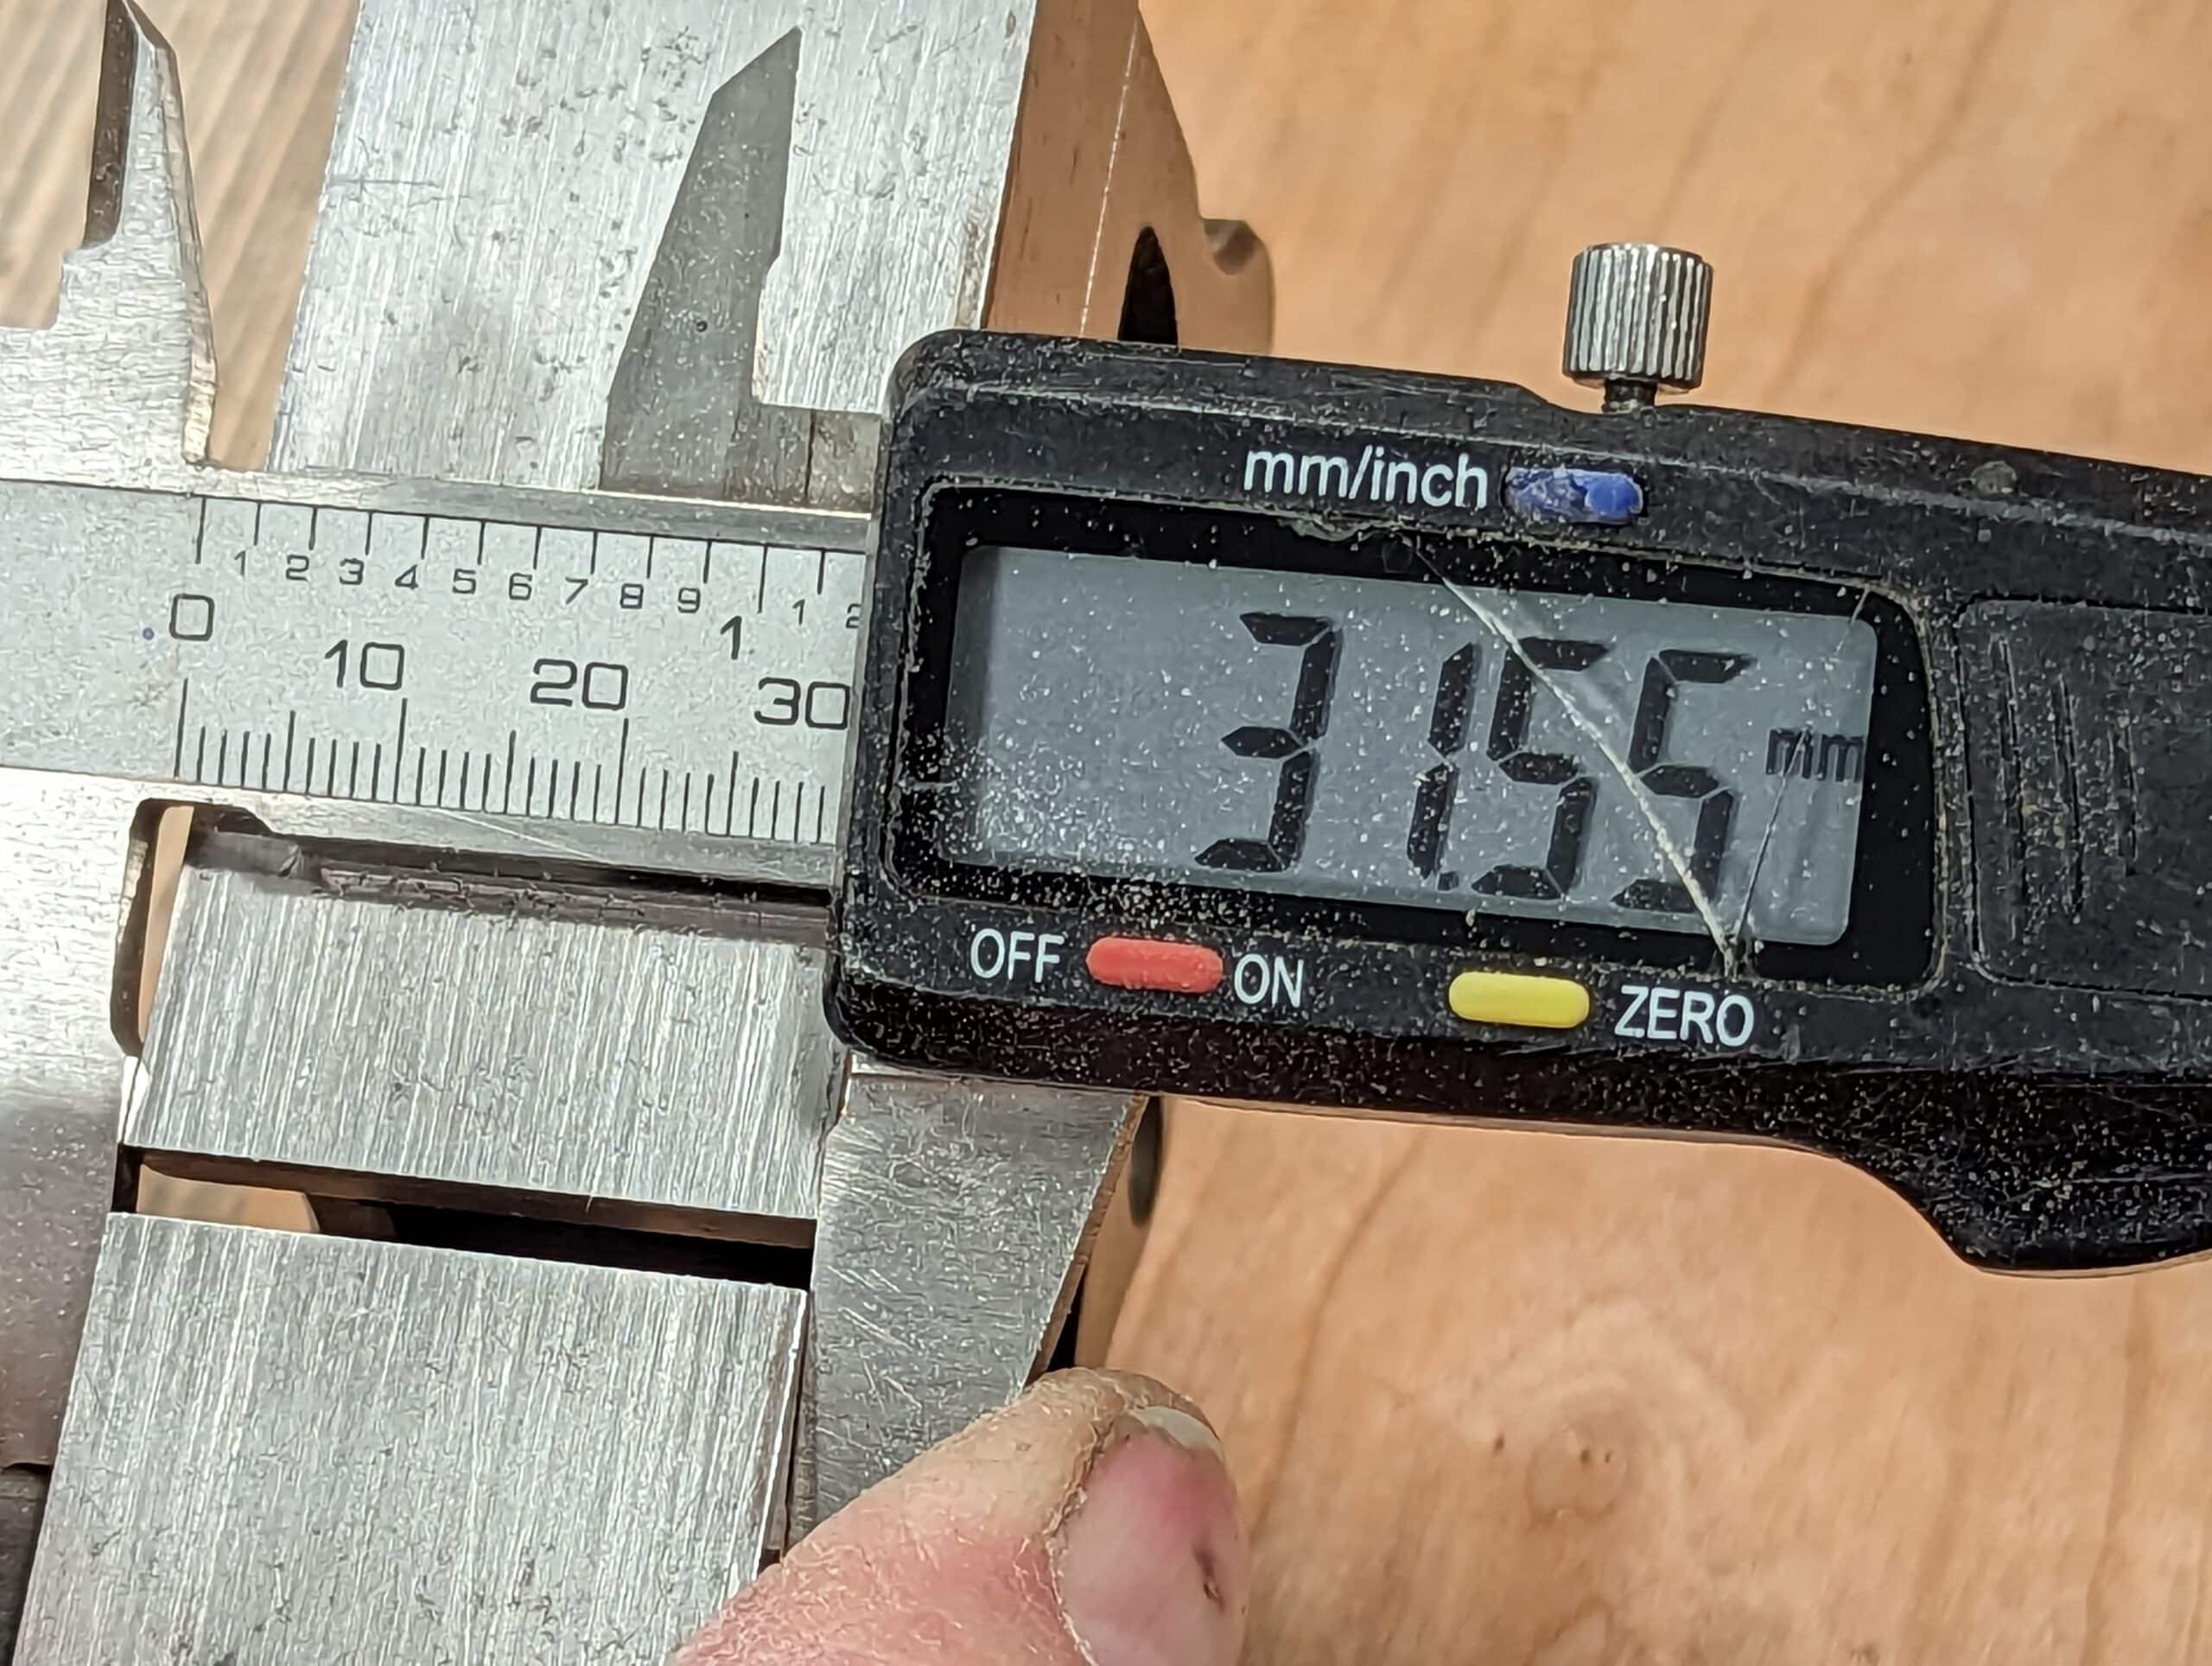
I have enjoyed using my shoulder planes through many decades. I own Record versions, both narrow and wide ones and then too a Veritas one whose blade is 1 1/4″ (31mm) wide. They all work well provides the blades are sharp and square-ended. That said, in the first two decades of my woodworking life `i never used one. Even though we mainly use the knifewall to saw and pare cut to, we can indeed use the shoulder plane to finalise the cut to the knifewall line too. With practice, you can feather into a cut if the saw cut was slightly off at one side. It’s a technique you develop by applying different points of pressure through the plane body in the same way we do with bench planes like smoothing planes and Jacks. We can rely on the weightier body to counter any and all resistance and most knots are barely discernible when push and follow through the cut without faltering. the best way to use the plane is with a shallow set and many strokes rather than heavy cuts.
The end result of that final stroke is a dead square shoulder that’s square both across and vertically and of equal importance, straight. The length of the sole fore and aft, combined with the weightiness of the plane steadies the plane with each thrusting stroke. Once registered, quick successive strokes without removing the plane from its ever-forming platform are practical and positive. I prefer the knife wall all around to guide my strokes as it gives me the exactness I need to establish both shoulders in perfect square-across alignment. It’s also good to note that plane strokes rarely result in equal thickness from the start to the end of the stroke though in theory that would make sense to us. Compression of the wood, applied pressures and then other resistance factors, wood types, grain types affect plane functionality stoke on stoke. This plane starts at the edge of the shoulder with the blade engaging the face of the shoulder at the depth setting of the cutting iron. Inevitably the plane rises as the plane passes from one end of the shoulder to the other. It’s so small an amount it’s almost inconsequential but the plane dulls with every stroke and this rising in the cut will inevitably mean you are taking more off at one end of the shoulder than the other. This, of course, happens in all planing with all planes. To correct this we have options; we can plane from the opposite side into the previous cuts or we can sharpen repeatedly with short distances between sharpenings. It’s up to us. Keeping sharp is my choice.
The shoulder plane can be used lying on its side and vertically according to preference, comfort visibility of cut and more. Depending on the presenter, you might think this or that are the only options but mostly I find it depends on the pulling or pushing power as the blade engages the wood. Both standard ways work perfectly well and you will gain confidence going either way according to your own feelings in the zone. The thing is this though, the tenon is upright in the vise for that vertical trim you want to a shoulder. Pushing the plane into the cut seems good on one side and pulling on the same side can feel more awkward. Flipping the plane end for end might resolve the conflict and when you focus on the opposite shoulder you might find everything completely different. It’s important to practice different options so that you become more conversant with the tool. This gives you options and versatility.
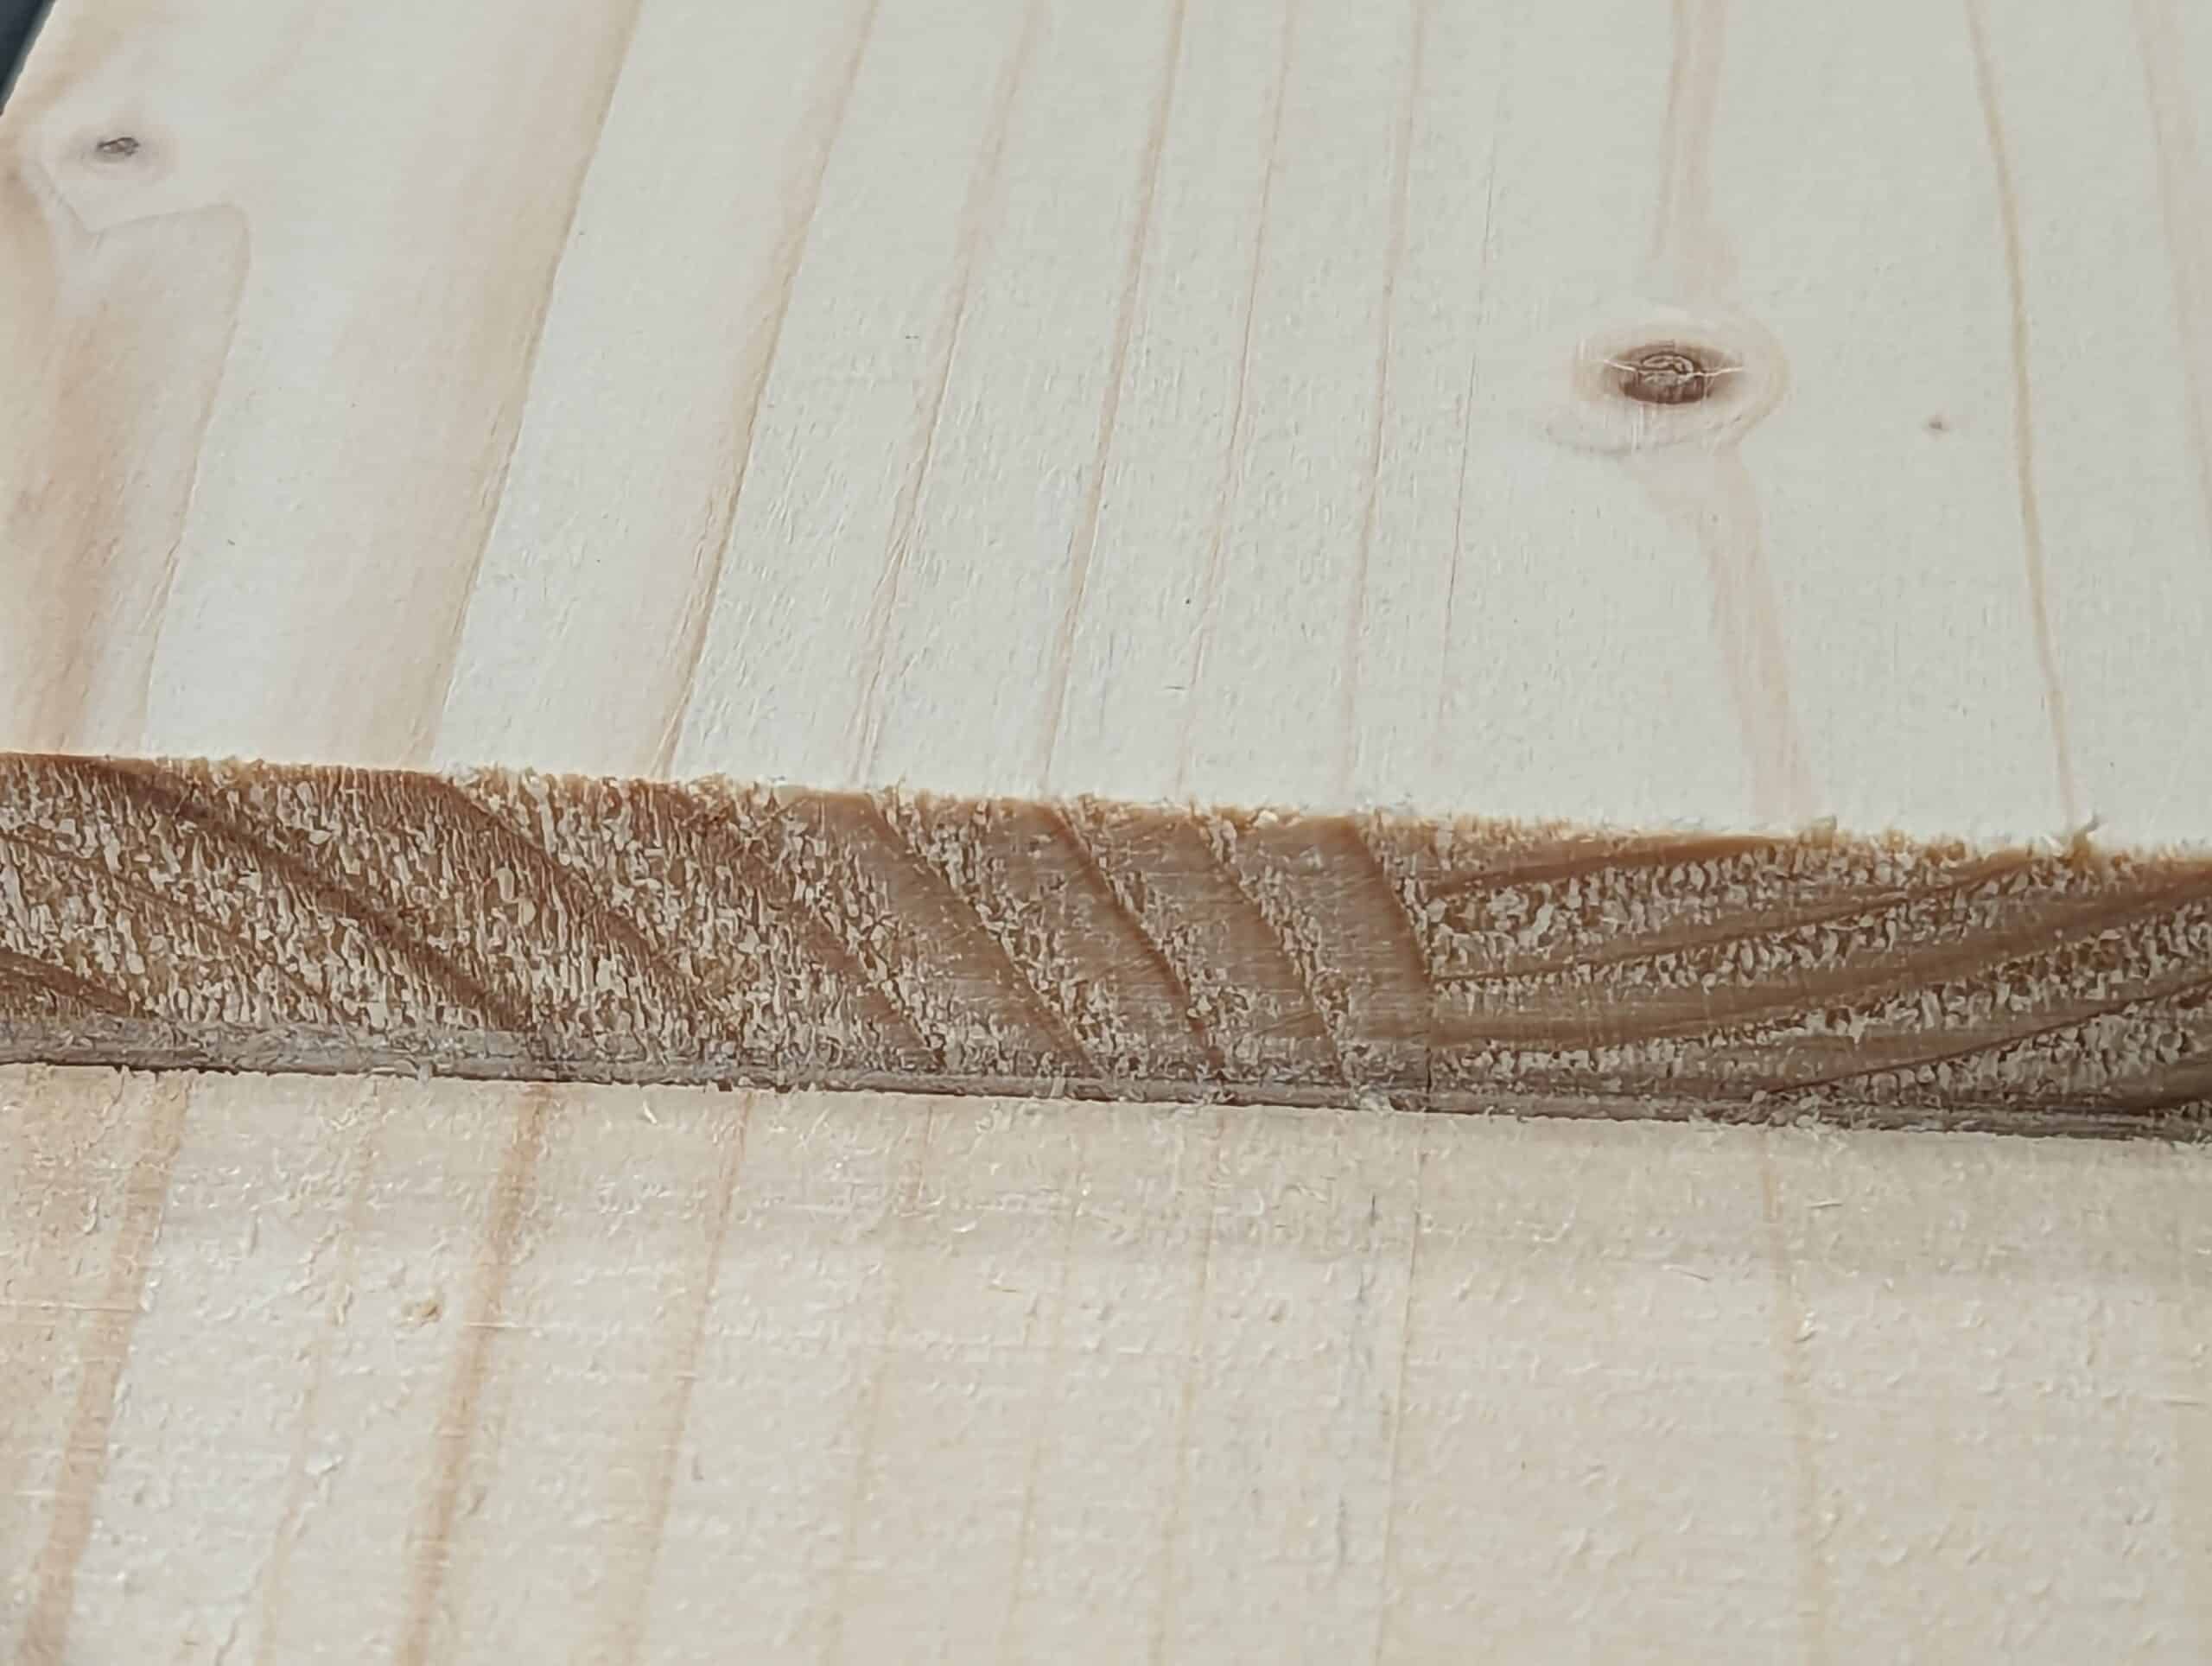
Softwoods with their characteristic variability in grain density between the two side-by-side aspects or sections of every growth ring can be highly problematic with end-grain planing and especially with shoulder planes. The hard aspect to the growth ring with its denser grain doesn’t collapse under the force of the plane but the plane’s push forces the hard ring into the soft ring aspect next to it and this causes a degree of collapse. At this point, the soft ring becomes compressed until the opposite force equals the pressure applied by the plane which is when the fibres sever. Compression against each adjacent hard growth ring and the knock-on effect results in clean-cut hard aspects and tear-out and compression retention in the softer aspects of the grain. This results in tiny gaps in the softer wood areas. This will usually show on the face grain right by the shoulder corner. The only way to minimise harm is a truly sharp cutting edge combined with a cross-grain knifewall. The below images show the result of shoulder planing end-grain rebates.

Remember that soft woods are not the same as softwoods and hard woods are not the same as hardwoods; quite confusing terms. There are dozens of soft-grain hardwoods. One of the softest least dense woods is balsa wood which is a hardwood and not a softwood. Such woods compress under end-grain planing until the build-up of resistance equals the applied pressure and fights back to result in cut fibres.
Try planing shoulder lines in available softwoods and soft-grained woods. Spruce, pine, fir all plane quite differently and you will see which ones have grain collapse and which ones resist it. Switch to other woods like cherry, walnut, oak, maple just to see the differences.
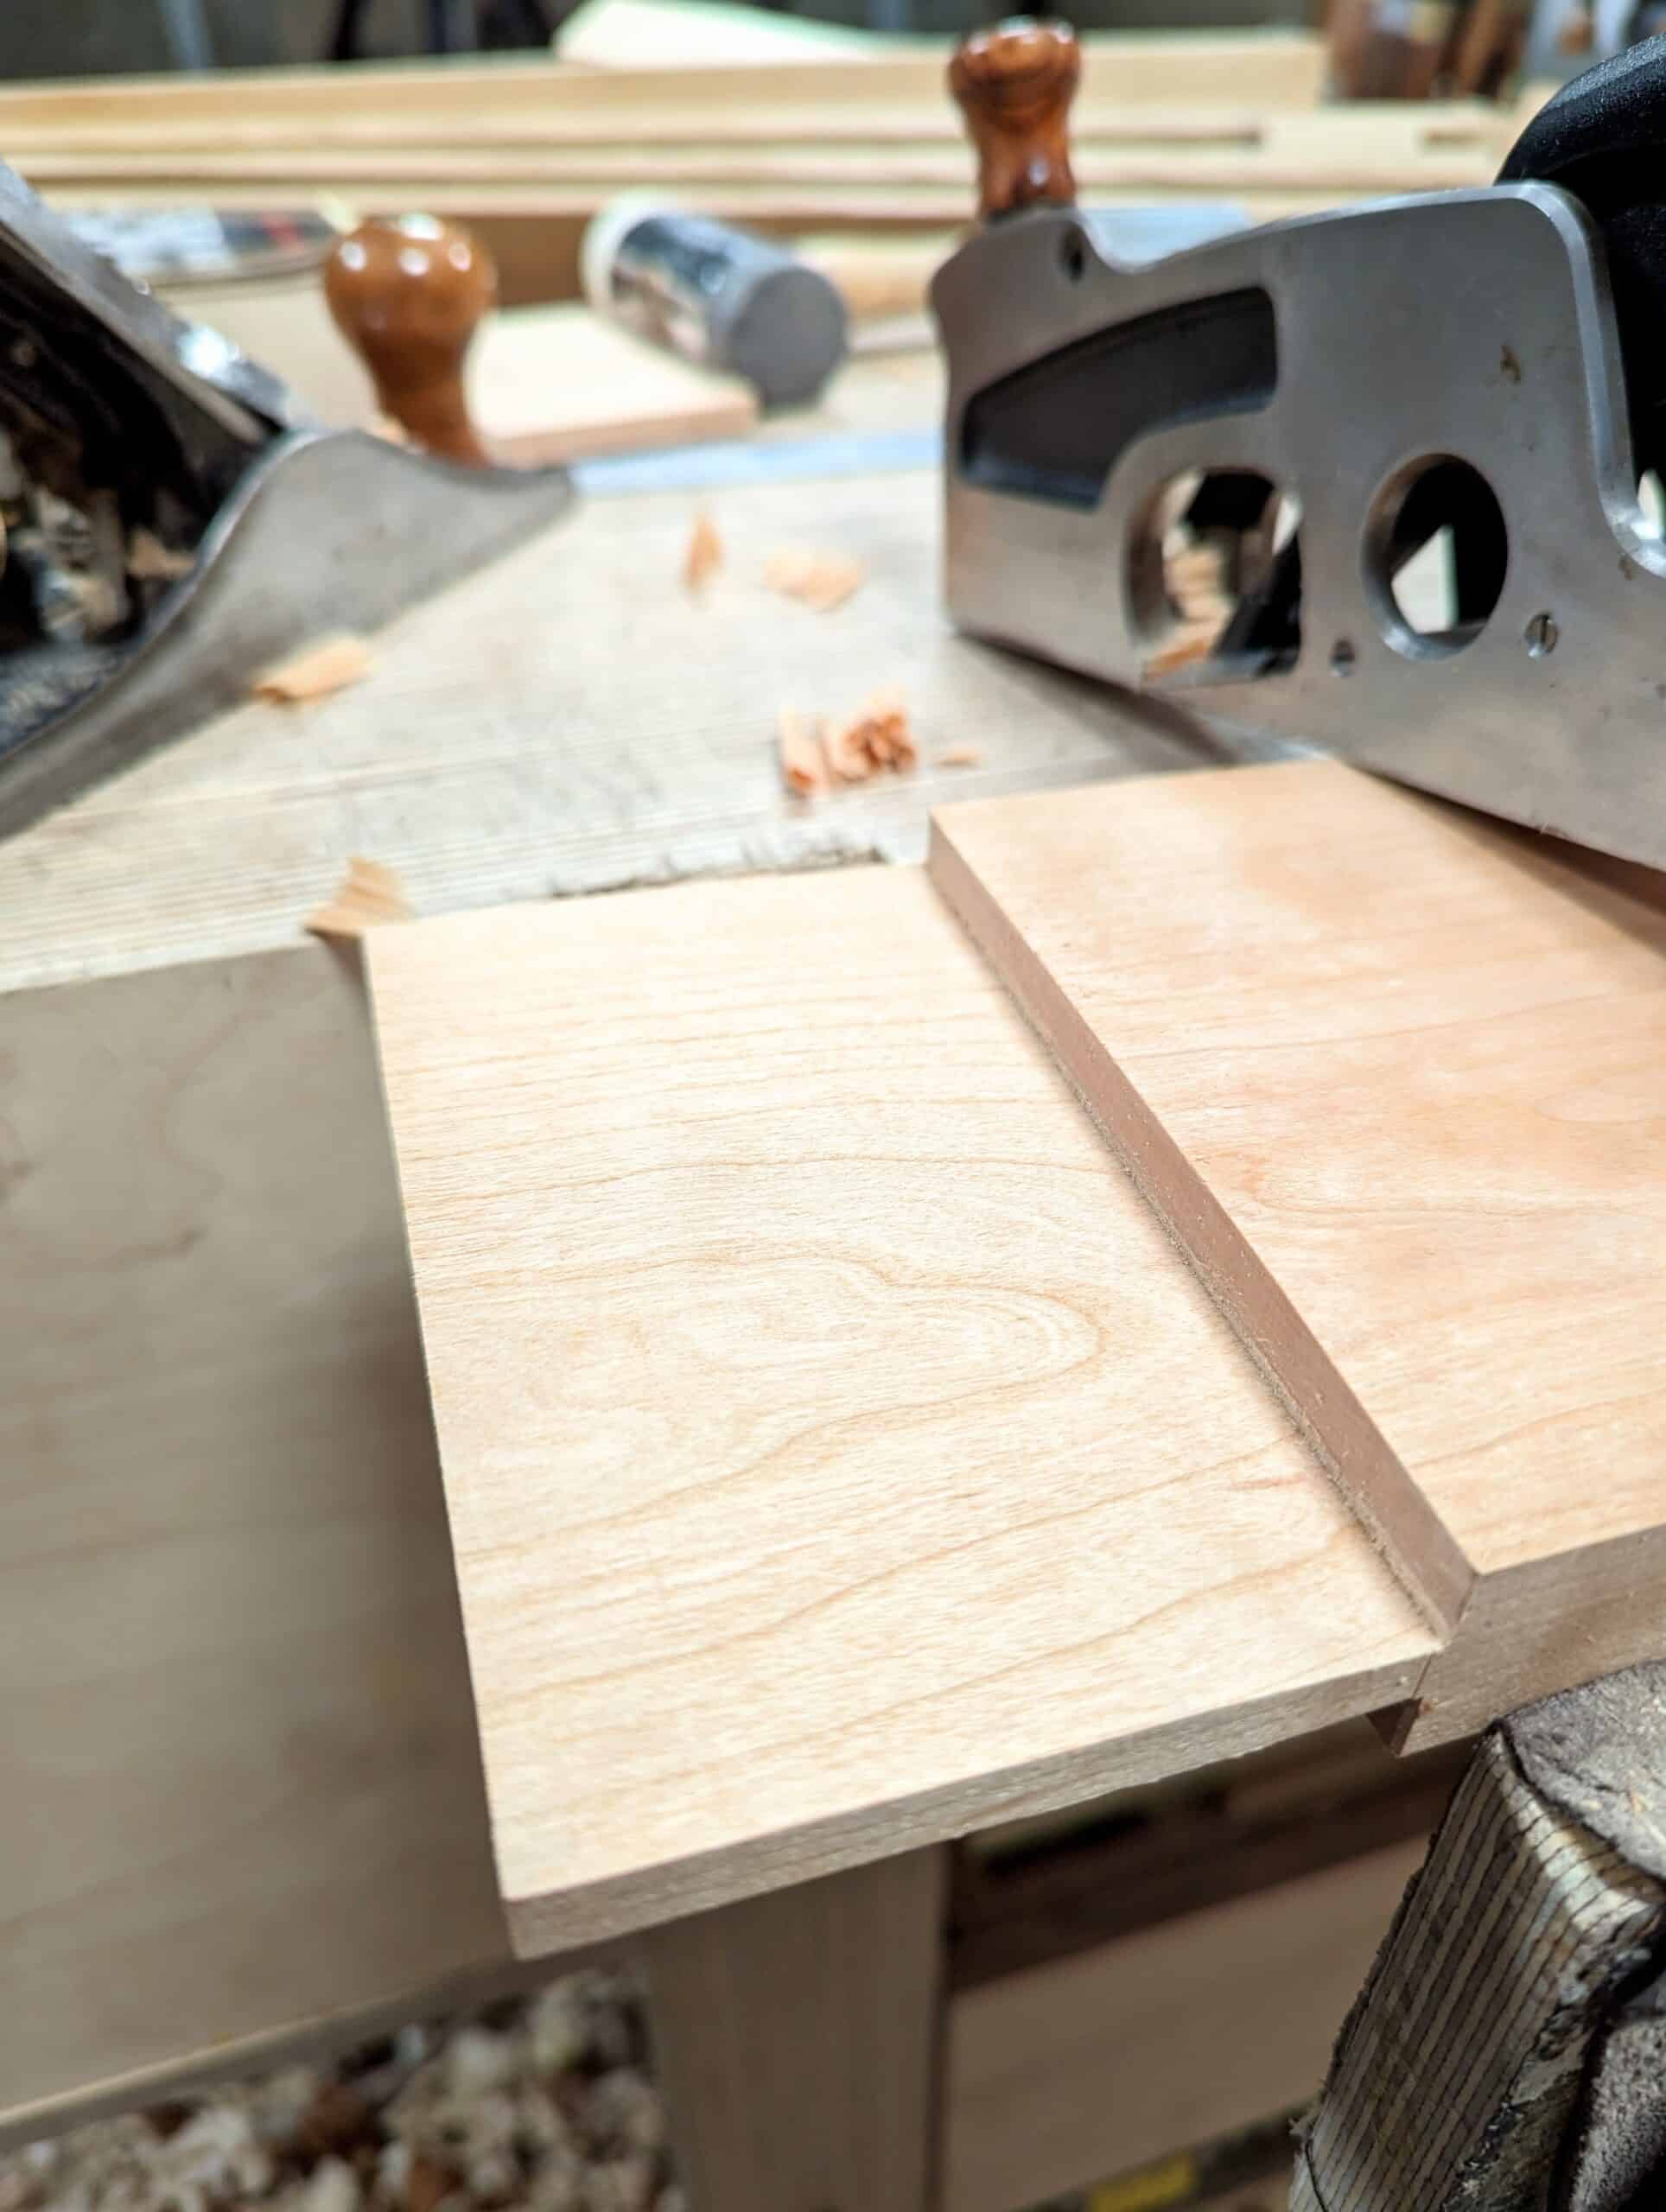
Often woodworkers don’t realise that shoulder planes can be used on the cheeks or faces of tenons and the interiors of cross-grain step-downs like dadoes. The strokes are side by side and barely overlapping. Use the hand router to establish a level surface all across and then follow on with the shoulder plane for a super-smooth surface.
You can also use the shoulder plane for the first pass up tight by the shoulder and then use a #4 smoothing plane on the outer reaches. This is especially useful on long and wide tenons. You can work to the gauge lines or do as I often do and use the router plane as the marking gauge to mark the cheeks of the tenon before any cutting takes place and then, after cutting by whatever means you choose, cut with the first pass of the shoulder plane to the line and then follow on using the #4 to finalise the tenon surface.
Below is how your tenon can look using this method
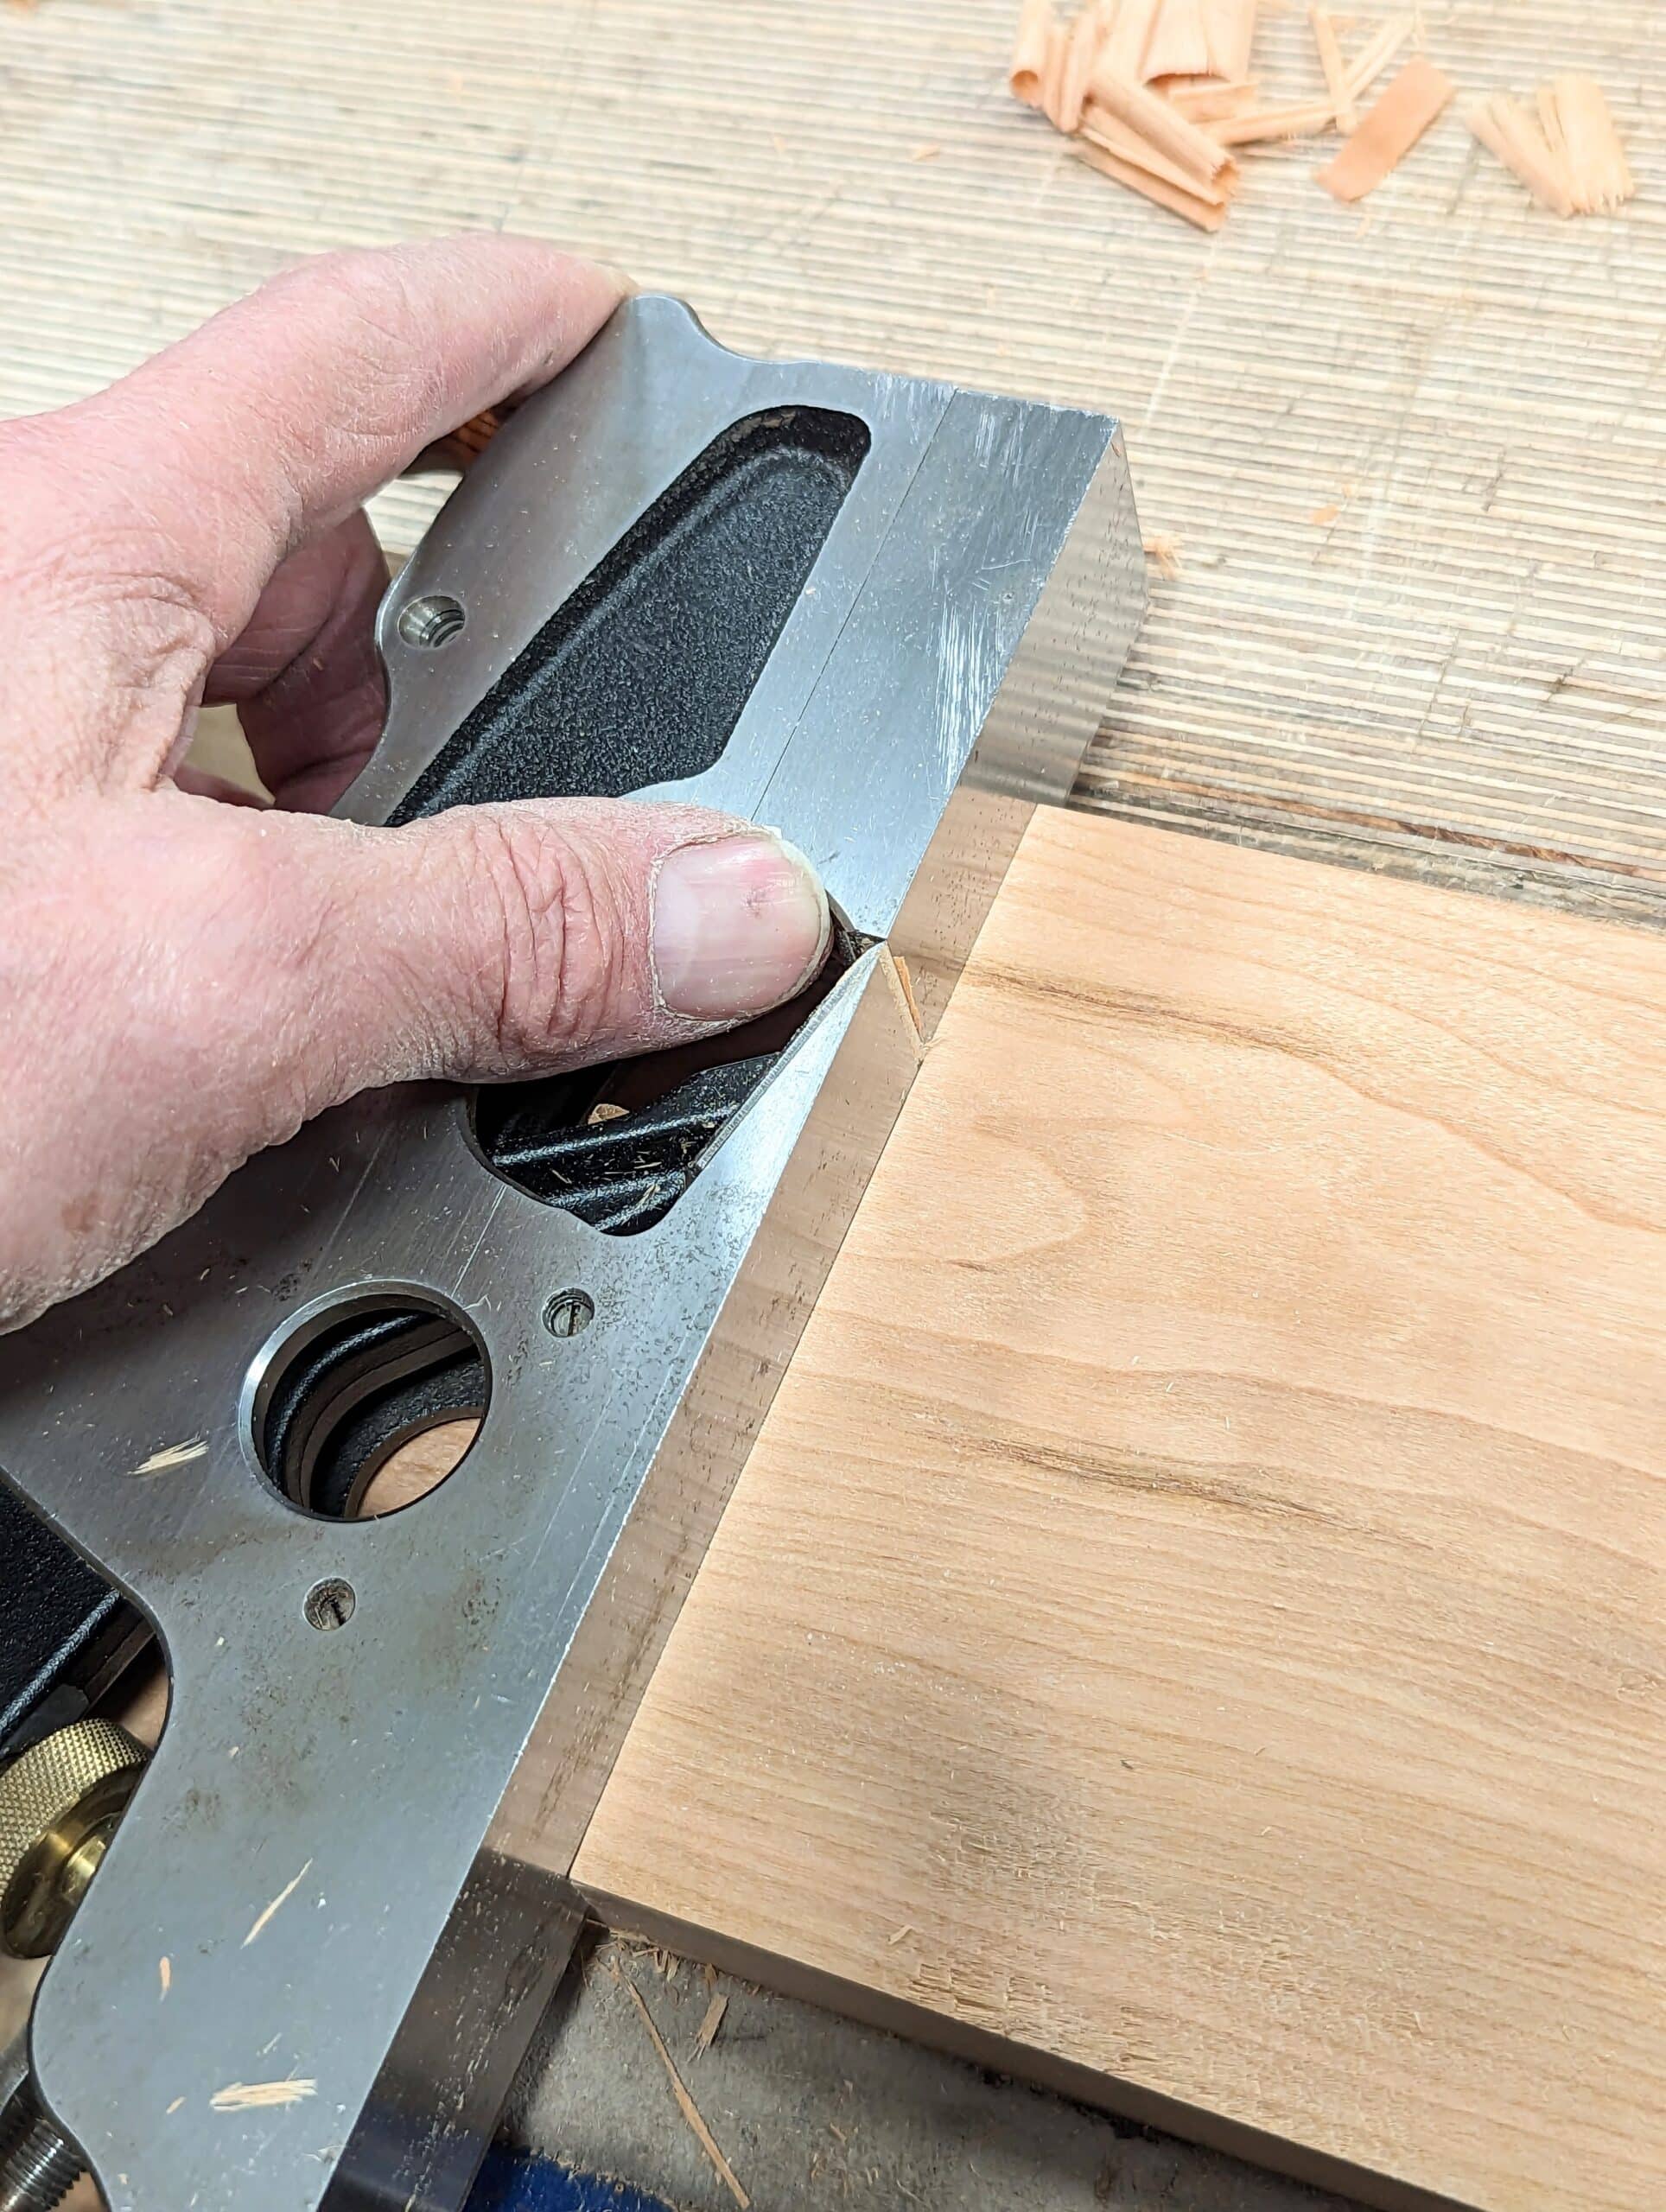
If you look on the shoulders of old shop doors and such you might see on the extreme corner of the shoulder line a bevelled back ending (see below). It’s done so that the shoulder plane can pass through in successive passes and when done it is scarcely noticed.
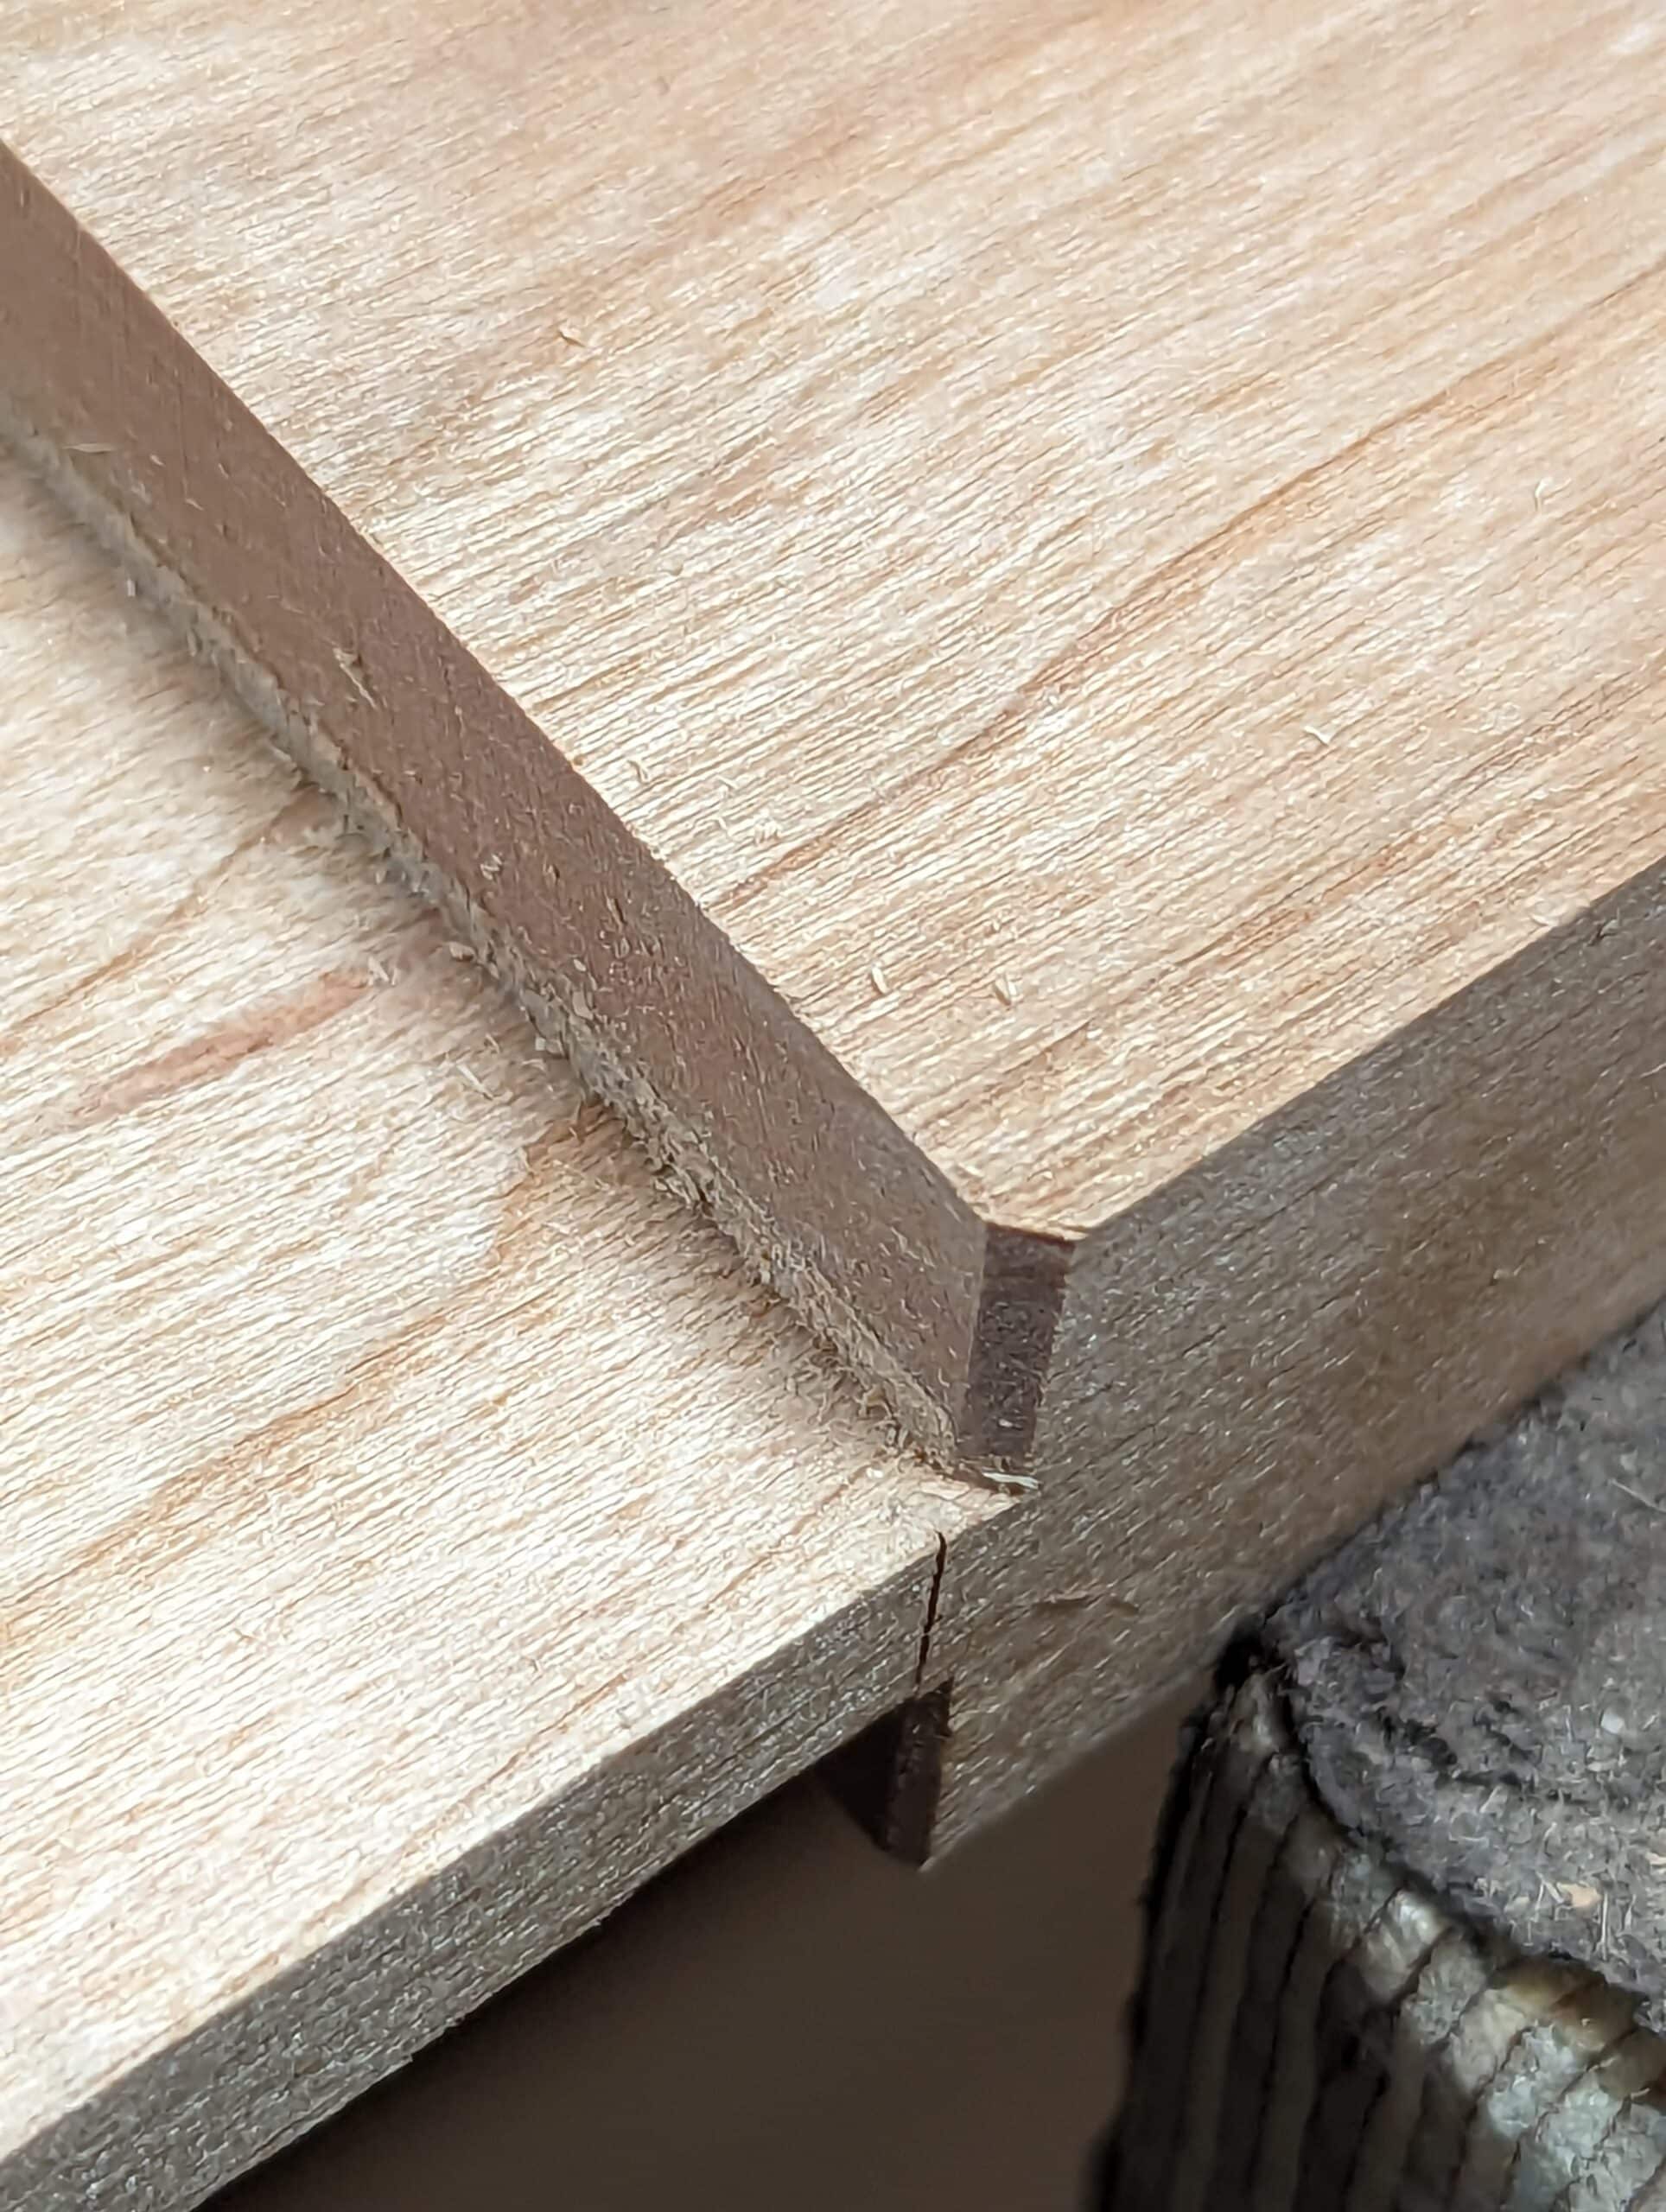
If you look on some shoulder lines you might see the end near the outcut is fractured . . . this almost always happens when the cut is too deep and that is with or without the back bevel.
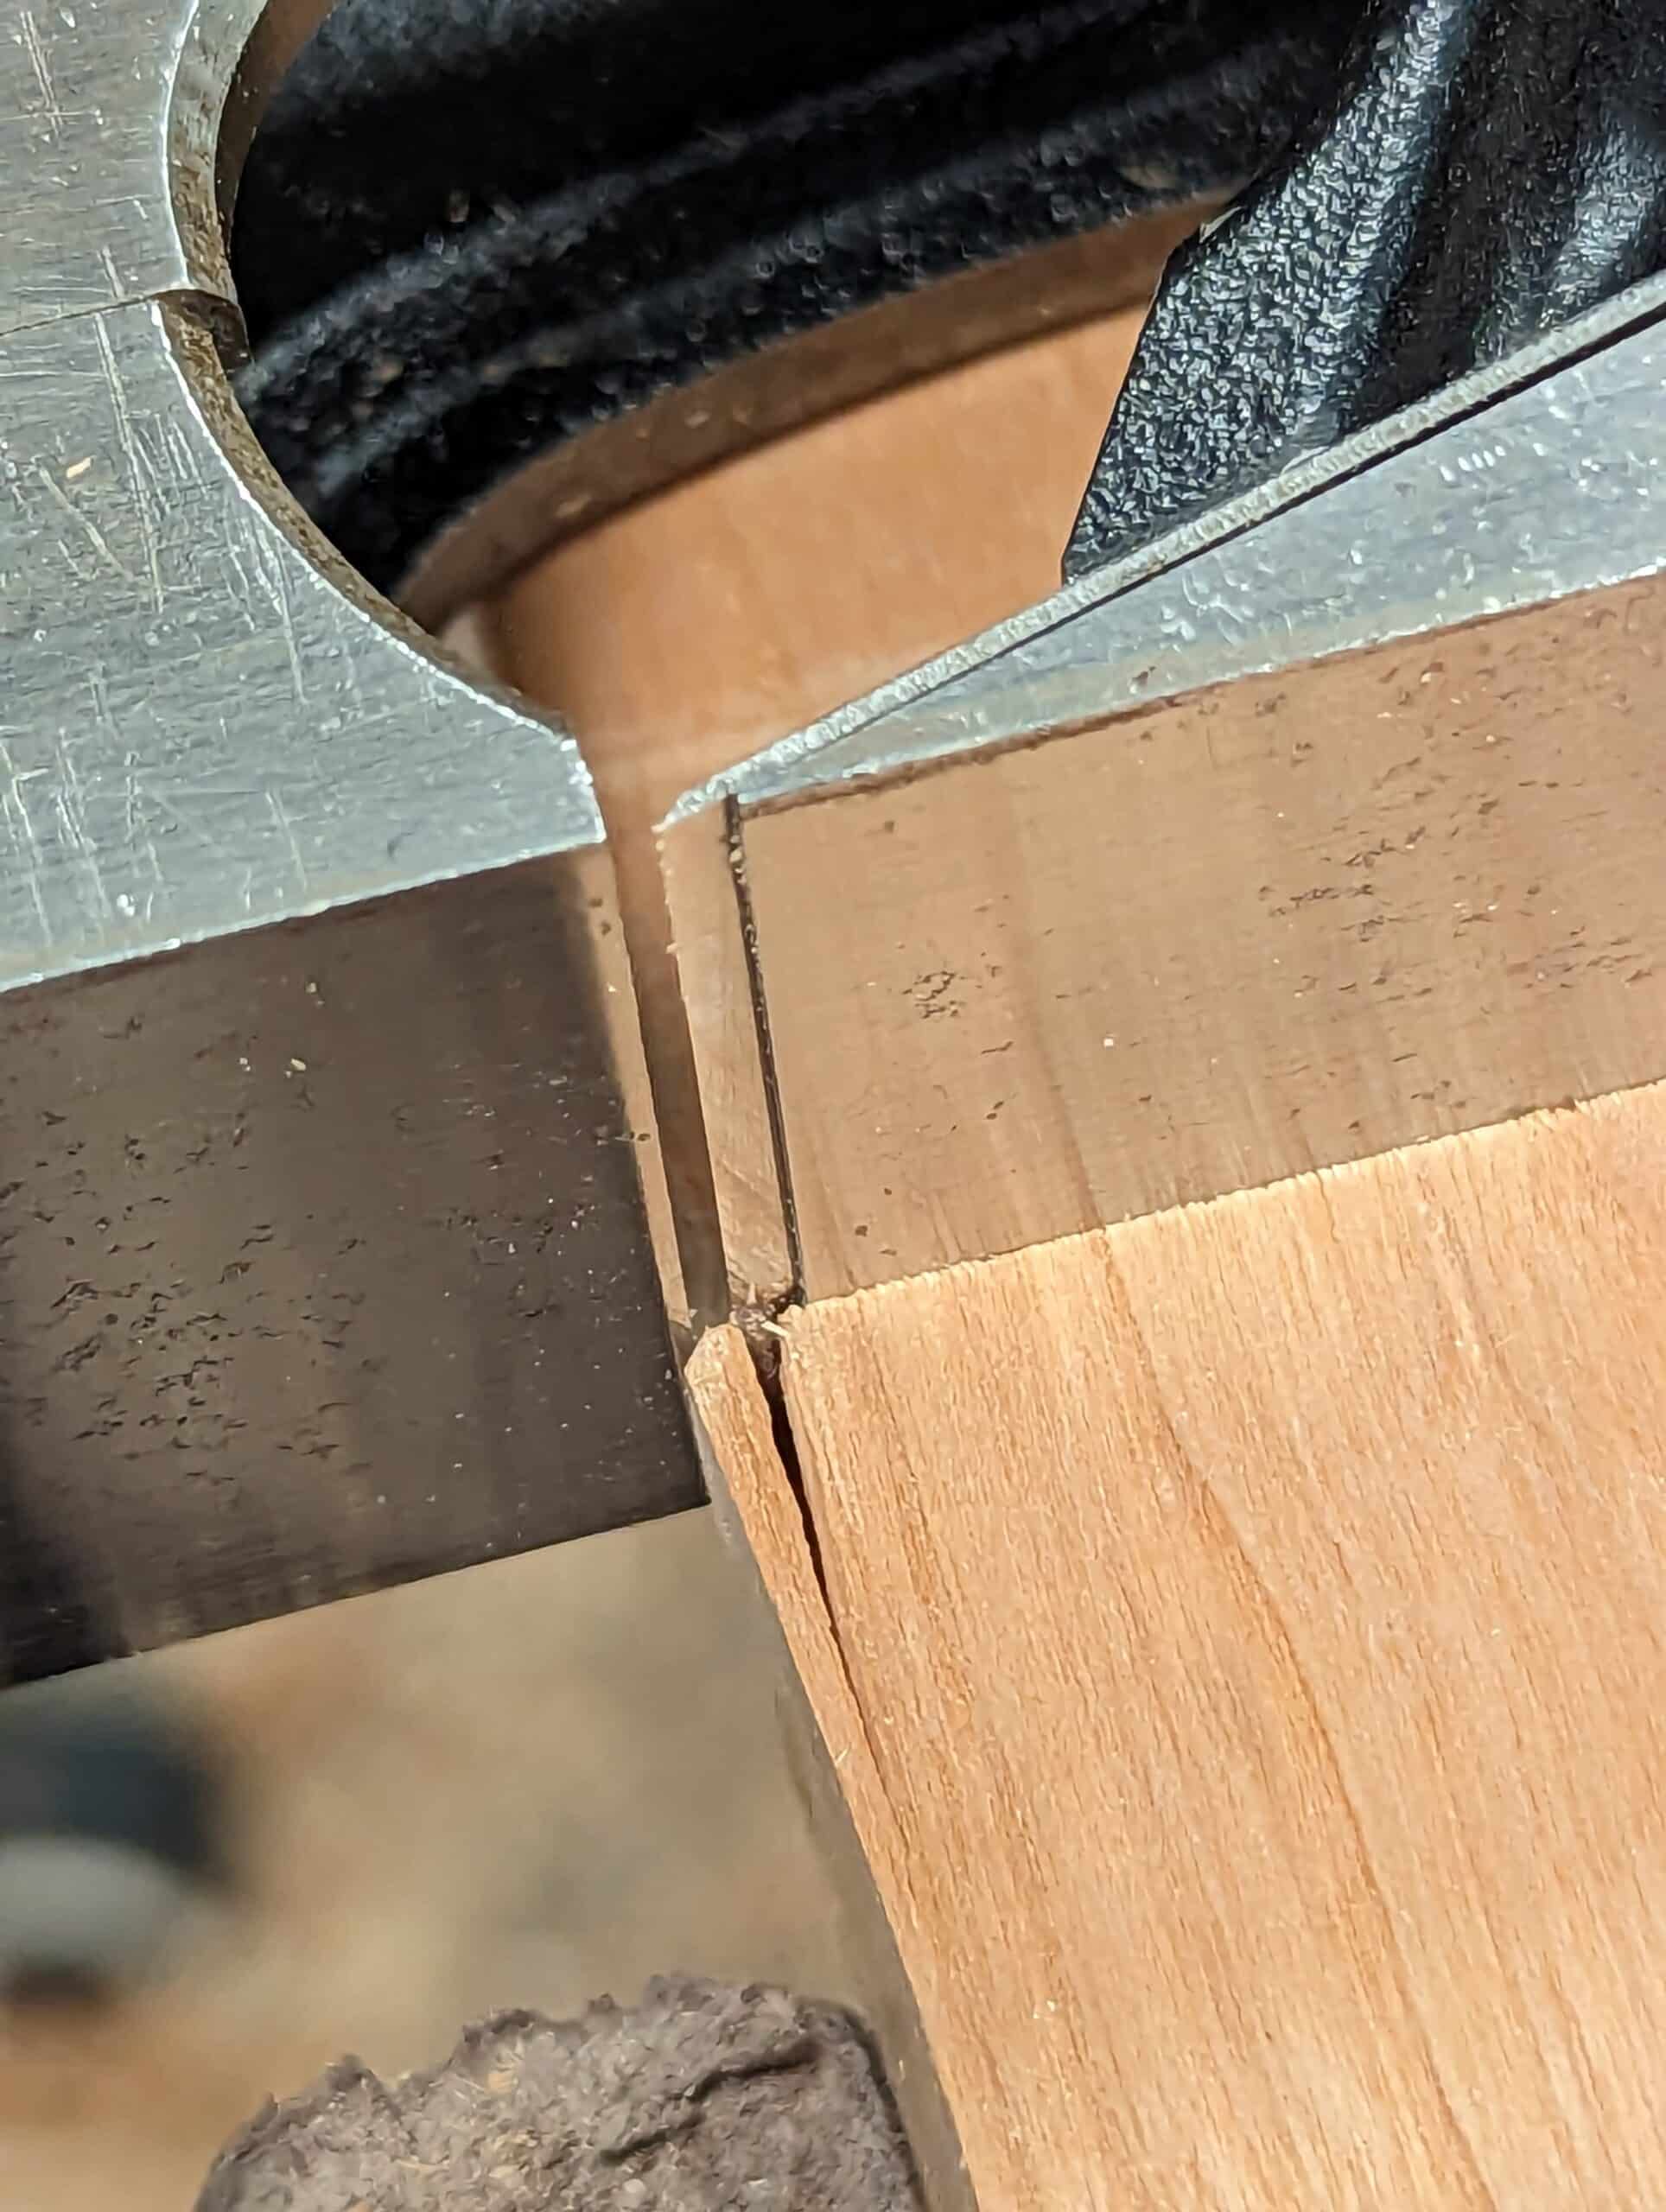
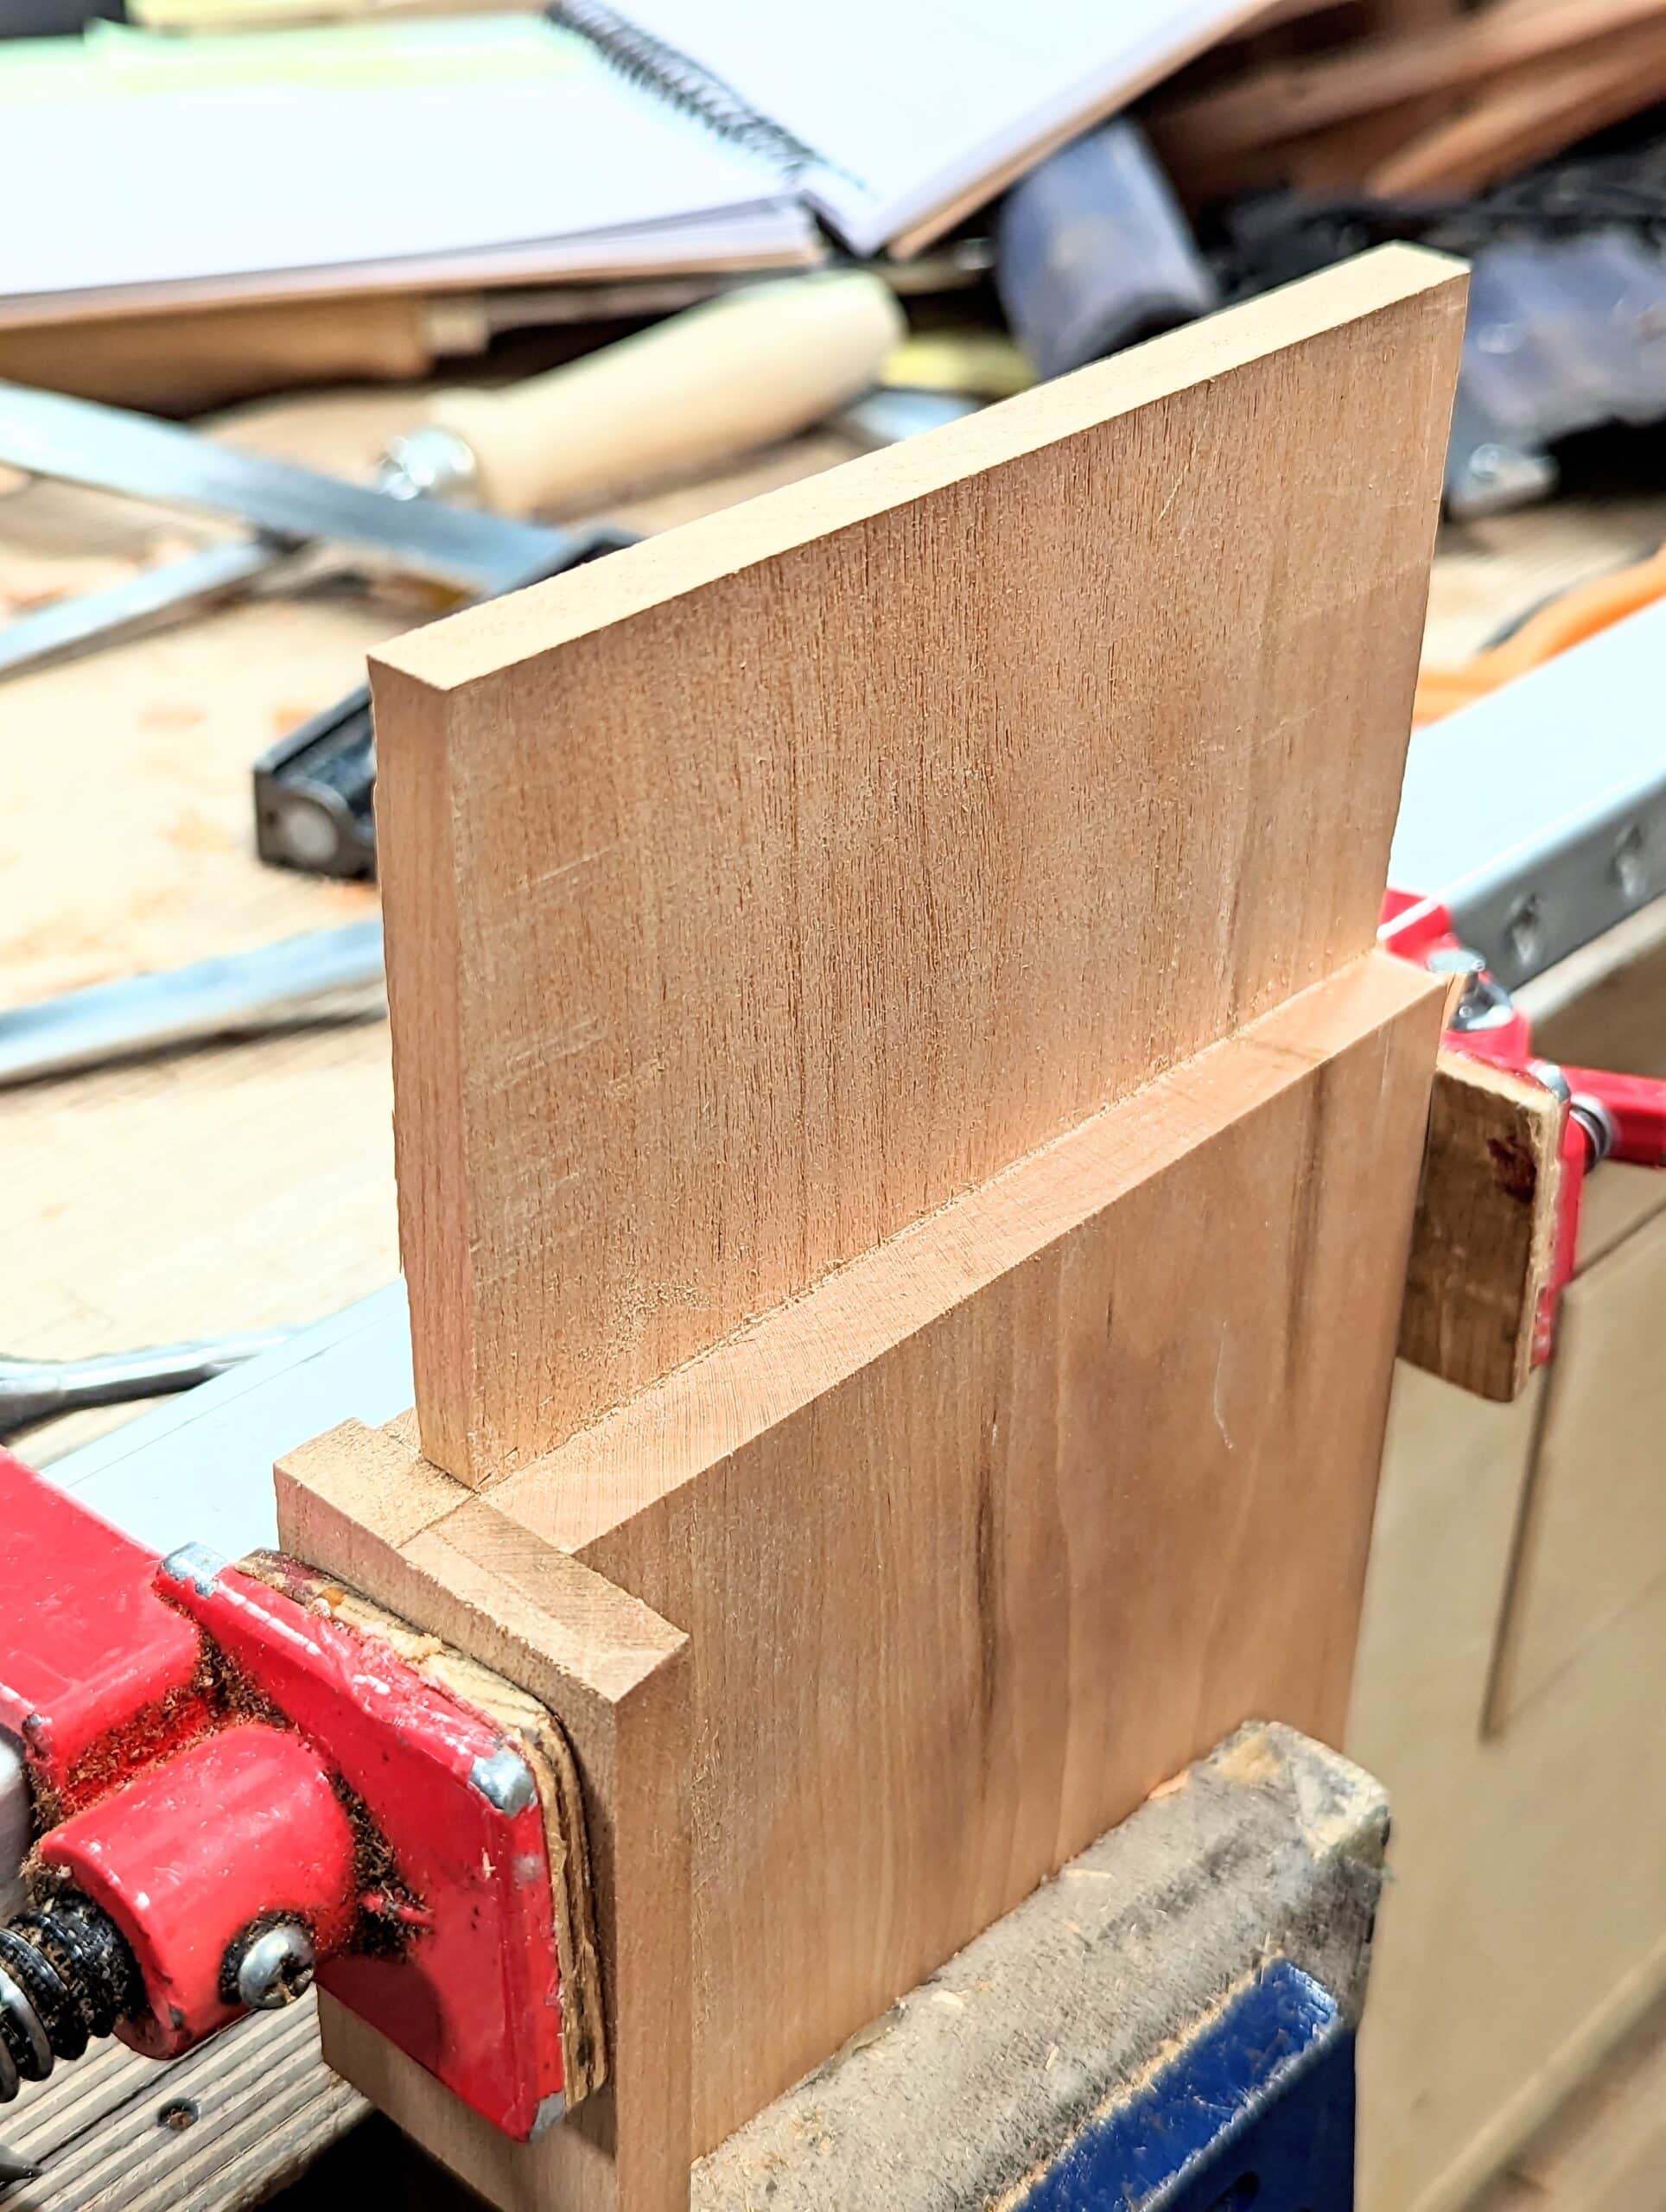
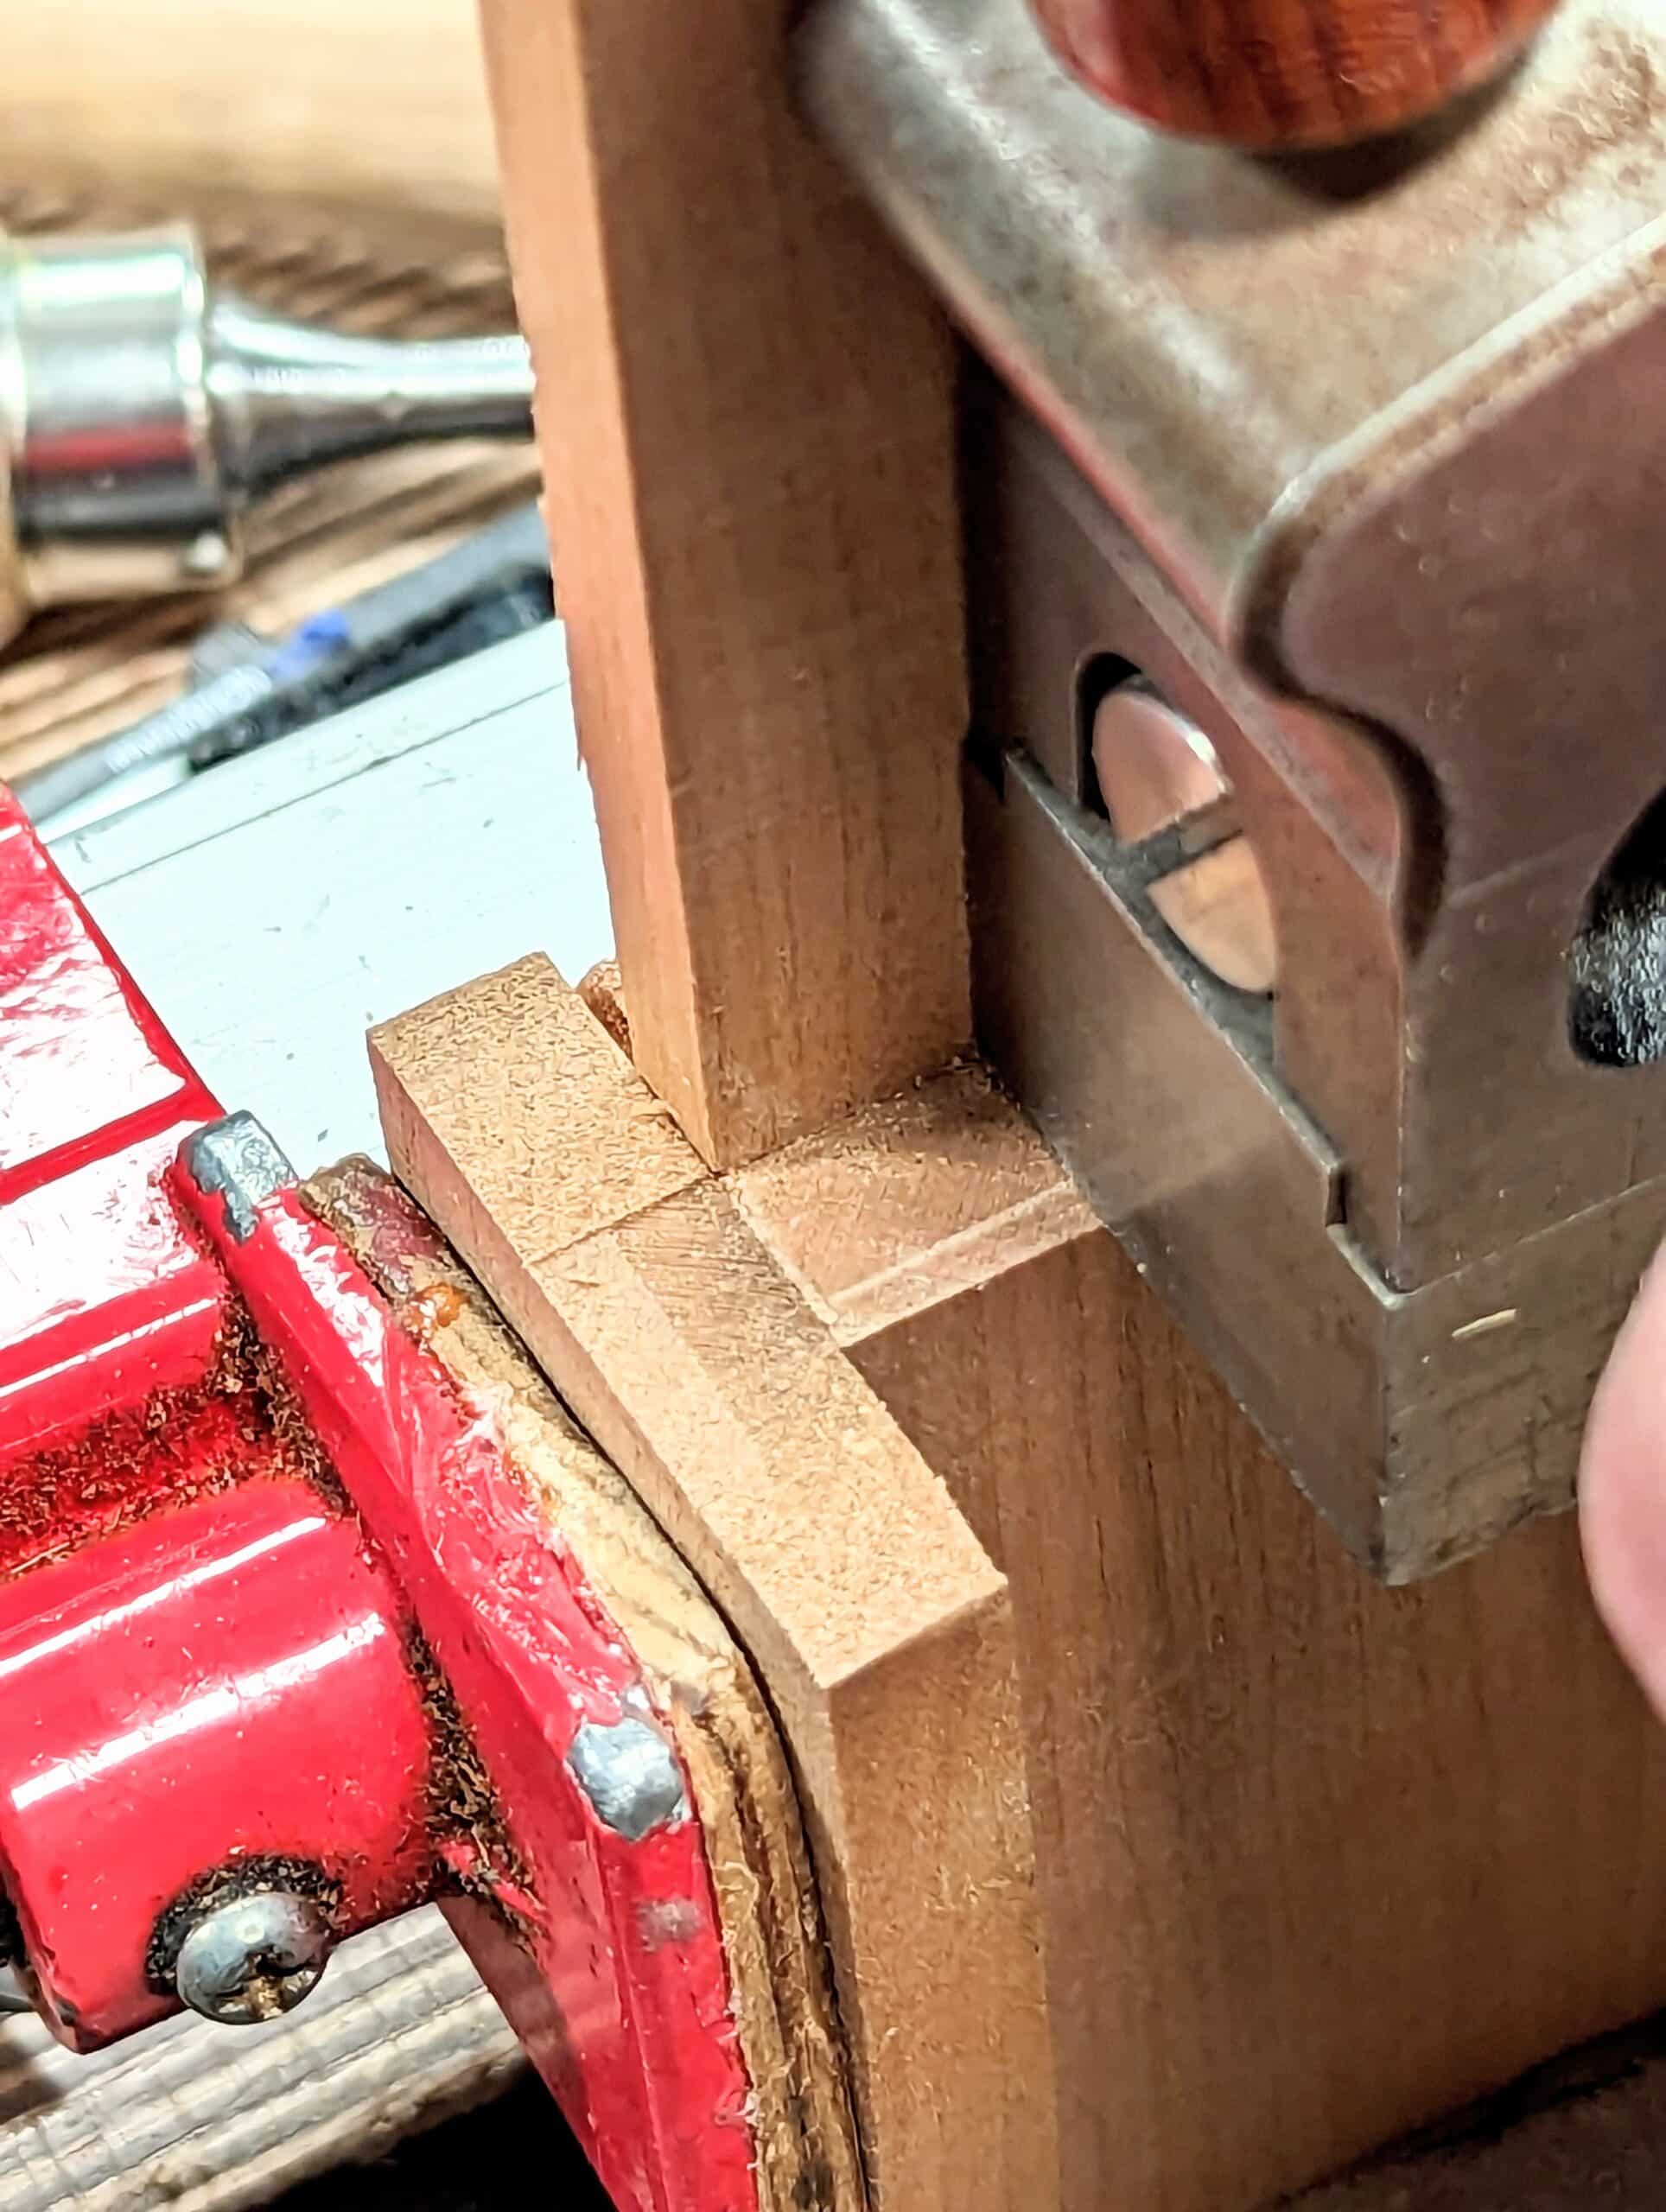
Adding a sacrificial piece (below) is mostly awkward and inconvenient but it does result in guarantees at the end of the cut. I often find it more practical to push the plane almost through and leave a quarter inch or so at the end which I pare cut level with the shoulder line. I think I do this as much as anything but some years ago, using the knifewall method at its fullest potential, I pare-cut the last inch with a one-inch chisel and just ran my plane into it. It was perfect.
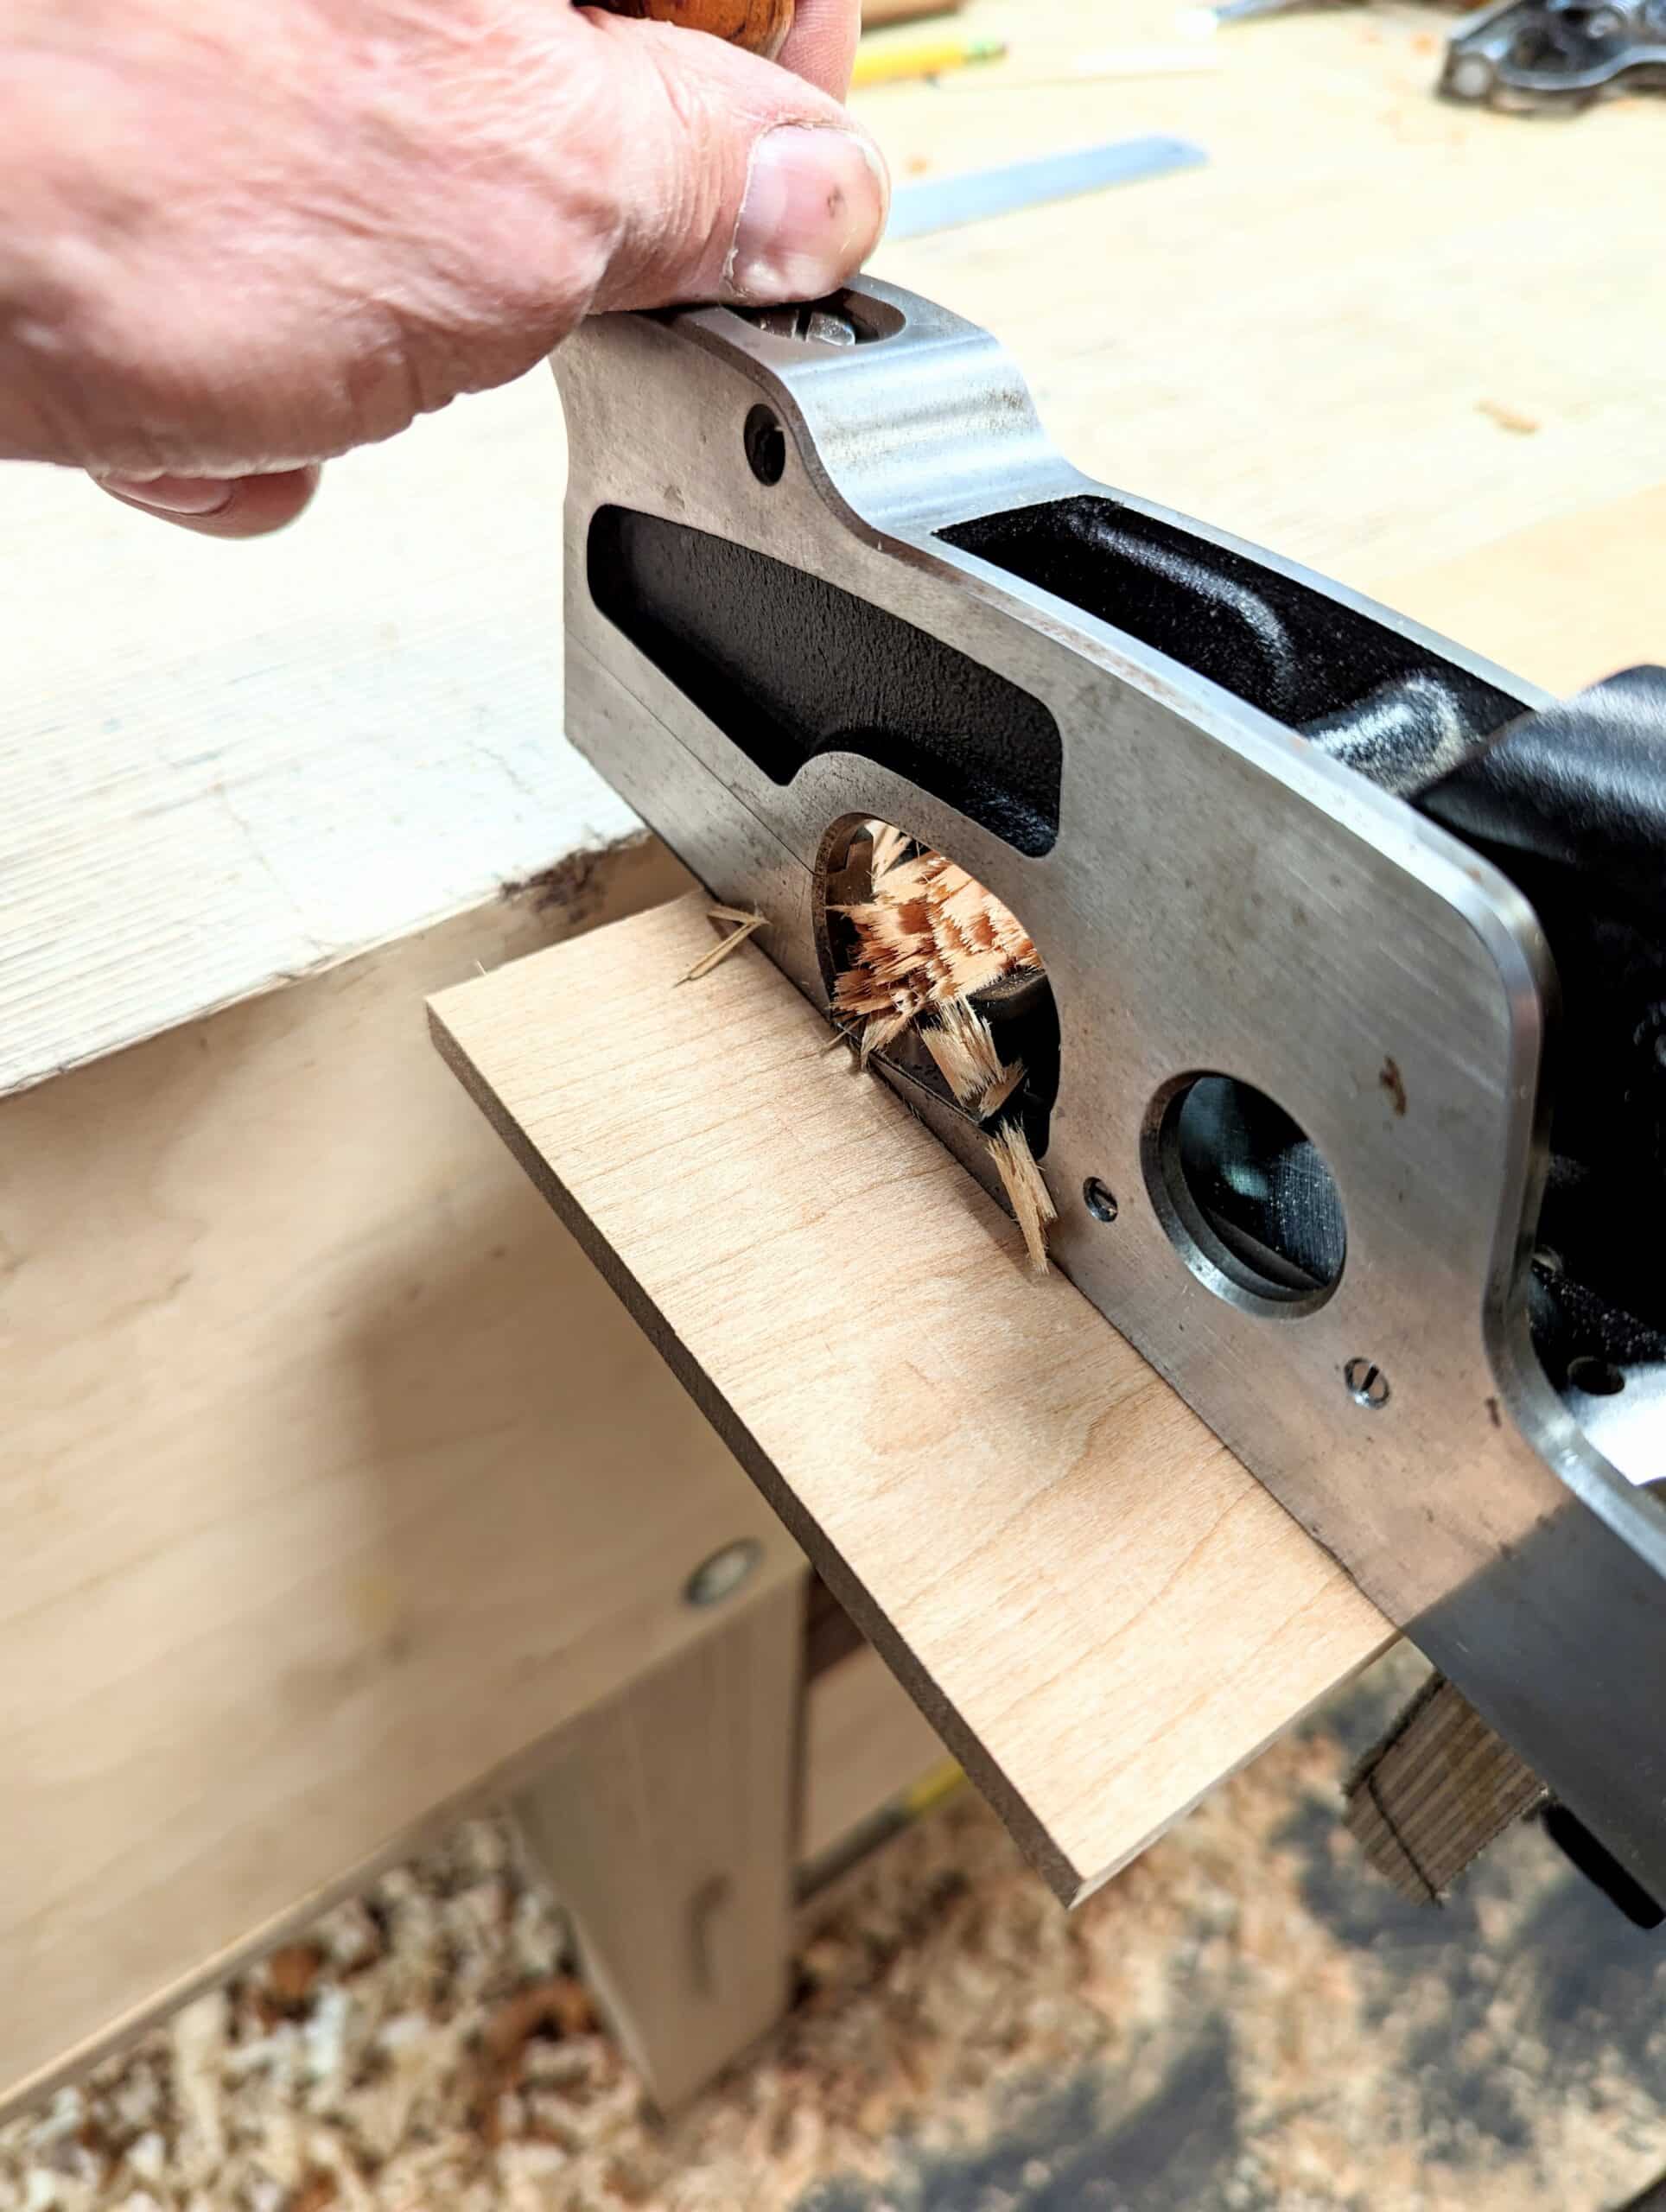
Lastly, and it might get missed, it might seem to make sense to put the cutting edge corner of the blade flush with the outside face of the plane that is up against the cheek of the tenon but it cuts better with a slight relief by allowing the cutting edge to overhang a fraction of a millimetre. When it’s flush, that inside corner doesn’t cut except for the first few opening cuts. Overhanging slightly really improves the cut. The cutting iron on shoulder planes can be shunted left or right to the long axis of the plane to allow for an overhang on one side or the other or, if centred, slightly to both sides so that if you change direction there is no need to readjust the cutting iron.

Hello Paul,
can bullnose replace this plane or is it too short ?
I’m talking about bullnose because I have one and I don’t always know how to value it.
Thanks for everything.
The bullnose is one of those planes that often steps up to the plate in different places and situations but never quite equals what it tries for as a replacement. That said, there are times in awkward places and spaces when you would never get a full shoulder plane in. Mostly it’s to do with the length of the sole before the cutting. That large registration face empowers the plane as does the weightier steel mass that keeps it in place.
The bullnose is one of those planes that often steps up to the plate in different places and situations but never quite equals what it tries for as a replacement. That said, there are times in awkward places and spaces when you would never get a full shoulder plane in. Mostly it’s to do with the length of the sole before the cutting. That large registration face empowers the plane as does the weightier steel mass that keeps it in place.
Okay, I got your answer. Thank you Paul for your return.
Absolutely, in my opinion they work best as a pair to cover most situations, I also have a narrower rebate plane for certain jobs that wider rebate may not cover, my Lie Nielsen rebate planes is one of, if not my favourite plane, apologies for the name dropping, but then it is is a great plane.🤔
It is your willingness to name-drop and your unbiased opinions that I appreciate most.
Dear Paul, it seems the 7th picture is not visible.
With Microsoft Edge, we just see the caption;
with Google Chrome there is a blank space with a sign like a prohibited direction sign and the caption under.
Hmm! It’s looking fine at my end. I tried a couple of ways on my computer and my phone.
Yep, I’m using Chromium on a Linux machine, and get the dame “No Entry” symbol where the picture should be, only on that one image. Strange.
I believe we have it sorted now Ian.
Would a 78 act as a poor man’s shoulder?
Was there a wooden equivalent of a shoulder plane? Would what I call a basic rebate moulding plane do the job? i.e. A flat bottom moulding plane with no guide or depth stop. I have both scew and square versions, will try them as shoulder planes when the need arises.
I was recently looking at 2 interesting wooden planes that I saw after initially being attracted to an Ogee moulder. They looked a bit like rebate planes, but with narrow scew blades (1/4″ and 3/8″) In front of the blade was a vertical blade sharpened to leave 2 nickers, which could be raised. A rebate at the side acted as a depth stop, which included a steel shoe that could also be lowered, by a brass thumb nut arrangement. I concluded (perhaps wrongly) that they were plough planes that could be used across the grain, perhaps to remove waste prior to other moulding planes, even though there was no fence, but not all rebate planes had fences.
What cutting angle do you use on those bevel up planes (bevel + beading)?
Until now I didn’t really needed a shoulder plane.
I might have used a shoulder plane on the long rails of the Moravian workbench I made for the son (for me, I use a workbench like yours); although those tenon’s rails are not that wide and… it is only a workbench.
The #78 have a fully machined face and can be had quite cheap; but of course the cutting angle is 45° and, on mine, the setting with a lever isn’t that easy. I have just tried it on end grain and for it to work, it needs, as you pointed out, a really fine setting and a really sharp edge.
A #78 will work but it takes some setting up. Hammer taps with a small steel hammer work very well for both alignment and depth of cut. There isn’t too much difference in angle presentation as the general rule of a 30º bevel plus 15º bed angle on shoulder planes comes out the same as the #78. The only things that are missing are the flatness of the sides of the plane along with the heaviness of shoulder planes. These you can live without.
Hi Paul, I have a few antique should planes and wondering whether or not to sell them after buying the Veritas years ago they old planes see zero use. Do you have any thoughts on incorporating them back into service?
I live very close to a Lee Valley store in Burlington, Ontario, my wife would say perilously close because it truly is like candy store for woodworkers. Your blogs are great preparation for a visit there, so are your books which they always have in stock.
Thank you for sharing your ideas so generously.
Hi Paul
Are Gunstock Shoulders Also KnownAs Diminishing Shoulders ?Long And Short
Yes, that too, James.
Is the text in Italic:
“It is often surprising that in some woods bevel-up planes do not fare […] talking temperate growing regions and not tropical.”
above the picture with the caption:
” This image shows […] to stop edge fracture of the unsupported fibres.”
supposed to be also under that picture?
I can see 15 pictures in total. Am I missing one?
We are looking into and think we found the issue. The text for pic 7 says, It is often surprising that in some woods bevel-up planes do not fare as well as bevel-down planes. The top portion of the planed end grain is from a standard #4 smoothing plane not sharpened to maximise a good result. The lower part came from a bevel-up shoulder plane specifically sharpened to maximise the plane’s potential. You can see how the wood directly behind the outer element of the hard growth ring shows no grain collapse but collapse deepens and worsens the further the cut traverses the full width of each growth rings. I planed from right to left. The hardest aspect of each growth ring is the outer edge of each dark ring. Remember a growth ring comprises the whole of the light and dark areas, the dark being the slowest aspect of the growth at the end of the winter period before spring when new growth layers begin for a new season. Of course, we are talking temperate growing regions and not tropical.
I think it’s fixed now, Sylvain.
Thank you very much.
I can see 16 pictures now.
The full text was readable.
To avoid citing a long text in a comment, I usually shorten it by replacing some text in the middle of it by two brackets with three points in it. Like this: […].
Would an old wood rebate, dato, housing, etc. plane (straight or skewed) work as a shoulder plane?
It’s not at all the same animal. You can make any rebate plane work but the shoulder plane is not a rebate plane it’s a low-angle bevel-up plane and with that low angle presents the cutting iron in a more direct cut than an elevated steep angle. Typically the wooden rebate planes present the cutting iron, a bevel-down plane, at 50º. This is a massively different animal altogether.
I asked a similar question earlier, assuming that there would be a wooden equivalent, but shoulder planes didn’t exist in the wooden plane era. I guess that then the equivalent of a low angle shoulder plane was the paring chisel.
I wish to point out that a 3- Way C-Style Clamp often used to affix edge strips to the show edge of boards during glue-up can also make an excellent go-to clamp to hold that backer piece against the board that is having its shoulders planed while sitting in a bench vise….Not as heavy as that bar clamp you are depicting in the photo. Of course, many woodworkers will need to buy a 3-Way Clamp but they are cheap.
If I do use a shoulder plane it will to clean up rebates, other than that it just hangs in the tool cabinet. As for the bullnose plane, it never gets used and if I sold that would be the day when it would be handy to have which is why it never goes up for sale.