Plough and Rebate Planes: Tuning Your Instrument
My recent blog post surrounding plough planes and the weaknesses I spoke of reminded me of the energy I put into writing Essential Woodworking Hand Tools. For that work, I wrote over one thousand pages, cut it to just under a thousand myself and then I and Joseph distilled (it’s called editing) that down further to its final page count of just under 500 pages. Even so, it’s still quite a massive work. I’m a sucker for punishment as I consider an additional Volume II for what I consider slightly less essential tools but still important. Nothing was ever ‘copied and pasted‘ from other resources, another’s writing, manufacturers’ blurbs or sales and distributor outlets, magazines or whatever; the raw footage from a lived lifetime of daily woodworking by an ordinary working man, a crafting artisan, created a different kind of work. Something perhaps truer somehow. I’m not writer-trained as such, nor did I have any kind of a writing background. I started to write as an adult because I liked the composition of words and phrasing. Being somewhat self-taught in English, some hasten to tell me to stick to woodworking. But I don’t write for them and I get my thoughts and feelings across the way I want to. What I wrote in my books and yet still was and is what I learned and earned a right to from long-term experience using every kind of hand tool I came across in my daily working as a craftsman and most of those I ended up owning, over decades. What I ended up with in my hand tool gatherings at the workbench was what I distilled from the great masses of tools. I rejected almost all of the new iterations because their values were wrong.
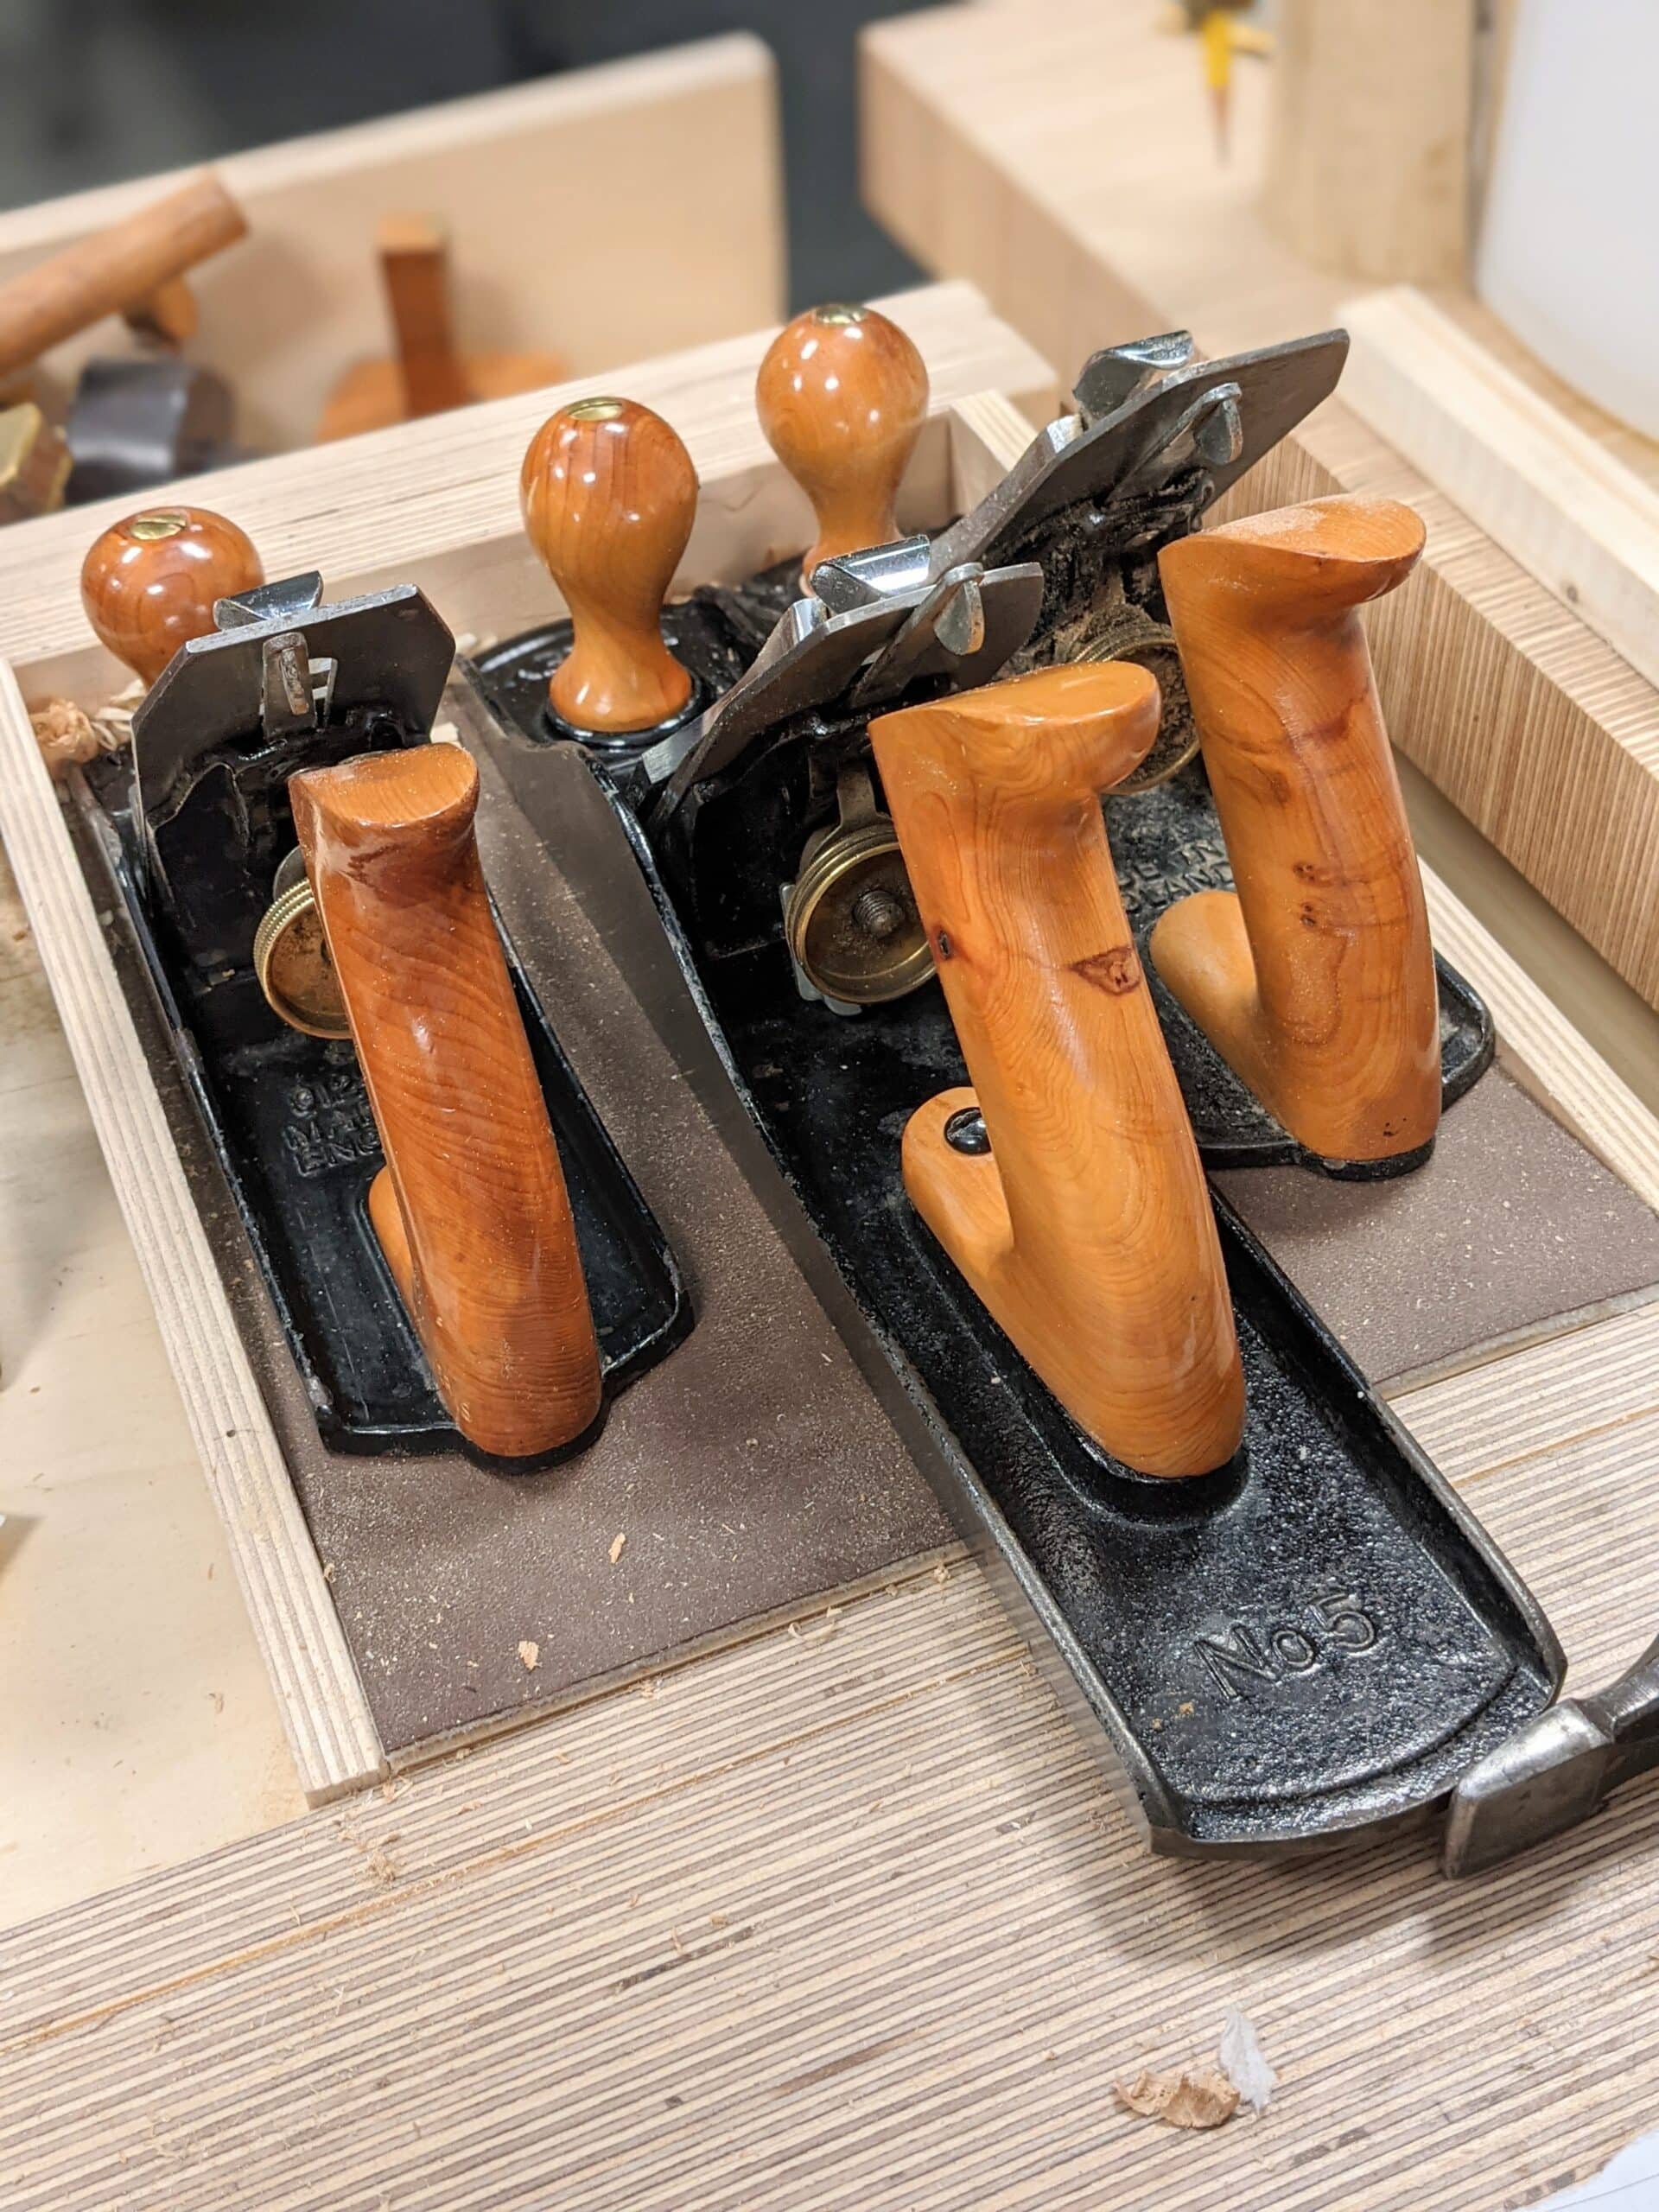
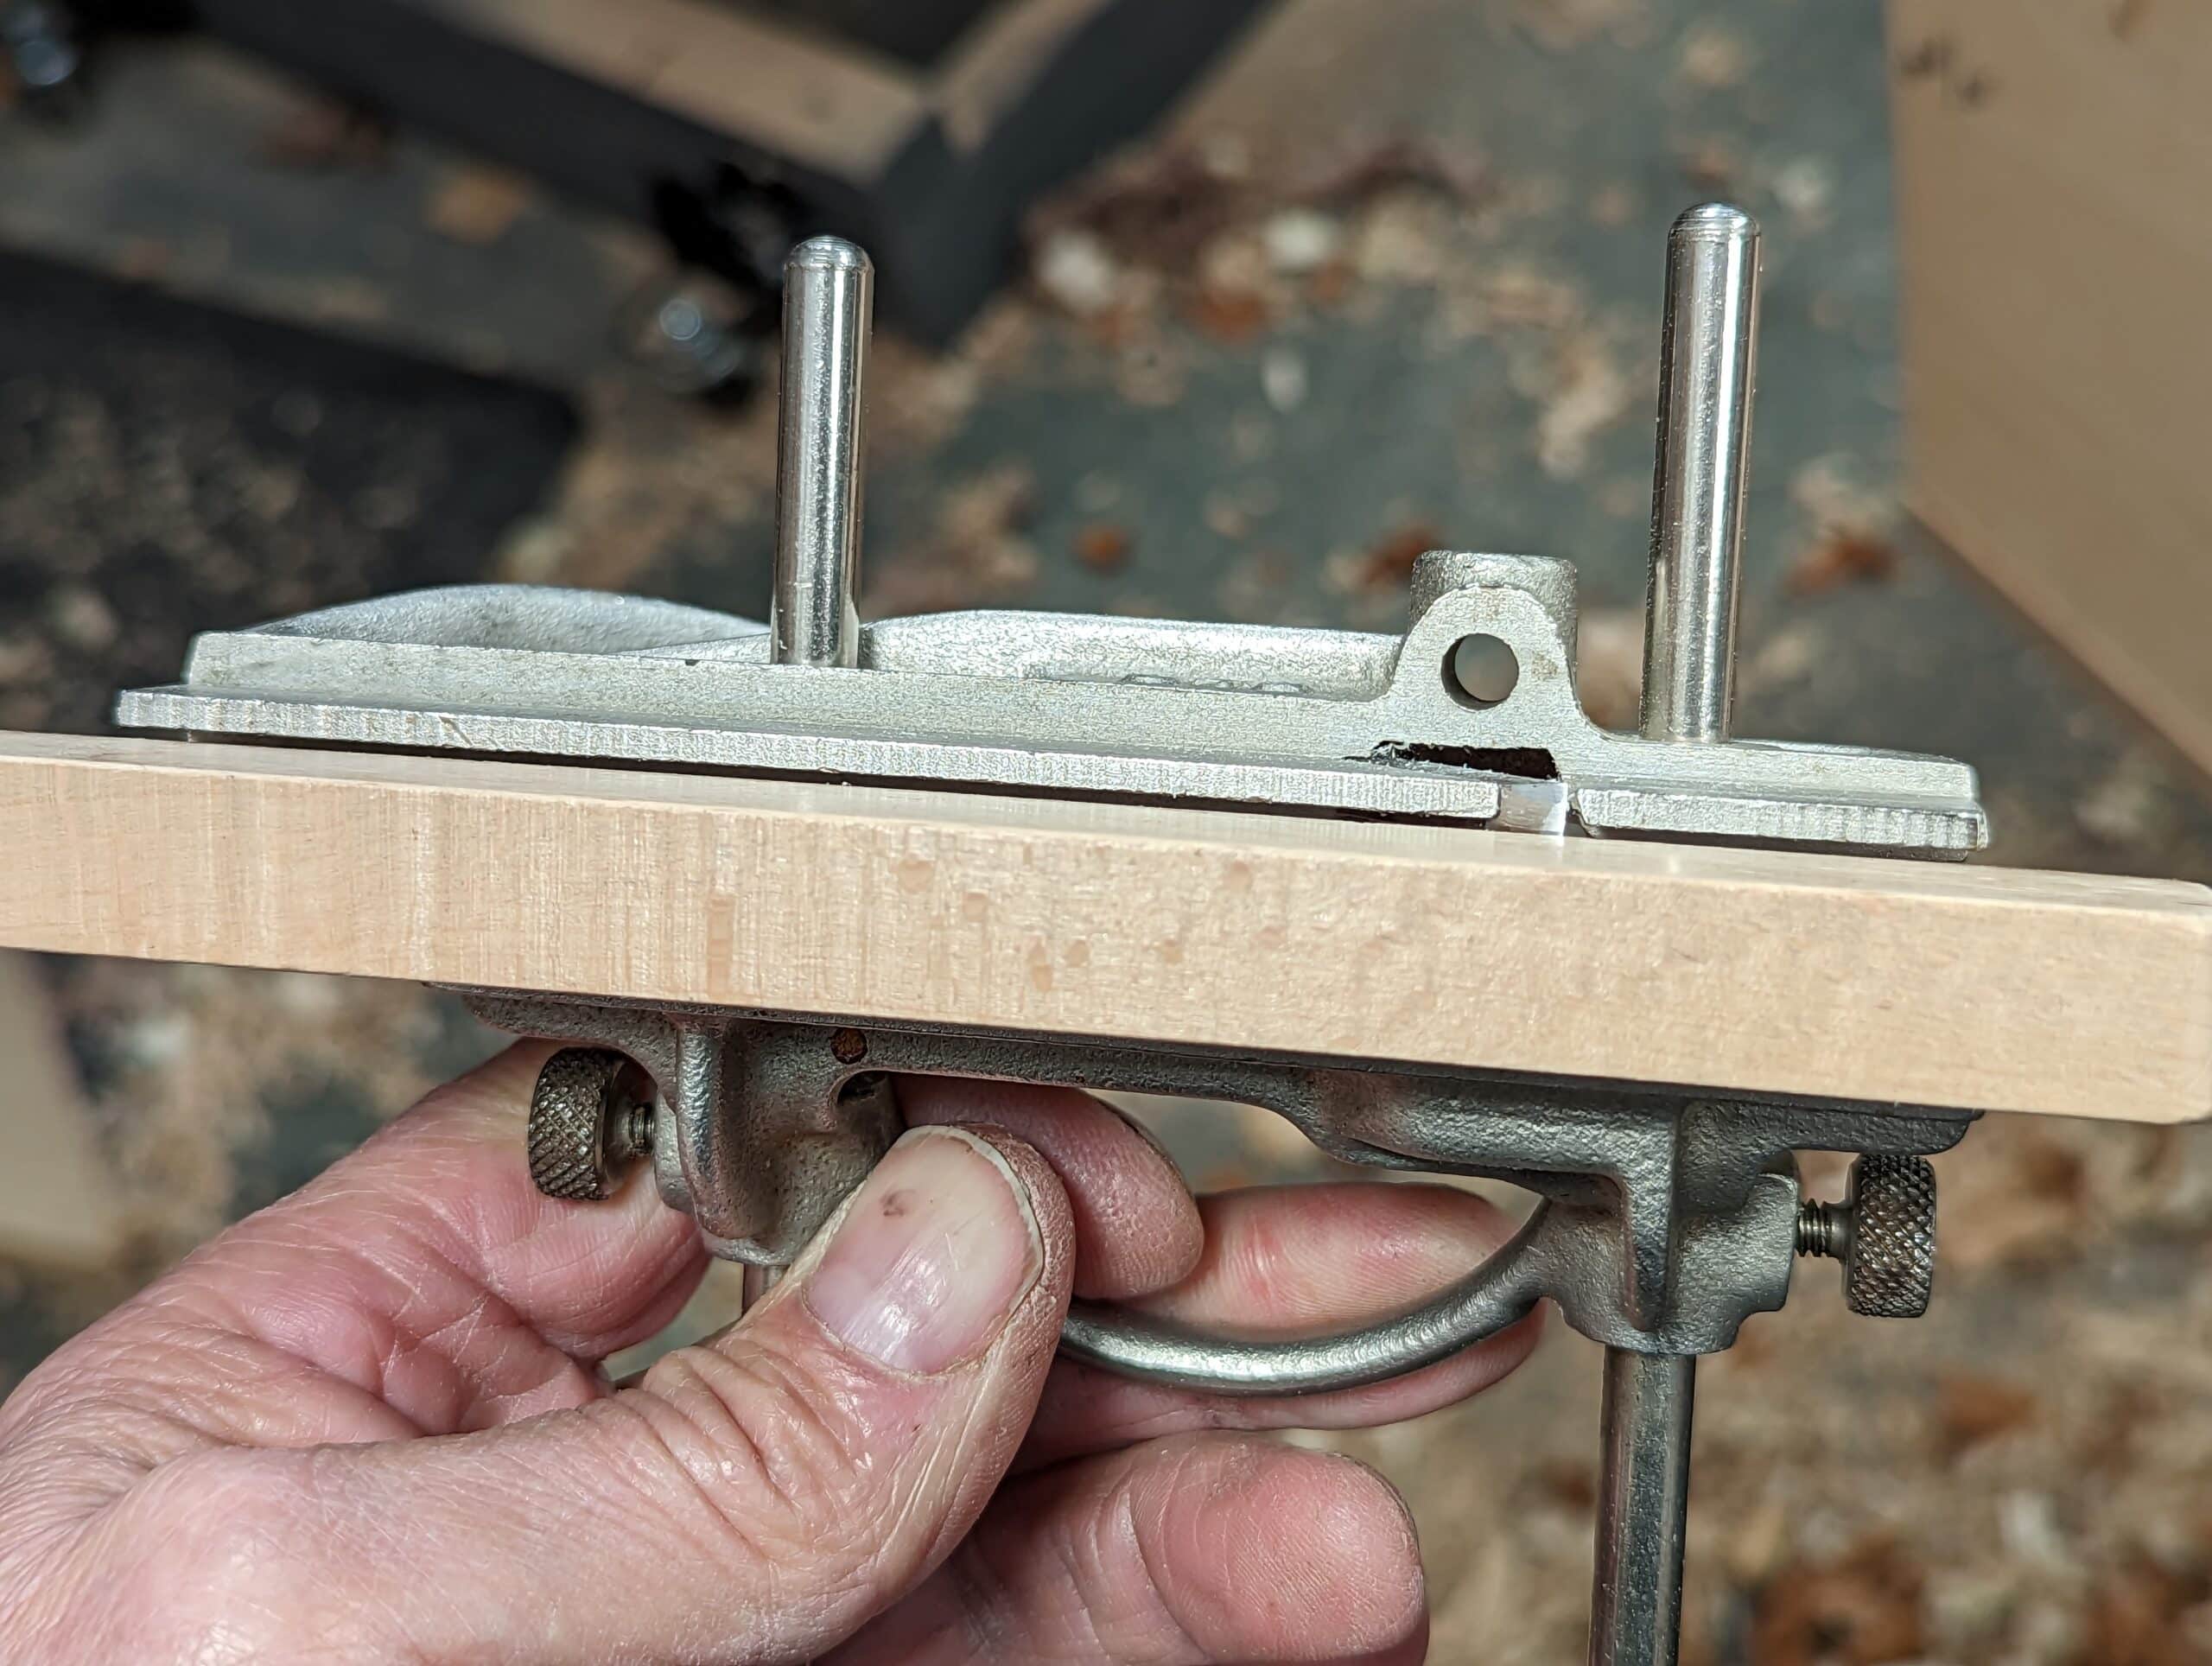
All metal planes are quite different from other tools because of the moving parts and then too the added attachments engineered to micro-adjust and give preset distances as guides and stops. I say metal planes because metal planes lend themselves more readily to the attachments I speak of although there are one or two wooden planemakers out there too. The more moving parts these surface refiners, grooves and rebaters have the more risk there is of something ‘going out‘ on us. Also, these components will almost always affect performance in different ways in our using of them. With the rigours of using the planes, stops and fences, guides and cutters, holders, etc are frequently knocked to a different position. Therefore all planes of every type need minor and major adjusting.
I would describe adjustments surrounding initialising a plane for your first-time use, be that new or secondhand, as usually a major adjustment point. Once it’s done, ongoing adjustments are usually minor but frequent if not generally accepted as the always-ongoing daily maintenance of owning planes. That’s the blade adjustment in terms of depth of cut, aligning the cutting iron edge to cut parallel to the sole for shavings of even thickness and then a surface free of tramlines and then of course sharpening which always necessitates resetting everything. Saws and chisels, auger bits for drilling, awls, drawknives, knifewall knives (often called marking knives) and such are really fixed performers. These tool types only need periodic sharpening except for saws which need the teeth setting every few months or in some cases a couple of years depending on the amount of use. I haven’t actually kept records on that simply because it depends so much on the amount of usage, but one set per six to ten sharpenings seems probably close to me. Indeed, not each time you sharpen as some say. That’s silly and a waste of time. Spokeshaves are really another version of plane so I put them in the category of planes albeit more tentatively.
Plough planes and rebate planes, also called rabbet planes and even filletster planes, can and are indeed often problematic for various reasons usually surrounding blade position in the body of the plane, fences and depth stop setting and alignment and so on. Knowing where to adjust their various elements needs a little consideration. A good example might be that the blades for rebate planes rely on slightly overhanging the blade either to one side of the plane body or the other or both provided it’s wide enough. If it is one side, it depends on which side the plane snugs up against the wall of the rebate you are forming. The overhang is very small, a fraction of an inch or millimetre, usually about 1/3 of a millimetre is enough and that will go against the wall of the rebate. You will set this up in conjunction with the fence which keeps the distance exactly so that the plane body around the mouth area is not in contact with the sidewall of wood in the rebate but the very side of the cutting edge is. This will create what we call a relief area. Whereas the body of the plane fore and aft will indeed make contact with the side of the rebate as it is being formed, it serves only to nudge the plane as it passes along the wood.
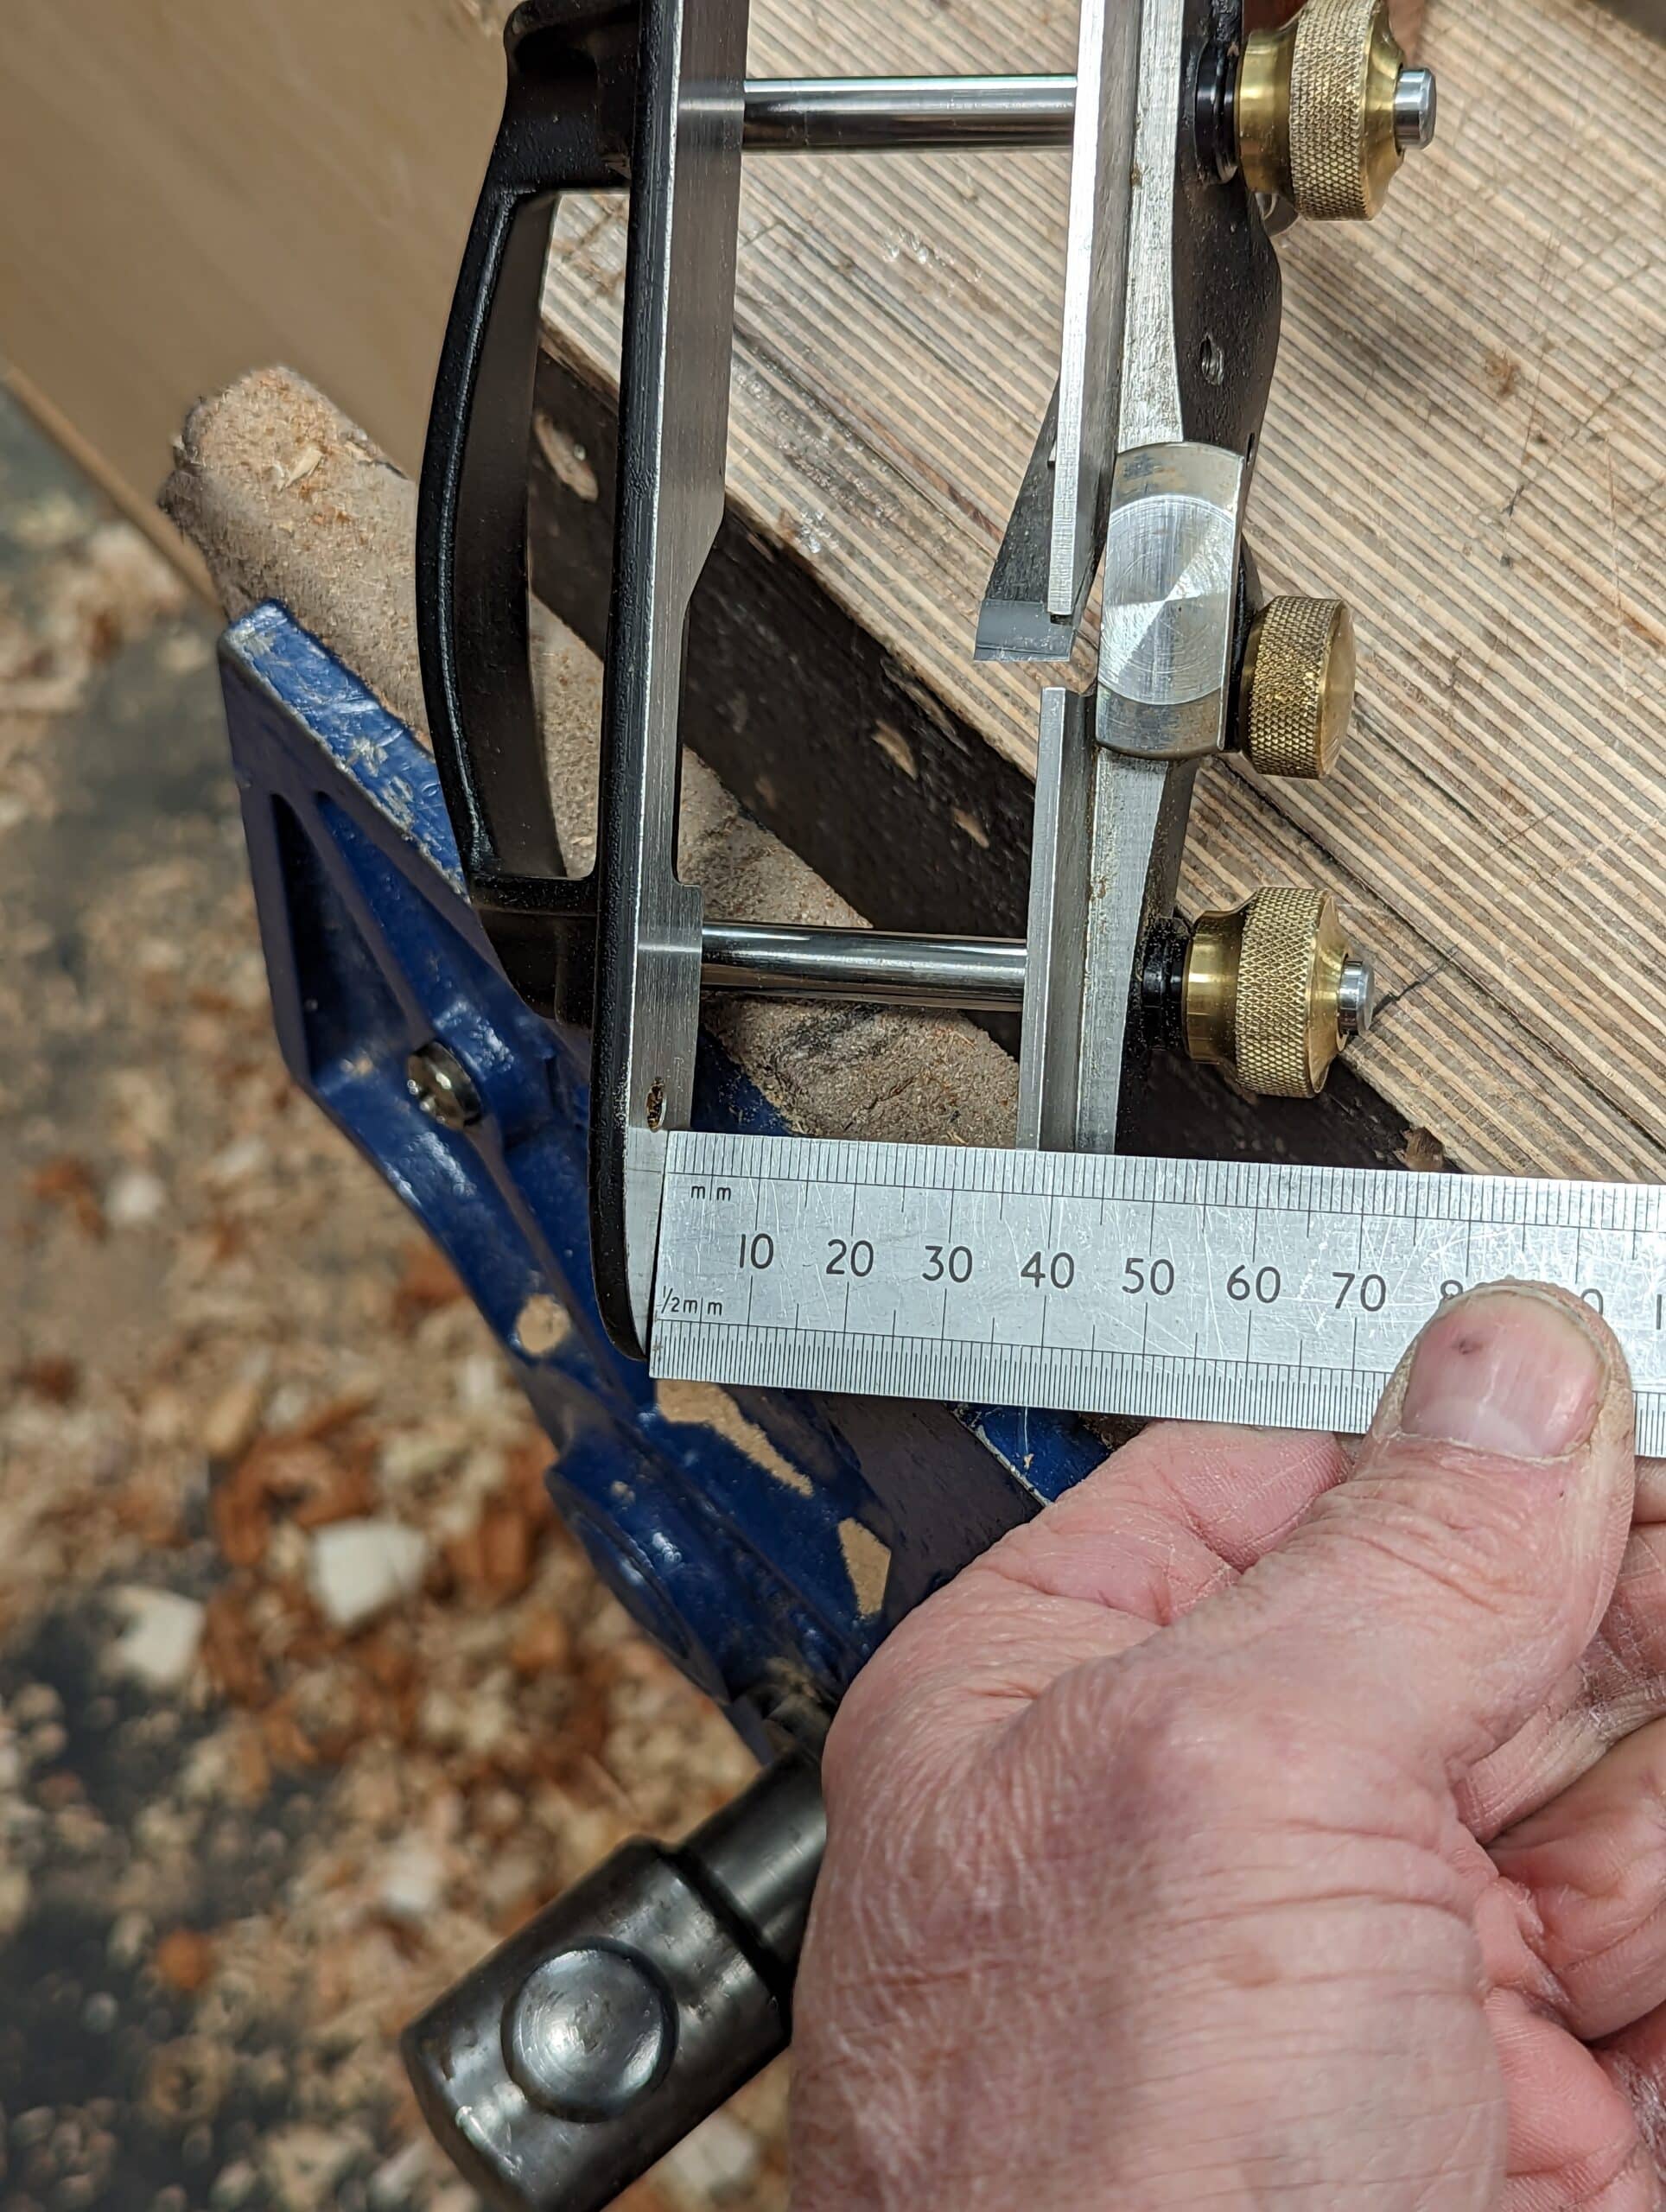

That being the case you will eventually look for certain elements to adjust that makes them work or makes them work better. The fence too needs to be at least parallel to the sole of the plane or slightly more open at the rear end of the plane. If it tapers the other way the plane tends to jam. The bench planes we often use require only a few minimal tweaks to set up after sharpening but micro-adjusting them is an ongoing necessity as you change the depths of cut intermittently or indeed reset them because of certain grain awkwardness. Plough and rebate planes on the other hand seem always to need thinking through, in the zone, at the time and according to wood and wood grain type. The more you do this the quicker you will become at adjusting and then too being aware of what problem might specifically be occurring and the sooner you can get on with the ploughing or rebating. I should point out that fence parallelity is usually out by a millimetre or two and sometimes more. One millimetre usually does not affect the plane enough to be always problematic but it might be in some cases, harder more dense grained woods can affect the planes performance markedly. Of course, any more and it will make the plane awkward to use and can jam the plane as the cut deepens stroke on stroke. I don’t know that any of us have the ability or the wherewithal to fix such engineering issues like this. You could abrade the fence but that is a bit iffy. The best way we woodworker scan correct this discrepancy is to add a compenating tapered fence in wood, which is the best plan anyway as the plane works so much better with wood against wood rather than metal.
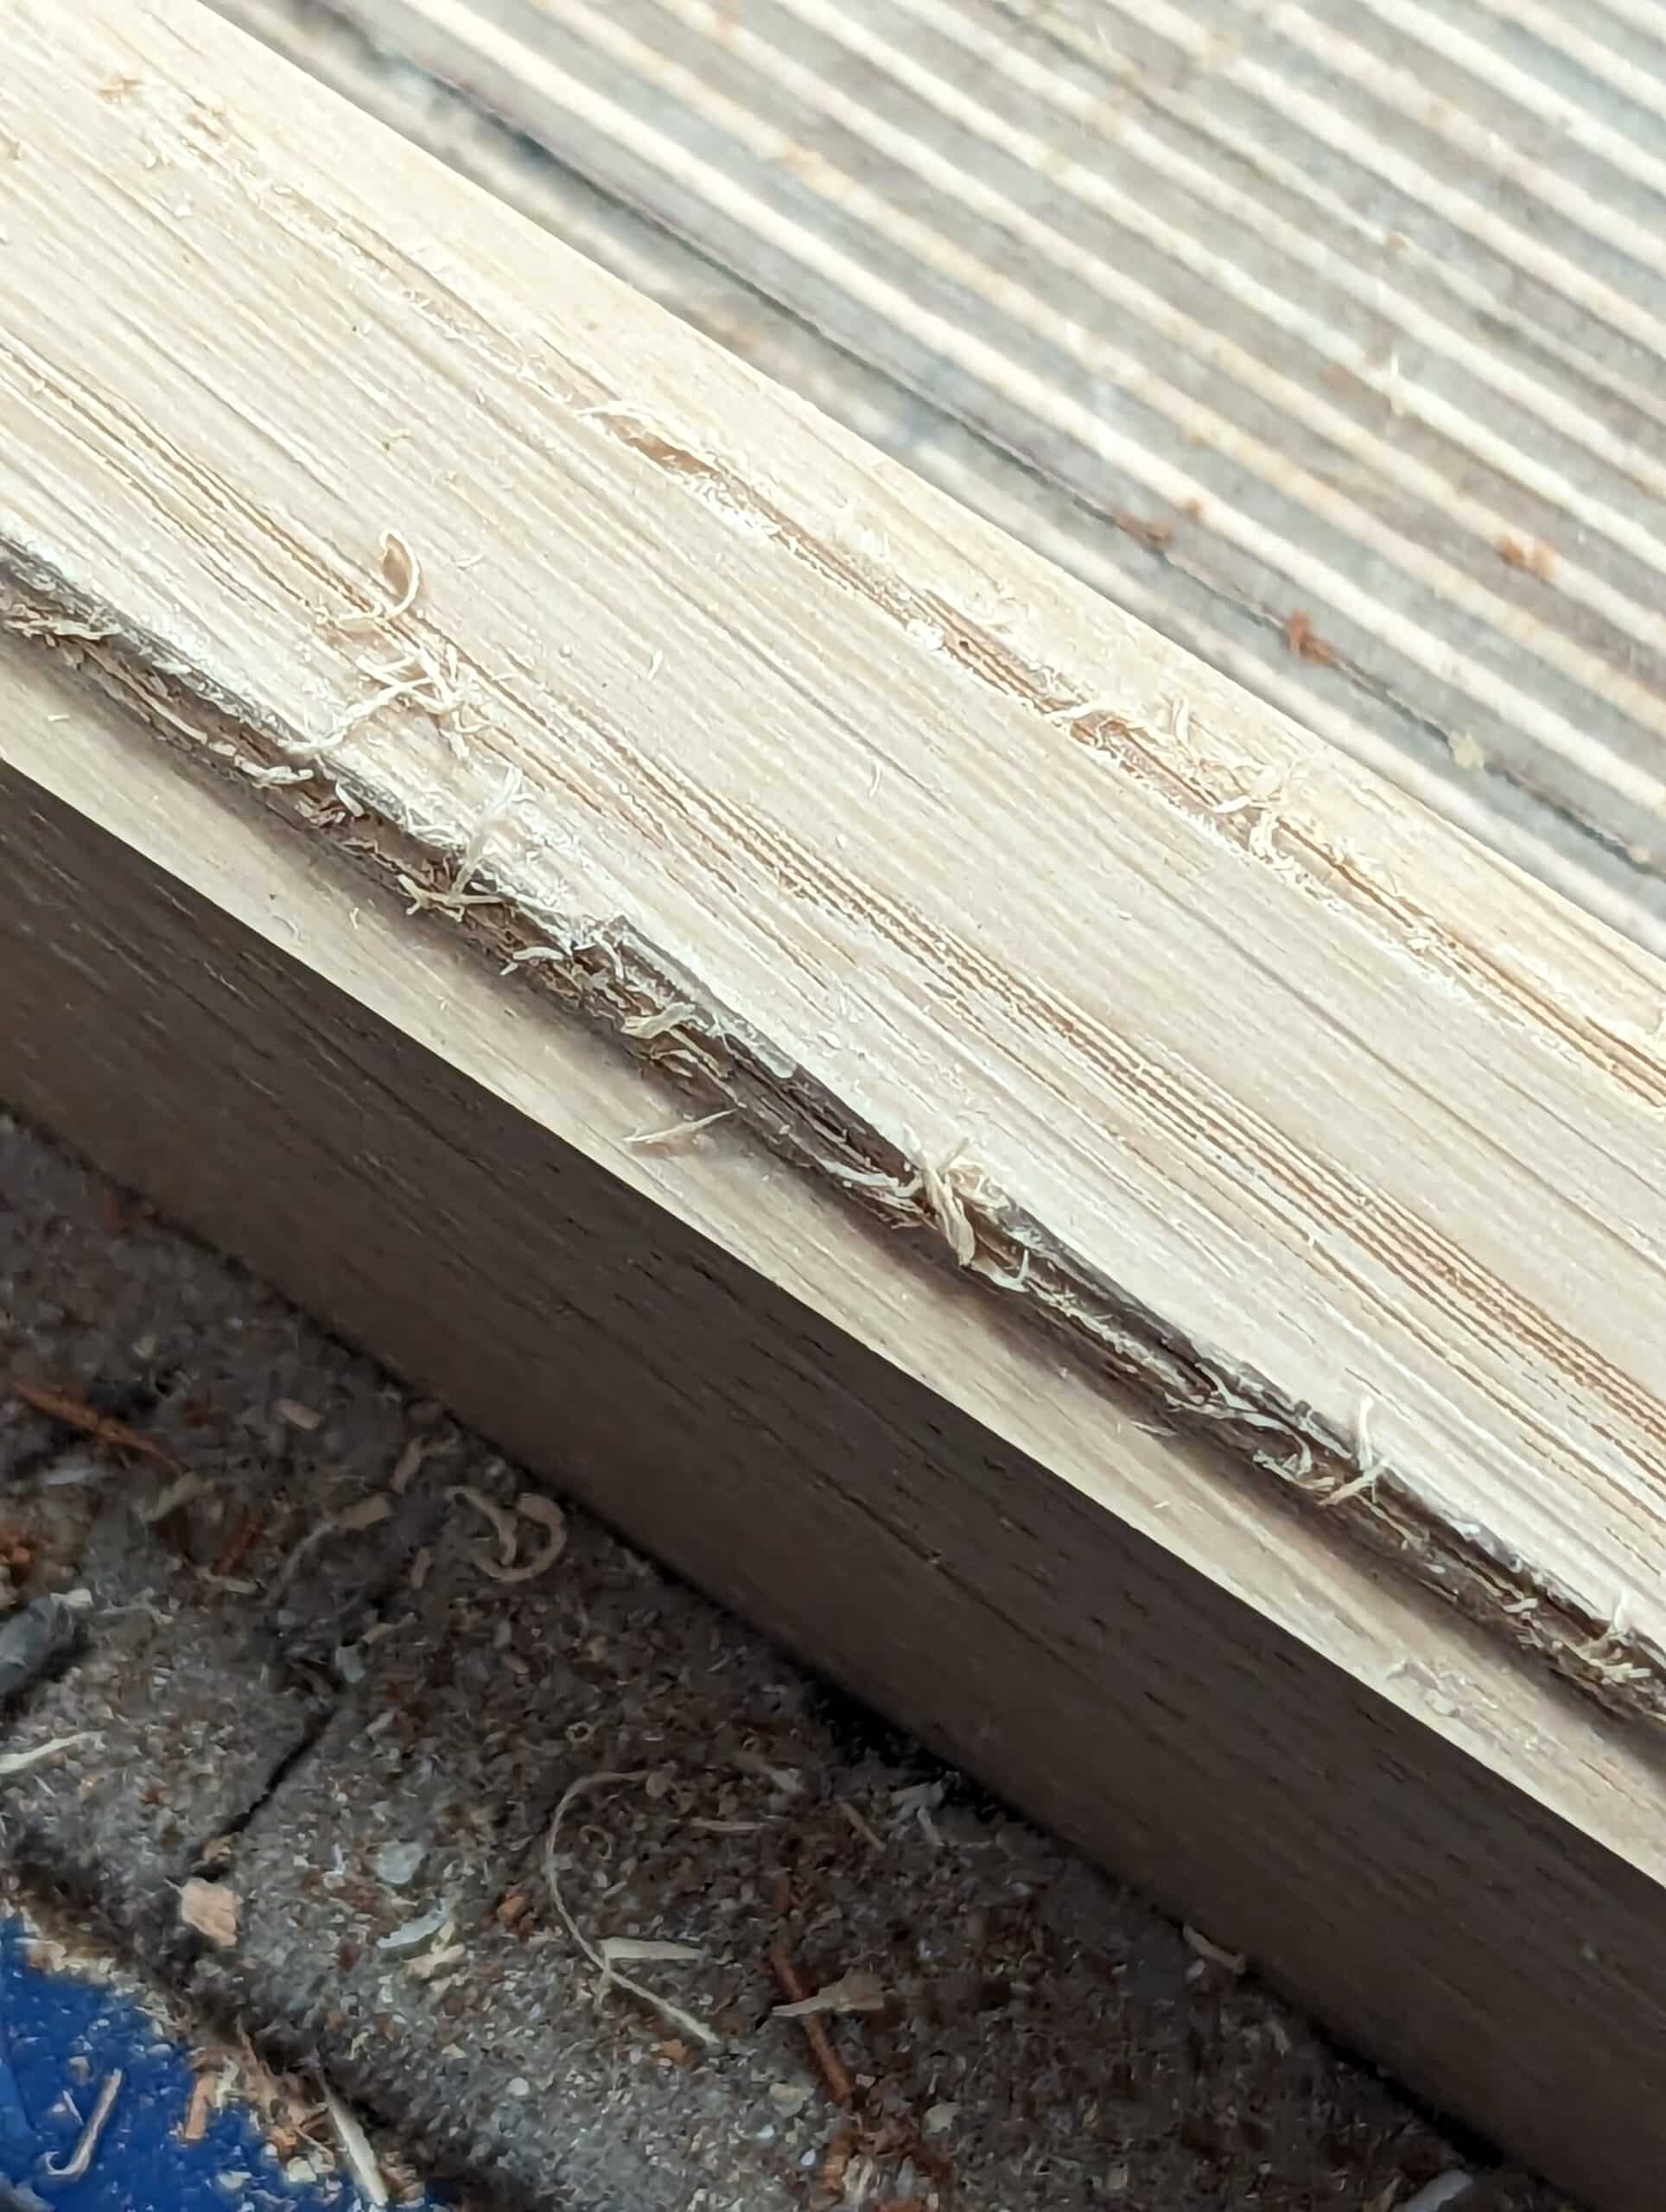
We tend to forget how a cutting iron on rebate and plough planes deteriorate after each sharpening. It’s the same with chisels and indeed saw teeth. After a period of use, the very corners of the cutting iron fracture much more quickly and more than along the corner edges. These corners to the cutting edge are critical because when and as they wear (which is actually fracture and break-off) the internal corners of the wood remain uncut.

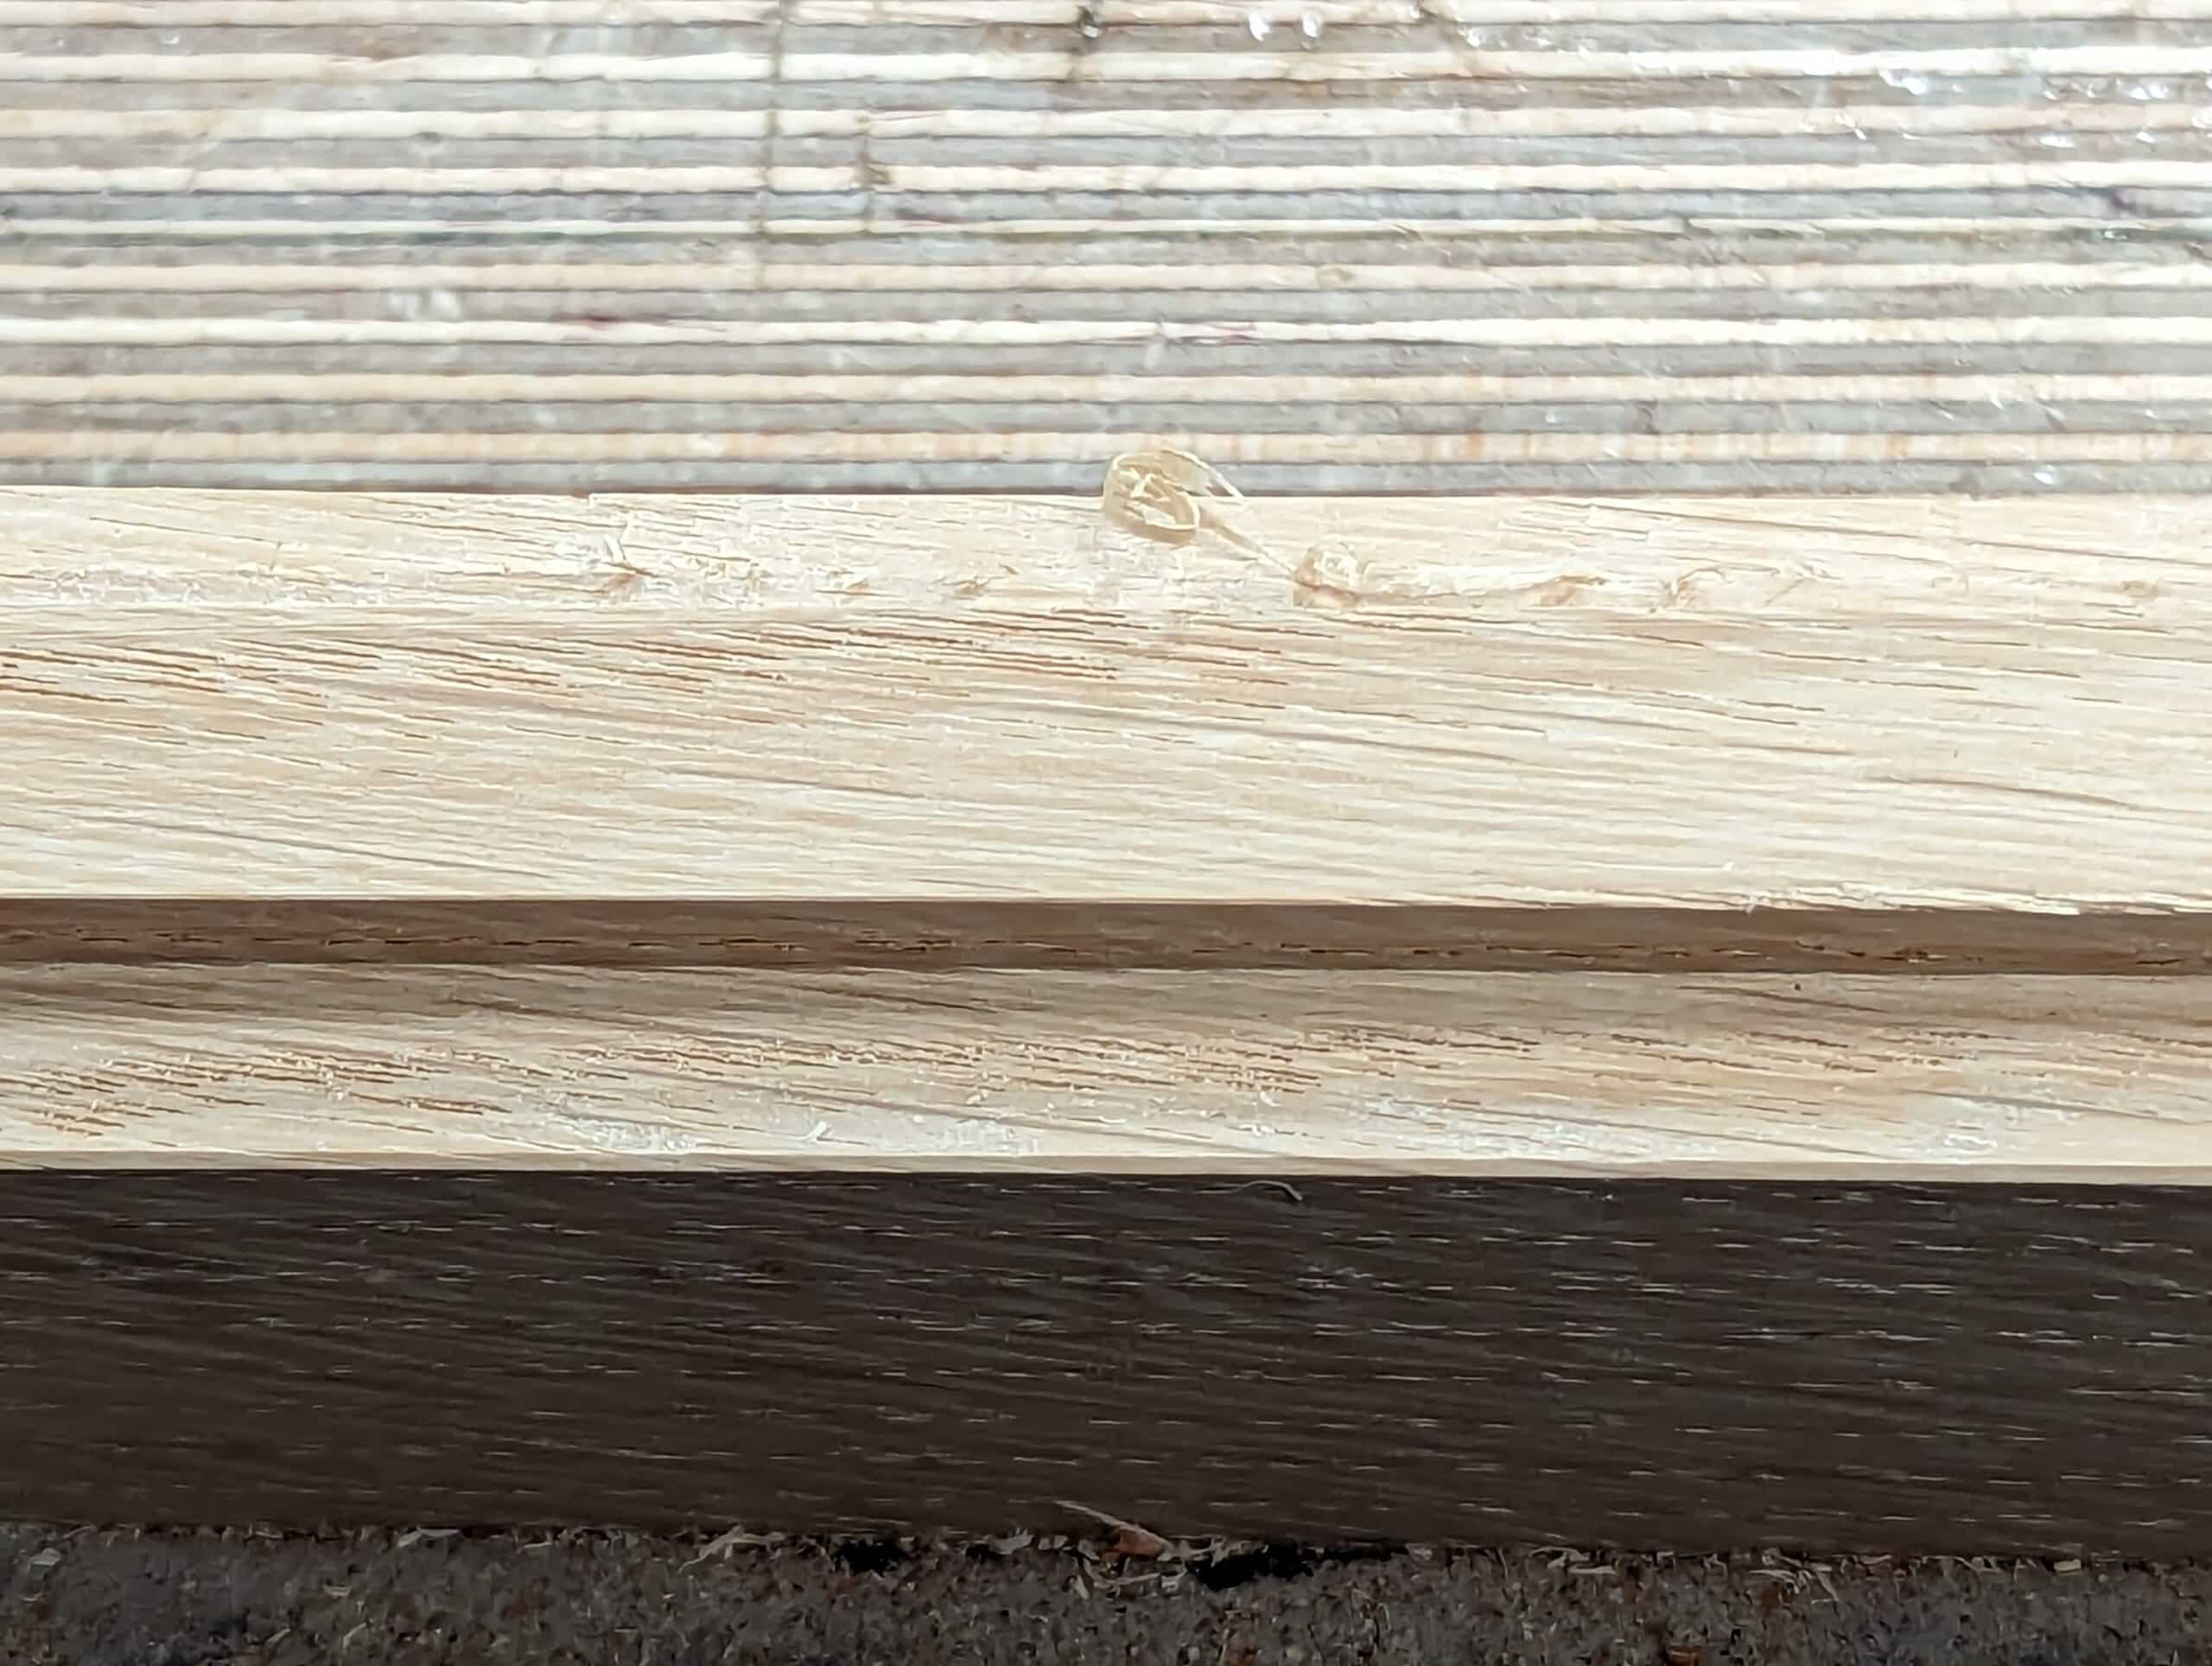
When we neglect periodic sharpening the blade, with its now rounded corner, no matter how slight, keeps nudging the plane over stroke on stroke. The more we neglect resharpening the more we end up with a stepped internal side wall to the rebate. On plough planes, this may be much less evident because, of course, both of the corners to the cutter deteriorate at the same rate whereas on rebate planes it can mostly be on the one corner alone because this is the way we use and set up the plane. Shoulder planes and bullnose planes are mostly used from both sides so they too need regular sharpening to work well. So what happens in the ploughed groove is the plane begins to start jamming because of those uncut corners which are actually being ripped from the body of wood. The deeper you get the more resistance you feel.
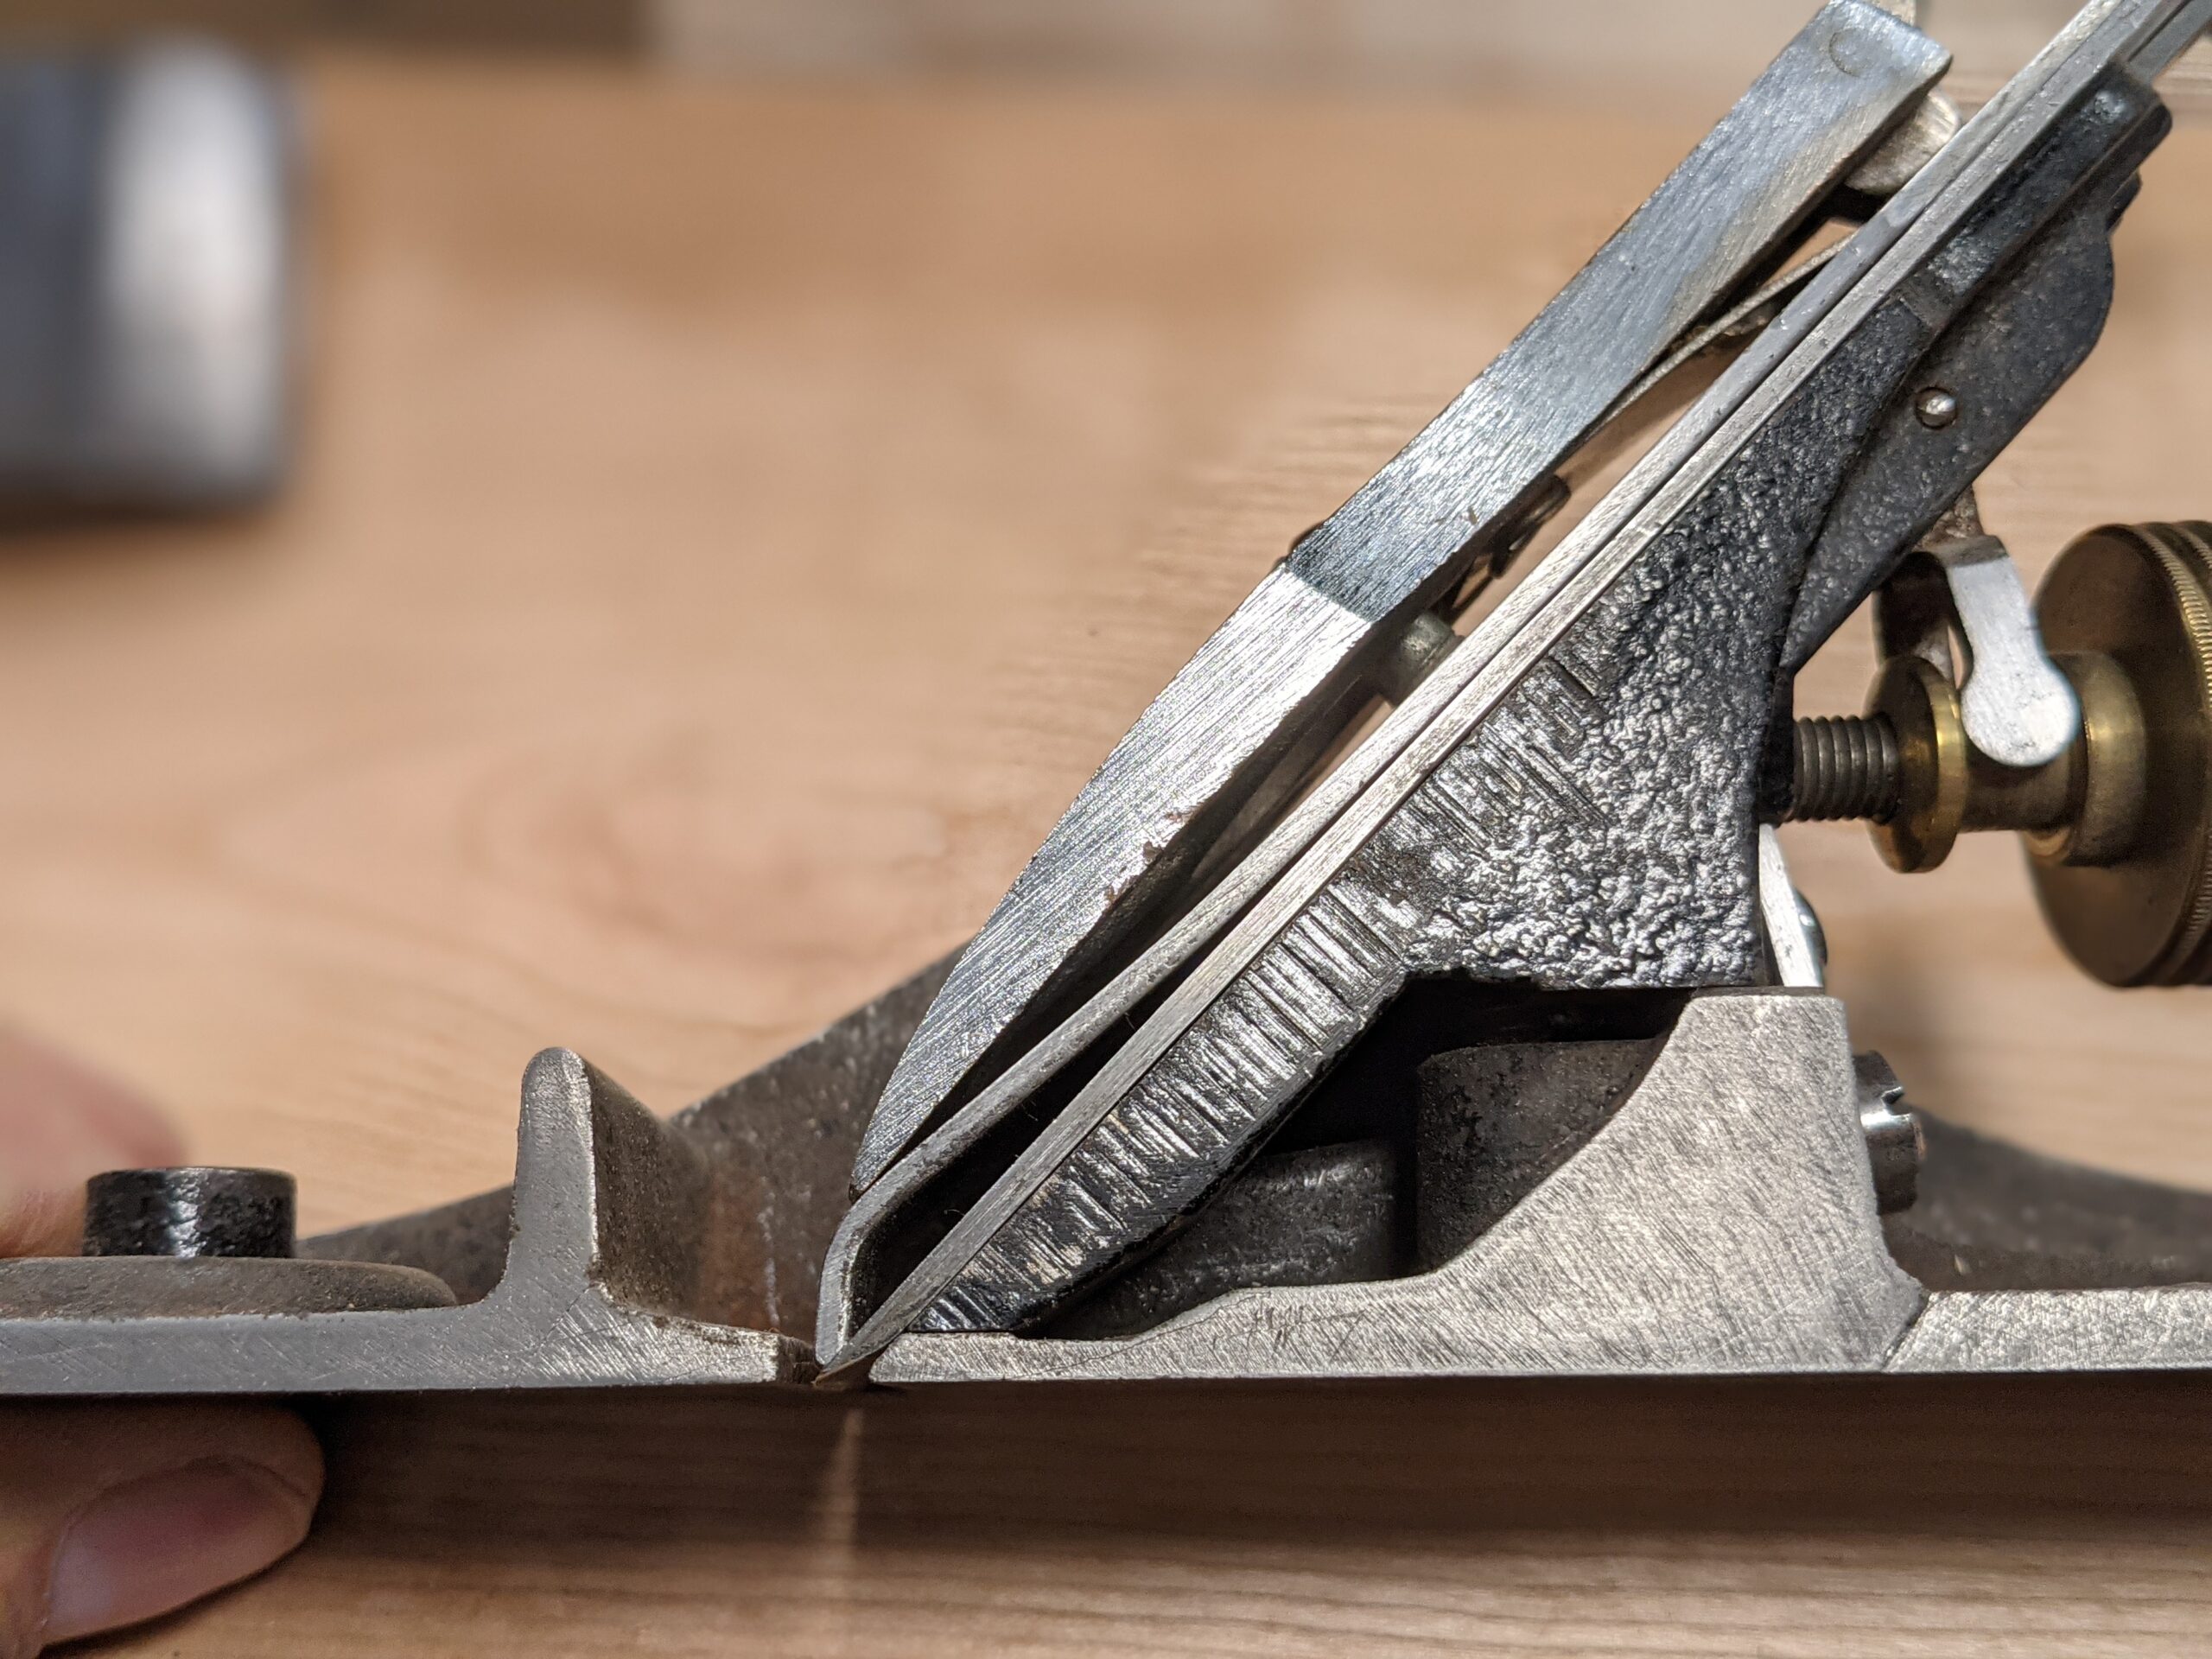
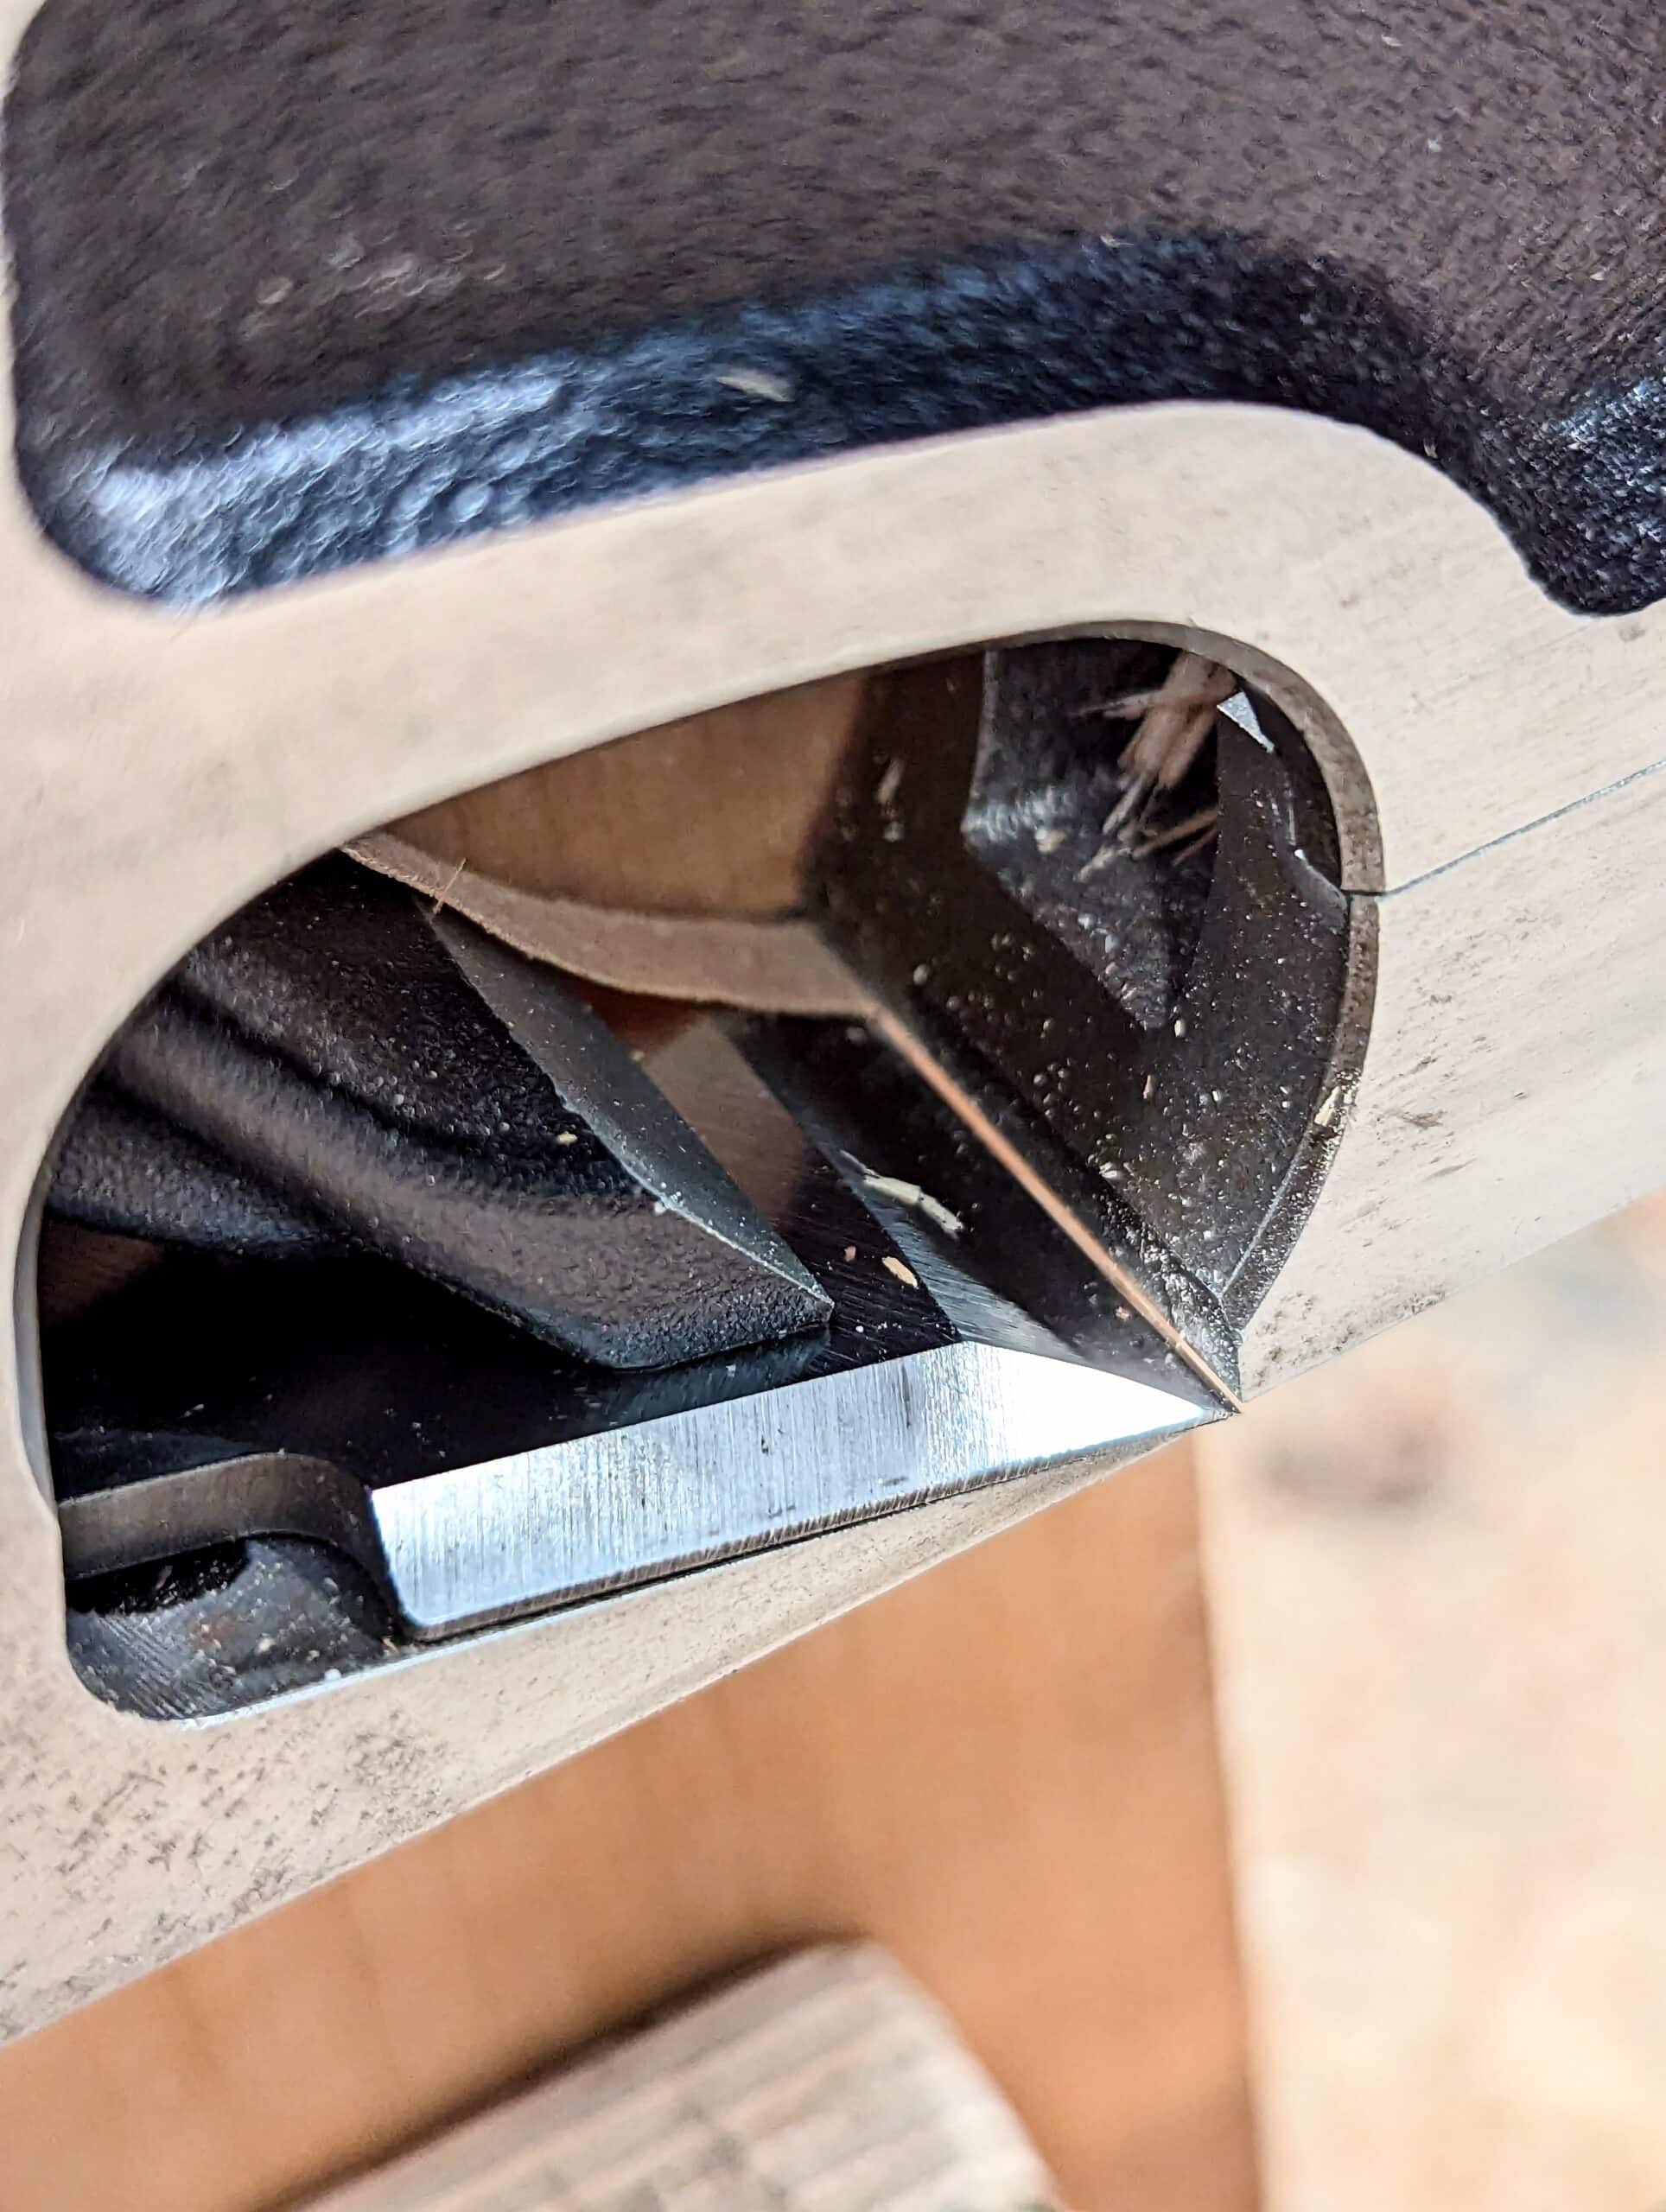
Another consideration for any rebate plane type and plough plane version is the cutting iron itself. The profile of the cutters should be slightly trapezoidal in shape; basically, trapezoids have four sides two of which are parallel. In our case, for cutting irons in these plane types, the front and back faces are parallel while the sides are narrower on the back of the cutting iron and wider according to size on the front. Without this shape, the cutting iron tends to jam in and through the cut. This narrowed back affords us the relief in passaging through the wood.
Finally, remember that deep cuts are possible with plough planes because of course we are usually taking only a narrow cut somewhere between 3/16″ and 1/2″. Because of the narrowness and our strength, we can indeed plough deeply. The problem here is the top face of the cutting iron is effectively ploughing ‘under’ the surface wood. This then leaves the surface fibres ‘uncut’ and lifted from the face of the wood. It causes corner fracture to both plough planing and rebating. Best to start out with shallow cuts for the first several strokes and then deepen for faster cutting.
We might now use shoulder planes as much for refining the final levels of rabbets as we would the shoulders of tenons. Why? Well, in times past, shopfitters and joiners made entryway doors for shops and hotels, pubs and more from wood. When extruded aluminium and plastic came in in the 1950s, we saw such classic door making all but disappear. These doors had gunstock shouldering to the mid-rails 10-12″ wide and bottom rails had even wider rails, up to and beyond 20″ wide. In our woodworking today, most rails are narrower, often no more than 9″ and most less than 5″. Using the knifewall method for establishing shoulder lines means we can trim the shoulders with a one-inch chisel dead to the line and therefore have no need for a shoulder plane. Shoulder planes work best on wide shoulders most;y because we get better registration on wide and long shoulder surfaces. Much more awkward on short and narrow ones.
I’m working on another blog on shoulder planes currently.
Paul, thanks for an interesting read as always. I remember reading on your blog a while ago about some booklets / books you were preparing for publishing, do you still plan to do this?
We are working through them to update them. With all the work we are already engaged in it will take some time.
Hello Paul,
I have a skew rebate plane (Veritas) – is this set up the same way ?
It is. The theory behind the skew, and indeed the reality, on rebate planes, is that they ‘pull‘ themselves into the inside corner more readily as this point of the cutting I is in early contact and the paring of the rest of the cutting edge follows that leading corner.
Thank you, it works beautifully now.
Thanks Paul. My dad (born 1938) has been interested in woodworking since the 1940s as was his father and uncle. I got him your book as a gift one year. He read it and really liked it saying he saw things in there that he has never read elsewhere before. That is saying something. We look forward to any other books you publish. Please do so as I am sure there will be a lot of info in there not found elsewhere.
Slightly related to your discussions on degradation of edges. There was an individual on YouTube who wanted to test the sharpness and edge retention of sharpening vs. stropping. He bought a device where you cut a “plastic string” and the force needed to cut it gives a numerical read out. He was quite thorough in his experimental design and execution. The data showed that stropping doesn’t get you back to the same level of sharpness or stay as sharp over strokes as compared to resharpening. This is something I’ve seen you mention in the past as to why you just quickly resharpen (and strop as part of you normal routine) rather than strop. I believed you because you have over 50 years at the bench. Was nice to see someone do the testing.
Well, I have some new stuff coming out soon that changes many things for me too.
Hi Paul. I’m looking forward to it.
Hi Paul, I have your book and absolutely love it. It is very informative, but also a very beautiful book. So I don’t want to write in it, instead I wrote down notes from it a note pad just for it.
It was nice to hear you comment on a second volume. I can’t wait. Any chance that might be happening soon?
Hi Paul, thanks for this post. I built a room door recently and on the way I experienced the issue you described above with the fence of the plough plane (record 44) wandering off the reference face while going deeper. The grooves were to full depth which was around half inch with the stop attached if I remember correctly. I never had this drifting to such an extent before and couldn’t find an explanation at that point. Now it seems obvious. The wood was far from ideal with big hard knots on the grooves’ path which probably degraded the outer corner of the iron which then made the fence drift. I thought “how can this be? I’m adding side pressure and still it goes the opposite way with progressingly deeper cuts.” Thanks again. How many times have I read your blog and you discussed the exact thing I was working on at that time!
I know that feeling as well. Also, I’ve gone back and rewatched videos only to find things Pauls discussed that I didn’t understand because I didn’t have hands on experience at the bench with this issue.