Setting Up and Sharpening your Router
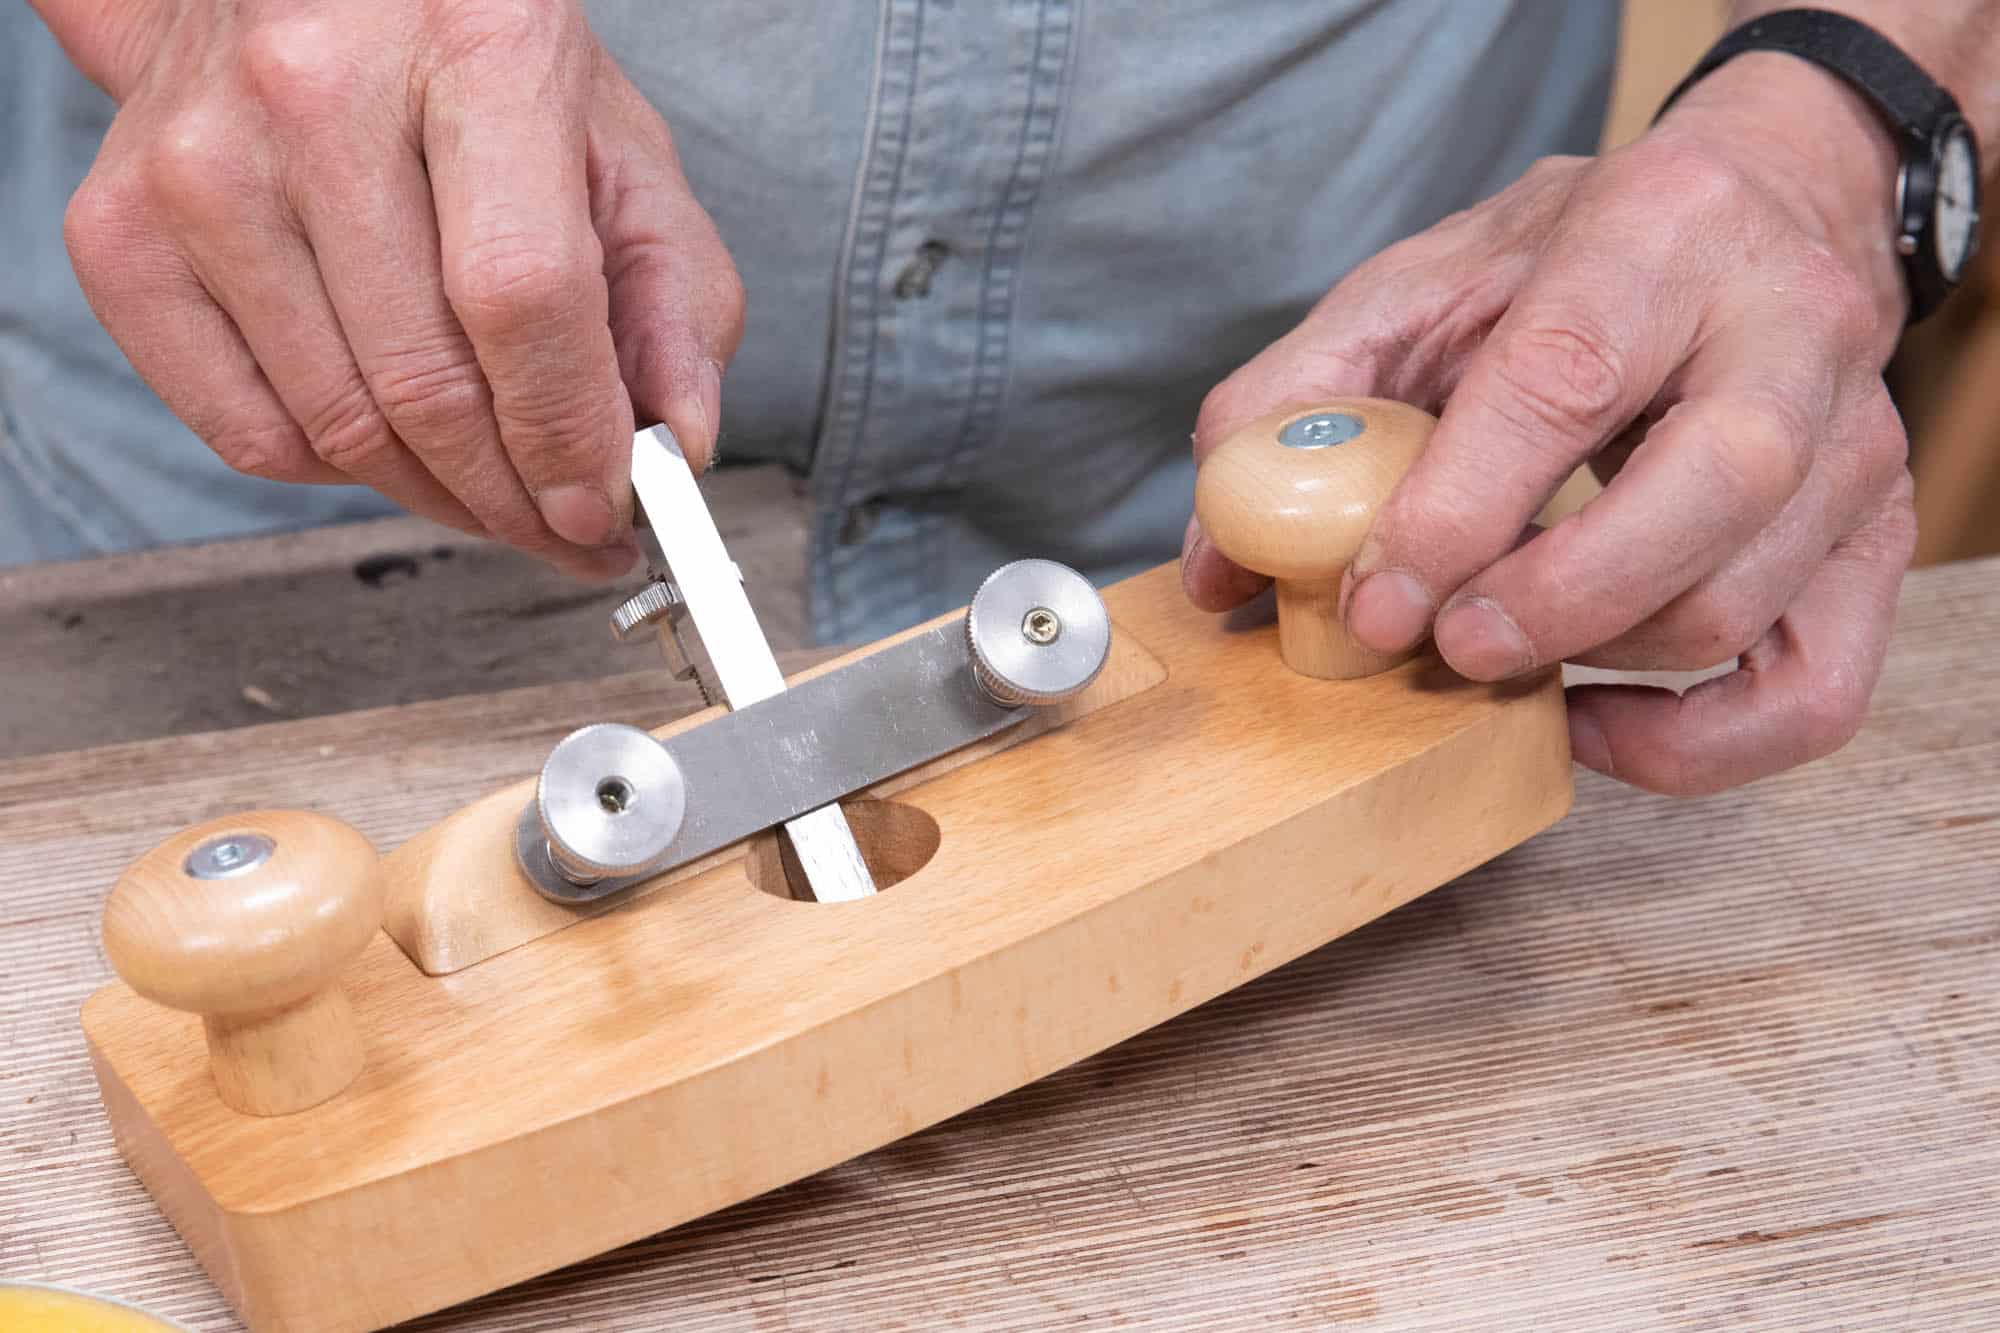
Setting up the router plane is mostly done in the making. The blade pretty much slides into its channel but might need a small amount of paring to the sidewalls for a smooth extension and retraction movement. The depth of the channel leaves the cutting iron slightly above the surface of the wood on either side, the retainer bar* then presses the blade fully to the bottom face of the channel allowing full contact of the bar over the whole width of the blade. This then applies adjustable pressure to the blade via the retainer bar and the adjustment nuts on either side. By fine adjustment, you can set the pressure which will either lock the blade in a solid immovable position, or back the thumb nuts just a little which will still apply pressure to the blade whilst allowing continuous adjustment of the depth of cut during use. The fact that you can alter the depth of cut without having to loosen the blade is a unique feature of this router plane.
*If you are making your router plane from scratch, i.e. without a kit, you can watch Paul making a retainer bar here.
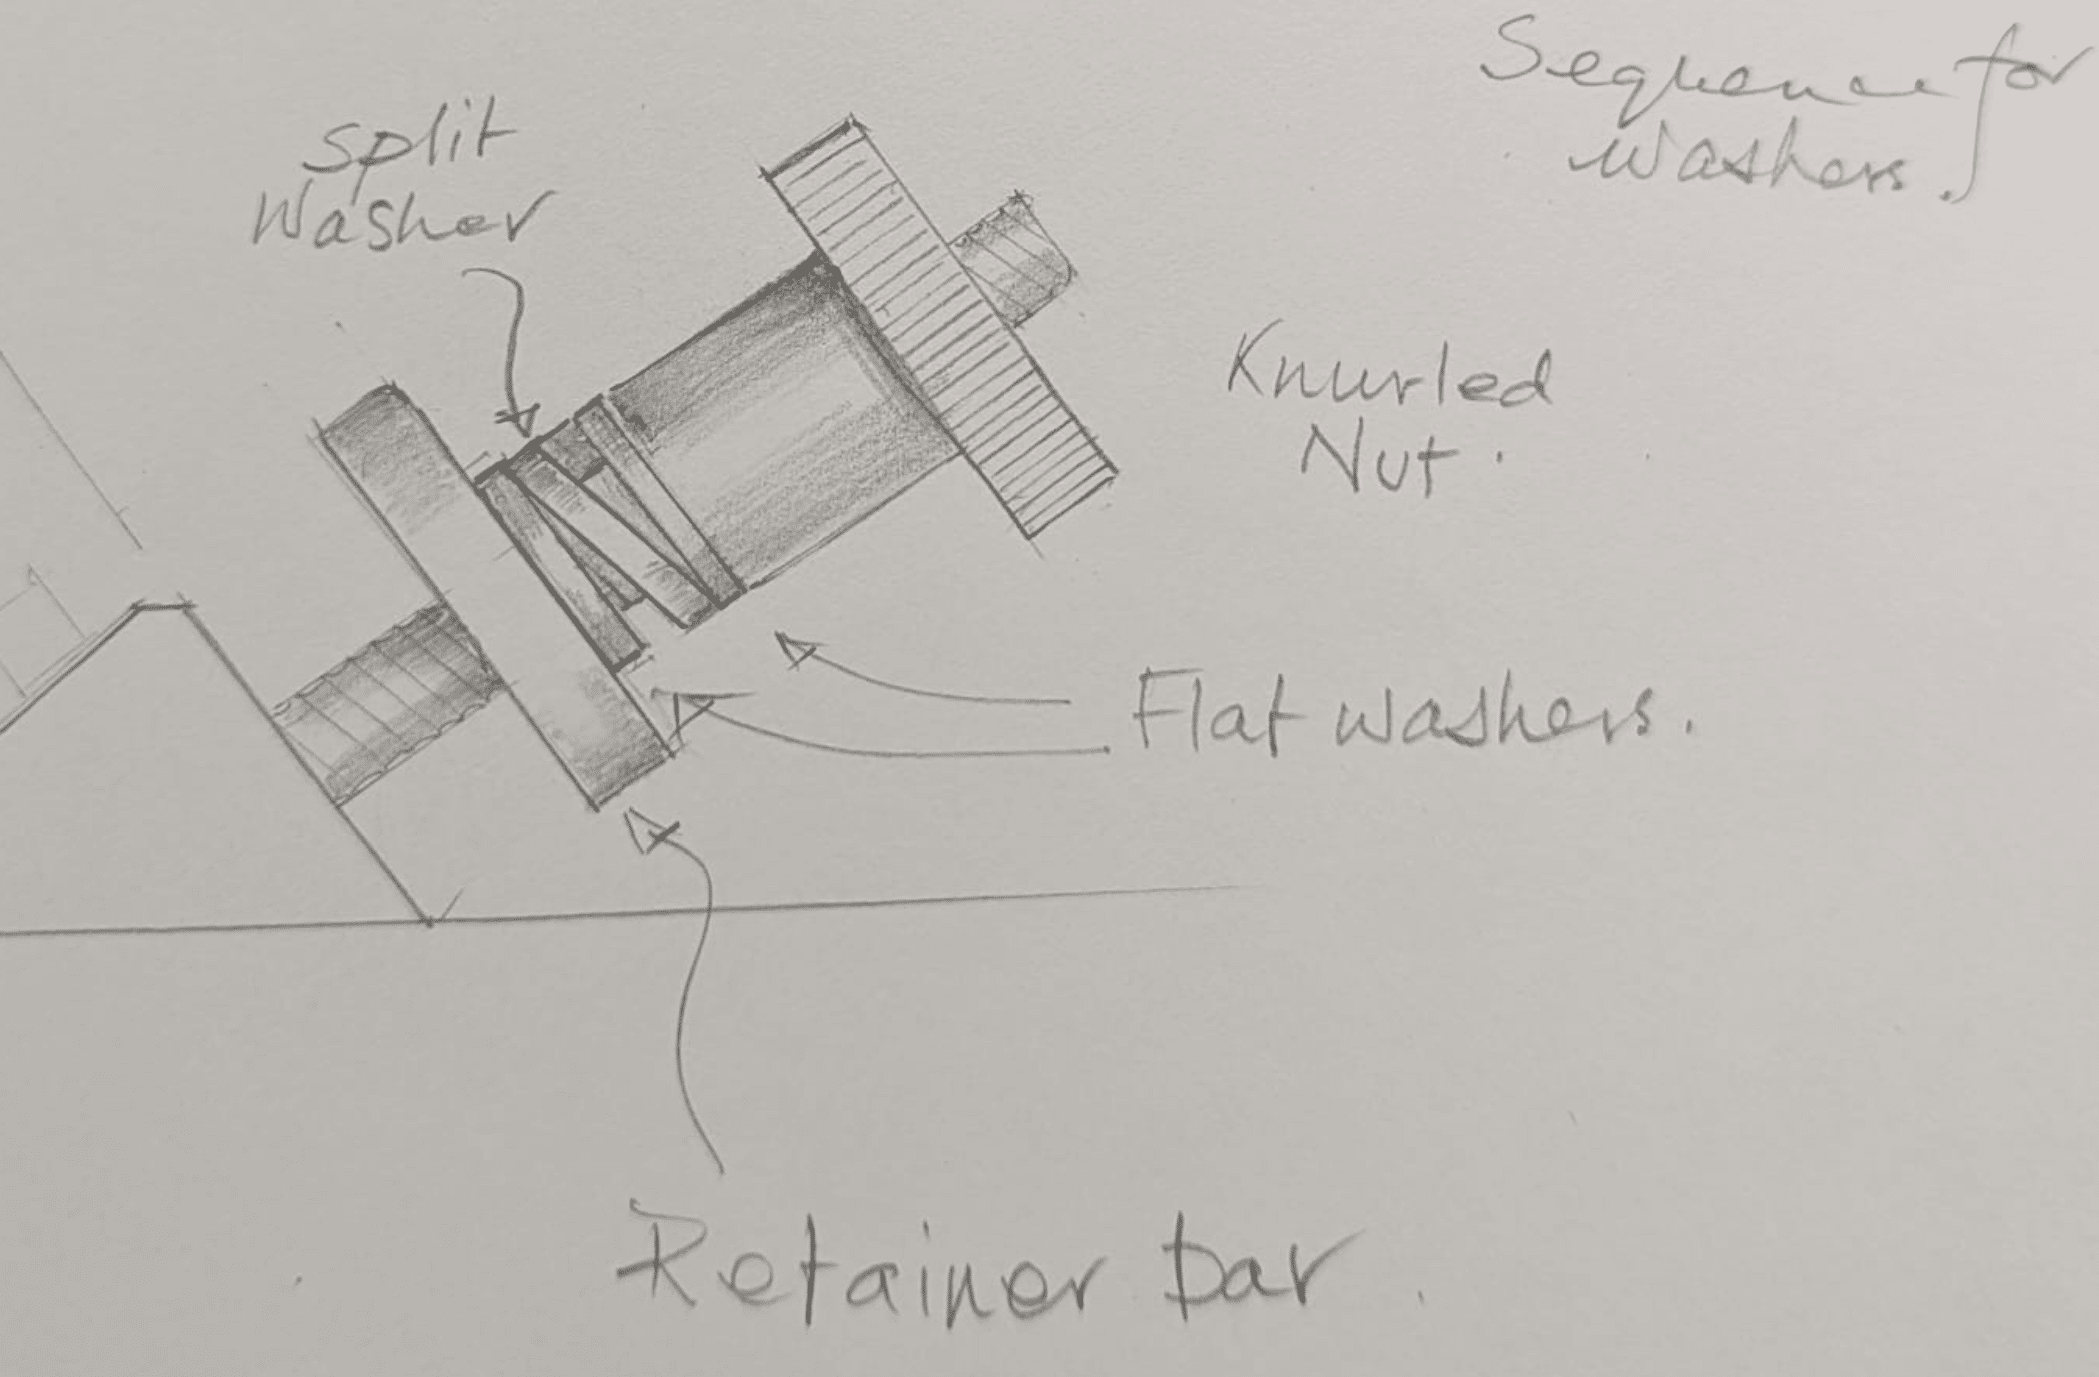
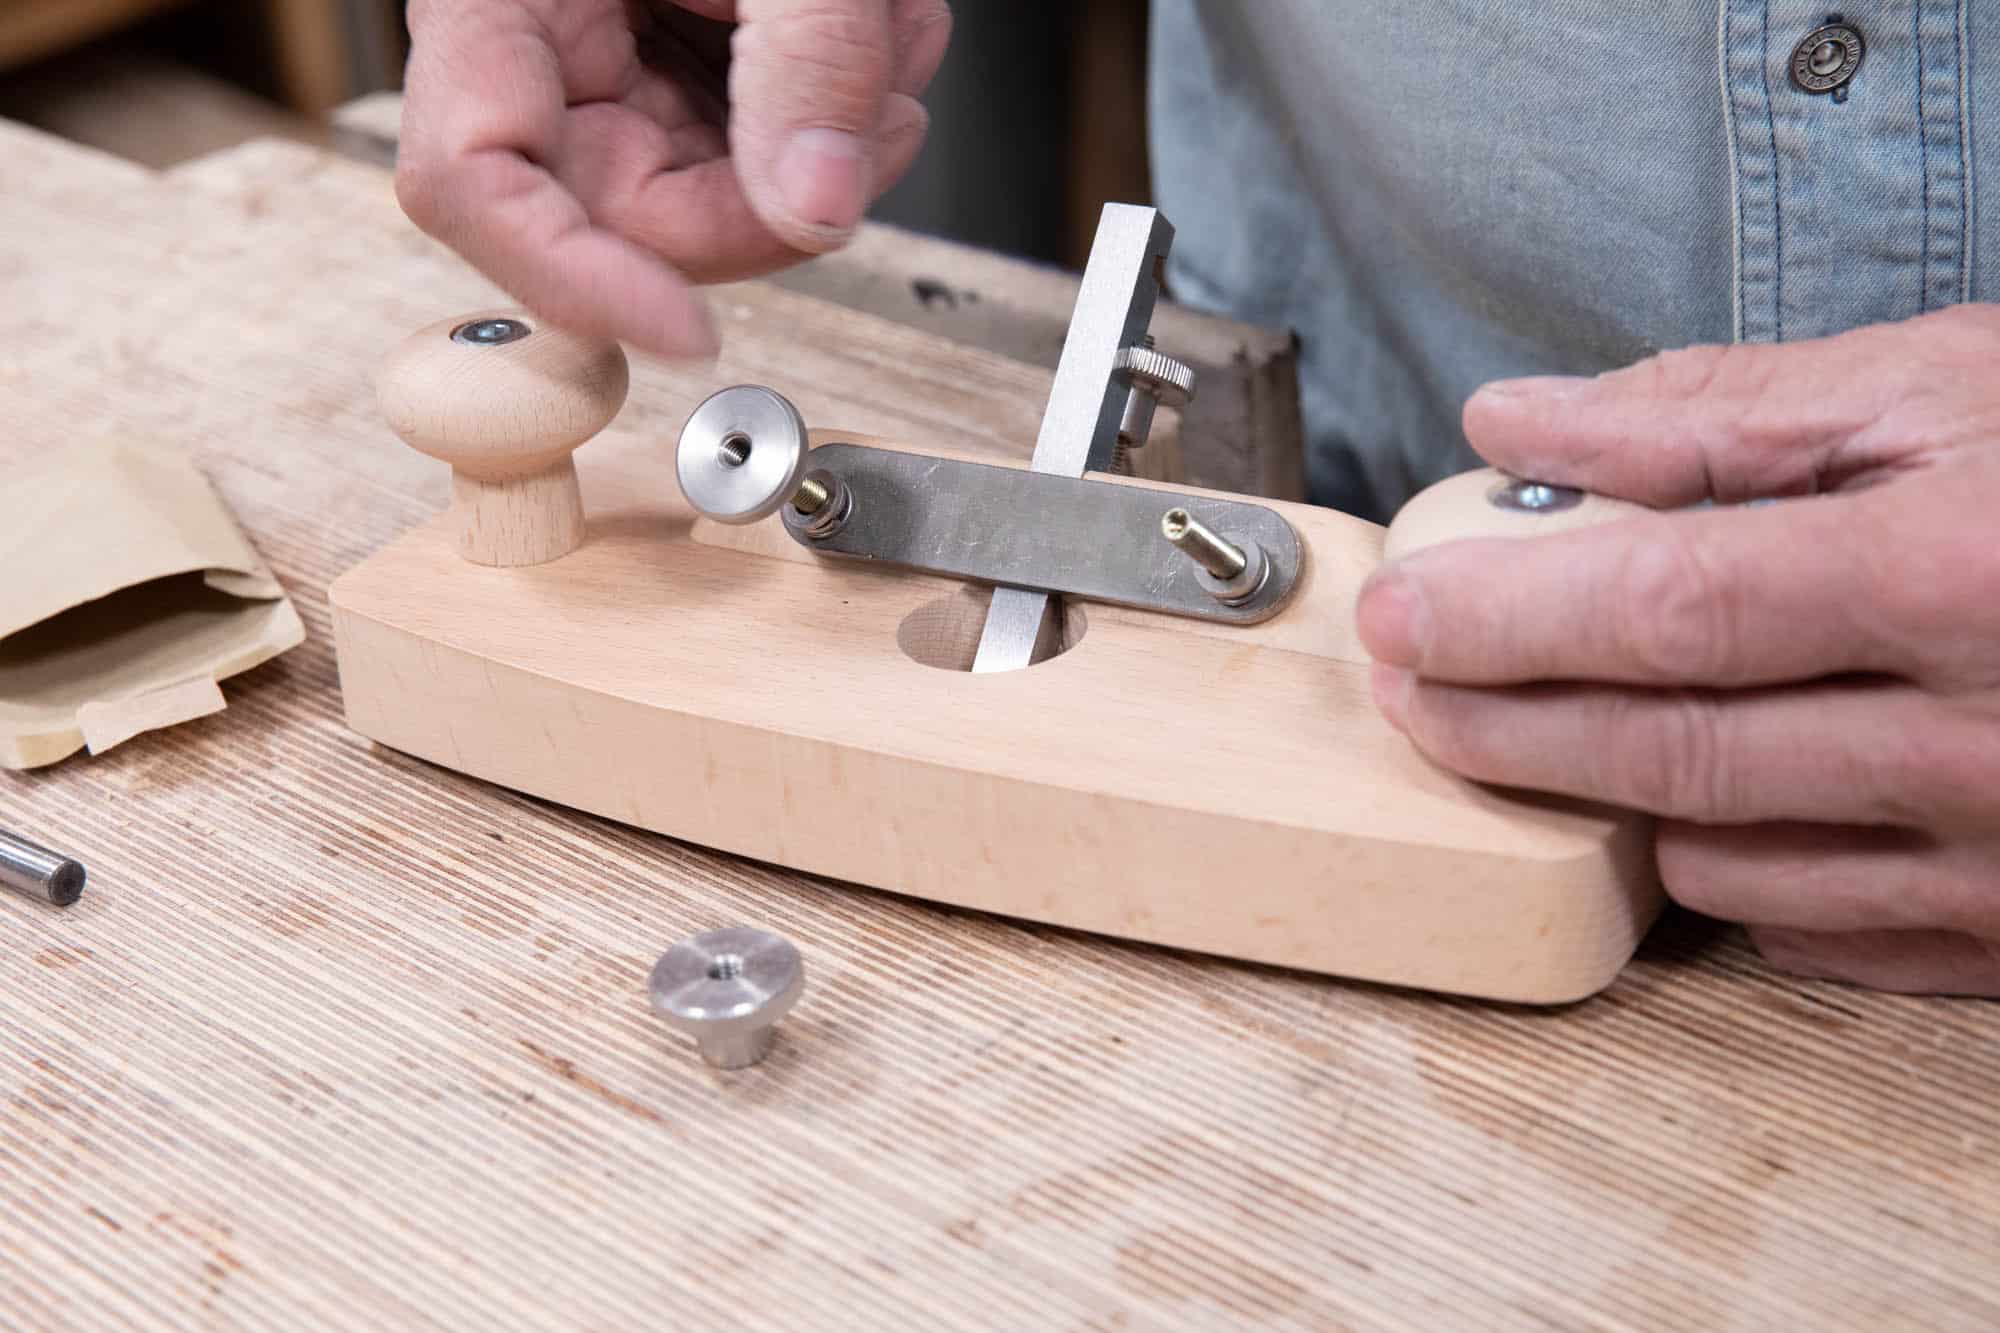
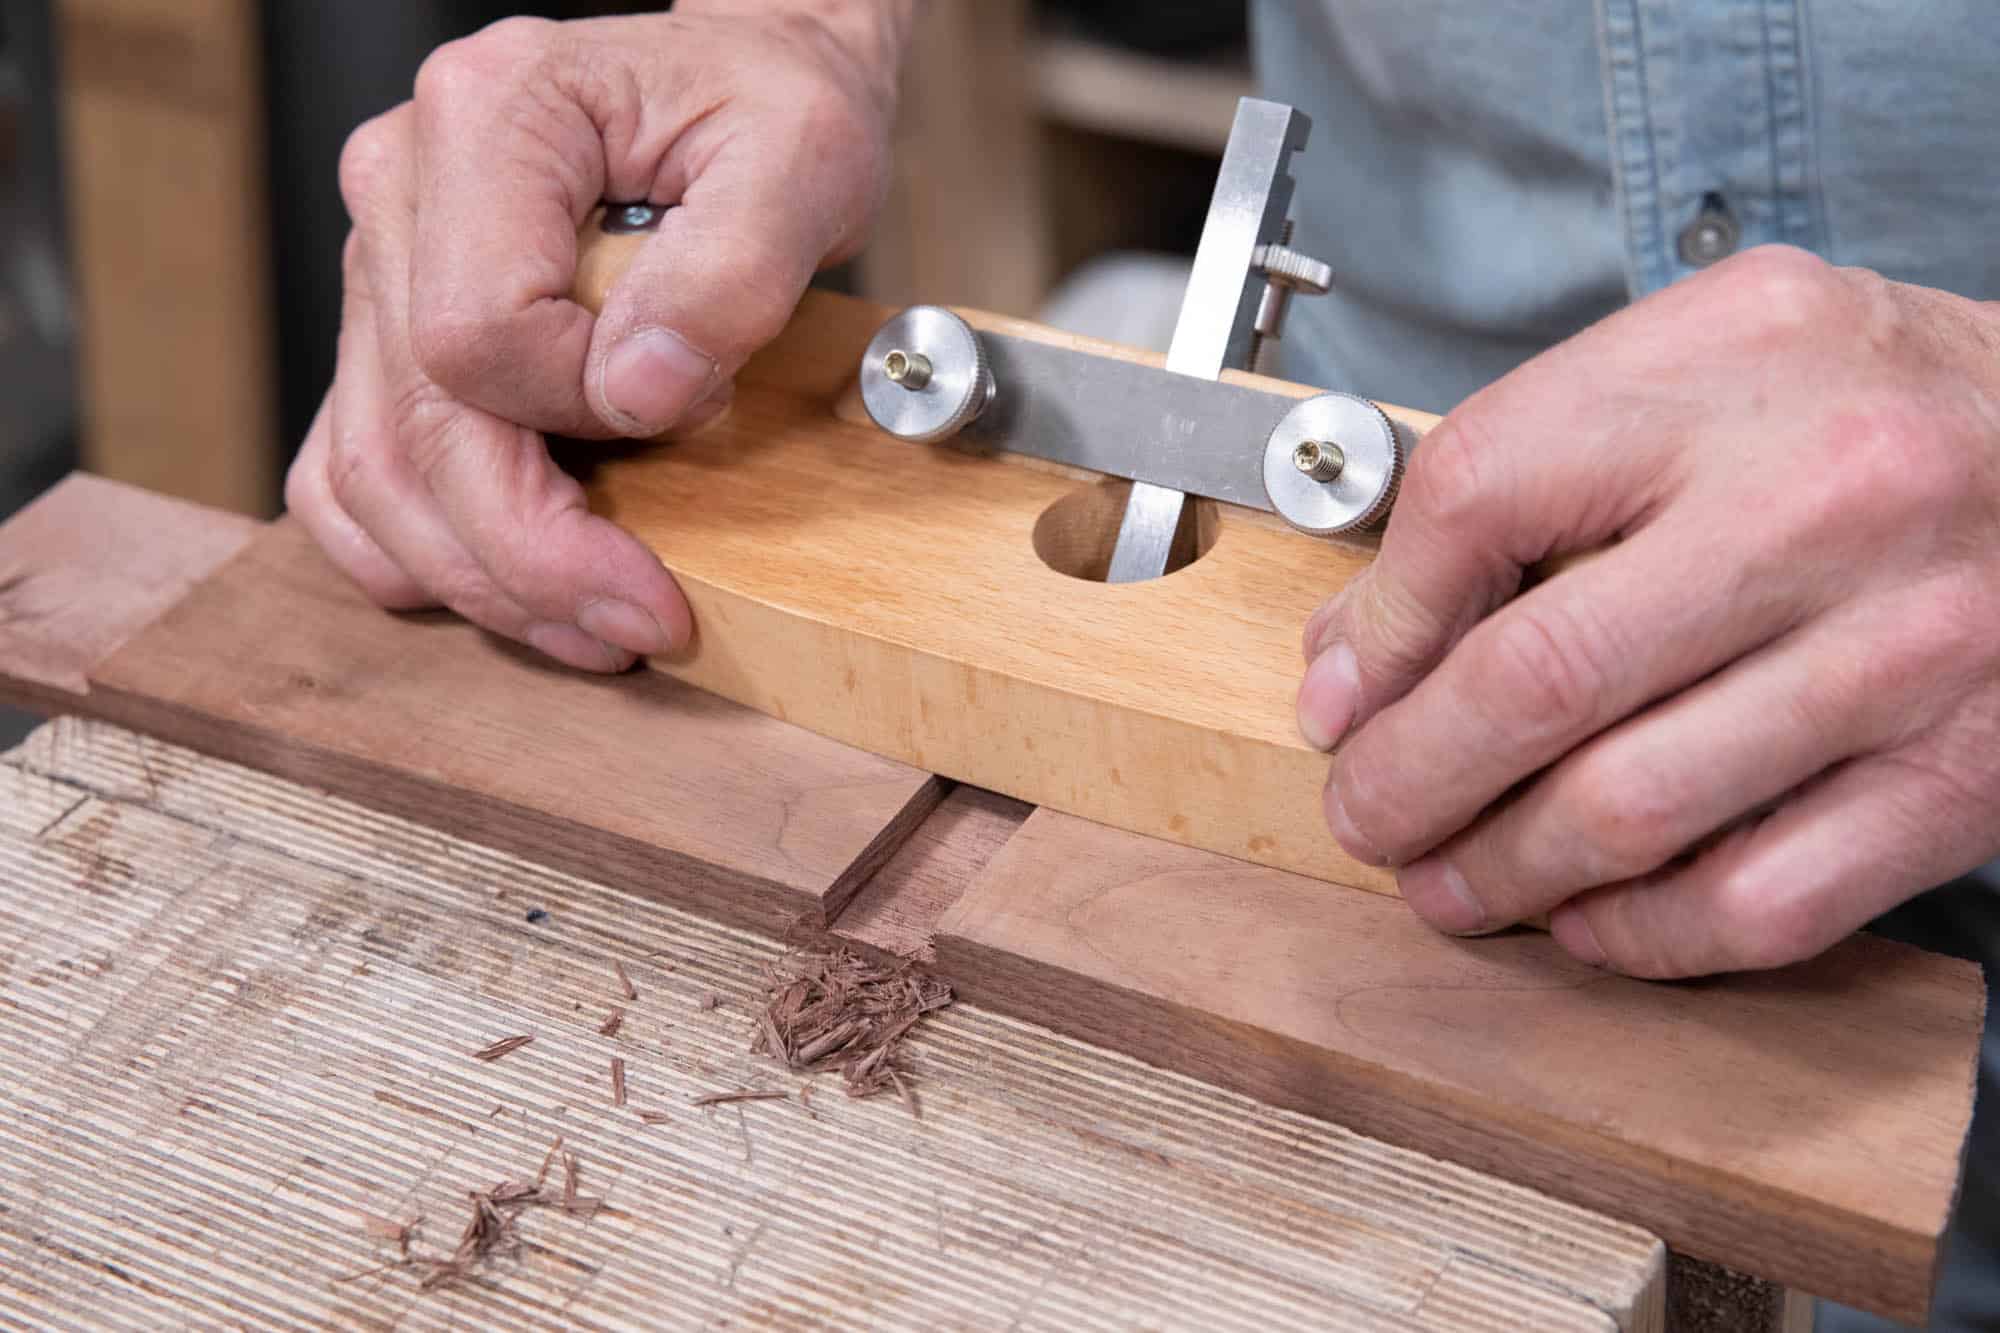
Assembling the plane begins with the blade installed in the channel and one of the notches fully seated in the depth adjustment nut on the back. The retainer bar then drops onto the two front hanger bolts with the holes offset towards the bottom.
Before inserting the thumb nuts to secure the retainer bar, a split washer sits between two flat washers on either side and this simple addition allows for applying very controlled pressure via the retainer bar to the cutting iron.
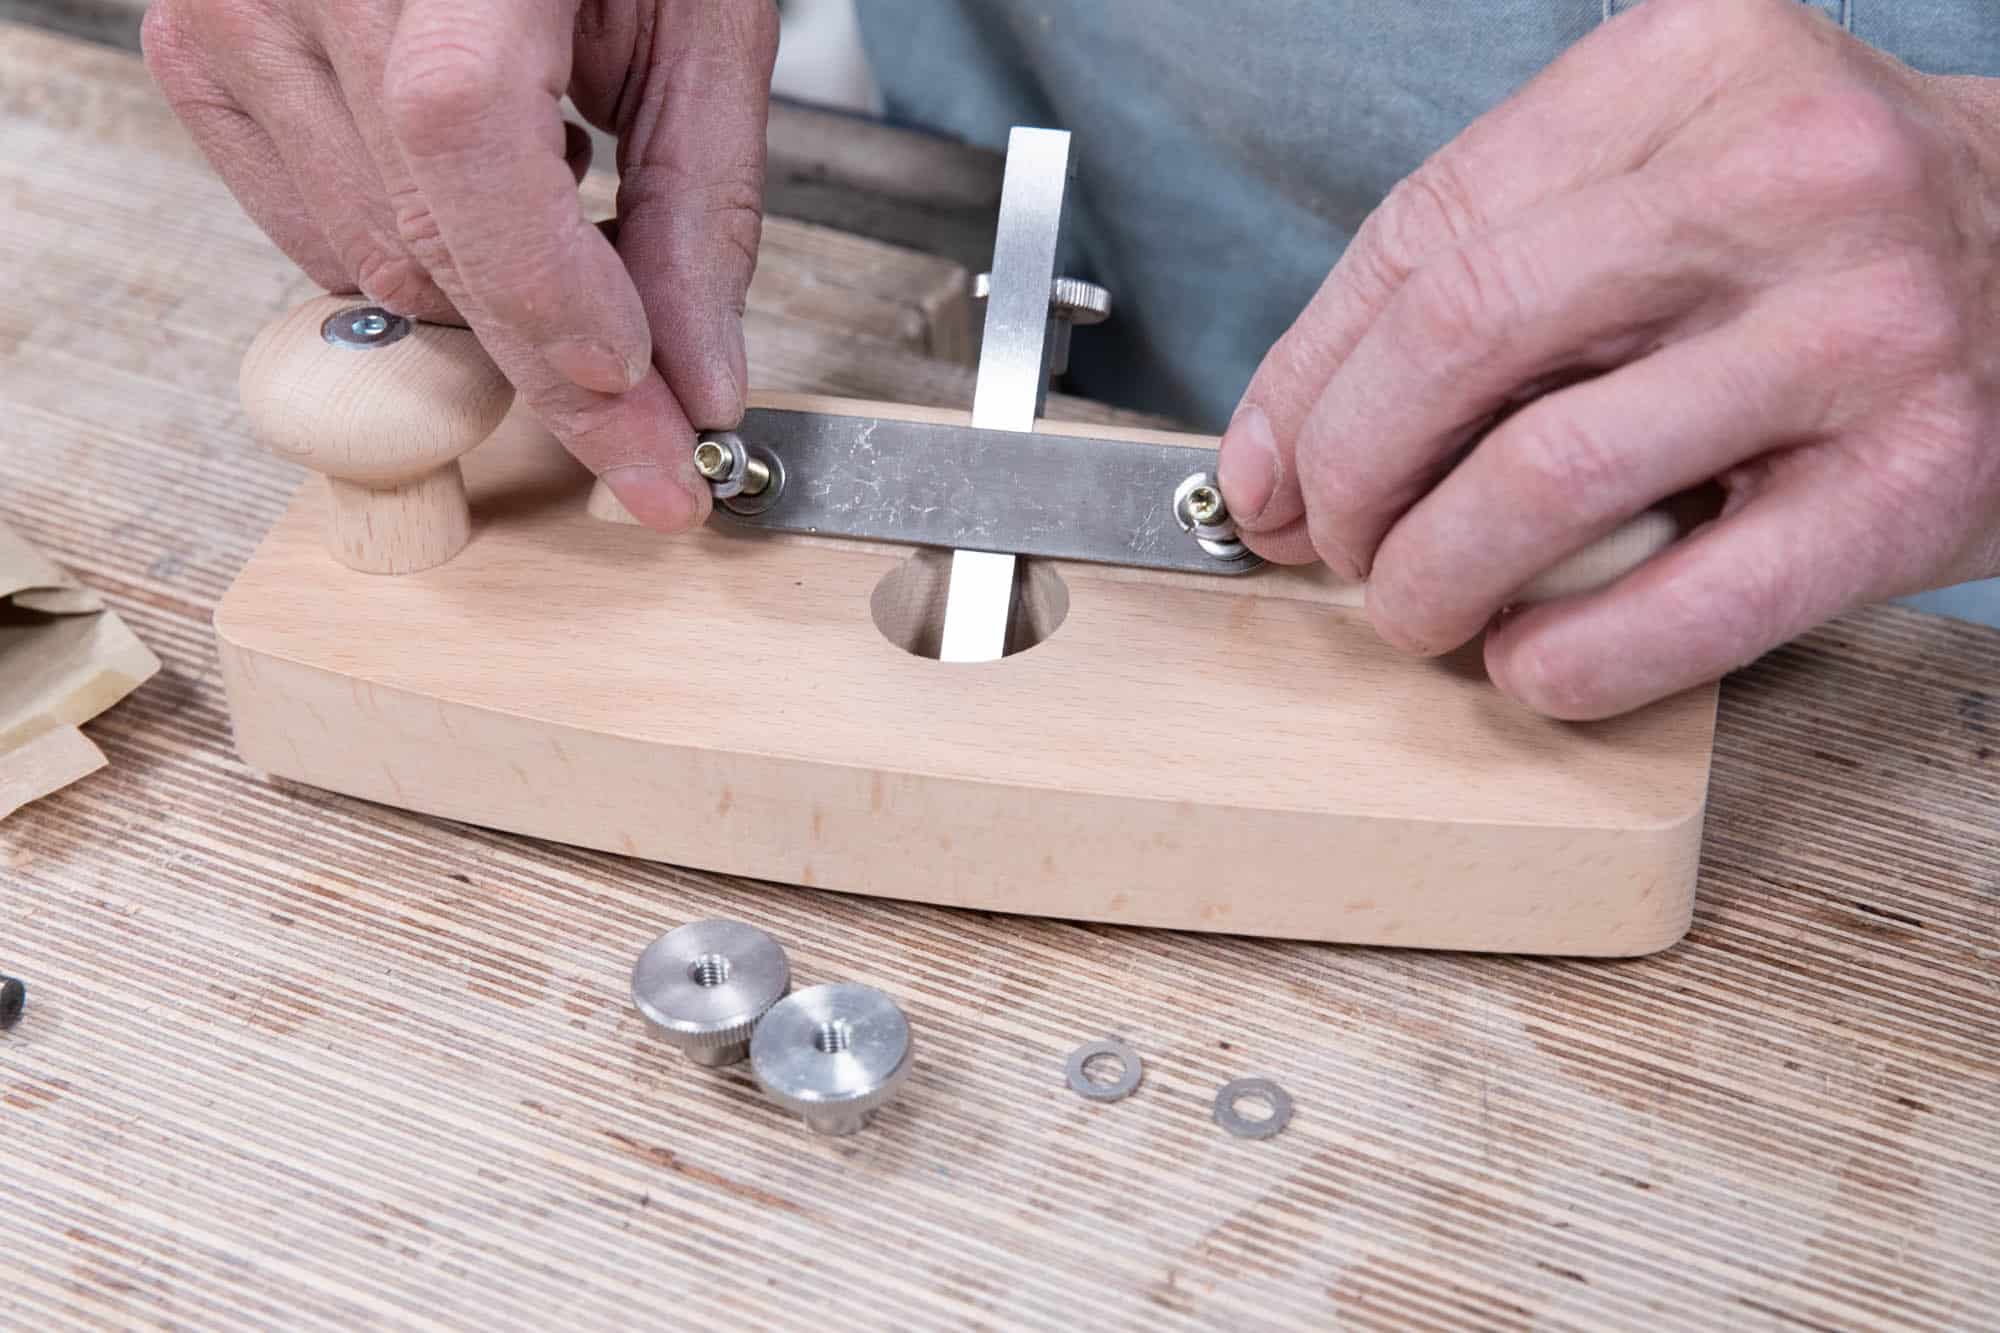
There is no need to apply full torque to the thumb nuts either side of the blade. It is best to cinch both thumb nuts down tight first and then back them off a half turn or so. Ultimately, you will adjust these according to your personal preference as you begin to better understand your hand router plane through use.
Sharpening the blade
The blade supplied with the kit* comes almost ready for use and in fact, will already cut when installed. It comes with a 25° bevel but should now be strengthened by steepening the bevel by the cutting edge. Generally, this final bevel, sometimes called a secondary bevel, will be 30° but can be a little over or under. This bevel need be no more than 1/16″ (1-2mm) wide and should be perfectly square to the blade so that when in use, it cuts parallel to the sole of the plane, thereby resulting in a level surface once you have reached your desired depth.
*If you have made your own cutter, the process for sharpening is no different. You can watch Paul sharpen a cutter he made here.
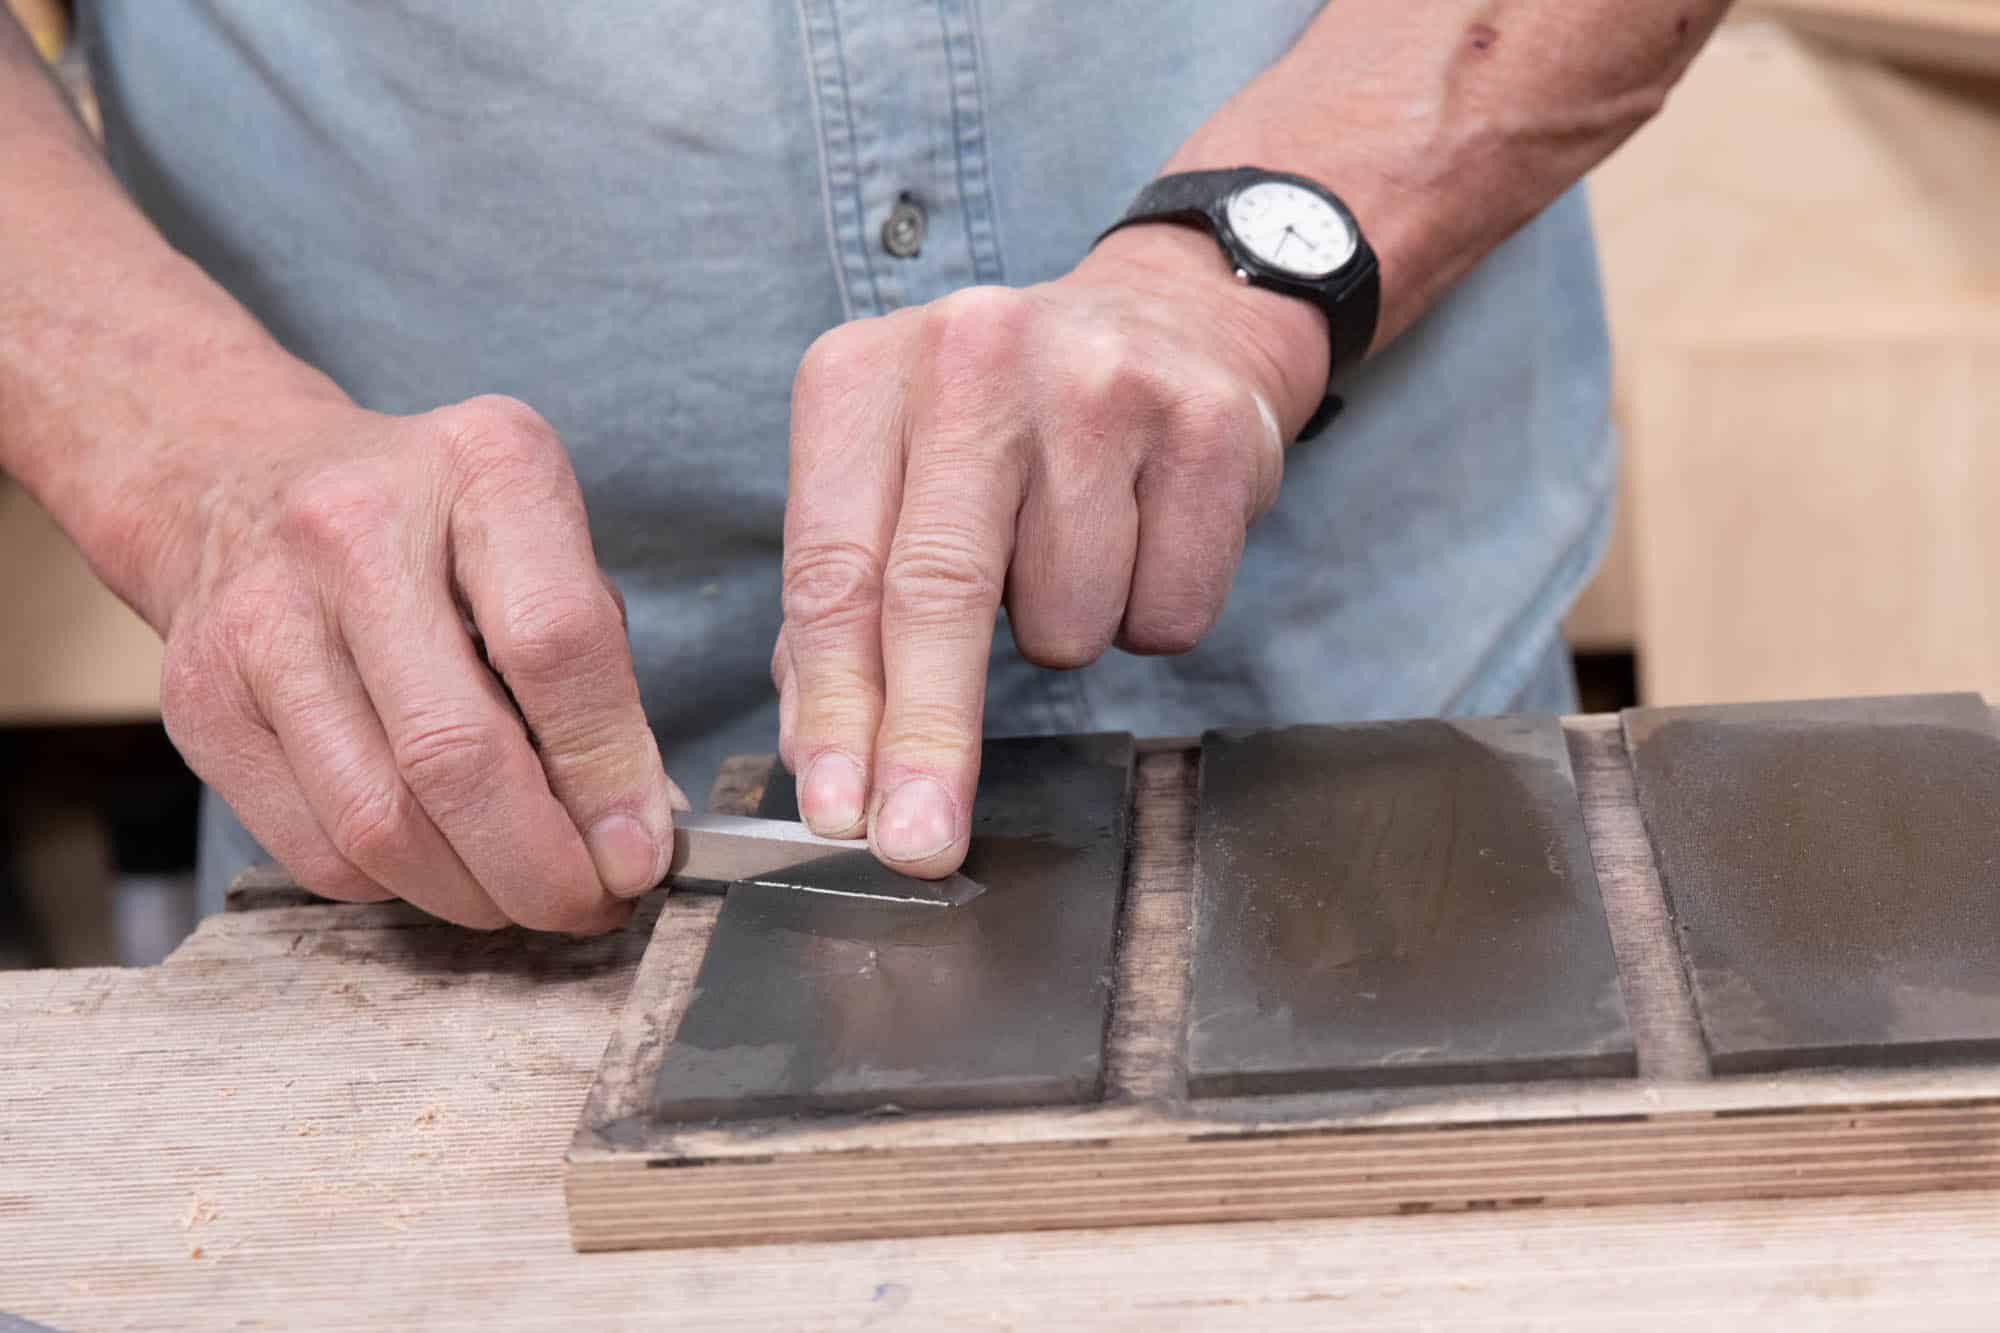
To begin, hold the cutting iron firmly and rub the bevel back and forth on the fine stone or plate three or four times.
Keep the blade pressed steadily to the sharpening surface with no sideways rocking. Use your non-dominant hand for additional stability.
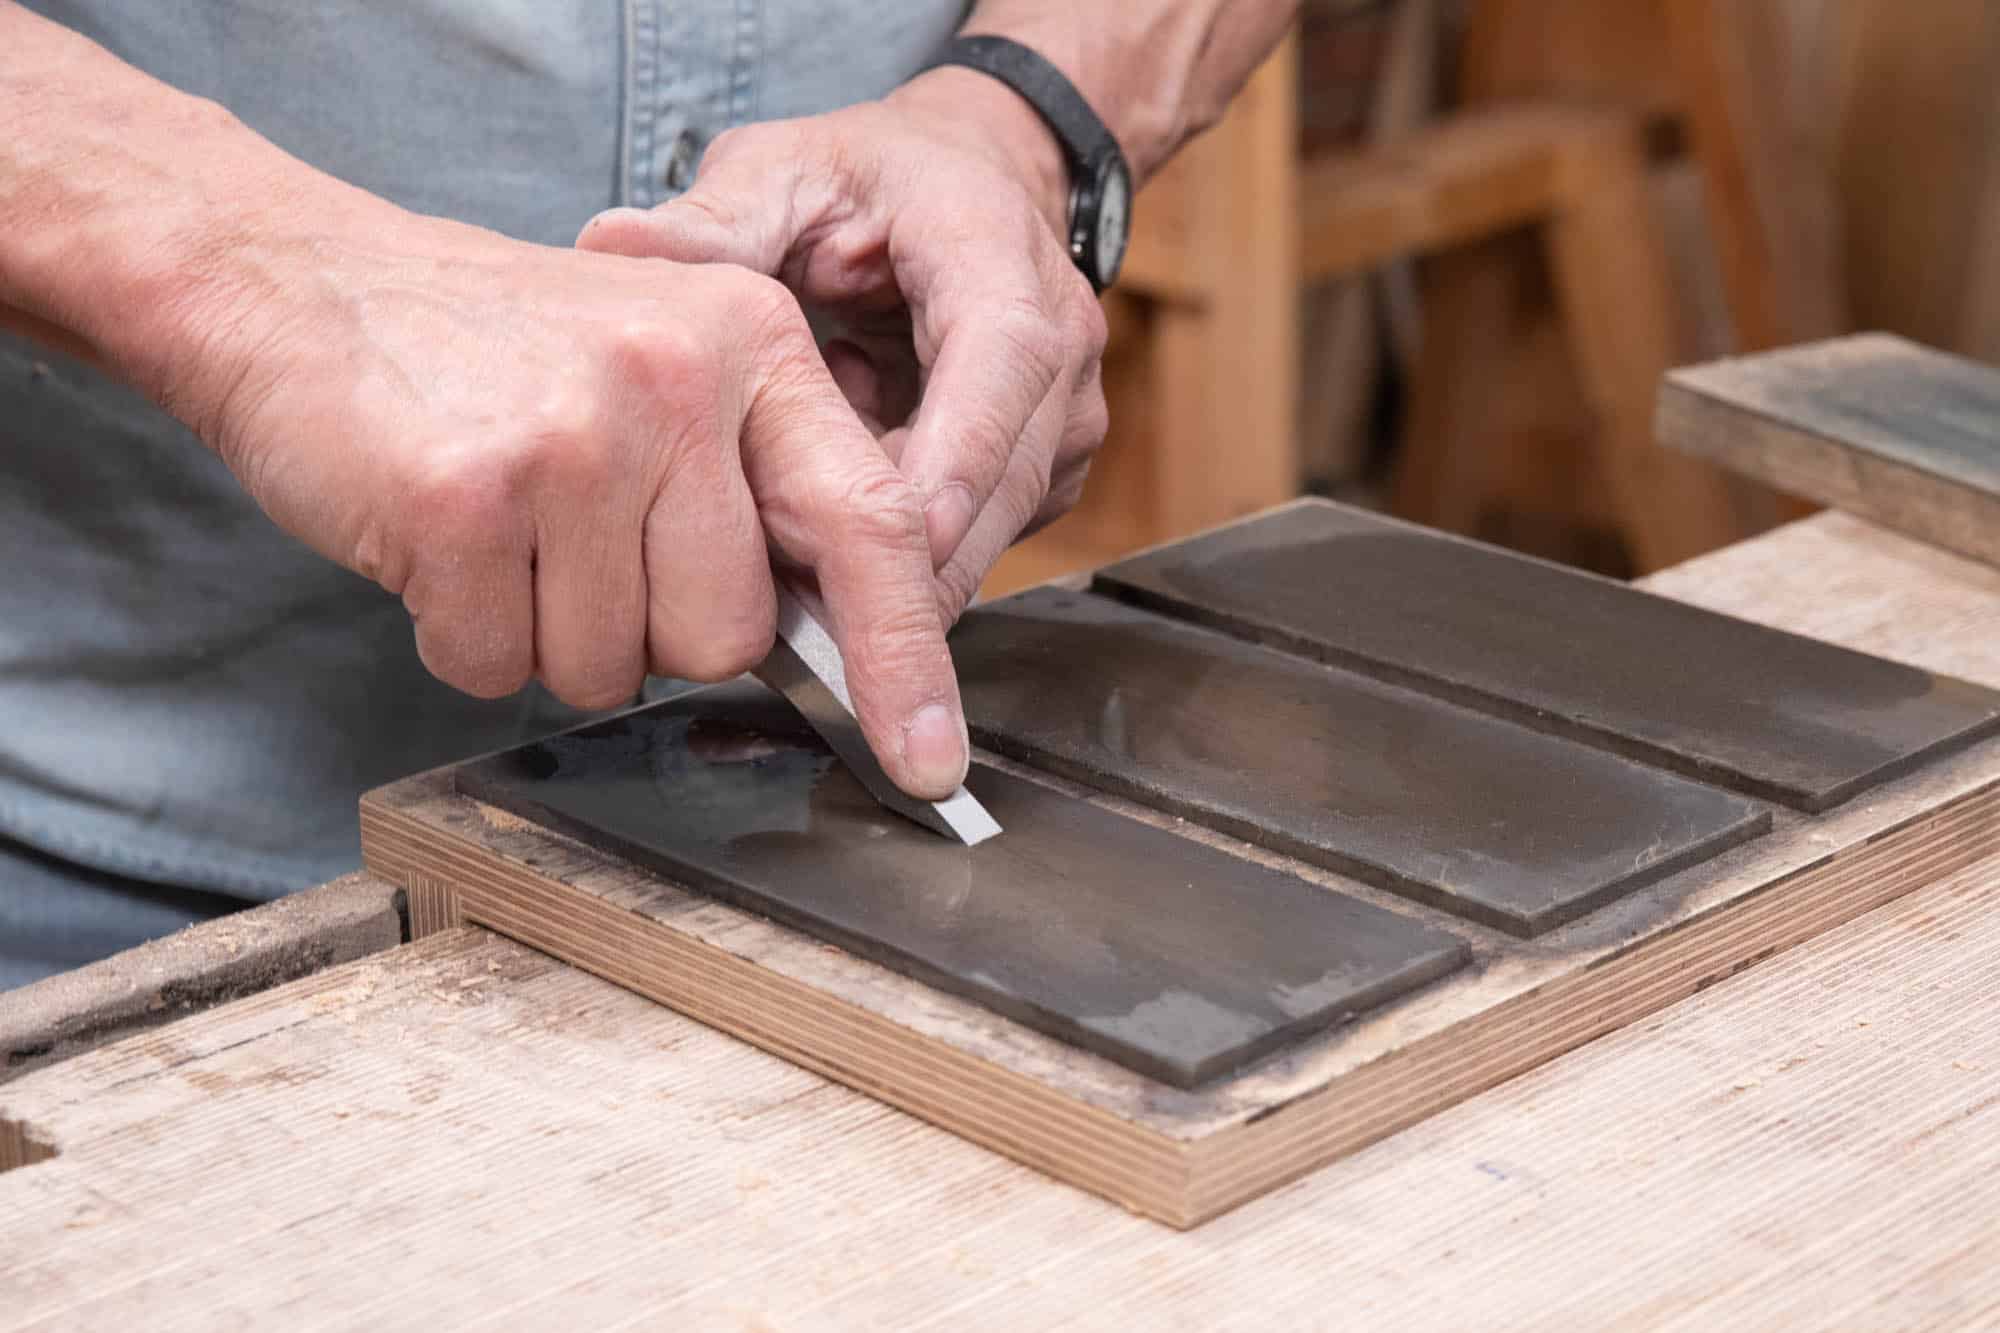
The flat face on the opposite side will now have a small burr. Flip the blade over and rub two or three times on the flat face also.
Use a leather strop applied with buffing compound to further polish the bevel of the cutting iron, keeping the blade close to parallel to the main bevel. Usually this takes about 30 strokes evenly and firmly on the bevel.
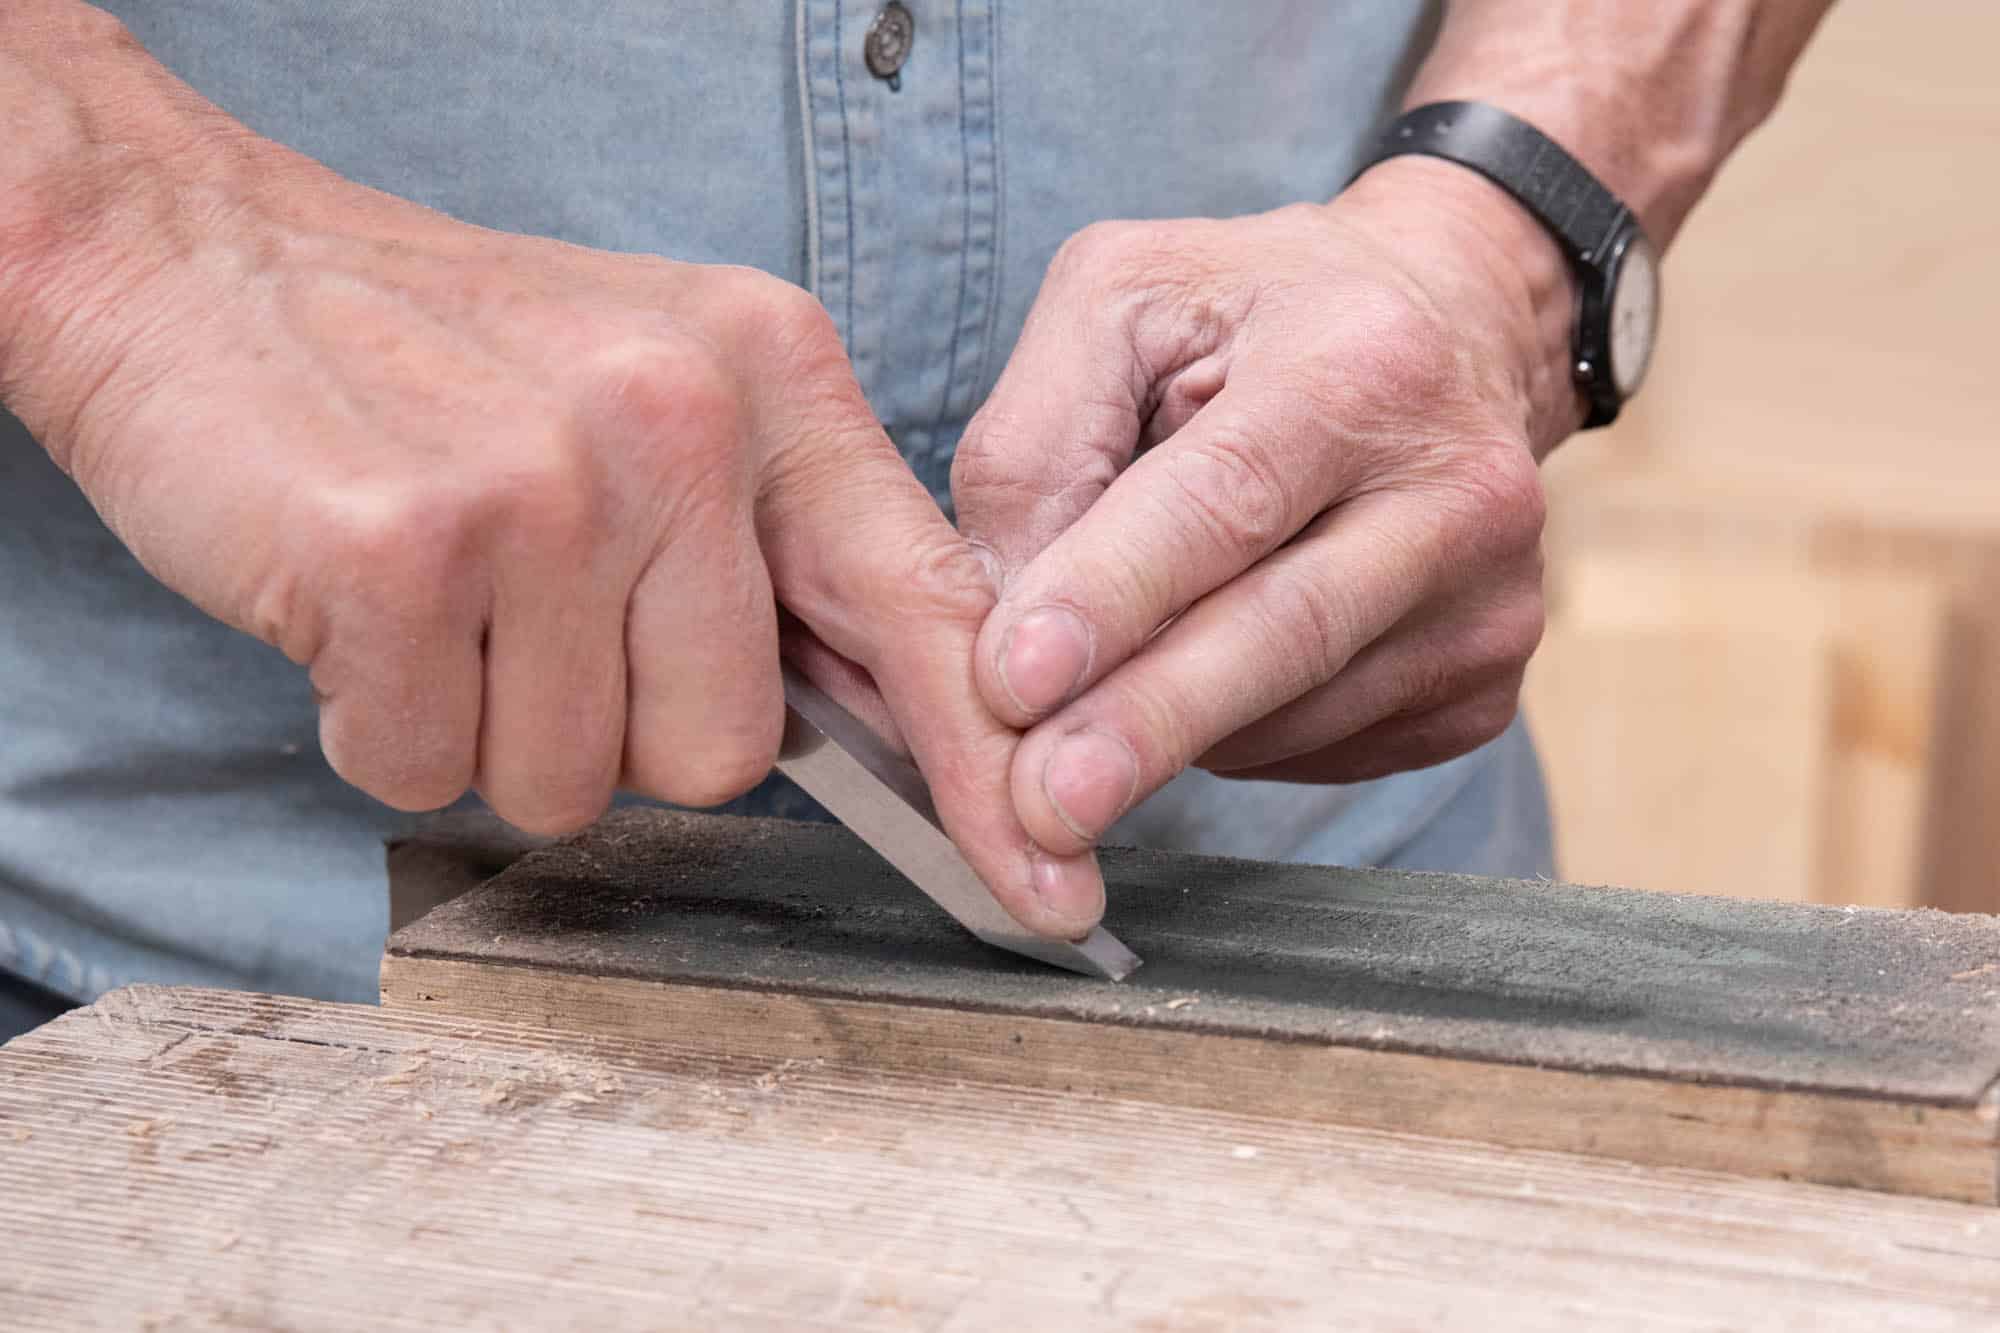
Because the blade is so narrow, using both hands to keep the blade steady and at a consistent angle will give you better control. Establishing an angle near to, but still lower than the final bevel will prevent rounding over the actual cutting edge as this would dull the blade.
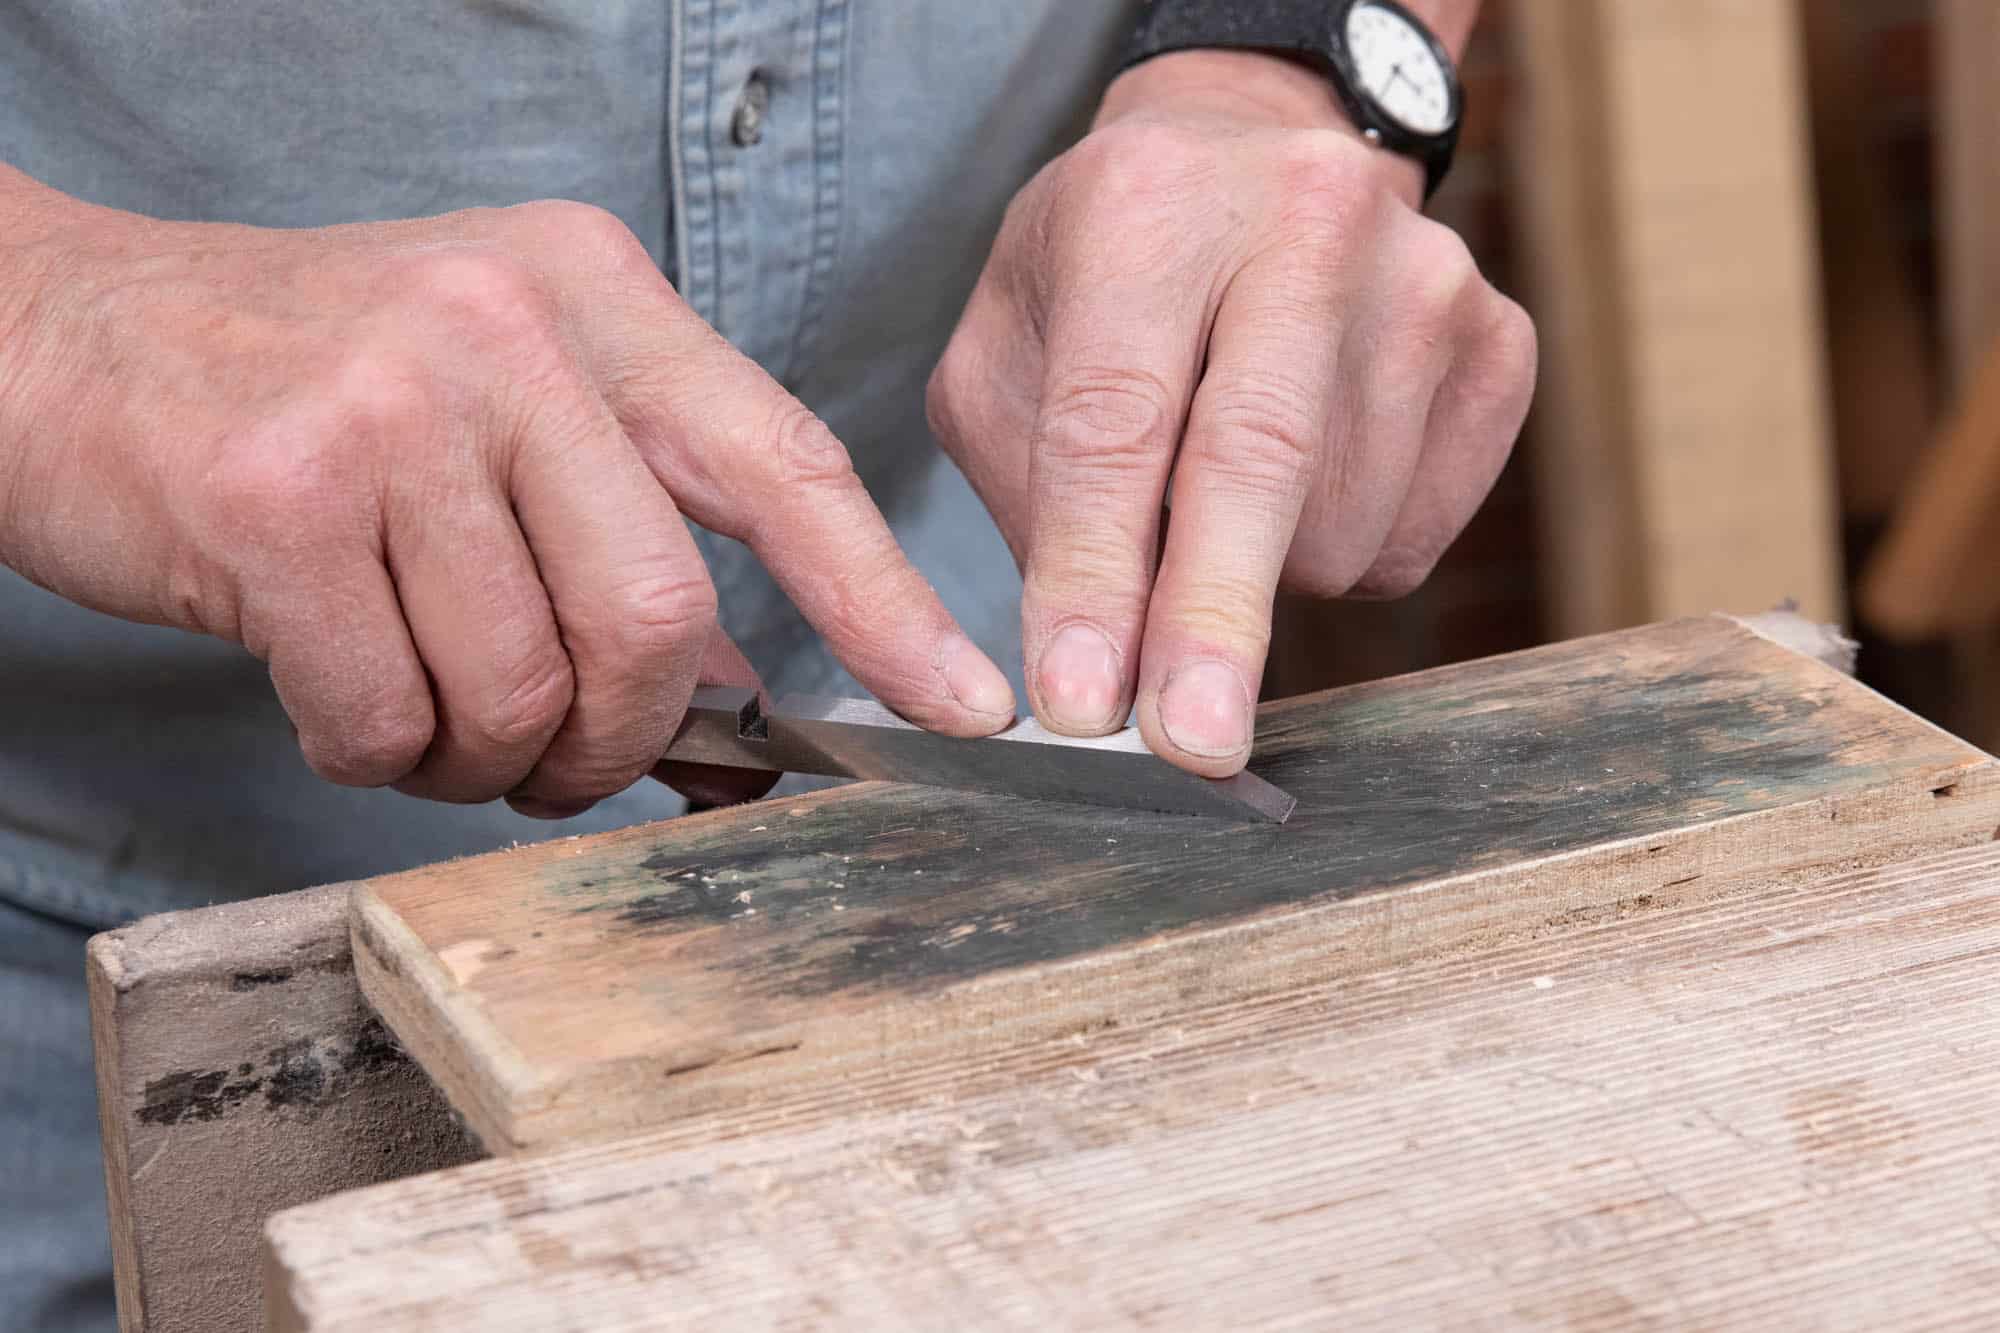
Finally, use the reverse side of the strop (the wooden surface) also charged with buffing compound, to refine the flat face of the blade.
The narrow band of light behind the cutting iron reflects the size of the secondary bevel. This will widen through subsequent sharpening and you will eventually have to grind the main bevel on a coarse abrasive so that the cutting bevel doesn’t get too wide.

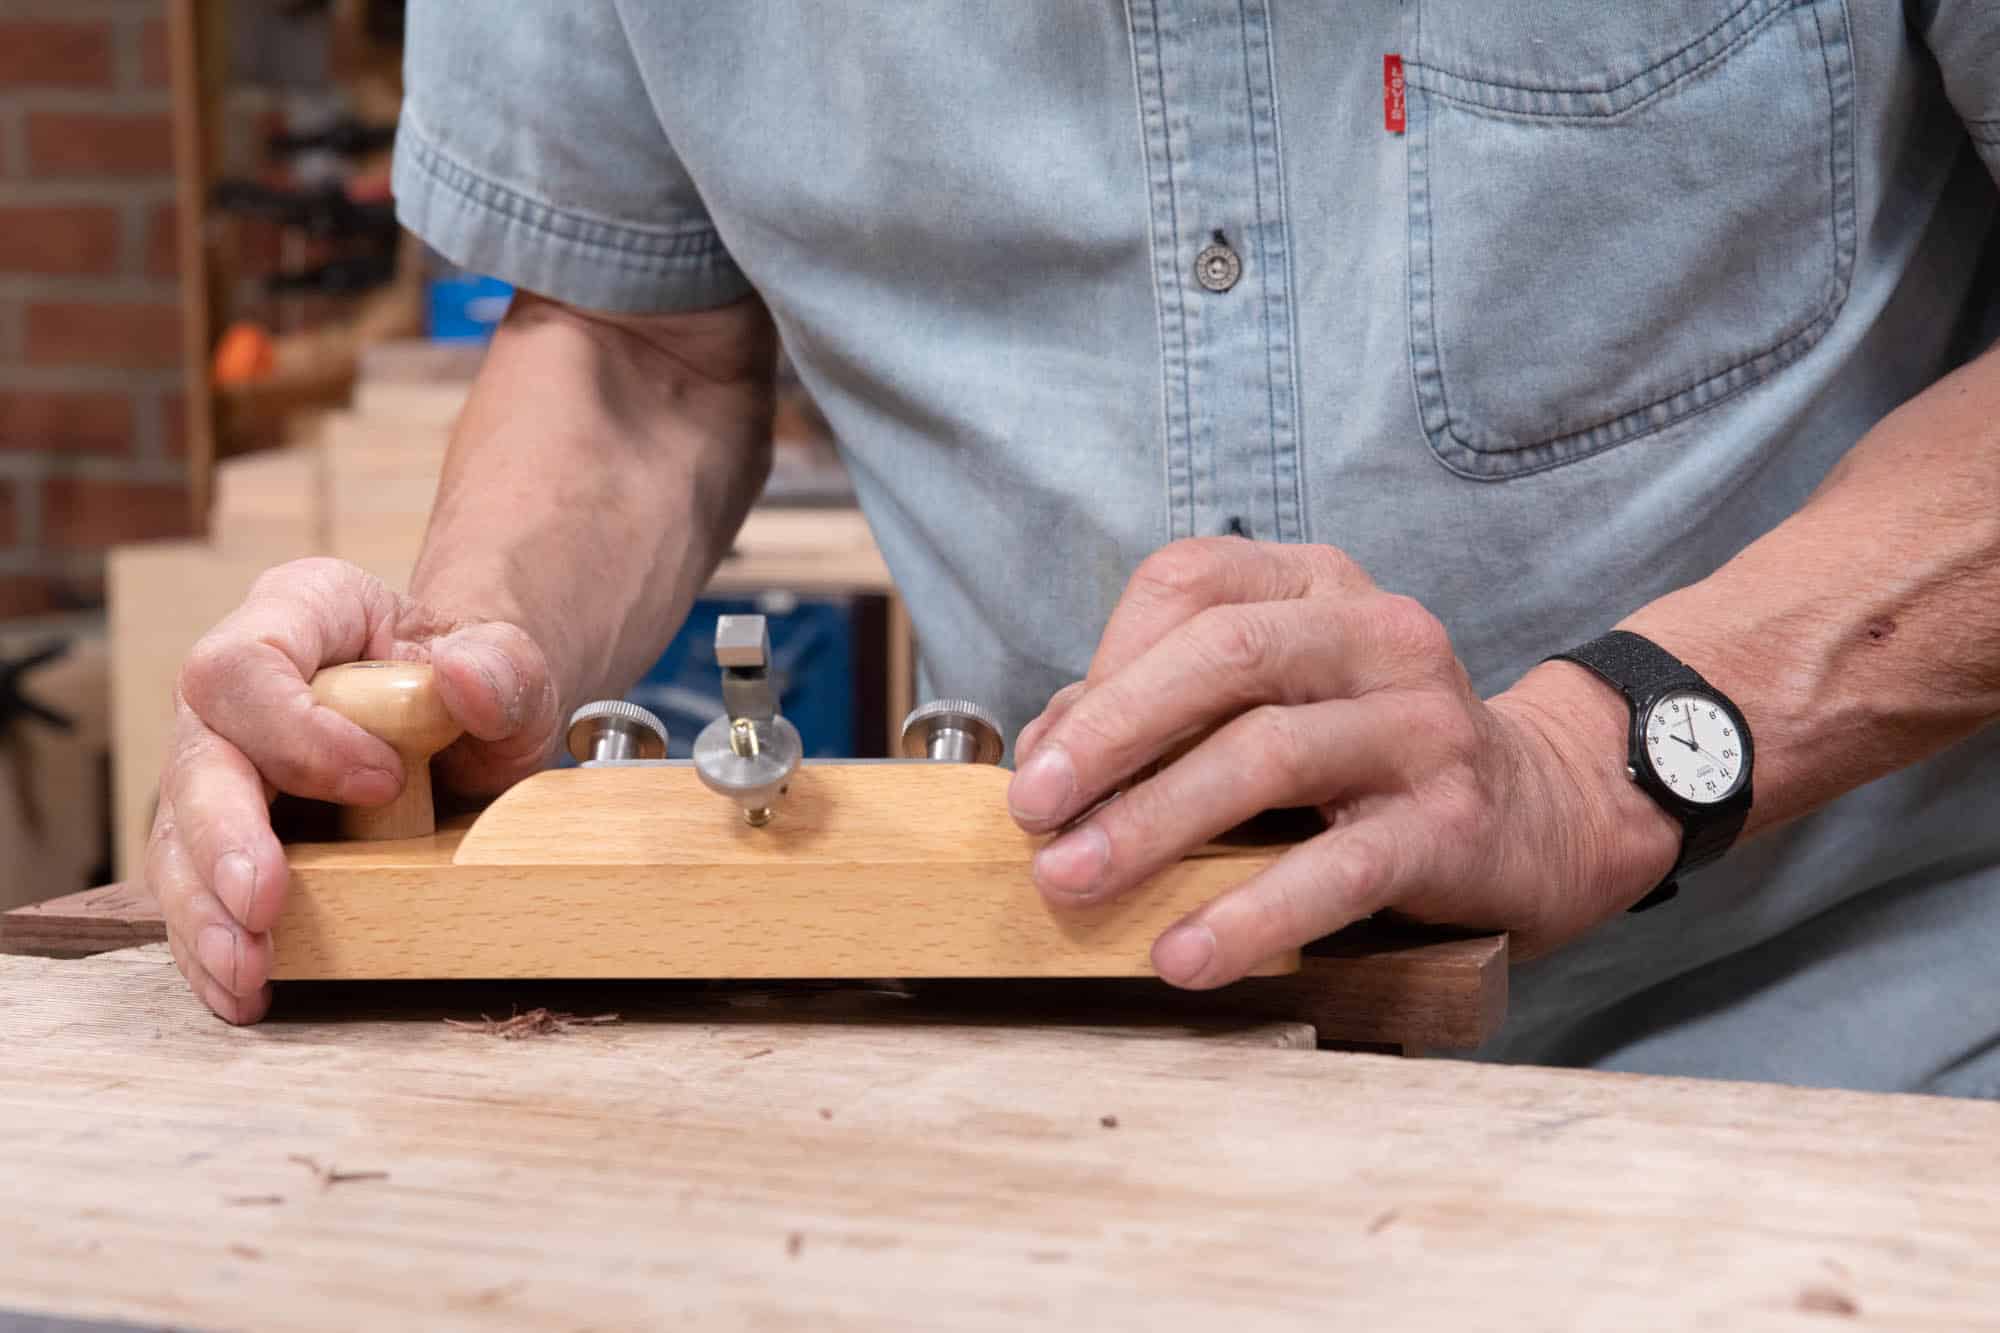
It is not necessary to remove the retainer bar once everything is set up. Reinstalling and removing the blade is simply a matter of loosening the tightening nuts until you can push the retainer bar far enough forward to pull the blade out from the top.
General User Considerations
As with any other router plane, it is best to remove small amounts of wood in successive passes rather than trying to take off too much at once which strains both the plane and your work. On a flat board of wood, at least 3″ (76mm) wide, make two saw kerfs across the grain 1″ (25mm) or so apart.
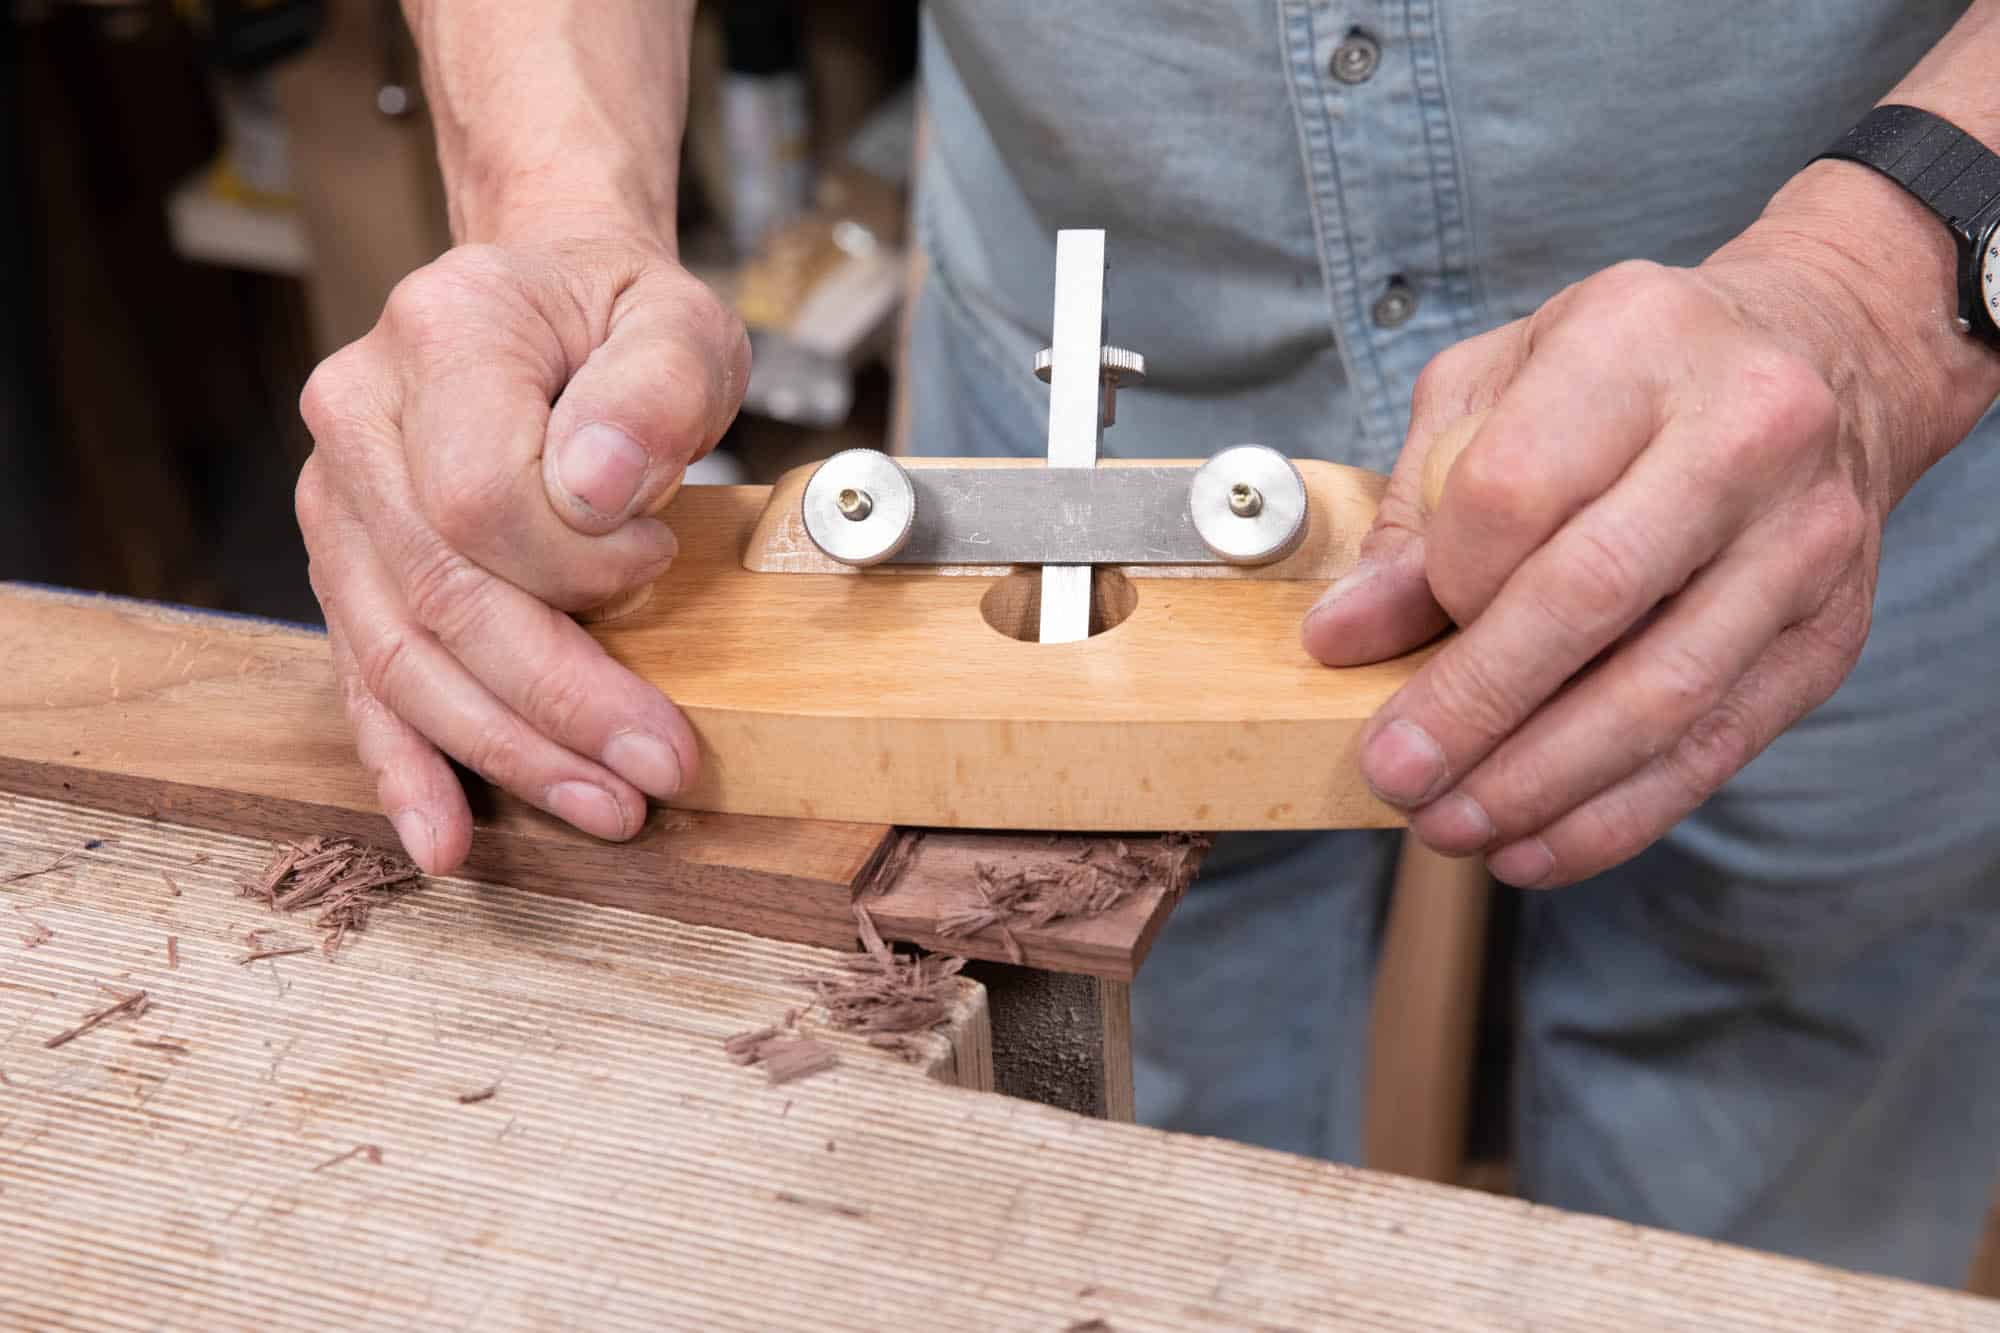
Start by first setting the cutting iron flush with the sole of the plane so it’s not removing any material. Move the plane back and forth between the kerfs and turn the adjuster until the cutting iron just skims the surface, taking a very fine cut. Now, turn the adjuster a quarter turn or less and try again to see how it feels. If the router cuts well without much strain, continue with this setting to take the whole surface down to a uniform depth. For the next pass, turn the adjuster a little more, perhaps one-third of a turn and see how that feels to you. You can take deeper cuts, but this often results in a lesser quality surface, which is fine for taking the bulk off, but for final refinement, a shallow cut will give you the best result.
You will become more confident as you use the plane and will come to know precisely how much to turn the depth adjuster for optimal performance. It is also important to note here that different woods work differently so you must always use you router according to the task and the wood.
Thank you for your support and following along with building this router plane. I hope you enjoy yours as much as I have mine!