Shaping and Glue-up
We now have the main parts for the body of the plane ready for shaping. We do this before assembly and glue up because it is easier for clamping in the vise where we can apply more direct force with the rasp and file.
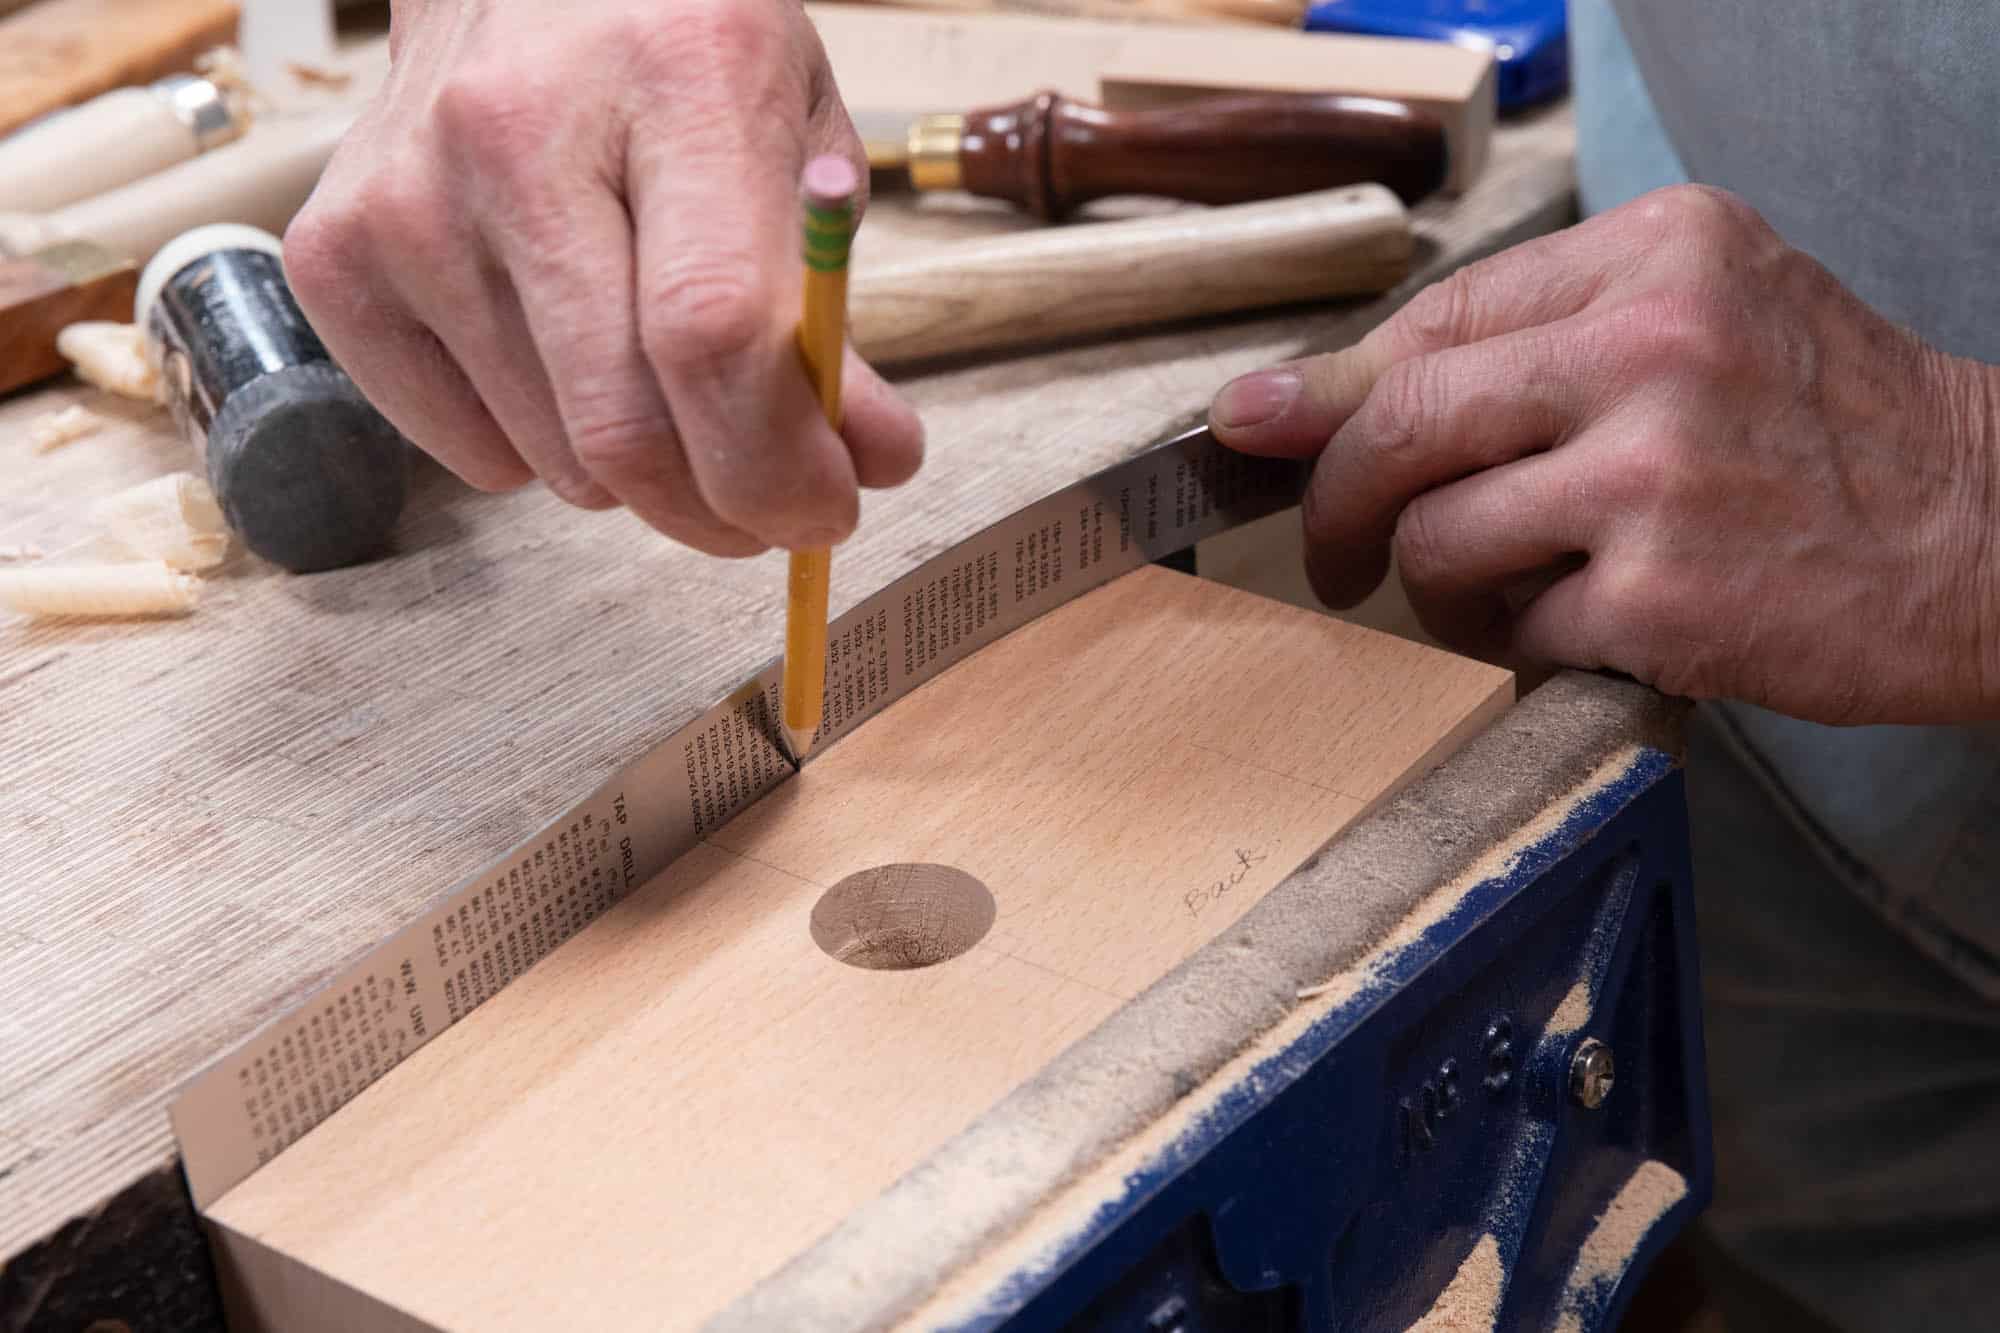
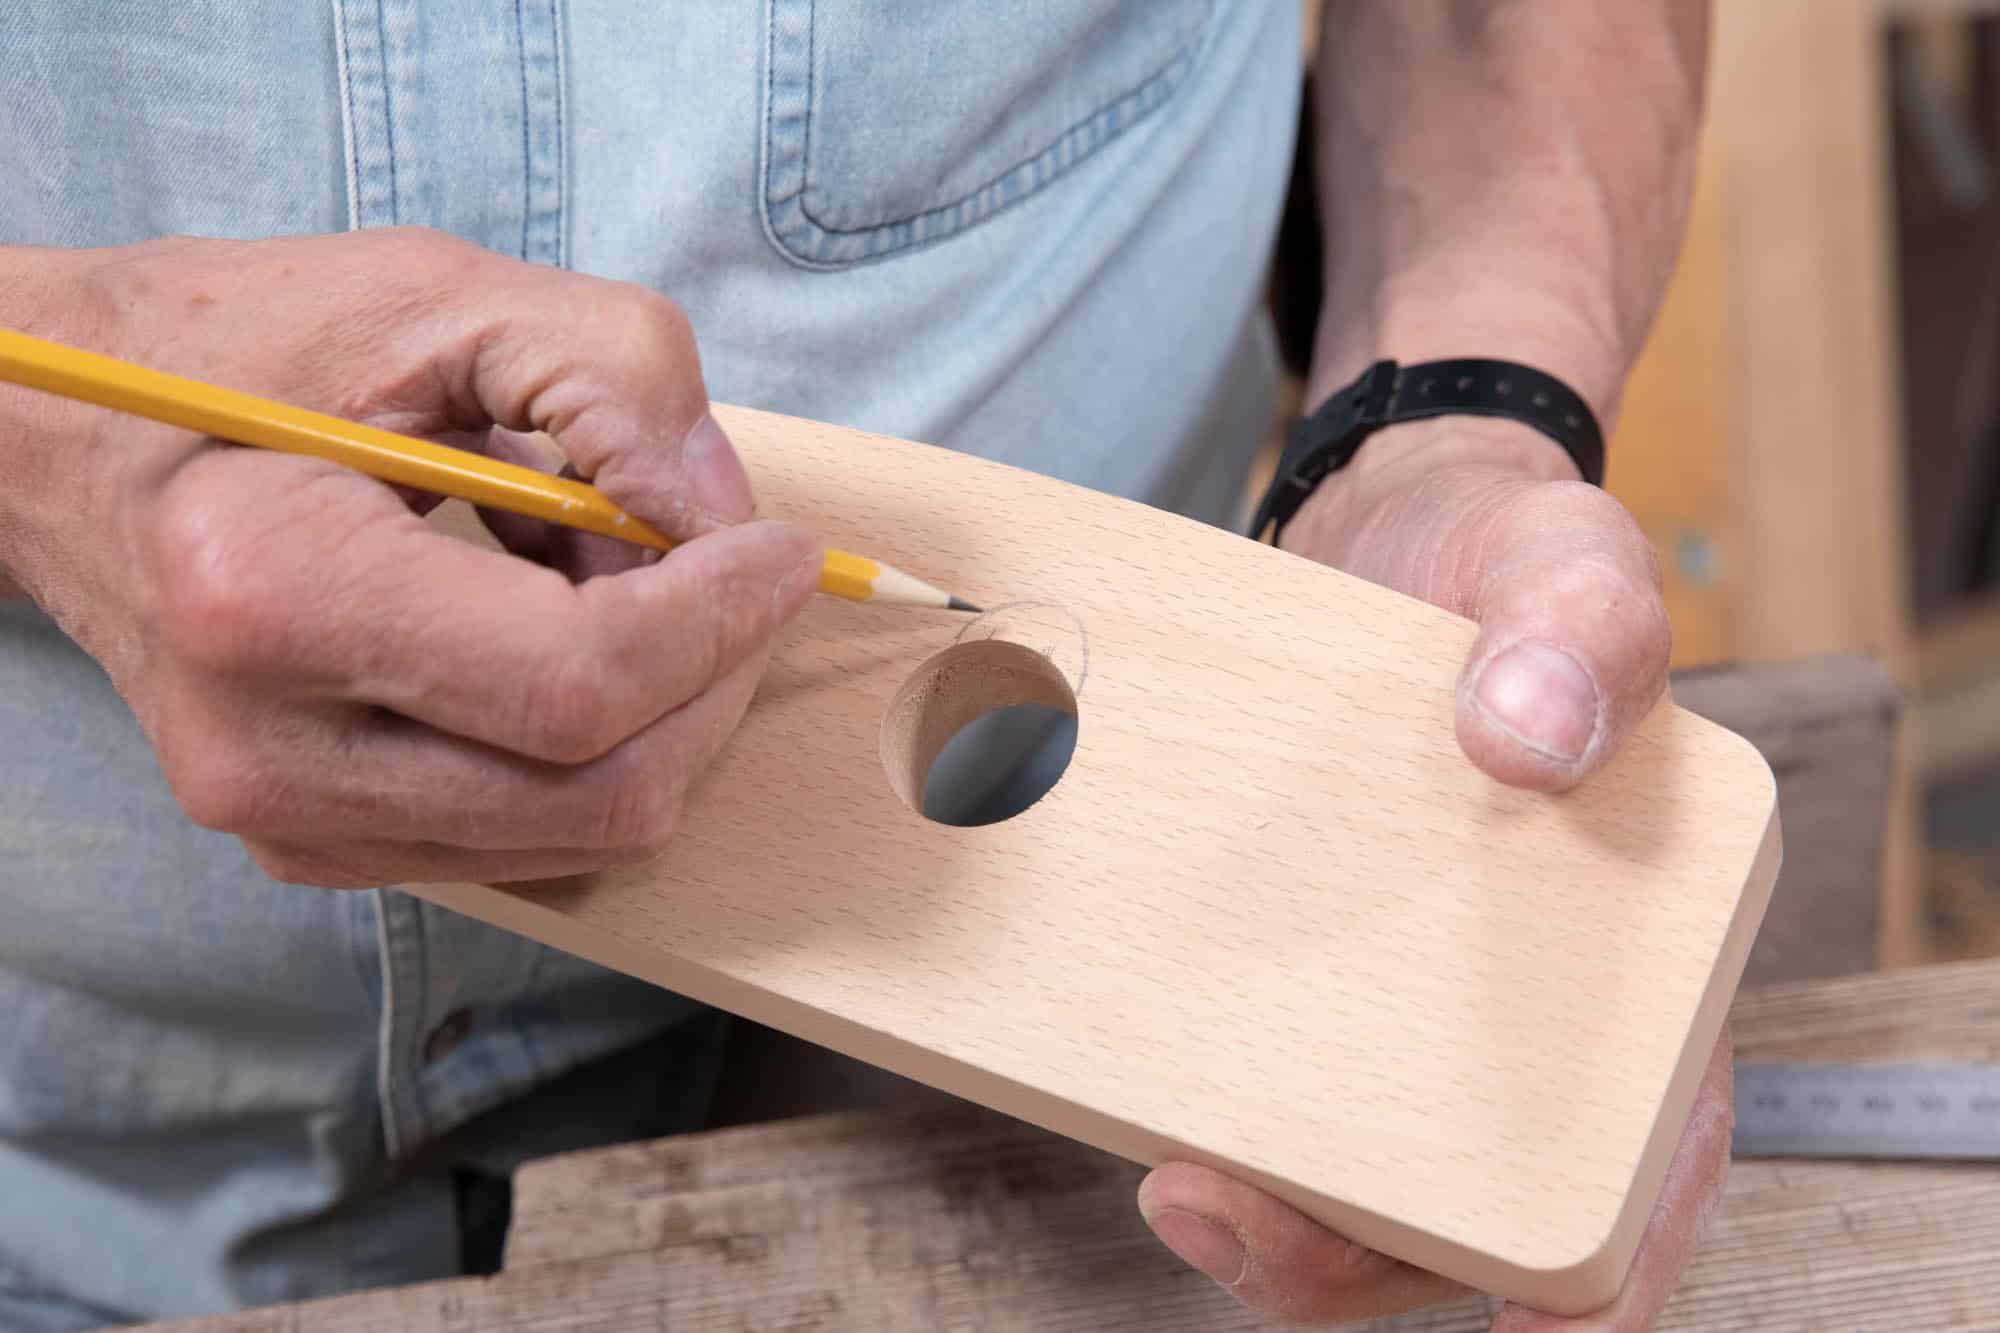
Centre the upstand on the centreline over the hole and with the back edge of the upstand flush with the back edge of the plane base. Trace around the fore-edge and ends of the upstand lightly with a sharp pencil.
Shaping the Base
Start with the long curve along the front of the base. First, measure 1/2″ (13mm) from the two front corners and make a pencil mark. Next, pinch one end of the ruler in the vise together with the base so that the other half is free, and then bend the ruler to the 1/2″ (13mm) mark. Strike a pencil line to the curve, and then repeat on the other side.
To remove the waste, use the stop cut method as this will make it much easier to chop the waste off with a wide chisel. Work from high to low and pay close attention to the grain as it can take a sudden nose dive when chopping and split below your pencil line.
Use the smoothing plane to remove any unevenness from the chiseling and work to the line as closely as possible.
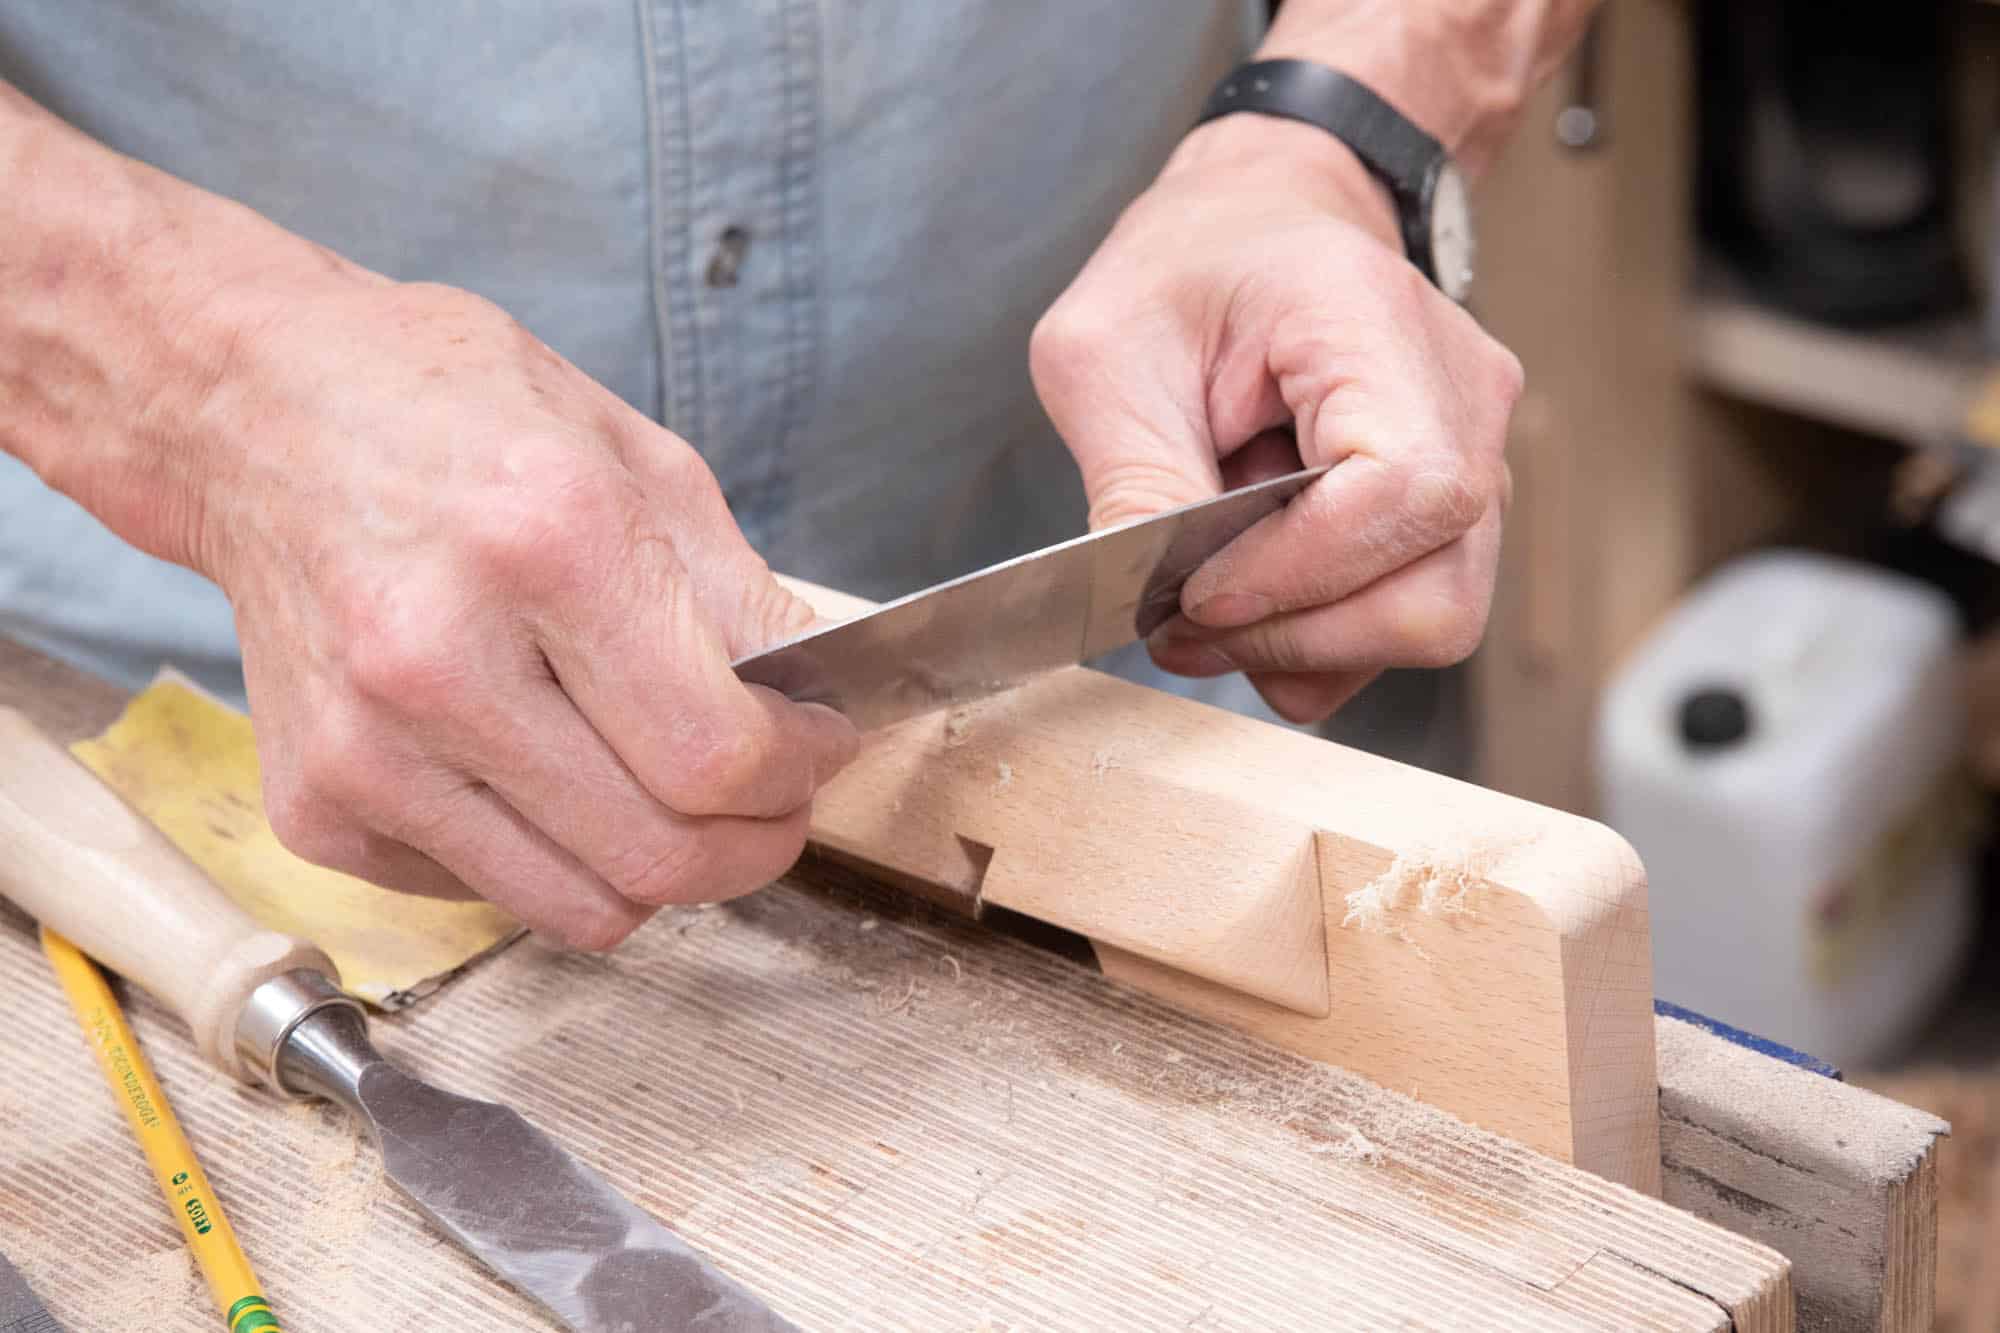
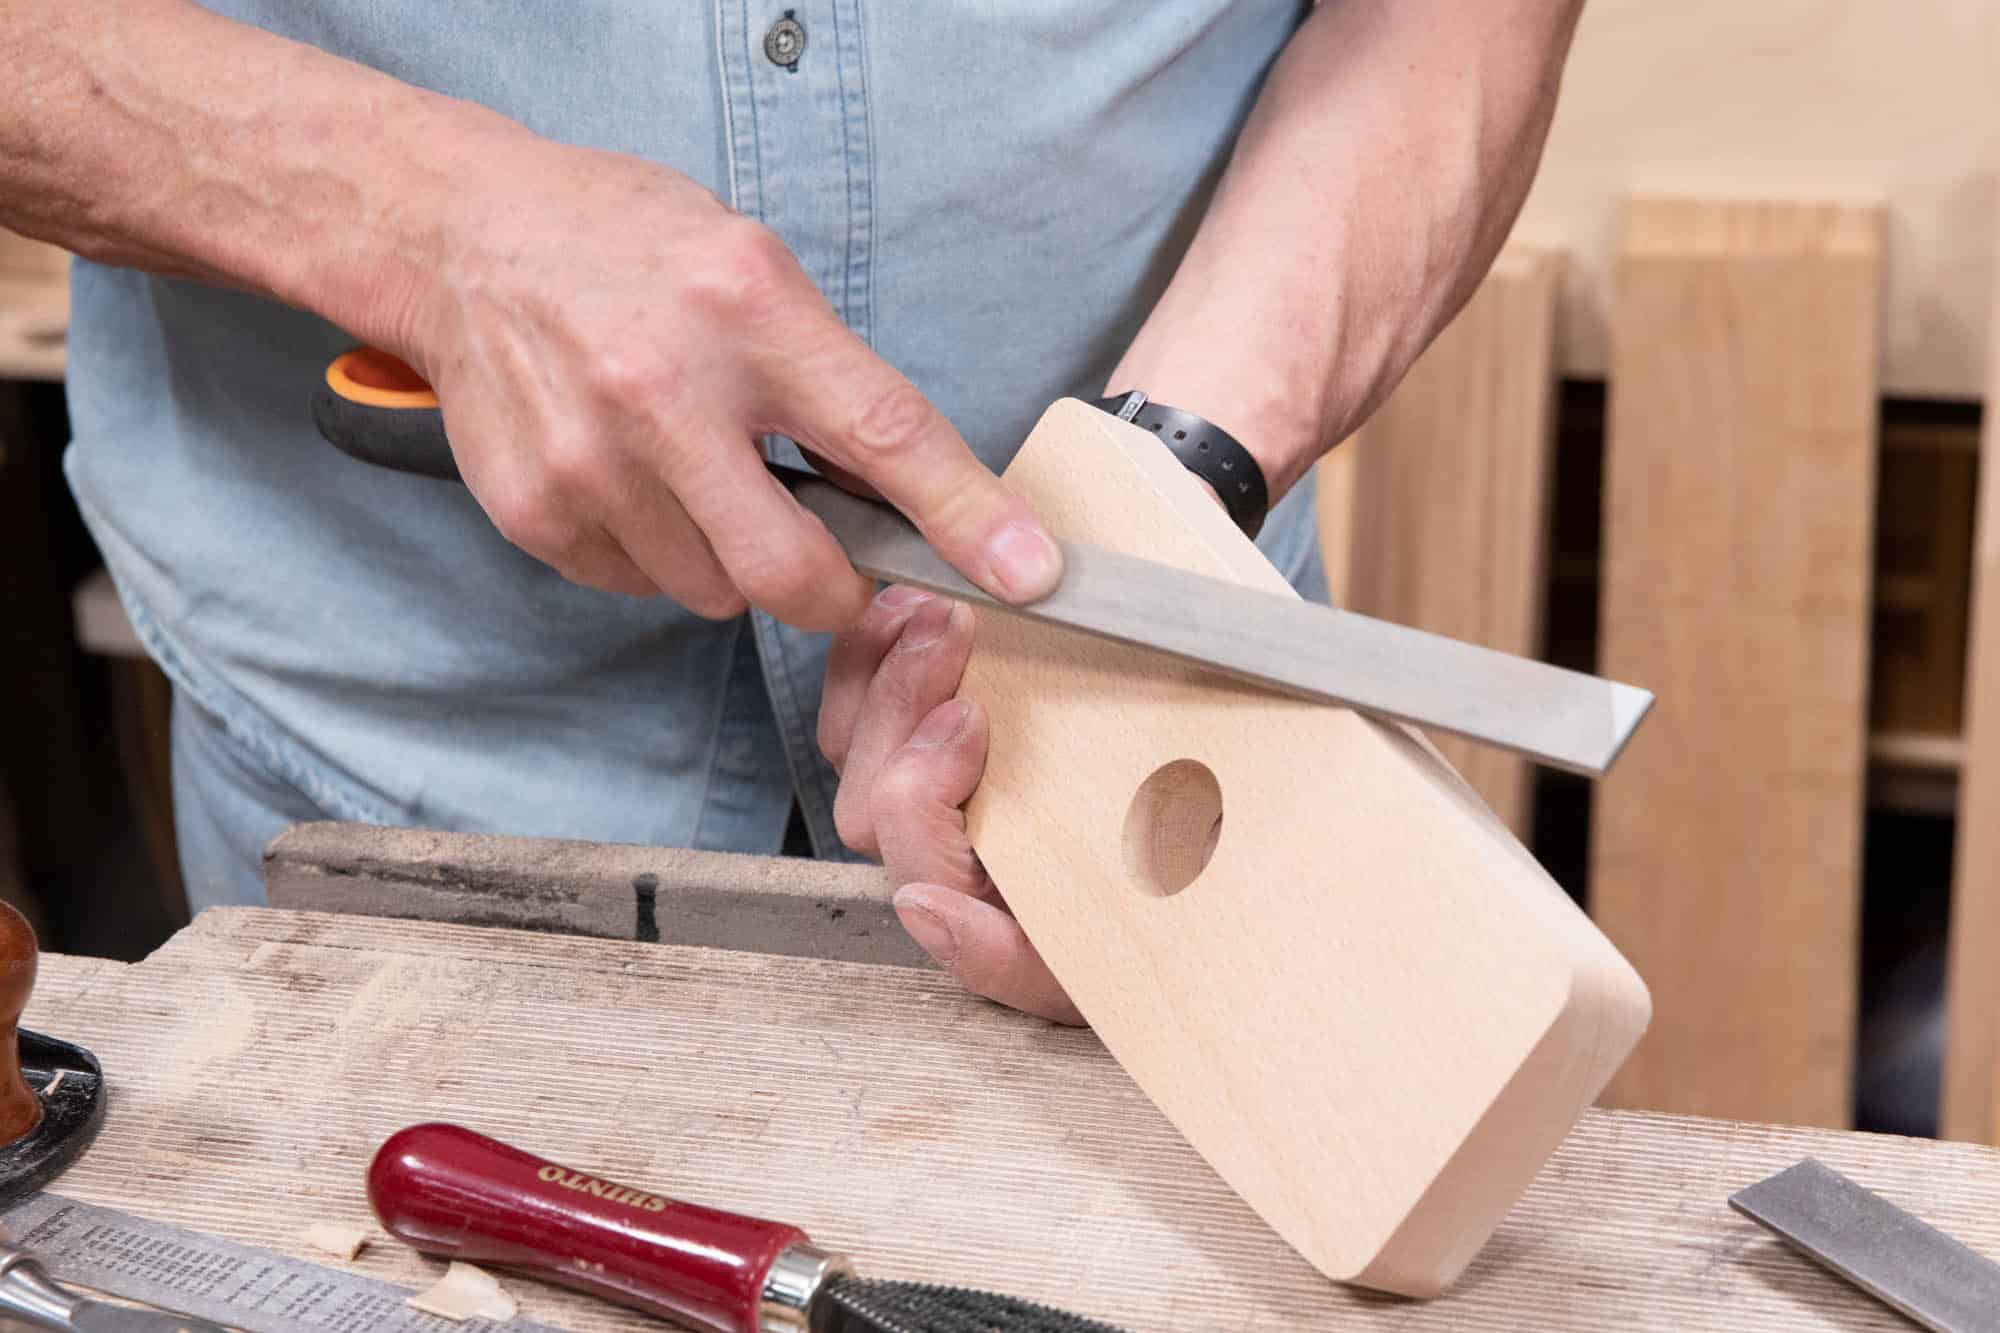
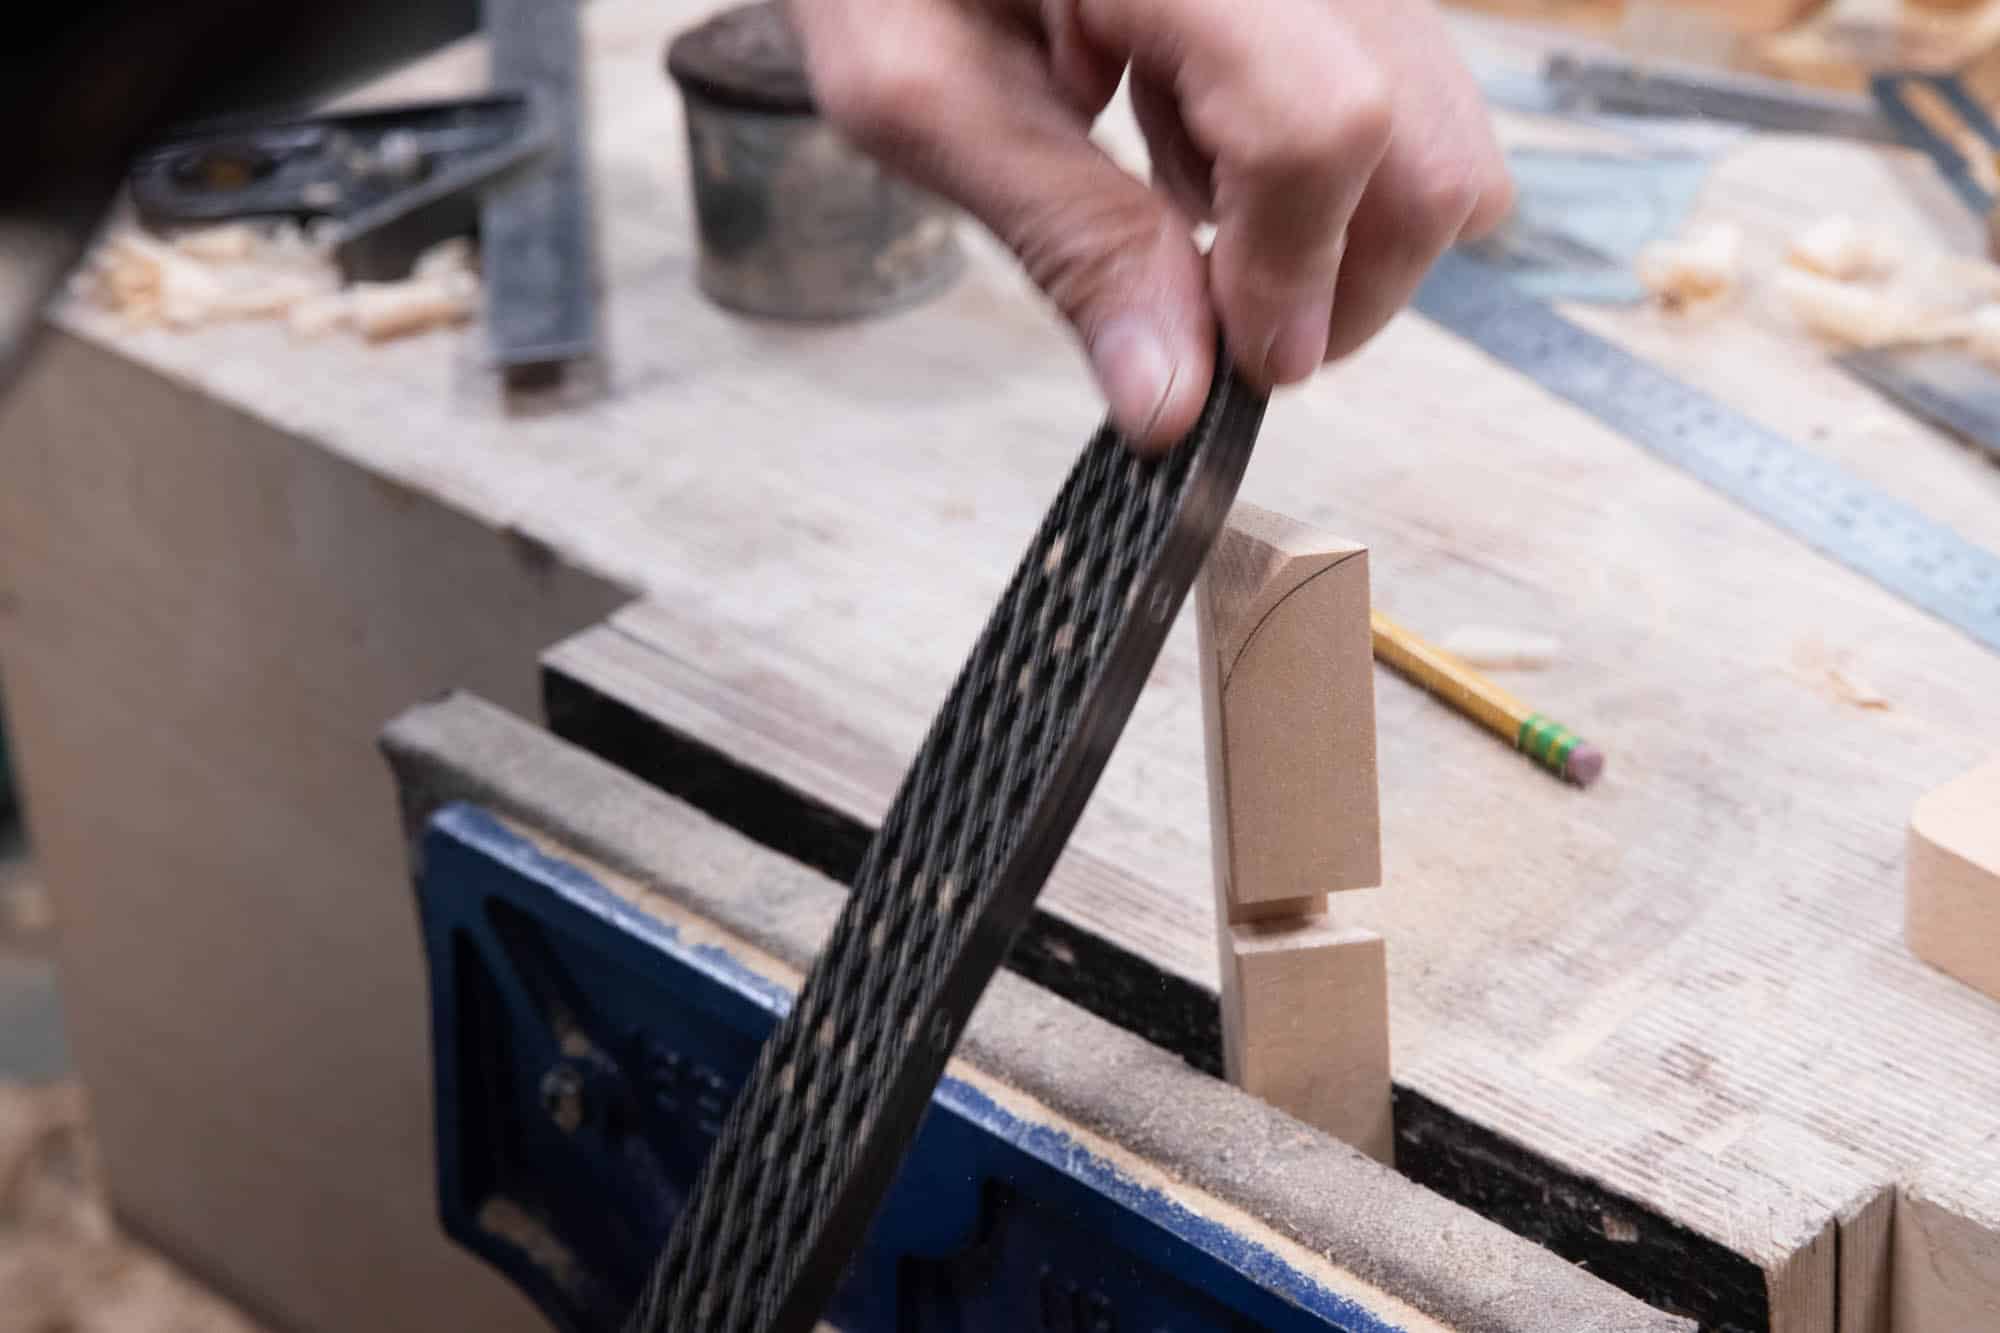
Sharp corners to any plane tend to catch and long term this will often catch the work where we don’t want it to. It is best to remove these corners right from the start and the steps to doing that are quick, simple and easy to do with just a rasp and a flat file.
A 3/4″ (19mm) washer or a penny will give a consistent radius to work to. The rasp removes the corners rapidly but you can also do this with a chisel.
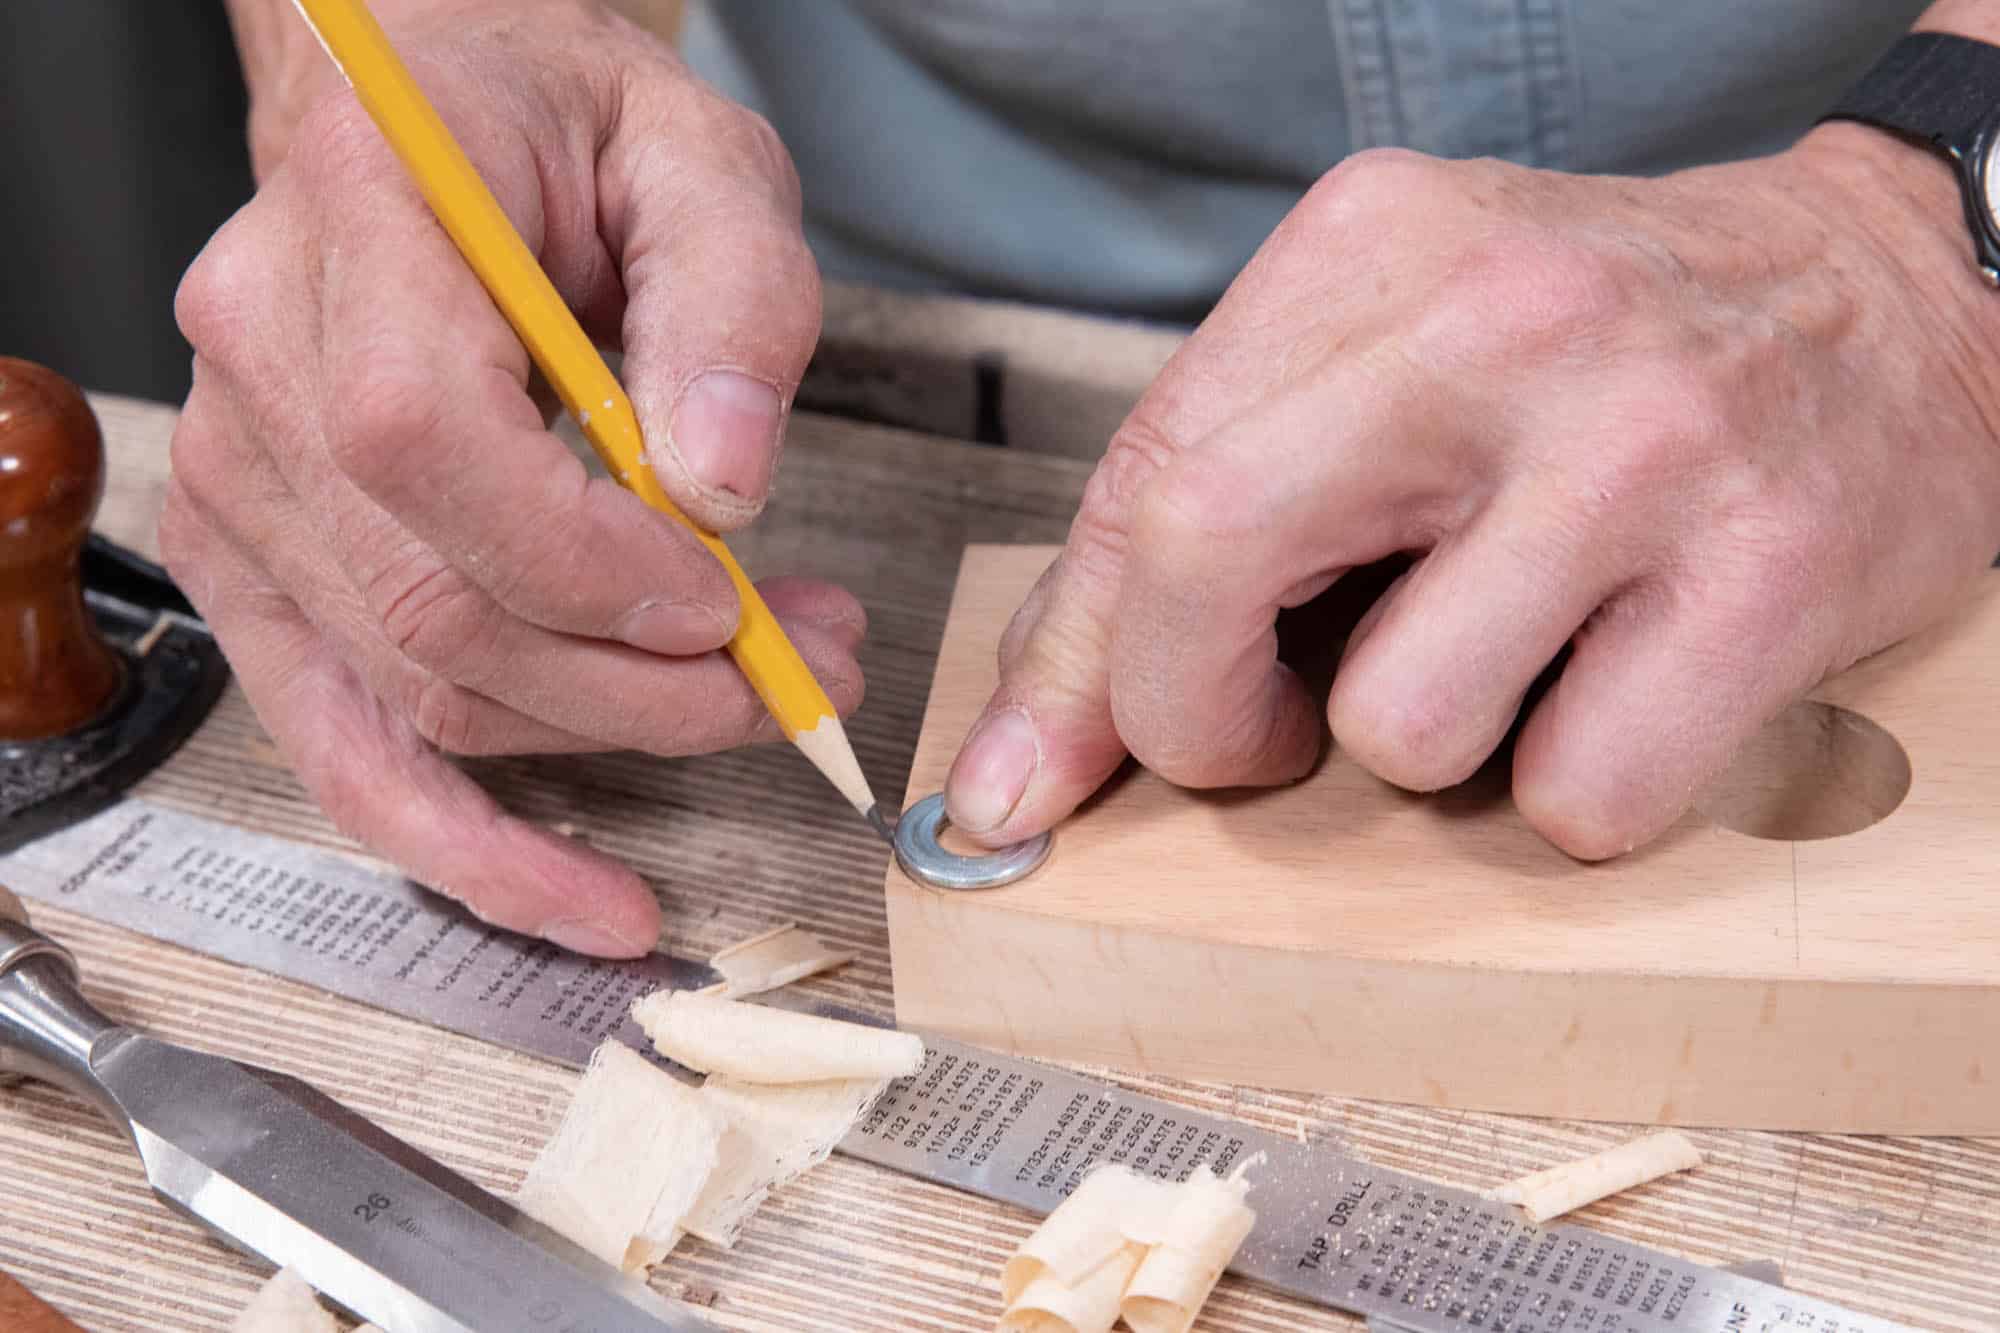
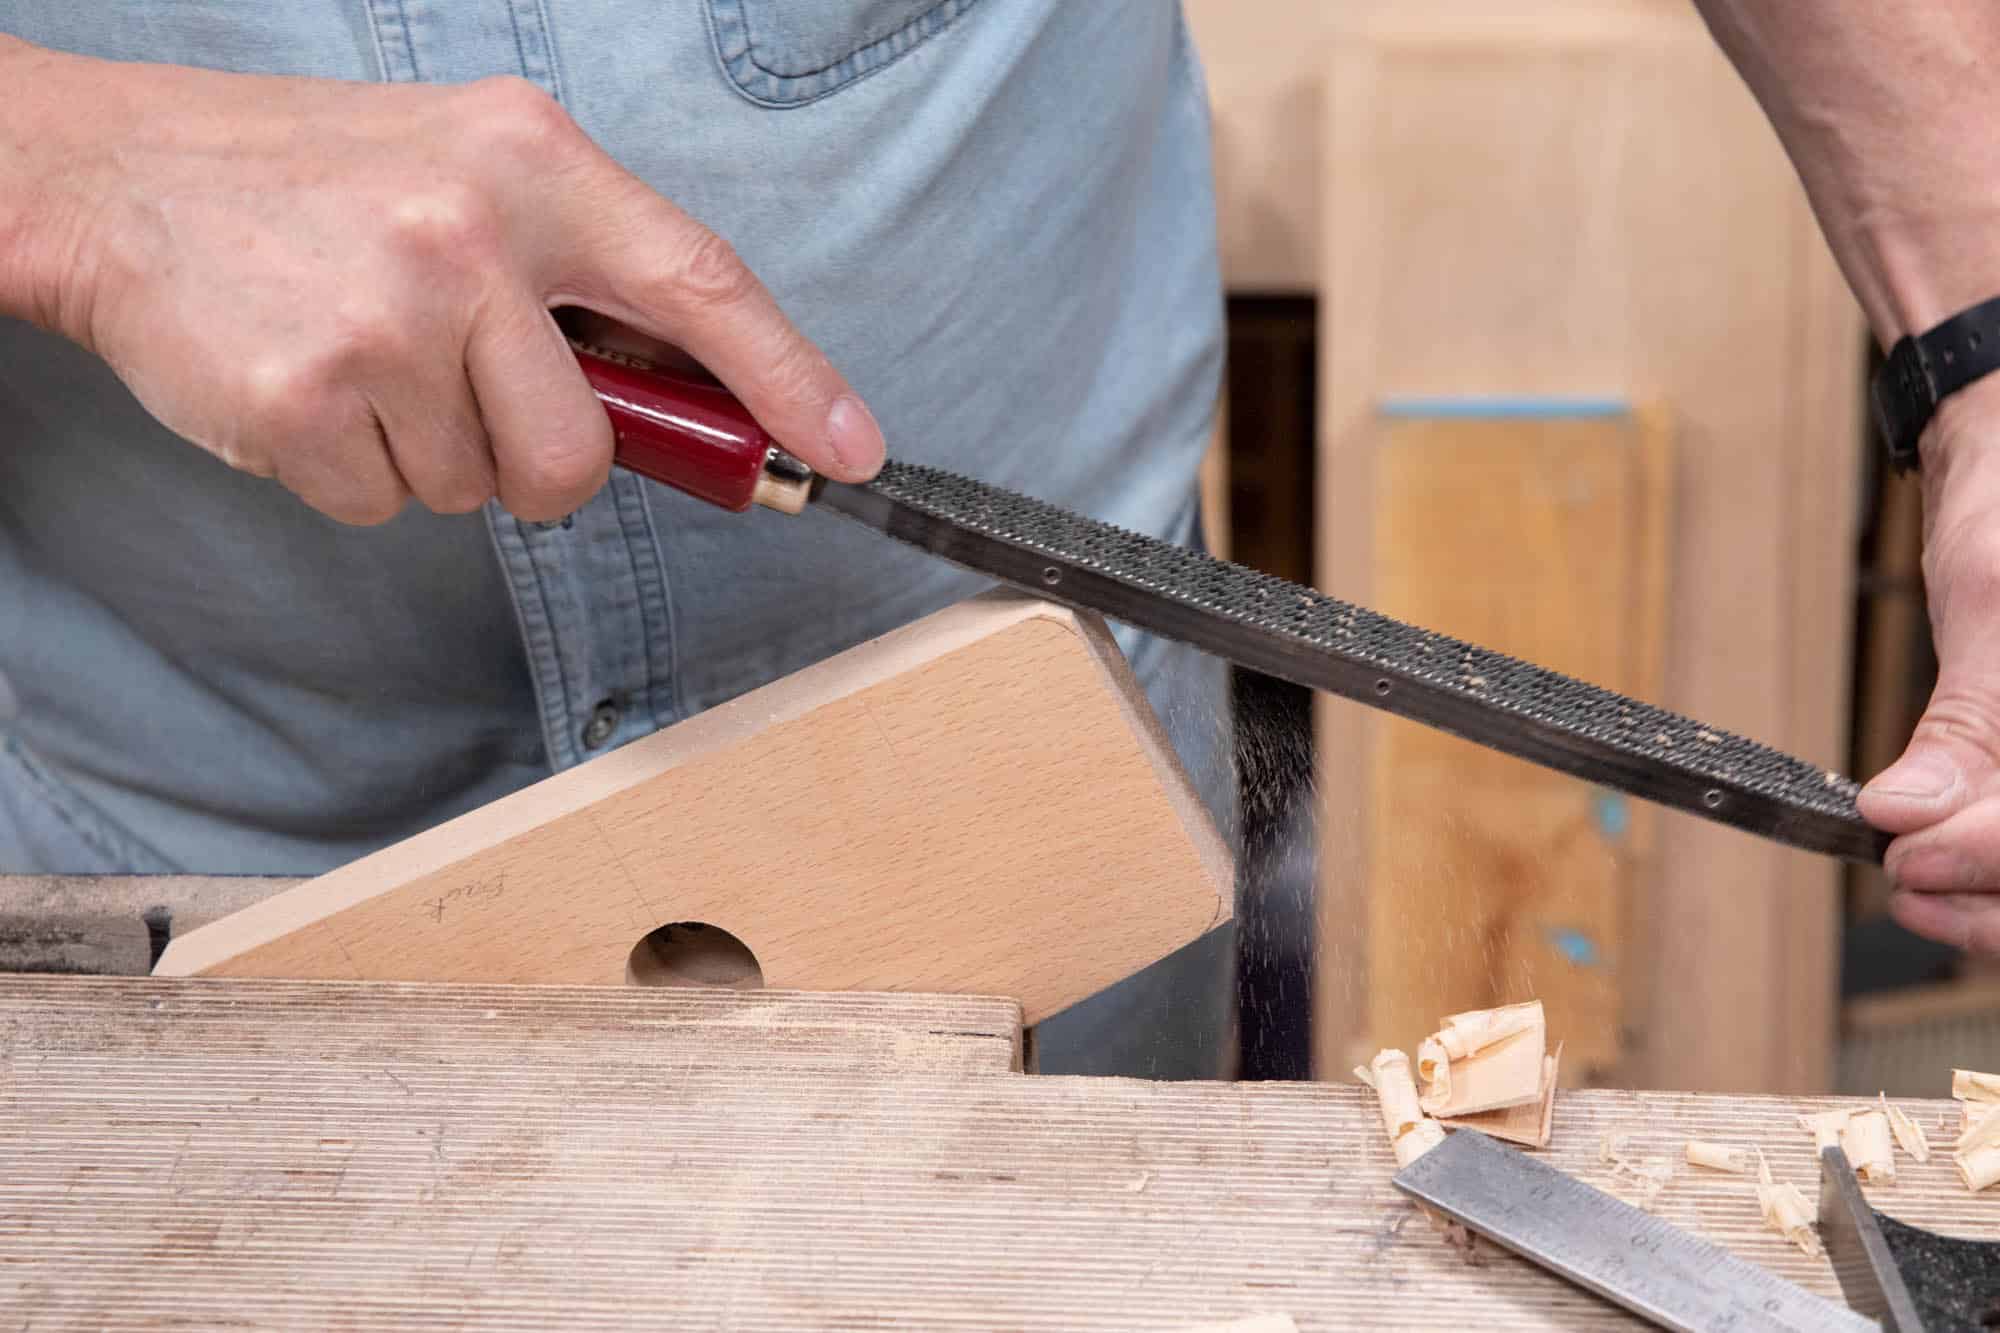
With the bulk of the waste removed, a flat file will clean up the corner and give you a smooth continuous radius.
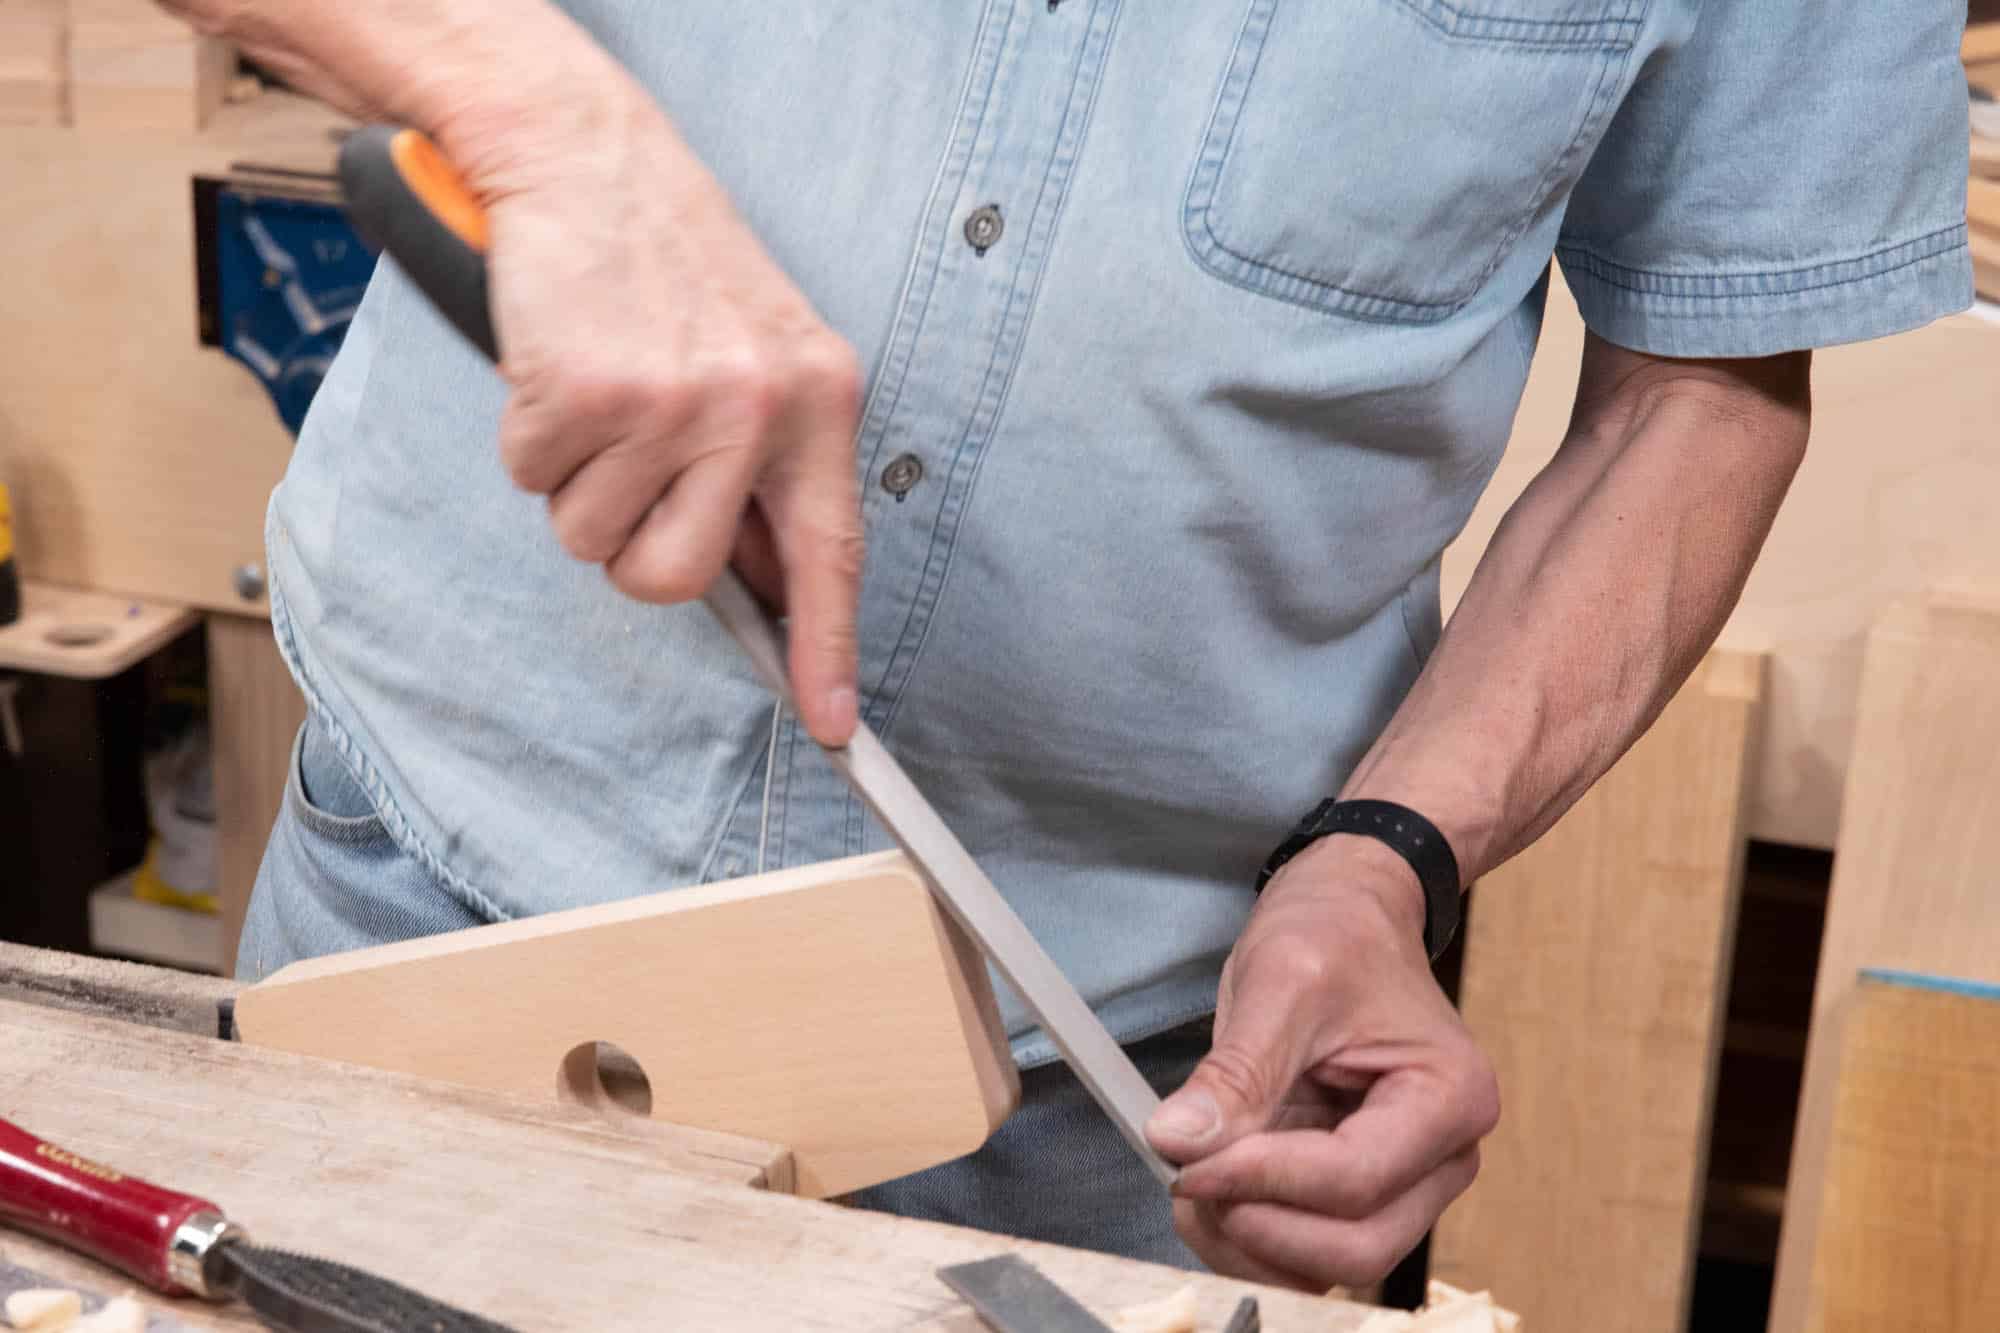
Also break the sharp edges with the flat file. Equally, you could take a couple of shavings with a sharp plane.
Shaping the Upstand
Shaping the upstand allows additional room for the fingers and thumbs and also makes the plane more comfortable to apply pressure to. I find it easier to use a tin with a diameter of around 2 1/2″ (64mm) rather than compasses.
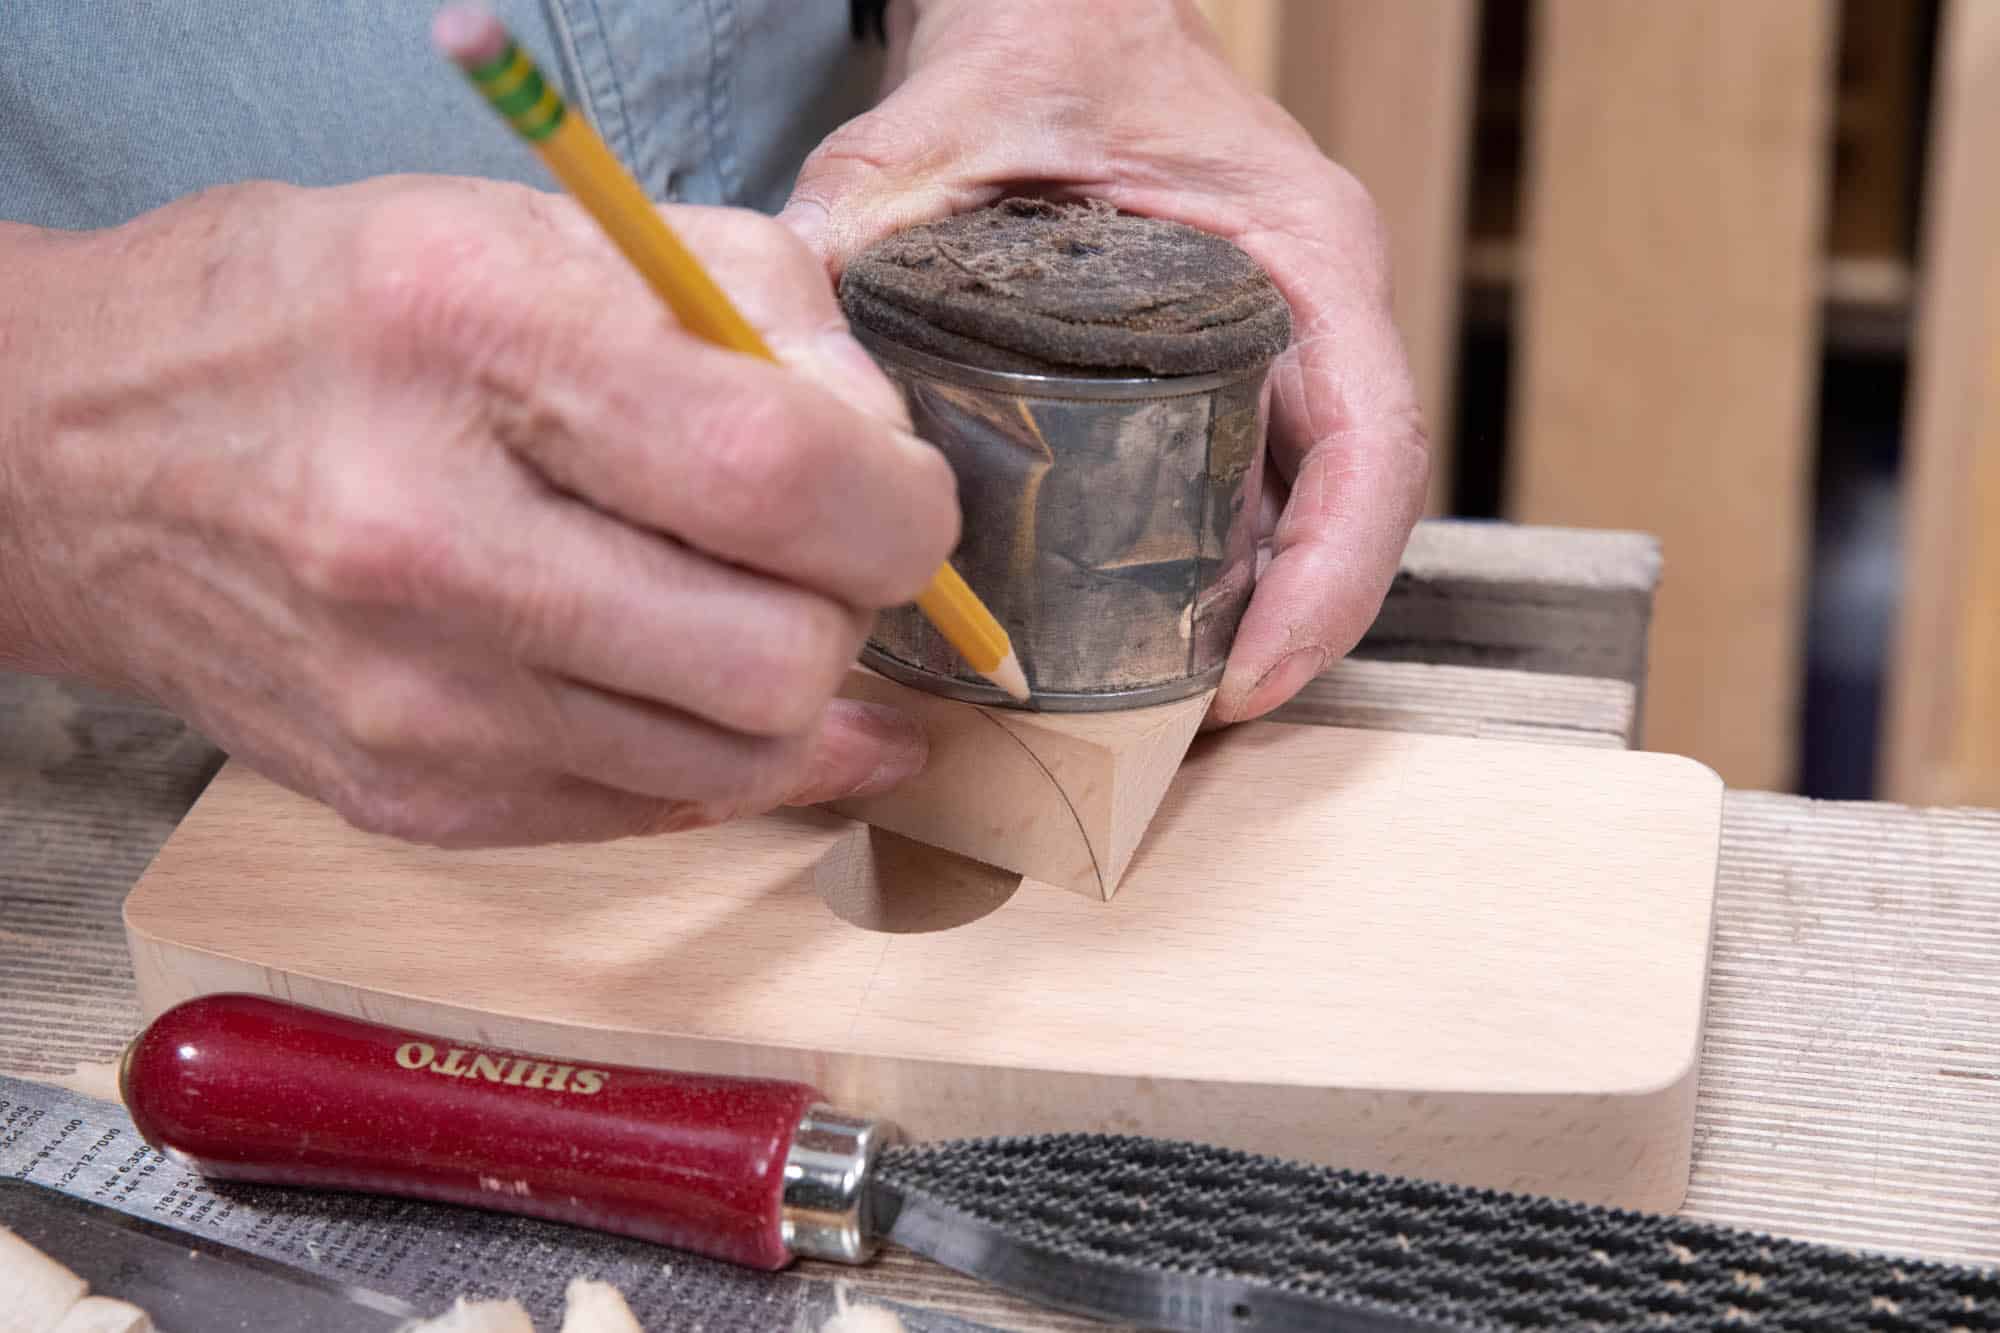
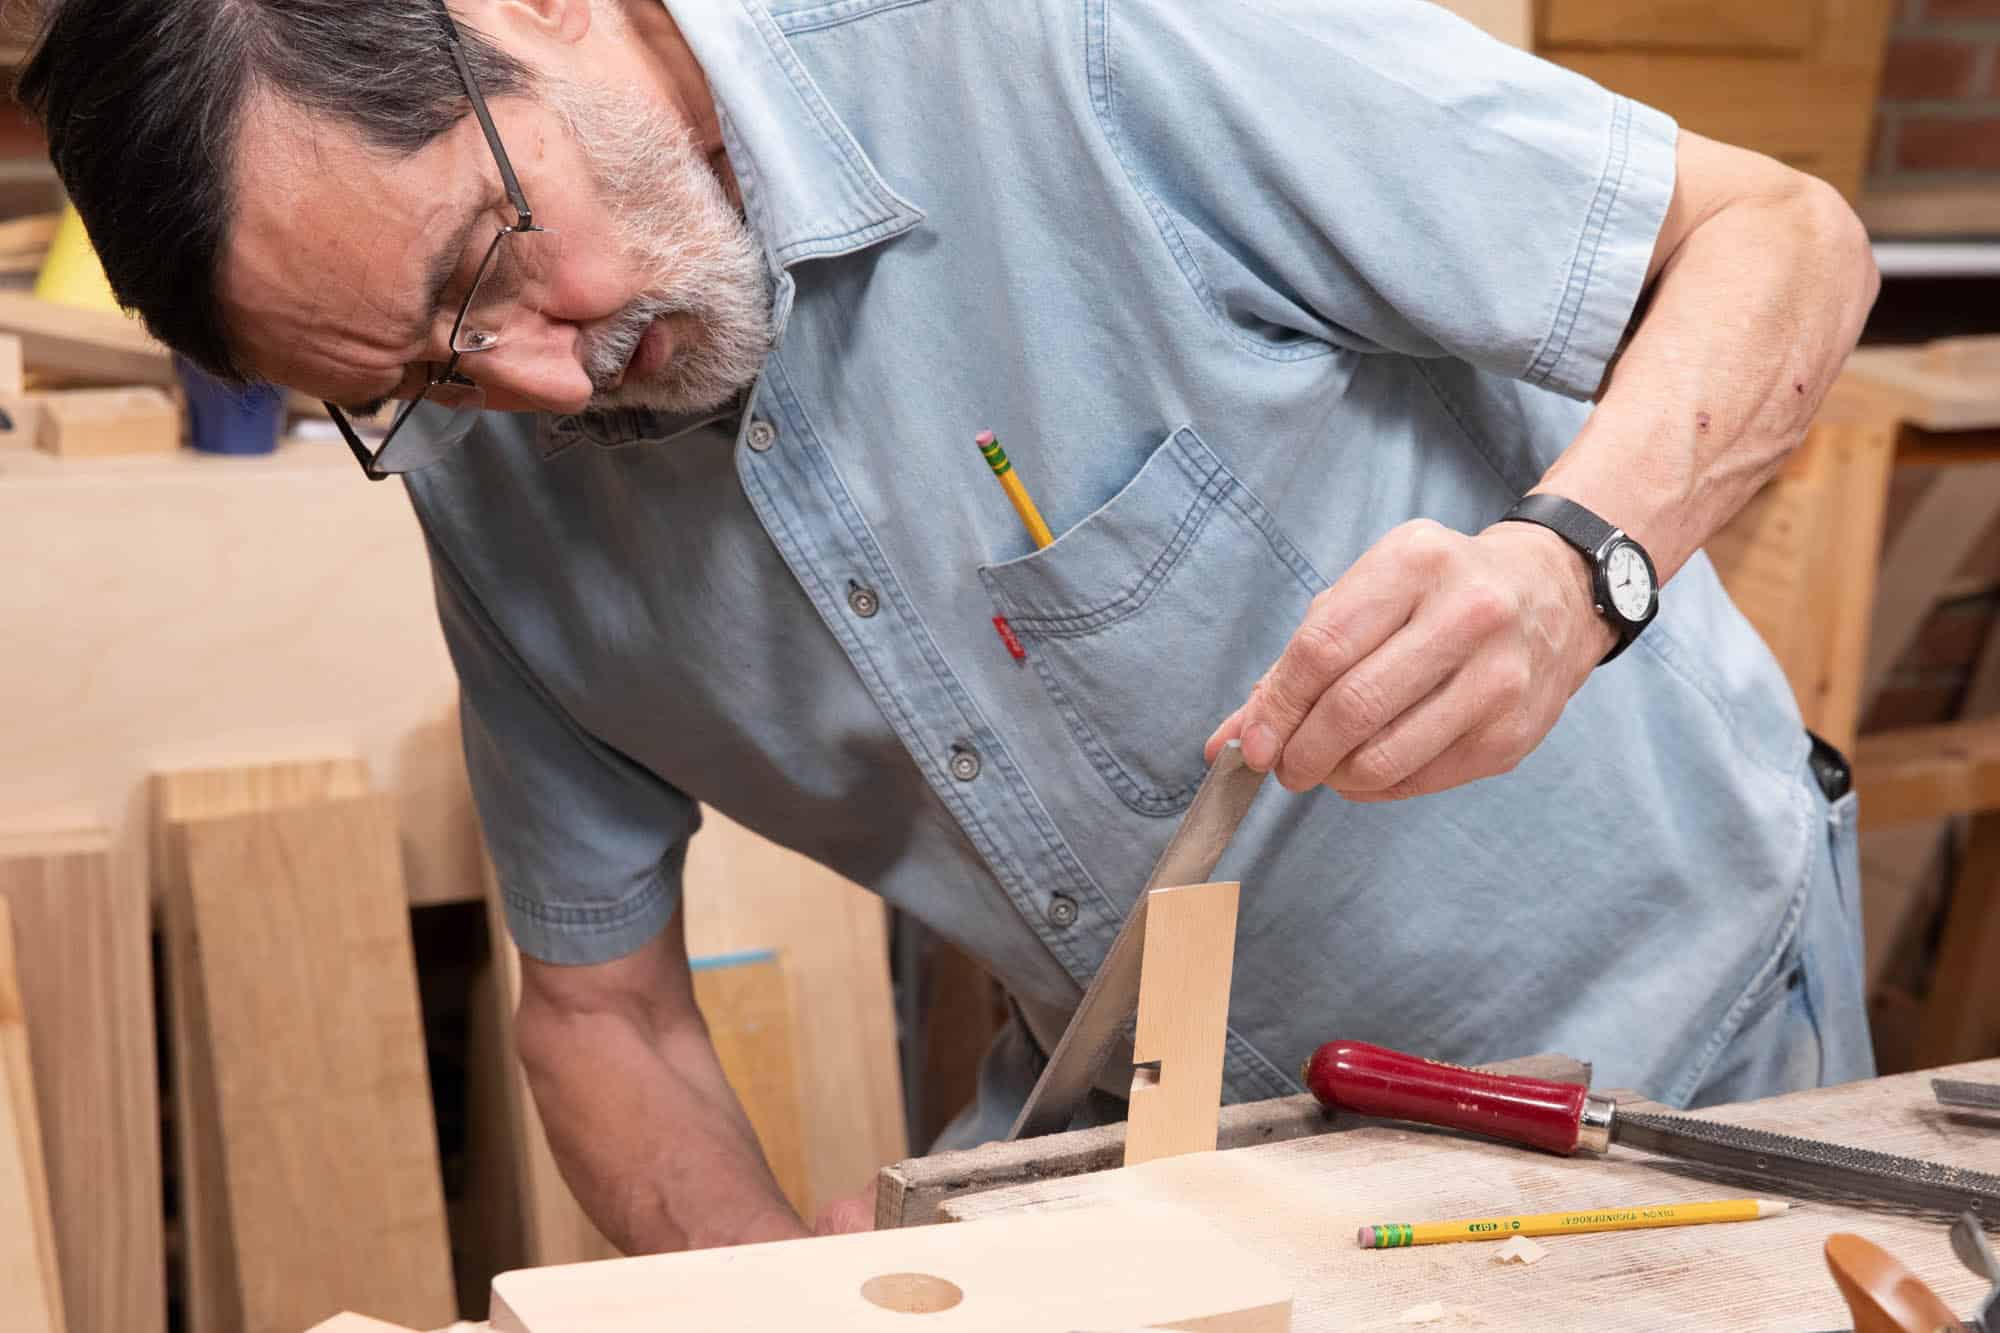
Creating a small flat about 3/16″ (4-5mm) wide along the top ridge of the upstand facilitates clamping in the vise for shaping. Clamping the two ends to the vise jaws works best and gives the best holding position.

Gluing Up
Inevitably, the upstand will slip under the pressure of clamping with a film of glue between the two parts. Here’s a trick I have used for years that works well for two good reasons; the nails prevent slippage and work perfectly for locating one part to the other.
Drive two panel pins (finish nails USA) into the top of the base of the router plane choosing a position to avoid where subsequent holes will go for other components later.
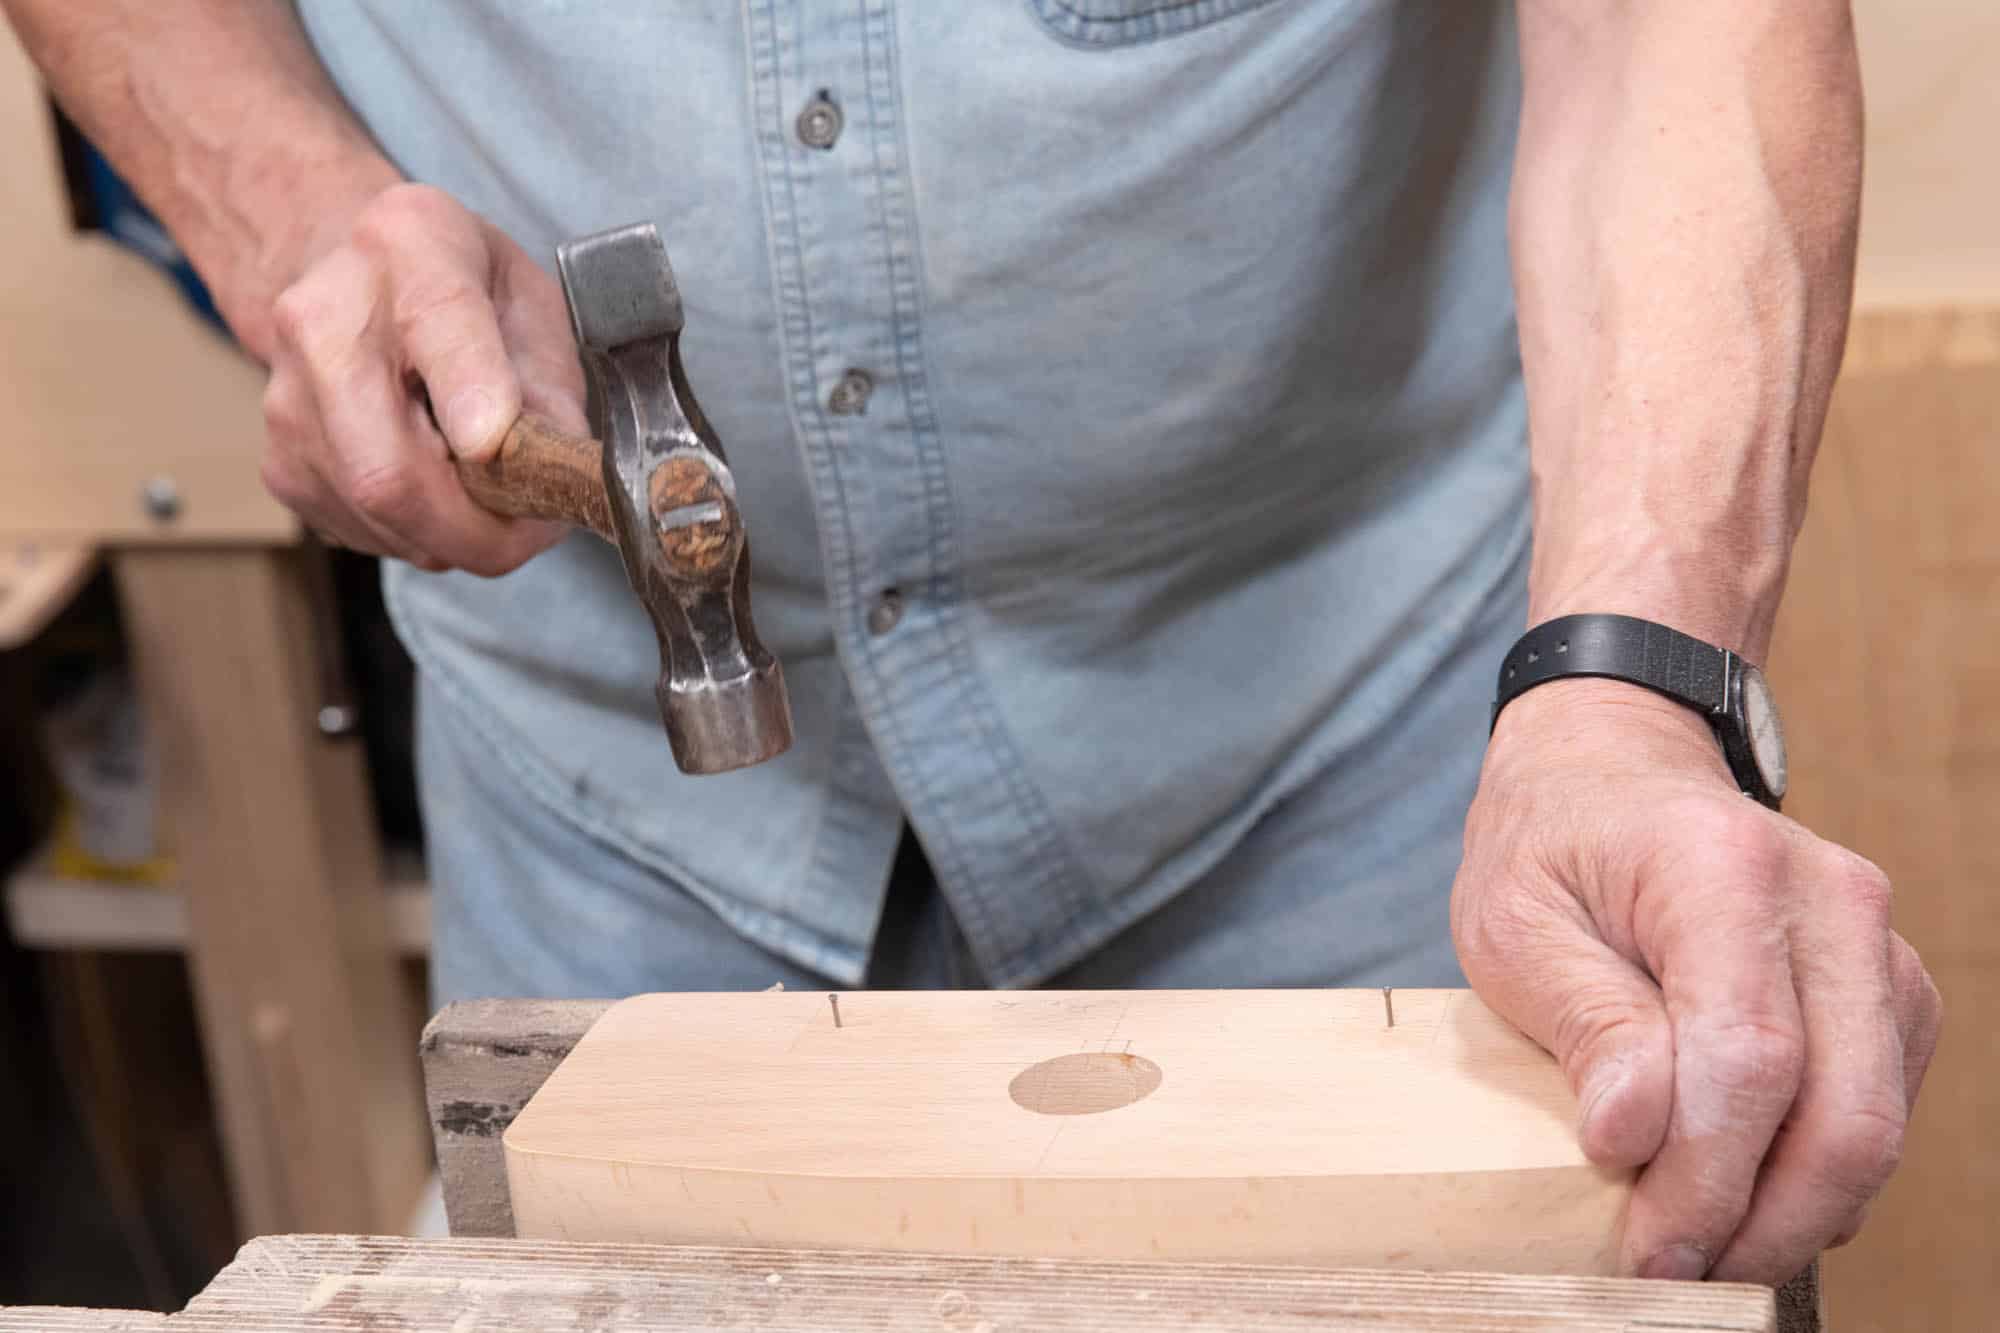
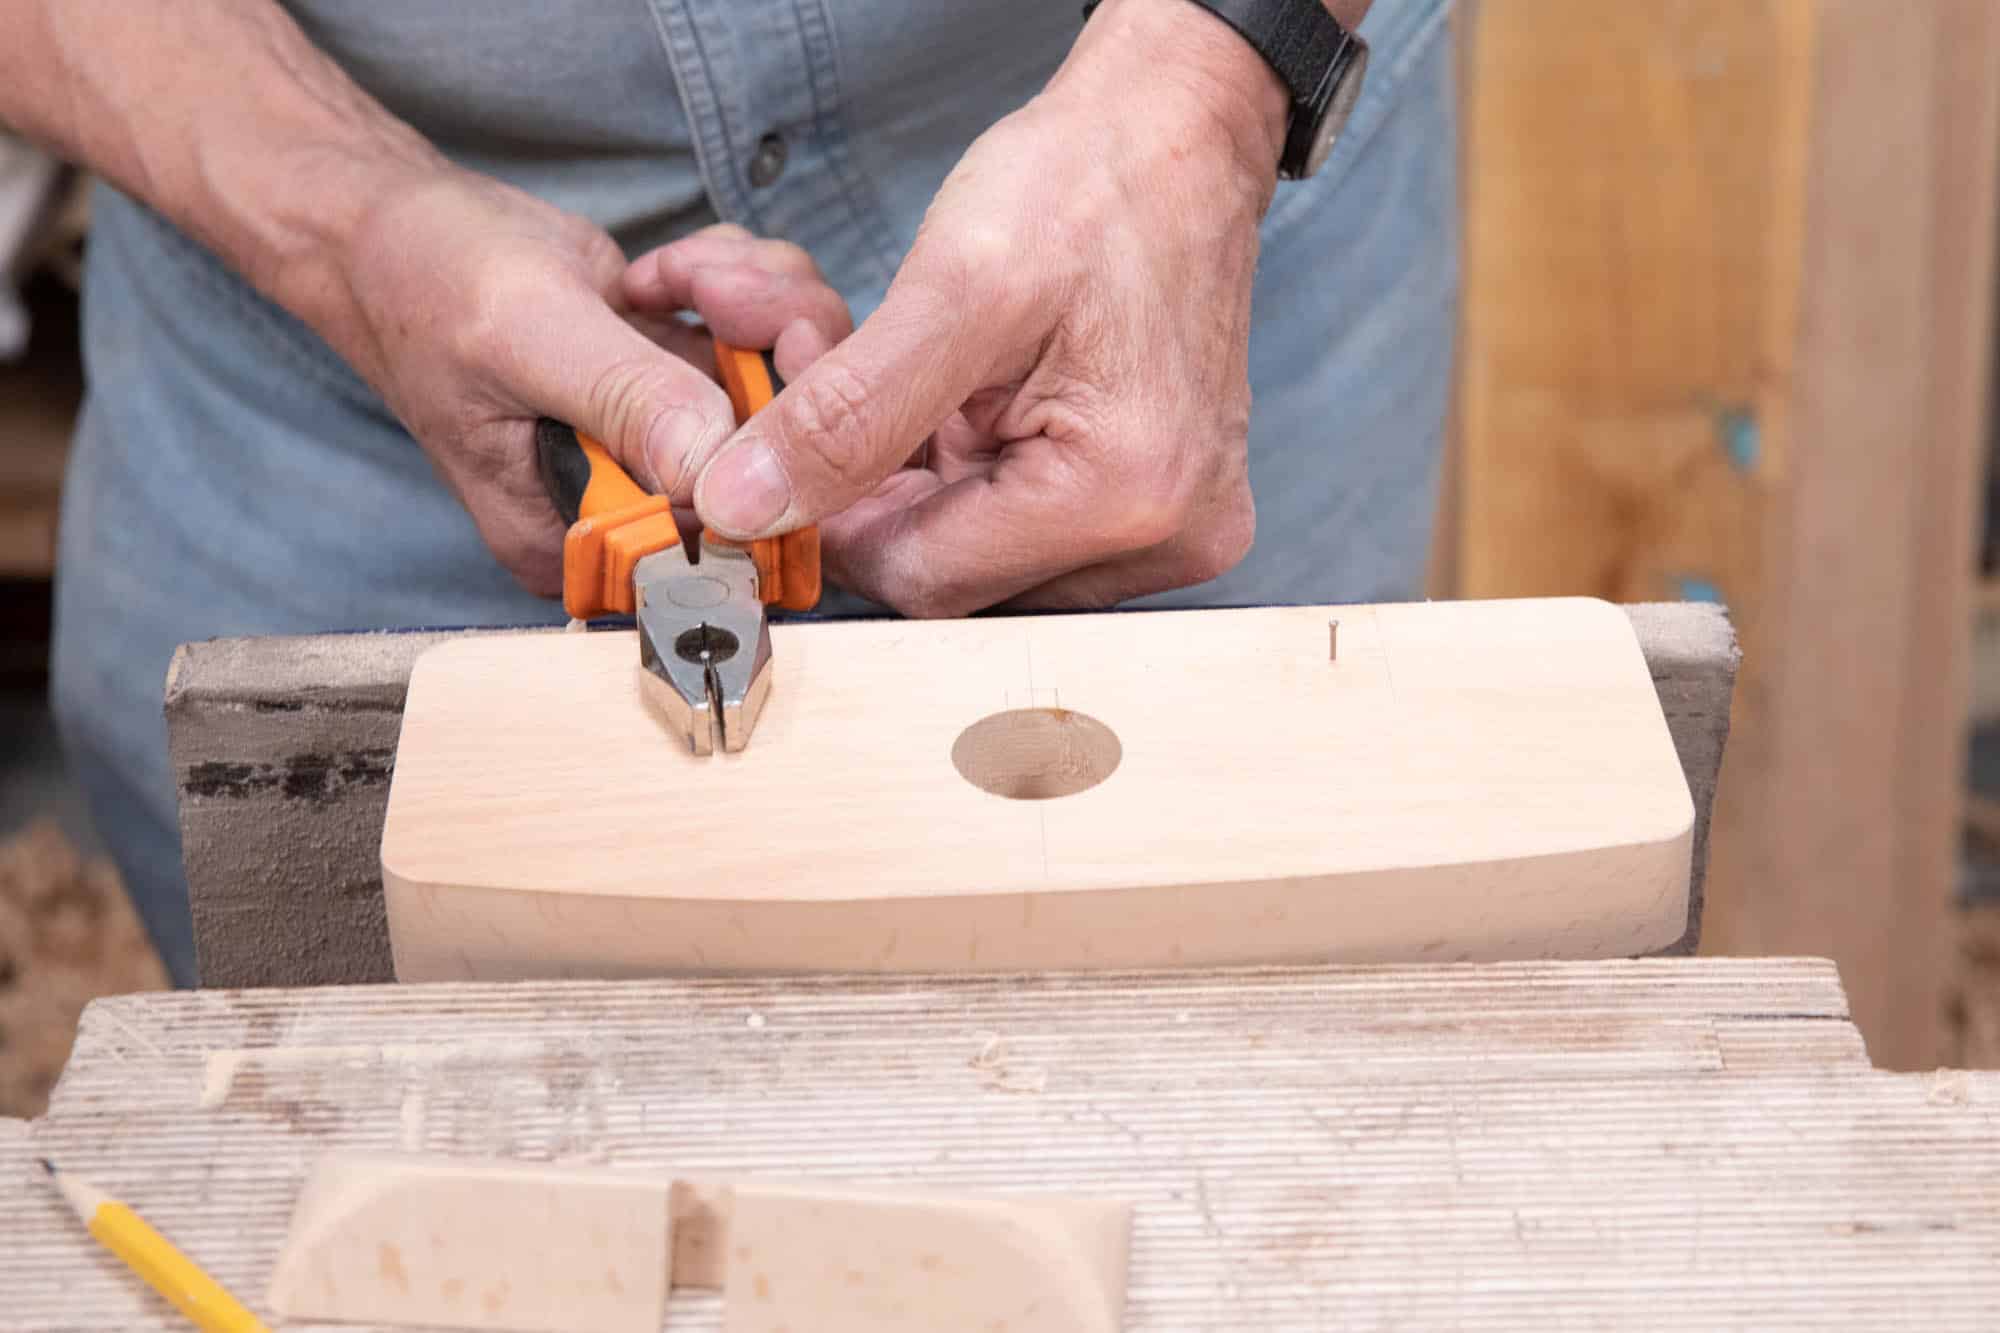
Flushing your pliers with the surface generally leaves on about the right amount. The nails should protrude about 1/16″ (1.5mm) so you may have to drive them a little deeper.
Align the upstand to the pencil lines carefully and tap on the top ridge to indent the nails into the underside of the upstand.
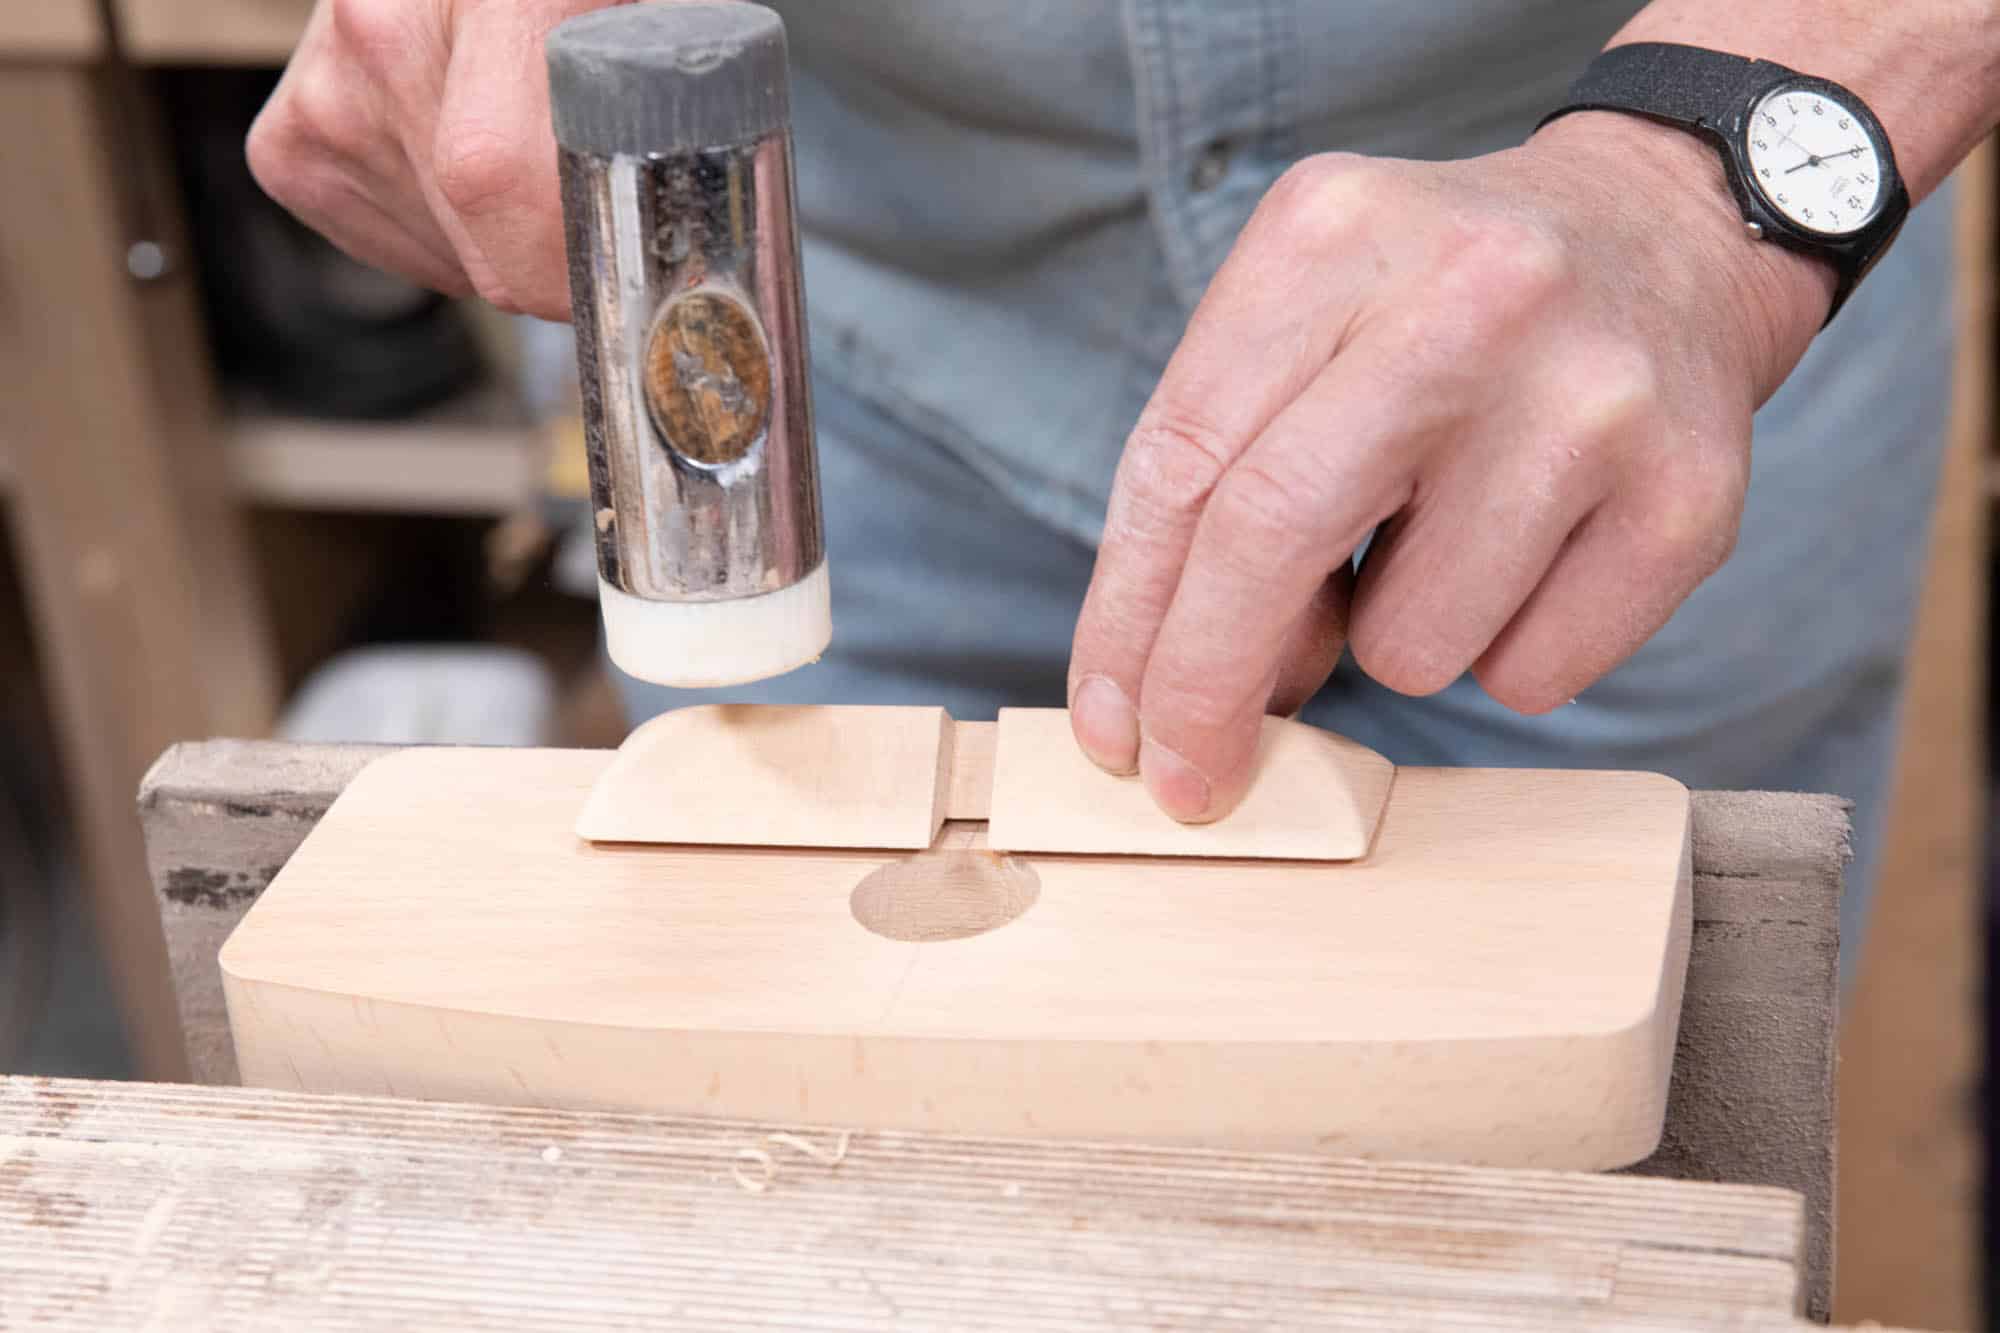
With the two dimples clearly defined, apply a film of glue to the underside of the upstand and position it on the base using the pins for alignment. Then clamp the assembly into the vise using full pressure to seat the upstand firmly against the base and leaving no gaps.

Once the glue has set, clean up any squeeze-out with a sharp chisel.
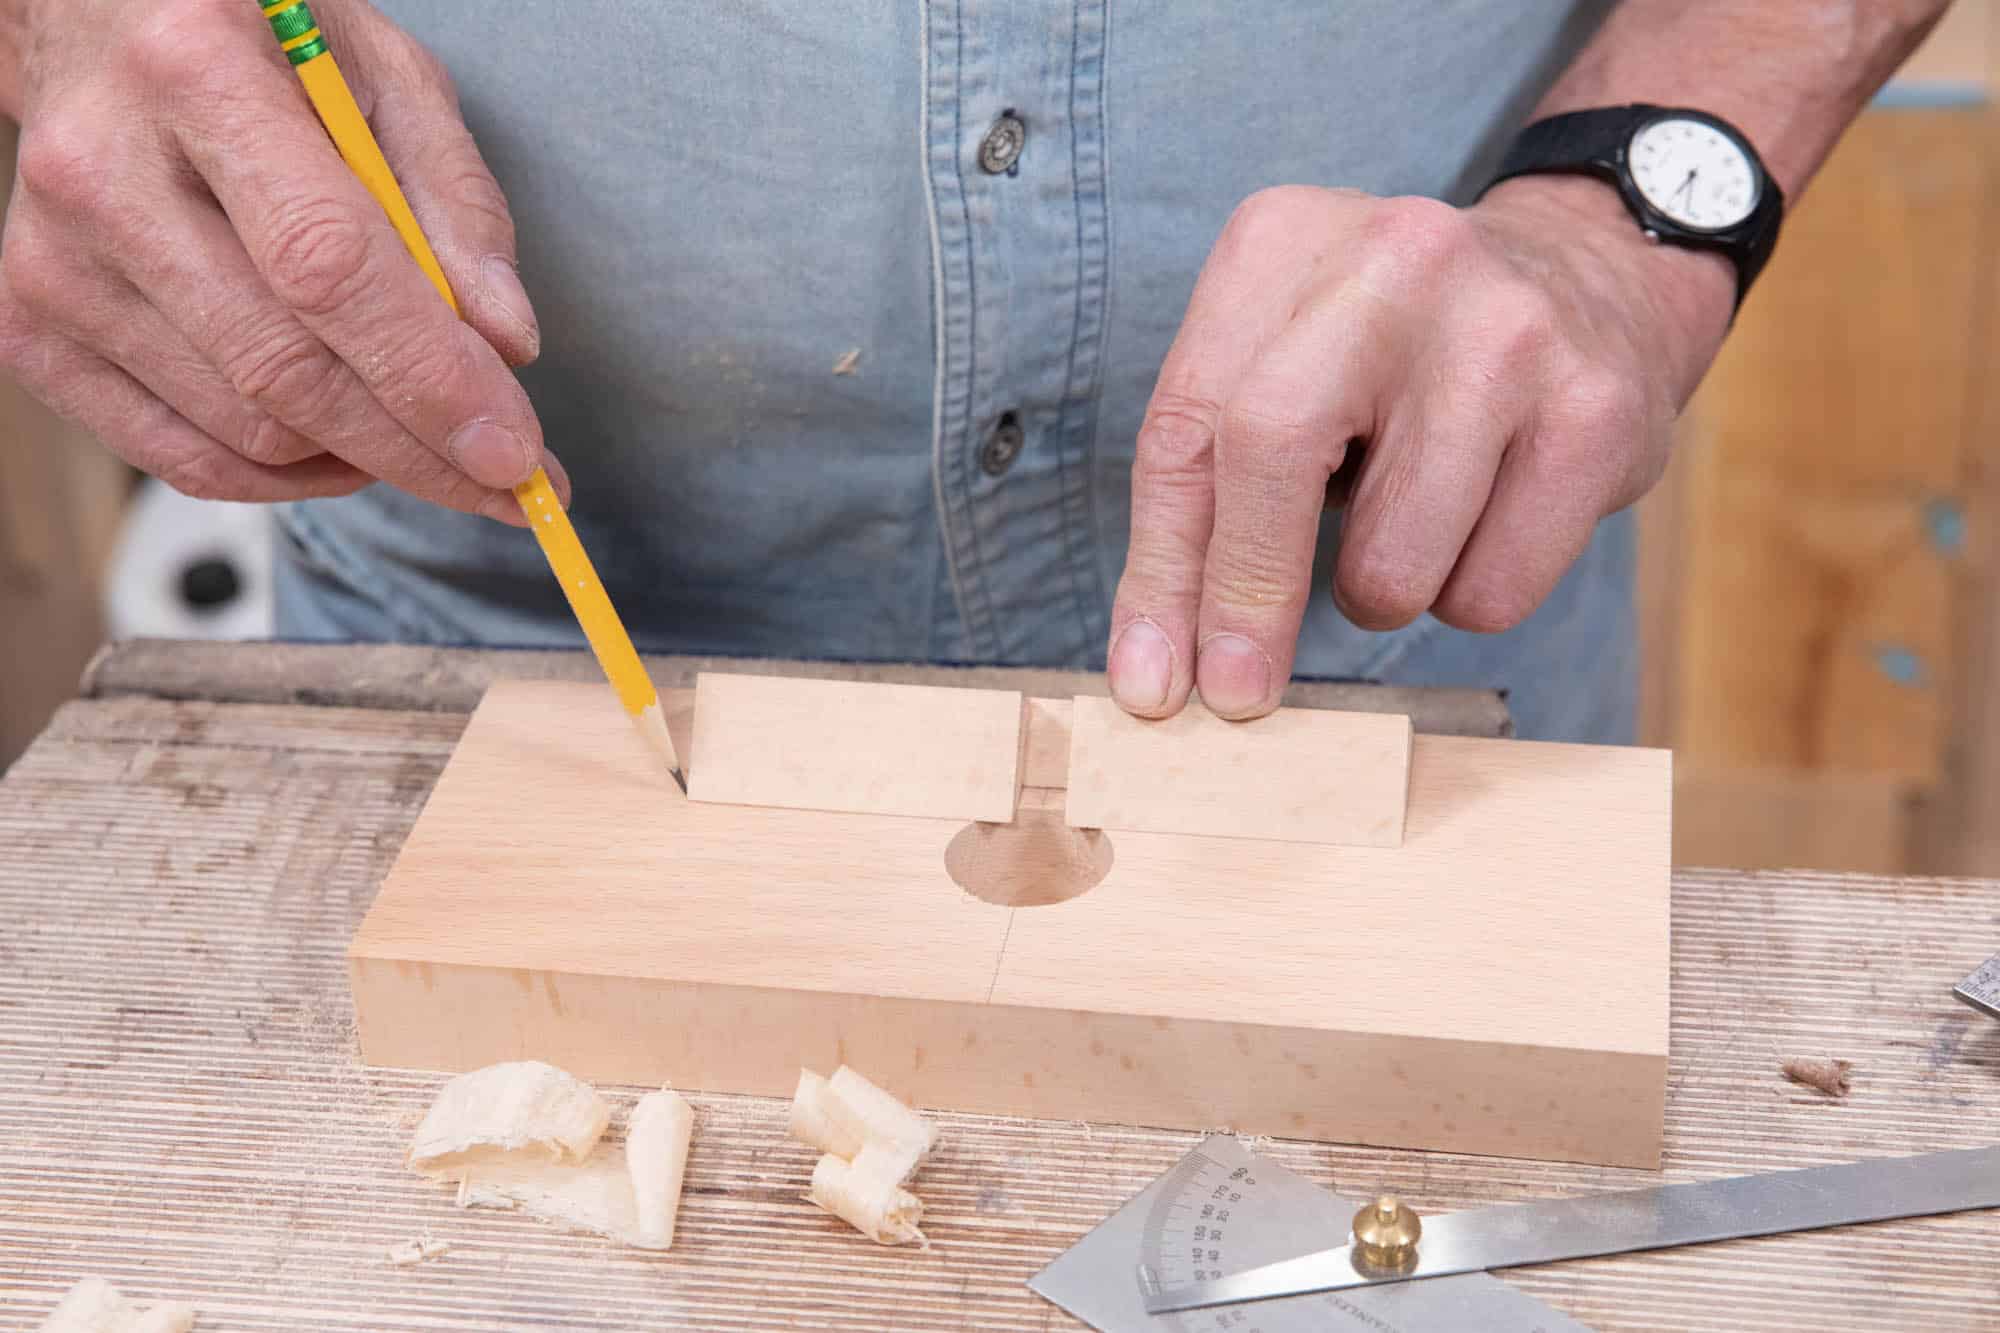
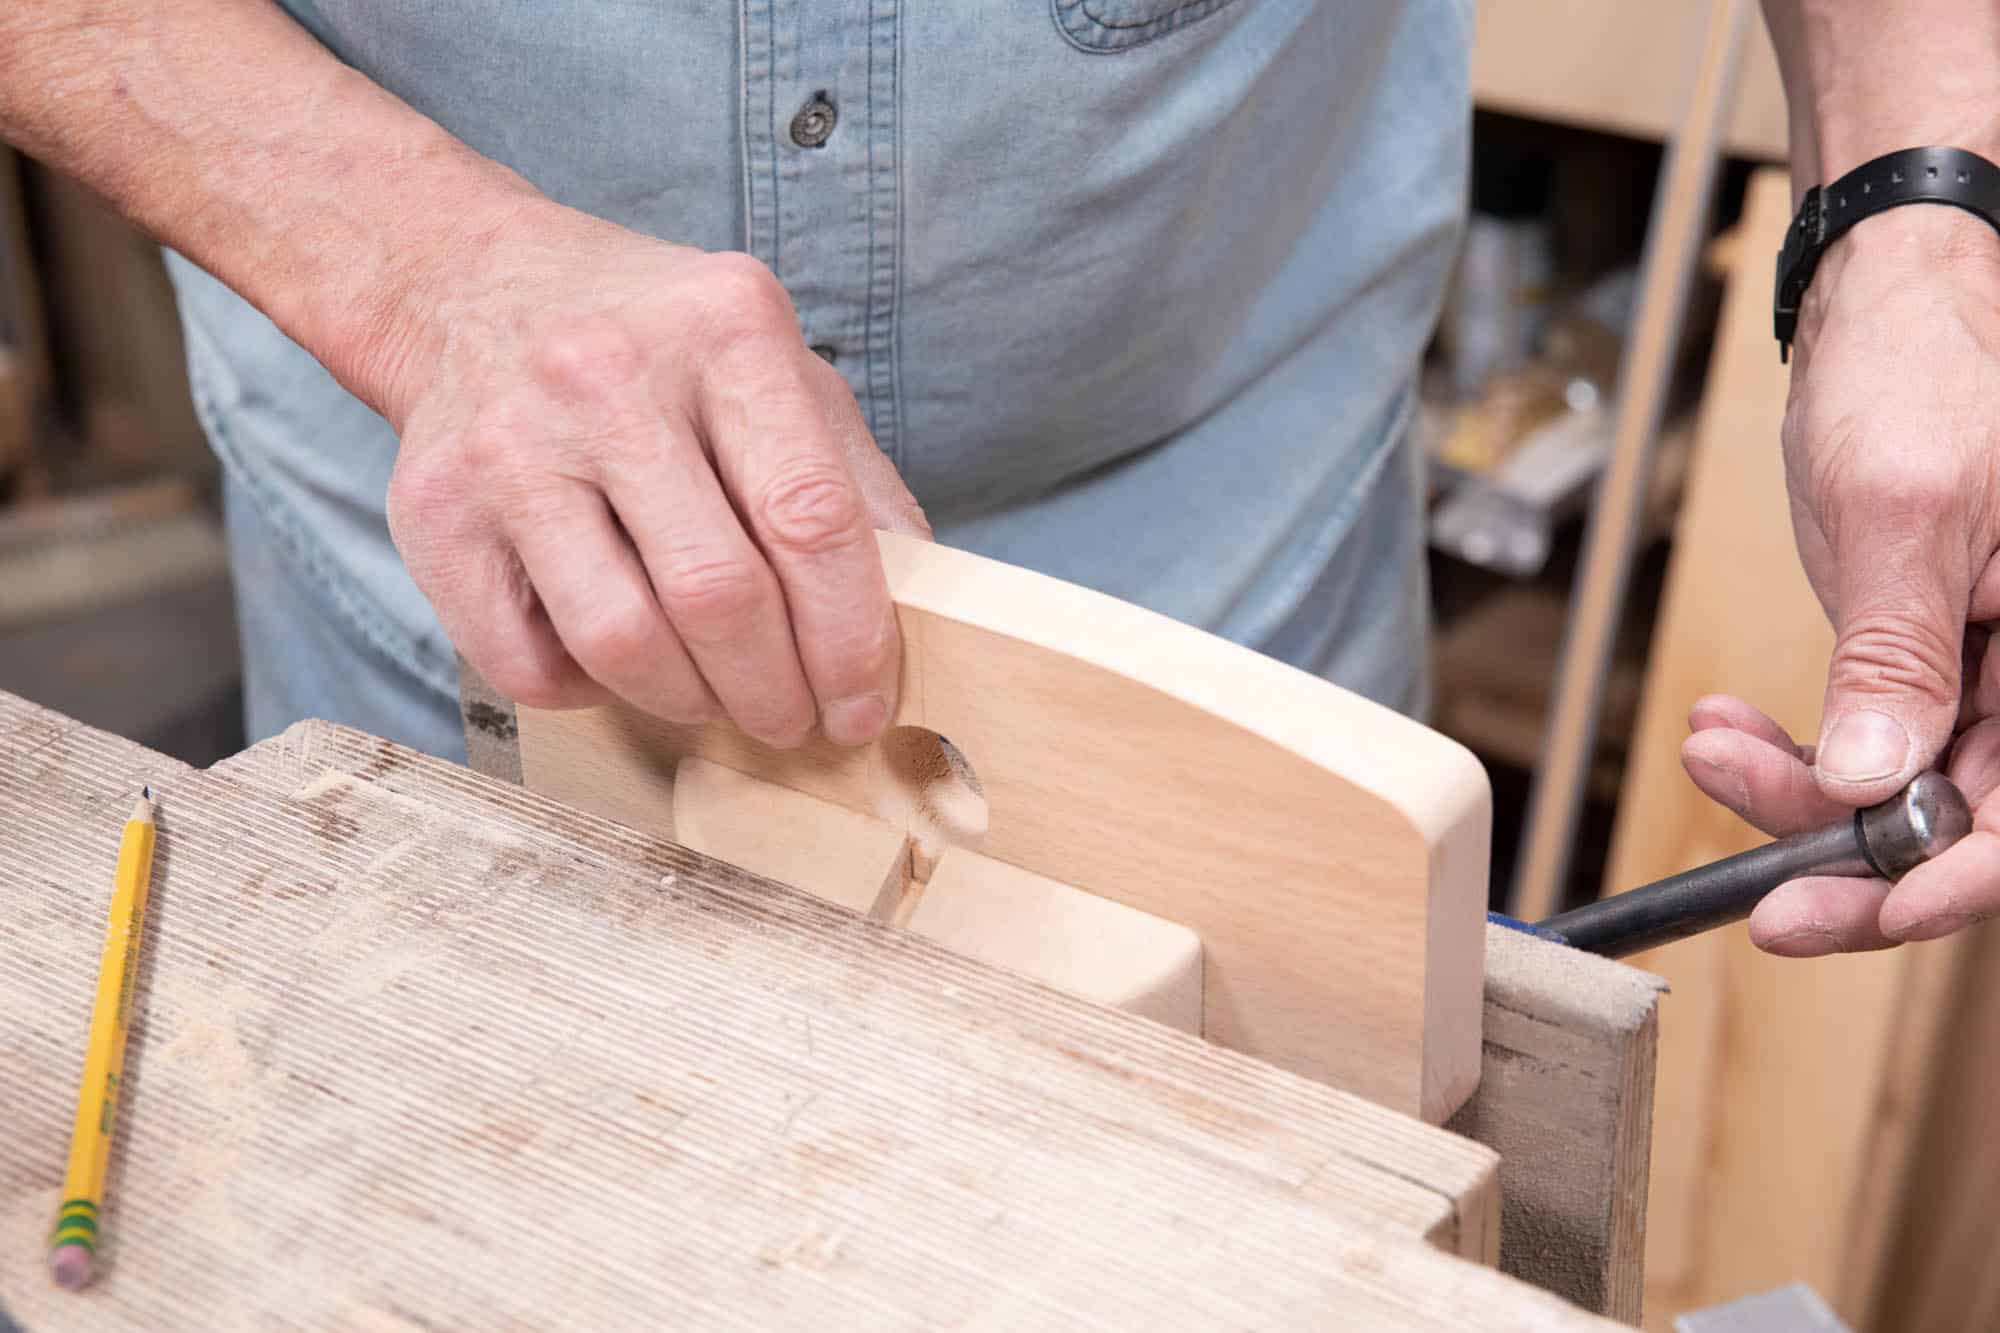
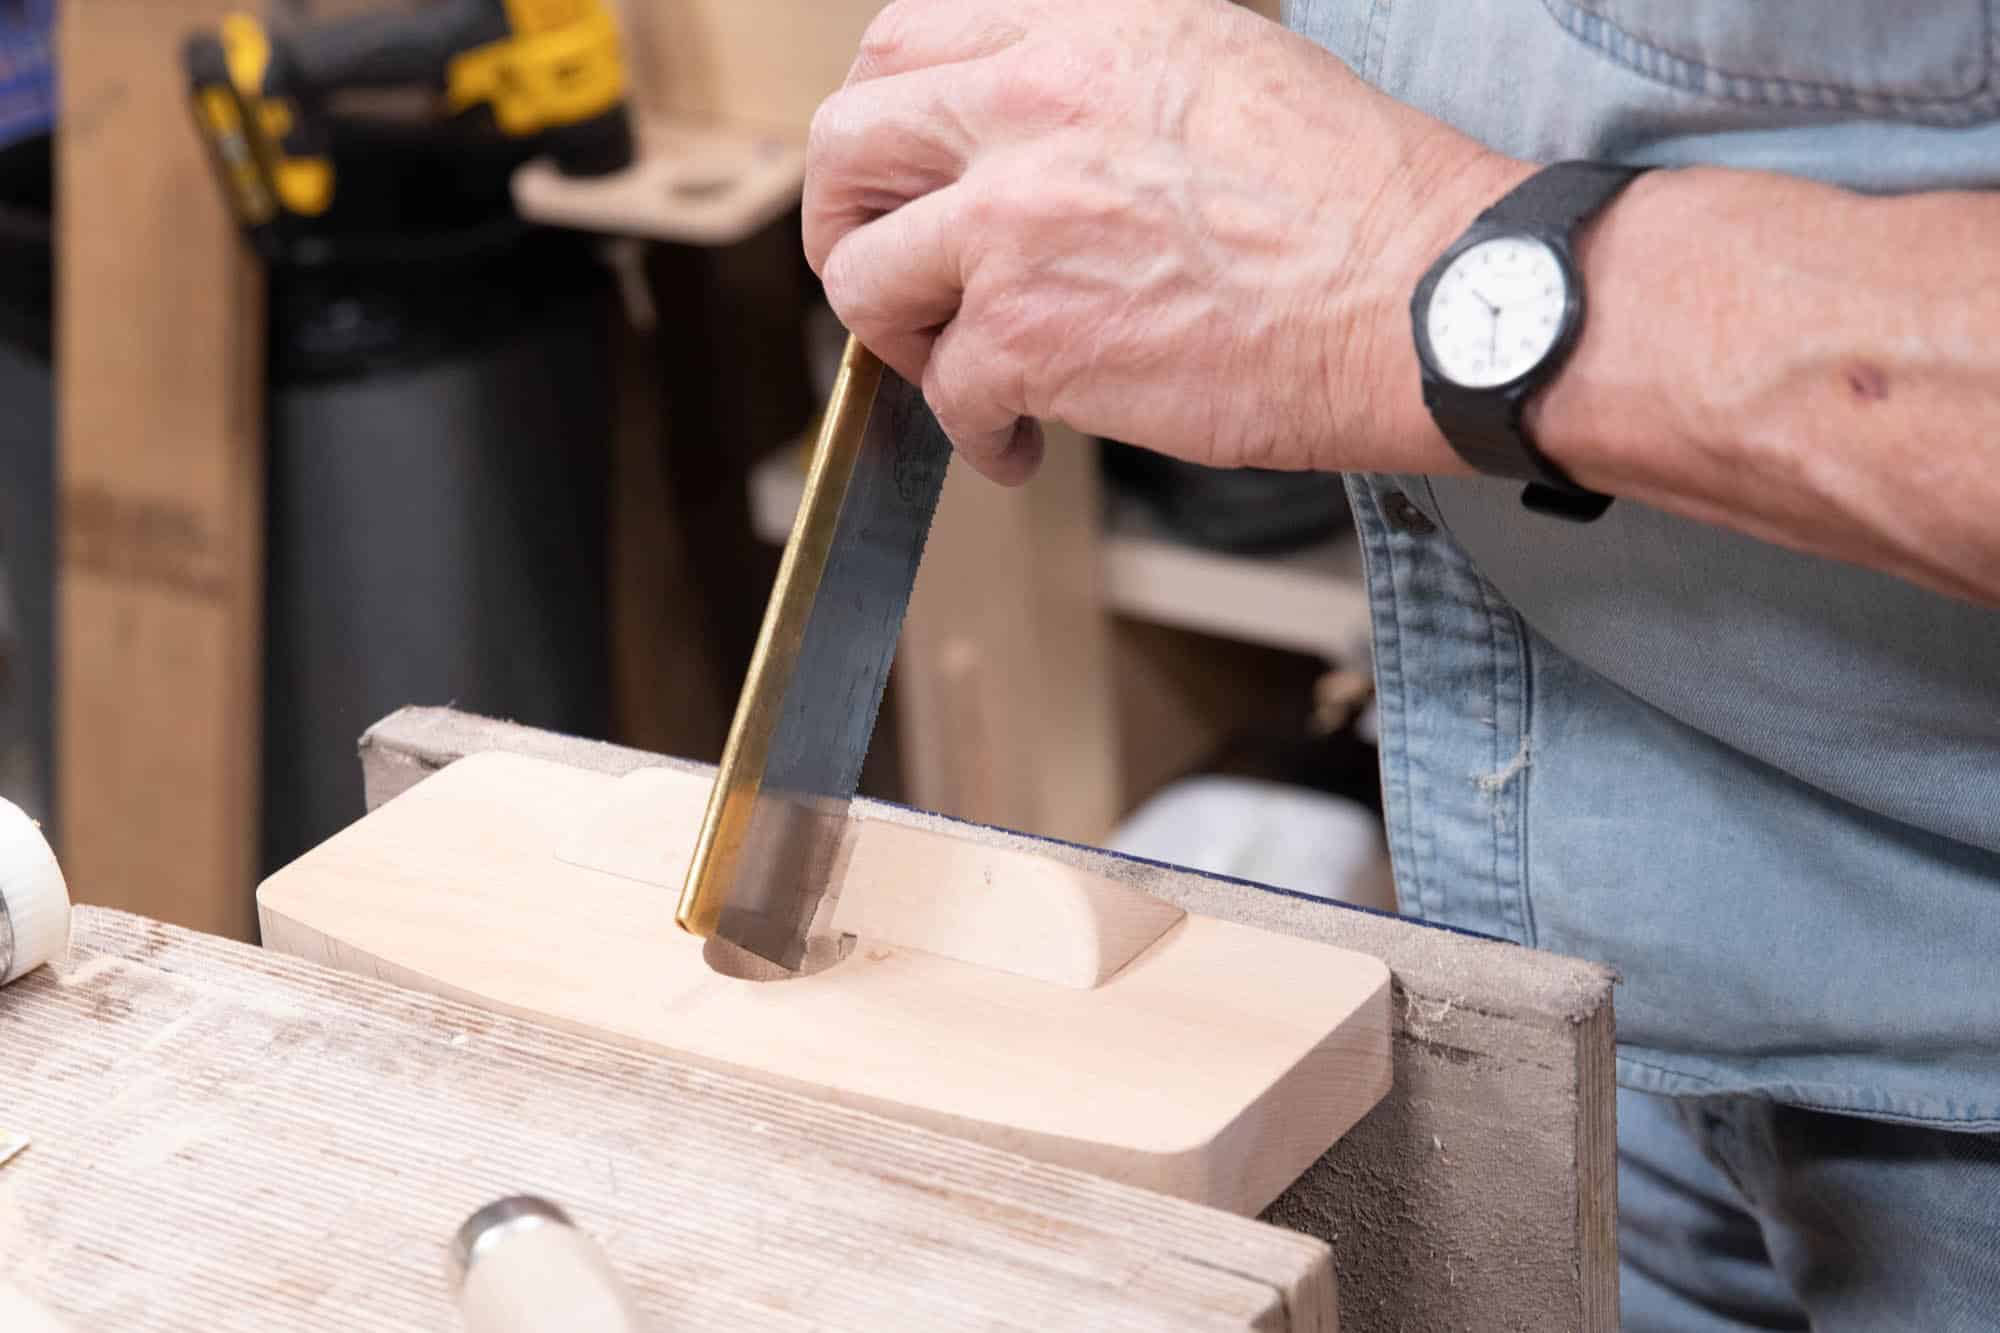
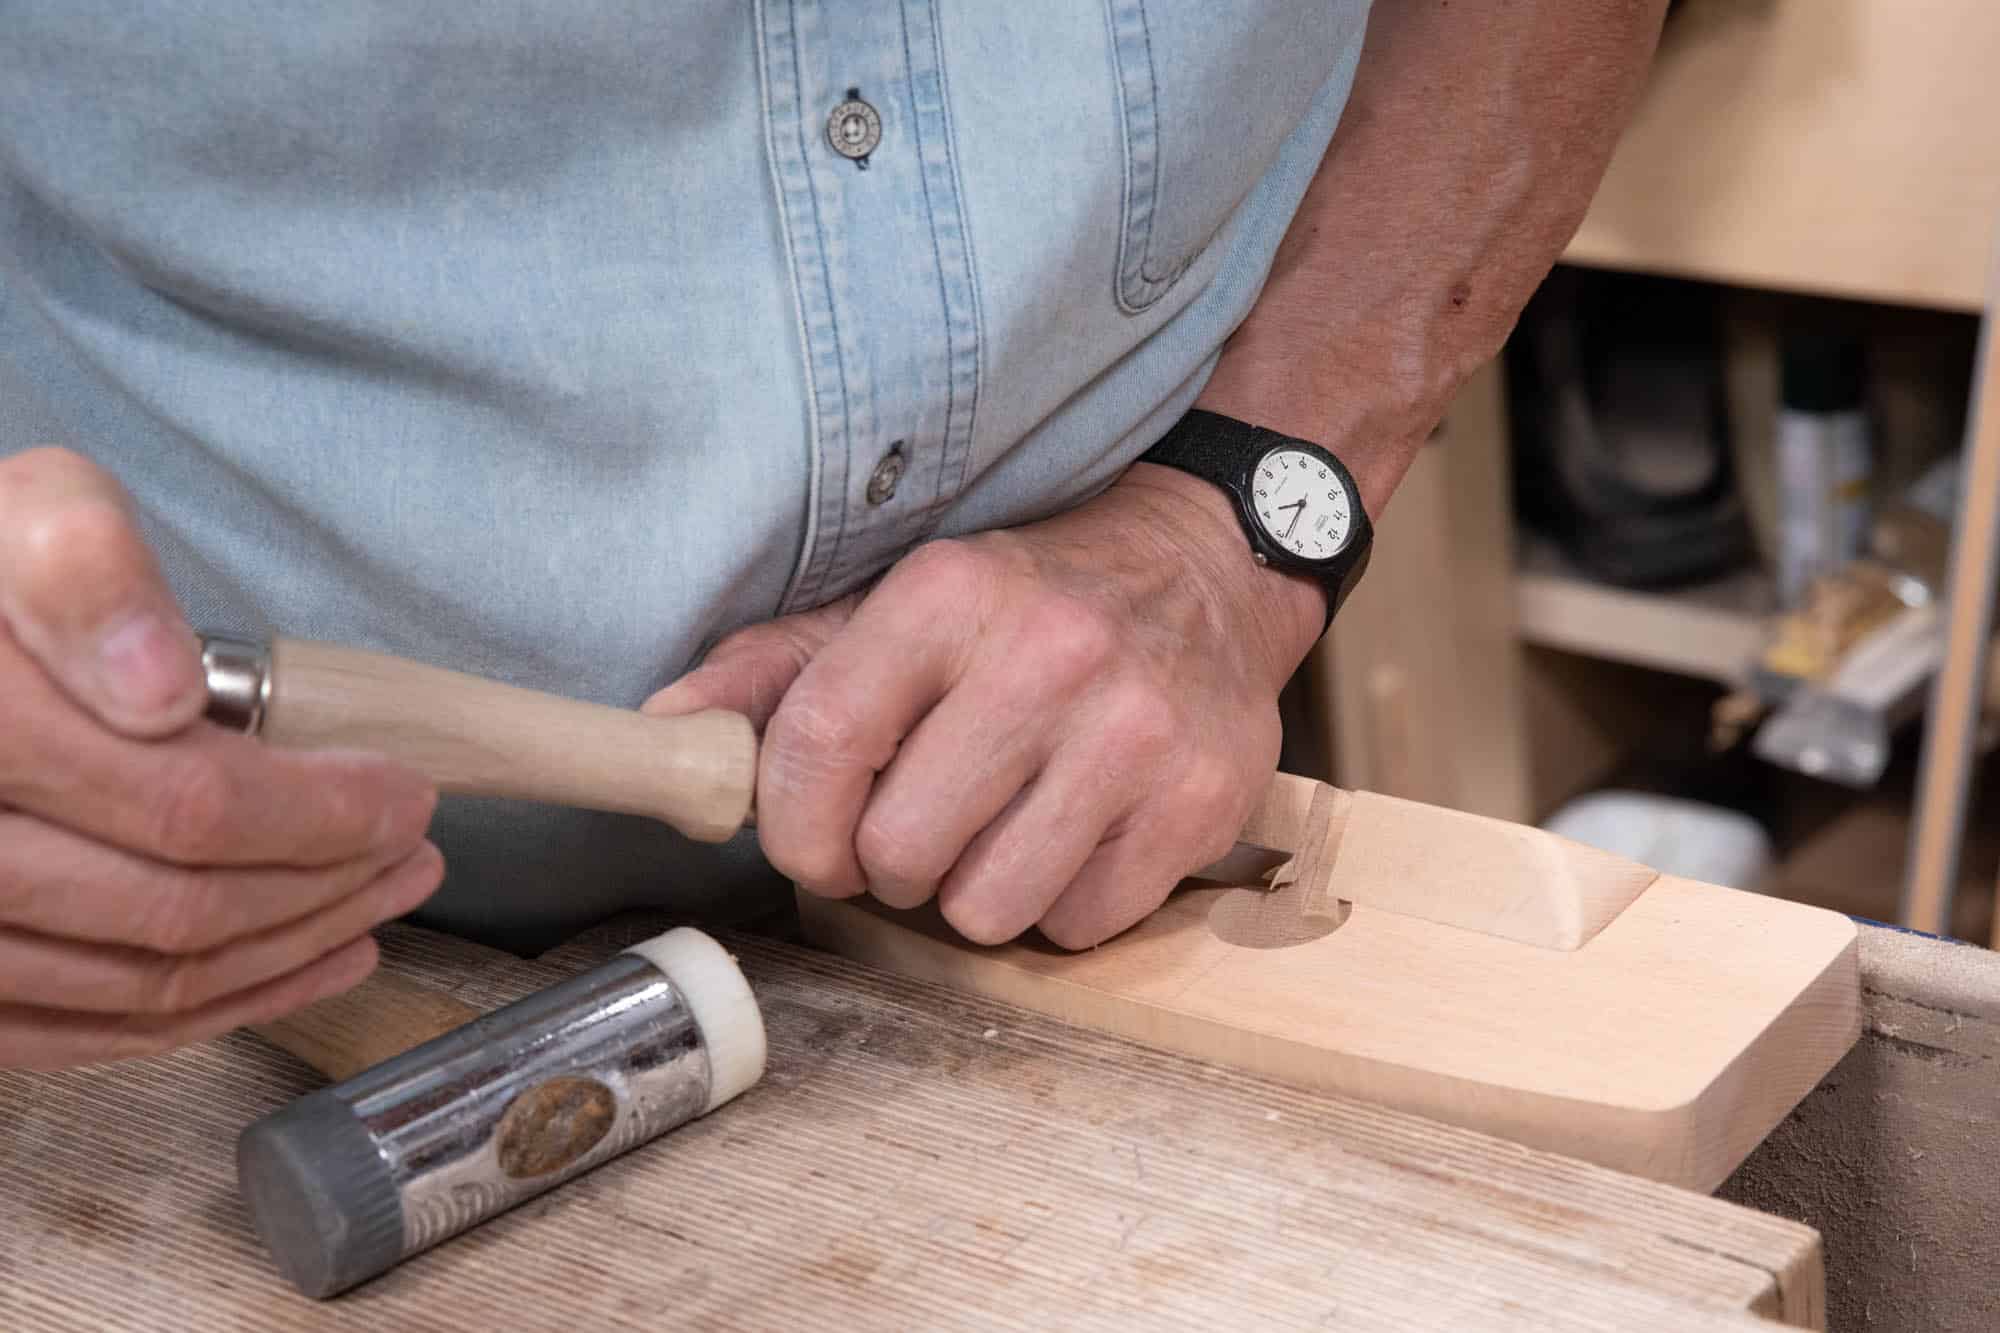
Extending the Recess Onto the Sole
We must now extend the main channel in the upstand down into the base. Work carefully to align everything accurately as the base of the groove needs to be perfectly level with the main groove in the upstand. Any dip can cause the blade to be less supported where we really need the greatest support to be.
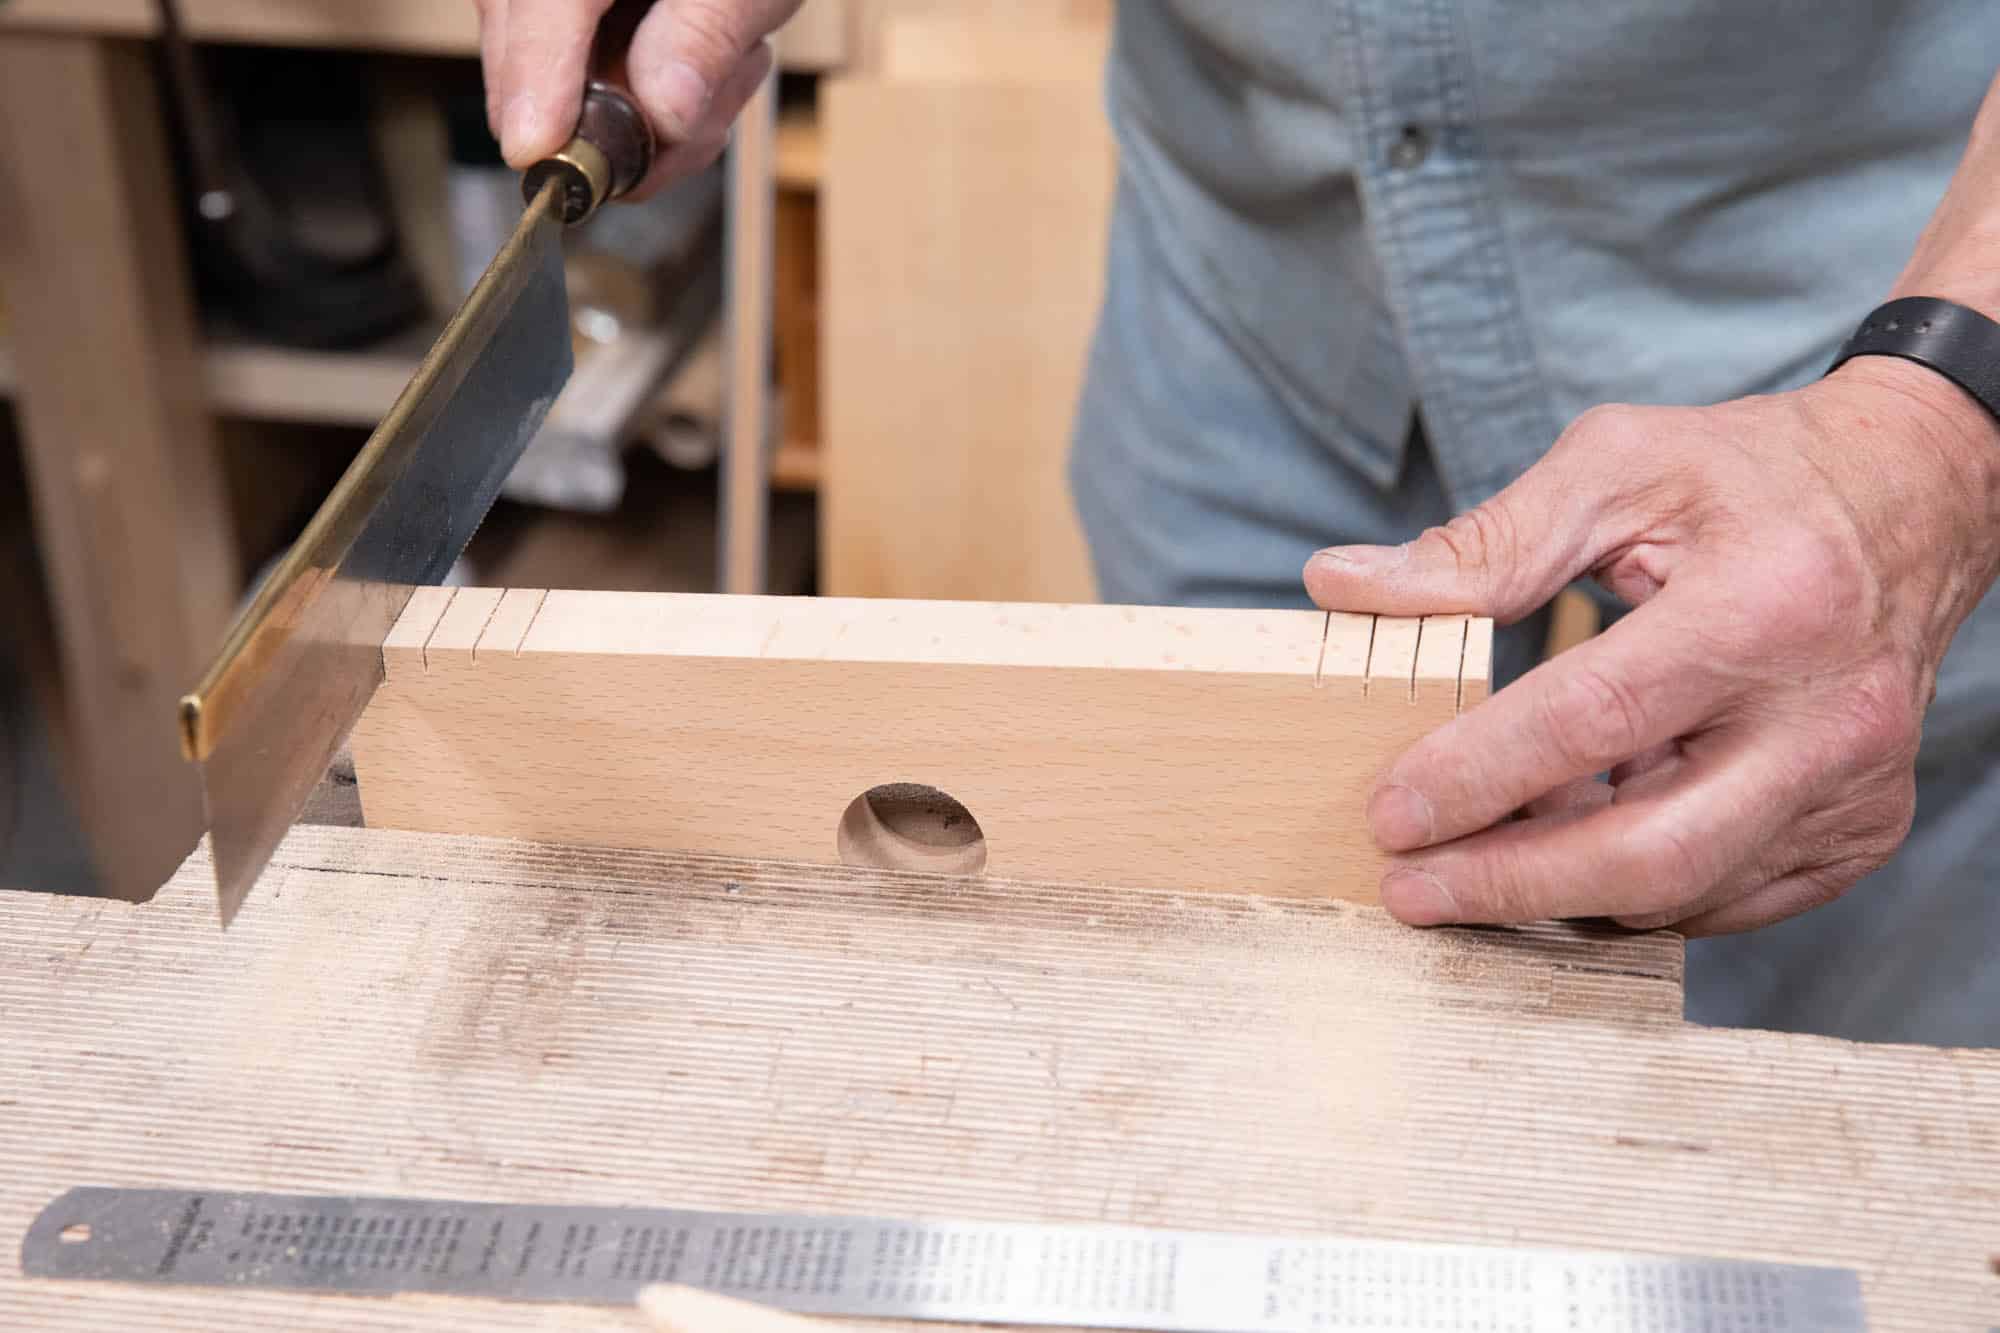
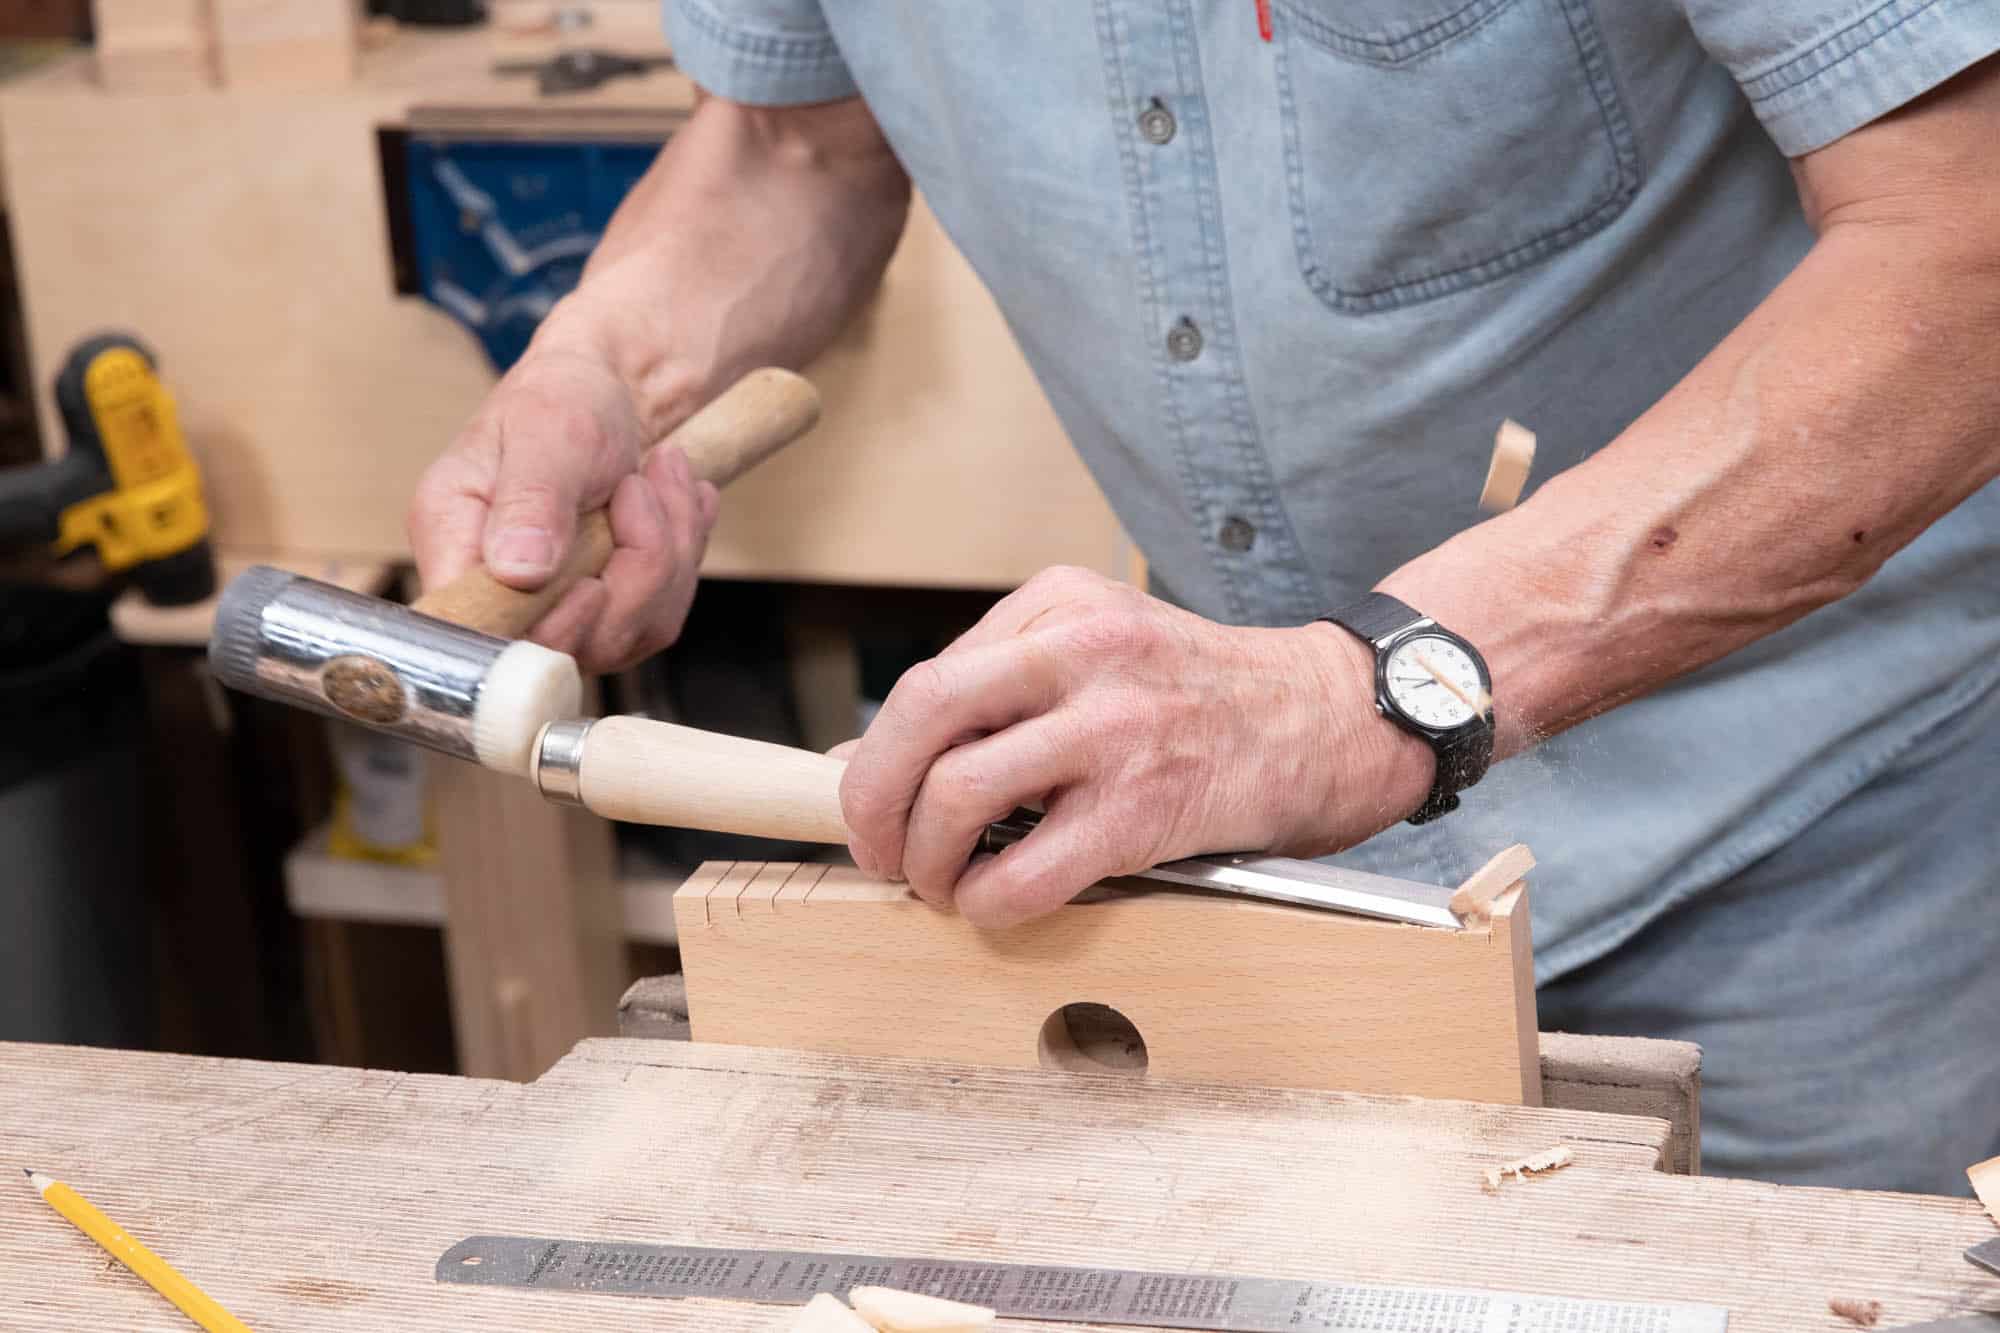
Take a 1″ (25mm) chisel to the centre of the channel and strike with a chisel hammer. This will allow you to take out the excess wood by paring from the top with a chisel.
Alternatively, you can use a small tenon saw to extend the recess to just shy of the final depth.

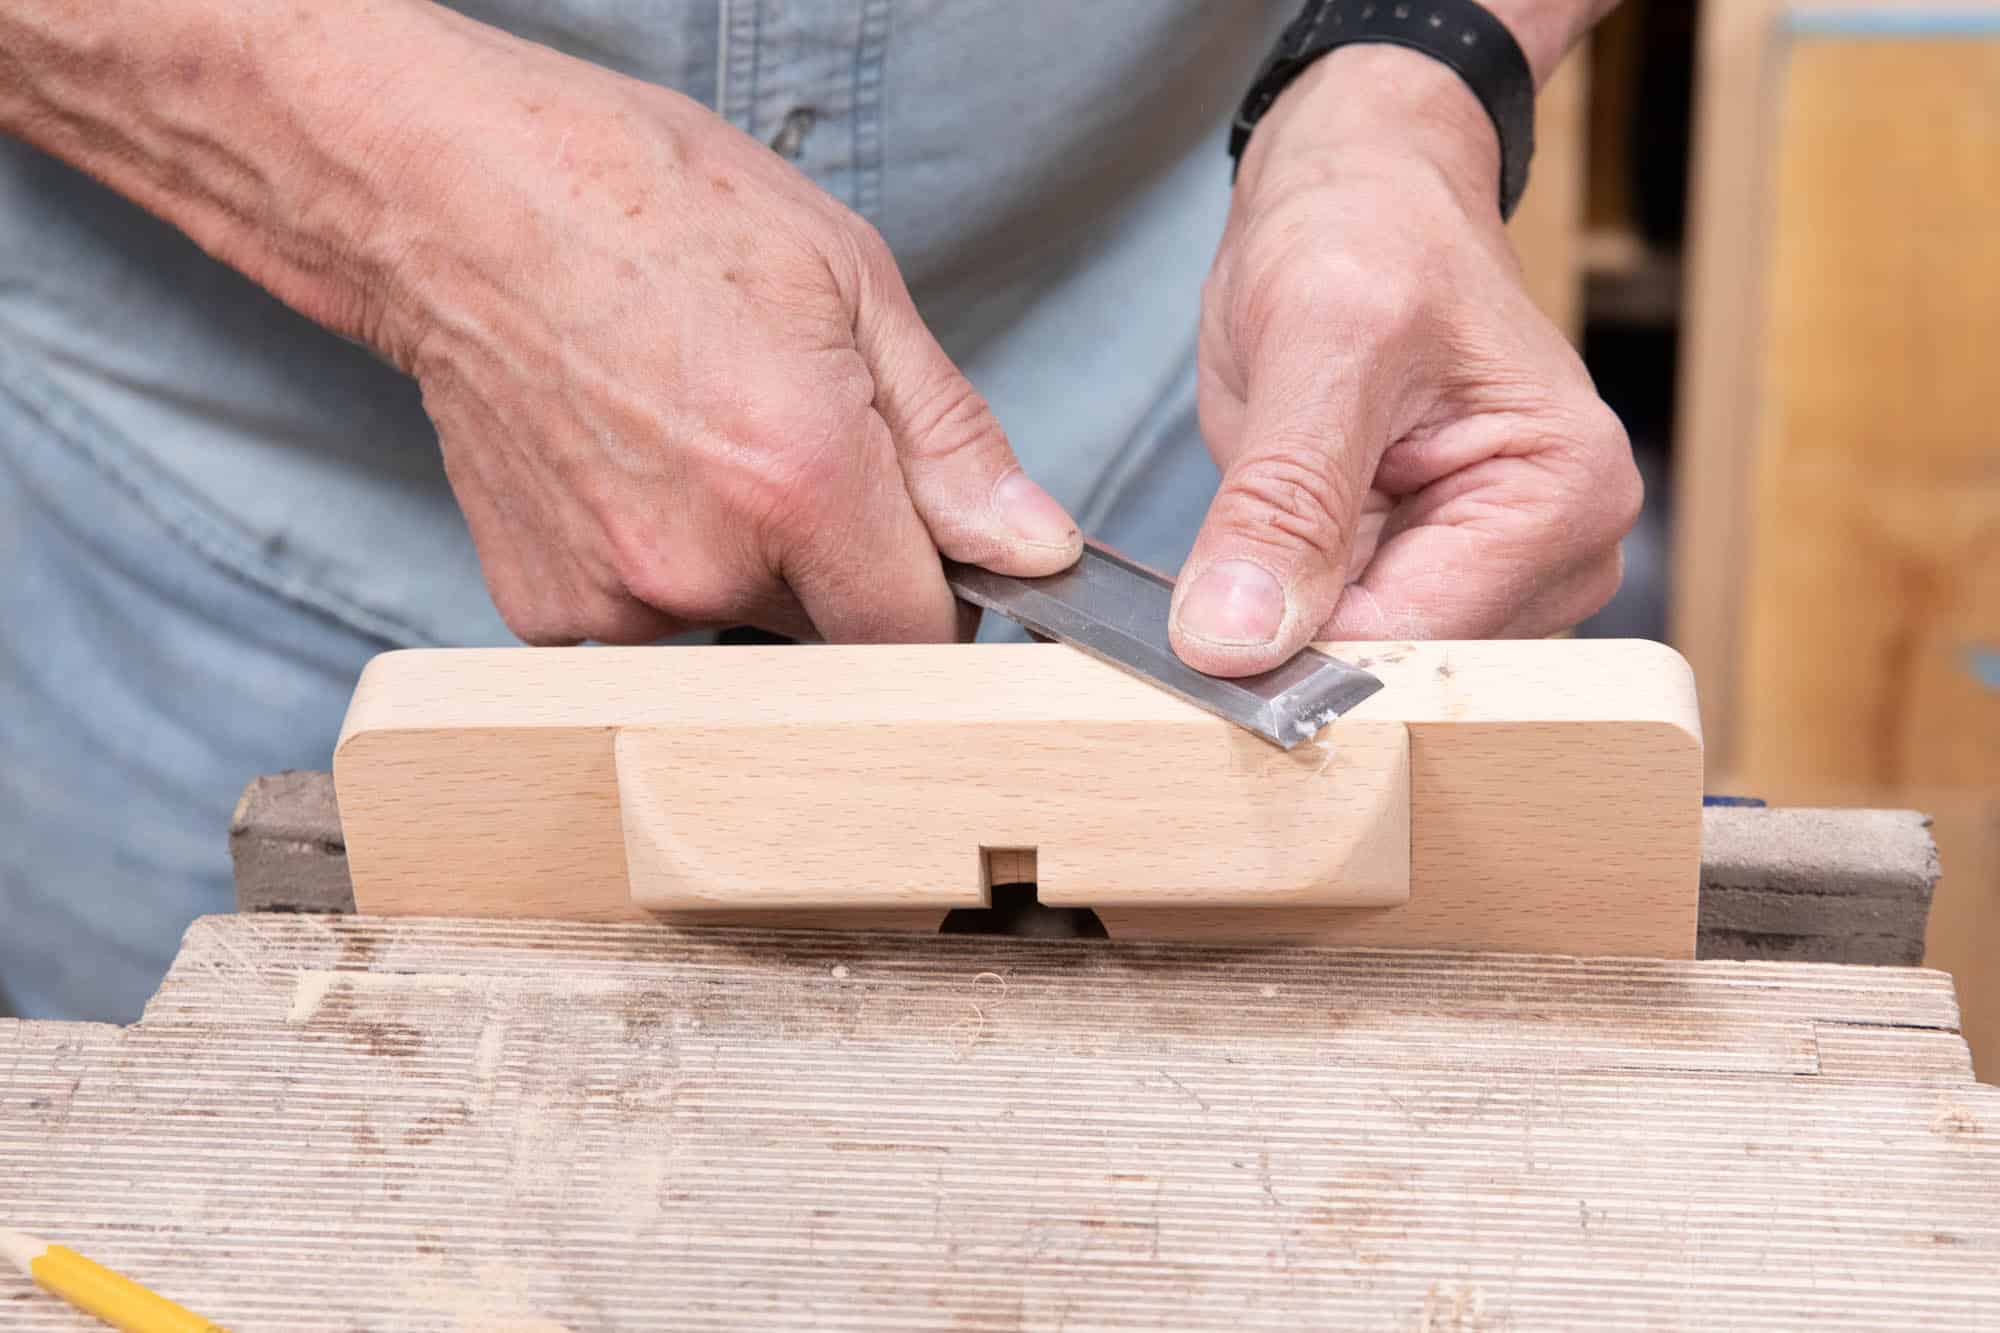
Pare out the waste wood, making sure you do not take too much off and create a rounded bed for the blade. A sharp chisel is essential to be able to take off a little at a time.
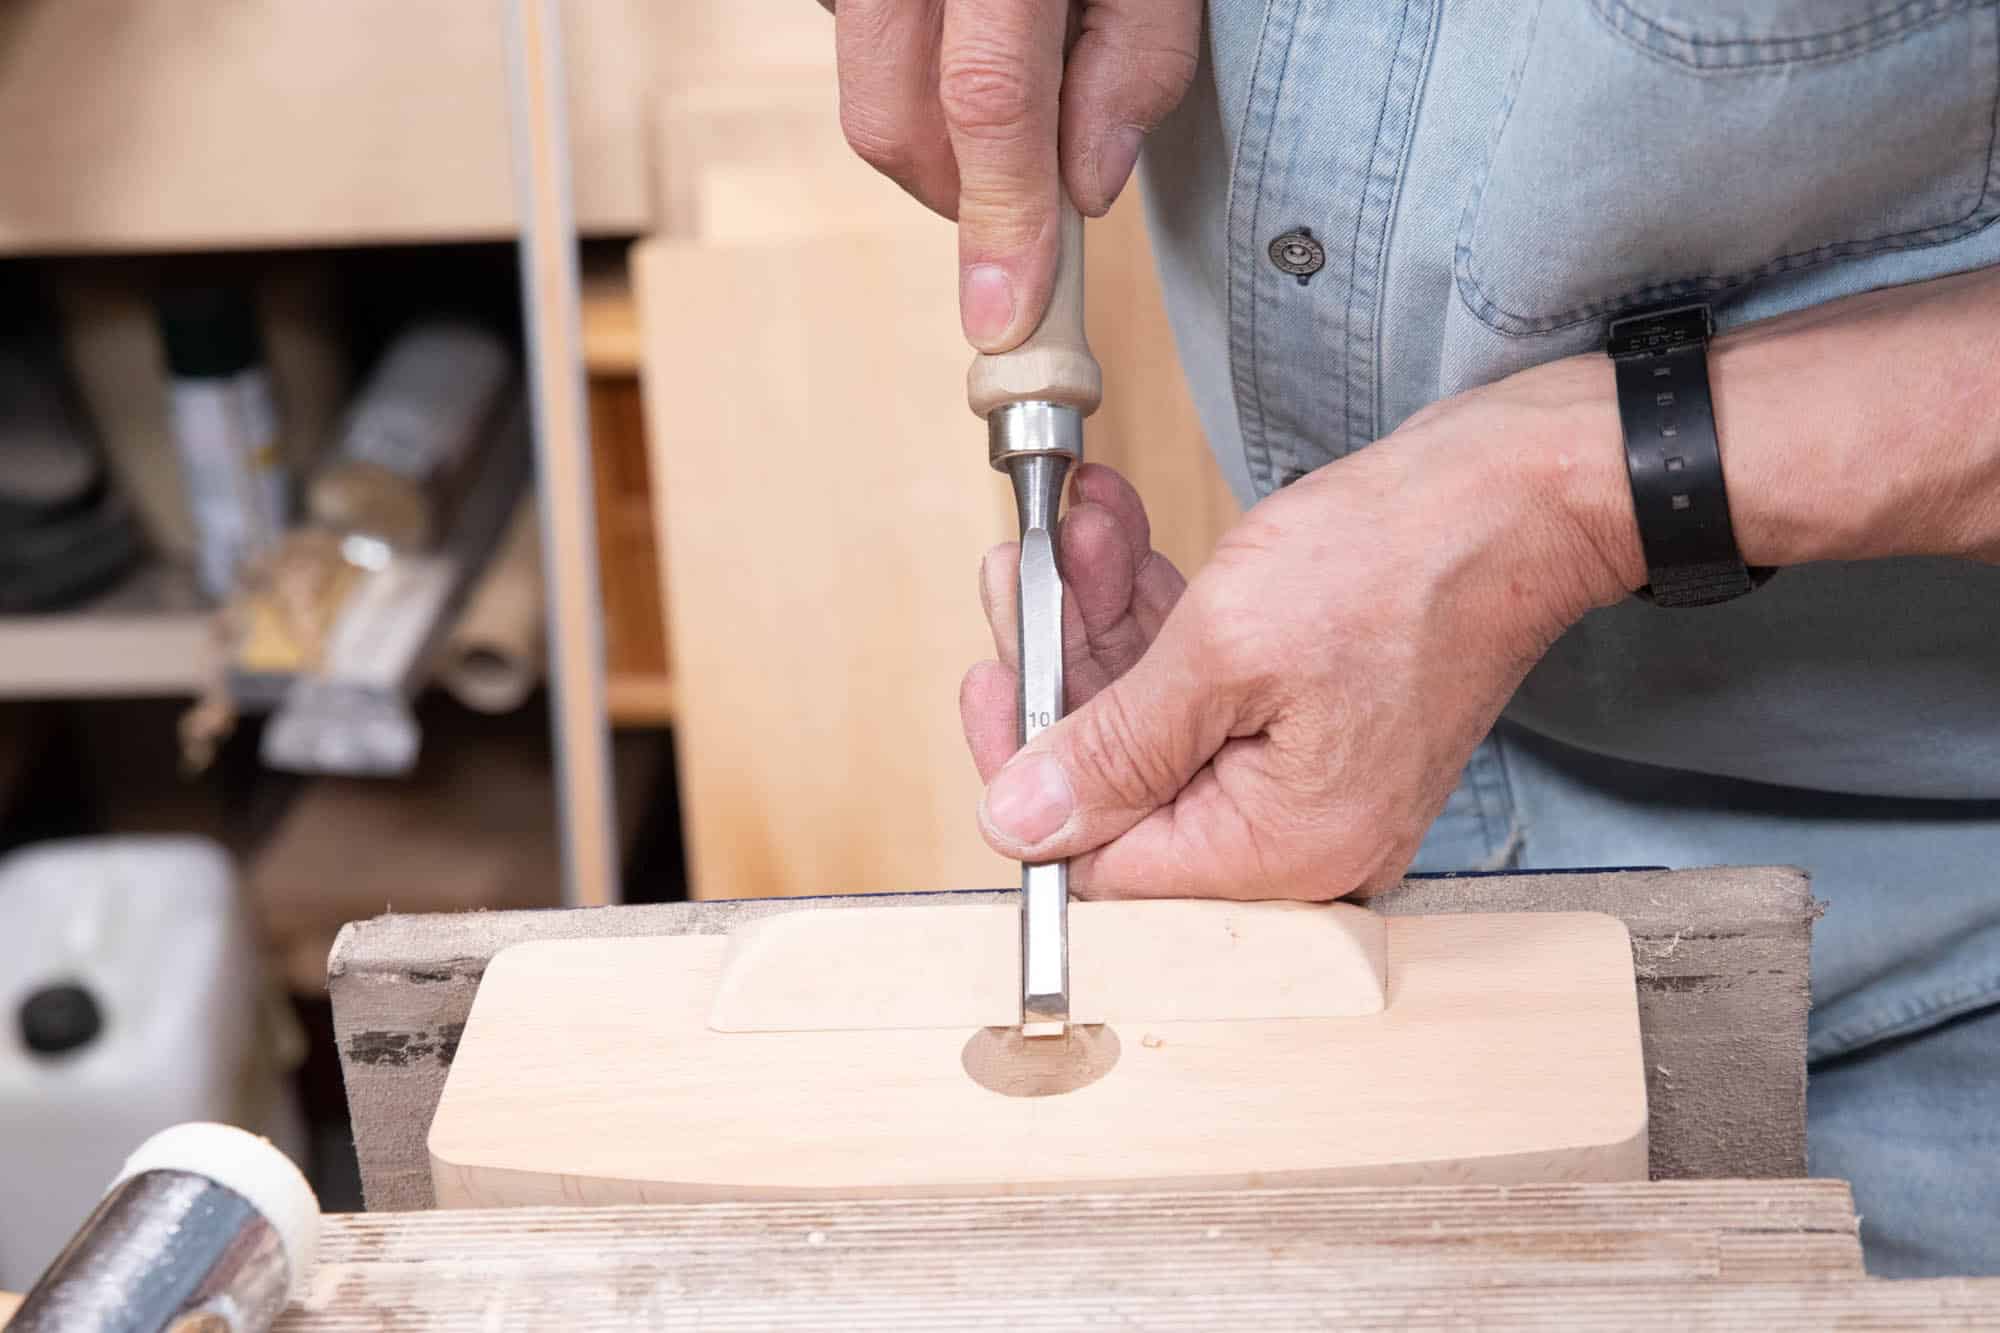
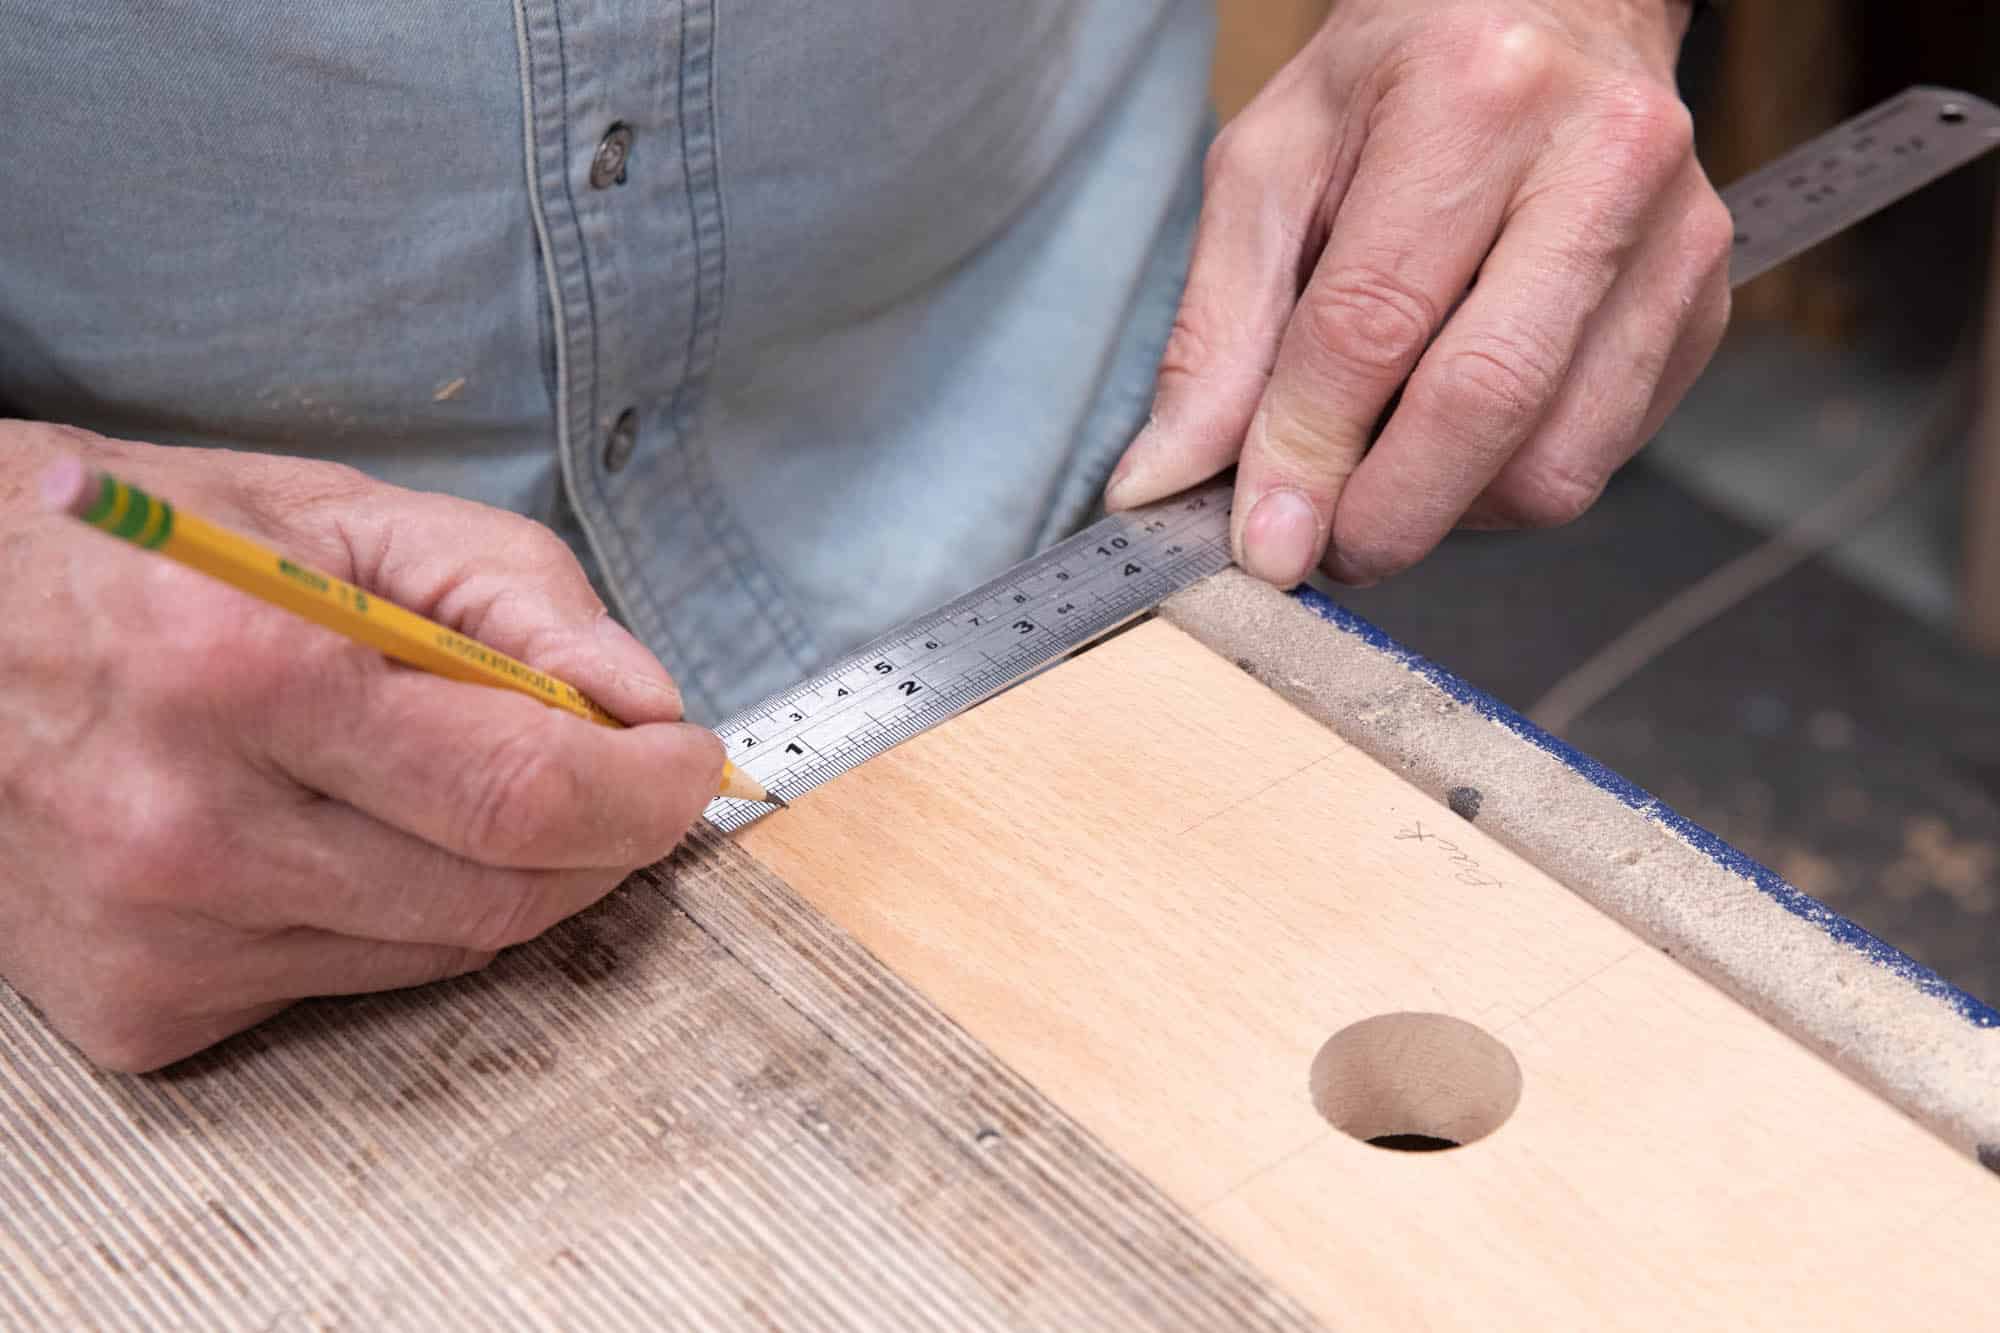
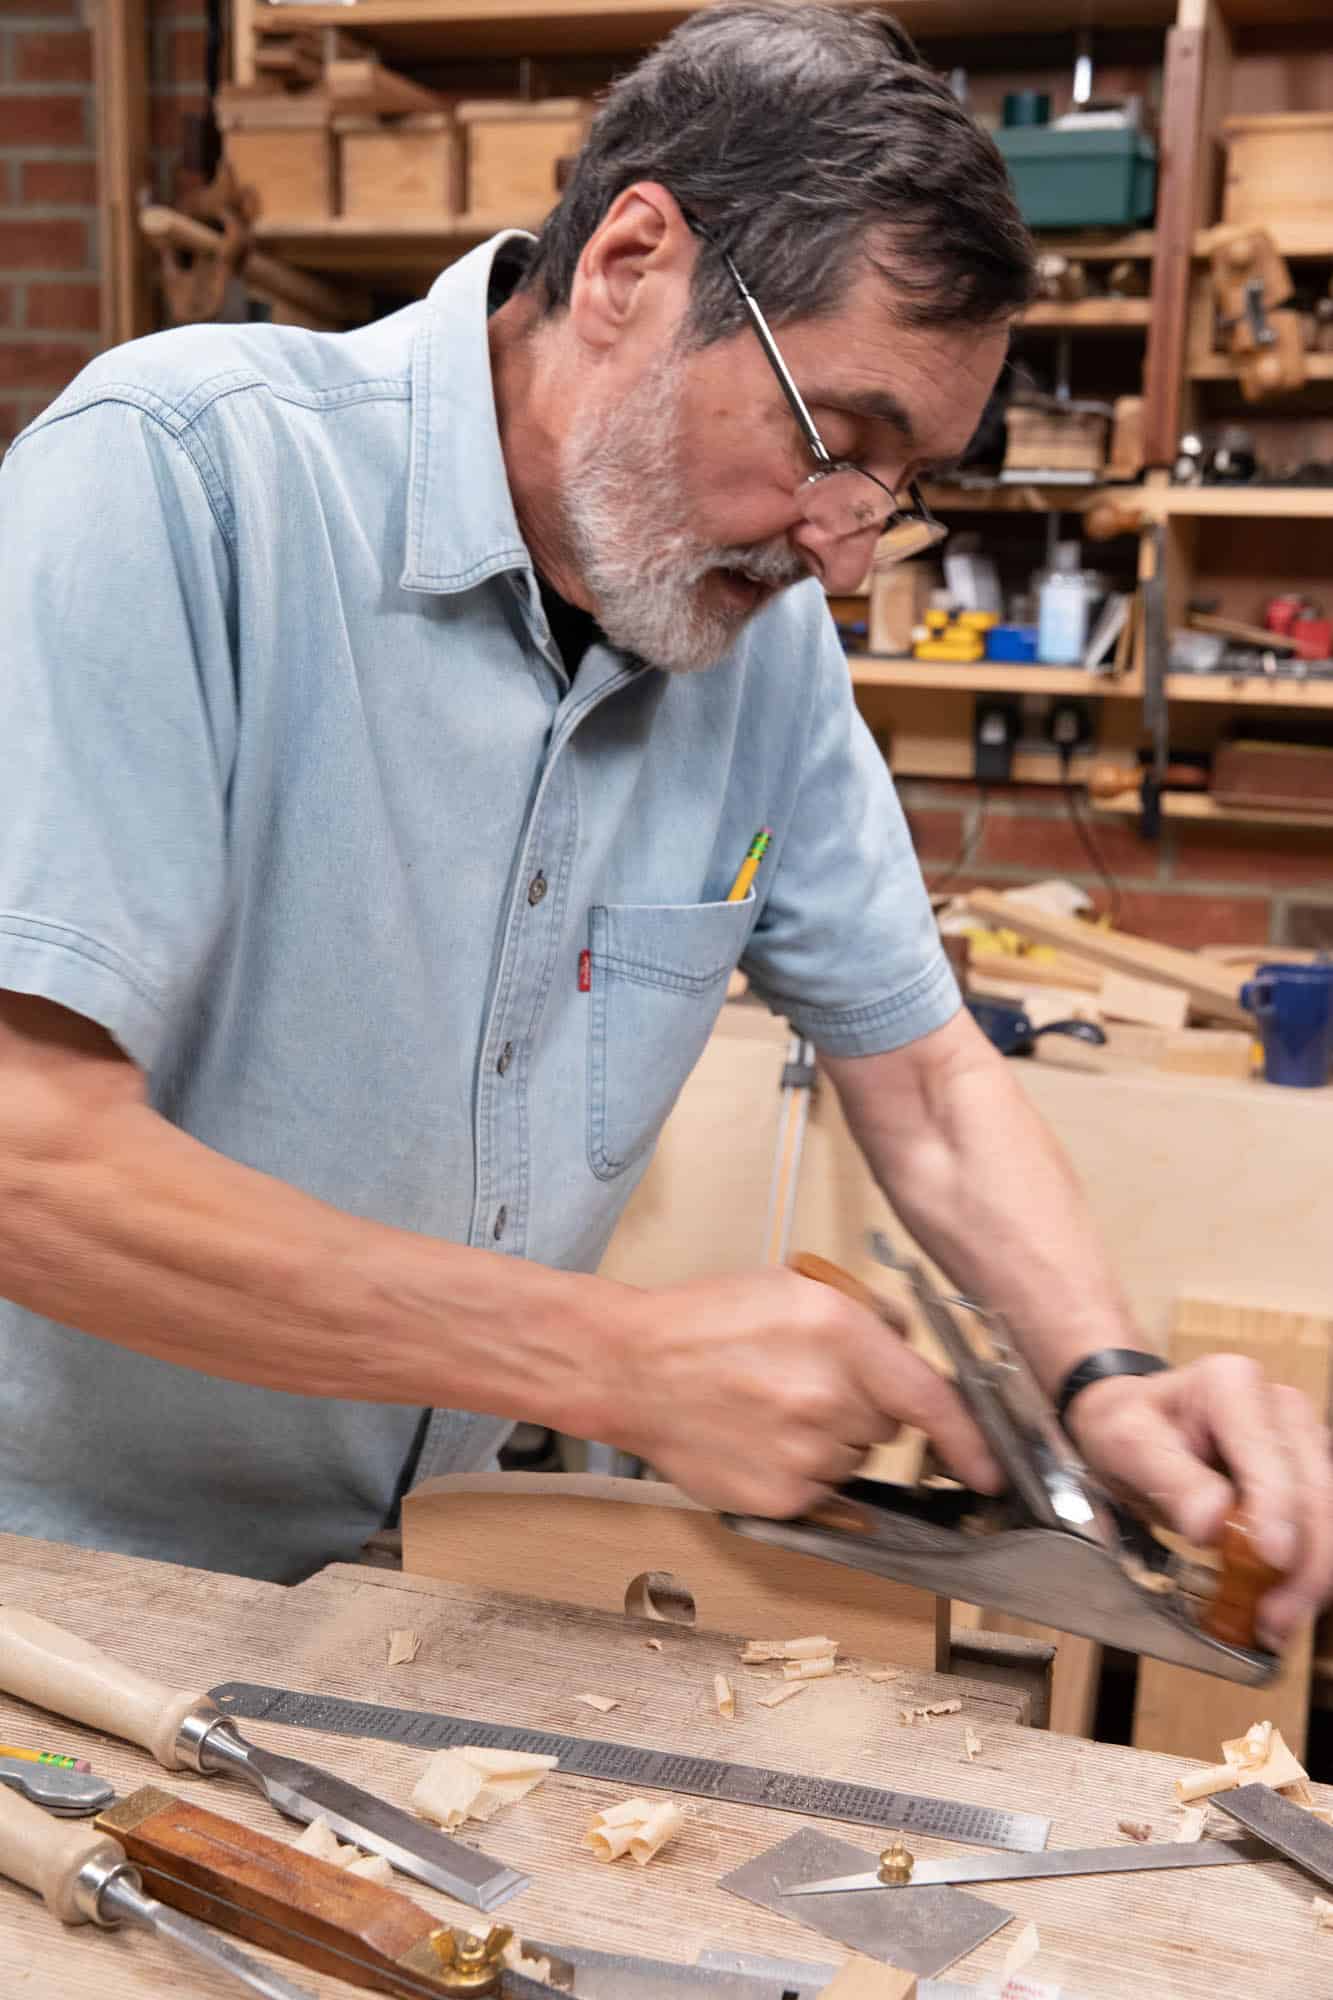
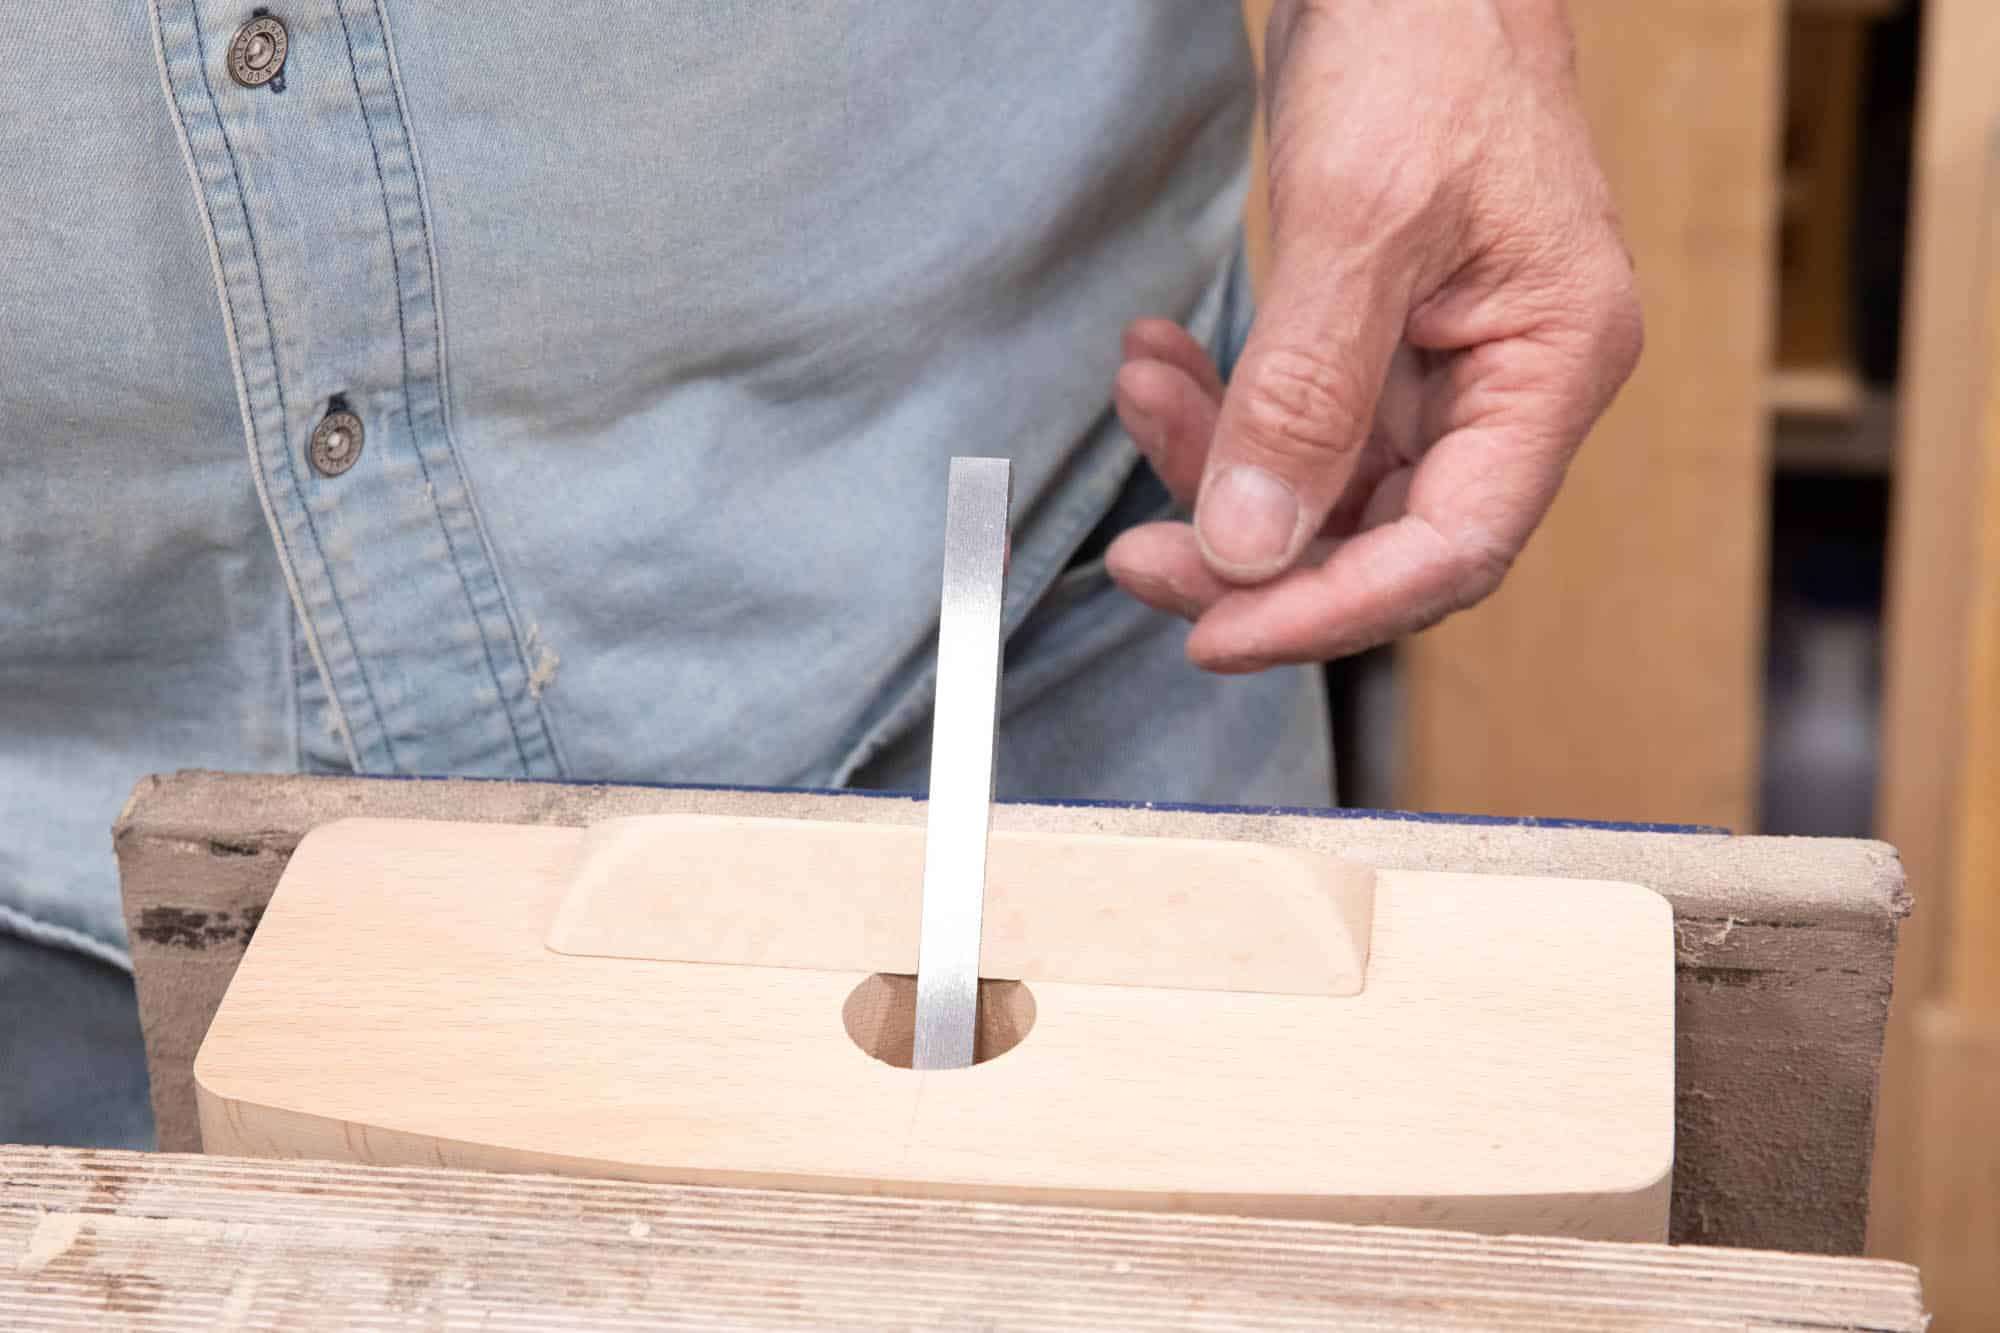
Place the new blade into the channel and pare either side as needed until the blade fits with a friction fit if possible.
A slightly loose side-to-side fit will be fine as this will allow the blade to move more freely for adjustments. The bed, however, should be dead level throughout so take your time as any rocking near to the leading edge will cause the plane blade to flex and pivot when in use, resulting in an uneven and jagged cut.
To conclude the shaping aspect of the body of the router, there are a final couple of steps that will improve the performance of the router and the overall appearance.
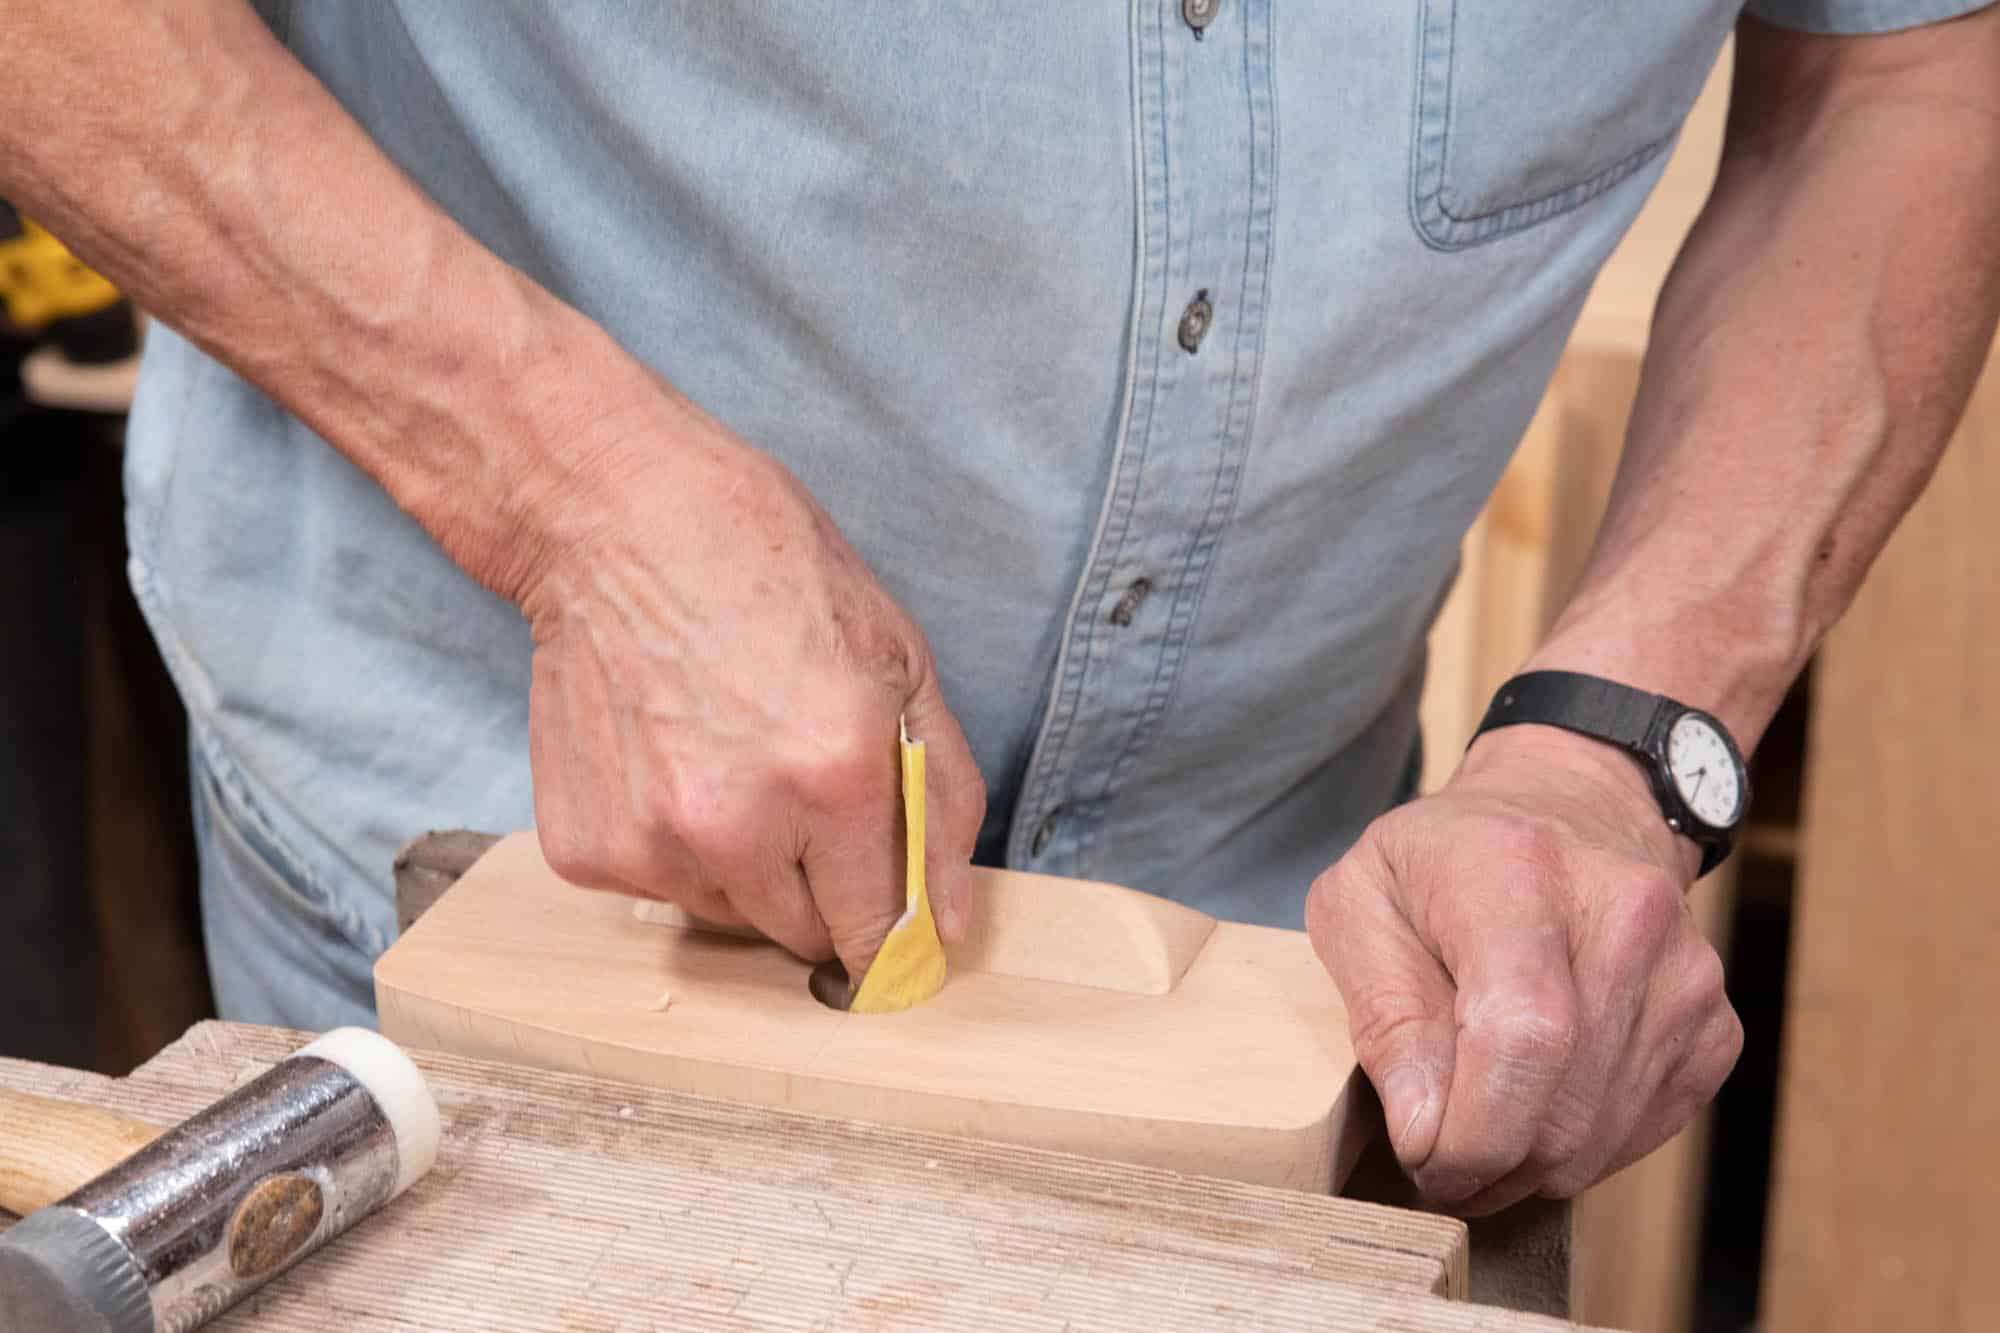
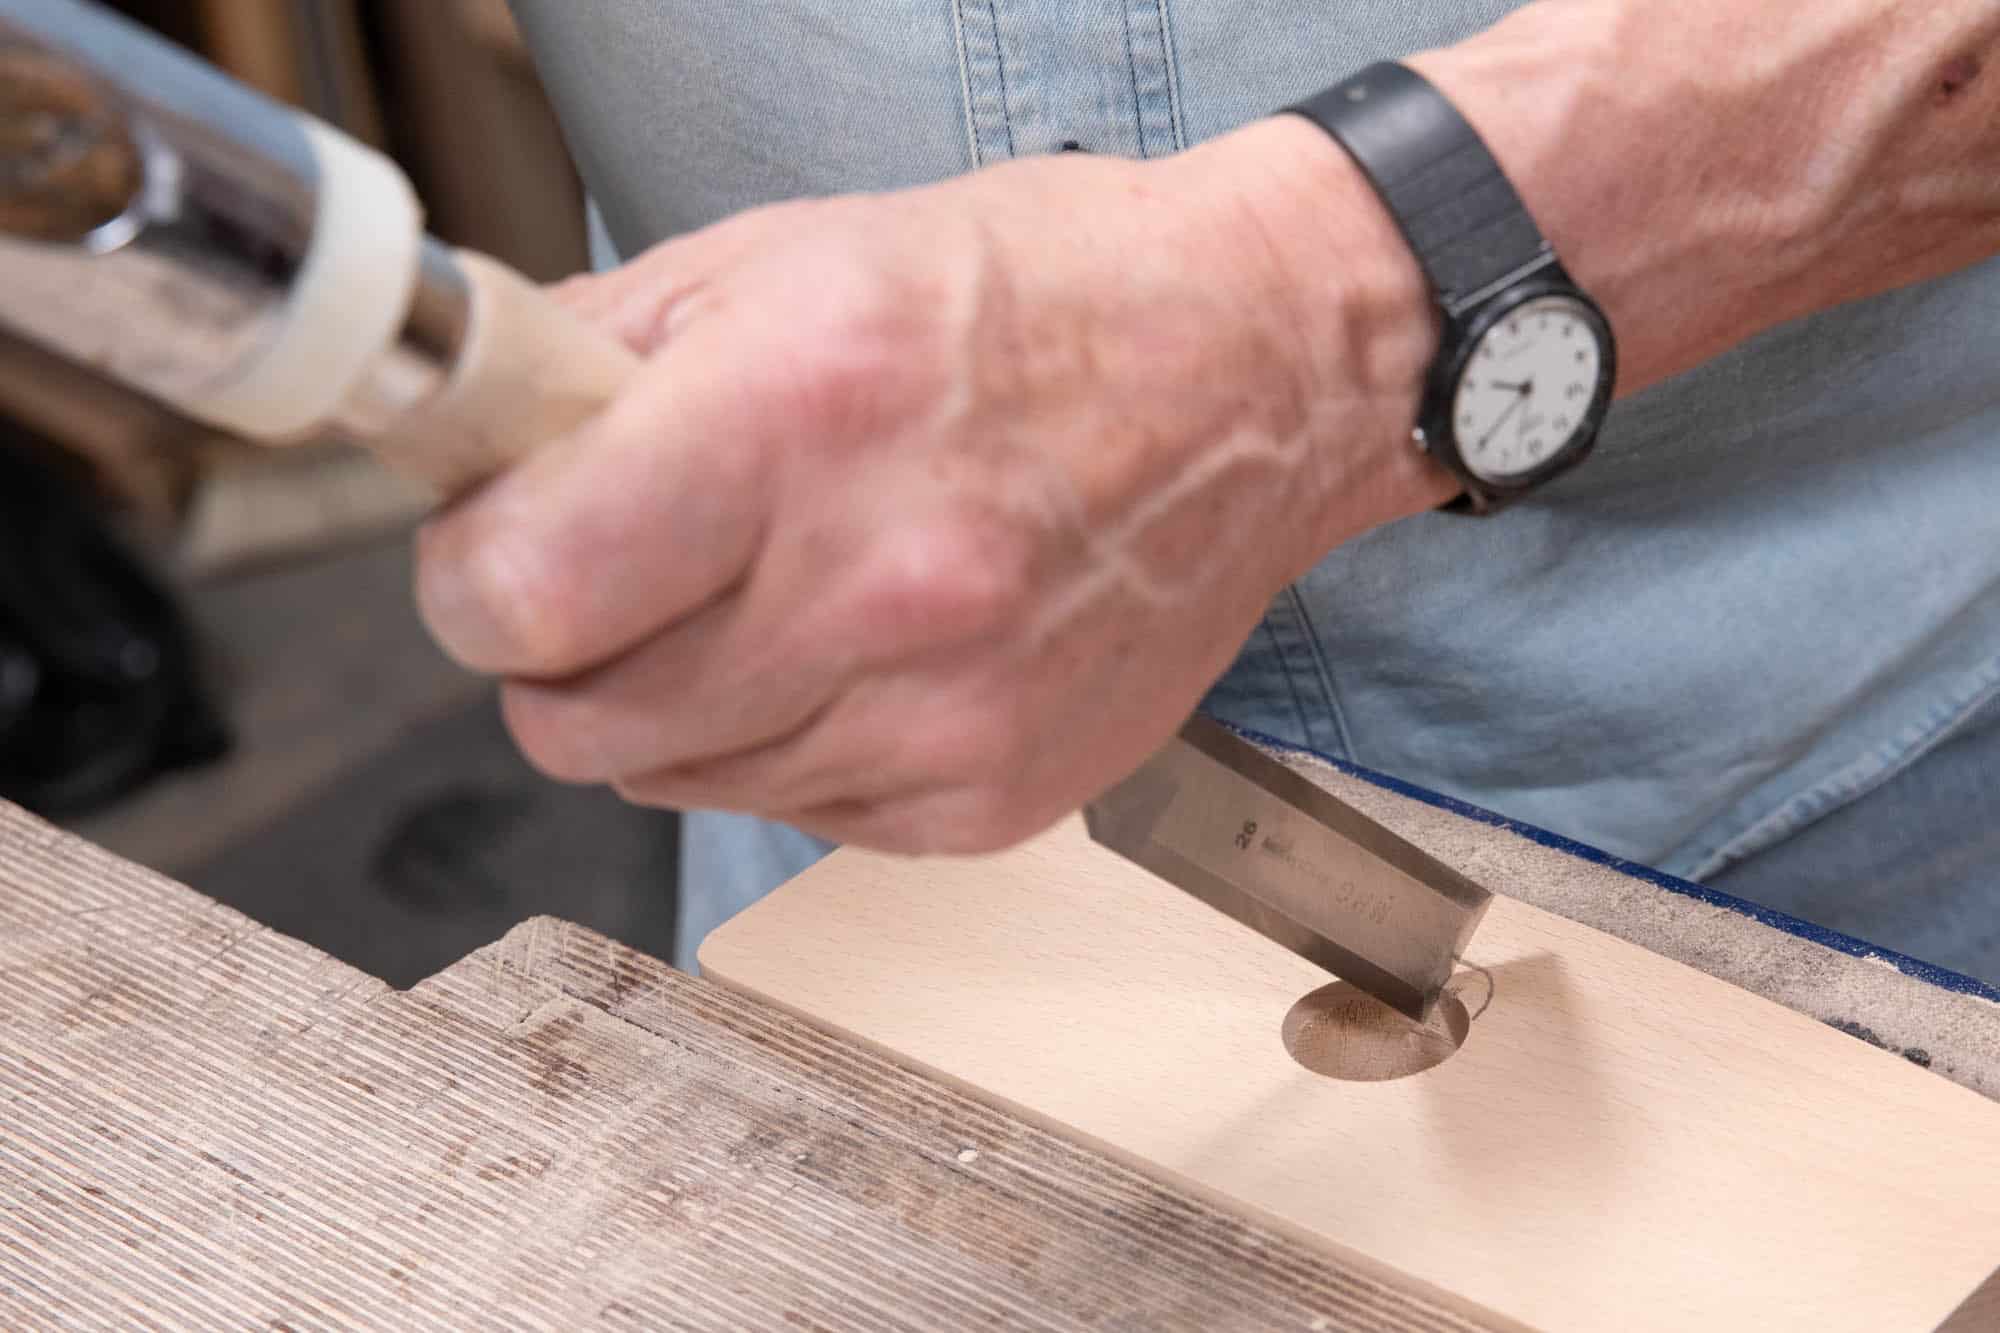
Extending the Front of the Hole
To add extra visibility to the cutting edge, we crate a half-moon at the fore edge of the hole on the underside of the plane.
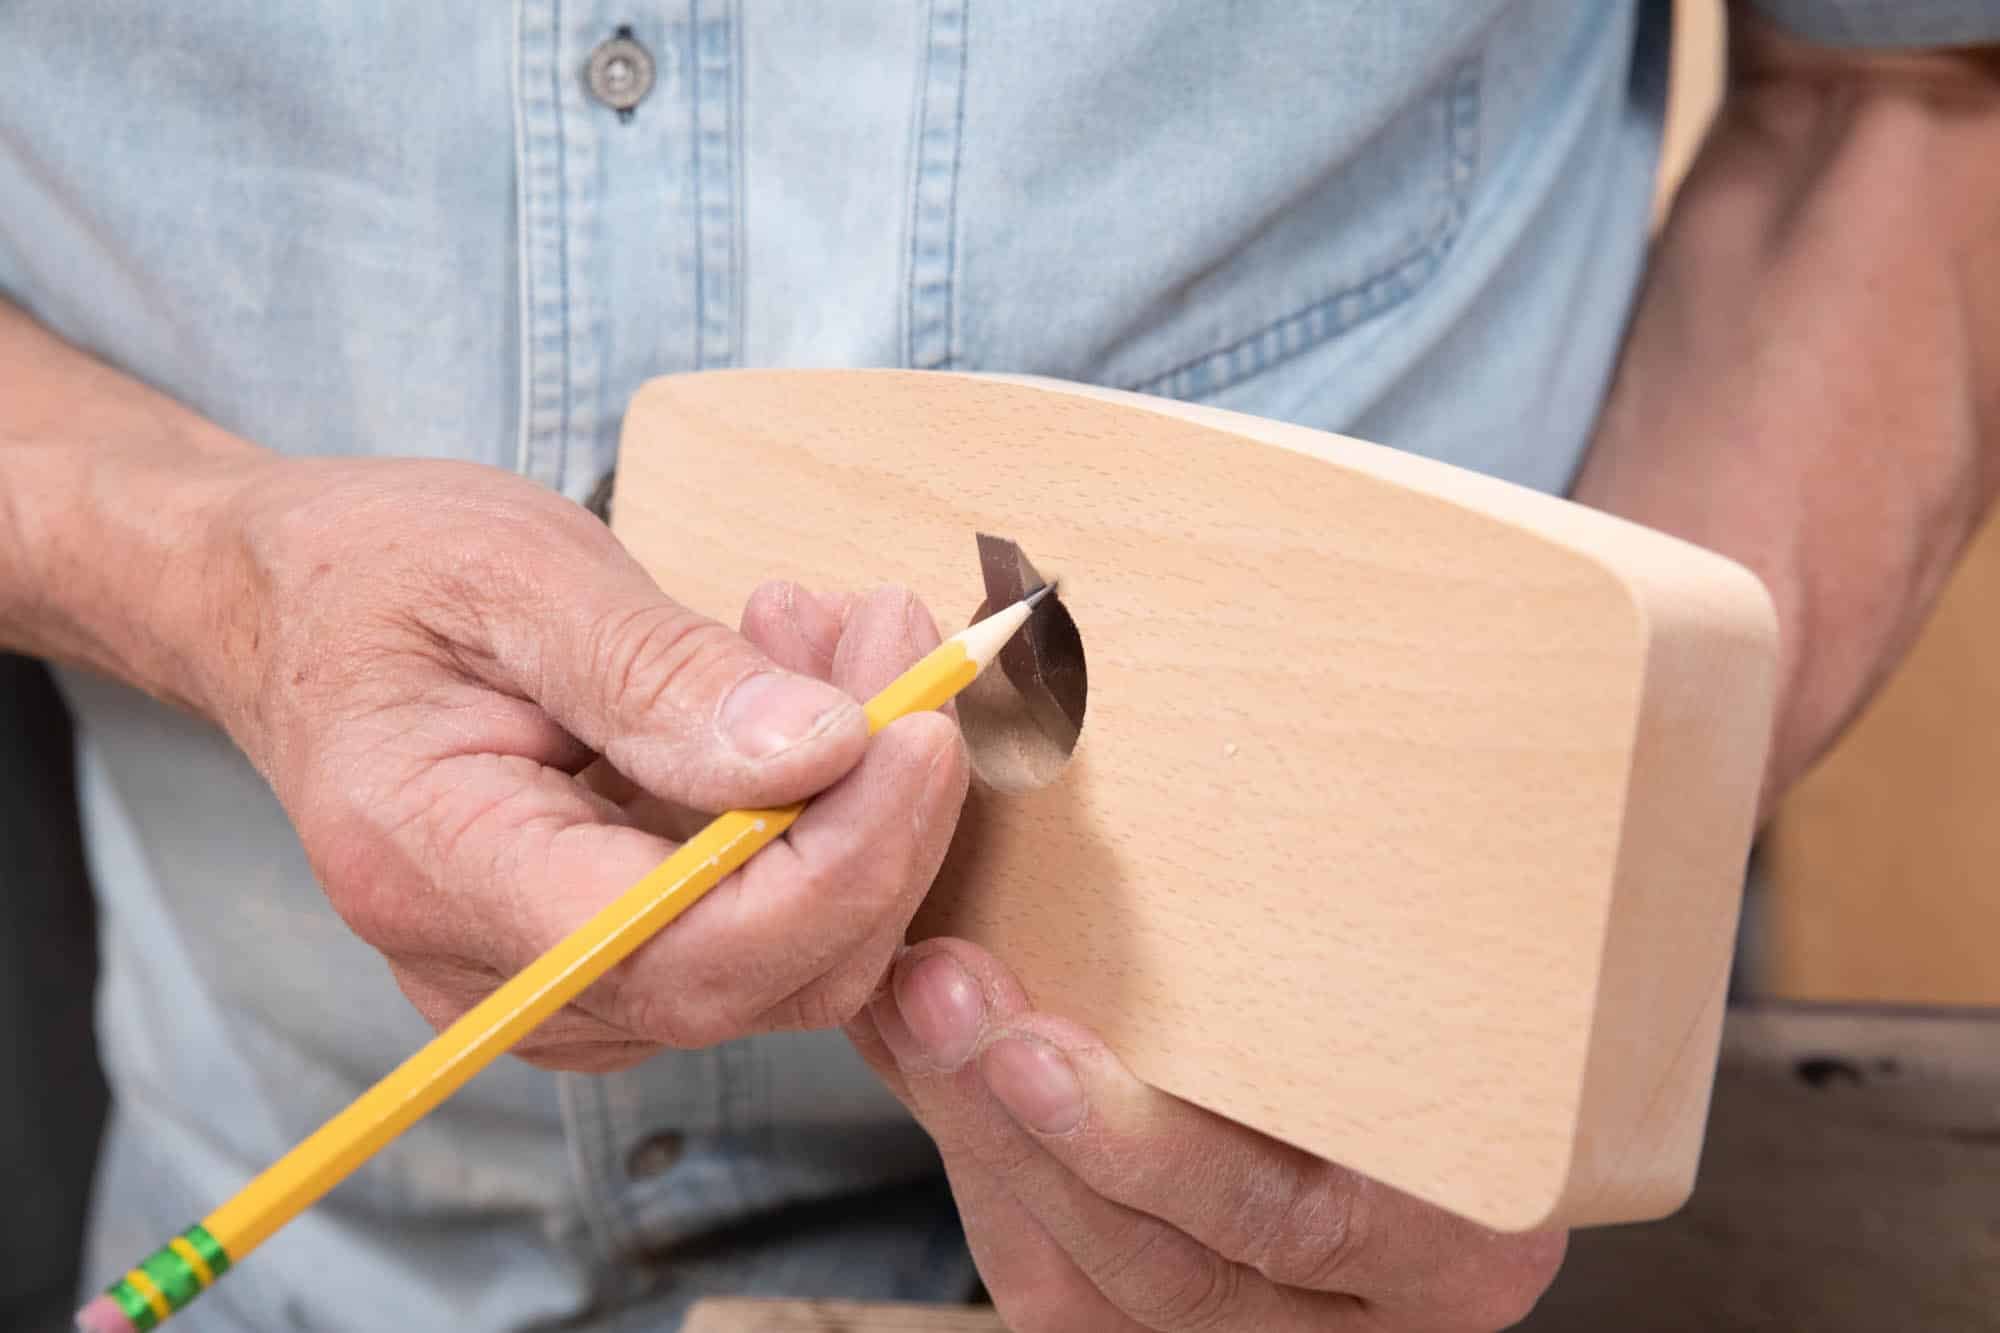
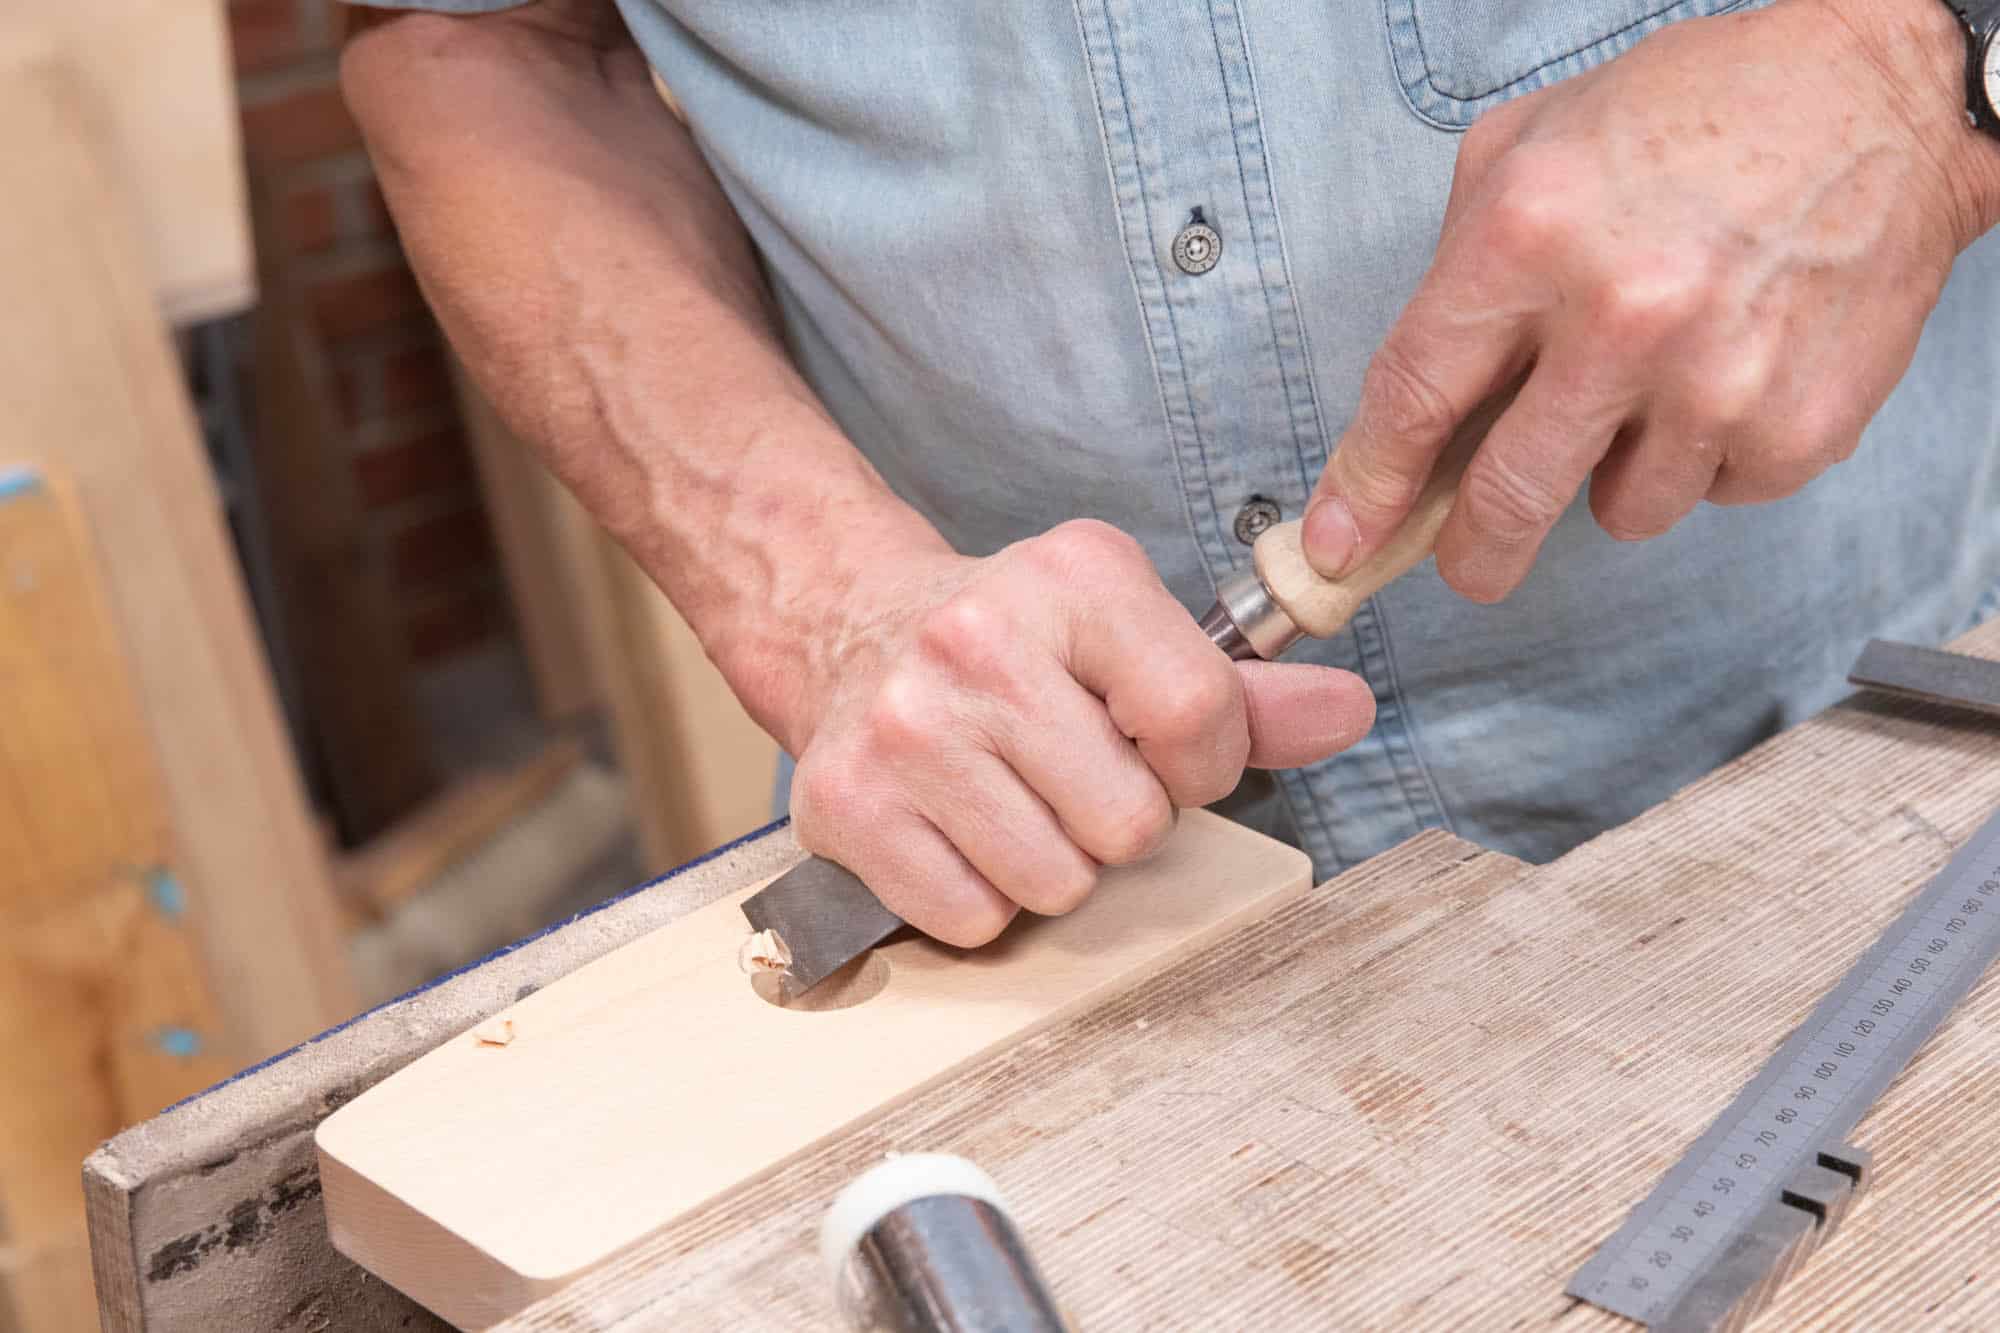
Pencil in a guide line to work to as shown to create the scallop. Clamp your router in the vise, find the centre with the edge of your chisel on the front of the hole and strike with a single stroke. You can then chisel in from either side, bevel down, to remove the bulk of the waste wood.
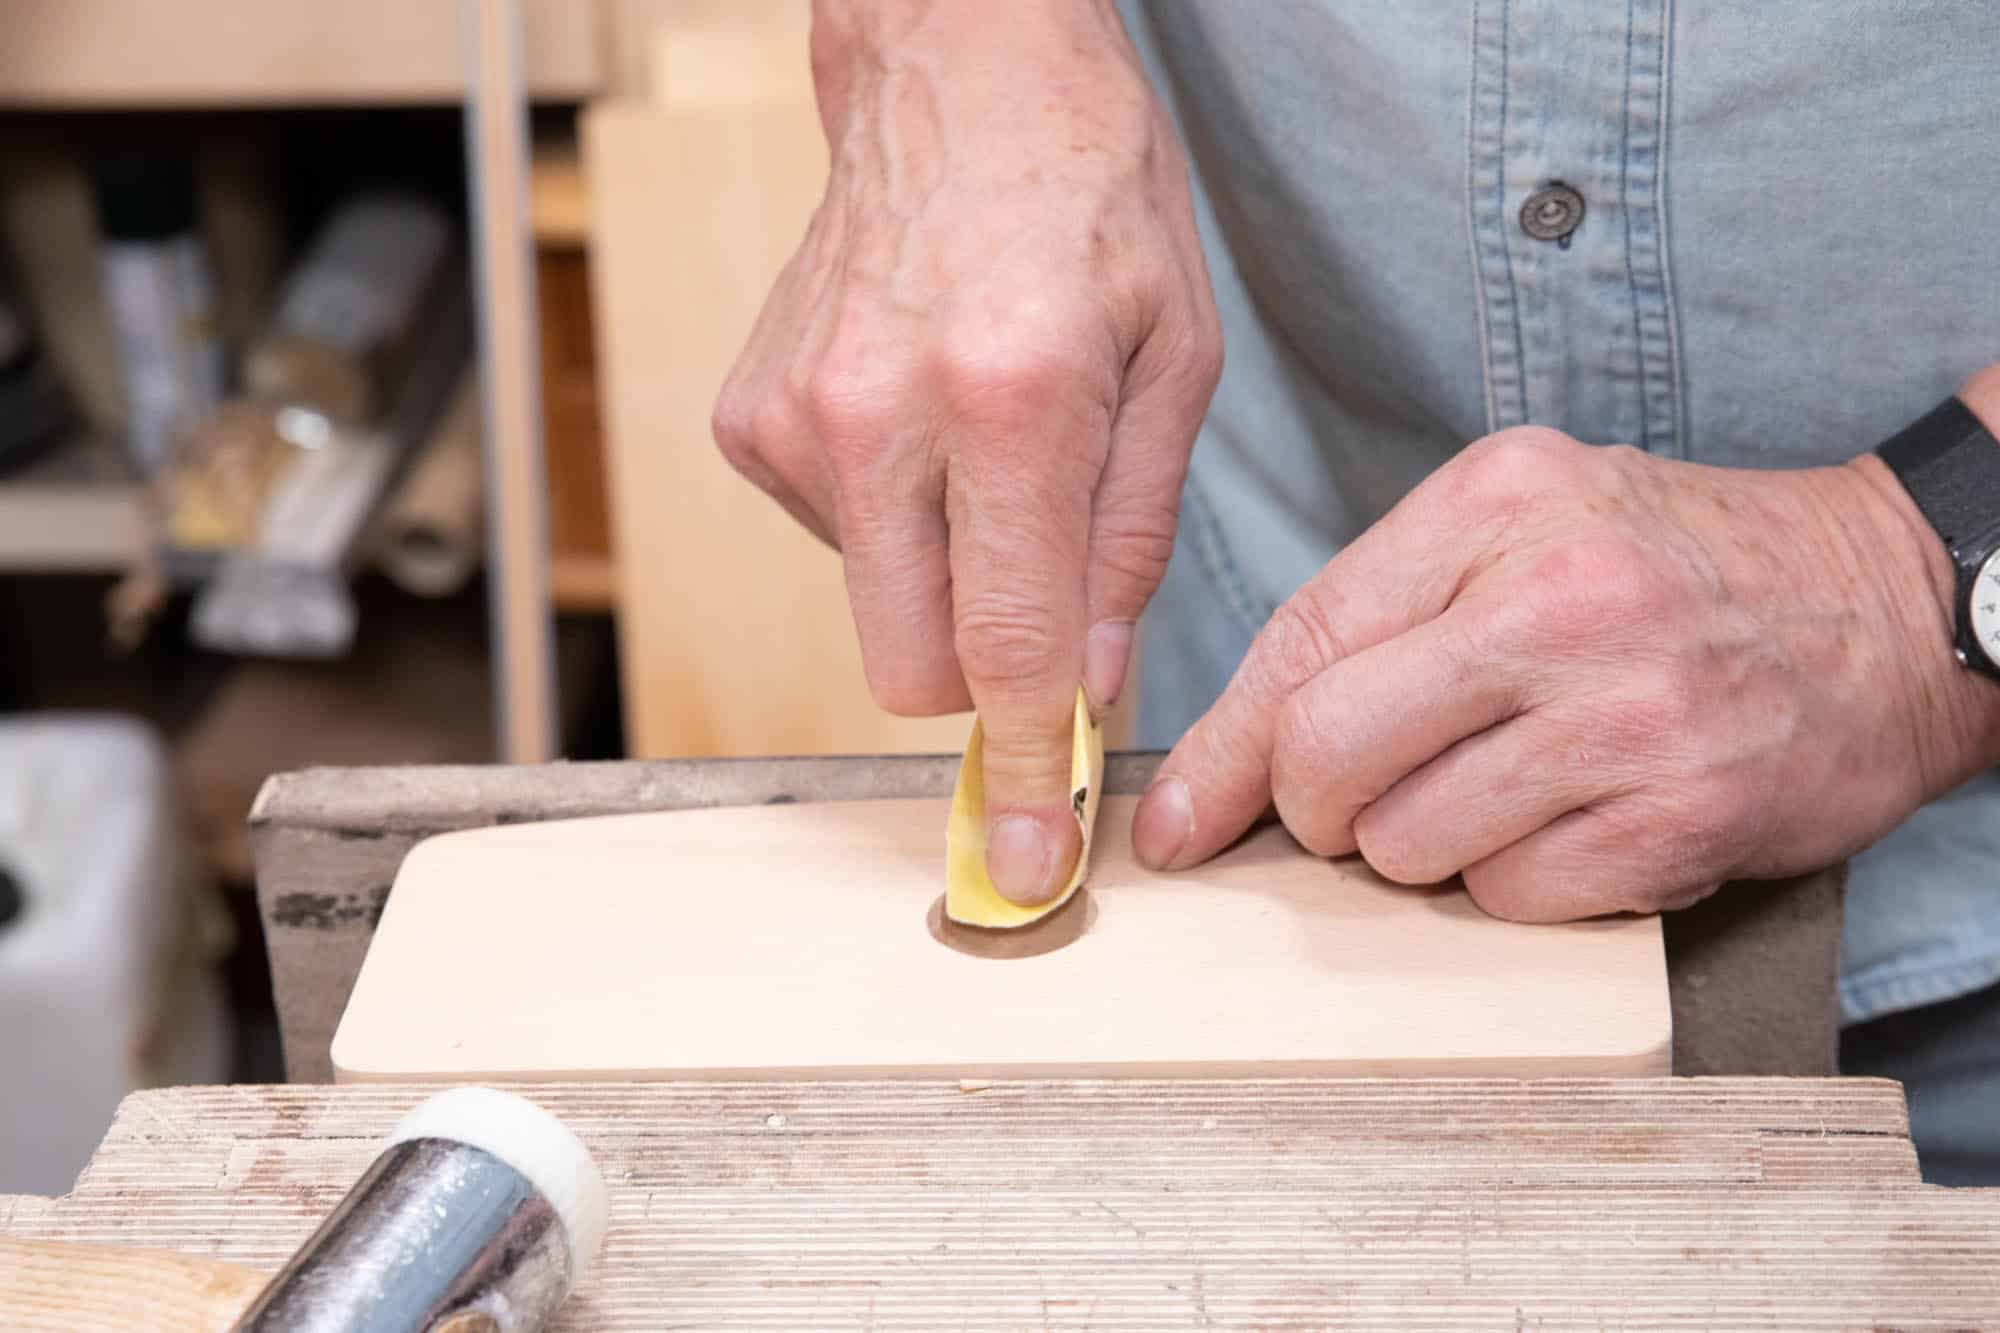
Use a piece of 240 grit sandpaper to sand the surface of the scallop smooth.
Finally, remove the corners of the upstand that are overhanging the hole, again, bevel down works well for this.
You can now clean up any marks such as scratches caused during the making.