Making Your Own Timber Dogs
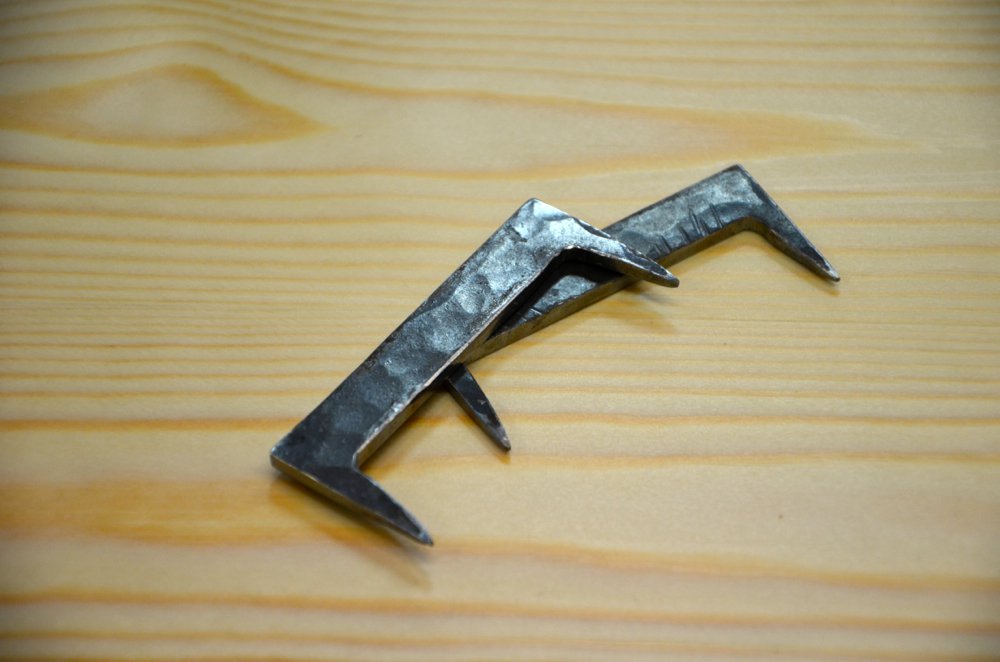 They are not really used much any more but at one time they were a mainstay in the workshop of many woodworking trades ranging from boatbuilders to furniture makers and joiners to coopers. That said, they are very handy to have around and well worth making half a dozen.
Some timber dogs were 2 feet long and some as small as 3/4”. Mostly they were blacksmith made, but now the trade is not generally available to us so we can make our own from flat bar stock as I show here.
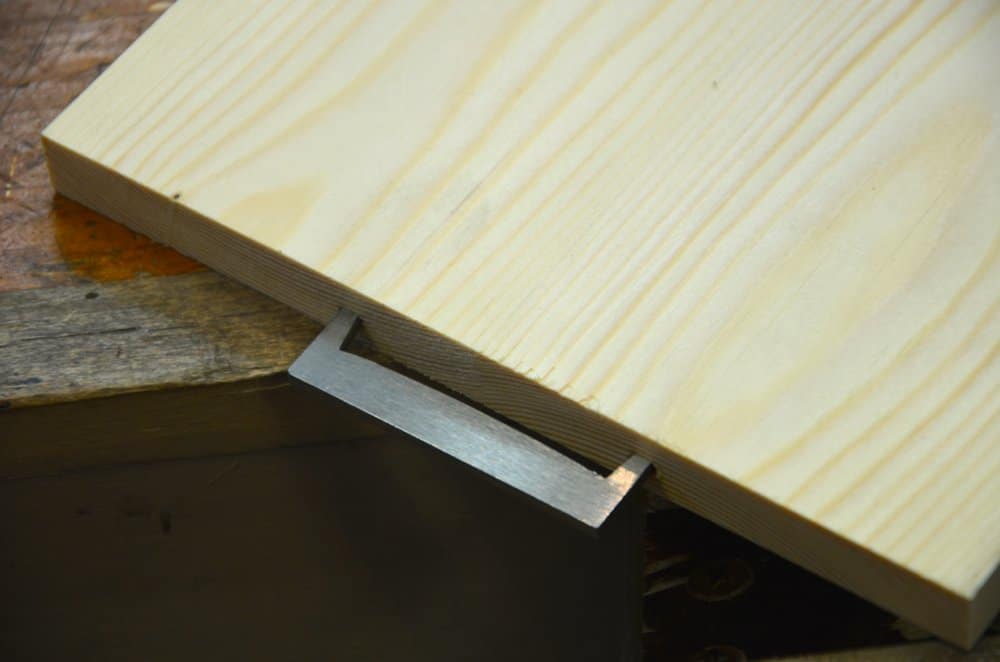
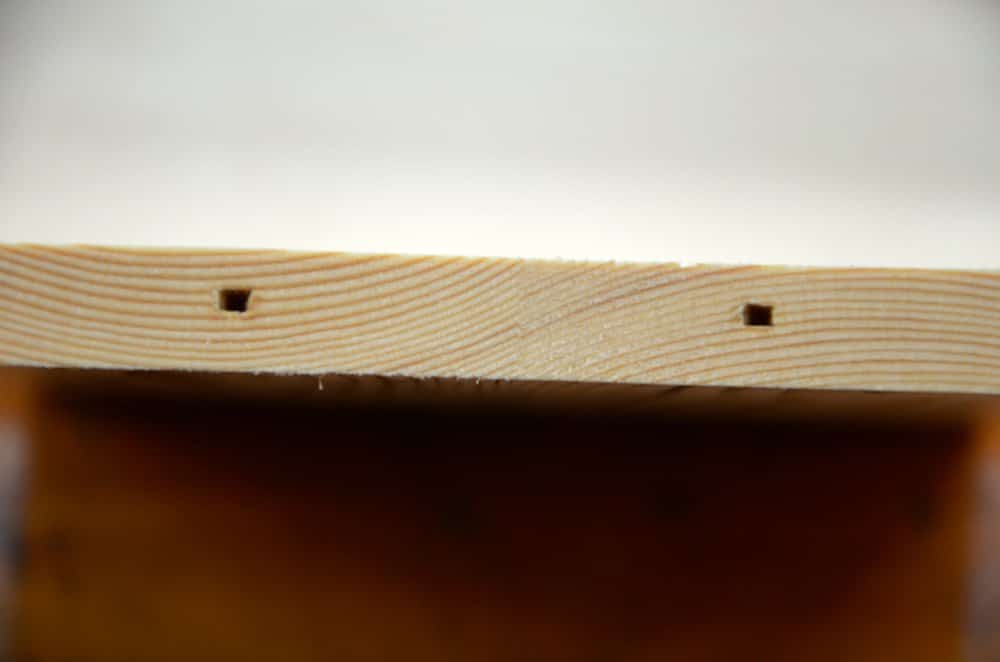
The best use of the dogs is to glue up boards and use the dogs to apply pressure from both ends of the boards. This transfers pressure along the glue line. Generally, though not always, we make an allowance to compensate for the material we lose in leaving holes in the endgrain. That’s when the end grain will be visible after construction is completed. The picture below shows what I mean.
In a previous blog I showed how these dogs worked best if there was a slight camber to one or both meeting edges of the boards being jointed. It doesn’t need to be a camber but just a shaving to give a taper along the edge of one or both board edges. Either way works fine.
If you are concerned about end grain shrinkage on the outer edges along the edge grain then I wouldn’t unless you are using green wood or wood that has a higher moisture content than you should be using. If the wood shrinks at the ends faster than the mid section can release its moisture it can cause an issue, but, as said, this is usually the result of inadequate drying or seasoning in the first place. When moisture levels are around say 8-12% there should be no issue. Conversely, if moisture intake at the ends is heightened because of location, kitchen or bathroom, a hollow along the joint line can certainly cause issues as the mid section can’t absorb moisture as fast as the ends. Whichever way you go, remember to advise your customer or the recipient of the piece not to leave the piece near to a heat source which can also mean a window in full sun, heating radiators and fire stoves and hot air blowers for central heating.
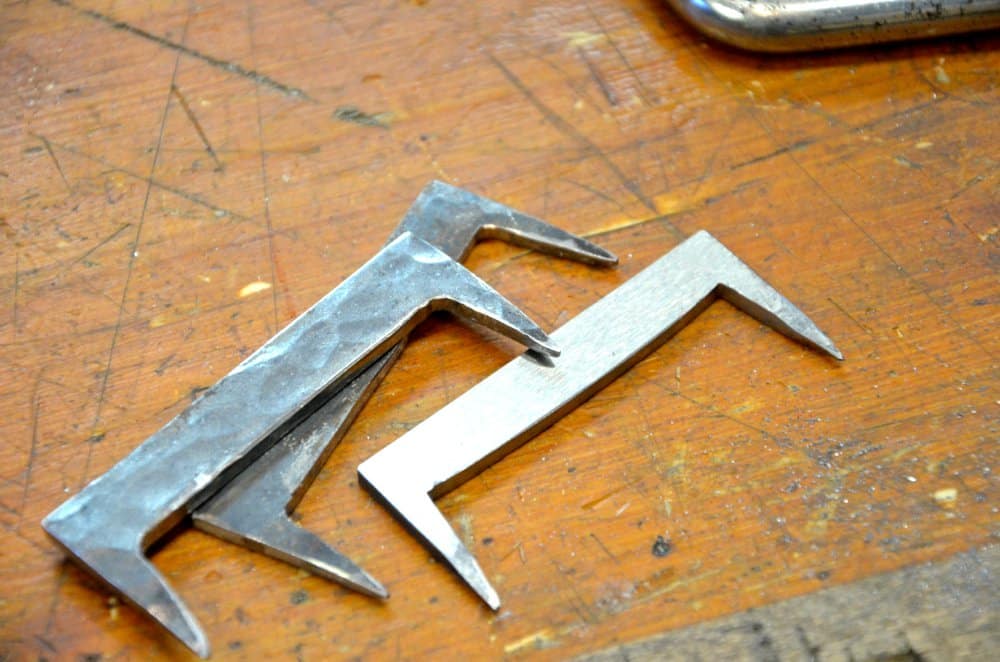
Making the dogs
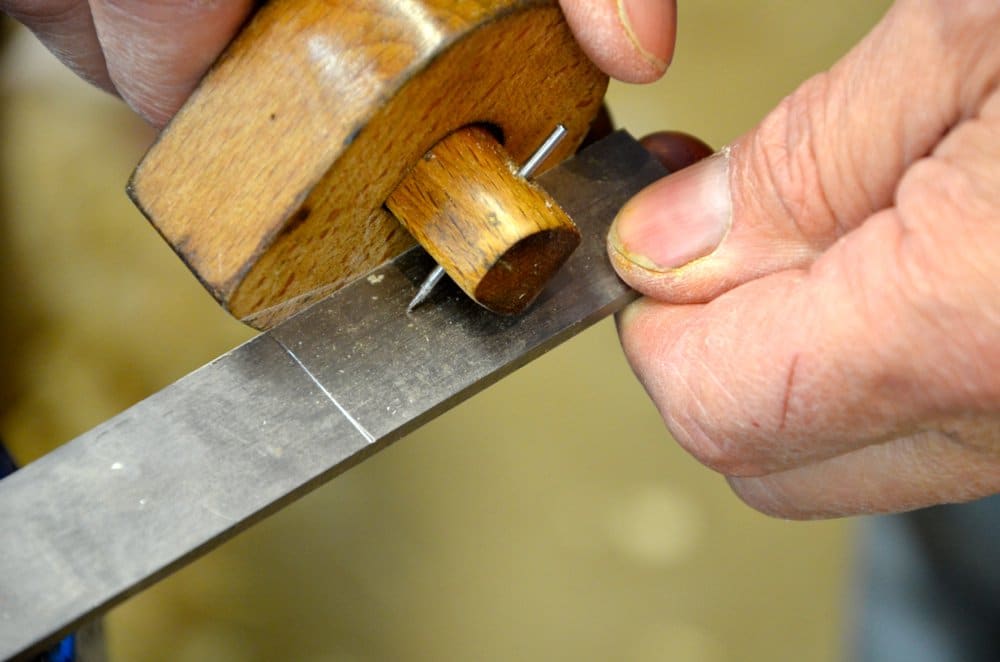
To make the dogs I used some O1 steel, but mild steel will work fine. In my case I made the dogs from 3mm x 25mm x 62mm (1/8” x 1” x 2 1/2”) long rolled bar stock.
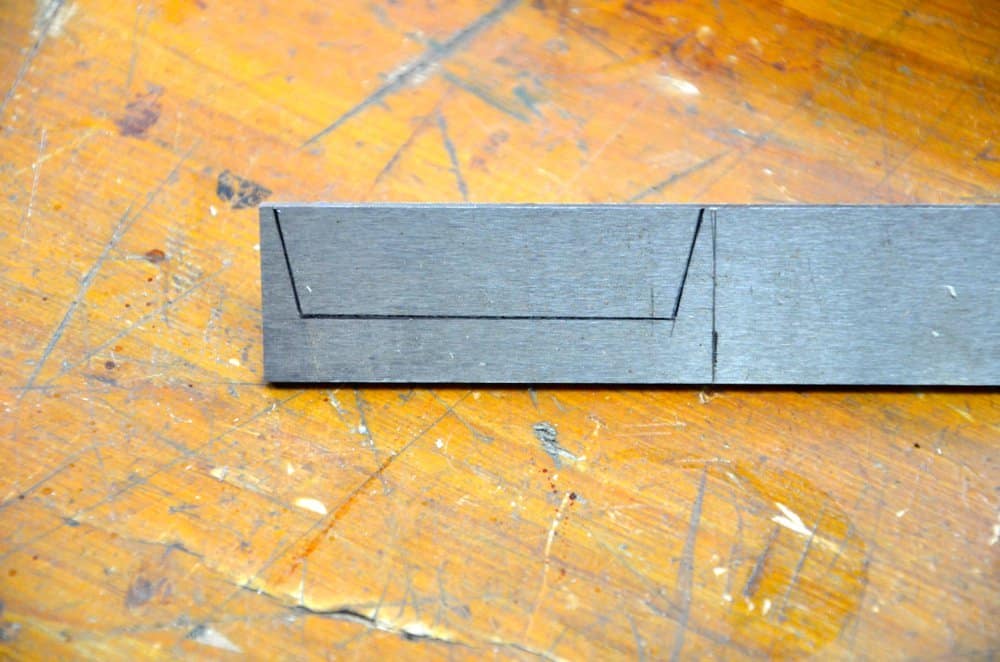
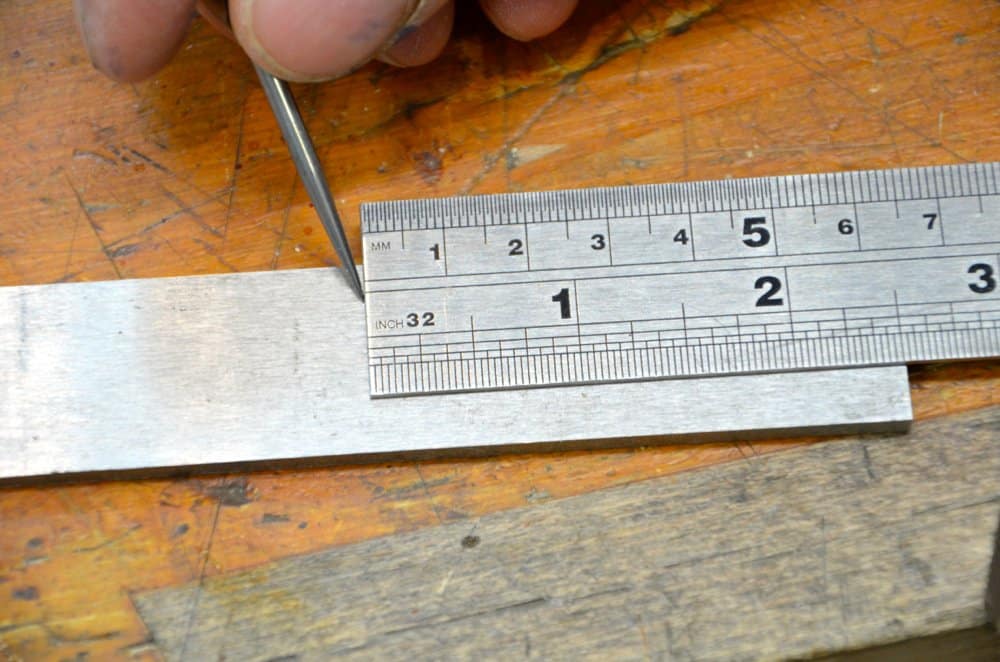
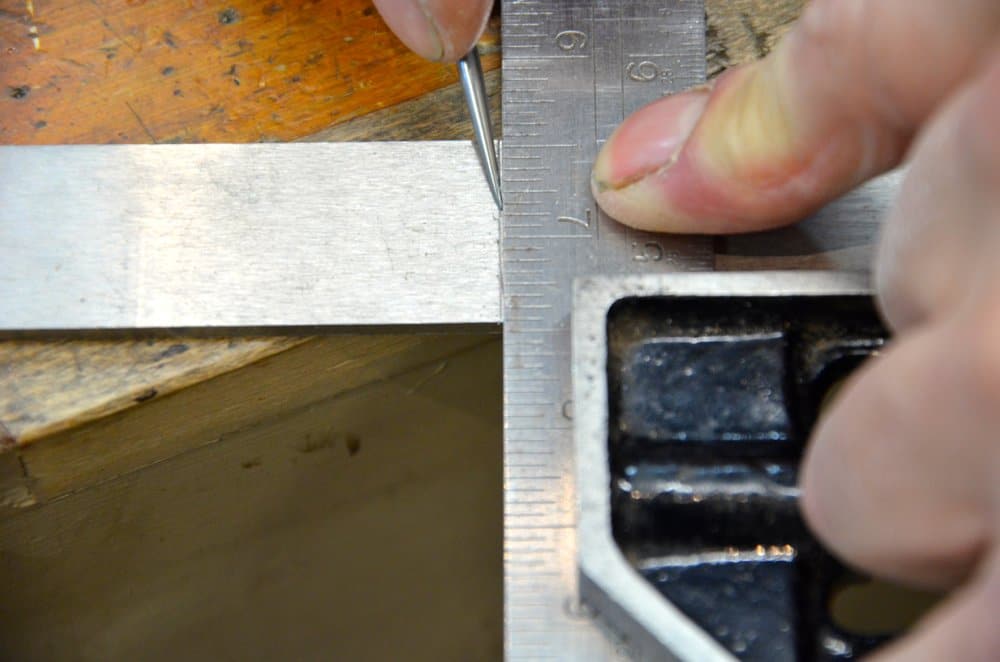
I laid out my cut lines on the bar before cutting to length. That way I have the extra length for holding on to for the bulk of the work. The scriber in the end of the stock of the combination square works well, but you can use any sharp steel point. I also used a marking gauge for the long depth line, to keep me parallel.
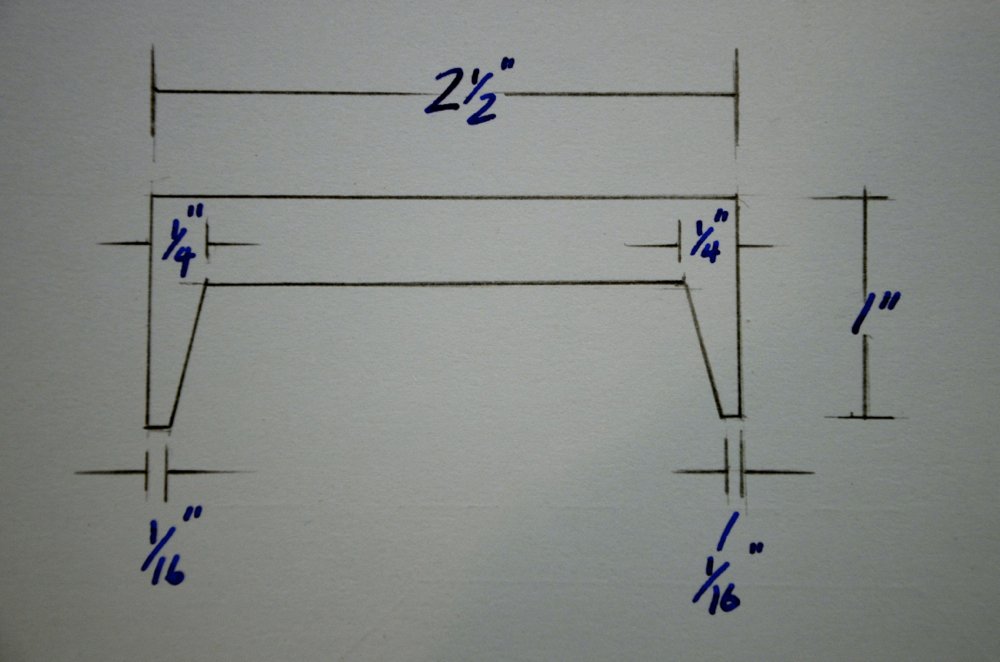
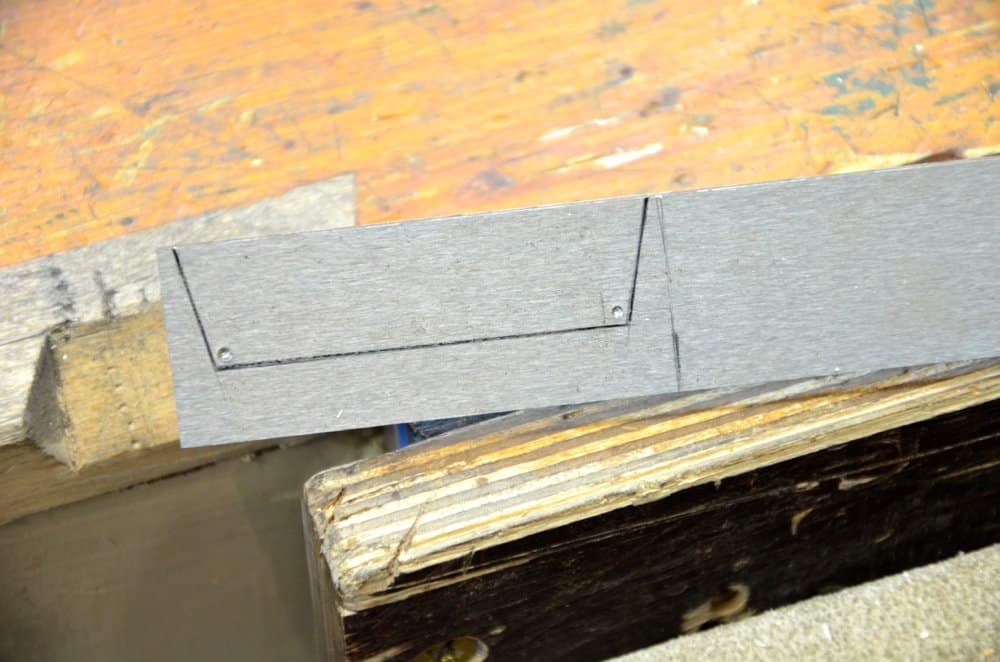
The drawing above gives my recommended cut lines. Notice that they don’t come to a point as yet. I draw out the tips between two hammer heads but make sure you take safety precautions such as safety glasses.
Sequence for layout lines.
I used a centre punch to pinpoint the position of drilled holes to the two internal corners.
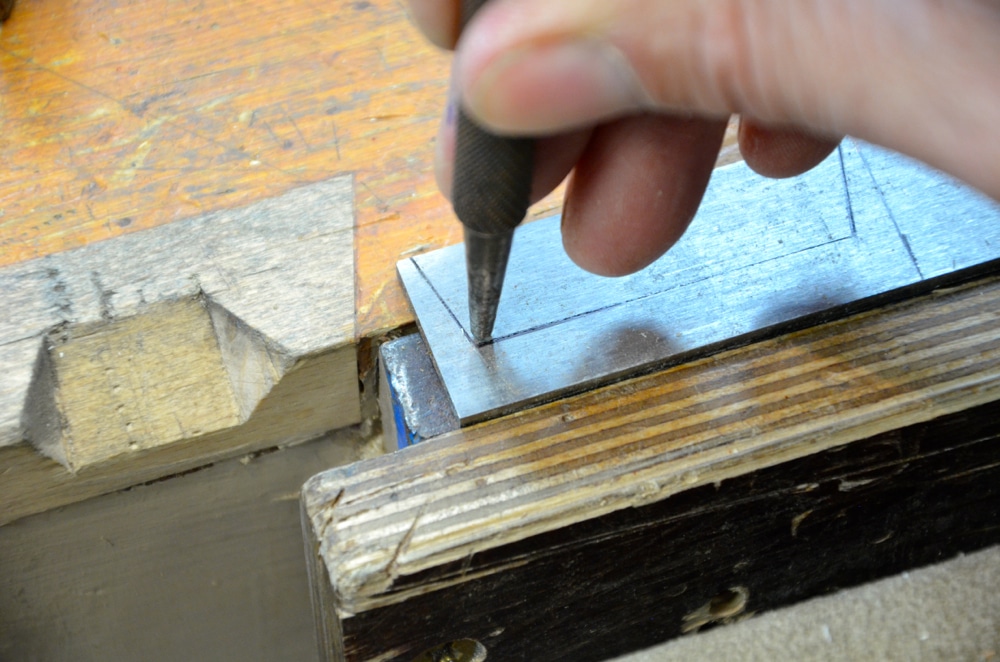
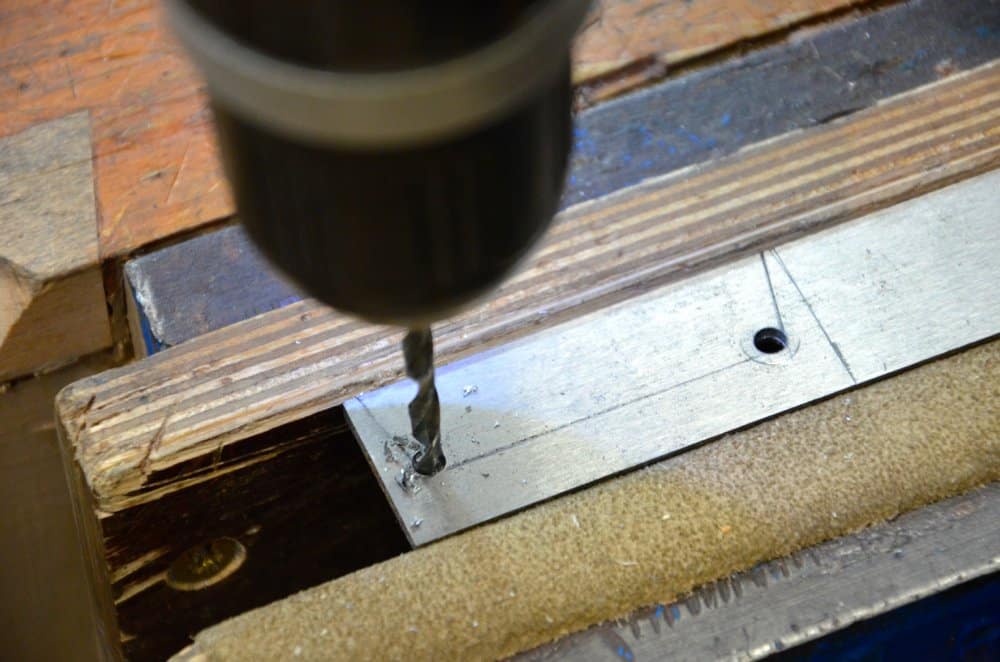
I used a 5mm (3/16”) twist drill to drill out the corners.
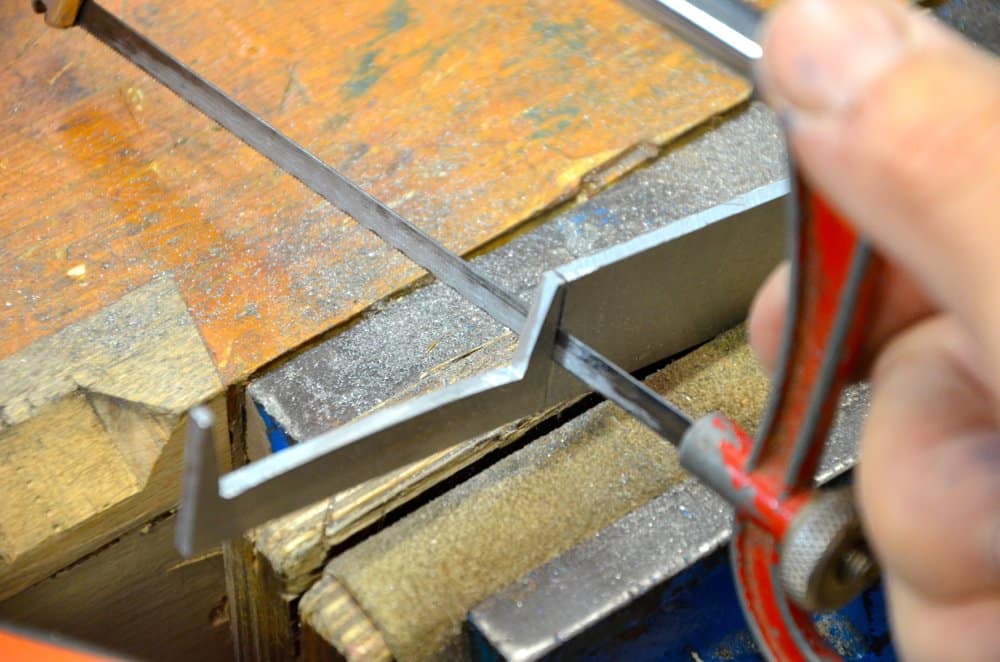
I first used a junior hacksaw to cut along the angled pins.
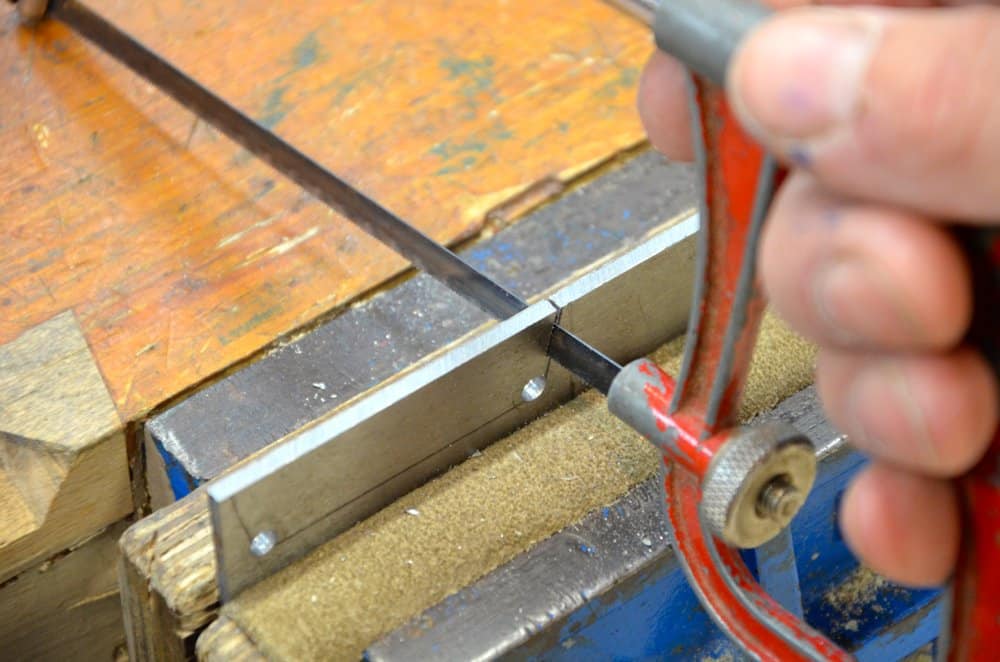
I used a coping saw to turn the corner.

I then cut out more waste to facilitate the extra width of the hacksaw blade…
…and cut along the length with the hacksaw again.
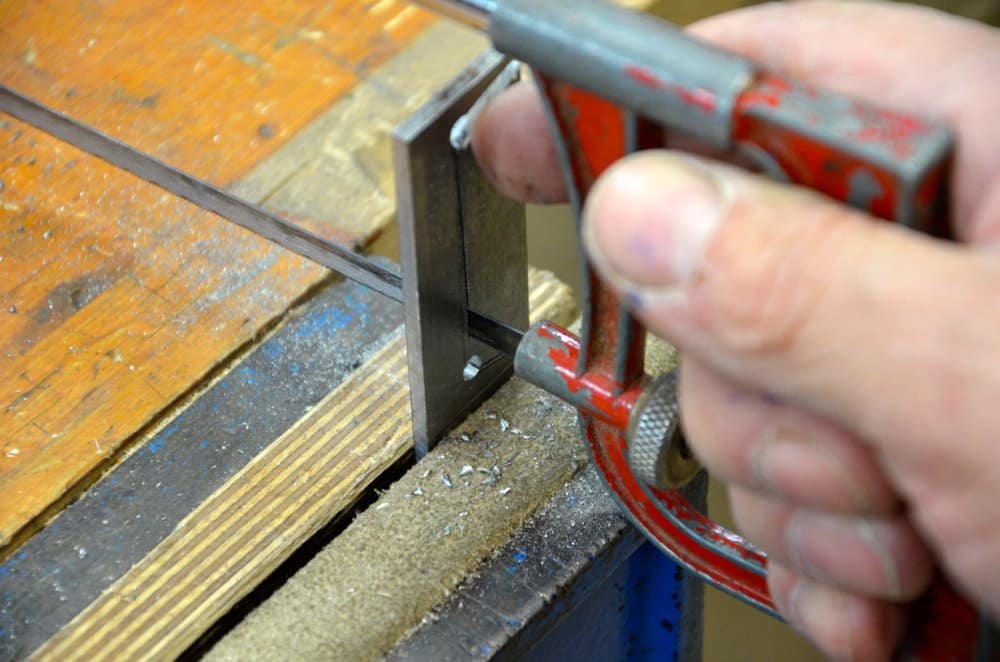
 I removed another section to facilitate the hacksaw blade.
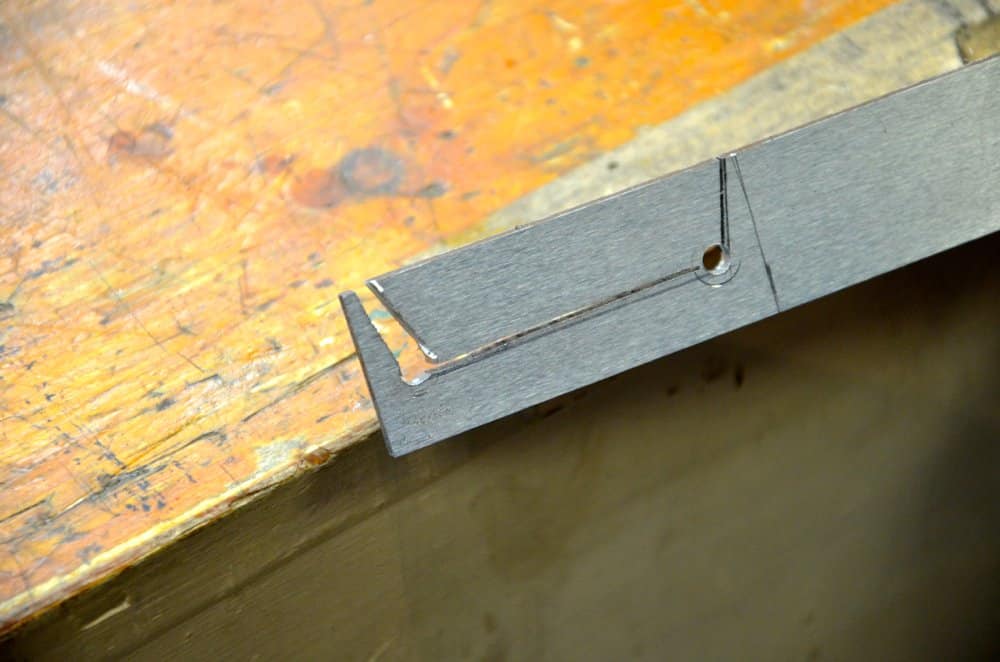
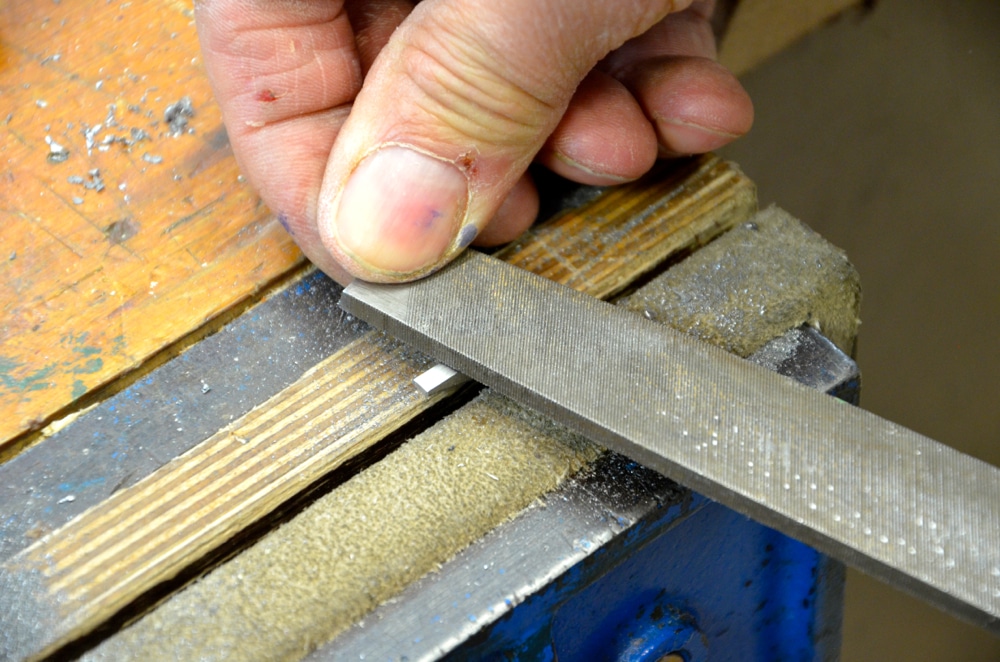
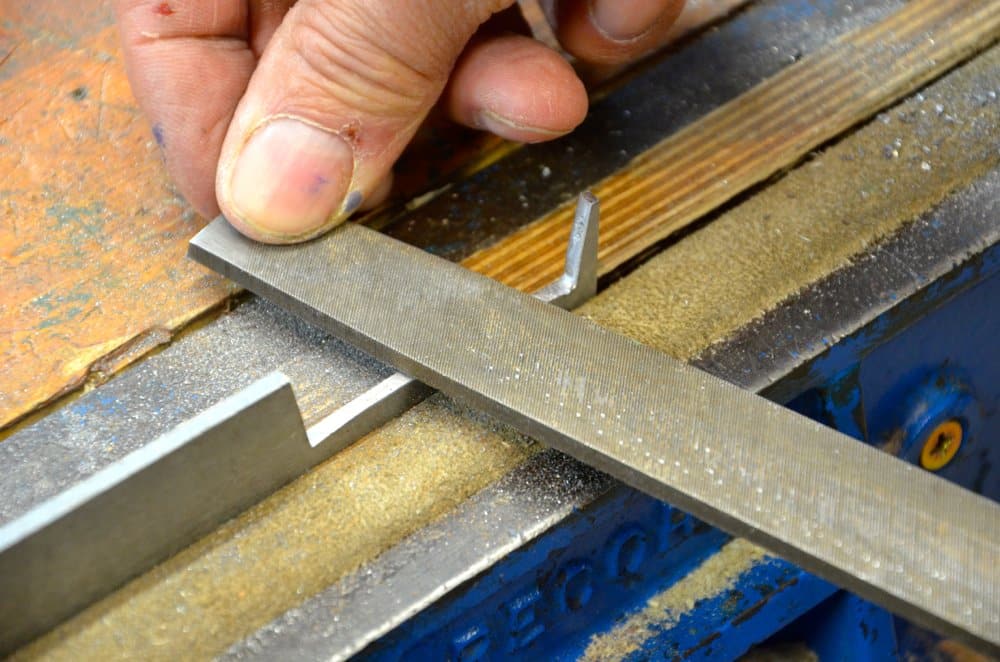 To neaten up my cuts (not actually necessary for functionality) I used a smooth flat file to all hacksawn surfaces.
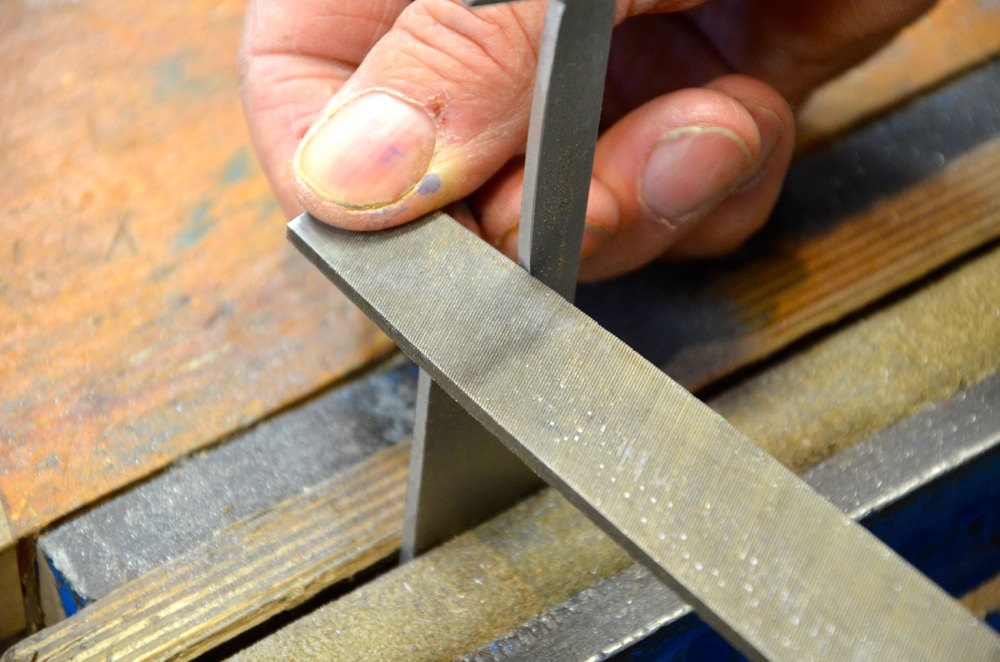
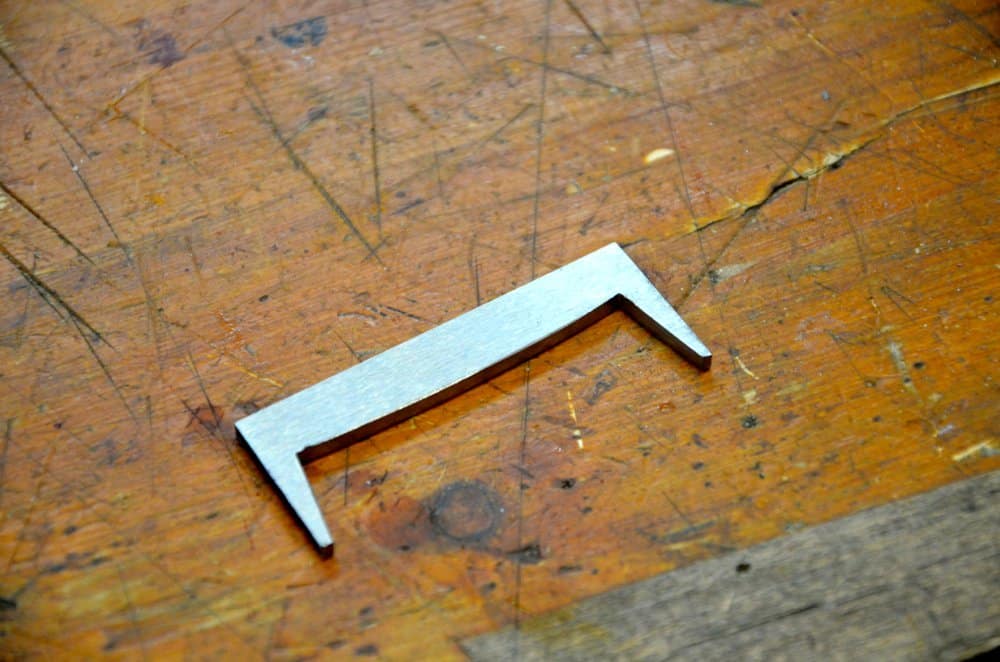
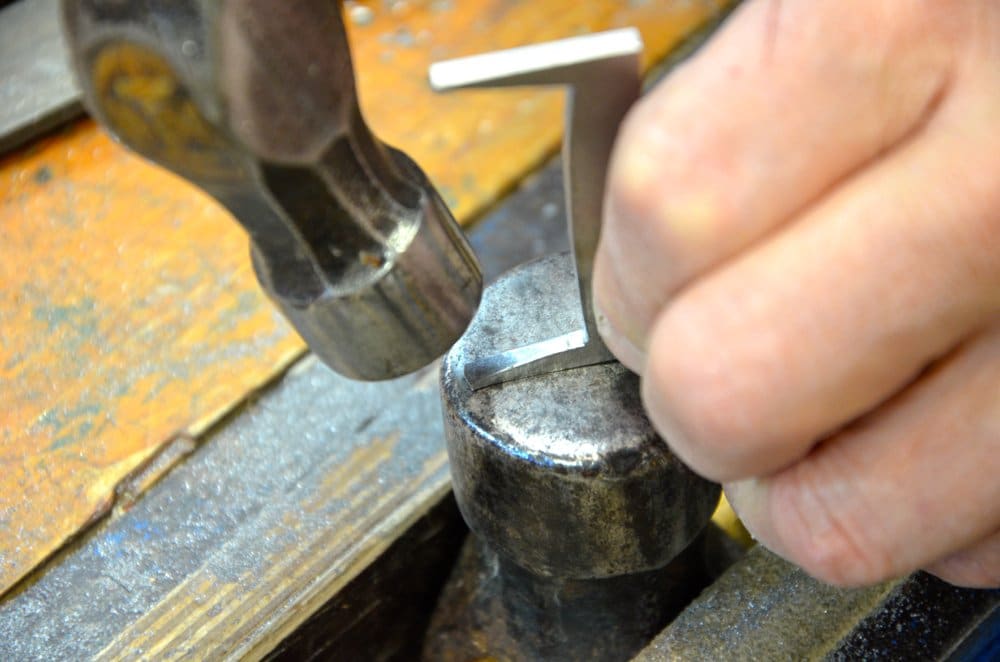
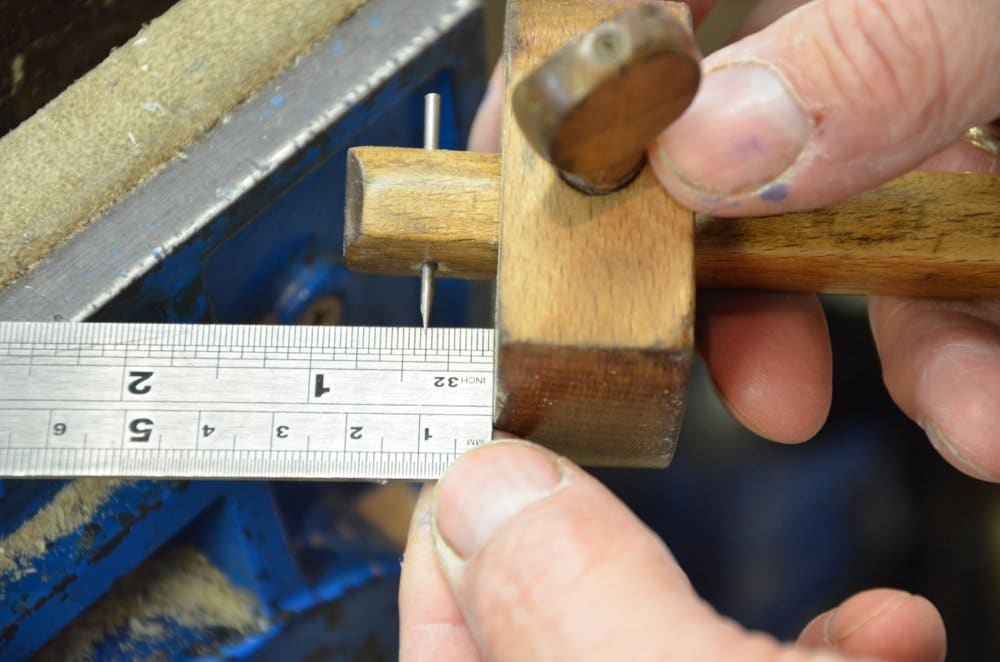
I drew out the steel points from both outside faces and the inside edge of the pins. They don’t really need to be sharp. Thats up to you.
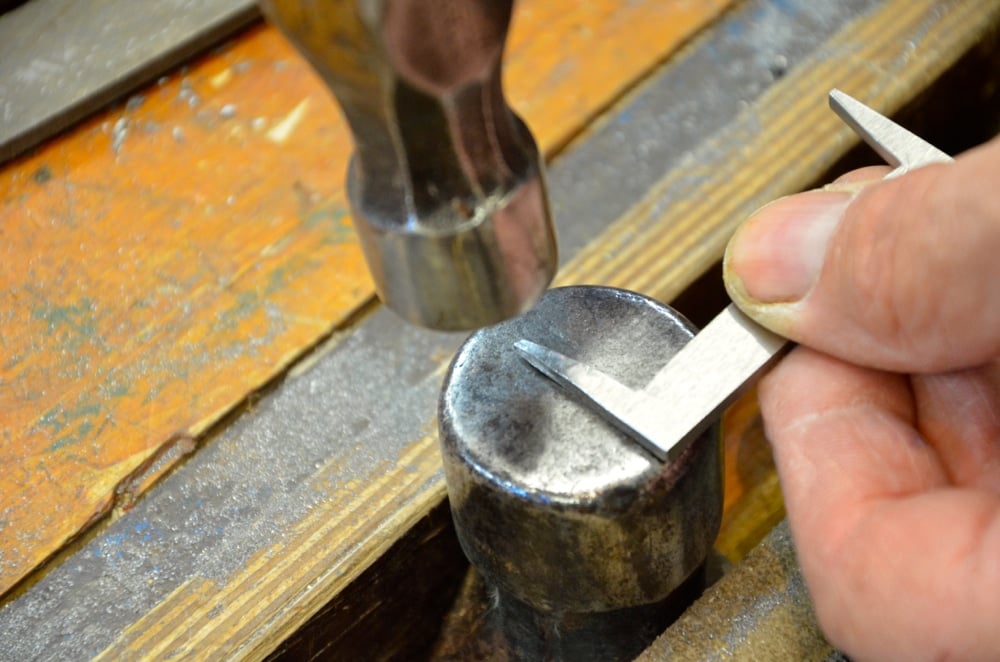
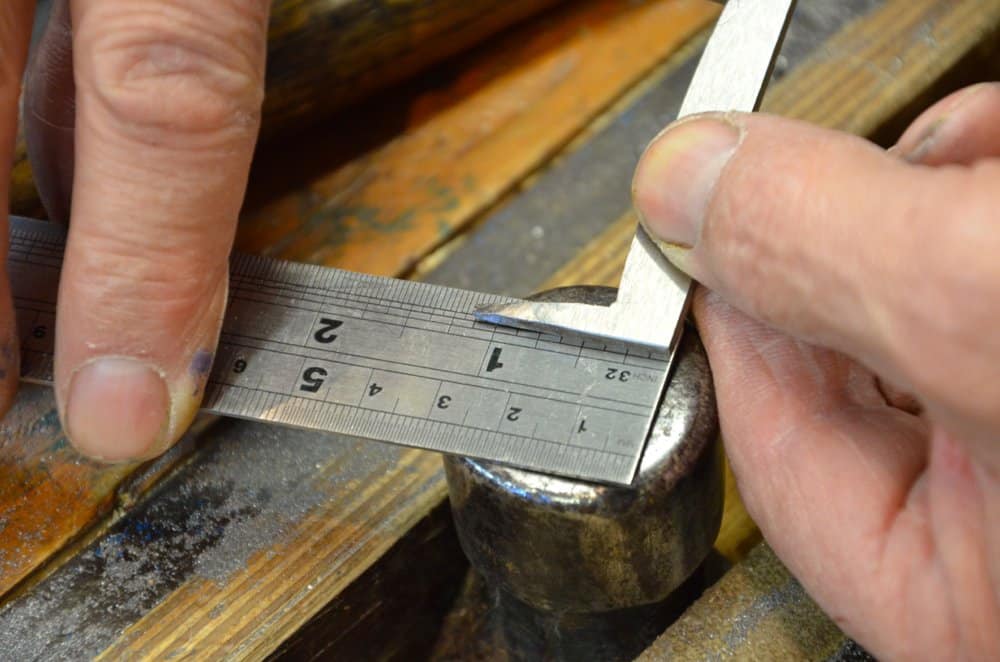
Drawing out lengthens the pins by 1/8″.
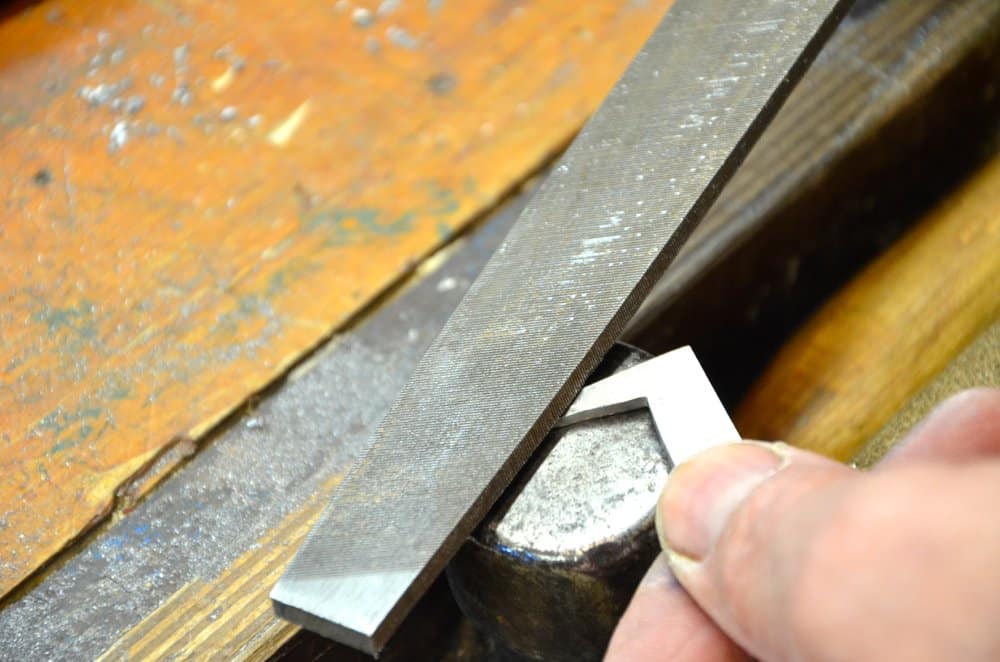
You can forget the drawing out and file to a near point if you prefer to.
Hello Paul,
what do you think about using spring steel of similar size for that?
That’s what I have to hand.
Is there any advantage/ disadvantage in it?
Thanks for your ideas.
Jens
I see no problems as long as it’s thick enough, only advantages as long as it cuts with a hacksaw.
What is the degree in the inside leg I measured mine at 65 degree but I am not to sure how critical that angle is for it to hold or if fileing small groves on the legs would help clamping power I know the outside is supposed to be 90 degrees also I have not found anything on what the height is supposed to be like 1-2 or 3-4 proposionaly???
I have had all sizes in square and out of square and not found any yet that didn’t work. I don’t think this is anything more than a slope to the inside and square to the outside. What you don’t want really is an equal angle to the inside and a=outside of the legs.
Are the ones in the picture at the top of the page hand forged or did you somehow make the ones you made look hand forged?
I bought a set of six dogs from the store and just spent some time experimenting with them. They were not sharp out of the box, and this caused me a little frustration when trying to seat and sink them, so I sharpened a couple of them a little bit, which improved performance. I’m thinking now that they should be fairly sharp for best results.