A Sharp New Look
In a communal workshop, it makes sense to have a central sharpening station for all to use and that’s what I just completed in the bench shop next door. As more and more people begin to use the benches it makes sense to relegate sharpening to a central point and that is what I used to have when we held classes of up to 20 students. Of course, we’re all using it and it’s working great. Rarely is there a conflict of timing but if there was you can still sharpen at your own workbench as needed.
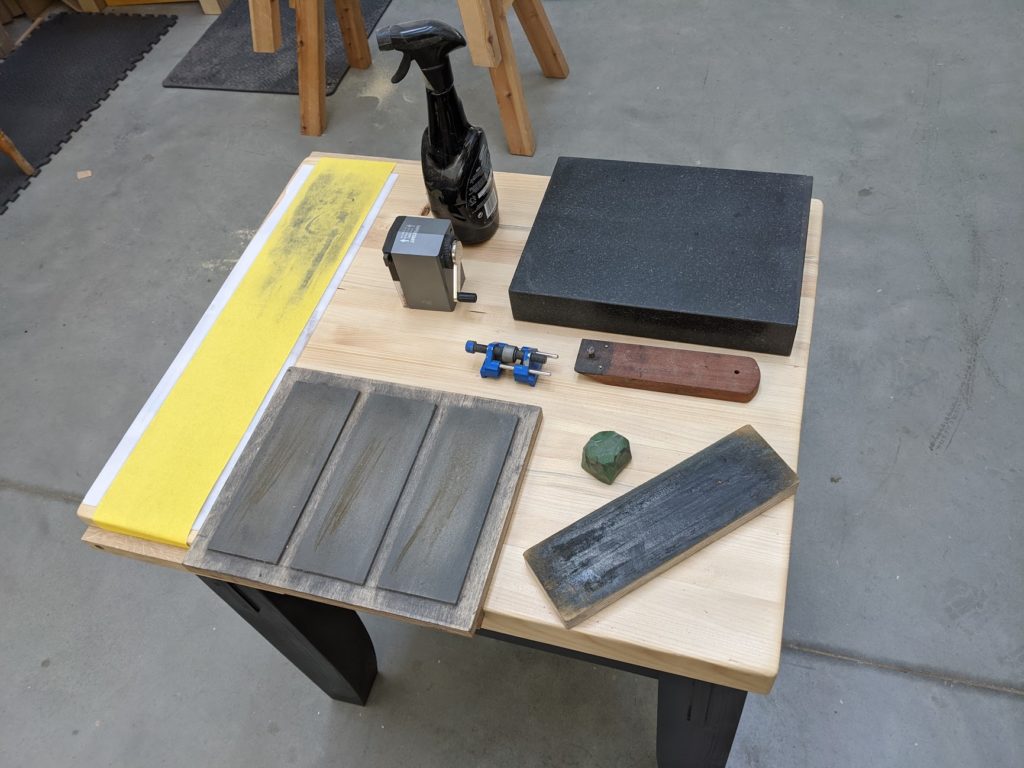
On this workbench, we keep all of the relevant equipment for day to day sharpening and fine honing and everything is fixed in place rather than removable, that way the permanence helps keep things in place and in order. One thing that’s not there is the card and cabinet scraper set up, mainly because both of these rely on a vise and the ideal vise and height for these is the workbench we work at anyway.
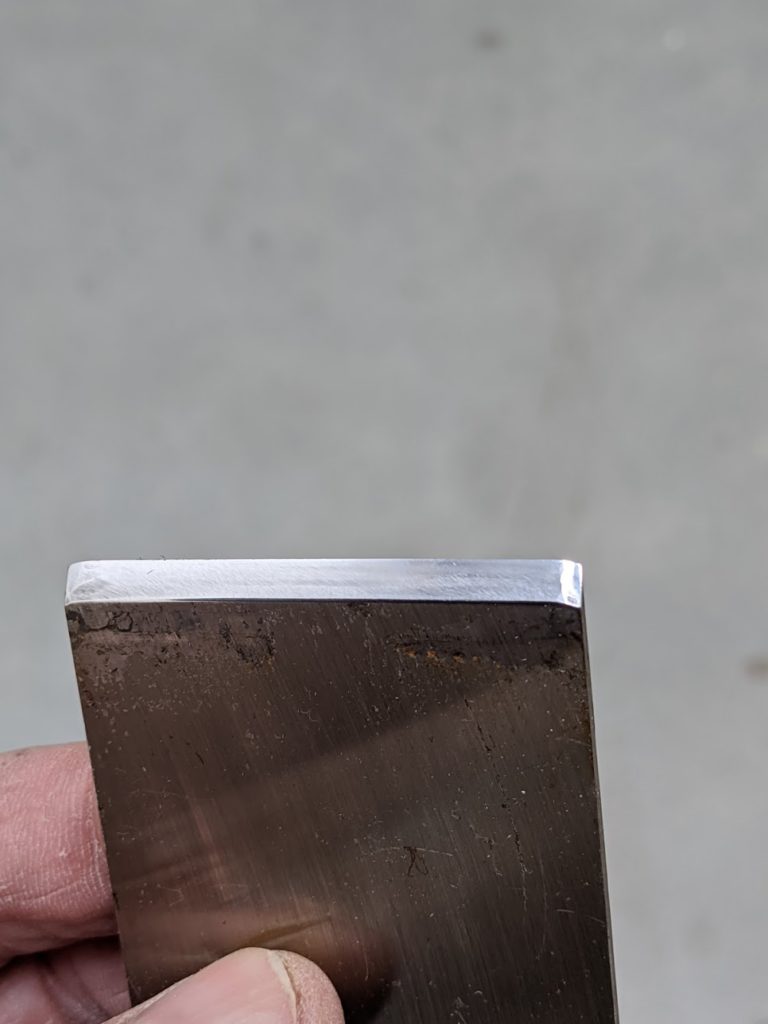
You may or may not remember my answer in classes, where people height varied so much and changes from one person to another can be difficult to provide for. I always kept a 2″ x 2″ batten by the sharpening stations so that placing your heels on the batten raised you up 2″. It worked fine. In the main workshop, it is more important to direct weight and strength from the shoulders and upper arms through to the hands as directly as possible. You only need minor linkage movement, mostly at the elbows and then less at the shoulders and wrists.
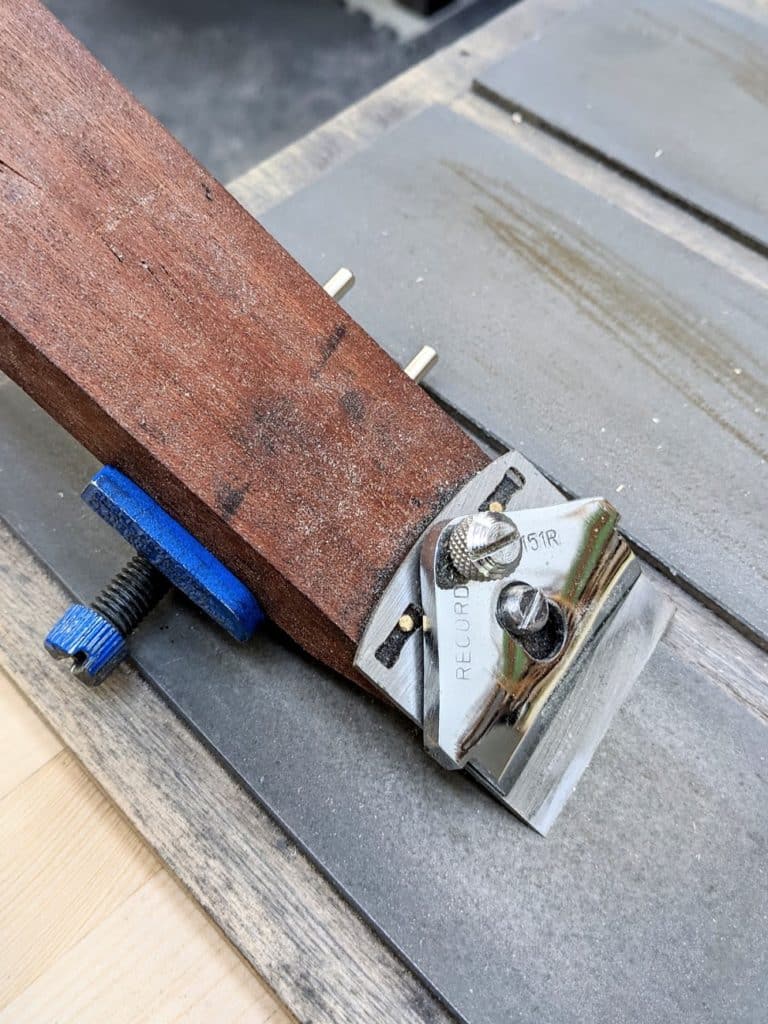
On the new sharpening station, I have the triple-plate diamond plate setup of roughly 250, 600 and 1200 grit plates, the catty-cornered strop (caters to both right- and left-handed people), buffing compound, granite registration/test block (for flattening and testing flatness), the spokeshave extender which I consider to be more essential than most aids. This one means you can handhold for freehanding or install it into the honing guide as shown. This one is my own design for sharpening spokeshave cutting irons. I put it together when my students seemed always to have difficulty latching on to the small size and relying on fingers with no fist grip possible. Also, many new to woodworking have difficulty getting the angles right and prefer to use a honing guide. Here’s how to make your own:
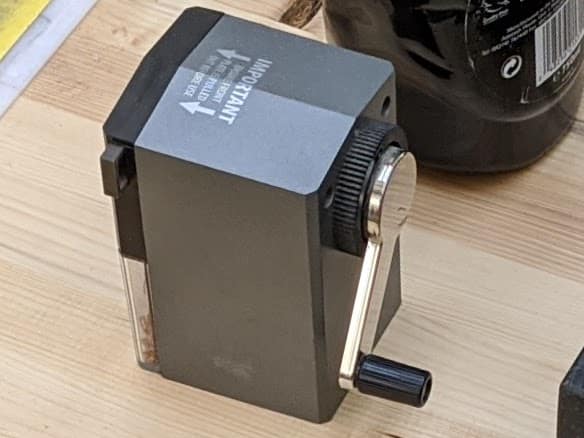
A Swordfish pencil sharpener (probably the best type I have found and very long-lasting), honing guide any make but this one is an Eclipse, sharpening fluid (auto-glass cleaner, cheaper the better) and then the coarse abrasive paper (for quickly reestablishing the 25-degree bevel). This is the fastest sharpening setup I have ever put together and trialed.
Size-wise it measures 28″ long, 23 1/2″ deep and height to the tabletop is 31 1/2″ so 32″ to the top of the plates. It could be much more compact for a smaller area though. I have a smaller one in my garage for my own use generally. The important thing is that it stays put, doesn’t rock even slightly, and it doesn’t get in the way.
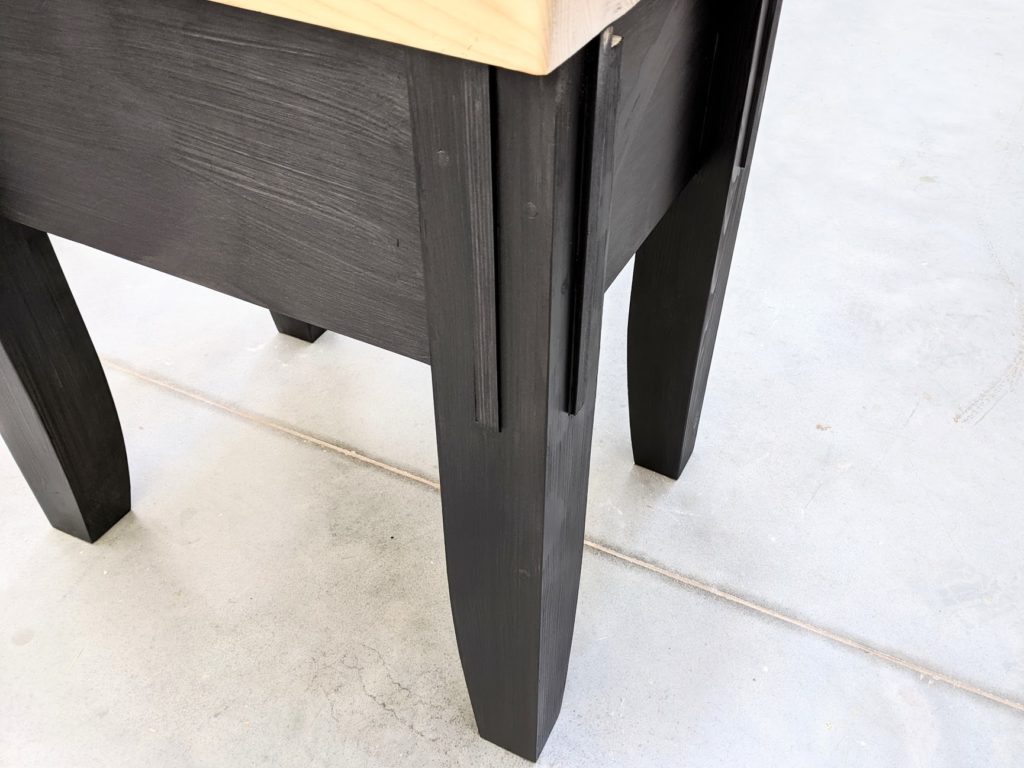
The top is laminated pine 2 3/8″ thick made from studs I used to make my first UK school workbenches 10 years or so ago. With 4″ square legs and the wide, interlocking aprons it is totally rock steady and immovable in use, so no swaying back and forth through the rigourous continuity of on-off sharpening. I coated the surface top with three coats of water-based, clear varnish for easy cleaning as these areas can get mucky in a heartbeat and there is no reason to give in to it.


I have noticed that you never need a square for sharpening and there is also none included in your sharpening station. I find it always difficult to sharpen at a perfect 90 degree angle, especially with narrow chisels. A square would thus be essential for me. How do you avoid this problem? I have tried to distribute the pressure evenly, but with limited success.
Muscle memory takes time and so too self-correcting by eye. A quick glimpse tells me not to tilt but press more heavily with an evenness that still gives the straight edge I want. I suggest you take a little extra time to check purely by eye first and then decide ahead of the square which way off you are. Only then, check with the square to see how good your eye is.
I like having a rag handy to wipe off the stone or diamond plate. This takes metal particles away with the used fluid. Keeps them looking tidy, clean cutting, and prevents clogging.
All it needs now is a book of Crossword puzzles or Sudoku to sharpen ones’ mind! But seriously that is a great setup. And I need to make one of those spokeshave extenders, its always tricky for me to sharpen the iron on those. Thanks for posting that video, will make one this week.
Paul
Are your diamond plates glued in the holder?
Mr Chris,
Reference to Paul’s video instructions on how to make his diamond sharpening plate holder shows that Paul secures the plates in the recesses with a wiggle or two of silicon sealant. It means the plates are secured but could be removed again by levering the plates up. When I made my plate holder the fit was sufficiently tight to not require the silicon sealant but I am mindful not to turn the holder upside down in case any of the plates were to fall out accidentally.
My plate holder is similar. Actually such a tight fit I had to press them in gently with a clamp. I then had to turn them upside down and tap the plywood a couple times against my bench to pop the plates out. I then added a squiggle of silicone and pressed them back in to keep them from galling out when this thing gets moved around. This holder is pretty heavy and the last thing I want is one or more of these $60 plates dropping on the concrete.
In an ancient video
https://www.youtube.com/watch?v=dVsfkVR9VmI
Paul taught us how to glue a diamond plate with silicone (at 27 mn 57 s)
I do apply a squiggle of silicone, the type used for sealing around windows. Clear works best.
Thank you all for your helpful replies
Instead of auto glass cleaner, I’ve been using ‘slip solution’ which I originally had left over from applying plastic window film. It is made of just 1 teaspoon (5ml) of Johnsons baby shampoo diluted in 500ml of water. Seems to work well, it’s obviously kind on the skin, and you could make 100 bottles of the stuff with a £2 bottle of shampoo.
I have the same stones as on your station 250,600 and 1200 from EZe lap but I am finding that it takes me a long time to establish even the smallest of burrs when resharpening, certainly a lot longer than it seems to take you in your videos and I get a very minimal ‘wire’ edge dropping off when stropping. The problem seems to be that my 250 stone is not aggressive enough, and actually if they weren’t labelled I would have a hard time differentiating between the 250 and the 600 as the feeling of grit is very similar between them.. I’m wondering if I was sent a mis-labelled stone perhaps, or if I’m missing something? Was thinking about ordering an extra-course stone, but this could be too much..?
I bought the same setup and I found that I too couldn’t tell the difference between the 250 and 600 grit after they’d been used a few times. I dug around on the web and found (https://woodworkingmasterclasses.com/discussions/topic/longevity-of-coarse-eze-lap-diamond-plate/) that I wasn’t the only one seeing this and contacted the supplier. The long and short of it was that the 250 grit was returned and refunded (good supplier on eBay – toolventure). Since then I’ve been using the Amtech coarse plates – only 2″x6″ but enough to do the coarse sharpening and cheap enough to replace when they get blunt.
That coarse plate is not good for grinding, but it’s plenty coarse to sharpen. I find it super easy to get the burr now, but when I wasn’t good at freehand sharpening, I used to have a lot of trouble. I would suggest you sharpen an edge all the way to the strop. Once you know it’s sharp, go back to the plates and start it over and keep checking for the burr. If you got the technique consistent, you should get a burr almost instantly, even on the fine plates, because there’s no roll or fracture or round to repair. If you don’t, you might be doing something wrong.
You could also compare what that stone feels like versus sandpaper you know is around 250 grit, just as a way to diagnose. You shouldn’t be faster with sandpaper at all (it clogs and you can’t push or it tears) if you stone is what it says it is.
I hope that helps you find out whether there’s something wrong with the stone. Not having a teacher in person to help you with these things can be frustrating. Once I realized I wasn’t achieving the sharpness I wanted, I started paying a lot more attention to my tact and hearing of using the stones and it made me get a lot better.
The coarse plate does lose it’s edge quite quickly but it is less this than the distribution of particles and the size of them. Wider in diameter, they tend to suspend the steel above the plate but it could be that you are not applying as much confident pressure as I do. I have one of the coarser plates and found it less advantageous. Personally I think the plates you have will work well but that they are really not meant for heavy removal of steel and I have written extensively about woodworkers waiting way too long between sharpenings before they sharpen up. Please consider this. I rarely go more than 20 minutes without sharpening as I find waiting longer just exacerbates the dullness.
A couple of quick questions: Did you use a lap joint on the table legs? I’m wondering how you got both those boards to cross thru unless there’s a lap joint fitting them to the width of one.
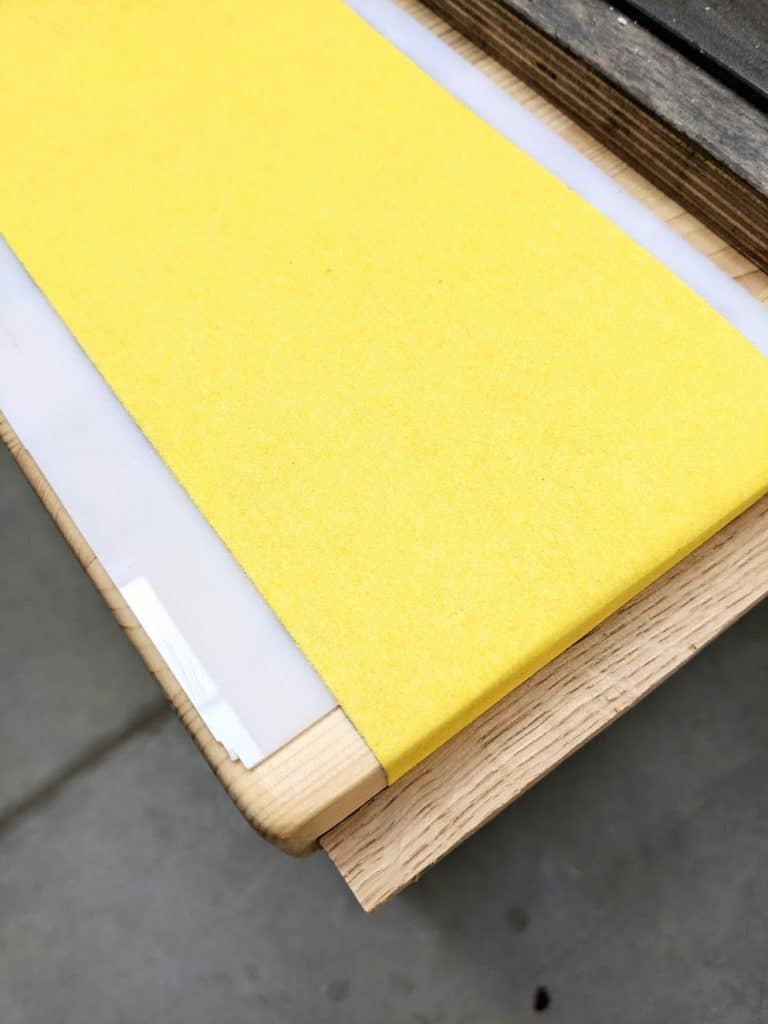
Second–what grit is your coarse paper on the sanding station?
Thanks, Paul…….. love your instruction!
Tish in NC
oOPS… NOT LAP JOINT….. half the board width on top and half on bottom?
It’s quick and simple but not easy to explain. Here is a link to a similar but bigger dismantleable table that uses the same joint except on the sharpening station I used 3/4″ plywood. I used 150 grit abrasive, which is plenty coarse enough.
Thank you Paul and everyone else who responded. I guess I should have mentioned that I can consistently sharpen to a level that I am plenty happy with using the stones I have, it’s just a feeling that I am rubbing furiously on a not-coarse-enough stone and wasting energy to get there. I can omit my 250 stone and get the same results with just the 600 and 1200 for only slightly more time and effort, which makes me wonder about my 250! It was more aggressive when I first bought it I think.. Maybe I’ll try more pressure.
Mine still definitely cuts well after several years in use.
I use UltraSharp diamond plates (300, 600, 1200). They came with some instructions and this link, which I found useful: scienceofsharp.wordpress.com
It explains, along with 30-50,000x magnification photos, how the edge is formed. One thing that benefited me most was the observation that on finer stones, the pressure required is less. And I noticed I was putting too much pressure not only at 1200 but even at 300. Try once to sharpen with relatively less pressure and see if it changes anything.
James, I have the DMT Coarse plate (325) and initially it didn’t do much at all. It took a lot of breaking in. My 600 used to cut faster than the 325. Probably after 3 or 4 months, after I’d started free-hand sharpening, I was sharpening a lot more often and it soon ‘broke in’. Now it gets a burr straight away.
Regards Adam
Oops, correction, it is the extra course 220 grit.
Regards Adam
@Jeff I have exactly the same issue with my coarse Ezelap stone. It was great for the first month or so, but now 18 months later with moderate use, it seems to “shine” rather than cut. It improves very slightly following the various cleaning methods. The 600 and 1200 both still feel as though they are “cutting” without the need to exert significant pressure (which seems to be the recommendation for diamond stones). I have recently started woodturning and bought a Sorby proedge, so have to use that when a blade needs major surgery. Frequent trips to the superfine keep a nice sharp edge for regular maintenance. Bit disappointed with the coarse stone, though as it was a significant investment.
Mine still works after several years. Wonder if it’s something your doing.
James,
I too have experienced this, the course plate (250) doesn’t seem to be aggressive enough on some sharpening jobs. I went ahead and ordered the coursest plate that’s available (EzElap). It’s not cheap but does allow faster initial sharpening (getting the right bevel angle etc). This extra course plate sits in its own holder but to be honest once your chisel or plane iron has been sharpened the first time satisfactorily the normal 3 plates (250, 600 and 1200) are just right and therefore the extra course plate is not used as much. I don’t worry too much about developing the burr or wire edge, the finished sharpness (including stropping) always seems sharp enough for me, certainly much sharper than before I started the sharpening process.
I taught myself to do all sharpening by freehand even my gouges and very small router plane irons. But I can see where this would work in a classroom environment or you had arthritic hands.
But over time my angle changes from the 25 degrees ( or whatever Needed for that tool) and I find that I want my concave edge back. On chisels especially I find it hard to chop out my dovetails because of the increased force needed when the angle changes to much. Then I use a jig on a water stone wheel to reestablish the correct angle. I hope over time to be able to learn that part of sharpening so I can better match my cutting edge to what Material I’m working with.
missing:
– something to measure angles, small try square, magnifying glass (optivisor?)
– I have a hand crank grinder
– something to sharpen saws and drill bits?
Bench is not meant for and not really suitable for saw sharpening so left that stuff out as unnecessary. My regular workbench is ideal for me. No use for a grinder either though I do use one. A grinder is not really a necessary part of my sharpening regimen, even a hand crank version either, so not included; just more clutter to bog things down. I do have an electric grinding wheel for metalworking, sharpening twist drill bits and so on. The idea is to declutter and simplify and then to remove anything that puts anyone off sharpening when needed rather than when have to.
Lovely setup . Any chance of a few pictures , or sketches, for the table ? I need a couple of these in my shop !
Hi, Peter, not sure if you’re already aware, but this appears to be quite similar to Paul’s Assembly Table project. HTH.
Thanks Ted . appreciate the guidance ..
I found this blog post timely as I belong to a makerspace with over 200 members- at least 1/2 of whom practice wood-butchery. As a cabinetmaker with previous shops I had a sharpening work-center, so in trying to establish a sharpening center at this shop I had to put forth several arguments several times to get it done. The dull chisels got sharp, the unused lathe previously stocked with dull tools is getting used with sharp tools,. Now we have the diamond stones, coarse and white wheels, tormagoid sharpener with most attachments, drill bit sharpener, saw vices, triangular files, wet stones, burnishers for card scrapers.
The only things missing are slip stones for the rather cheap carving tools the makerspace currently has.
Most importantly, neophytic wood-butchers are using sharp tools and learning when and how to sharpen them.
Thanks Paul for posting that.
Sharpening, to me, is what makes such a difference between machine and hand tool woodworking as an approach. I fell under the spell of nicer, bigger, “faster” machines despite originally doing what I needed to do with hand tools due to cost and availability. I took a HARD turn off that path when I discovered your videos. I’ve also realized that, while I might tend to buck the straightforward methods and means you suggest (guilty of chasing the ever-keener edge from finer and finer waterstones), I have realized that you really do give HONEST advice about the most effective practices. I’ve shortened my between-sharpenings time drastically, since the methods are so simple and direct. Every phase of woodworking is more fun and rewarding with sharp tools!!! If I could just understand why we fight the simple practices that make such tremendous positive change possible. Almost because it’s too simple. It attacks the fundamental habit that change must always be difficult and/or painful.
THANK YOU!
Paul
I notice you have a honing guide available but I couldn’t see a set-up guide. I use a piece of ply with four hardwood strips at the correct distance for 25 and 30 degrees for planes and chisels as an aid for fixing the blade in the honing guide , makes it very easy and fast to get a consistent honing angle.
I have marks on the benches to set to. Dead simple. Worked for years.
I have found that if a coarse stone is having a hard time cutting it can be clogged with dwarf from a soft steel.
Using a white plastic eraser like the Steadletter Mars works great to pull the junk out from in between the diamonds. Just a quick pass and it is back to cutting.
I bought a Trend honing guide about 3 years ago. When clamping a chisel in it, it twists the chisel very slightly (about 0.5mm) but enough to make the end of the chisel out of square, and the bevel “runs away”. I complained to Trend and they told me it was the way I was using it. Trouble is, I asked a friend to try it, with the same result. I have to clamp a small 0.5mm piece of plastic under one side to keep the chisel square now. Also the circlips holding the brass roller, are the same diameter as the roller. So on a wide diamond plate, the circlips “catch” and rub on the plate. Anyone else had these problems?
Always remember that Trend staff are usually linked to sales, and selling makes you an expert at selling and rarely if ever woodworking. I know a lot of fine people selling kit of every kind, rarely do they become experts in what they sell yet they often, mostly, consider themselves experts.
At the risk of inciting years of debate on “proper” sharpening table height – 31.5″ seems quite low compared to your preferred workbench height of 38″?
I’m presuming that is a workable and preferred height for sharpening plane blades/chisels/etc.
Do you find that height good because it allows you to get over the blades more, use body weight to press down on them? I’m interested in how that height came about and what the benefits of going low are?
It’s not high enough for me full time but takes care of student apprentice needs because tey are shorter by four inches and they are the ones using them not me most of the time.