It’s Silly to Say . . .
. . . some things.
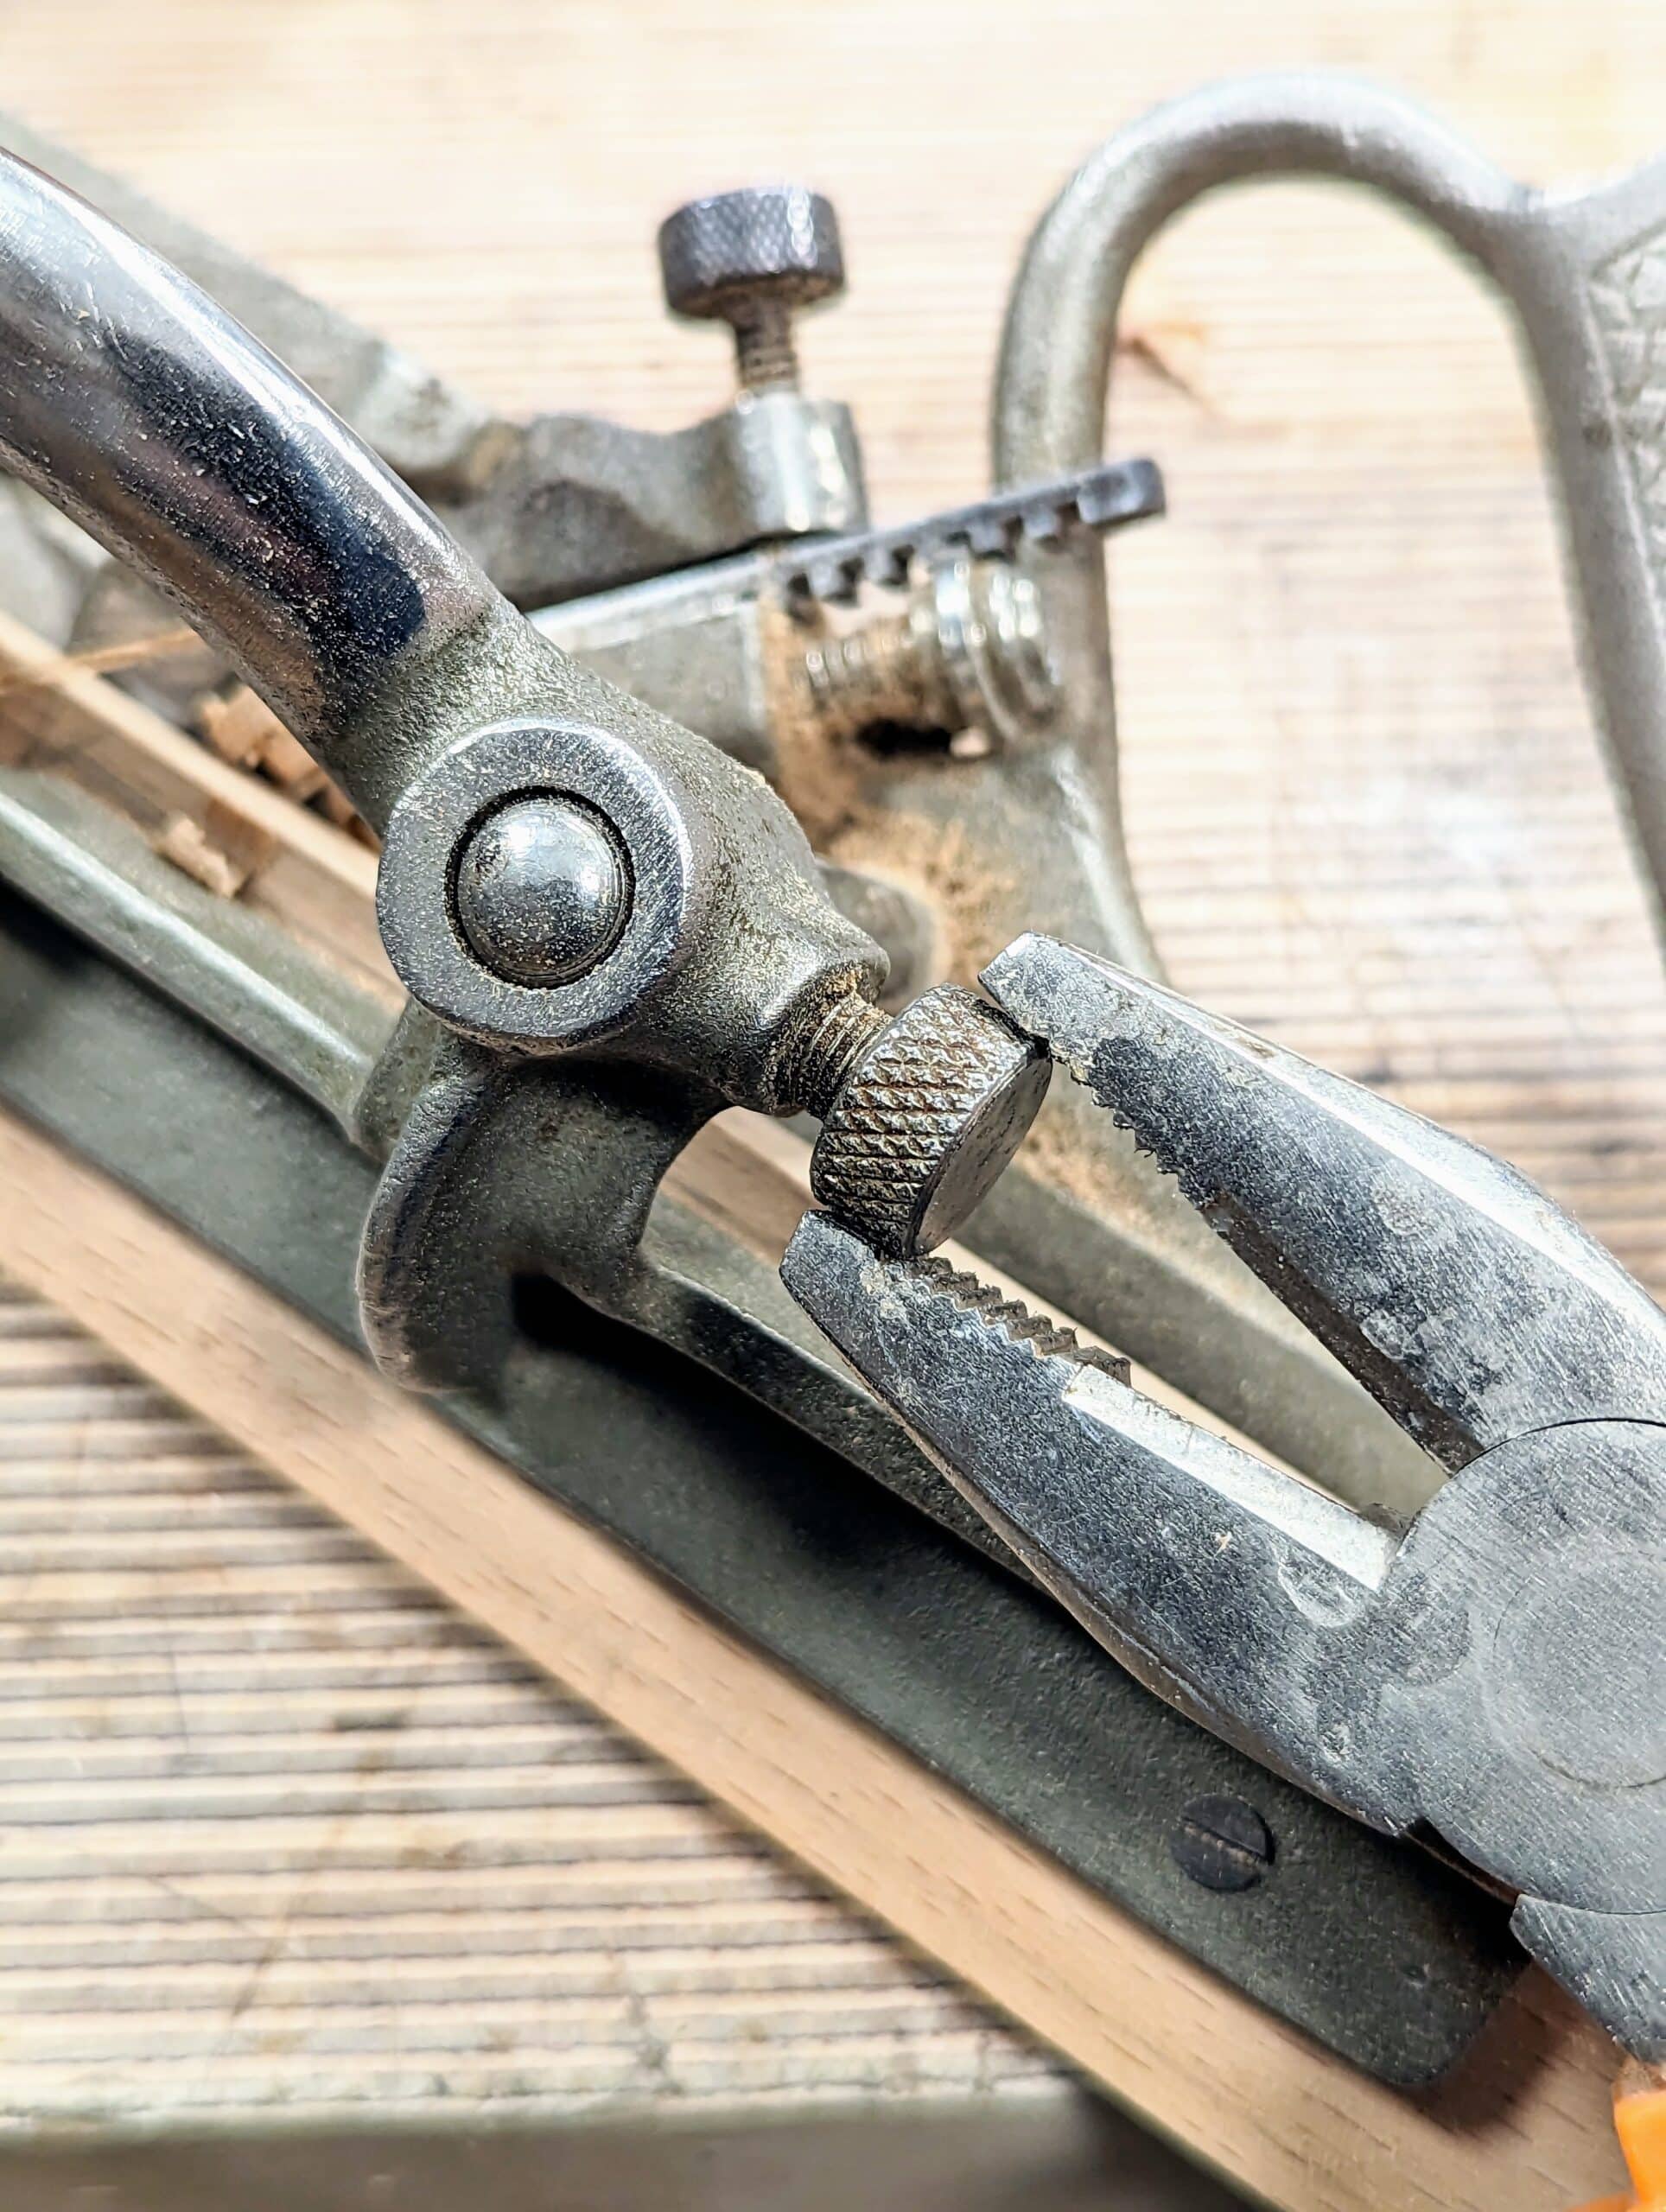
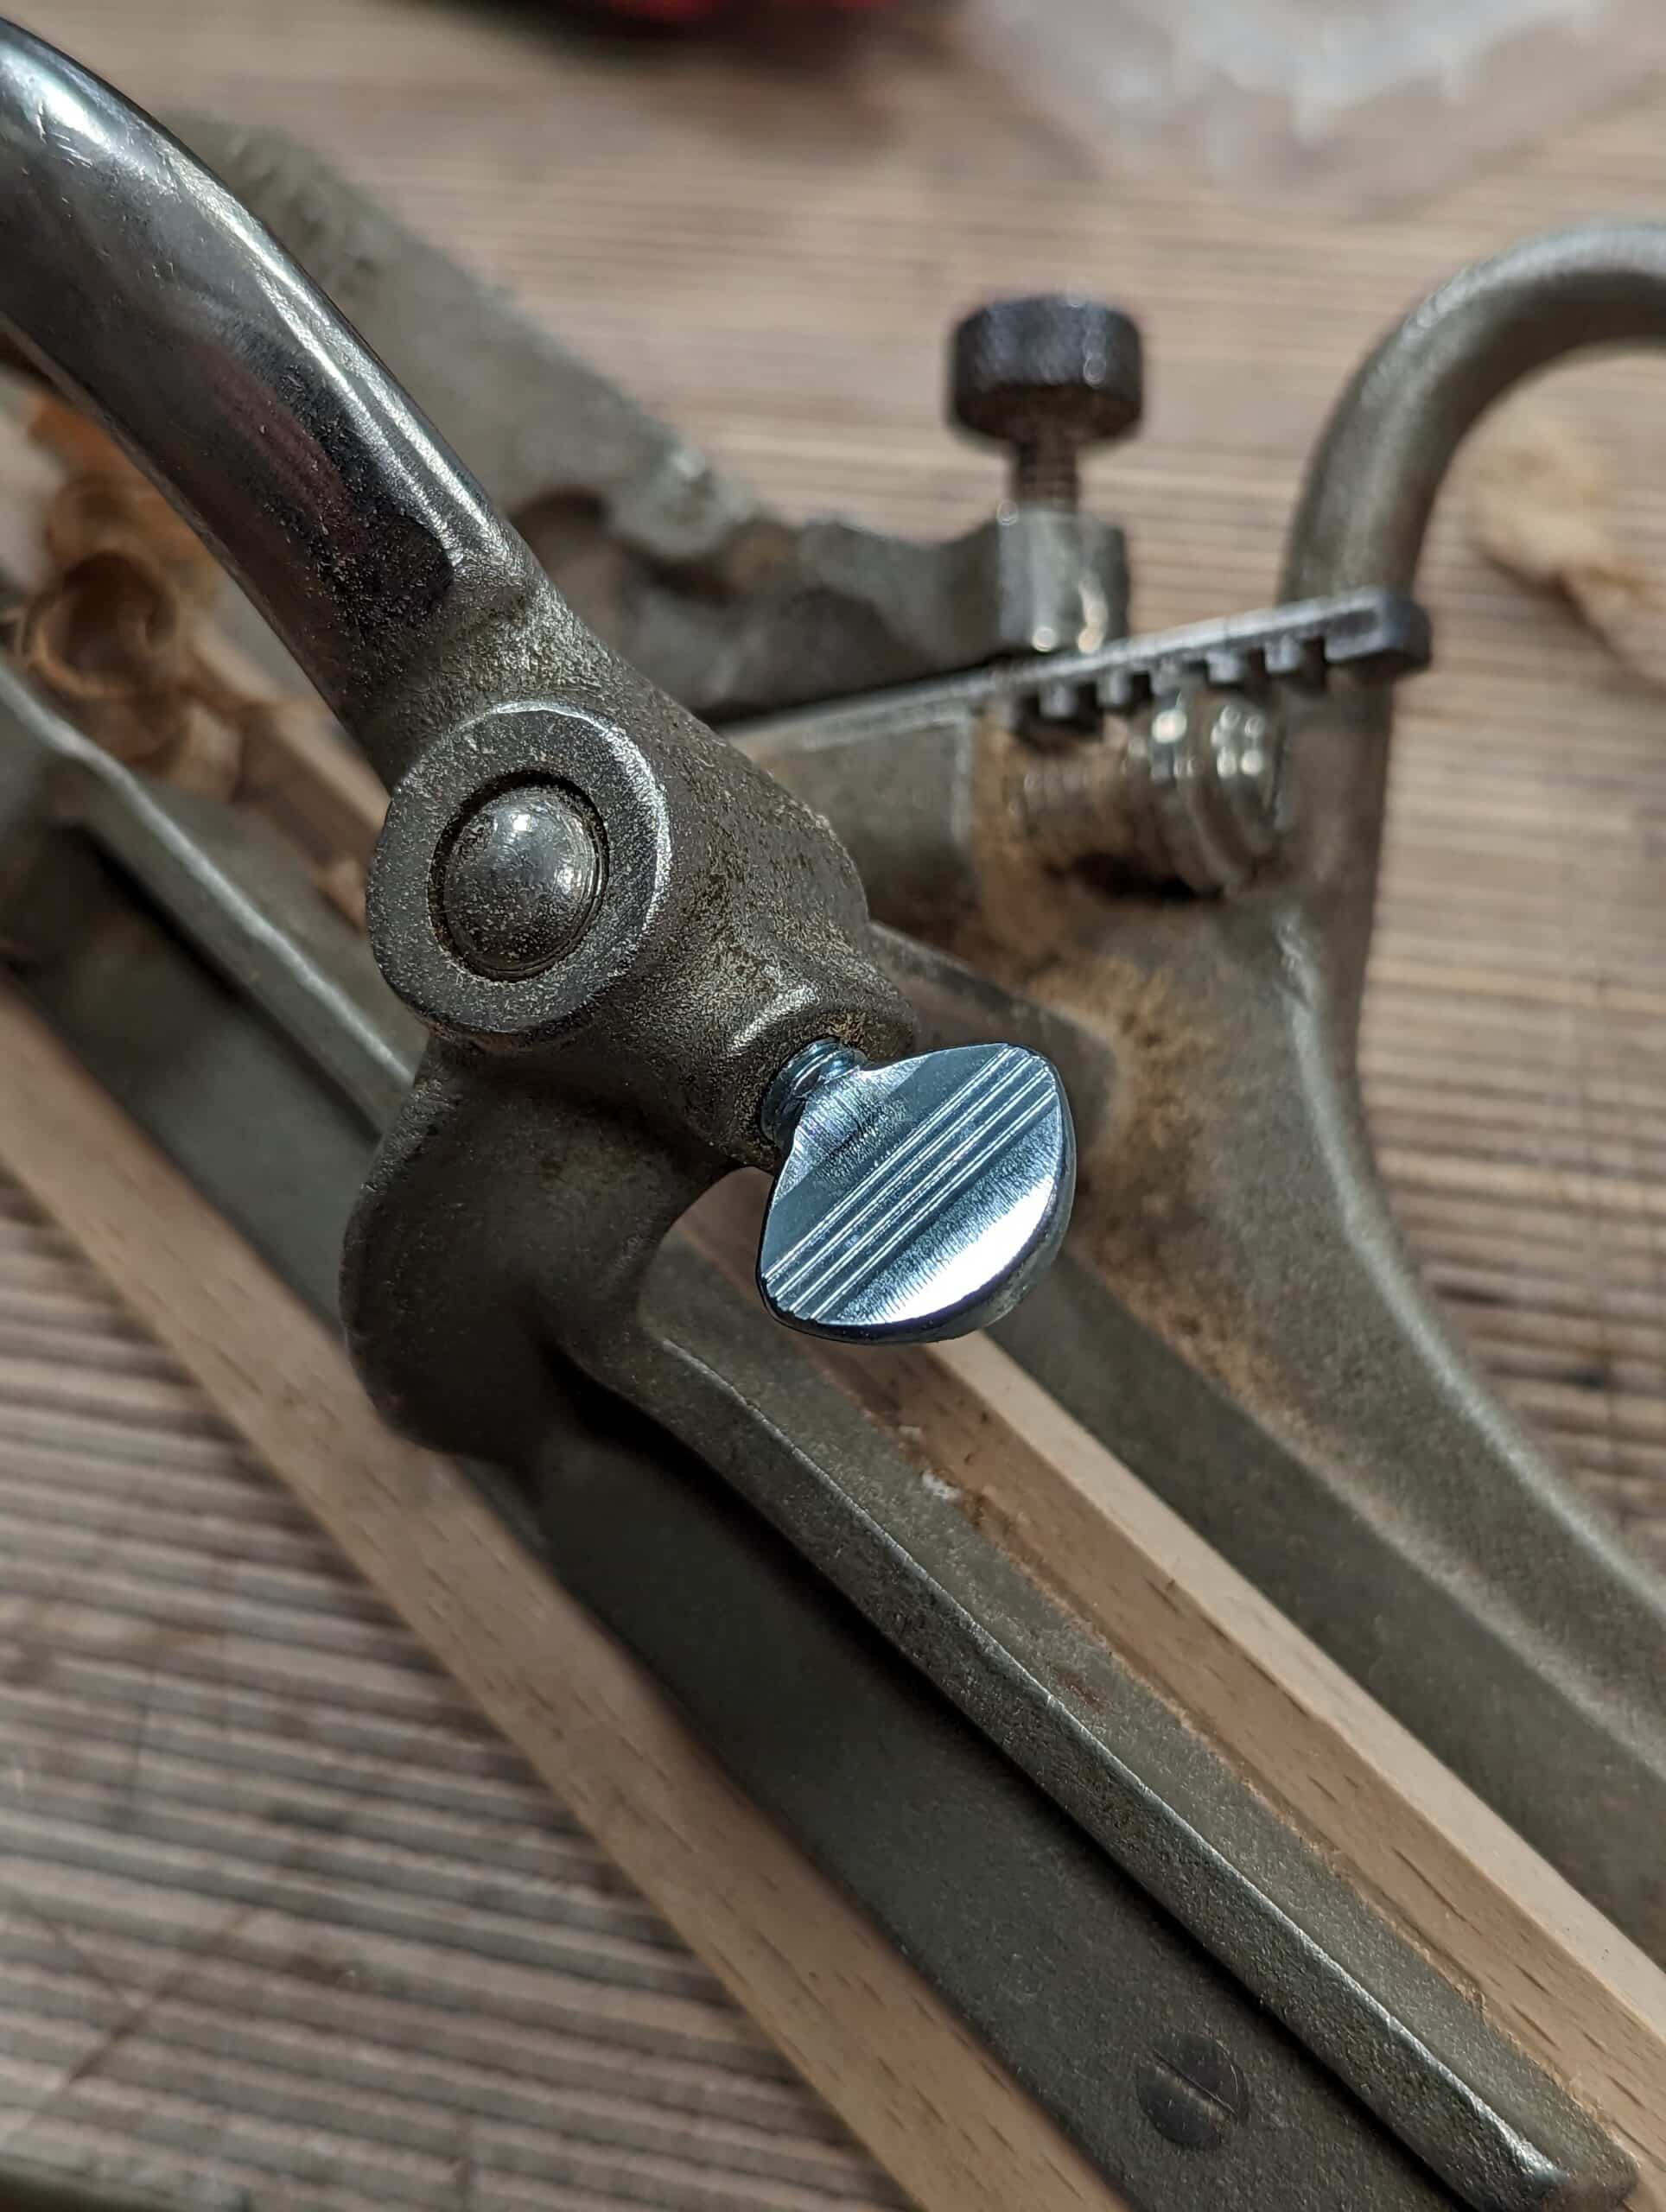
A commenter once watched me tweak the knurled setscrew to my plane fence using pliers. His comment said, “It’s bad practice to use pliers on a knurled nut because they will damage the knurling.” Of course, even when being used carefully, as I was, they can, and long term they most likely will. I think from my part I liken it to getting revenge on the engineer who put it there in the first place (not really) because on many tools you cannot apply enough force by finger tightening alone and the fence or depth shoes often move as they loosen through the vibration and rigours of working the wood. Unfortunately, often before you realise what’s happened, the moving part has misaligned to create a wider groove or rebate and a staggered step, or the depth has deepened more than you want and you have to then find some way of repairing the damage.
I suppose if you only design an item and never use it you might not realise just how much energy goes into using tools like plough planes and rebate planes like the #78 Stanley. Imagine all the upper body weight behind a short and narrow-soled tool coming up against wiry grain and some knotted areas with say a quarter-inch wide blade. The top pressure on the incline of the blade is phenomenal. The blade is car-crashed into a brick wall and the shock waves emanate throughout the body of the plane with all of the same domino effects you would get in a car crash when every bolt is shocked from the engine and car body by the impact. It’s most doubtful that the engineer in his office, 3D printer and computers at the ready, can actually road-test his product in any real and tangible way or in the same environment they would get here at the bench with someone like me in the saddle. The truth is that you must get through the knots in the wood in the same uniform and regulated way you do the rest of the wood. You can’t just bin a piece of wood you’re working on because of obstacles like wood grain. We have some tricks up our sleeves to help, saw kerfs and chiselling, but we don’t always see before the blade hits the recalcitrant area of wood. I have had wiry grain that looked just fine dislodge all adjustable parts in a single swipe before now and without warning.
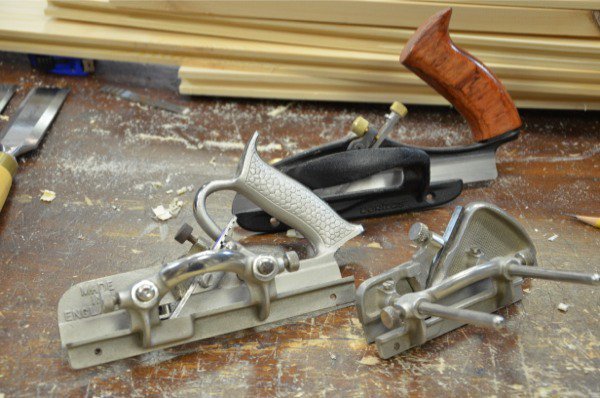
My tests over many years and now even decades reveal some interesting facts and some that woke me up to the design flaws too. The above two planes. One is no longer made while the other is currently made. Stanley plough planes all work well but of course, they are no longer made. That means eBay and secondhand finds are the only way to get your hands on one. I often see them without blades because by selling the blades individually for £5-10 apiece a plane that might only sell for £30 will make £30 for the body and £50 to a £100 overall. But making your own is dead simple, they take only a matter of minutes to make and aside from the fulfilment you get for having a set you made you can also match them perfectly to the chisels you might use alongside them too.
In my case, tweaking hand tools with pliers has never resulted in serious damage though on brass it definitely marks the softer metal. On steel, it is less so and though I have done it on most of my tools through many decades it is not so bad I can’t stand the neglect of it. I want the confidence of tightened down fence and depth stop but seldom get it from knurled screws on plough planes and similar. The convenience of a pair of pliers goes unsurpassed unless there is a slot for a flathead screwdriver. The pliers are there in my drawer by my right hand and I pull them out, grip the setscrew (not too tight) and put them back in a matter of seconds. The tool designer-maker should have used common sense and used either thumbscrews (not always slip-free) or a slot head to take a flat-headed screwdriver. I suppose doing that would be to admit doubt about the holding ability. Thumbscrews and pliers go well together too though. In the case of the Record versions, with no slot heads to the screws, no one complained about this oversight to the overall design in the early days of the plane’s release; that being so the makers made them for over half a century and saw no need to change. Had the designers stood at the bench using the tools in daily making the faults would be obviated by use and they would have made the changes pretty soon after manufacture.
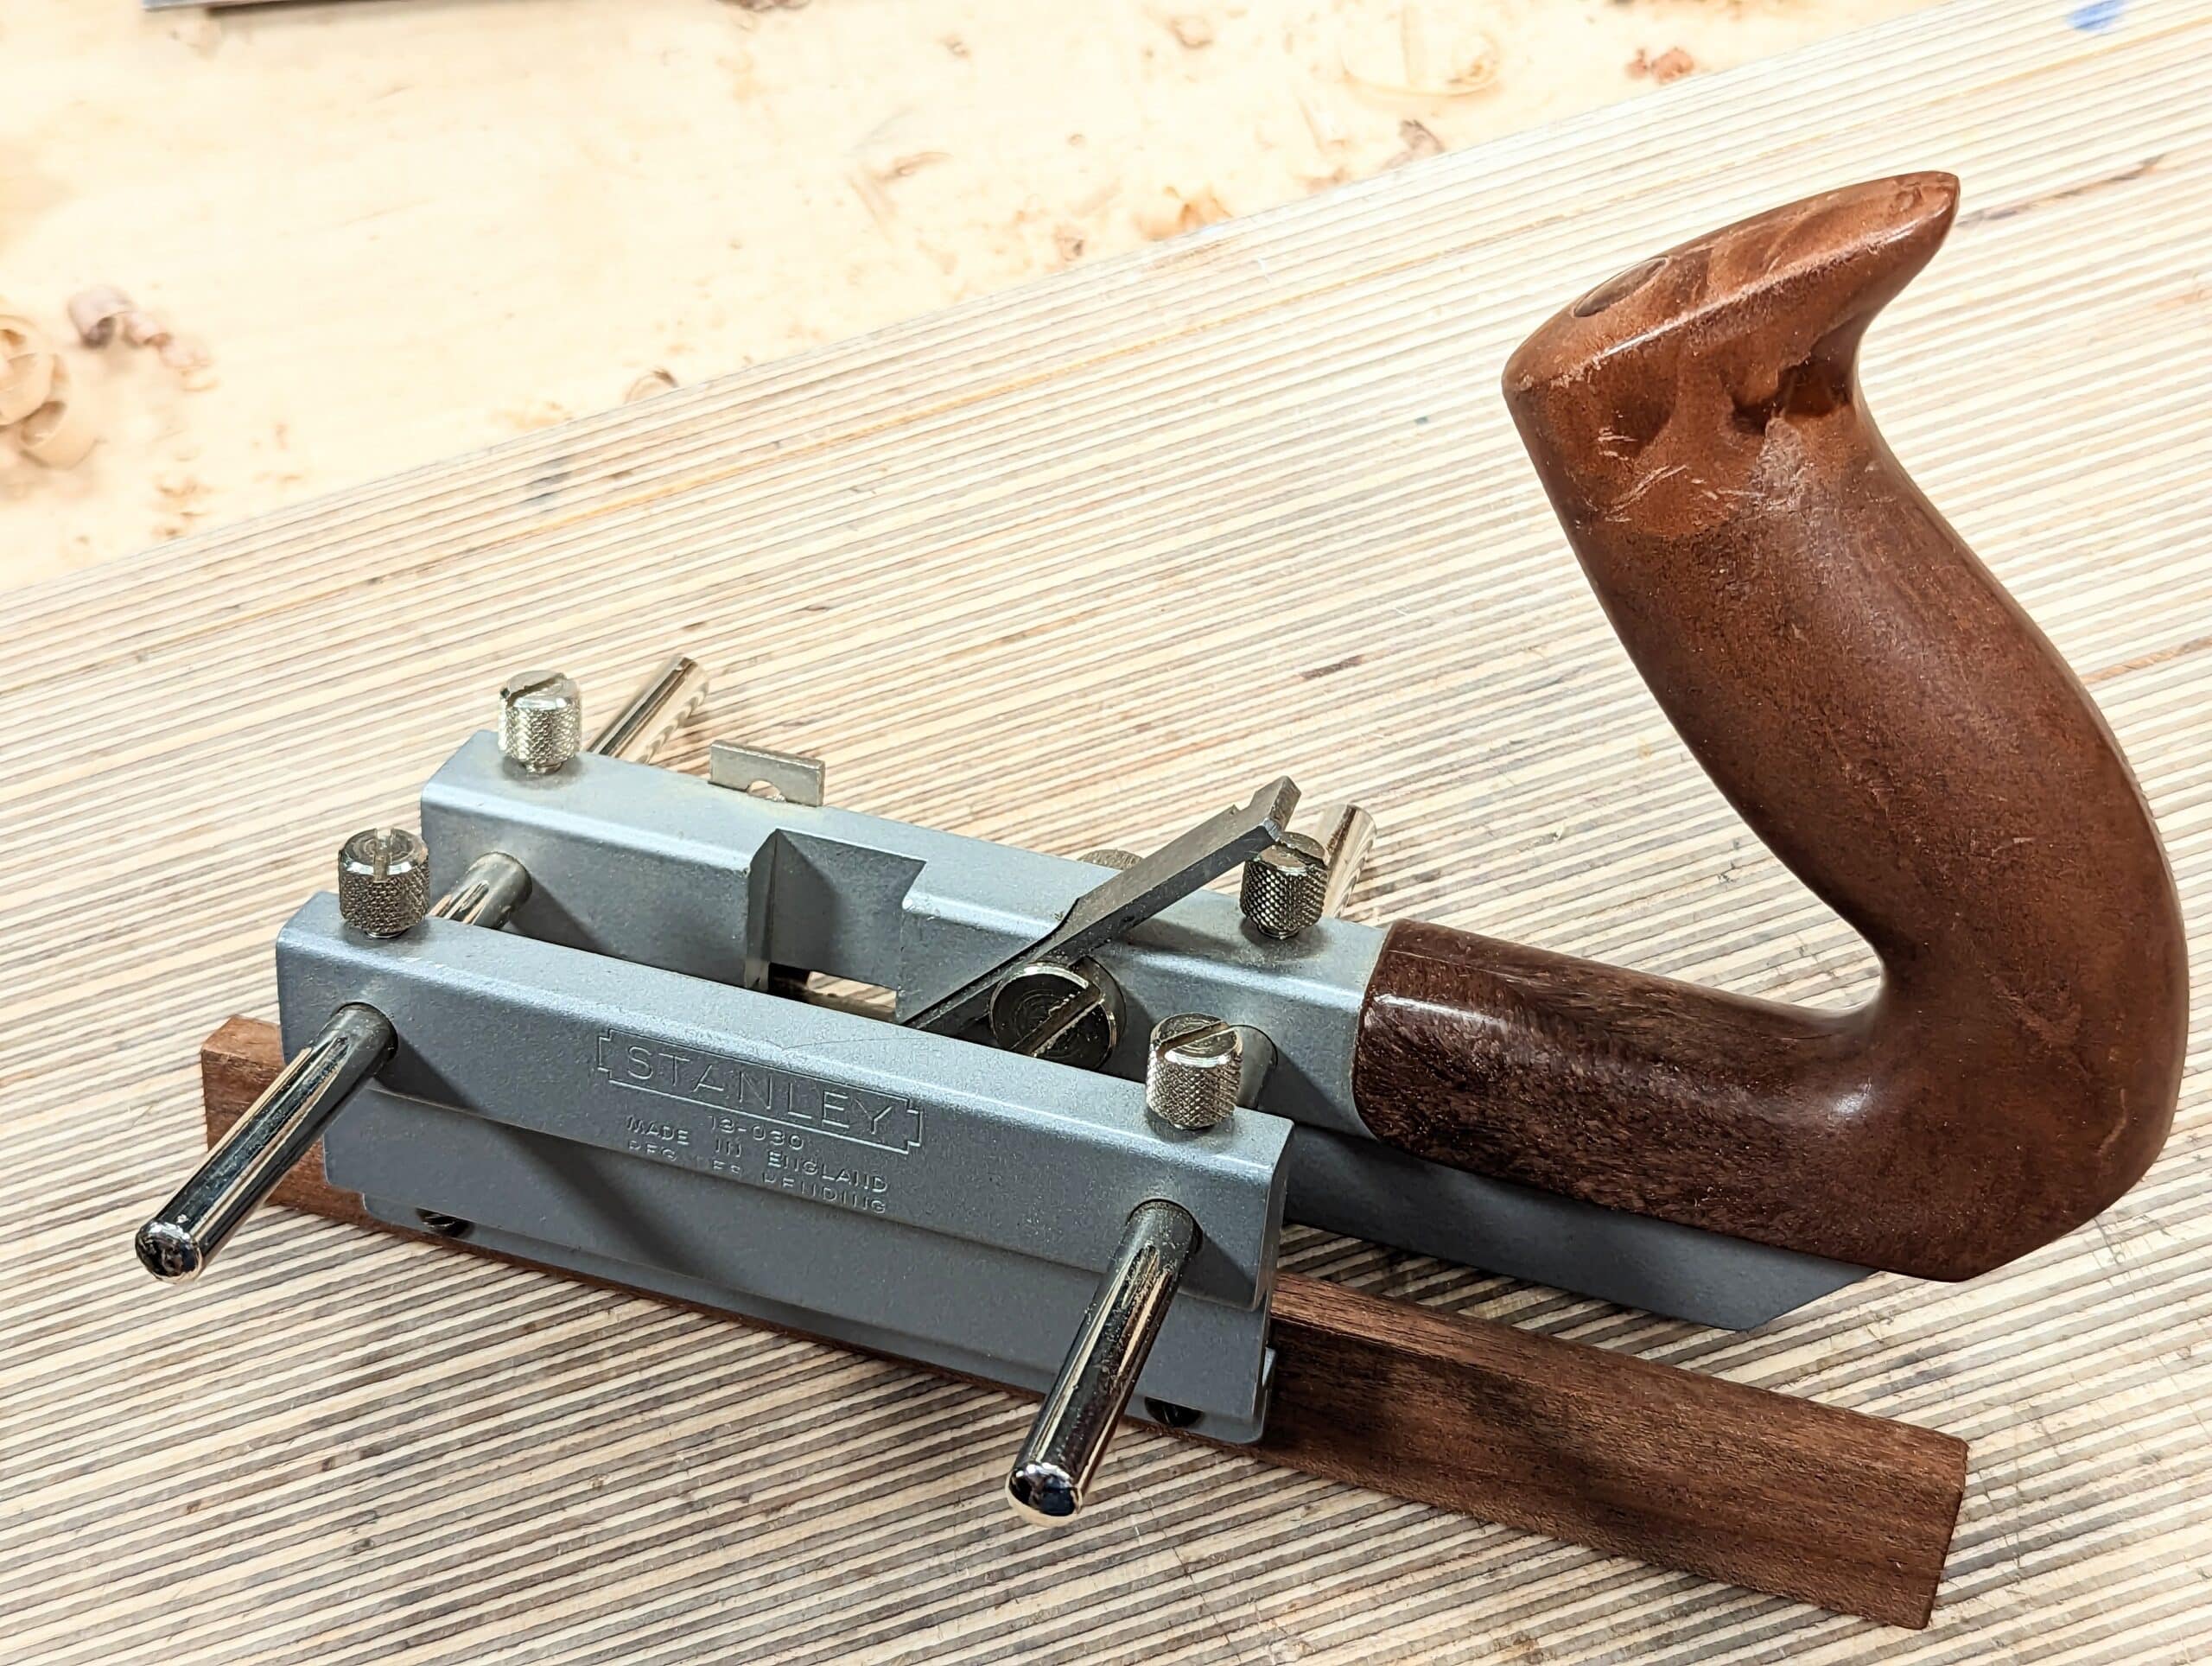
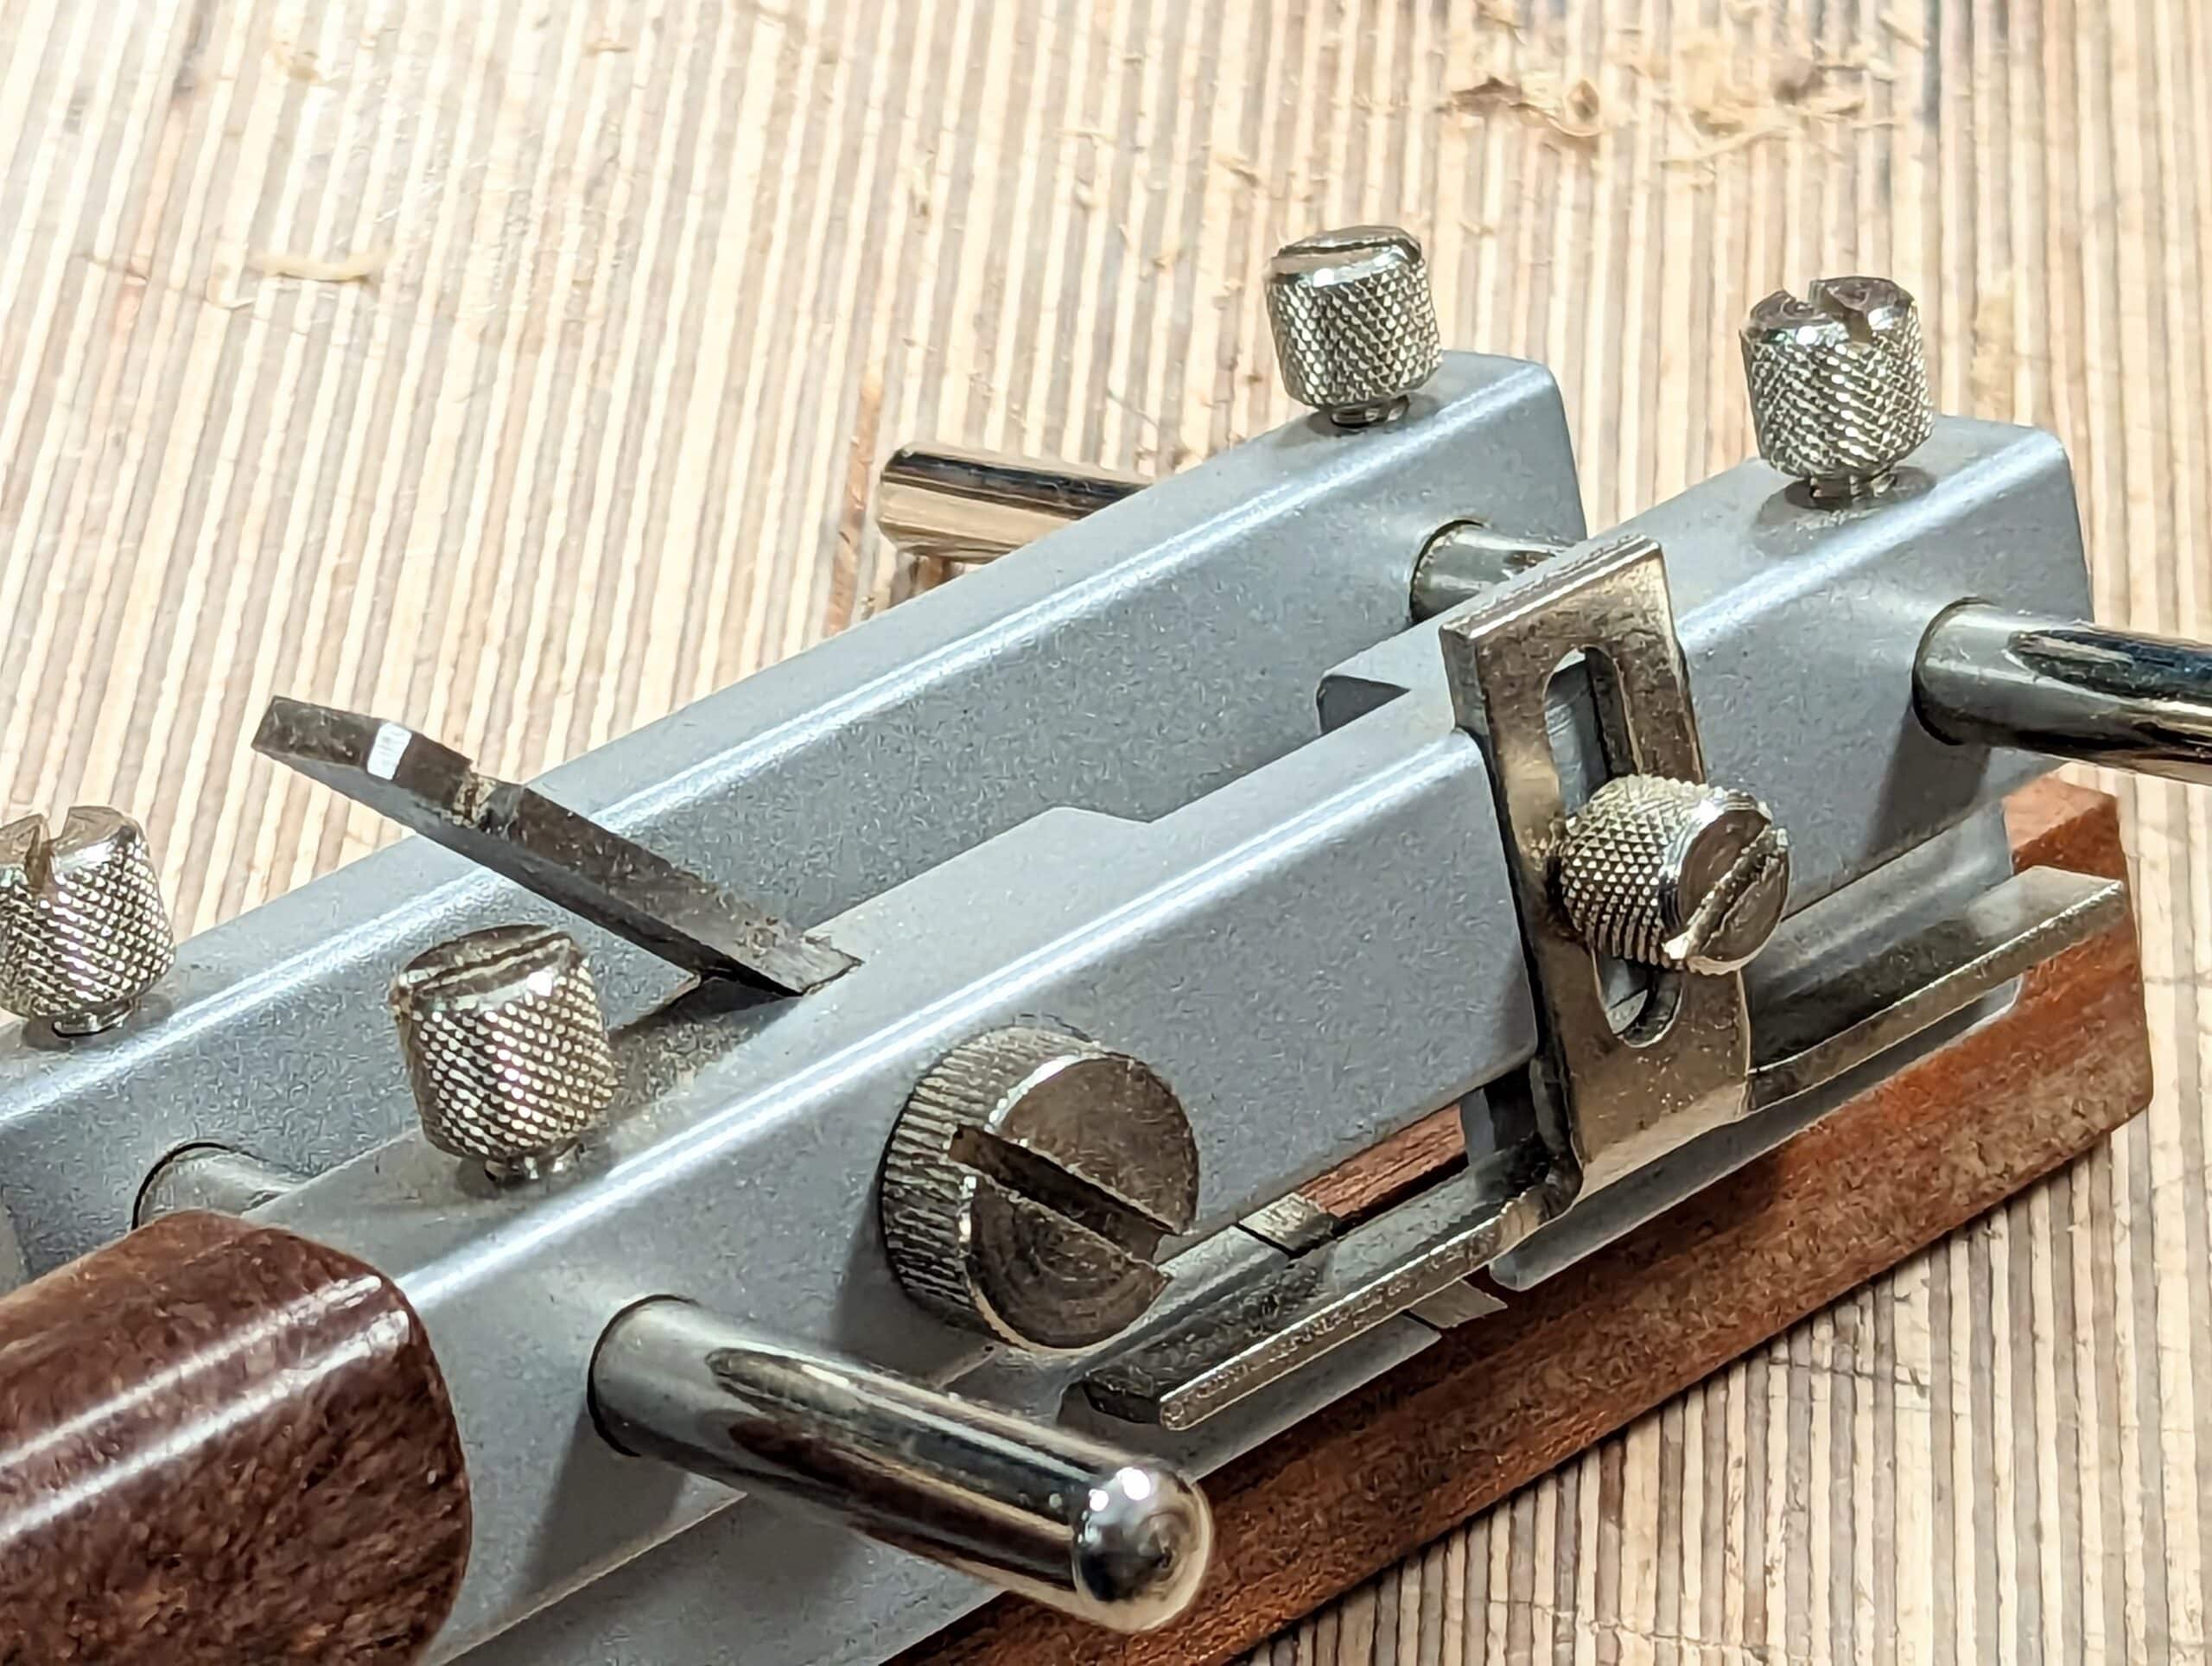
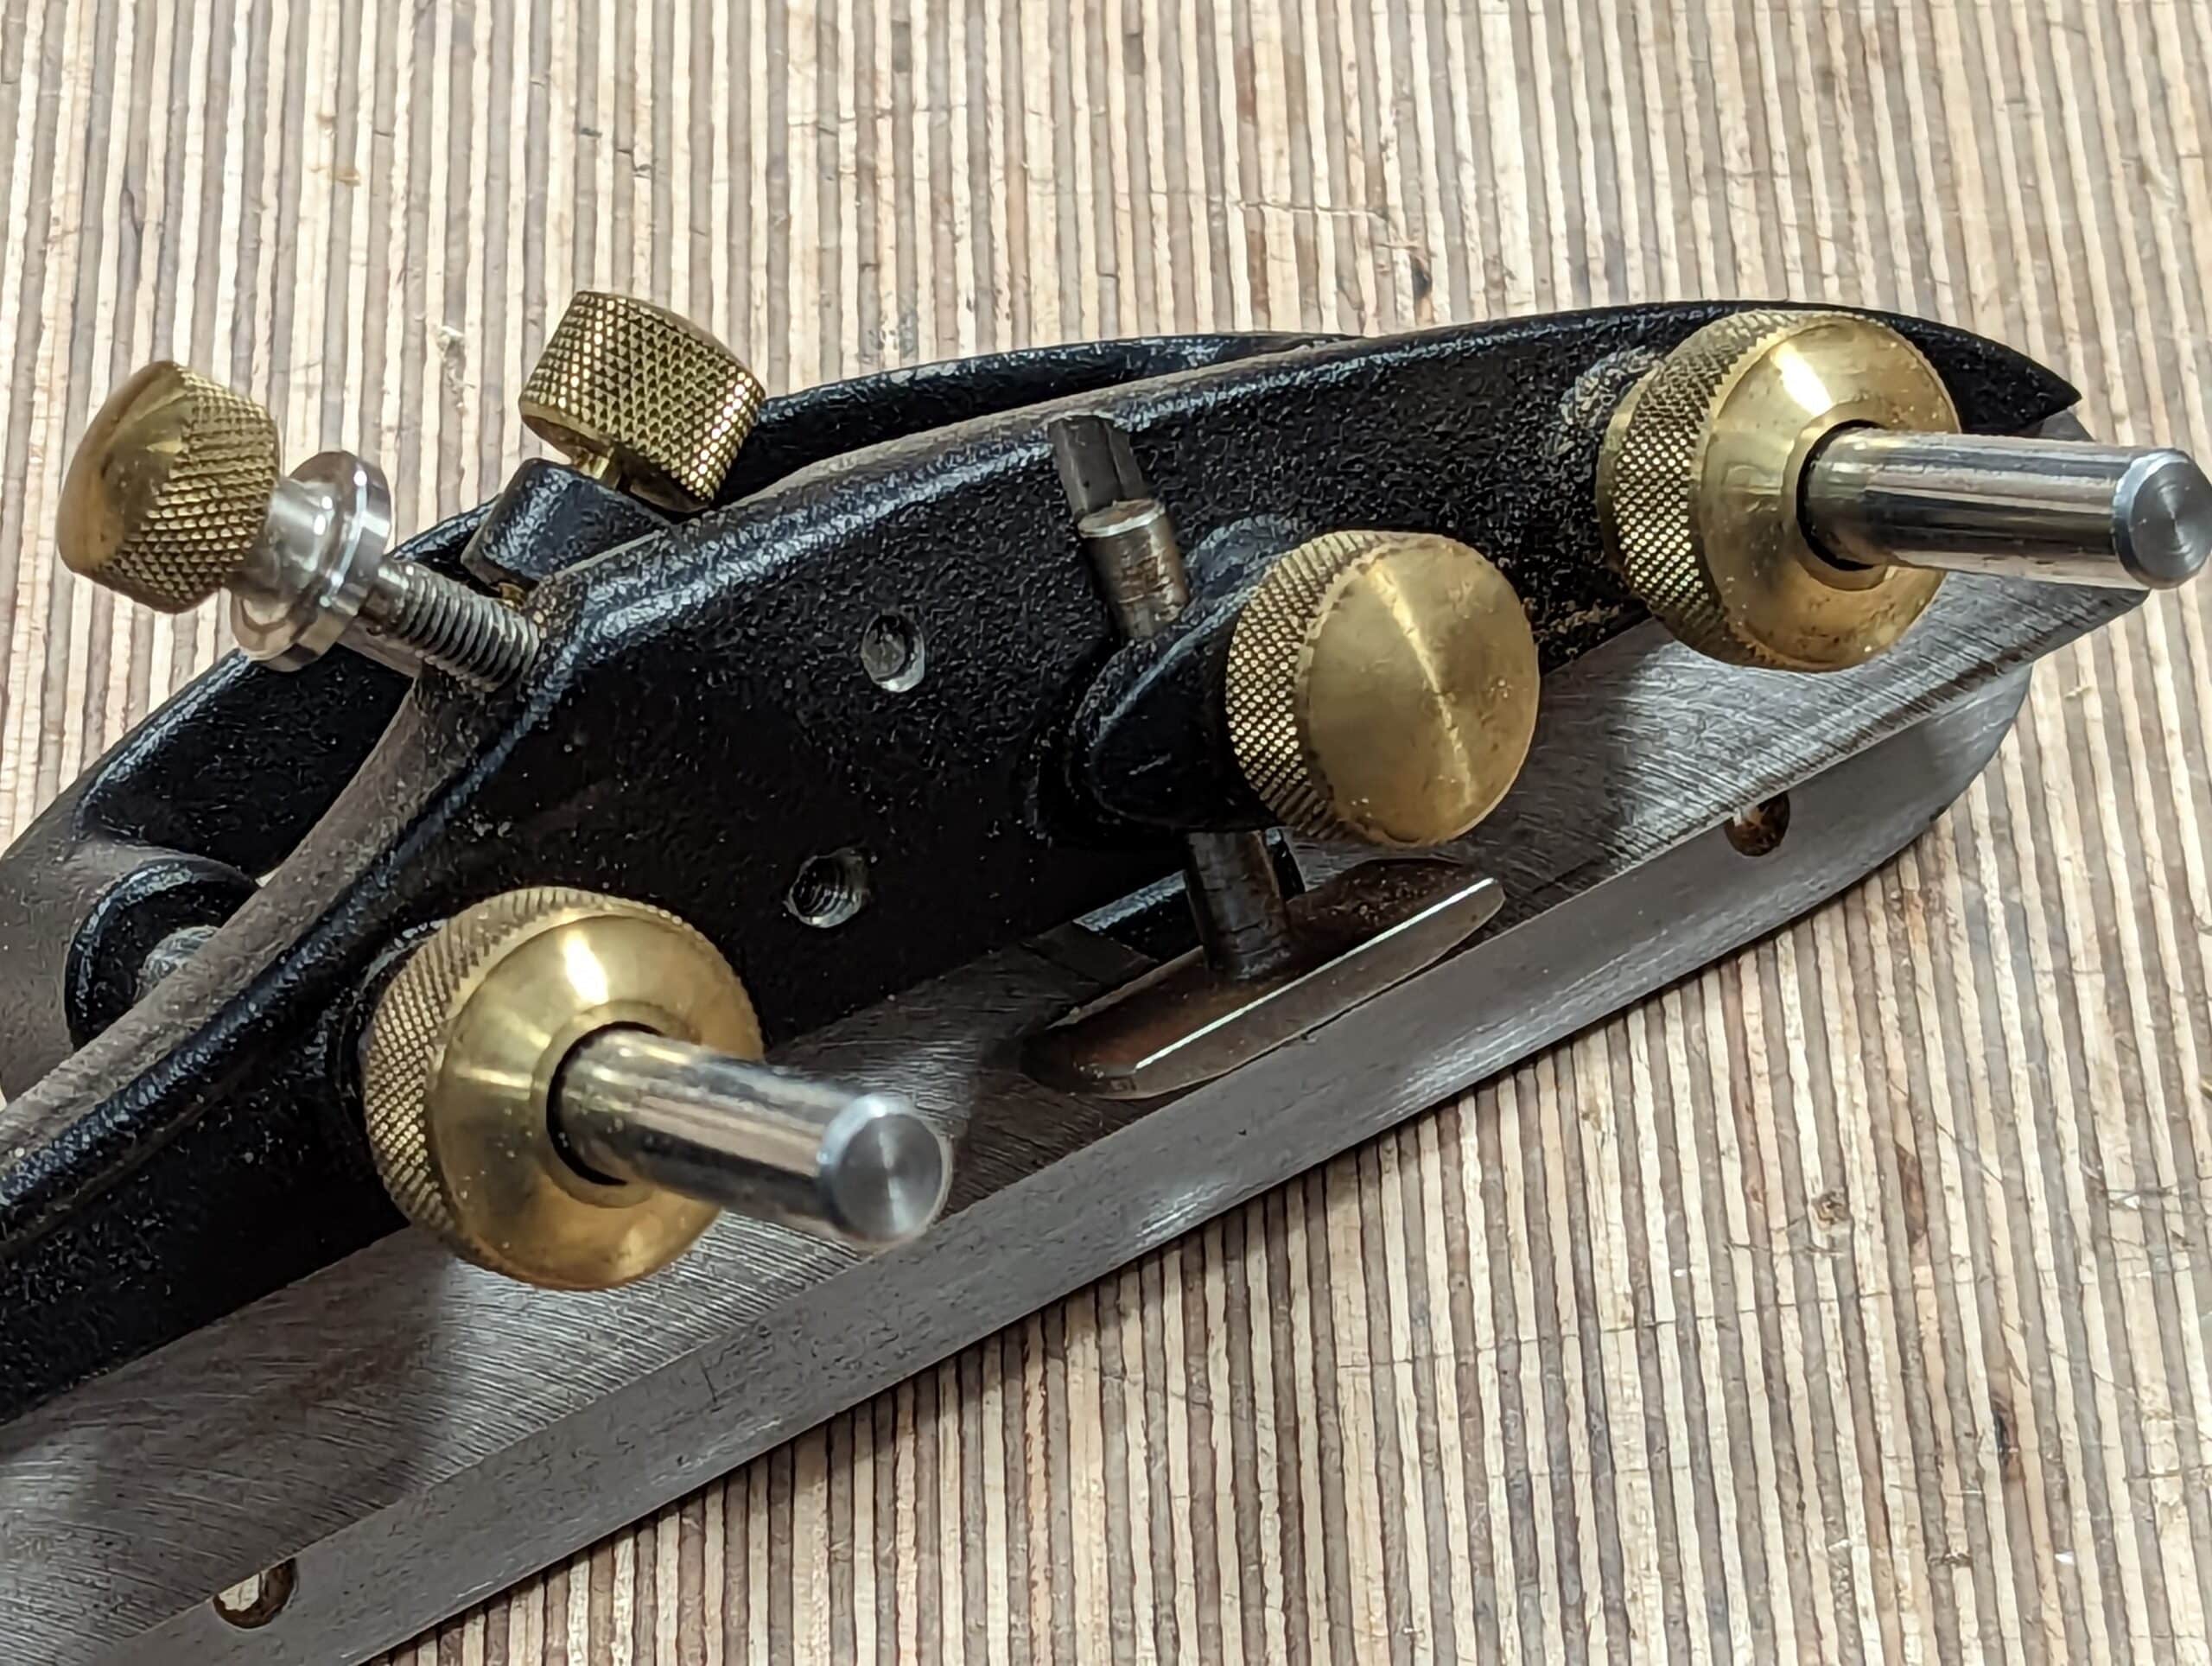
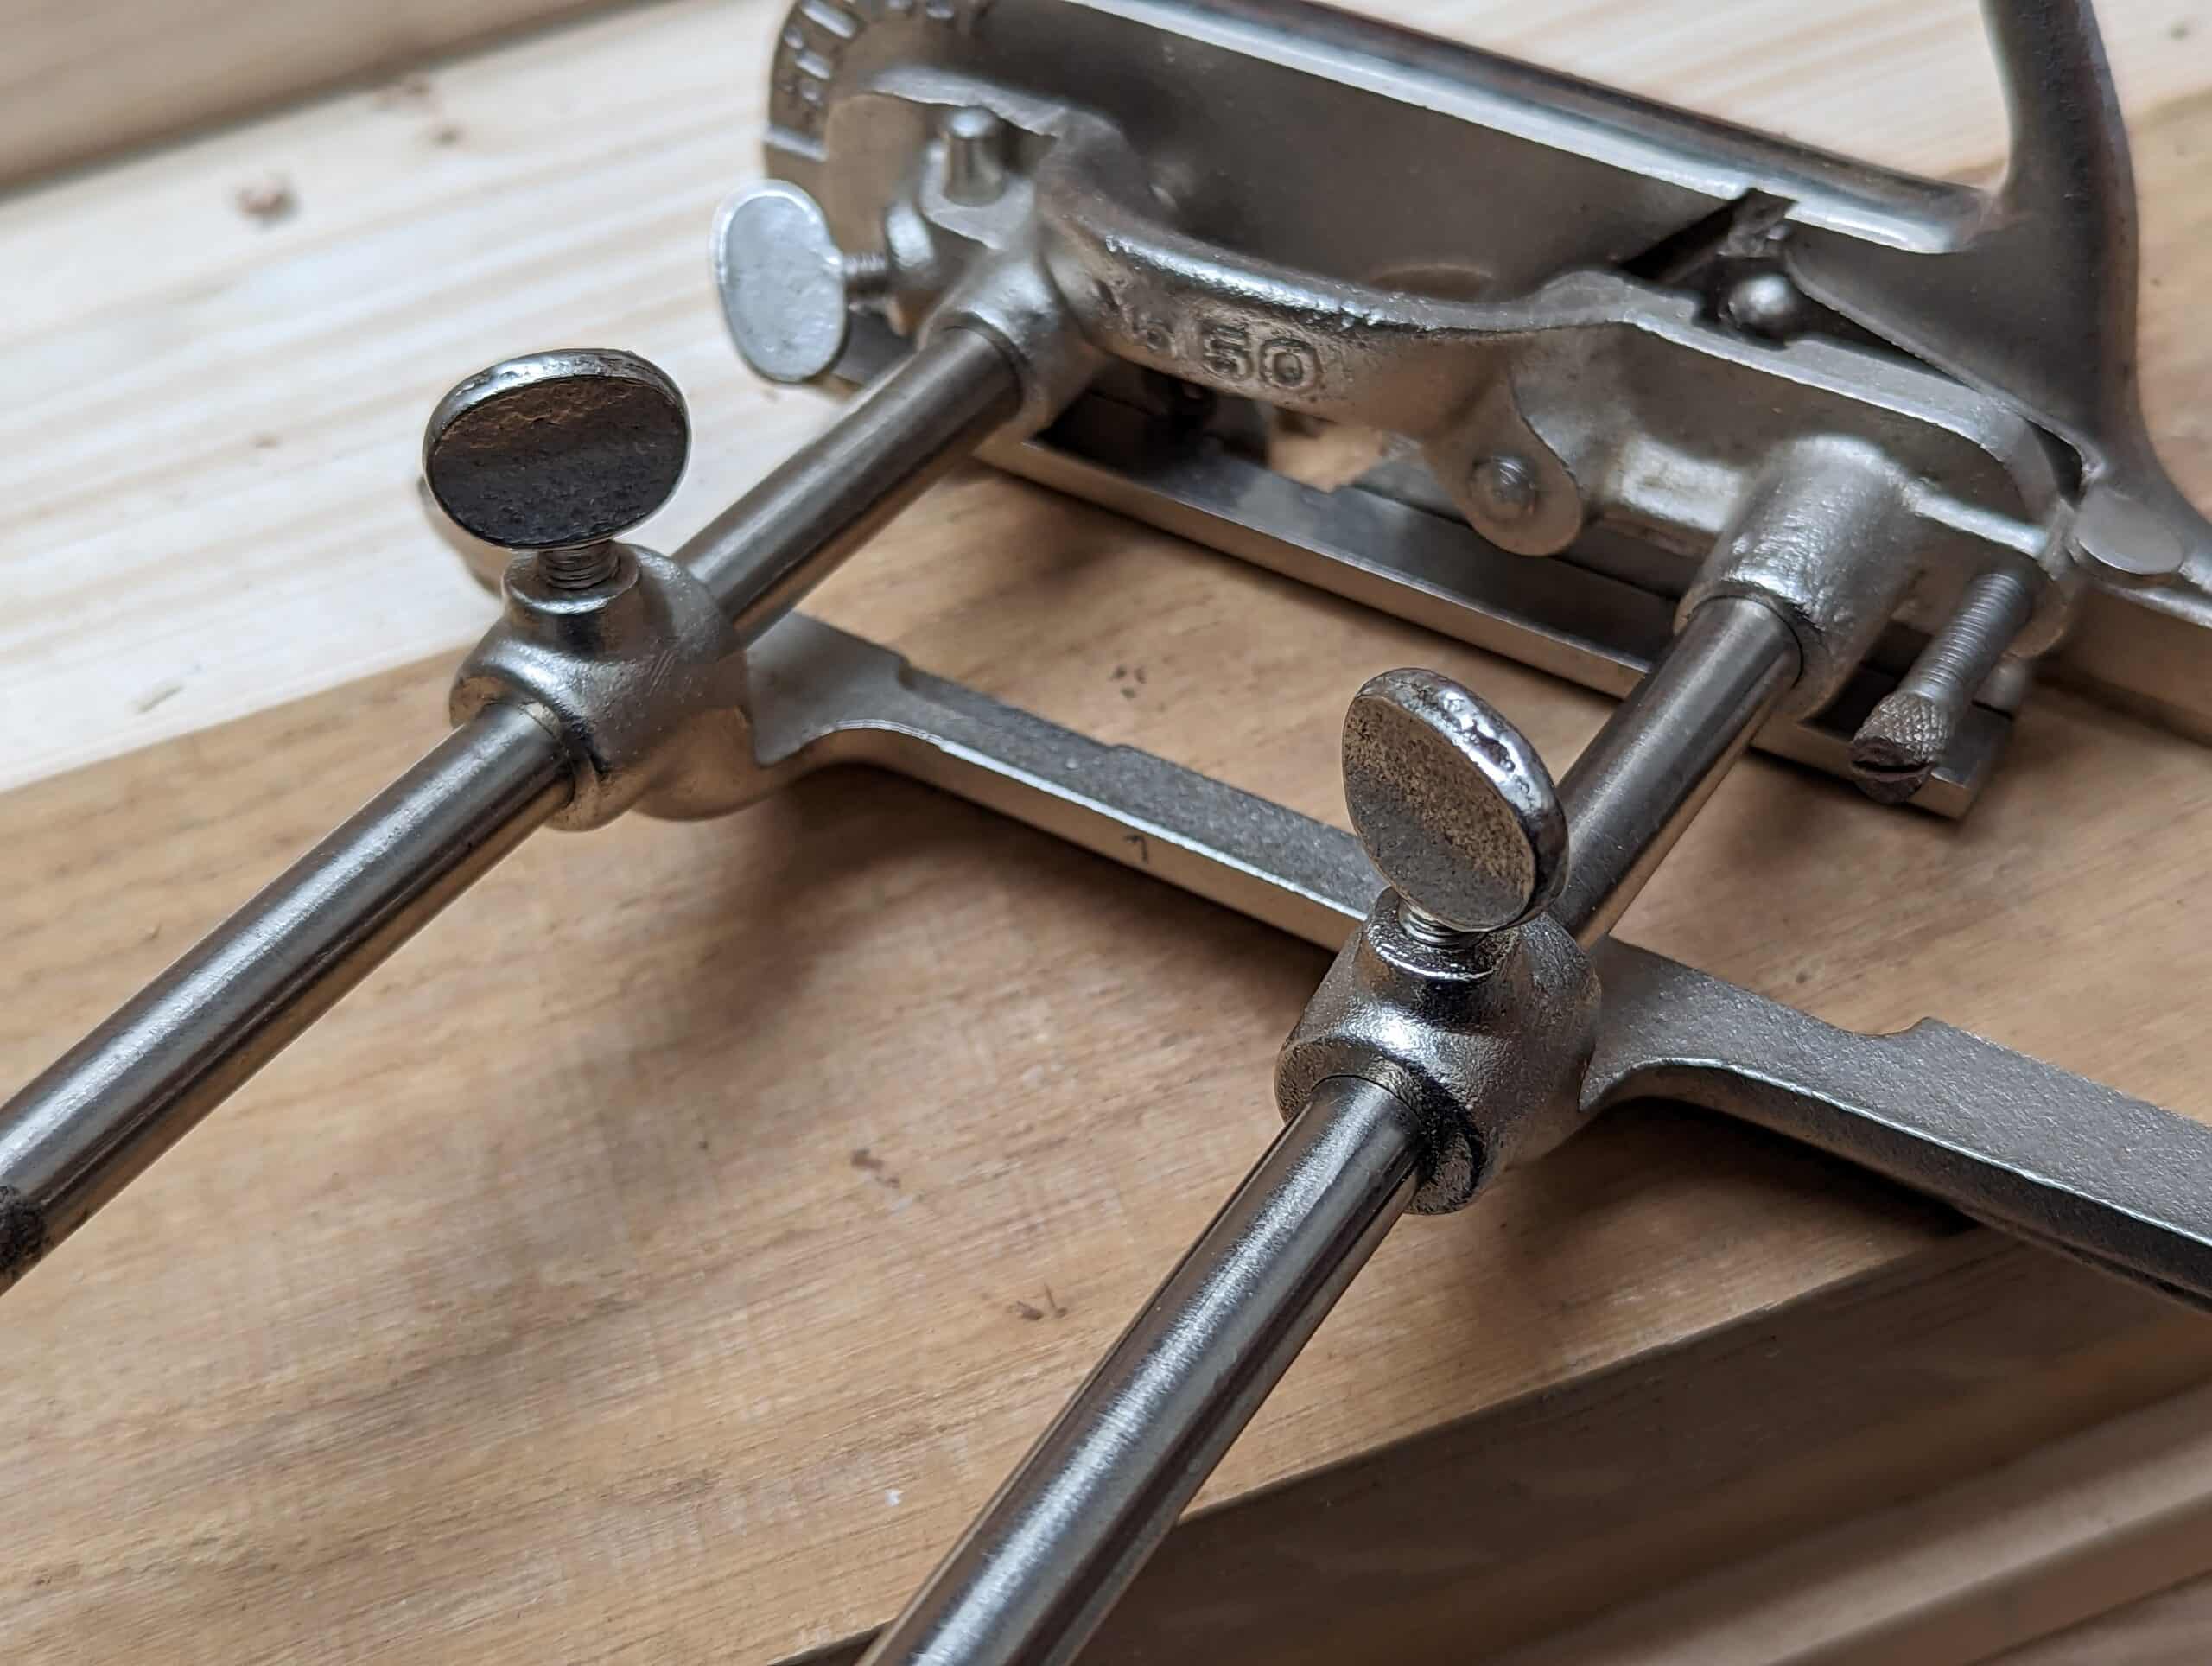
This week I tested two plough planes side by side with regards to the guide fences holding their power positions as non-negotiables on the bars for guaranteed parallel cutting of grooves and then to on the depth stops. The Stanley (2nd above) is now vintage I suppose but it is probably the best plough plane made because it’s so rock solid in performance, the fence is gripped solidly to the twin bars even with just finger tightening and rarely if ever slips, even when just finger-tight and when you tighten with a screwdriver the bolts will never move no matter what you encounter. The second plus is that the depth stop stops you dead on too.

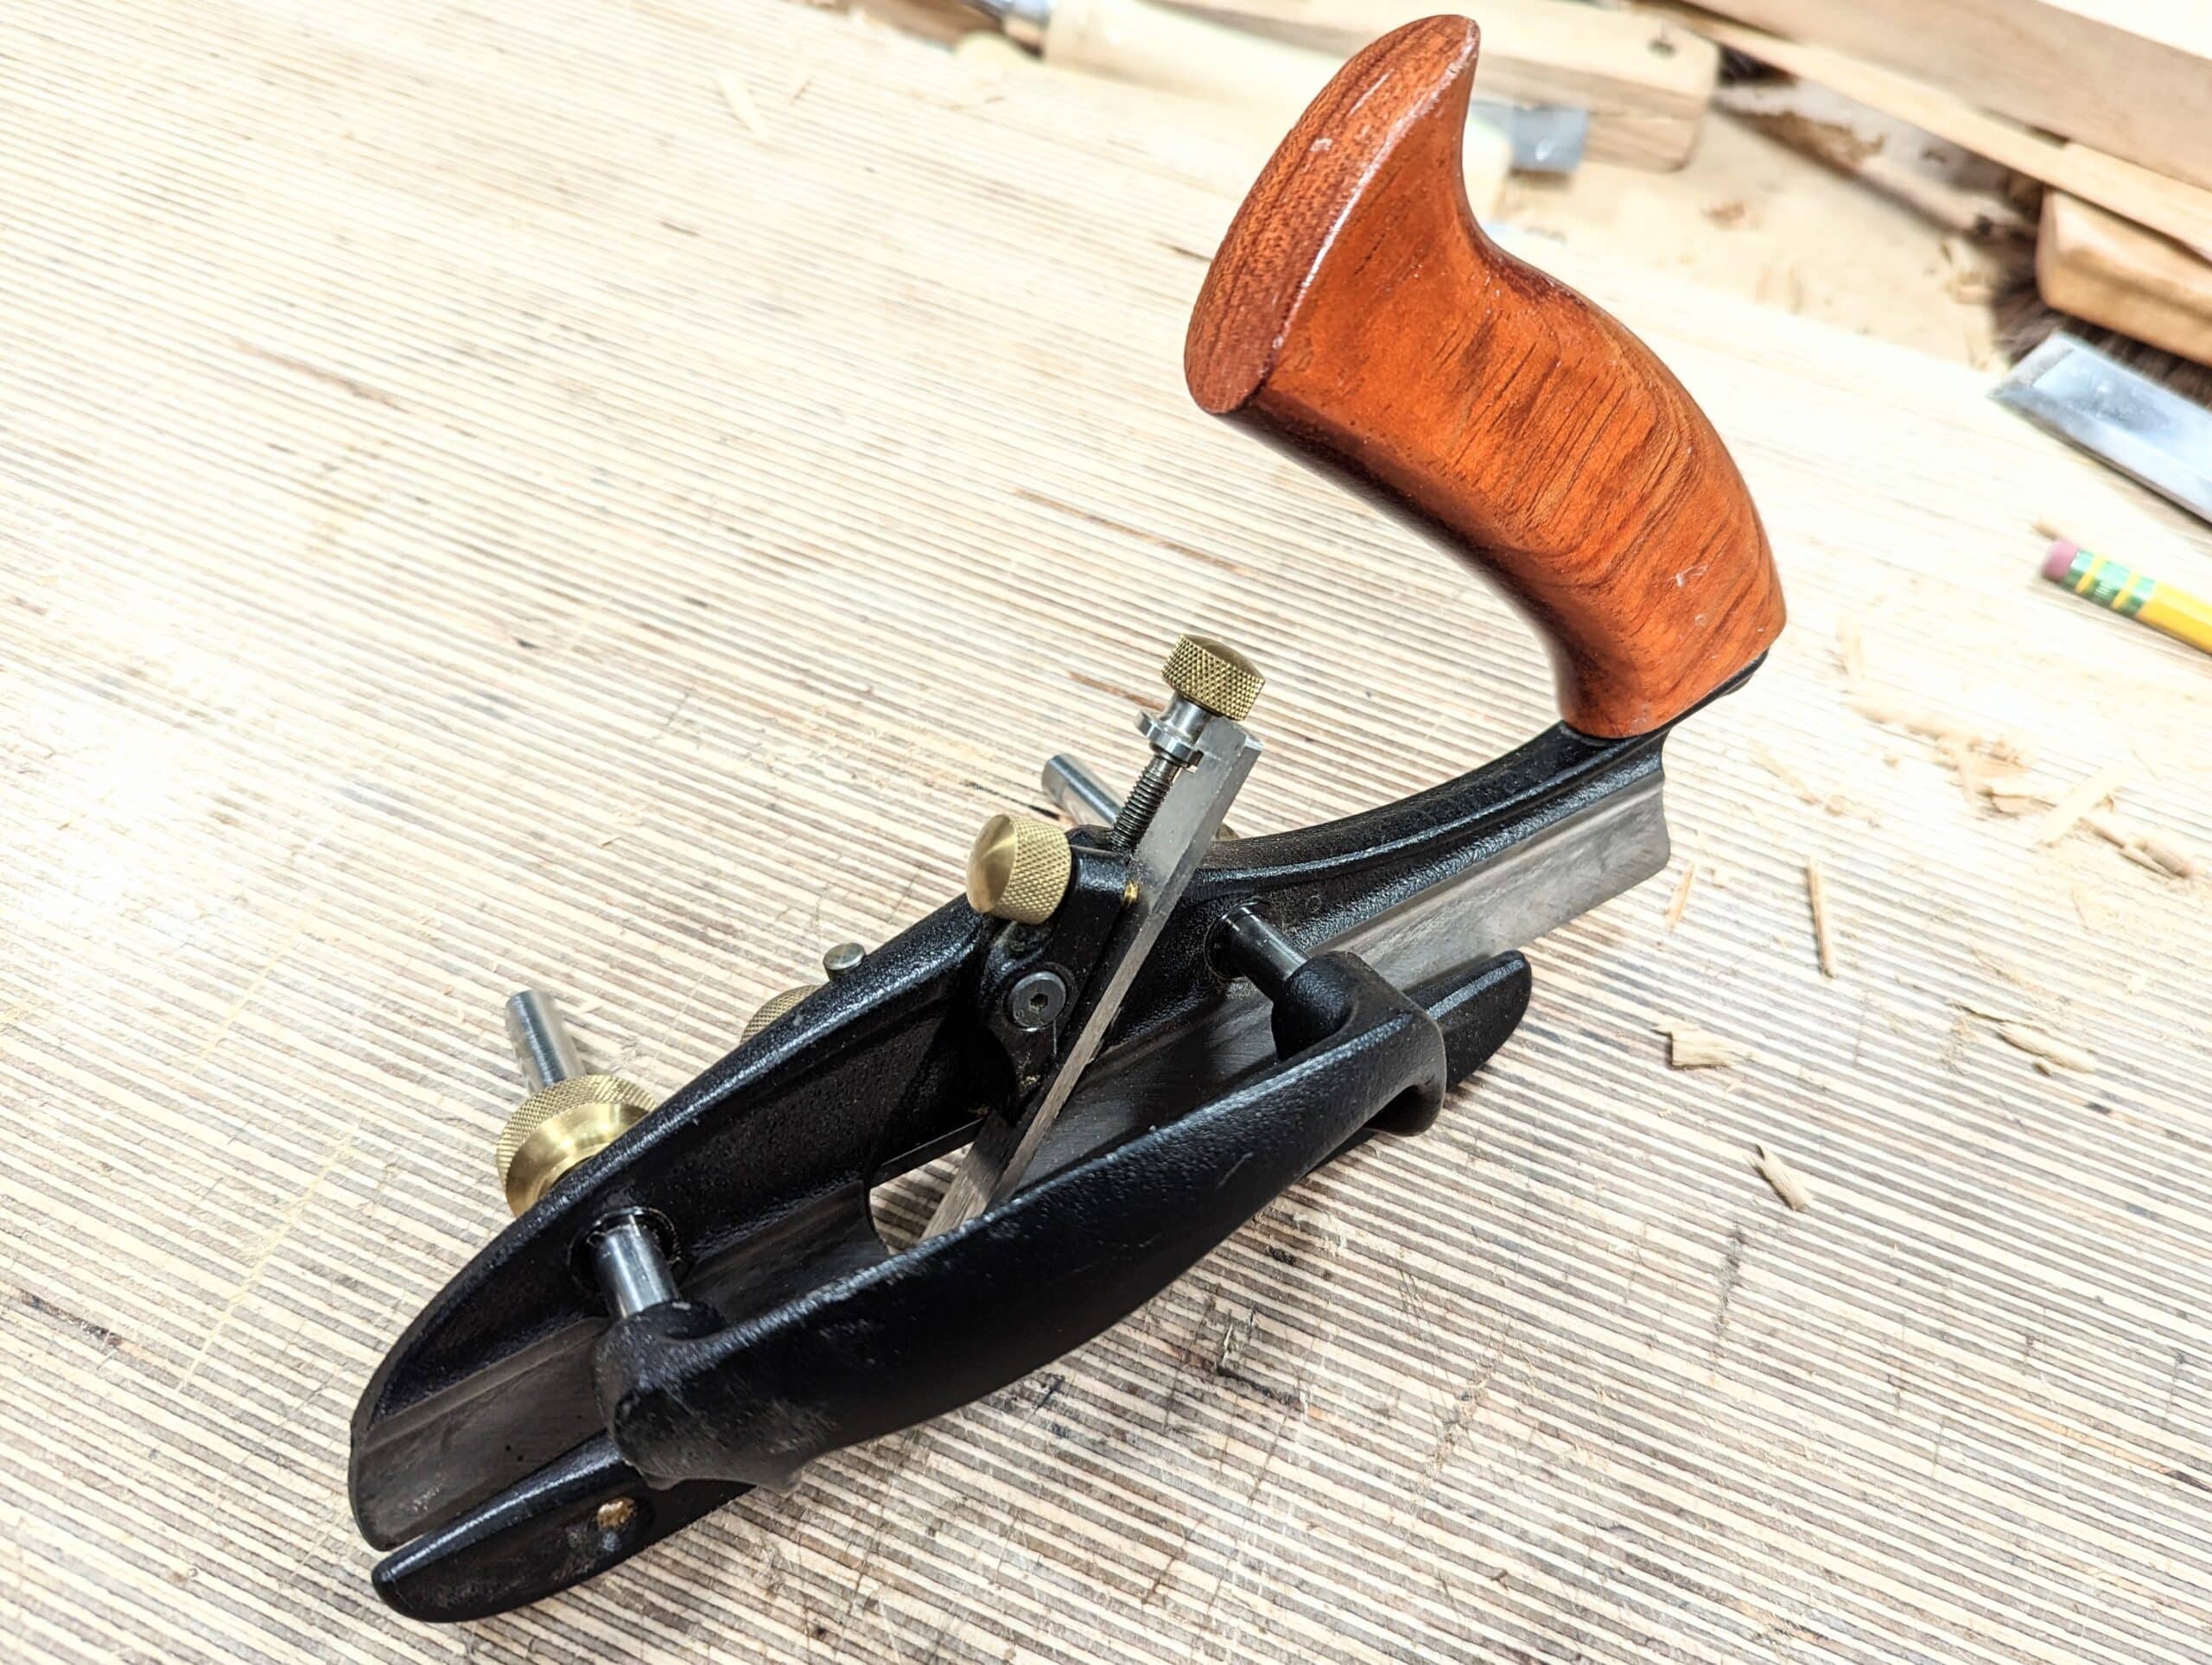
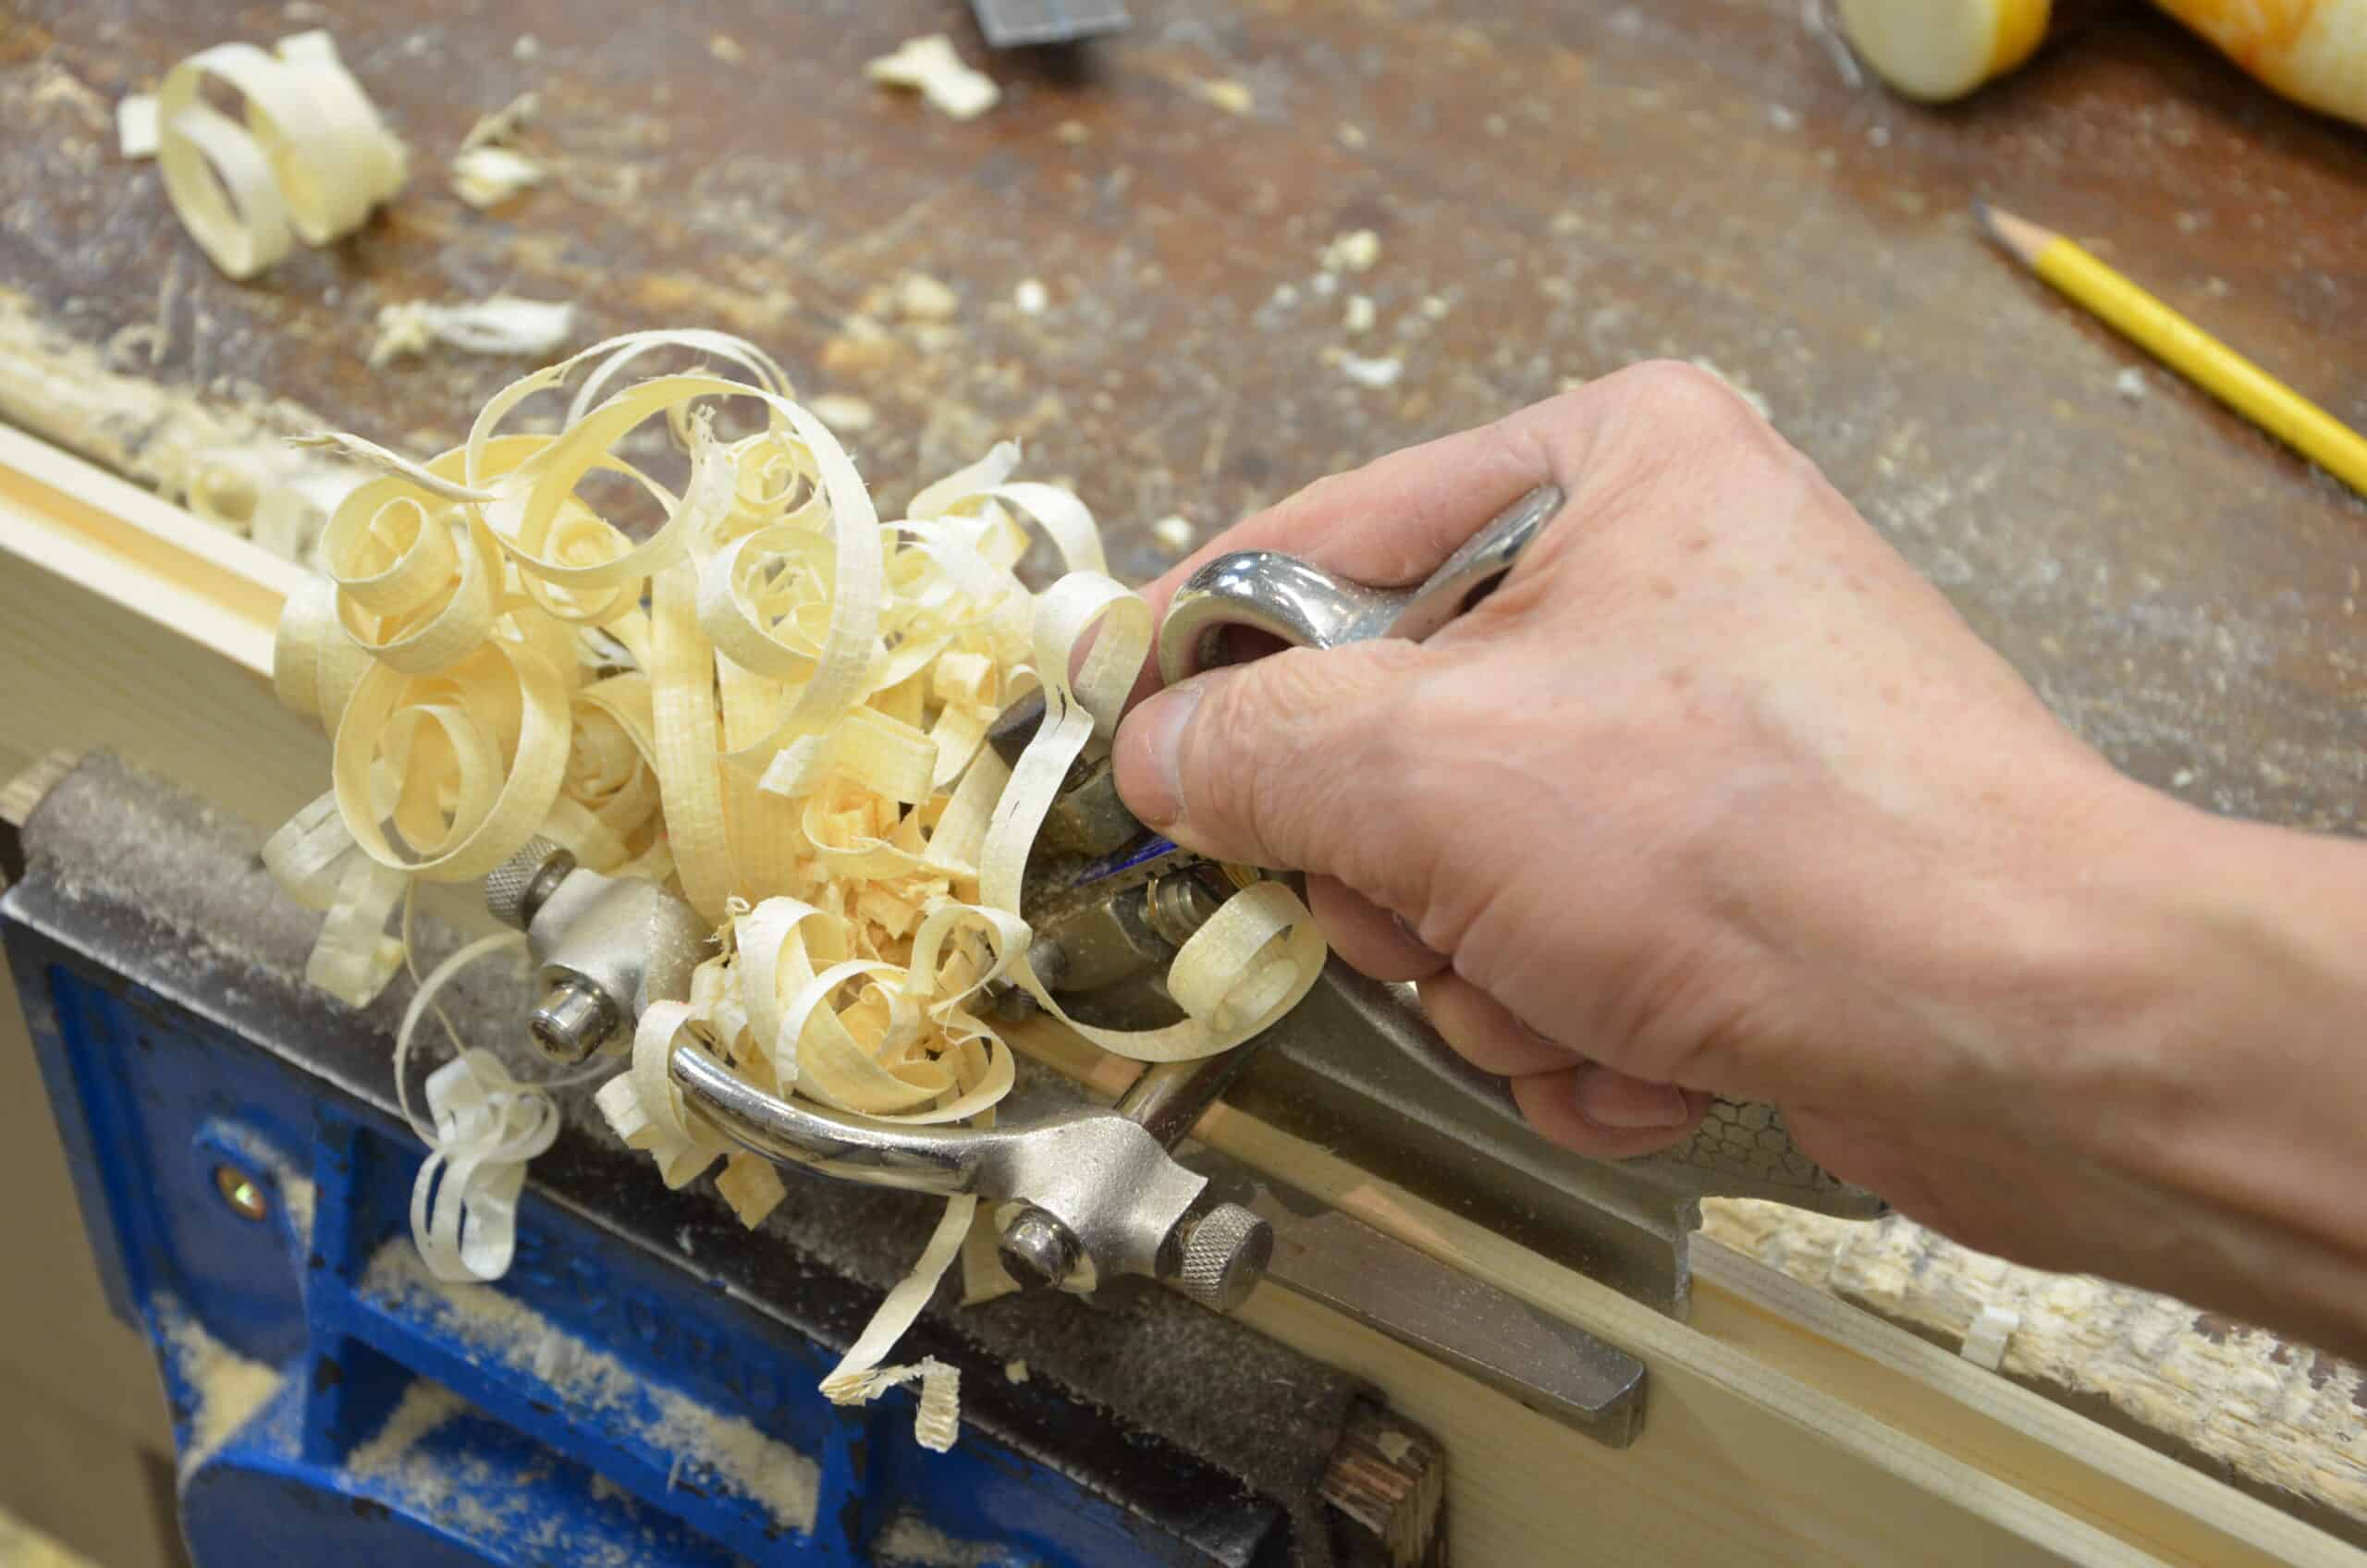
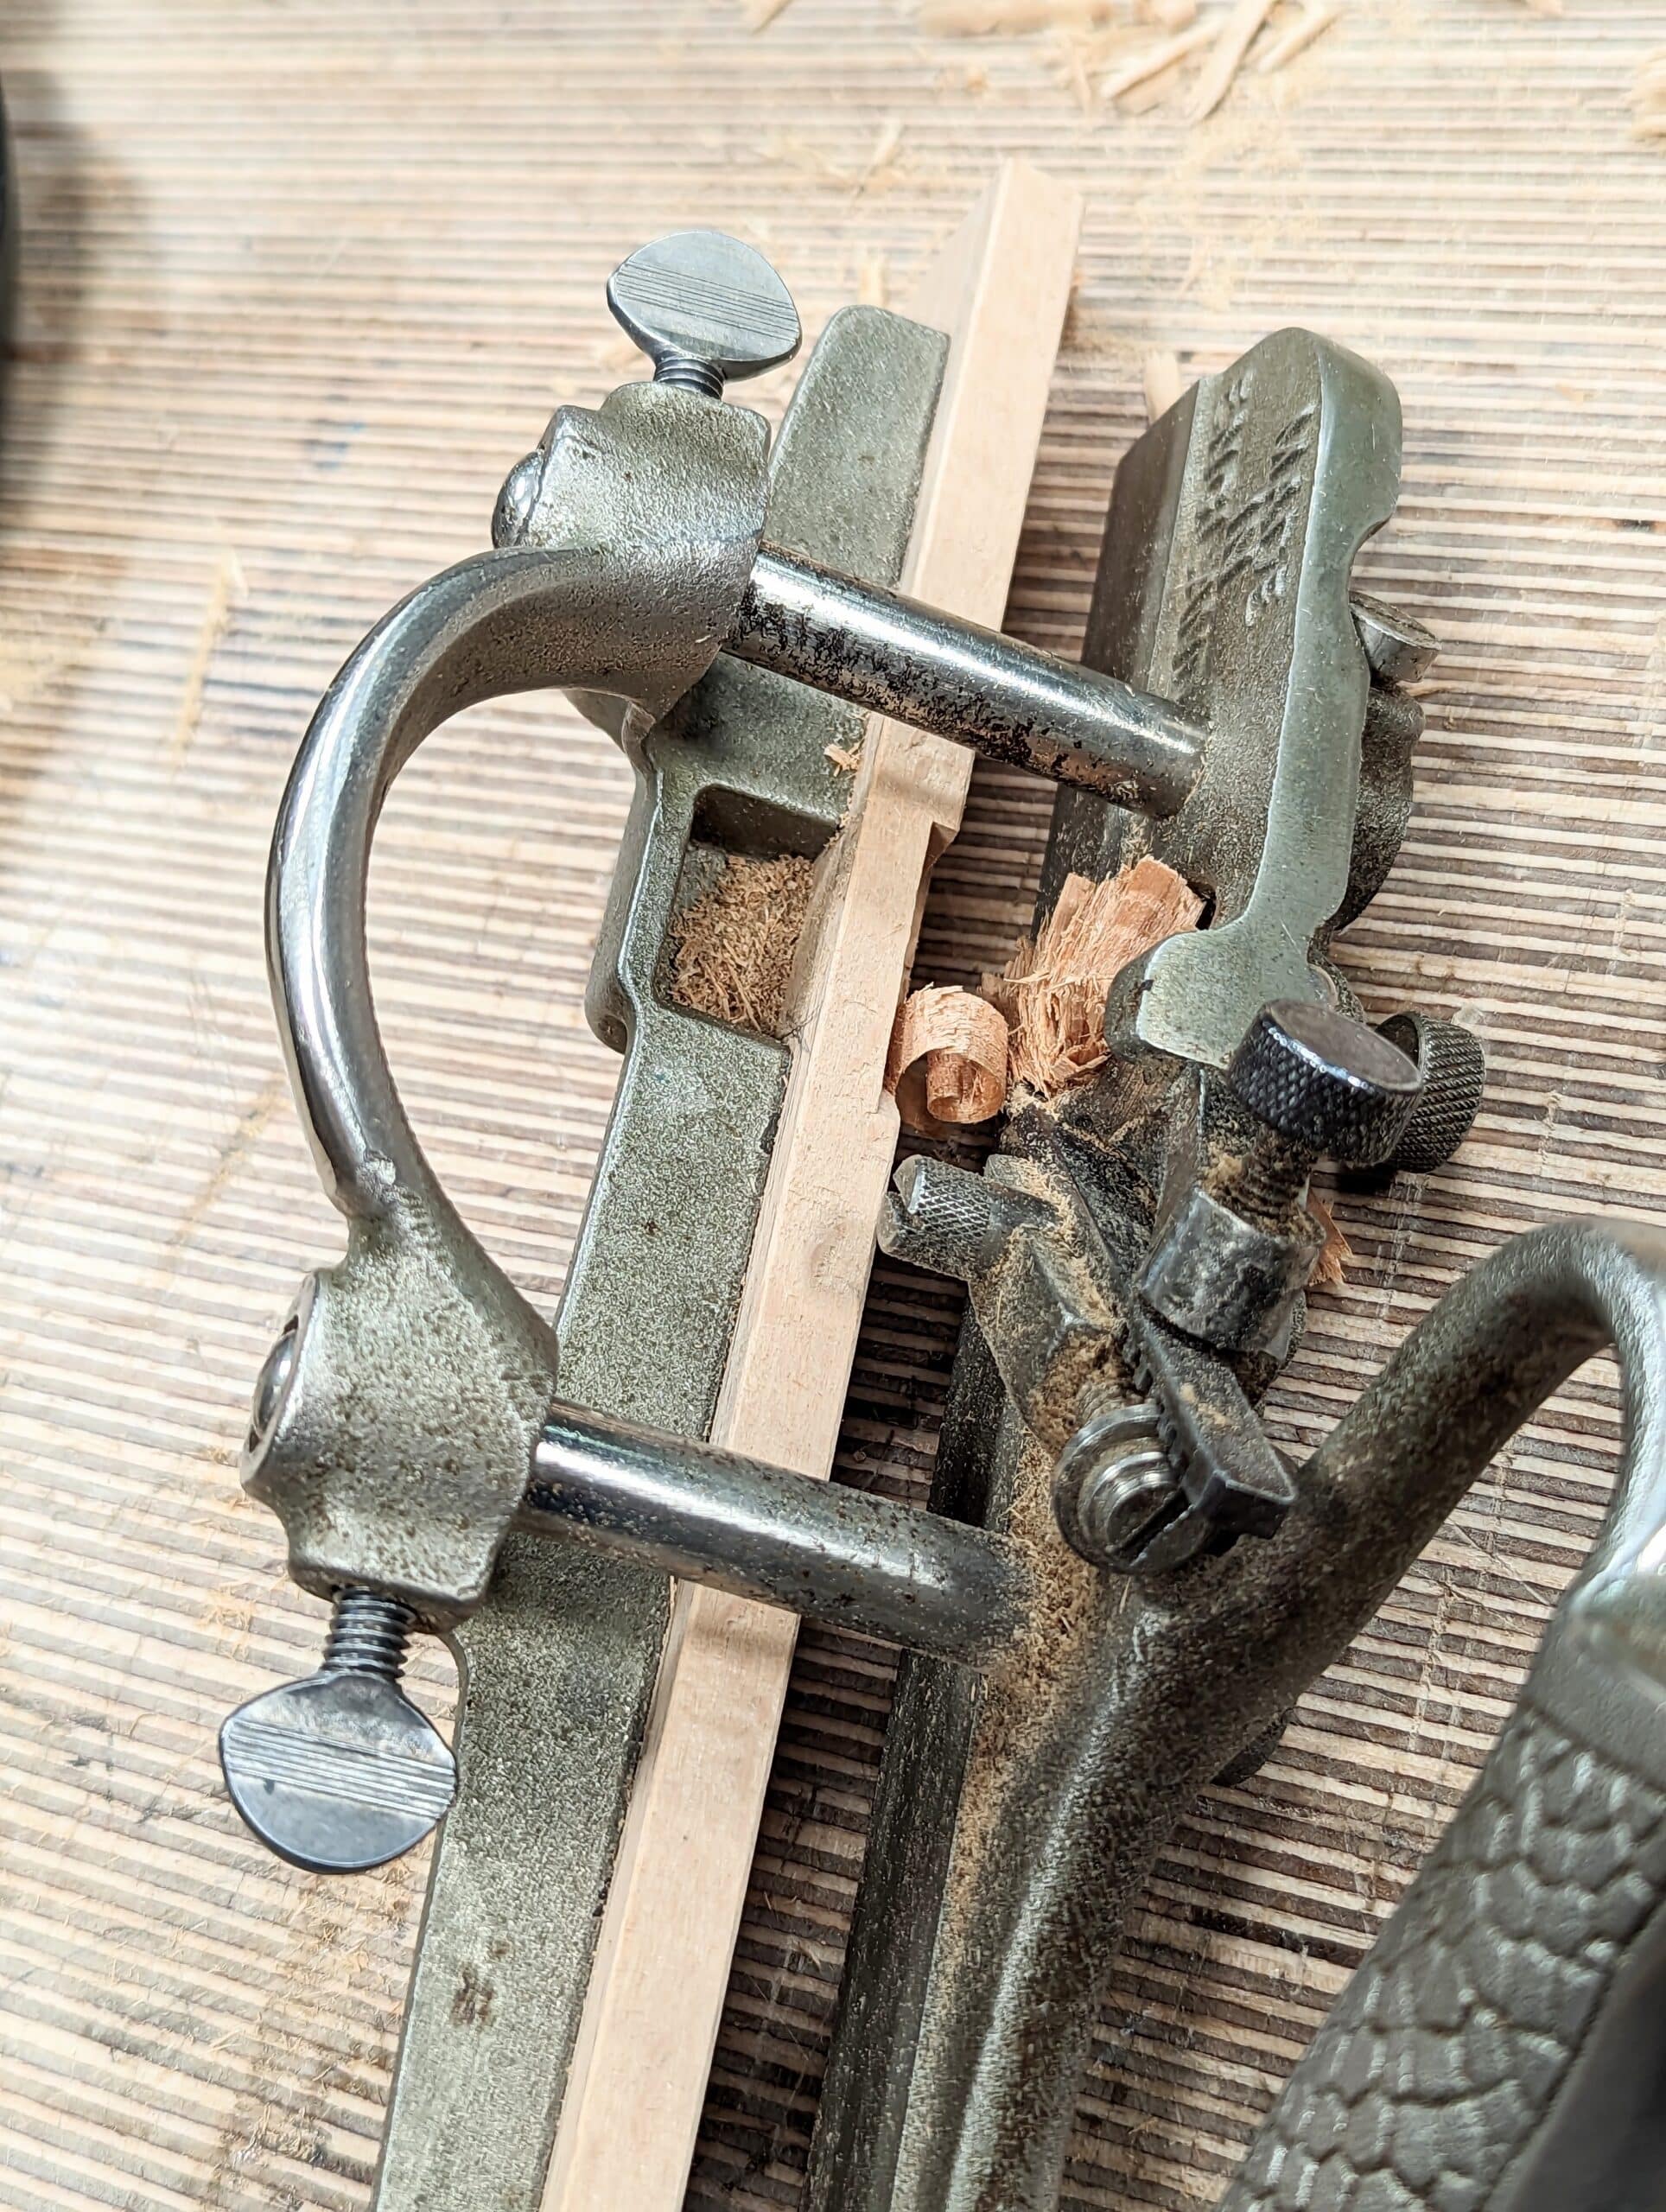
The second plane is the Veritas small plough plane in the picture above. What I did was set both the plough plane fences and depth stop/shoe absolutely as tight as I could with my fingers. On the Veritas one, this is the only option. I then tested both plane types by tightening the setscrews on the plane body and setting the ends of the two parallel rods onto the benchtop and pressing via the bodies of the planes. The Veritas offered very little resistance and slid easily along the rods all the way. I did raise this issue with Veritas a couple of times BTW. I understand that they have fixed the issue with a revised collet and it’s now rock-solid and immovable so no longer a problem. The Stanley on the other hand would not budge applying the same pressure and method of testing and yet I was using only the finger-tight tightening I used on the Veritas plough plane. The Stanley plane gave the additional option of a slot in the cheesehead machine screws they used.
So what made the difference between the two planes?
The Stanley applied pressure via the machine screw directly centred on the two parallel rods and so too onto the rod of the depth stop. With strong fingers, this is usually enough. I would probably still use the screwdriver for added security. It’s necessary to apply good lateral pressure pushing the fence to align against the wood when ploughing down grooves and then in wiry grain and hitting knots you must deliver certainty as the resistance comes from the wood.
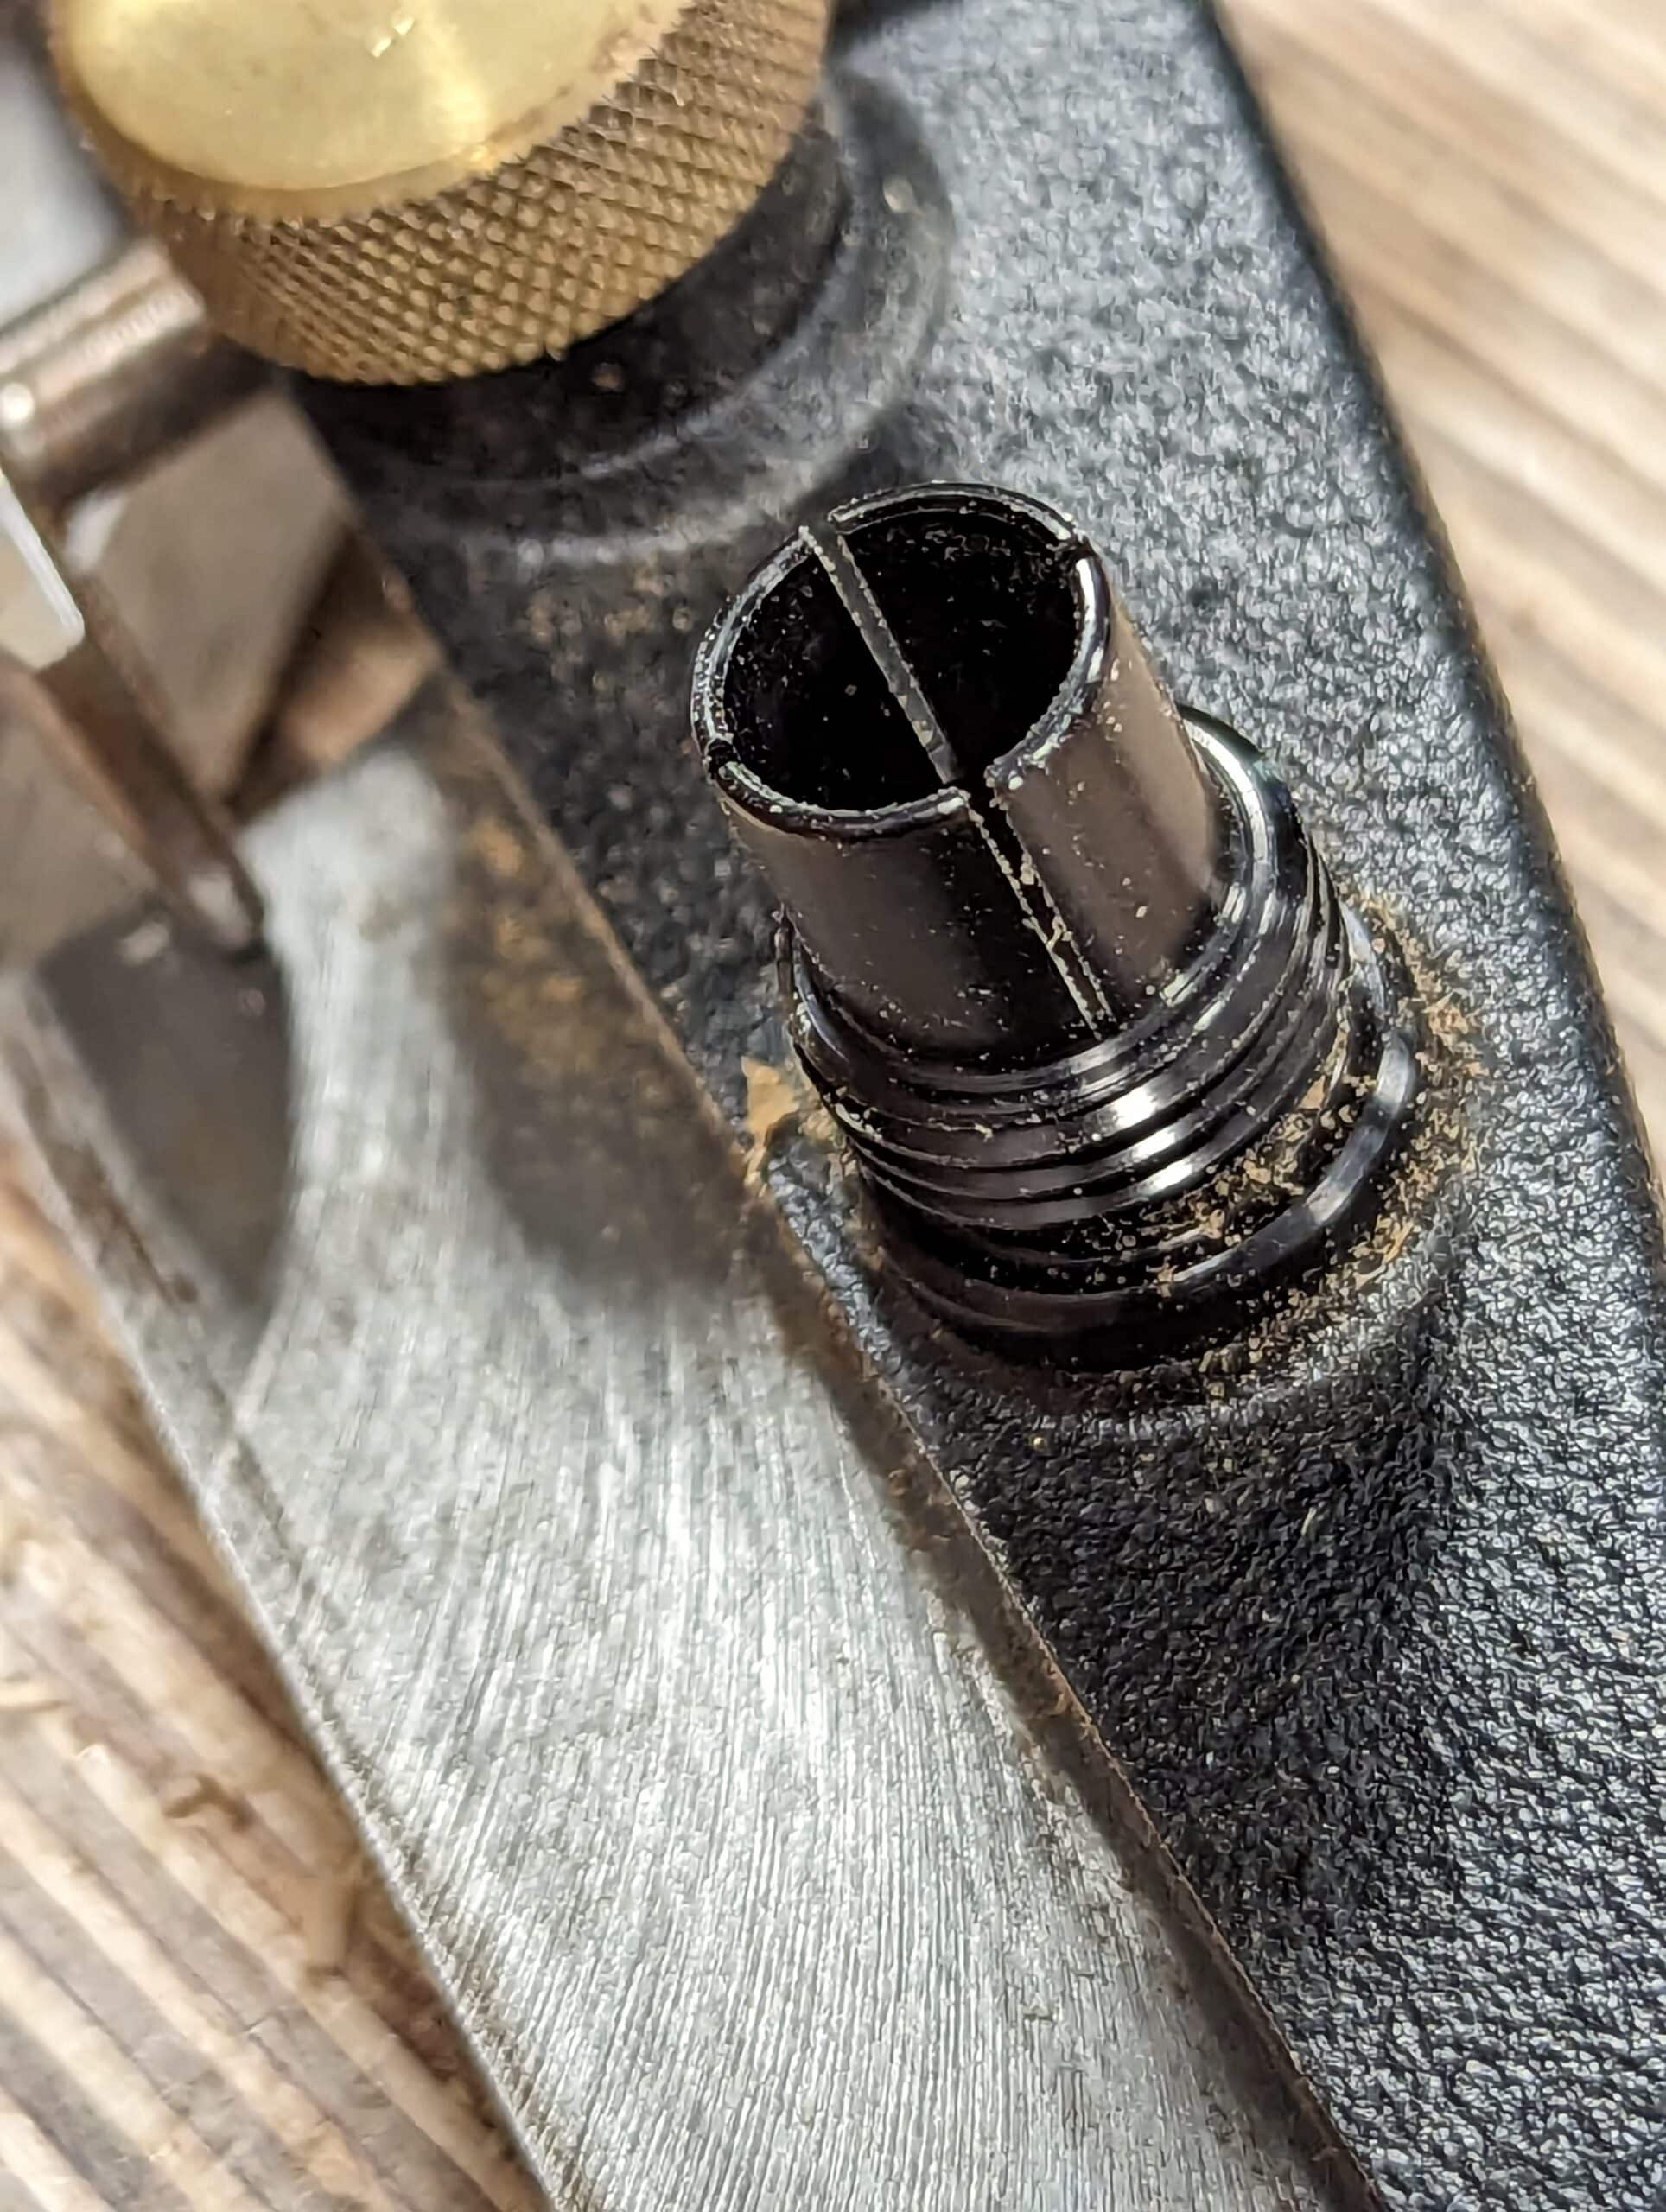
This is the innovative Veritas version of locking the bar to the fence and the plane body that didn’t work too well on my early model at all. The collet mechanism locking the fence to the rods via brass screws through an internal cone shape applies pressure to the split tube collet fastened securely to the plane body. It’s a clever device even though it didn’t work well at all in my plane. Think hose pipe tap attachment where the hose is fixed by the outer threaded ring, maybe. They changed the collet (I just heard) and that fixed the issue and I am glad because I do like the plane and the overall design.
Some good tools are ill-thought-through in certain aspects of the design because of the small things mentioned. The knurling on a nut can be enough for initial and convenient setting but I often feel there is insufficient force and that a spade head thumbscrew or the slot head will secure higher confidence.
It takes almost nothing for manufacturers to remake or add different components to offer as alternatives (it could be charged for to cover all costs, so no loss to manufacturers) and they could all offer brass or steel thumbscrews to reflect their thoughtfulness and customer care. Of course, it’s too late for some makers who passed along their output to those who bought them out and discontinued some of the original product lines
I have different fastenings to one or two planes that are questionable as to authenticity; they look as though an owner/user switched the knurled cheeseheads out for thumbscrews that tighten more easily and securely while one has slot heads with the knurling.
So we see that many things are silliley said and equally so in the making of things work. Pliers resolved the main problem by introducing a secondary one of lesser consequence. Many people toss comments over their shoulder (and I am guilty too) and walk away from the issue, taking no responsibility for expressed thoughts but poorly considered in that self-righteous way we have. Yes, I could wrap the locking mechanisms with leather or shelf liner inside the pliers’ jaws, but that’s not going to happen. I just use pliers where necessary but my good report on the Veritas plough plane of many years back, made in good faith, is now of course, negated by a fuller performance in practice. At the bench, after many slippages, I had to abandon the plane because it was not dependable. The pliers on the Record or Stanley work well and though I have done it for decades now, the knurling is still intact. I refuse to worry about the nickel-plating.
Is it possible to roughen the guide shafts with sandpaper to increase the grip?
No. All other guides are smoothly finished evidencing the fault lies elsewhere. In this case it’s the collet concept that’s all.
It is always annoying
– first to have to modify an already expensive tool;
– second to have to use an additional tool for the setting.
An option could be to make, with a strap of leather, something which works like an oil-filter belt wrench.
Another option could be boring 3 little holes on the rim of the veritas knurled nuts to allow the use of a hook/pin wrench/spanner. (I don’t know what is the proper name – in French: clé à ergot)
Some of those spanners are adjustable for various diameter and are worth about 15 EUR.
Although one could probably make one by oneself with a bit of metal skill.
Sylvain – I assume that you are refering to a C spanner, I have several, but not that small.
No, I’ll keep it for a season and get rid of it.
Paul – I do keep a pair of pliers with tape on the jaws to reduce the damage done.
The spade head nuts and screws were common in the past on wooden planes, and I have a wooden spokeshave that I love that uses them to adjust the blade.
However, my Record rebate plane has one on the fence. I used to be in the habit of putting my left thumb against it. One day I hit a knot, plane stopped, thumb kept going resulting in a broken screw. It took me a while to find a replacement so I now keep thumb pressure away from it. It may have been a poor casting, or it might be that they were dropped because of breakages and it being easier to create the round ones (cheaper?)
I do love the brass ones on old wooden tools.
This is a fascinating post to me, thank you for posting it Paul. I find it interesting to consider the different kinds of hardware that can be used in tools. For example, using a steel cheesehead with a slot in a wooden marking gauge would allow maximum torque, but could damage the wood, in which case maybe using a brass cheesehead or even spade thumbscrew is probably sufficient. I like the idea of making the hardware advertise: “don’t turn me too hard, you could break the tool.” Of course in this situation it was just wrong.
It’s not the concept, it’s the implementation. Routers, milling machines, and metal lathes all use collets with great success. Veritas botched the implementation and probably overestimated the ability to tighten them without tools.
Well, I held back a bit to be kind. Even when tweaked with pliers, marring the knurling all the more, I could still slide the fence readily all the way in a single thrust and not much pressure.
for the veritas plane, i suspect steve/paul is right. the collet sounds like it either hasnt been quite designed or manufactured right [most likely], or is made from the wrong metal.
i would presume that brass knurled nuts are used on woodworking tools as the brass is self lubricating (and looks nice) – a good thing for nuts not where they are infrequently used, and dont need to be tightened too much. problem is in this instance… they do need to be tightened!
i wonder if veritas could design a square ‘rod’ for their plough plane, and have a square ‘collet’ locked on to the square rod with a set screw etc.
anyway – there would be robust solutions to this if desired, now the problem has been flagged.
( i have had the same problem persistently with many drill stops slipping on the drill bit, which also lacks a good easy solution)
ummm, sorry veritas i should have read sylvains comment below before commenting!
I have used the Veritas plow for at least 5 years – probably at least once a week. Originally I used a regular pair of pliers and dinged up the brass. For the last two years I have used pliers with a plastic jaw liner. I check the tightness often and I have never had a problem. My problem with the collets is they continue to grip even when the set screws are loose. This makes it very hard to adjust the fence. This problem seems to be multiplied on the Veritas combination plane which is almost impossible to adjust. I have reported the problem to Veritas which has no workable solution.
You are not the only one having complained; it seems Veritas has been listening.
I have just examined my Veritas plough plane.
While the collet on yours has four slits, on mine, which is probably a little bit younger, the collet has eight slits.
I have tried to push the fence with all my body weight against the workbench apron; it didn’t move (hand tightened).
The depth stop has been upgraded also.
I have the upgrade one on my plane.
I seems an upgrade was free until 31 August 2016.
You might nevertheless still try to get an upgrade.
Salko Safic made a video about the depth stop upgrade (a little bit more than 4′ long).
I have reworked the post to reflect the Veritas changes to the collet. I’m glad for the update in the design. The goal of the post is to say that some knurling is simply inadequate for those of us using them every day and then too for those disabled by hand problems such as arthritis.
“silliley said”
I Love It Paul!
Agree.. I had Veritas apply the upgrade to my plane and both the depth stop and fence are solid and secure using only hand tightening. Granted I am only a hobbyist, but in my current project I have ploughed grooves in the fronts (Sapele) and sides (Hard Maple) in three out of four drawers and the settings remain unchanged.
Thanks Paul. I have the Veritas small plough plane I really like it. Early on, I didn’t realize how hard you should snug it and things loosened and my groove got wider which made me upset. I check and tighten the knobs quite a bit now.
It is possible to buy soft jaw pliers for not much money to reduce marring. There are also small rubber straps that wrap around a bit of plastic that can be had; forget what it is properly called. Mostly, my knurled knobs are marred a bit before I figured all of this out. Such is life.
Great diagnosis! So fun to geek out over these details!
I worked at Bridge City Tool Works and when possible we would use a set screw on a through tapped knurled knob which would enable use of a Allen wrench for extra torque. Great for smaller knobs.
For clamping down on shafts, instead of a round hole in the collar or part, a (not sure on the geometric name..) a “triangular oval” gives a 3 point contact on a shaft: The knob, plus 2 more points if contact. This provides a much stronger connection than just a round collar hole and round shaft.
Michael
I had this struggle with my Woden 78. I’d get it set up for the cut I wanted, then everything would slip out of place and ruin things. This was especially frustrating on the depth stop, where the shoe didn’t accurately slot into the body (this I fixed with some files).
In the end, I sawed a slot into the thumbscrew in order to be able to get it tight enough
Hi Paul, you mention the nickel plating on some Stanley planes. I recently got a Stanley #90 with the plating flaking off. Have you had any experience with removing such plating? While I don’t mind the appearance, I’m not a huge fan of little bits of metal all over my hand.
Little off topic it looks like someone made a wood tote for that Stanley 13-030, interesting, I got the 25-250 that Paul recommended in previous blog and the tote is some kind of ugly, but it has slotted and knurled screws to lock it down.
If you laminate up some quality ply that has thin veneers and no voids for a tote blank that has no short grain. Then you can follow Paul’s great video on making a plane tote, and make yourself a pretty good looking tote that has better feel. I left the ergonomics alone because I found the plastic handle (once it was fully deburred and the mold line removed) very comfortable.
I have had my fair bit of issues with plough planes. Started with a Stanley 50 that was very hard to set up and use…
Required a lot of tweaks to get it to work reliably and repeatable..
I have since got my hands on some record plough planes which are much easier set up and use.
I keep a piece of thick leather nearby to protect the knurled screws while I tighten them gently.
Depending on the plane you have to set the fence very accurately, costing time… All of this is moot of course if something slips afterwards.
But what prompted me to this reply
I have a feeling there is some analogy with having to fettle a bench plane before it can be used…
Some things you just have to know about the tool and how to handle it.
Thanks to Paul for guiding us along the way
I have a question for those having an unmodified early version of the Veritas plough plane.
When tightening by hand as much as possible (with the rods in) does the knurled nut bottom out against the plane body?
and,
Are the slit fully closed?
Good question but no, mine is off the plane body by 2mm. I cannot see if the collet closes but I believe it must but insufficiently. I thought about cutting additional slits into the existing ones or at least trying to widen the slits a little more so that they are tapered which would allow them more room.
Although mine have 8 slits, I wander if Veritas went back to 4 wider slits as the picture shown on Lee Valley site, with the new depth stop, shows only 4 slits.
What would you use? A Dremel cutting disk, a jeweler saw, …?
The depth stop upgrade is 0.00$ but I suppose one has to pay the shipping.
Although it might be possible to modify the existing piece (tap a new hole for the knurled screw, enlarge and counterbore the existing hole). The original piece was supposed to block the depth stop so a thin shim under the modified piece might be needed for easy adjustment.
Really interesting post and comments. An area I have very little experience in. I made myself a panel guage one time, and in order to tighten the screw against the wooden rod, I glued a lever onto the head of the screw. Now it tightens to an insane degree, leaving marks in the wood! I really need to change it for something with a little less torque, but I’m not sure what. I do like the confidence that the tight grip gives (especially on the long panel guage), so perhaps I can inly a piece of metal into the wooden rod that might better accept the force.
Once the plane is upgraded, for those disabled by hand problems such as arthritis, google:
“custom strap wrench nut saver Bern Billsberry”.
I have a Veritas wheel marking gauge which suffers from not enough grip to not yield to along-the-grain marking. I have gotten used to using my pipe grips to nip it up so it doesn’t really bother me much. Similar problem with the miniature router and similar solution. They are tools at the end of the day and sometimes you have no choice but to adapt them or your use of them to suit your own methods of working.
I found the cutting iron turned away under pressure in forward thrusts and so I ground a flat face that held the cutting edge square-on to the work and held the cutting iron in place too.
Good idea Paul, thank you.
Thank you Paul. All of what you said is appreciated. I have experienced this issue too, and have seen well known woodworker Chris Schwarz similarly use his pliers to tighten the screws on his original issue Veritas Plow plane much to the gasps of his viewers and readers. I think it is far better to have a setting stay fixed on a tool than to worry about a scratch on a knurled set screw.
Just thinking about threads on old UK tools or indeed any tools. What would they be? BA or Whitworth? US and Europe would be different again. Making slotted screws or even spade headed ones would not be a big deal to someone with a metal turning lathe, perhaps check out the local model engineers or similar as such people would probably see this as a little helpful fun project.
James
My Stanley 78 and cabinet scraper use 10-28 spade head screws. (Didn’t know they were called “spade head” until I read this post.) An odd size; you might see it as 3/16, and hard to find. In the US, 10-24 and 10-32 may be found at the big and little hardware stores, but not 10-28. Lowe’s even has spade head No. 10 screws, but not in 28 pitch. 10-28 was used in the past by Stanley, Cessna, some sewing machines manufacturers, some small arms manufacturers, and in some older faucet handles.
Hadn’t considered M6. May give that a try if I can find it. I have purchased incomplete Stanley hand tools at the flea market, especially if those screws are still intact. And 10-28 dies are out there. Something to think about.
They are everywhere on ebay.
I have seen old Japanese sliding bevel gauges that had an interesting thumbscrew that was knurled, but in the center there was a piece of steel connected by a pin that you could flip out and use as a lever to get more leverage to lock in place. I ordered one but it came without the lever. I noticed that the manufacturer had changed to producing in China vs Japan, and I have been unable to locate a Japanese made model. Such a simple idea that probably costs a couple of pennies, but i guess they would rather save those couple of pennies now.
I have a new Shinwa sliding bevel gauge also made in China. For what I do it’s ok, but Shinwa also make one that has a triangular “thumbscrew” on the bottom of the base. You can flip the tool over without a screw limiting you to one side only. I haven’t tried it though. That one is made in Japan.
Years ago I tried to research Stanley thread sizes as I was trying to
find, coincidentally, replacement thumbscrews. I stand to be corrected but I recall reading that they used their own or at least obscure thread sizes, 12-24 being one of them. No doubt this ensured sales of factory parts. Would be great if anyone had more information on the topic.
As I understand it, their thread sizes were not obscure when the design first came about, but as standardisation gained traction they became so. Once extablished as part of the design they were never changed, presumably to ensure compatibility. I doubt that they ever worried about compatibility of spares or trying to ensure sales of spares. More a fluke of history that the size initially chosen was lost from the standard size range available.
I have experienced the loosening effect. This isn’t anywhere near a complete solution, but a dot of Dykem on the knob gives an early warning.
used to work in machine shops,
modifying tools & equipment is
second nature [with a little knowhow]
will replace screws, nuts & assorted
fasteners with something better
as soon as there is some problem.
design is not a sacred science in
my eye, more an art. getting the job
done is more important than tool
appearance, cuz nobody sees the tools
[except e-bay, it’s “customized”] . but
many will see the product. tradition is
good, ’til it ain’t. my 2 cents.
I have a right hand and left hand version of the Veritas skew rabbet plane. It is the same design as the plough plane. The fence and the depth gauge slipped badly and I was disgusted after spending so much money! The customer service rep told me to wipe it down with alcohol as it was coated with oil at the factory. Didn’t help! I just checked my collets and they are the 4 slits. Wonder if it would help to widen them with my jeweler’s saw?
I did rough the guide rods slightly with some sandpaper, got a leather strap and a pair of curved jaw vise grips. Holds well now. I don’t remember what year I bought them, but I was never offered upgraded collets; never even heard of that until just now!
As far as the depth gauge, it slipped terribly. I usually hate rust on tools, but in this case I put water (forgot my exact method; may have used wet black powder, or just wet paper) on that area to make it rust! Did the trick for me. Still use the leather strap and vise grips on the knob.
Just thought of another possible solution. Long ago, I got a bottle of some liquid with grit in it to help screwdrivers get a better grip in screw slots. It came from Sears, which is long gone, and I don’t know if anyone still sells it.
I may rust the rods a little too, just to be sure.
Do you have a video on making tools for a plough plane. (You mentioned making them in a few minutes in this blog. I would like to make some for my Stanley plane for rounding corners with different radiuses.
Thanks for all your blogs and videos. They have helped my immensely over several years.
Regarding the locking screws on Stanley plough planes,I have noticed their threads are manufactured by the” rolling”method.This swells the thread,a quicker and stronger process.An unwanted raised burr can be raised on the clamping face of the screw,sometimes causing damage ie circular marking on the rods.A good practise would be to file the ends flat,finishing off with emery cloth,this way the full face of the bolt is in contact thus improving grip.
You could file or grind flats on the knurled nut and make it Square or Hexagonal. Then use a spanner…?
Thank you Paul for the comparison between the old and the new. I work pretty closely with engineers on an almost daily basis. Sometimes it’s hard for them to have to go back to the drawing board to revise something they think is perfect. I’m glad that Veritas cares about their customers enough to fix the issue.
As for the comment about using the pliers, I find it irritating that someone thinks they can tell me what I should or shouldn’t do with what belongs to me. Is it more appropriate to use a screwdriver to loosen the screw on my cap irons? Maybe. But am I going to stop using my lever cap as a means of loosening those screws simply because it might damage the screw or the lever cap? No. Why? Because it’s mine and I can do as I wish. Plain and simple!
a woodworker colleague has a rather unusual plough plane (Irving, I think?) which comes with little tommy bars fixed through the adjustment knobs – which seems like a good solution to me
if torque is the issue, it should be fairly straightforward in most cases to copy that approach, albeit with a removable tommy bar
After the initial free upgrade on the depth on my Veritas plough plane, I have not had any issues with it anymore. Nor did I ever have any issues with the fence moving, thank God, either. Overall, I feel very fortunate that I got a great plane that I too use very often in my everyday woodworking.
I recently purchased a Veritas rabbeting plane that utilizes a fence with collets, 8 slots in each, brass screws/knobs to tighten. With effort I can move the rods when hand tightened, but they are solid when I use pliers. So, pliers it is.
Brad
another thought, instead of thumb screws, just drill a ⅛ to ³/¹⁶ hole through the side of the knurled head and use a hex key or harden wire, or even a scratch awl to snug it up.
you can even file 2 opposing flats for a open end wrench or any parcel jaw wrench to snug, or even cut a slot in end to accept a cap screw blade screwdriver.
also clean up the end of the knurled nut threades end if it isn’t a crown surface while improve and reduce torque required!
but I agree a pair of fencing plires on a knurl surface as shown in the phphotois nit a proper use of the tool and its application, emergency ok but atleast turn the jaws parallel with the diameter of the nut head!
enjoy your blogs
Steven Lang
Columbus Michigan