Since March 2021 I’ve Made . . .
I can’t explain it. I don’t need to but I’d like to if it was of value and if I could do it justice. When I make I want me to do it. Currently, I like doing many things. I’m not much of a passenger and I’m not a spectator. I don’t play any kind of game except the ones I learned to play and then abandoned never to play even once again. I enjoy riding my bike and like digging into soil to grow food. The size of these tasks is in accord with the life I live. I ride my bike only for exercising my legs and own two bikes, one pedal power alone and the other electric assist to allow me greater distance without excess waste of time. The assist version allows me to go further and saves me from using the car. In 2019/20 I did not use my car except for essential trips like picking up wood, going to the recycle centre or moving what cannot be carried on a bike. I reduced my fuel bill by four-fifths that year and I was fitter. I also increased my circuit ride by quadrupling the distances for the added exercise. I found the wintertime harder because of the rain on ice. I think an electric bike pays for itself in fuel saving over a three-year period if you use it and the battery holds out.
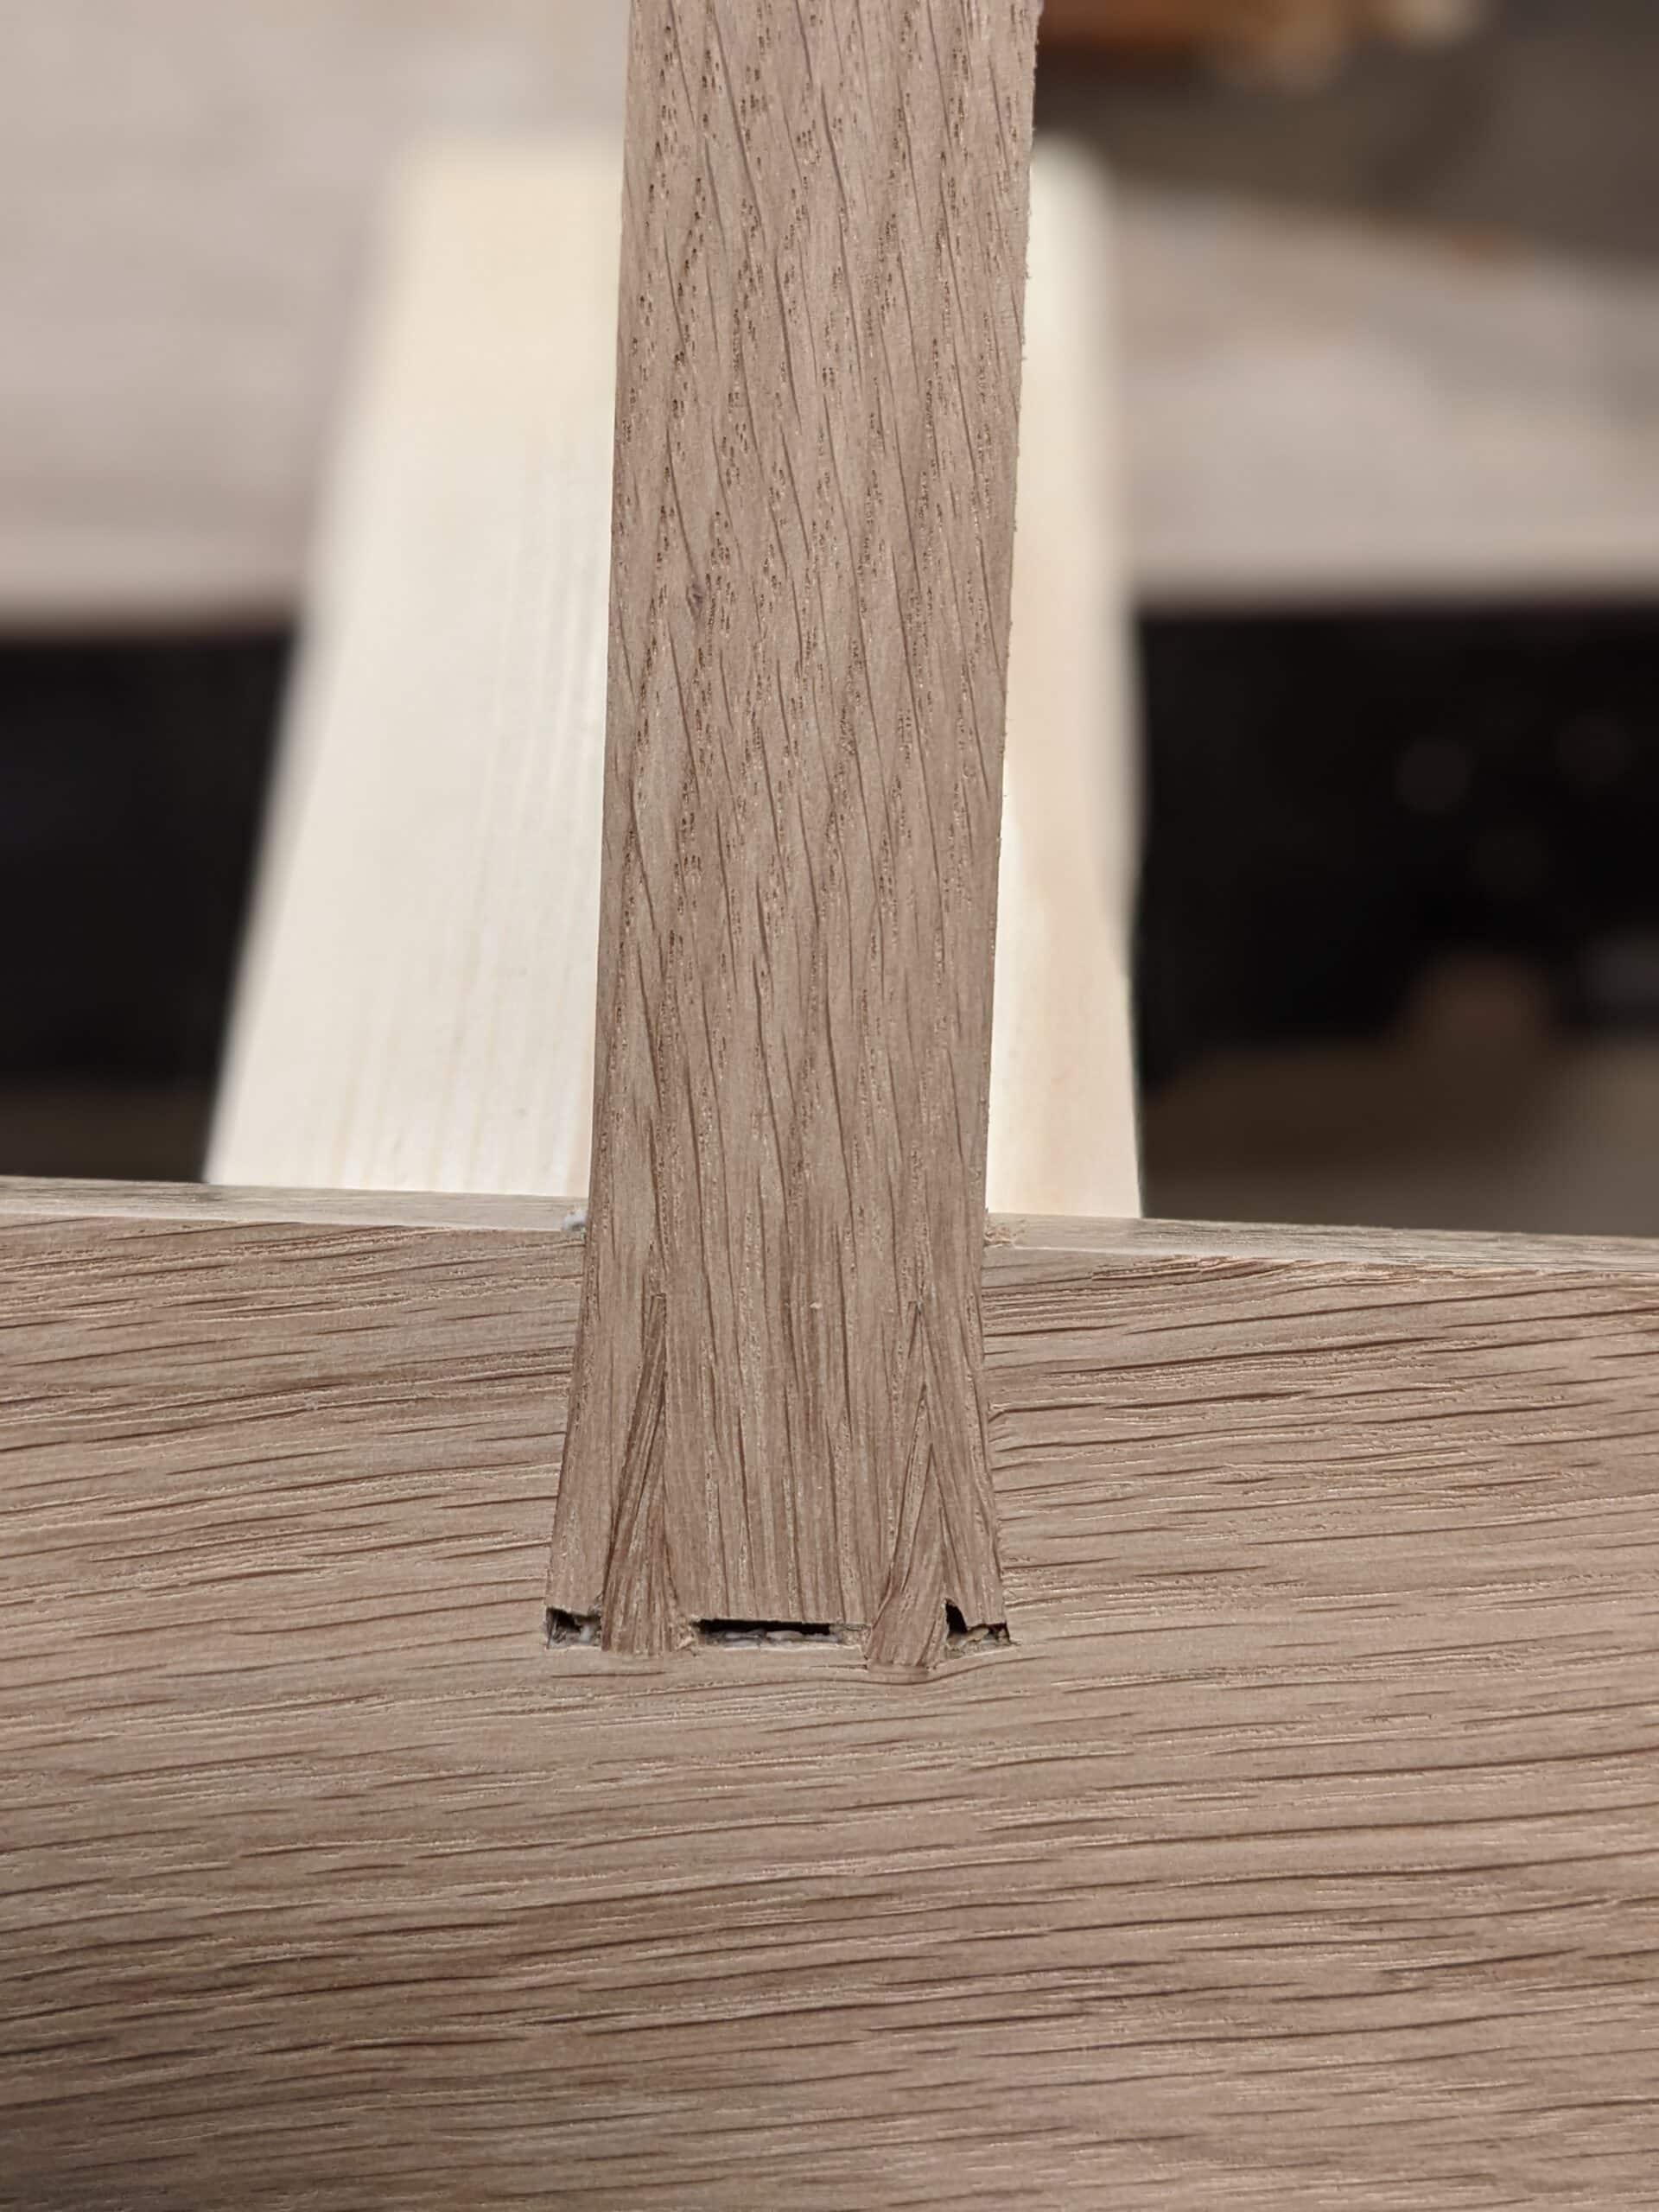
Now for woodworking. If I average making 10 mortise and tenons a week and take my 58 years working 50 weeks a year and six-day weeks then I have most likely made 29,000 hand-cut mortise and tenons. I’ve made that many at least and most likely double it. If I include machine-cut versions then I’ve quadrupled that but that’s not making that’s faking making really. This month I have hand cut 30 dovetailed corners ranging in widths from 2 1/2″ to 8″ wide. That comes out at 21,750 in my lifetime and it is likely to be twice that amount and I have never once used any machine or power equipment to fake-make a single one. Why so many? When I lived in the USA my workshop was open-door so throughout the working day visitors could walk through and for each group, I would cut a twin dovetail corner to demo my skills and help people to see the simplicity of cutting dovetails. I often did ten dovetailed corners for visitors a day and at woodworking shows it would be nothing to cut 30 dovetails in a day. They take me two and a half minutes to do and that included planing them up to pass around. Not too time-consuming. I was in the US from 1985 to 2009 so I guess in that time I might have actually cut 30,000 for demoing alone. You’d think I’d be good at it by now and of course I am.
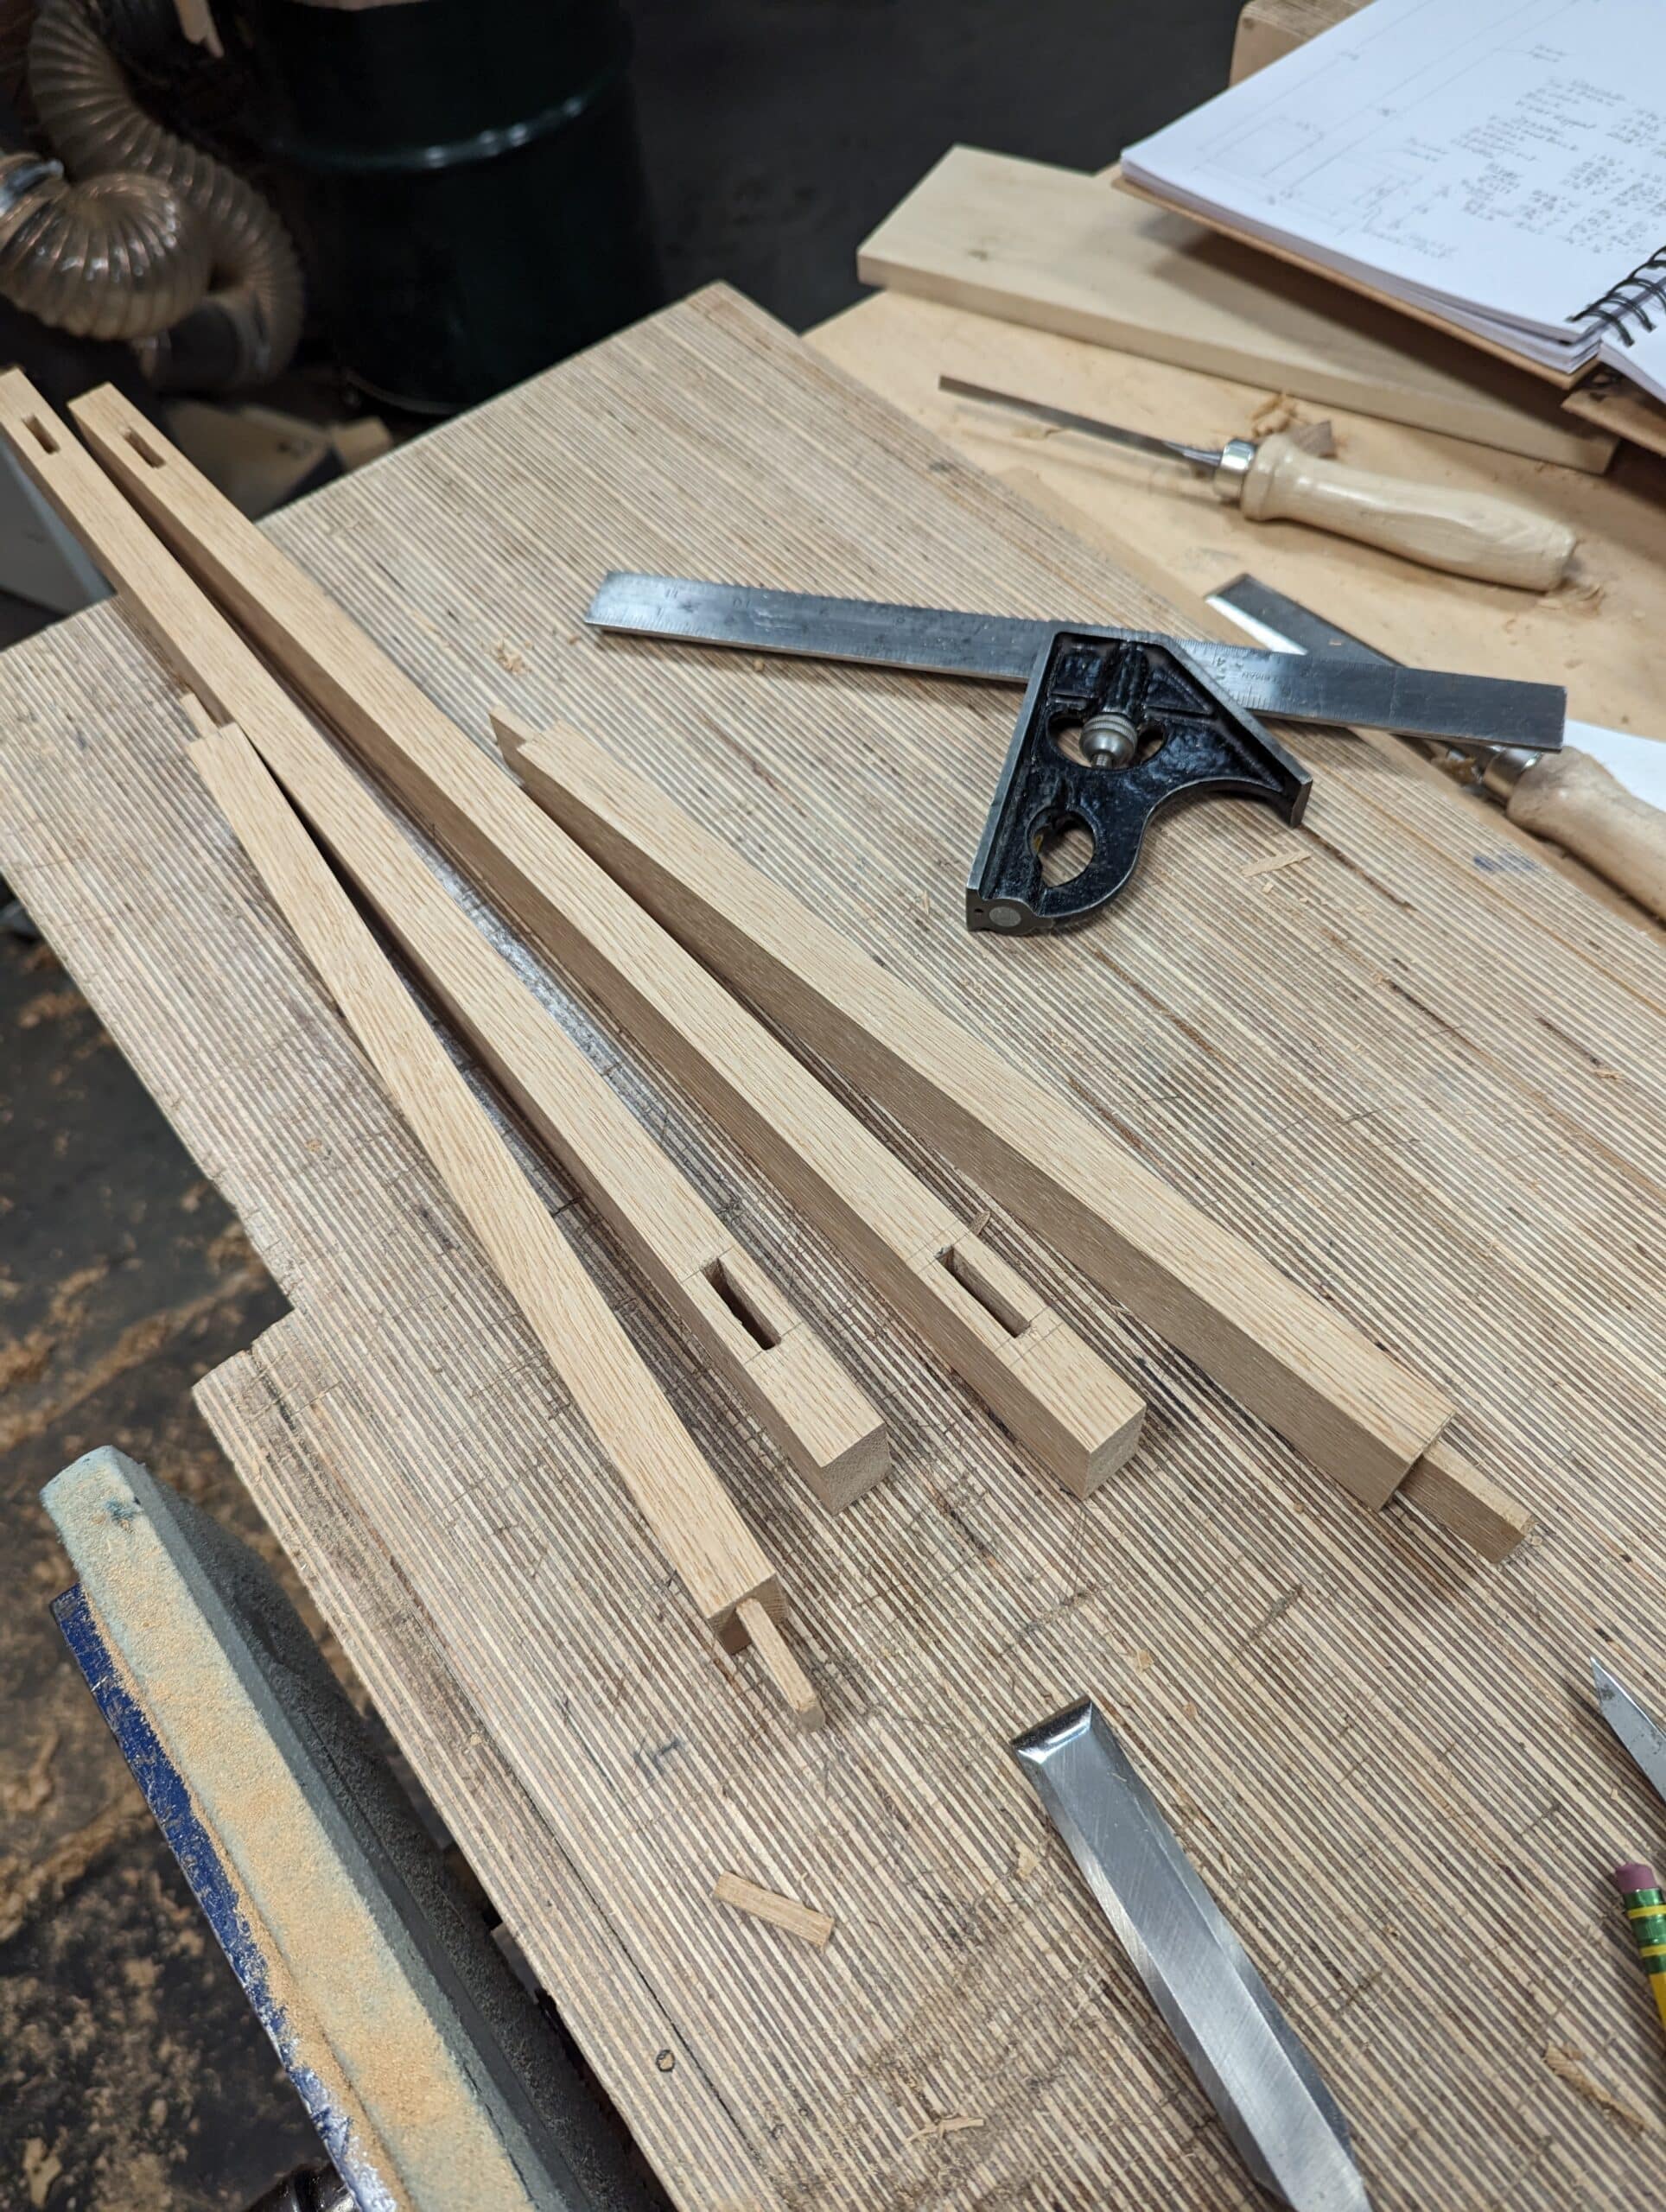
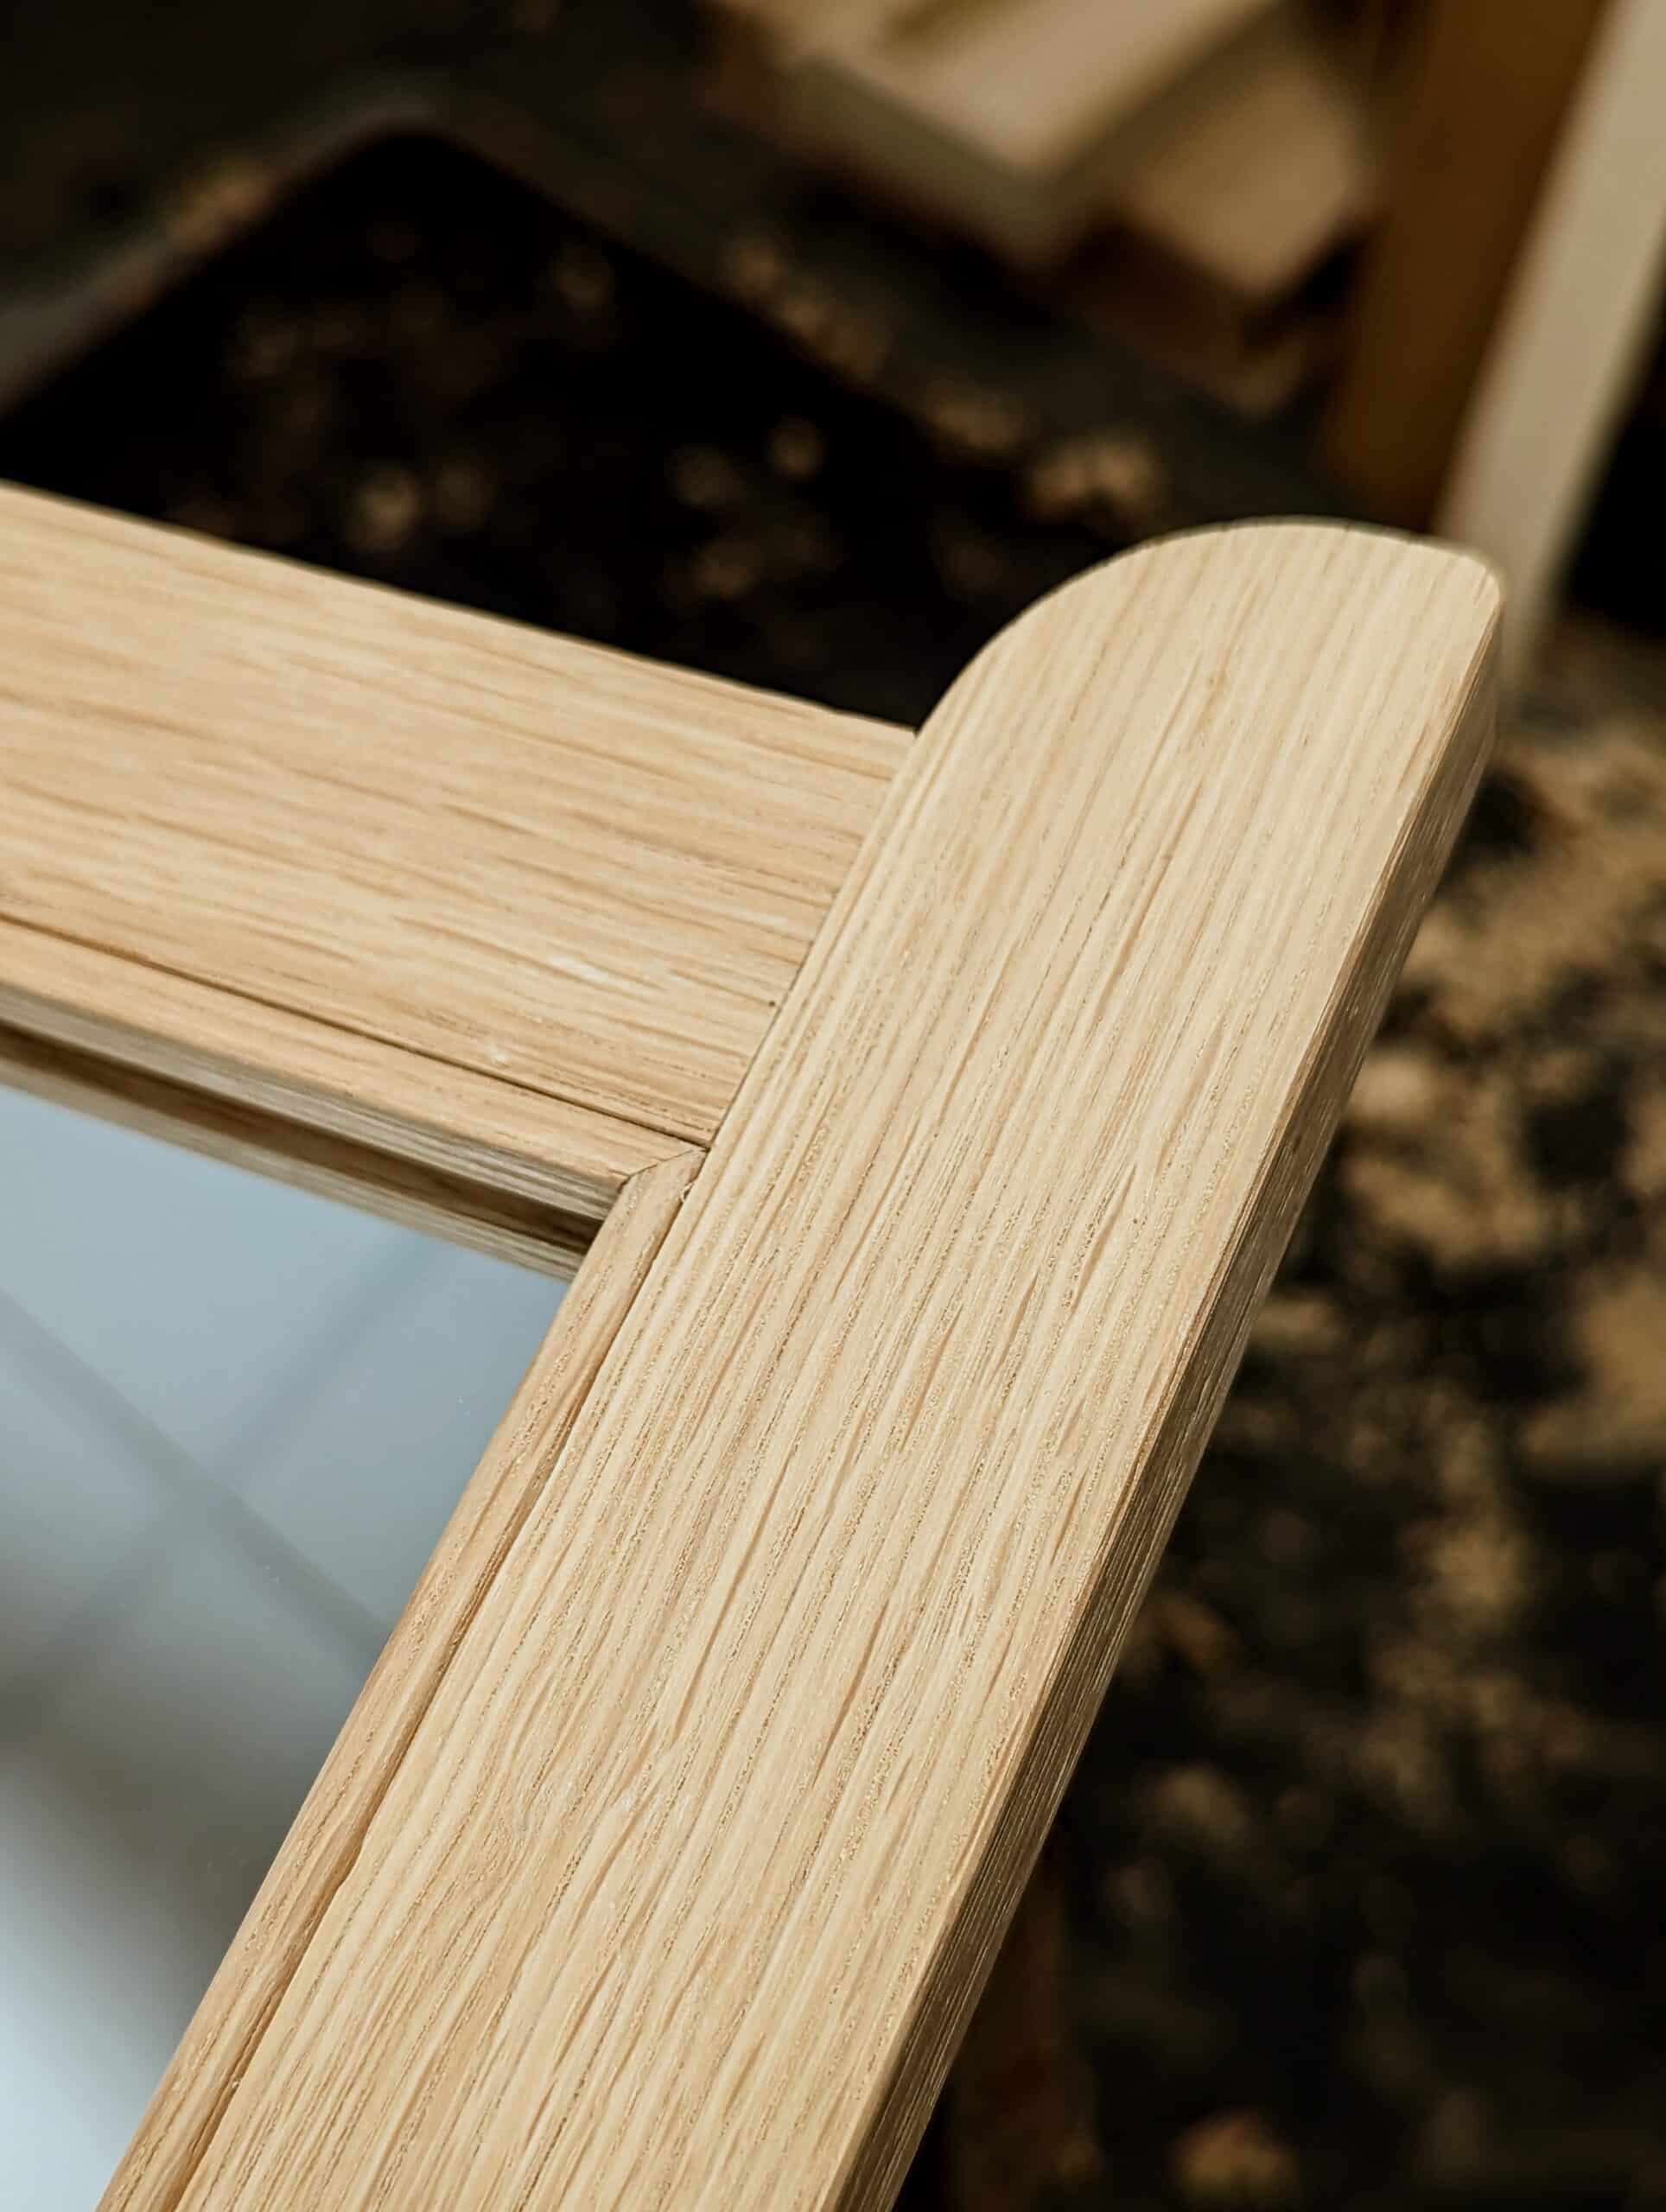
This week I timed myself cutting four mortise and tenons to make a second oak mirror frame and the four corners took me a total of one hour so fifteen minutes apiece. The shoulder lines and joints needed no trimming or fitting nor did I use a shoulder plane because the shoulders off my knifewalls guaranteed perfect seatings to each one and on both sides of the shoulders. But it would be wrong for you to assume that you have to make 30,000 mortise and tenons to get excellent results. Following certain patterns guarantees that you will get them pretty much straight off after a short period of practice on scrap wood. What was it I can’t explain? Oh, why I still enjoy doing it. There is a premise that I have used since I got the revelation of it for teaching others. With ten hand tools and three joints, you can make just about any piece of furniture you need.
The following pieces are pieces I have made over the last two and a half years. I delivered the first piece for Sellers’ Home in March 2021. In designing most of the pieces I made two. One would be a prototype and the other the one I would install in the house.

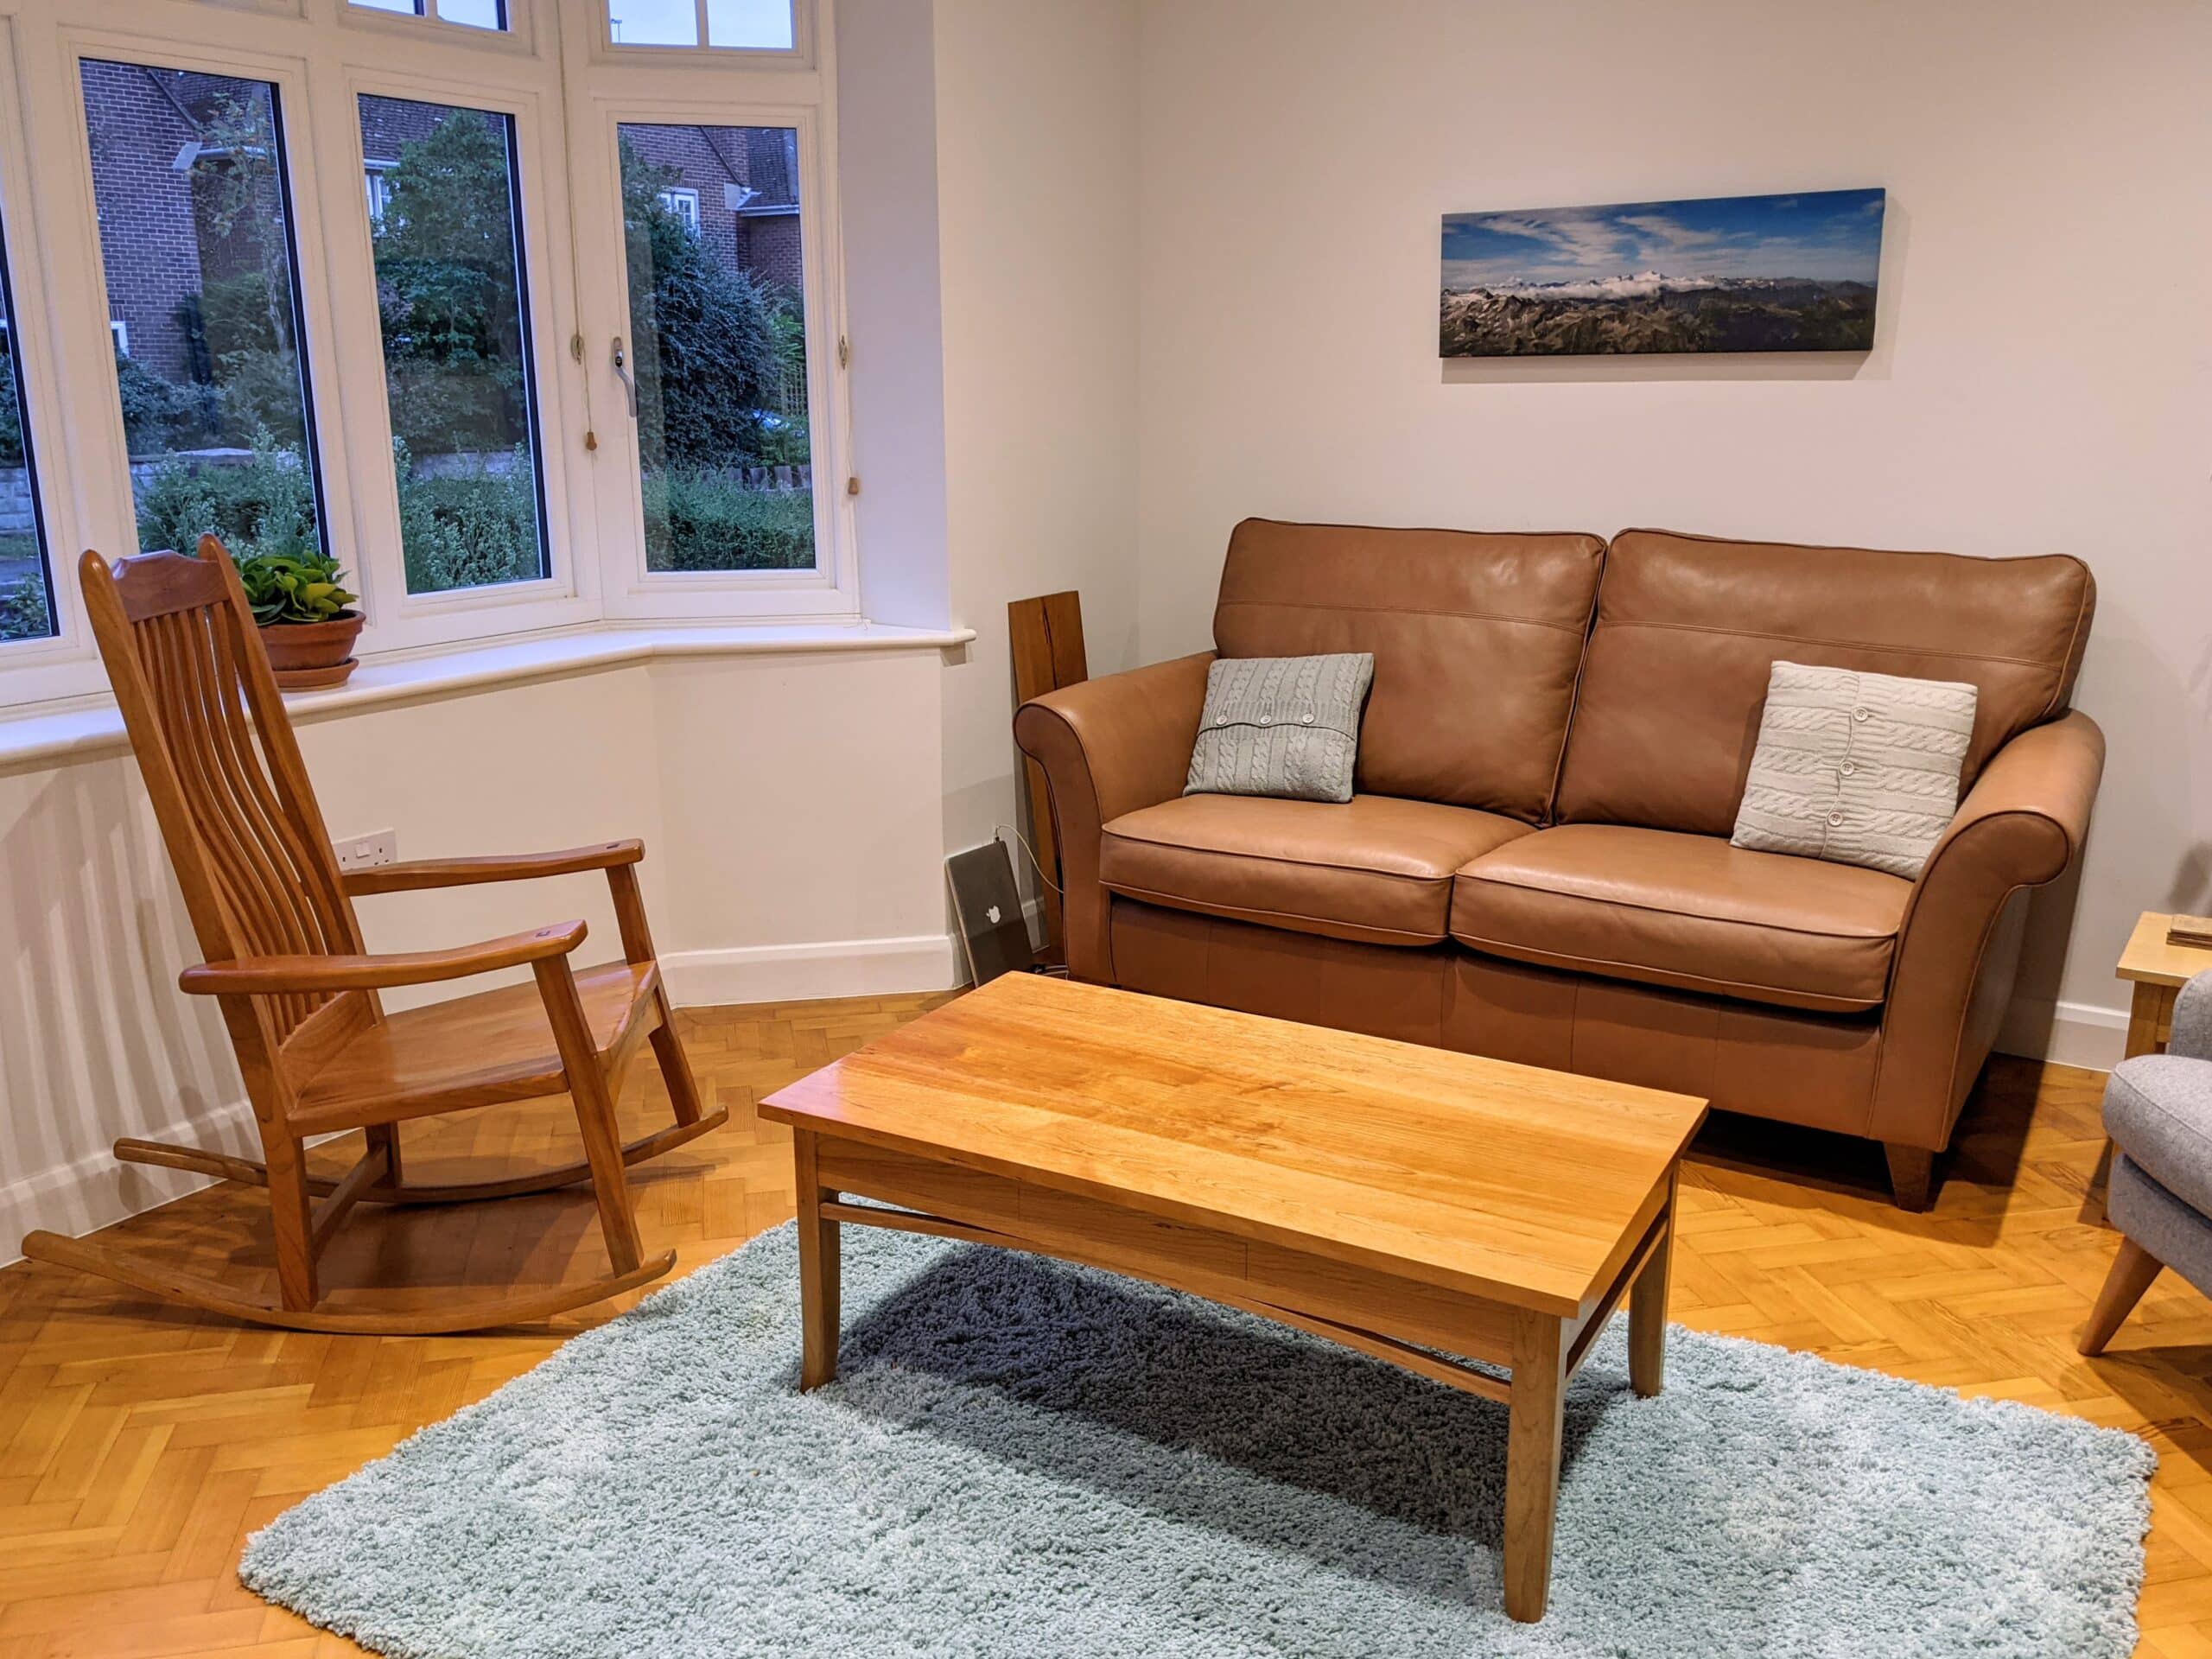
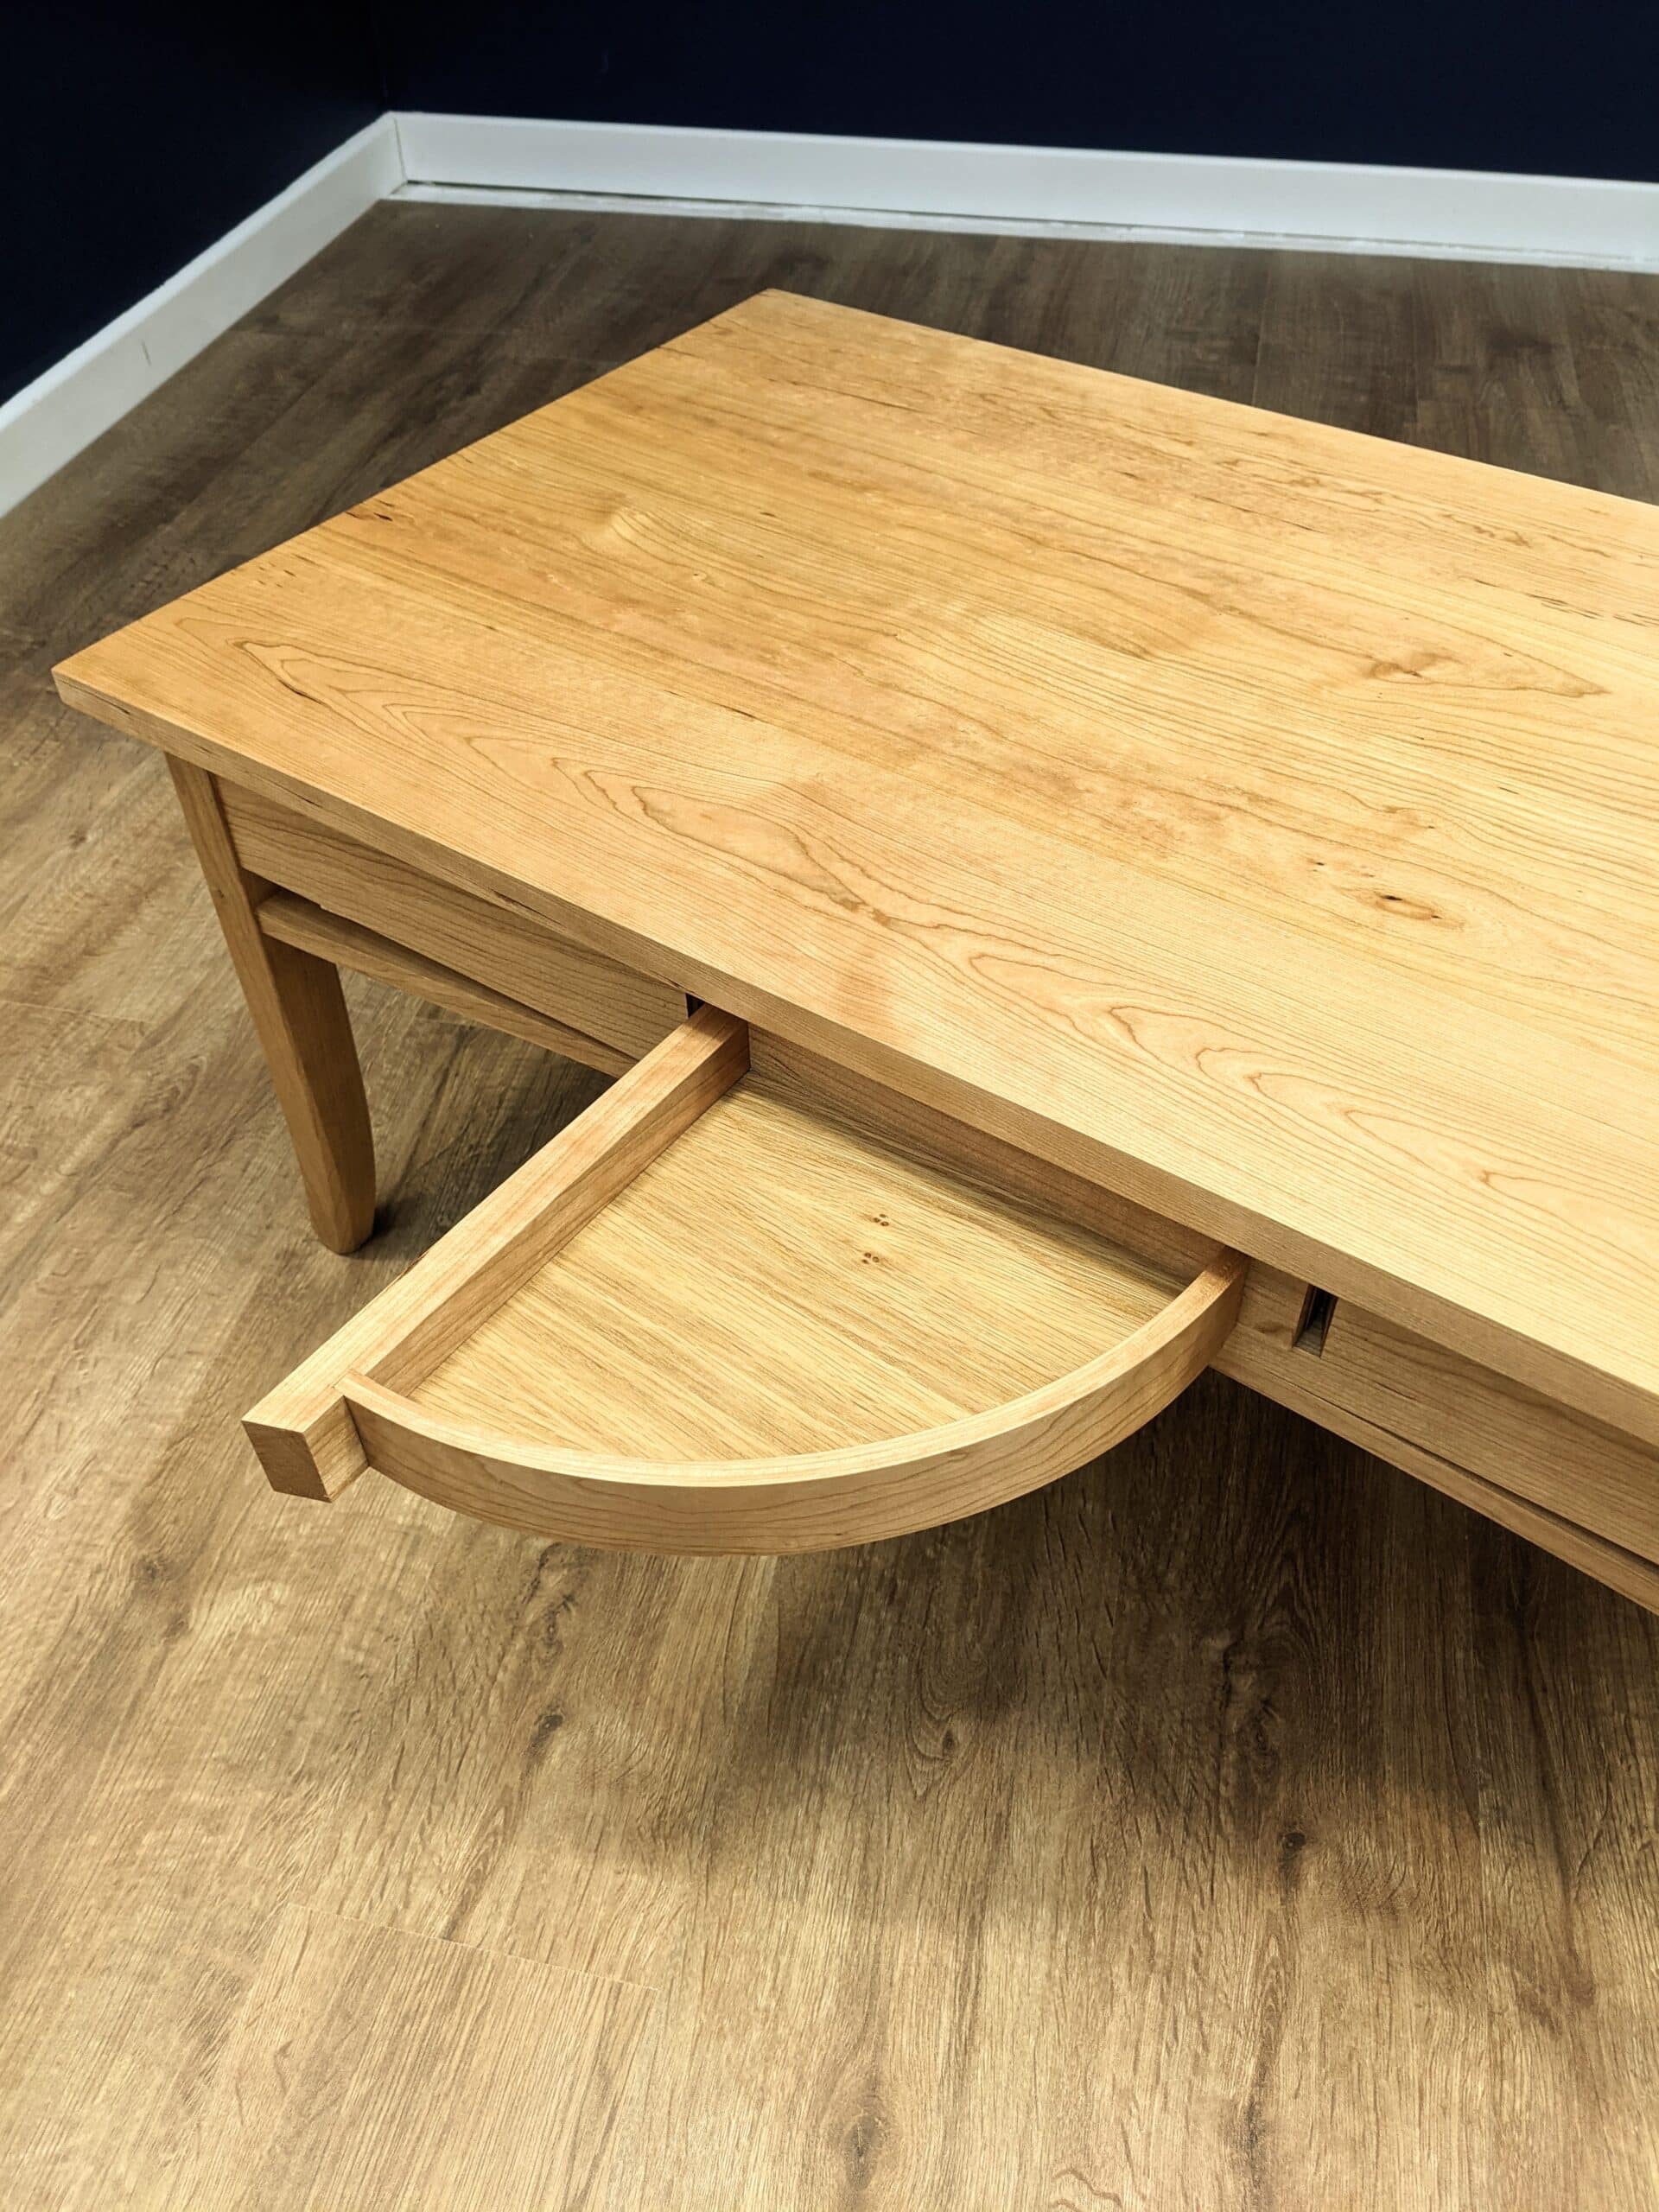
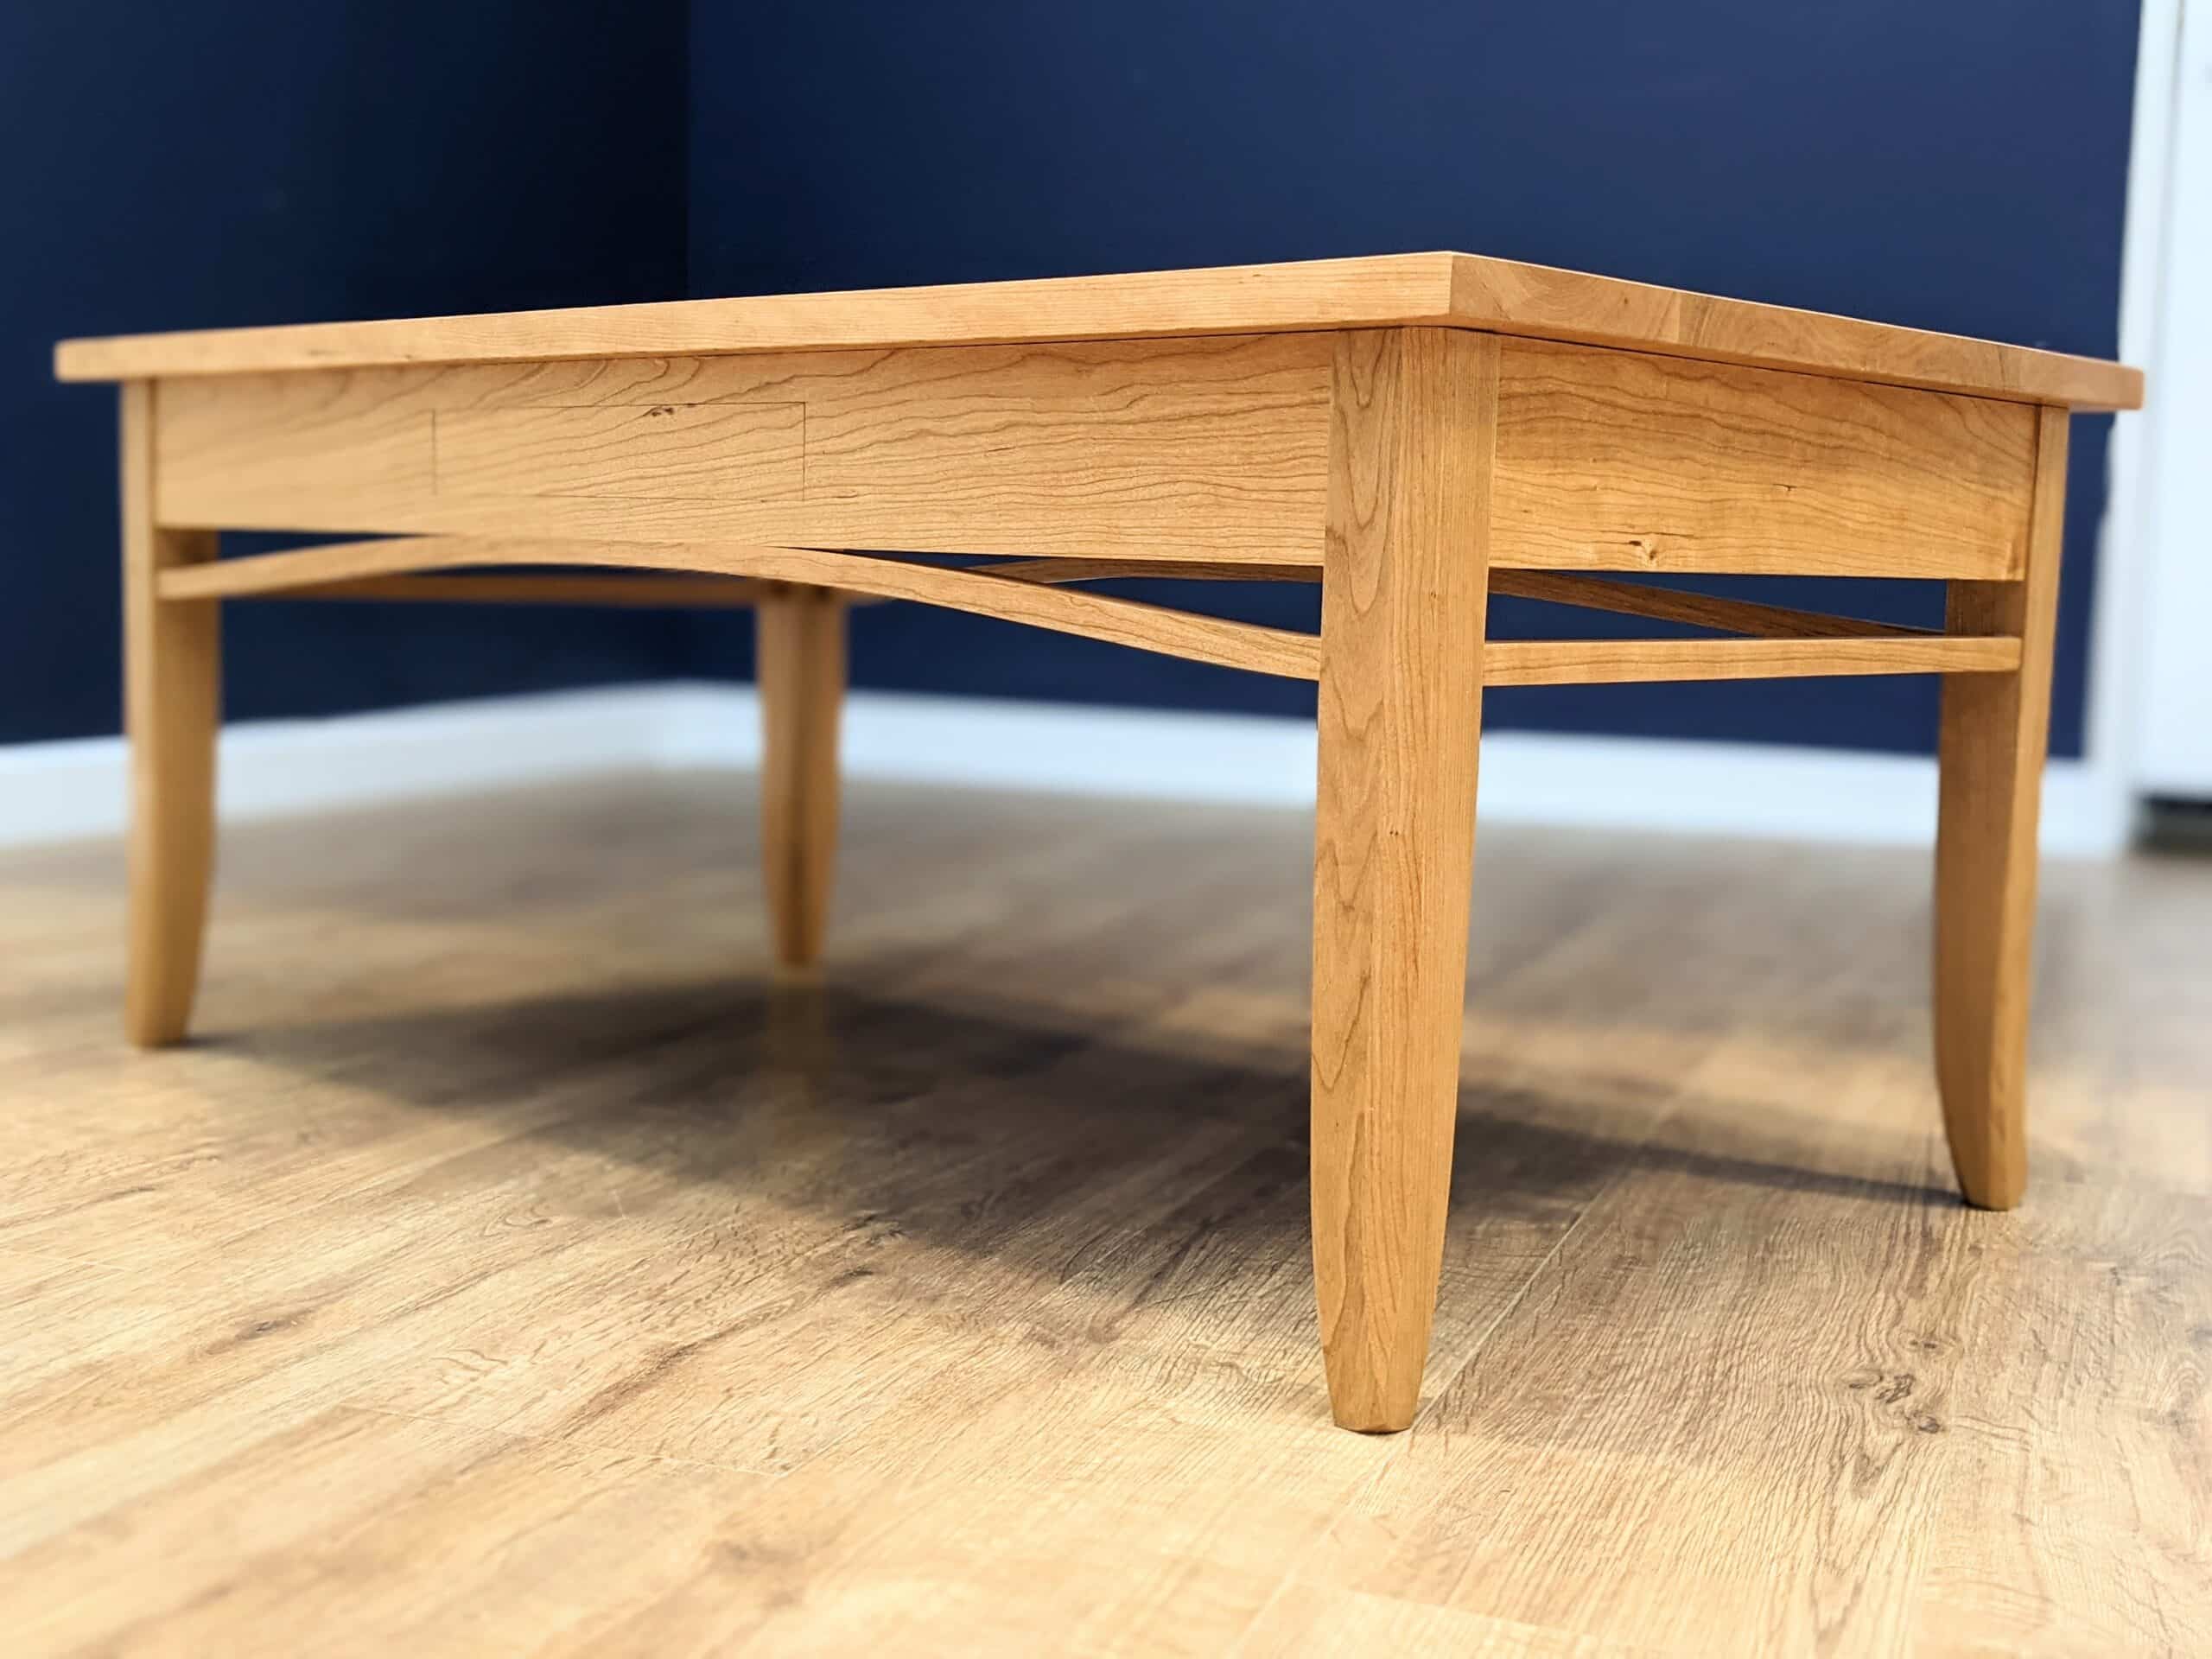
I wanted to add an additional idea to the coffee table and that was a hidden drawer that could be popped out for keeping the remote.
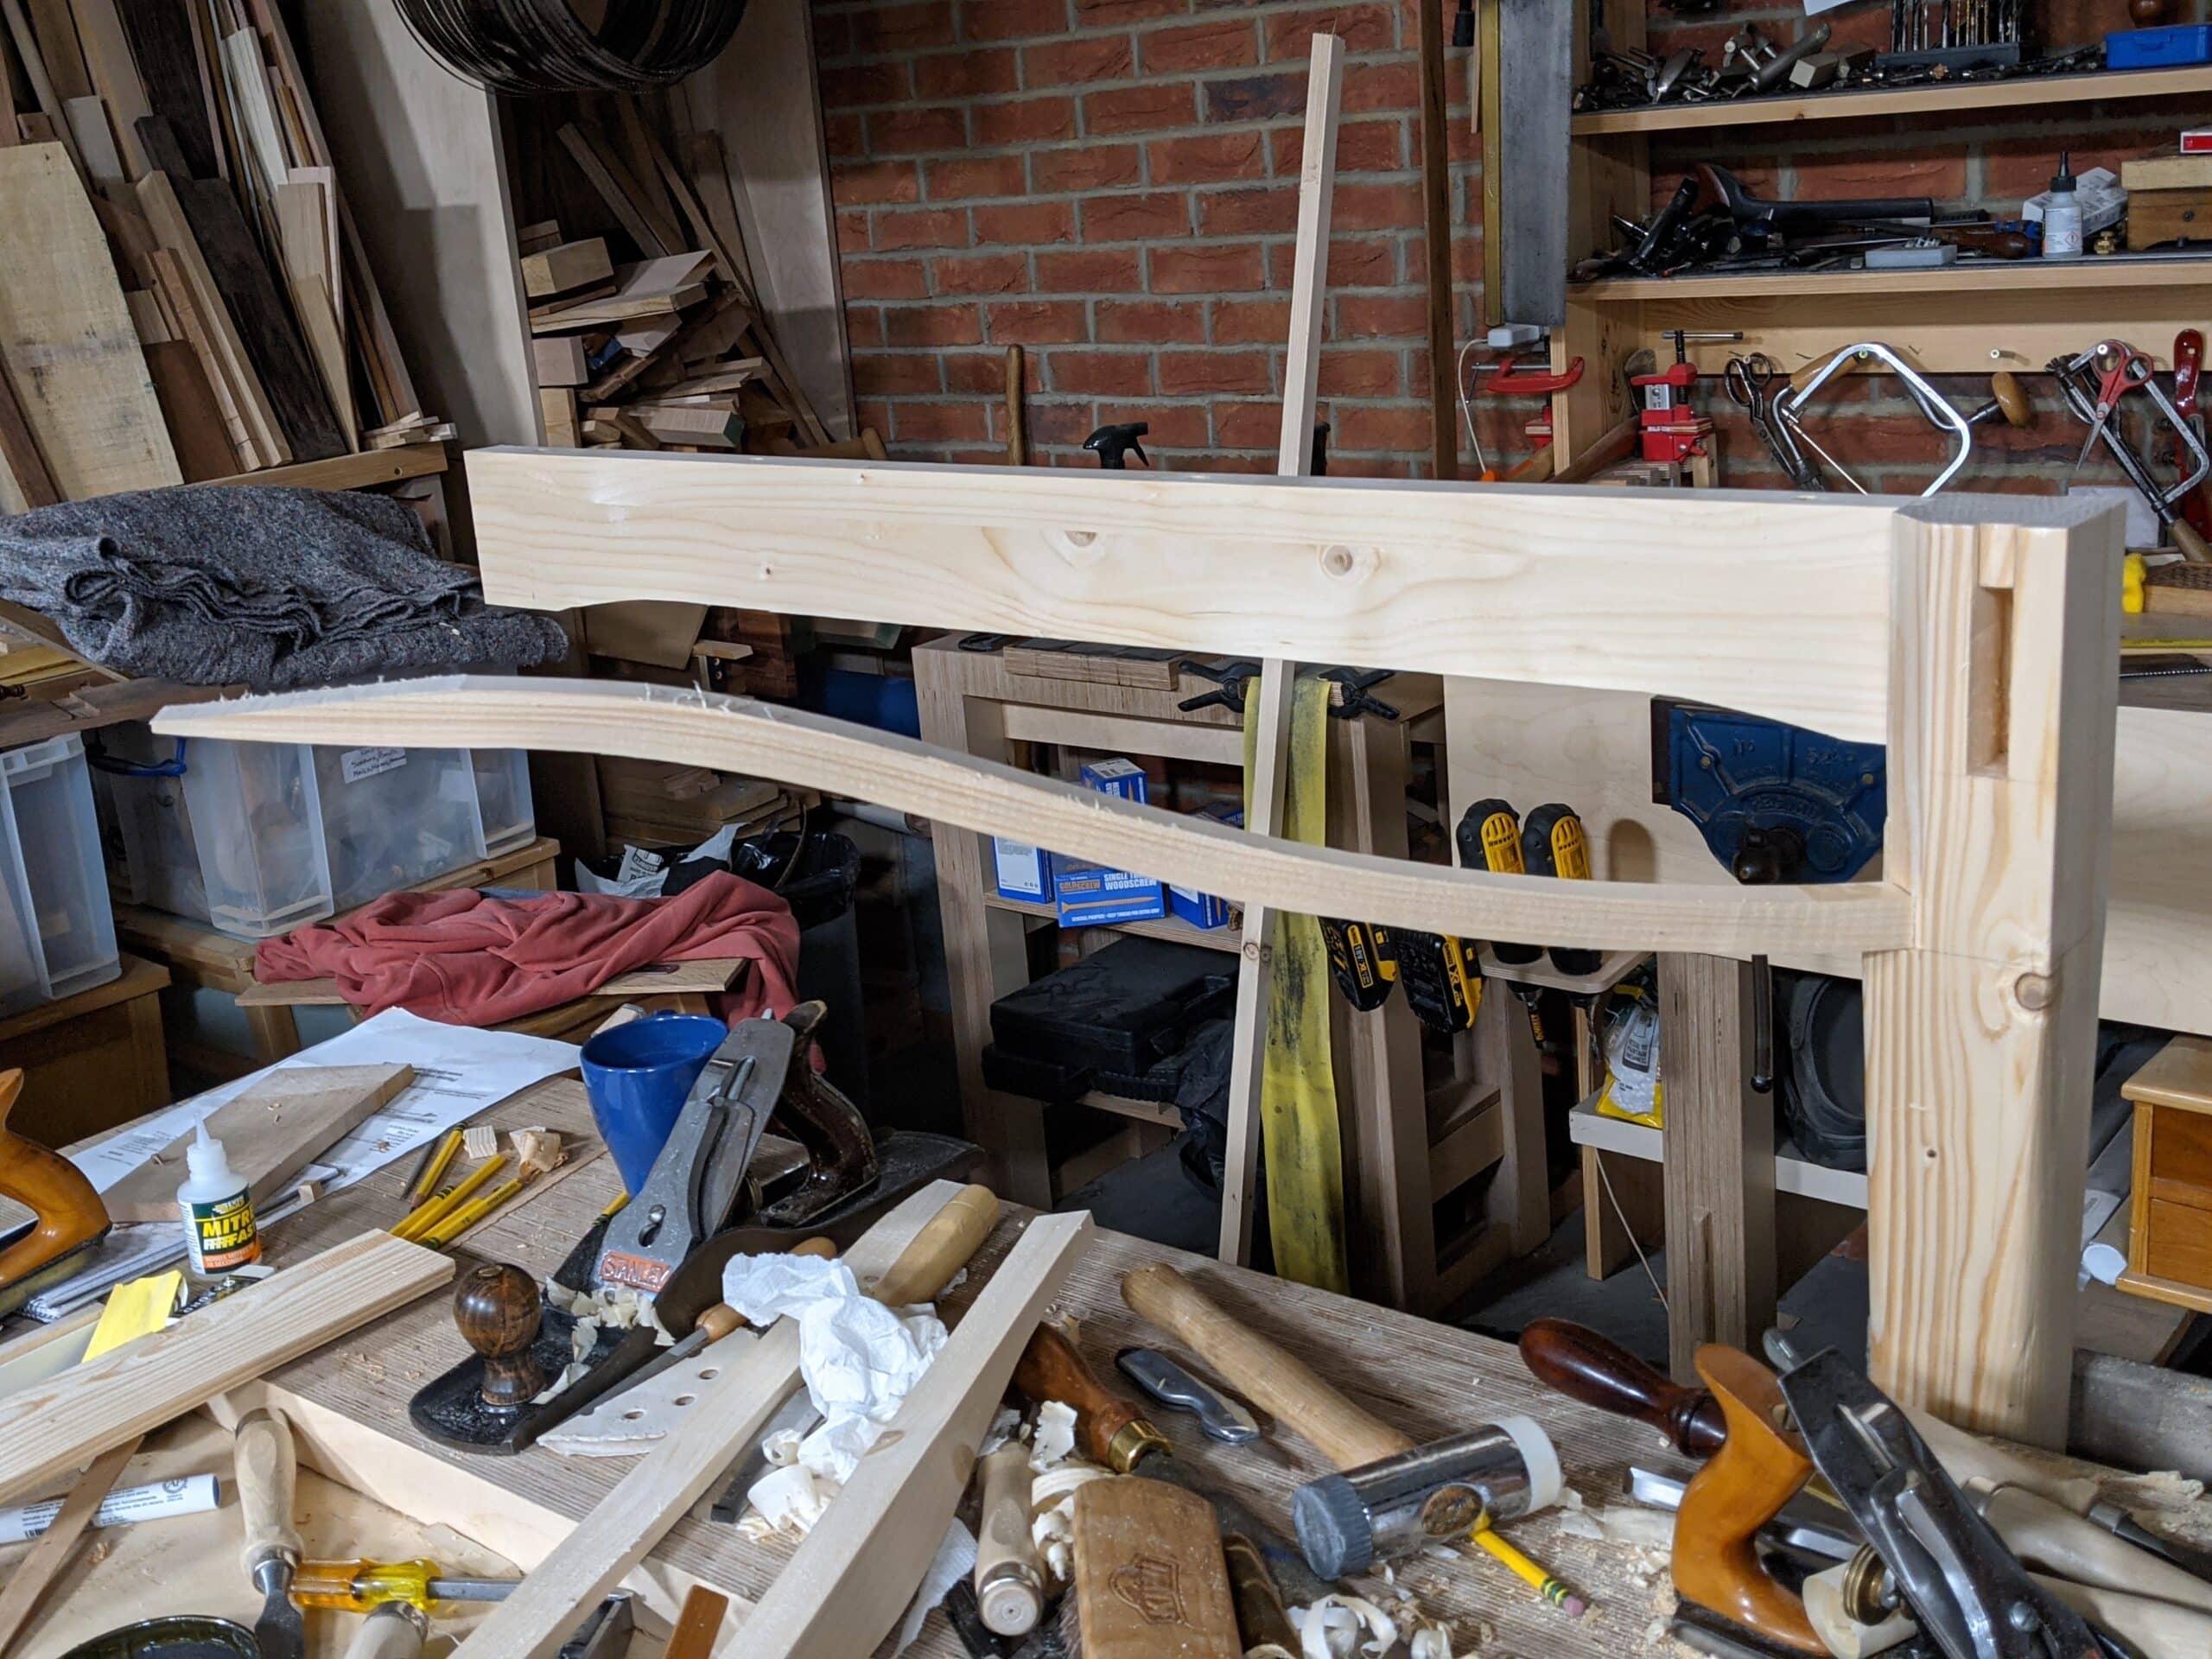
There is nothing at all random about the items of choice for making. We put out a survey three years ago and considered different options. One option covered places of making. We found that a garage was the most common place to make in and that determined our using a garage replication as the footprint size for us to reconstruct for filming in. Below is the actual workshop we have been making in. It’s more than adequate even for sizeable pieces like king-size beds and an 8-seater dining table.

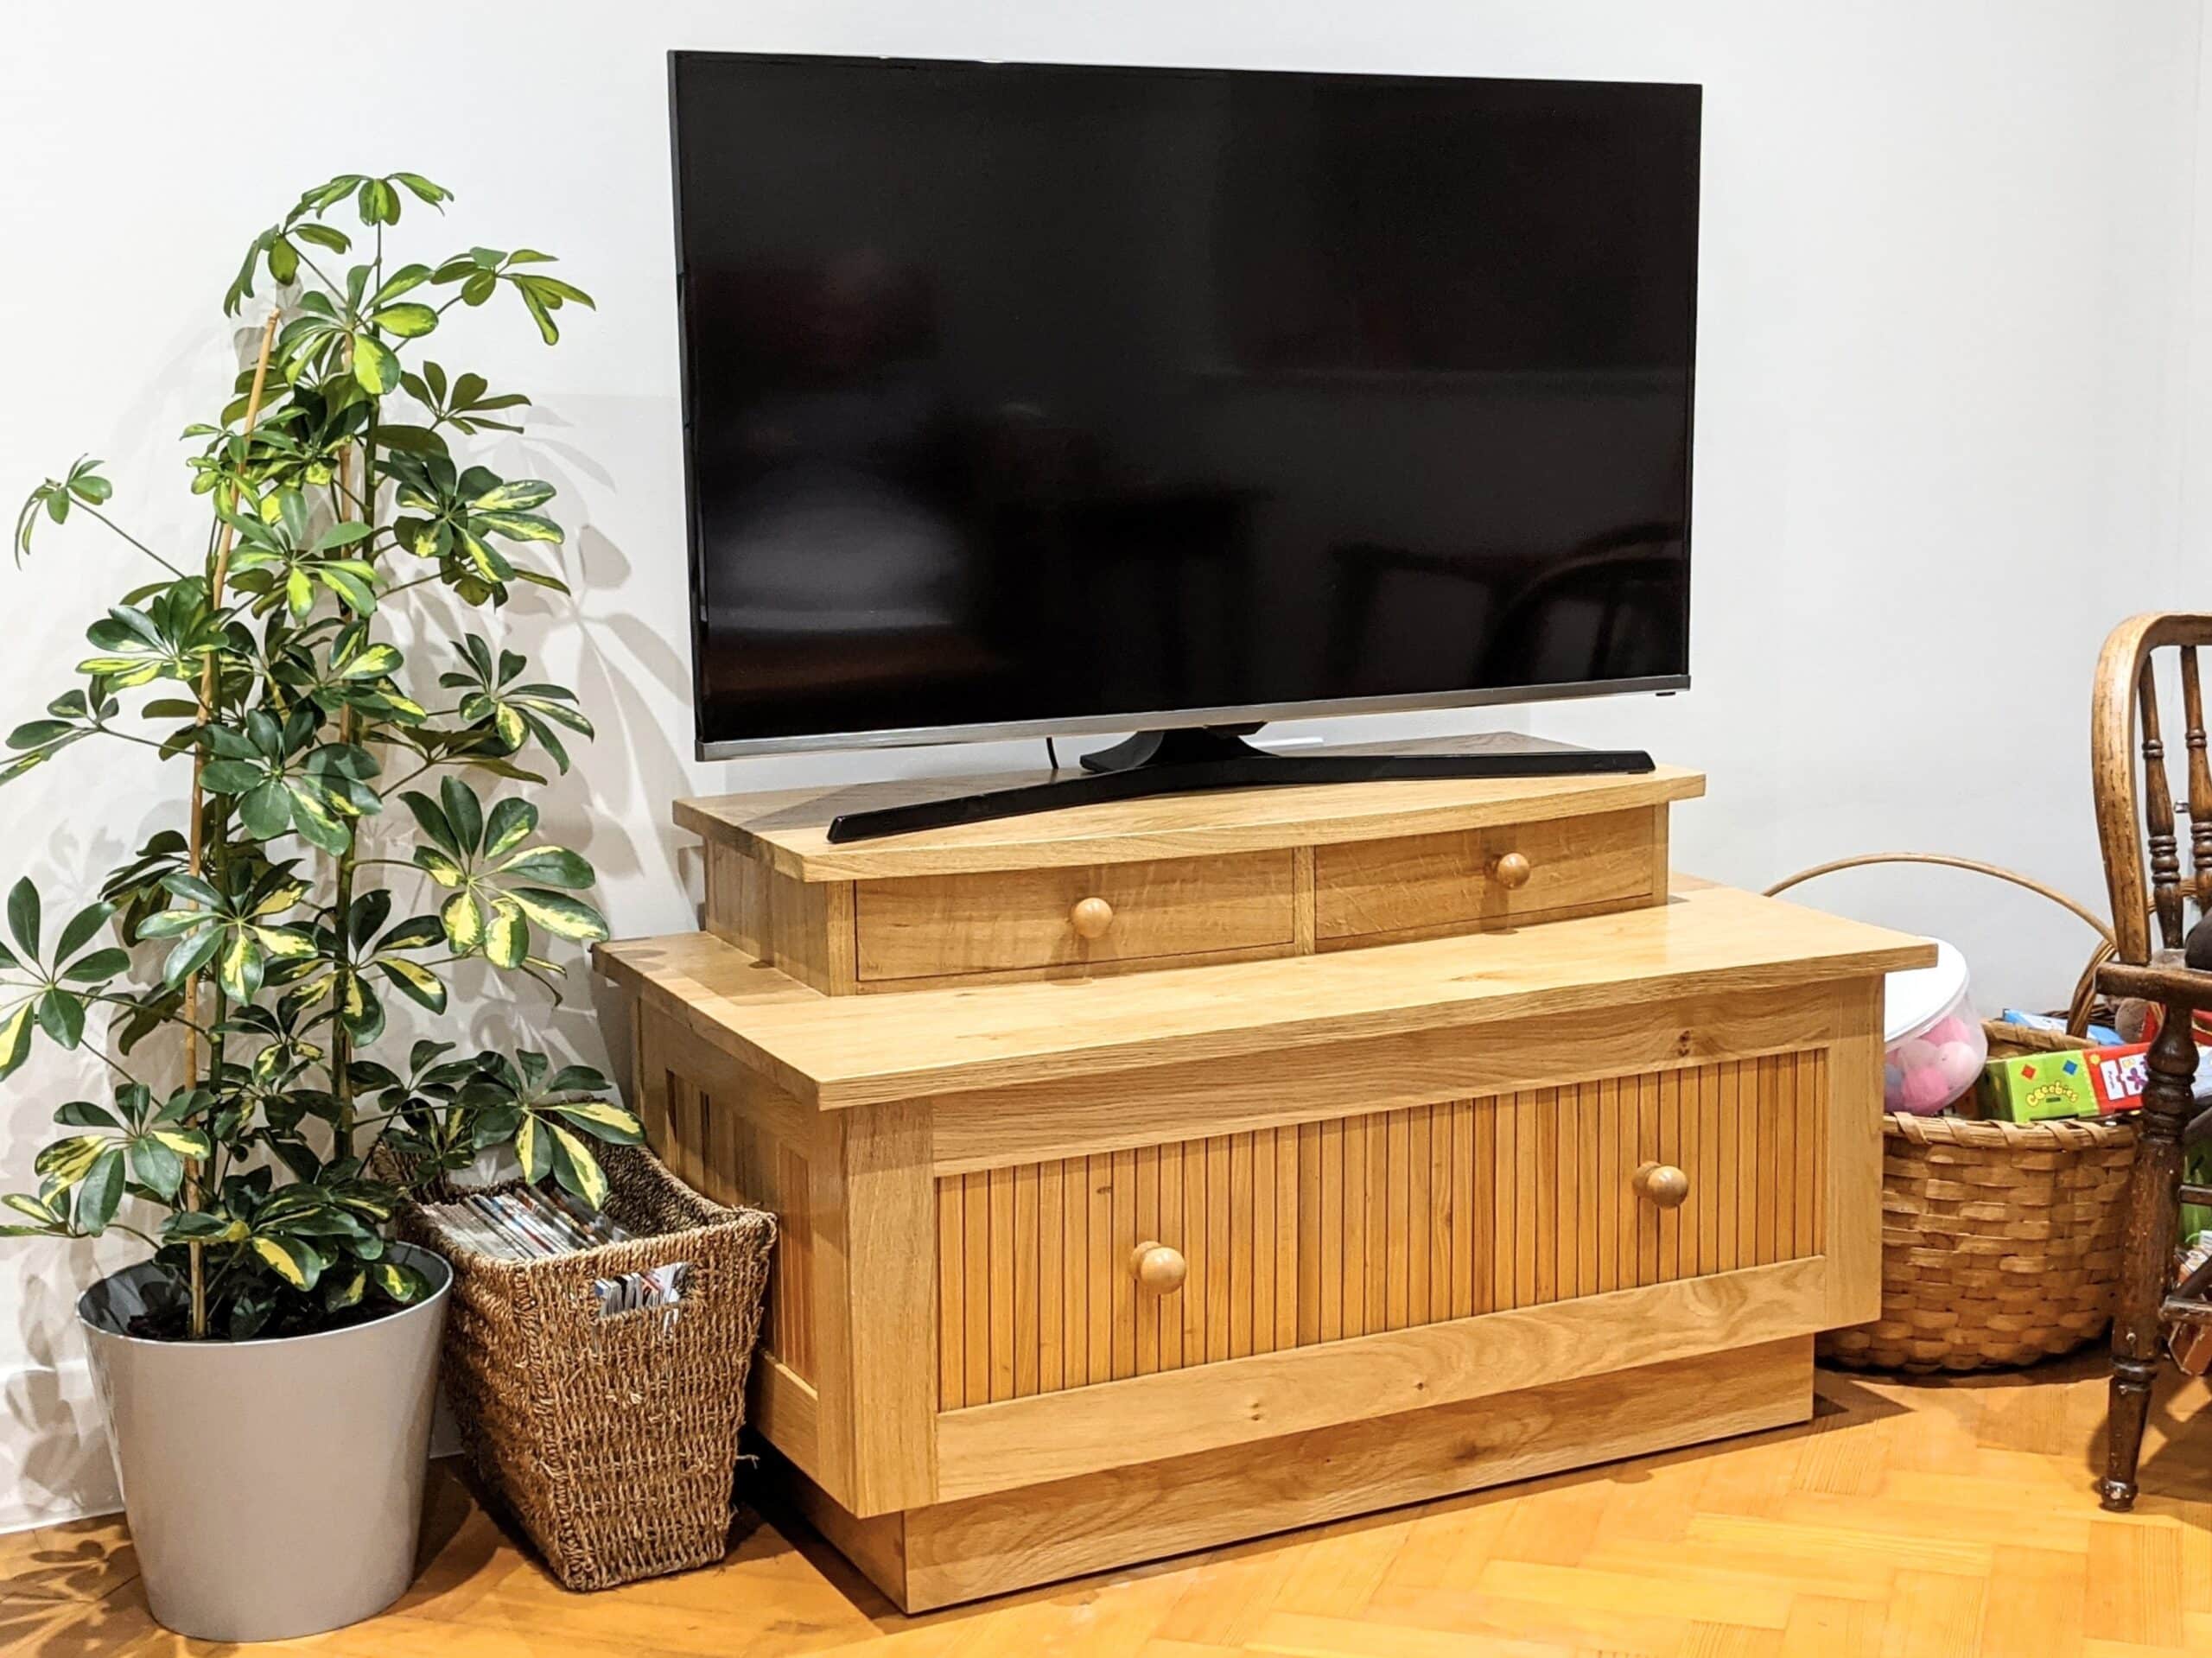
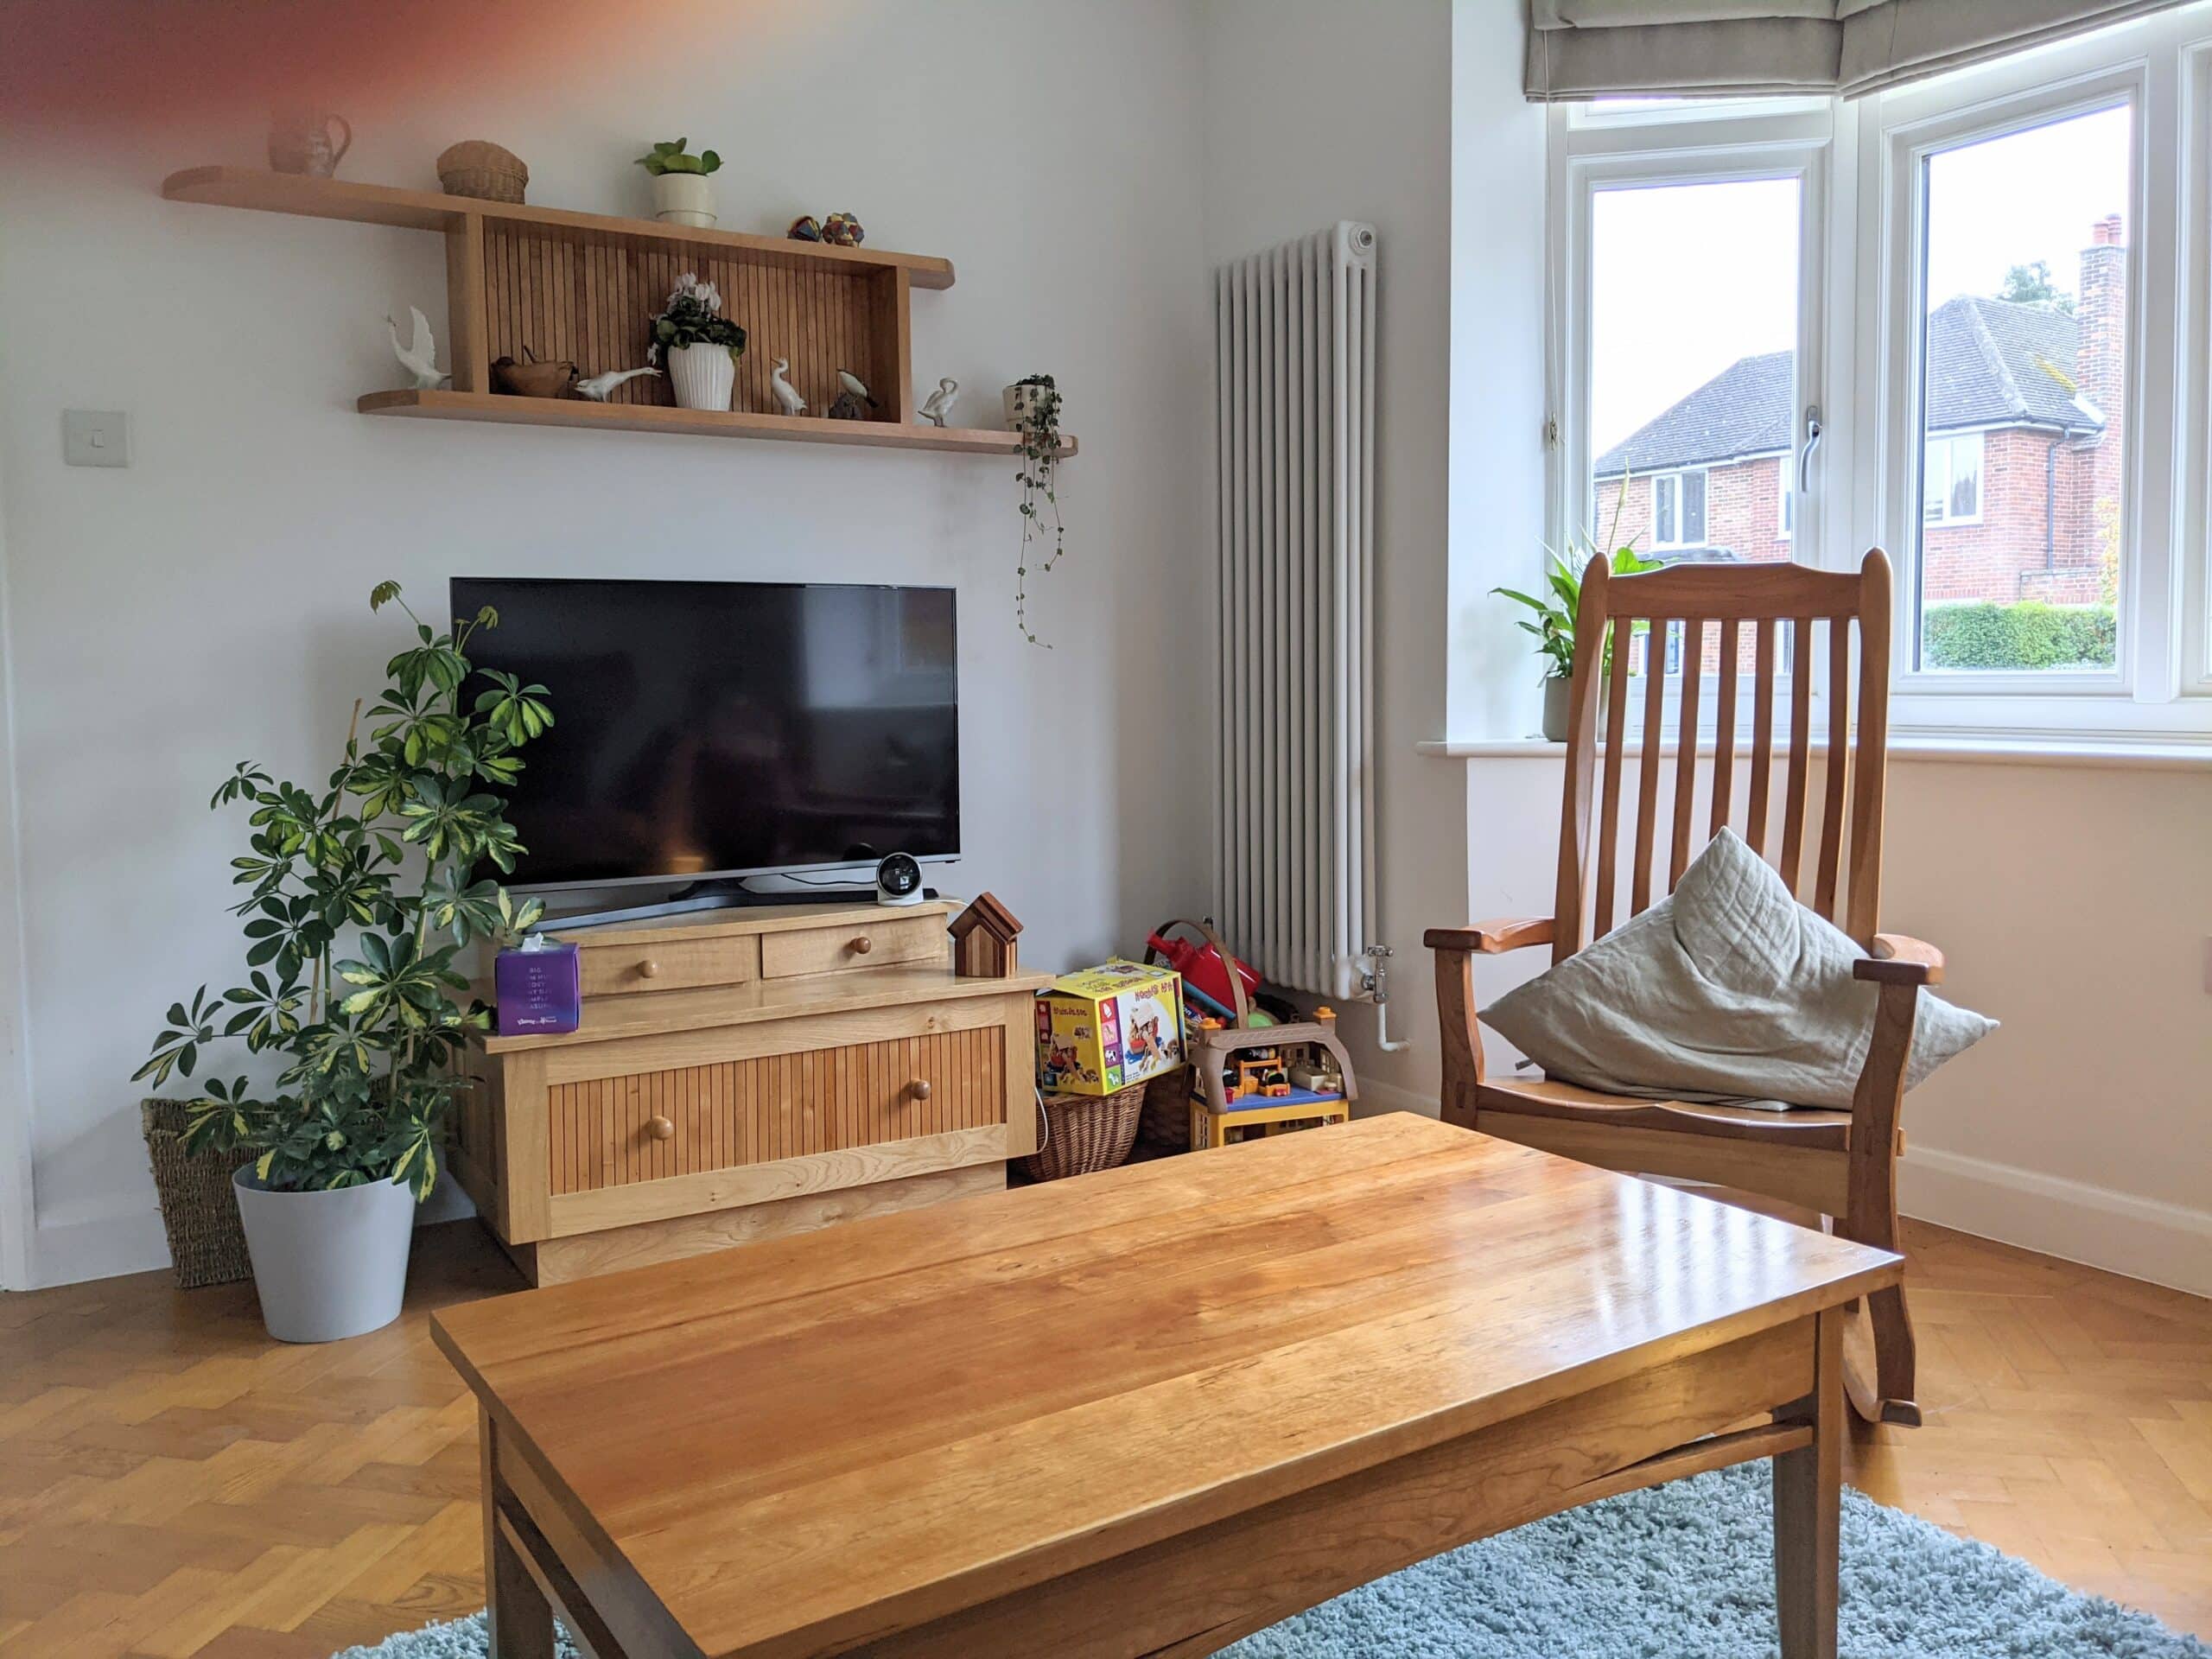
The TV stand is invaluable to the Sellers’ home now. The deep drawer is ideal for storing toys, games, puzzles and blankets. The design is unusual in that I liked the idea of tambour strips for facings and such rather than a simple flat front from a solid piece.
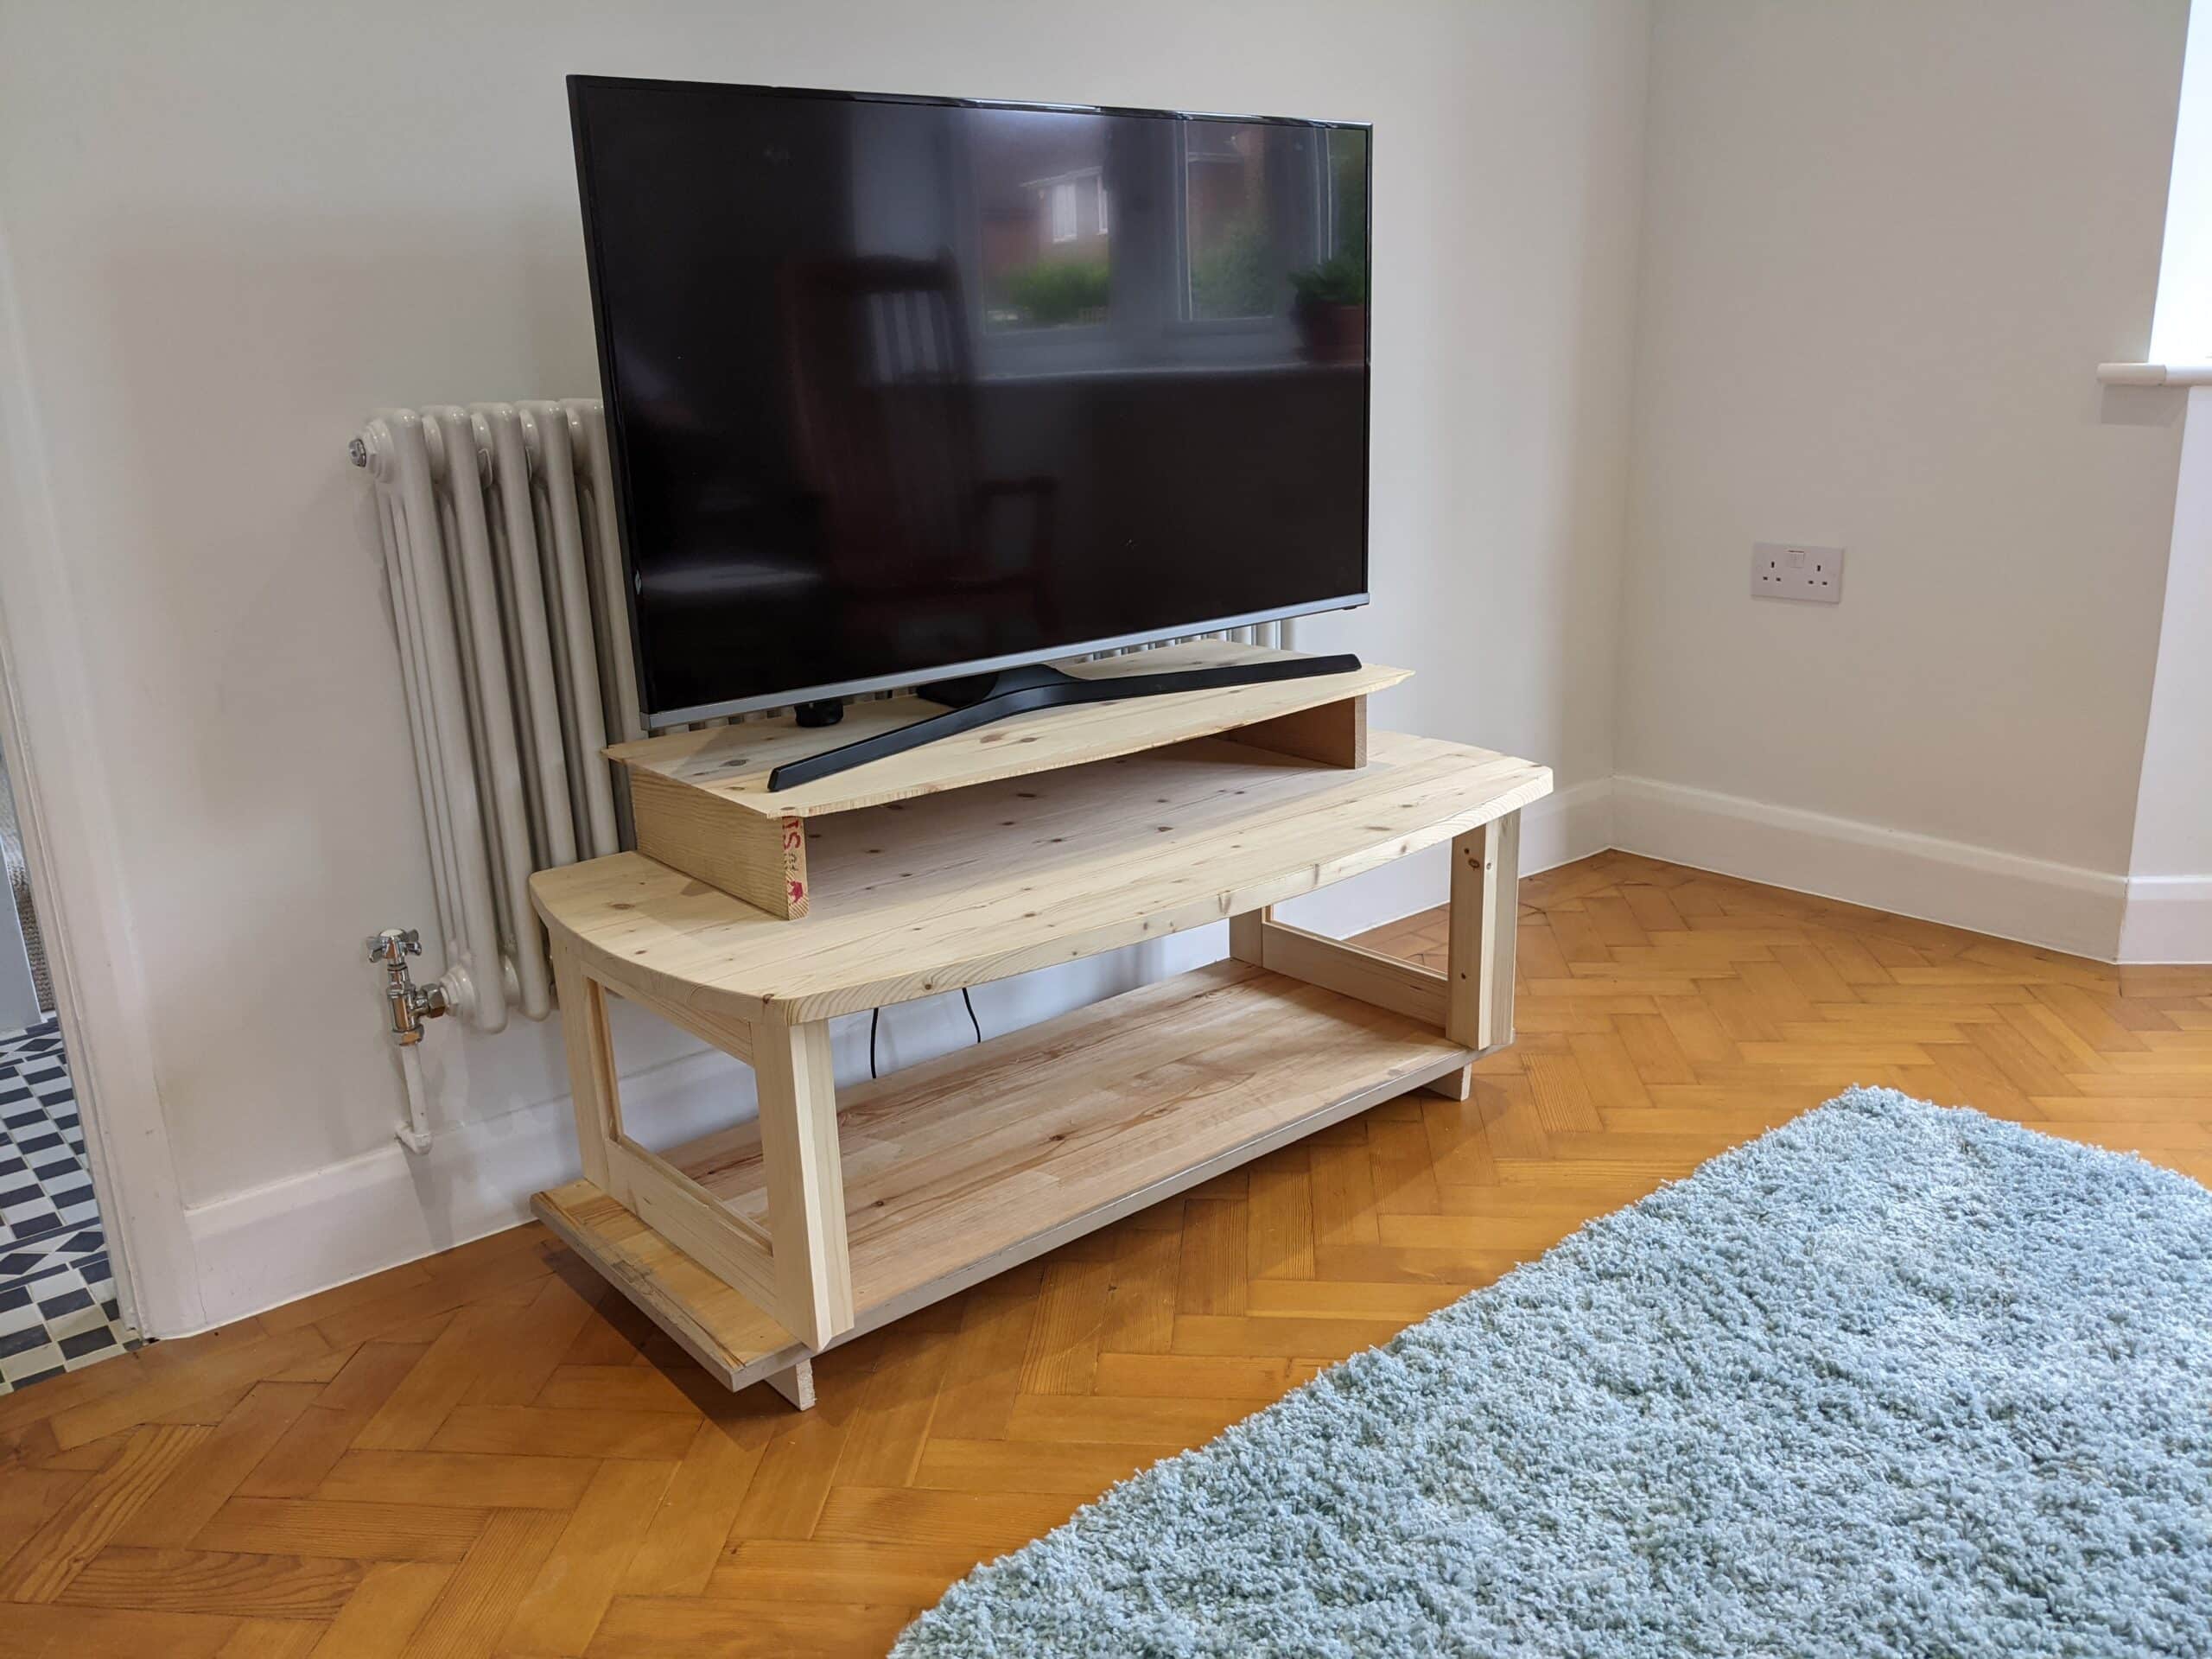
The whitewood works well to capture ideas and place them in a room. It’s an easy wood requiring less energy to work and usually, the wood can be repurposed if it doesn’t make a product.
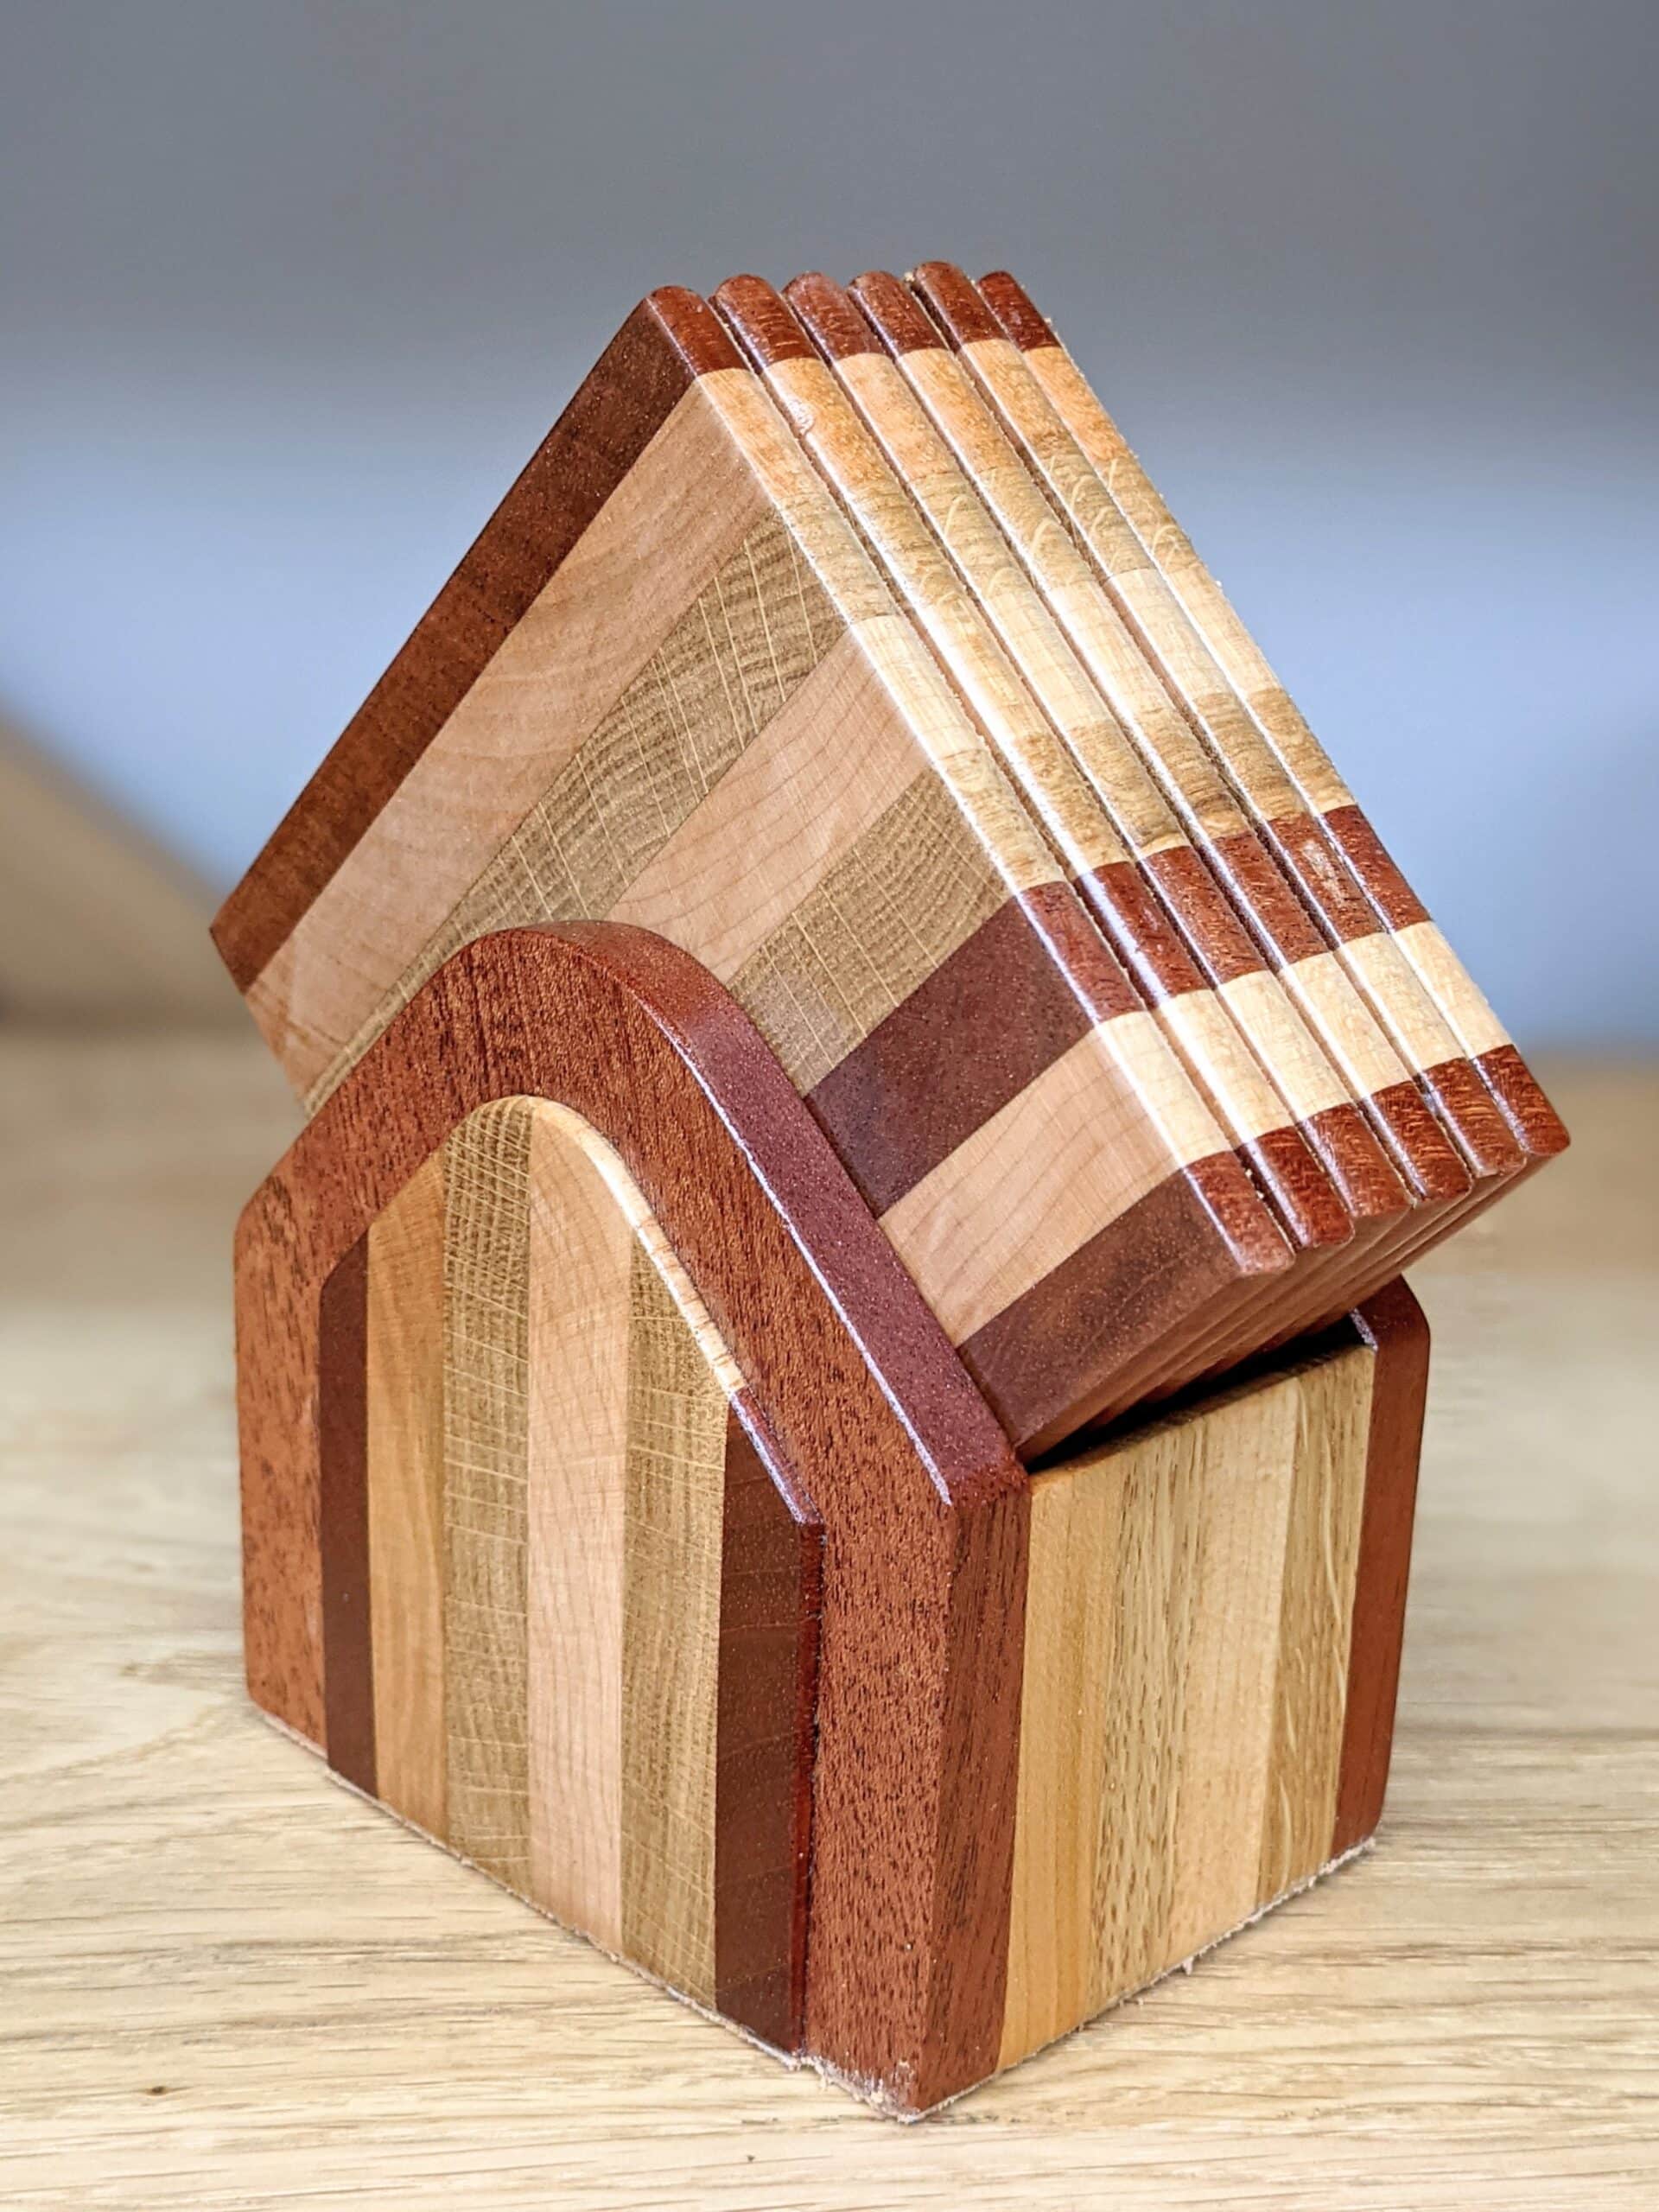
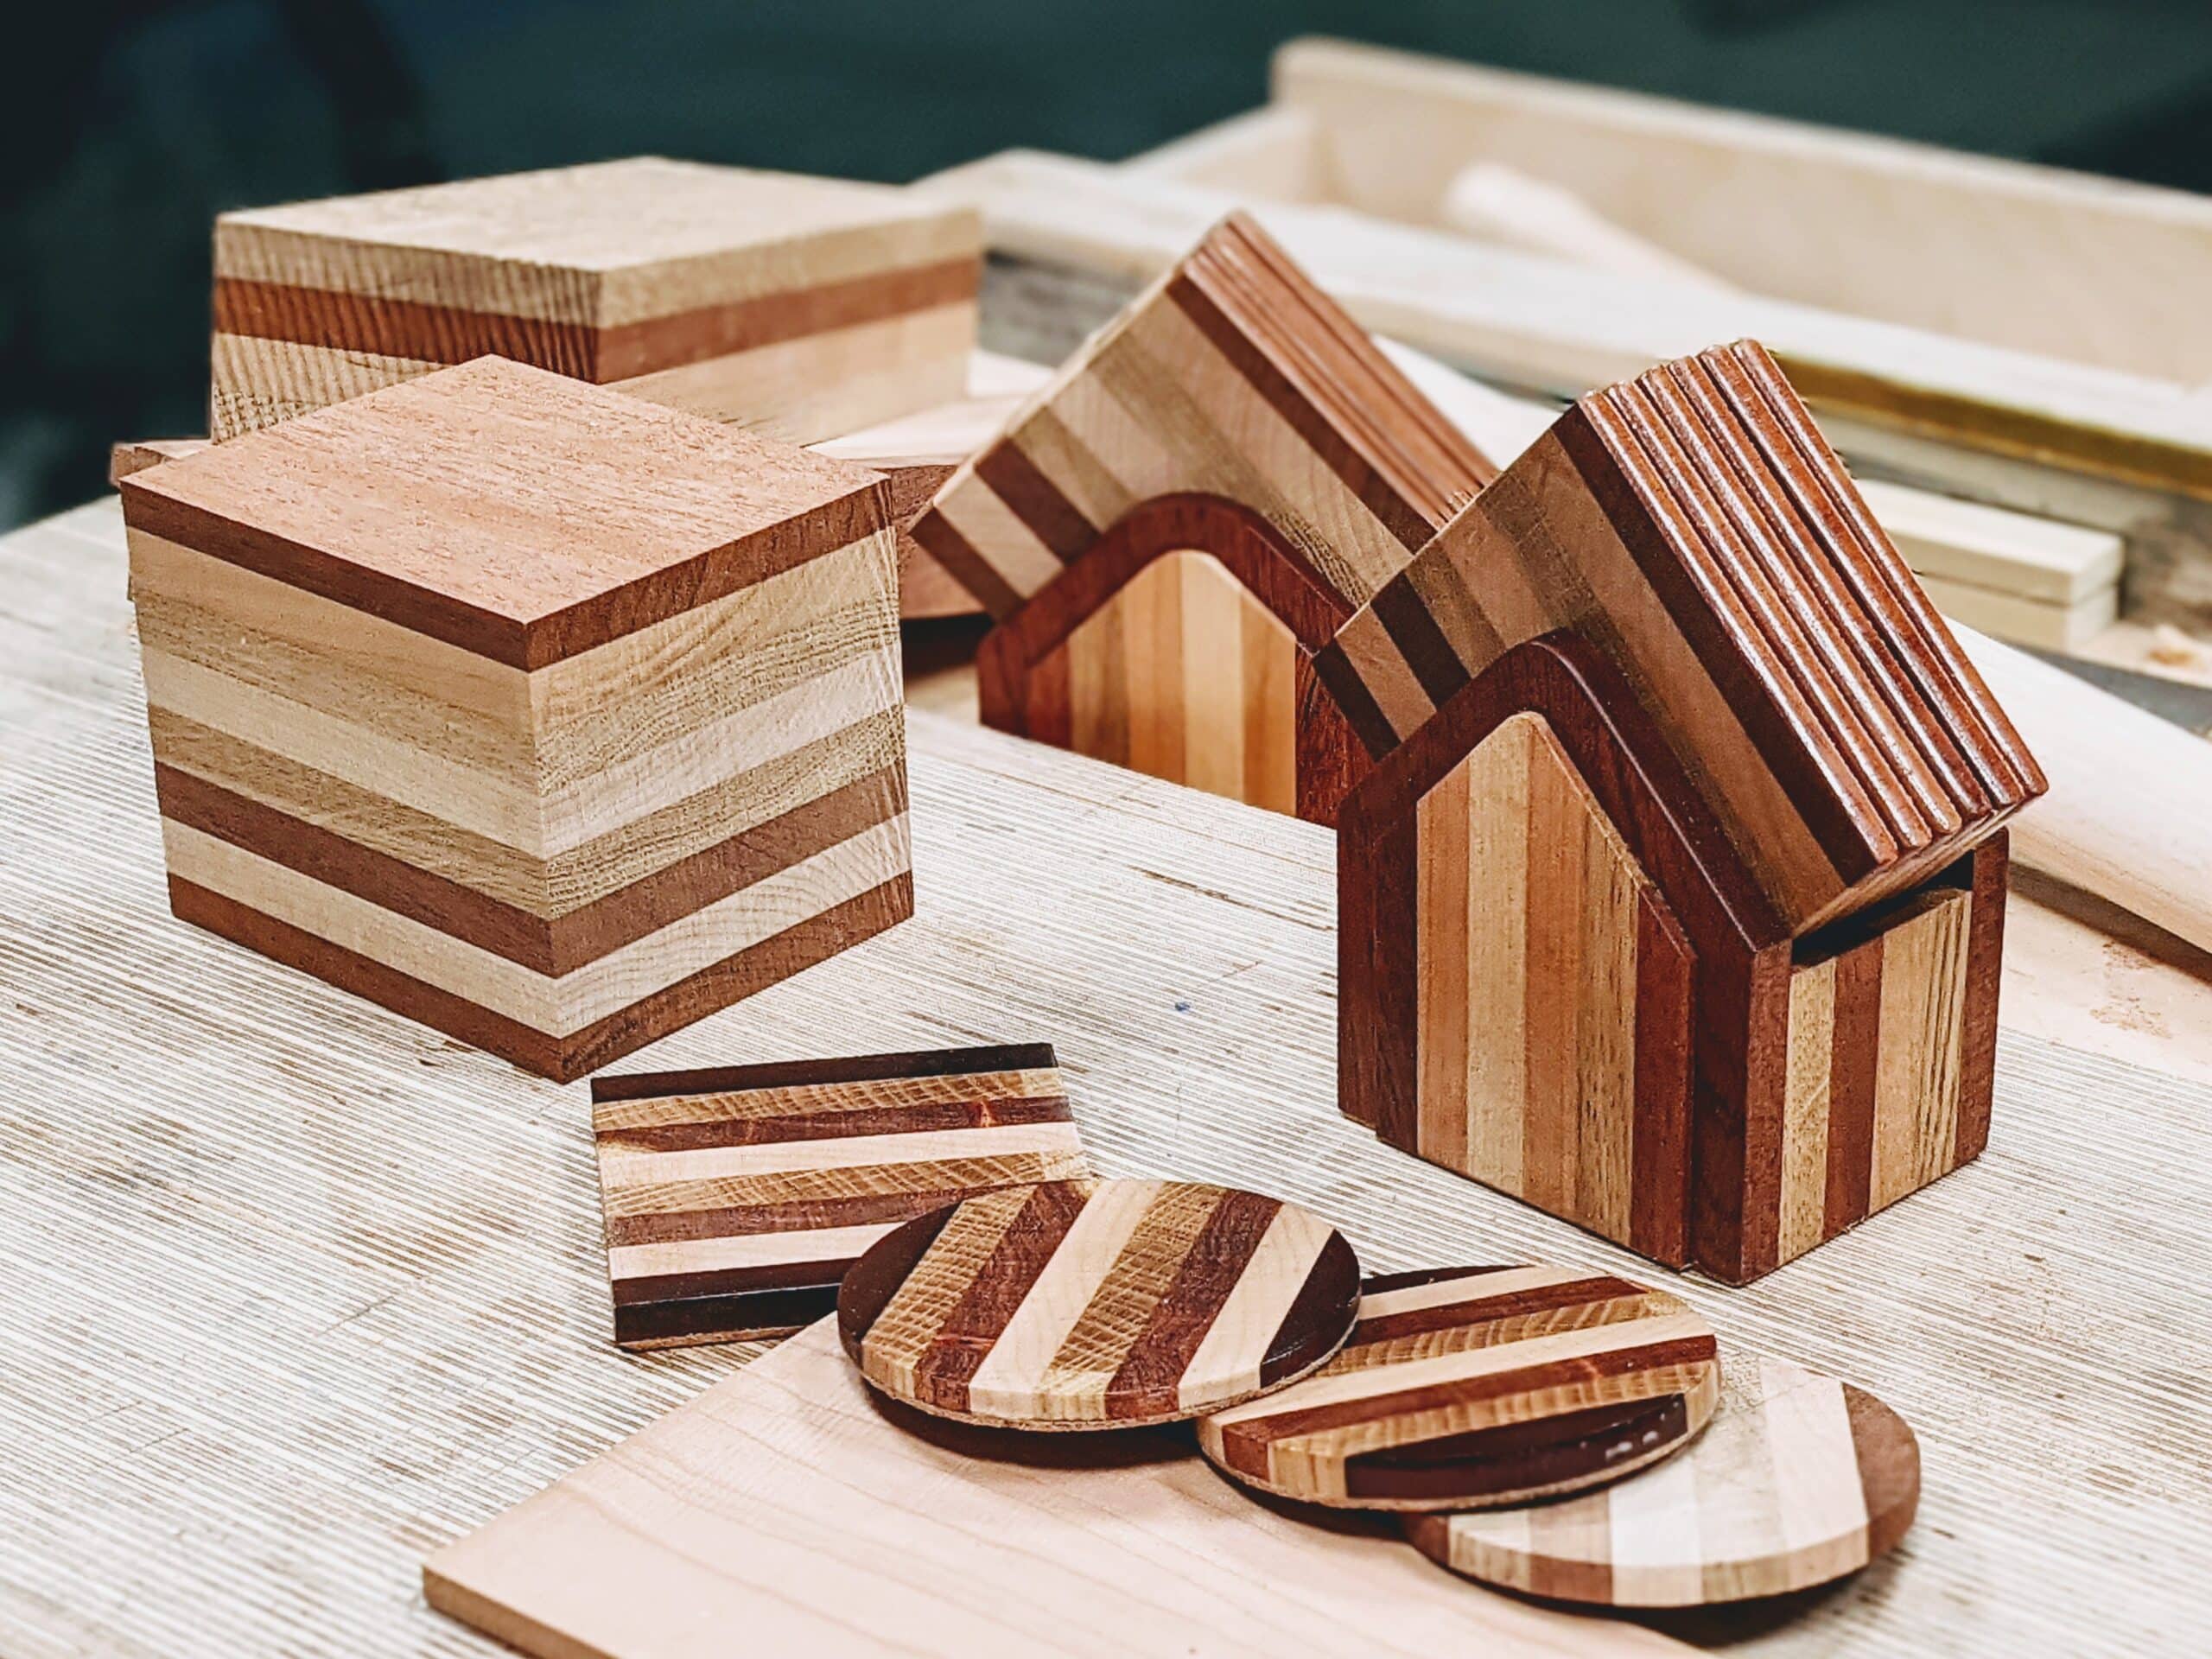
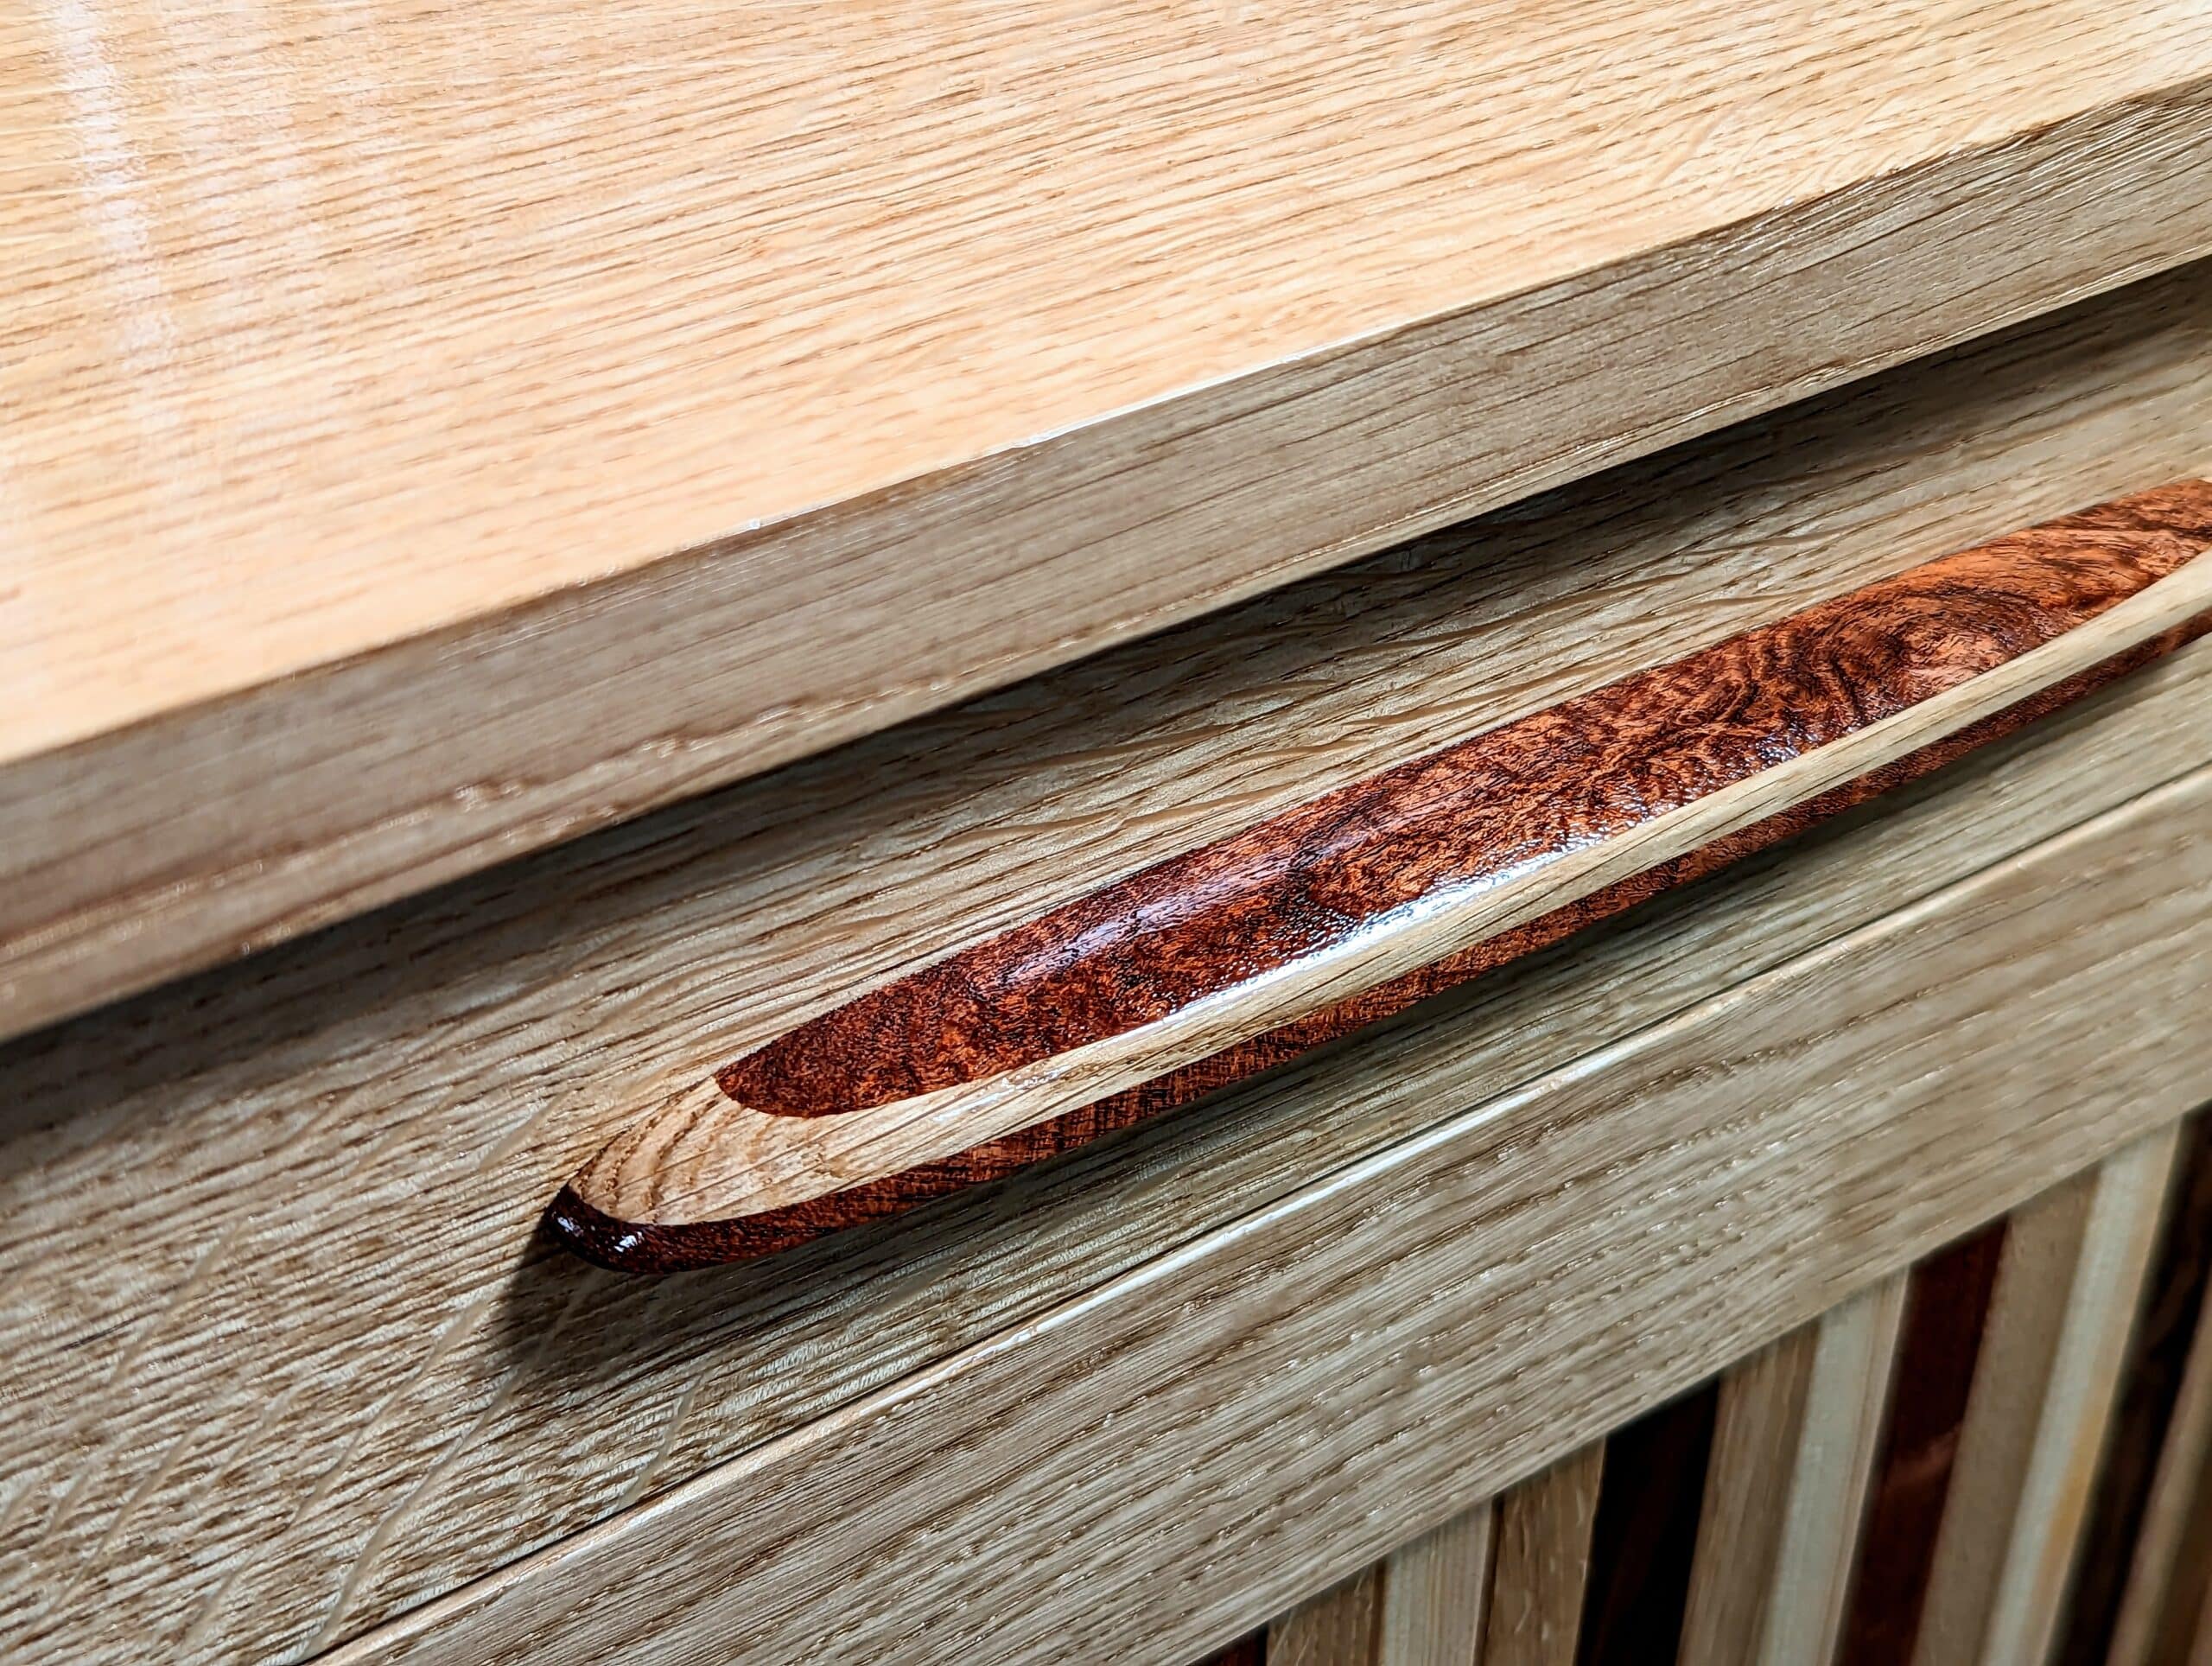
I like coasters even though many finishes are liquid-resistant including spirit alcohol, They make really good gifts for friends and relatives. I usually make several sets like these by ganging up the laminations and then crosscutting the length on the bandsaw. Planing the end-grain versions needs a truly sharp plane but the long-grain versions plane easily. I made it hard on myself on this set by combining end-grain with long-grain side by side.
The living room came near to conclusion within a few months. But it was in this year of 2021. over a couple of months that I concluded the design of the Paul Sellers router plane and then developed it into a kit of metal parts. This has nothing to do with Sellers’ home except we use the plane throughout just about every project these days. I want people to be able to make their own and then have ready access to a kit of the metal parts that alleviated metalwork.
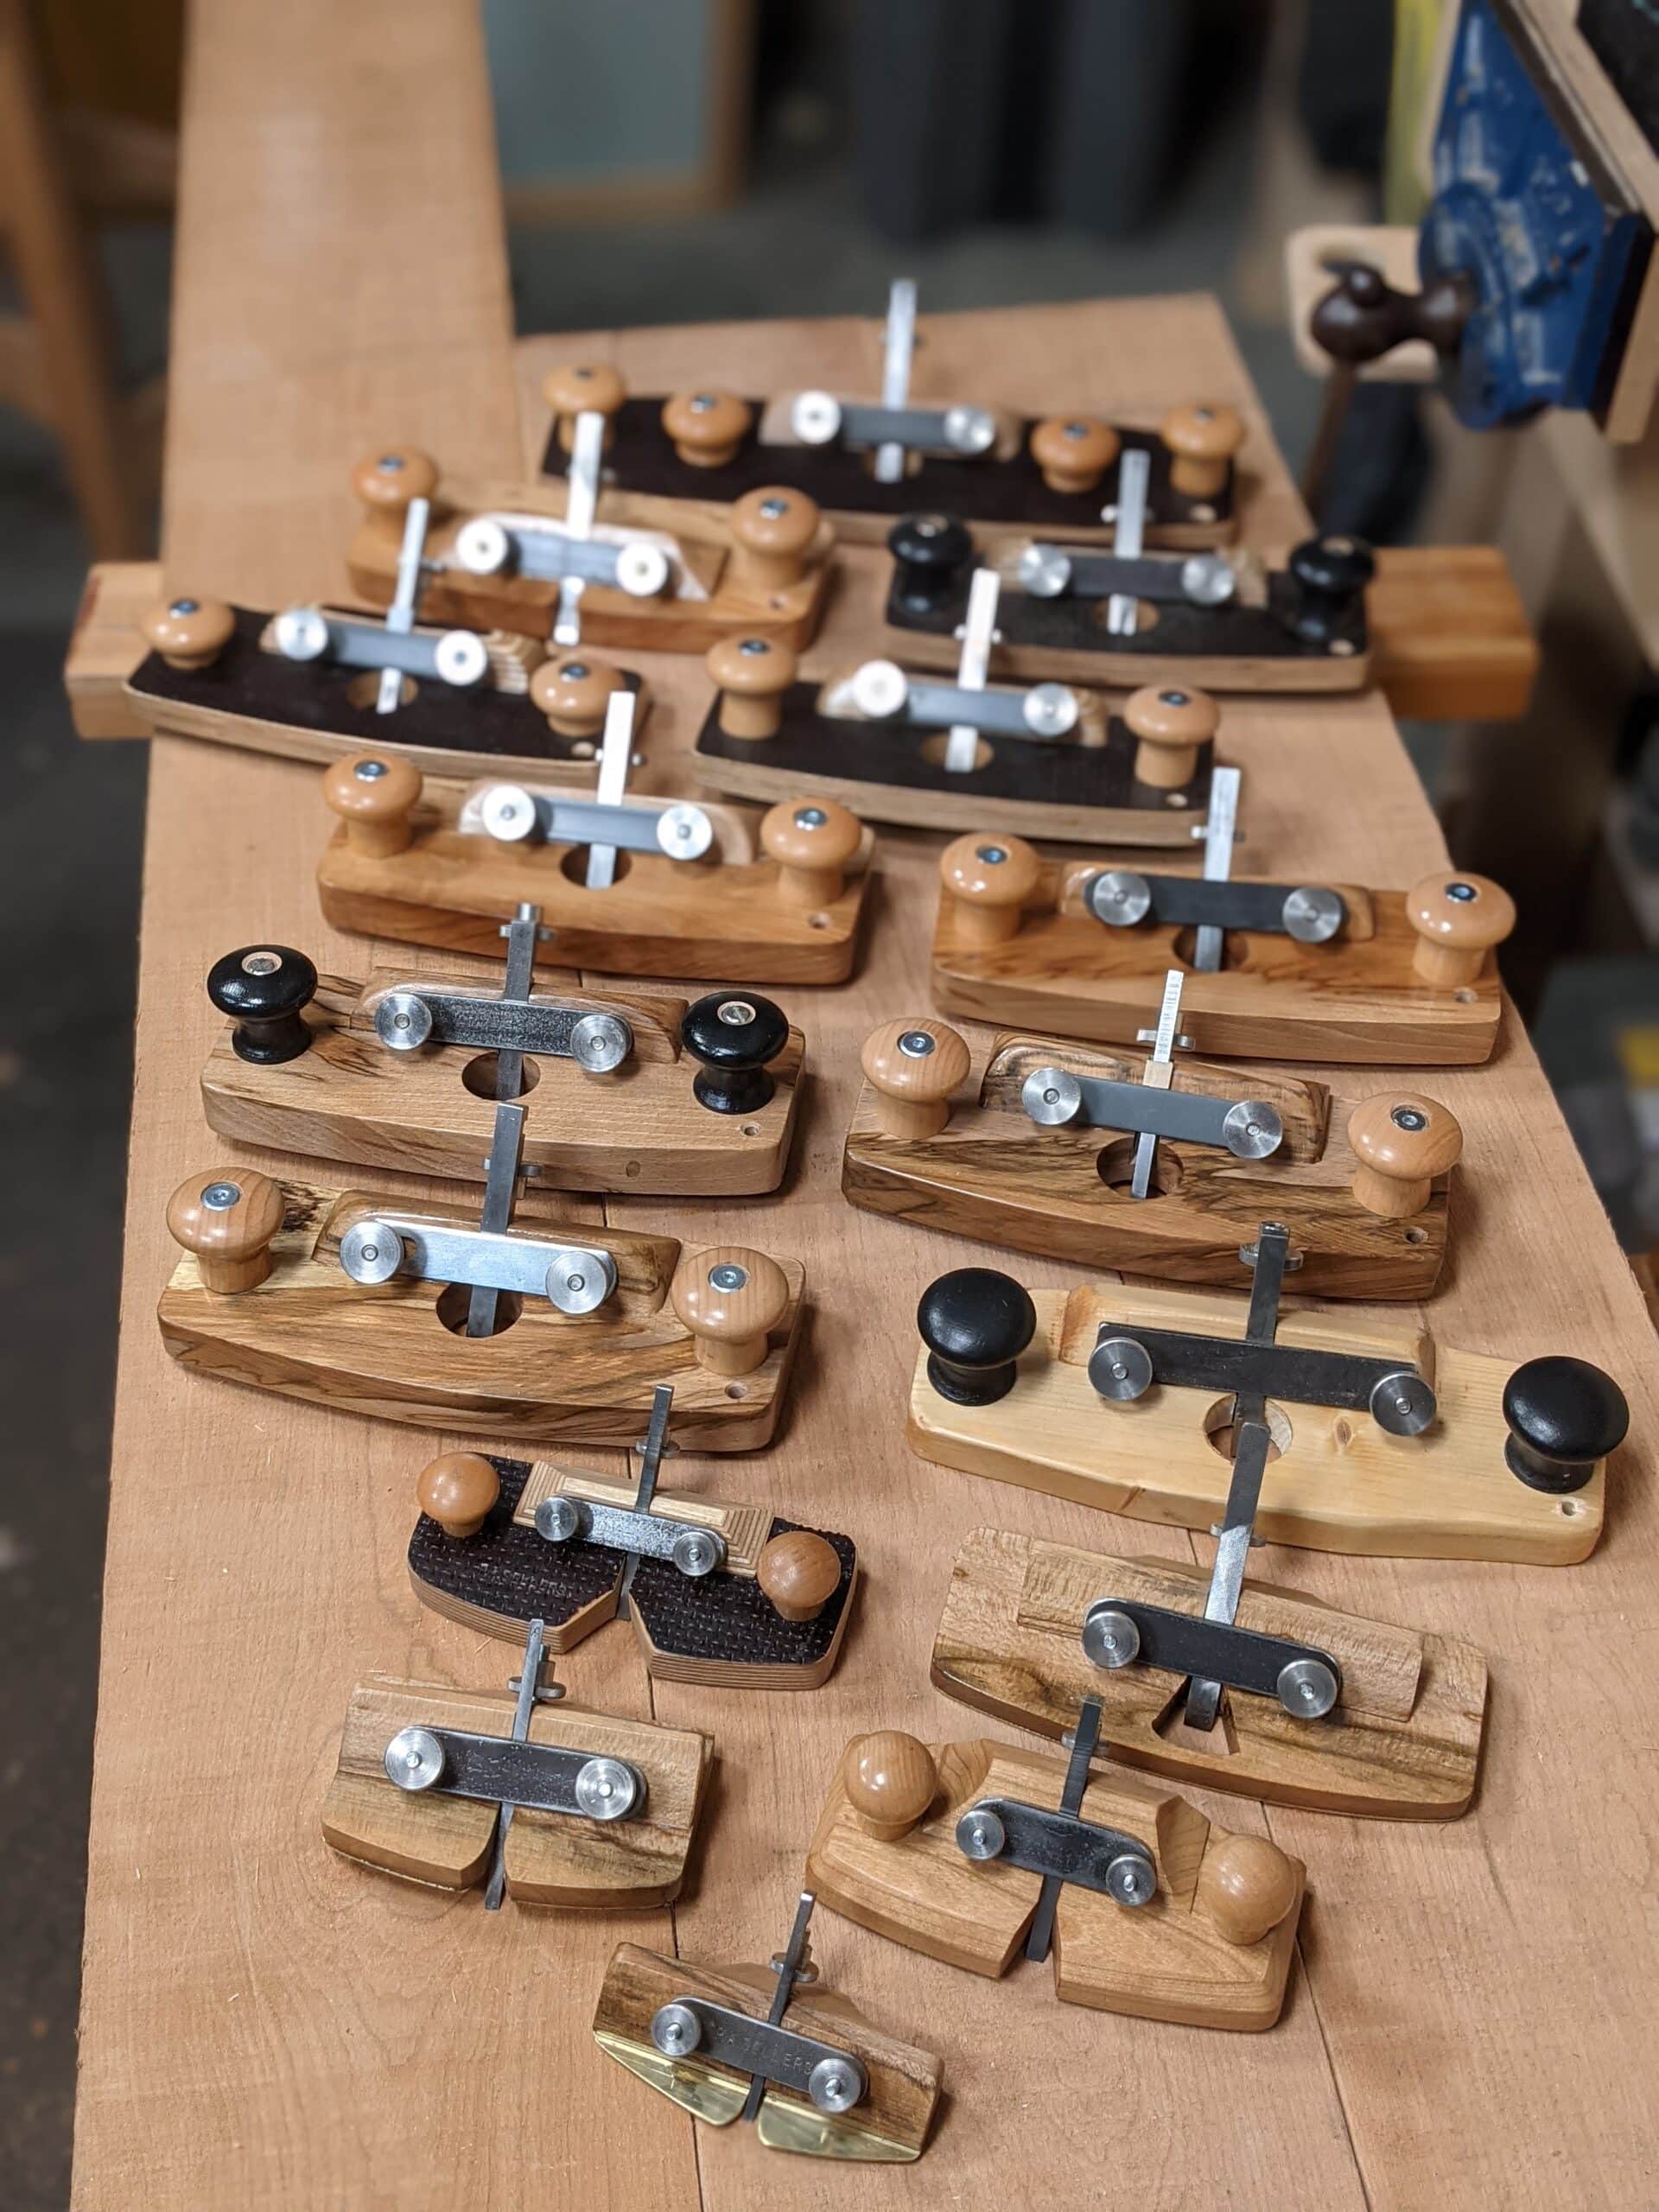
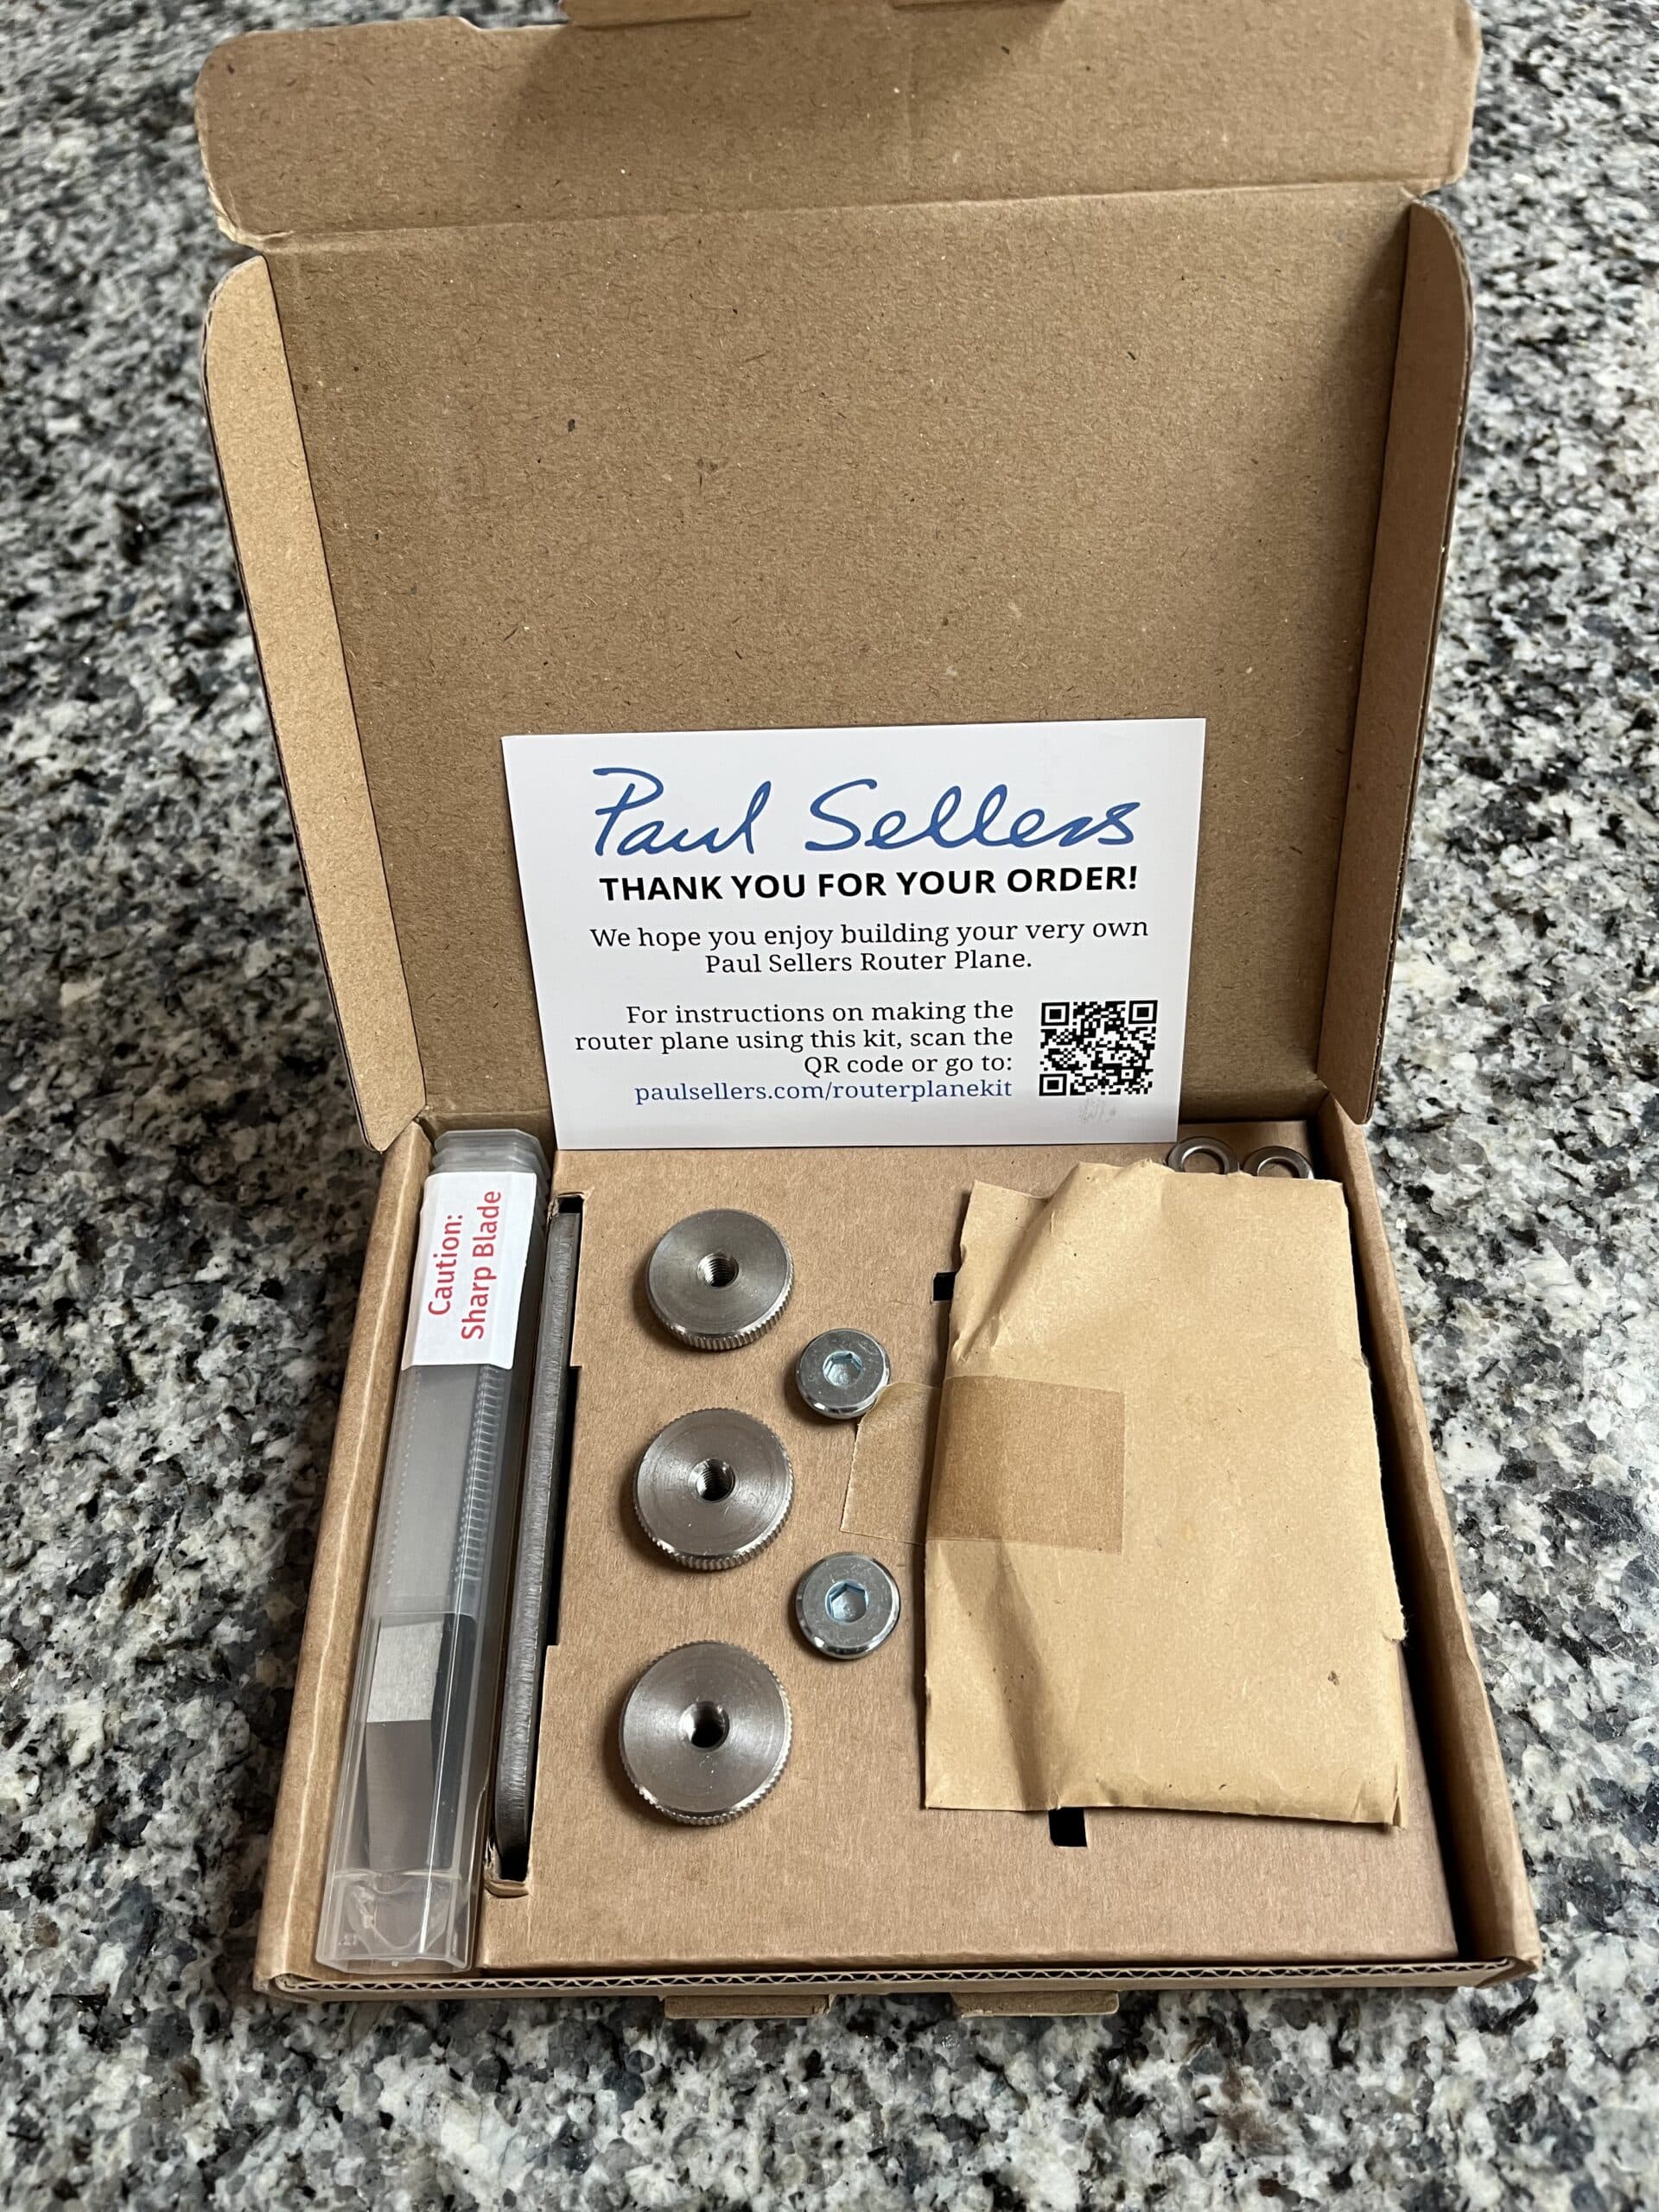
The router kit of parts can be had from us here. And here is my how-to-make-it video I think you will enjoy.
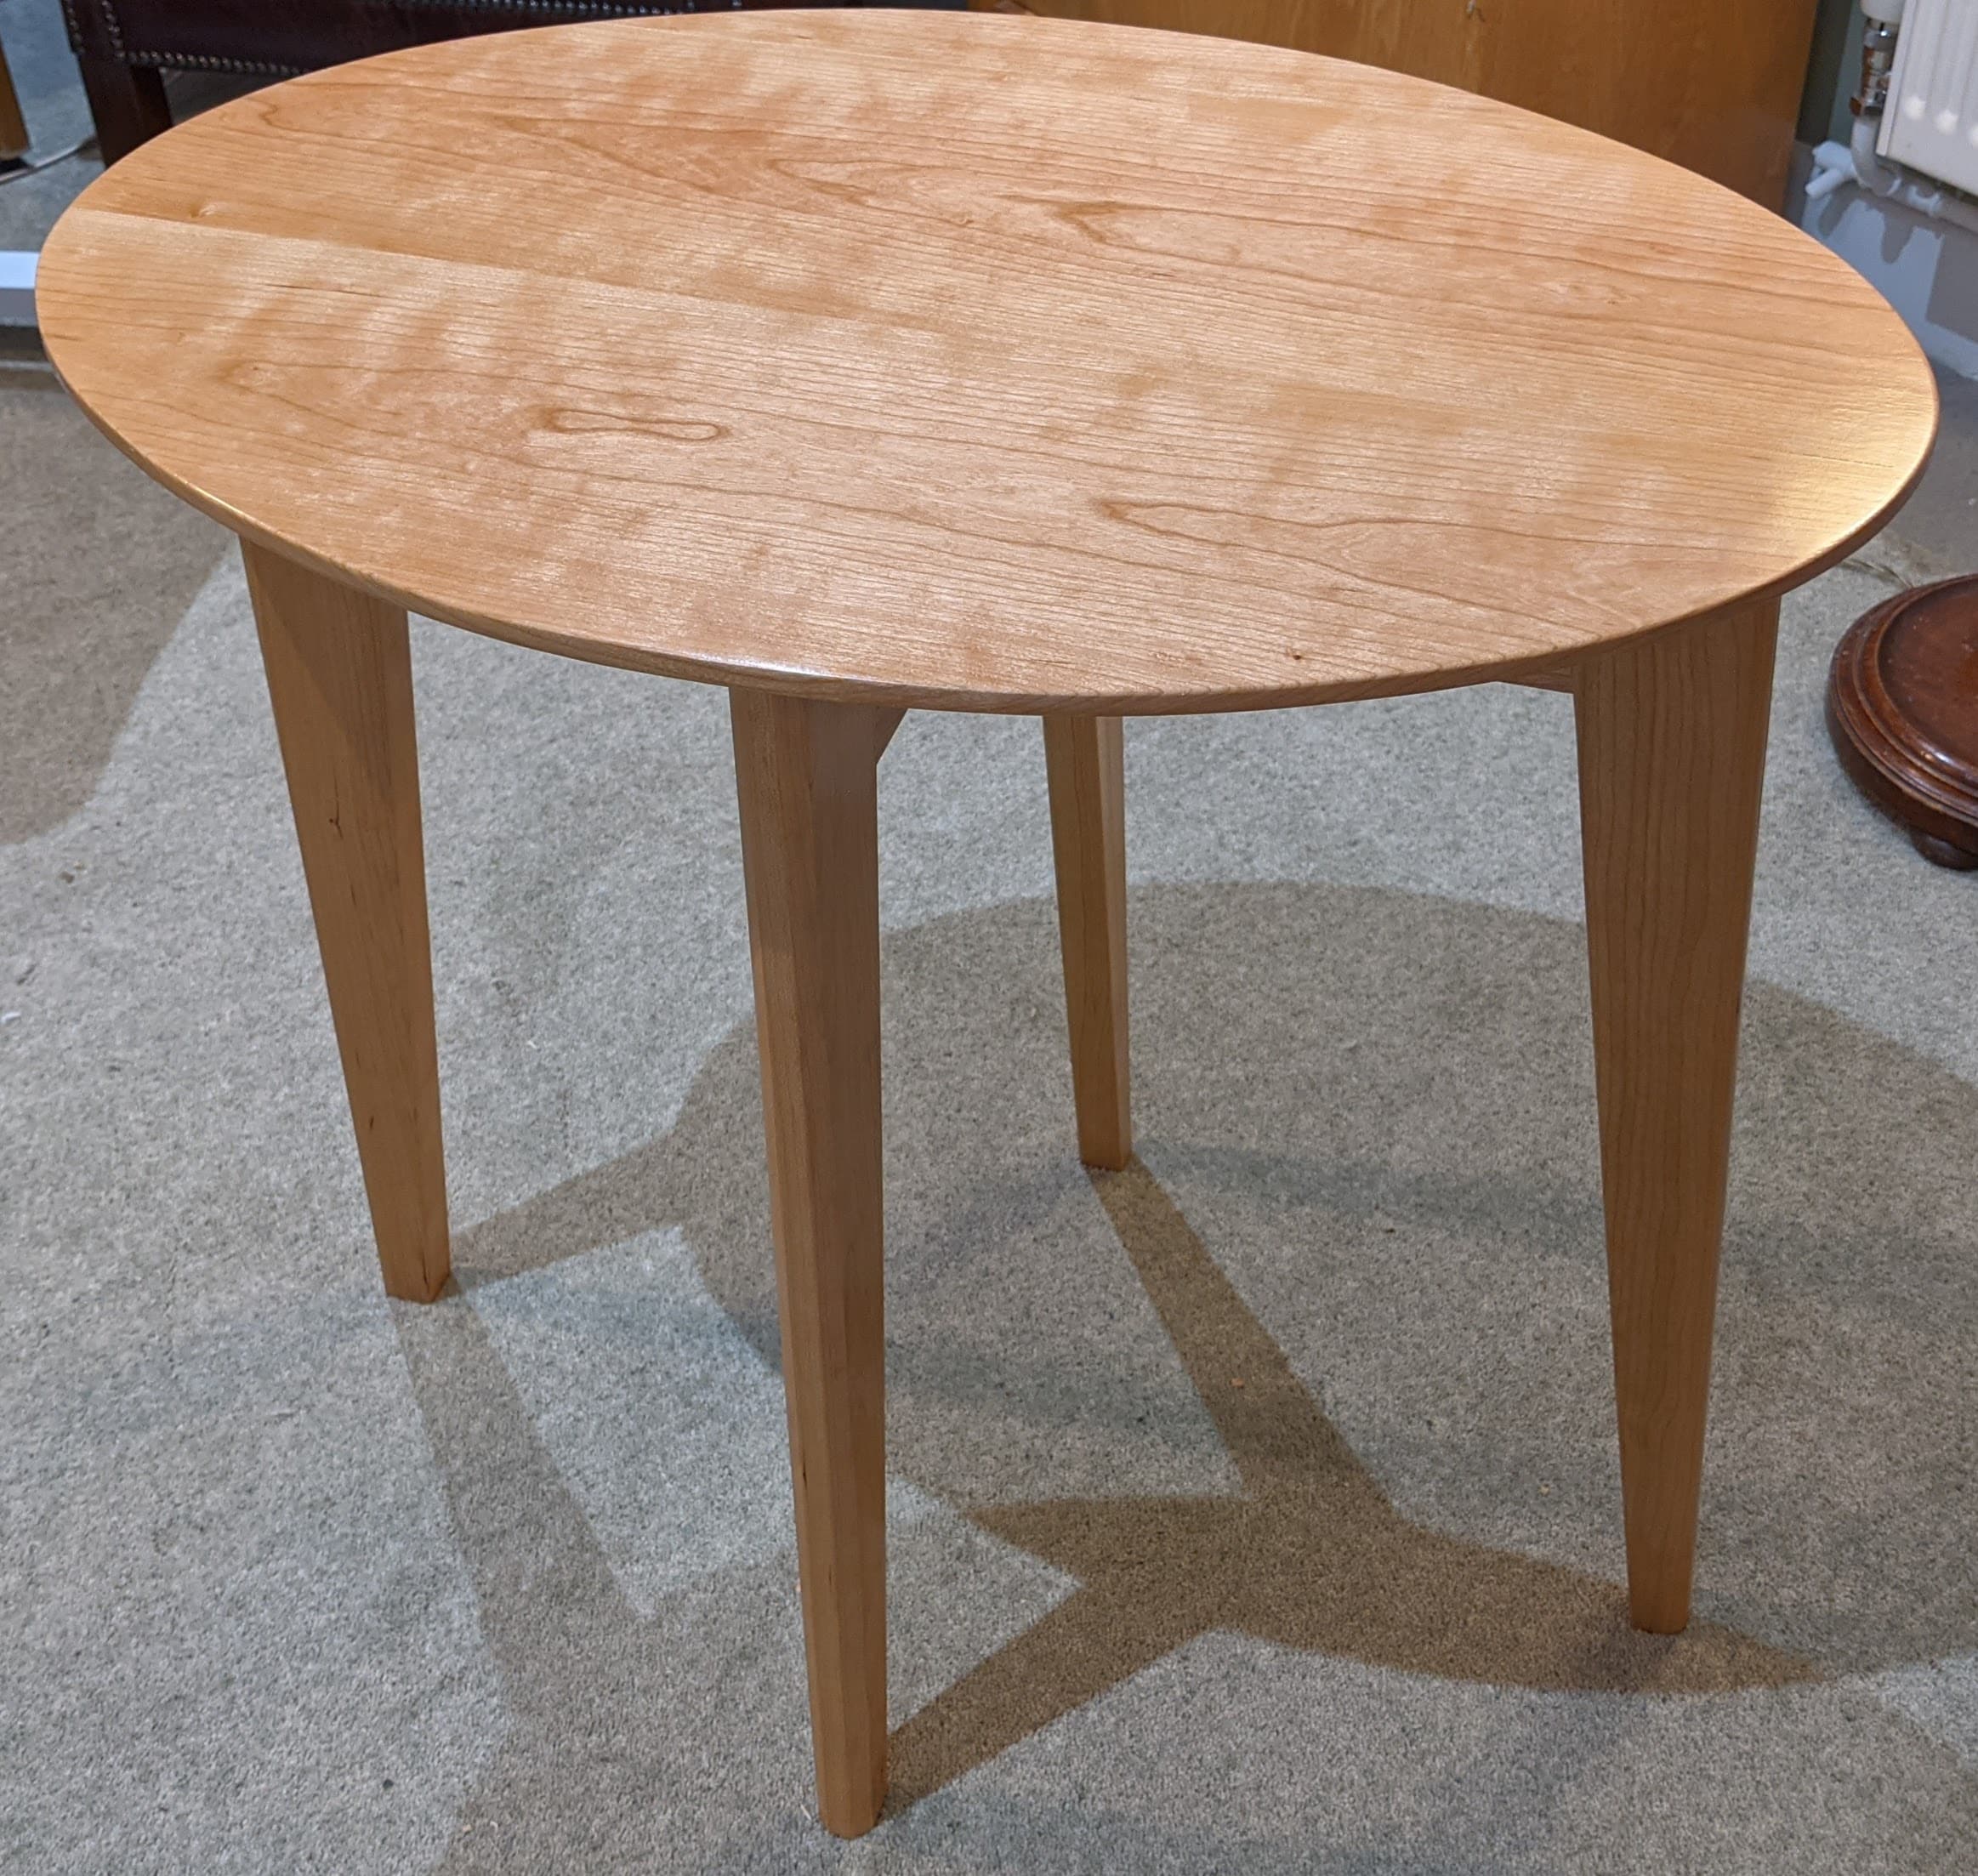
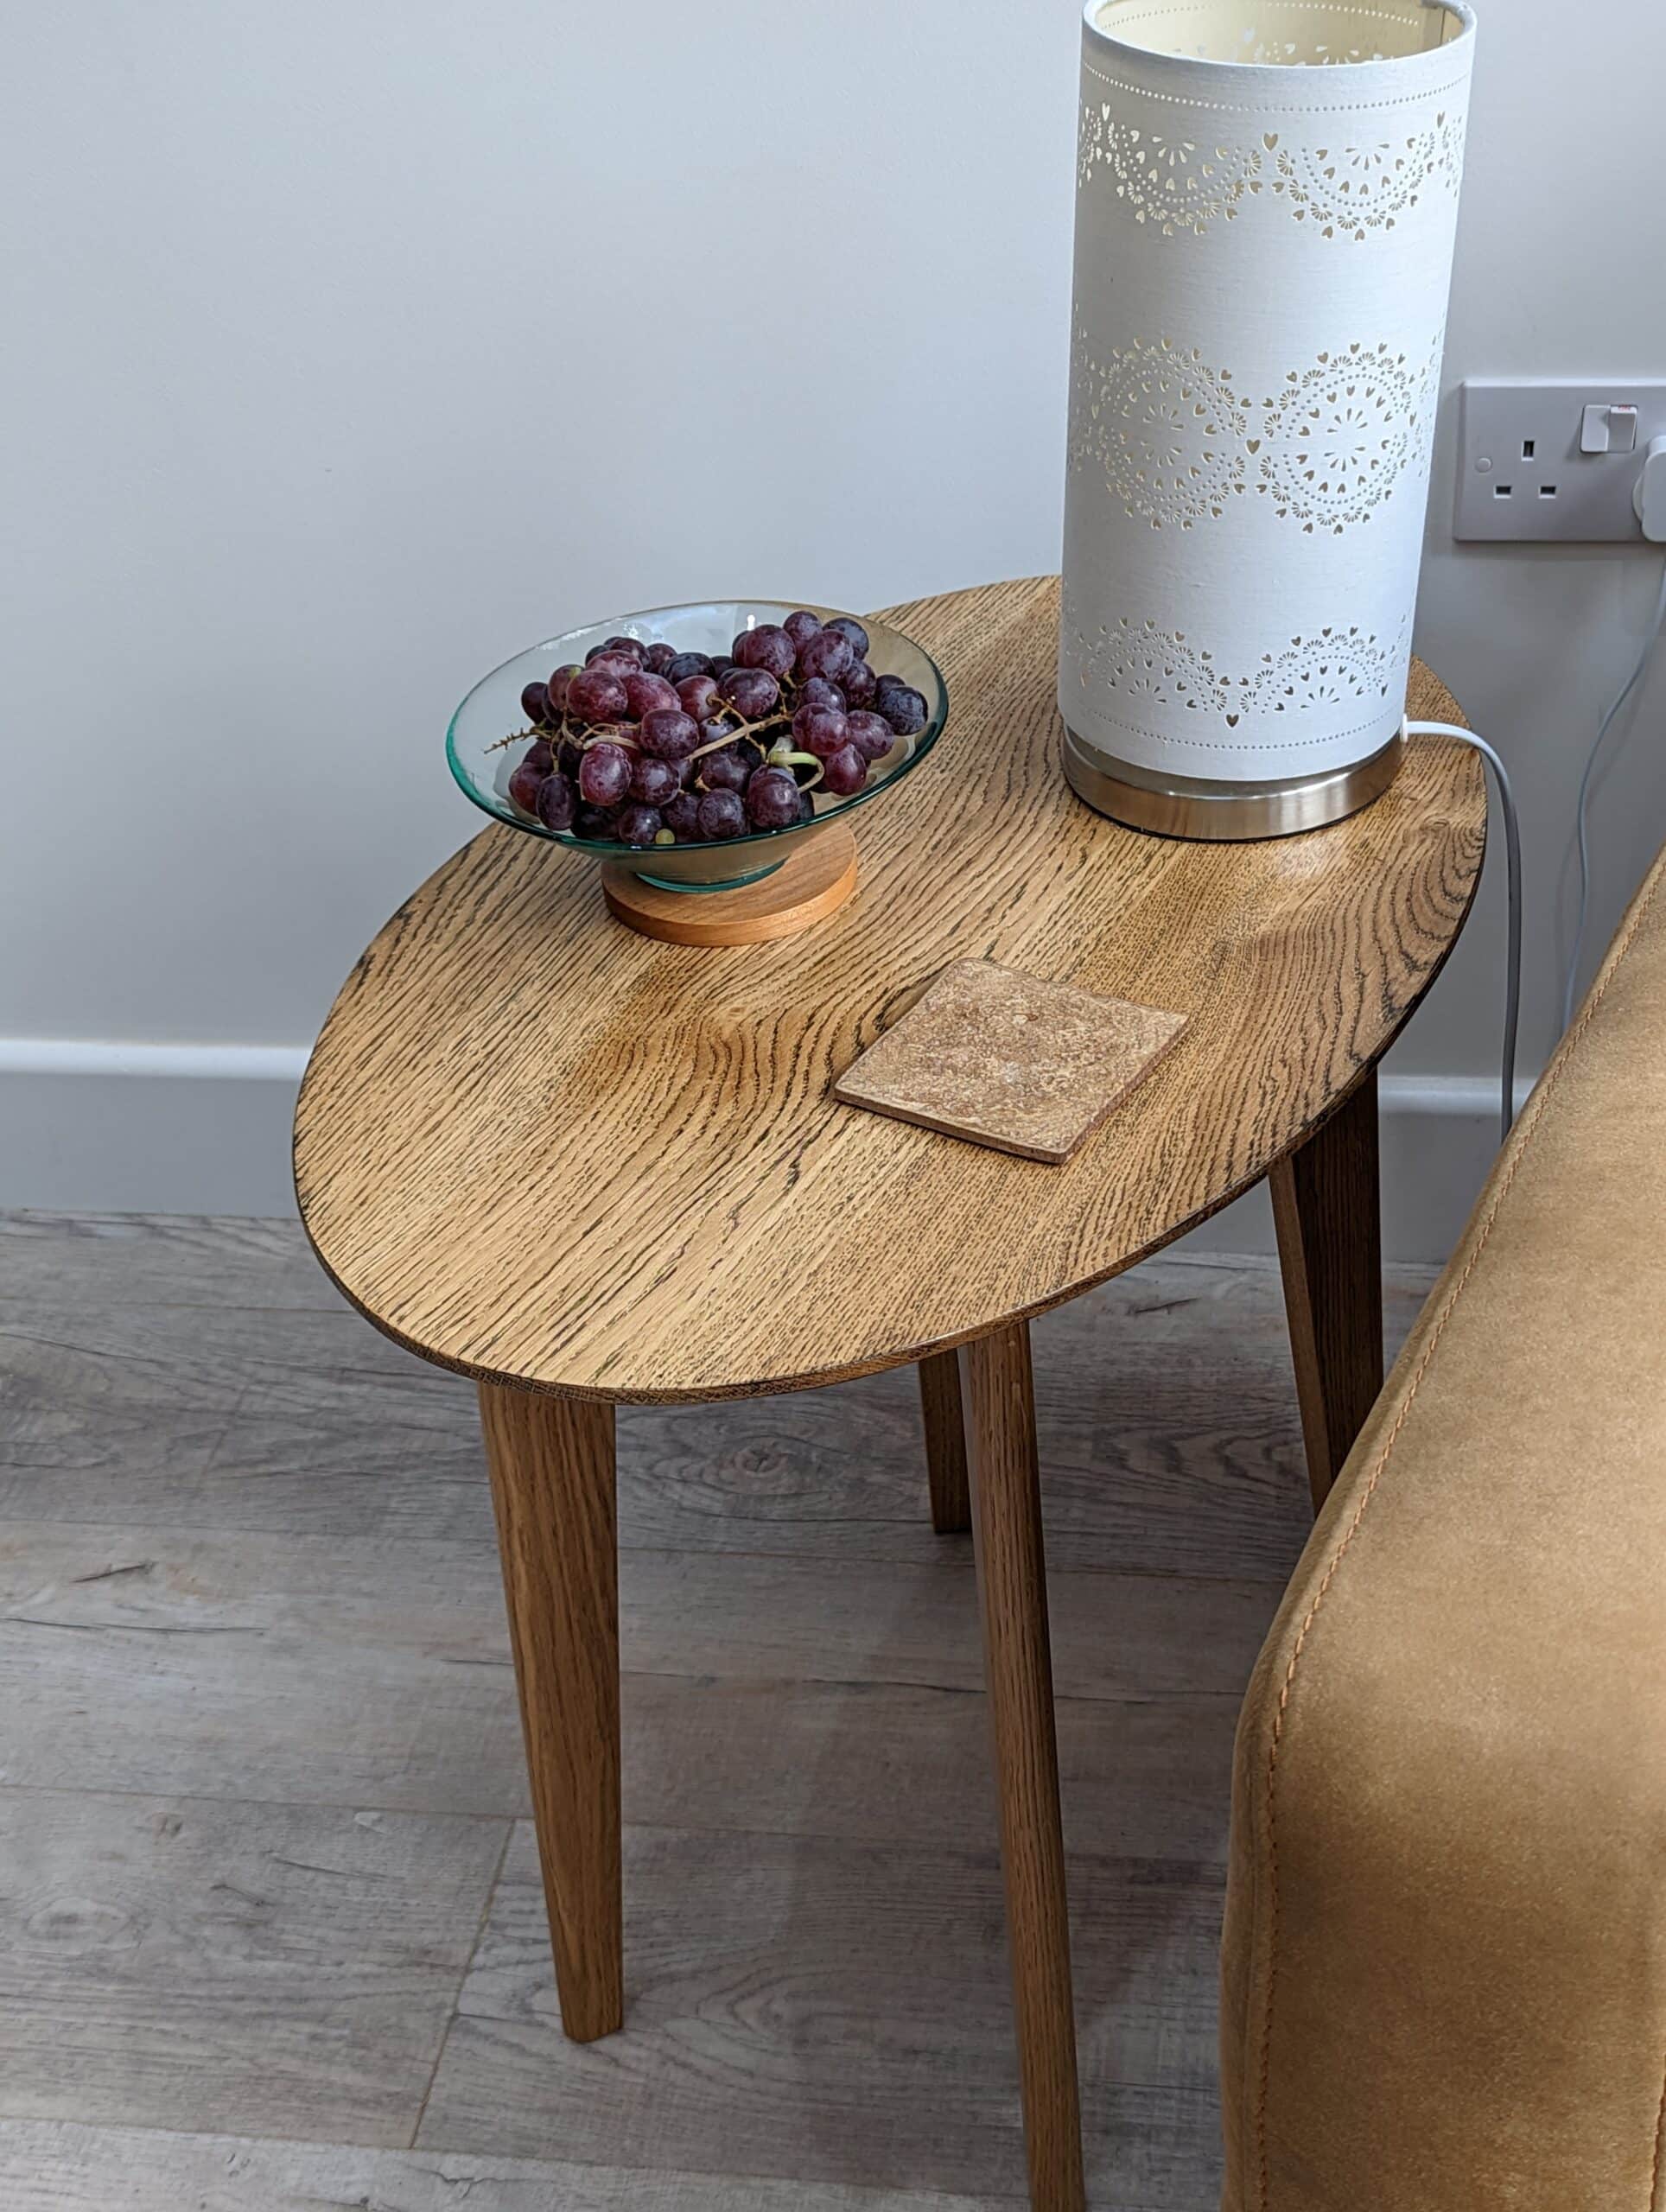
Occasional tables fill in the gaps and corners for convenience with guests. These cherry versions are smaller pieces and can be made from short sections of wood.
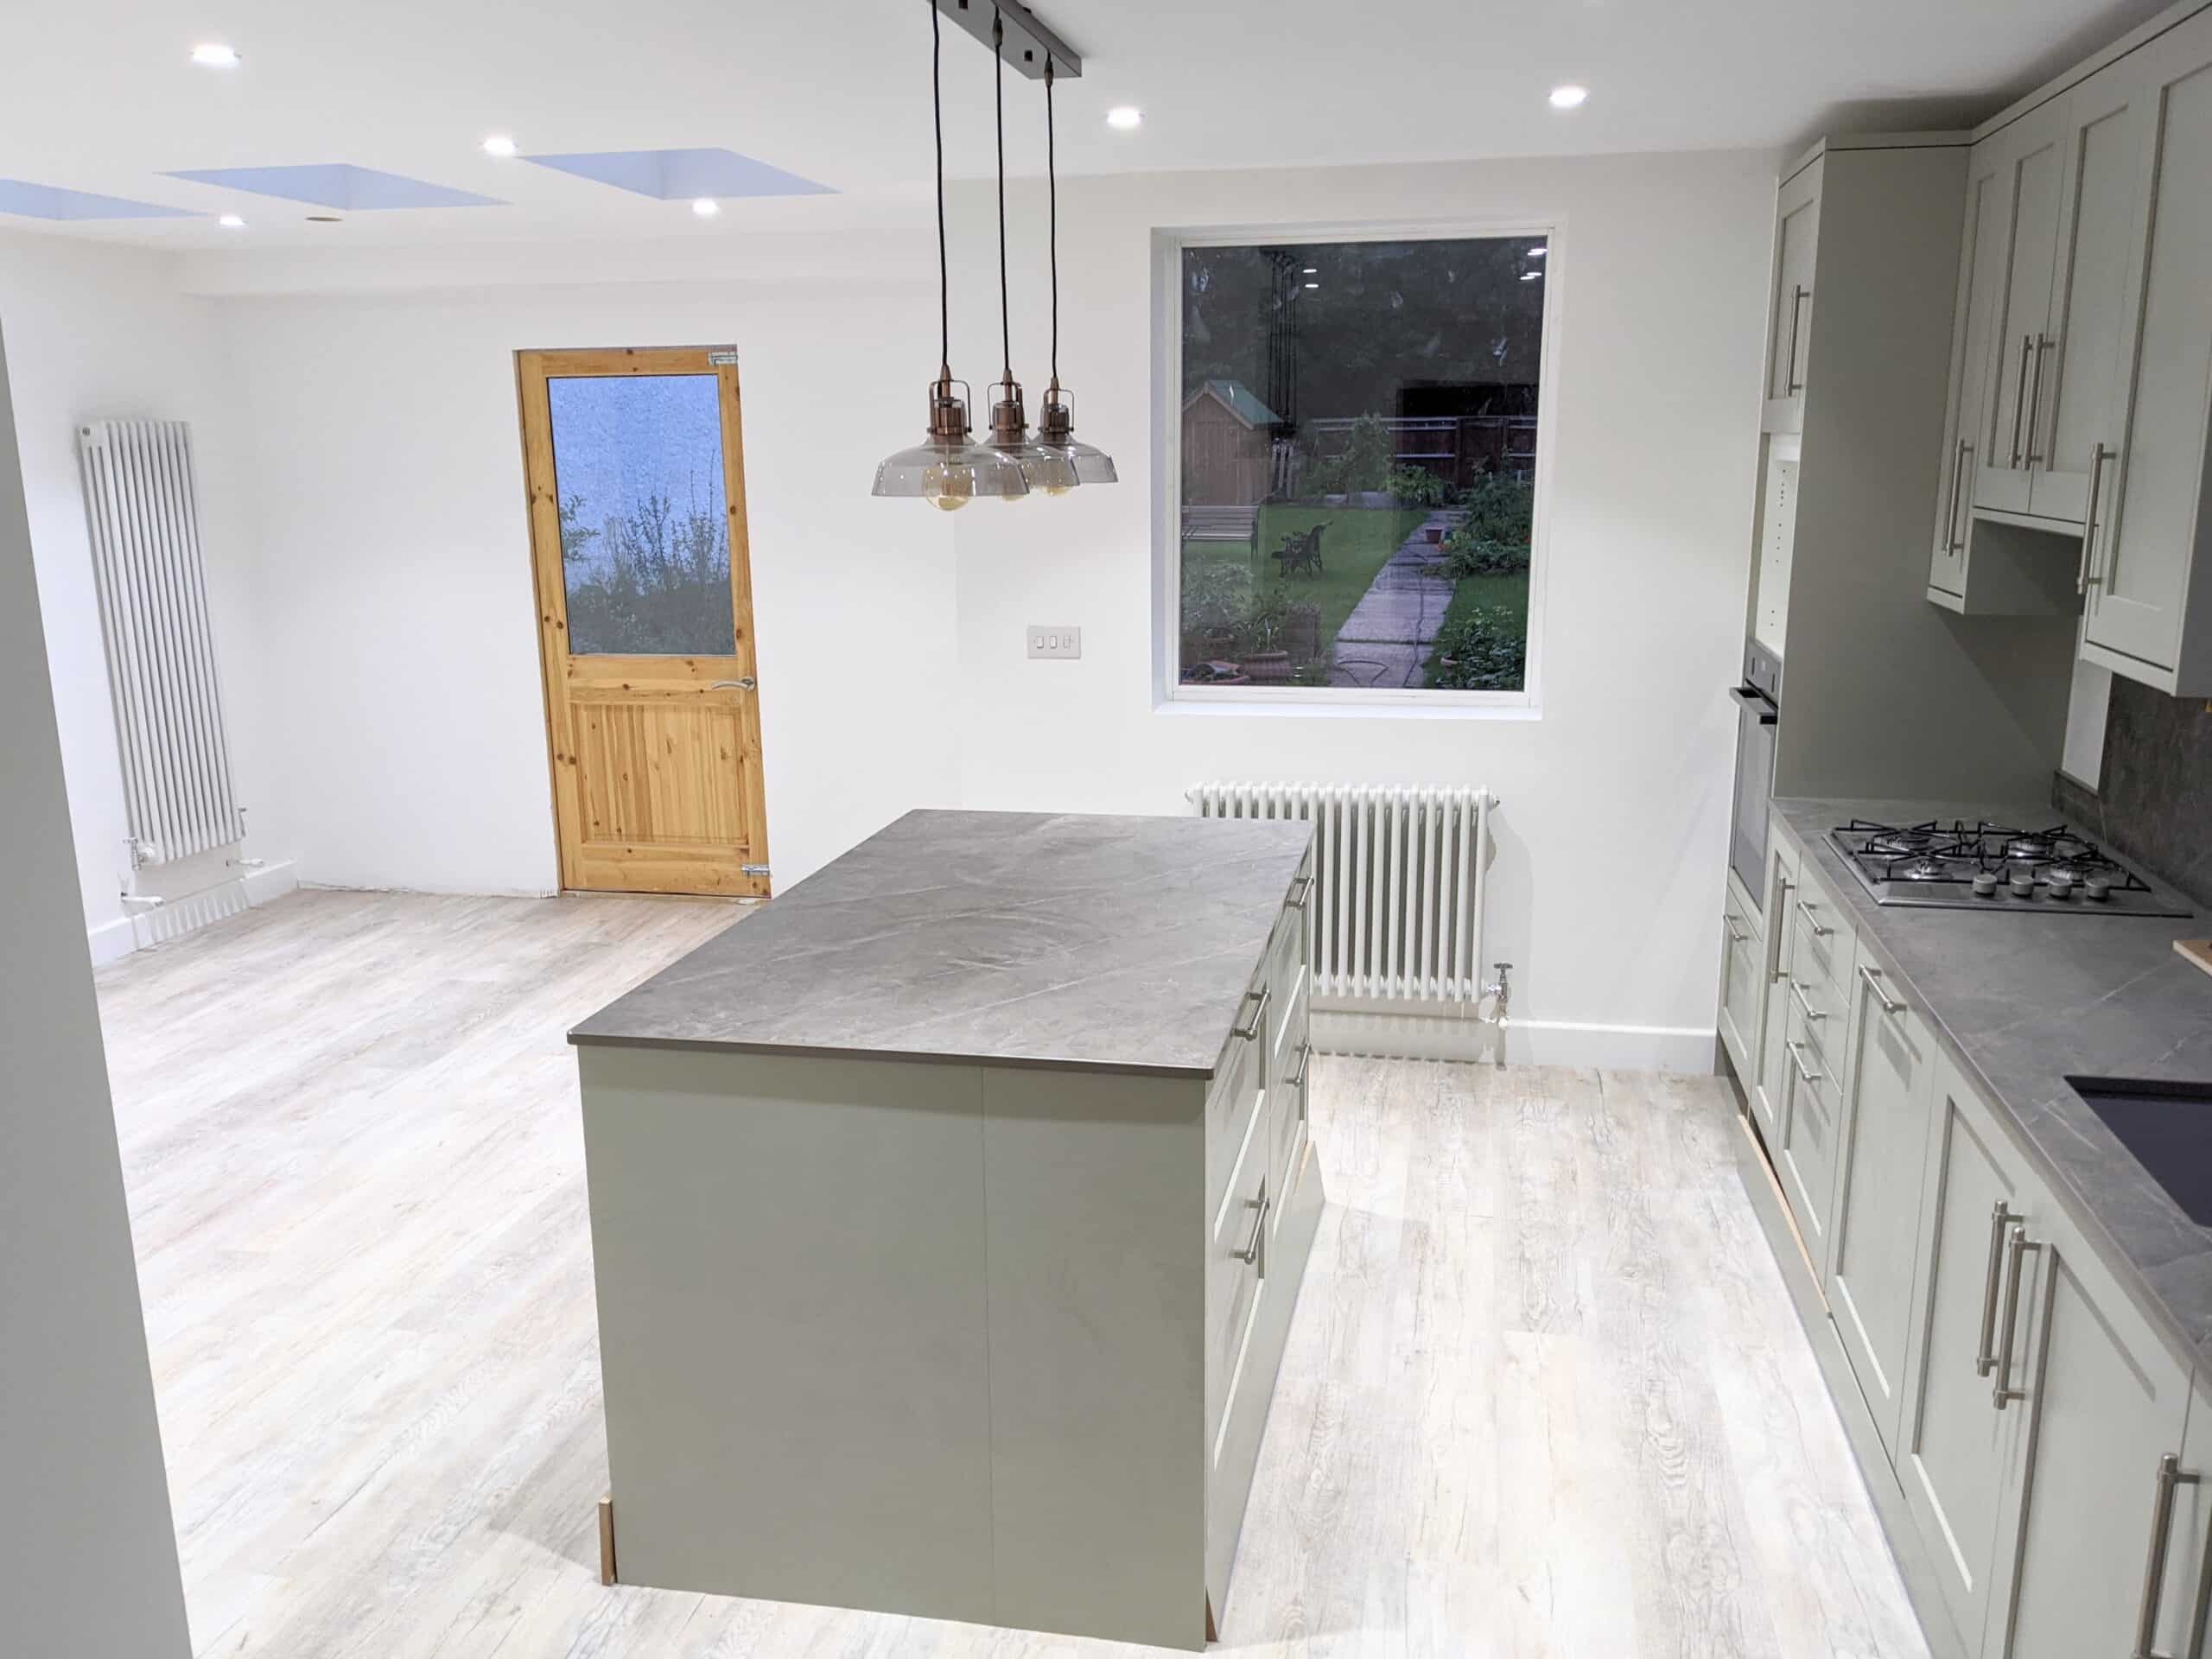
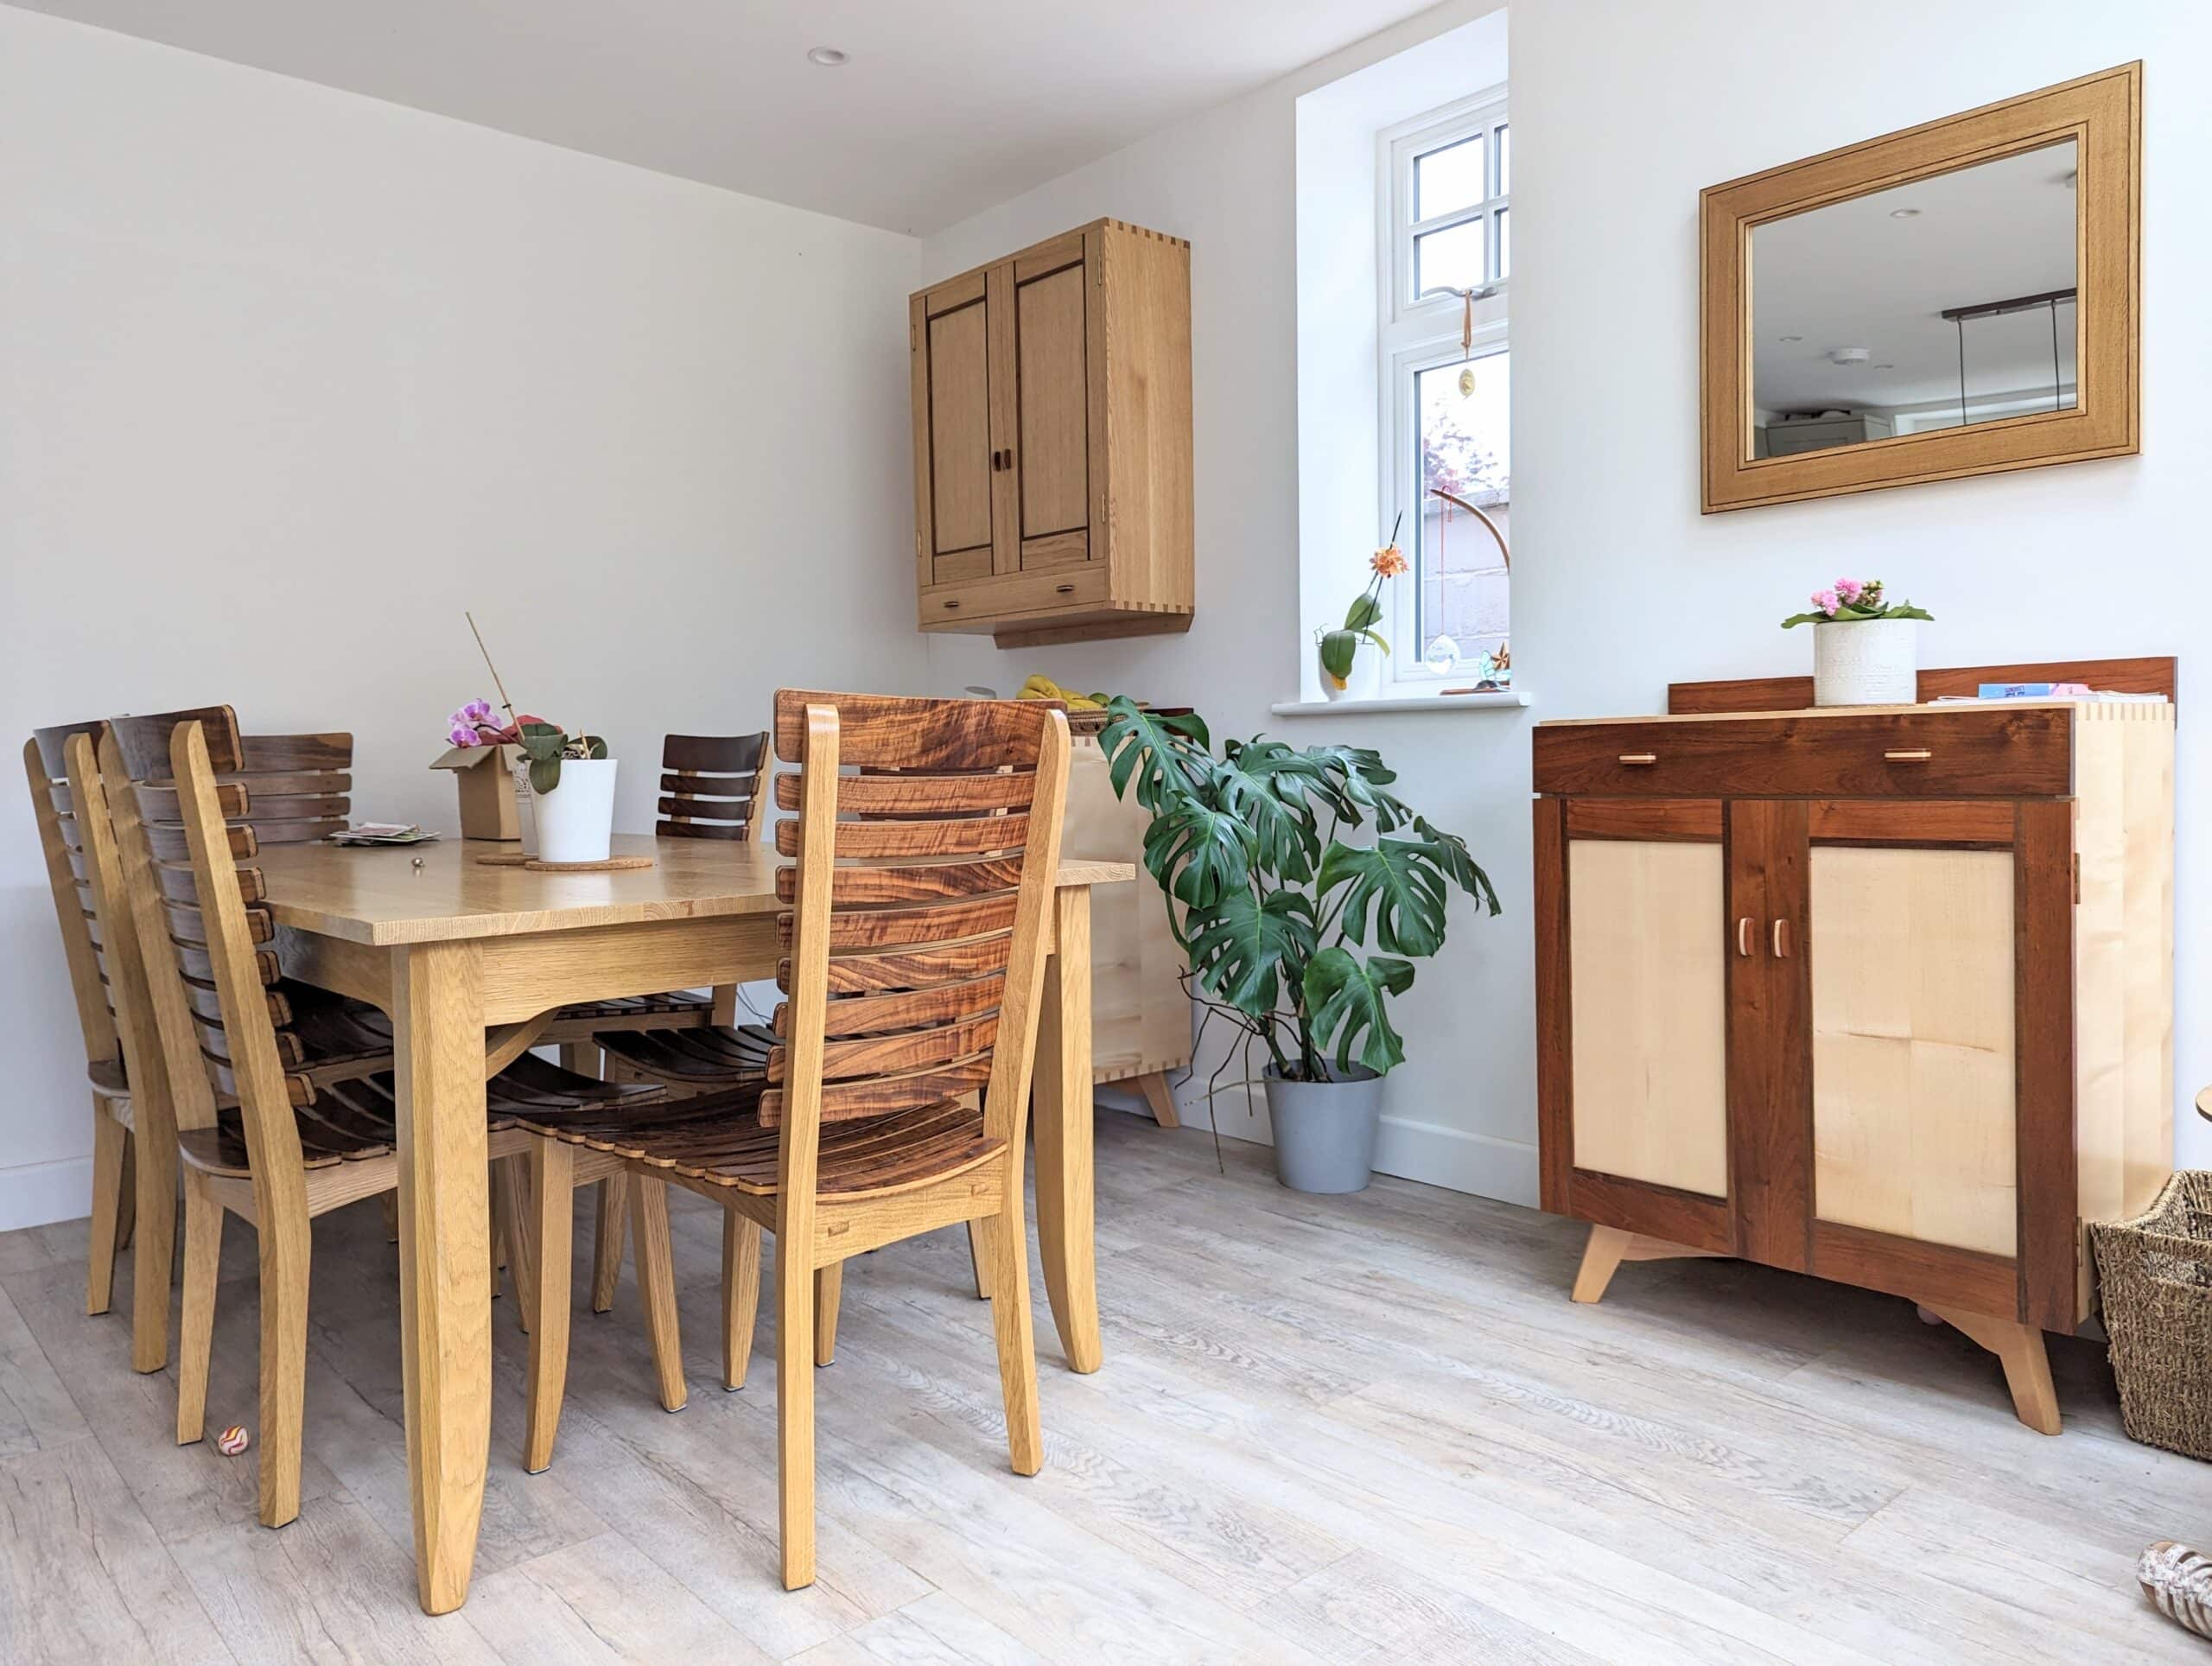
Once the living room was concluded we looked afresh at the new dining kitchen. The builders did a great job of removing brick walls and restructuring the whole of the rear half of the house to give us a clearspan full-width area with a third floor and combining what was a dining room and a kitchen into a kitchen dining family area leading onto the back garden.
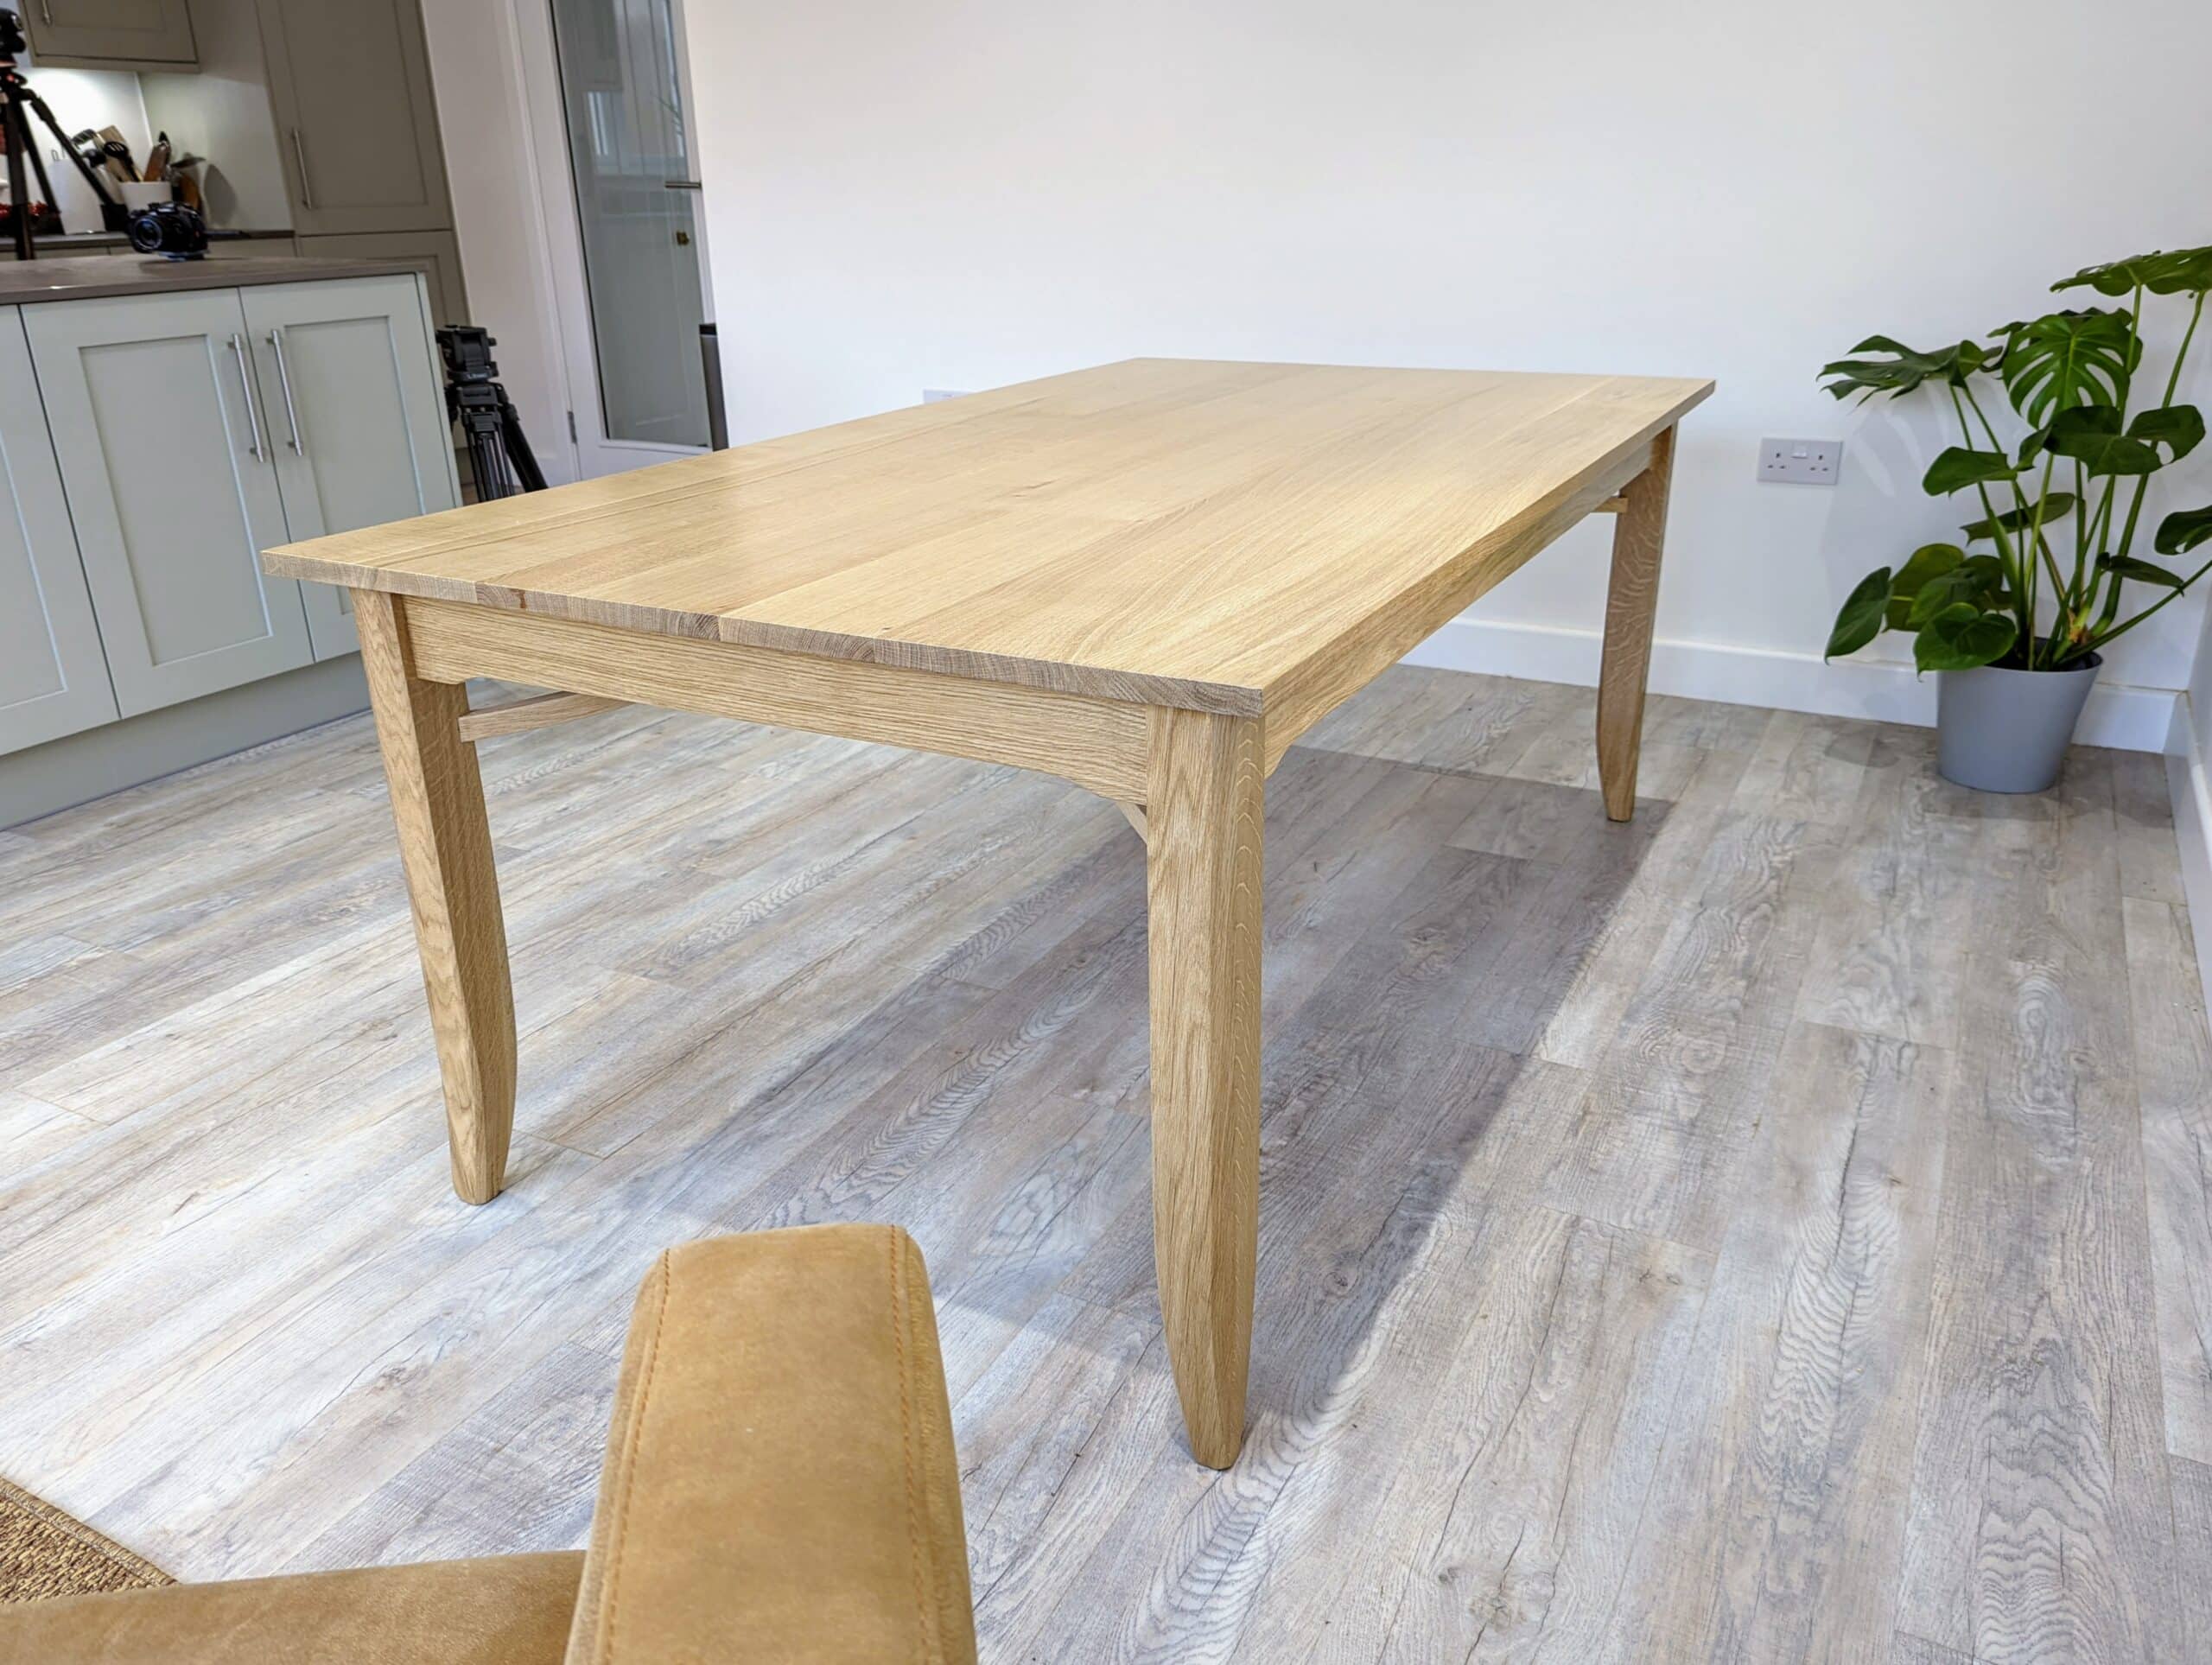
The first piece to be designed and made was the oak dining table. There was nothing random about the choices of pieces. We put out a survey and have made accordingly.
I experimented with modelling to test out joinery with fox-tail wedging to mortises to add strength through unusual features like this.
When the table was completed the house felt as though it was coming together.
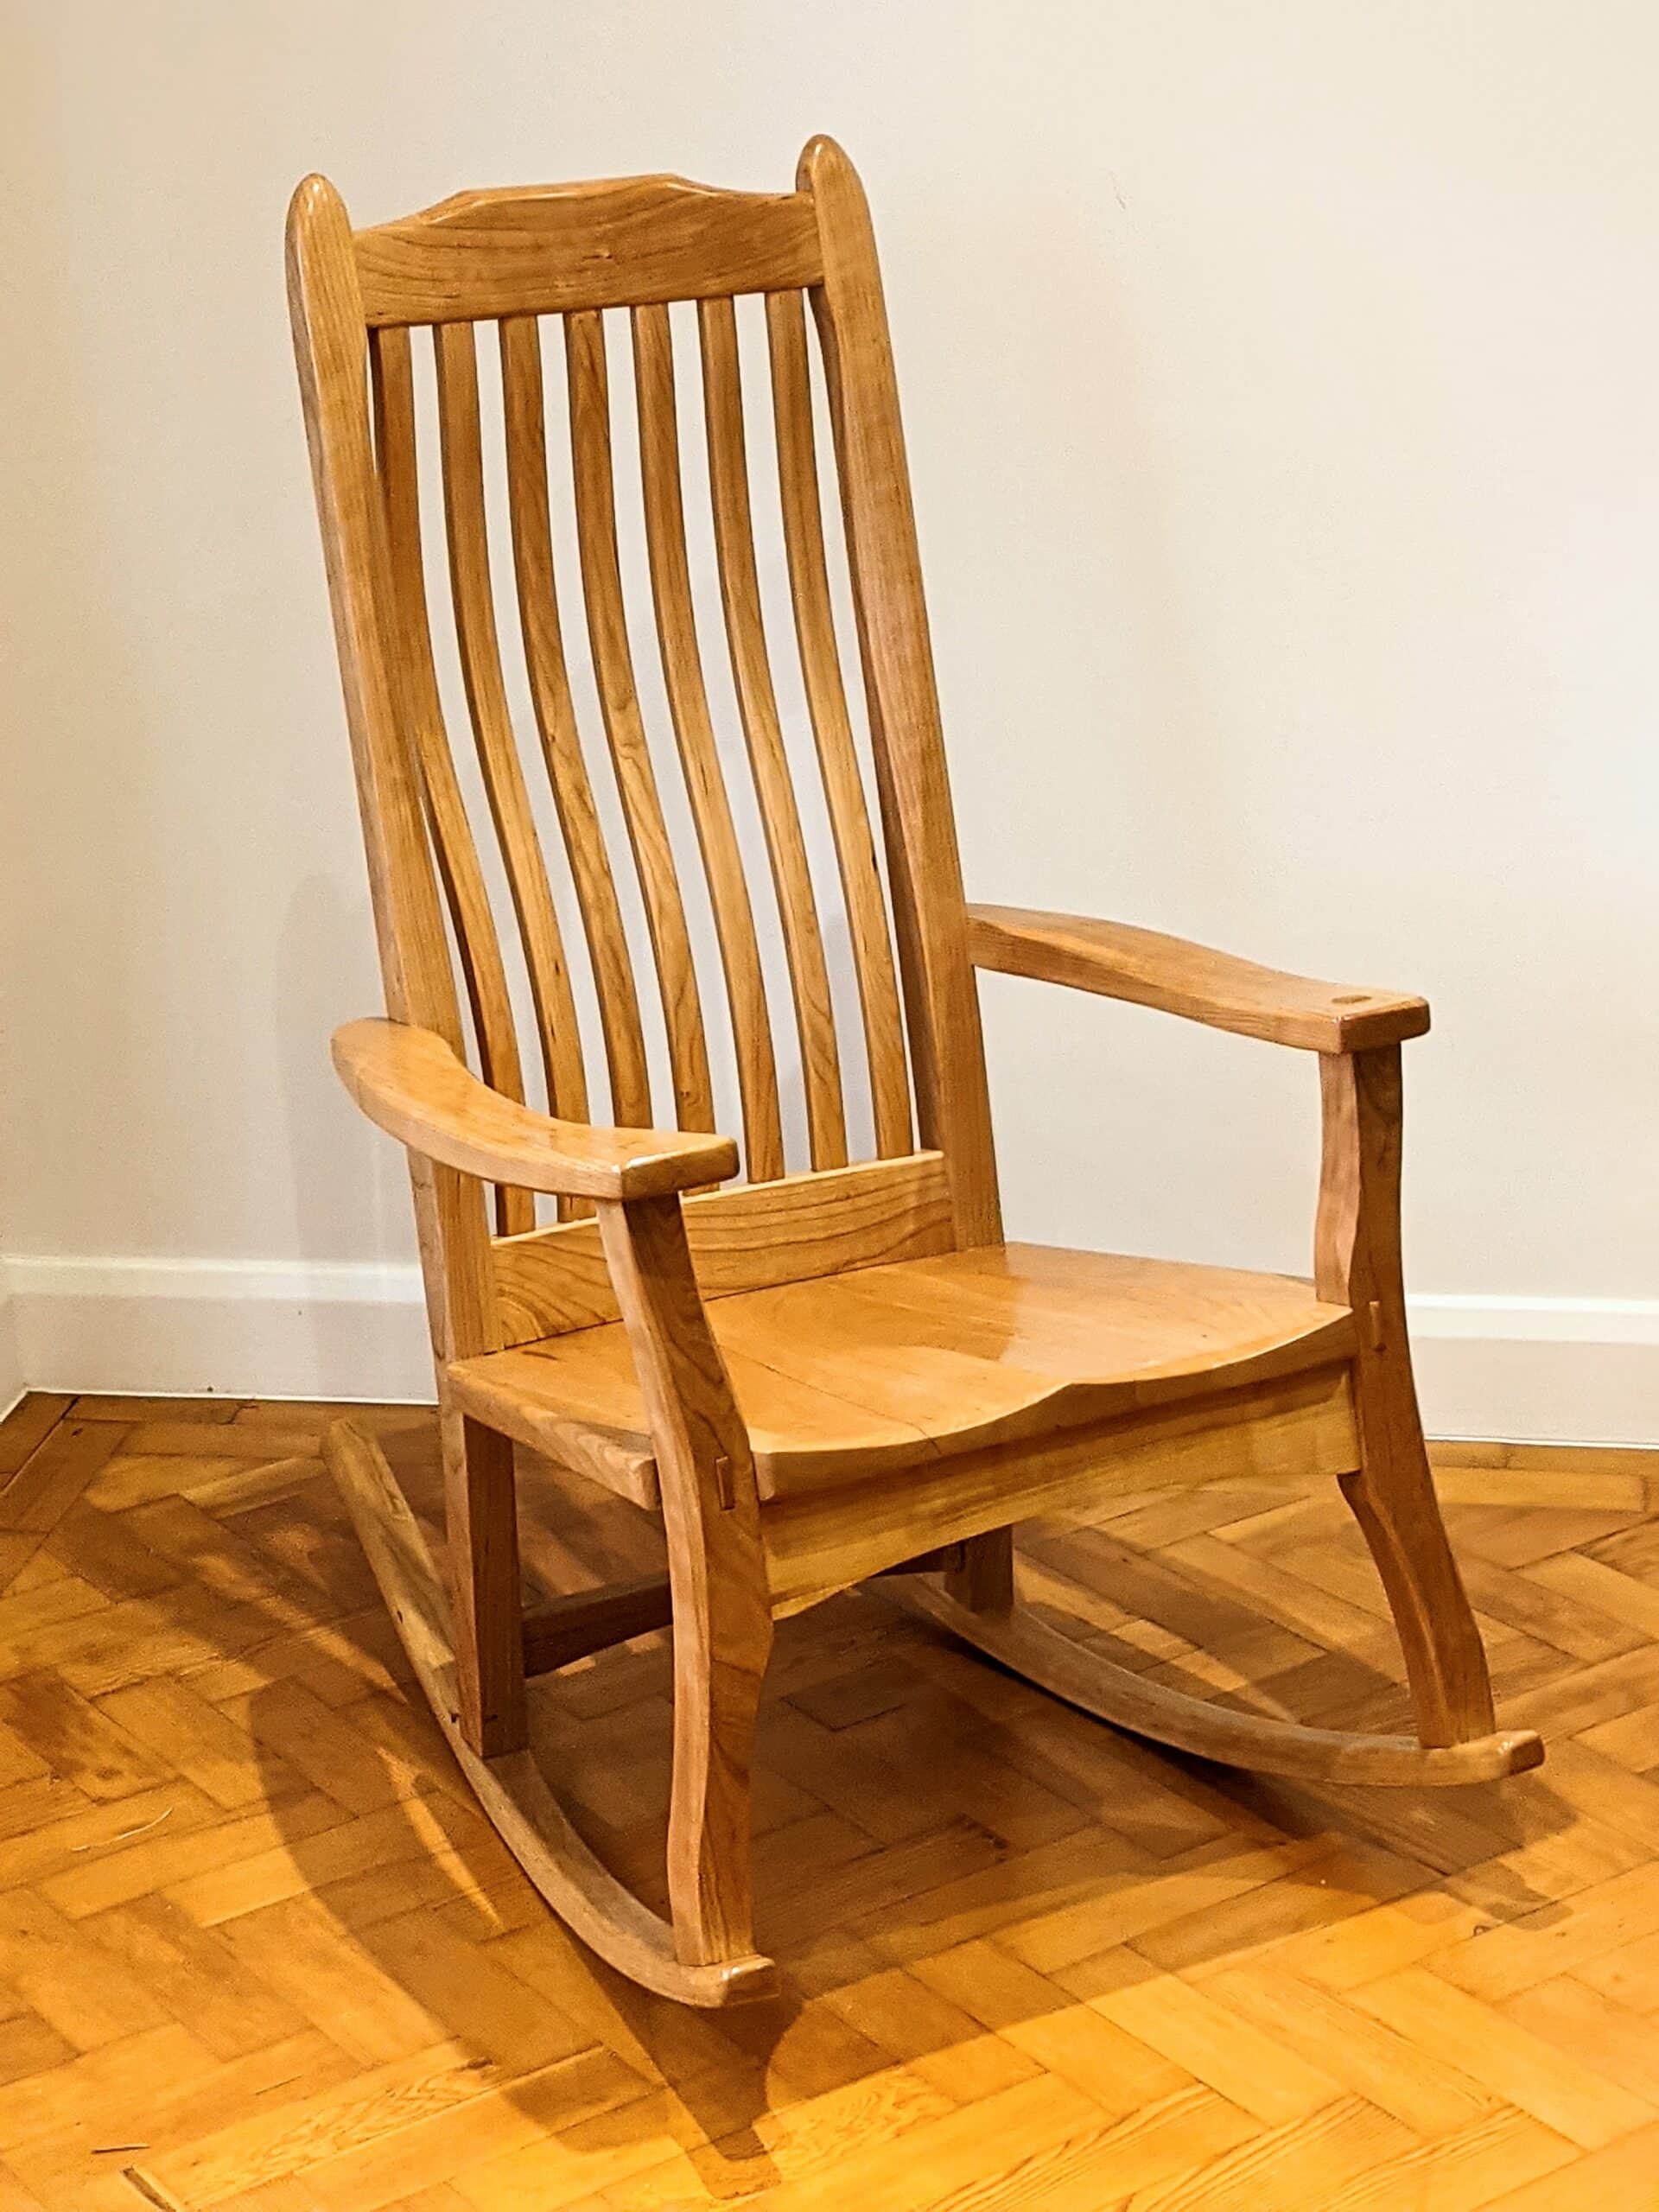
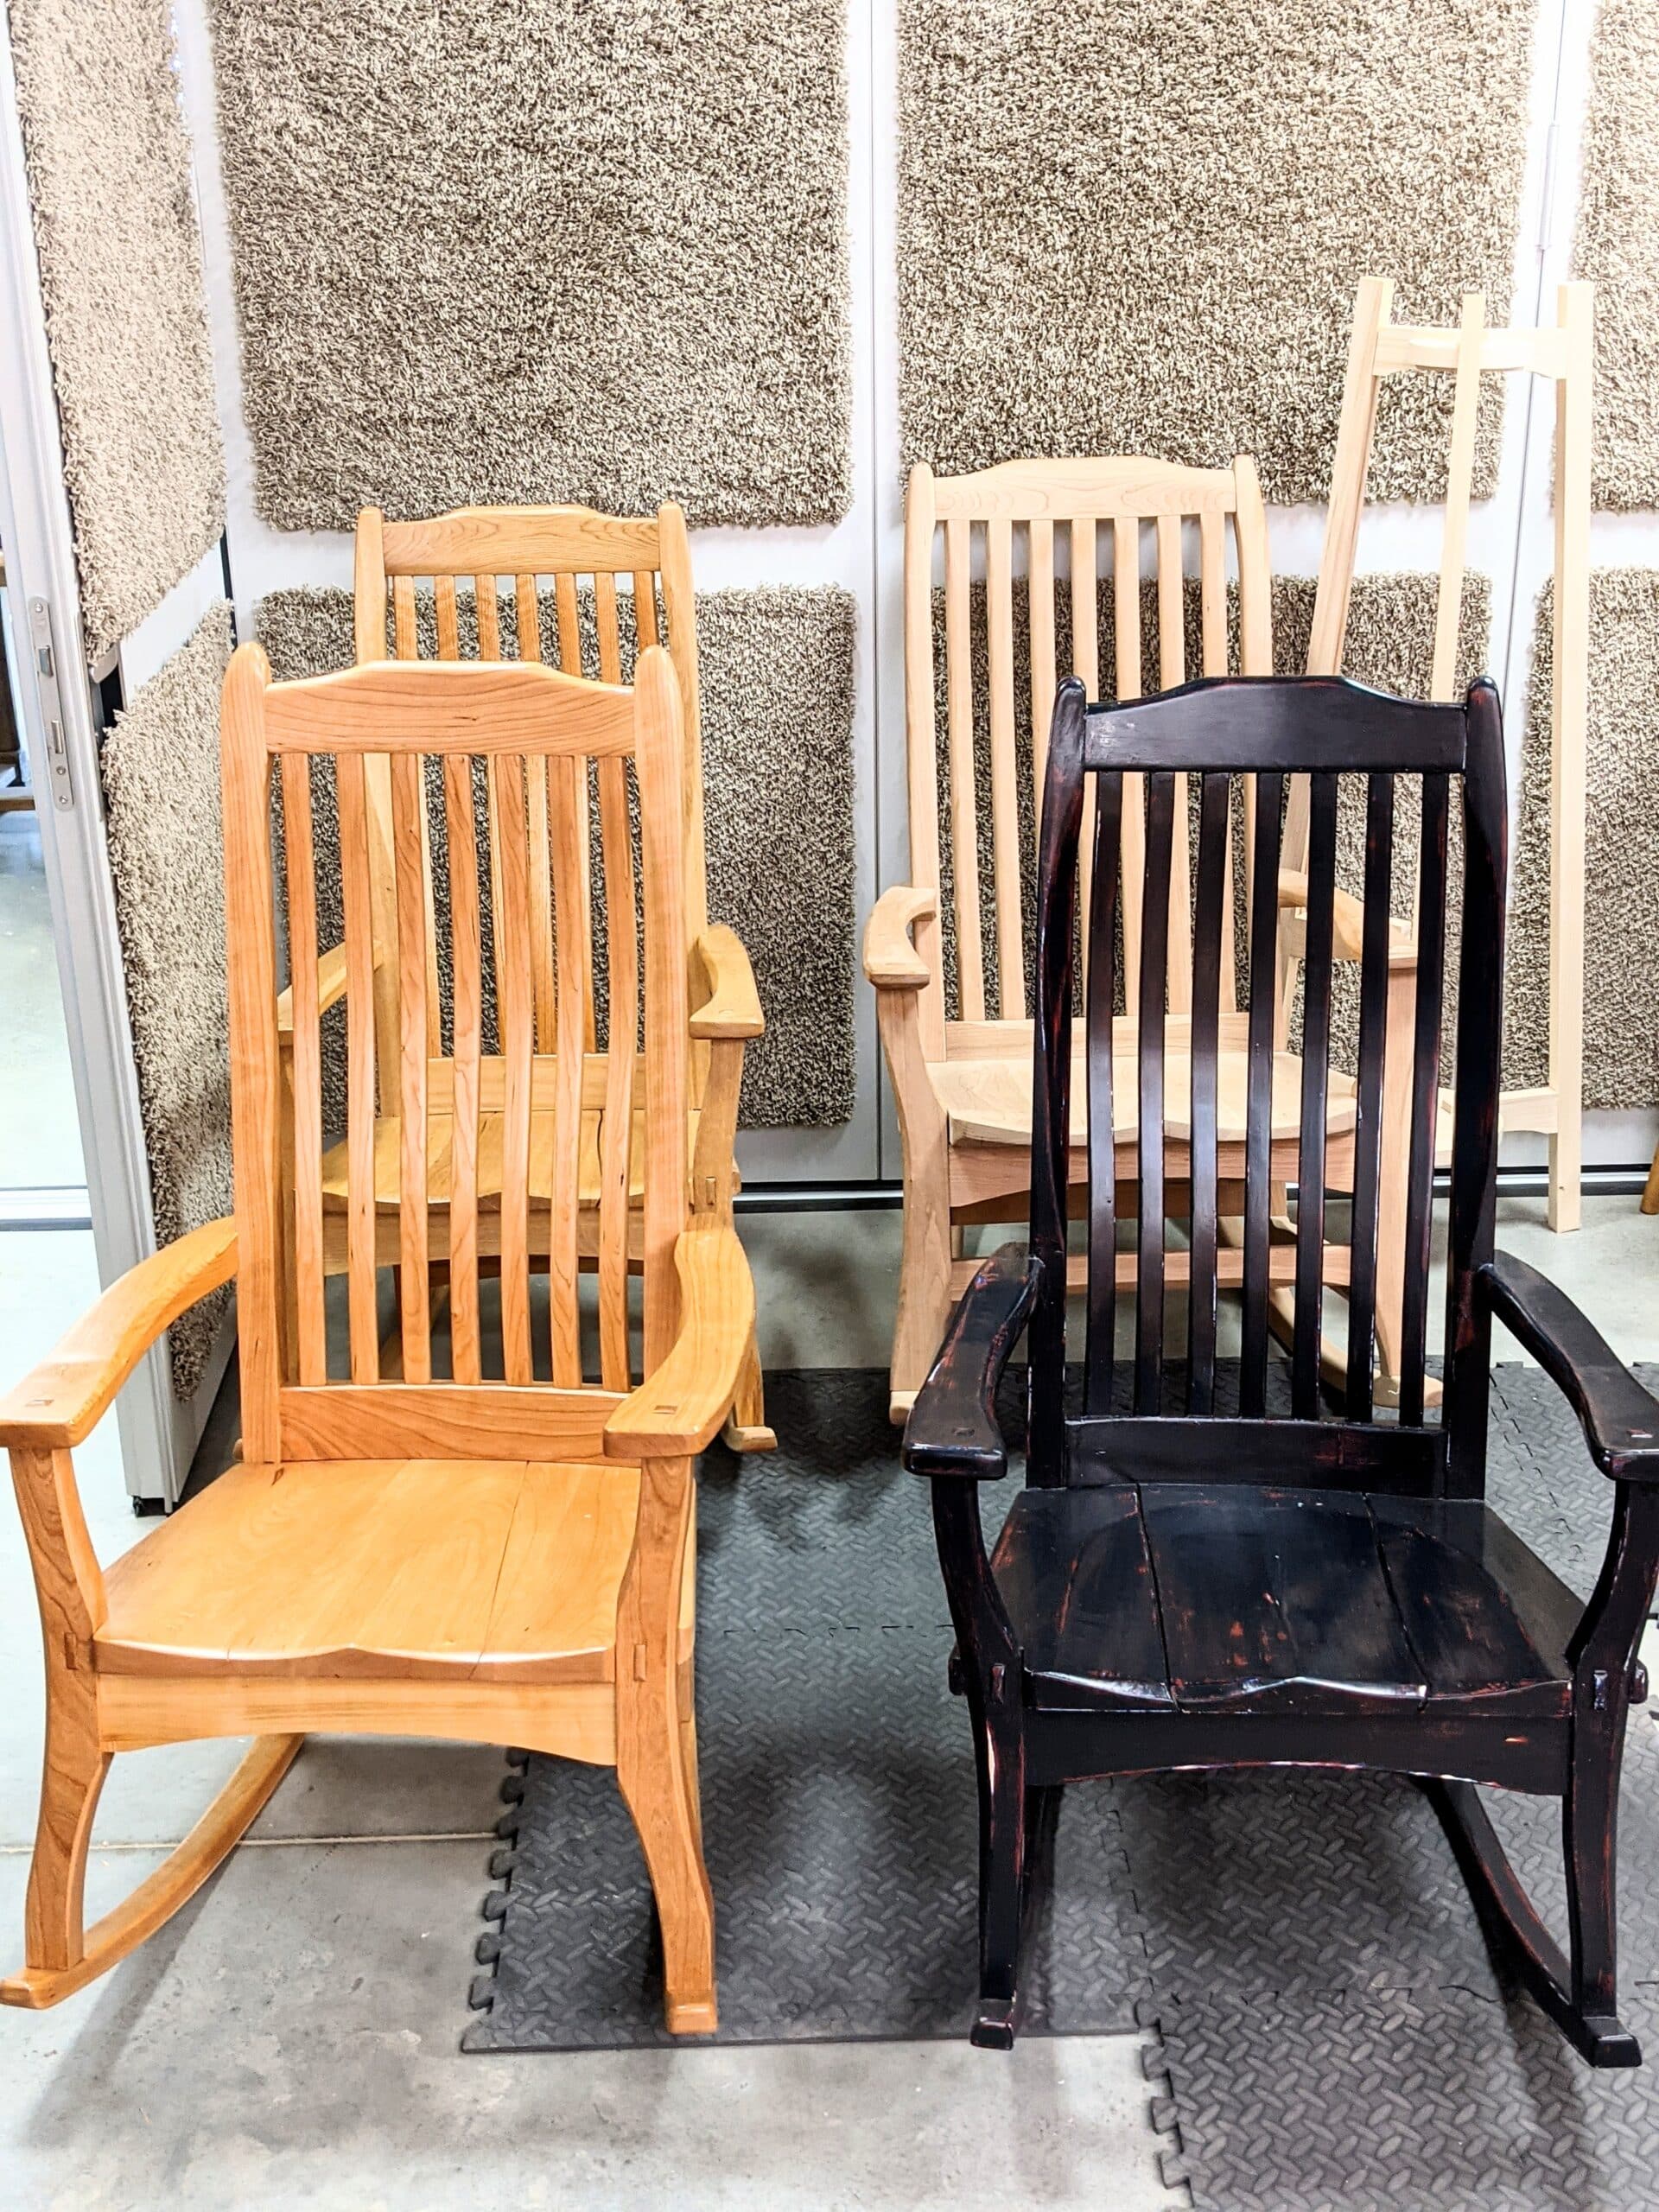
Chairs tend to be the nightmare of any furniture maker simply because they are so very demanding to make and then time-consuming too but . . .
. . . one by one they emerged in a combination of oak and black walnut.
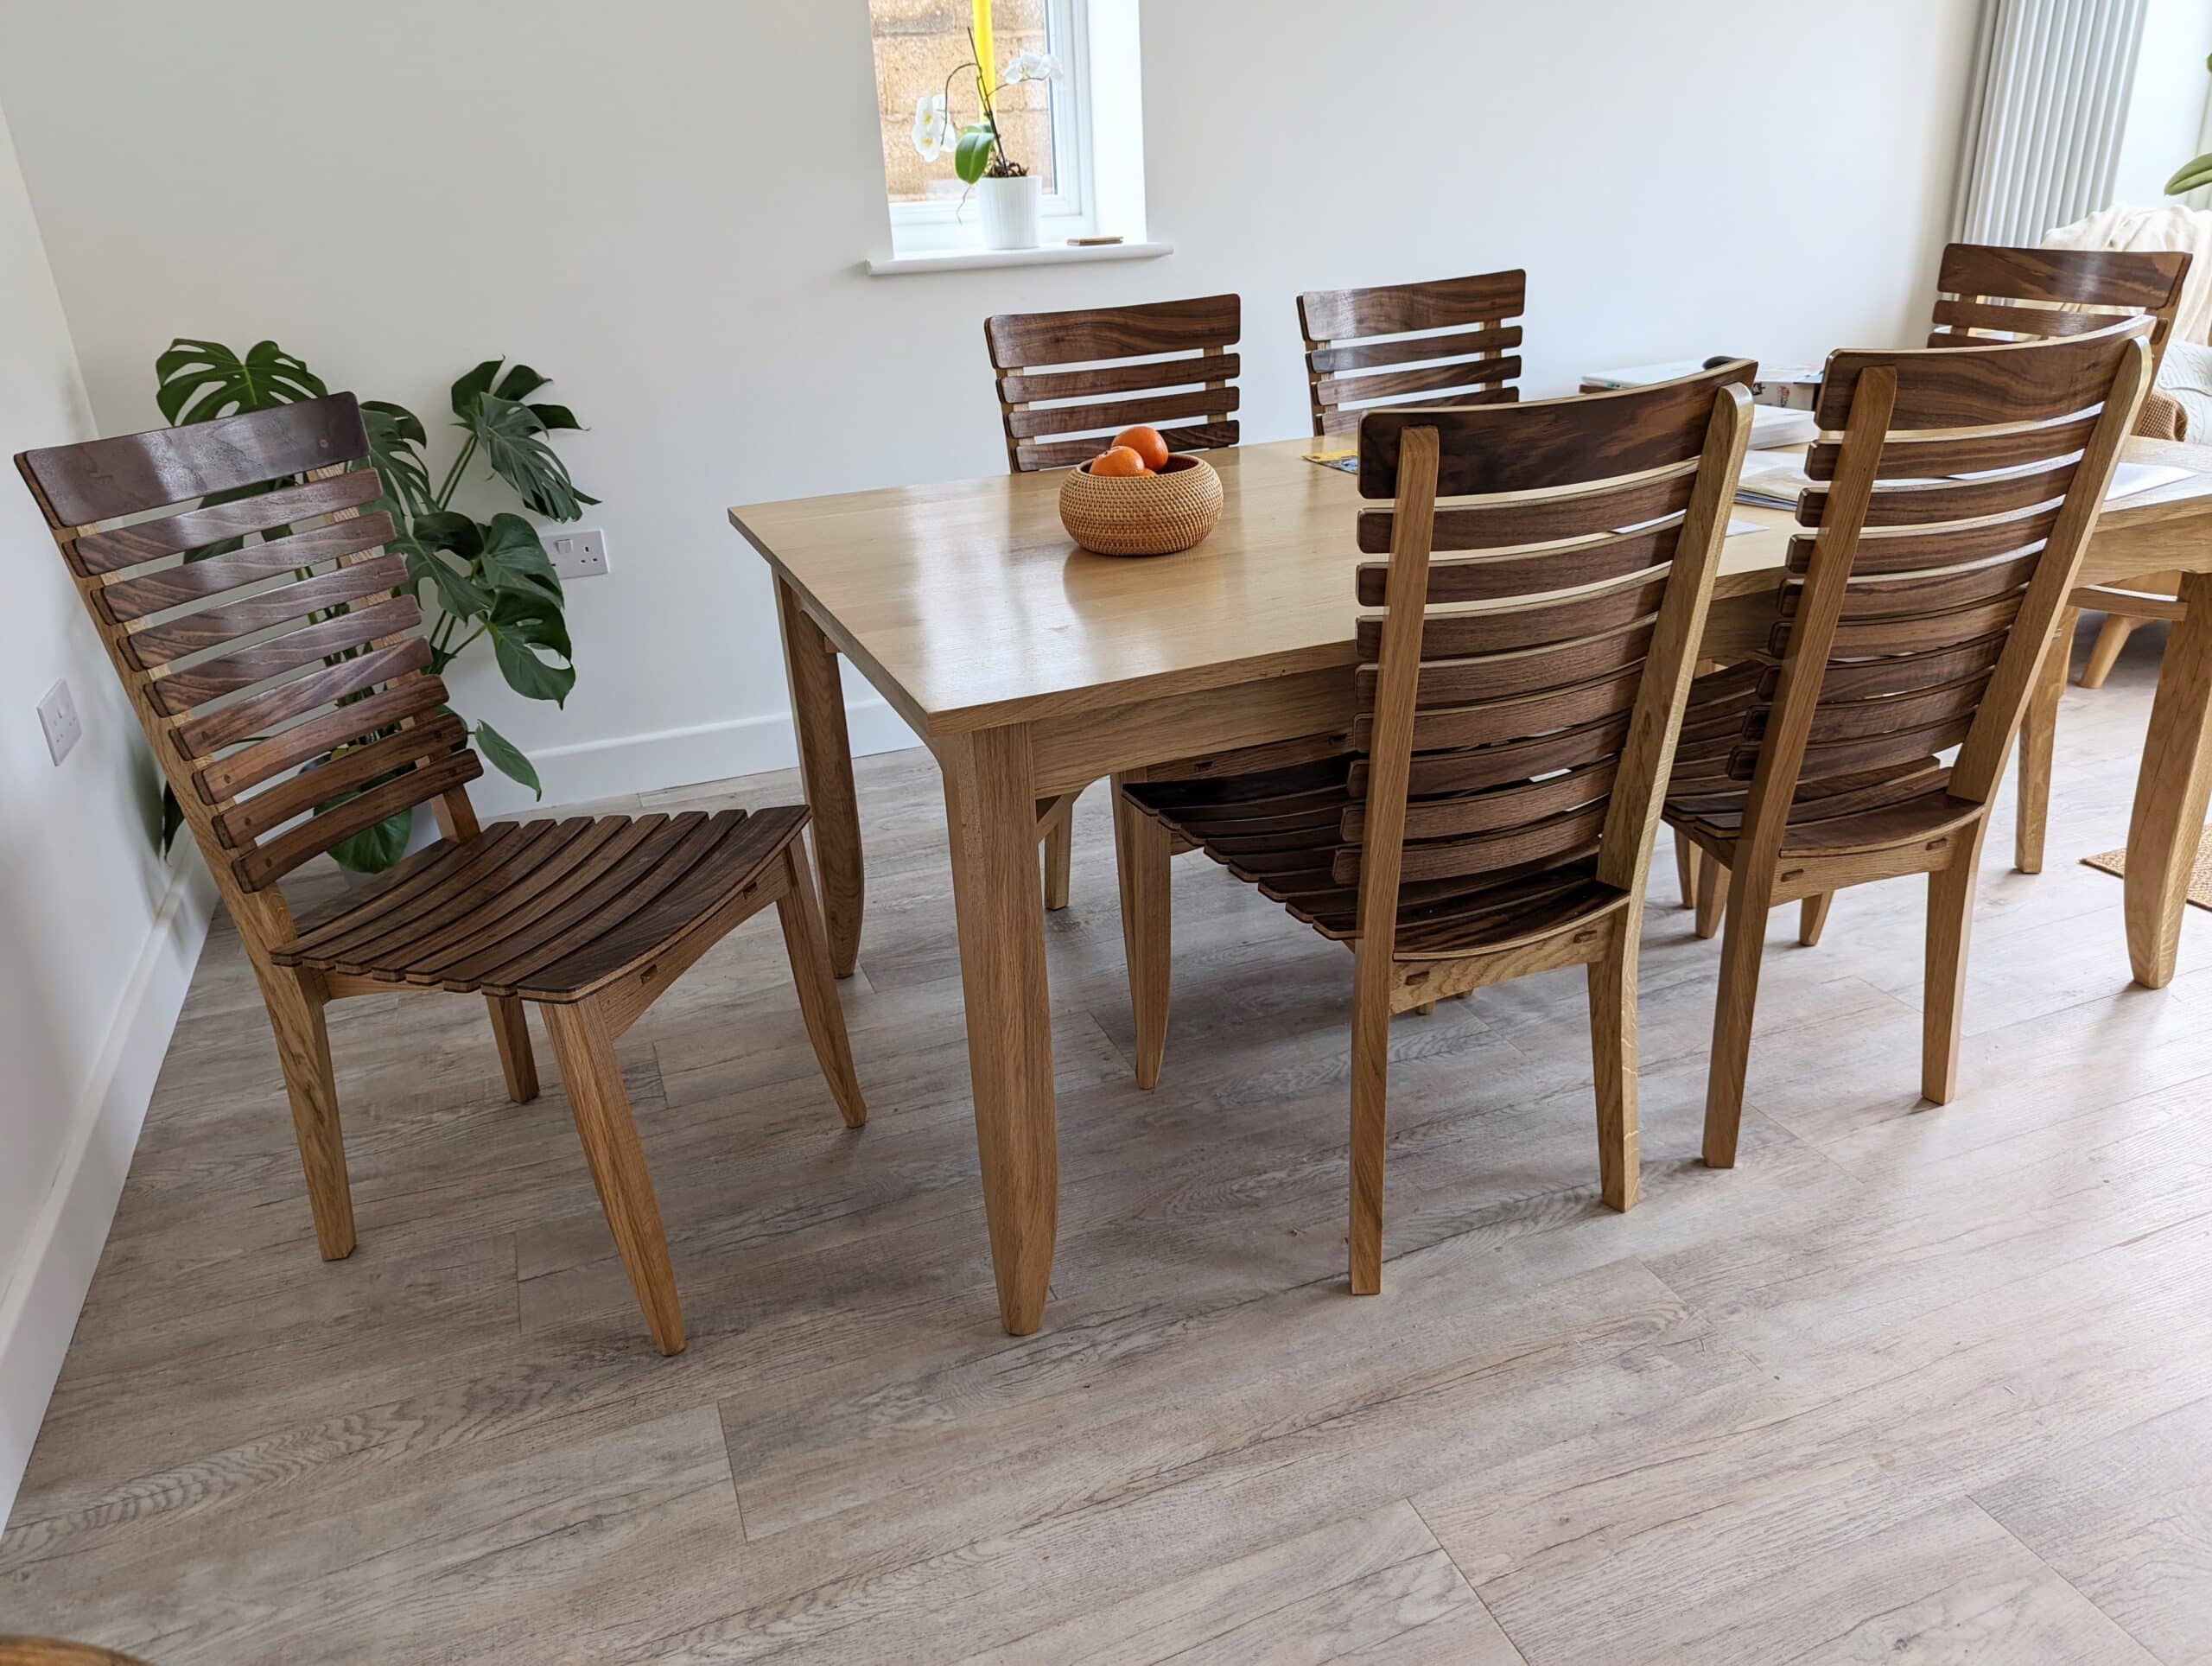
I was happy with the new outcome and of course, a dining table is nothing without dining chairs.
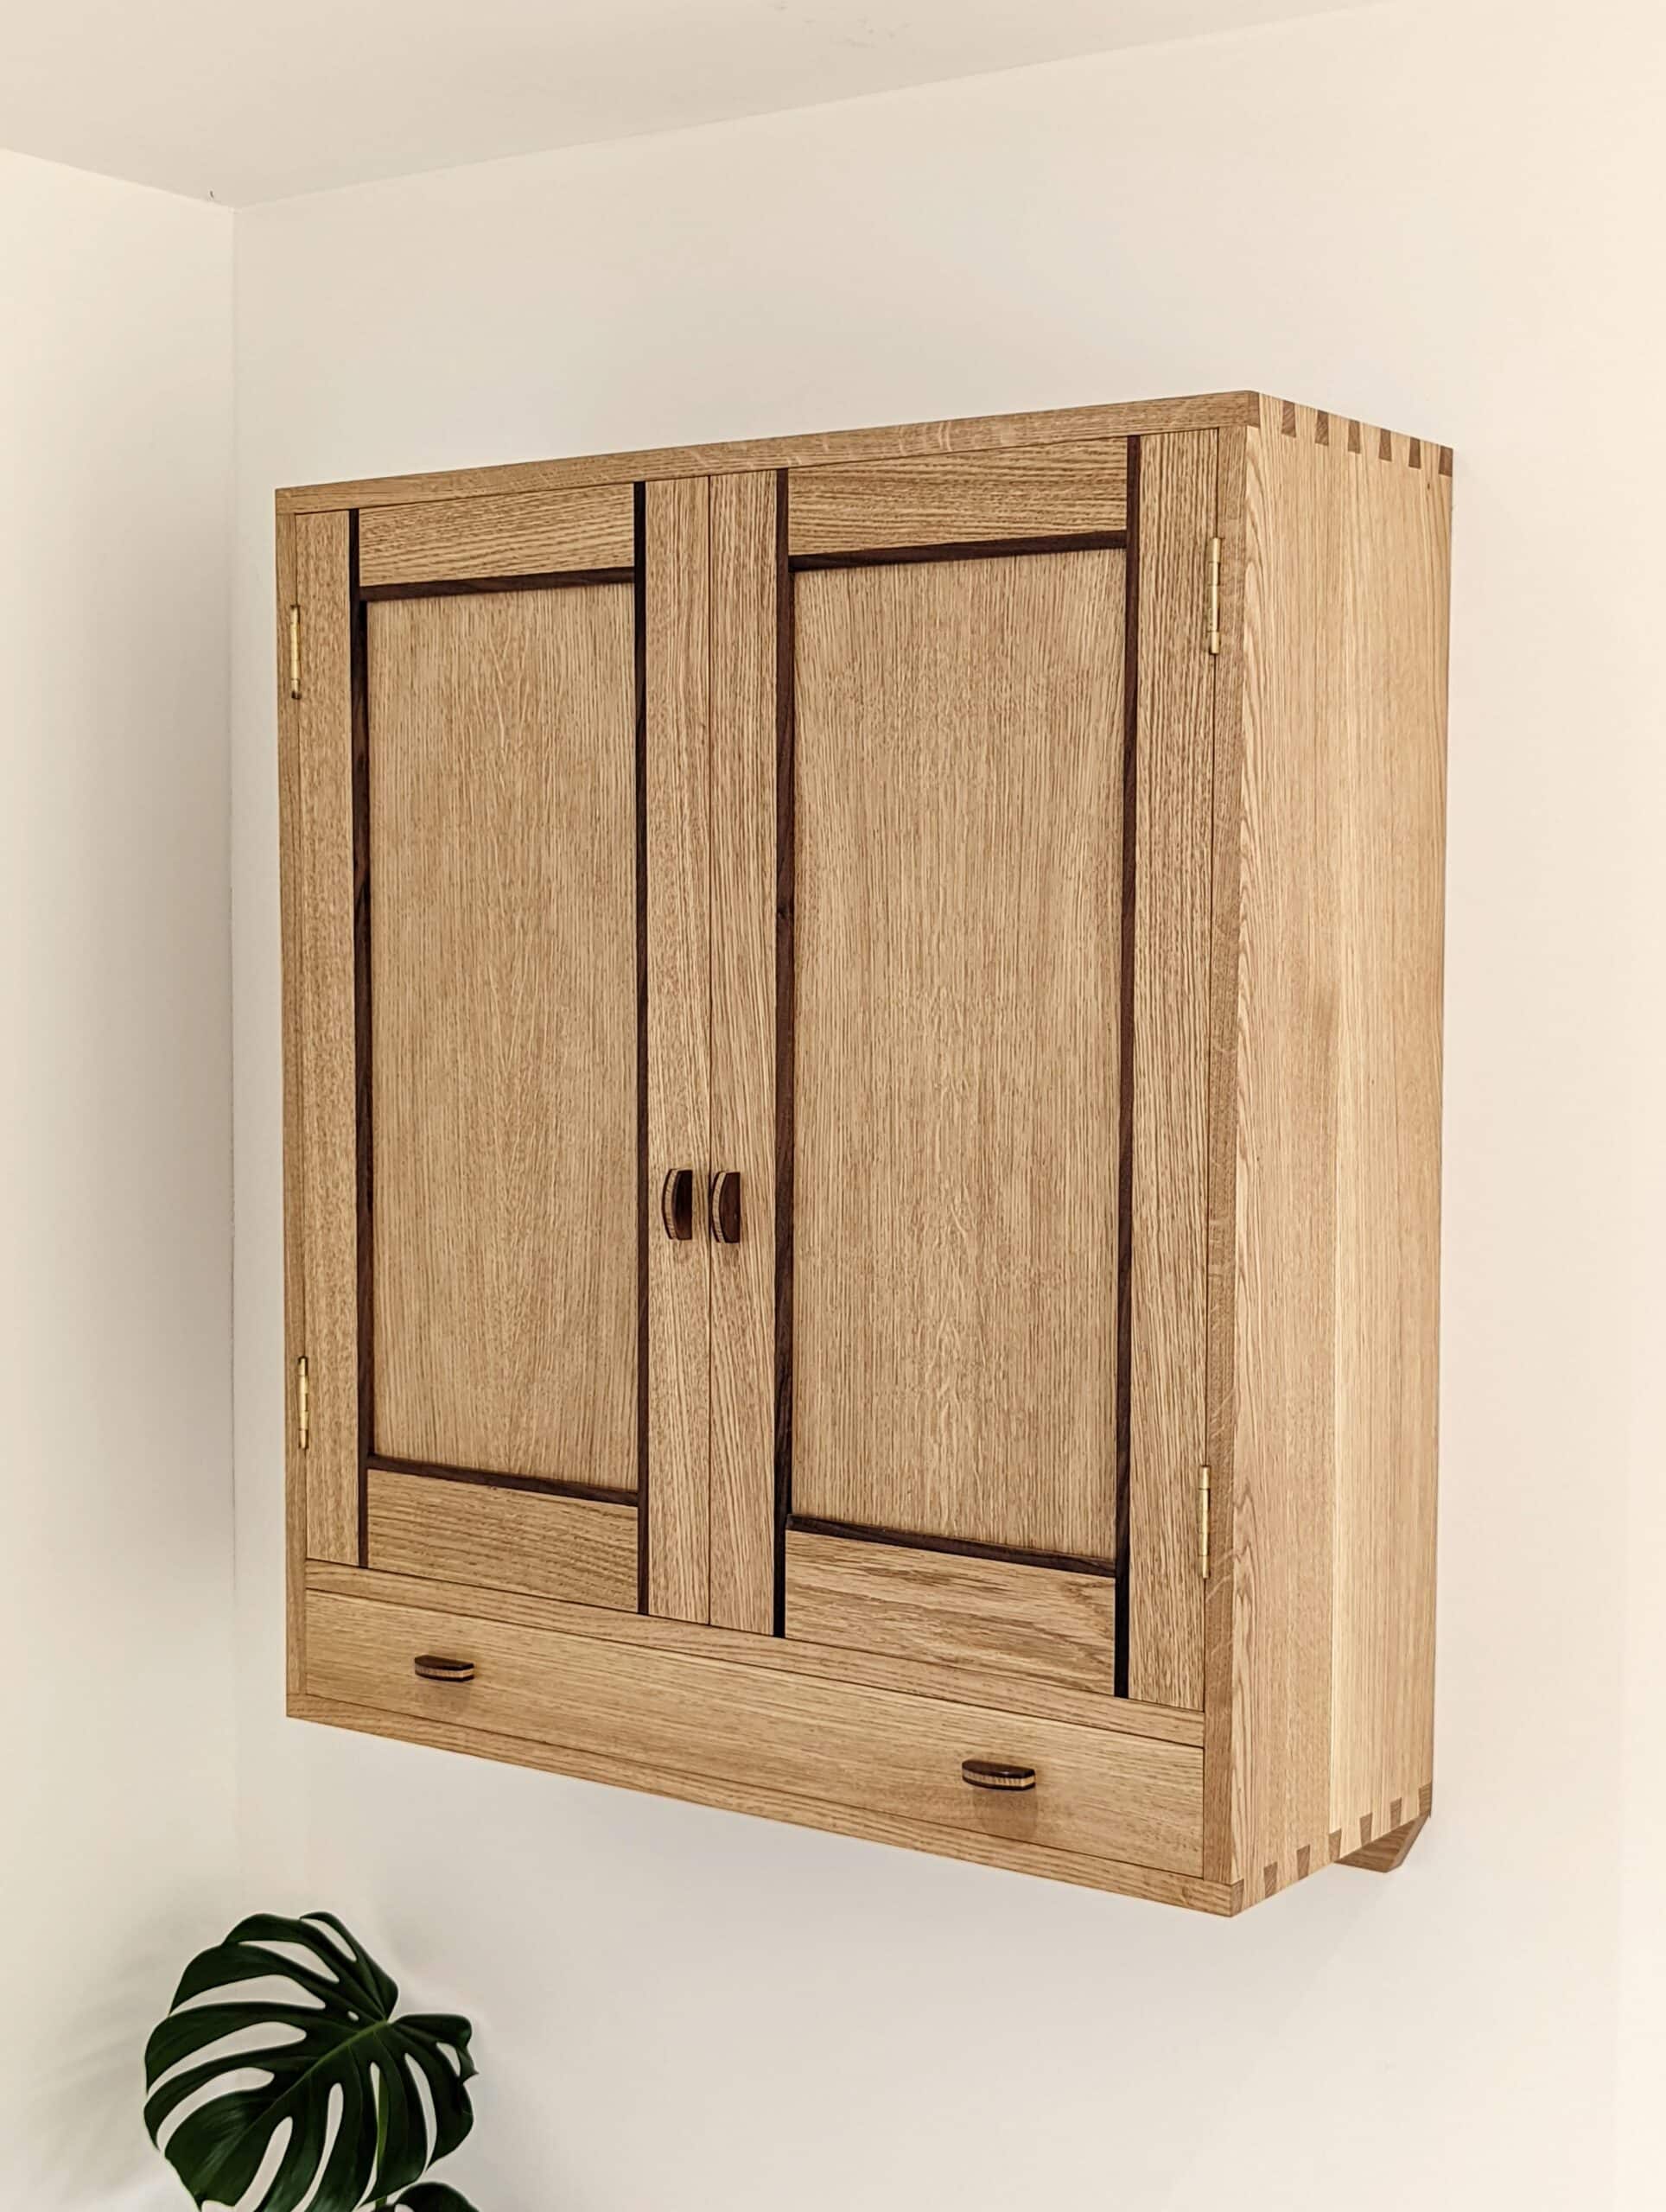
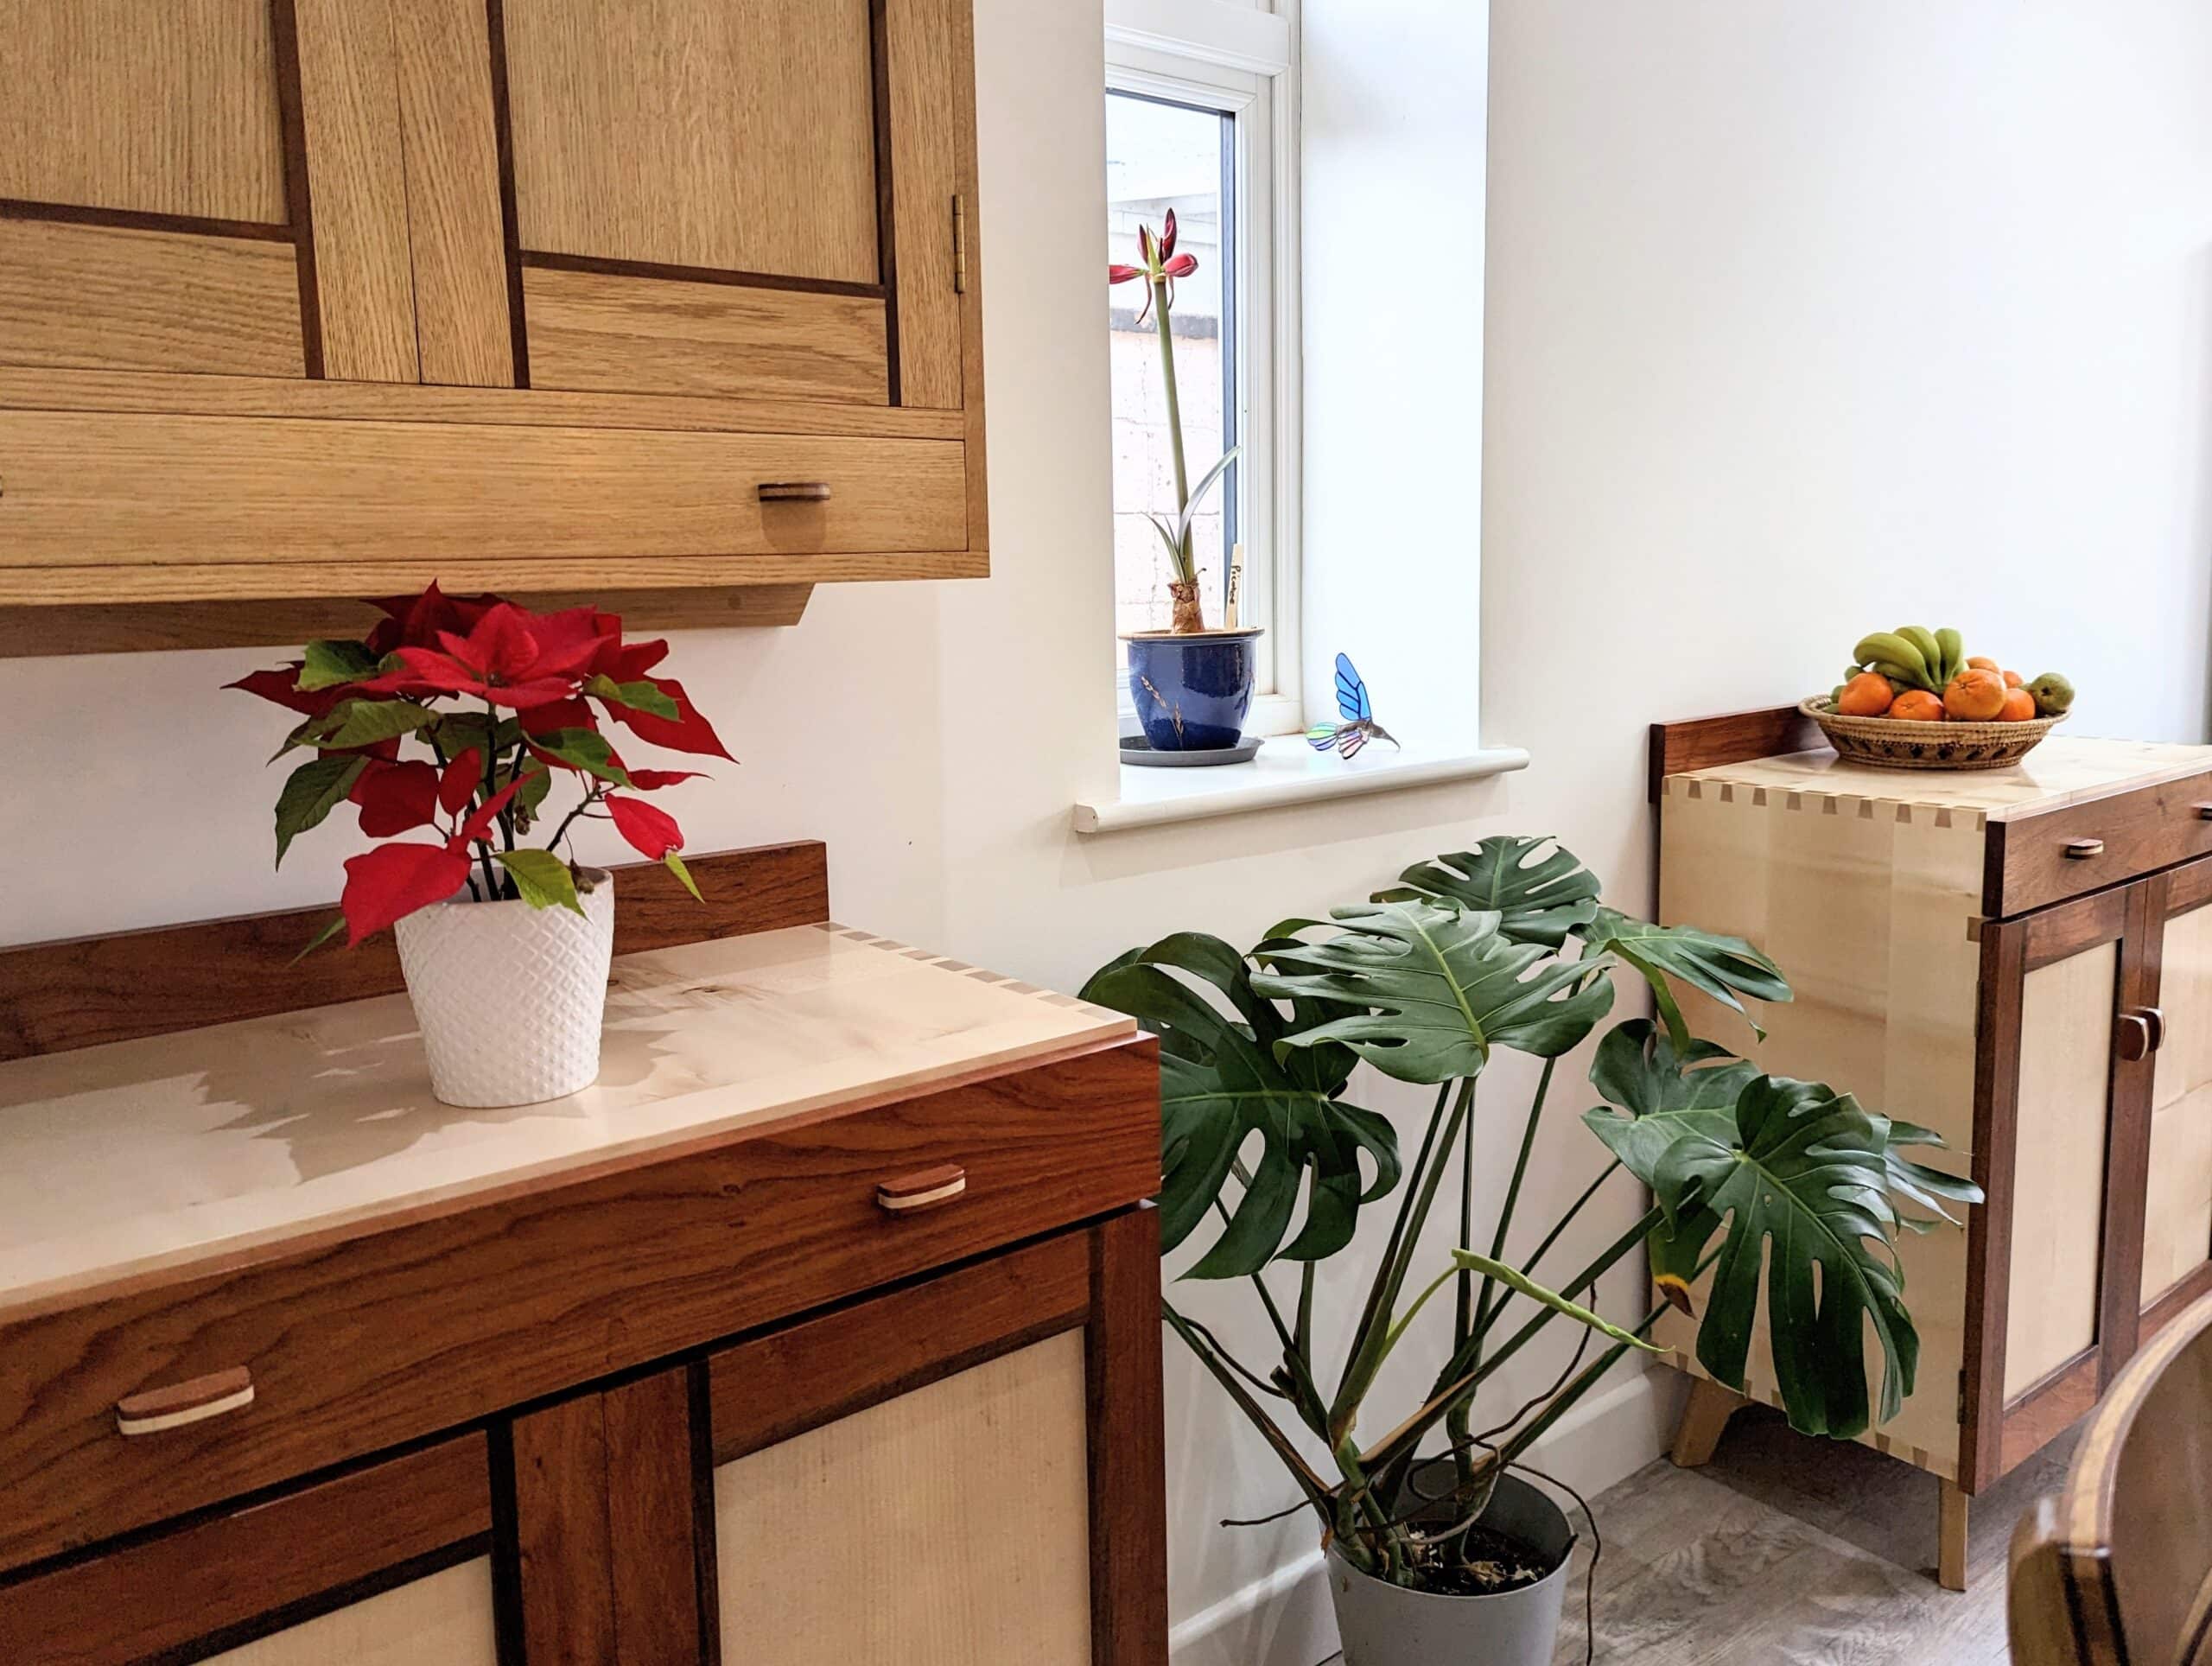
This week Joseph and I finalised the drawings for the hanging wall cabinet and the sideboard both of which complement the dining table and chairs.

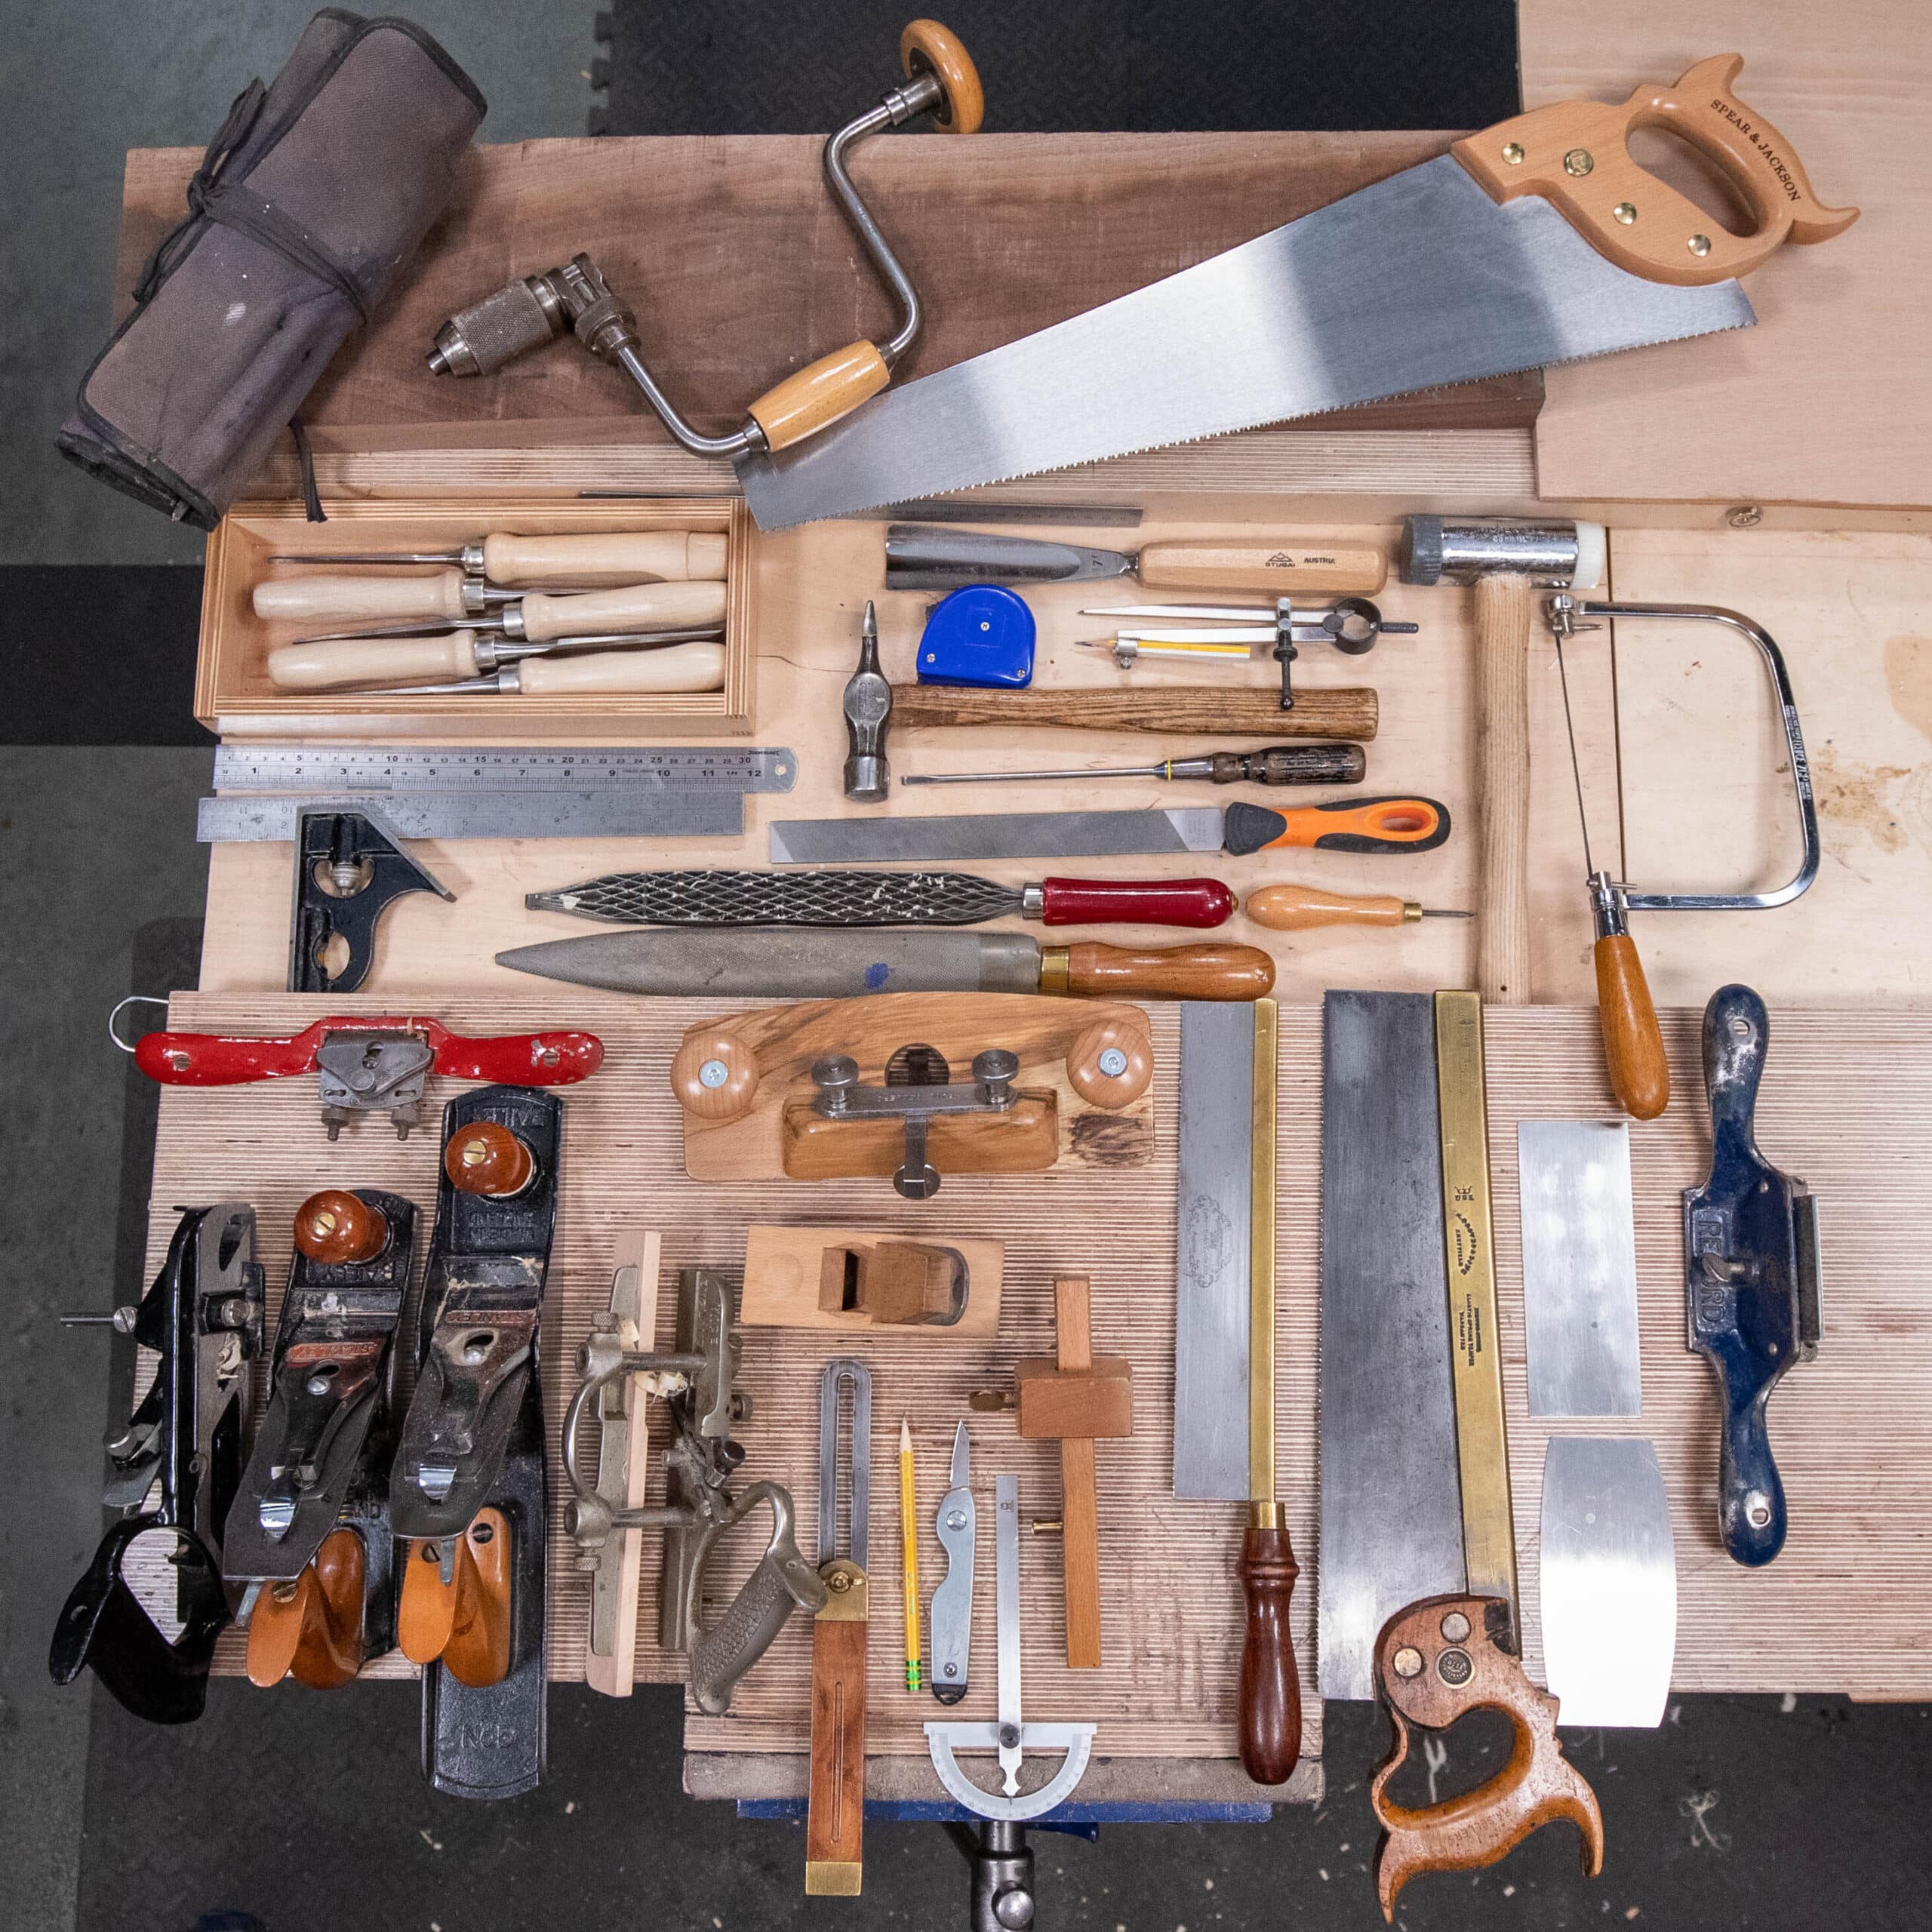
The sense of achievement can be overwhelming when you think that so far we have made most of what you’ve seen principally with only 12 hand tools.
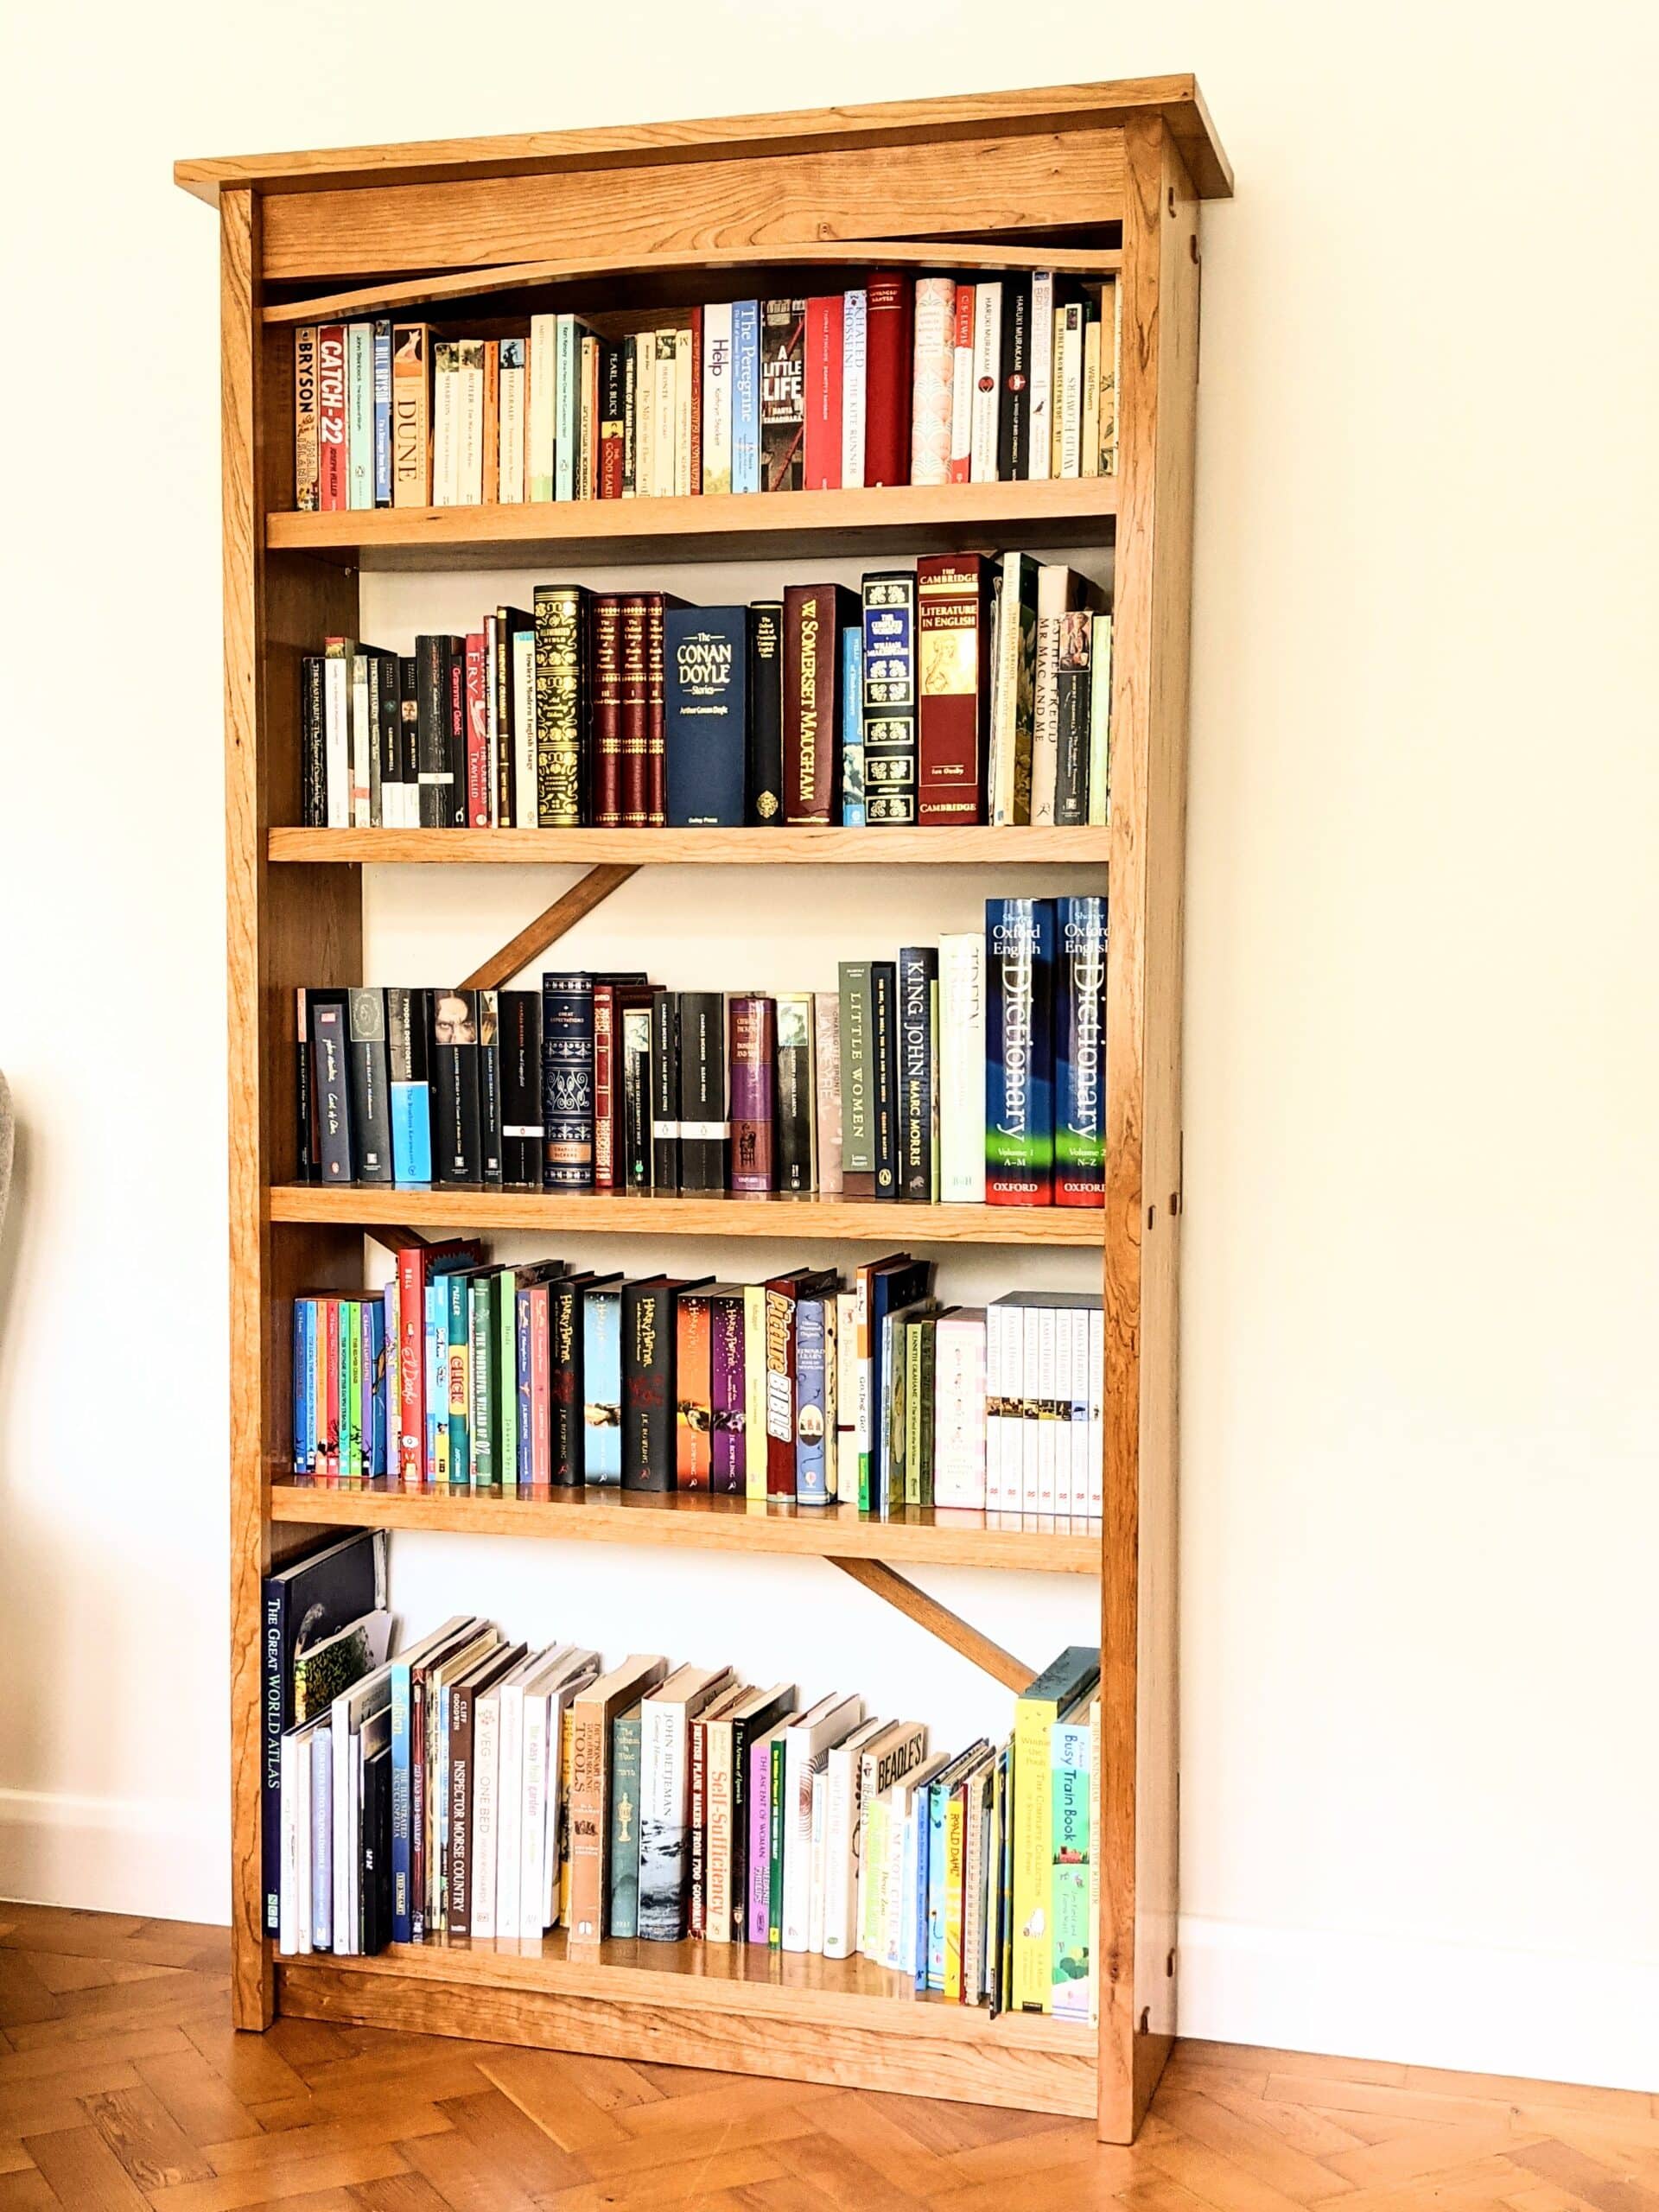
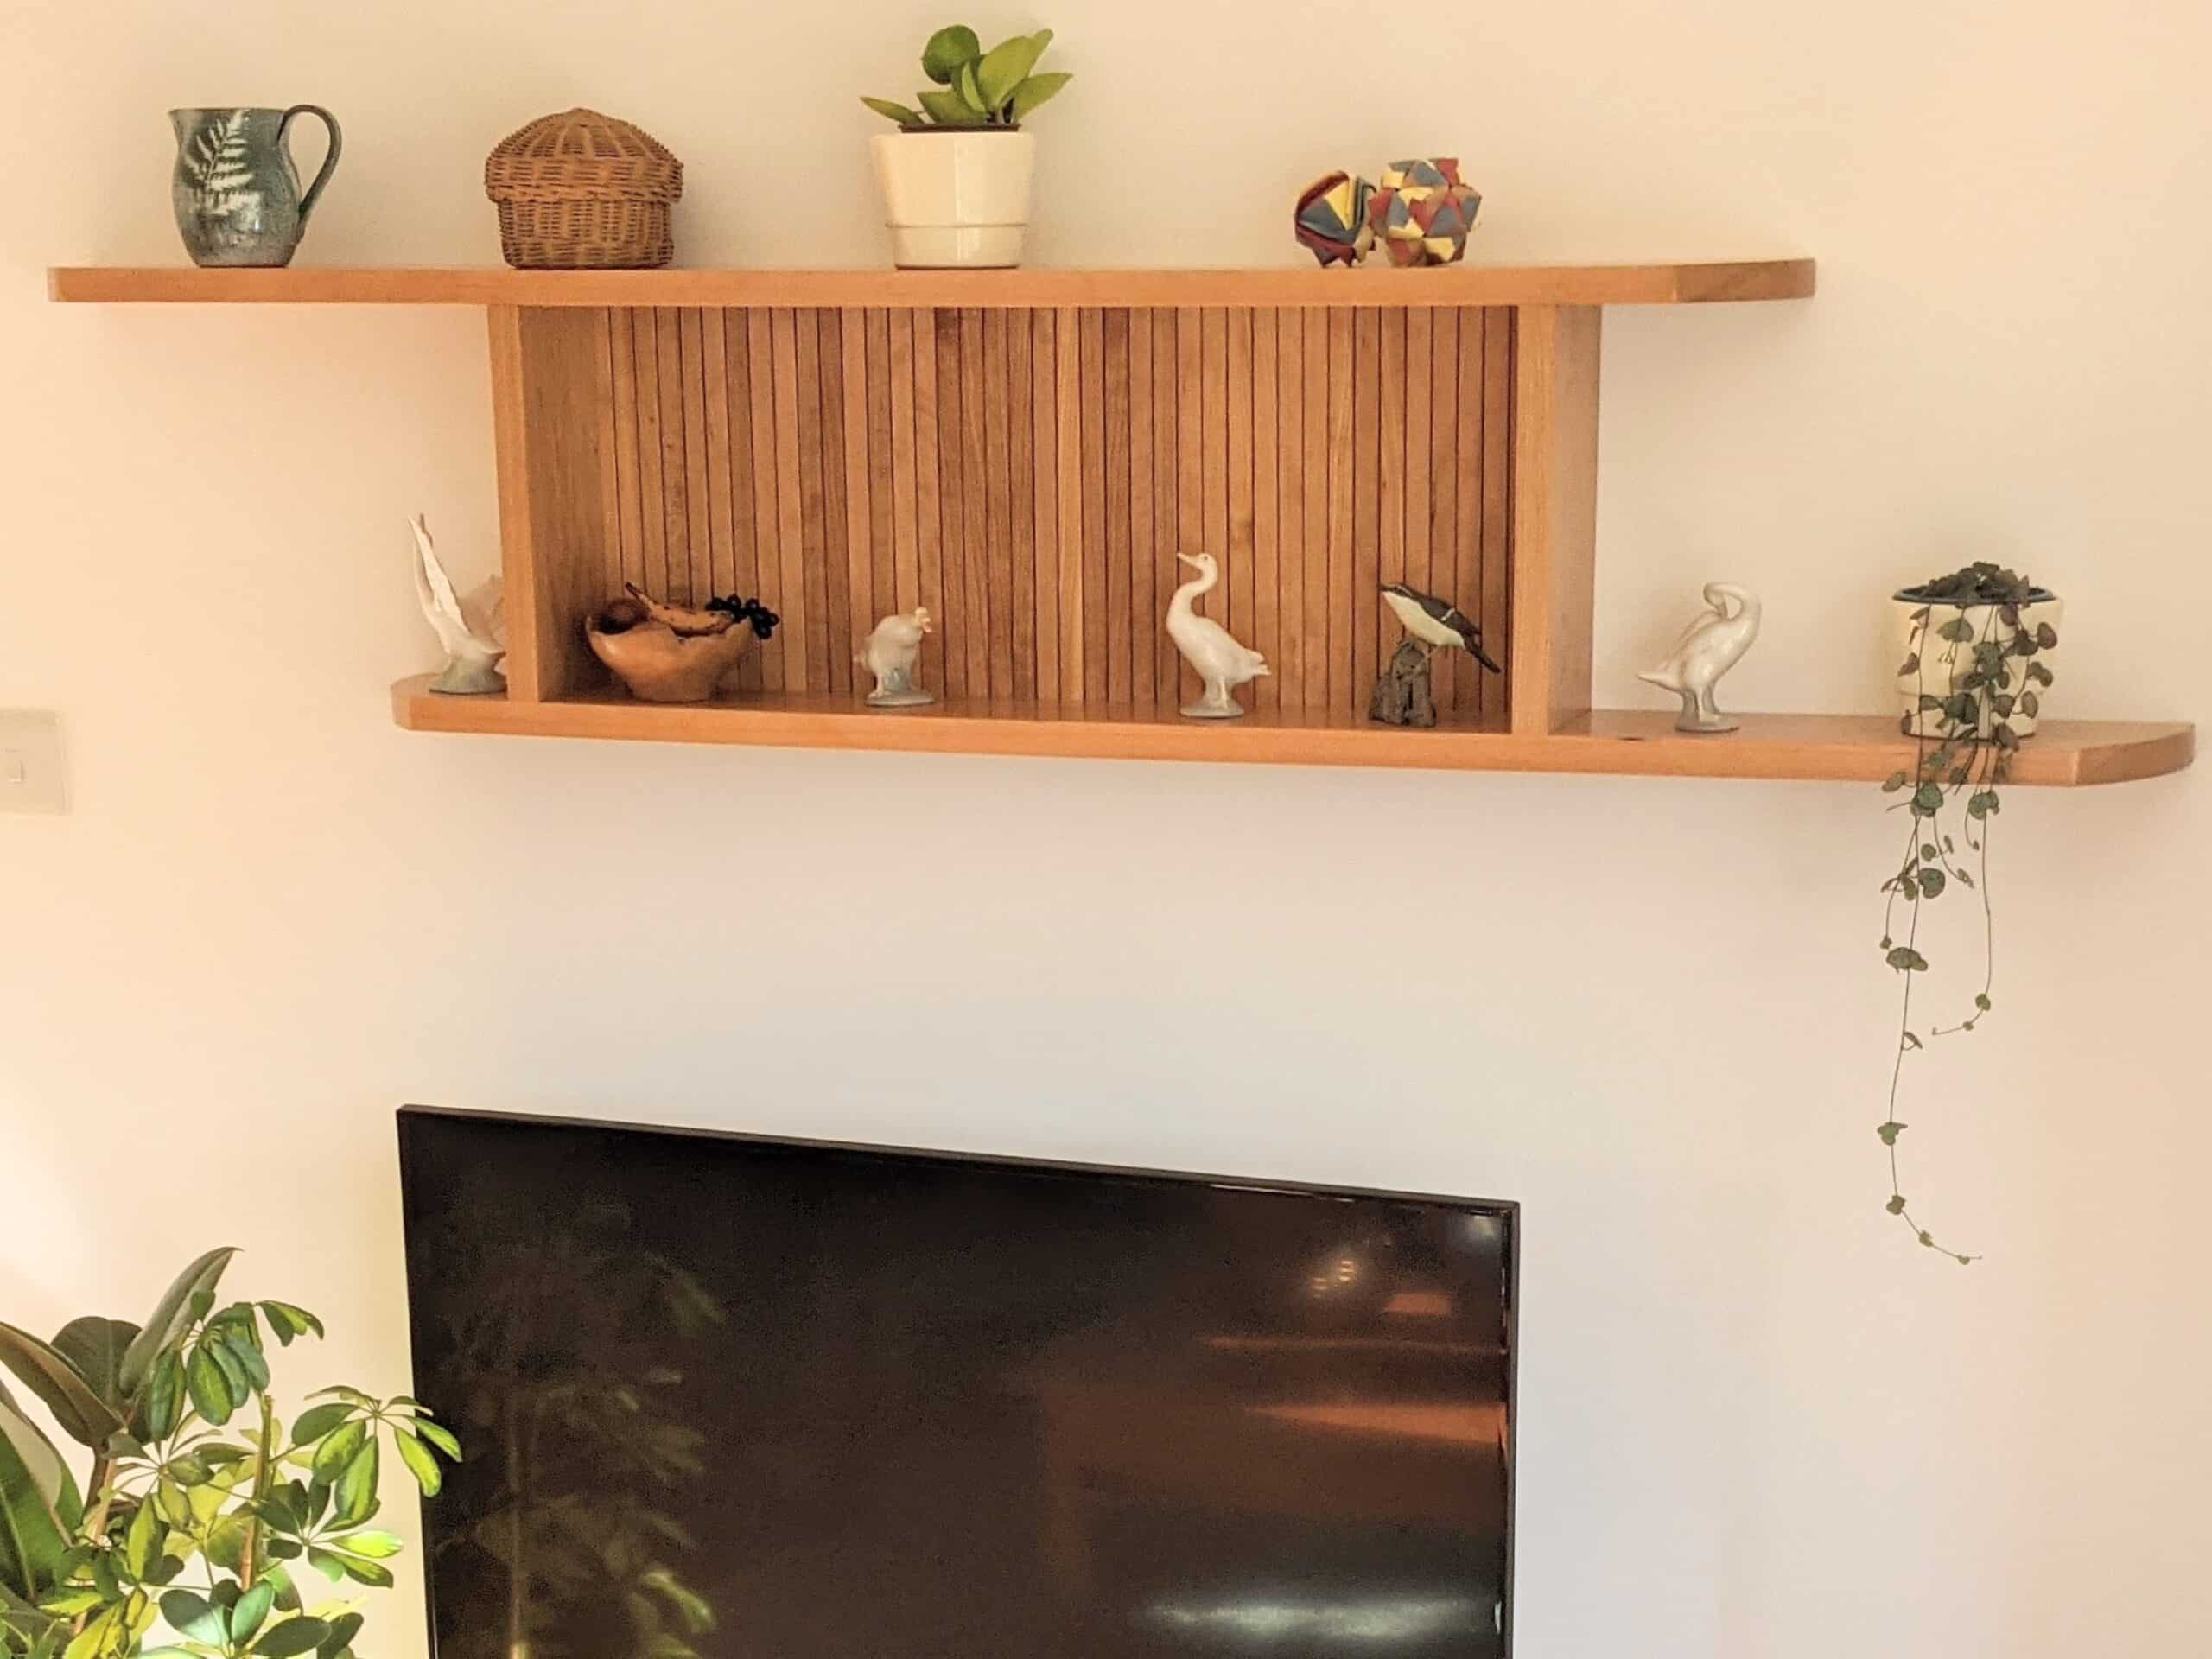
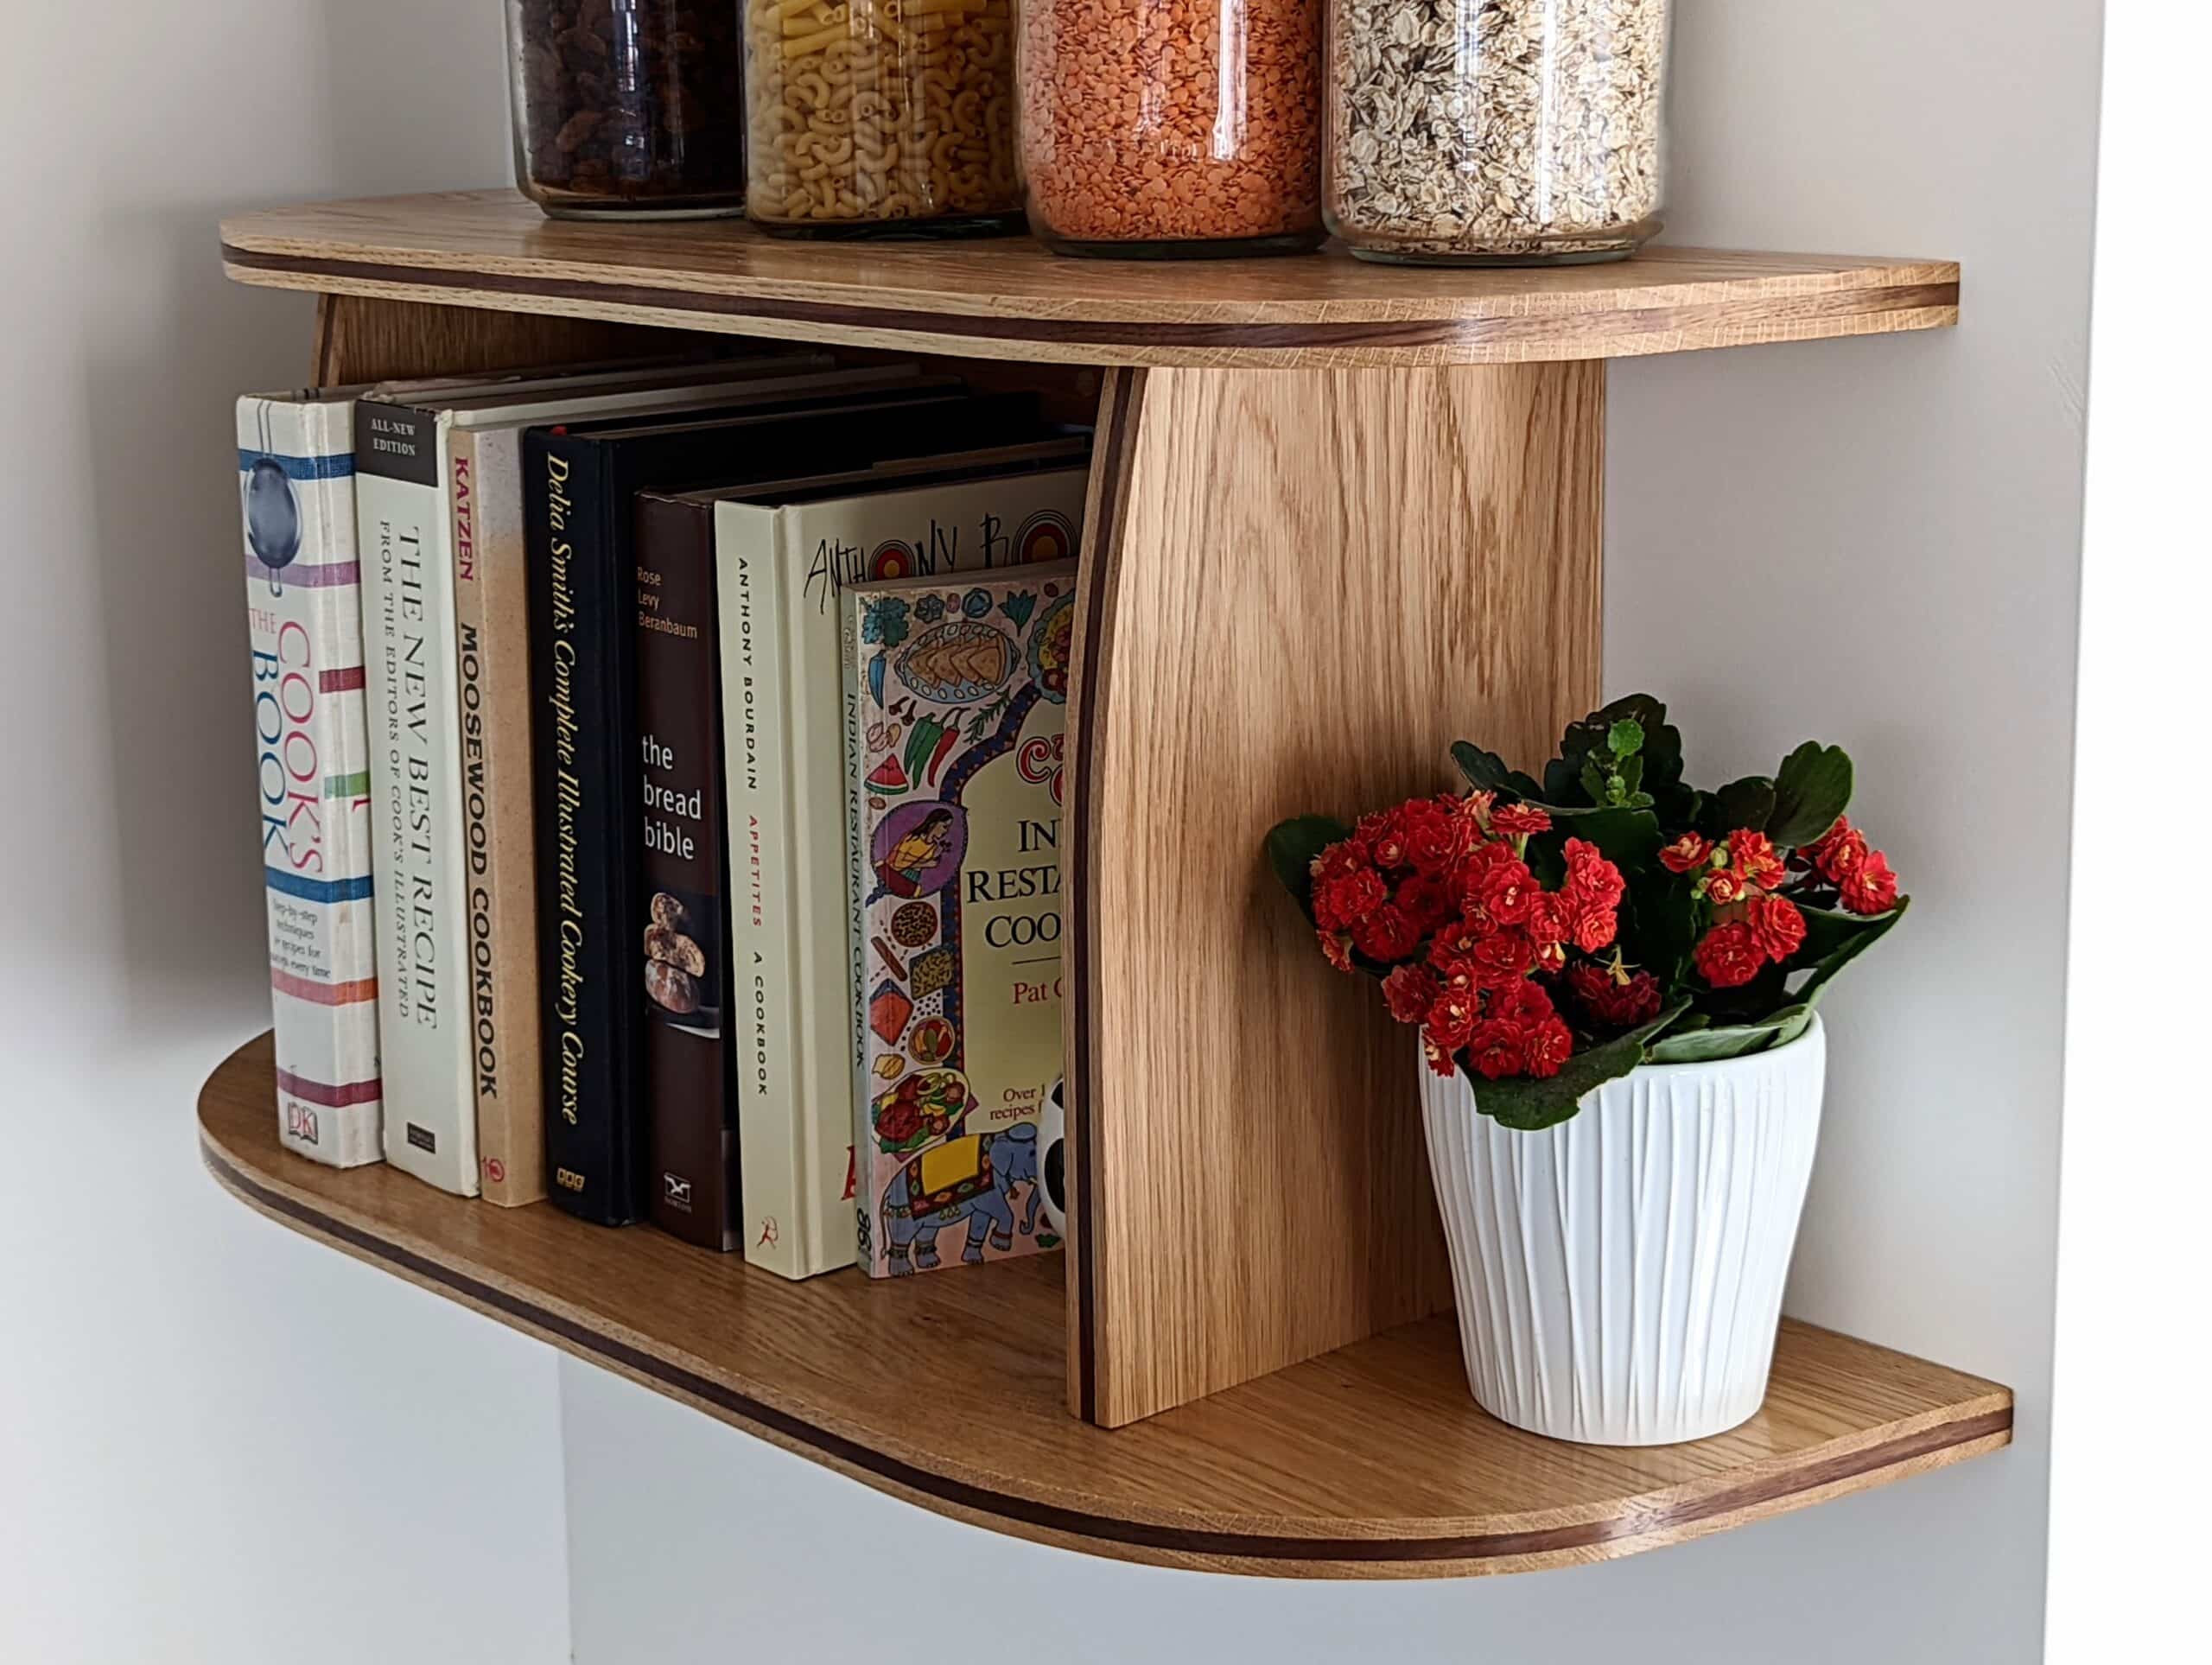
There are always corners in any room that benefits from small wall shelves like this and what better use than for those special family cookbooks? In this unit, I used sliding dovetails for their intrinsic strength and minimalist look.
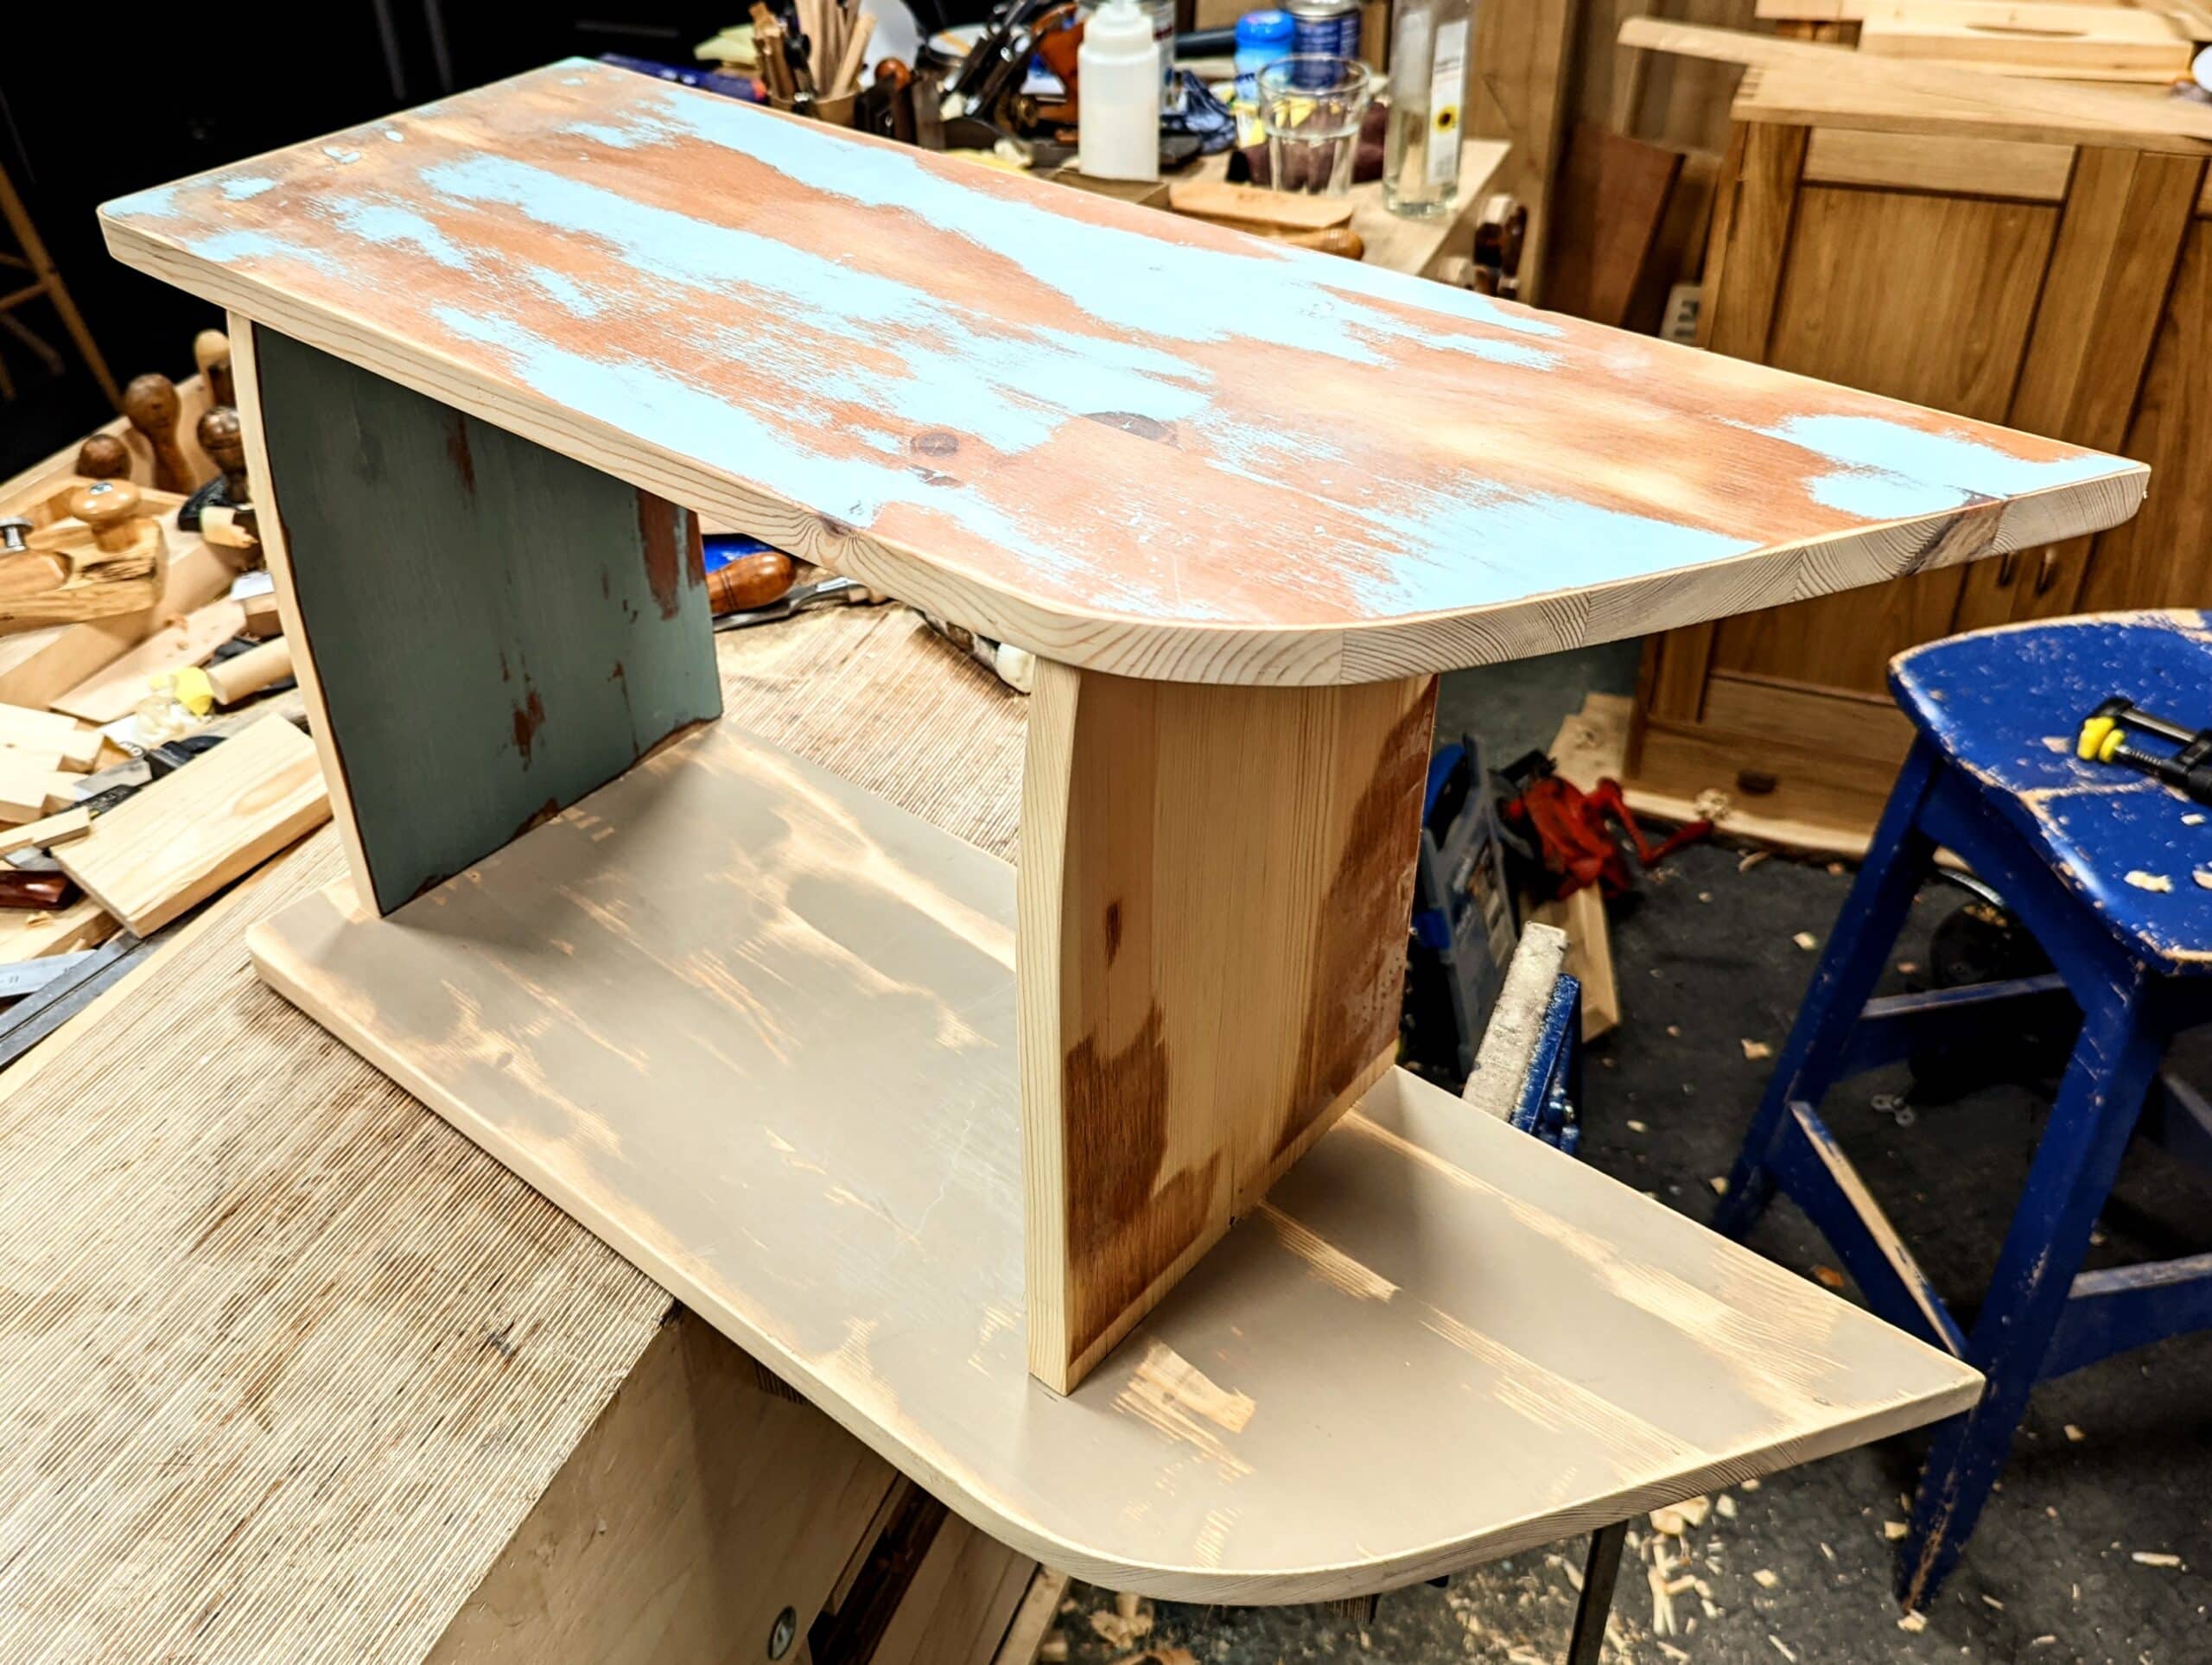
My design prototype came from some upcycle scrapwood pine.
Another rather complex-looking piece is really nothing more than an oversized dovetailed box in sycamore and mesquite. I made two of these, one for the underside of the wall cupboard.
Here’s a different angle to see from.
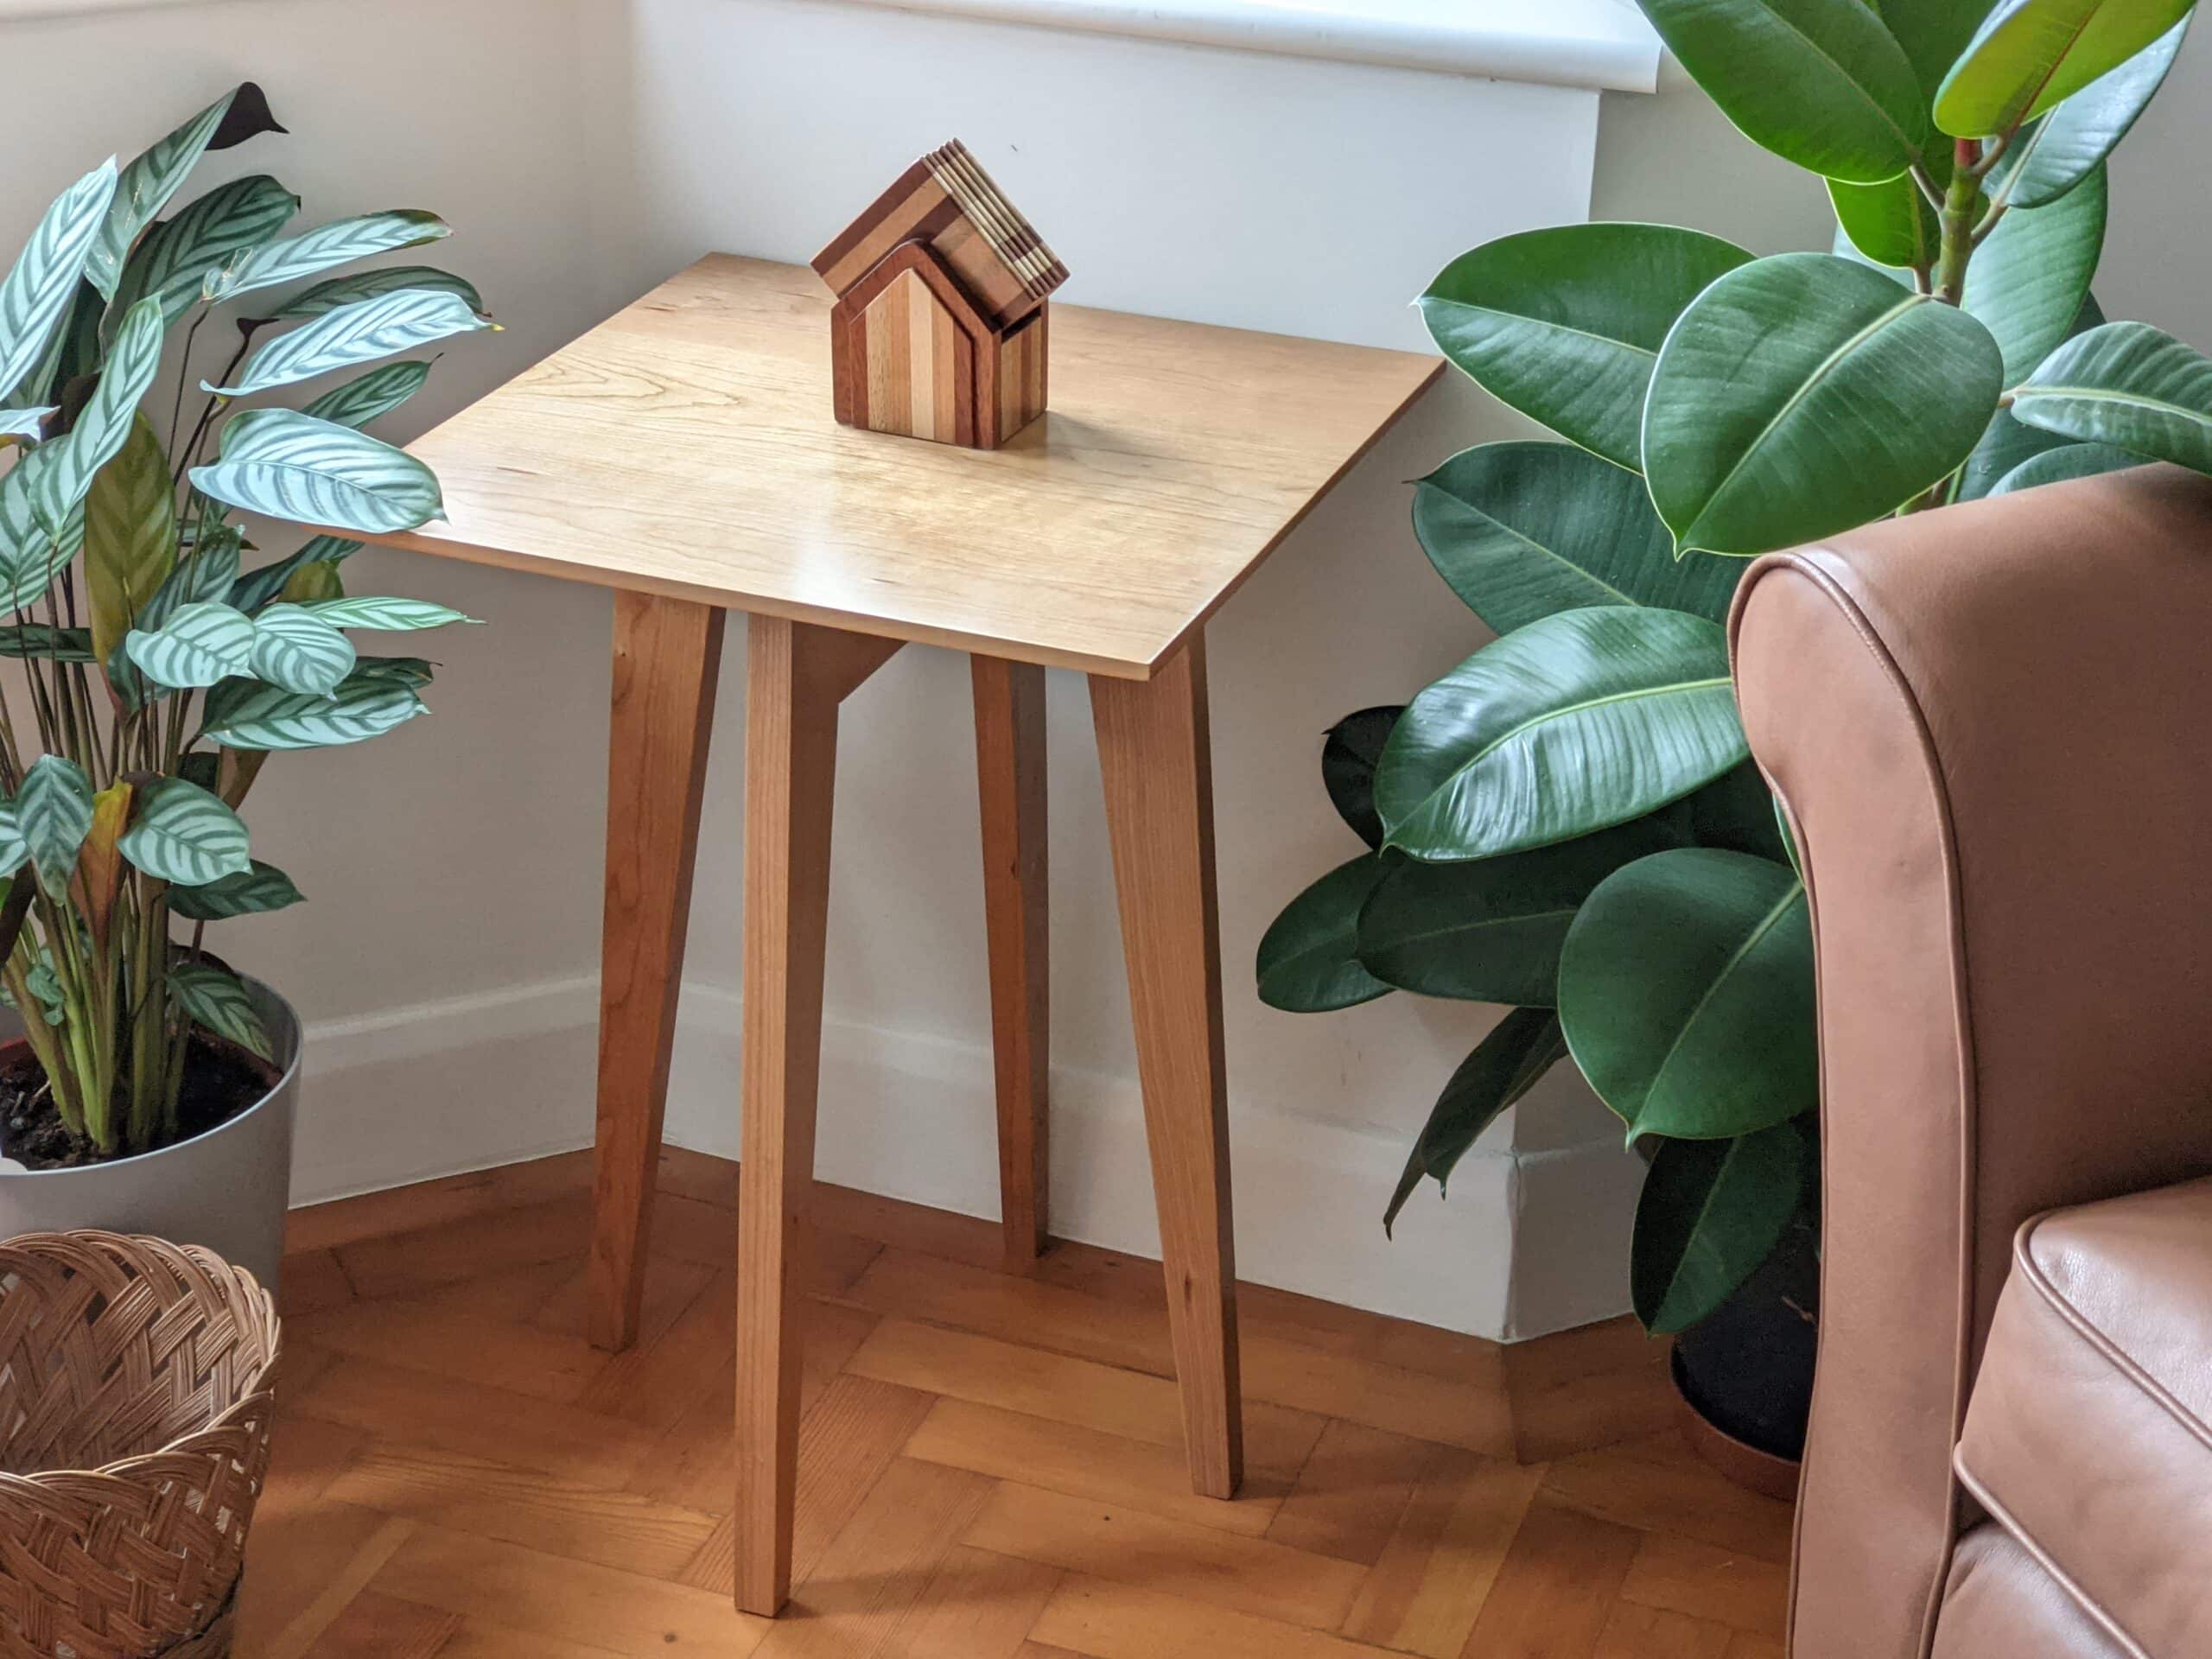
A few smaller accent pieces filled in the blanks yet again. I made more occasional tables . . .
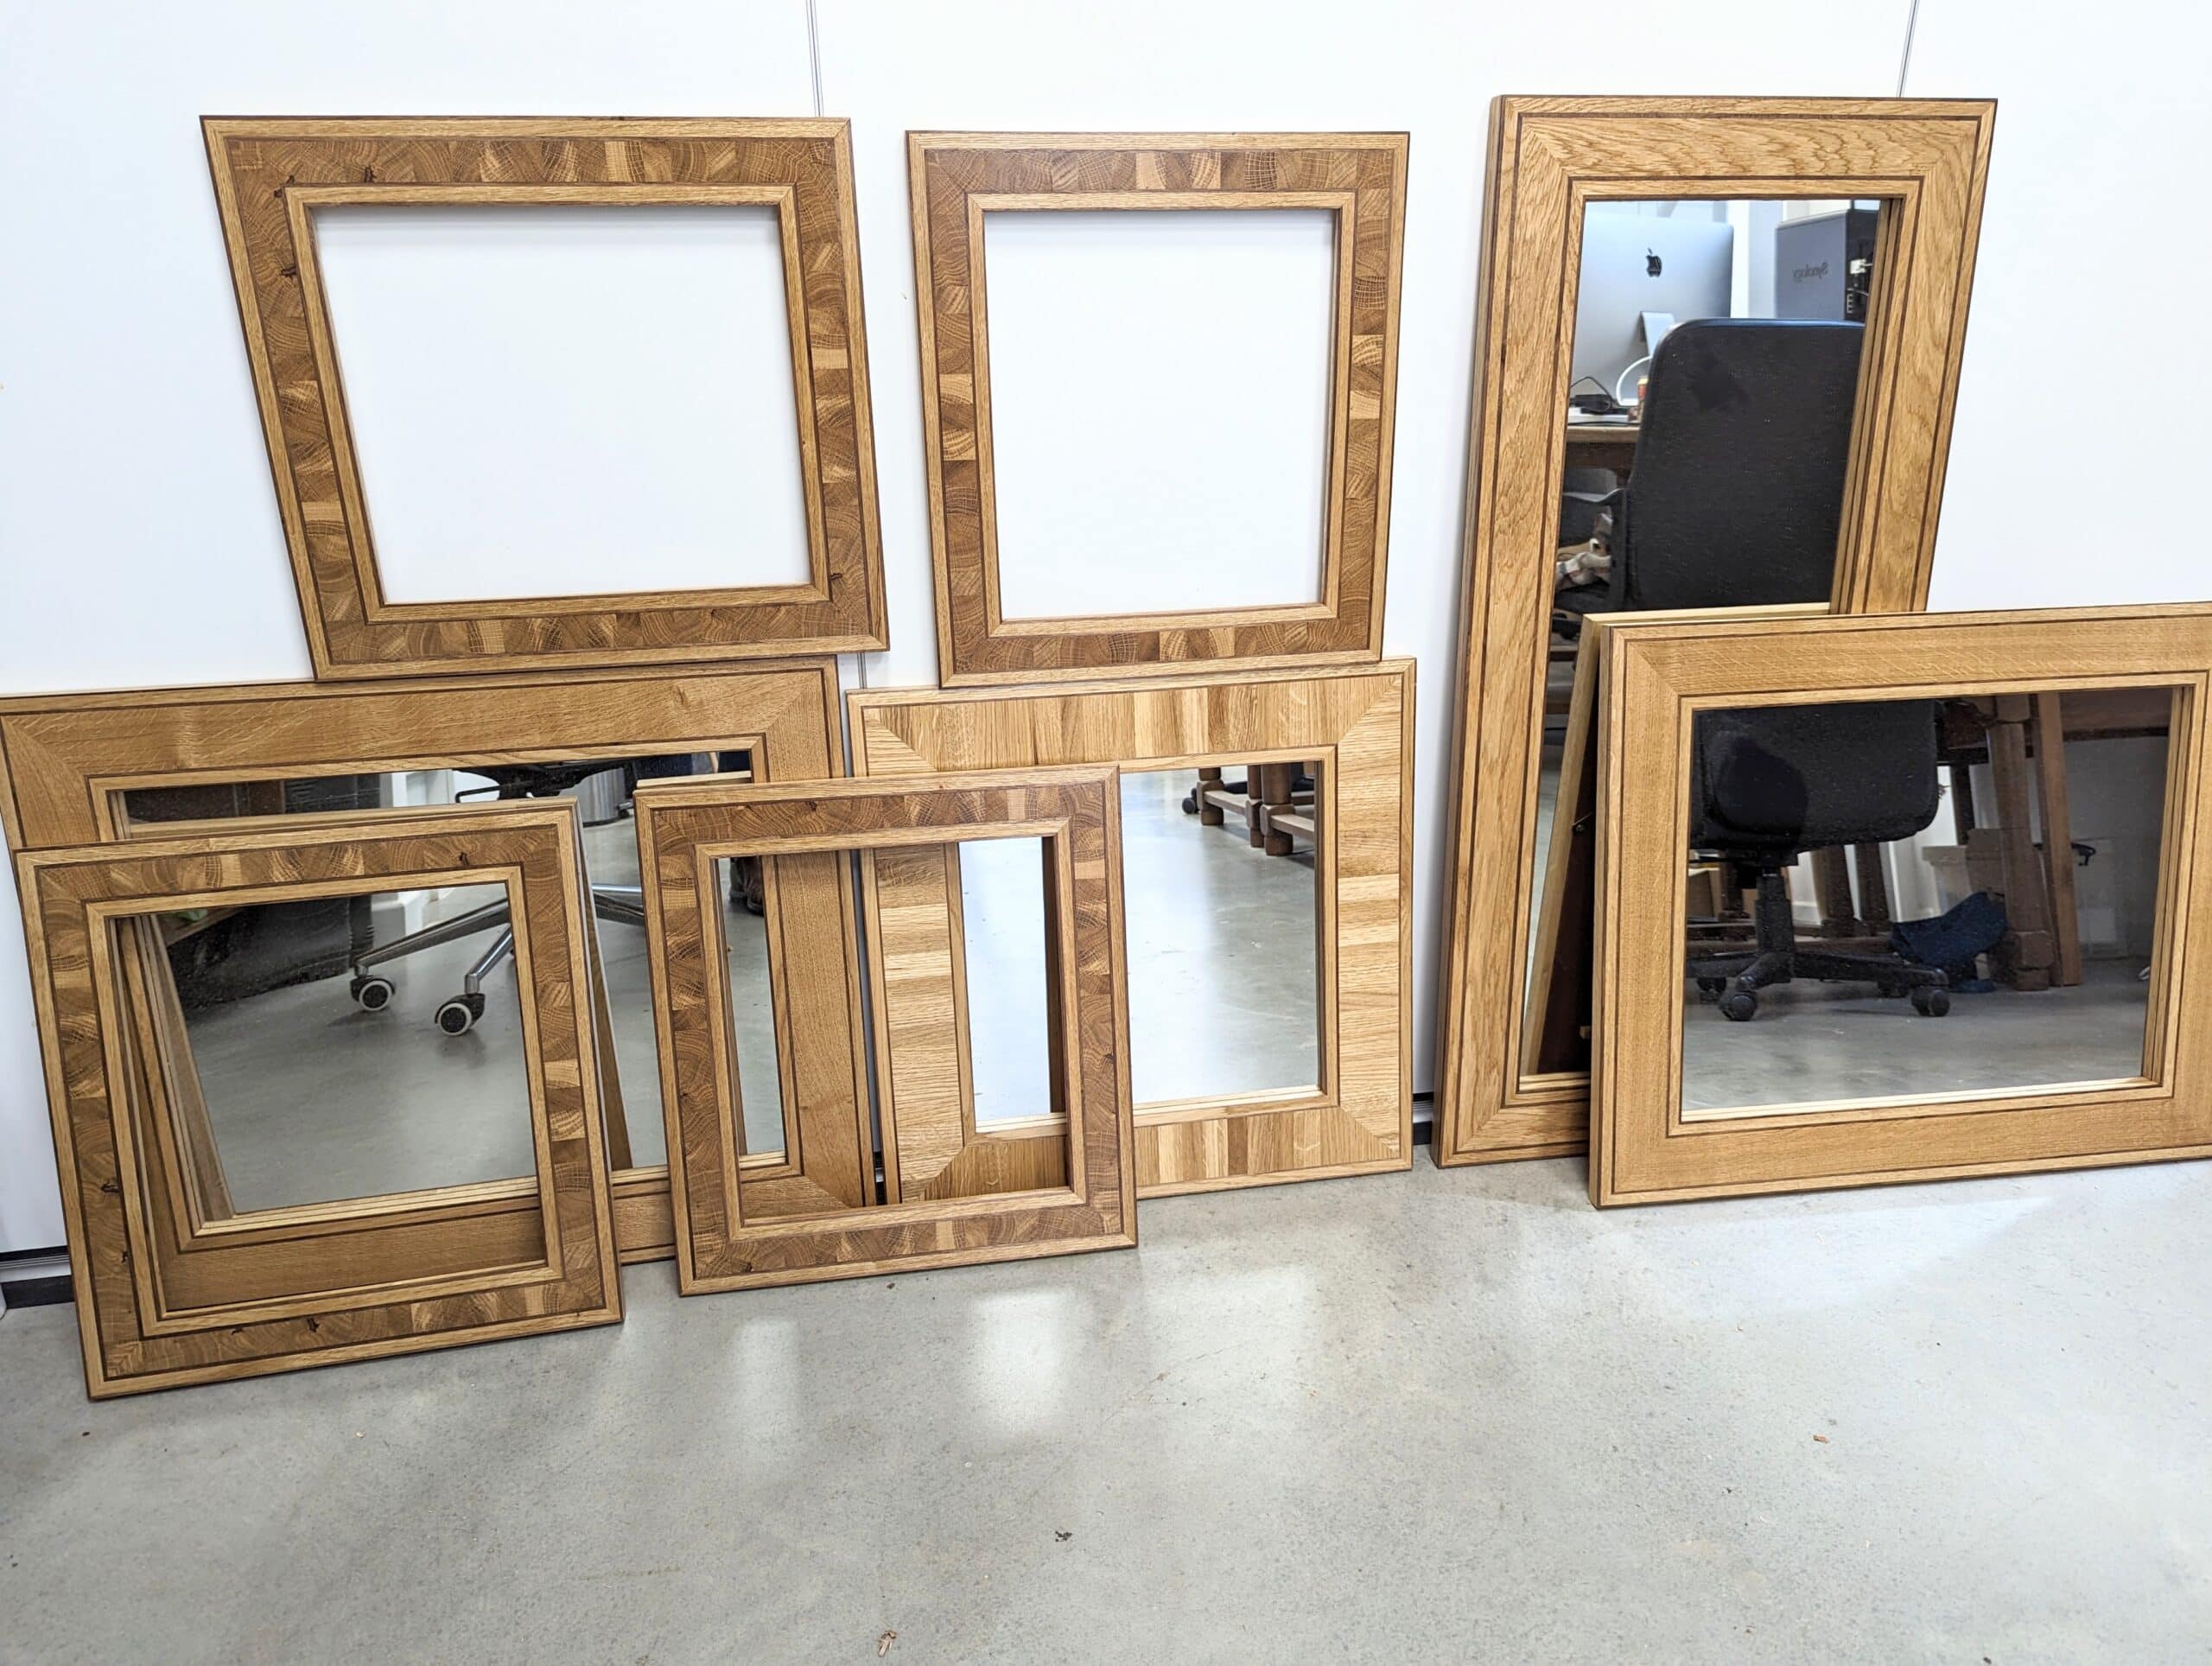
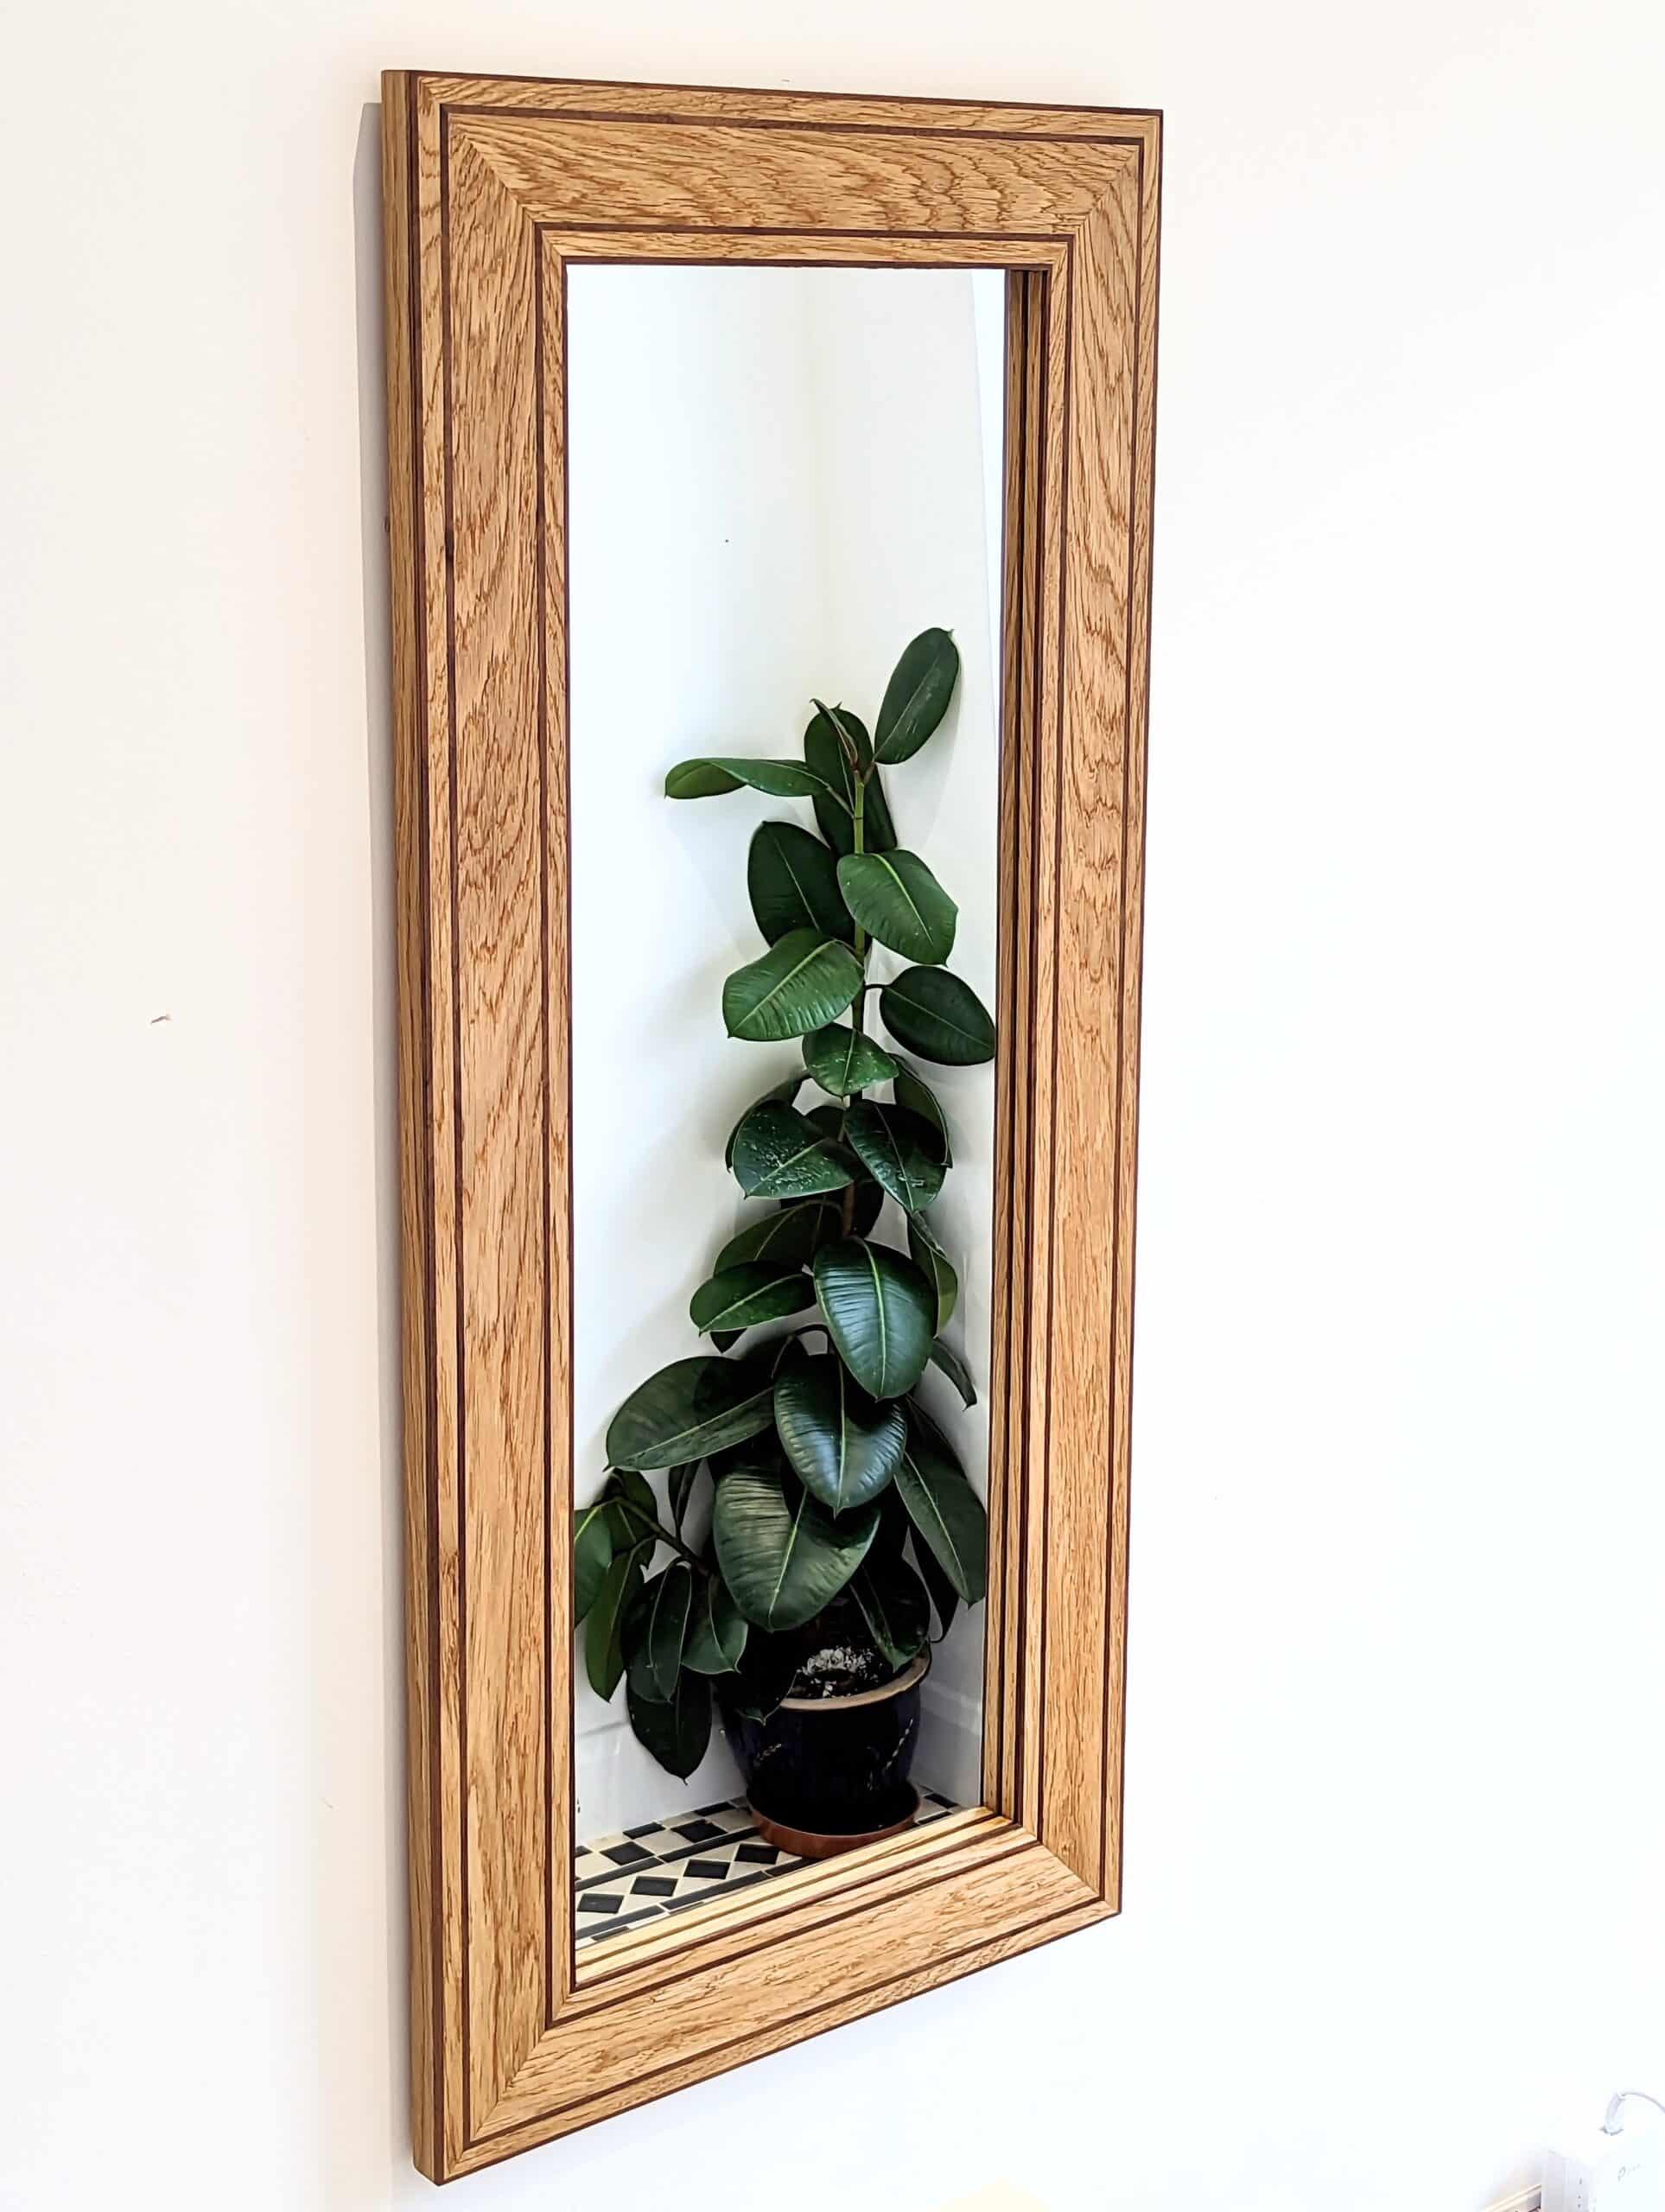
. . . and then the wall mirror decorated this room and the hallways with a longer version.
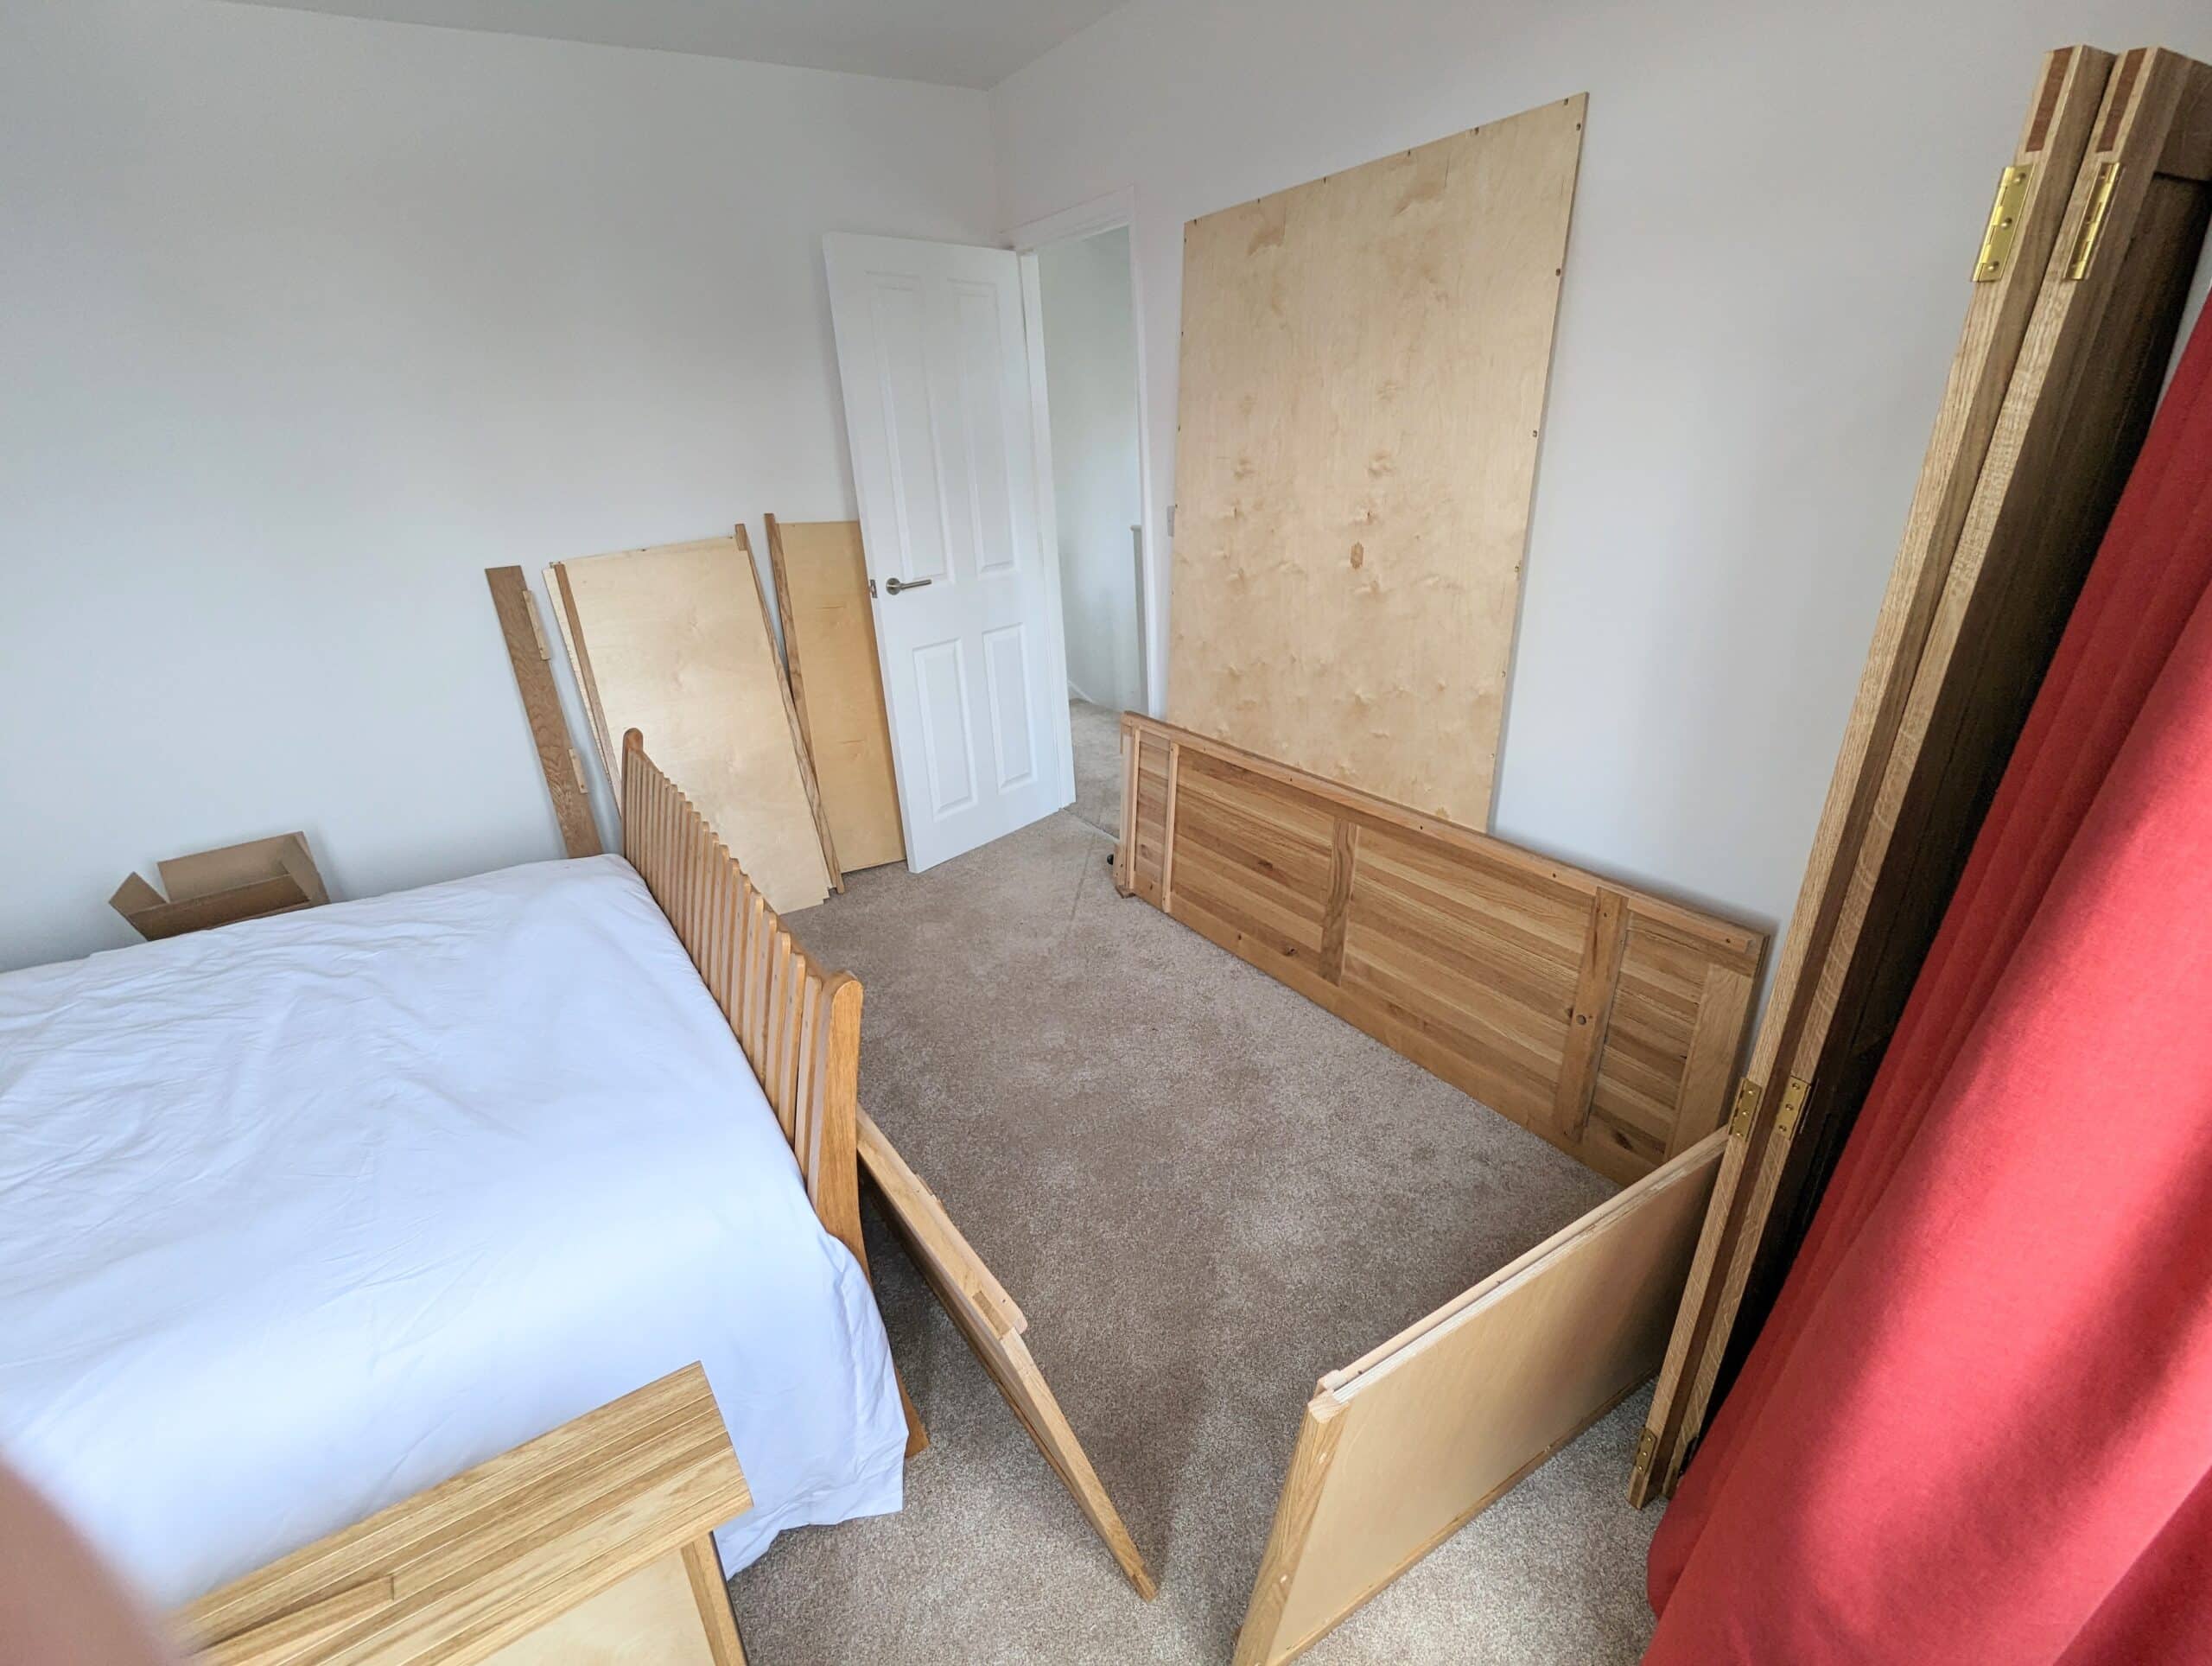
Moving on into the upstairs and thinking of kingside beds and wardrobes can be a little daunting but the challenge for me was making things that could be moved singlehandedly by this 73-year-old man. So between making and moving, climbing stairs and installing, I had my work cut out and remember that the only machine I used on all of these pieces is a bandsaw and no I did not buy machine-planed stock, only rough-sawn.
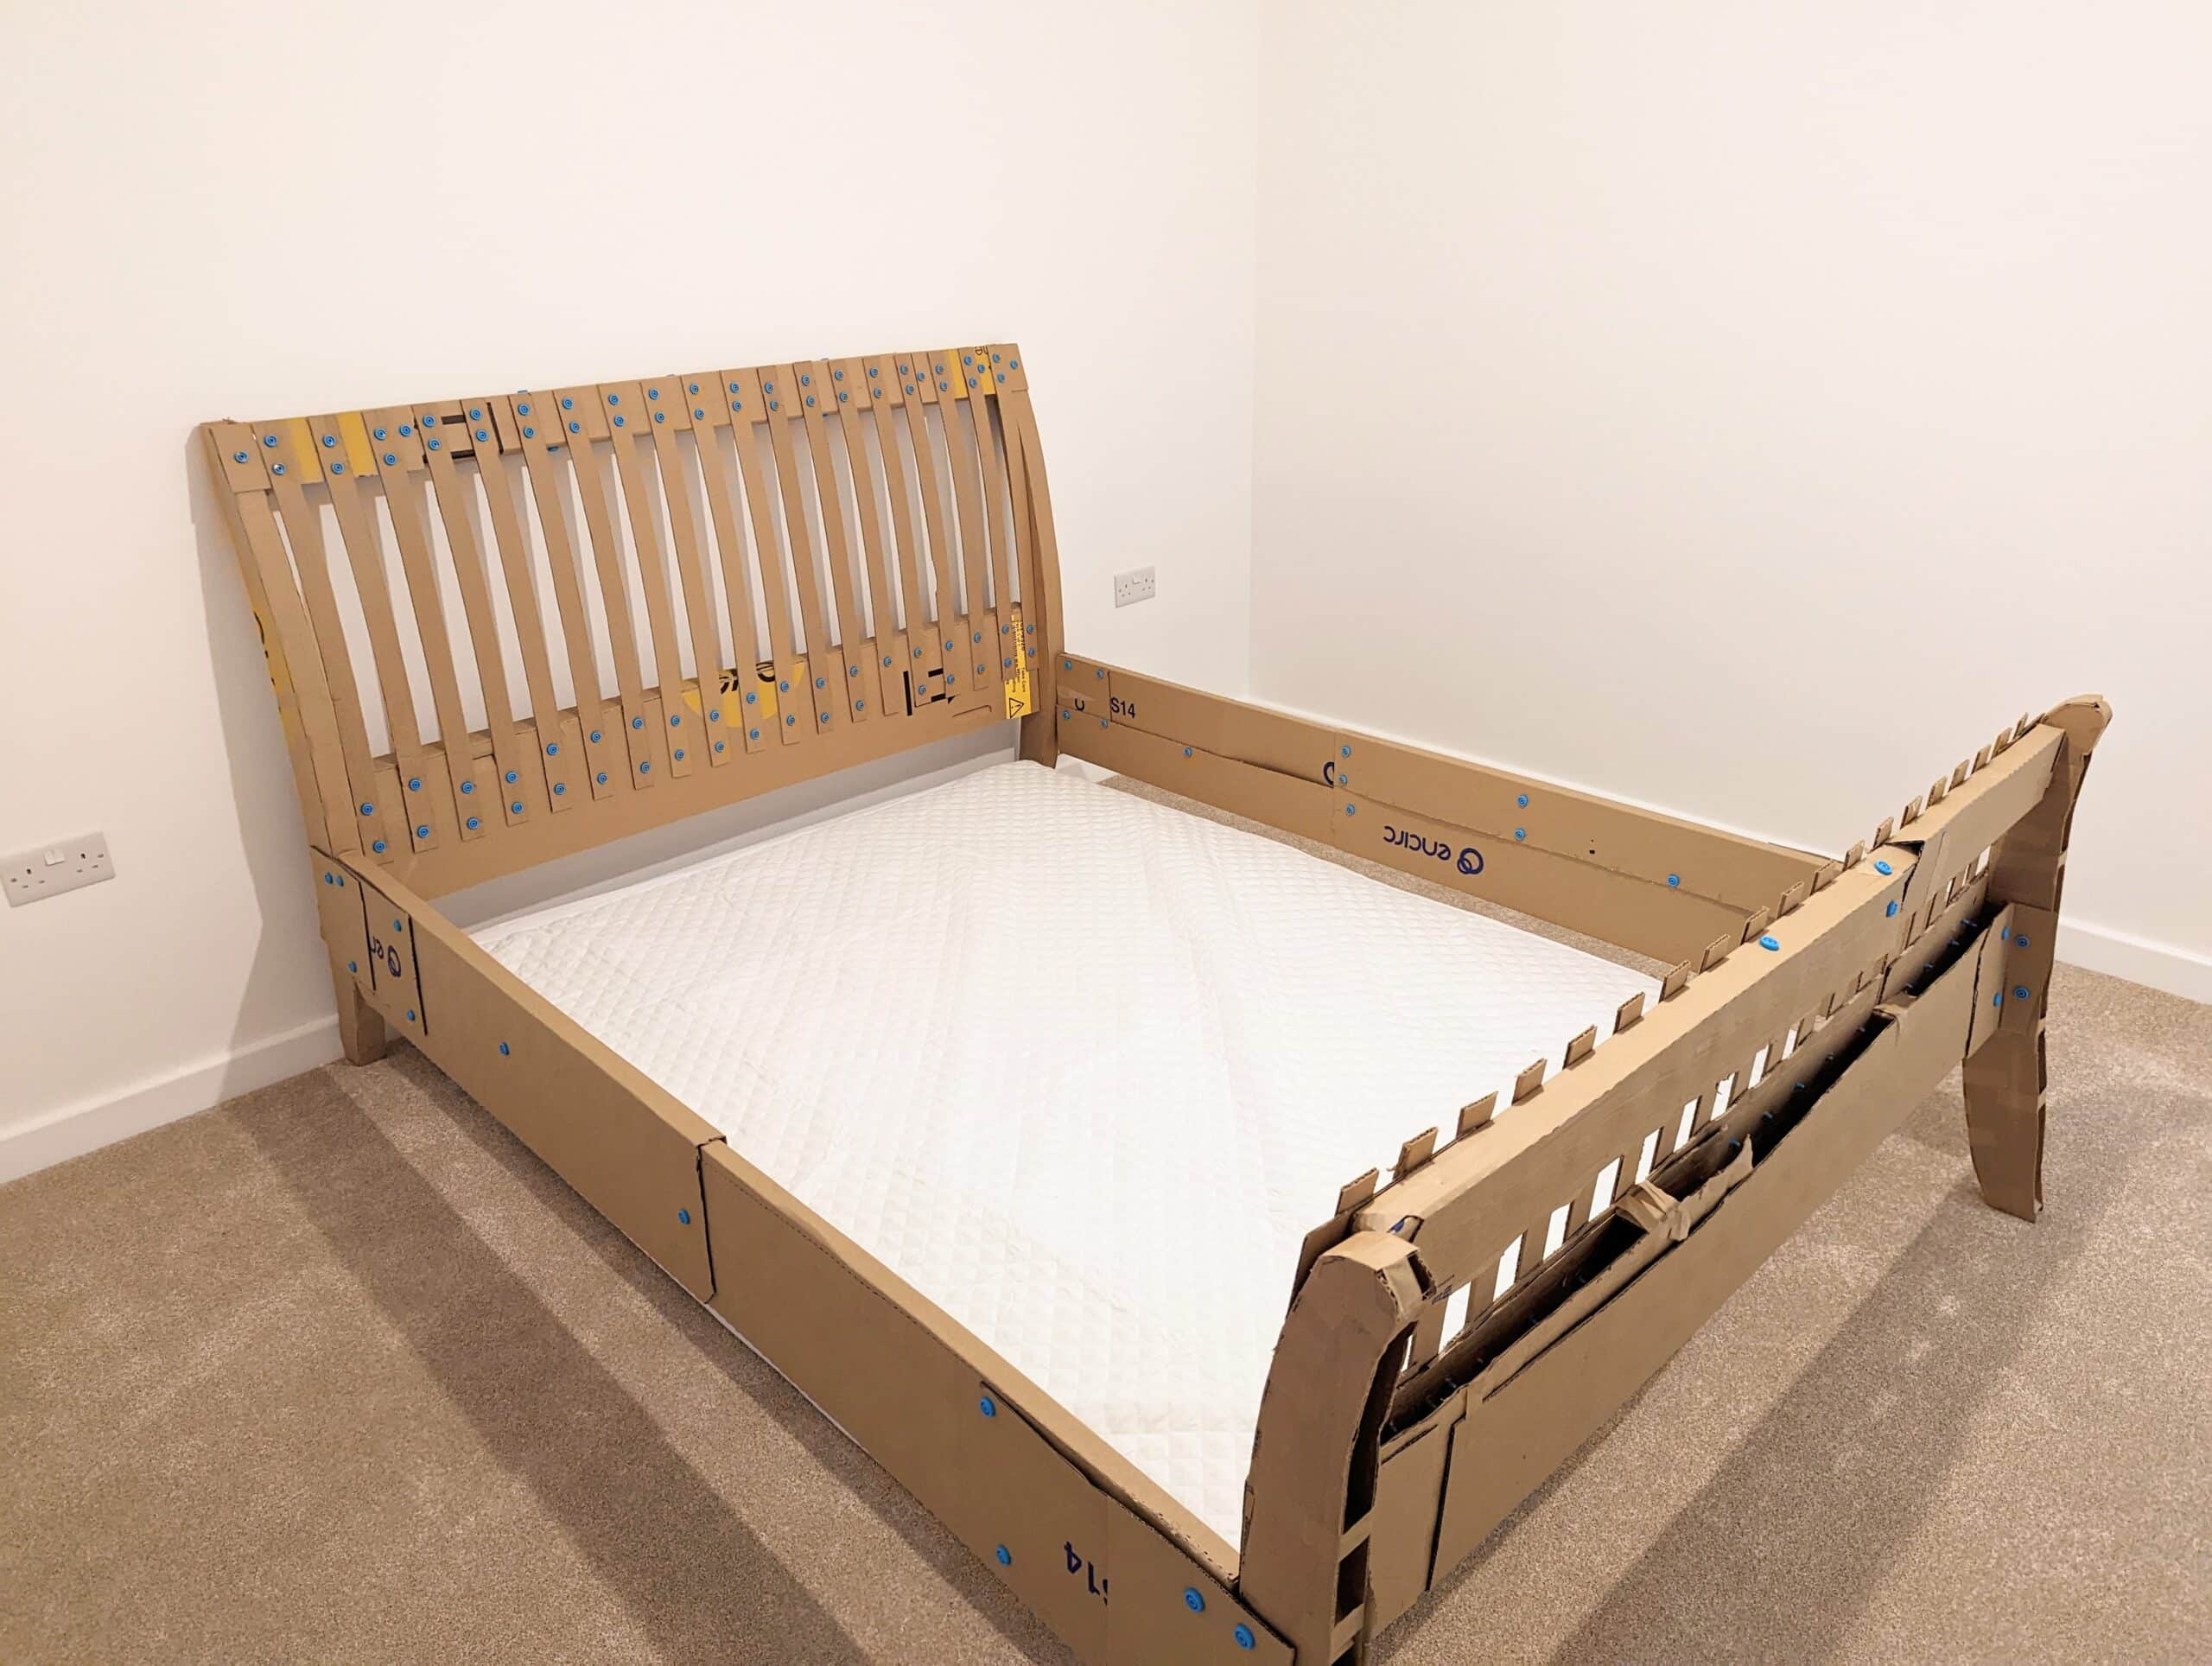
Yes, I made a cardboard facsimile and I am so glad that I did. It took me three hours to do it and it was so well worth doing. It meant that the team could see what I intended in a much more tangible way than say a drawing or description. Imagine turning up at your customer’s house and placing this in there for them to look at. They’d know you were serious!
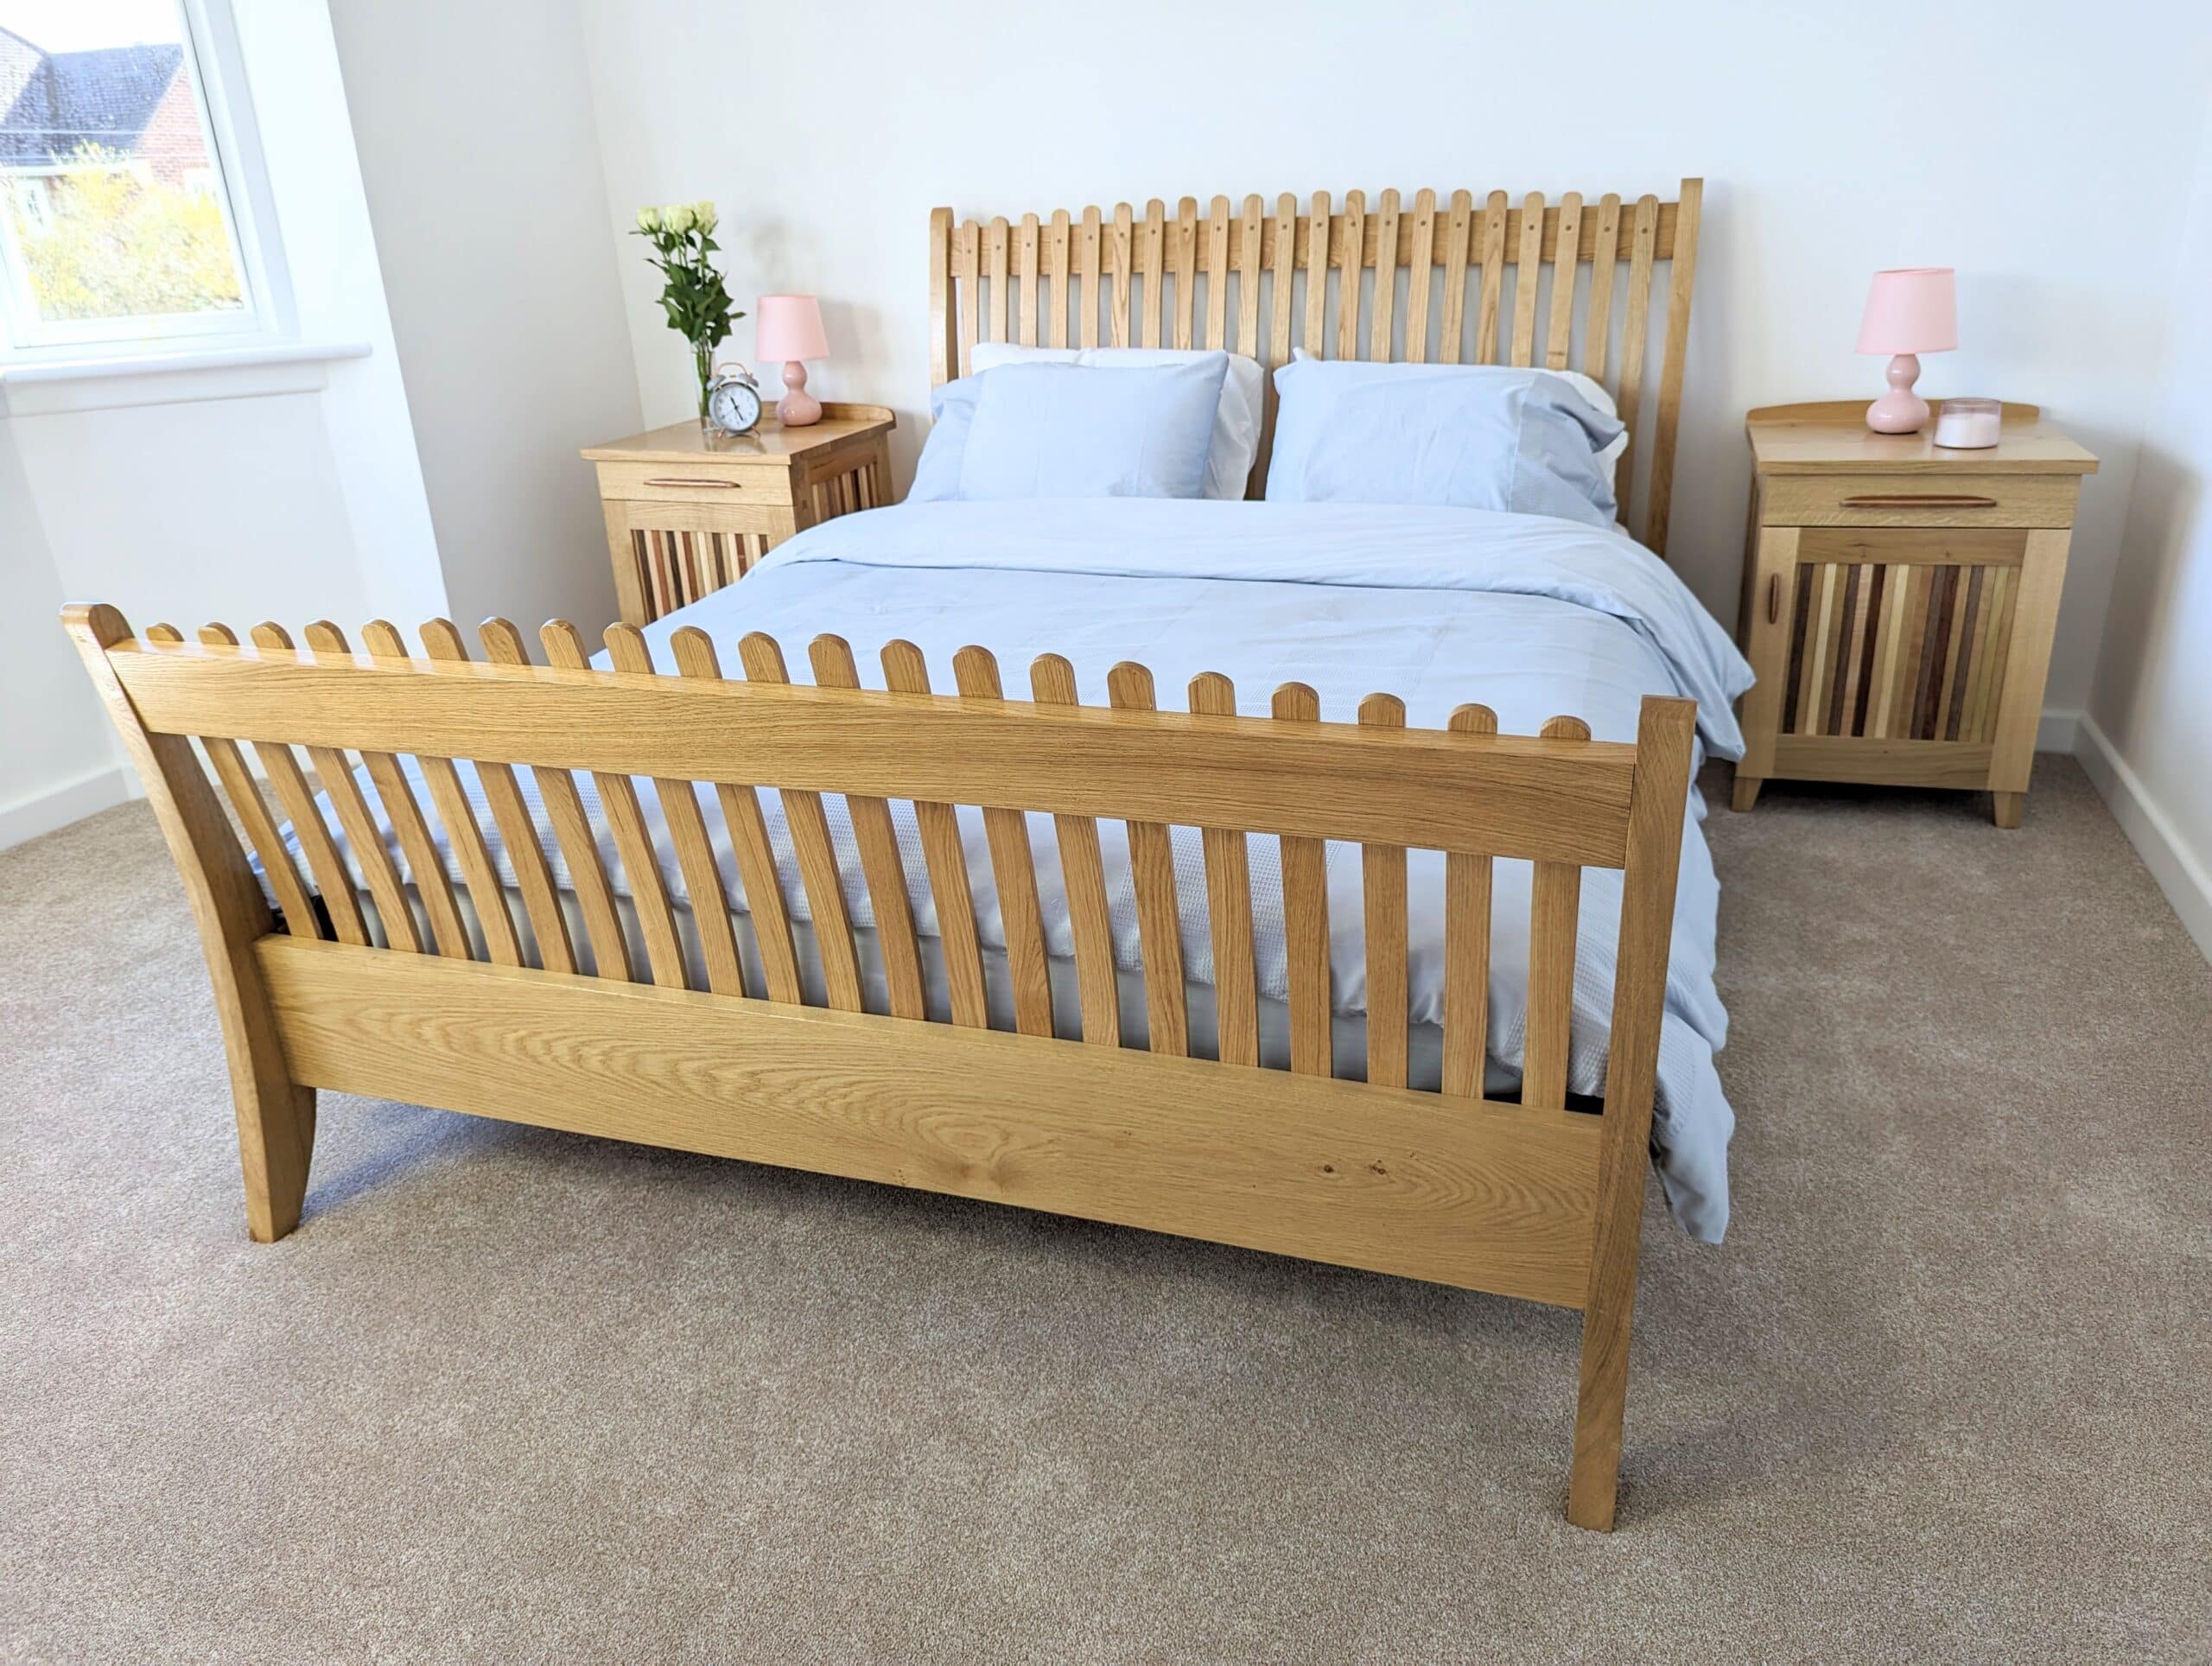
The first major piece for upstairs was the kingsize bed in solid oak. The good thing is that all beds are made to be dismantled and this one was no different. I used bent laminations to give it pleasing lines yet I kept the design simple and not overwhelming to anyone. It’s also scaleable so it would make a great design for any child or single bed too.
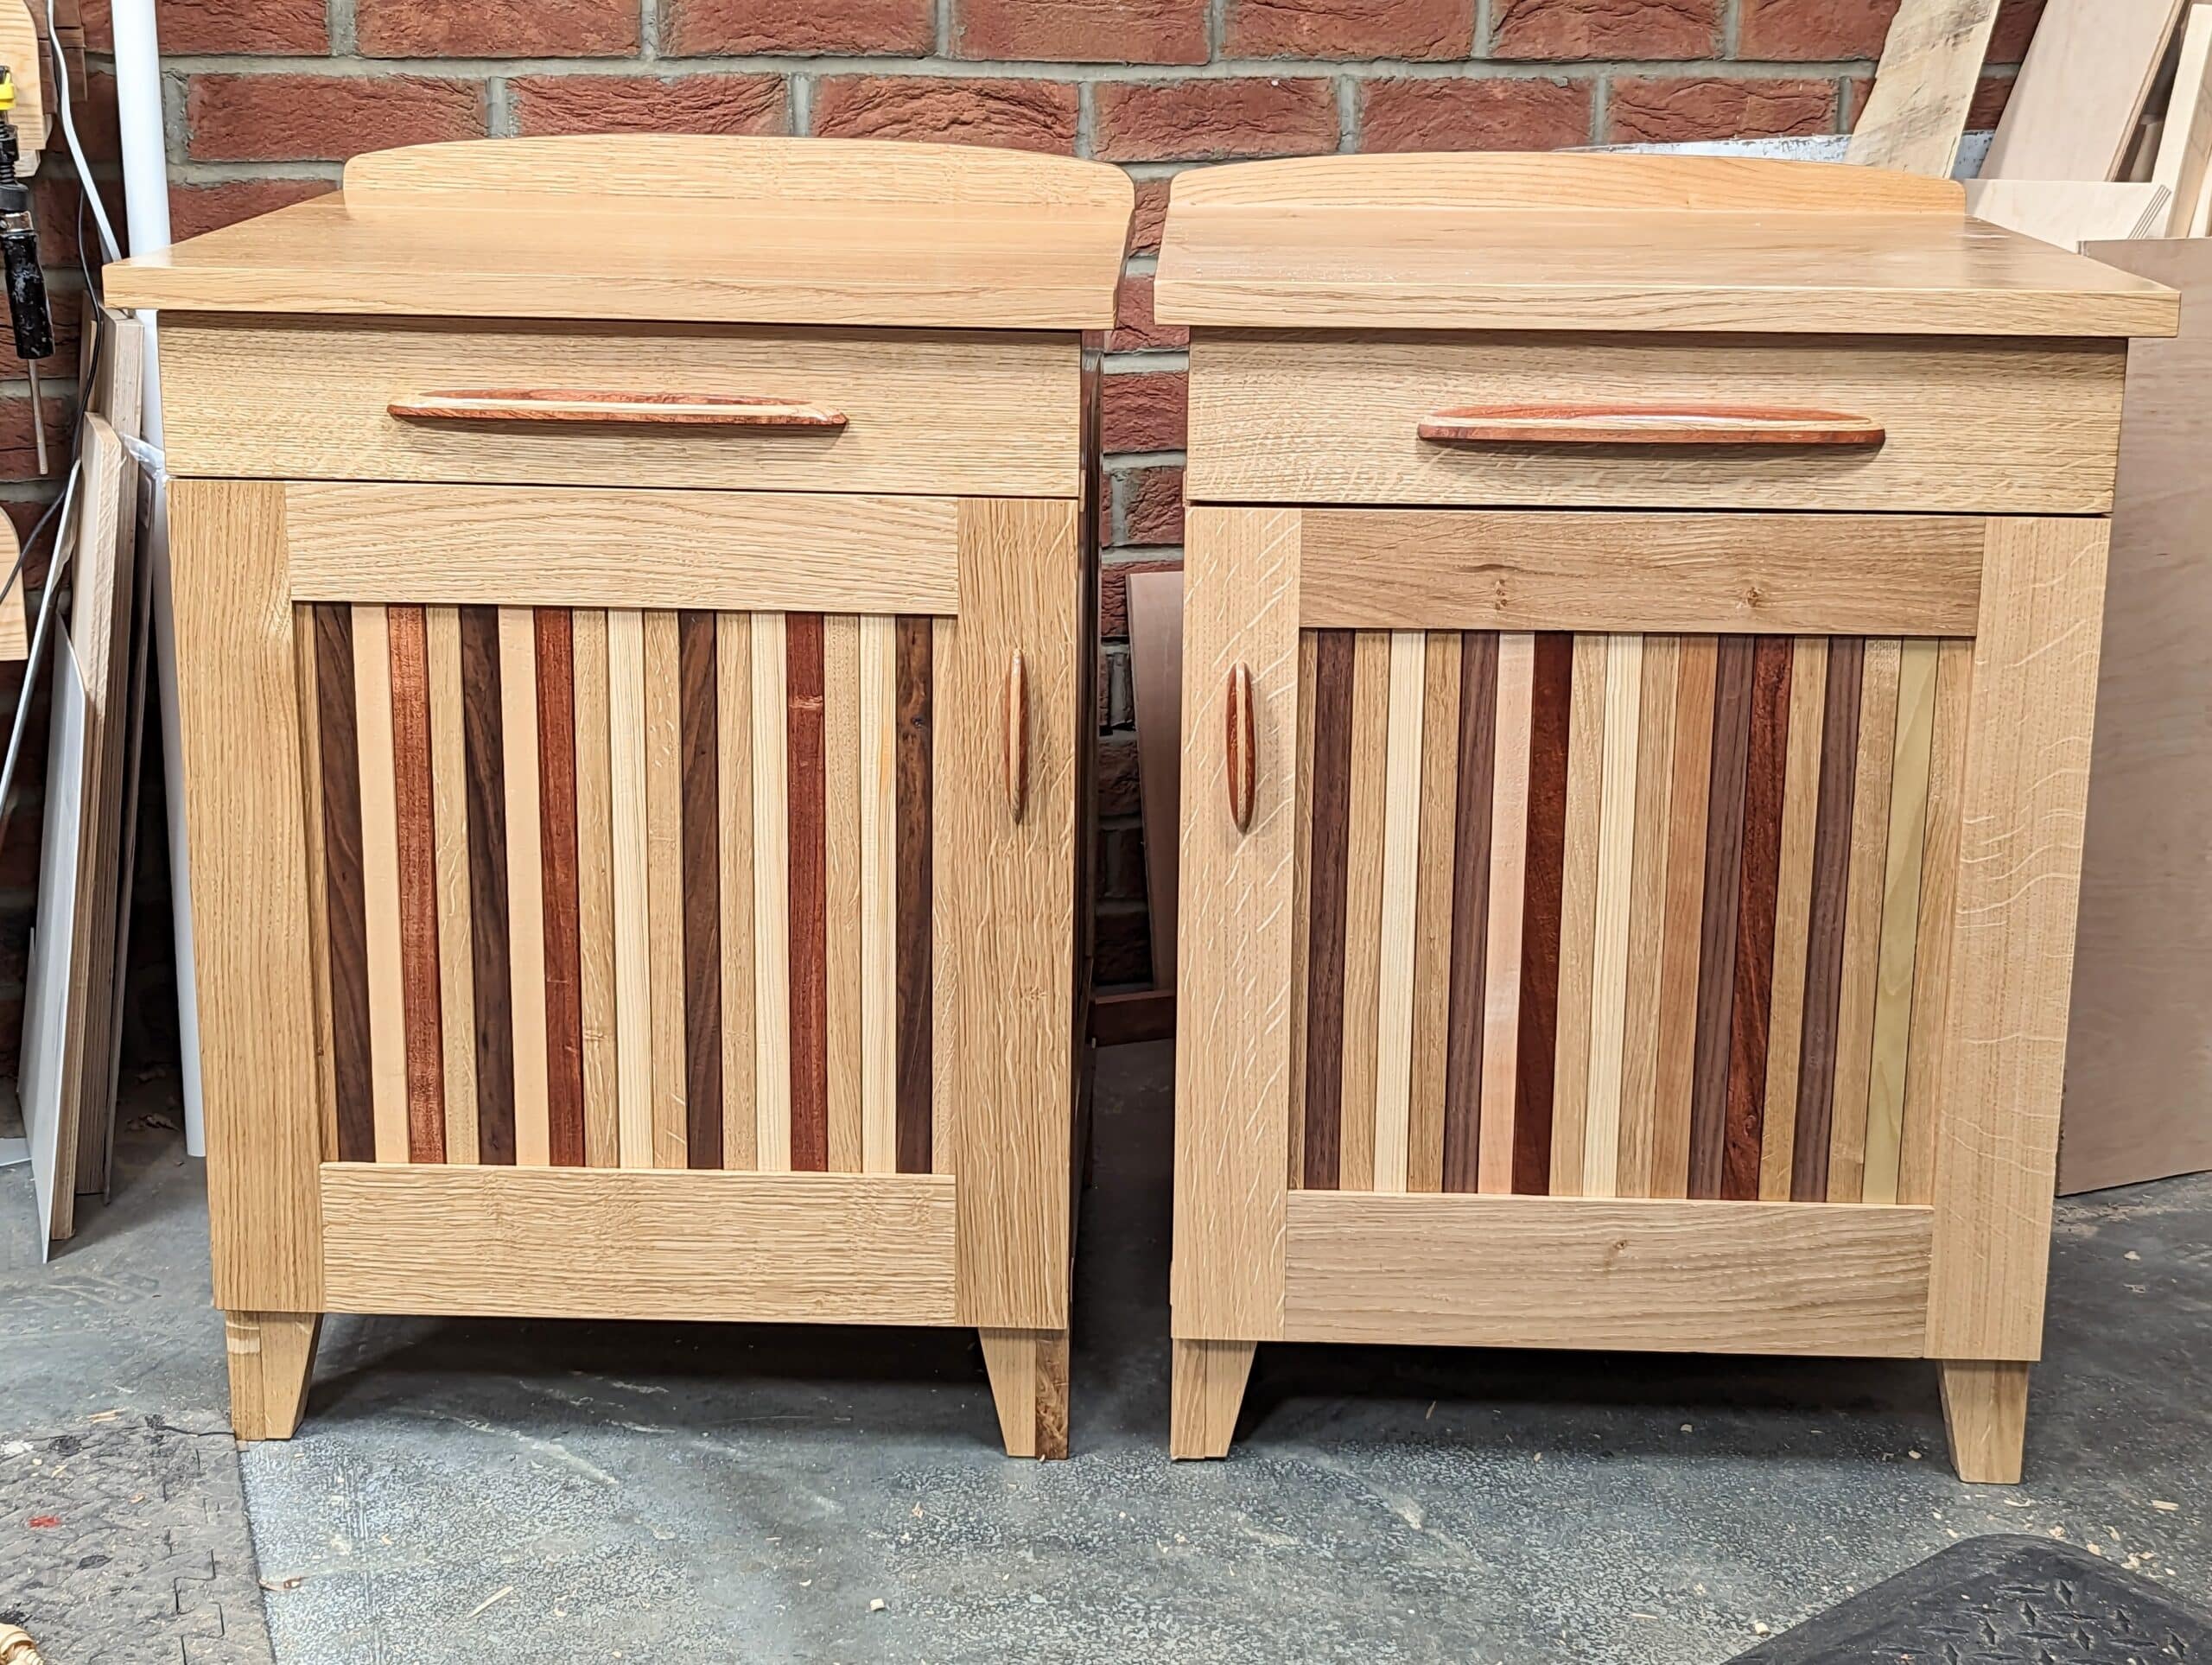
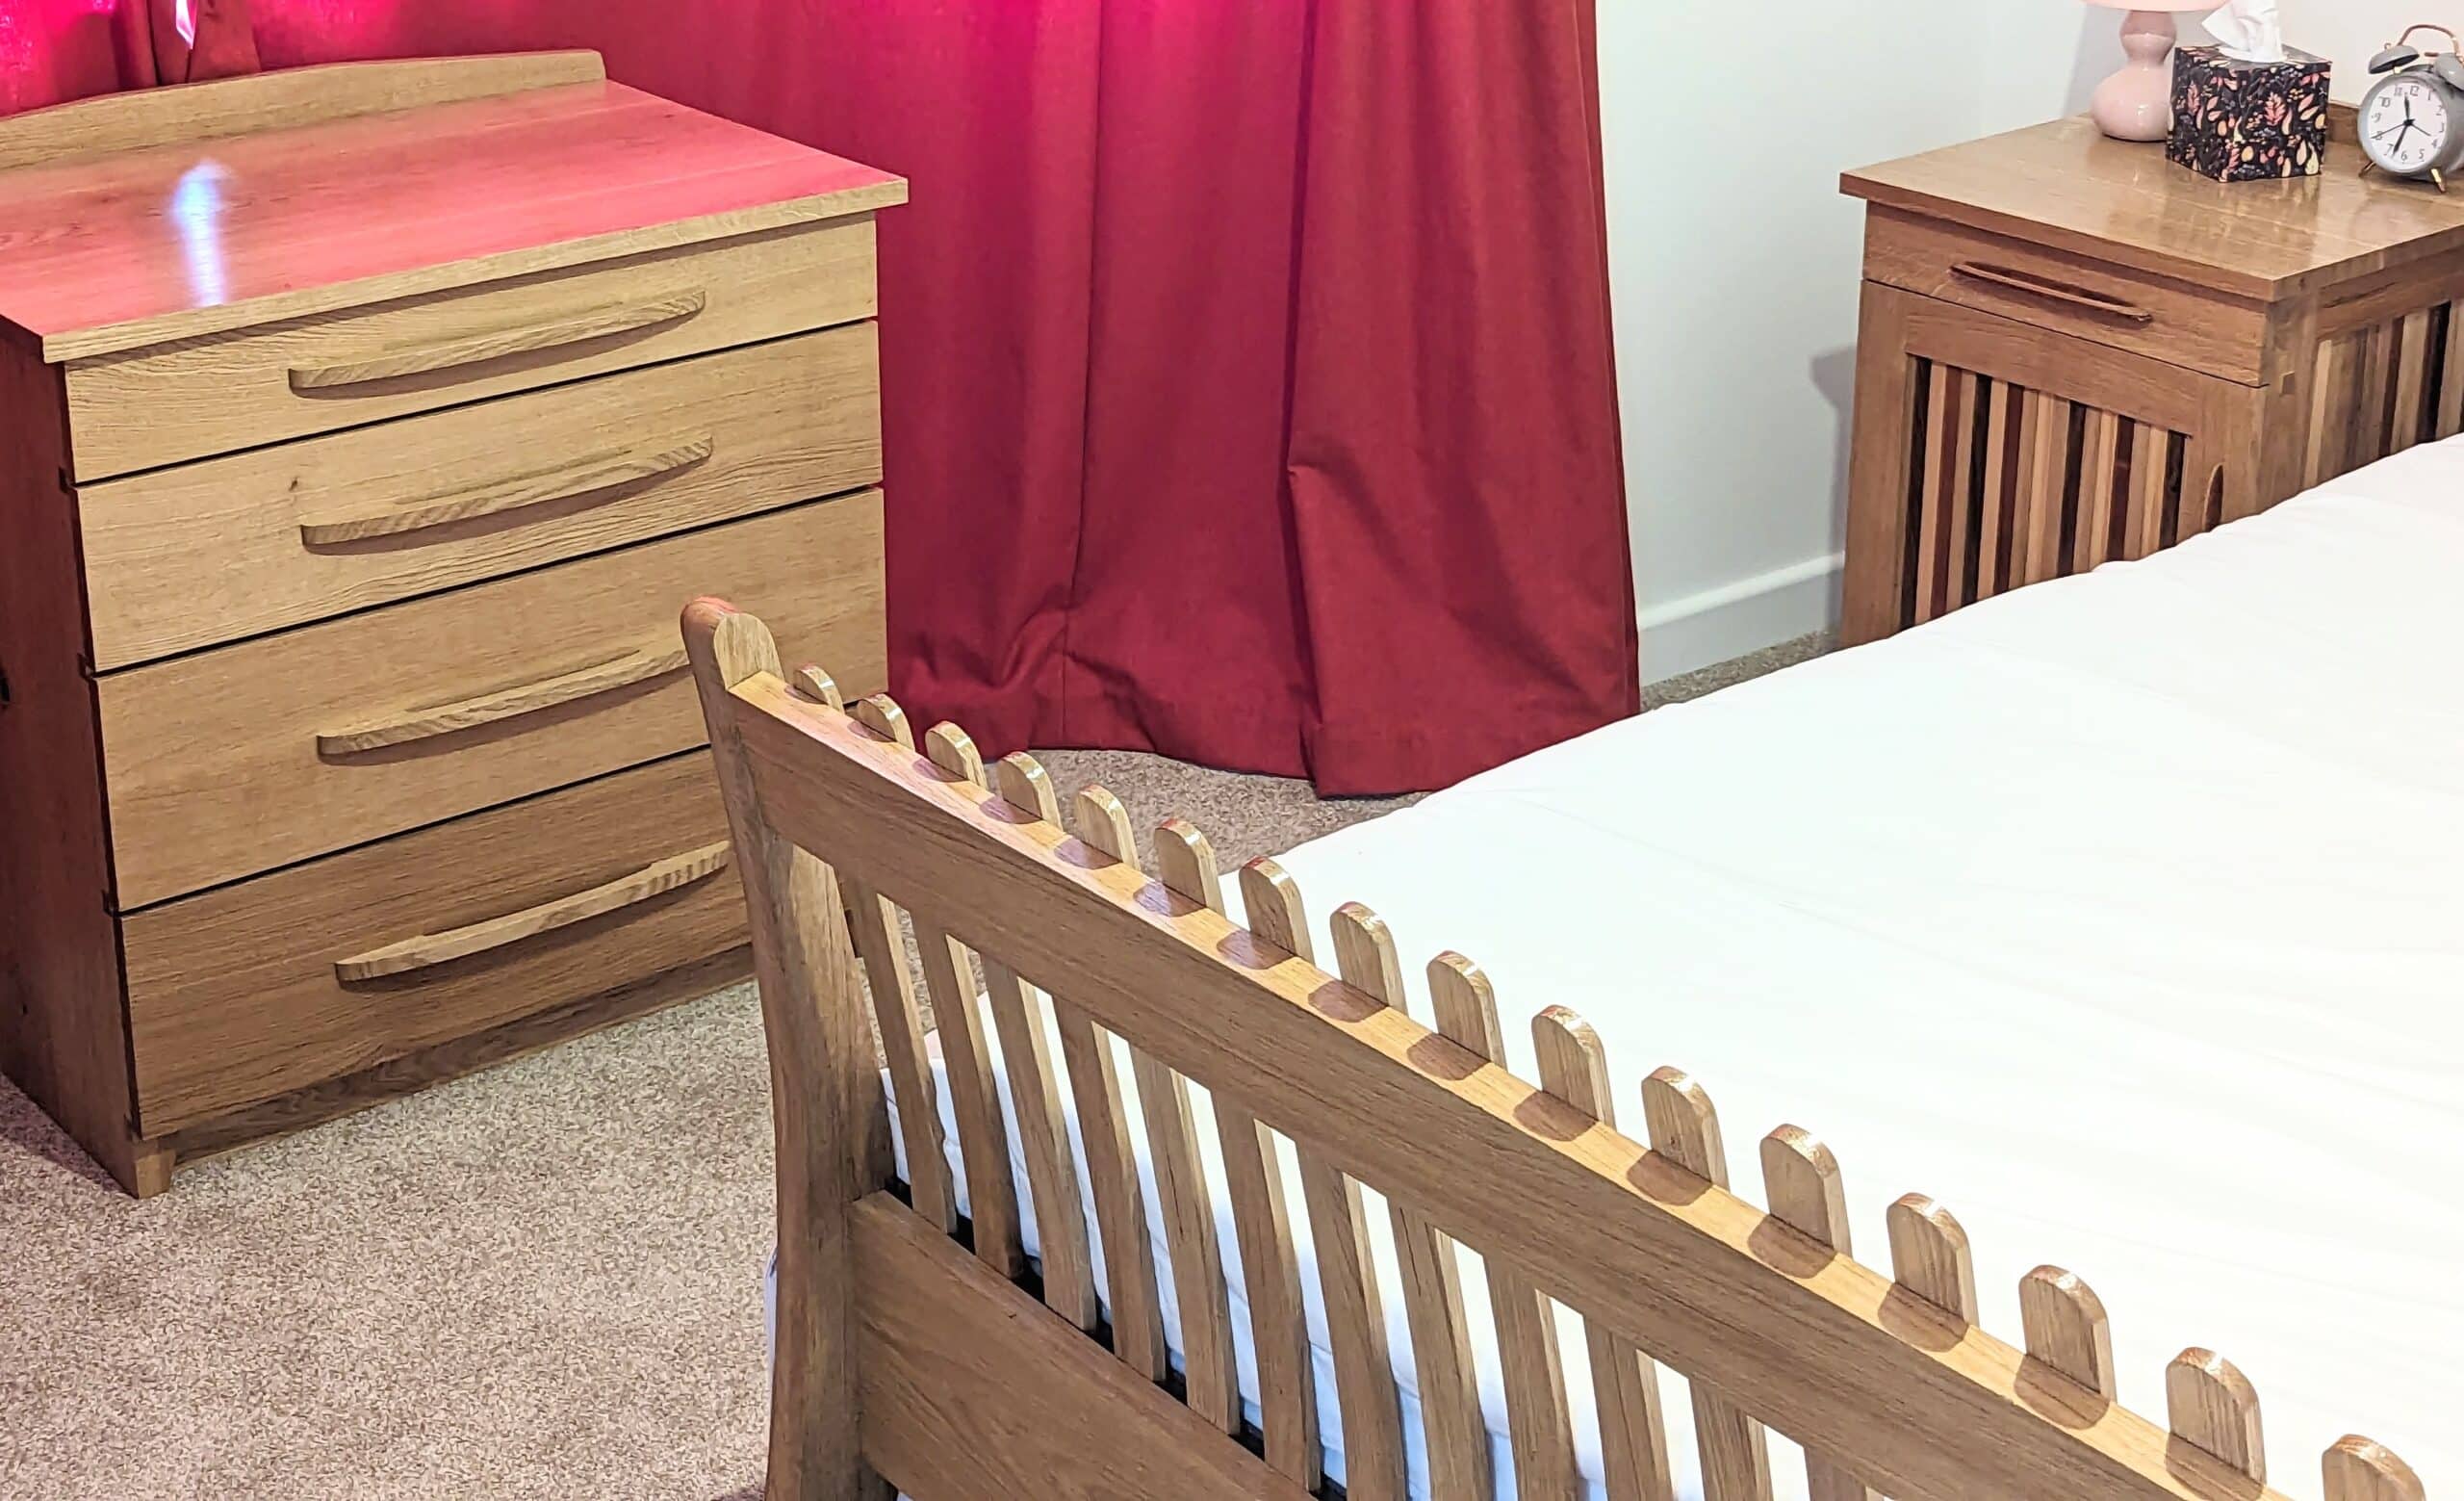
The two bedside cabinets or nightstands were very simple and yet quite distinctive using up scraps of mixed woods for the doors and side panels.
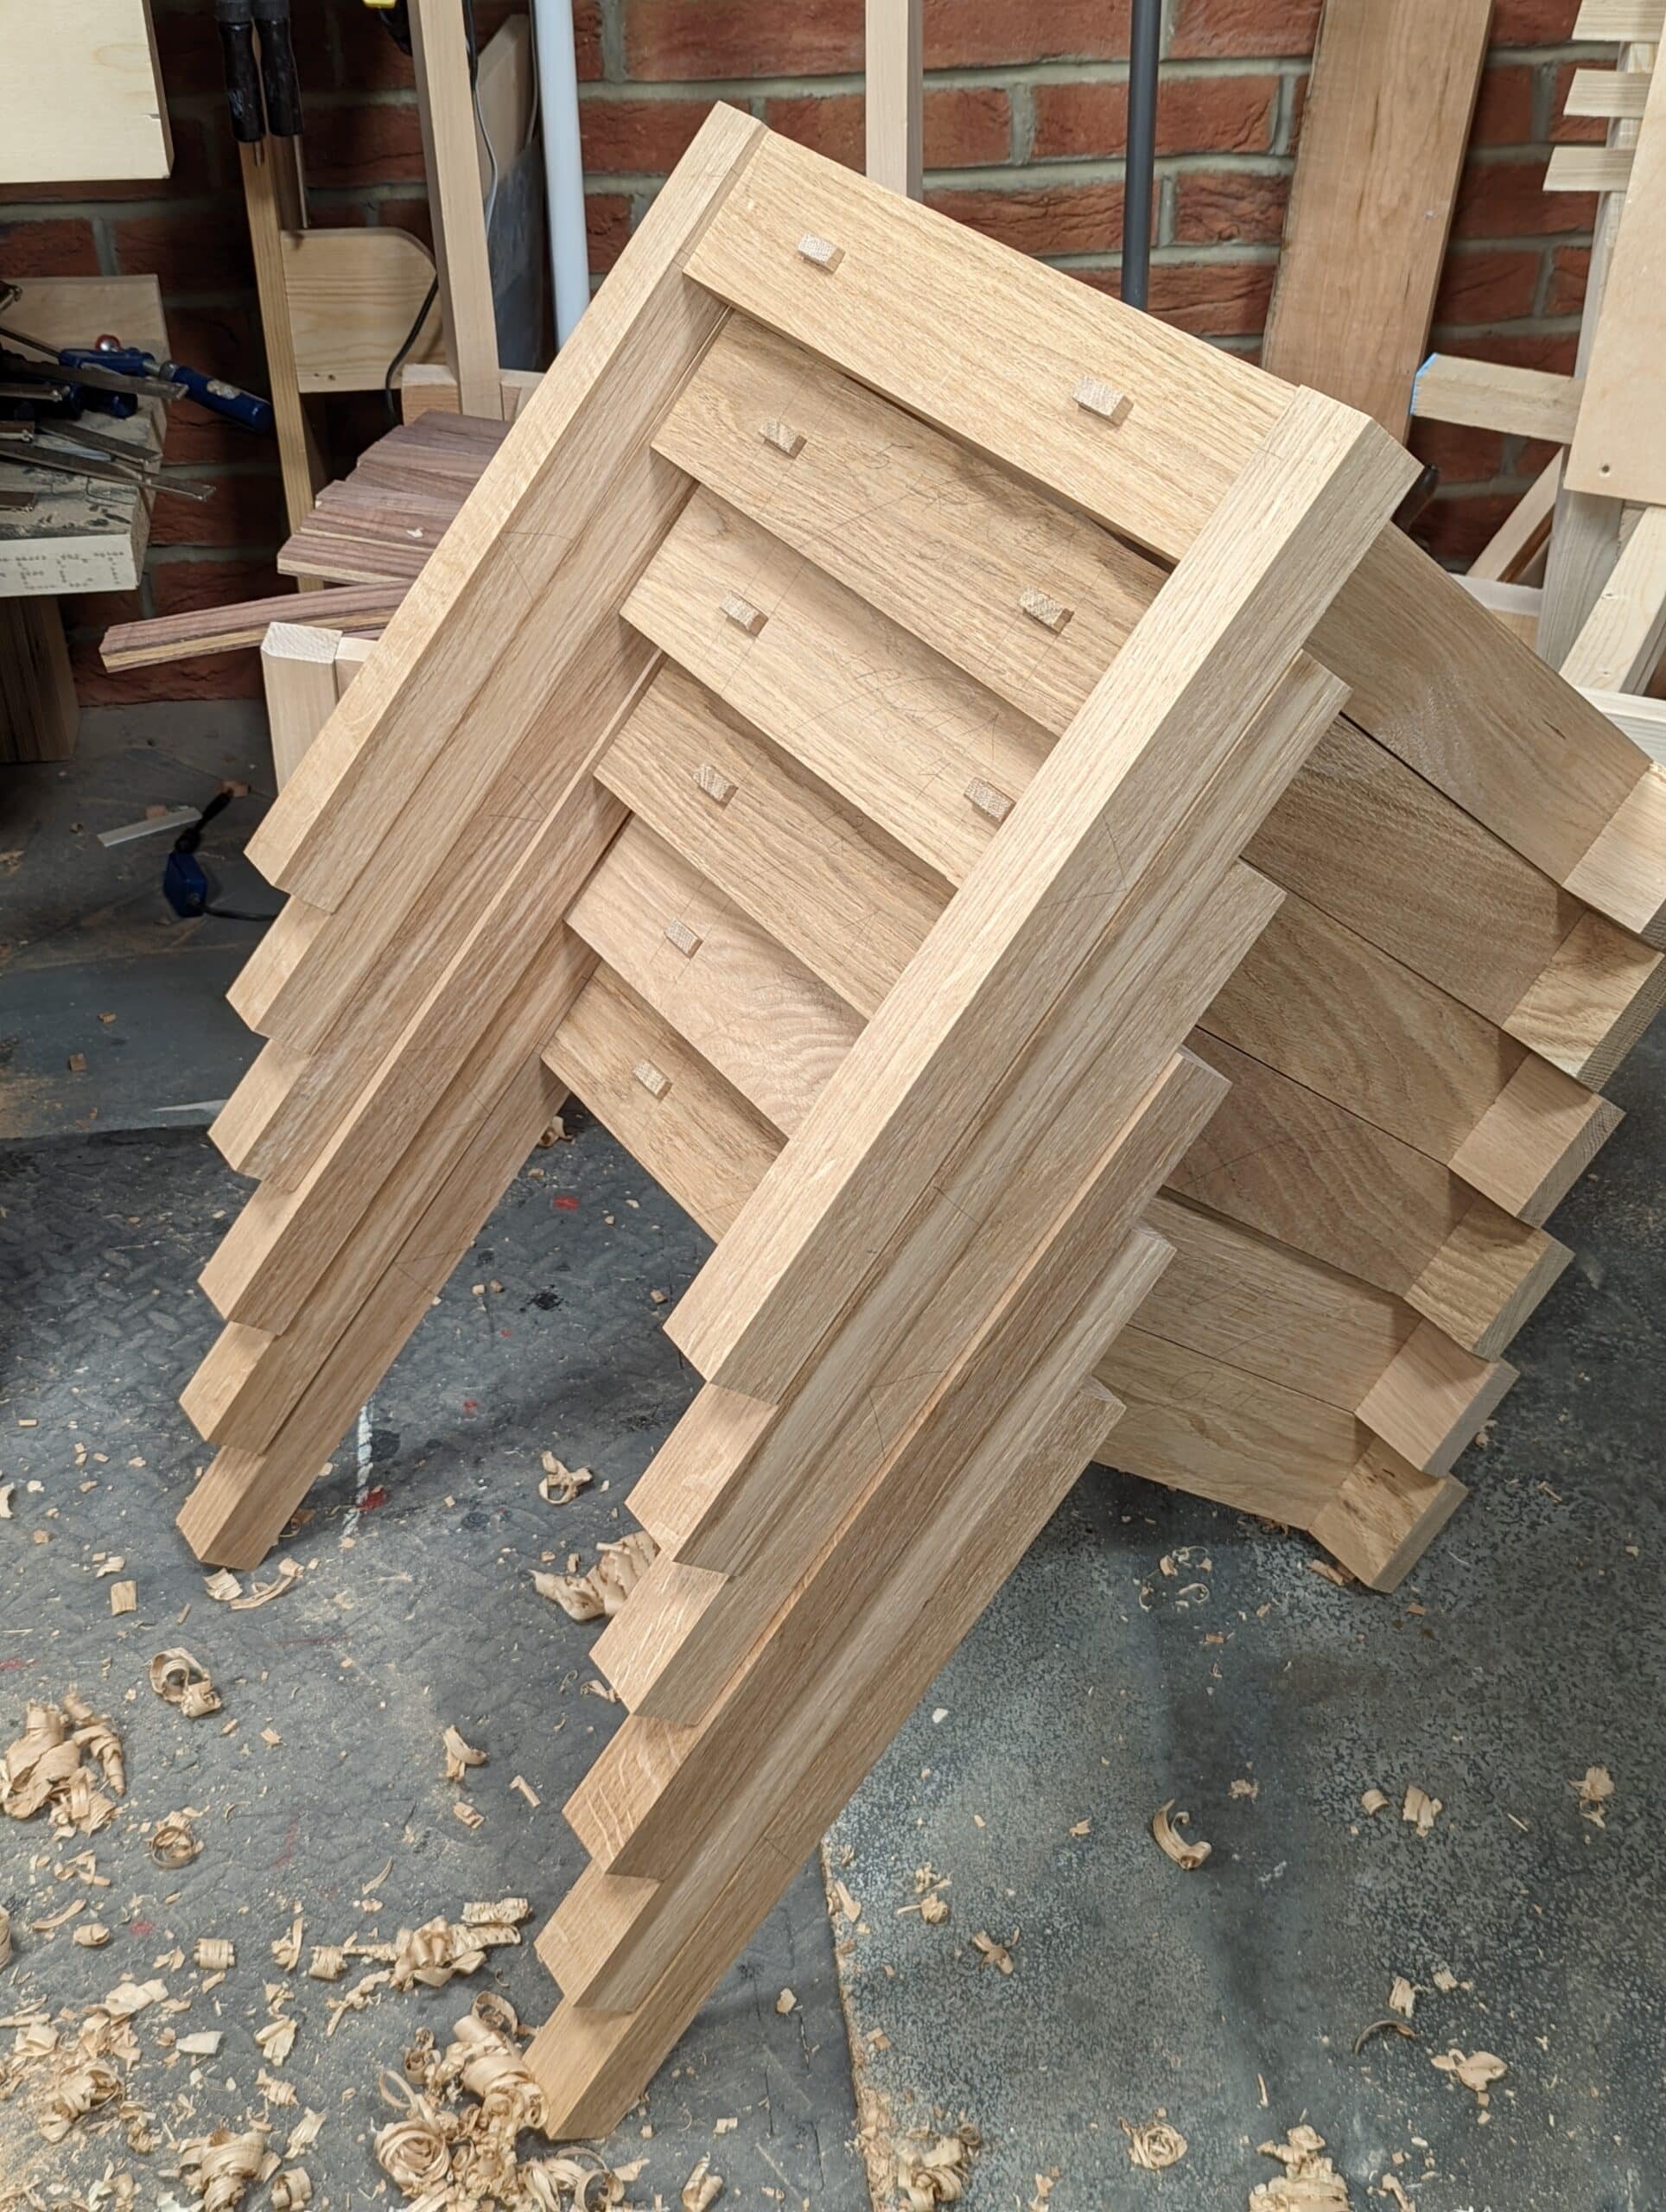
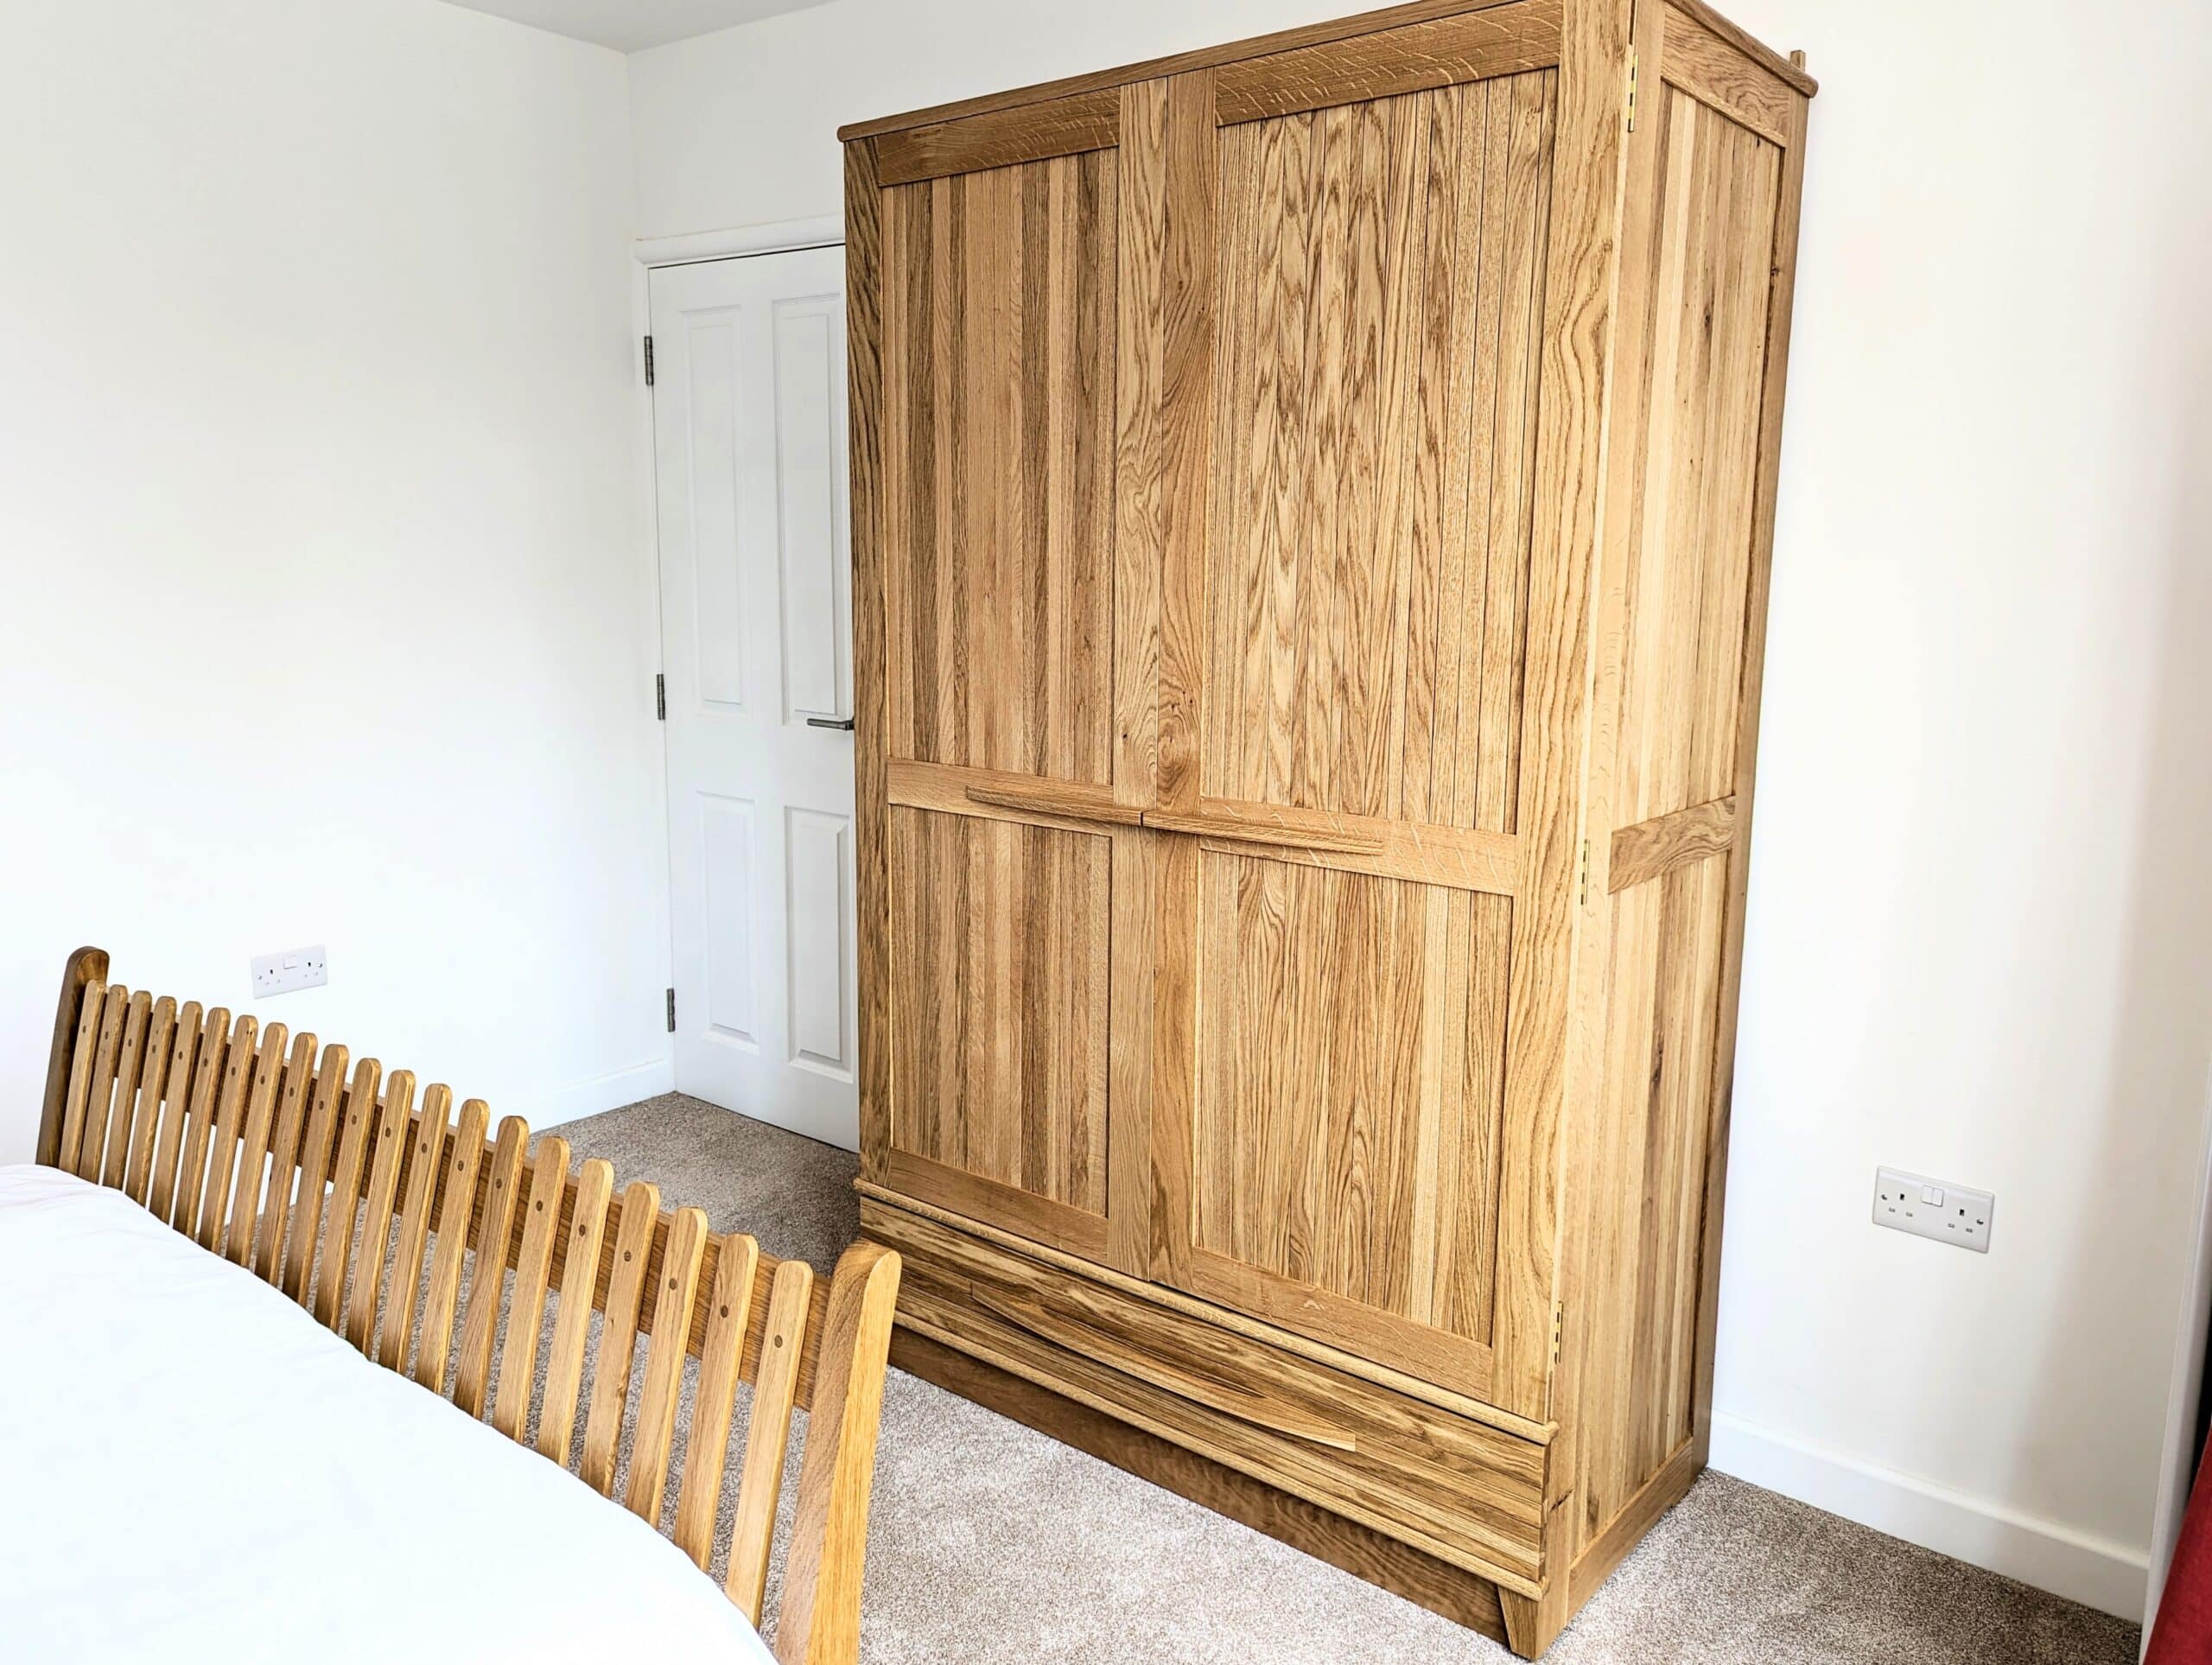
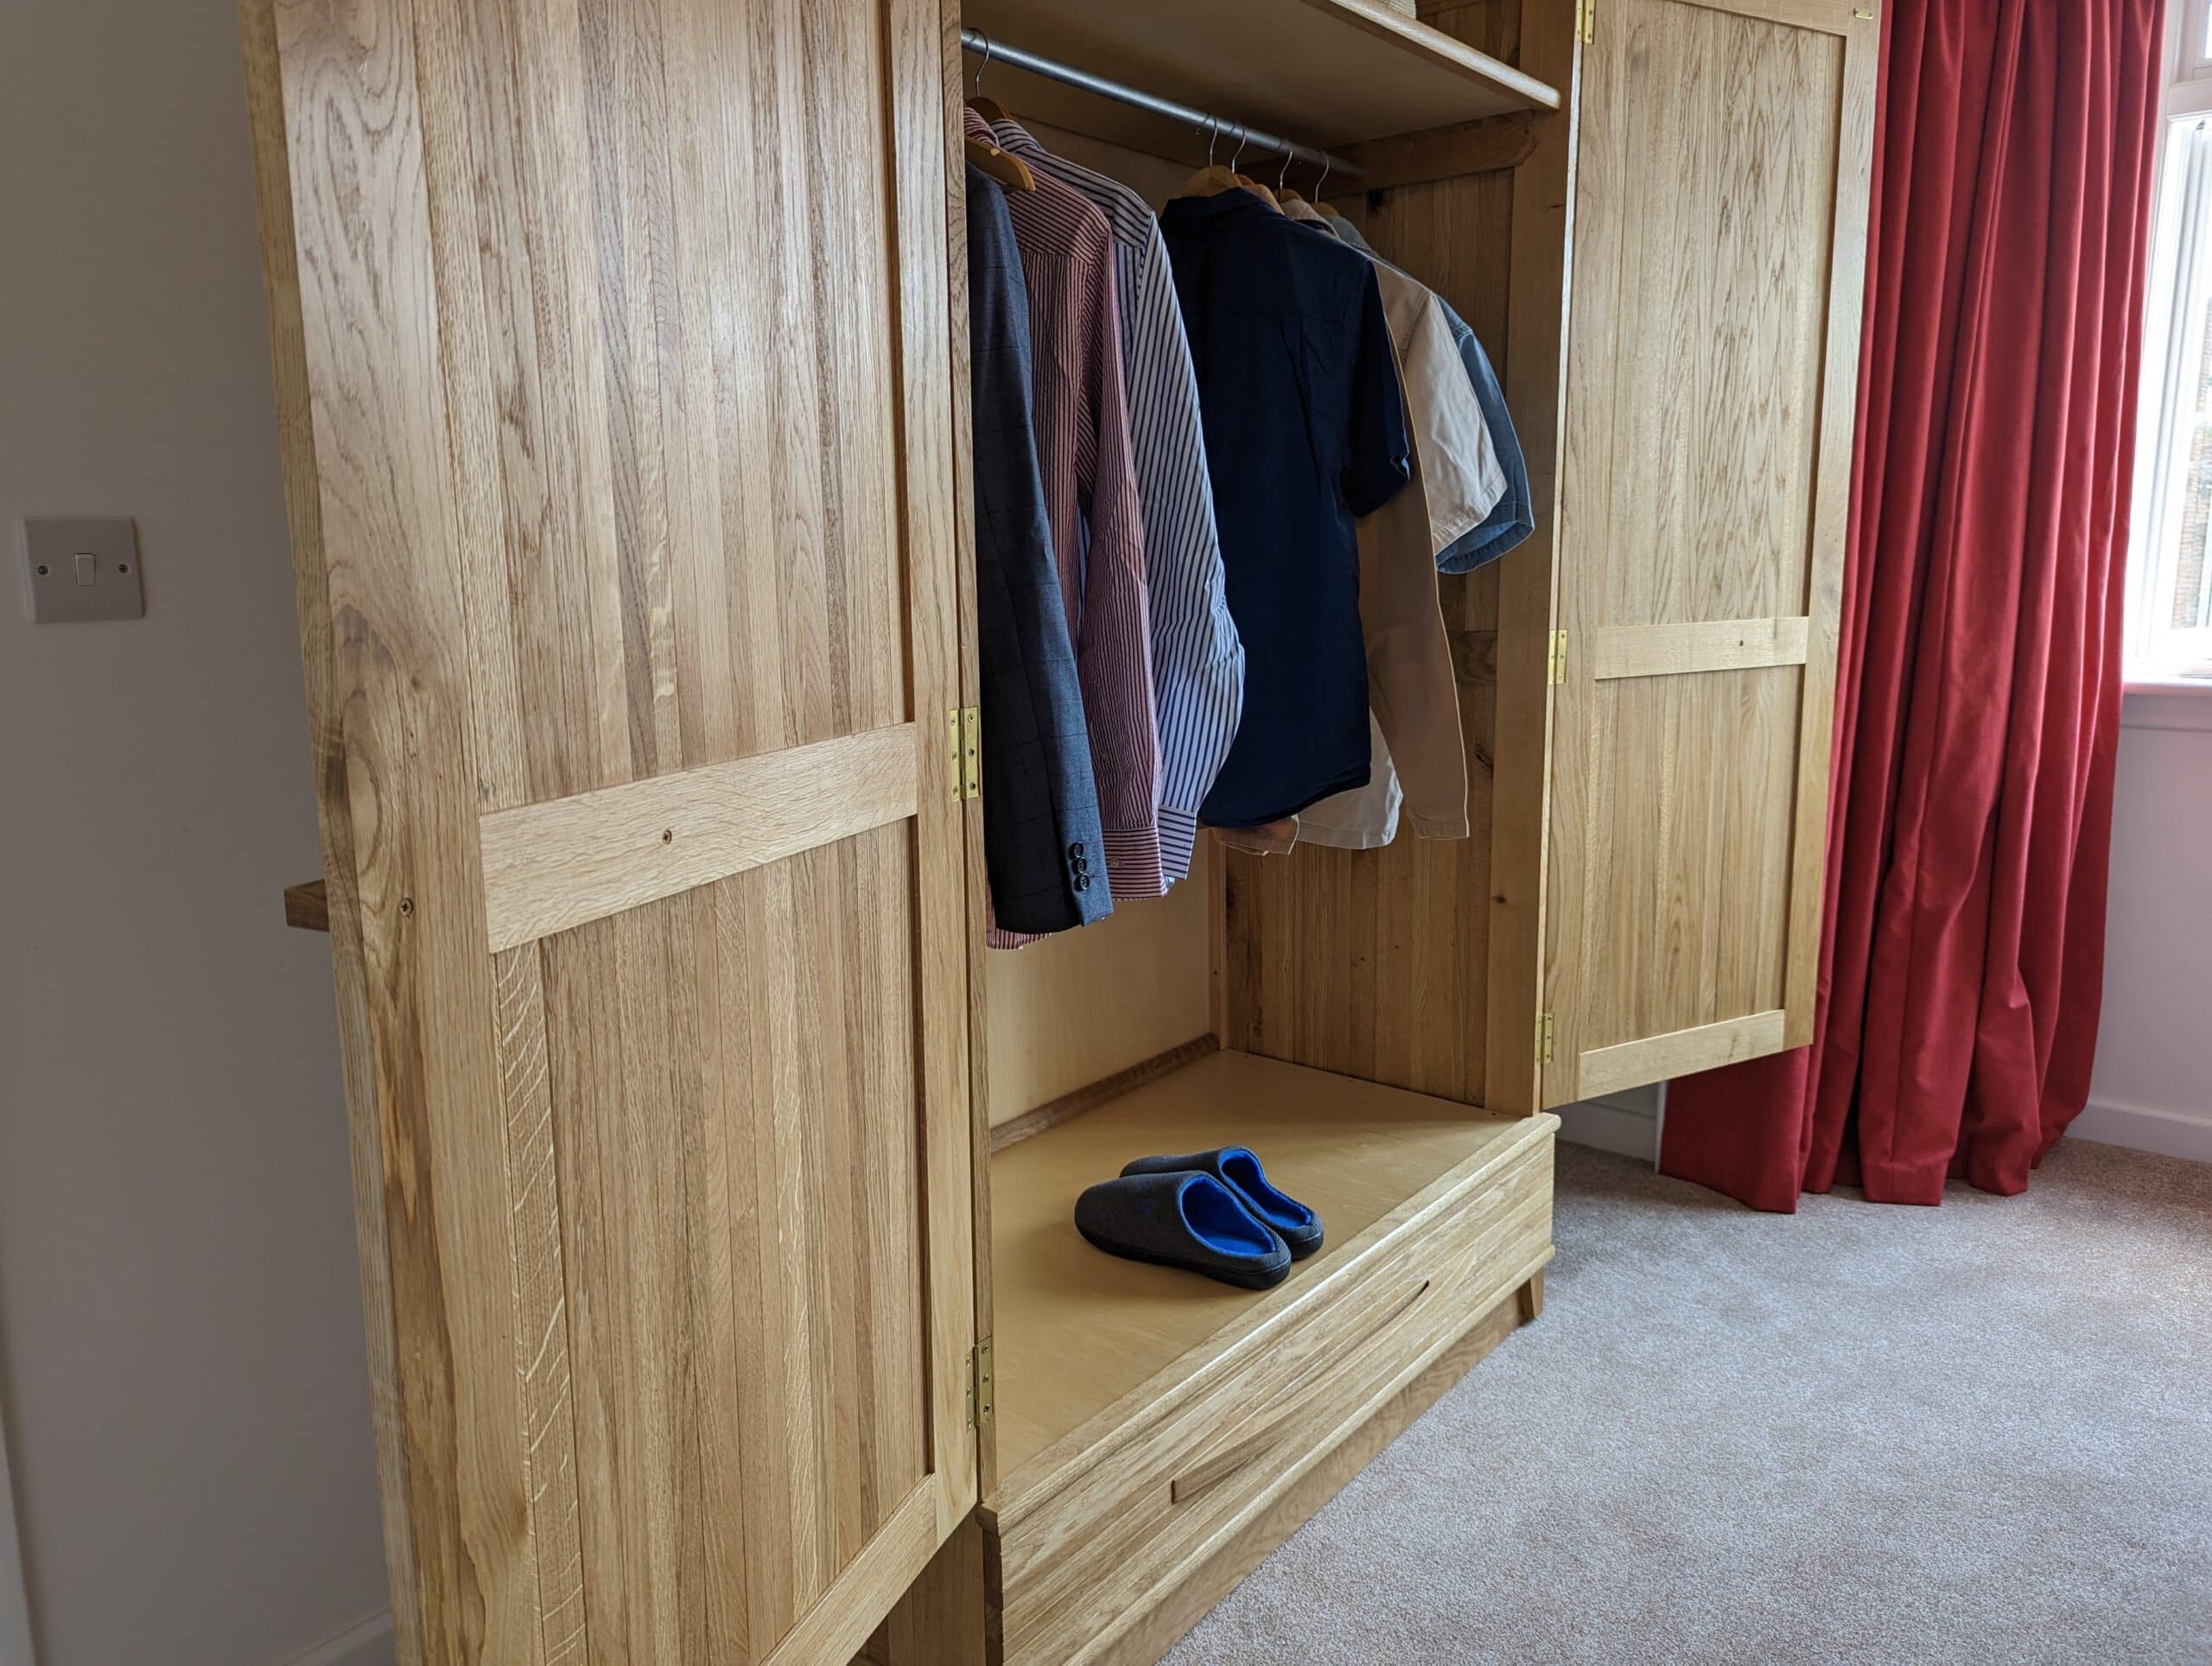
The wardrobe was quite a challenge mostly because of the size but then too it’s a knock-down version arriving when done as a flatpack but of course utterly handmade. I loved it.
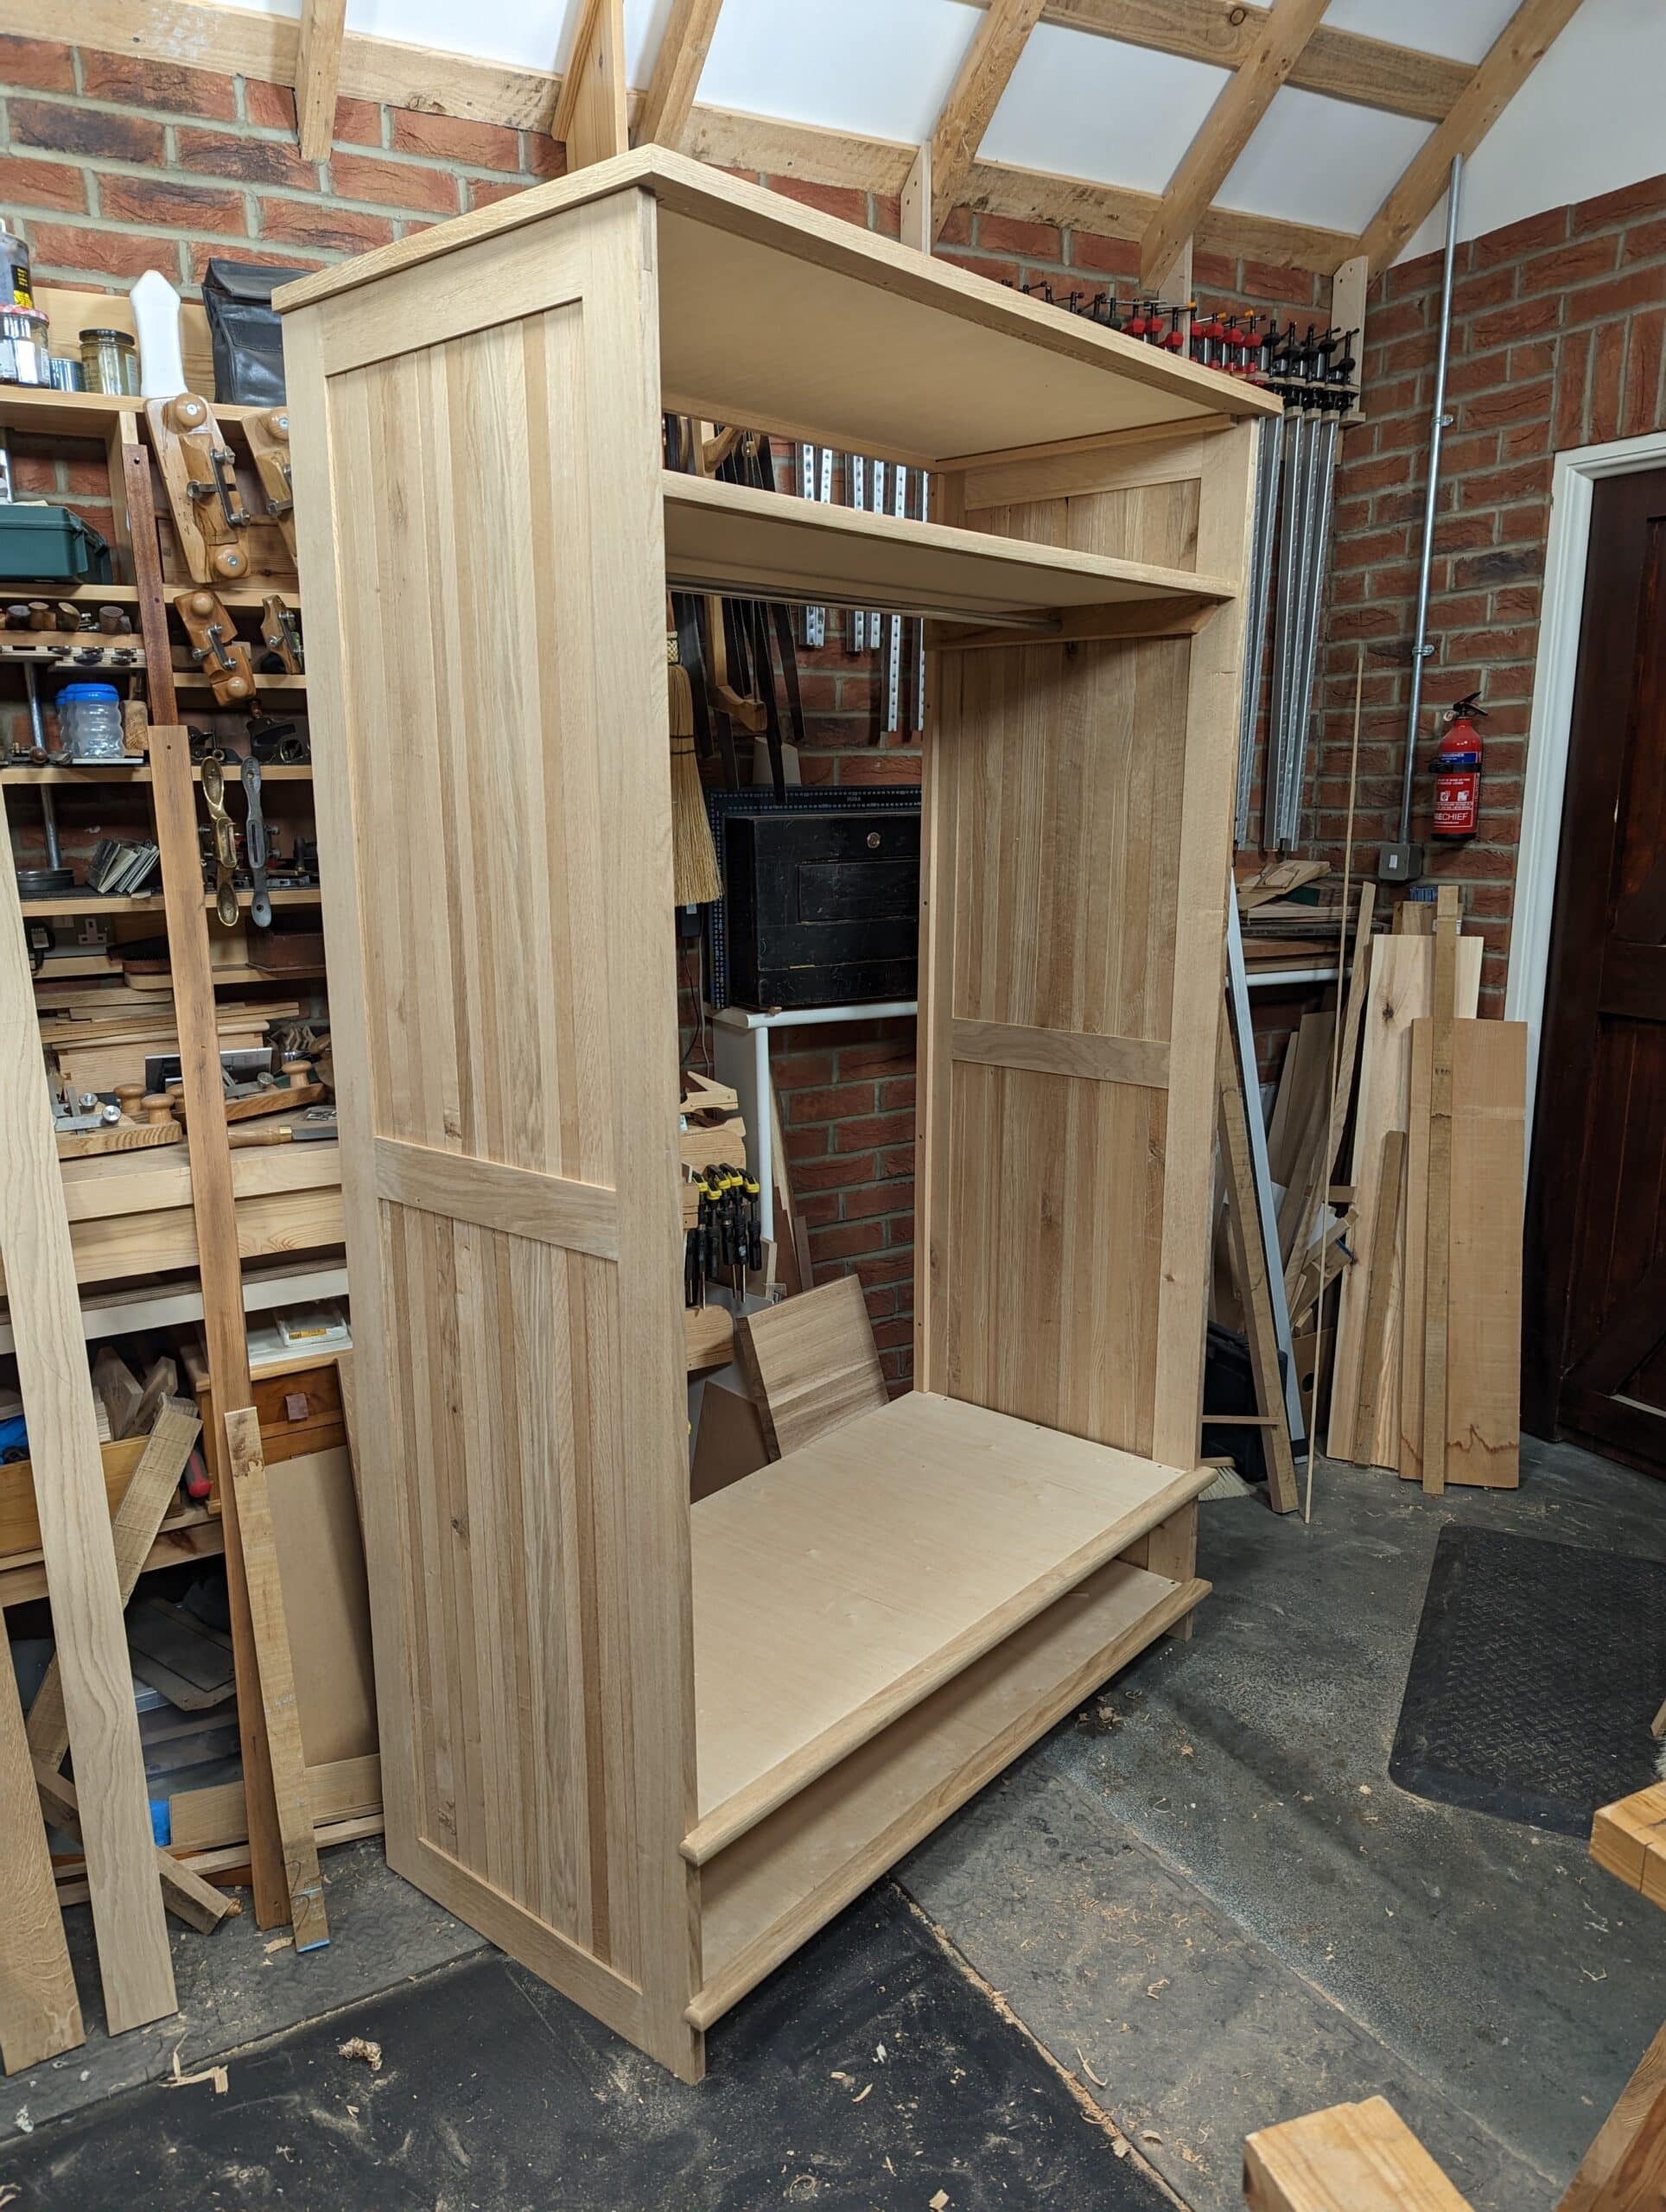
The panelling for the wardrobe was innovative in that I used up dozen of off-cut rippings for the side panels and doors.
The compact chest is one of my favourite pieces.
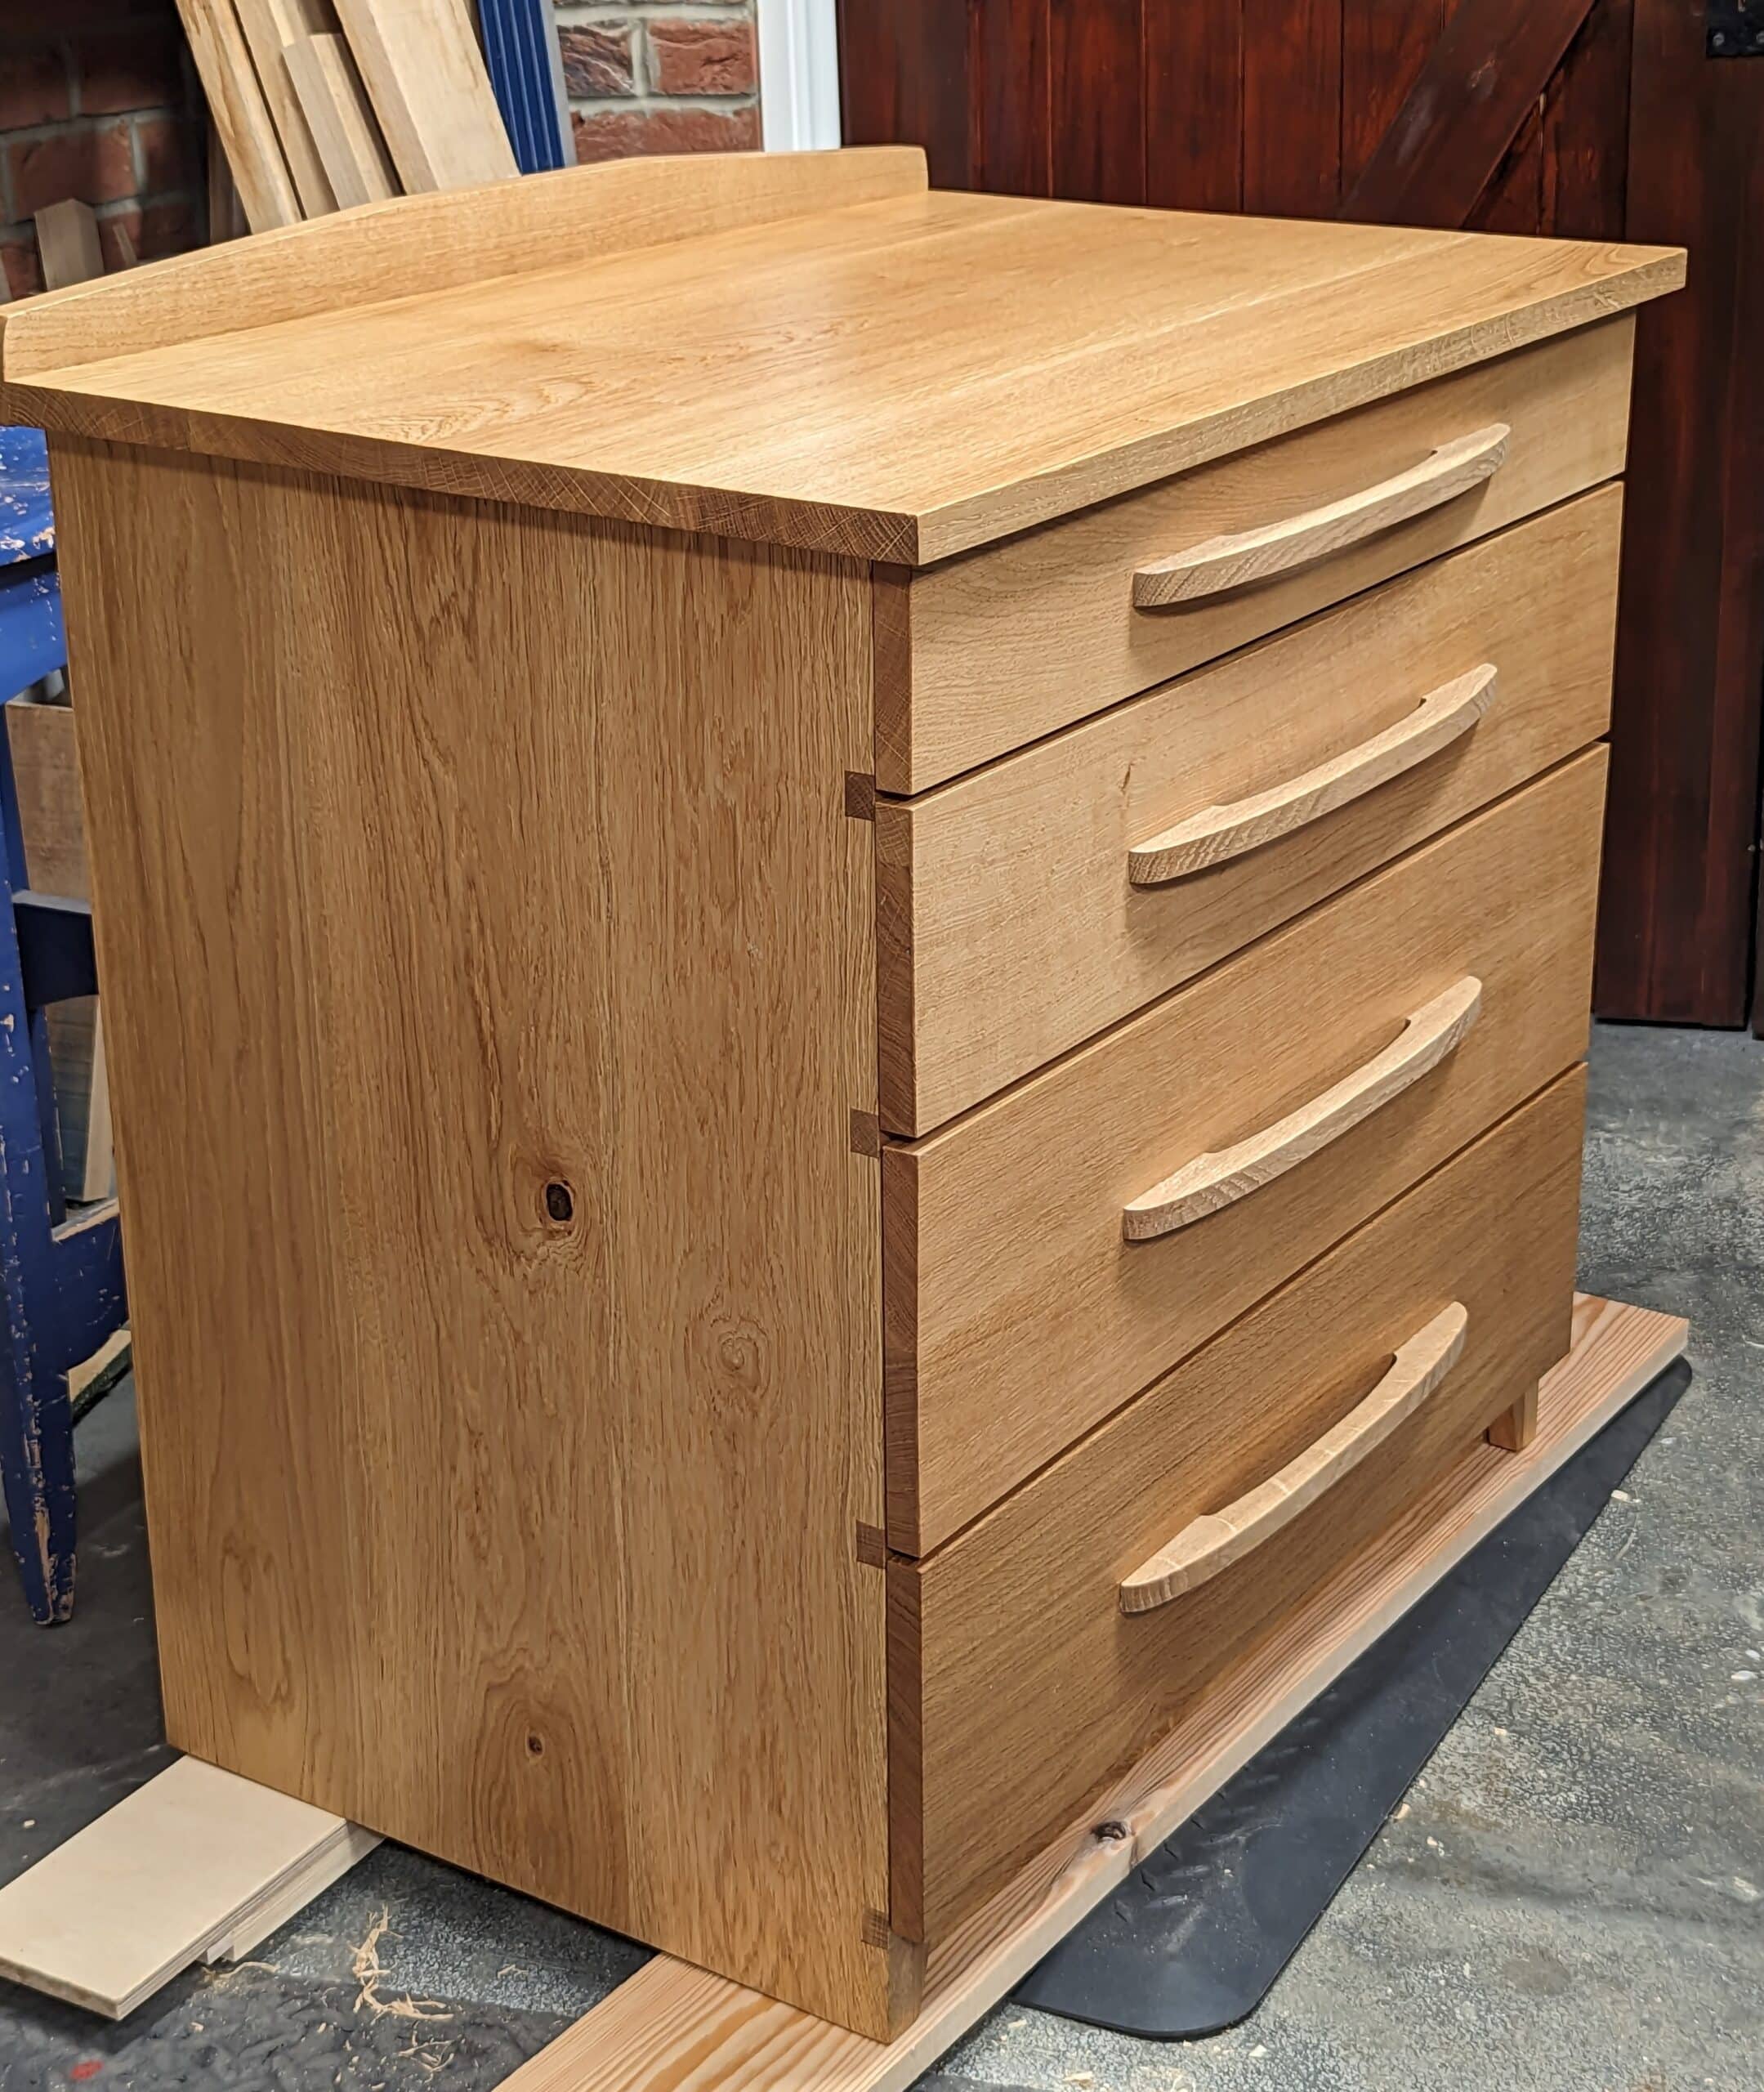
It just came together so well as a design and is easy enough to make too.
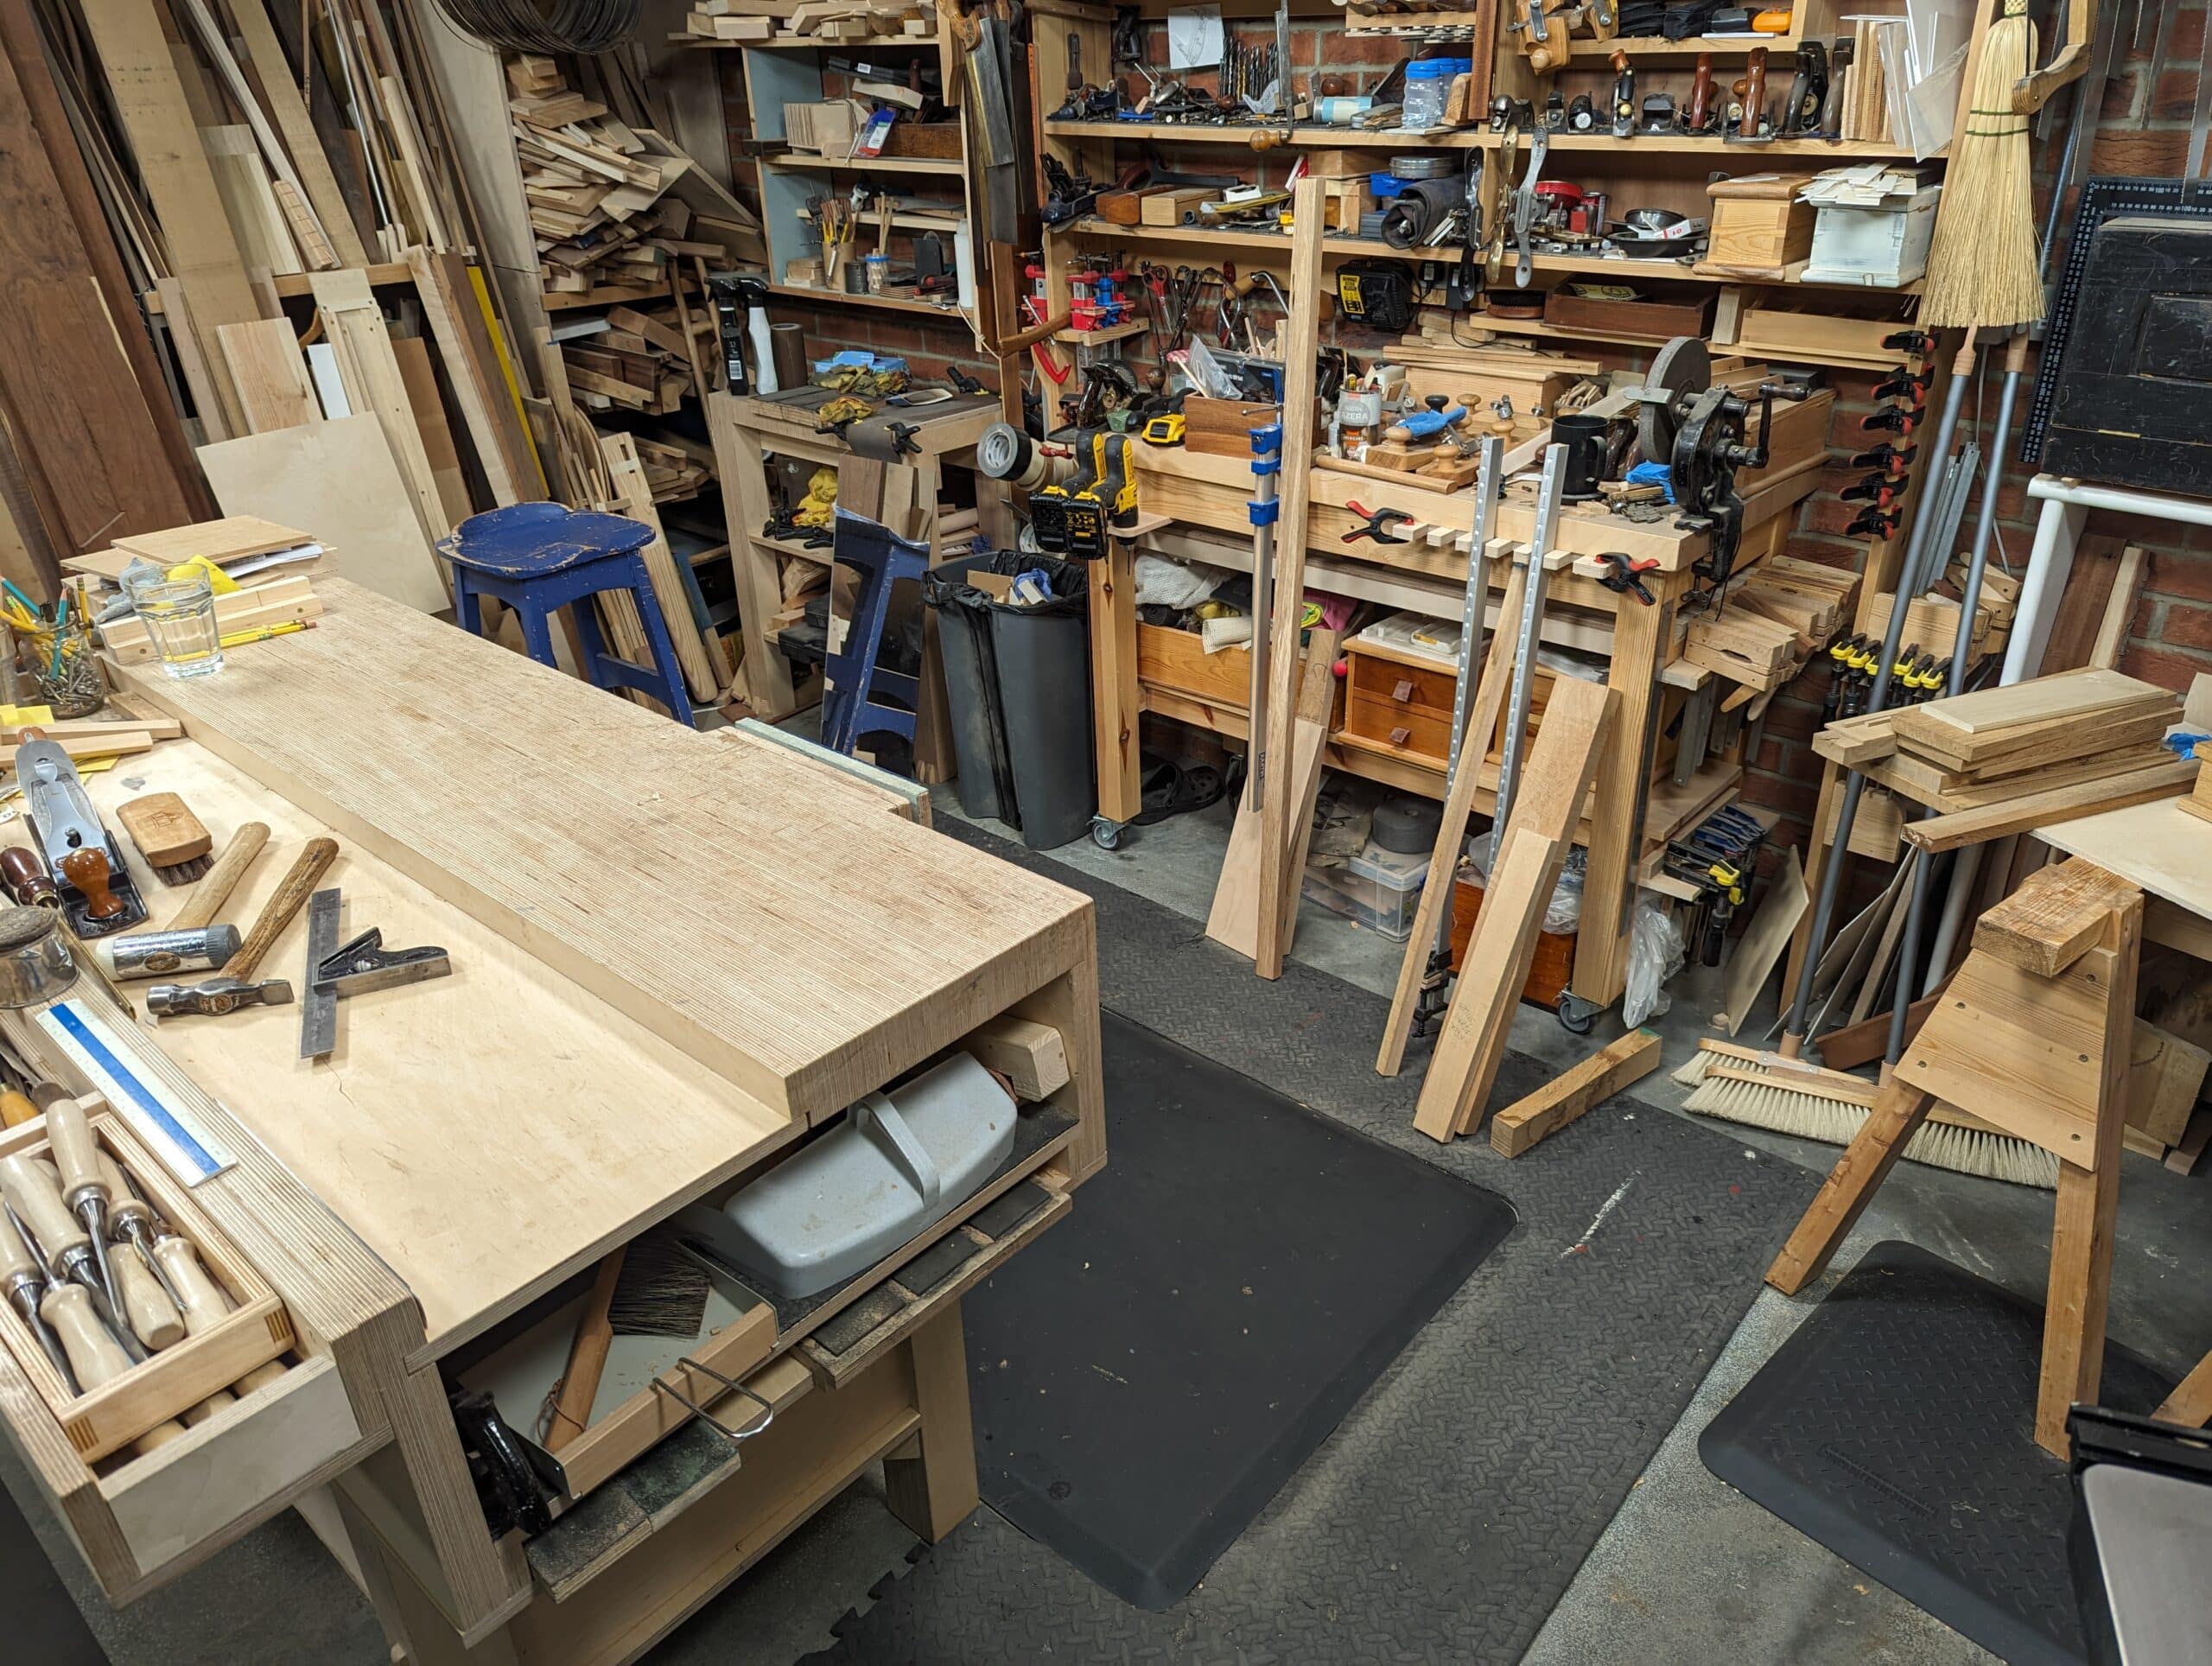
So, if you wondered what I have been up to since Spring 2021 this should fill in the blanks. But here is the most important thing to understand. Every stick and stem was made with these hand tools below and a single machine, a 16″ bandsaw.
Another fact some might not have understood is that they were all made in a single-car garage-sized workspace. Bottom.
Am I boasting? Not at all. I am just showing that this is all you really need to build your own houseful of furniture. Come and join us and we’ll learn together here at sellershome.com

oh my that workshop photo makes me feel so much better about my workspace. LOL
That’s funny. You can take hours to put together an interesting and encouraging blog post and the thing that draws the most attention is the clutter from a full day’s hard working. Oh well!
Paul – it’s the case of we all find comfort in knowing we are not alone in our struggles to be productive and maintain some semblance of order – even the best (you) struggle with the reality of clutter in midst of an active workspace. This was timely for me as I’m facing a serious downsizing from 1,100 sq ft into a garage space in next few months. All I know for sure is that my Paul Sellers workbench and one of my bandsaws will be going with me. Been following you since 2011 and met you in Fort Worth in 2013. You always brighten my weeks !!
Bill from Corpus Christi (formerly Kerrville)
Thanks Bill. And thank you for such positivity and support through the years. I have just spent some time on my biography manuscript and the book yet to be. Already it is quite a promising tome. I just apent some weeks on the Hill Country chapter in Reagan Wells, Leakey and the stretches between different points North, South, East and West. This was my favourite period I think. A period of massive change. I am hoping to be back there soon to map, draw and photograph this section for the book. Perhaps a three week stint there will do it as a vacation too. I’m looking forward to pulling that off in the next twelve months maybe.
I’m guessing that will be an awesome time for you – maybe even a new pair of shoes or two in SA – you know to pick your time if you can based upon weather – our heat index in Corpus Christi has been hovering 115-116 lately and well over 100 in Kerrville – can not wait for your autobiography !!
you’r not alone ! 😉
You are a constant source of inspiration to me. I have been following you since 2012 and still today you are the only person I continue to follow and I Always refer to when I have a problem or the slightest doubt. I think that thousands and thousands of other people think so. Thanks for being there and continue to give so much. Happy mid-August Mr. Sellers.
Agree!
A inspiring collection. Great work. Thanks for taking the time to post.
You are an inspiration to me, also, since 2016. I keep my tools sharp just because of what you have taught me. It the photo of your kitchen/dinning room, I do not see a toe-hole in the island or the cabinets. Am I deceived by the photo? Or, is this temporary. There appears to be a toe-hole in a subsequent photo. Thanks for all you have taught me.
I know that you must get a lot of comments that we don’t even see that deride your hand tool methods as arcane or somehow imply you’re a Luddite. But to deride machine made joints as fake is not being helpful to win people to your methods. My brother has burned up his electric powered router making dovetails. He would be hurt and offended if I told him his furniture is really fake and he should make them (like me ) by hand to make his furniture real and authentic.
After all it’s all about making items out of wood and I think we all benefit when people are doing something useful and it makes them happy.
You are right, Tom. I apologise. They are not fake in any way.
Fake? In a legal context or a physical one, of course they are not fake. One level up, in the sense of useful objects which make life better for many people, they are not fake at all. It would be like calling fast food ‘fake food’. It is not fake at all, but home cooked food is a whole other thing! So is an artisan made piece of furniture. Yes, in the context of crafting furniture, feeling the tool as an extention of the hand, interacting with the piece of wood, making a joint, then looking at it sometimes in awe – yes, here I would call machined joints fake. And I don’t think this is offensive in anyway to anyone.
Thanks Paul. I fondly recall watching those videos you did on YouTube showing the three fundamental joints (dovetail, mortise & tenon, and housing dado). I’ve thought about this for years actually and agree that really, those are the three joints. I think other joints are just derivatives of those. Can you think of any other joint types that are truly different? For example, a bridle joint, is really just a mortise and tenon with one wall of the tenon removed. Sliding (with or without taper) dovetails just a derivative of a housing dado. Maybe a scraf joint?
I agree about the fundamental tools. It really is amazing what can be done with a small set of tools. I’ve watched the 1960’s Dick Proenneke videos in which he built a log cabin in remote Alaska. He also had a small set of tools and to save weight and space made many of the handles on site.
typo above by me – mean to say for bridle joint that it is a derivative of mortise and tenon in which one side of the mortise is removed.
Wow
Such an eloquently written post, to complete insanely stunning pieces. As is the case every single time I happen across one of your videos, instructions, or written words, I’m incredibly fortunate for all you share Paul. To a 2nd year amateur woodworker, you have been a huge inspiration. Thank you for taking the time to publish this blog post. Hell, thank you for all you do for us aspiring makers. Please take care sir, & have yourself a kickass week!
I feel that I need to come to the defence of Paul with his latest blog. His wisdom and teachings are valued by me and with all that he has written about whether it’s in book form, youtube, Facebook etc, I don’t think a monetary value could be placed on his teachings, passion, enthusiasm and decades of experience.
The reason I converted from machines to hand tools is that I found his simple way of getting his message across was just what I was looking for.
Paul, well done and please keep up your good work. I check your website on a daily basis.
What do you do with all the prototypes you make after you get to the finished article , do you use them, pass them on or recycle the timber into something else. Regards Paul.
All of the above Paul. We’ve archived the pre sellers’ home versions along with the final products until we decide where everything will end up when I am gone.
Question
the backpanel of the wardrobe is in one piece.
That is of course very good to prevent left-right wobble.
But it is less “flat-packish” than a panel in two parts. How would you do with a two parts panel to ensure stability?
One can of course use diagonal braces. Any other solution?
I did not know if it would go up the stairs around the bend and the stair posts and was prepared to rip it in two and use a ripping of the same plywood to rejoin with screws through the back.
I’ve assembled more than enough flat-packed furniture in my day (at 19 I started working in a furniture shop, my first job), so I do have a bit of experience here. Typically for Tvilum-Scanbirch (danish manufacturer of flat-packed furniture) and other wardrobes, was a particle board construction with pressed fibre board backpanels. Usually the back panels were half the width of each section. The standard were 50cm width per door, typically a 3-door variant was arranged in a 2+1 configuration with one dividing wall separating the one door. The back panels for the two door “bay” were secured by a plastic strip with a groove on each side. A dado along the back edge of the sides and top panel, housed the back panels, which were nailed to the bottom panel. On the more expensive versions, the back panel was placed in a rabbet and nailed around the perimeter. Those cabinets became incredibly stiff when the nails were in!
On the cheaper models, small triangular inserts with screws secured the back panel and stiffened the cabinet to some degree.
I would not hesitate to build a cabinet or a wardrobe with split back panels, but I would make a rabbet for them and screw them in place. Two thin strips of wood glued to one panel would replace the plastic strip and make a “tongue and groove” sort of joint, and make the seam look nice.
Just one panel screwed to the top, side and bottom would make for a VERY sturdy construction indeed. It does not take much.
Besides, wardrobes tend to stay where they are put. 🙂
I love the small corner table with the coasters placed on top like a little house. It looks fantastic (as do all the other pieces of course). Such a good idea to re-orientate the legs. I guess that’s what comes of just trying and doing different things over a number of years.
One question. What size is that fishtail gouge in your tools’ picture? What would you use something like that for? It’s the one tool I don’t own!
From the picture it looks like a number 7 gouge in 30 or 35mm. As the handle says Austria I would guess it’s a HMG brand chisel gouge. Paul can correct me if I’m wrong.
Don B
A carving tool with the label Austria would probably be Stubai, I would guess.
It’s a #7 sweep Stubai 38mm 1 1/2″. I have owned this one for years and it takes and holds a good edge.
I so appreciate the “photo dump” of your work. Inspiring to say the least. If I may, I have a quick question. I have been asked to make some picture frames for some very important works of art. (Important to the family members, priceless to them). I really like the end grain frames you made. I was just wondering about the miters. Will the orientation of the endgrain/longrain cause the miters to separate? What have you seen over the years? Thank you.
I see no reason for any separation in the laminations nor should there be any cracking. That said, these are thick facings like veneers and not solid wood. I make a mortise and tenoned frame and then laminate the 1/16″ to 1/8″ facings to the face of the frame.
Amazing. And such a variety of woods colours and contrasts. Can I ask a question regarding your proto types in pine. Cost I am sure is a consideration. For chairs and especially your rocking chairs is pine strong enough for day to day use or should one stick to the hard woods?
Pines like European redwood or Scotts pine and then too spruce have a good strength to weight ratio. If there is any weakness it is more that the wood is soft and will ding and dent more easily than more dense-grained hardwoods.
Brilliant!!!!
How do you not have a HUUUGE ego?
I’d be bragging and people would hate me for it hahaha.
Seriously, every darn piece is a masterpiece. I’ve been to art museums with bananas taped to walls as “art”. This is real art.
Hi Paul. I’m working my way through a number of your projects since first building your bench 3 years ago. I’ve just made one of your frames with veneer in cherry and sapele for the bathroom. I like it so much I’m going to make another larger one to go in the living room – perhaps 3’ by 2’. However it’s going to be on the chimney breast over a log burner and I’m now wondering about what wood would be best for the frame structure and veneer to cope with the heat variations? I was planning to make the frame from ash and to have long grain oak and black walnut for the veneer – cut to about 1/8” thick. Will that be stable, or would you advise me to think about different woods to withstand the heat?
Thanks, Alan
Robert Atlanta
Just finished my first mortise/tenon exercise using the Paul Sellers technique.
Feeling pretty good…Pre-TEE good about it. Then I checked emails and found Paul Sellers (Professor / Doctor of Woodworking) ‘Since March 2021 I’ve made’ article. Reality check…my 1 M&T joint did NOT take 15 minutes…15 minutes X 4. This blog is inspirational eye candy of what can be accomplished with good (sharp!) tools, patience, attention to details and PS videos. Thank you Professor for your blogs and videos. BTW your router plane design/hardware is a joy to use. Now it is on to google search PS videos to find out (‘discover’) PS wood finishing products and techniques. TY Sir
Thanks, Paul. I enjoyed this post very much. I’ve been following all the while as you’ve designed and built each piece in this collection, but it is very gratifying to see it all brought together into one post. It’s very motivating. I’m still tooling up but was able to complete two basic woodworking projects with my young children a couple of weeks ago—a simple box, and a mallet made from two large sticks that my boy harvested on his own—and we will treasure that experience for the rest of our lives. We used a combination of new and restored tools all prepped with the aid of your tutorials. Thanks for showing the way!
Paul
I feel like we are friends because you are so unassuming.
Thank you for inspiring informing, and challenging me in life issues as well as woodworking.
Best regards,
Chuck
Wesley Chapel, FL
Paul, I have enjoyed your post and videos for years and just wanted to say thanks. I’ve gained so much knowledge not only in regards to tools but also in techniques. I get further away from machine work all the time and enjoy it more. For more than a year I have been saying to myself that Paul never shows the most used tool in his shop. Well I was quite surprised that in this article it happened. There it is in the last photo on the right hand side. The most used but never mentioned tool in the shop. The broom. Thanks for the education and the adjusting of my mind set.
best regards from Mississippi
I love reading your work and watching your videos, and your book is constantly being referred to in my shop. Would love to travel to the UK and take a class. Still kicking myself for not talking more with you when I met you at one of the “Woodworking Shows” long ago. Stay healthy and continue to provide inspiration. We all appreciate it.
Well, if it helps, I am unlikely to teach classes again although I will say never say never and it would be more likely that I would teach Stateside than in the UK or Europe I think.
Hi Paul
Do you ship to US the router kit?
Indeed we do. Here is the link to the only website selling our kit.
It has been fabulous watching this collection emerge. Your coffee table design now graces my living room, and I have made a side table of similar design. The dining table is on my to do list, and I do hope the compact chest is next video series.