Handworking Housing Dadoes
After sixty years of working wood you develop your pieces using systems you either designed and developed or you adopt concepts of working as standard practices that make worklife just plain practical. Those that know me and my work know that I developed my mortising guide to guarantee perpendicularity and parallelity twixt inside and outside walls to every mortise hole. For my first 35 years I never used one and that’s because they didn’t exist. Also, from day one in chopping mortises in a bona fide craftsman’s workshop it was expected that the mortise would do all of the above straight off, which of course, it never did for any apprentice but it was the way we learned. What it also did was create a situation where all the men could laugh at your attempts and make you the brunt of theor joking for 20 minutes and you didn’t get an exalted view of your abilities.
It was much later on in life when I saw my student’s mortises with a dog-leg jag in the middle of their mortises or their mortises heading south towards the outside wall of the workpiece that I told myself I needed to do something. Walking across a field in Texas just before a class starting in an hour’s time the idea and solution came to me. It’s one of those things you wobder why it never happened before now. I started running to the shop, literally, pulled out some scraps of oak and the first ever mortise guide came into fruition in time for sixteen students who arrived right on 8 AM. I demonstrated how this particular customised guide worked and mortised a pristine mortise hole with all the ingredients of perfection. Since then I kept a rack of them for my students. I also made a small rack of half a dozen sizes for my own use guaranteeing distances from the corner of a leg or door. Mine are 1/4″, 5/16″, 3/8″, 7/16″, 1/2″, 5/8″ and 3/4″. I have others and the faces of mine are lined with a hard plastic face or plate brass and steel. For even greater variablity I can slip a sheet of paper, card or plastic in between the guide and the wood or if a more permanent one is needed, between one of the other faces and the facing. I have every size I might need. Here is a blog on making them.
Here’s the thing. In that class, where I first introduced the guide, I already knew it would work before I’d even used it myself. Some things obviate their functionality before they are used. Of course, when you are trained without it you become proficient in fast order without using such a thing and that’s because when you are an apprentice you make so many of anything it becomes automatic. Students, on the other hand, are unlikely to have that level of experience-gain in the short term of a week-long course. The students became quite matter-of-fact blase about the guide, treating it as though it had always been there. By the time they had finished making their eight mortise holes for their tables they simply took it for granted which is always the liklihood of most inventions.
Over the years, and on the pieces I make, I often use unmentioned and unnamed systems I don’t always draw attention to or discuss because, well, I just want/need to get on and not break the flow of things. Some methods I use may be more obvious than others and others not at all. Some I trust to others and some not. Why? Well, when things become common they often end up just being taken for granted as entitlement and are treated commonly. In my artwork I have developed a range of techniques Iuse to achieve certain effects with my various pencils. This is part of me and my specific style of drawing. I think everyone is entitled to own the pencil, but no one is entitled to a technique. Why? Because it identifies me and my work. In such cases, when a style becomes your owned style through use it often works as your signature. Someone wrote me recently and said, “As soon as I saw the drawing I identified it as an original Paul Sellers.”
How does this work in woodworking? We can now see how the mortise guide originated with me and it came withgood reason at the time. I passed it on and other’s use it in teaching circles without crediting me or even aknowledging it was my design. It’s become commonly used in many woodworking circles and especially so in schools whether online or in hands-on workshops. The stepdown on my dovetailing makes for impeccable alignment for marking around them on the mating piece to create the tail recesses. In hand woodworking it’s these small nudges that remove much of the guesswork at different points of alignment and by things like this the tails fit perfectly every time. I use this exclusively for a half-lap (blind) dovetailing but then it’s equally beneficial for the common or through dovetail counterpart. What about the vertical alignment guide to plane end grain square ends in a heartbeat and yet have the vise to lock everything off and make planing a very normal thing? The opposition to that didn’t come from those that used regular shooting boards, just those who didn’t like change.
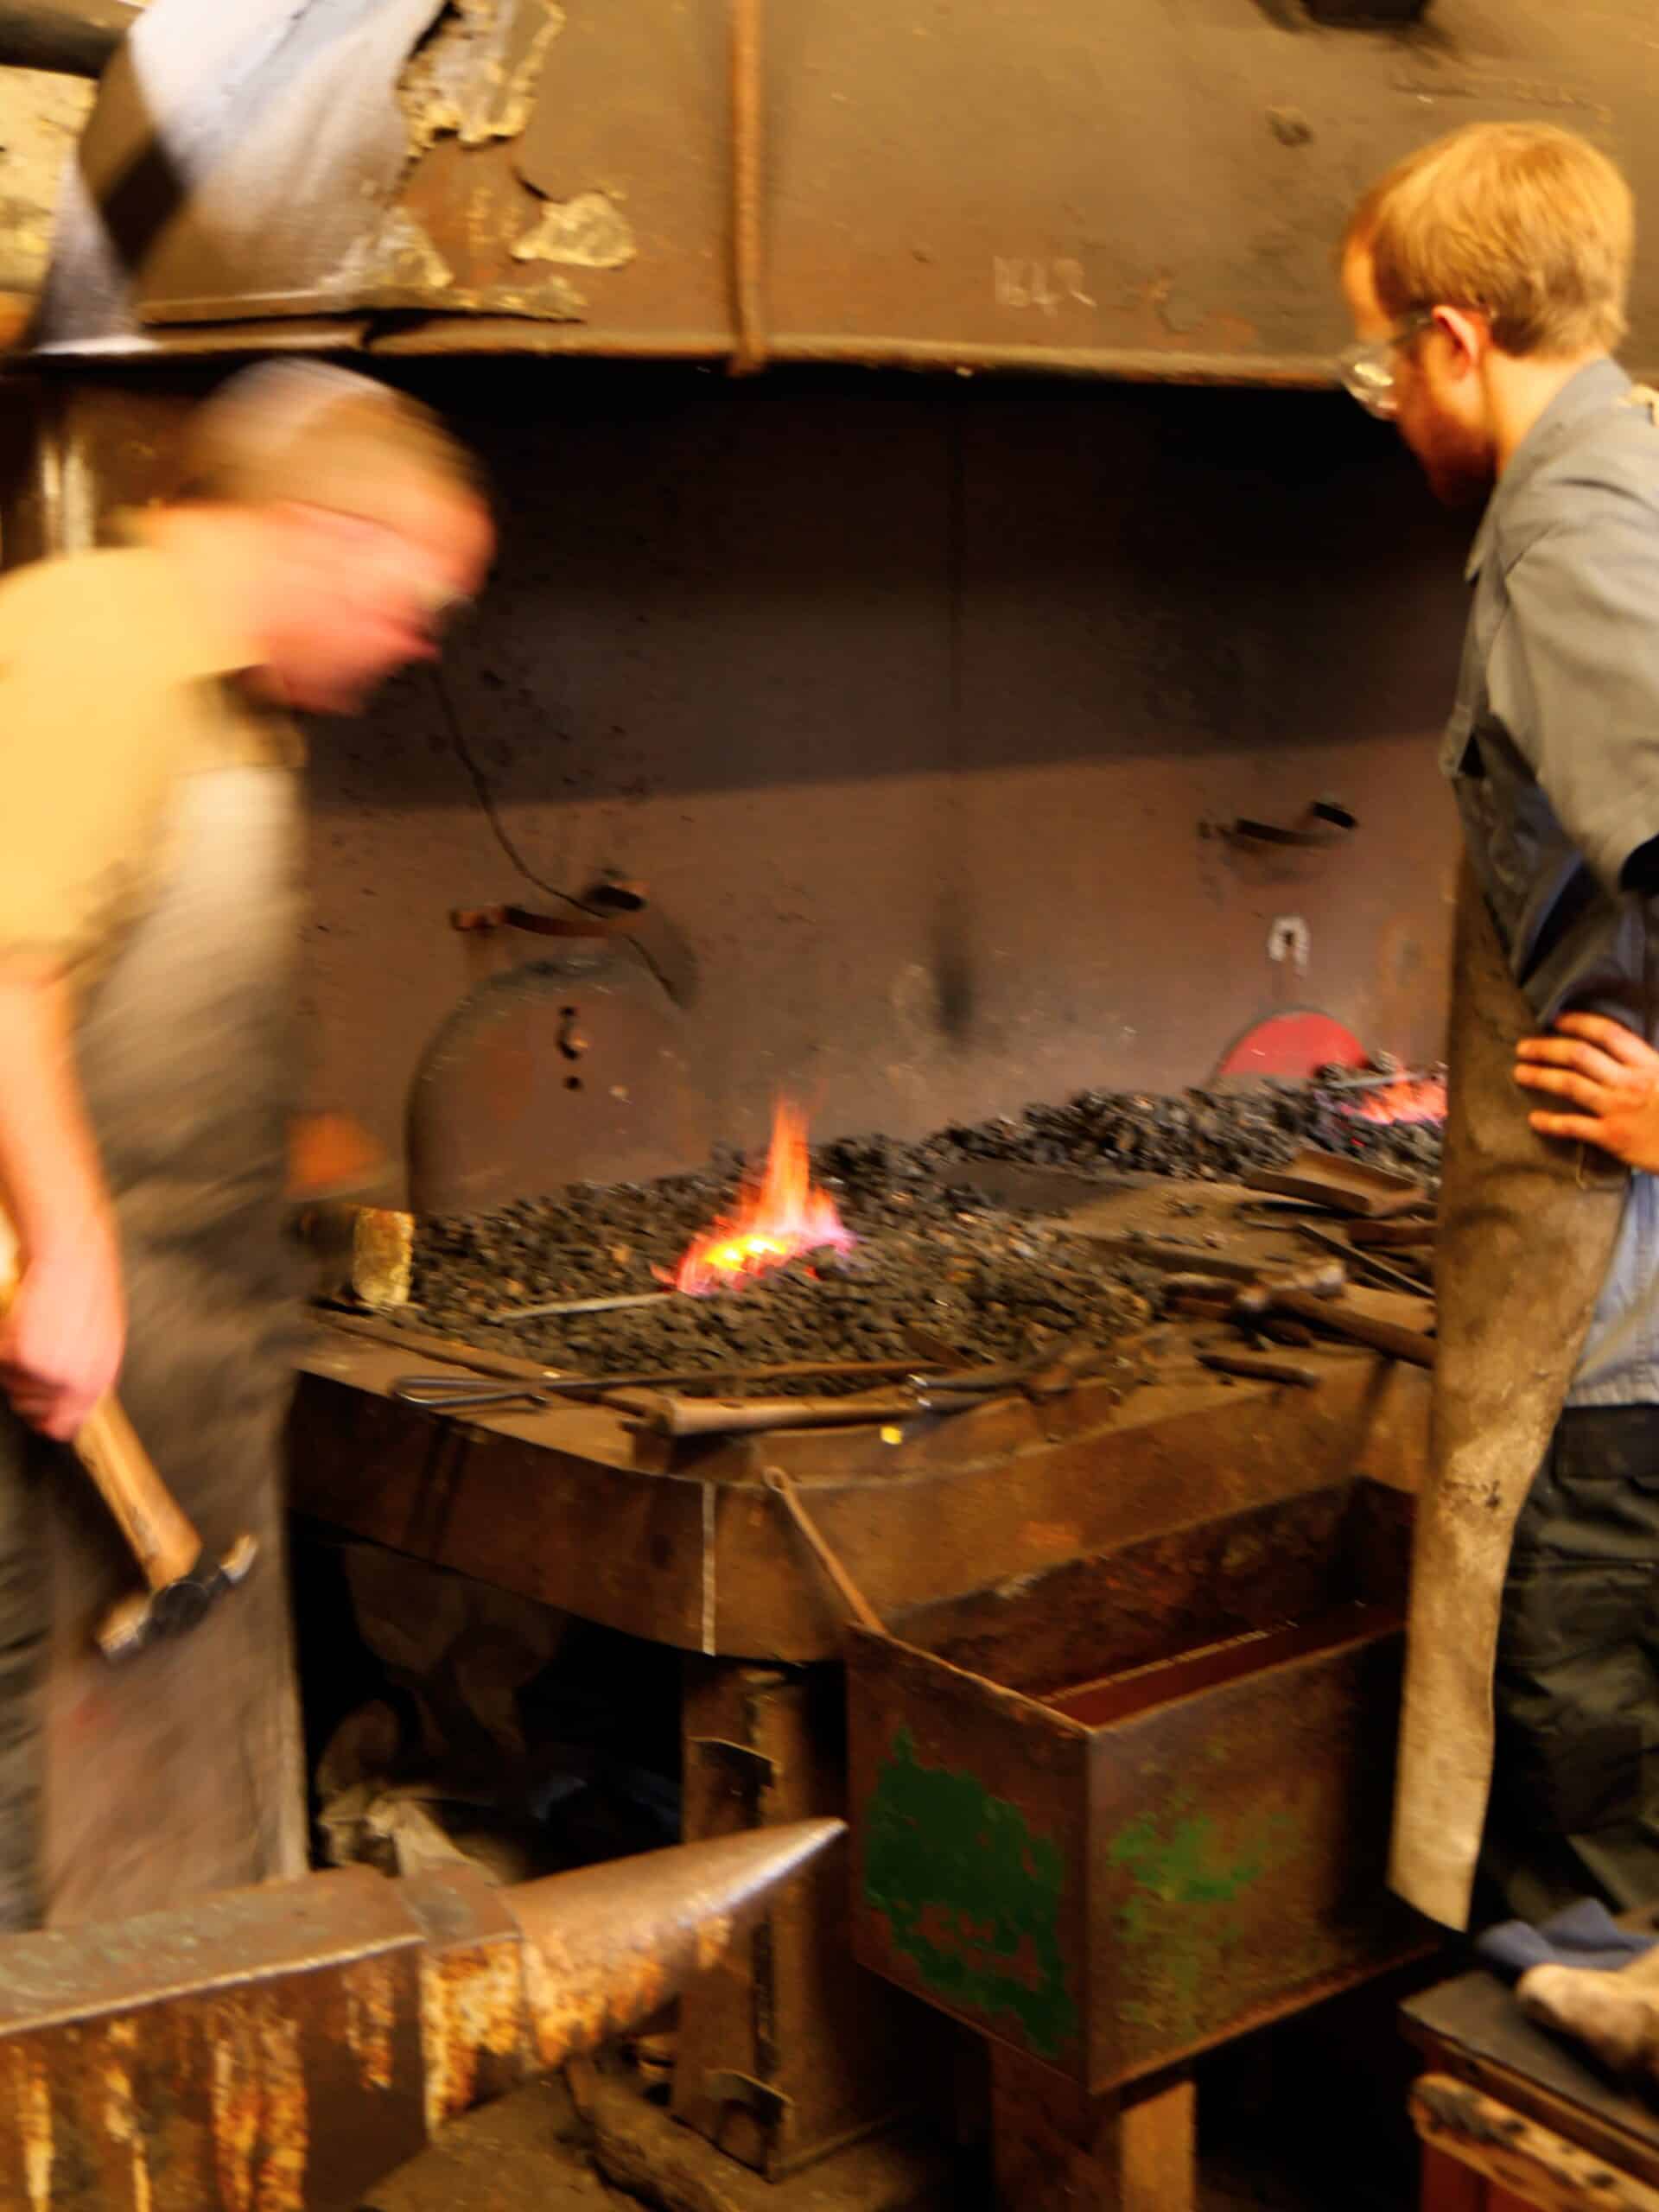
In my world of undigitised making the engineers I will forever admire the most are the smiths of old hammering out their metals and uniting their components with a forge weld using borax, swift, and deliberate, hammer blows to send two metals into oneness and less so the finger-tapping key strokes hitting send with a single digit and delivering the work to CNC machines somewhere esle in the world. Now, I want us to be careful in our interpretation of what I’m saying. Experience tells me that the two ways of knowing are not nor can they ever be one and the same. Experiential learning in the touch, taste, smell, hearing and seeing three dimensionally can never be the same as the reading of it and the limited digitising of it. You cannot see heat in the way I speak of even if you can see subtle colour changes in video nor can you hear the ultra-subtle compression of fibrous materials or feel them under your fingertips without physically touching. I hope that this explains things. We in the art of making learn best in the actual making and drastically less by reading.
In making my bookcase for an upcoming YouTube video I used a system I find helpful because I don’t use a thickness planer to true up my wood. For the 80% of my audience choosing hand tools and the other percentage that never used a thickness planer nor ever saw one in use, a thickness planer and jointer, often one and the same, the planing machine takes the roughsawn wood and trues up the initial registration face and then para-planes it to thickness with complete intolerance of variability. Done well, machine planing wood surface-planes the first, wide face of the wood dead flat and straight; it’s this process that removes any undulation in the wood and includes all twist, cup and bow from the wood. We call this surface planing, surfacing and jointing and rely on the two halves of the planer bed to suspend the wood as we pass it over the cutterhead. The cutterhead is a cylindrical mass of steel that holds two or more full width blades or a special spiral cutter, all of which are bolted to the rotatable mass of steel called the cutterhead. A second step is to create parallelity to this face by passing the board back into the machine but this time from the opposite end of the machine but not on top of the machinebut beneath, sending the wood back into rotating cutterhead underneath using the built-in powerfeed rollers to take it through from one end of the machine to the other. If the wood is relatively flat, this whole proces takes only a few minutes. The more downsizing you do to the components, the less wood is removed in the planing process and the faster it goes. Small components in repeat cuts would allow a hundred pieces to pass through in a matter of minutes. In commercial settings and for mass production, no business would survive without this machine processing. In our setting, a domestic garage, and for a single coffee table, bookshelf, etc, the gain is not that great and the loss of space, increase in noisiness and anti-social activity is definately a cost we must factor for.
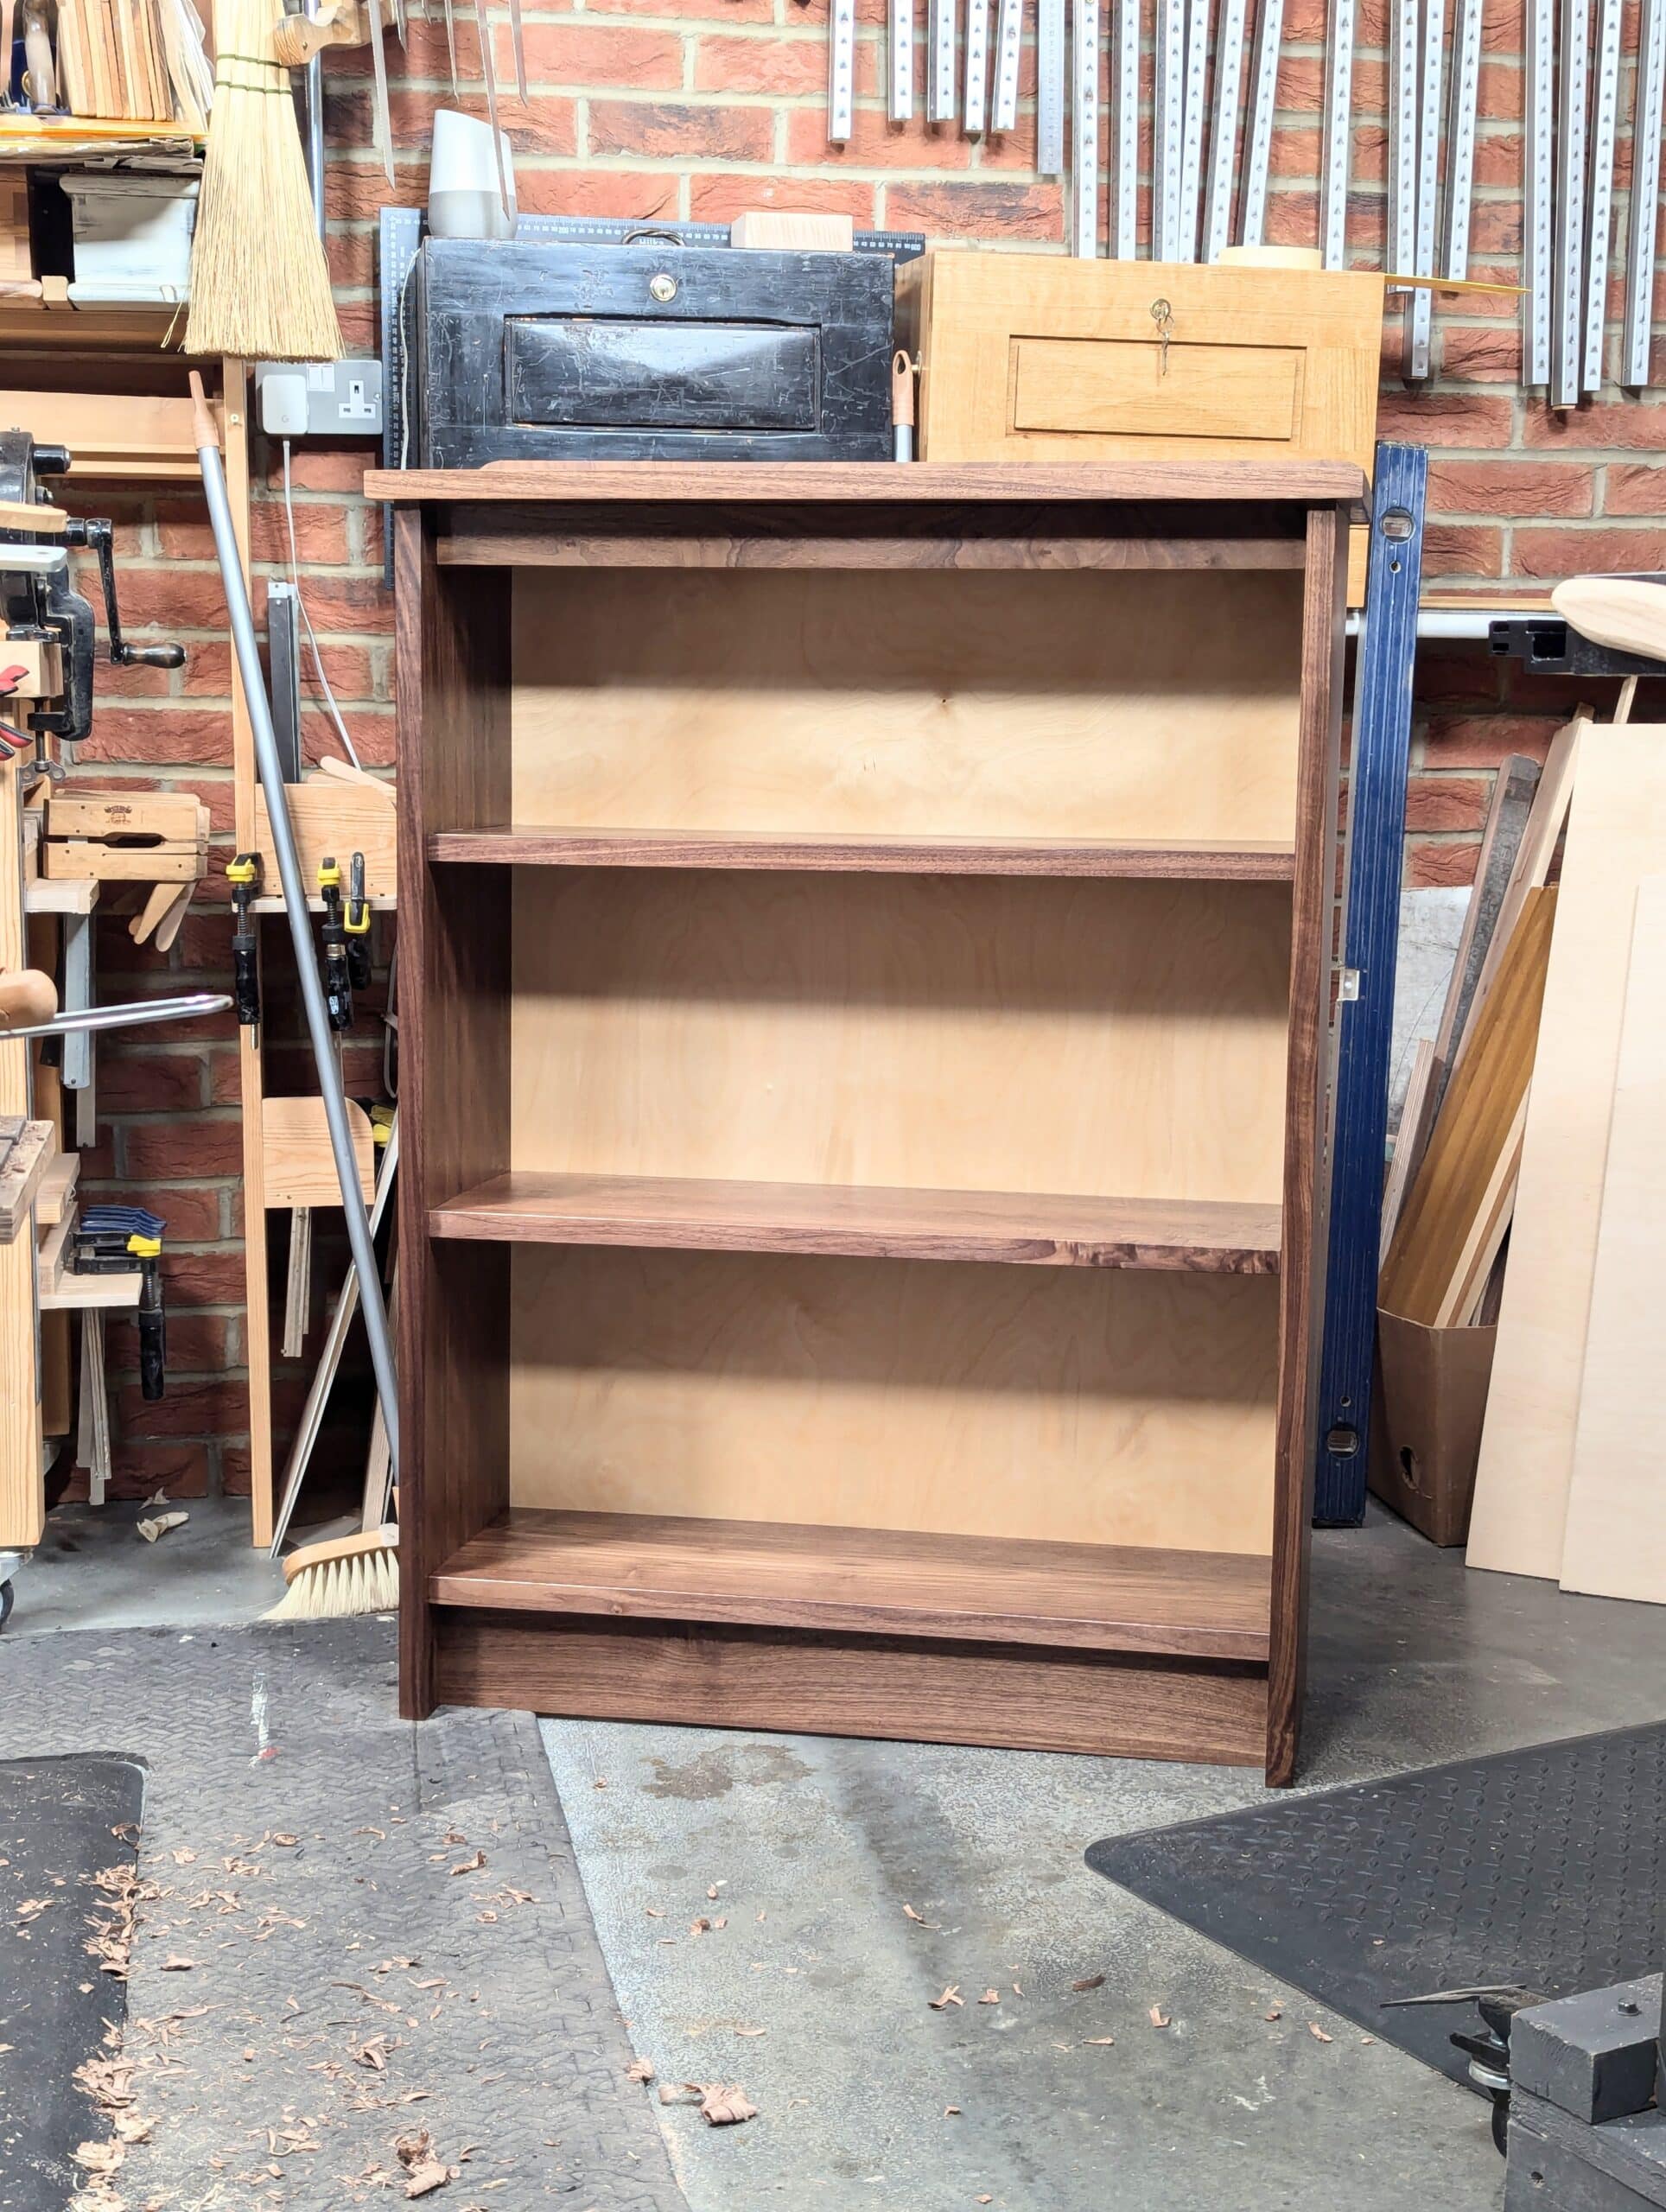
On this bookshelf comprising eight solid wood components, I used my simpling system of stock preparation. I have used it many times on projects through the years and we have filmed using it for video presentation but may not have actually mentioned it as a specific system. Is it new? Far from it in some ways and yes in others. In times past when all made things were all hand made things makers left the undersides of drawers, the insides of case goods and the backs of prjects with the defects ‘floating’ and the saw marks left from the mill on the unseen faces and the even includes on the high-end pieces. Today, that is less likely or even highly unlikely. Since the advent of machinery to mill wood, the wood comes out pristinely milled and totally faultless on all faces inside and out. In times past, we had the primary faces picked out as visibled facets and marked as such well in advance of starting any joinery. It was all part of the composition work and remember too that much of the locally sourced and milled wood from the miller meant wood could be bookmatch and matched for colour and grain configuration all in one supplier. This can still be had but not with ease. When I post something like this comments will come in to say I found this in this or that supplier who has a Woodmizer saw mill and harvests local trees. I know that this is so for a very small percemntage of users of wood but far from reality for 95% of us. Experience tells me that the wood from local suppliers is more than likely unpredicable, minimally uniform, not dry through in equal measure and you will not get what you want or need. Unreliable material, hedgerow trees and lots of crotch-grain wood together with knots will usually be categorised as “Character wood” by sales outlets and will be offered for a “More rustic setting in home or business”. For a maker in commercial circles, makers on a business level, local mills may not work too for several obvious reasons although they will often have access to more commercial standard supplies.
My system for preparing wood uses a very standardising way to work the wood that accepts material with some variance in thickness for most of the pieces. This variance will not affect making the joinery but a particularly large variance will have an appeariential impact you might not want. Having explained how machines simply joint (flatten) wood on one initial face, all other faces take their reference from this first trued face so squared adjacent edges are planed and checked for 90º to this first one and parallelity to it on the opposite side of the board follows. Because machining wood is so simple and effortless, woodworkers will consistently oass their boards through the thicknesser as standard procedure. In hand work that can mean several hours extra work and yet mostly what we need is the parallelity joinery relies on in its making. Mostly, this article is about creating housing dadoes and boards that fit into the dadoes without planing the two wide faces exactly parallel or even near to each other and yet any shelf from one position in a multi-shelf bookkase or drawer back will fit interchangably using my simple system.
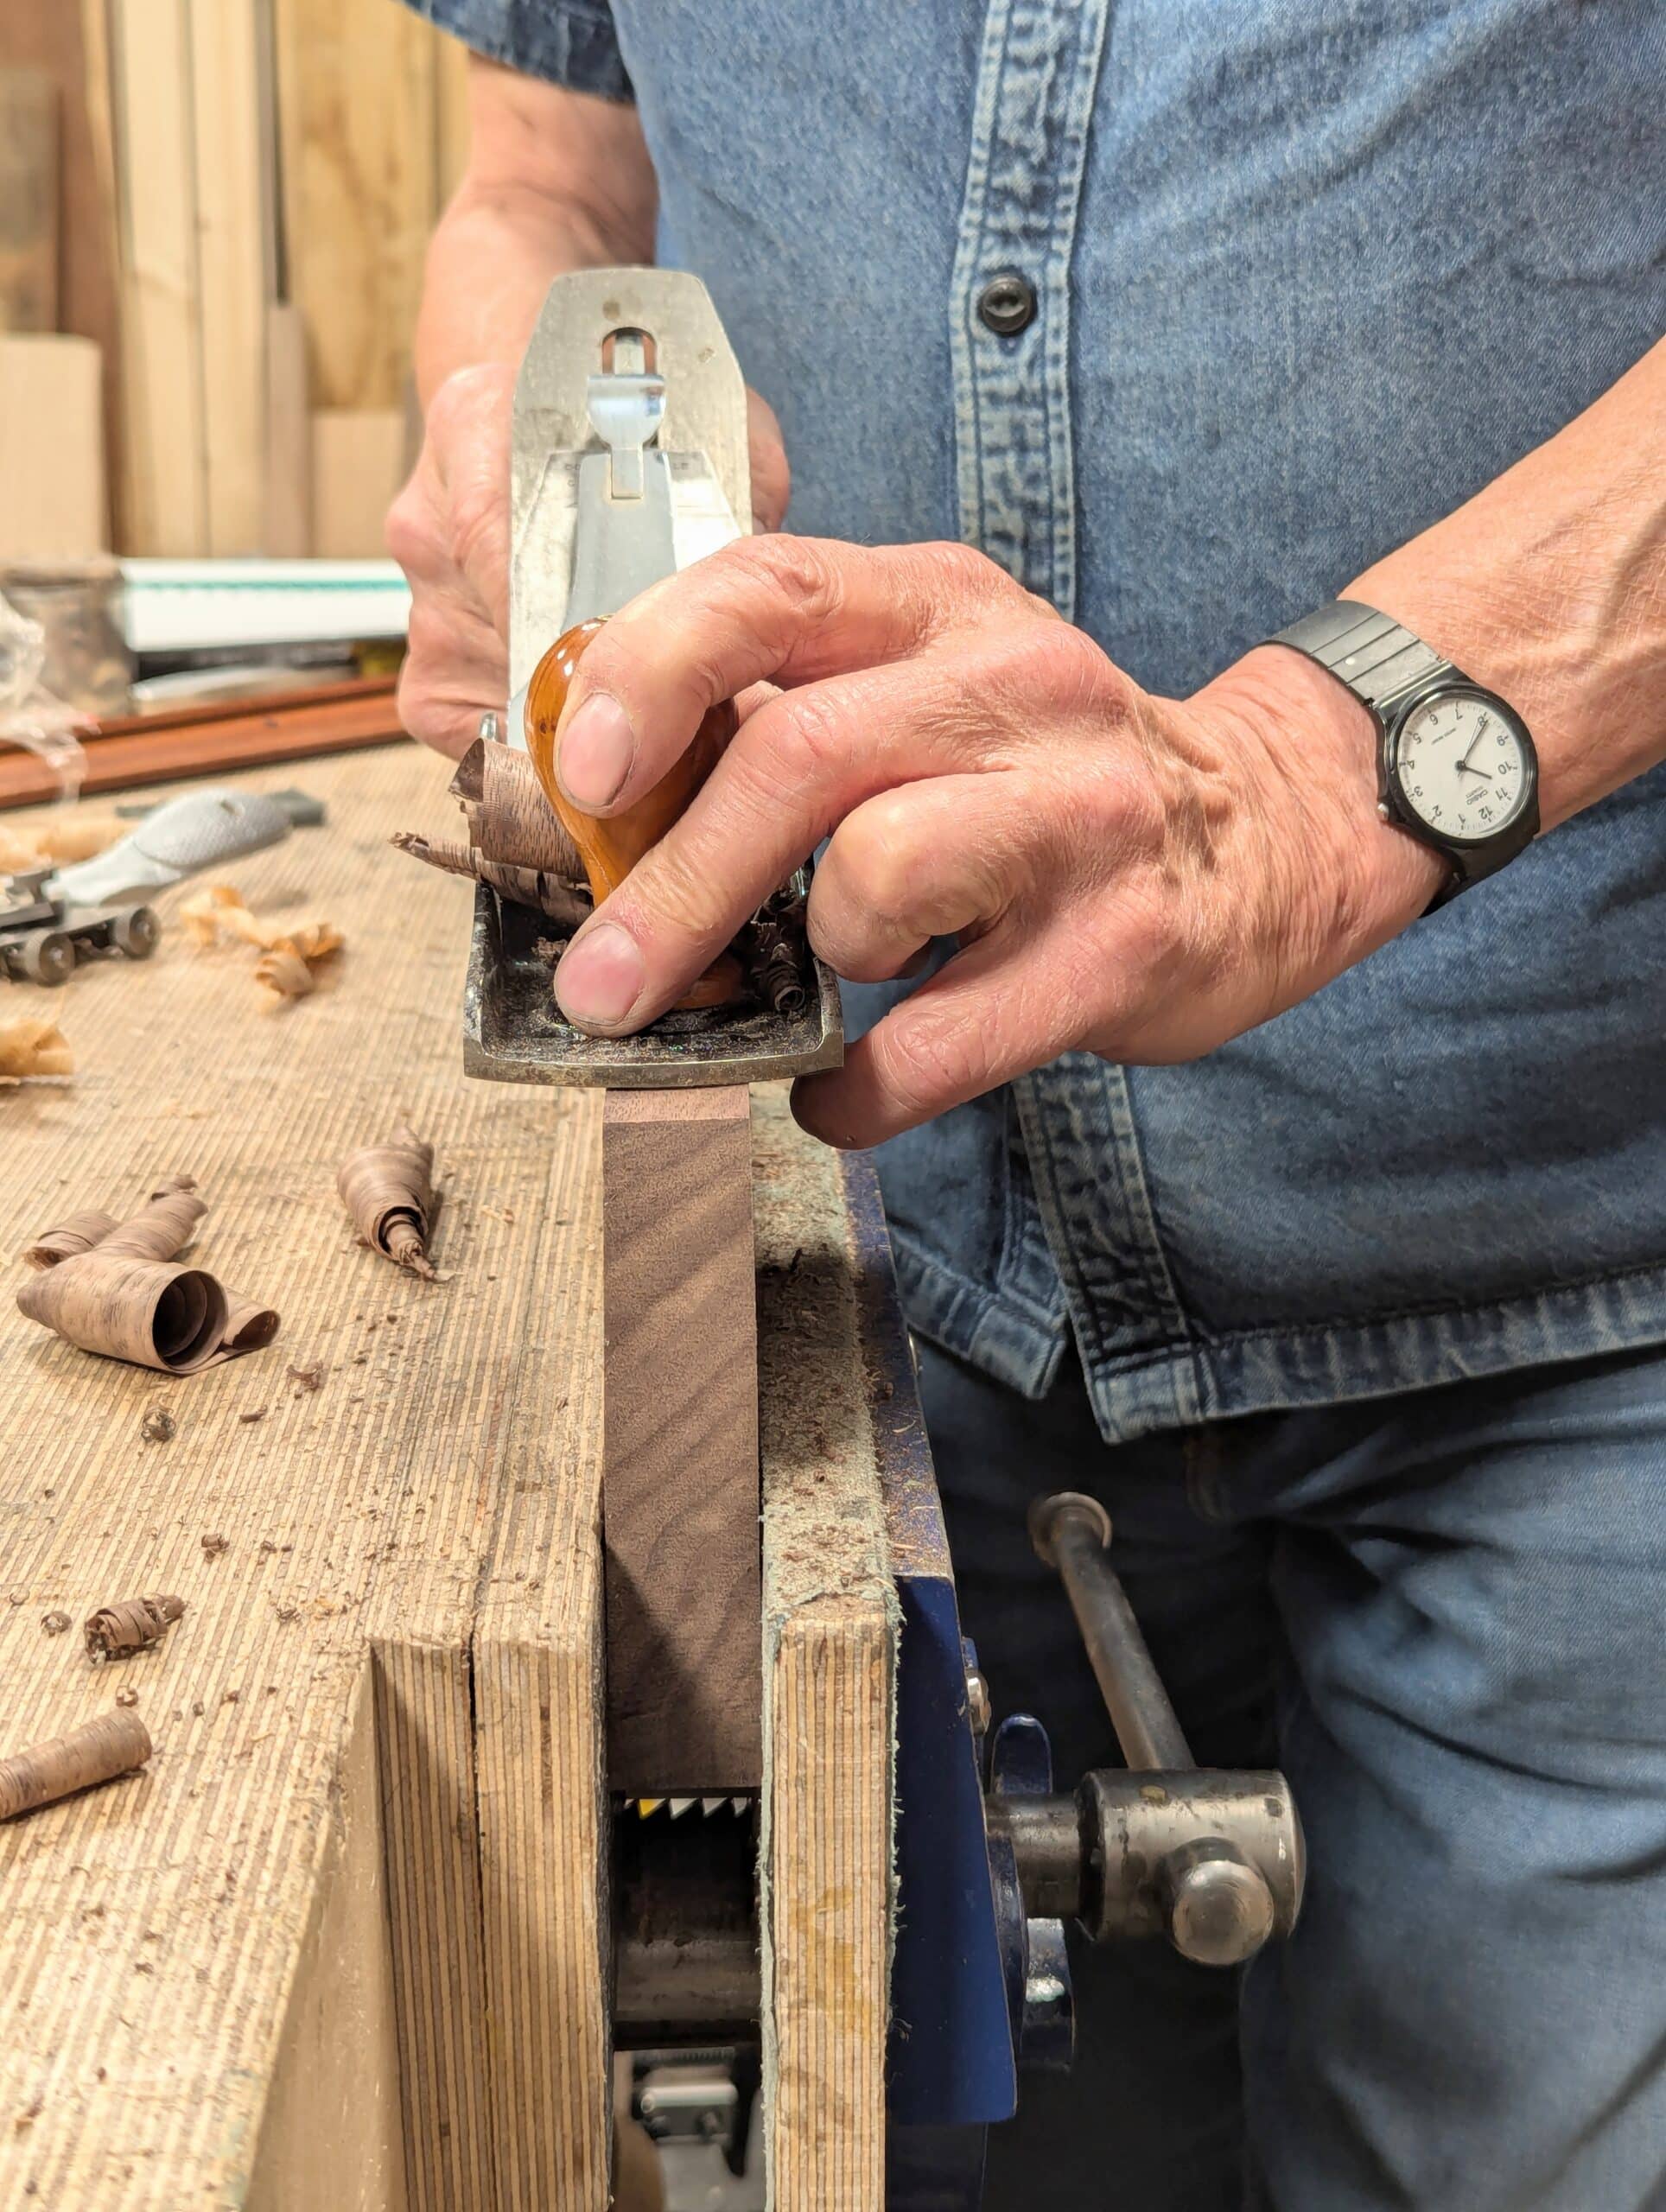
I first plane all of the first wide faces on all the pieces and remove all of the standard surface defects so that they are straight and flat and twist free.
I of course check for twist on this face––very important.
From here on I will always reference this face with the square and gauges, router plane, etc.
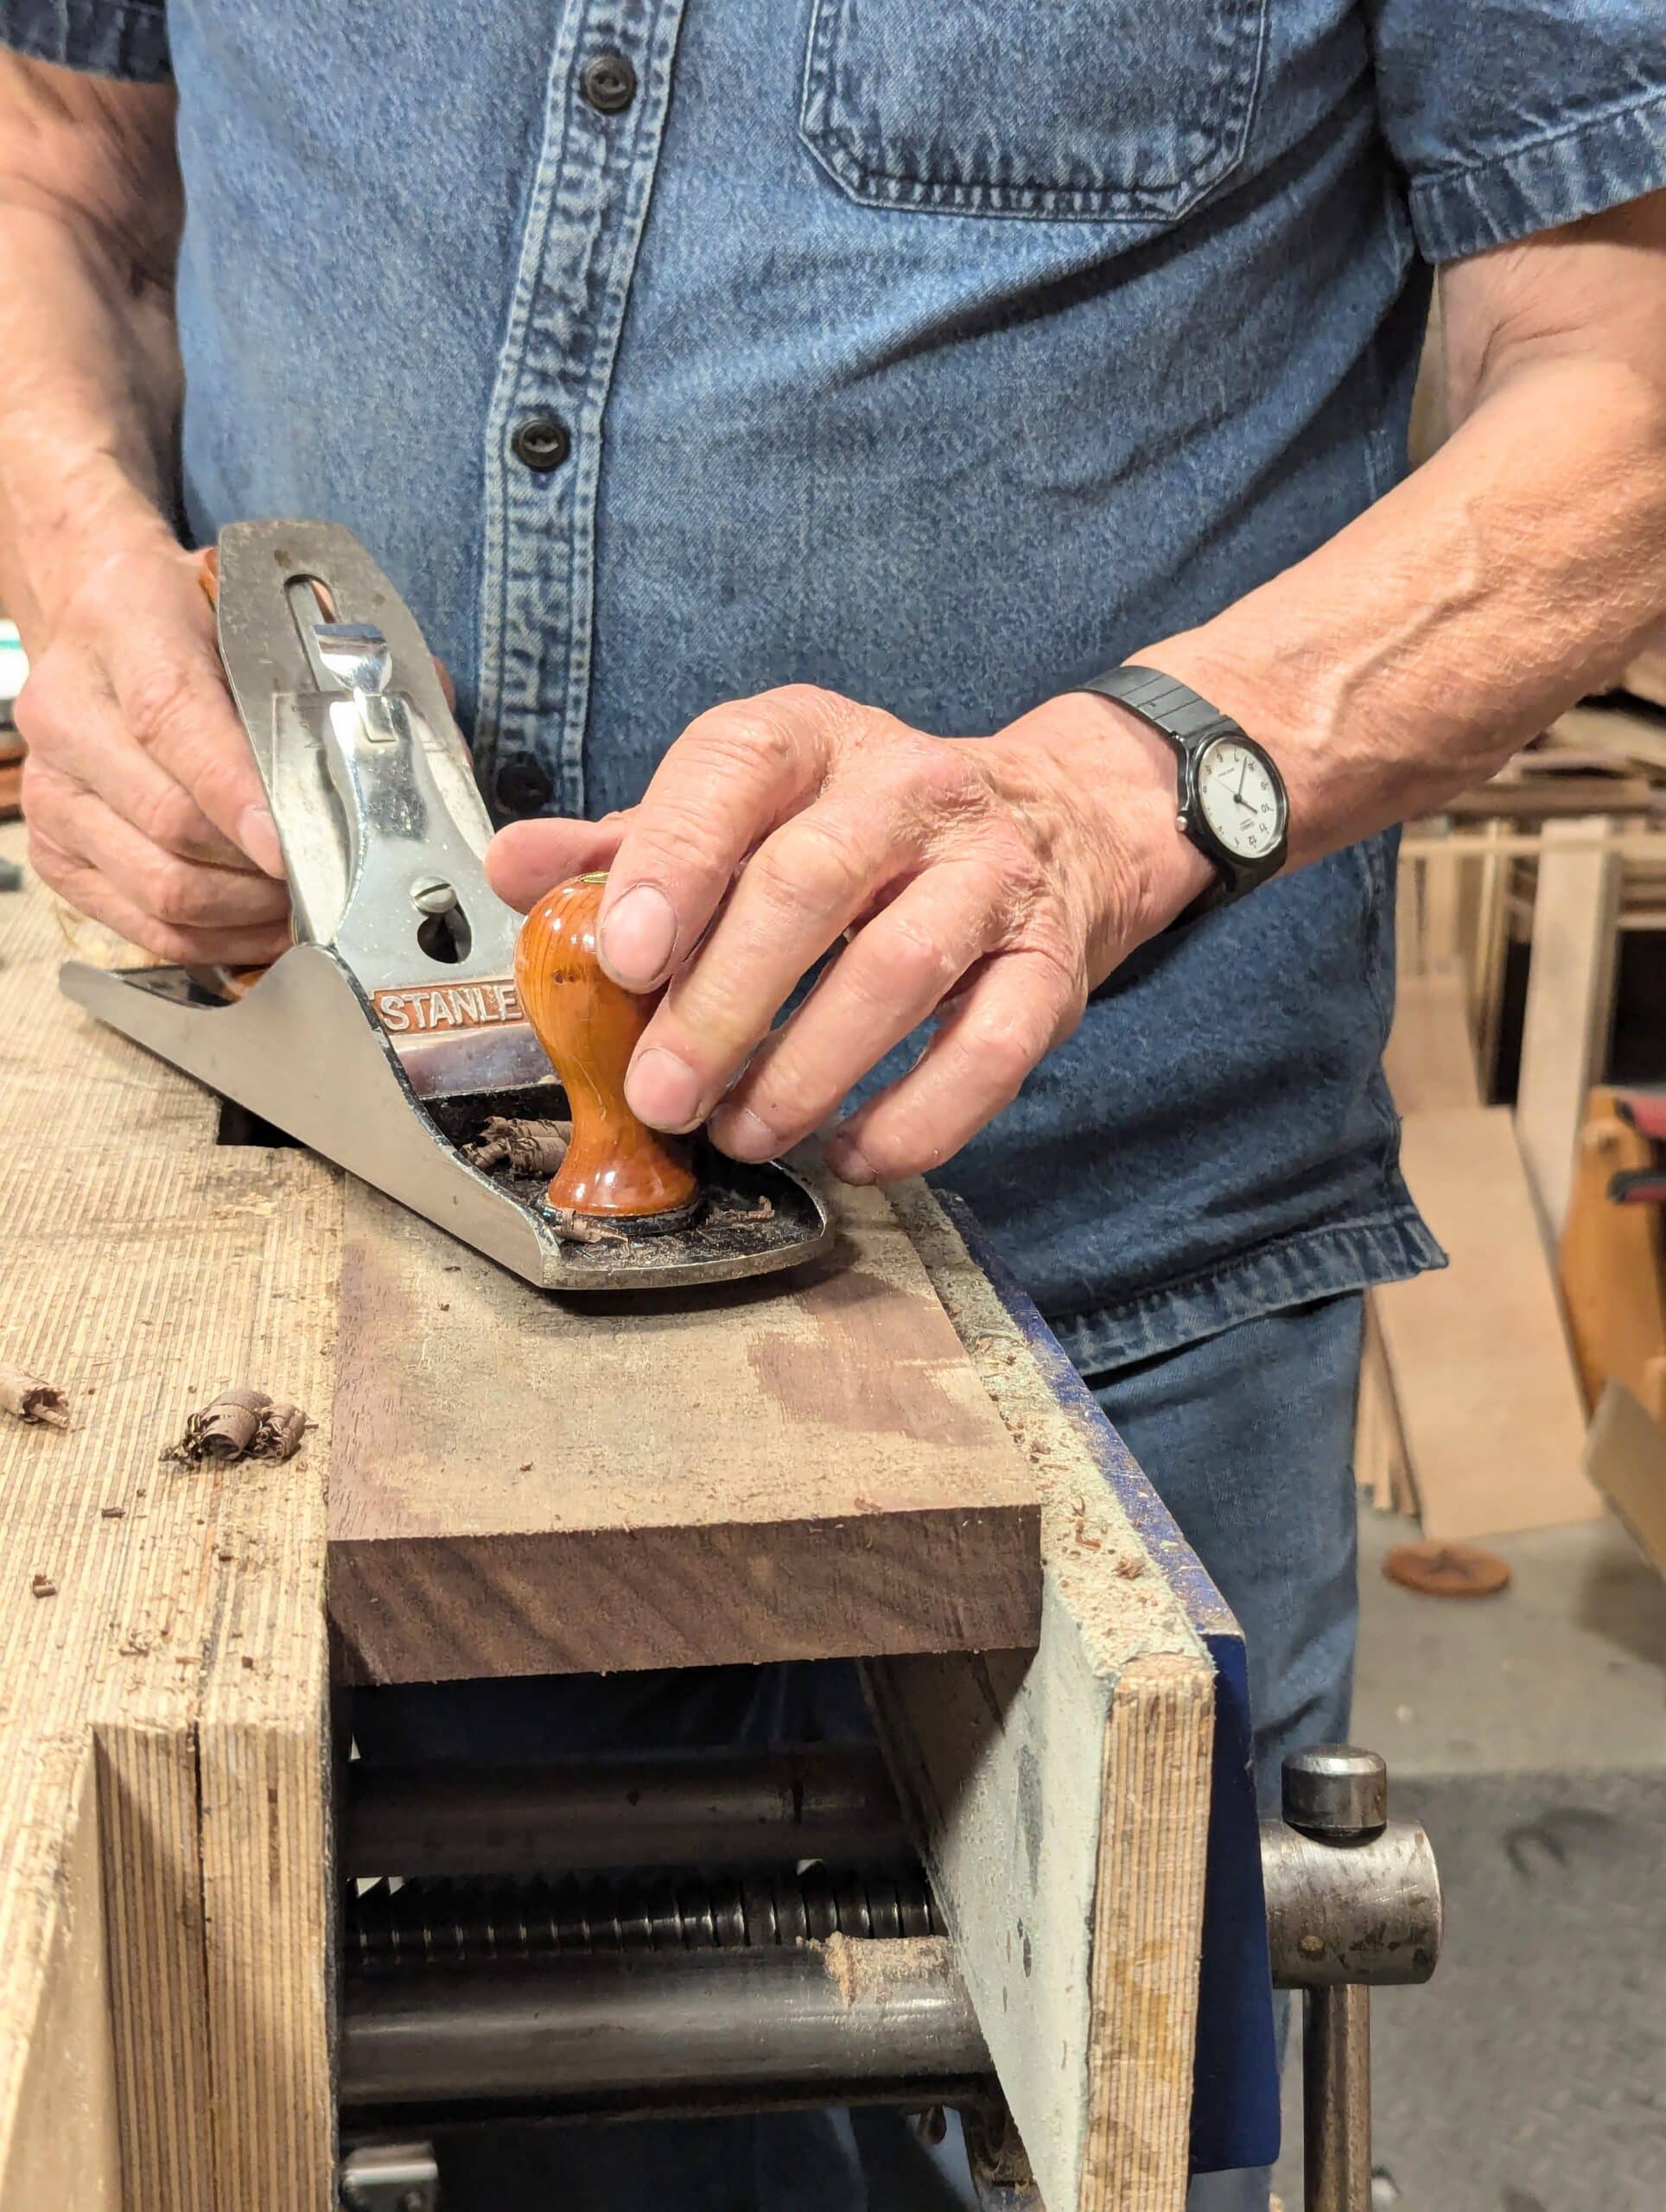
This opposite face, the underside, is surface planed but to a most minimal of levels and never totally parallel as it would always be with machines. This skimming removes any saw marks and makes the surface smooth only and using my method makes everything crisp. I then plane the edges square and straight and because of the thinness of the stock I rip it parallel before a quick surface clean up.
Once the sizing of the wood is completed I can begin cutting the joinery. In this case, all of my joinery from here on is what I call housing dadoes. These grooves can go with or across the grain so for the shelves and top I created housing dadoes and for the kickboard and cross bearer I made simple grooves.
It’s here that I want you to listen. All of my grooves are 3/4″ wide but the identical depth of 1/4″. These can be changed to just about whatever sizes you want so a 1/2″ wide dado or groove would work equally well. The detail to know is that the the grooves and dadoes will always be less than the thickness of the material being housed into the adjacent piece. That’s important. In my examples here I am going for 3/4″ dadoes that is in roughly 1″ thick stock and so the reference faces to set distances and depths from will be the truly trued faces. I will describe this as I go for clarity.
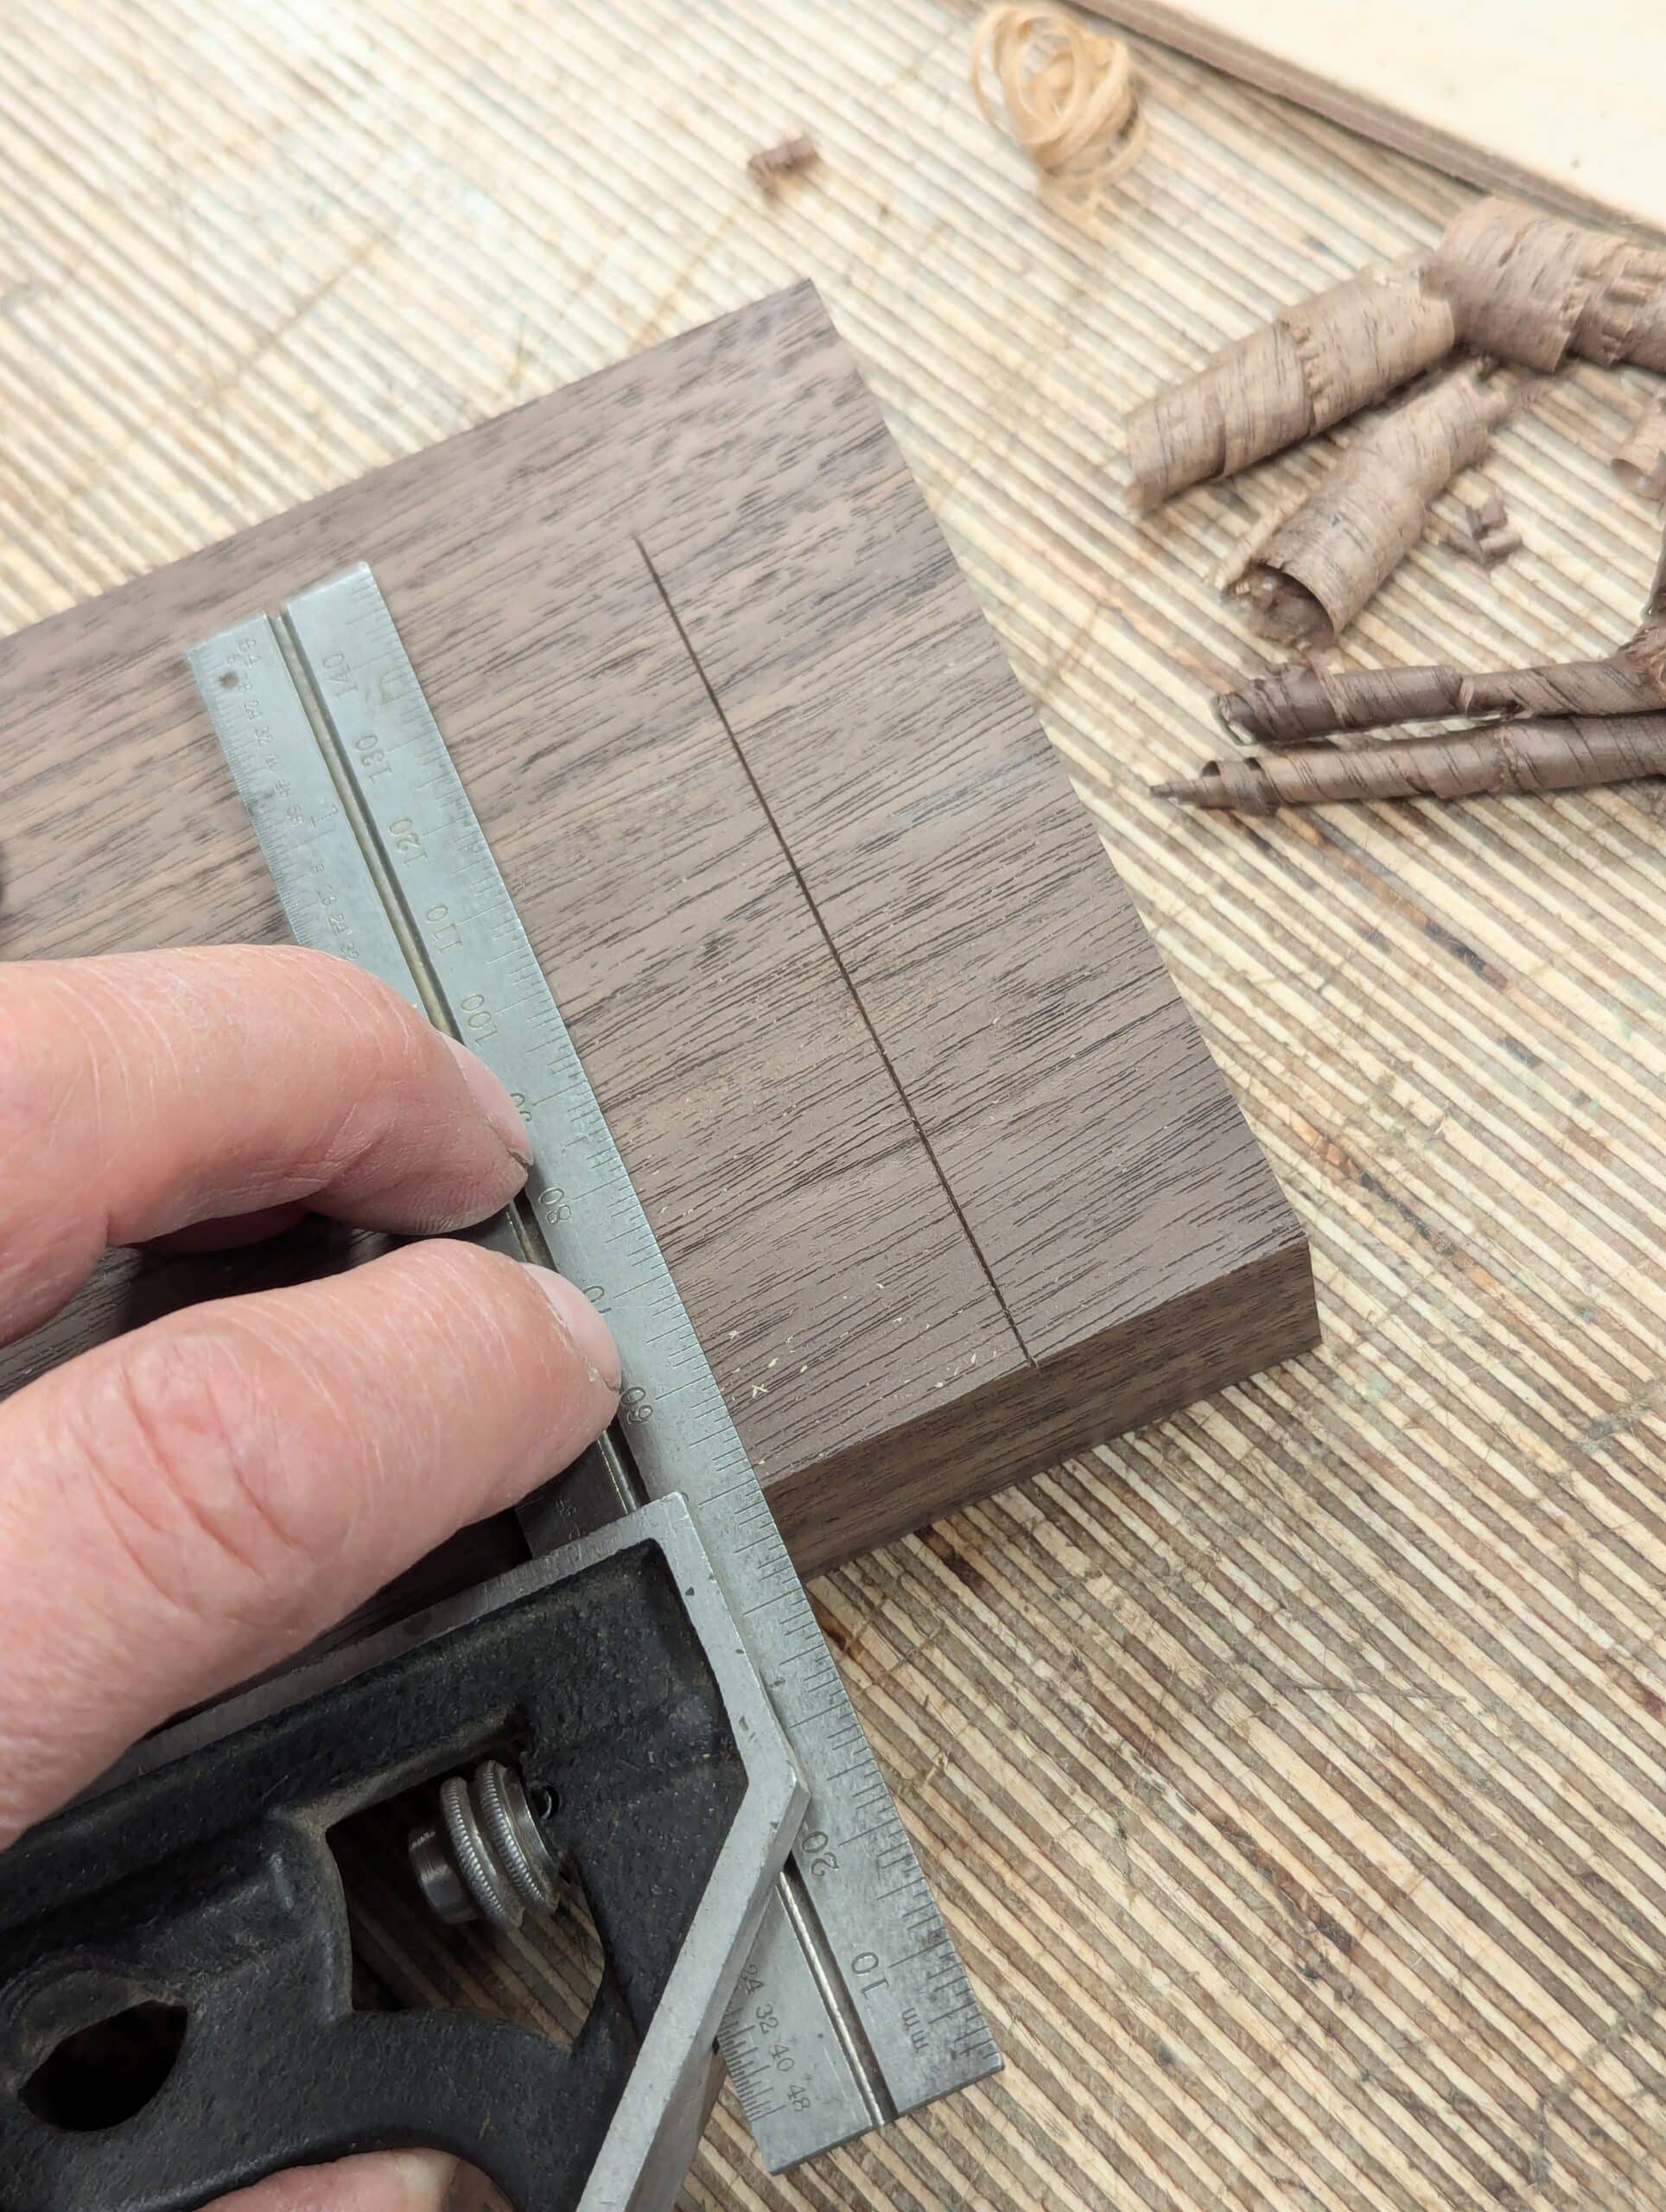

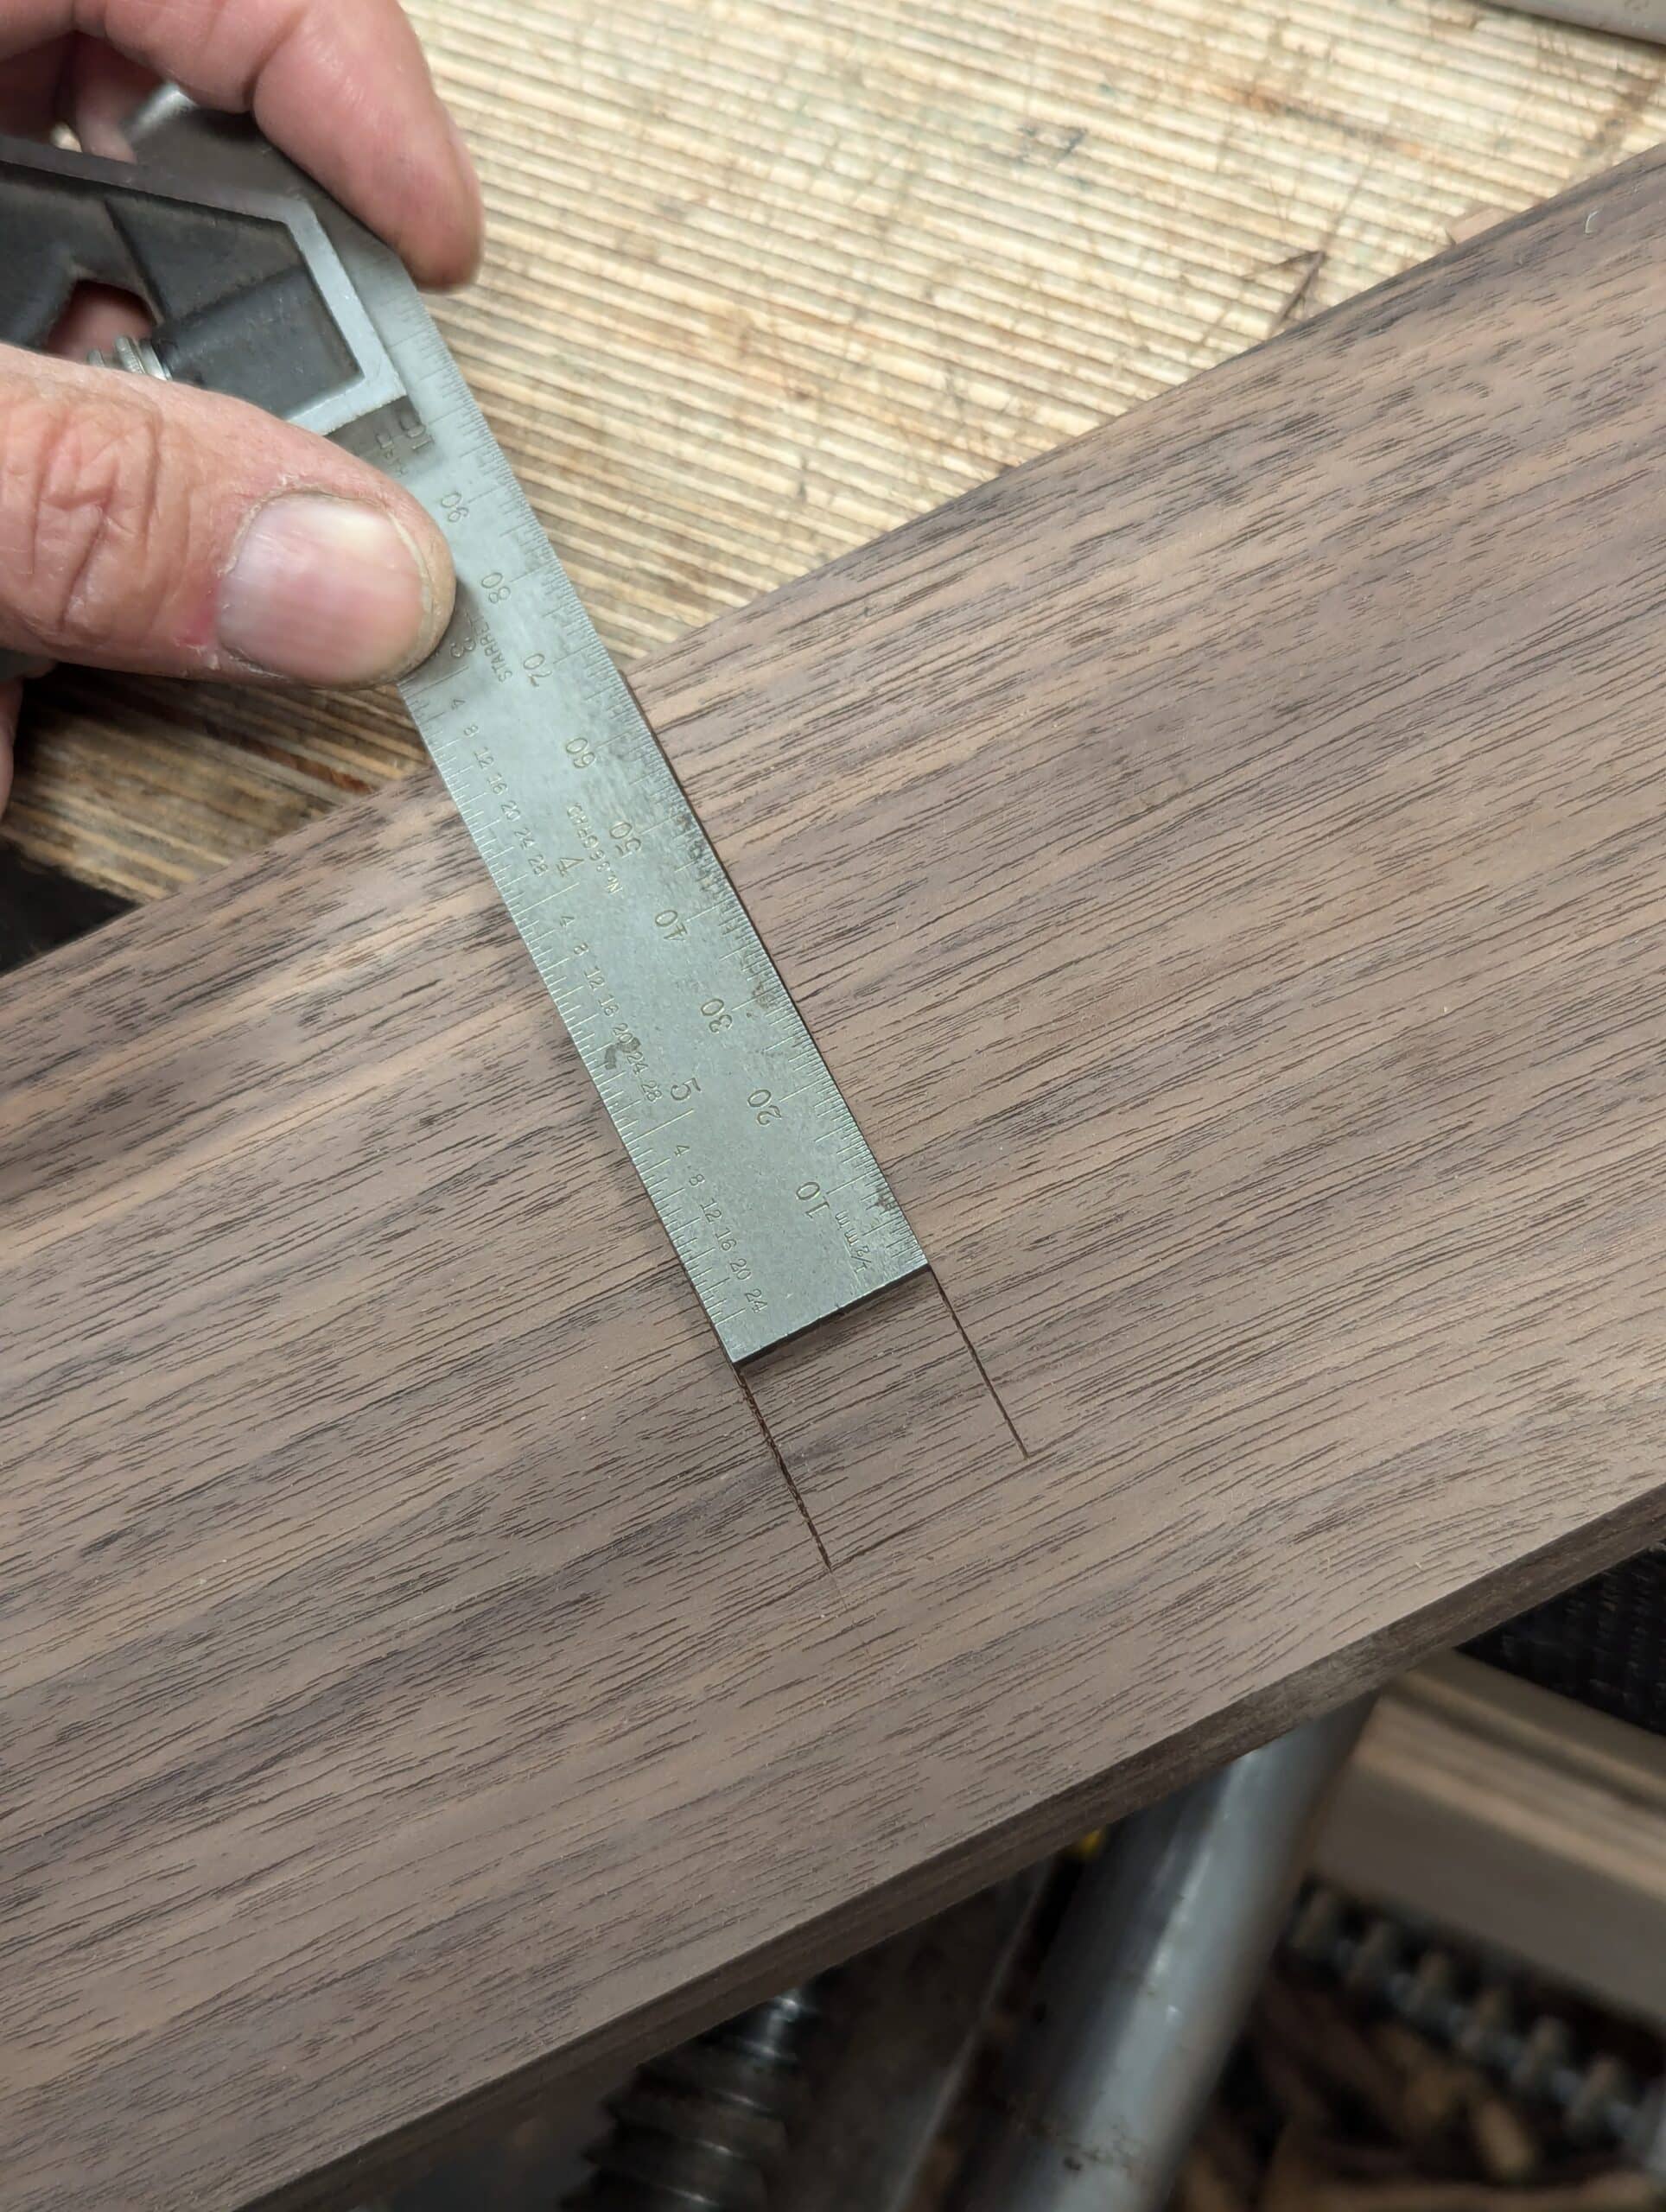
In this case this face is the underside of my top bookcase shelf and this face is trued dead flat, straight and untwisted using the plane and winding sticks to check this face as I go. The topside is simply smoothed to remove any defects and though not truly trued it will look flawless and feel good. Where the two knifewalls are dead on 3/4″. I generally use the blade of my square because this, on the six-inch Starrett square, is dead-on 3/4″. In this case, the housing dado is a stopped housing dado and to make this fit I will put a step on the outside of the side pieces to the depth of the housing dado and the 3/4″ width that matches the square’s blade width spot on. There will be no step on the front edge of the side piece but if you did want one to be you could do that too.
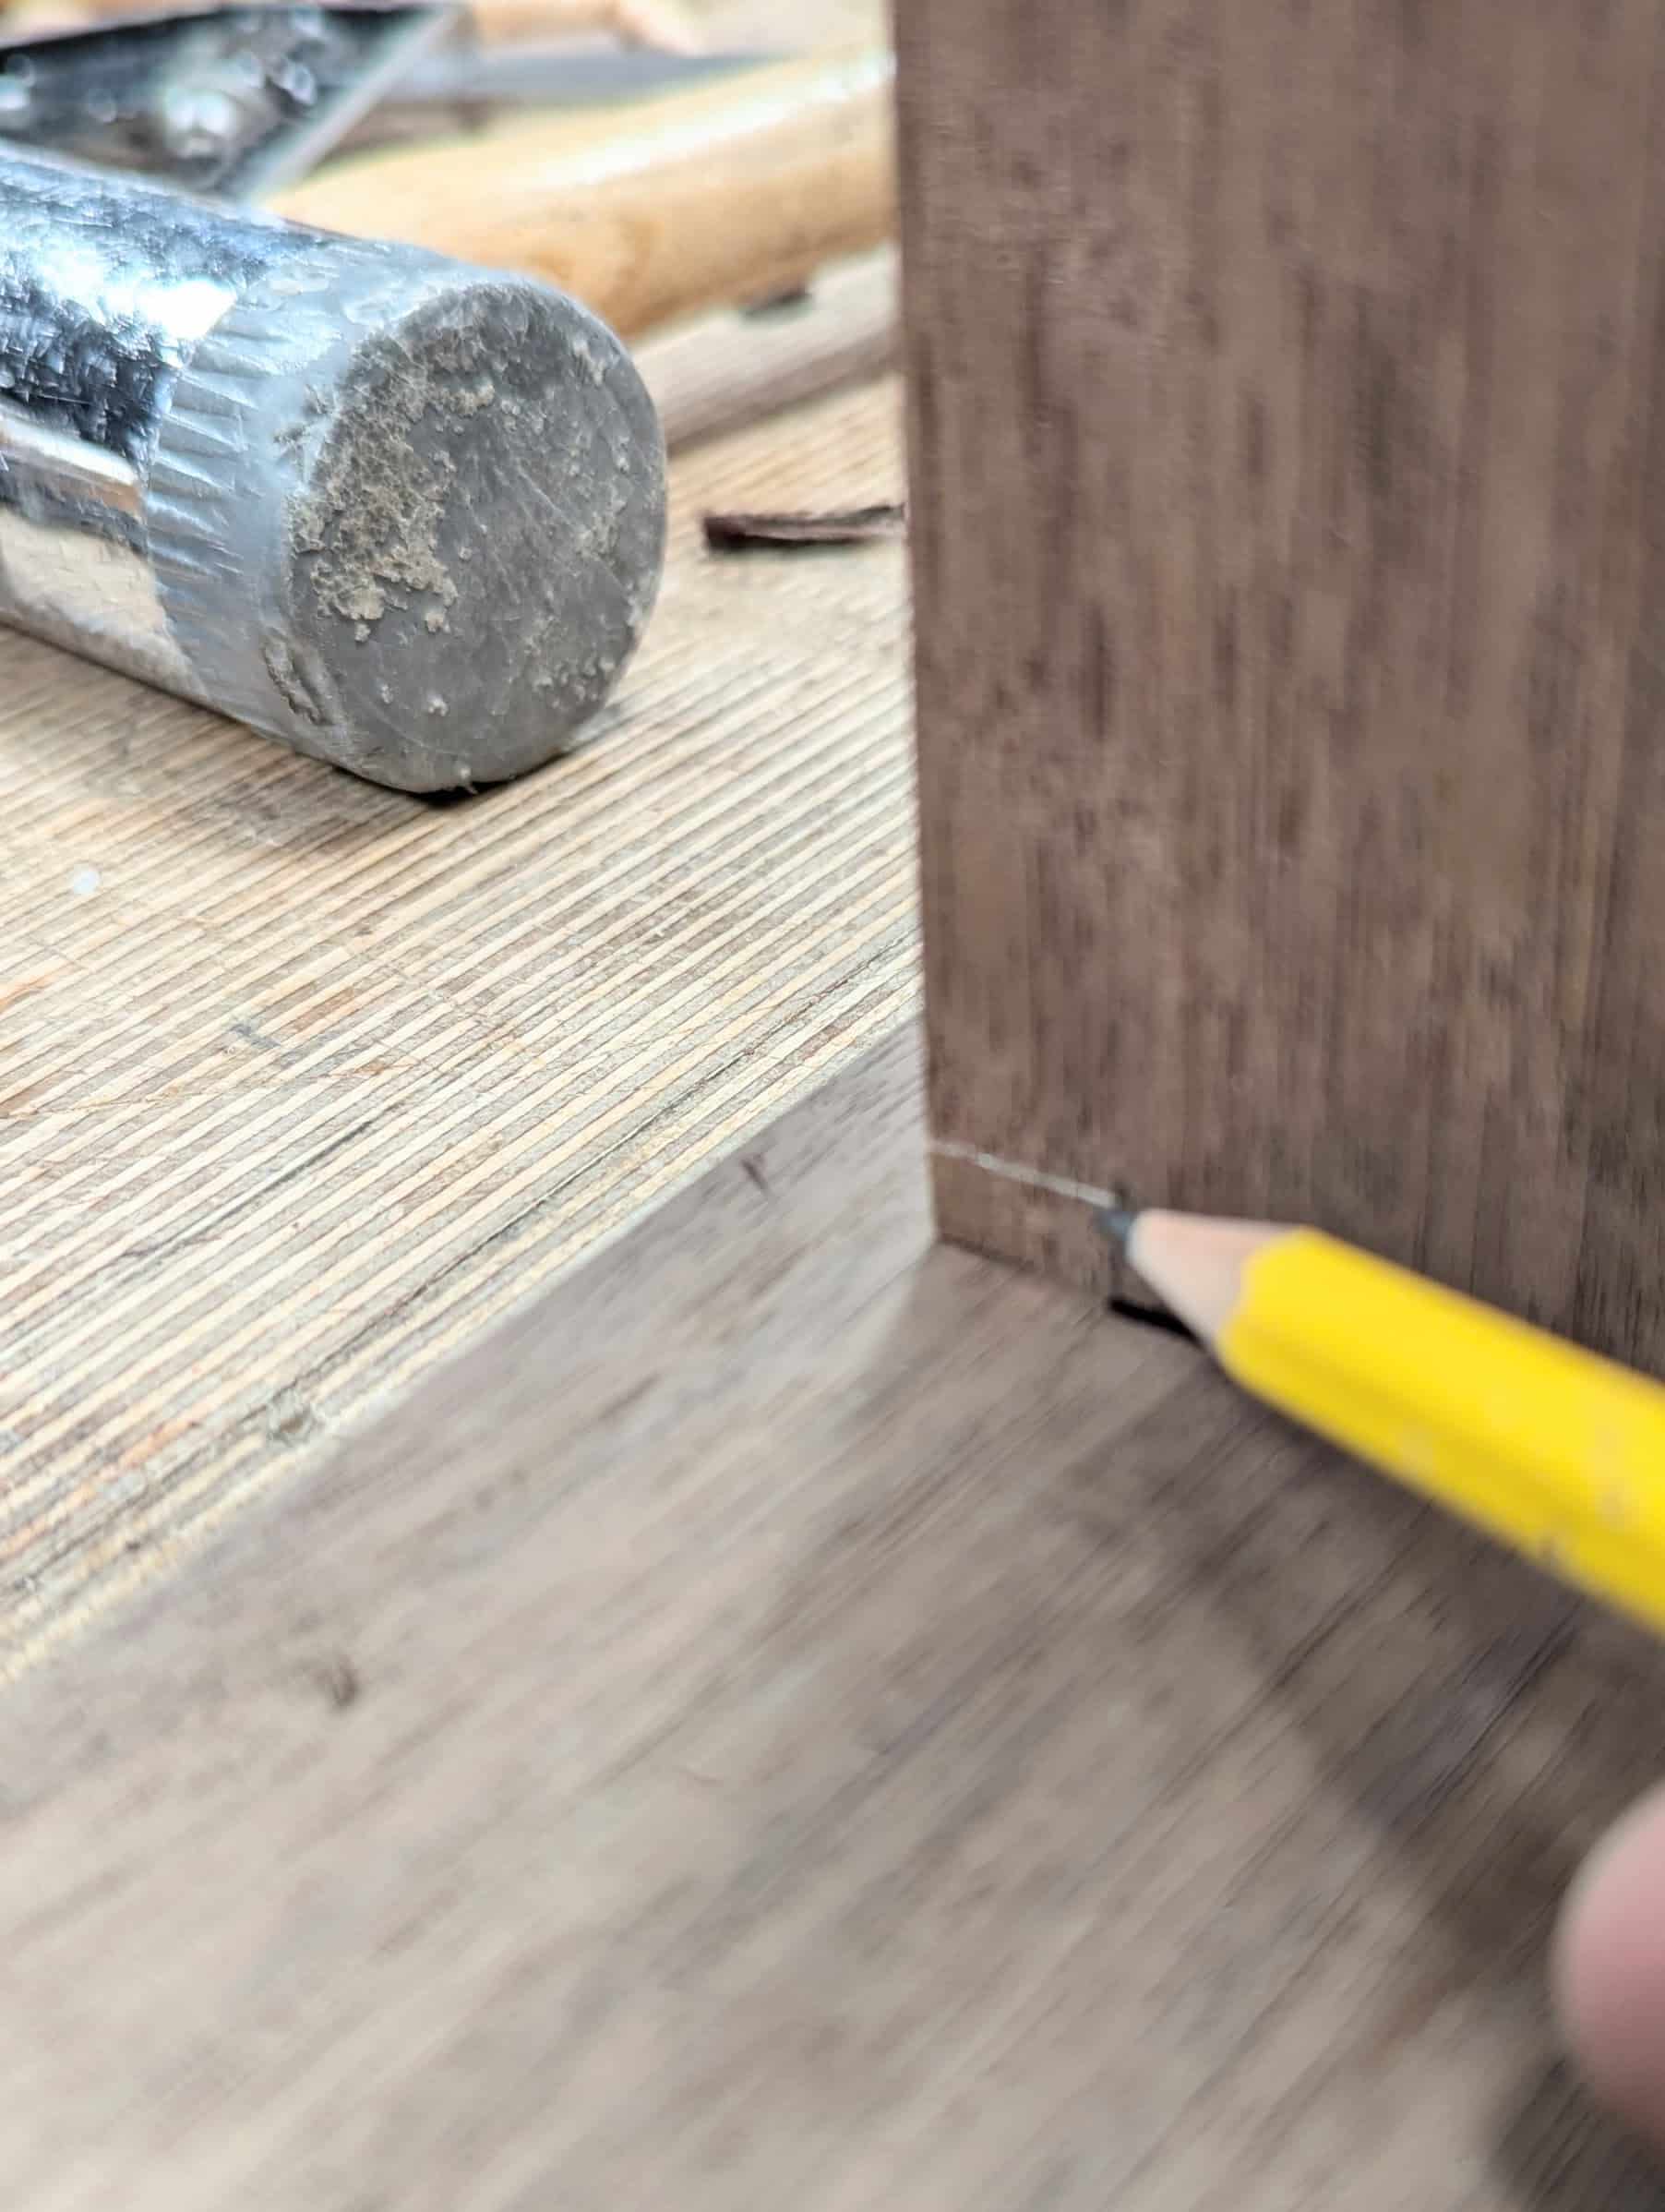
I square the knifewalls onto the back edge . . .

. . . and use the router as my marking gauge which is the final depth of the housing dado and the step down on the side pieces on the outside faces. This setting on the dado never changes throughout the making process of all the housing dadoes.
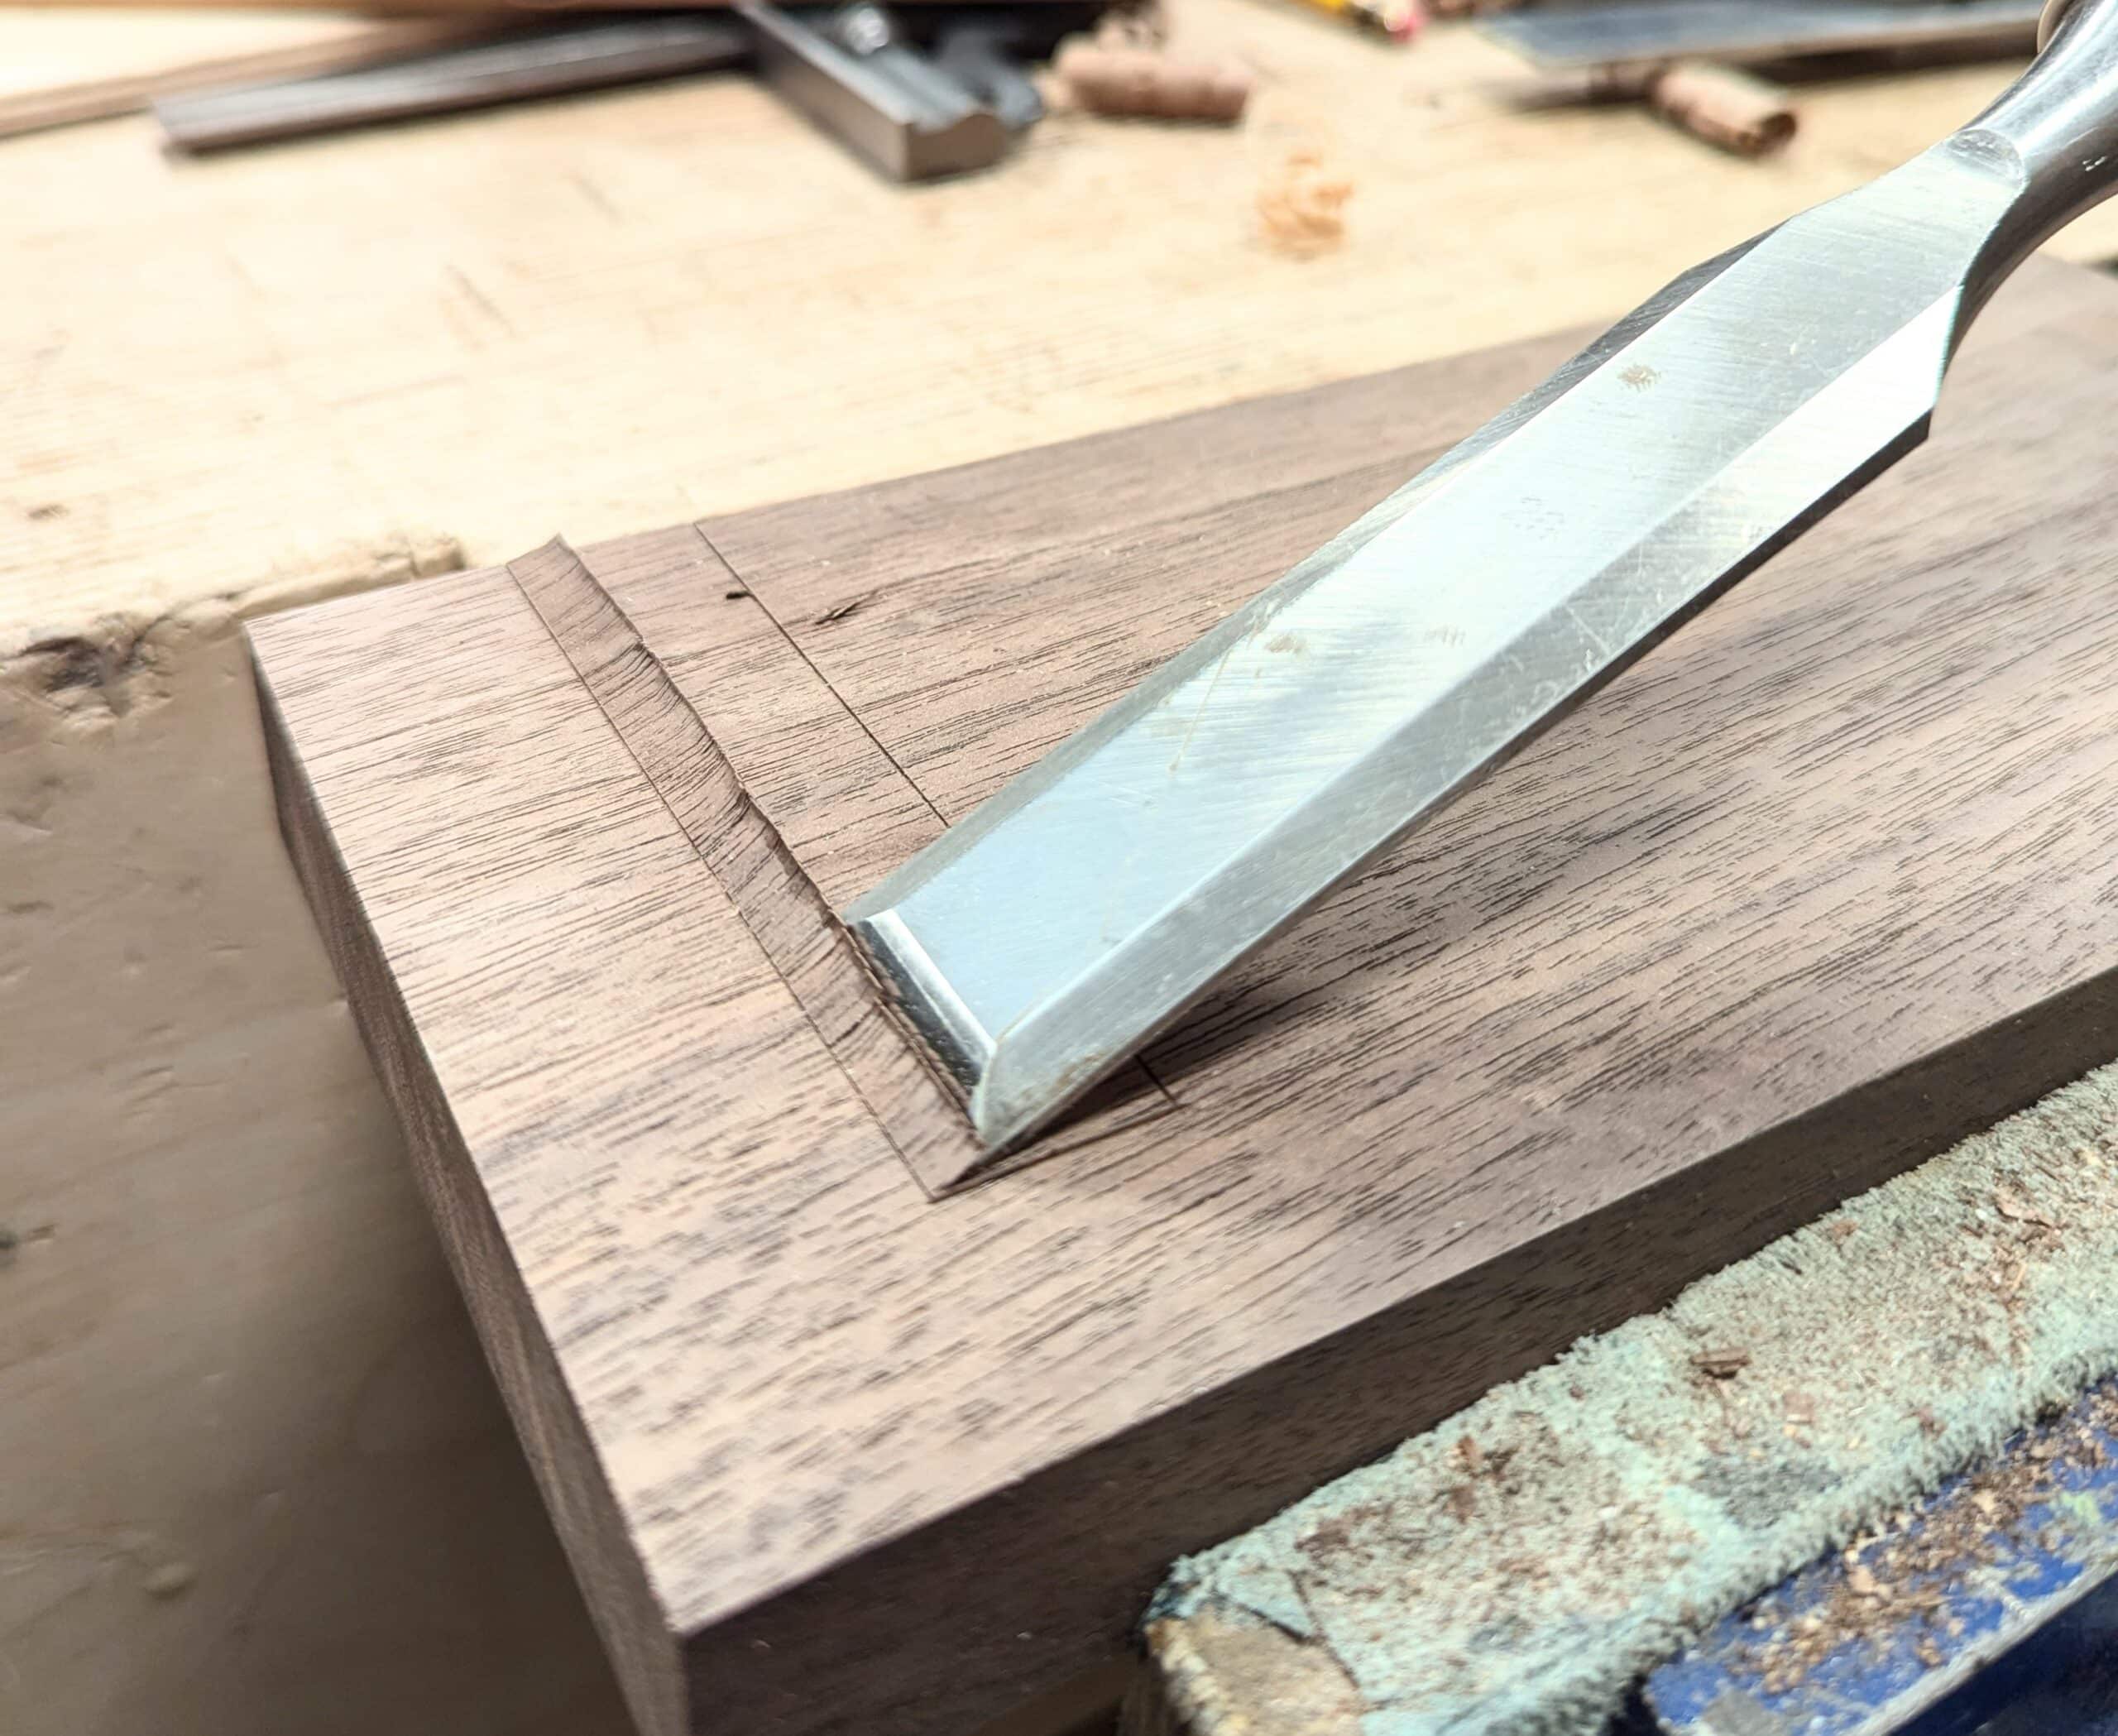
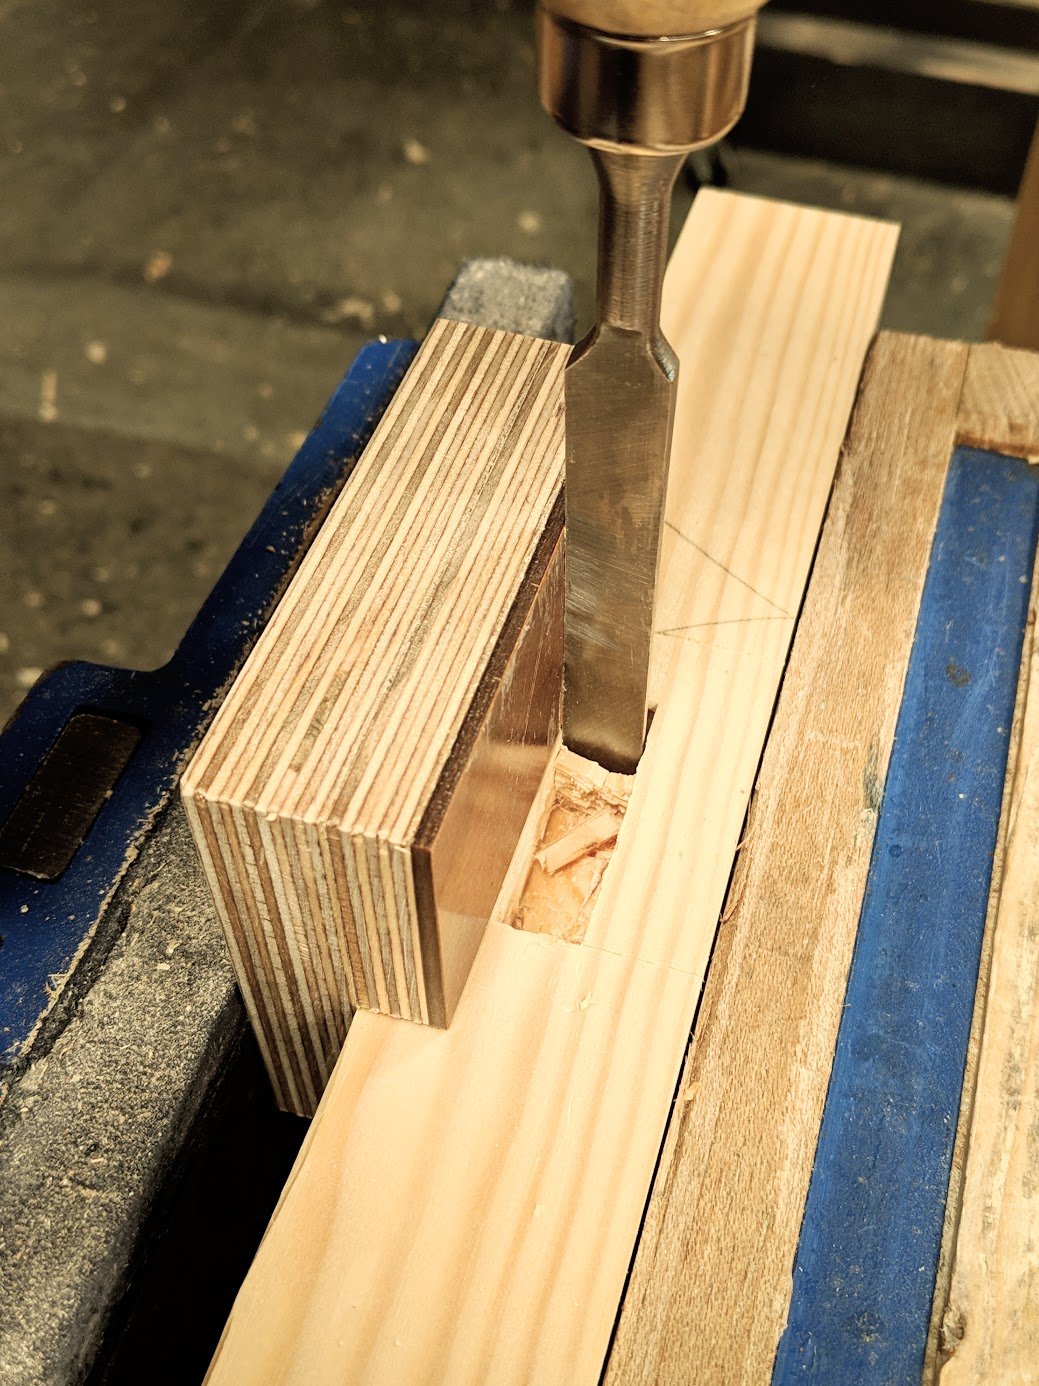
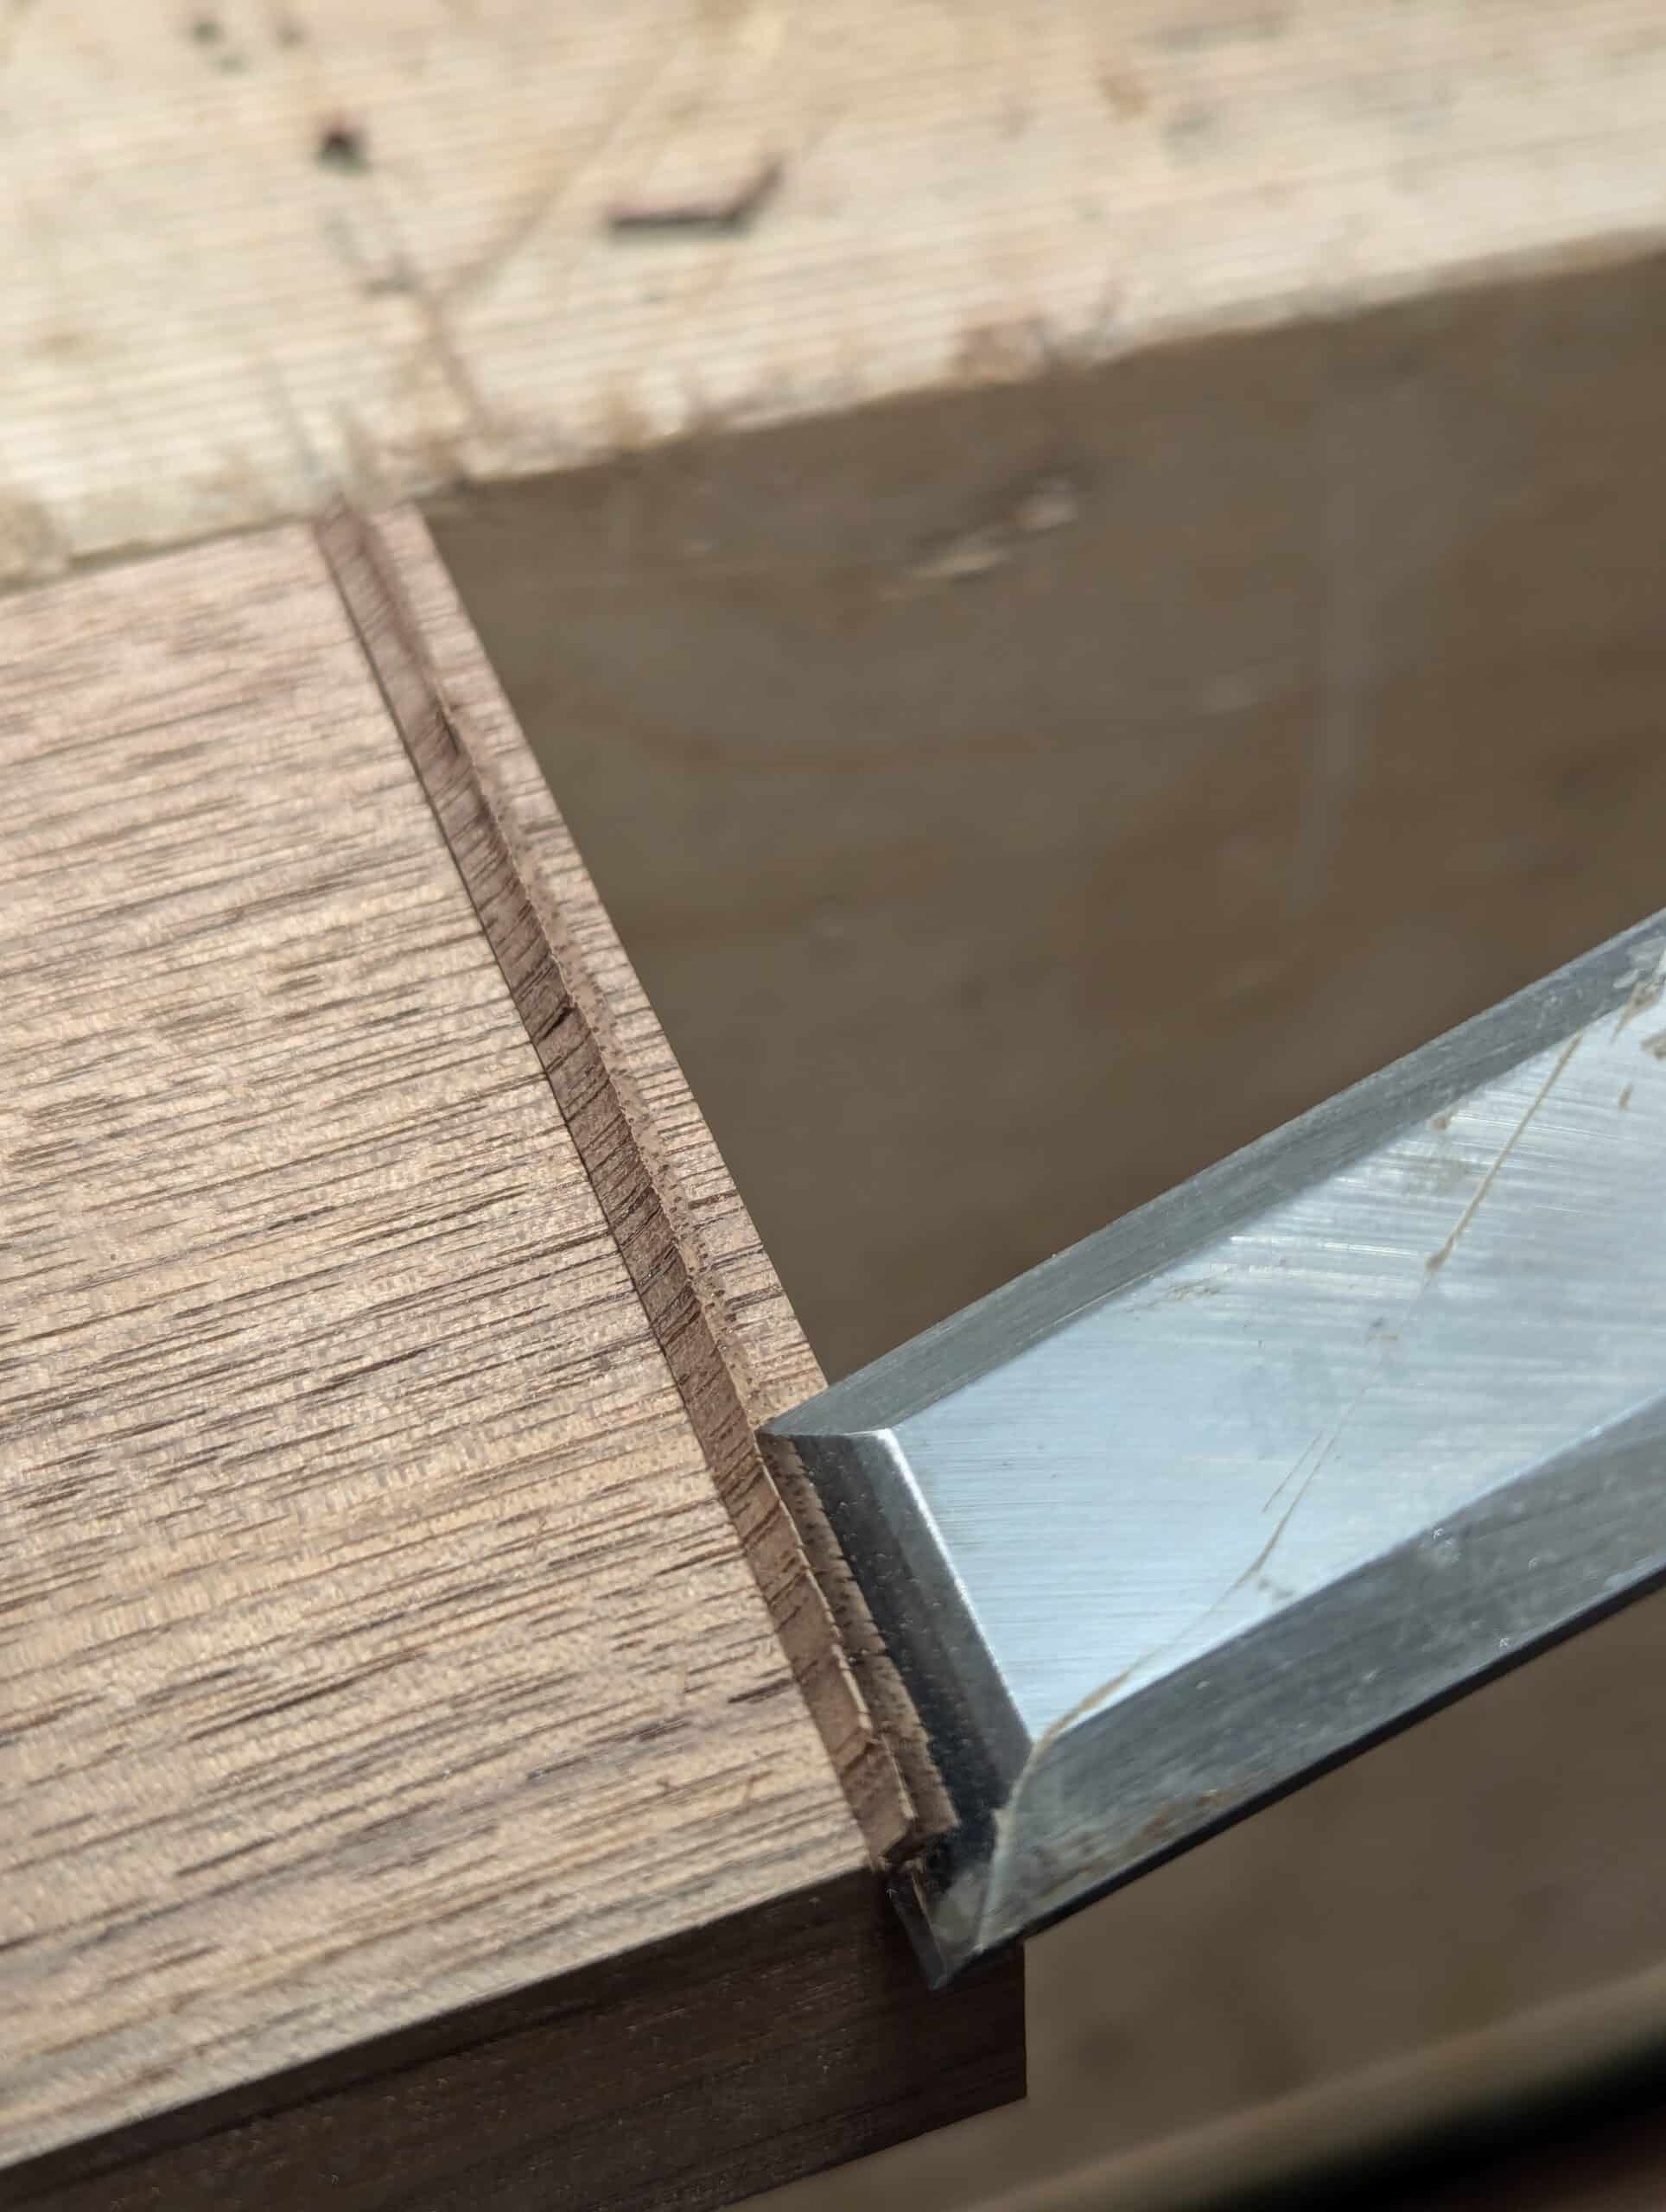
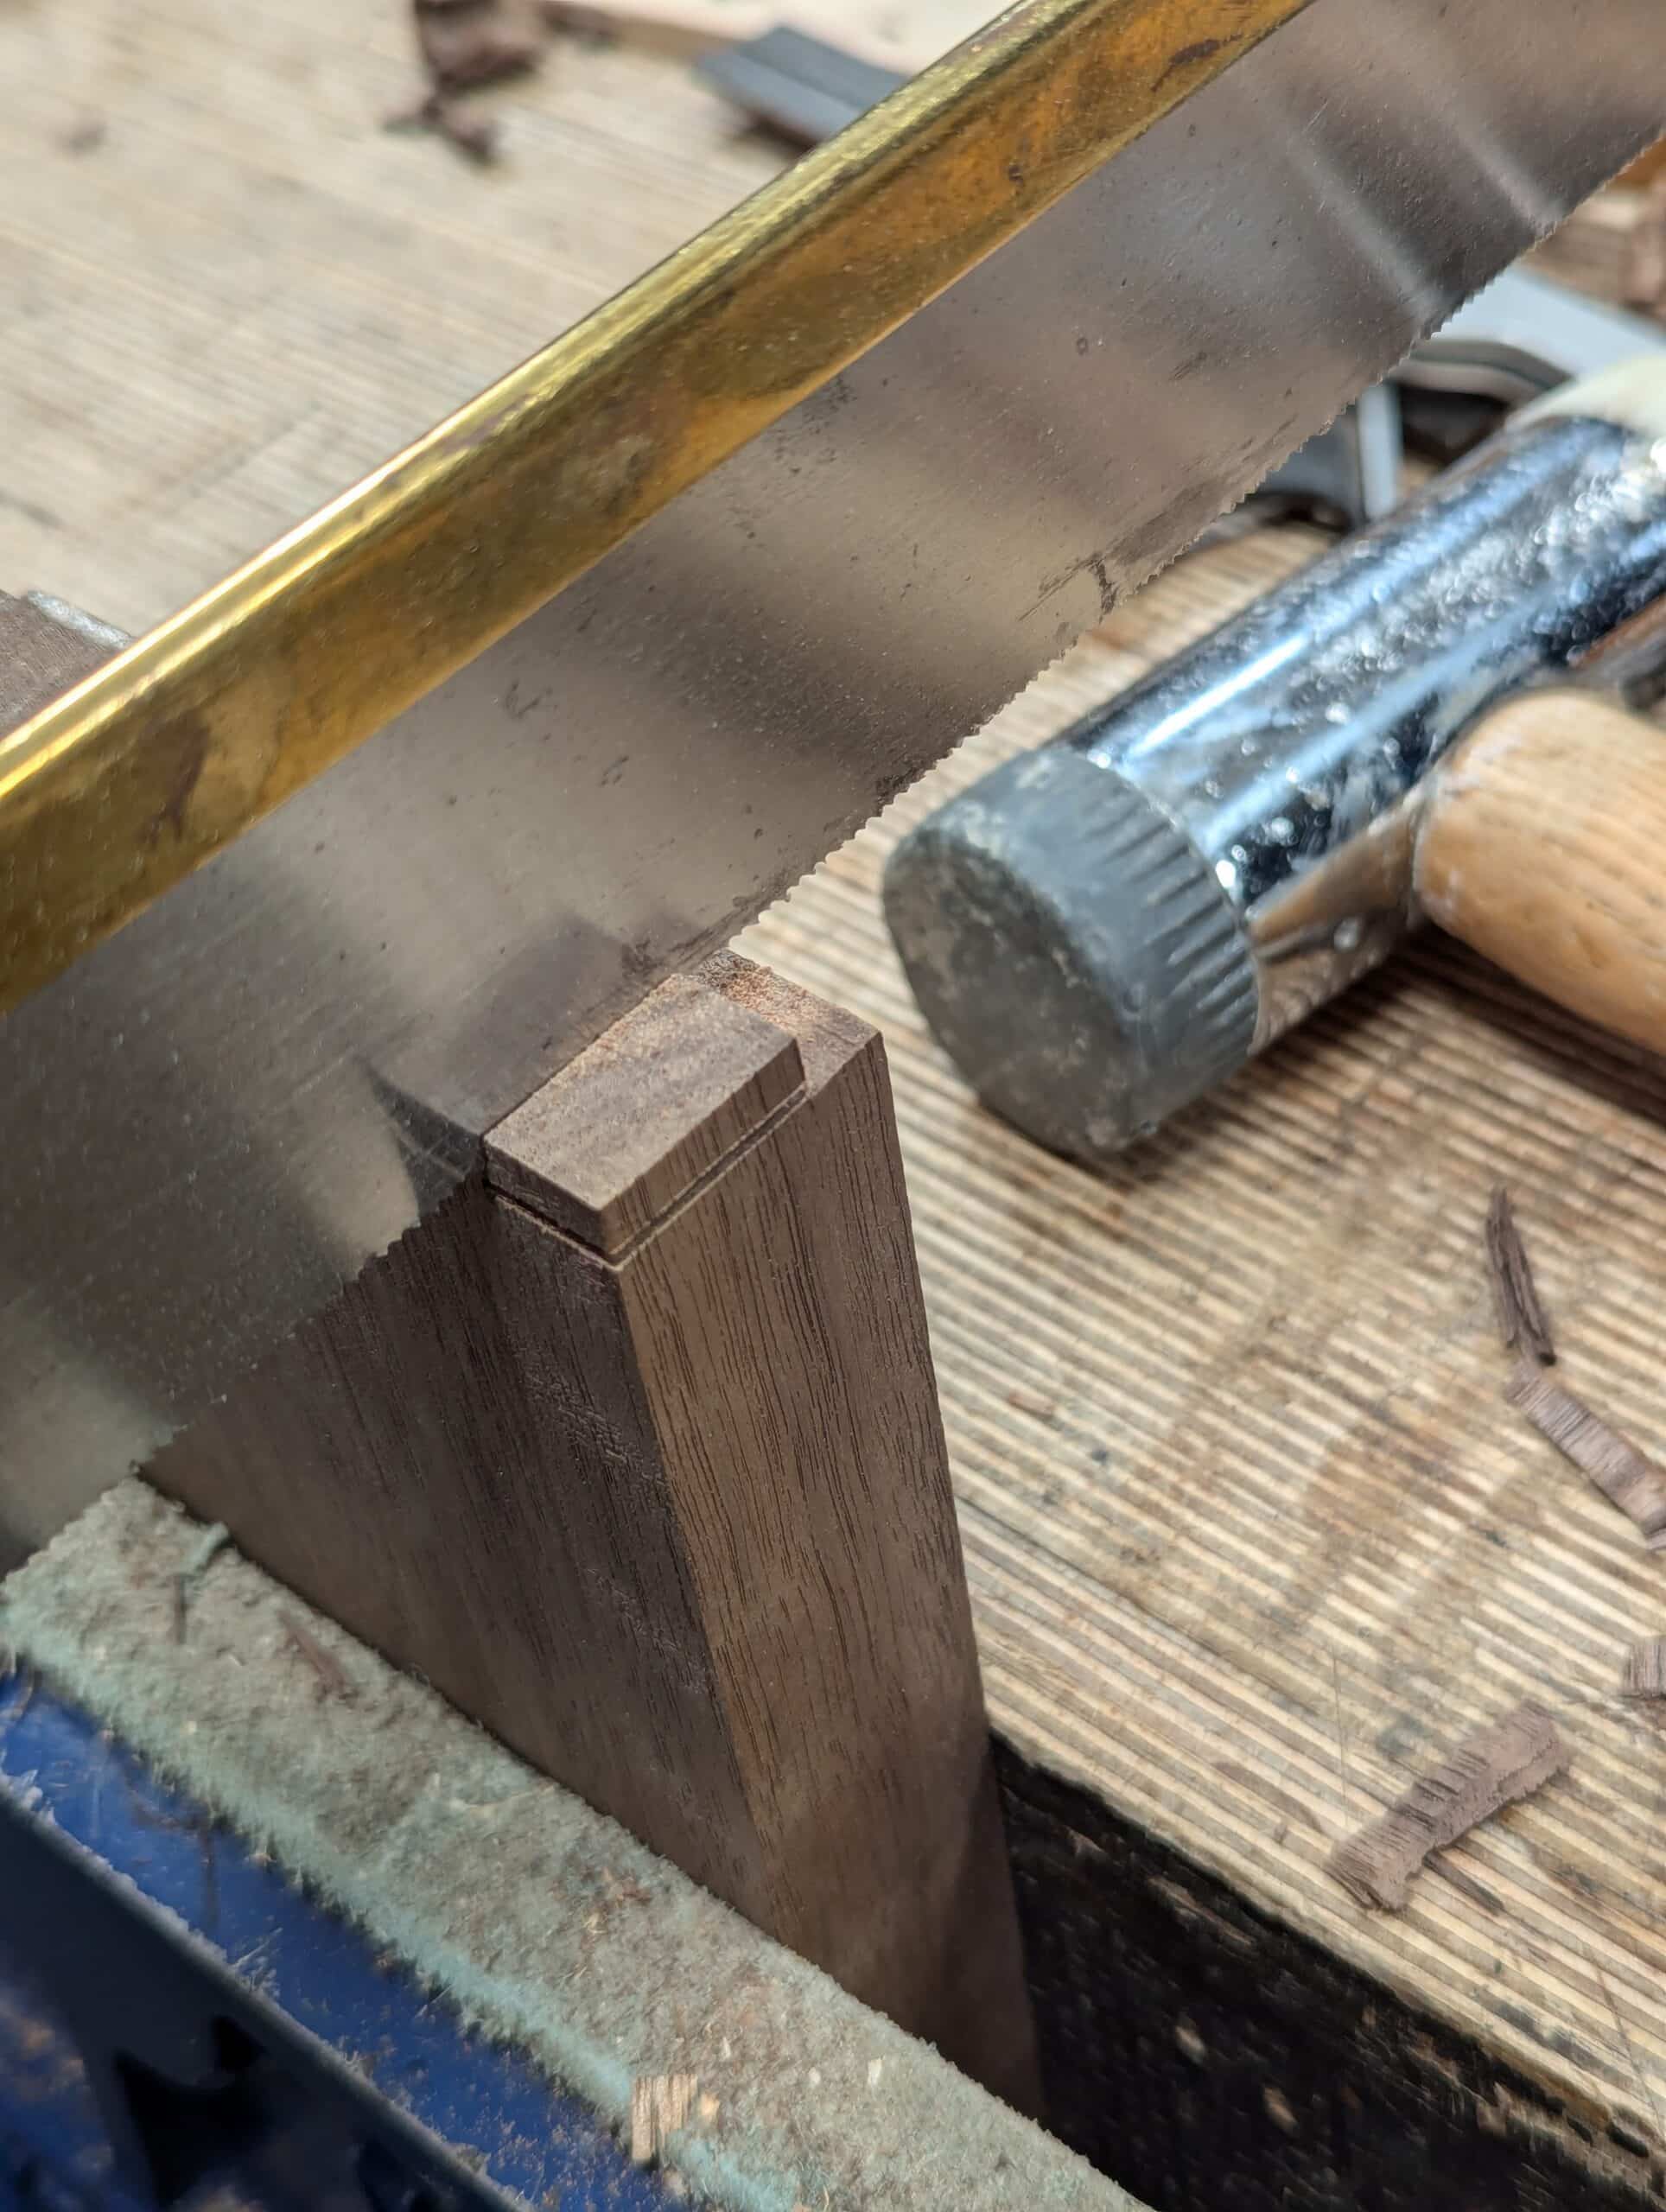
Now I pare cut into the knifewalls each inside of the housing dado and alternate between chopping and paring to take down the knifewalls gradually closer to the depth lines but leaving in a small depth to remove with the initial router plane.
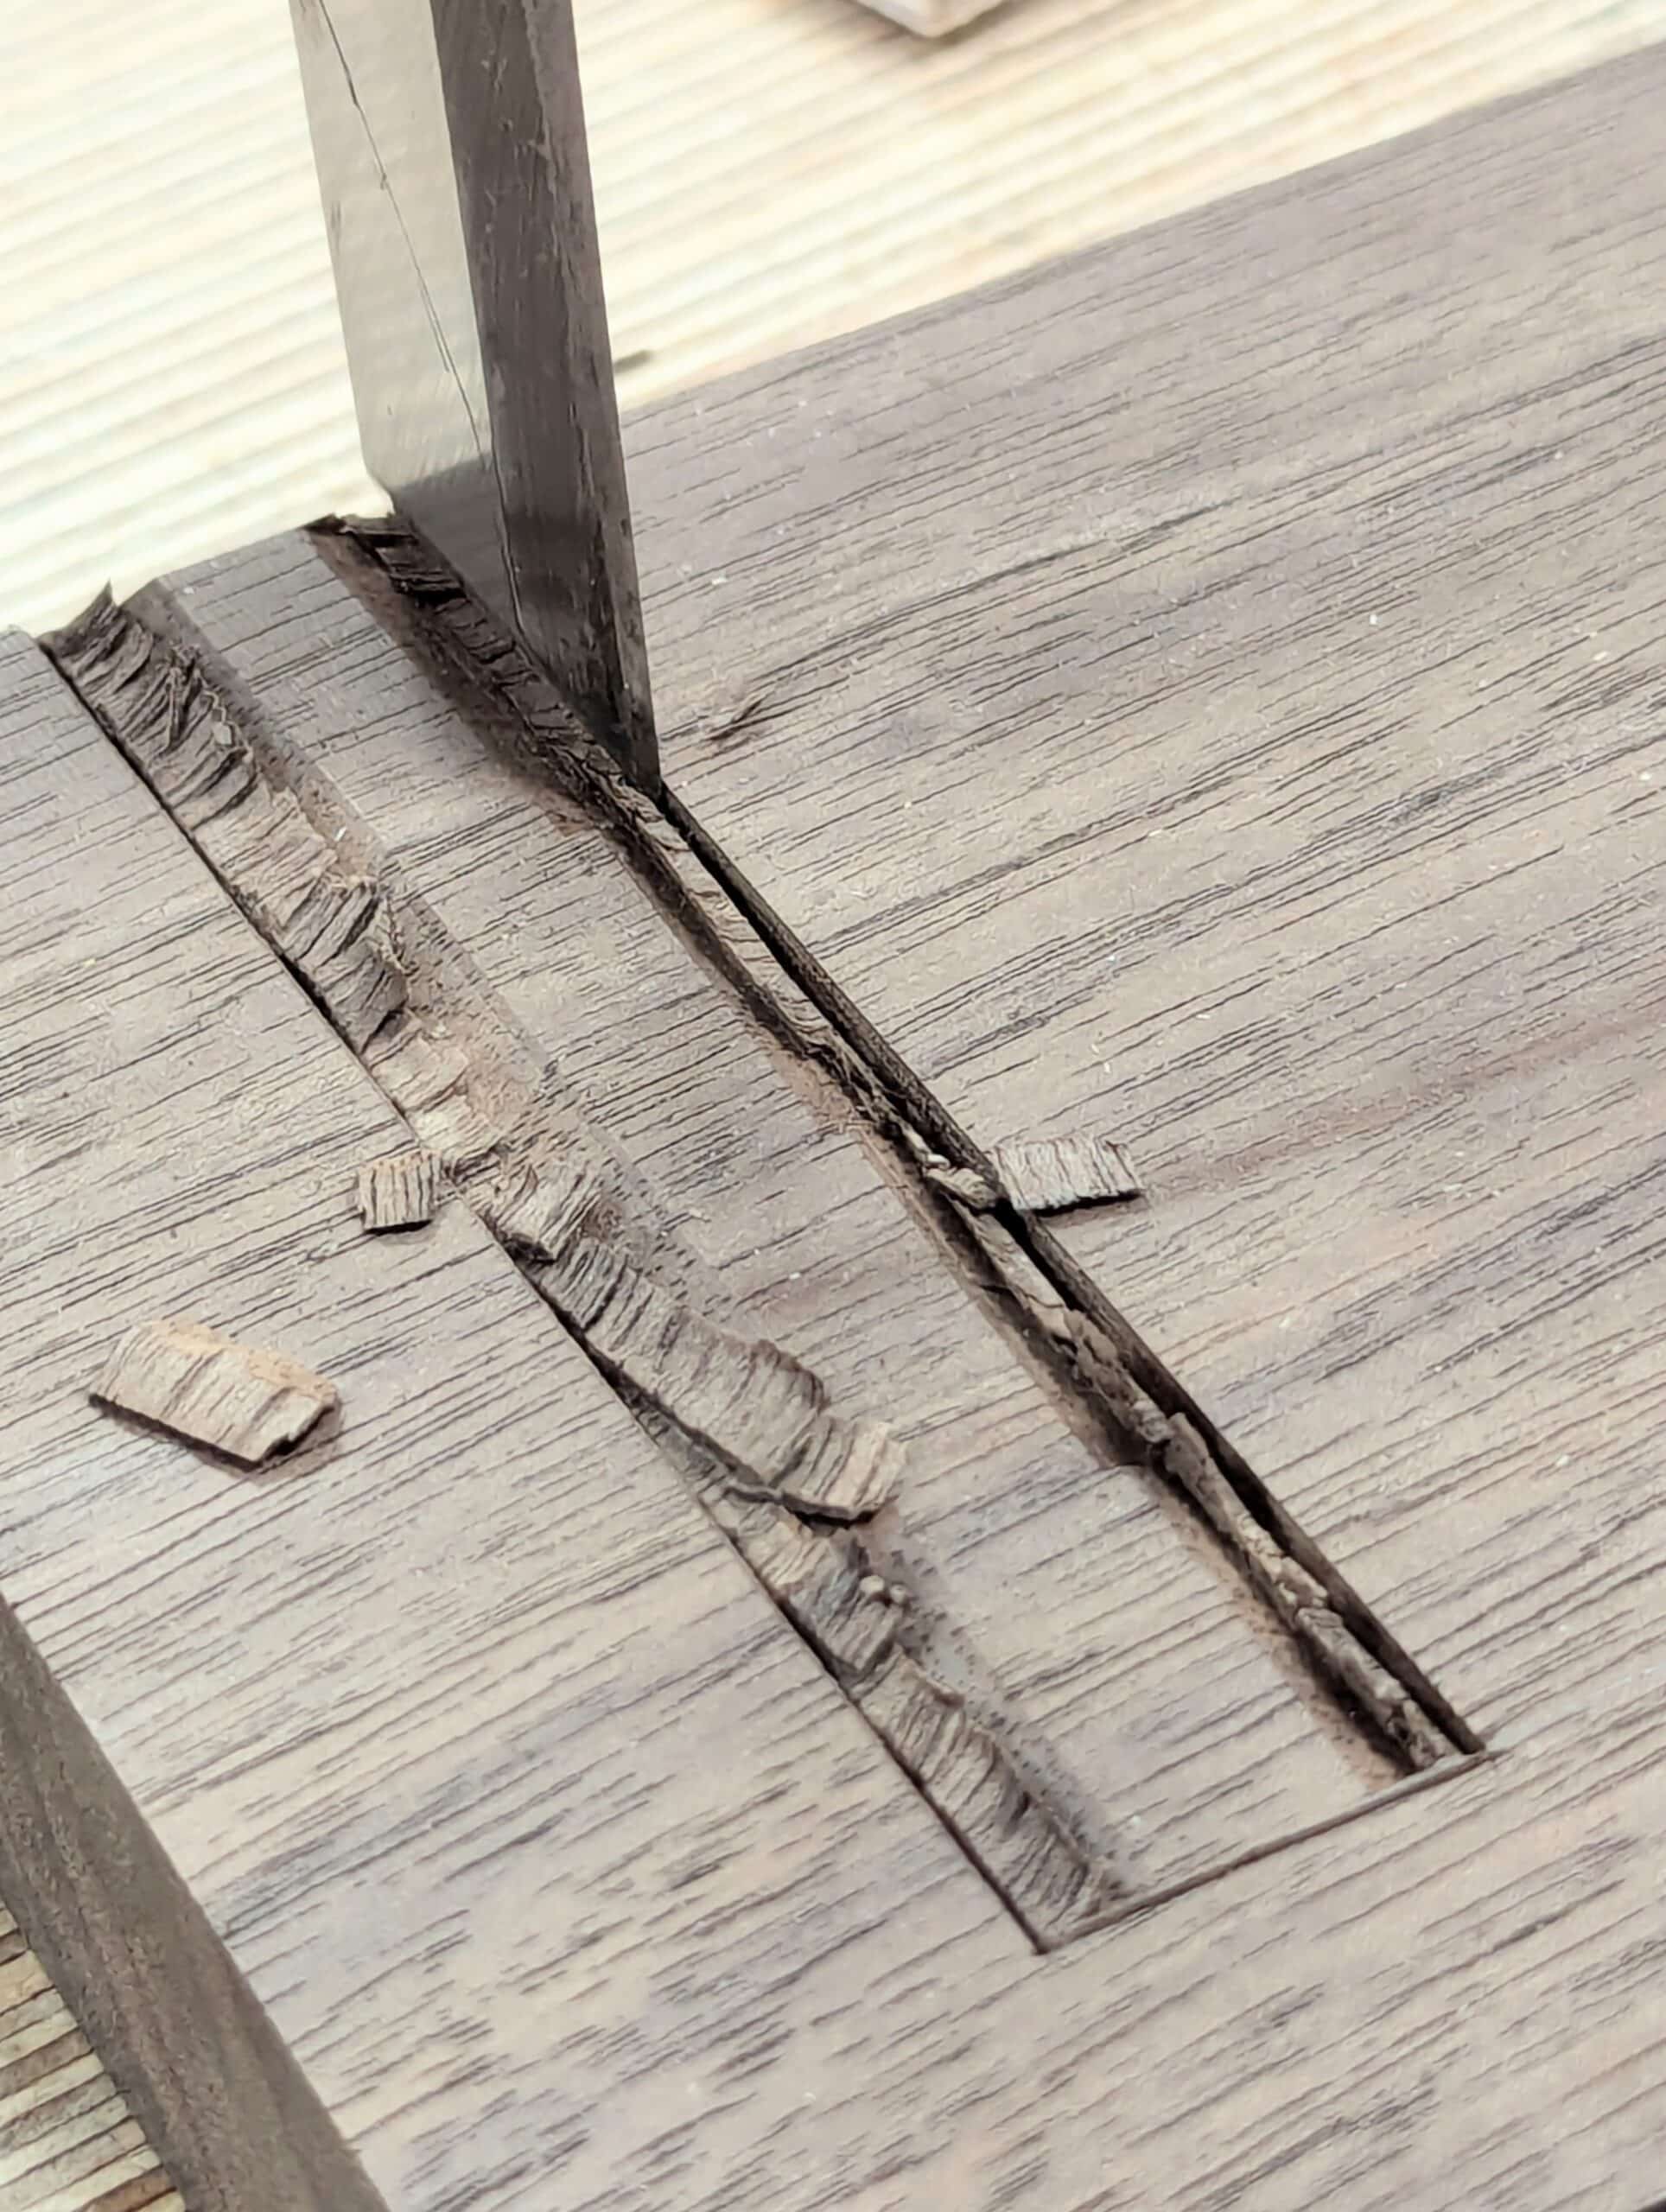
I pare out the waste with the chisel to take out the bulk of the waste near to depth.
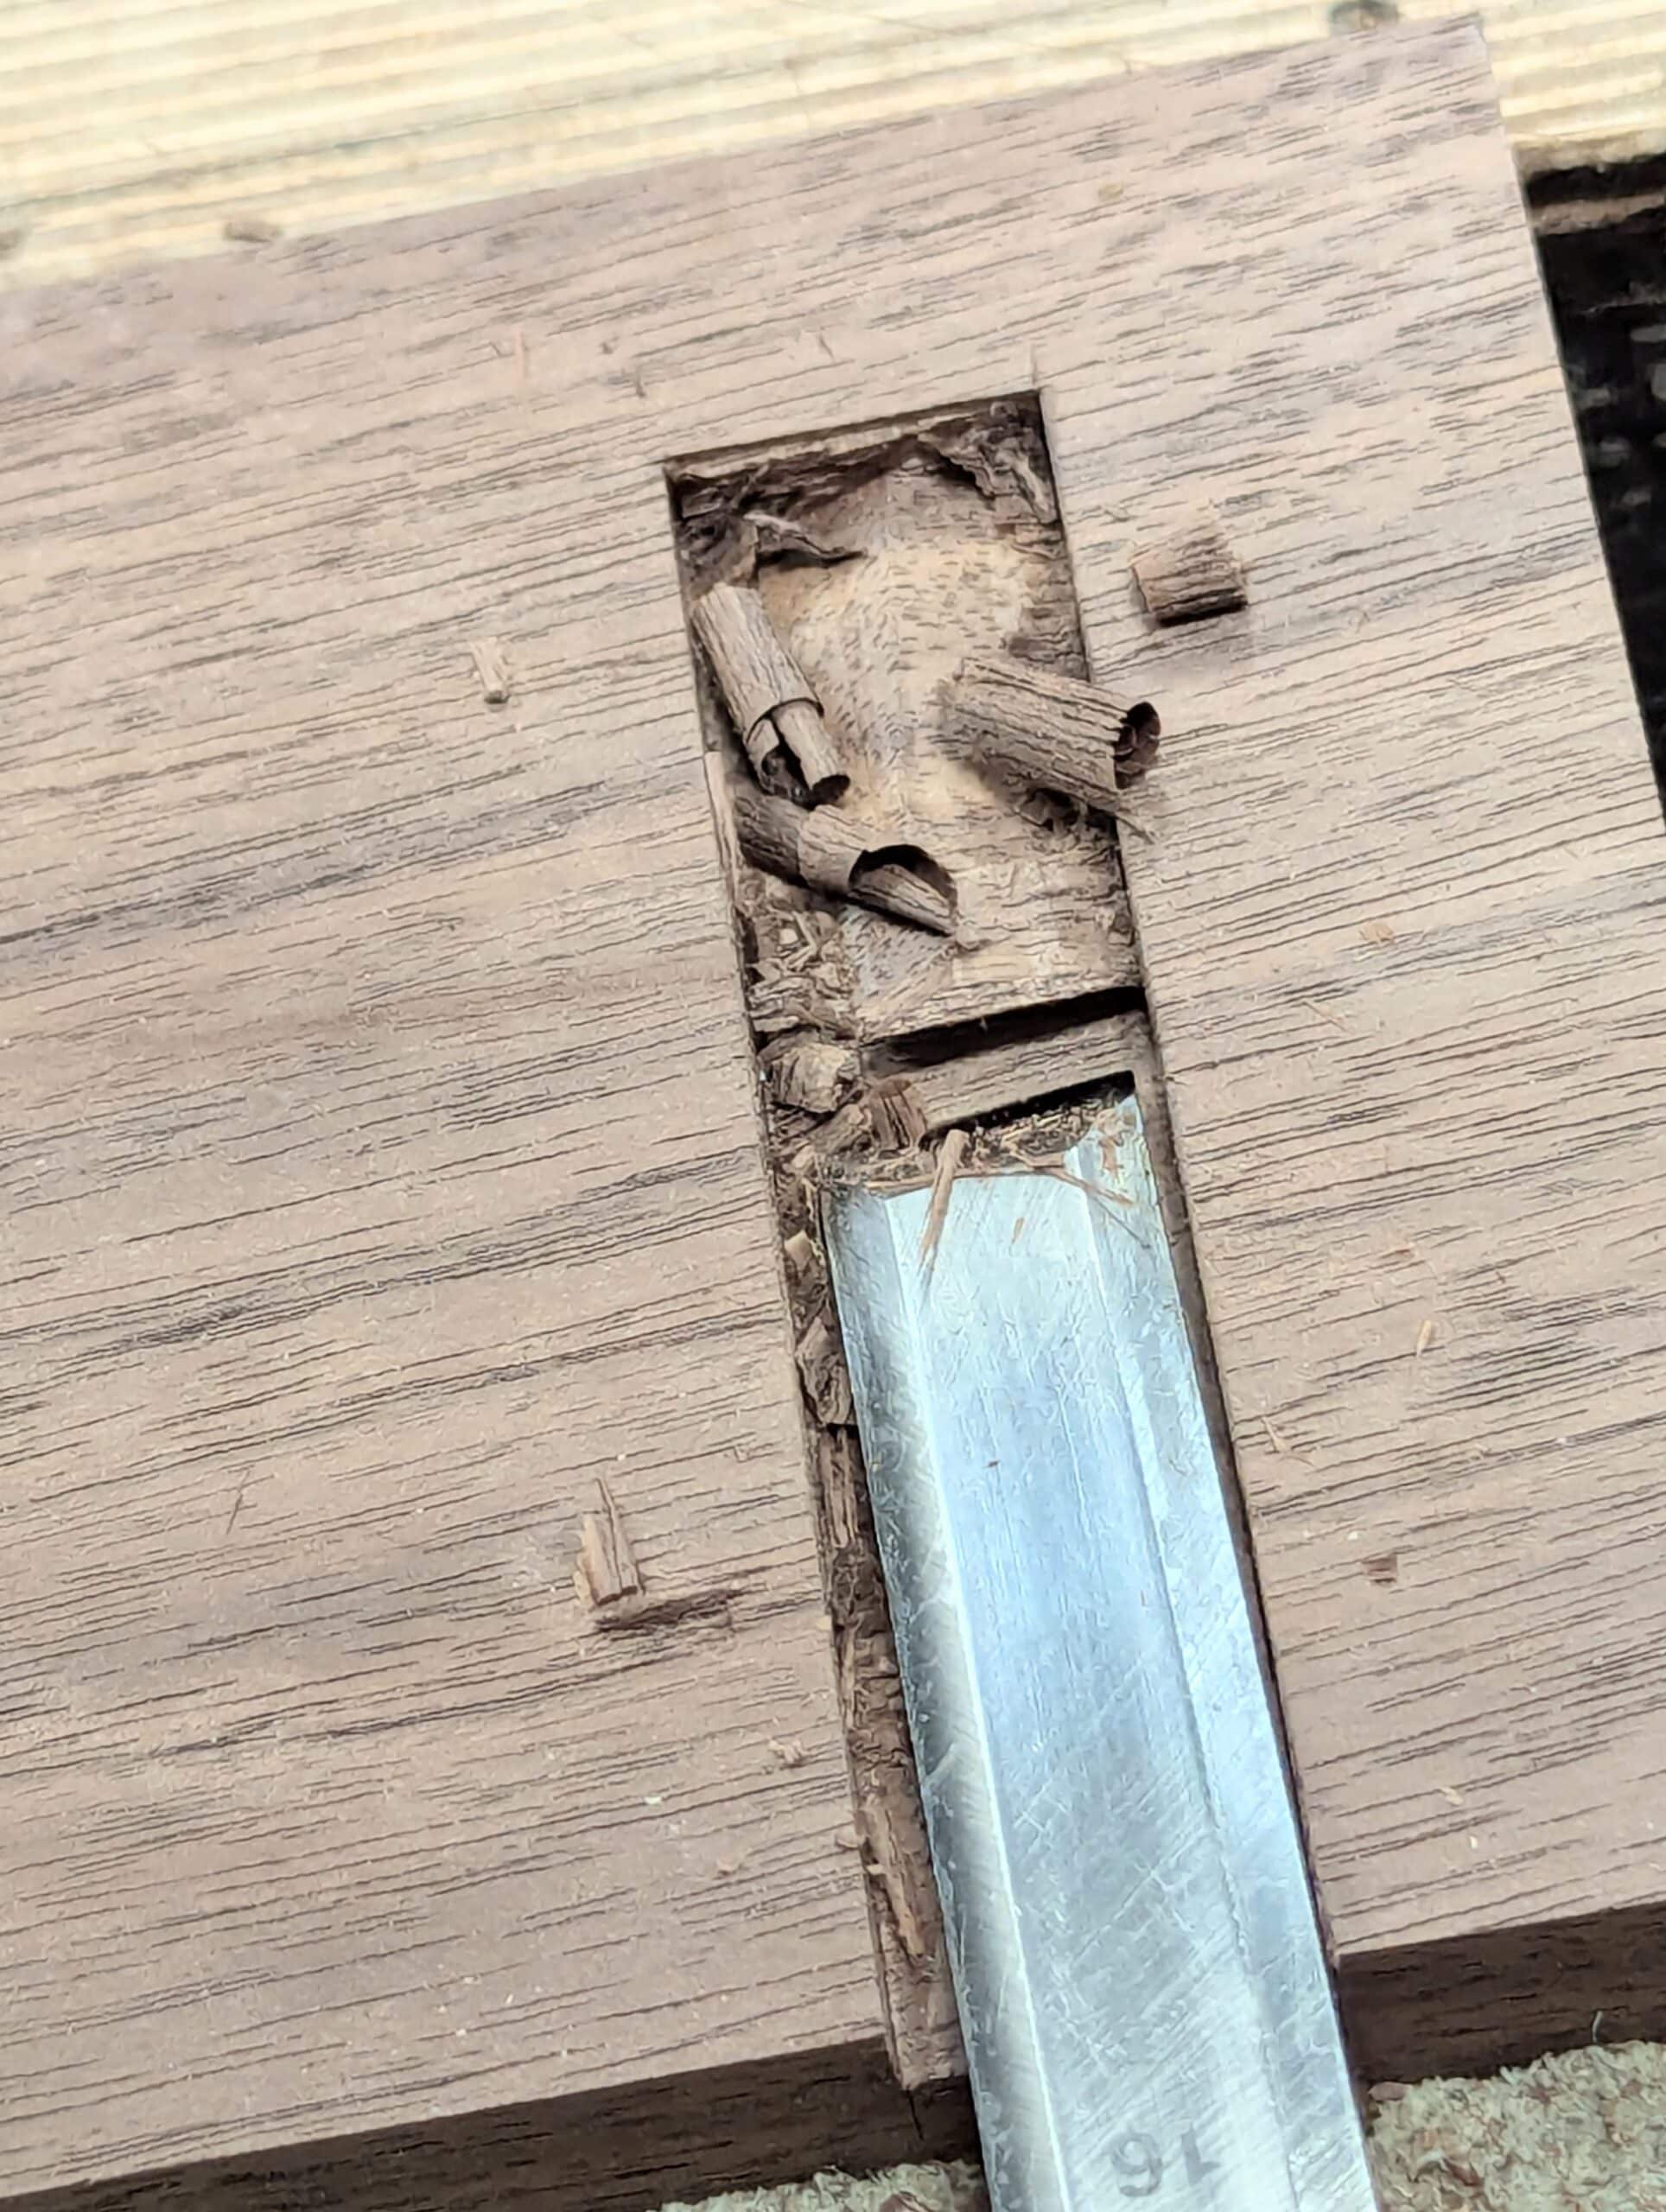
Now notice that I use two router plane types because I have two so I can keep adjusting the one ever-deeper whilst retaining the original depth setting of the other to establish the final depths on all of the dadoes exactly.
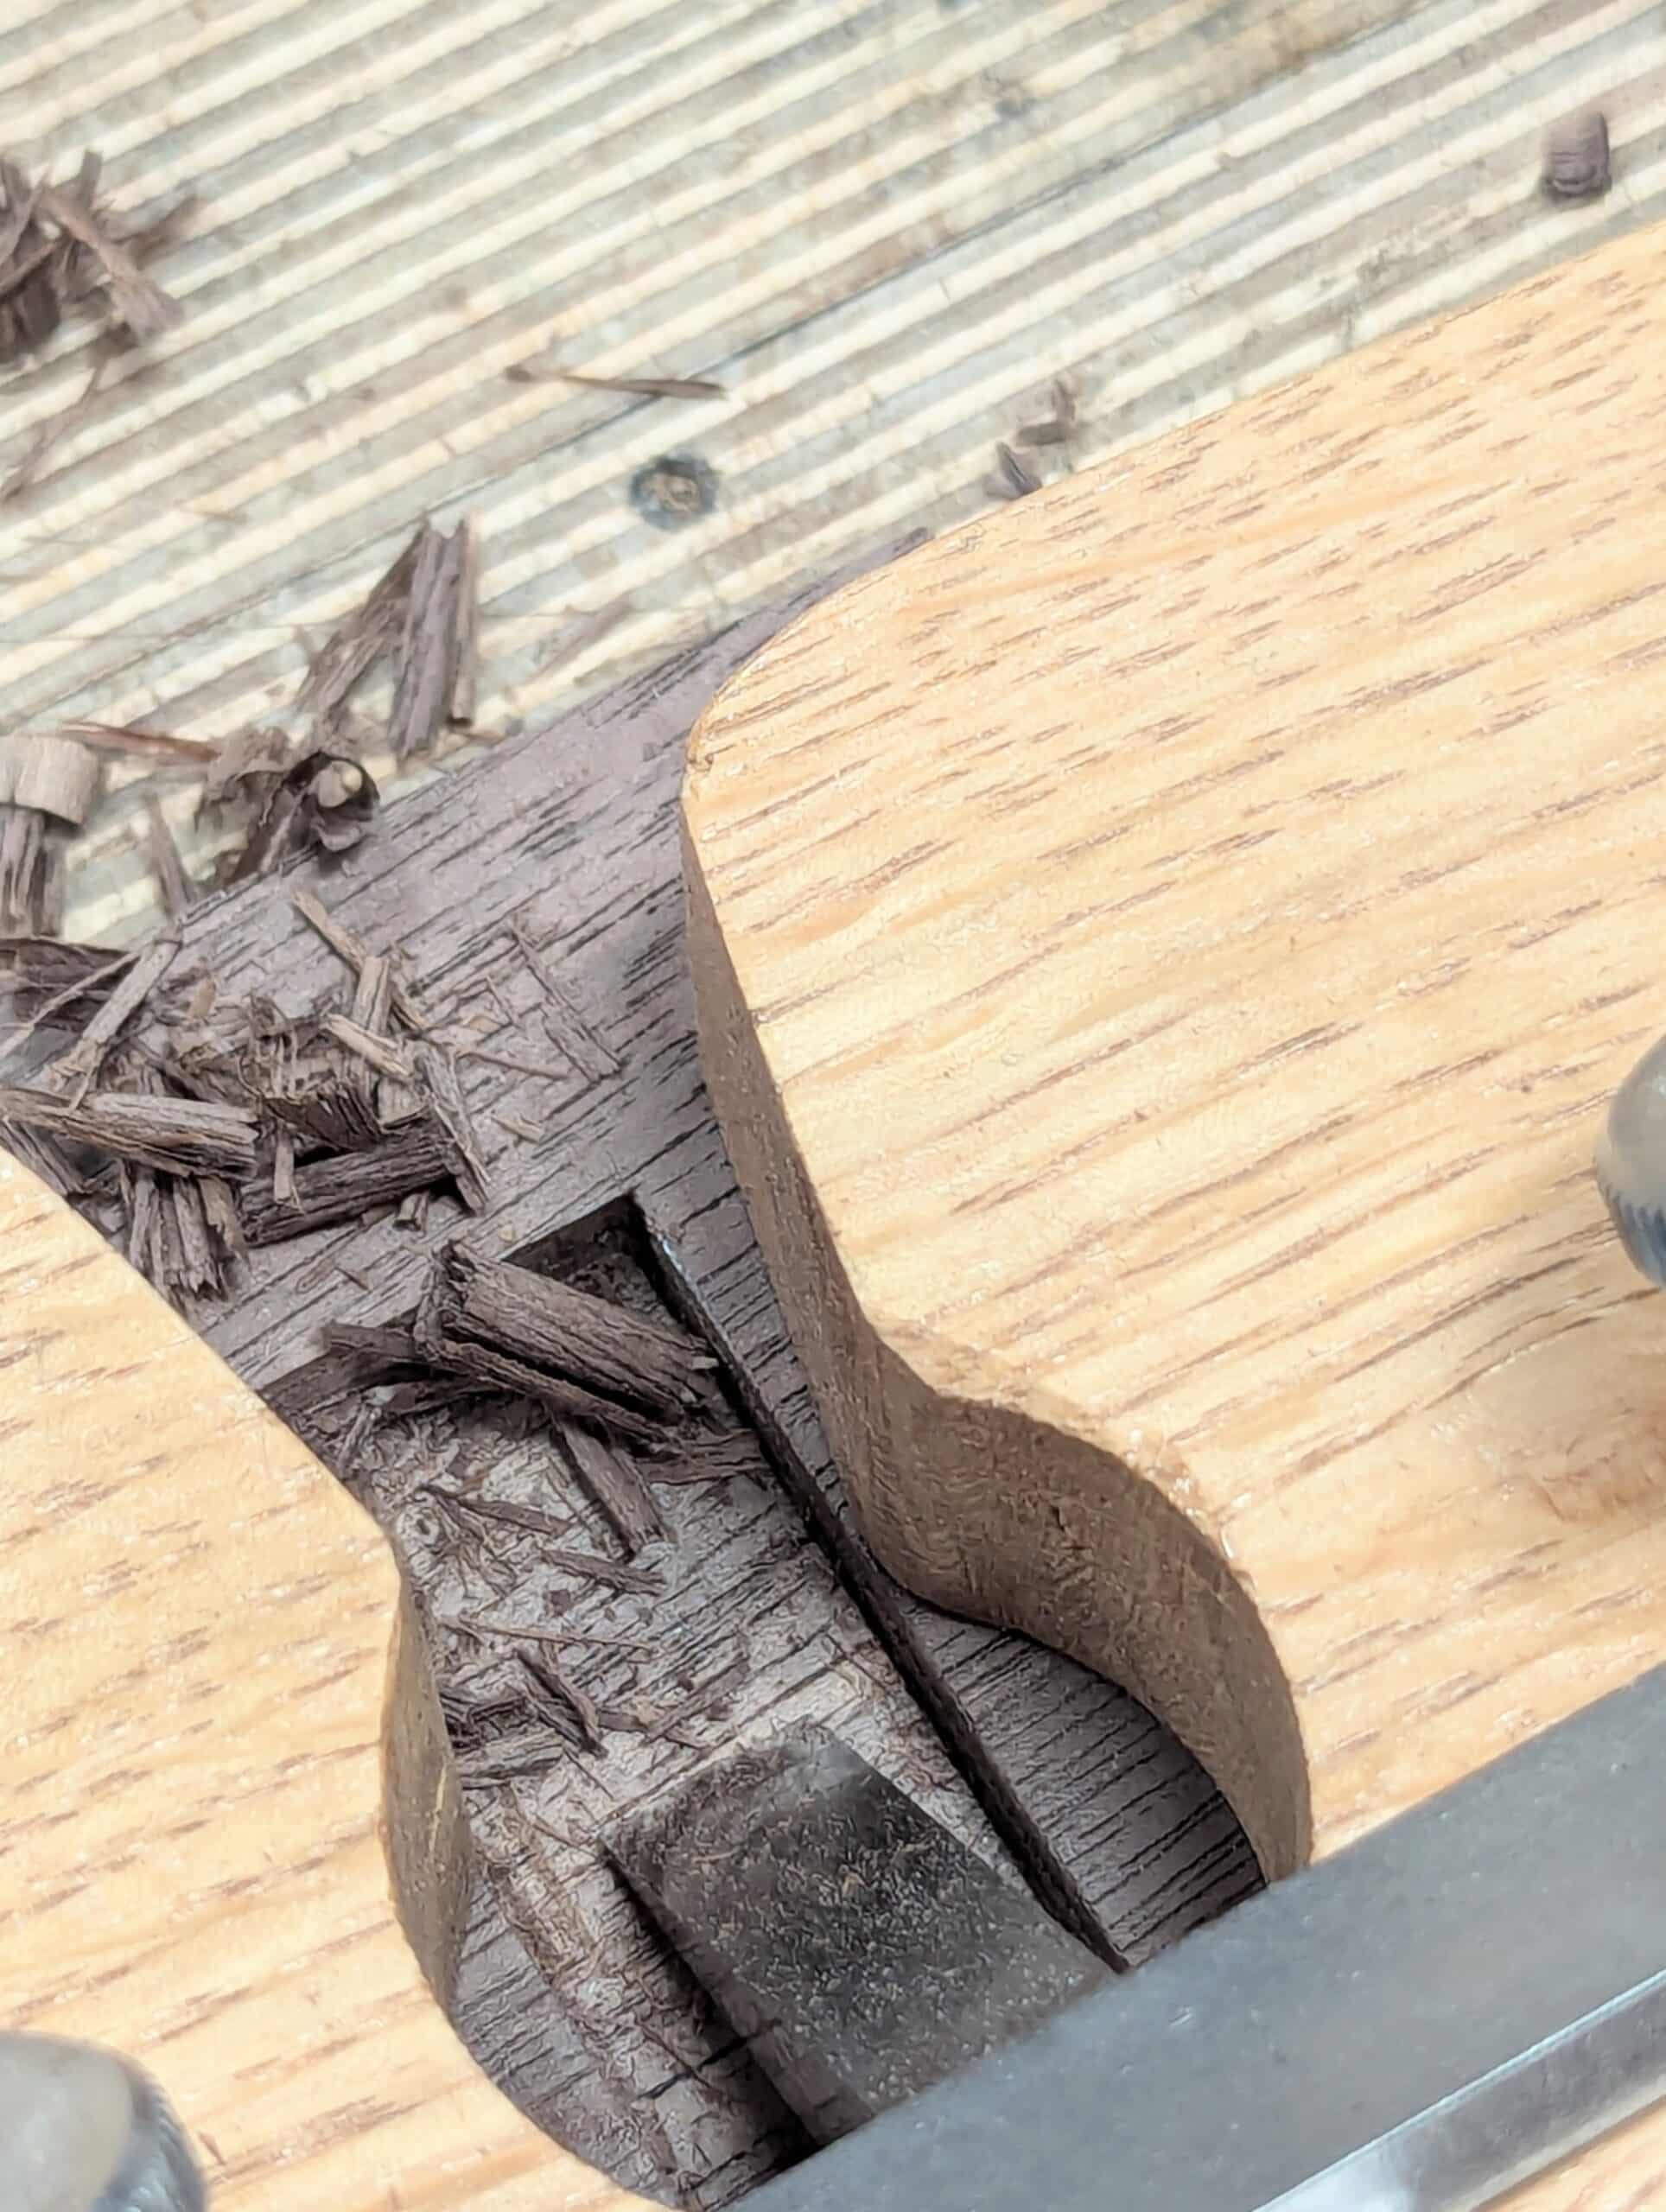
Notice too that I have an open throat router plane which works especially well on stopped housing dadoes as the waste wood does not jam betweent front edge of the plane’s sole and the end of the housing dado.
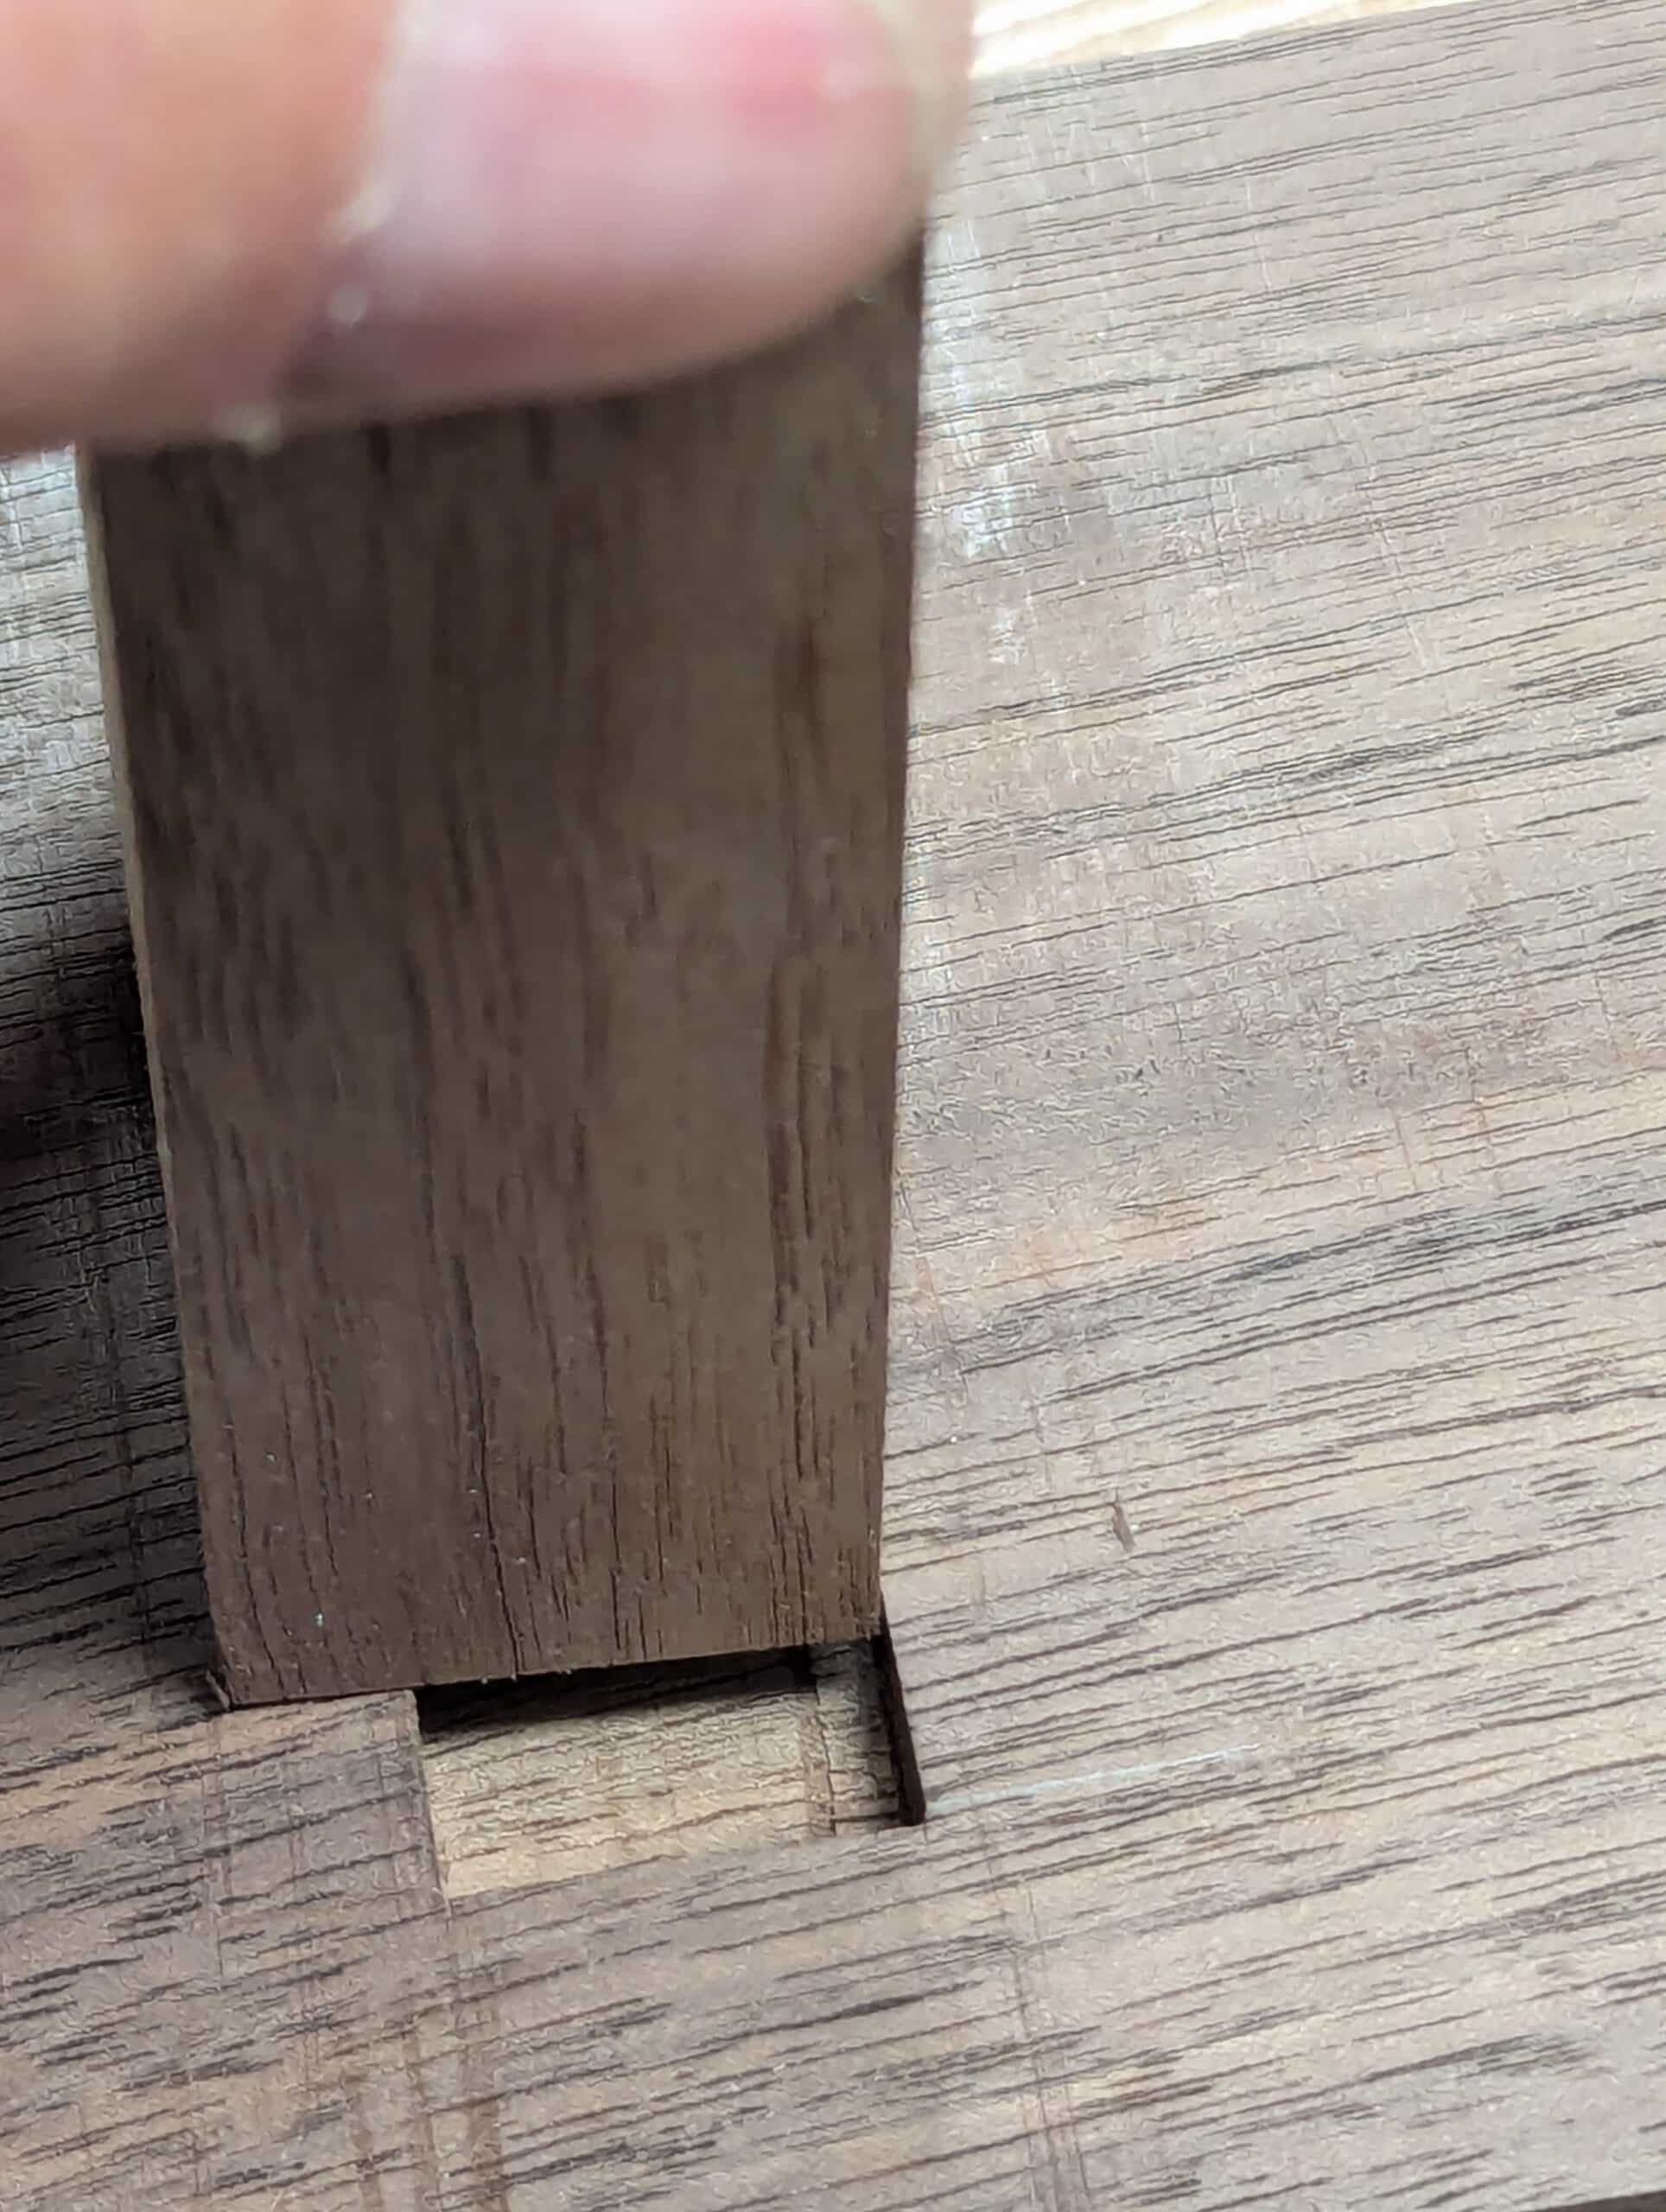
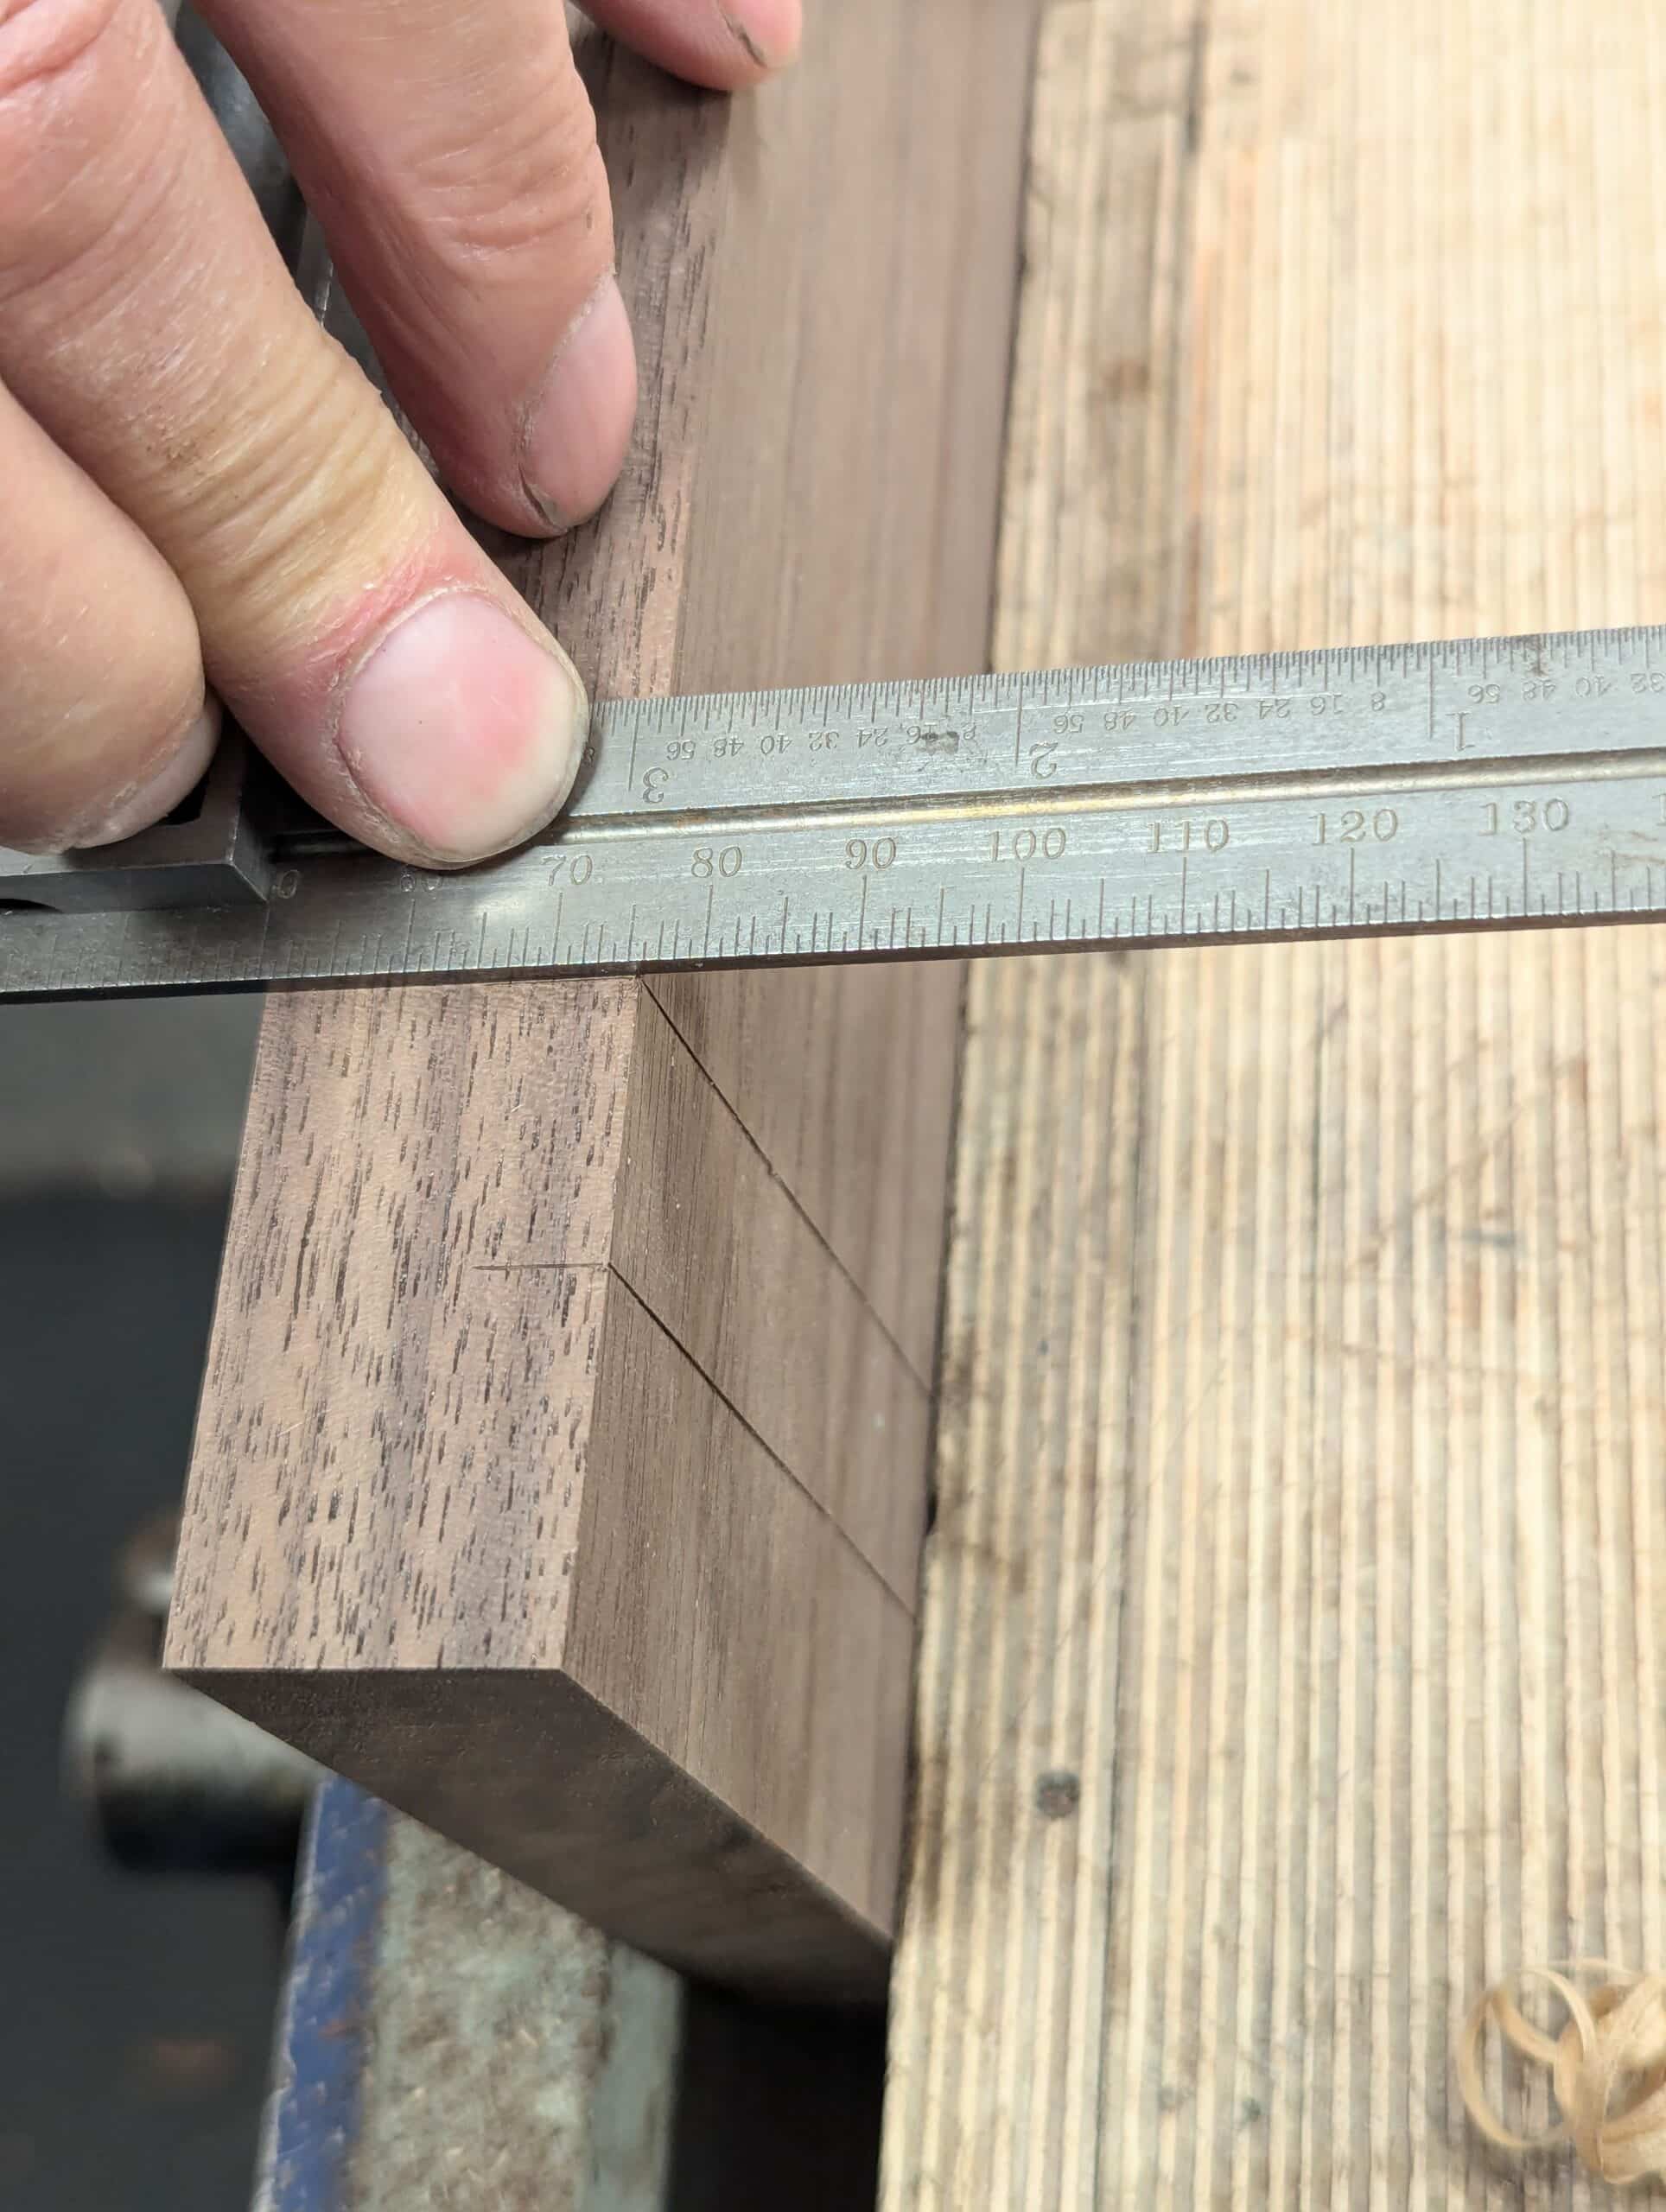
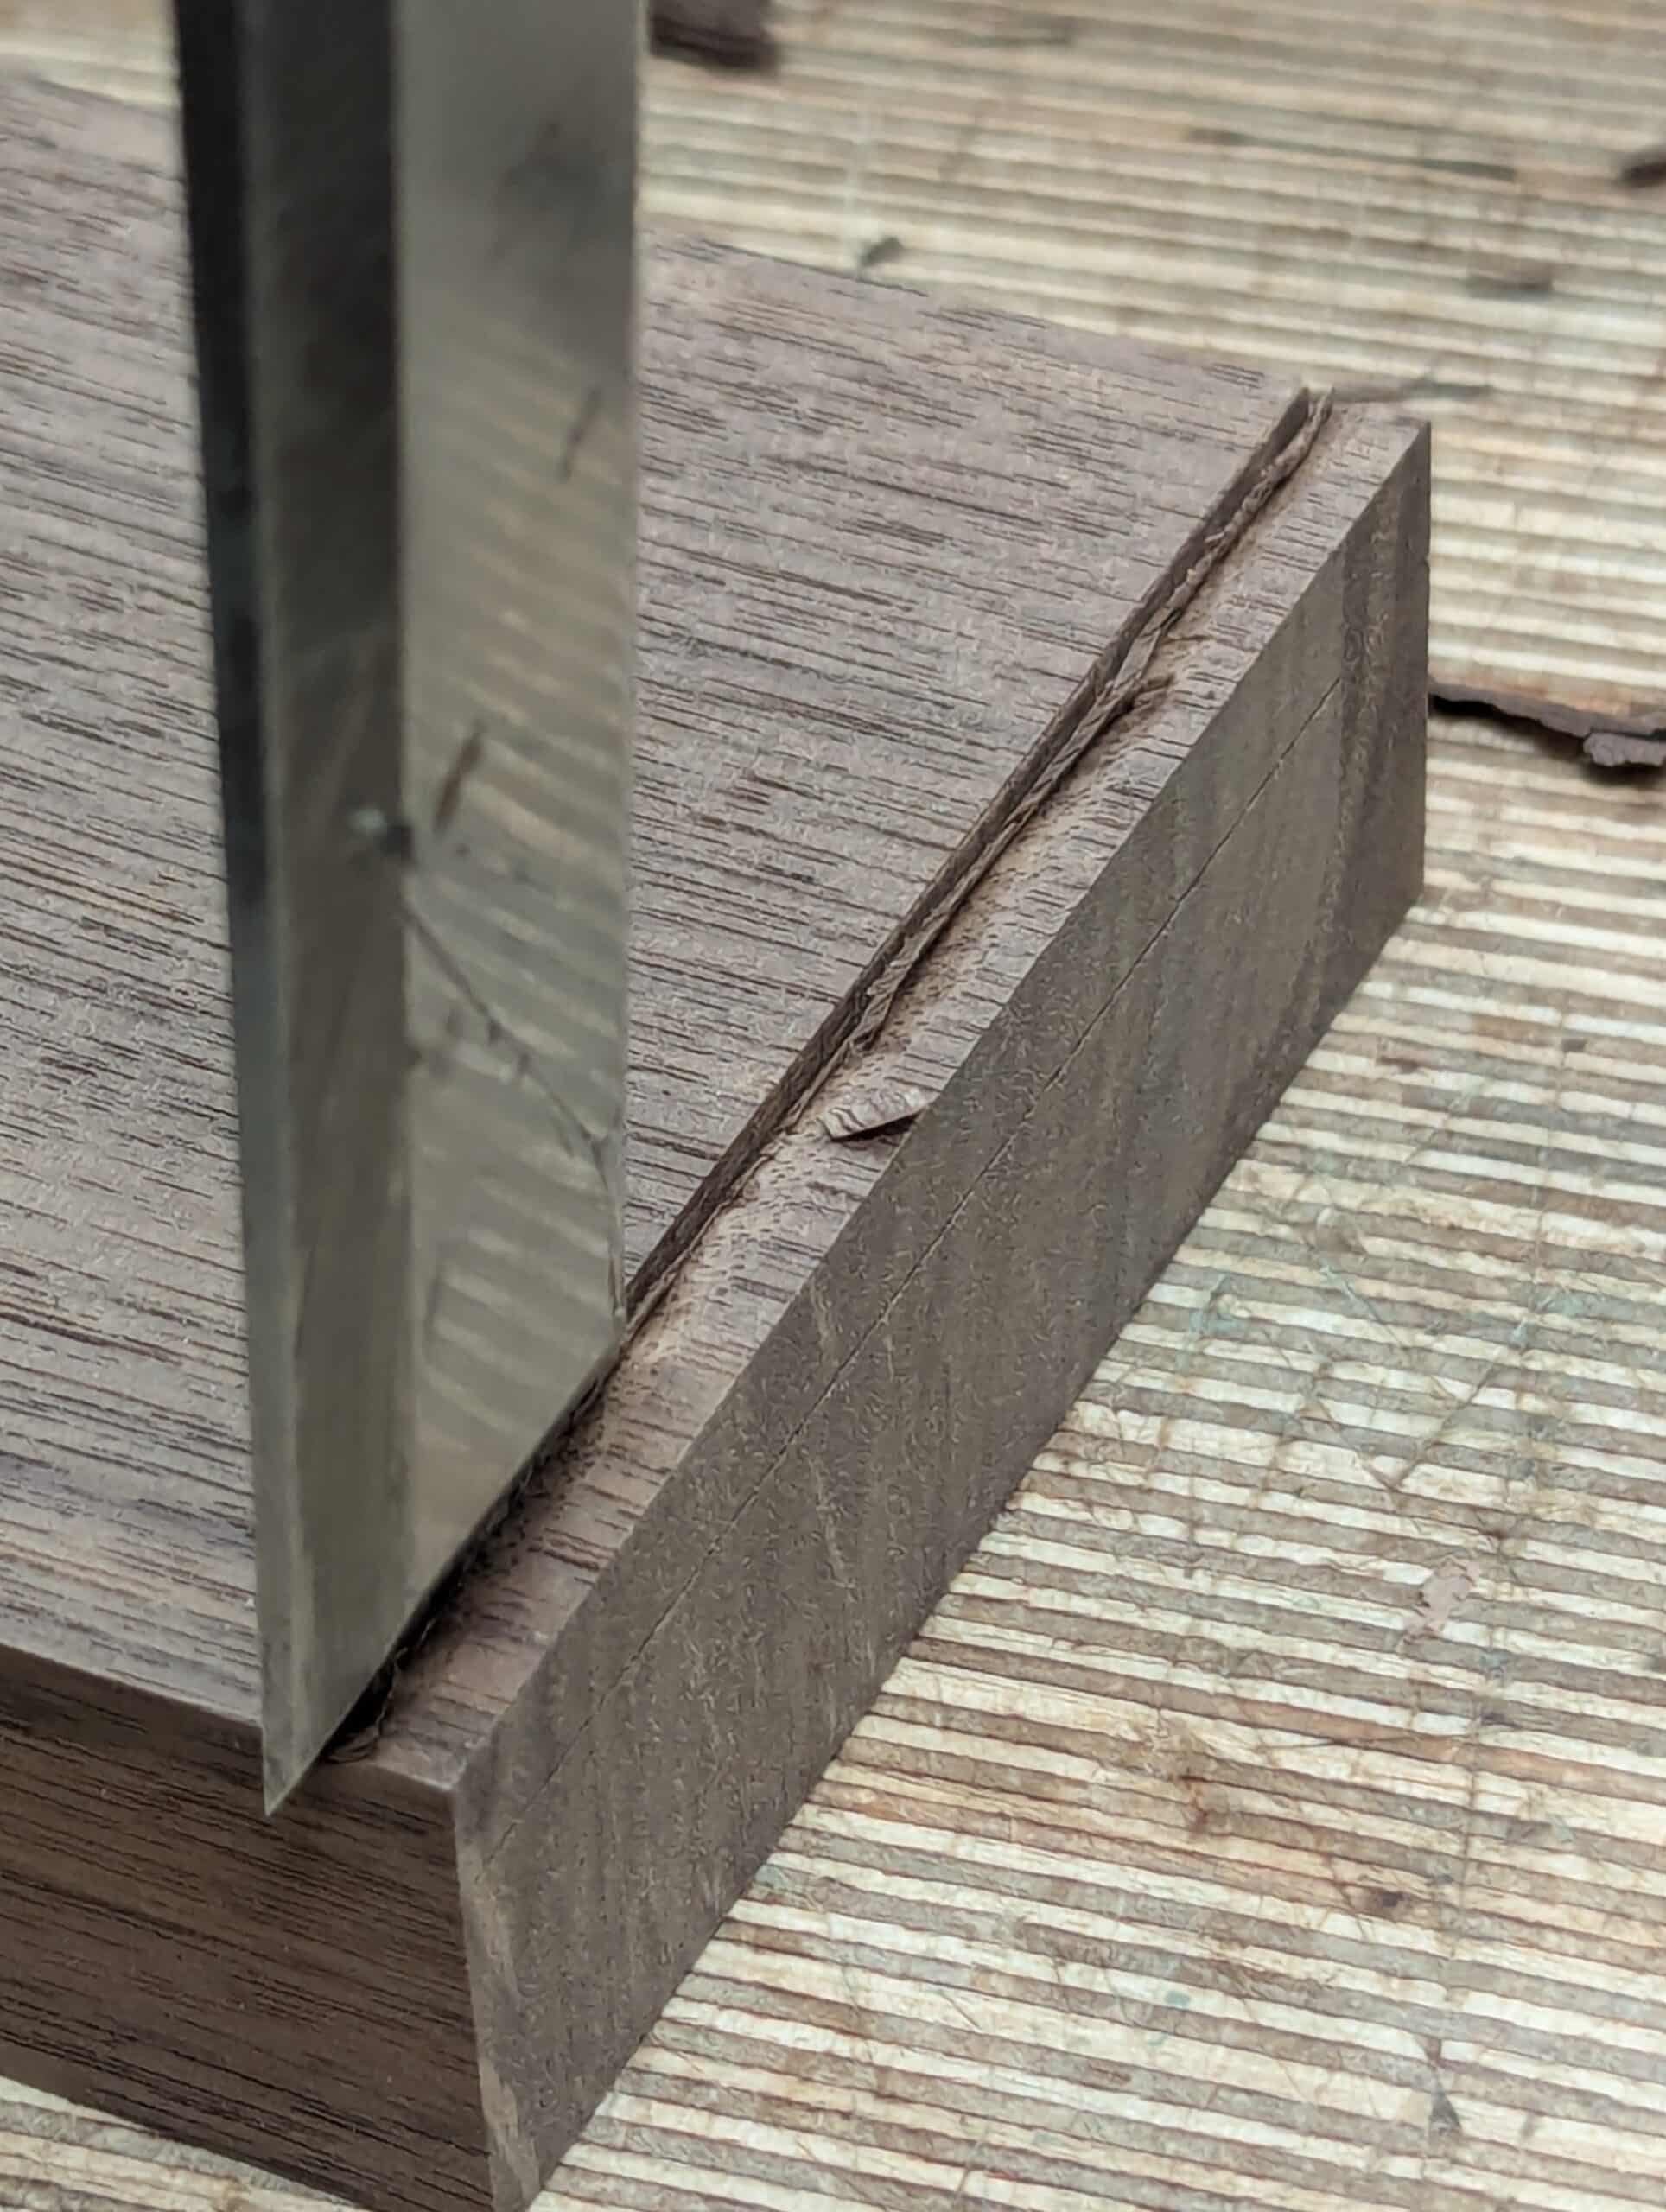
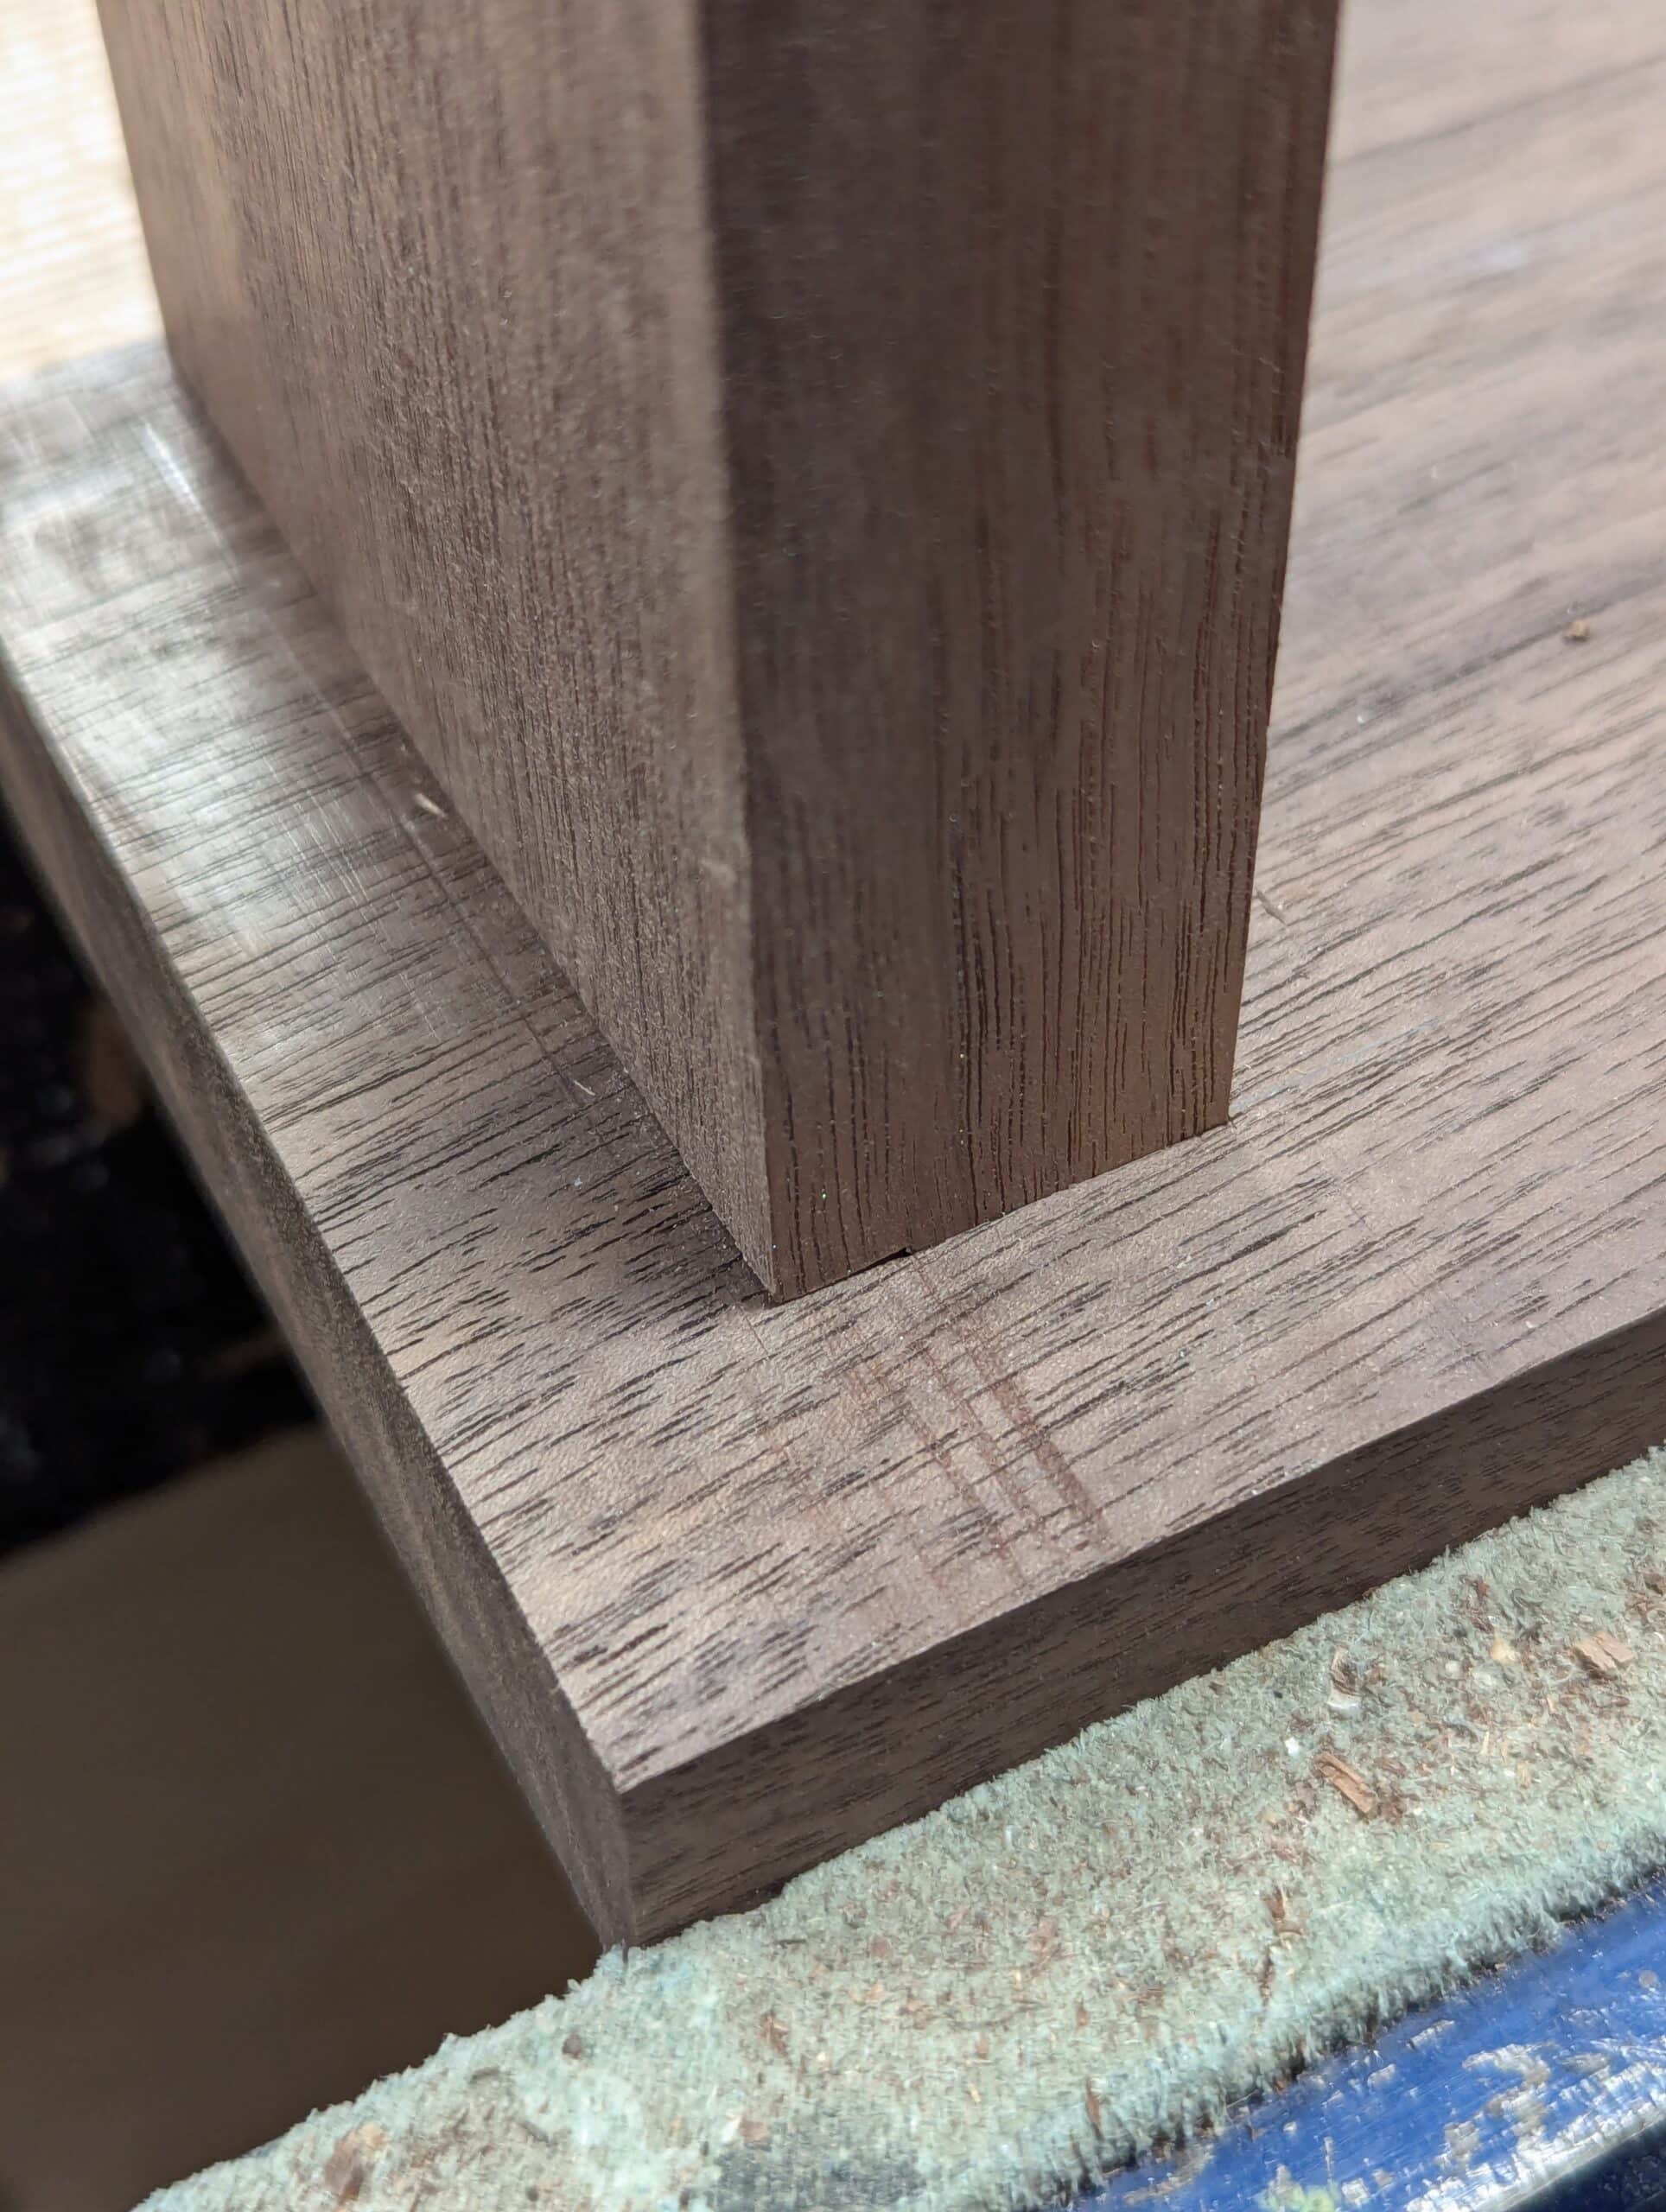
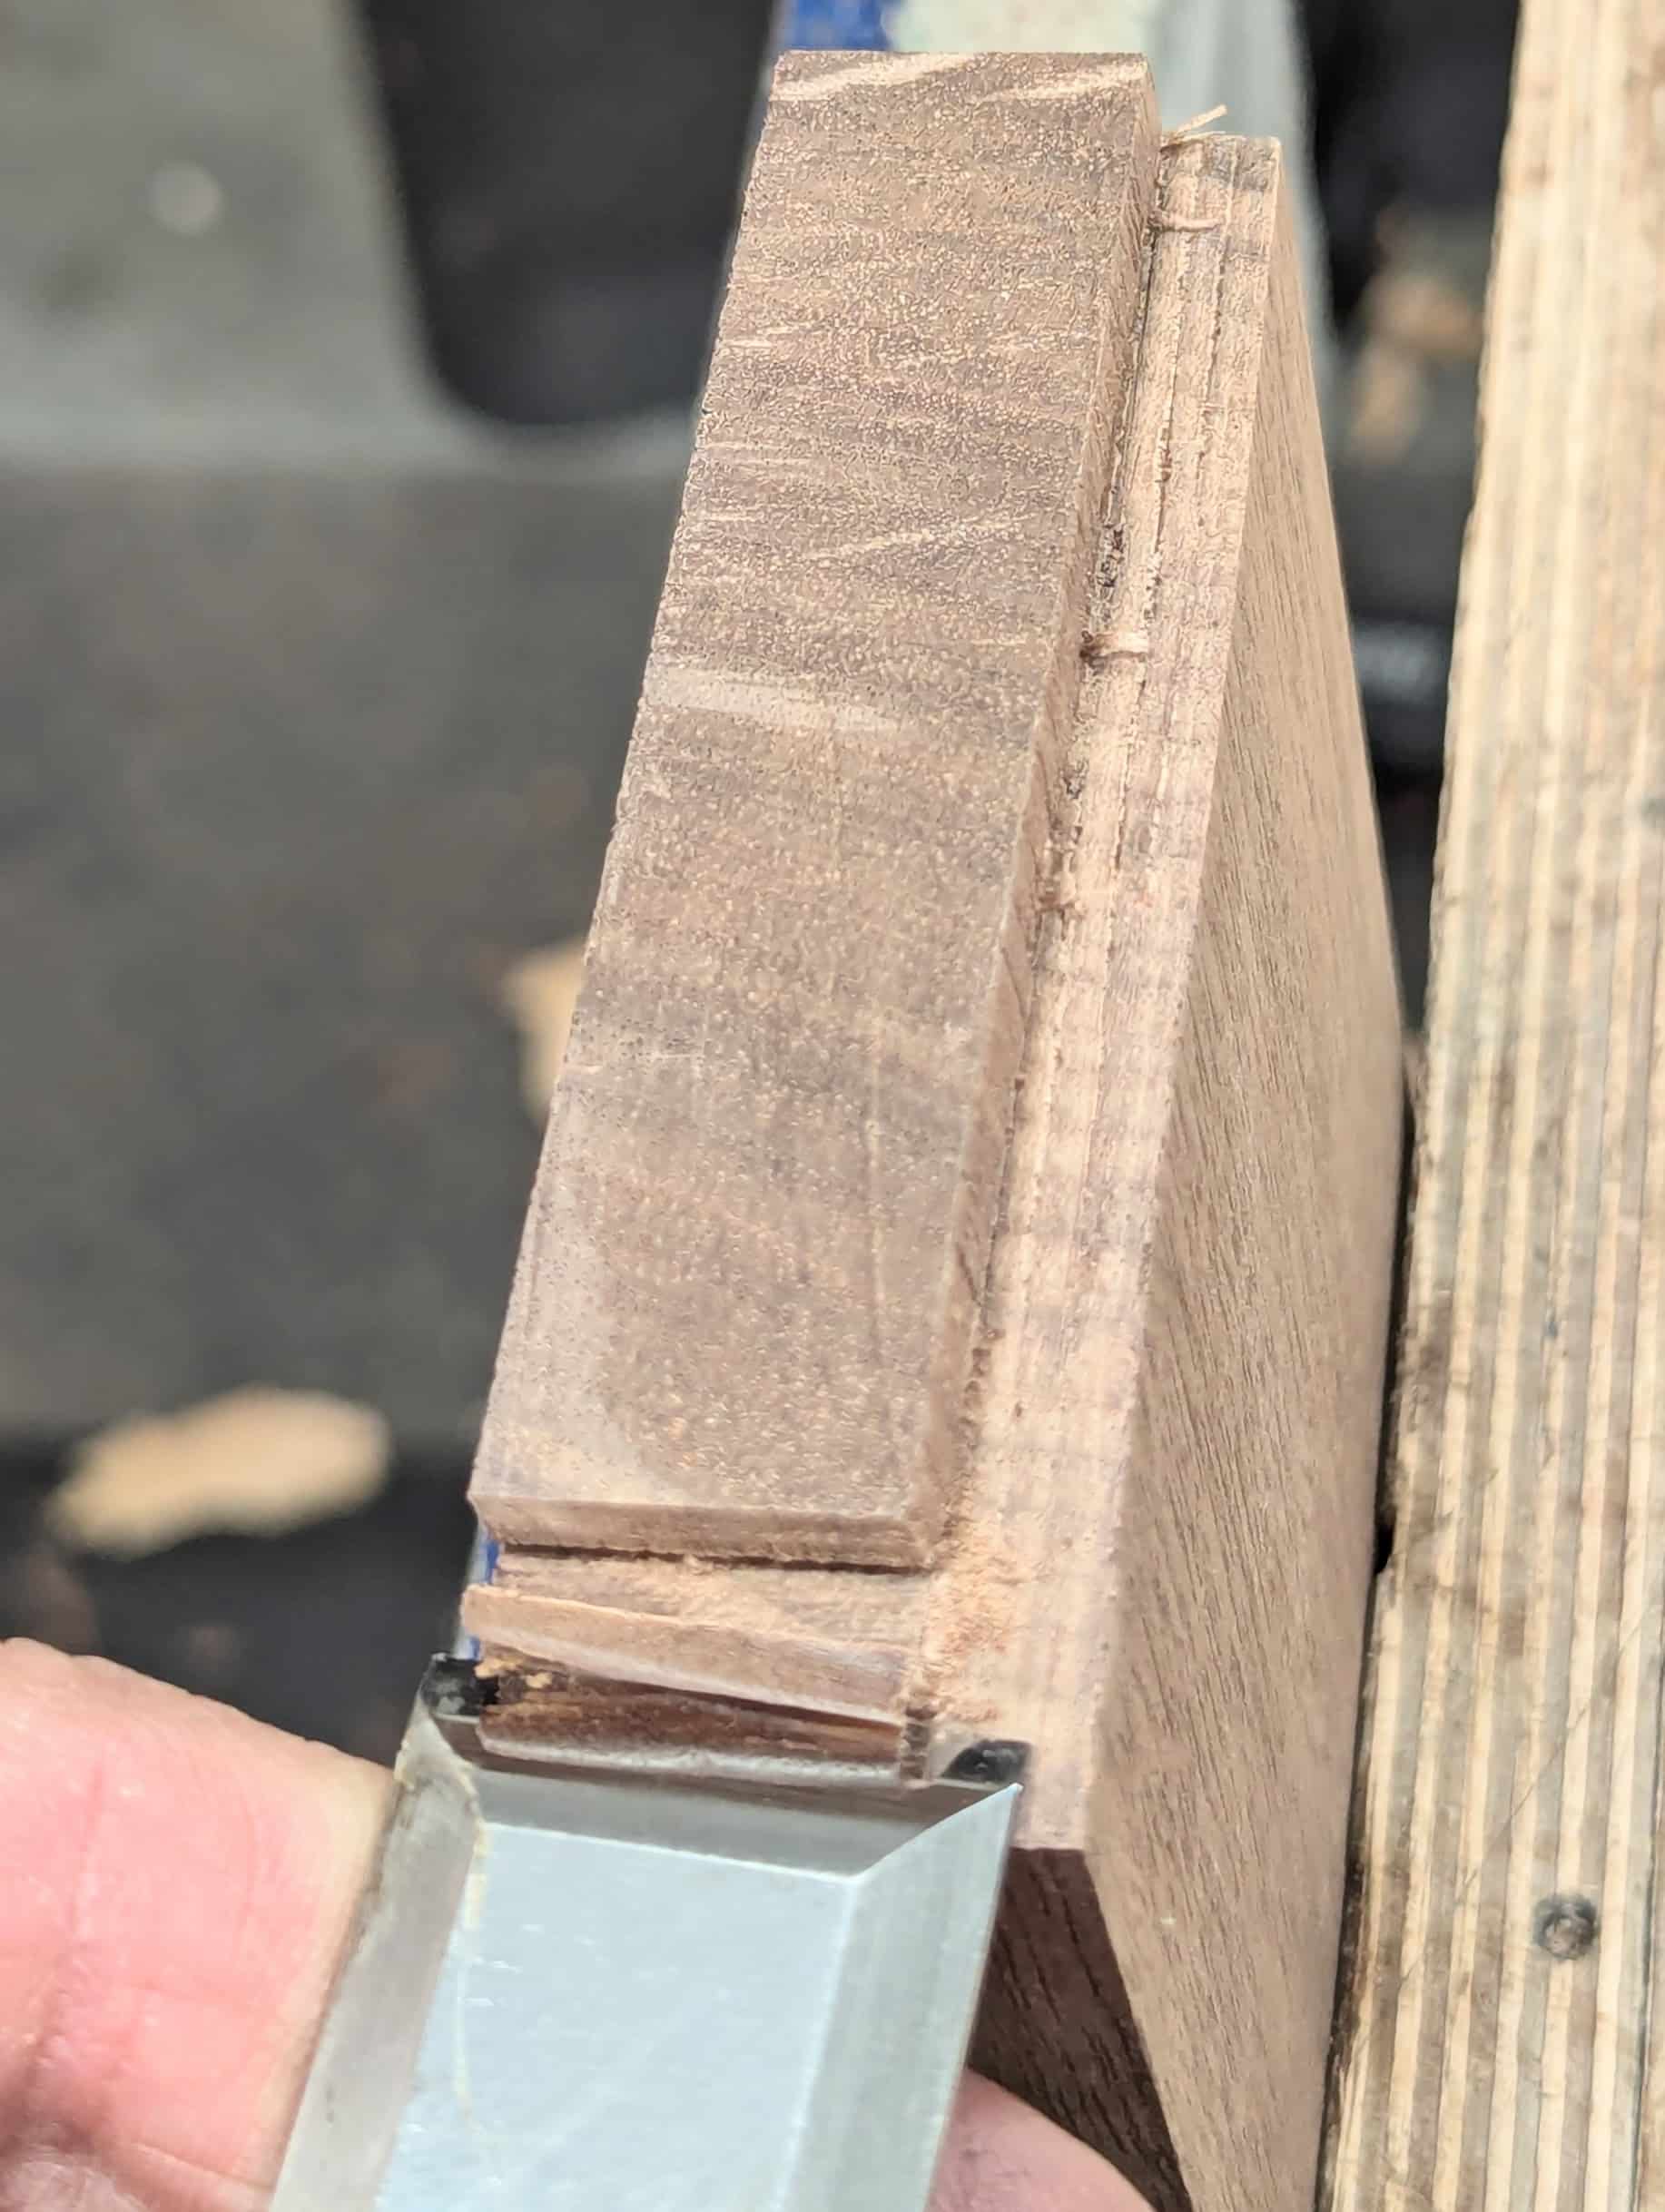
Here you clearly see the difference between my 1″ thick side piece yet to be housed into the recess and the 3/4″ housing dado.

To set the depth line to rebate my side piece I use the same setting on the orignal router plane which works like a knife cutter set at the 1/4″ depth, so an unaltered setting.
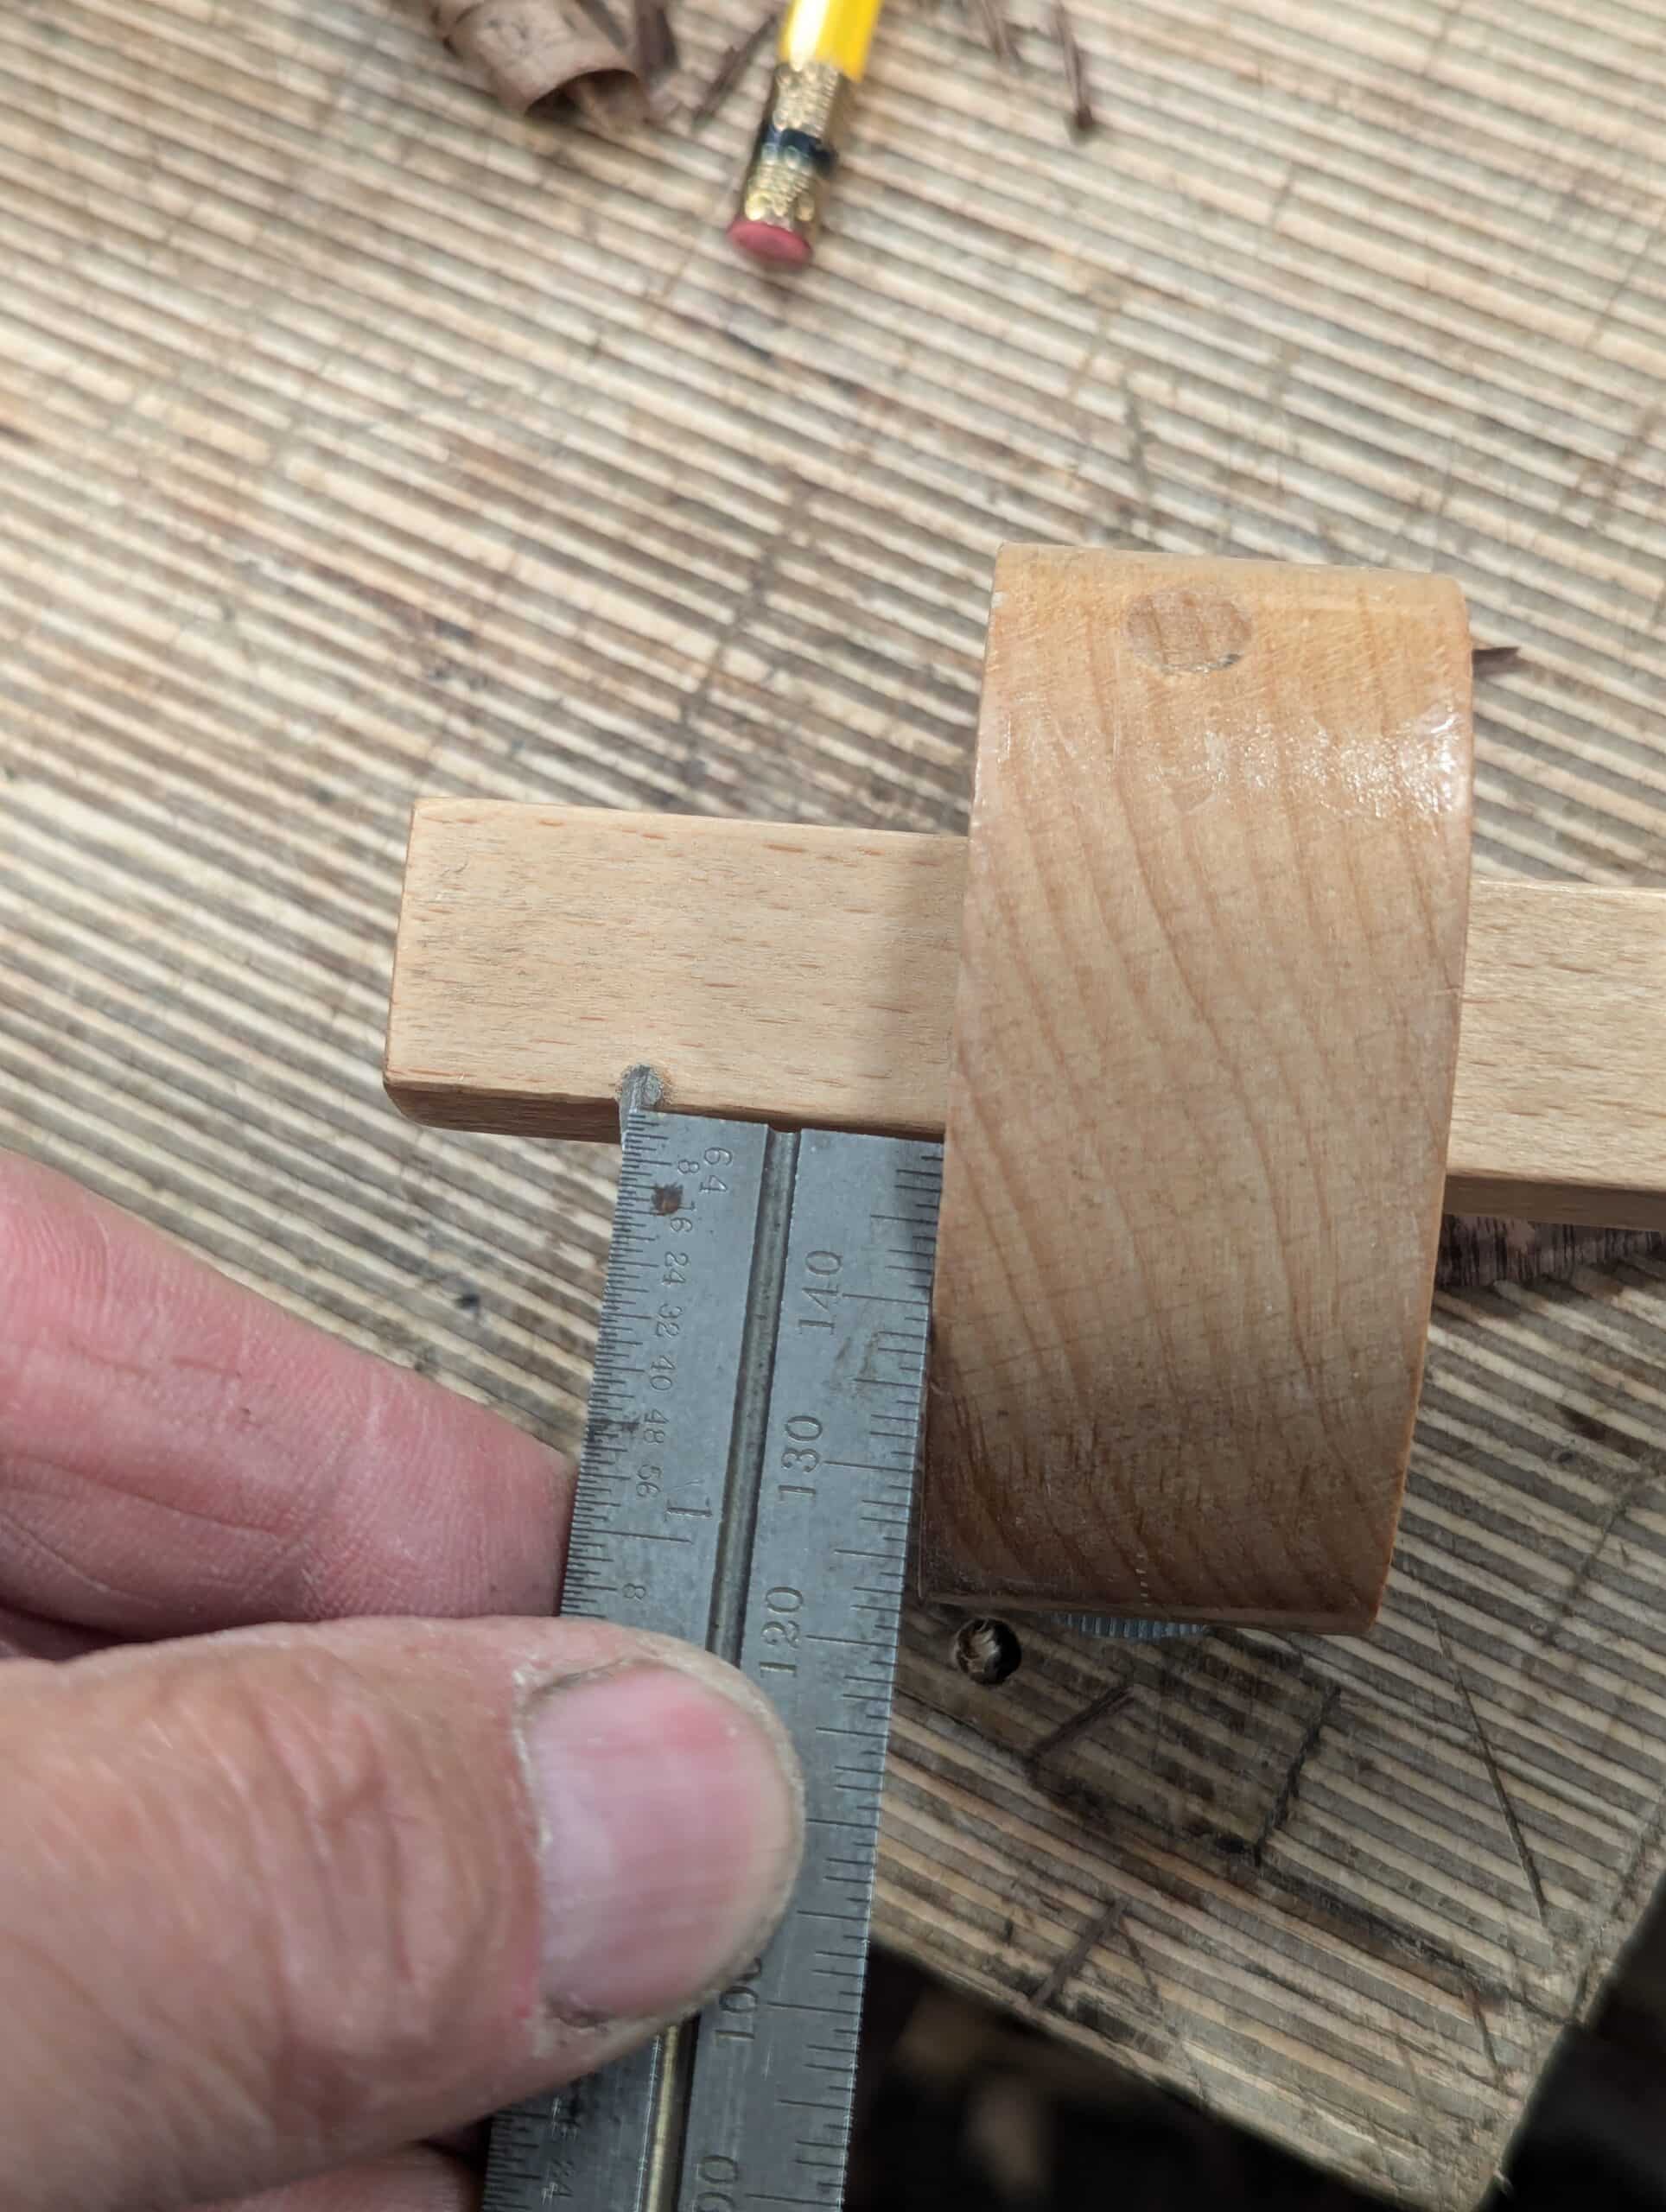
I use a marking gauge set to the 3/4″ blade of the Starrett square, but you can measure this too.
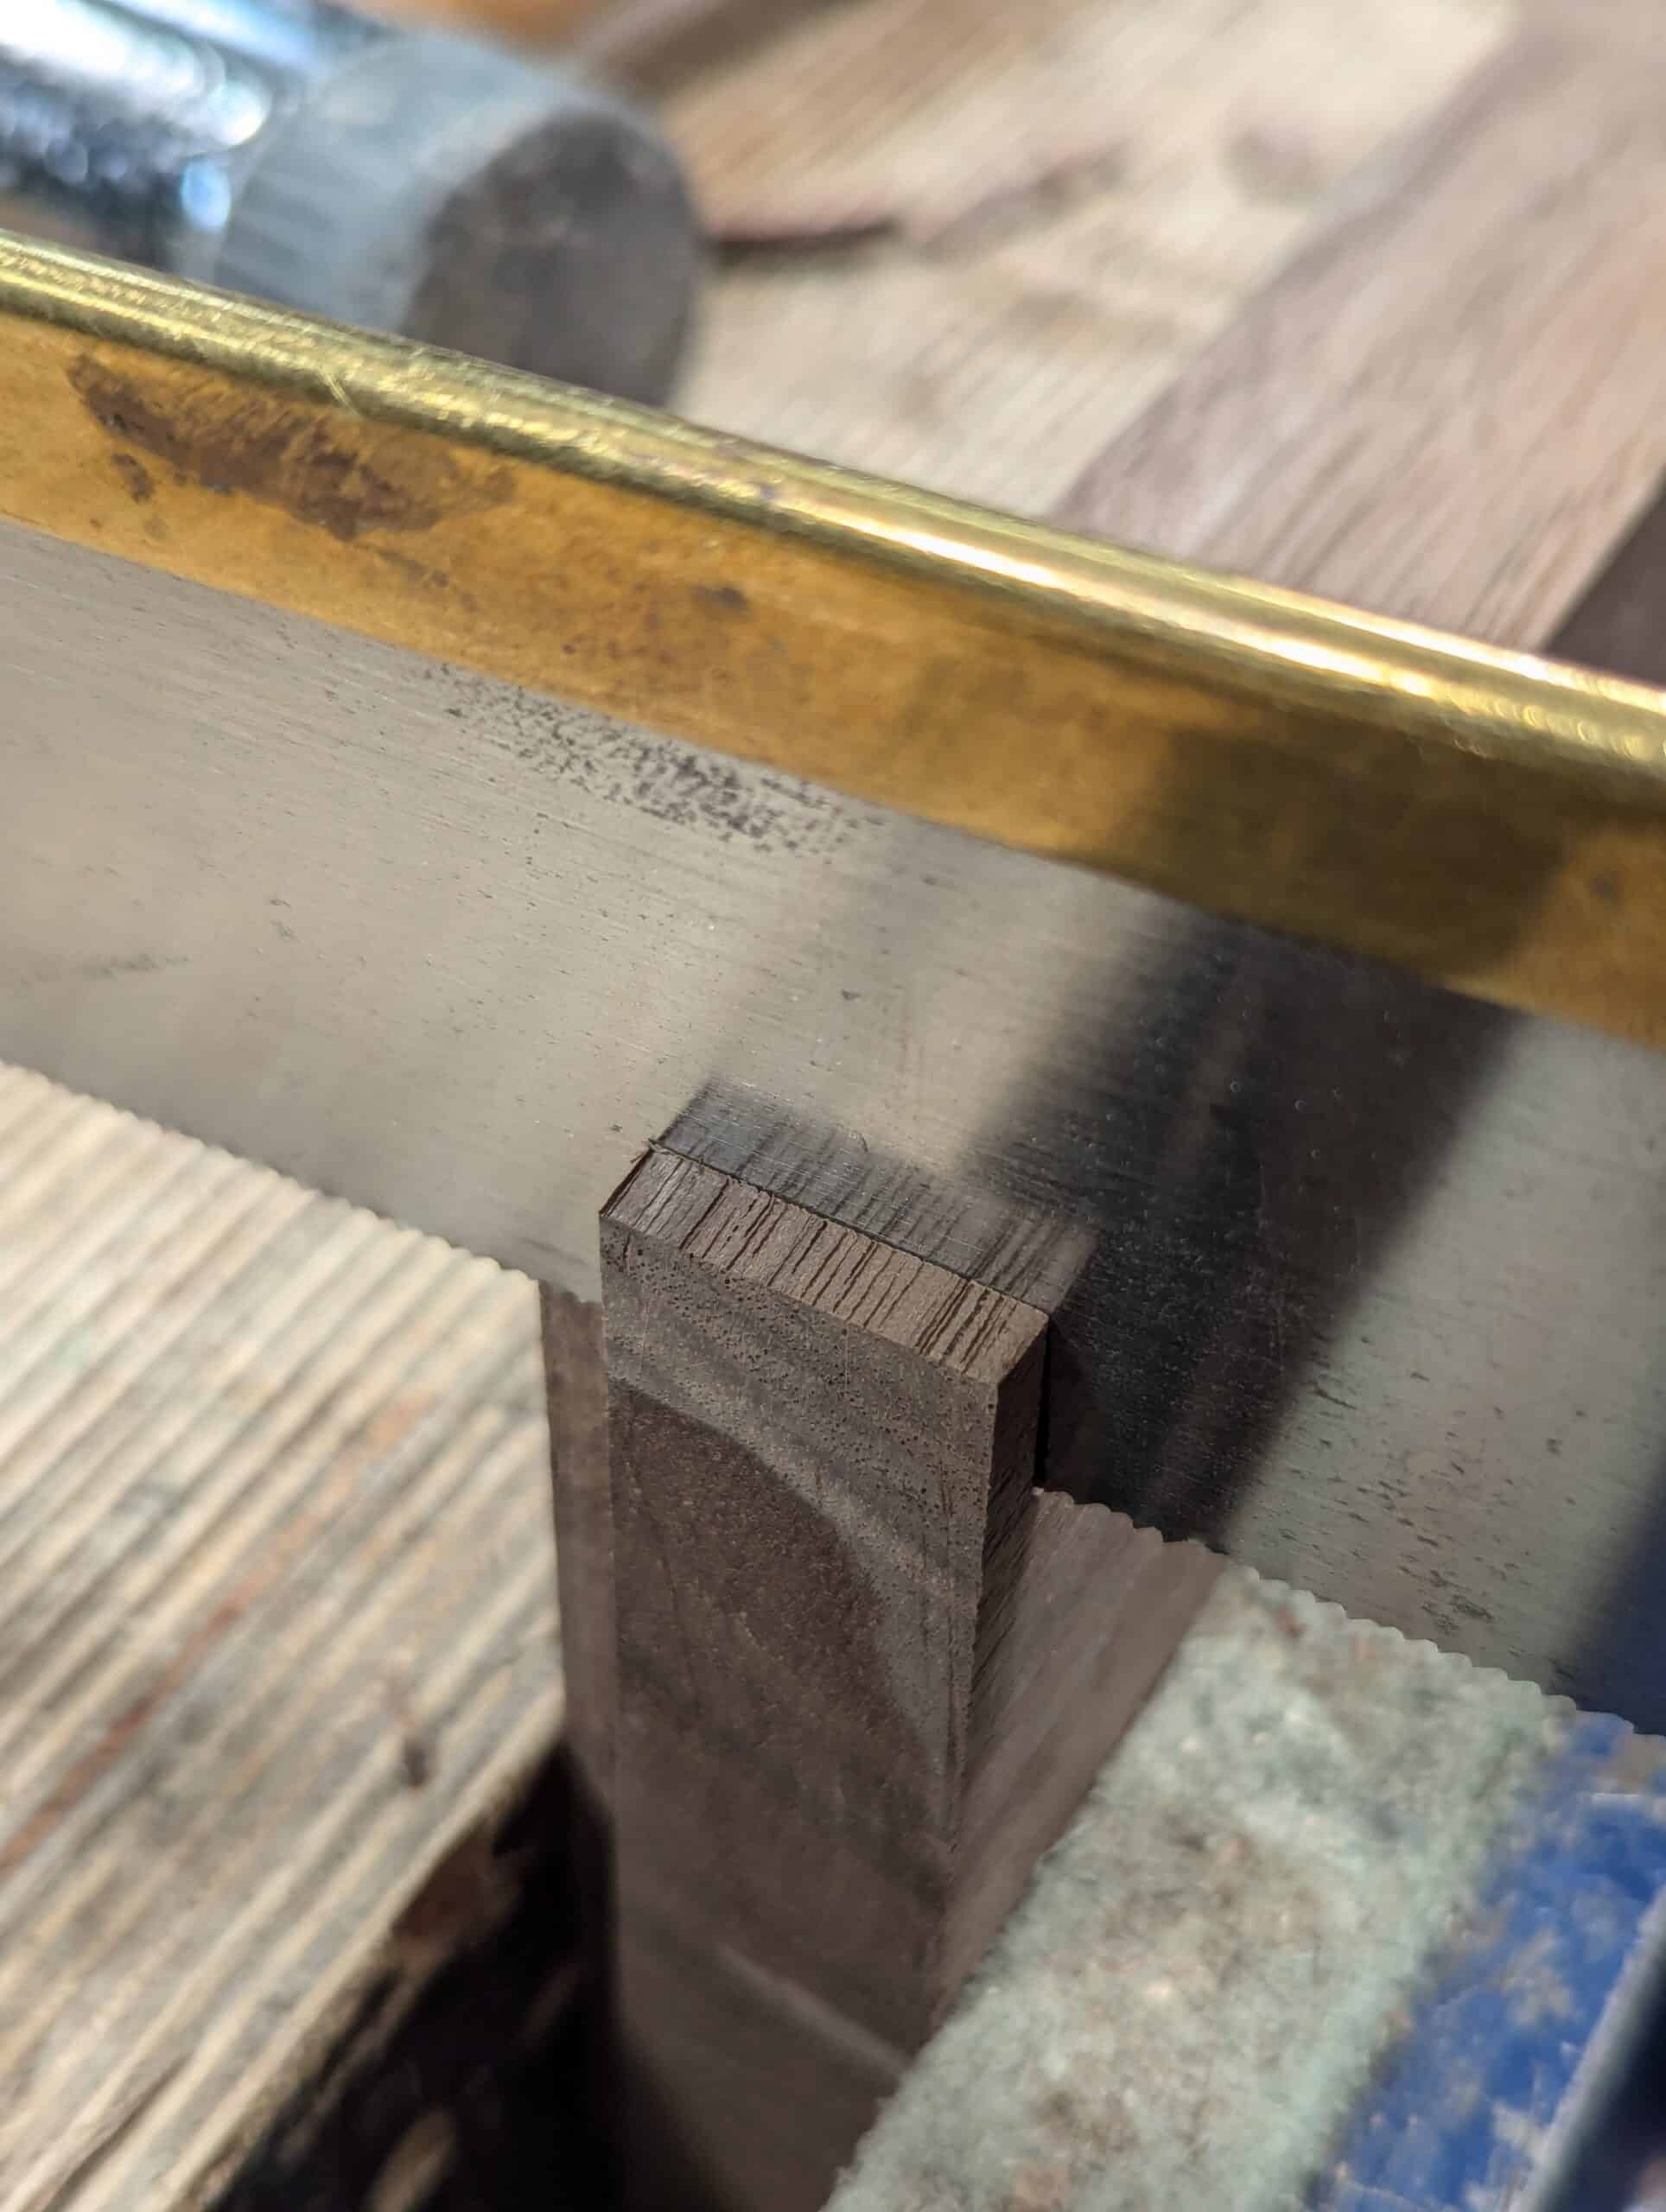
Now I mark the gauge line to give me the exact 3/4″ thickness of my mating piece and this mark is gauged from the inside face of my side piece, the one that will have the housing dadoes cut into it.
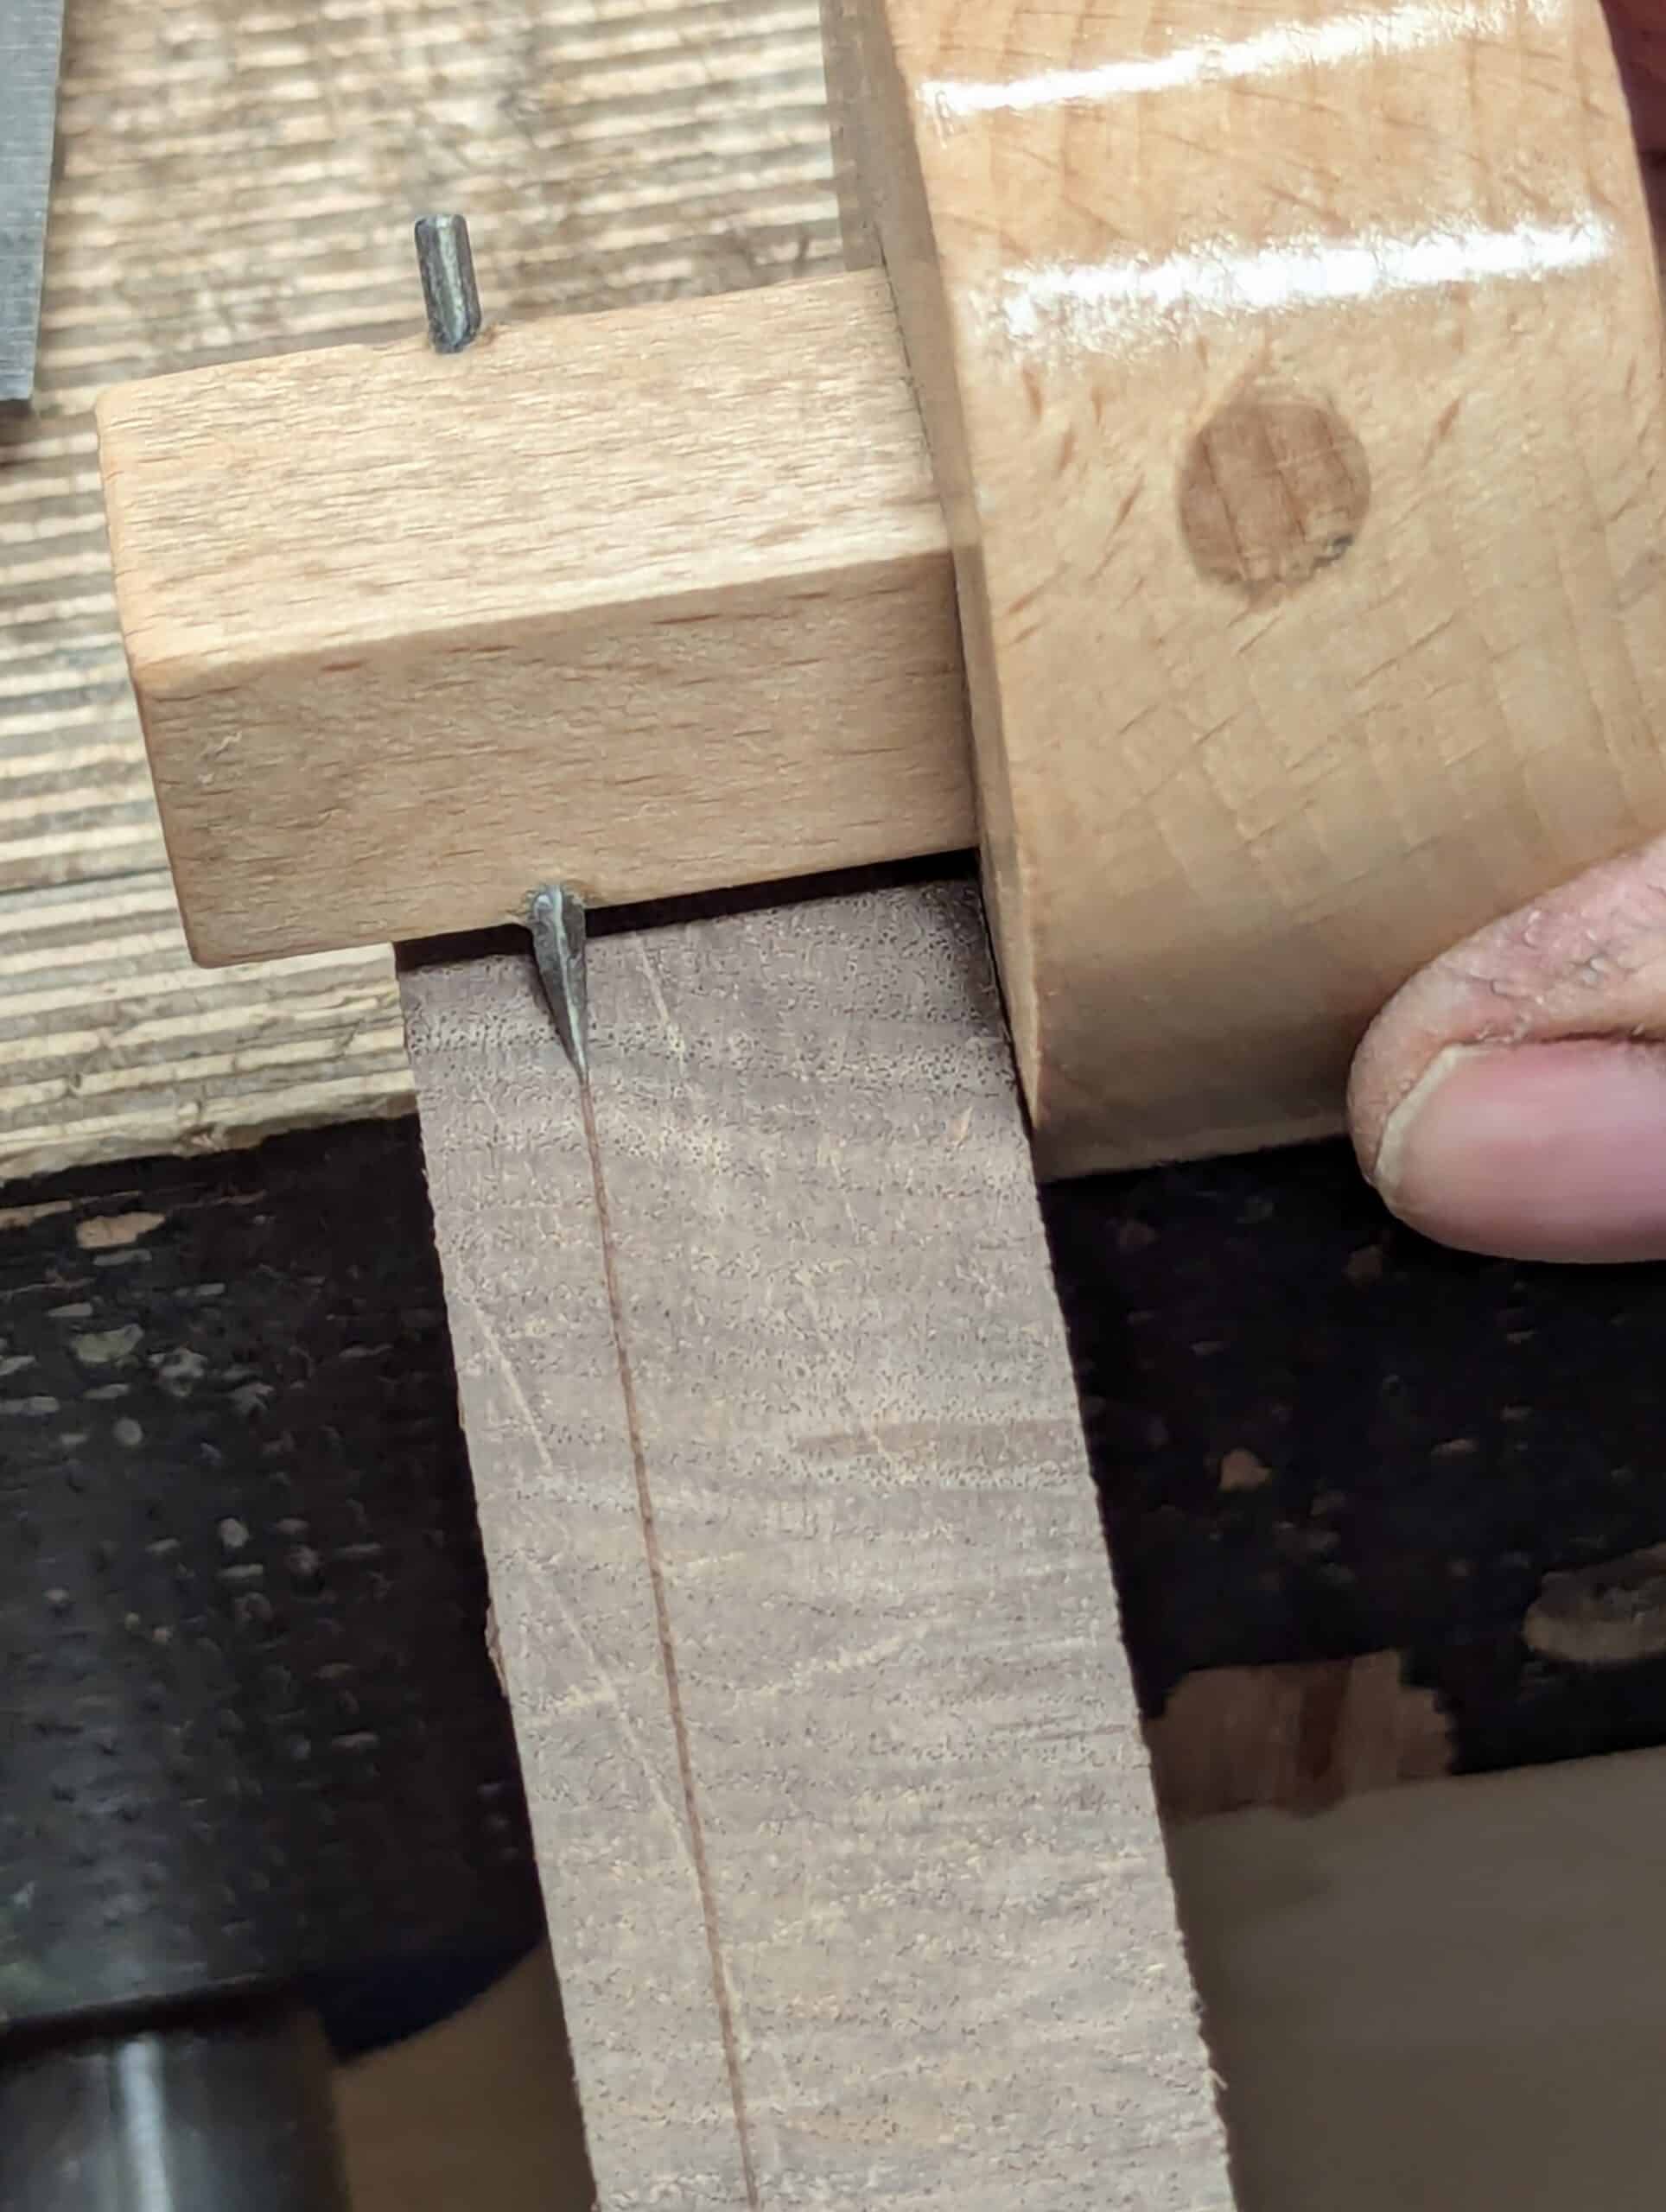
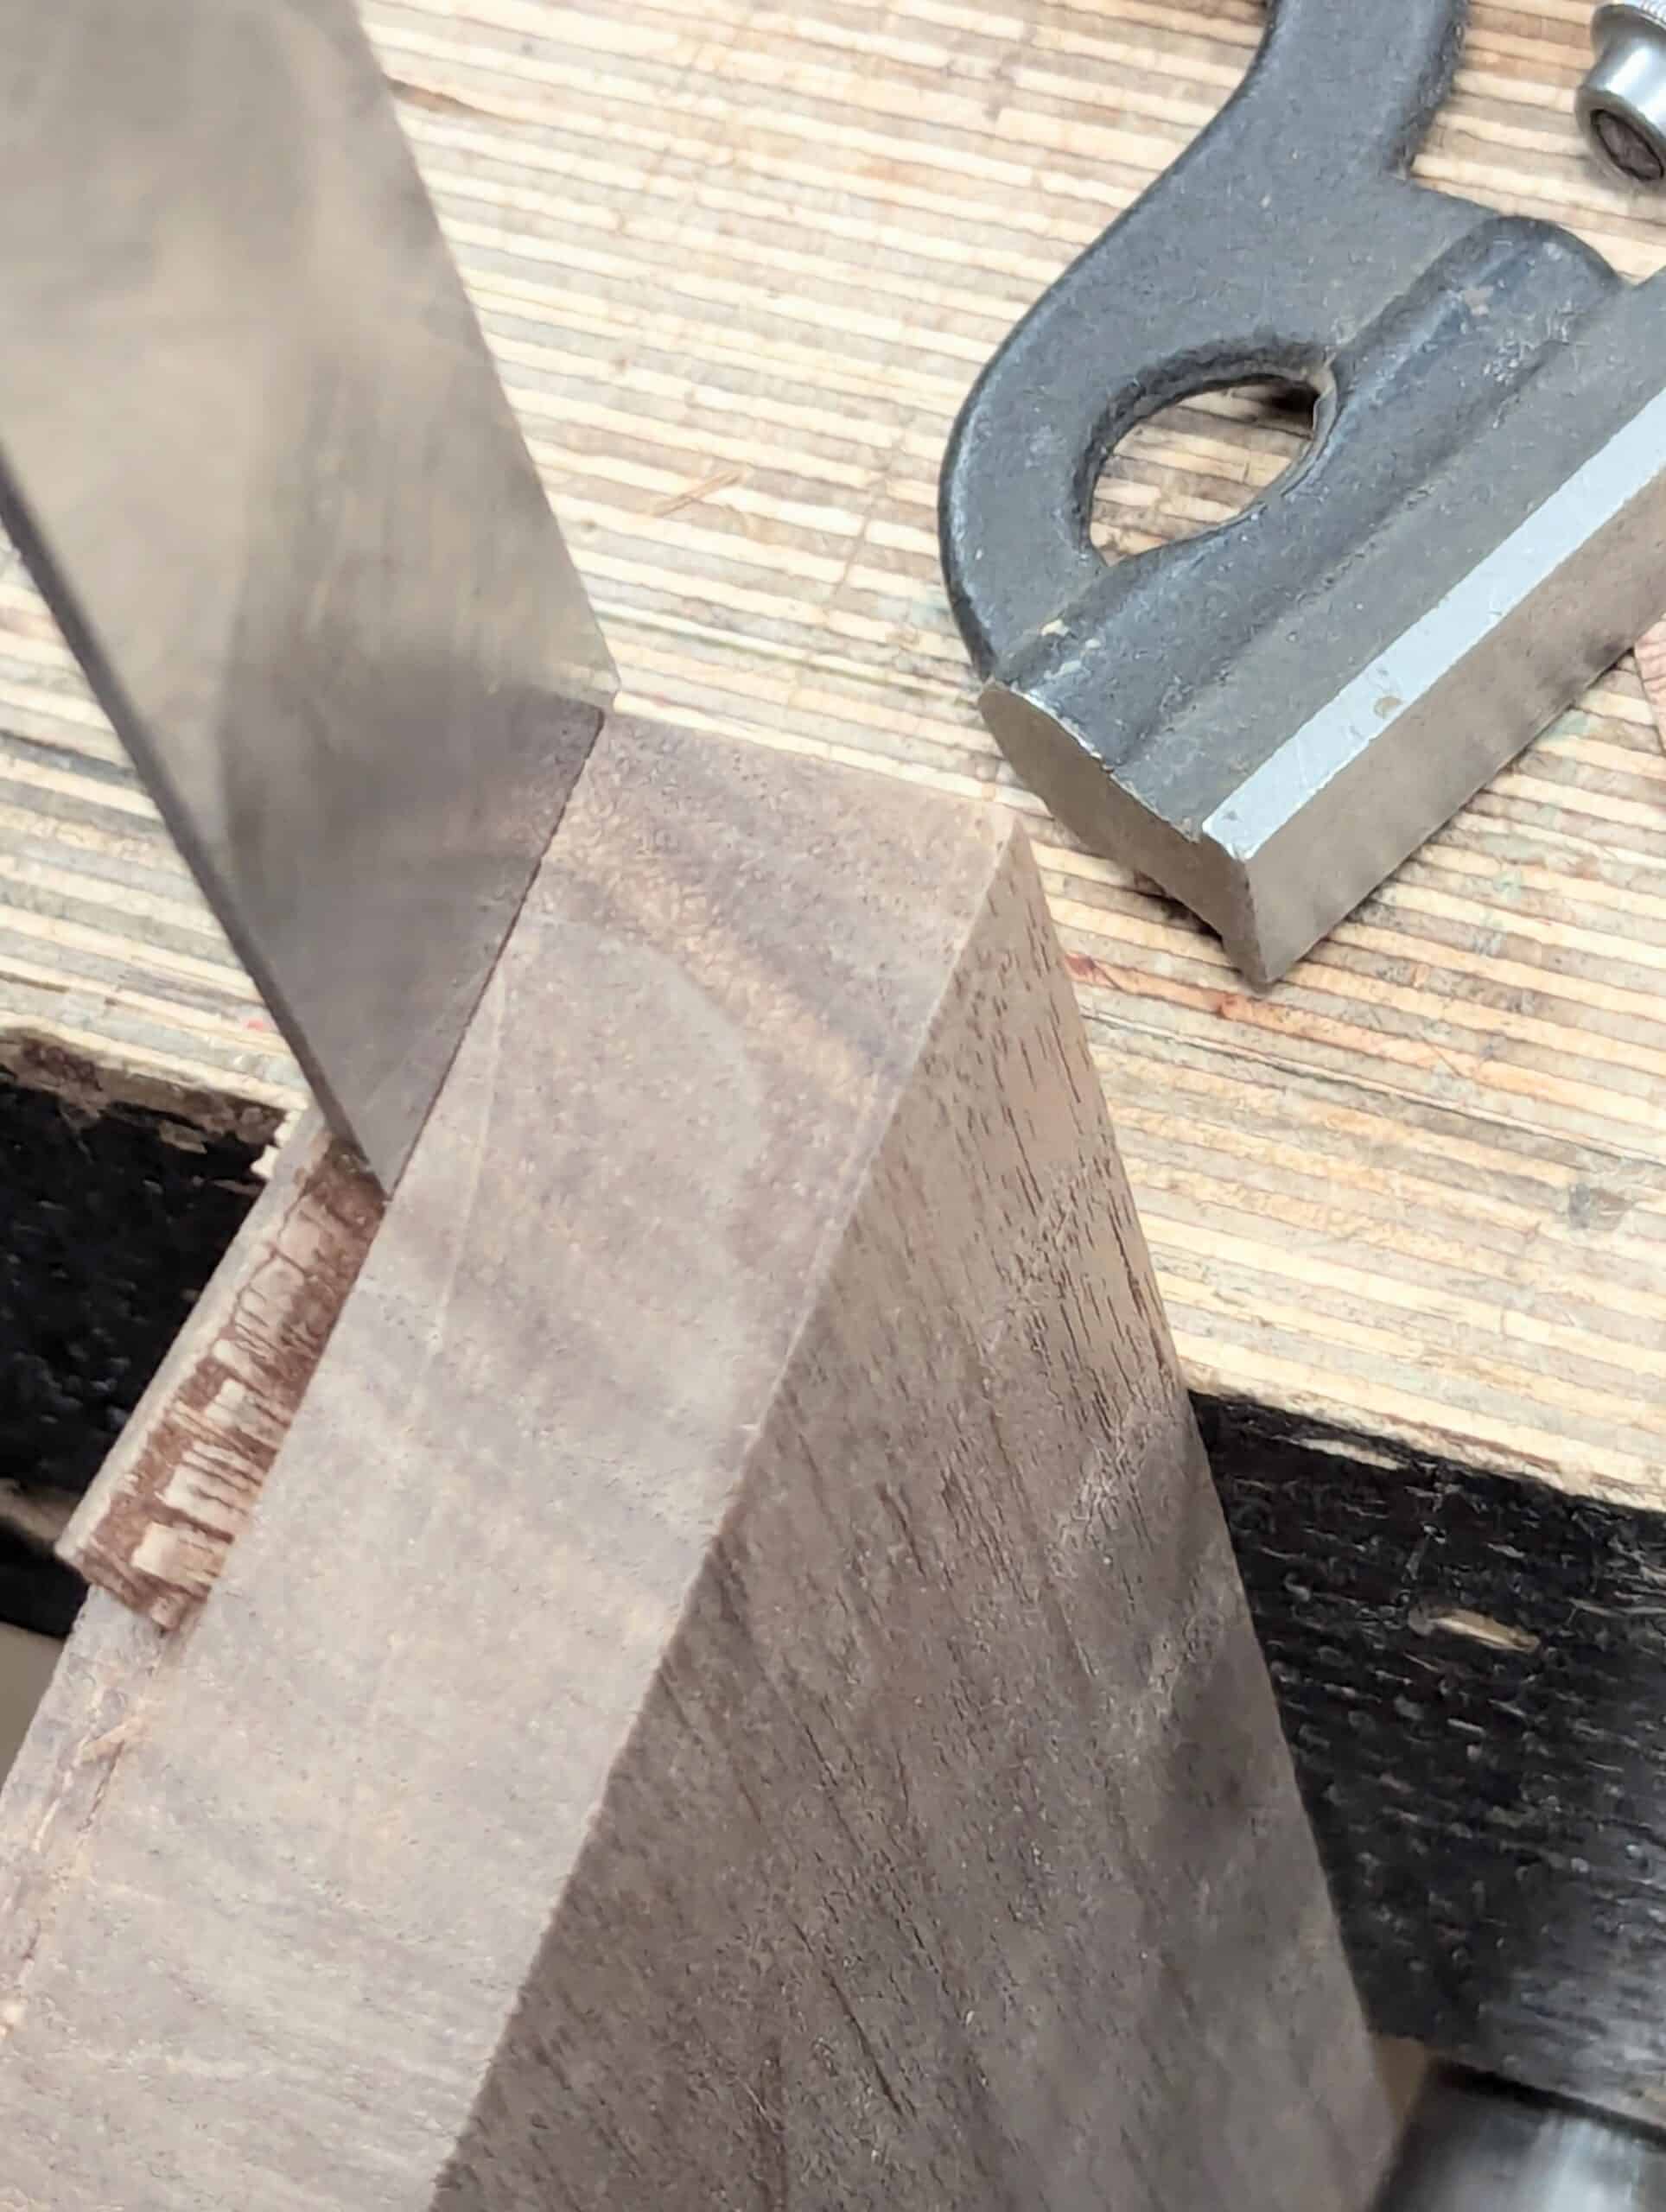
I pare cut at a shallow angle into the knifewall to define the cut line more definitively.
And then I use chop cuts to take the wall deeper with repeat cuts to the final depth. The chisel cuts are neater and crisper than sawing but you can saw too and then pare cut the surface as an altertnativer option.
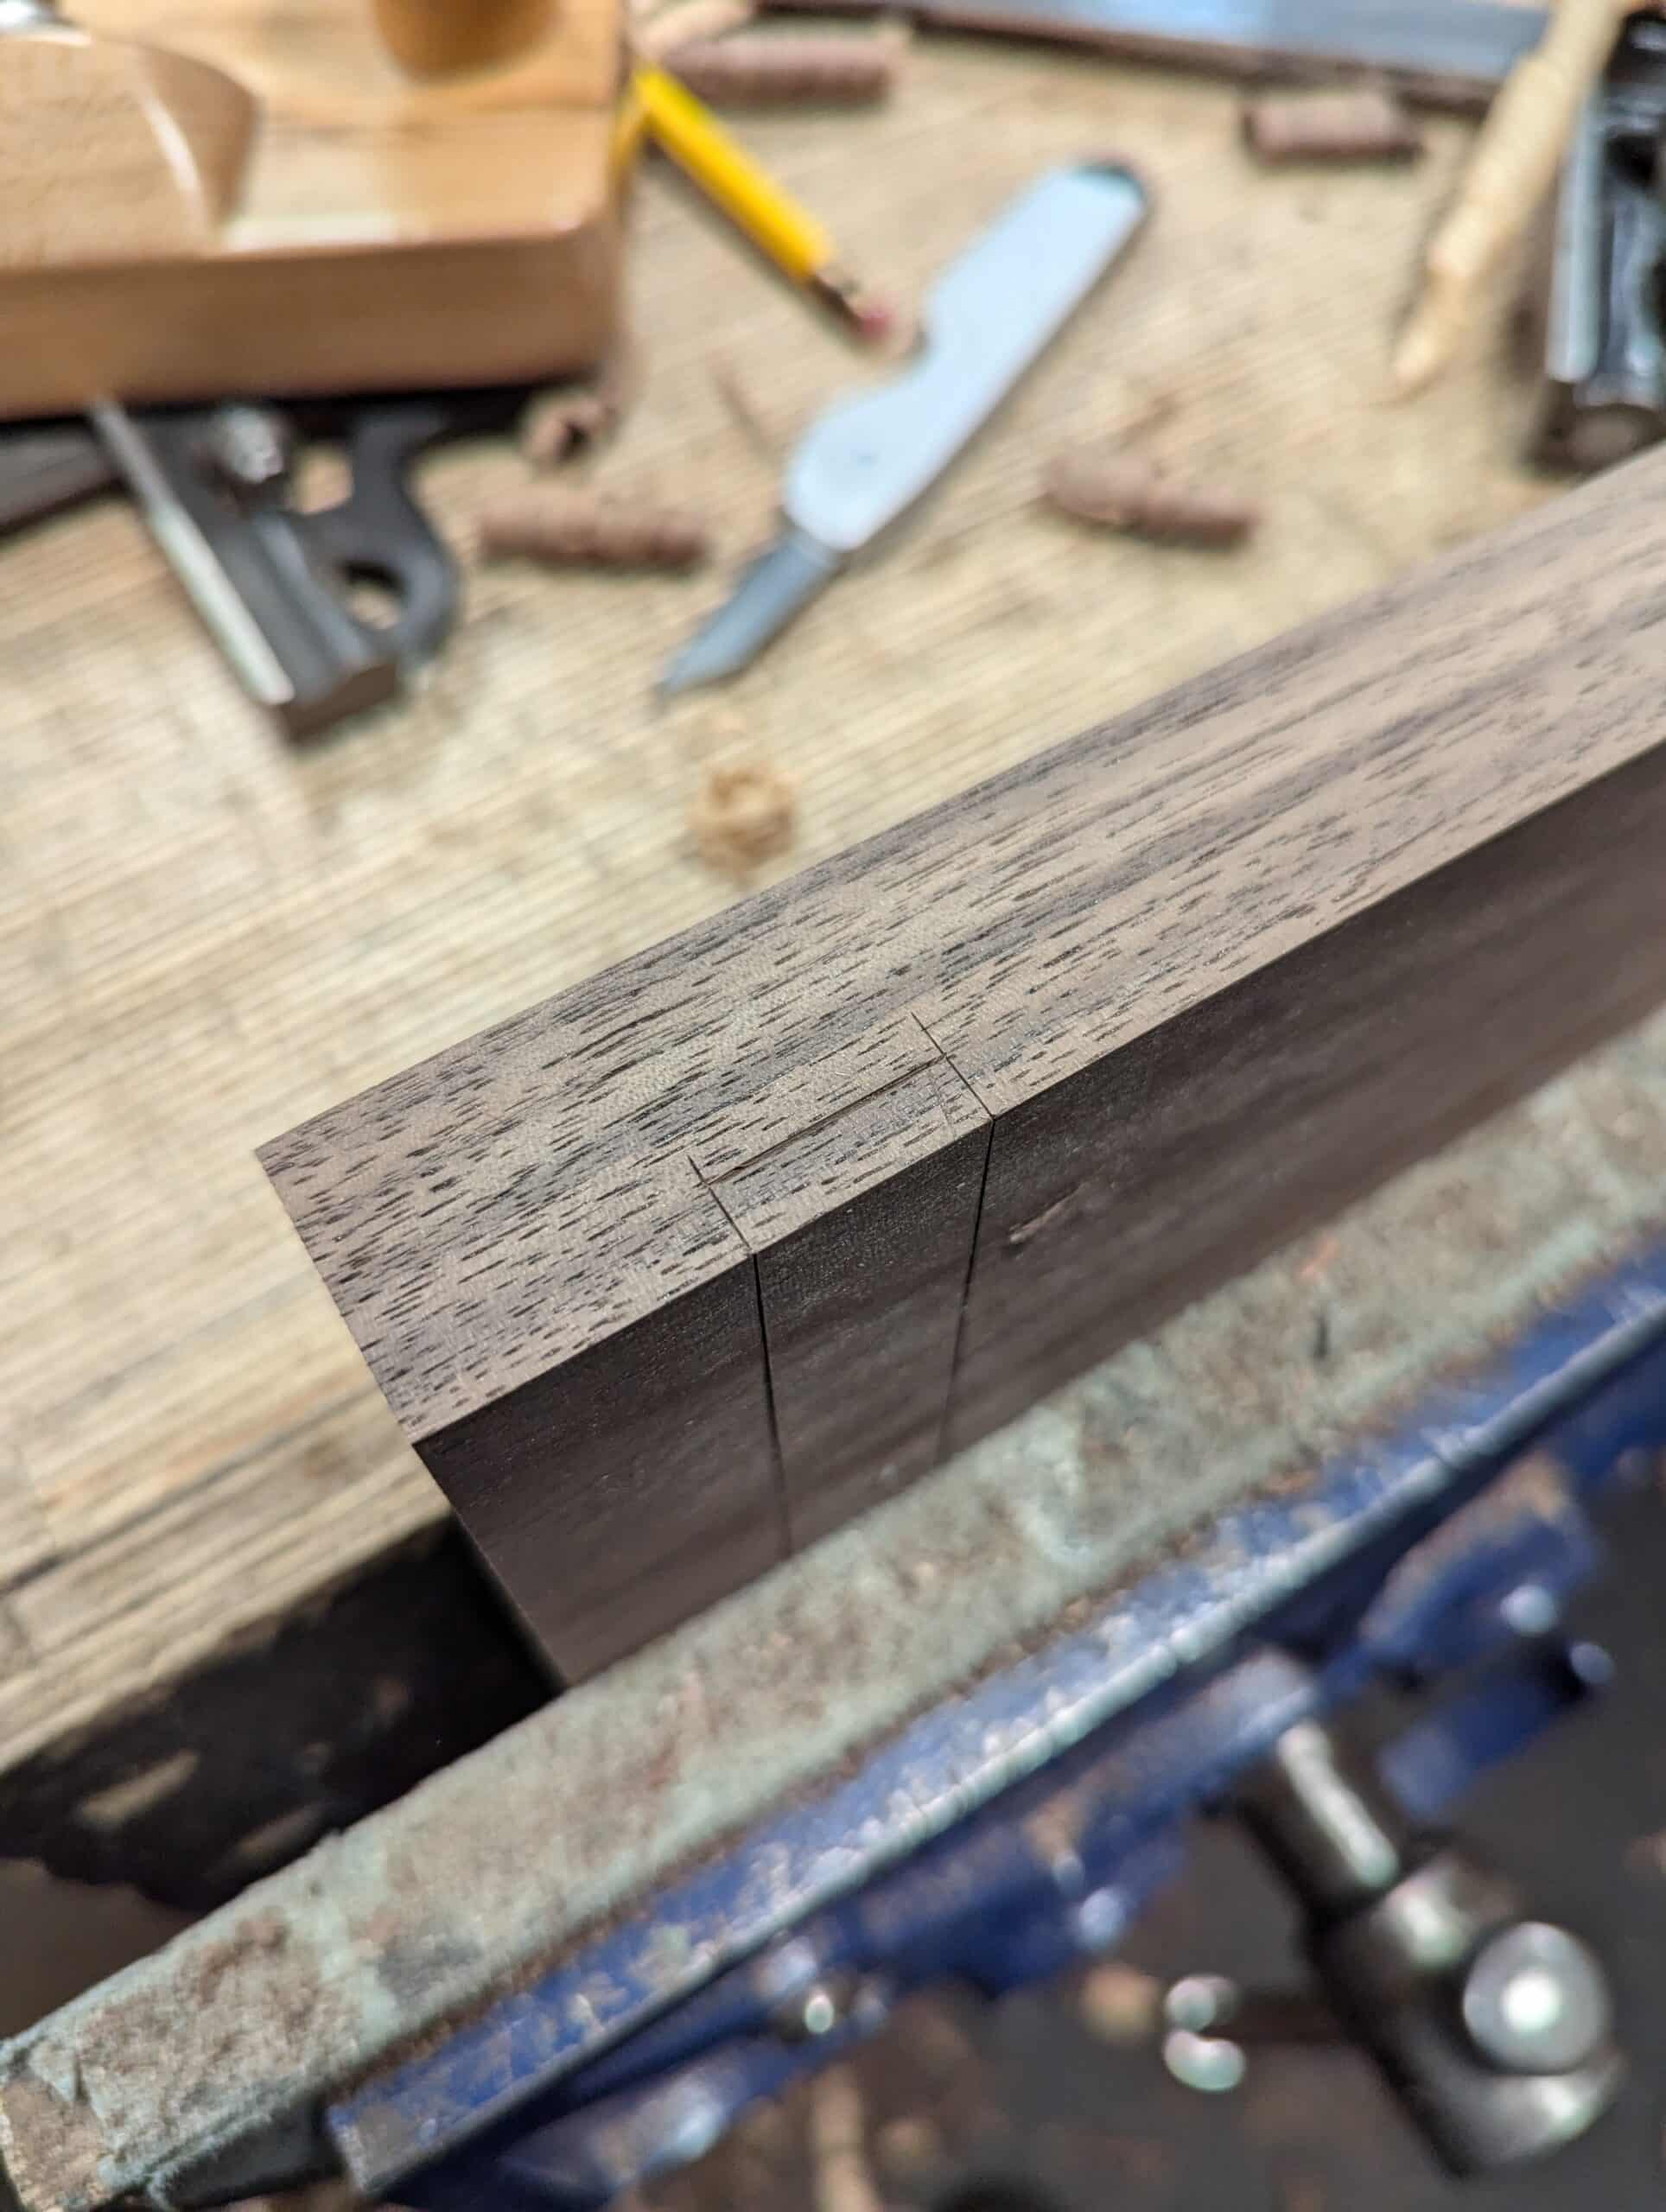
This is the conclusion of this type of joint.
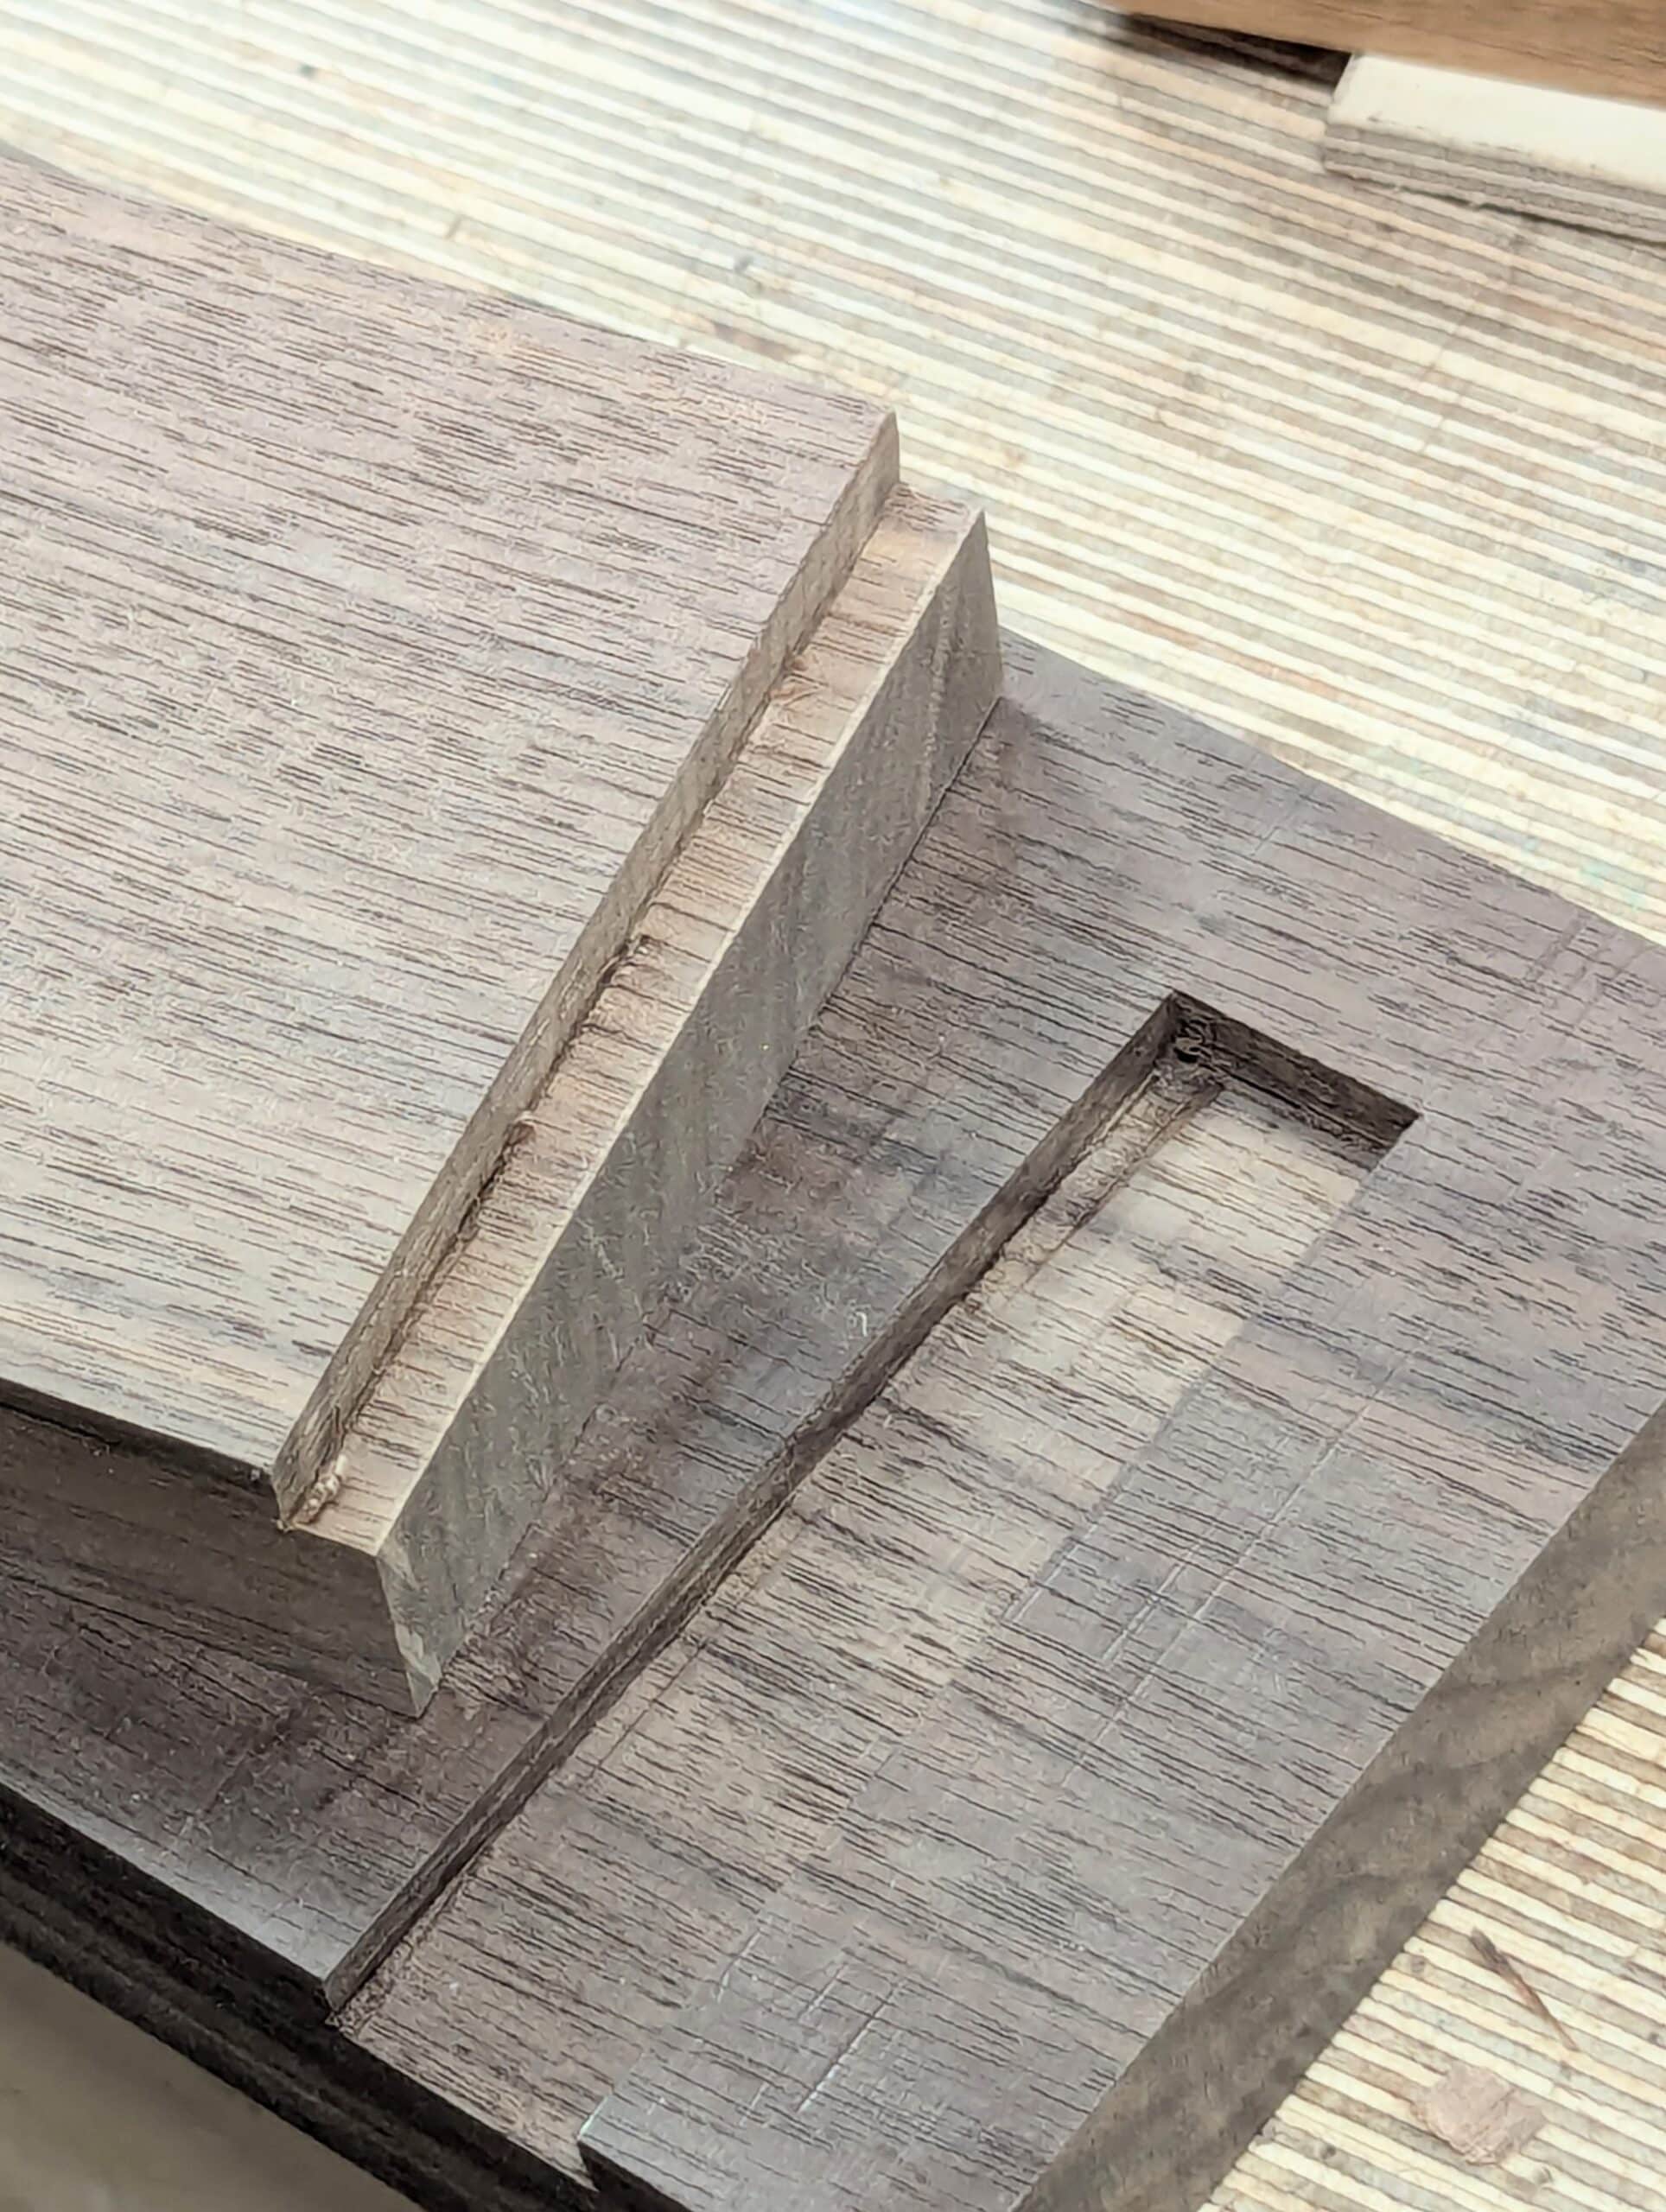
This next housing dado is the one we will use for for the shelf housing dadoes. The depth from front to back is less than the shelf width and that is because we want a step to the front of the shelf and this takes care of any gapping should the shelf shrink over the coming years. Again I use the width of the Starrett six-inch square to get the same exactness for each of the housing daoes I need to make.

The method of cutting is just the same as before.
In this case we need to cut a step in the front edge as the housing dado is shorter front to back than the shelf itself.
Pare cut any fuzzy fibres from the saw cuts and work dead-on to the knifewall.

xxxx
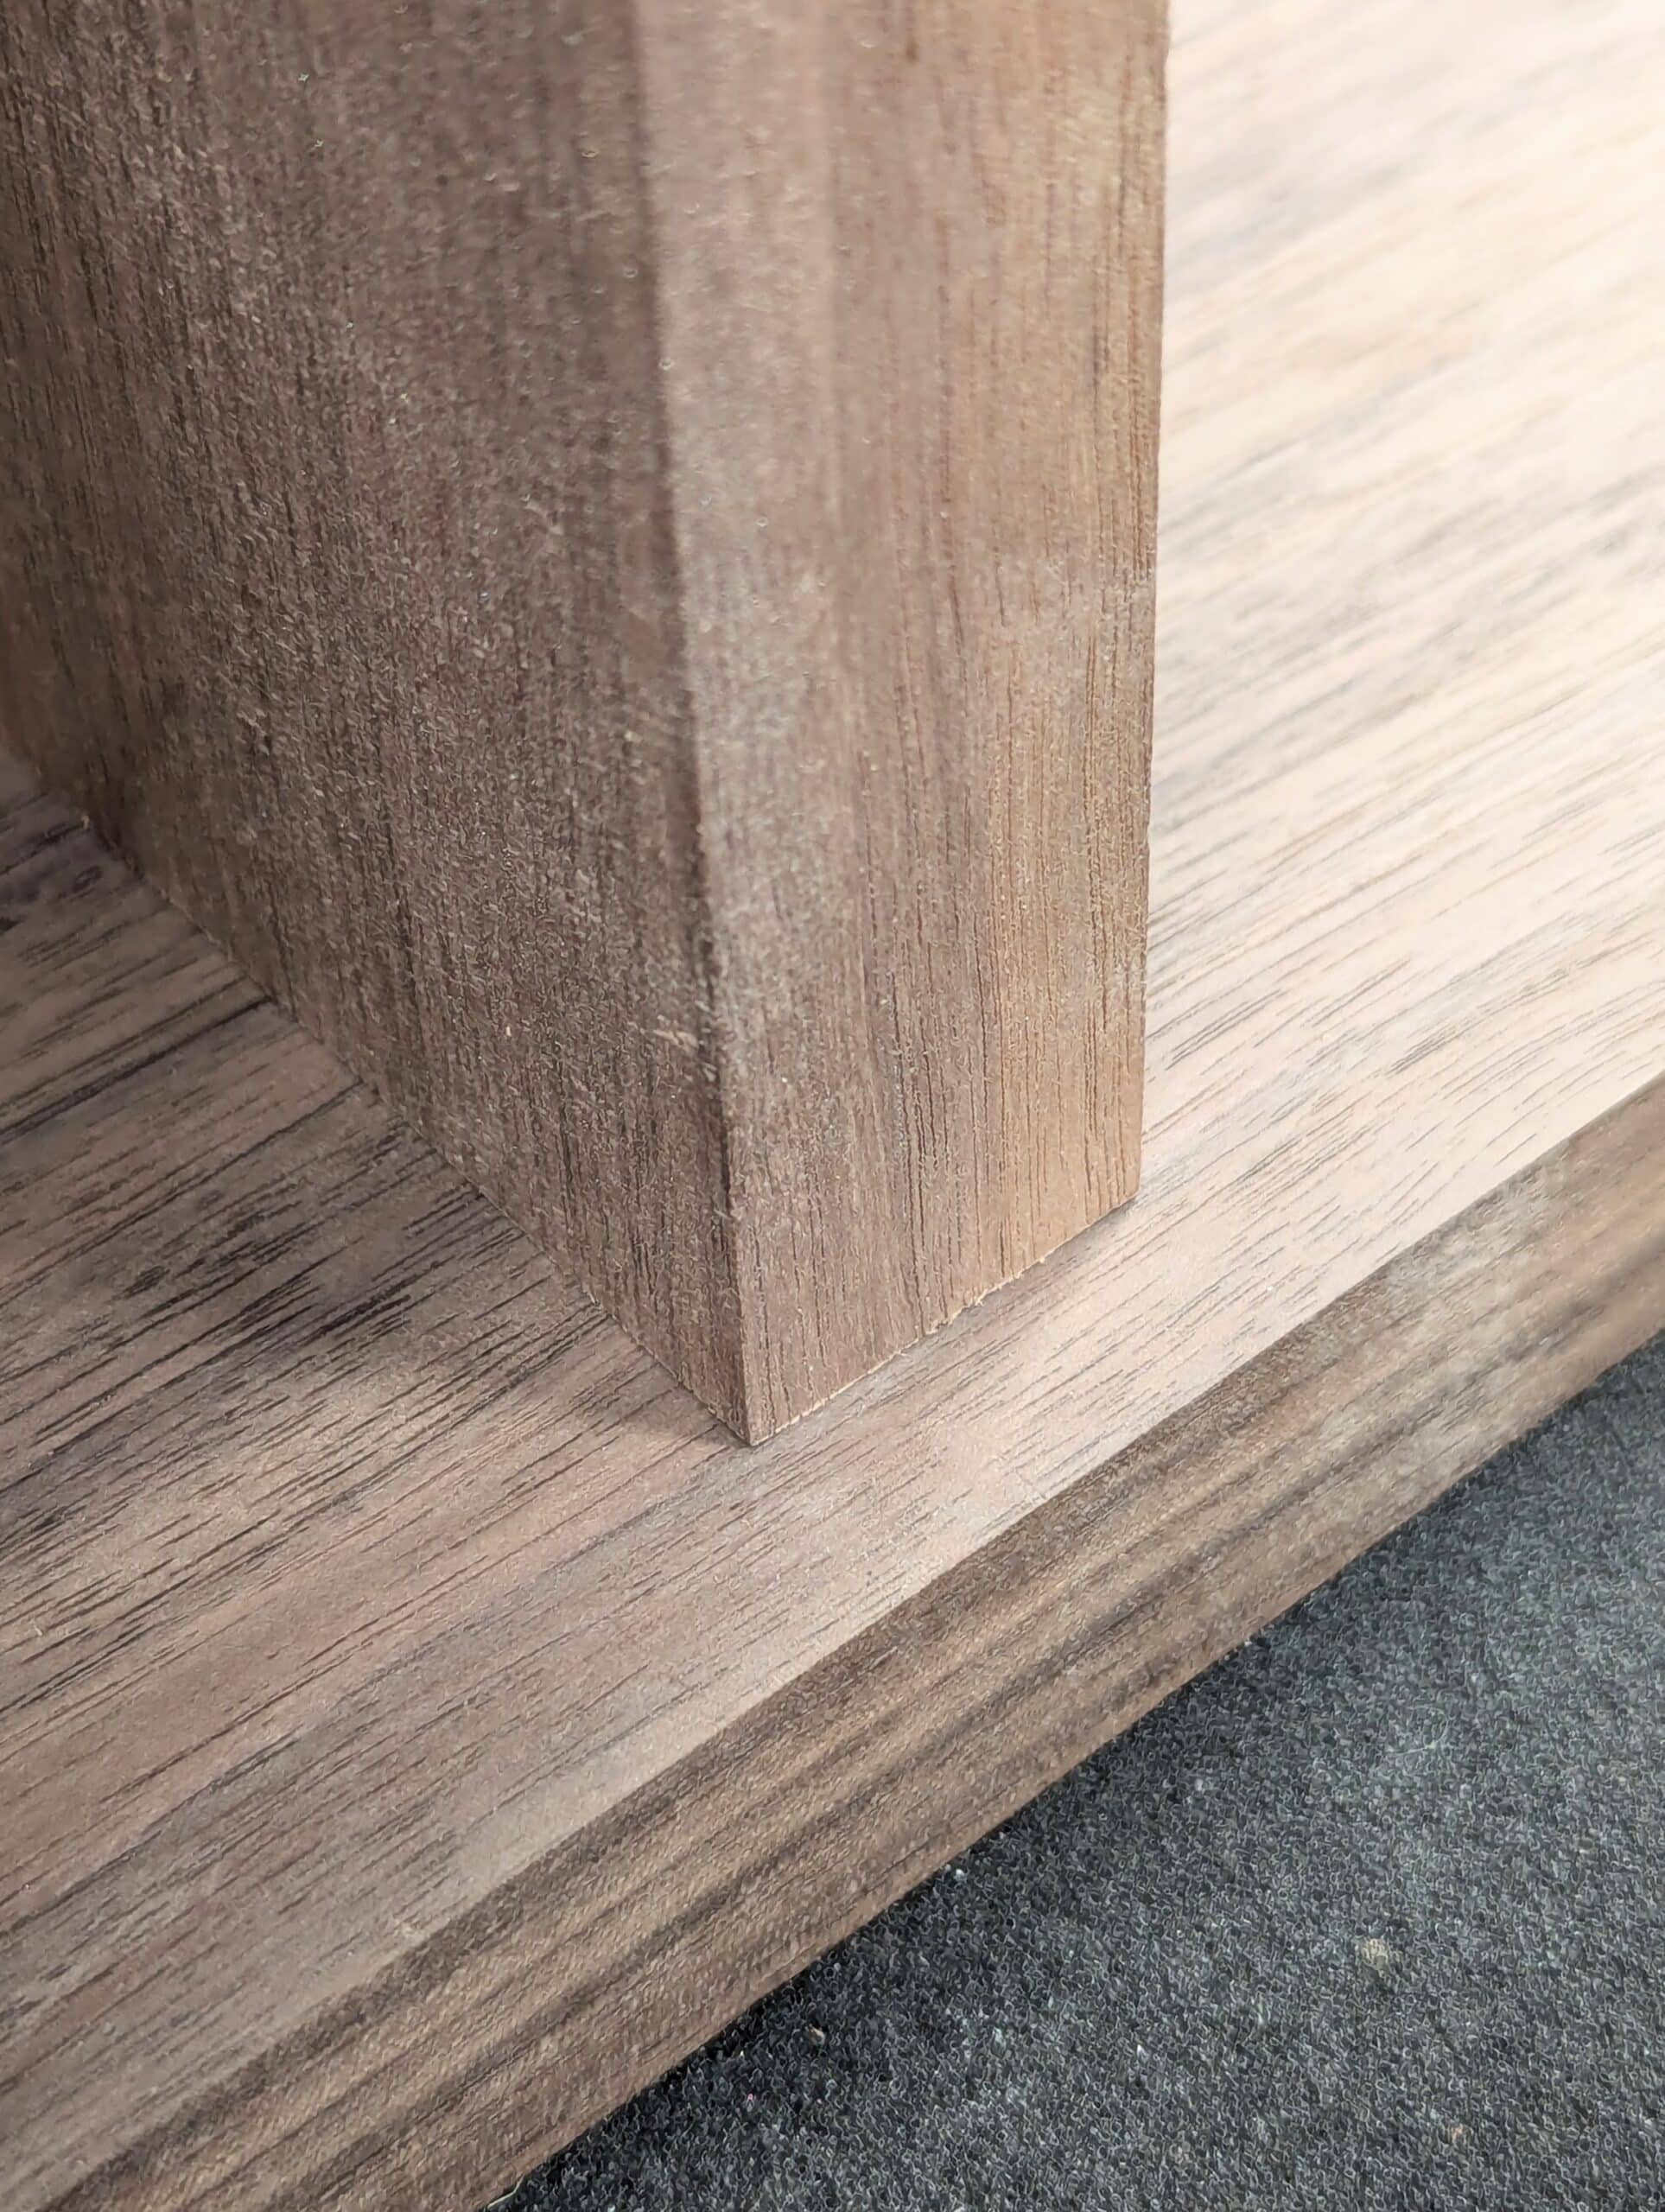
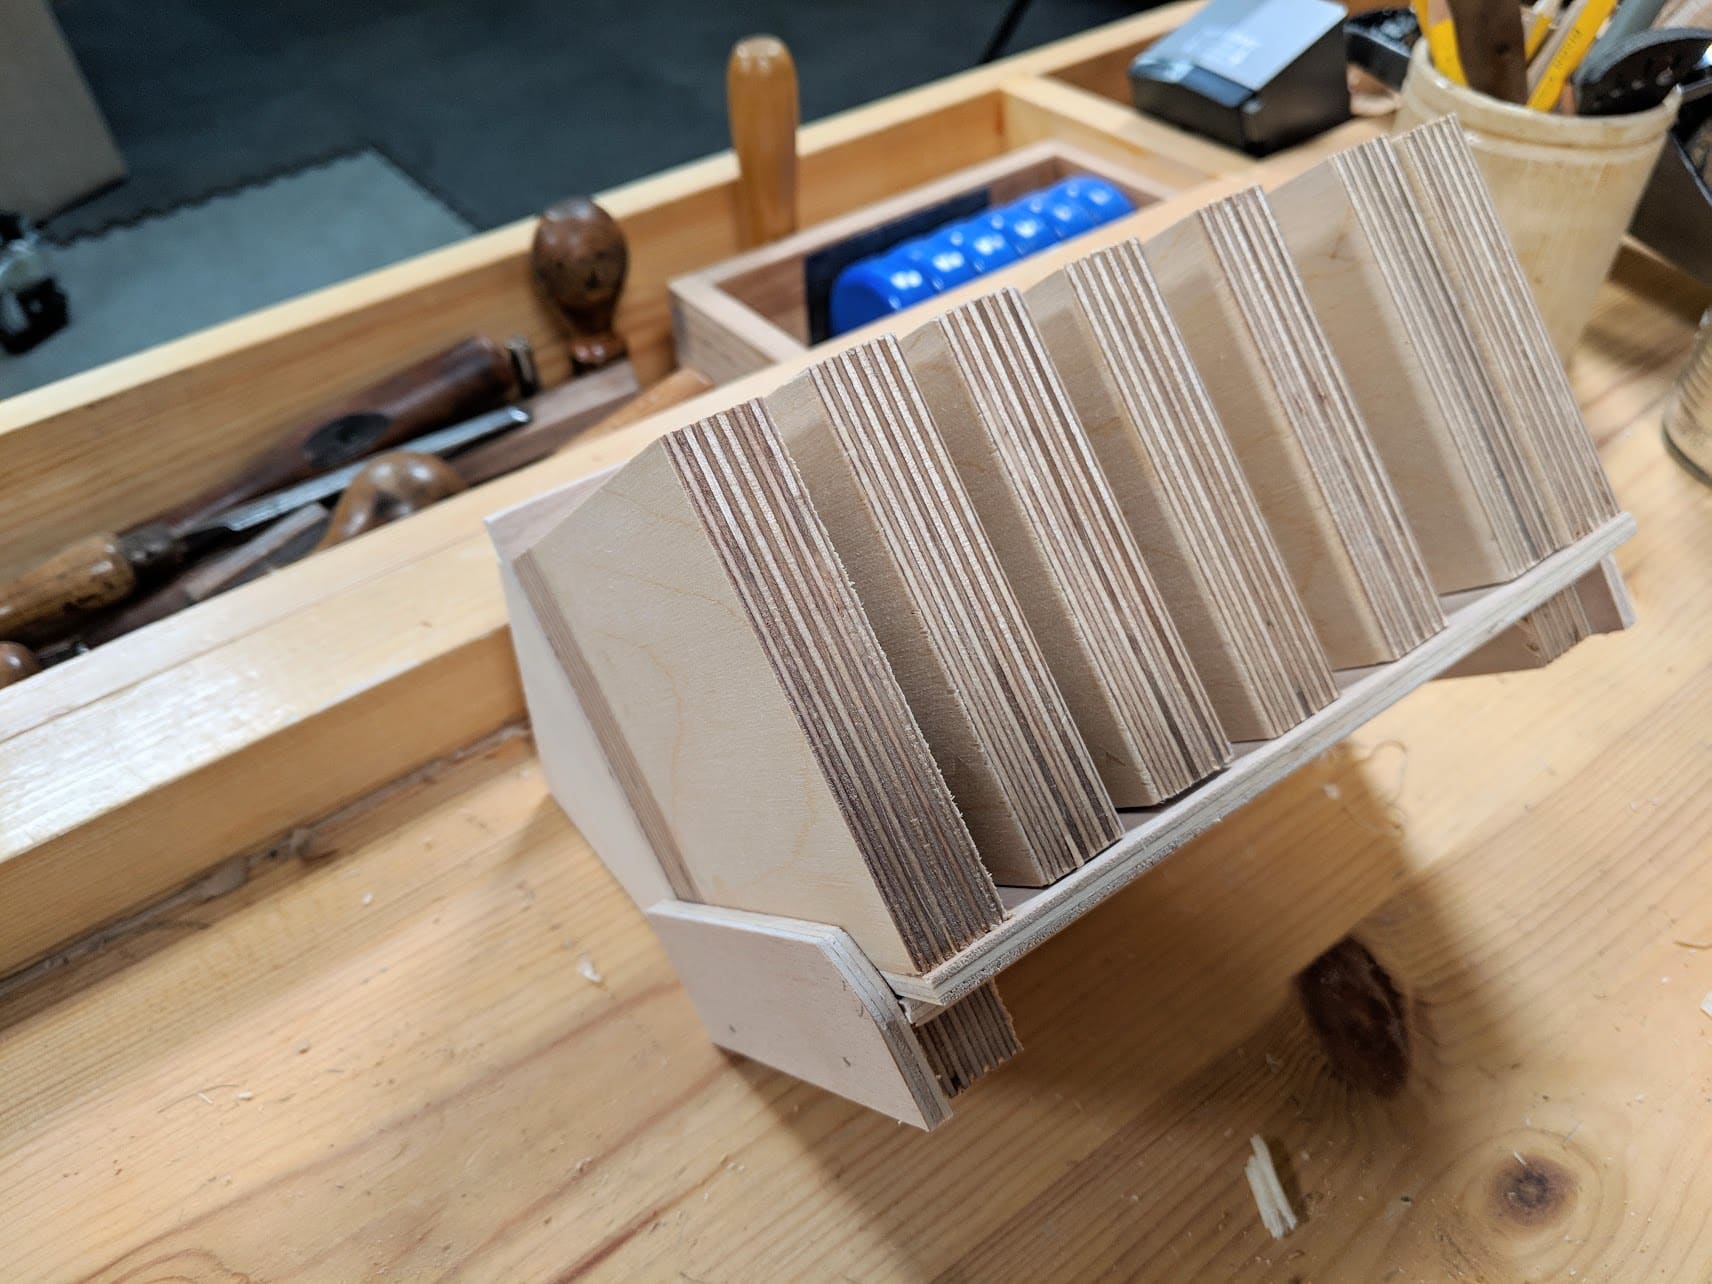
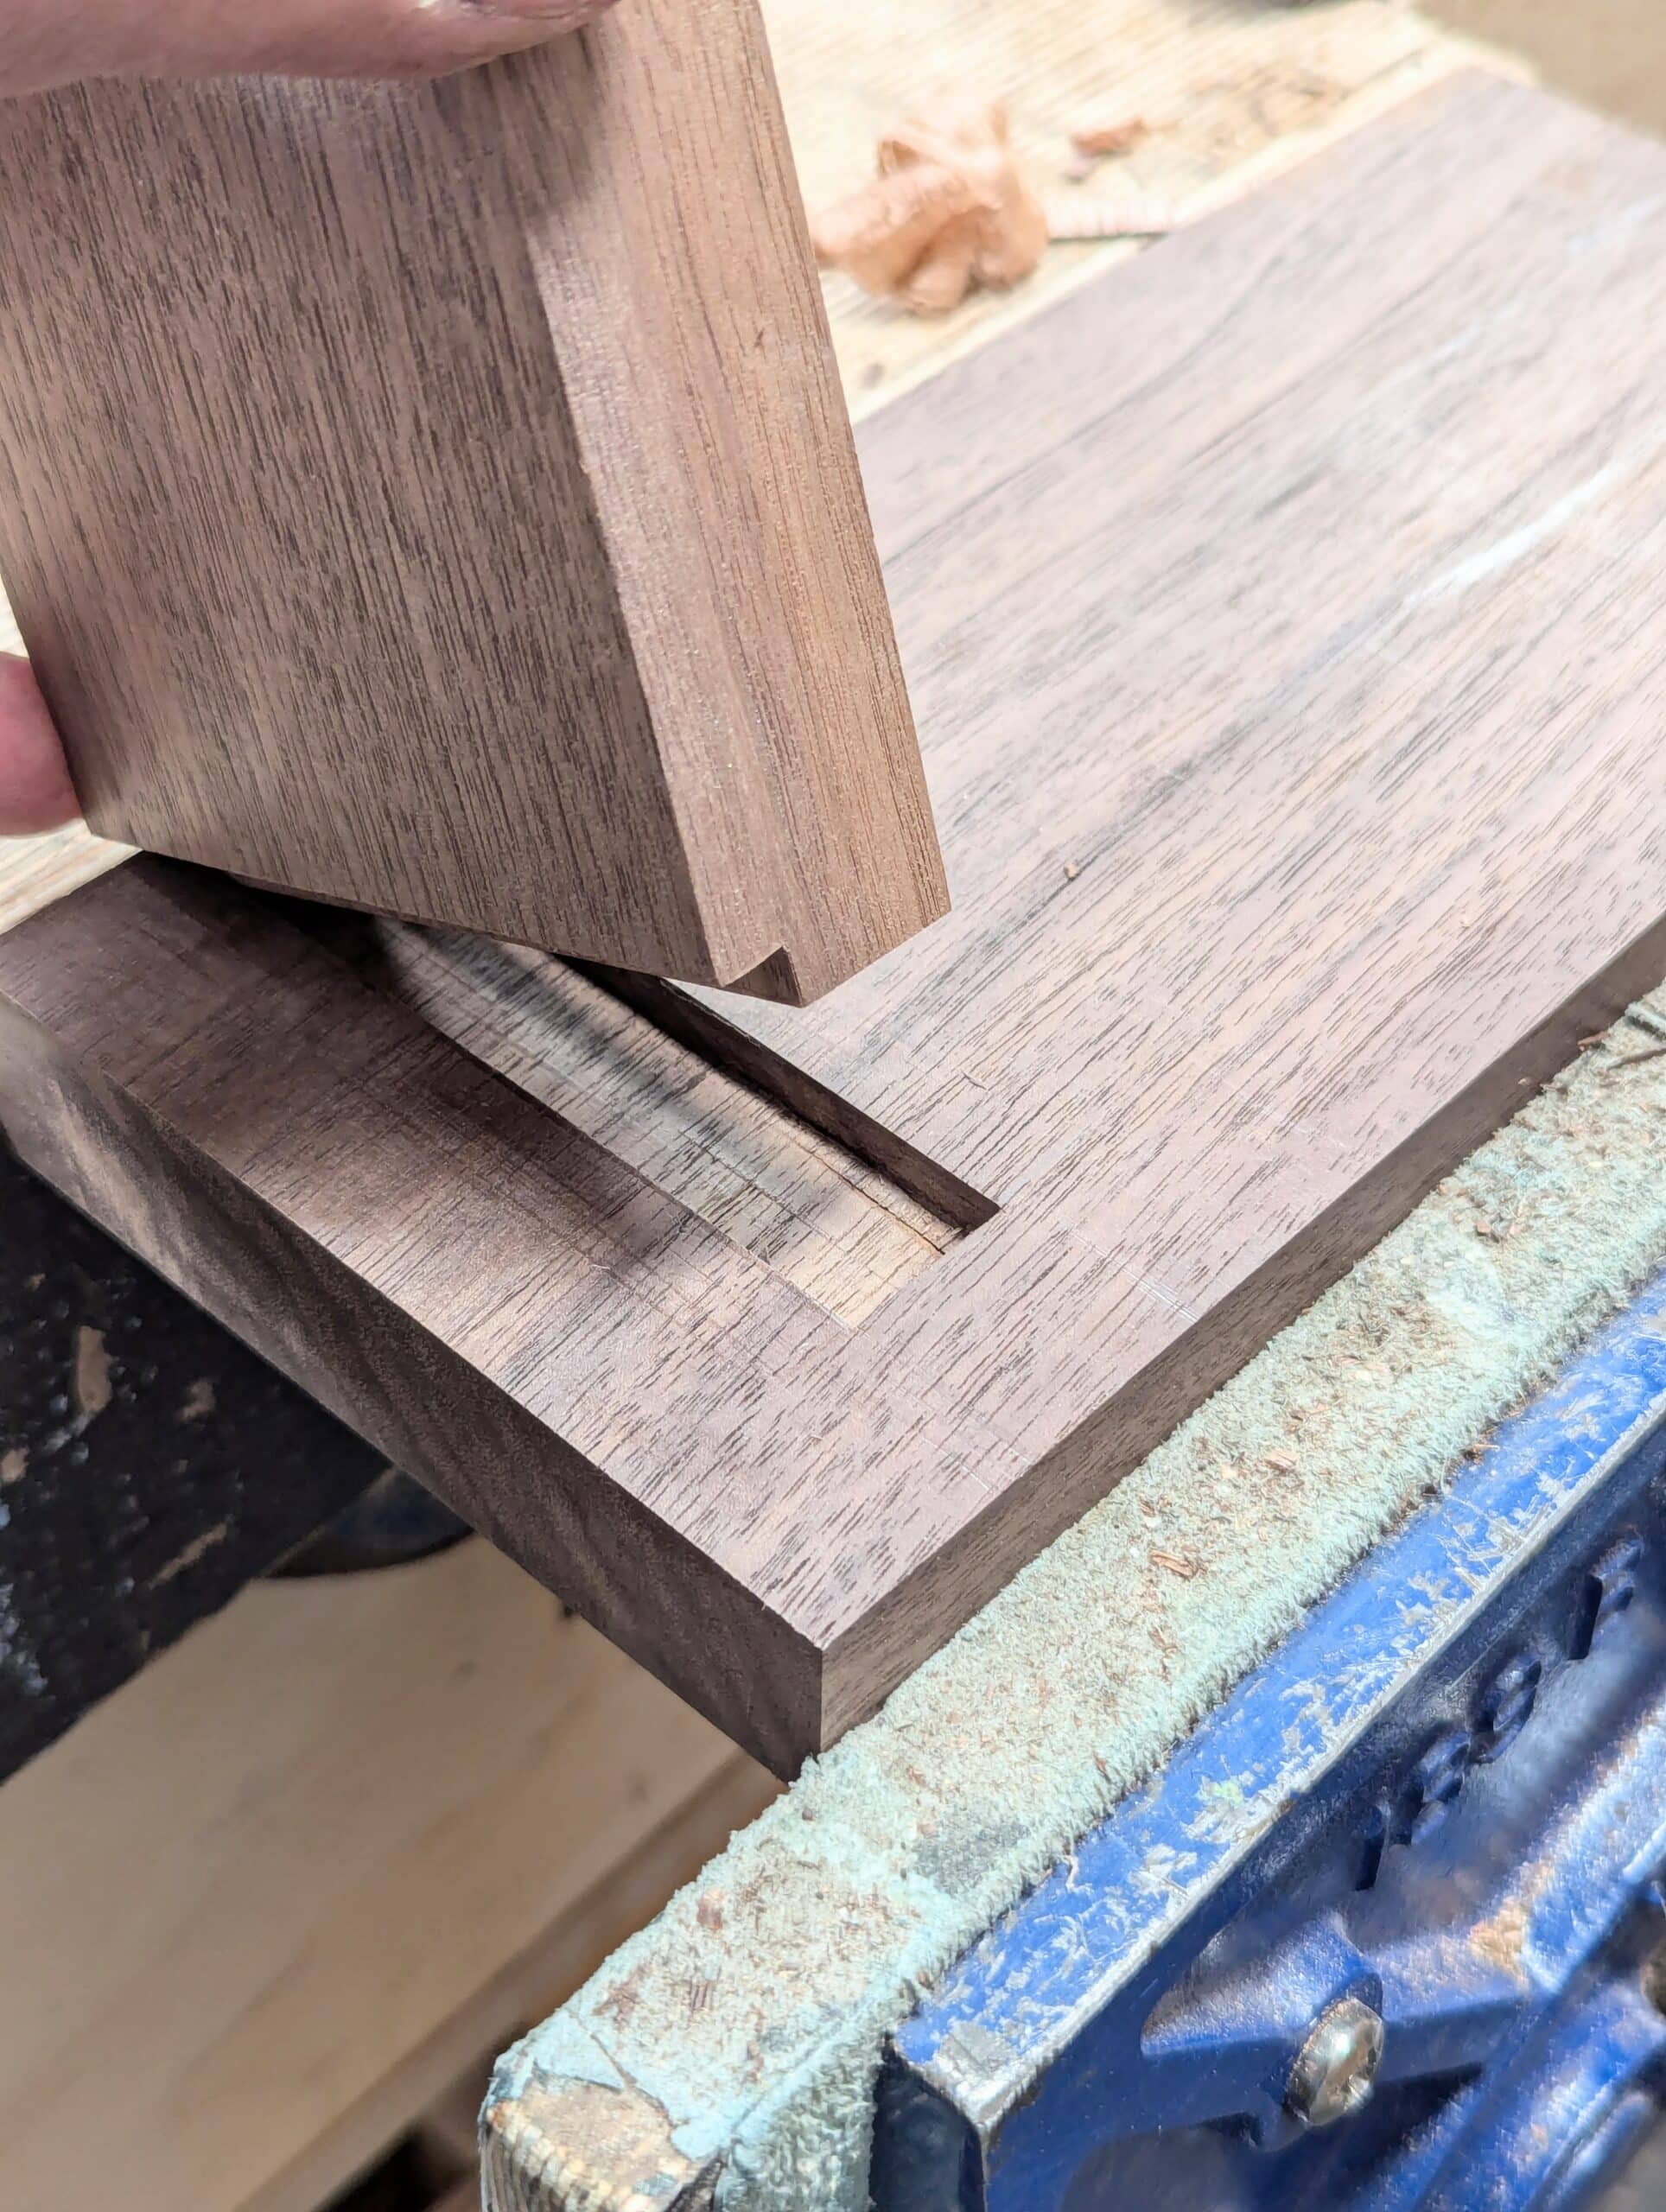
This is how the joint looks when completed…completely hidden inside from the visible front.
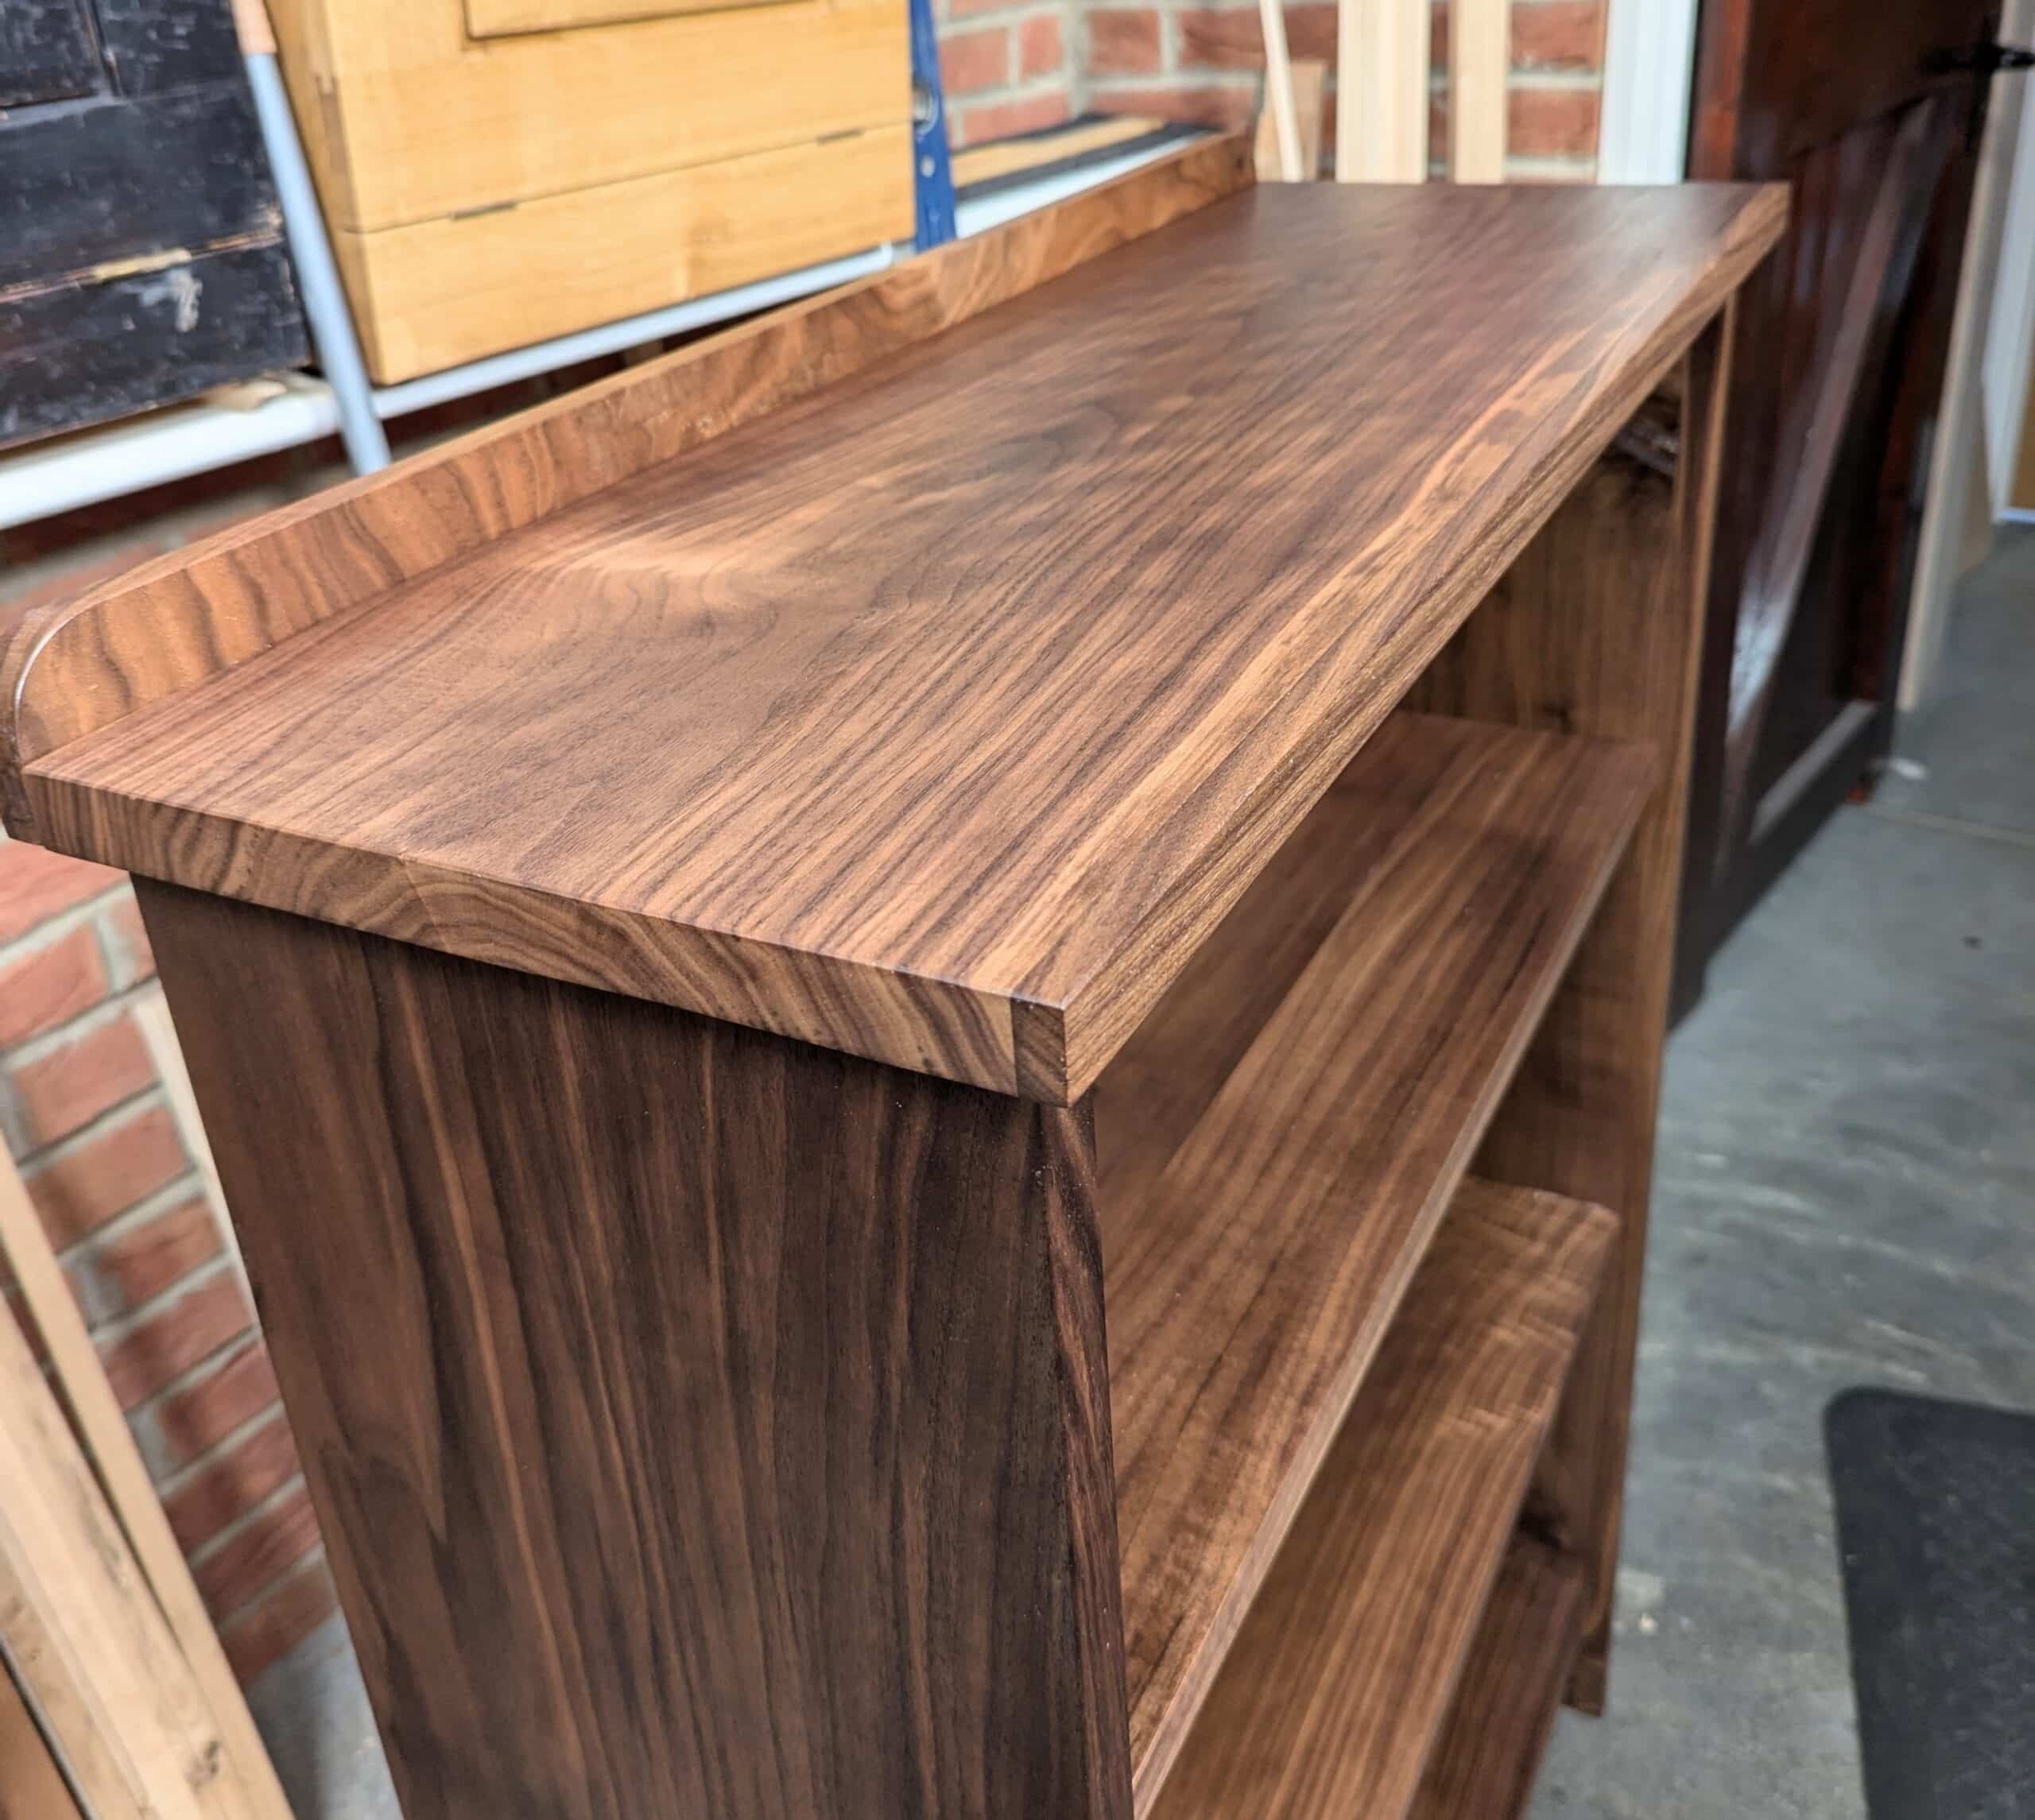
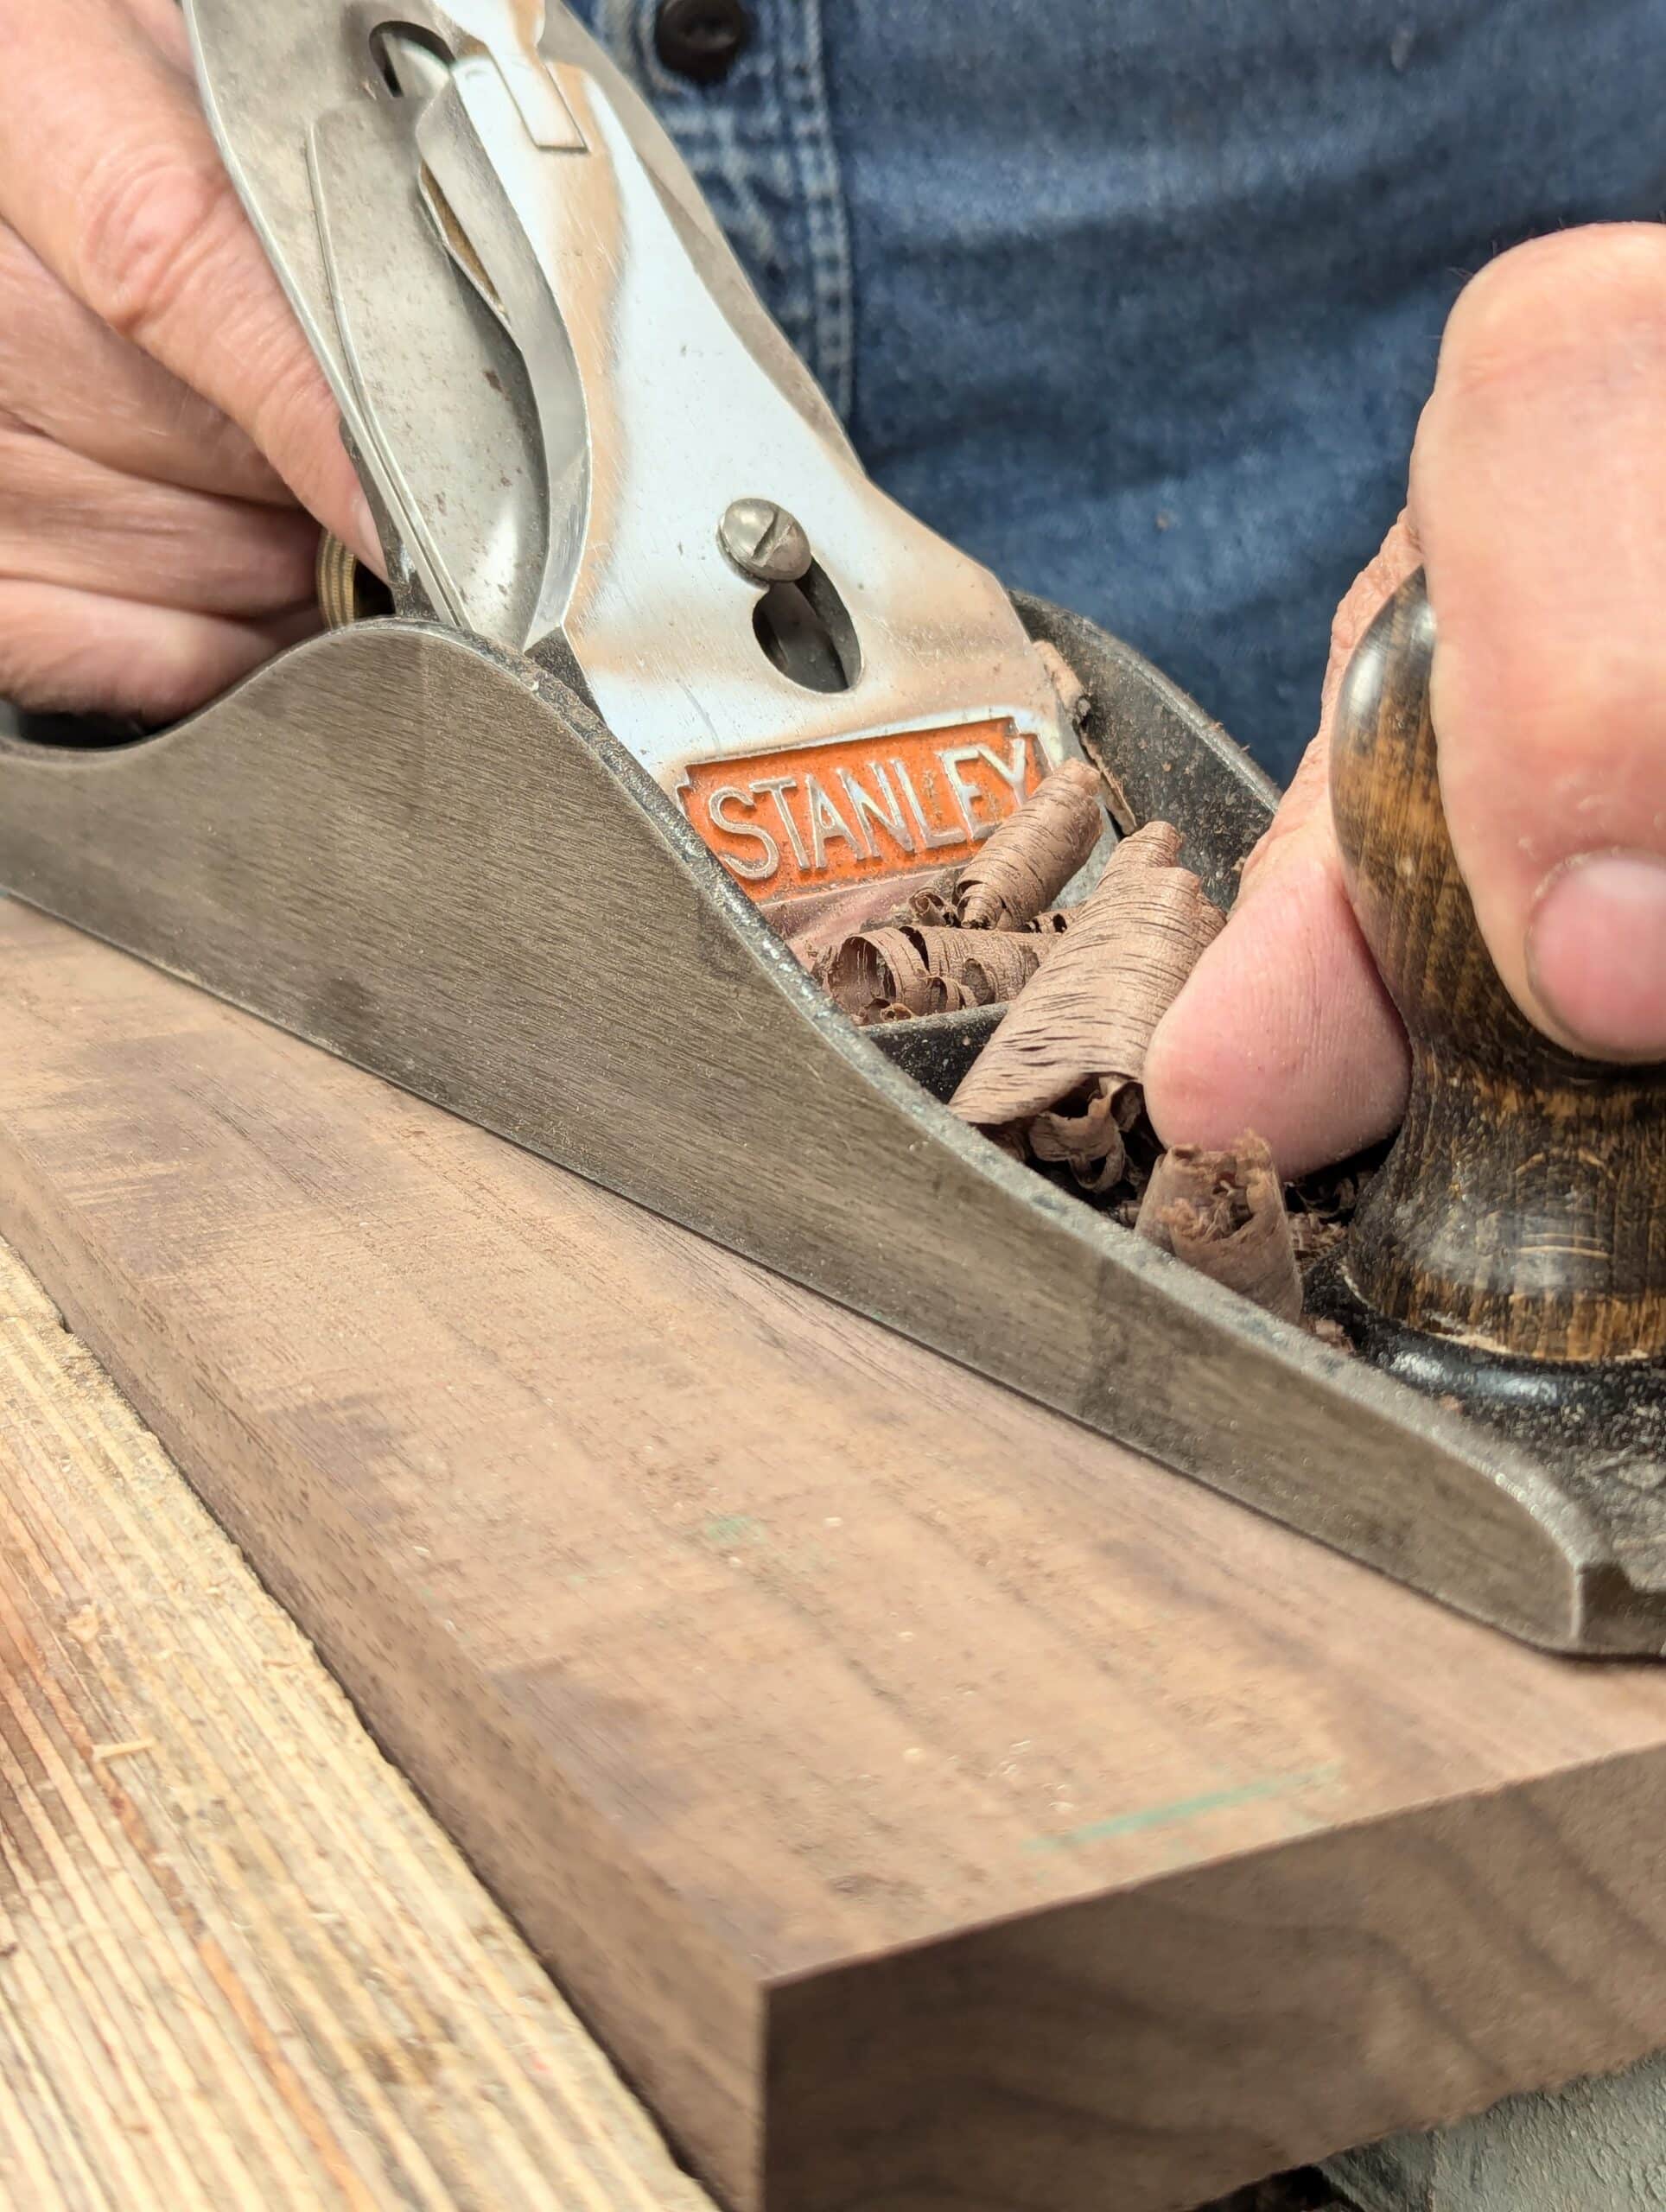
In using this system of pristine first-face planing and then barebones planing the opposite one, I guestimate saving about 50% of planing time, roughly. My unit is about four feet tall and three feet wide and eleven inches deep overall front to back. The wood is 15/16″ (roughly) thick. Planing took me about ten minutes for the accurate face and two for the second one. I used three plane types, a Stanley (converted) scrub #4 YT video here to make yours, a #4 Stanley smoothing plane and a Stanley #5 Jack plane. That’s about two hours tops in this particular wood which is black walnut. Walnut is a mild-mannered wood, not so soft but not hard to work in any way and planes more easily than most. In my view it is one of the more delightful woods to plane with hand planes. Other temperate hardwoods work similarly, soft maple, beech, oak, cherry and many others. For joinery, they all work about the same.
The same application of steeped housing dadoes can be used on the backs of drawers for drawer backs and on boxes generally. The router plane preset and unchanged guarantees tight shoulder lines which means owning two router planes, one for fixed unchangeability and the other to incrementally change the depth to near final depth when the other finesses the final depth.
But we shouldn’t dismiss the standardising of the housing dado at dead on 3/4″ off the blade of the 6″ Starrett square. Just about no measuring and a single marking gauge/router plane setting. Each board end fits any of the housings on the relative side when done. This is a significant saving in time and energy and then thought time too.
An elegant combination of “old school” quick rough dimensioning of interior hidden surfaces with a machine age looking result. It fools the eye into seeing machinery-like perfection. I sometimes leave the hidden surfaces somewhat rough with scrub plane undulations inside. But never on a shelf which requires smoothness on both sides. This method leaves invisible unparallelity between surfaces to save lots of work. I will certainly use the idea in the future. Thank you Paul for your sharing your gift of inventing new old ways of taming wood.
Eloquently put and received with thanks, Richard. Thank you.
Brilliant, Paul. I struggle with truing up wider boards (more practice needed), but you’ve just cut the work in half.
purchased your router plane kit and made the router….perfect tool! easy to make and a delight to use.
not too big/not too small/not too heavy/not to light…just right (insert thumbs up emoji here)
Dear Paul
Curious – what is the benefit to using a step under/at front of the shelf, rather that sizing the dado to take the full width of the shelf piece?
Regards
We do this because if there is any unequal moistrue levels in the boards the shelf might well shrink in dry weather and leave a telltale gap on that foredge and in a visible place. When the shelf overlaps it will not be seen.
Standardising all of the dadoes for non-standardising the thicknesses of the boards just makes for greater efficiency and the shelves become interchangable and not designated.
Ah, all makes perfect sense!
Thank you very much.
I understand you would not see a gap front to back and on the underside of the shelf where the routed/stepped parts are hiding the joint but would you not still see the joint line along the top of the shelf? would shrinkage potentially not show a gap here? thanks a lot i enjoyed reading.
This is a timely post because I am about to start a small bookcase for Mrs H in American White Oak. I shall certainly follow the techniques described to replicate the dimensions of dadoes and housings without tedious remeasuring and resetting. I’ll simply find a section of steel square bar or similar that is a convenient size and use it for each joint.
I did something rather similar making a pine blanket chest for a lady friend with stopped housings in the four “legs” (stiles?) at the corners so that there are no joints visible, but “shouldered” both sides of the dadoes, almost like long tenons.
All the measurements and settings took a long time. A very long time!
I can seldom afford to use anything other than cheap pine and redwood but I had a bit of luck recently when a friend gave me some short Oak boards, so I’m looking forward to playing with it.
Thanks as ever, Paul. Some good advice here.
Kindest regards.
Rod.
Hi Paul,
Is there a rule of thumb about the orientation of ‘face’ surfaces in a piece? I sometimes hear that the ‘face’ should be pointing outwards, but it seems like really that isn’t what you’d always want. For example, on a table leg for a table with aprons, I assume you would want the faces pointing towards the other legs as opposed to oriented outwards towards the viewer? Or, for example, on a dovetailed box, would your trued up faces go towards the interior or the exterior?
I appreciate all that you do and sharing your passion with the world, inspiring countless others in this wonderful craft!
Thanks,
Greg
I am not a typical maker in this, Greg. I always go with appearance and gut feelings over rules and do what looks the way I want it to. There are always other considerations too. If two sides are bowed in length put them opposite with bow going in and use the shelves to push them in opposition and you have straight sides.
Yet another most excellent lesson, Mr. Sellers. Thank you.
A very specialized case of the housing dado is one sometimes used to join aprons to table legs. In this joint the end of the apron is cut like a dovetail, designed to slide into a similar but negatively shaped mortise in the table leg end grain.
Can this joint be accomplished with hand tools? Have you considered creating a lesson on how to do so?
Thank you again for this and for all the many lessons you have taught us.
A few years back I build a big set of built-in bookshelves. I used commodity yellow pine from a box store. Reasons for that choice- cost and the fact I planned on painting these shelves. I rarely paint wood projects, but sometimes this is what one wants. If I had used the process described in this article it would have saved me a lot of time. Sizing the width of the shelves to the dados required tuning the thickness of all the shelves to be very close to perfect. Another challenge is that commodity wood from big box stores is not dried so that is really fit for cabinetry. My shelves were shifting in final dimension and shape through my whole project (and this after letting the stuff sit in my shop for more than a month to acclimate). I got a great outcome in the end, but there was some trial and tribulation along the way. If I’d followed the procedure above things would have been easier. I could have got all my shelves nearly just right and then banged out some rebates right before a final fitting together.
Southern Yellow has never been known for staying still. US builders often call it snake wood because it crawls all over the place with every exchange of heat and humidity. That said, I too have made many a bookcase and shelving unit from two-by-twelves because it works so well with hand tools and once constrained with good, constraining joints it restrains itself just fine.
Southern Yellow has never been known for staying still. US builders often call it snake wood because it crawls all over the place with every exchange of heat and humidity. That said, I too have made many a bookcase and shelving unit from two-by-twelves because it works so well with hand tools, is relatively straight-grained and knot free and once constrained with good, constraining joints it restrains itself just fine. As to it not being dried, usually the construction wood is dried down well enough it’s the storage and distribution afterwards that’s the problem. Living there in the US for 23 years or so I often lamented the way big box stores stored their wood outside or on the back of a truck with ripped tarps in the rain.
About the shelves. Thinking of the ends of the prepared shelves as “tenons” that are “relieved” from one face only, how is this feature of each shelf oriented with respect to the top and bottom of the book case? Is the “relief” pointing down towards the bottom of each shelf, or up towards the top of the book case? Can’t tell from the photos. Maybe it doesn’t matter. If the shelves ever sag from the weight of the books, maybe the relief should be on the bottom, so that a gap might not open up. Thanks for providing such a helpful lesson, will try it soon.
Good Question. You could go either way but the parallelity issue would be best underneath ideally (and thereby lost to the more open space that isn’t supporting the physical items of books and ornaments) and especially if the board markedly out of parallel.A 1″ thick shelf of solid hardwood would barely sag up to four feet wide if filled with books and the joint lines would not open or move under the weight if well made and glued though I understand the physics of the question.
Great lesson and a timely reminder as I am planning to make a book shelf this year. I have often pointed out to people that when making a table top, why bother with parallell faces? Just make sure that the area where an apron would meet the top, is flat and relatively parallell to the top side. It does not have to be dead perfect, because no floors are perfectly level and dead flat. Toss a carpet underneath, and you have even more “room to play”.
I also agree that most woodworkers won’t work much with locally sourced wood – but a few of us will have that experience. I had the luxury of felling a huge oak, cutting it to slabs and planks, stickered and stacked them to dry – and I am now making furniture from the wood. I had the luxury of selecting how to cut all of my wood, and I have big stacks of matched boards and slabs. All the planks I cut is quarter sawn – a true luxury! Quarter sawn white oak is perhaps one of the most beautiful woods I know!
I would recommend that every woodworker tries this at least once. It does not have to be that big of a process – go get a small tree, cut small planks from a part of the trunk and put on sticks. After a couple of years, make a small project from the wood. It is extremely satisfying – you do all the processes from harvesting a tree to finishing the end product. And you learn a LOT during the process!
Vidar,
I did that process with my christmas tree one year! It made for quite beautiful wood in the end, which was surprising. Not useful for anything more than a couple of handles and for carving, but an enjoyable process. I don’t have the tools for anything bigger than the christmas tree, which would be the main obstacle for doing anything larger.
Rico
Rico,
That is the perfect example, and I’d say the perfect size if you do not have access to bigger tools. 1-2 meters in length and 10-15cm in diameter should be plenty!
That being said, you can get an alaskan mill for your chain saw if you have one. Even a small chain saw can be used for the odd, smaller log. And of course, a hand saw is an option – but that is a lot of work!
Having a big band saw would make this easier, but it is not easy to manhandle a big, heavy log! I have tried it (I have a Record Power BS400, close to the one Paul has), and it is not easy. A log milling jig is necessary!
I rented a band saw mill for my oak. It took me several days of work plus a John Deere tractor, but that was SO much fun!
If you google «Slabs, planks and automotractors» you’ll find my blog article about the ordeal. 🙂 It is a fun read!
1 Article and I feel like I took an entire weekend course.
God bless you and your ability transfer that Skill knowledge that you have to others. I’ve look and poked around the internet dusting off those woodworking skills my grandfather sorta taught me as a kid. But when I’m lost your the one that seems to make its click. Boils it down to the simple steps.
My wife calls you My Woodworking dad. Sounds about right.
Simple, easy, almost foolproof!
Thank you Paul.