Just Another Trade Secret
Things come to us in the moment and then we leave it alone for decades and just use it ourselves. I’ve got so many it’s hard to keep up with myself sometimes. Sometimes deep and flawed surfaces in our wood end up on the inside, underside and back of a cabinet and we never touch them. In vintage pieces, especially from the pre-machine age, we can often progress a forensic investigation ourselves to discover the types of tools ancients used to part off their panel wood to bring the thickness down be that by pit saw, handsaw, axe splitting, wedge driving, circular saw, bandsaw and so on. The coarser surface, often barely planed and trued, gets allocated to the unseen places: it made sense to that pre-machine age no matter the continent not to waste energies or material.
I’m making a new video series and had some walnut in my wood rack; it’s some really fine and prime stuff a good inch full in thickness so I planed everything as usual and just enjoyed the full day’s workout. Walnut is one of the finest woods to work with hand tools. It hand planes beautifully, rarely tears out, chops crisply and always seems to split to the line you want it to. What more can you ask of it?
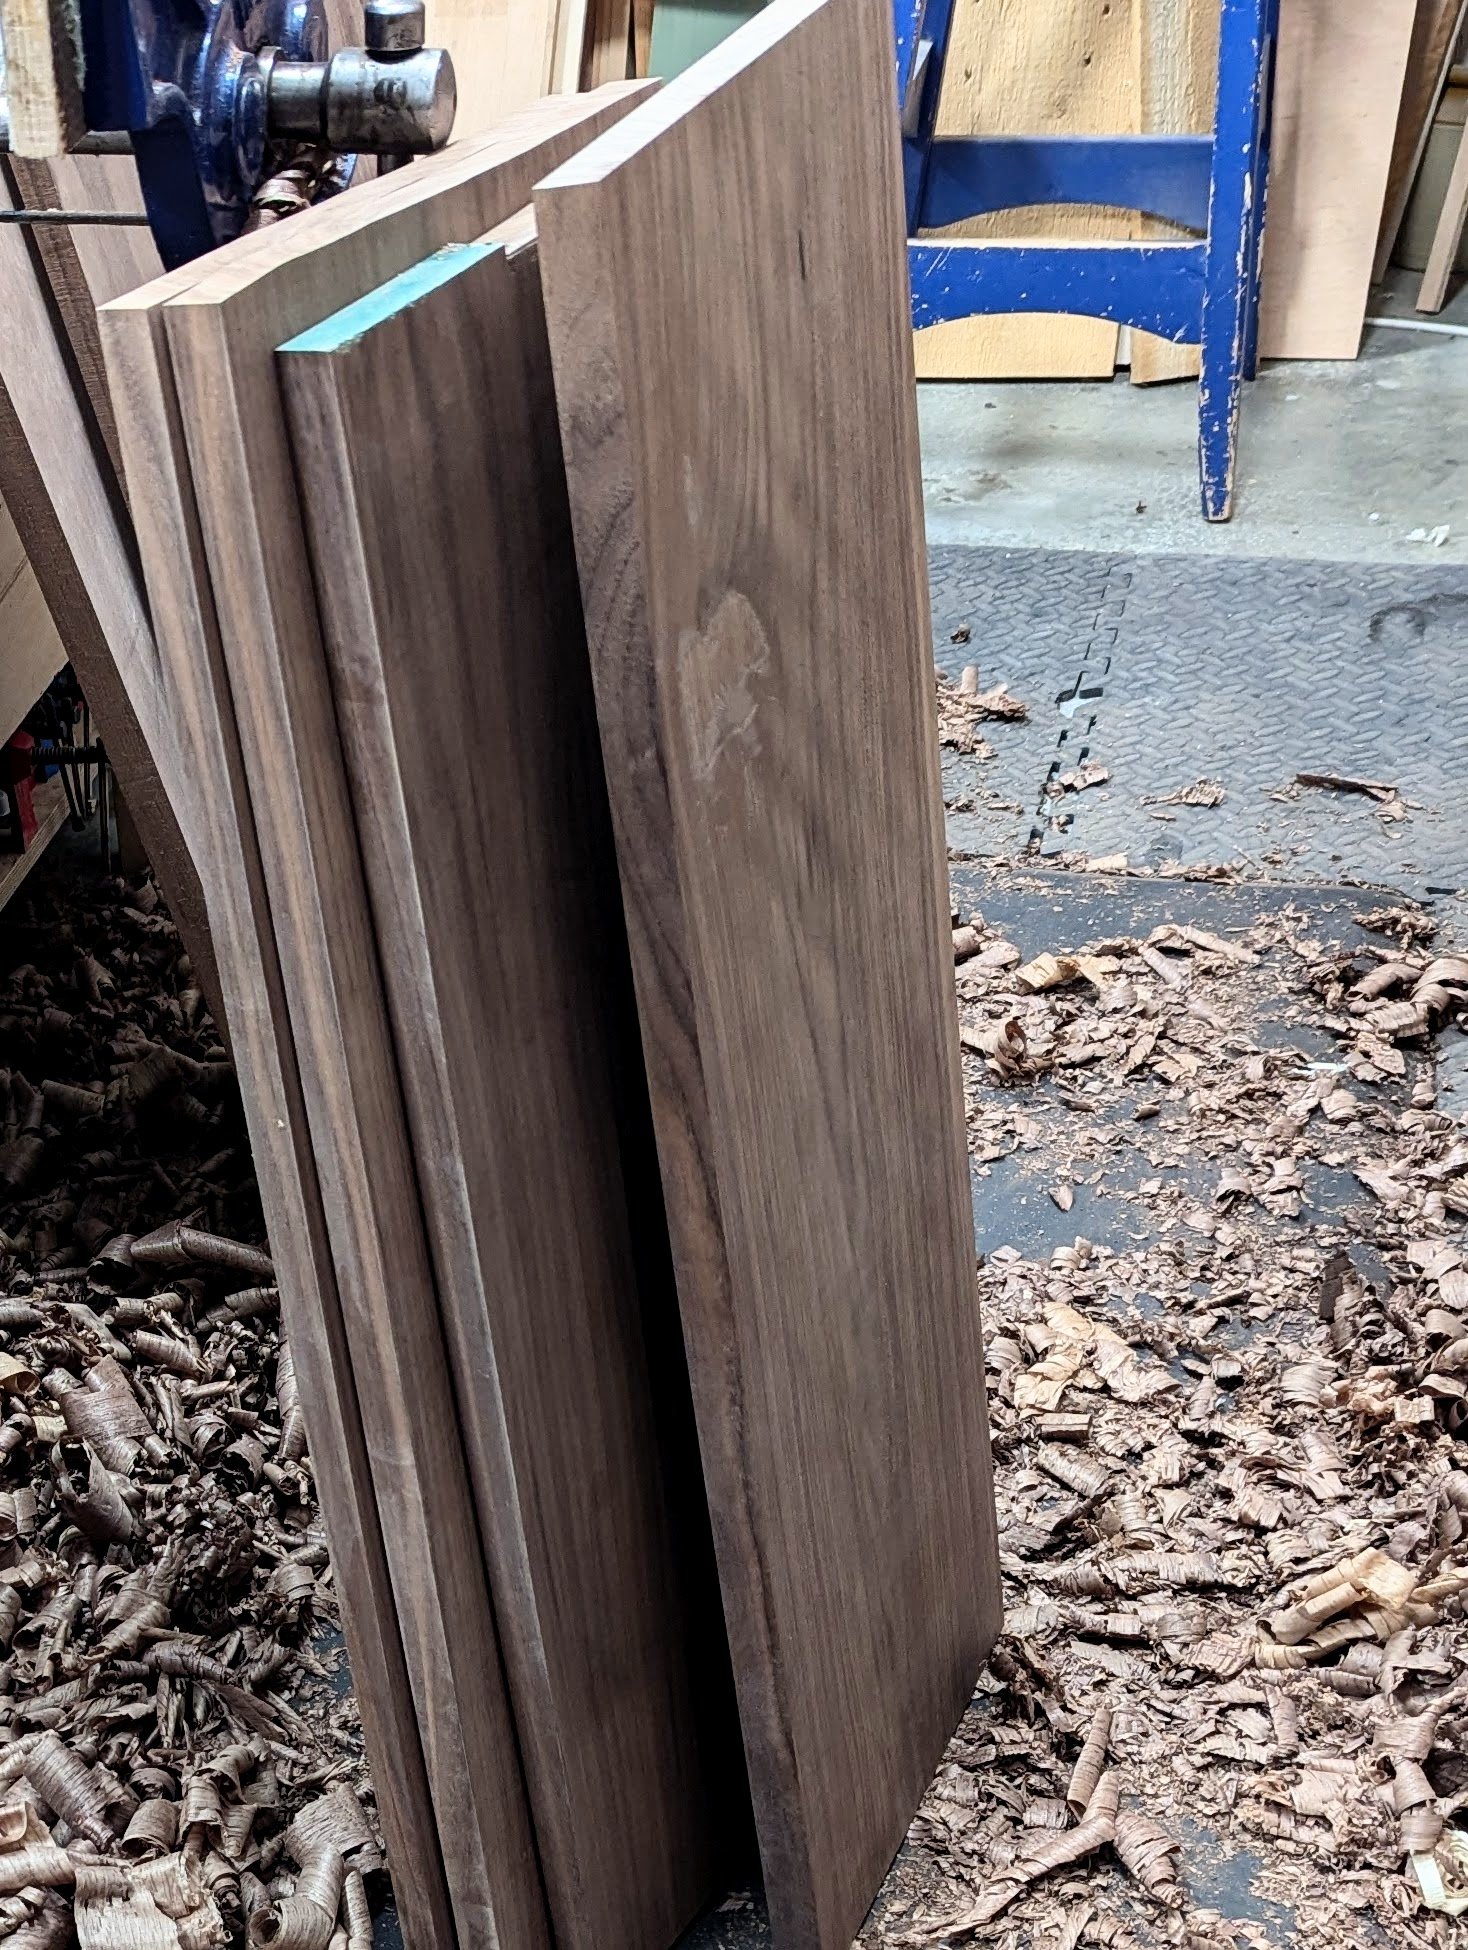
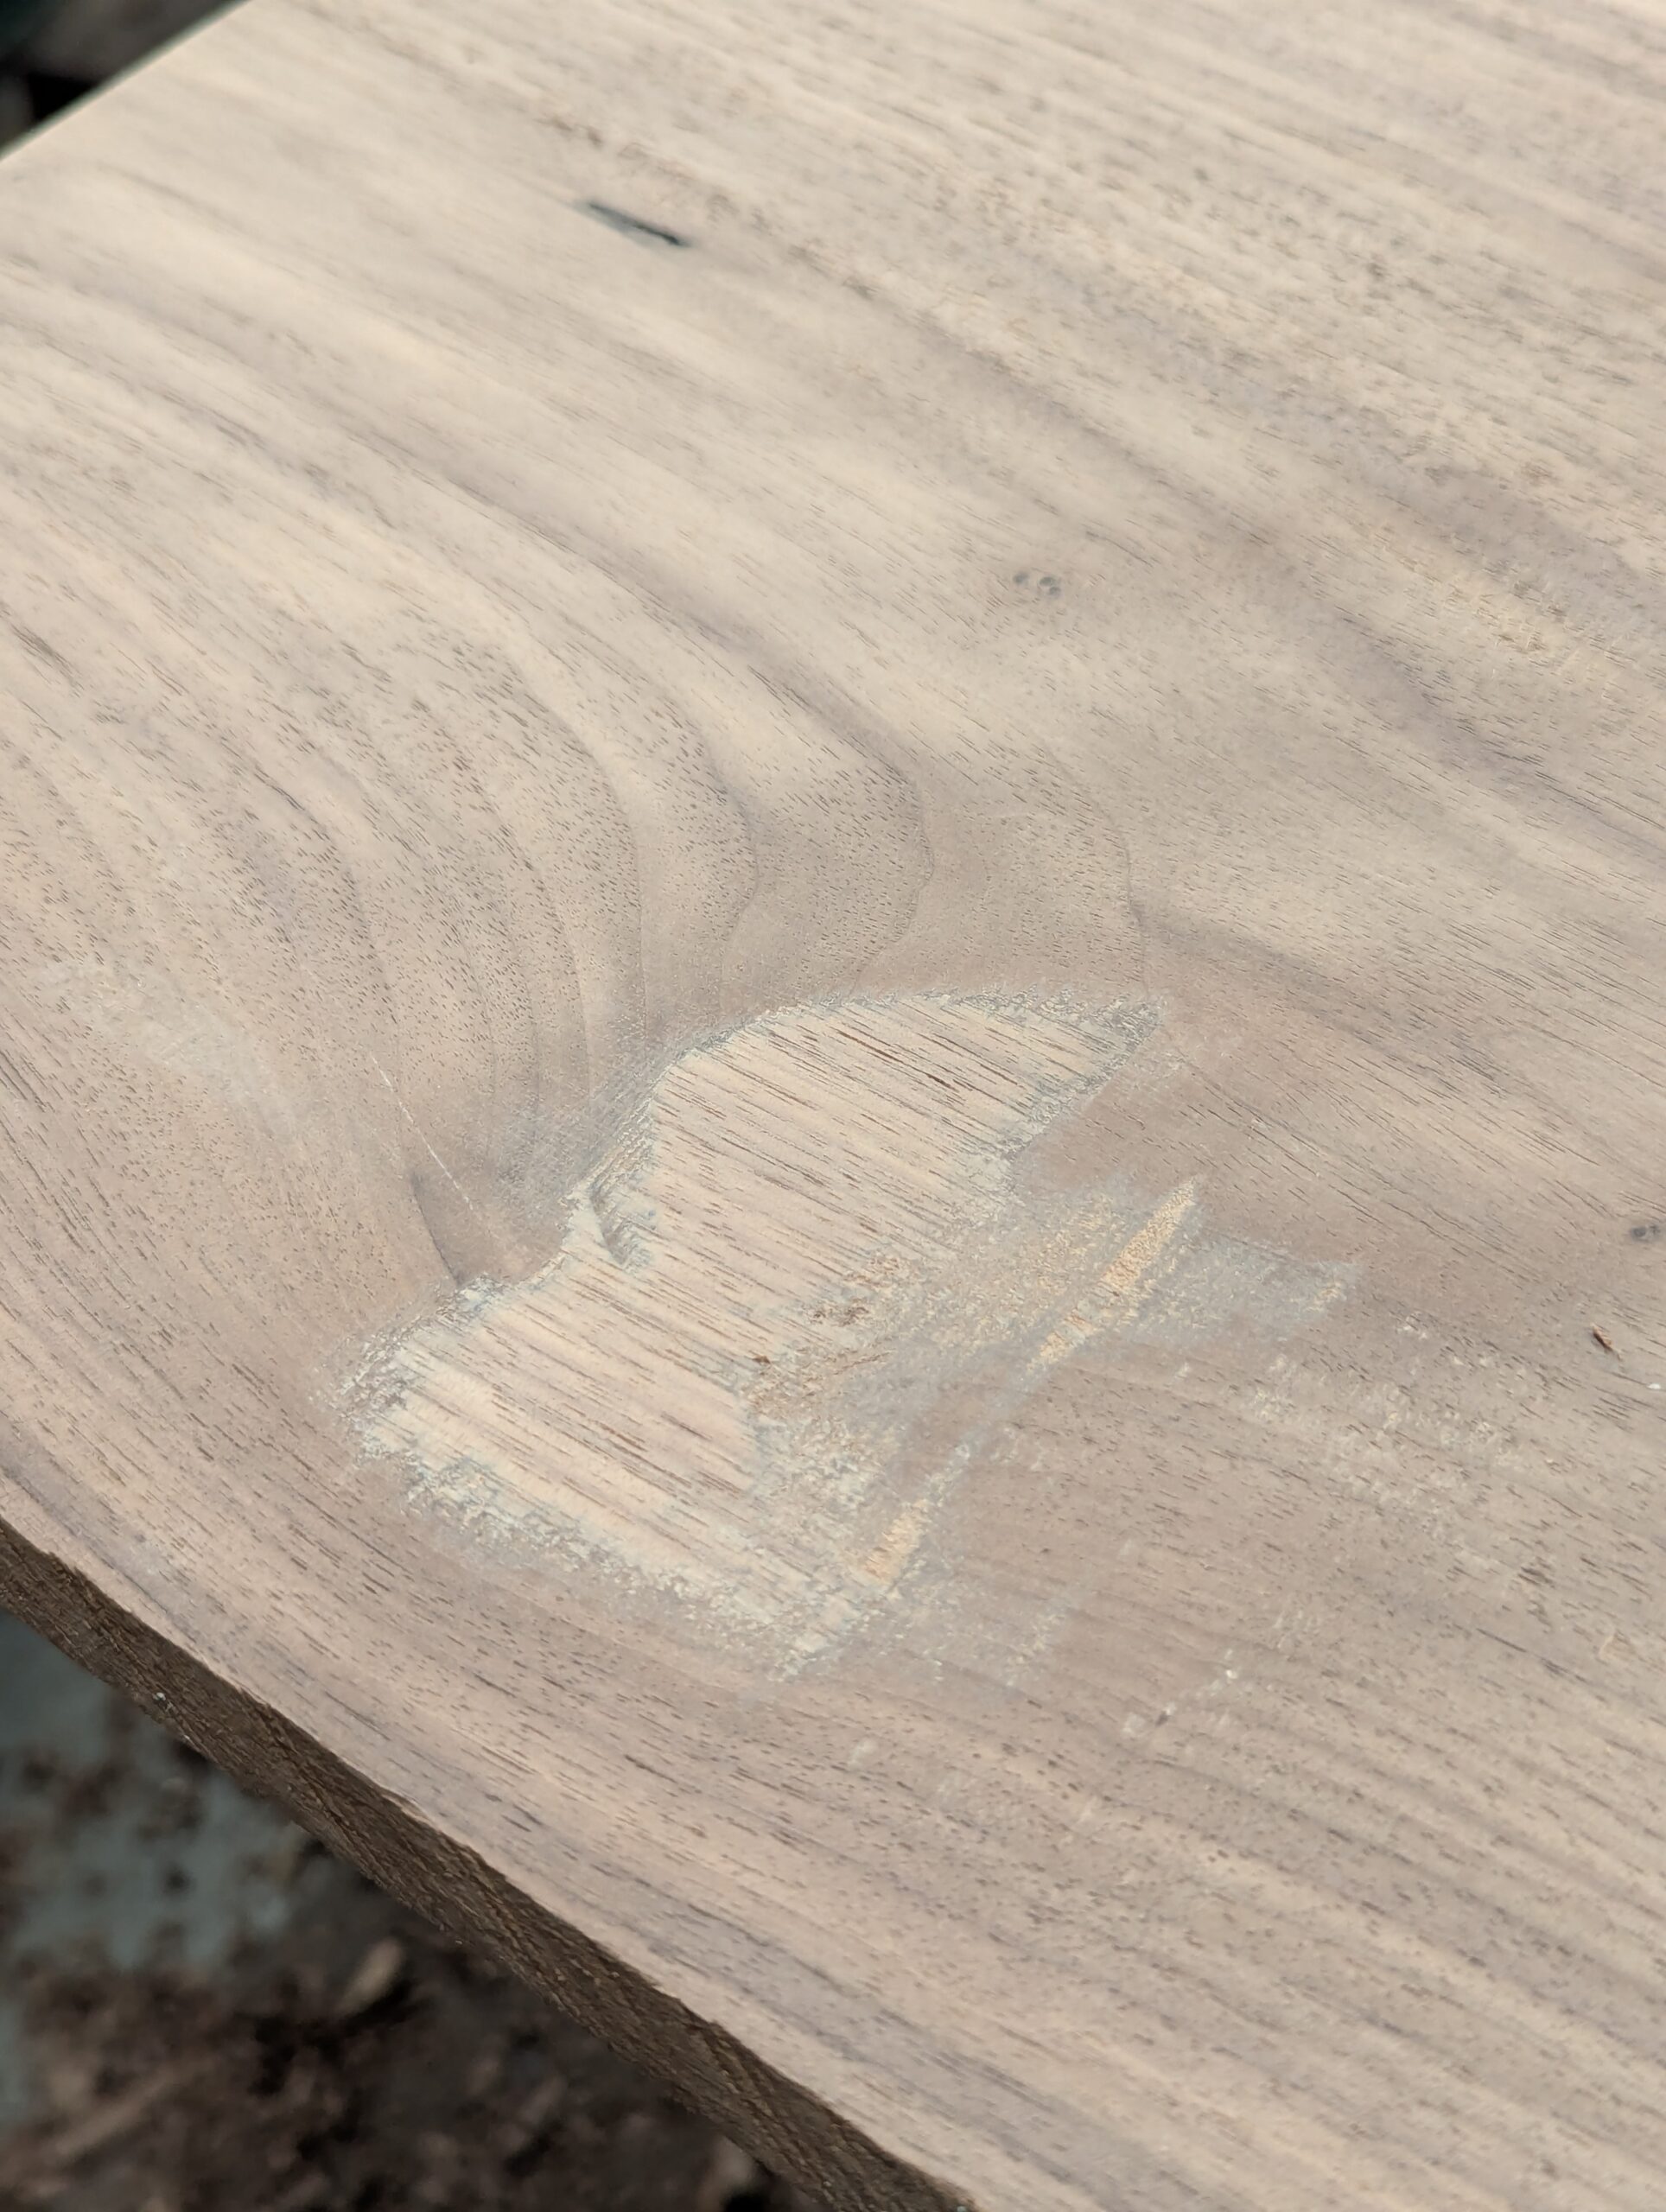
This walnut has some decent colour and even marking to its grain without being flamboyant––probably a US import of Juglans nigra. Cutting the sections to length and roughly ripping to an over-width width size cuts down on the waste and the energy I need to dimension everything. Surprisingly, my material all came out very close to my goal of an even 1″ in thickness but one piece had a deeper scallop that would have made my one remaining board too thin.
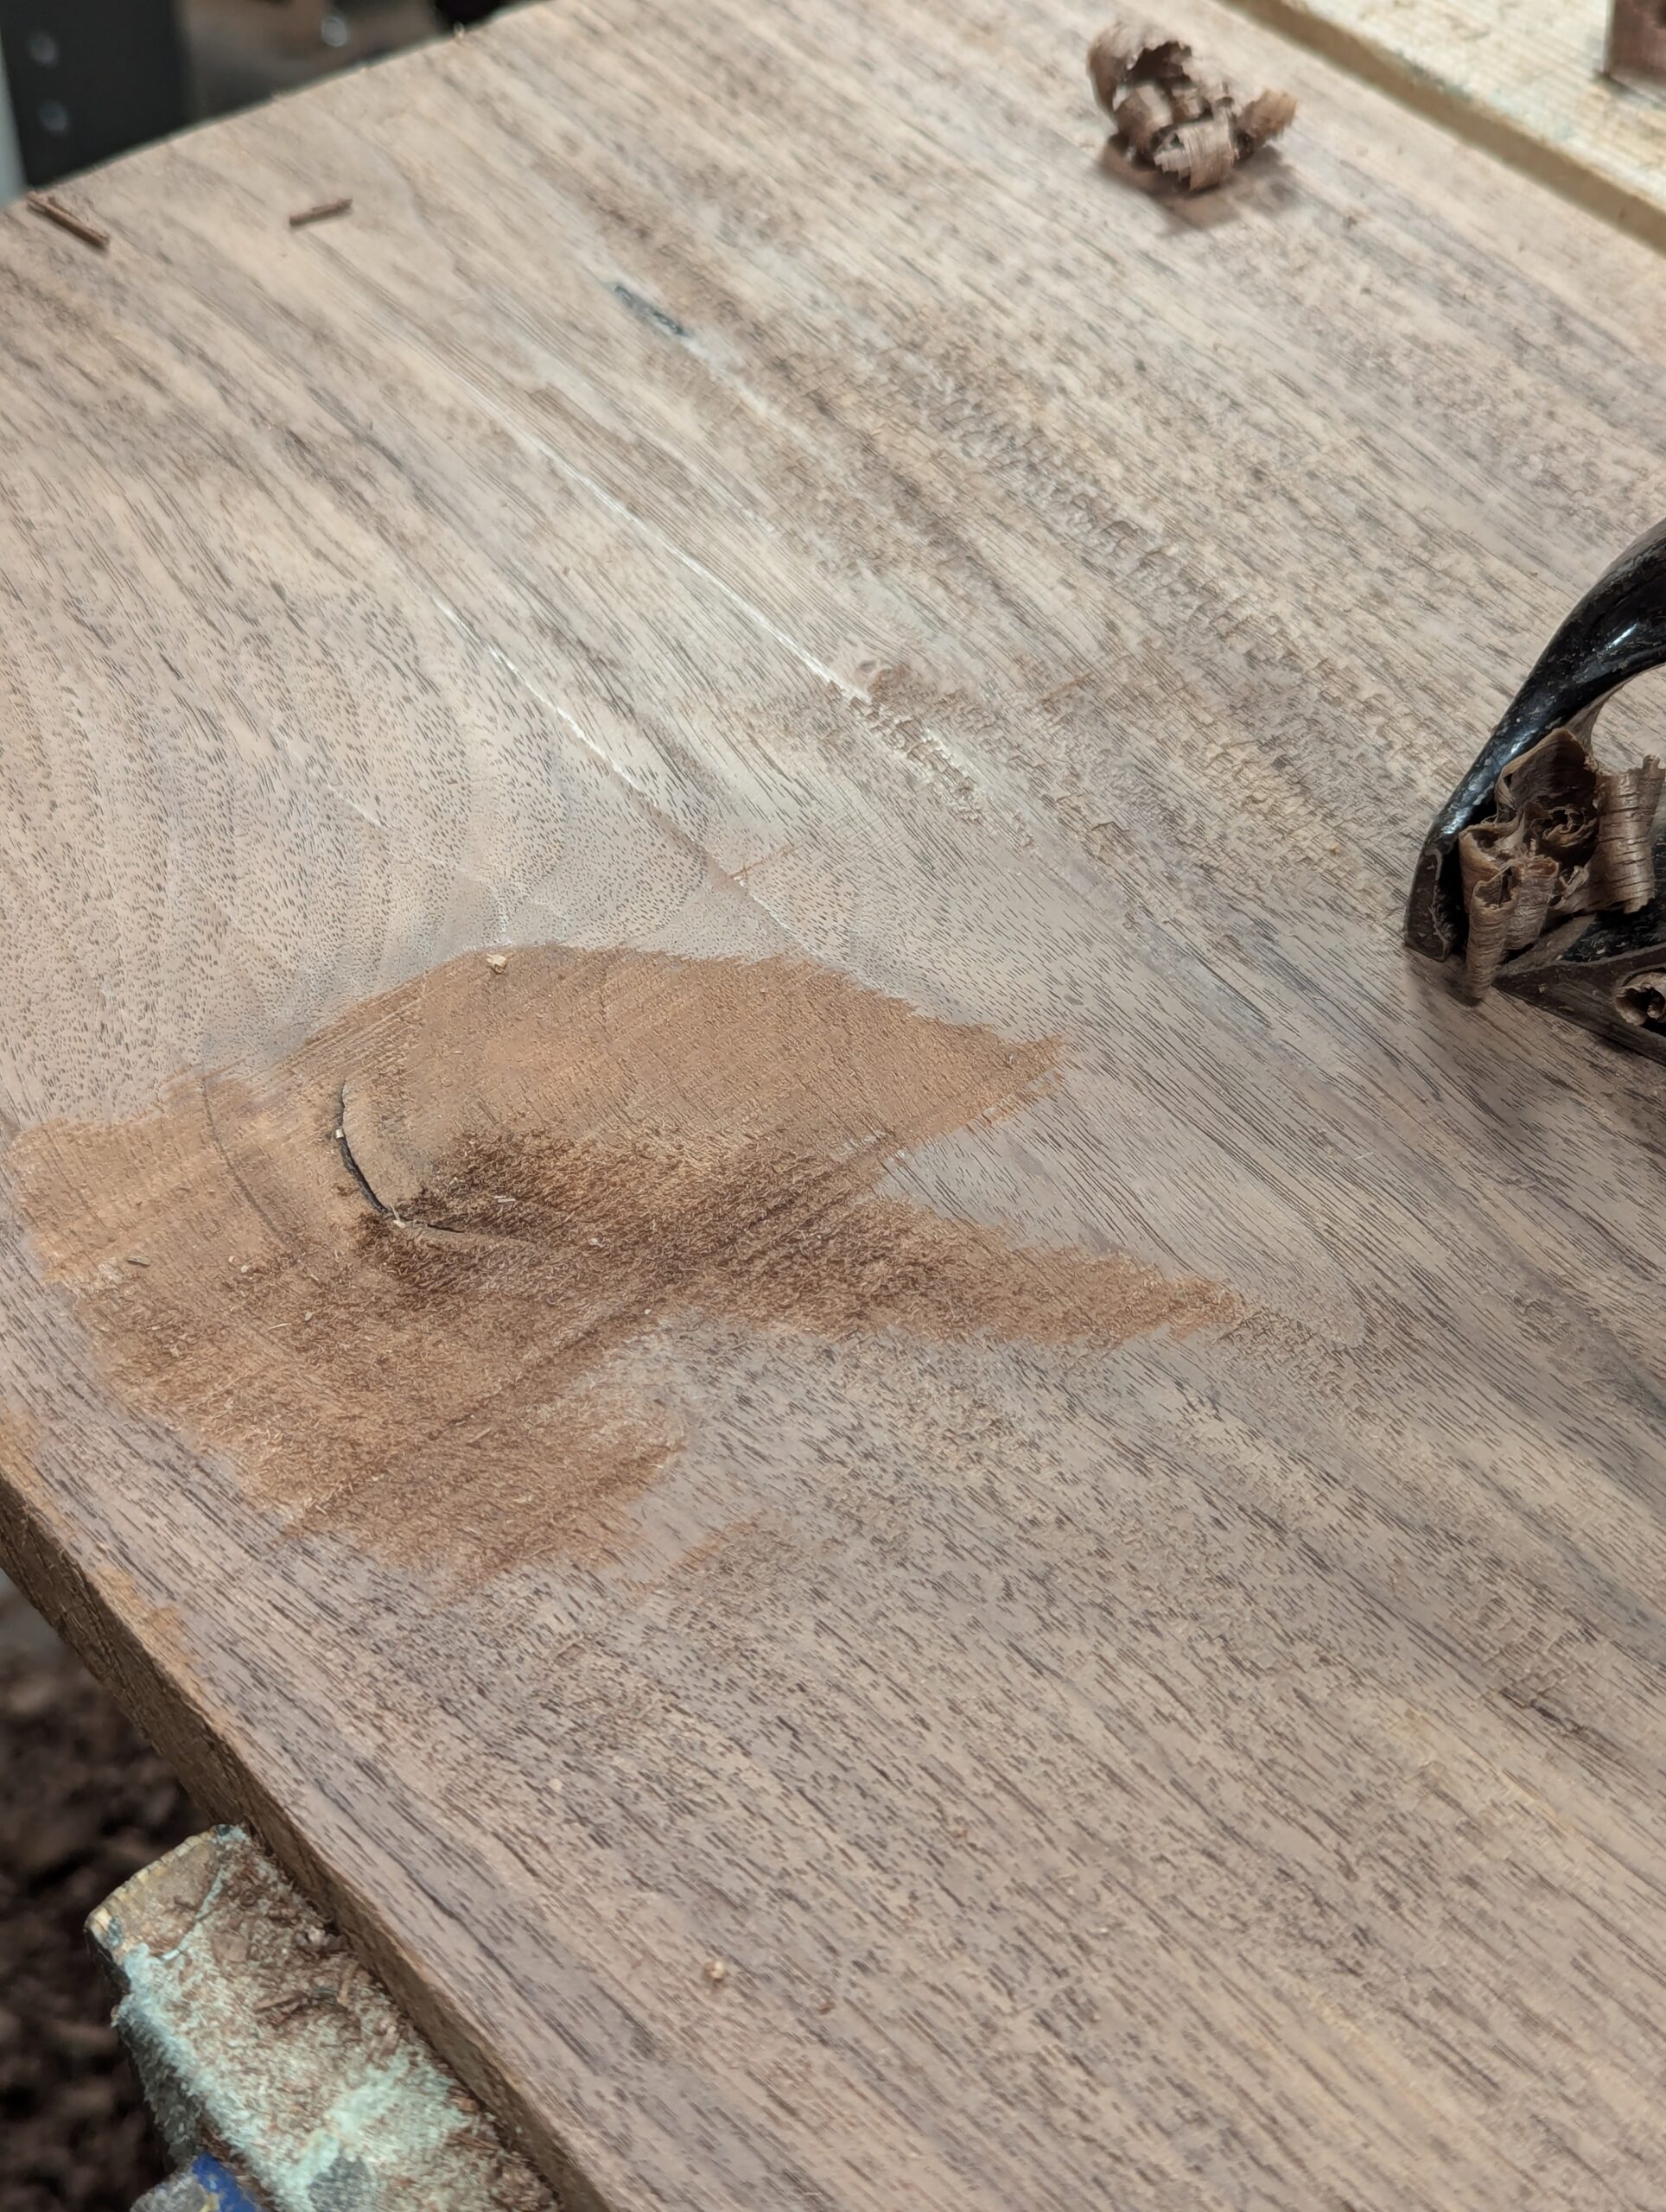
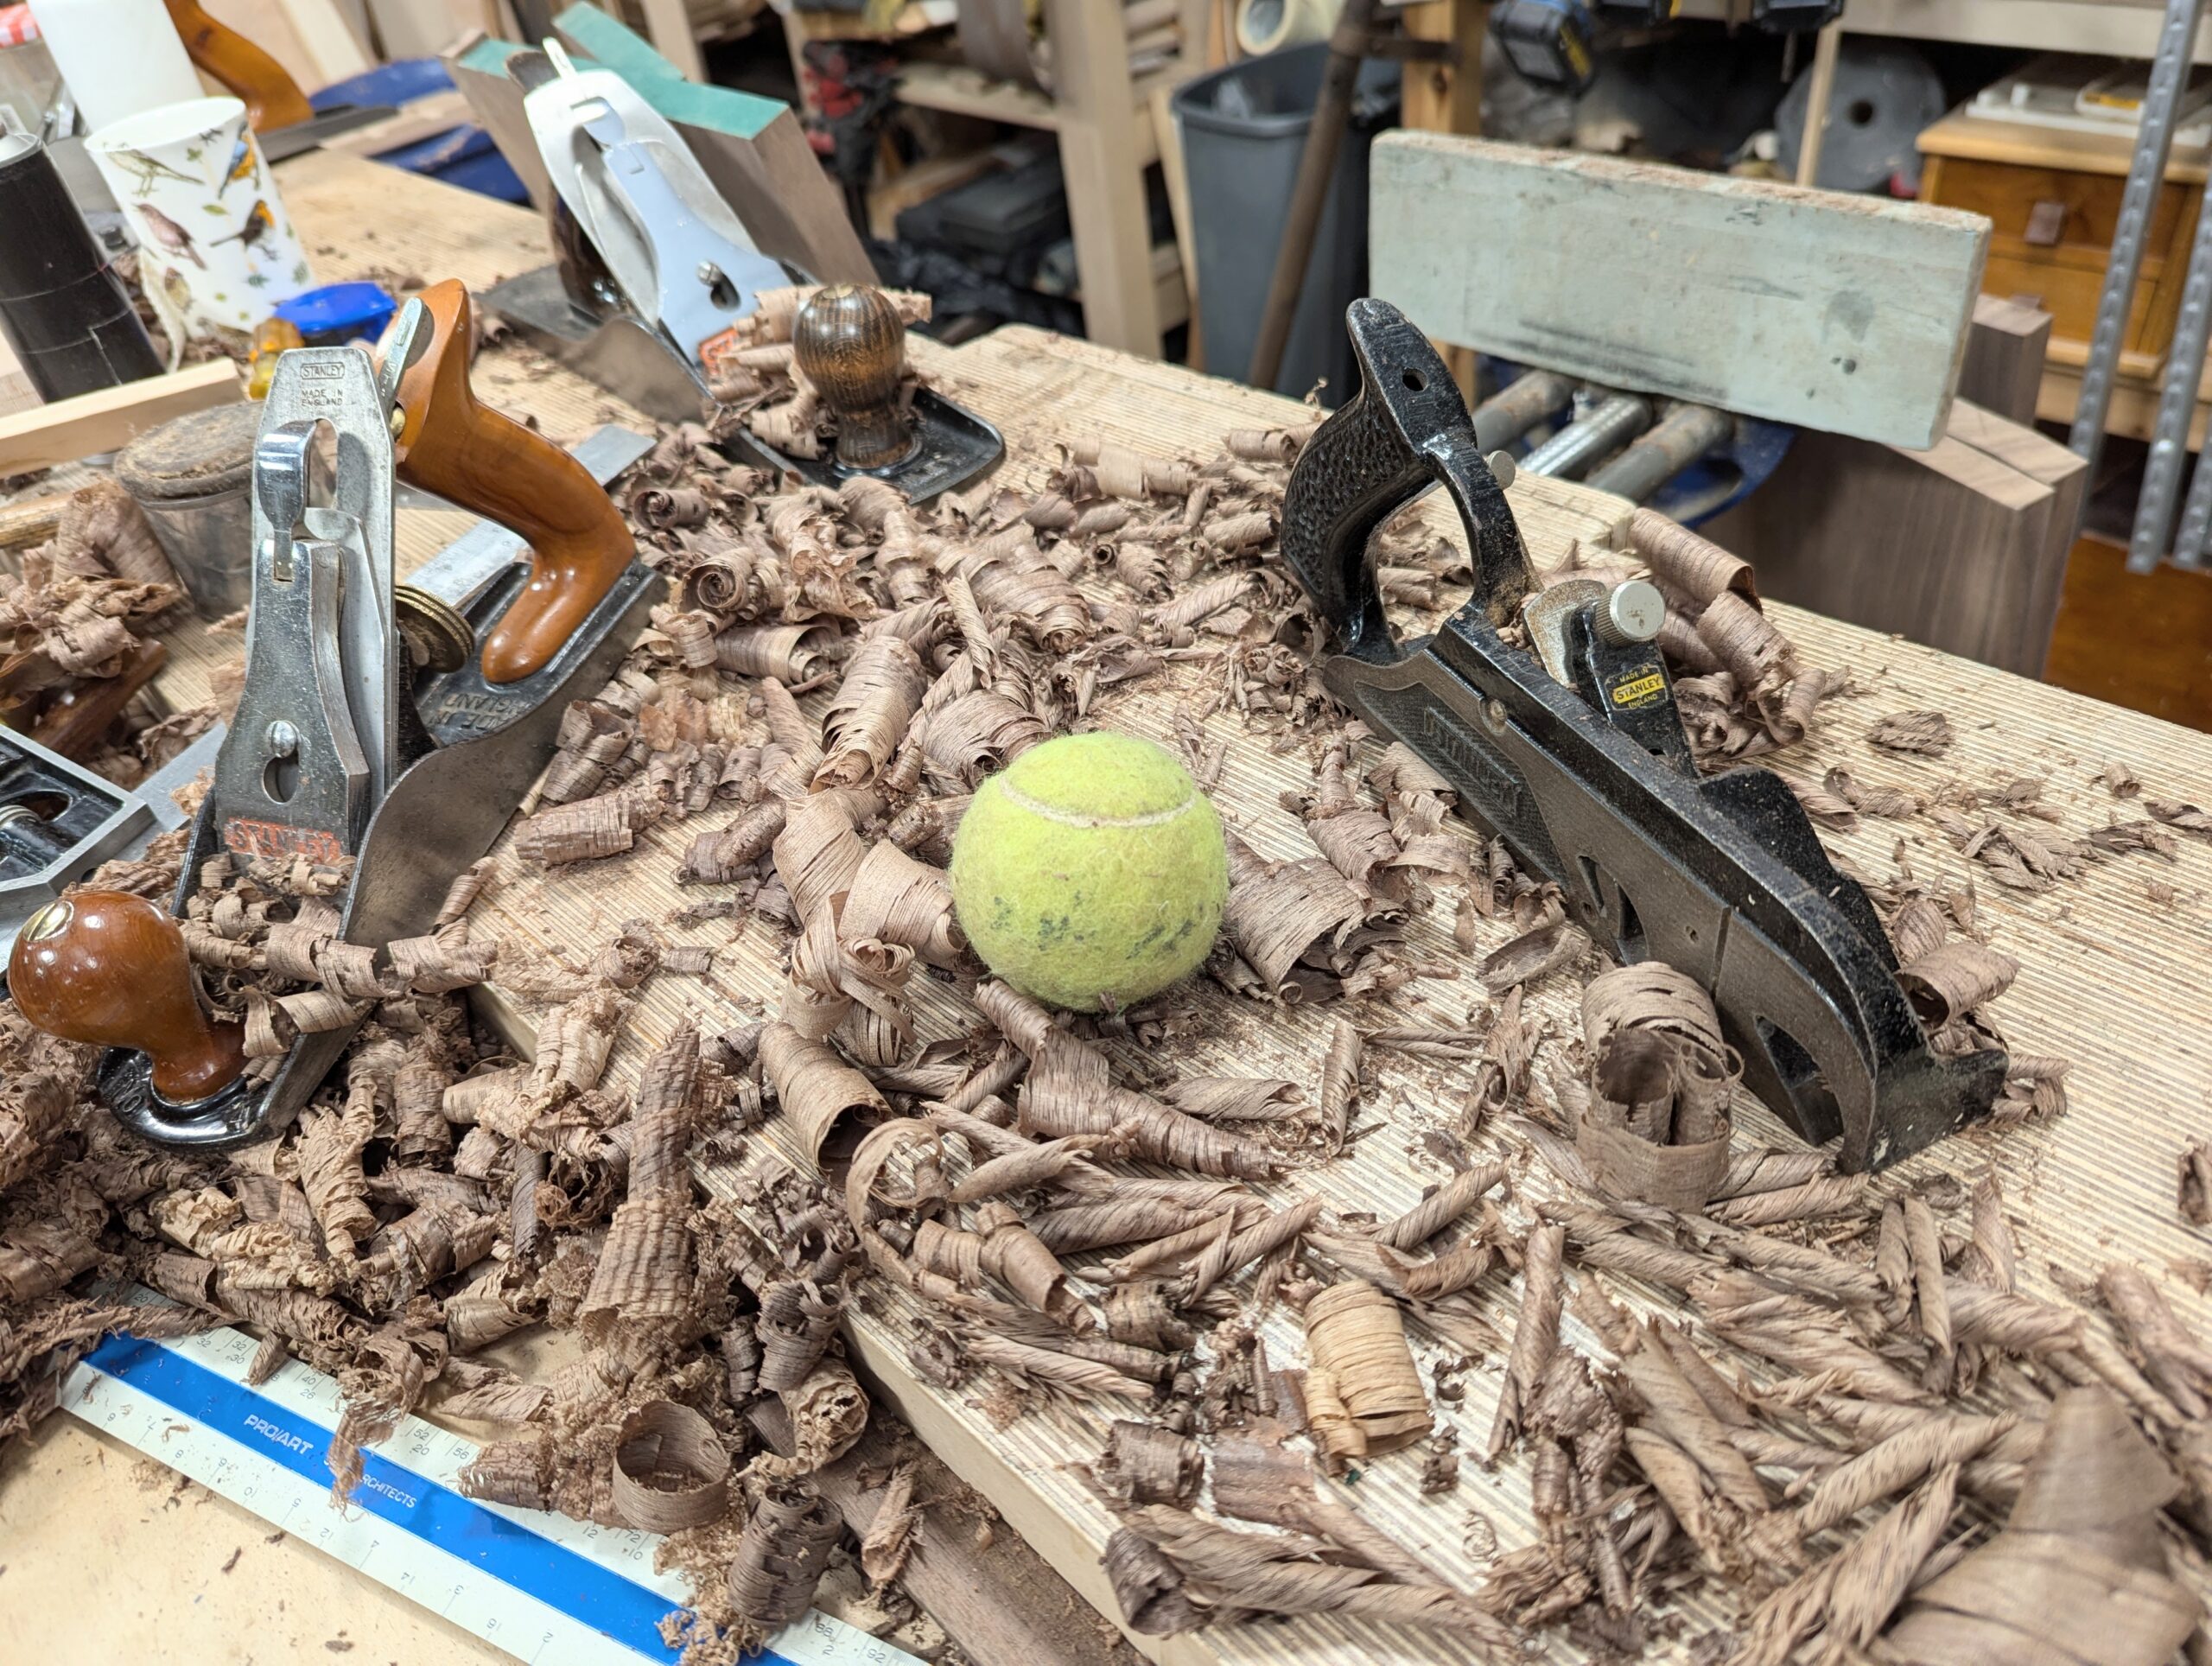
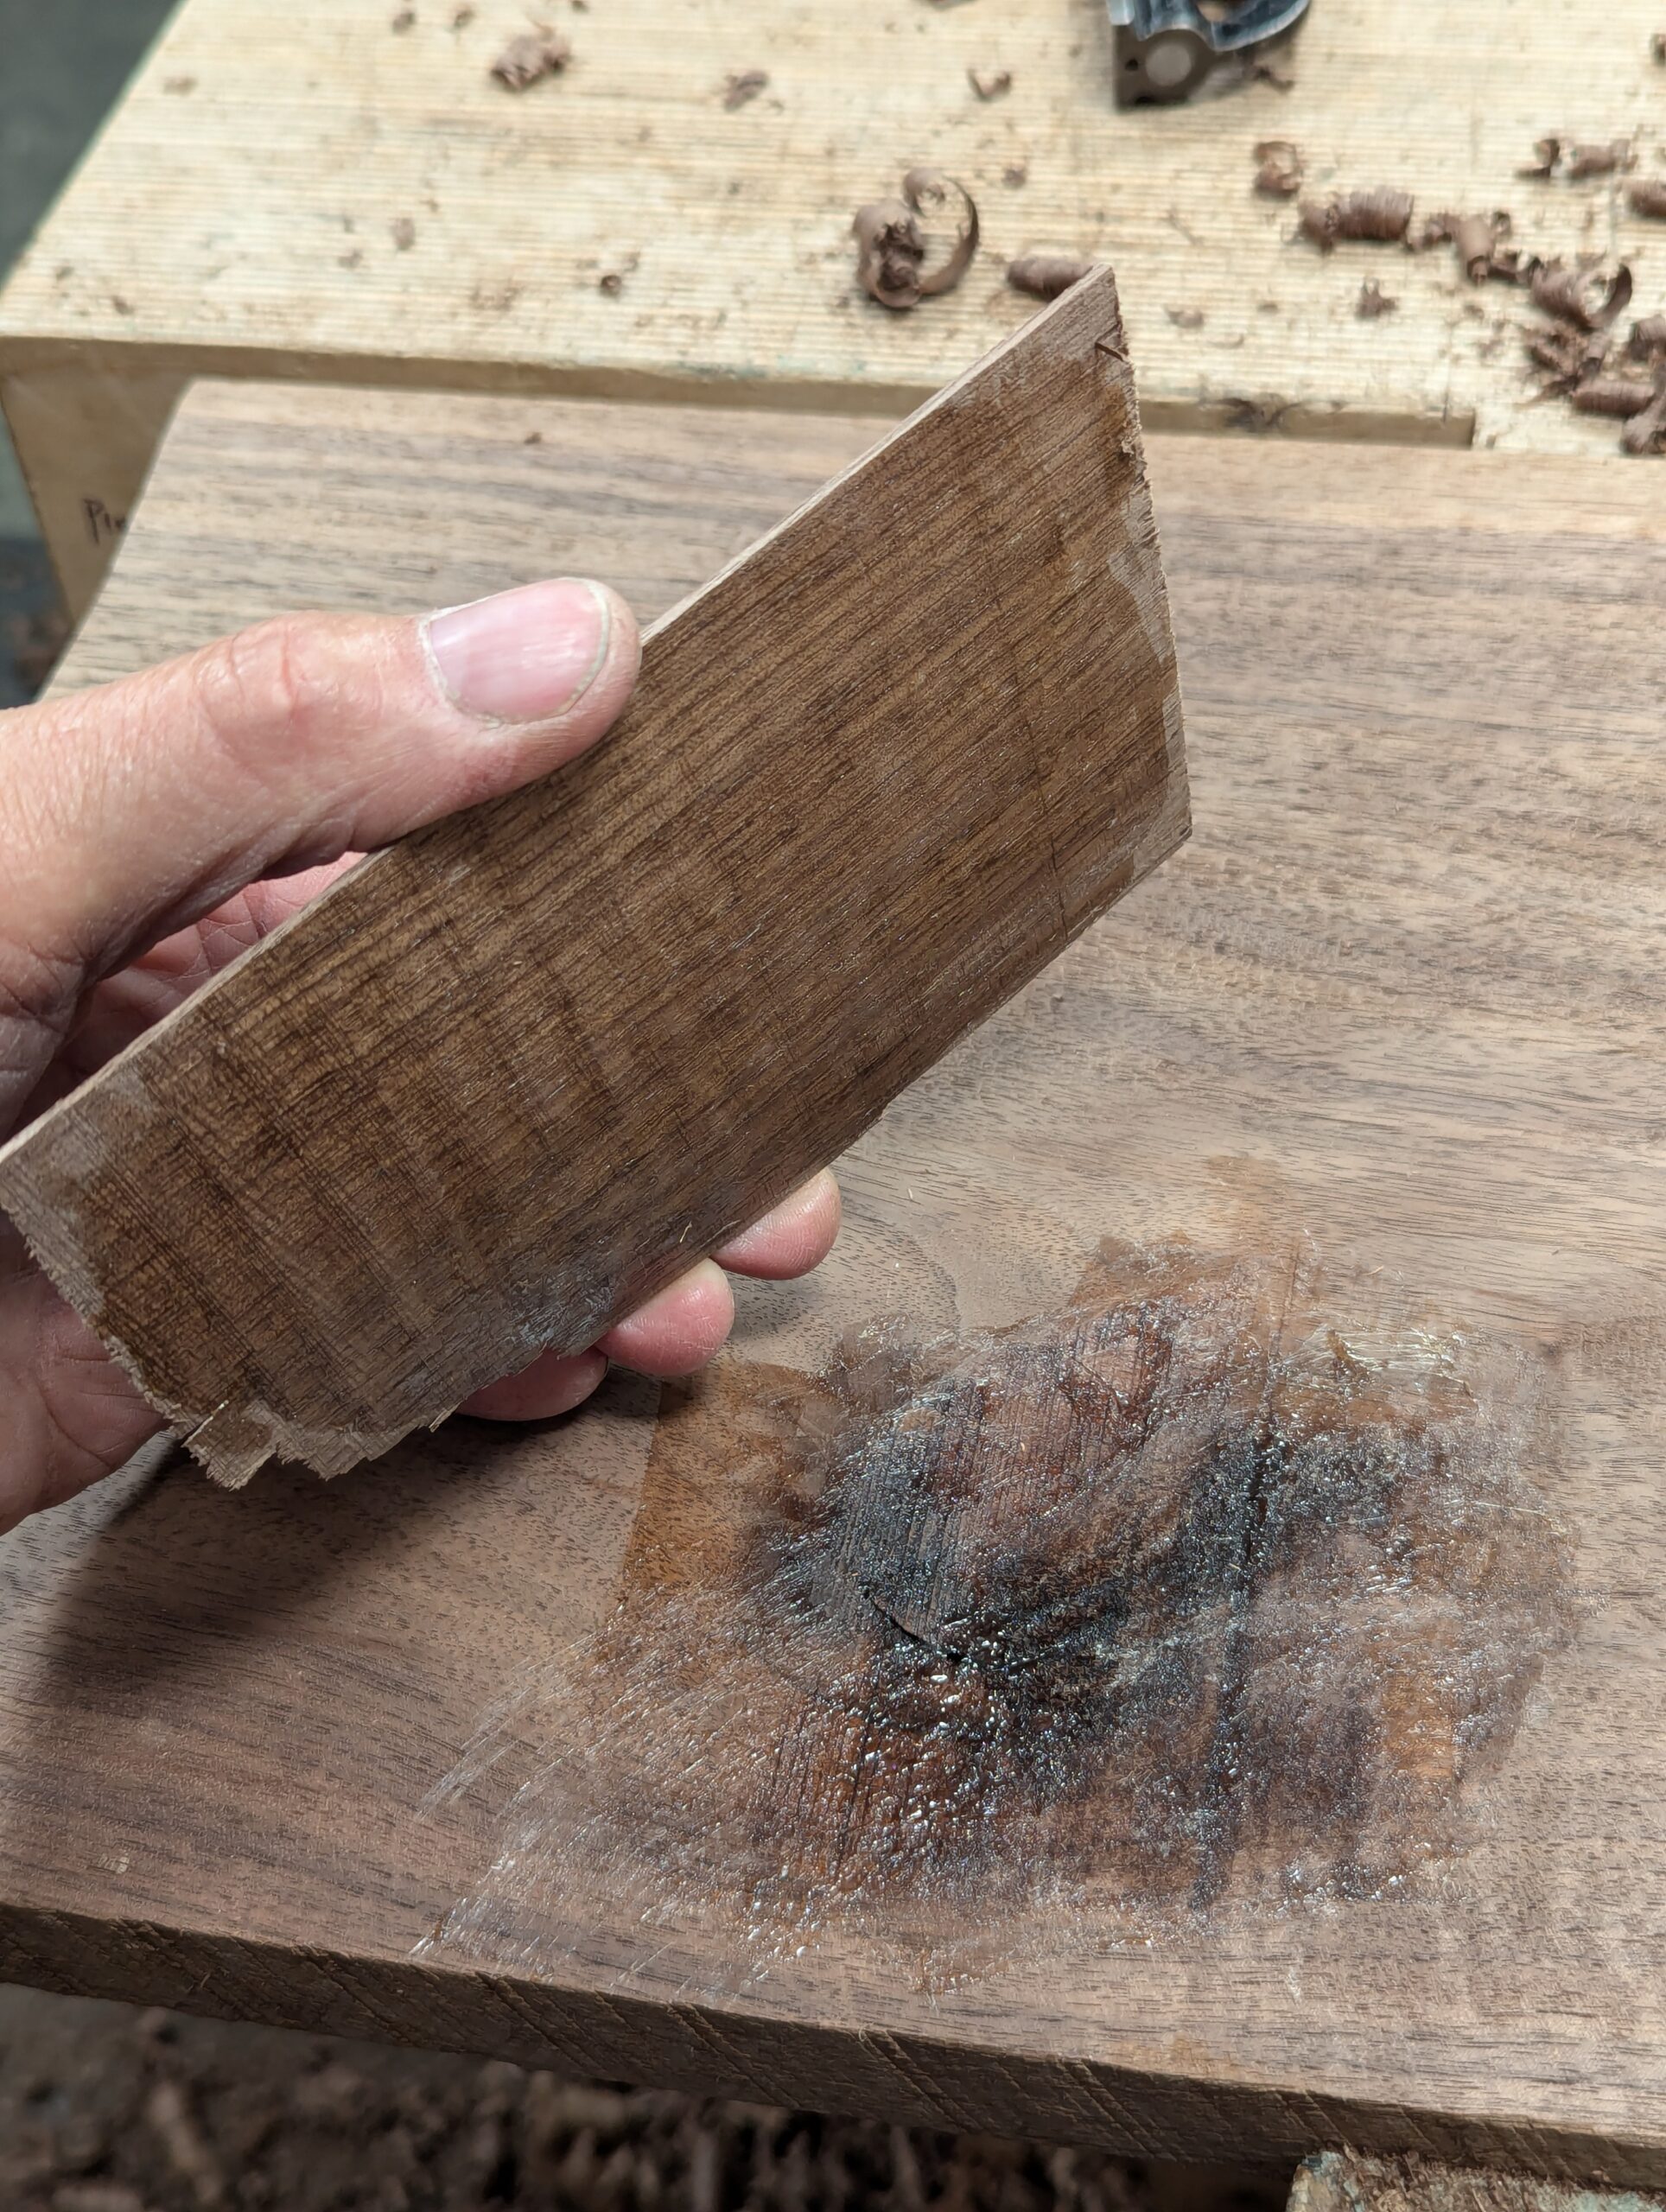
Defects like this, make the rest of the board a fault that needs taking down to the bottom of the lowest point in the hollow. That would mean that the board would be too thin. This trick can save the board and I only did this in this case to give you a trick for down the road. This hollow is on the underside of the top of my cabinet and so would never be seen in the finished piece. Let’s call it ‘Paul’s tennis ball trick.’
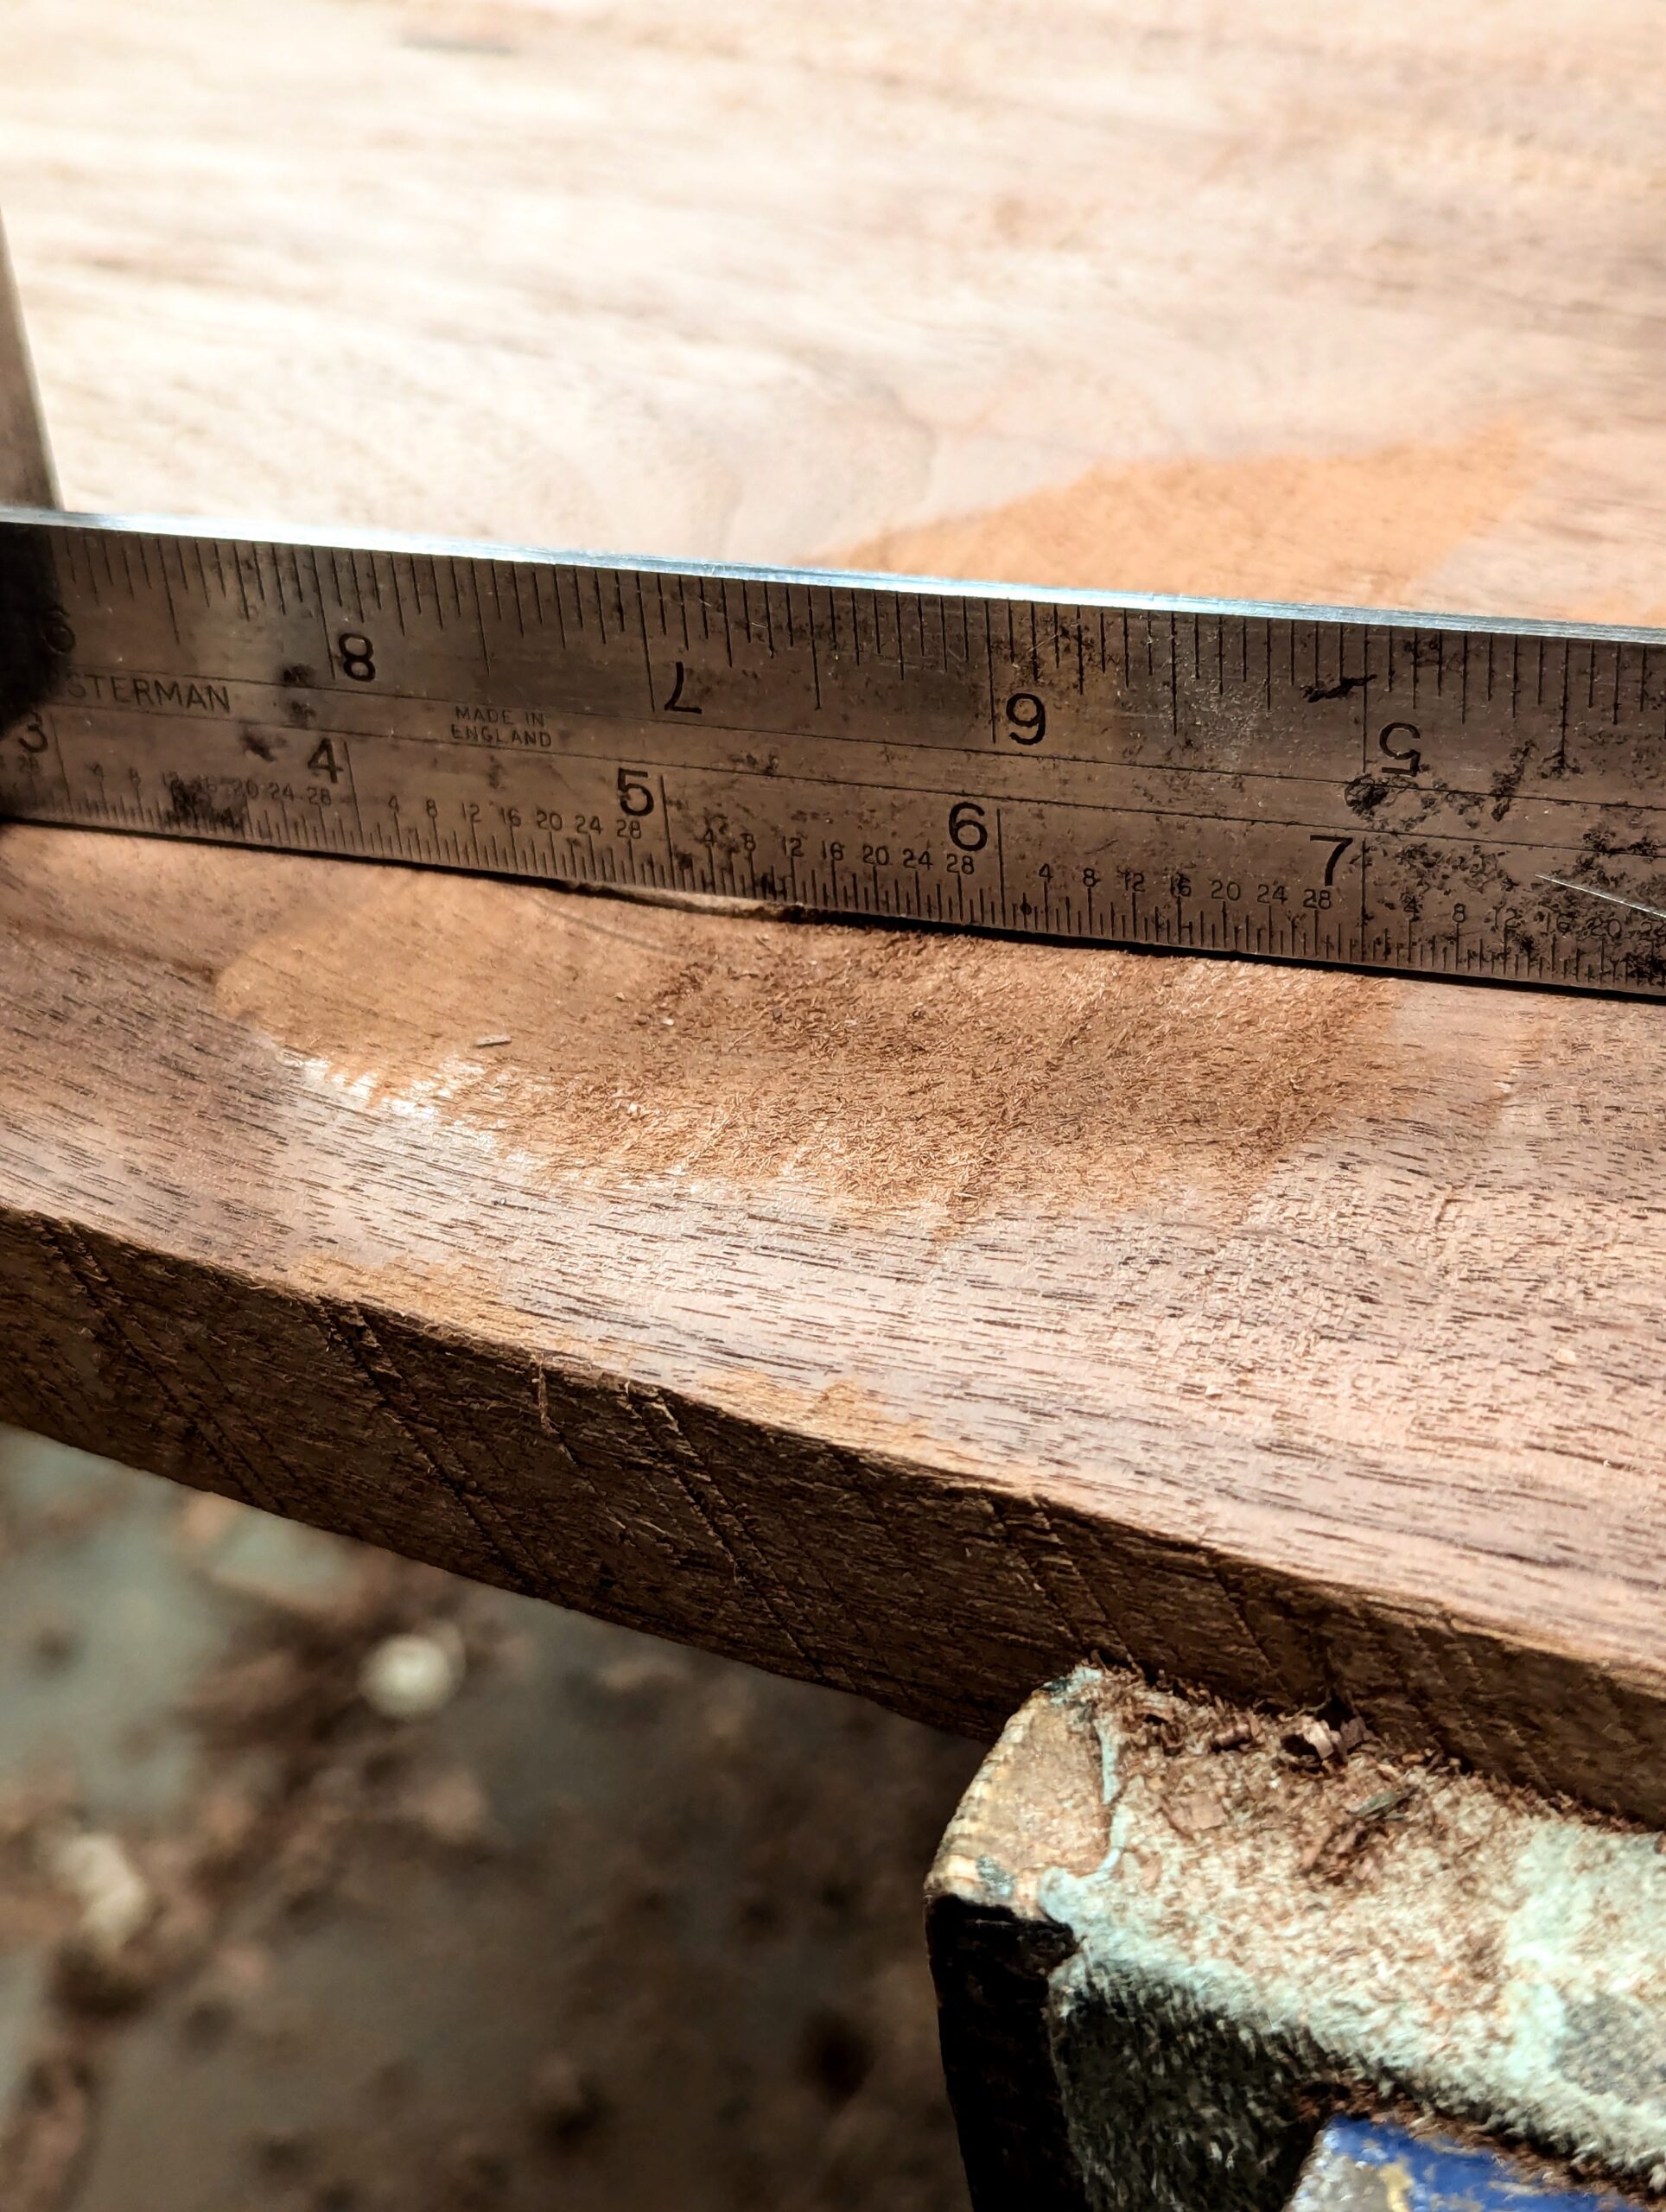
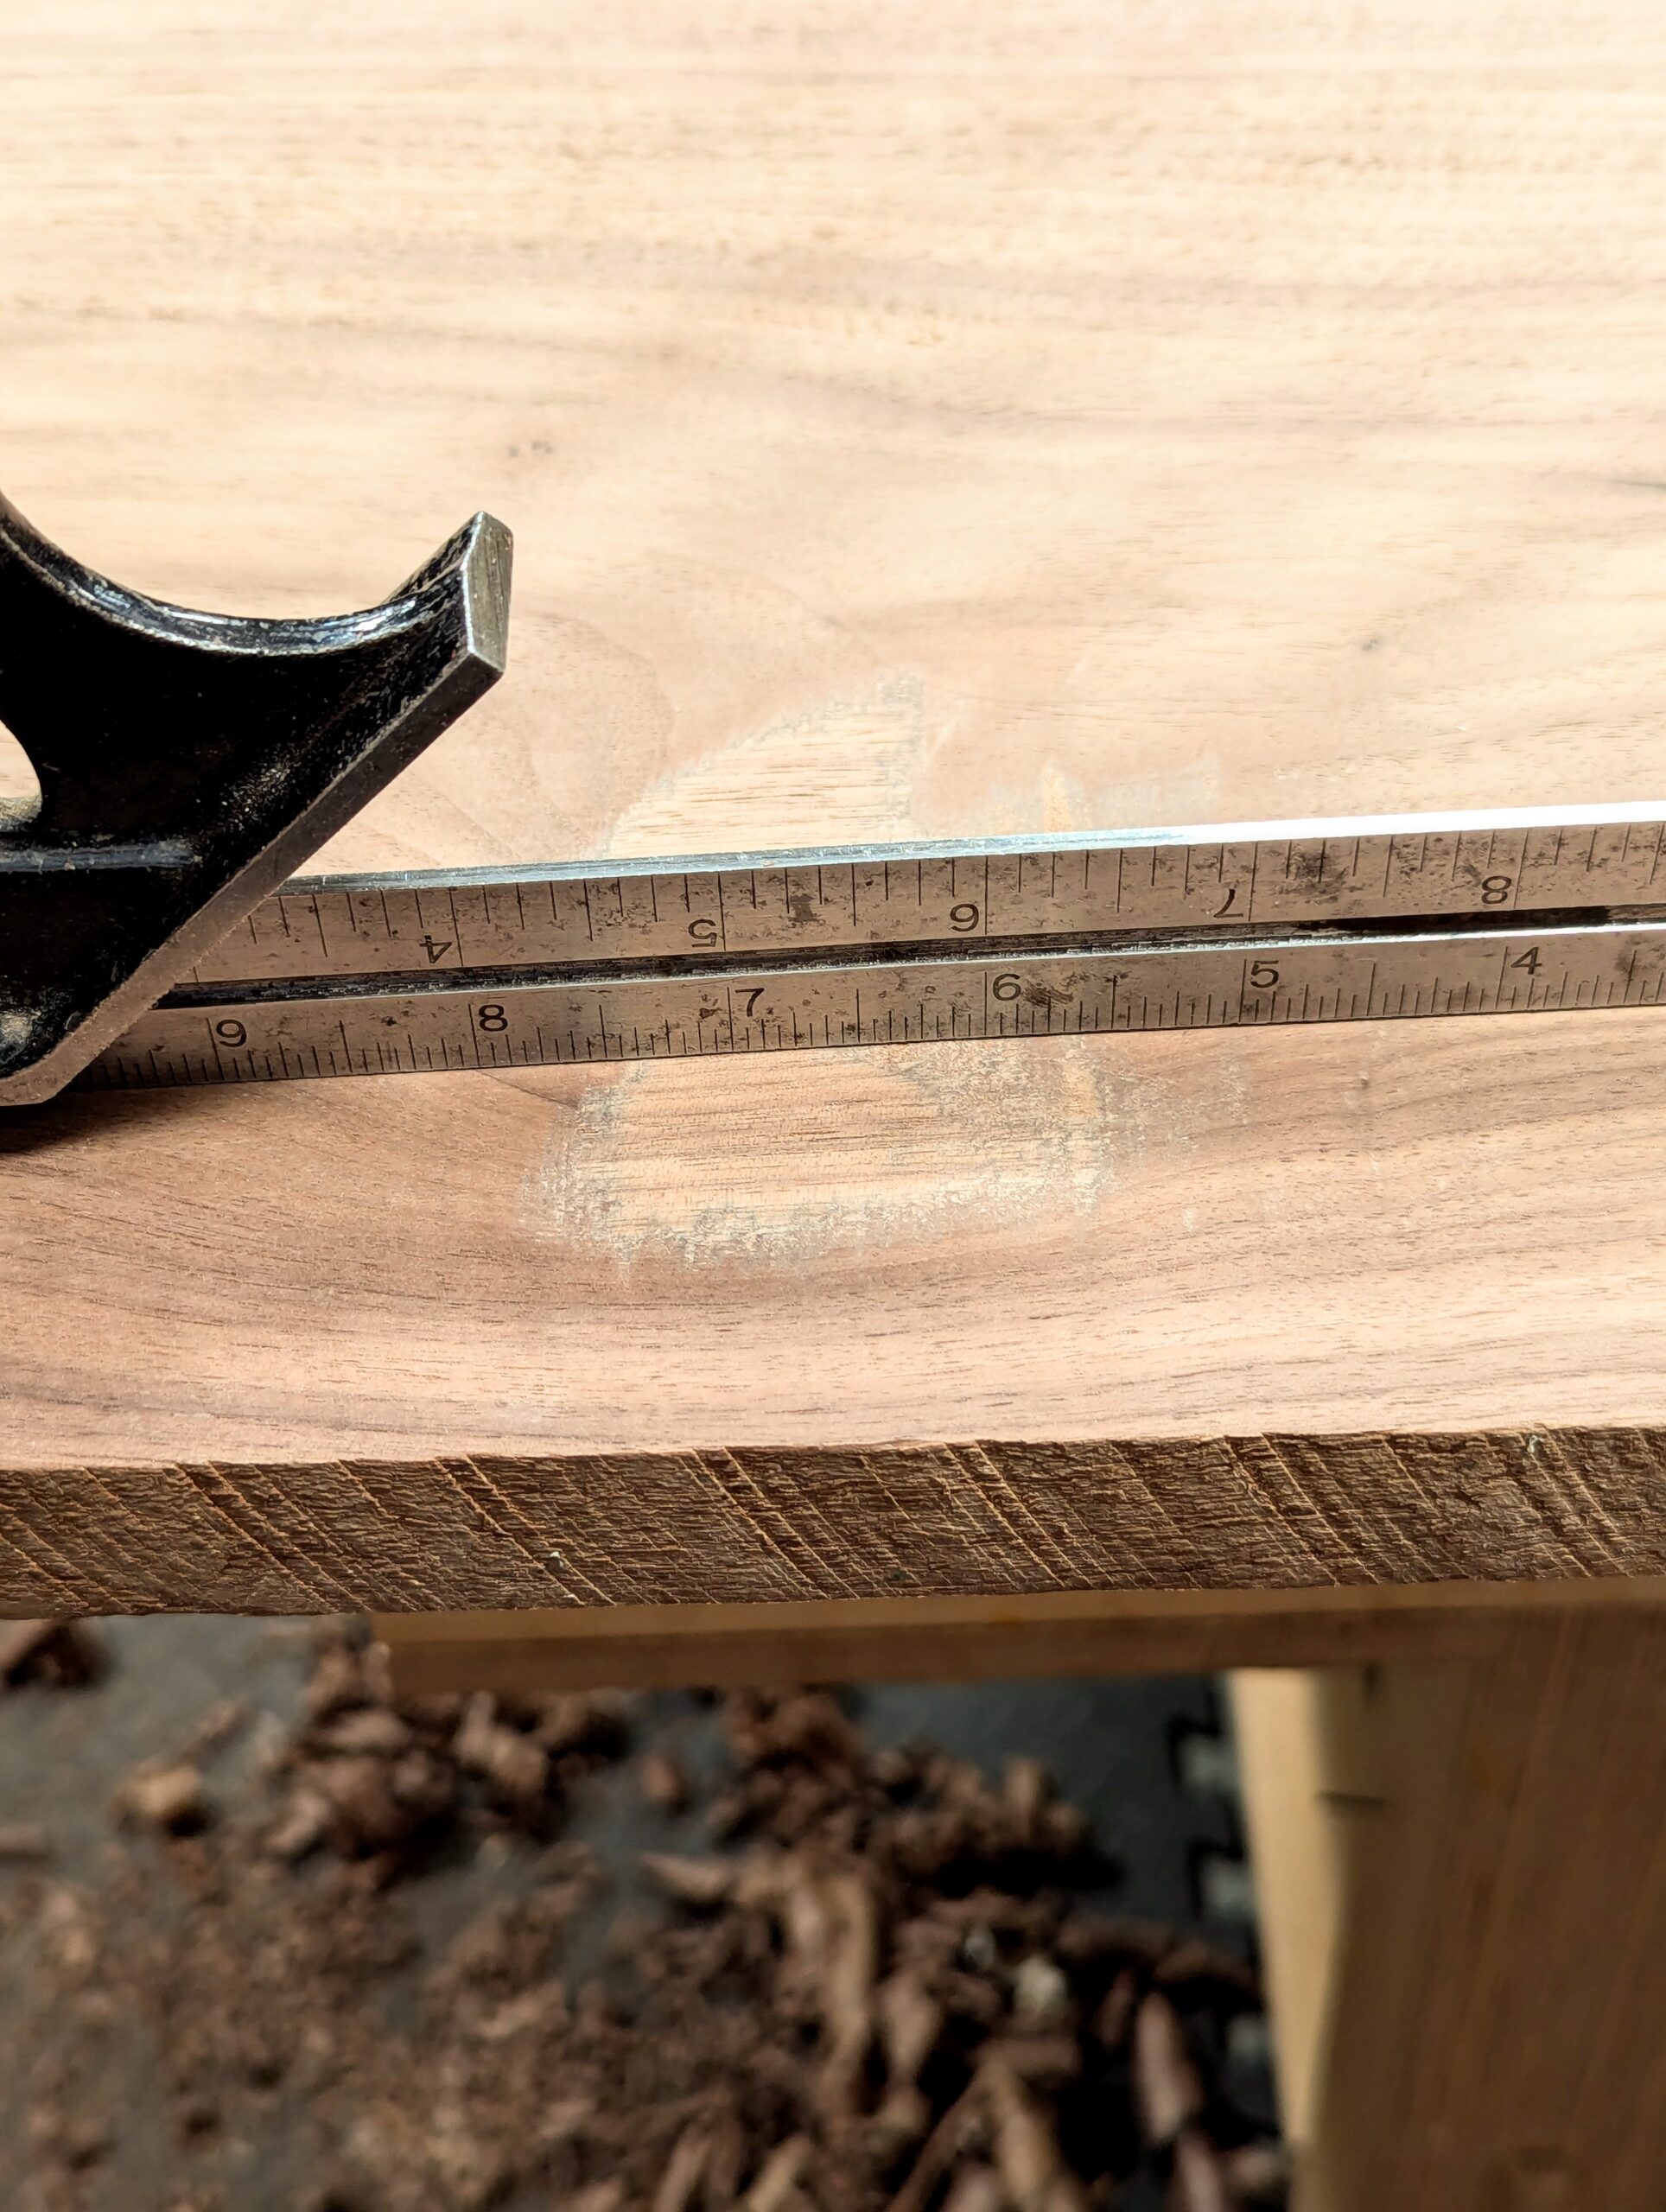
As you can see, the hollow is a good 1/8″ deep but to get through to even grain I would likely need to go another 1/16″ and that means losing 3/16″ in thickness.
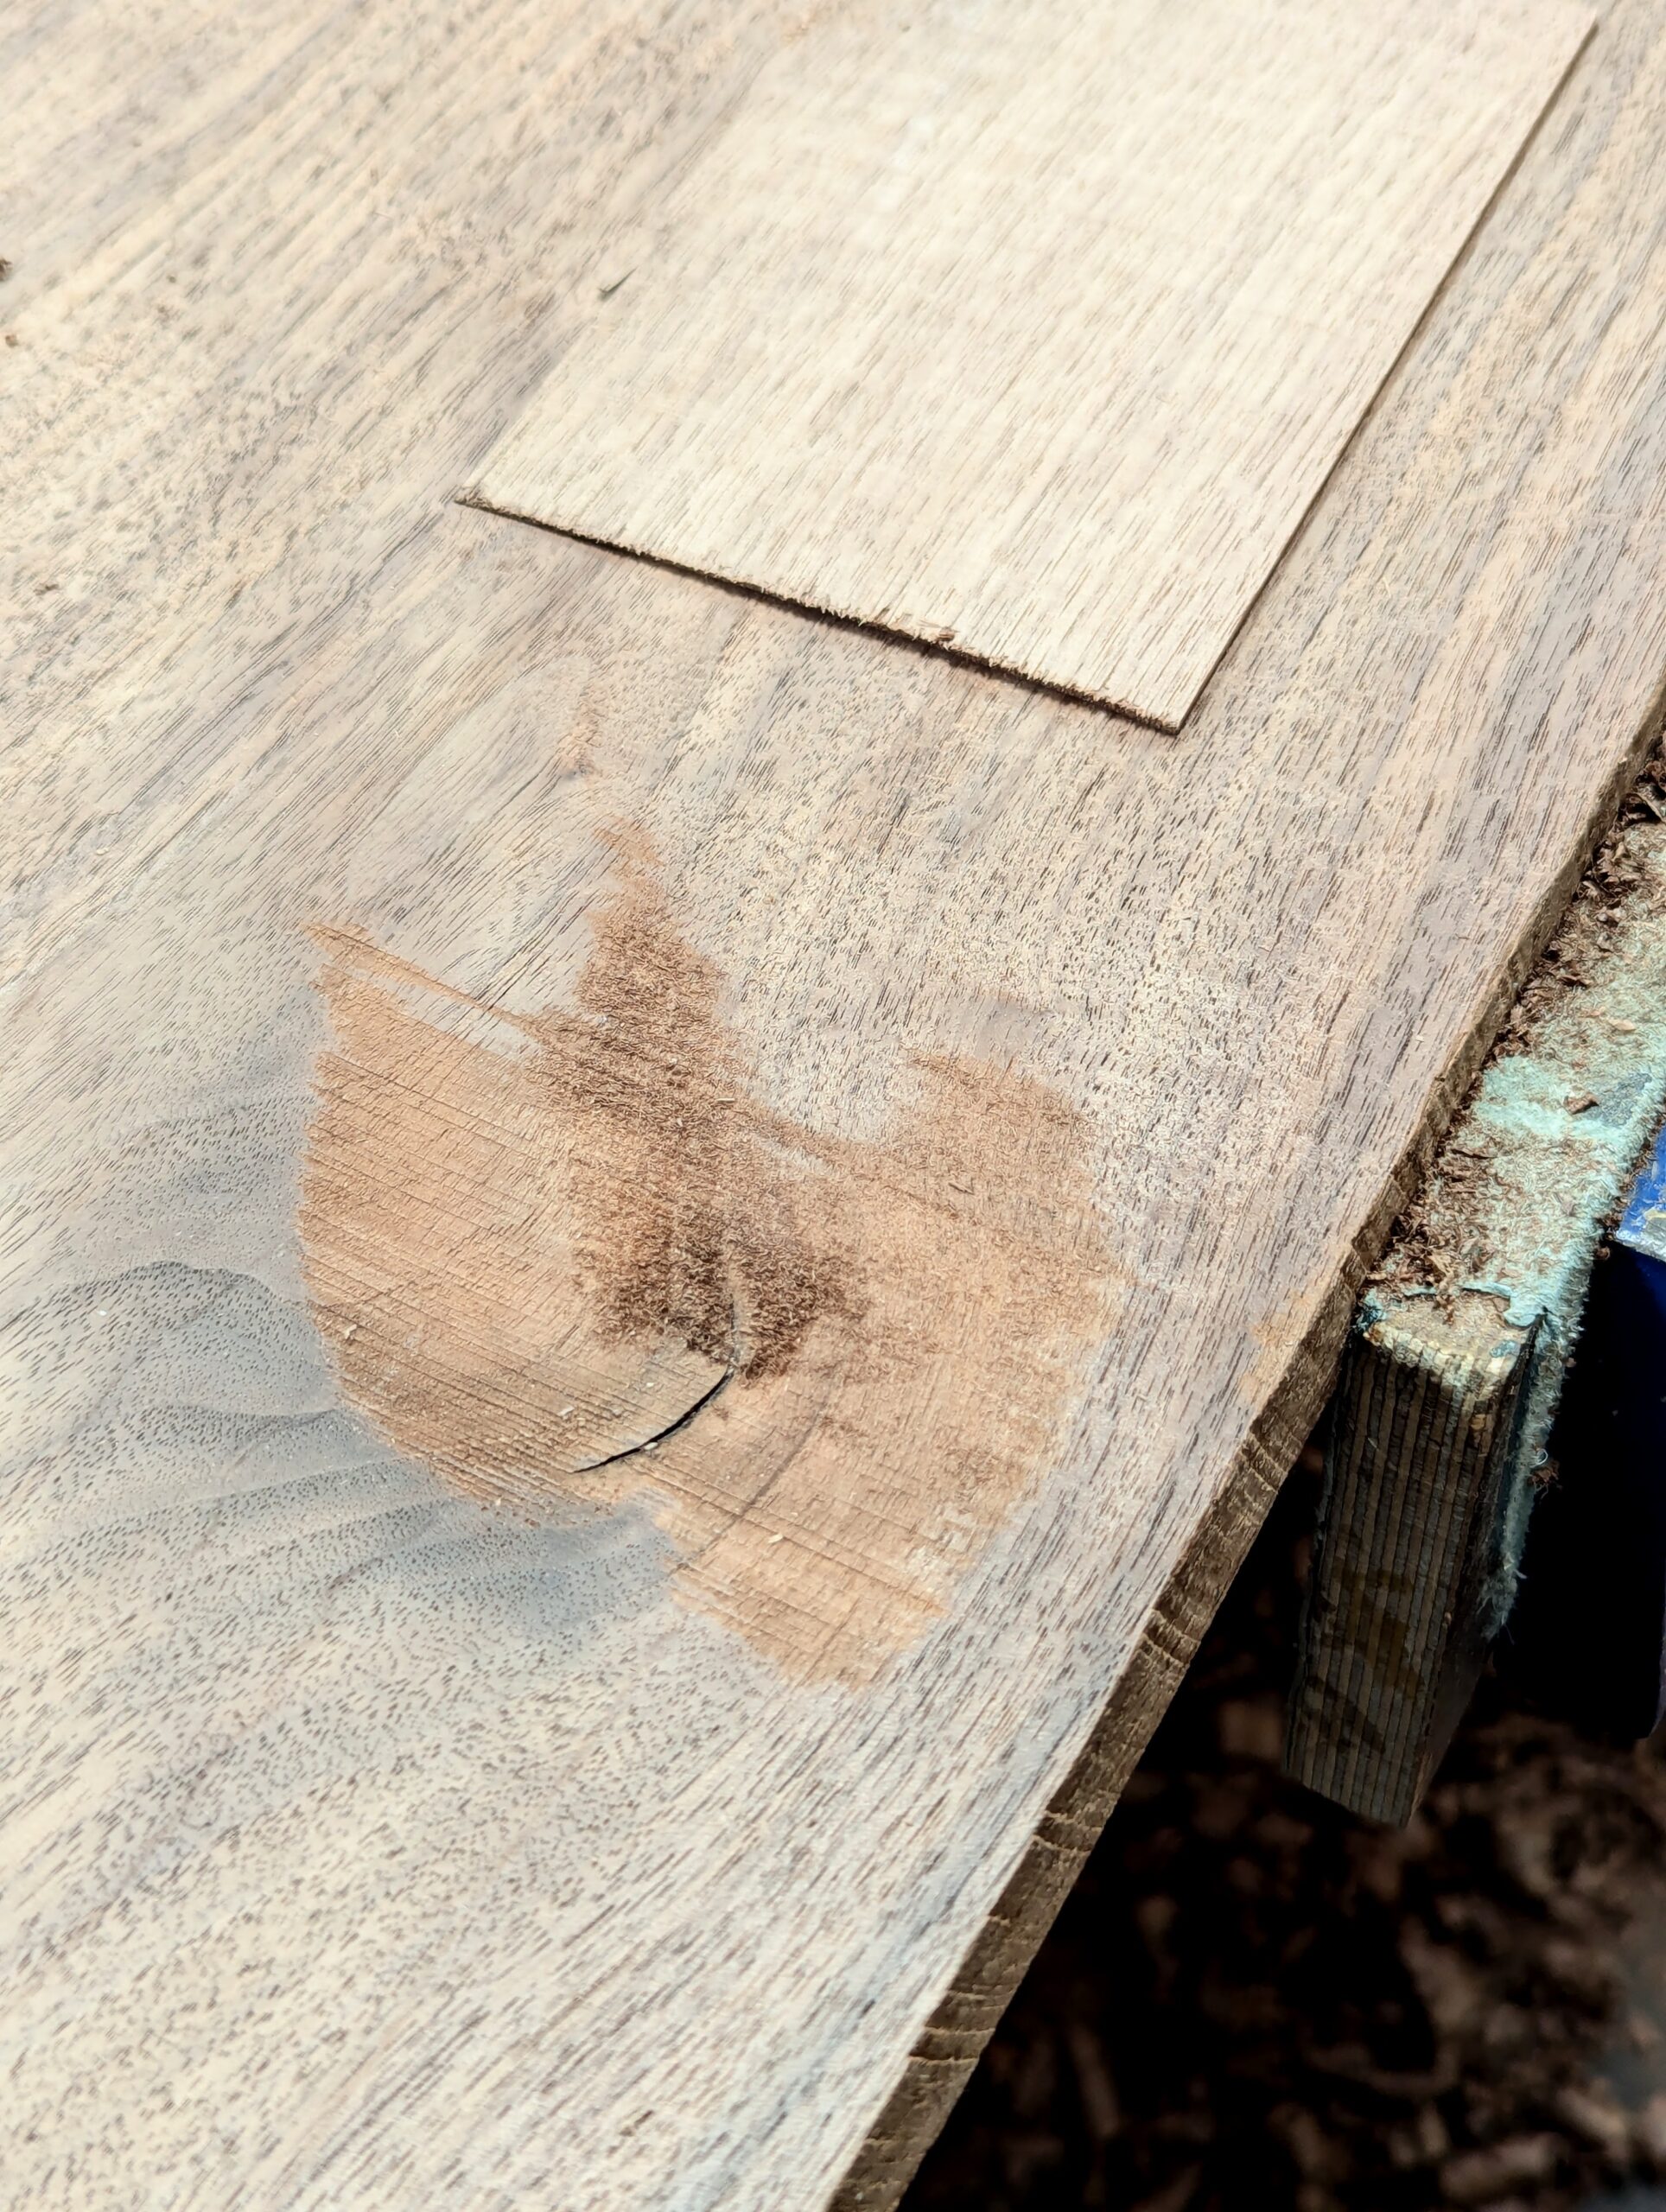
I cut my veneer slightly thicker than the 1/8″ I needed.
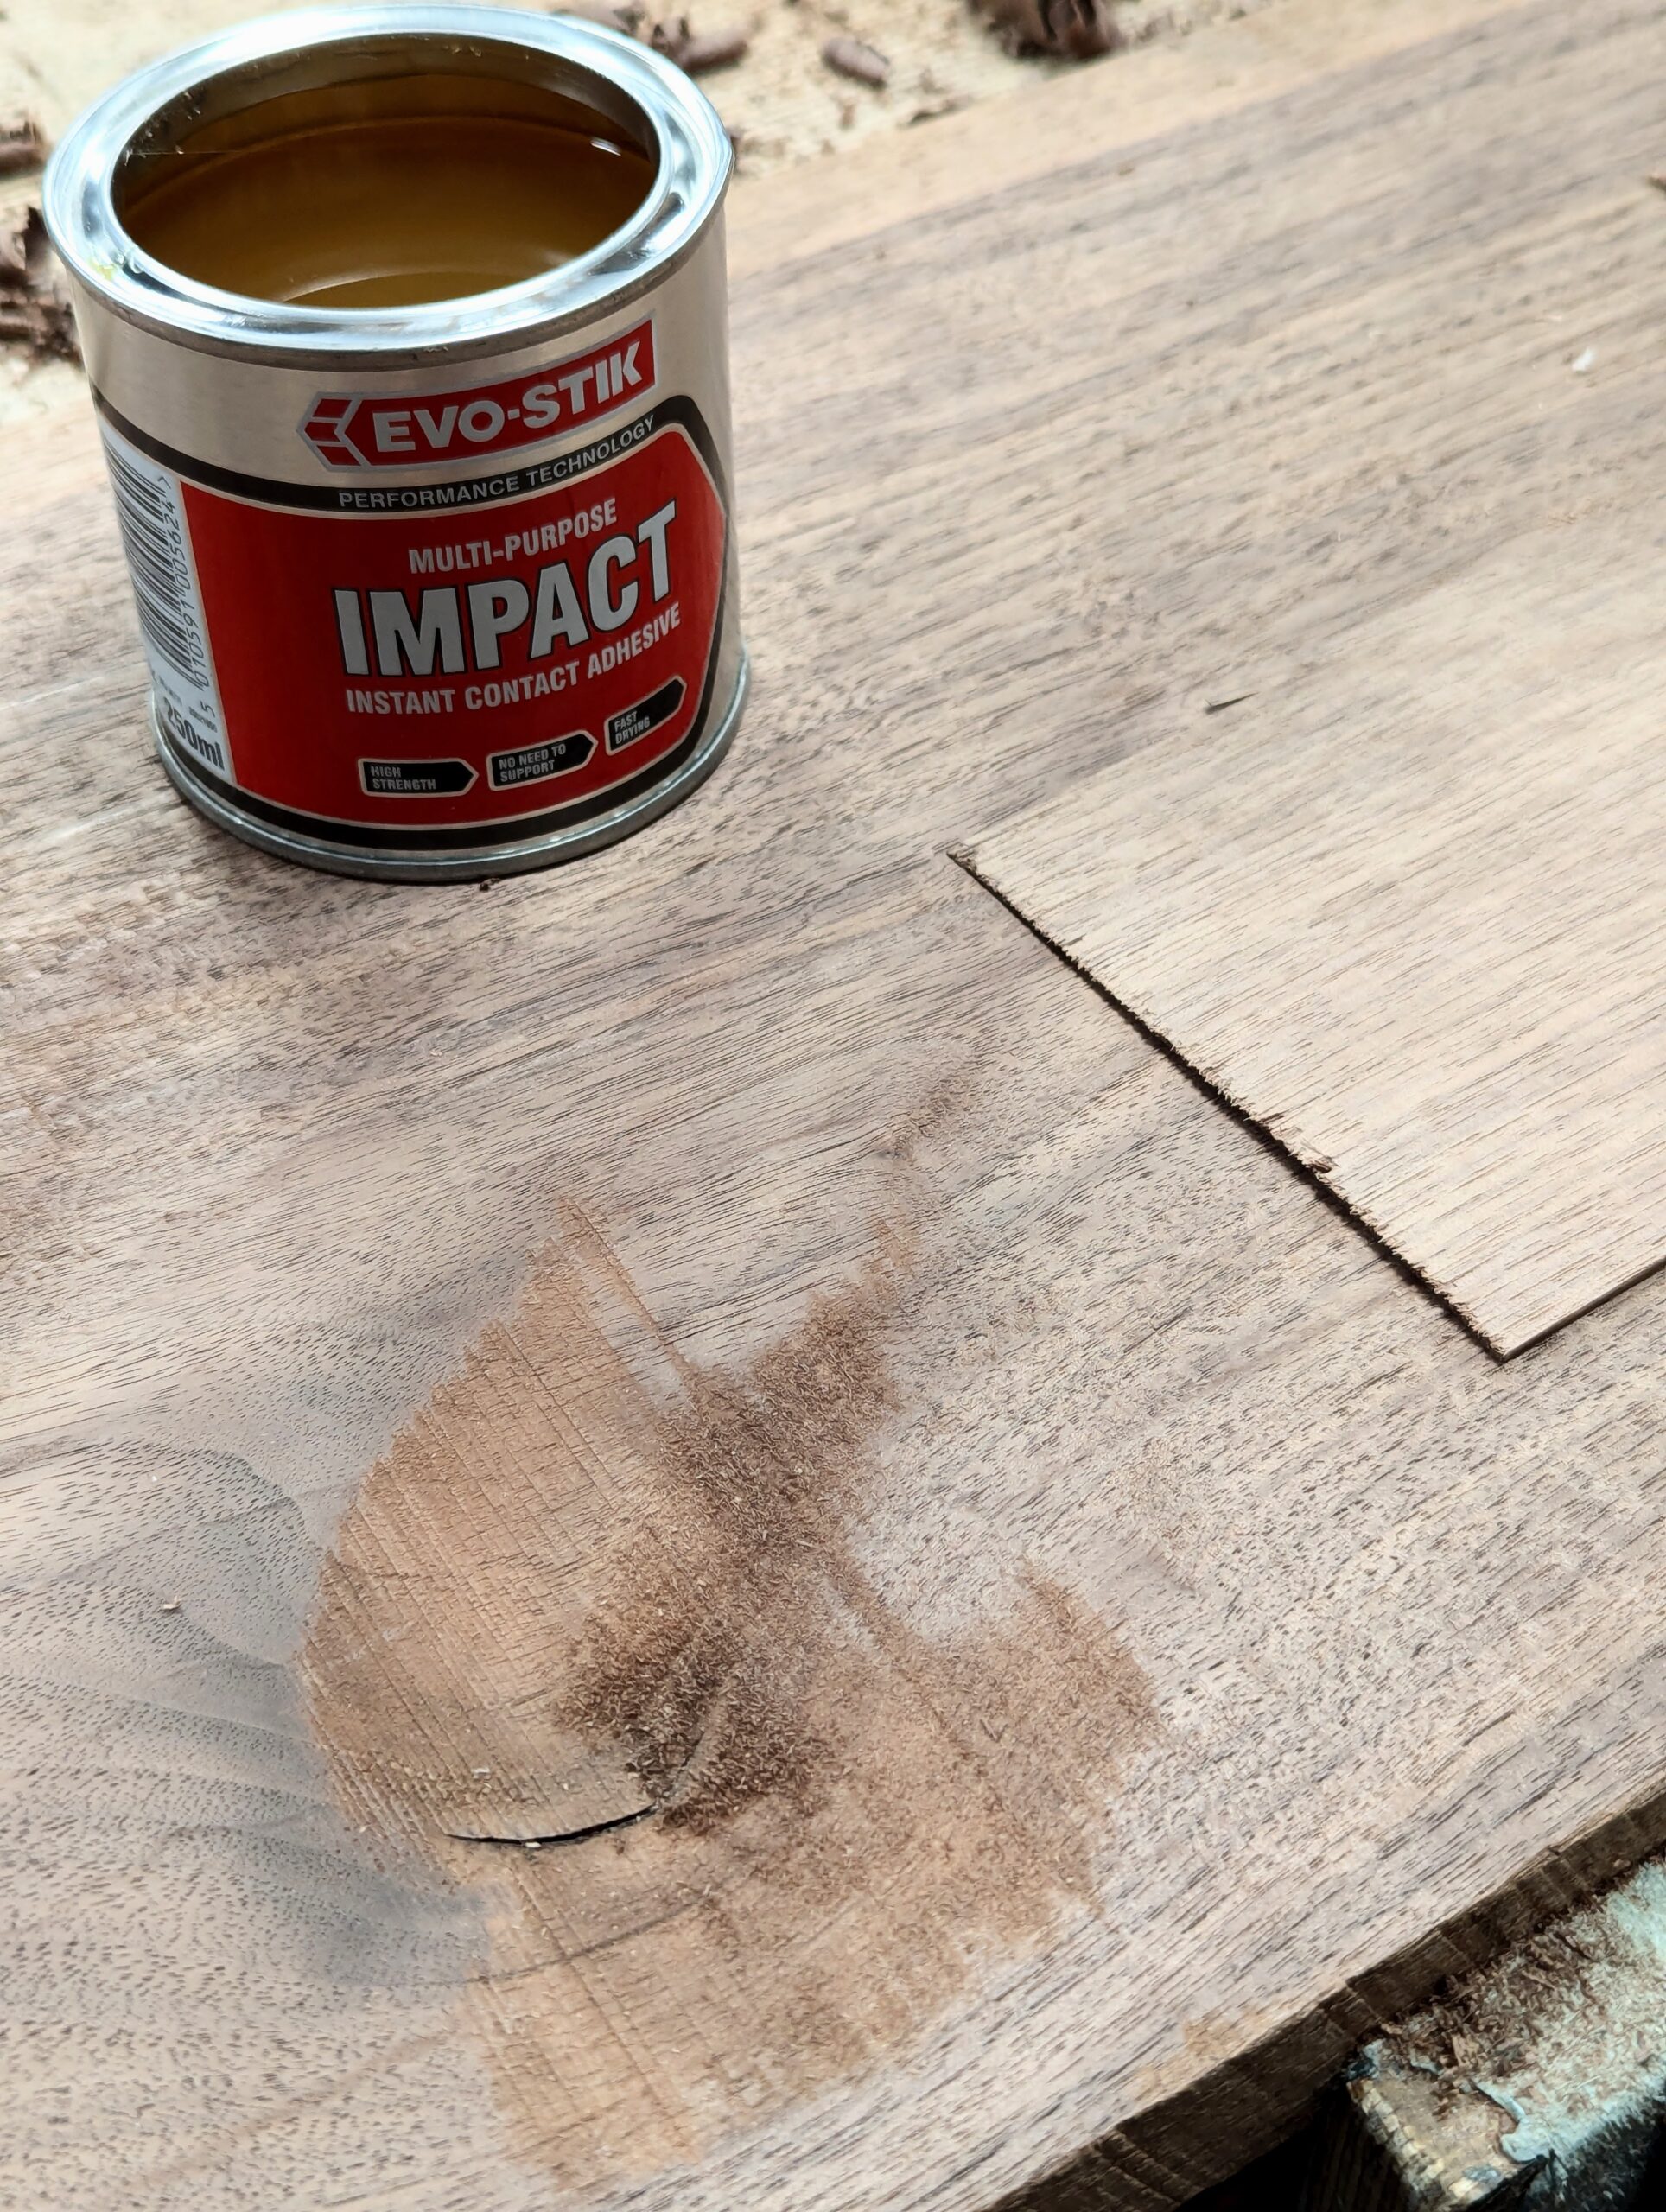
Using impact glue gives me the instancy I need.
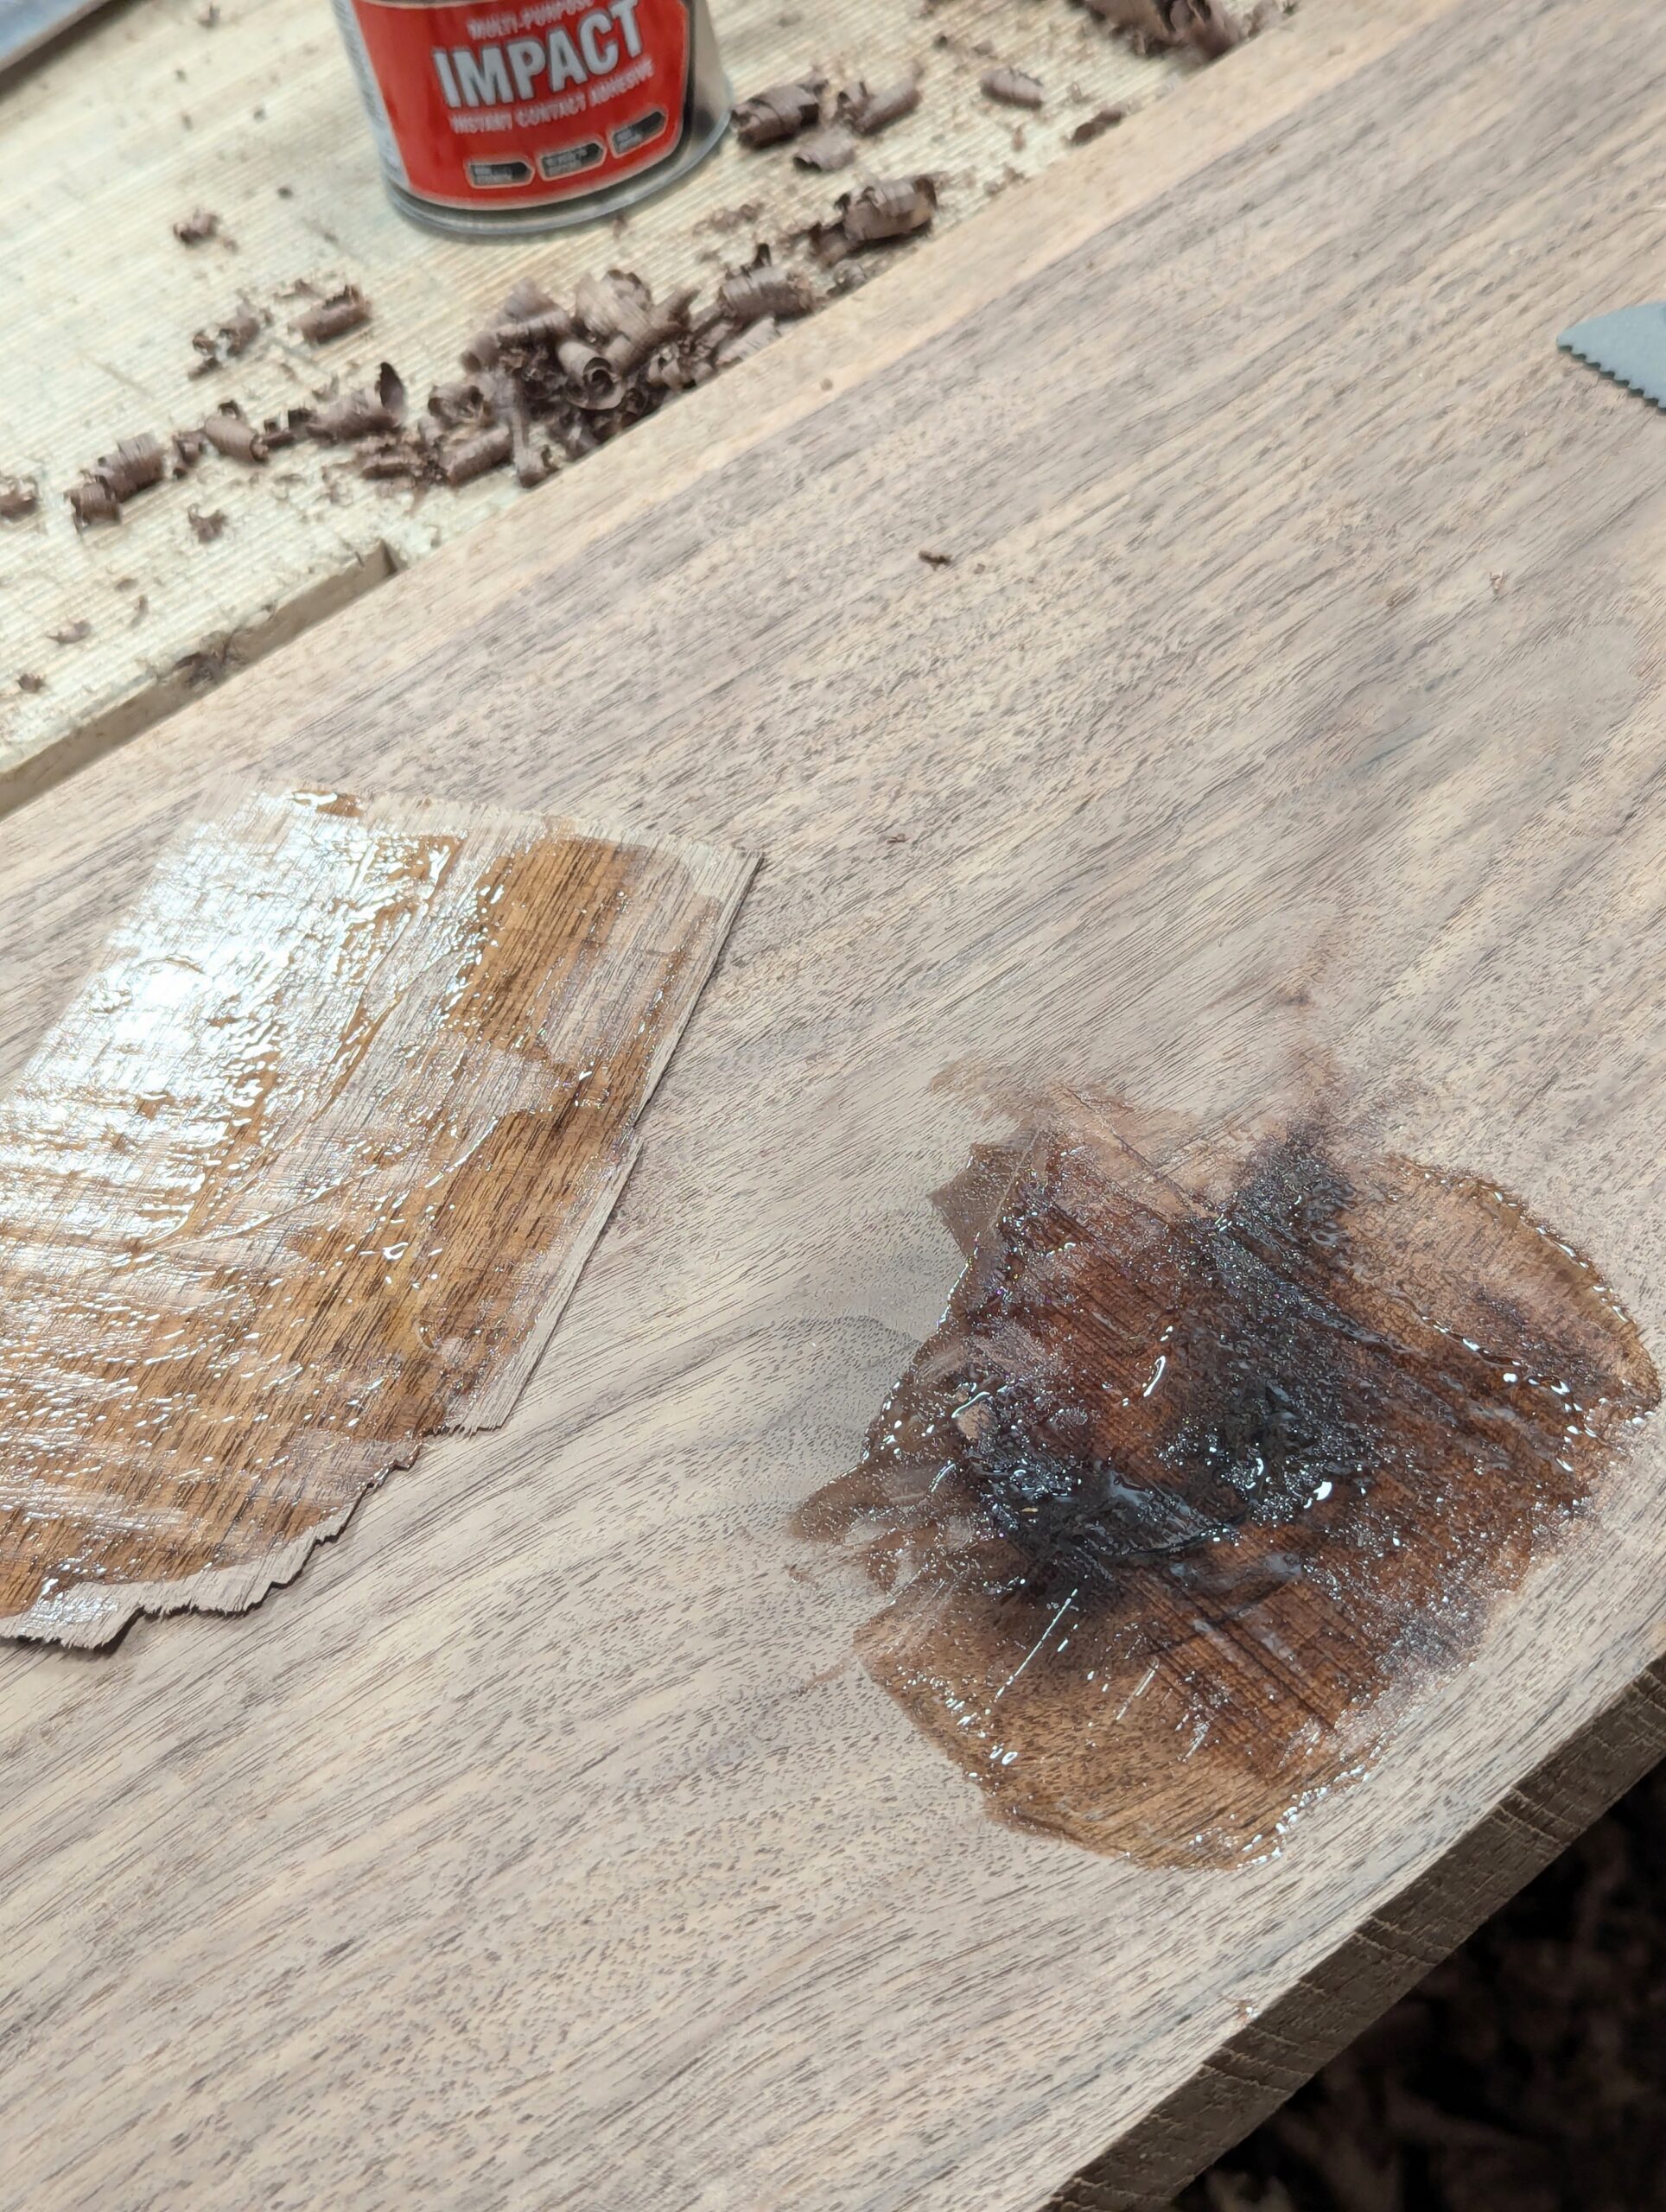
Apply a thin coat to both surfaces and I stress a thin, even coat.
Leave the surfaces exposed for a few minutes until touch dry.
Place the two faces together and press home using the tennis ball which will conform the ‘patch’ to the whole surface of the indent.
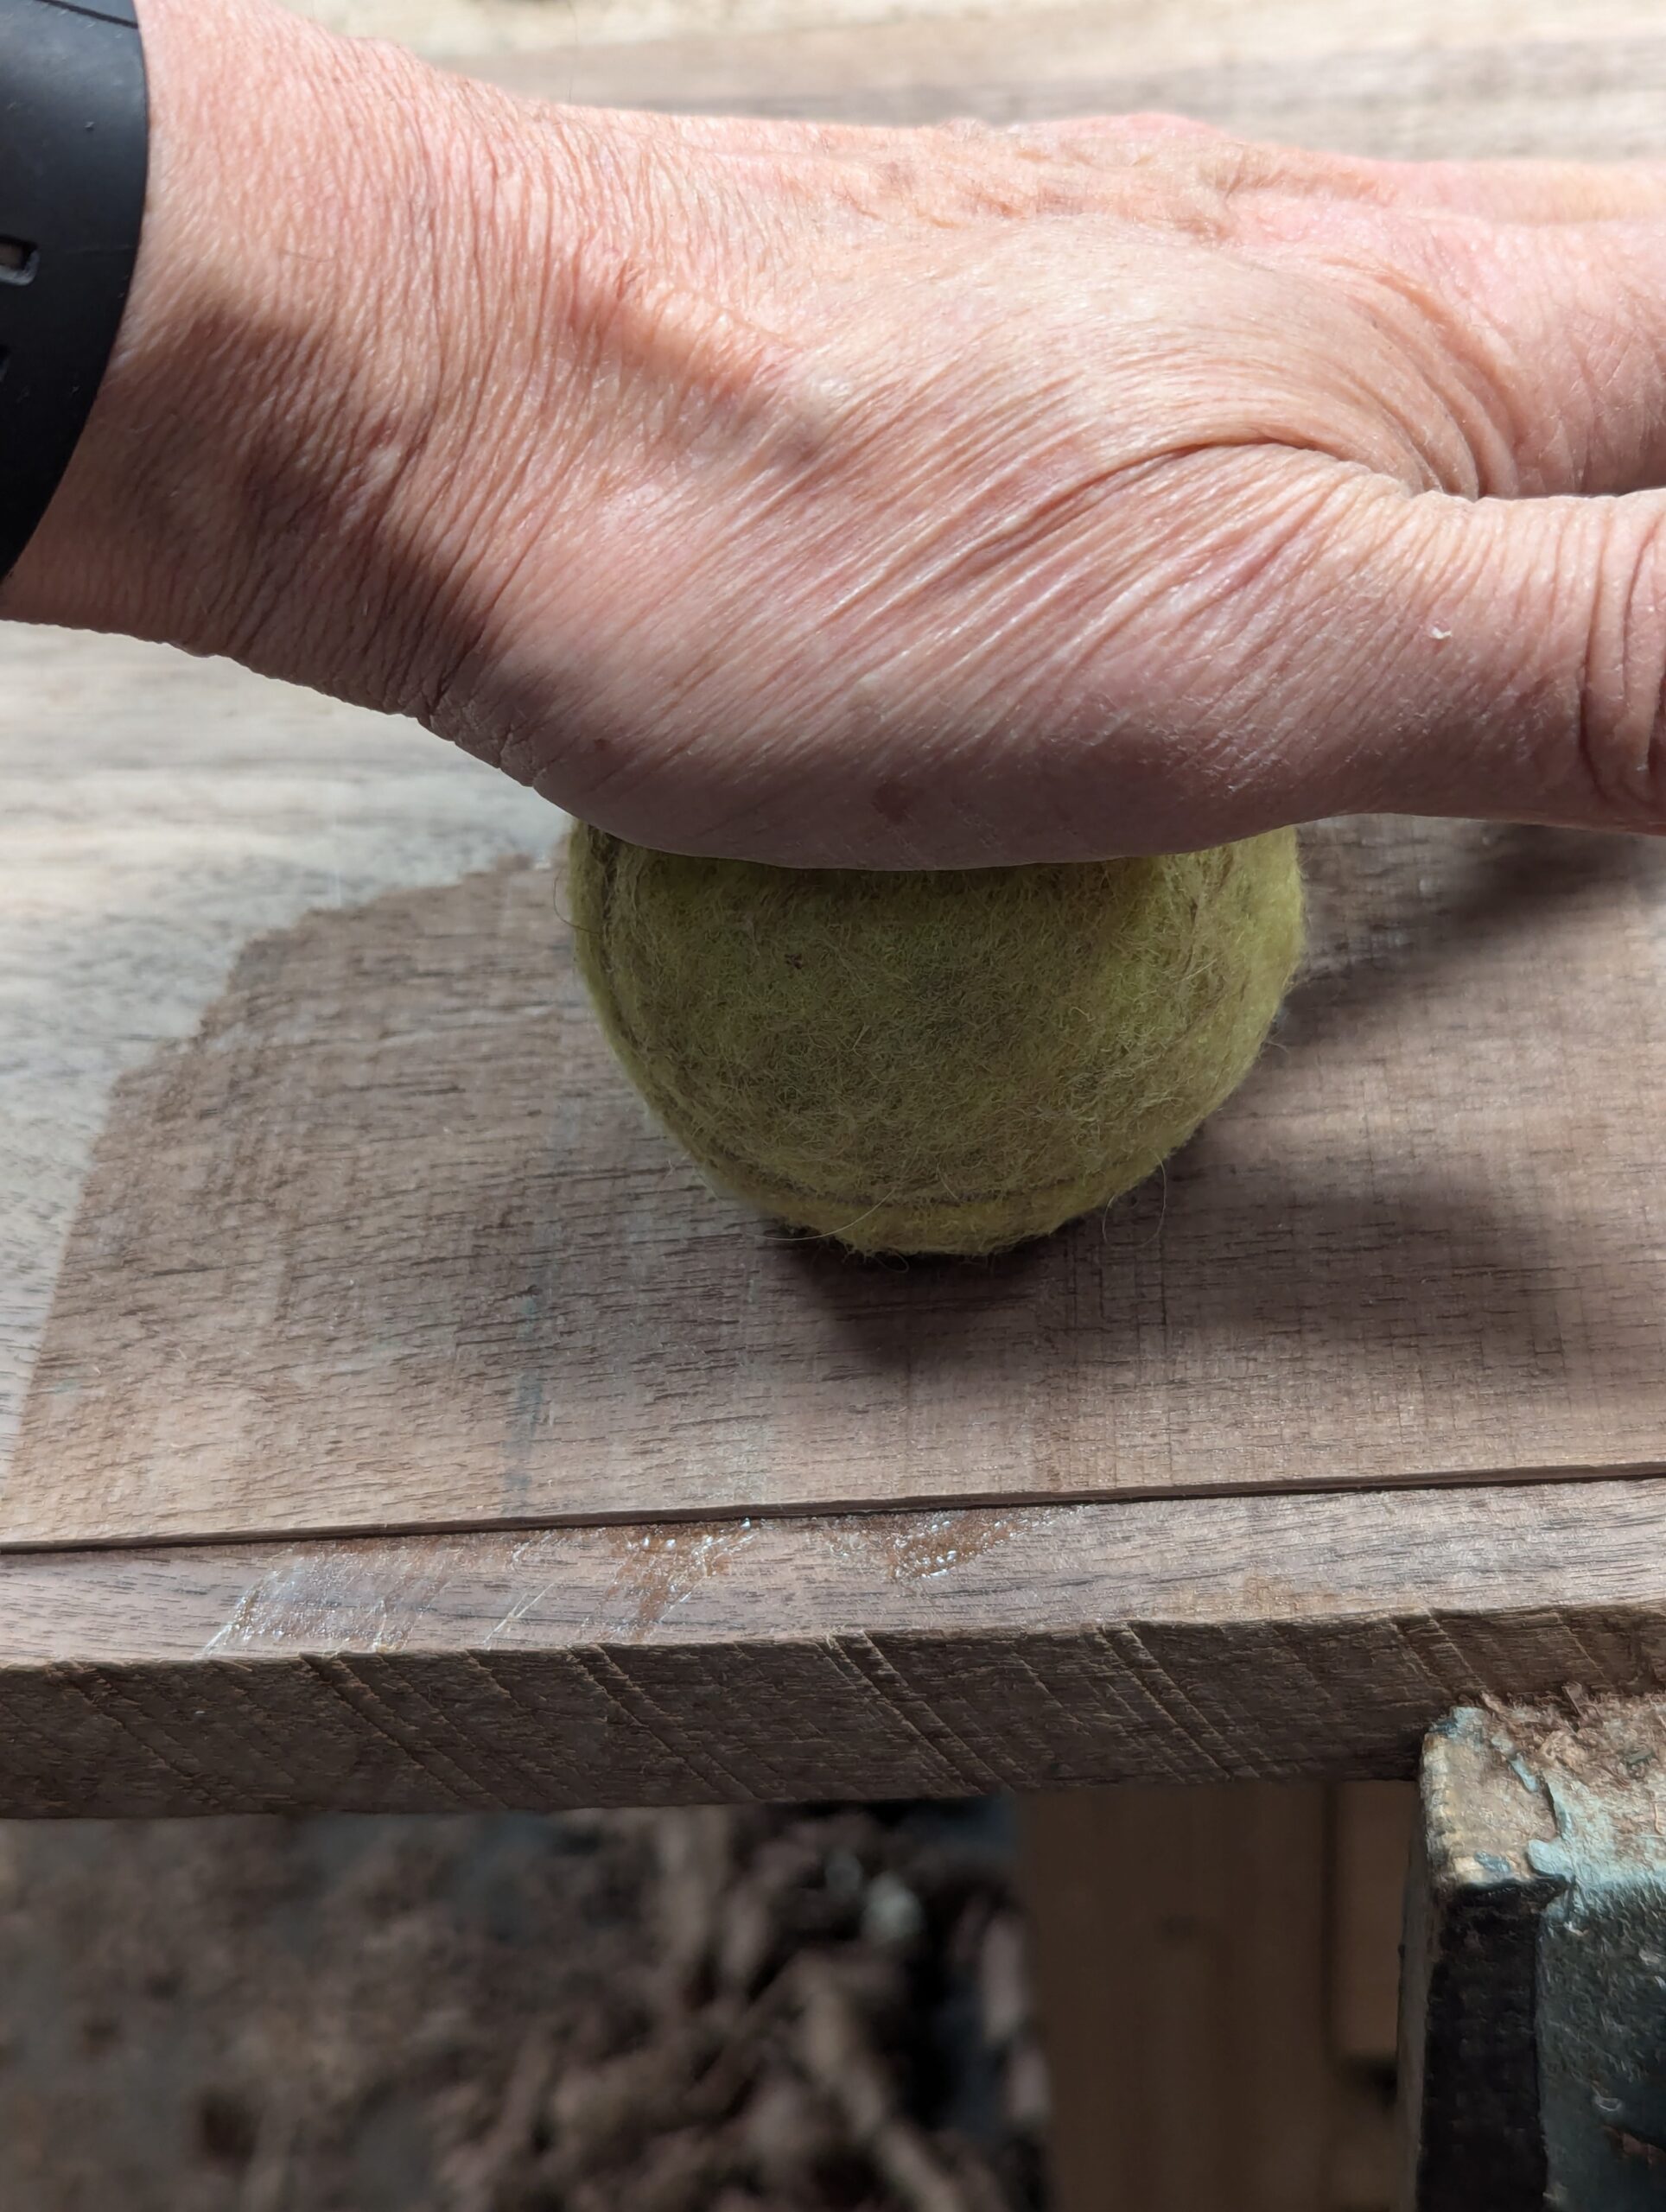
I like to apply as much pressure as possible on these small areas.
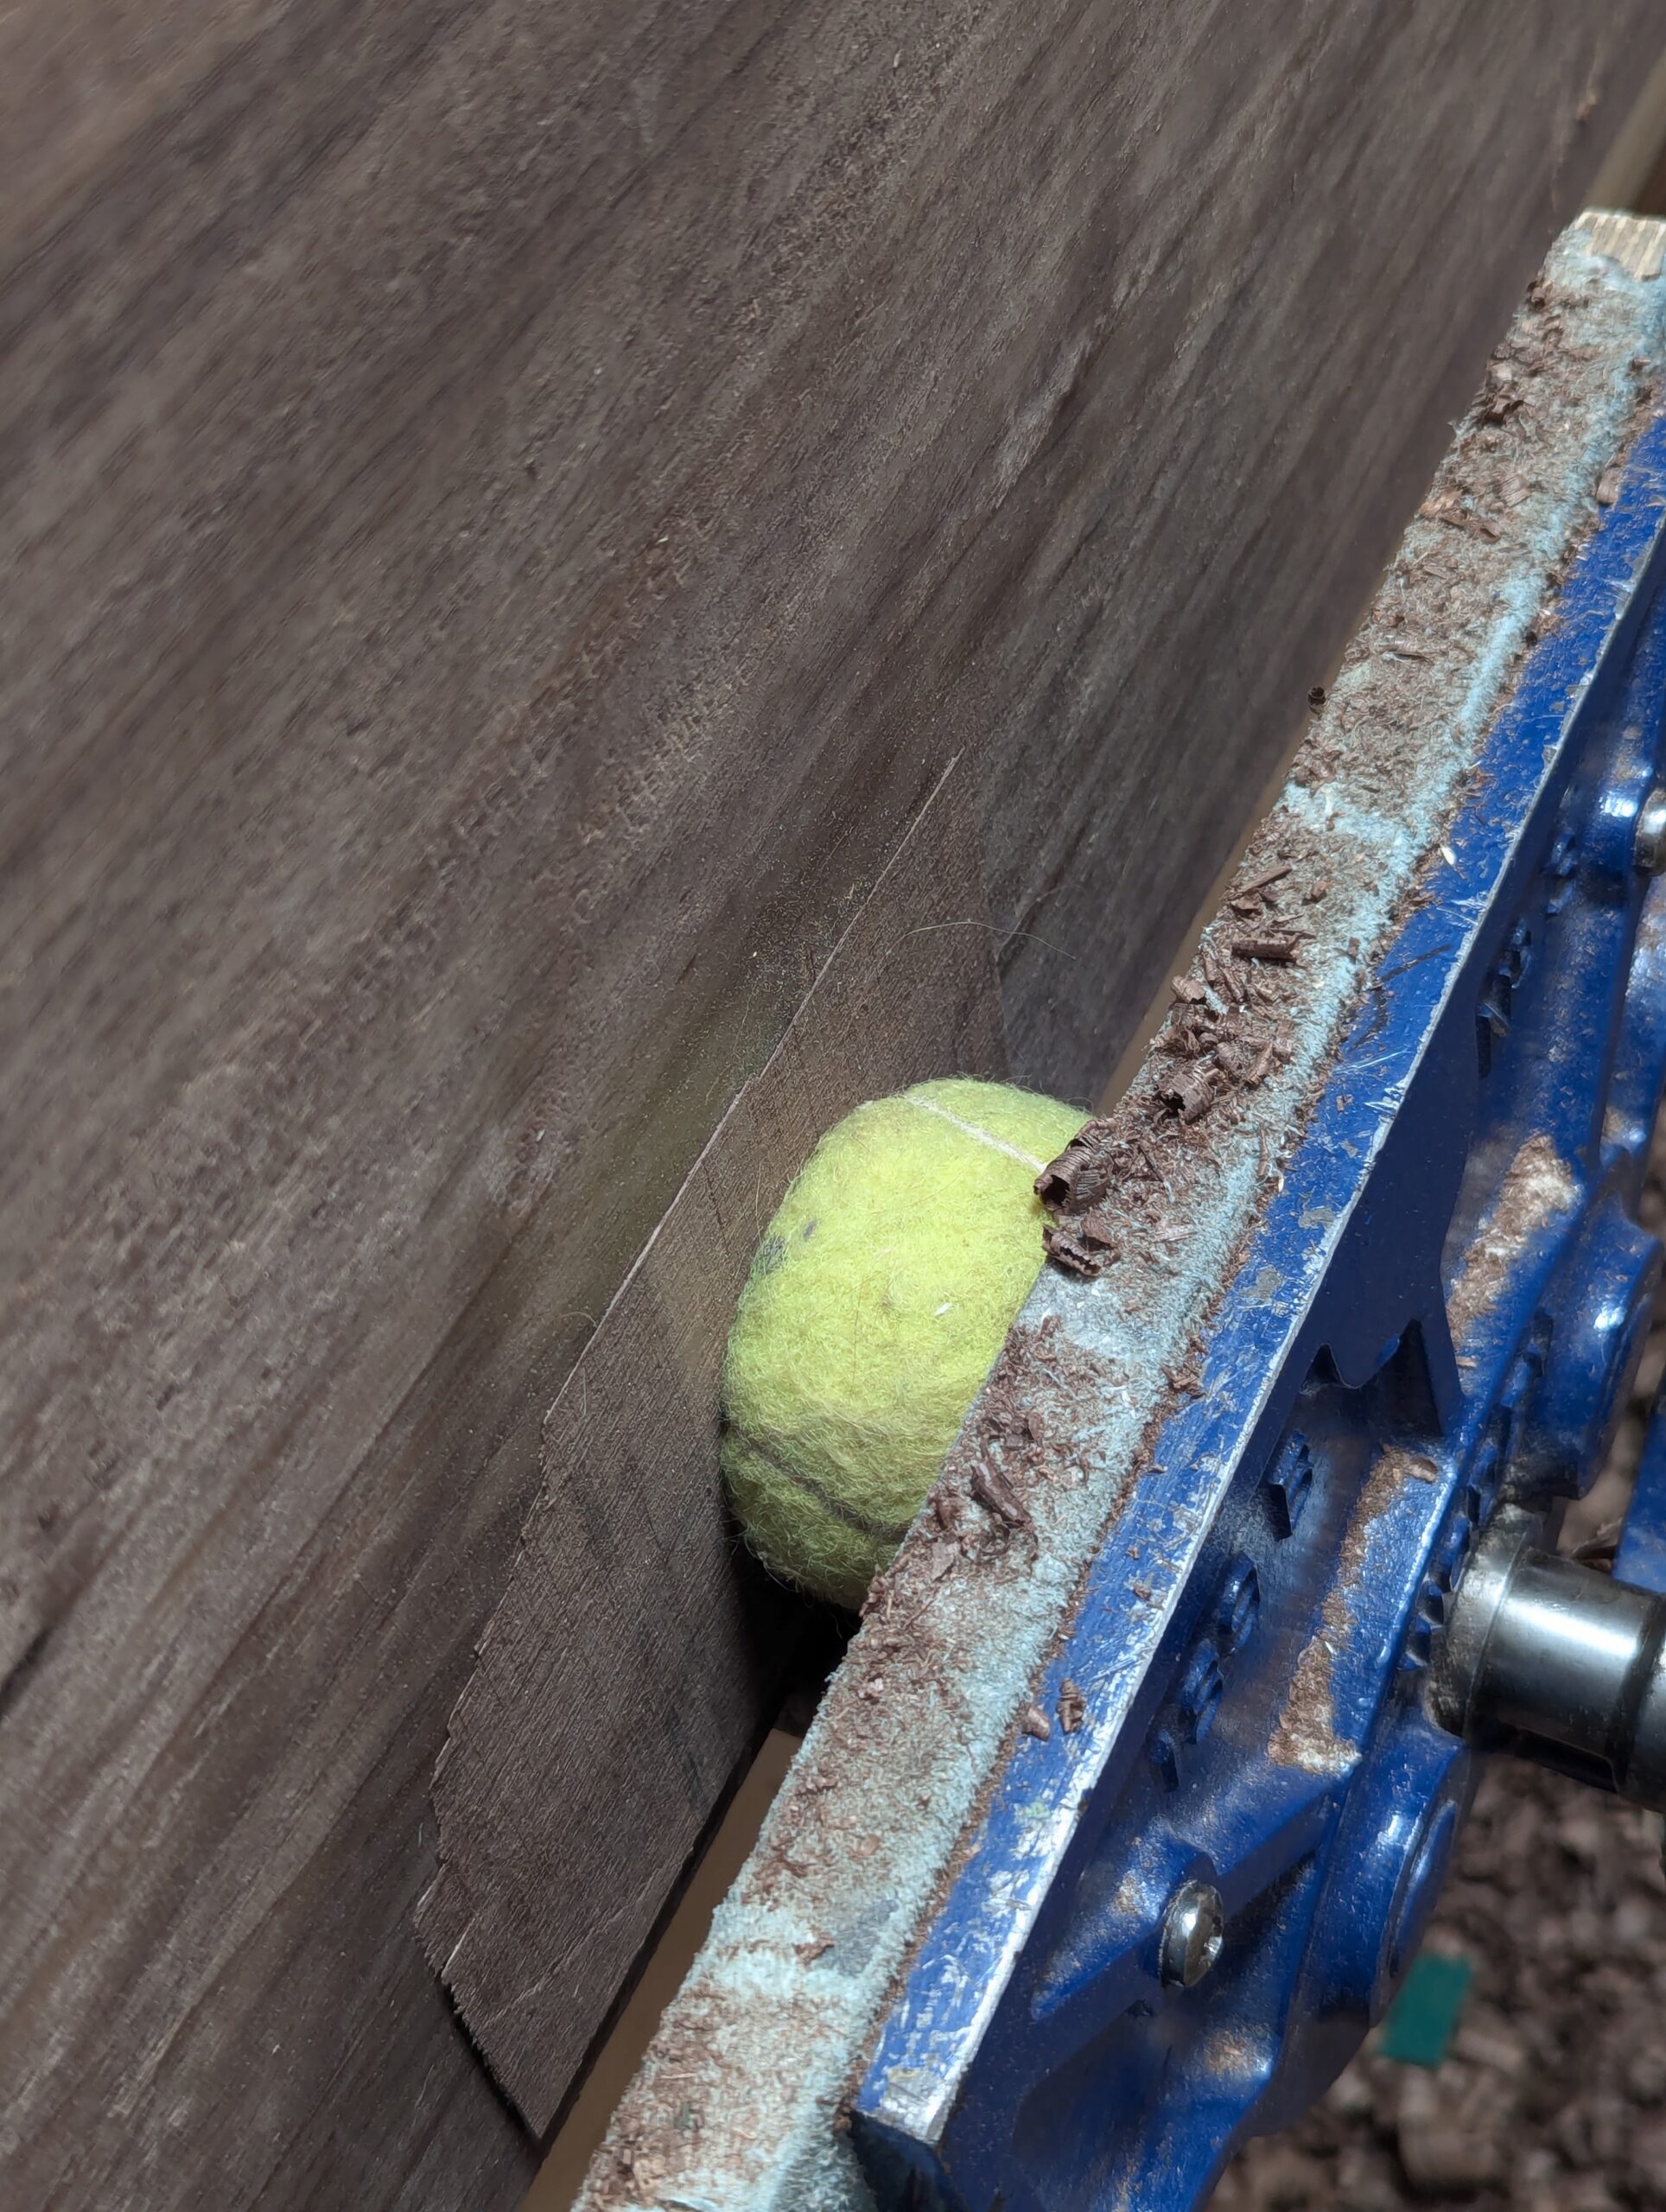
Putting it in the vise as shown delivers all the power you need but take care not to burst the tennis ball.
Go to my Instagram here to see what the video does!
Now you see the impact of moving the wood from side to side to cover the whole patch.
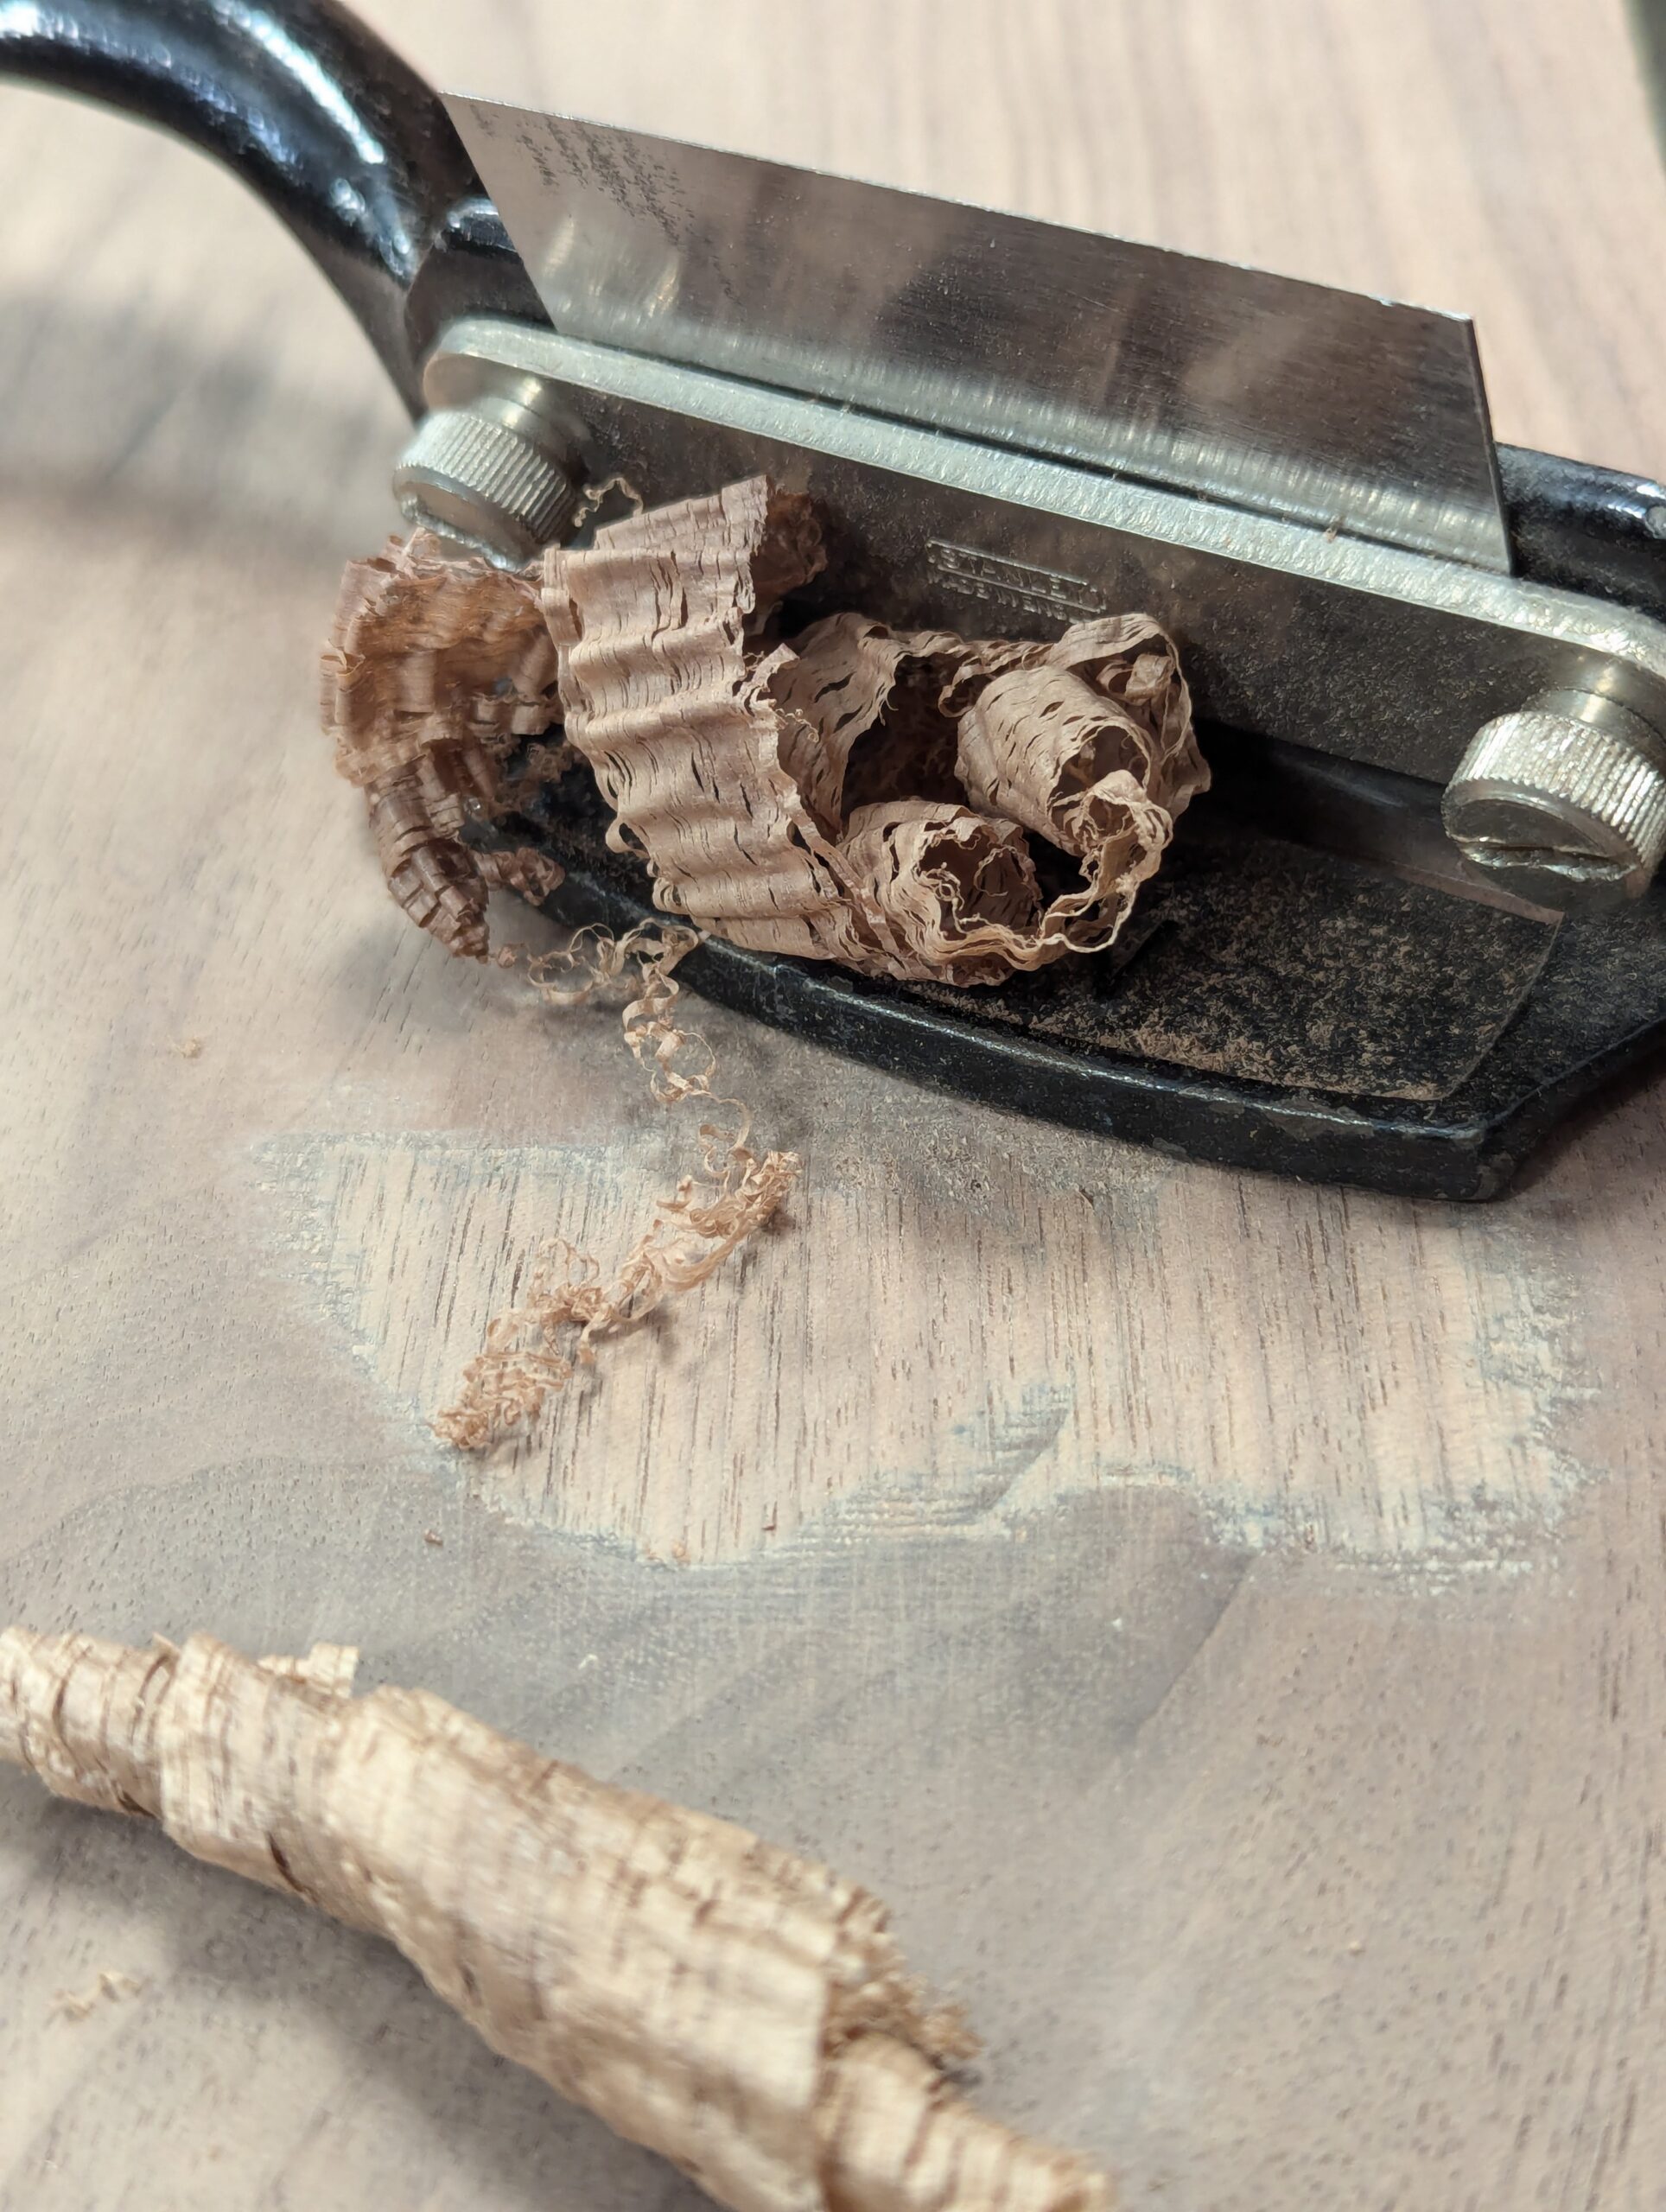
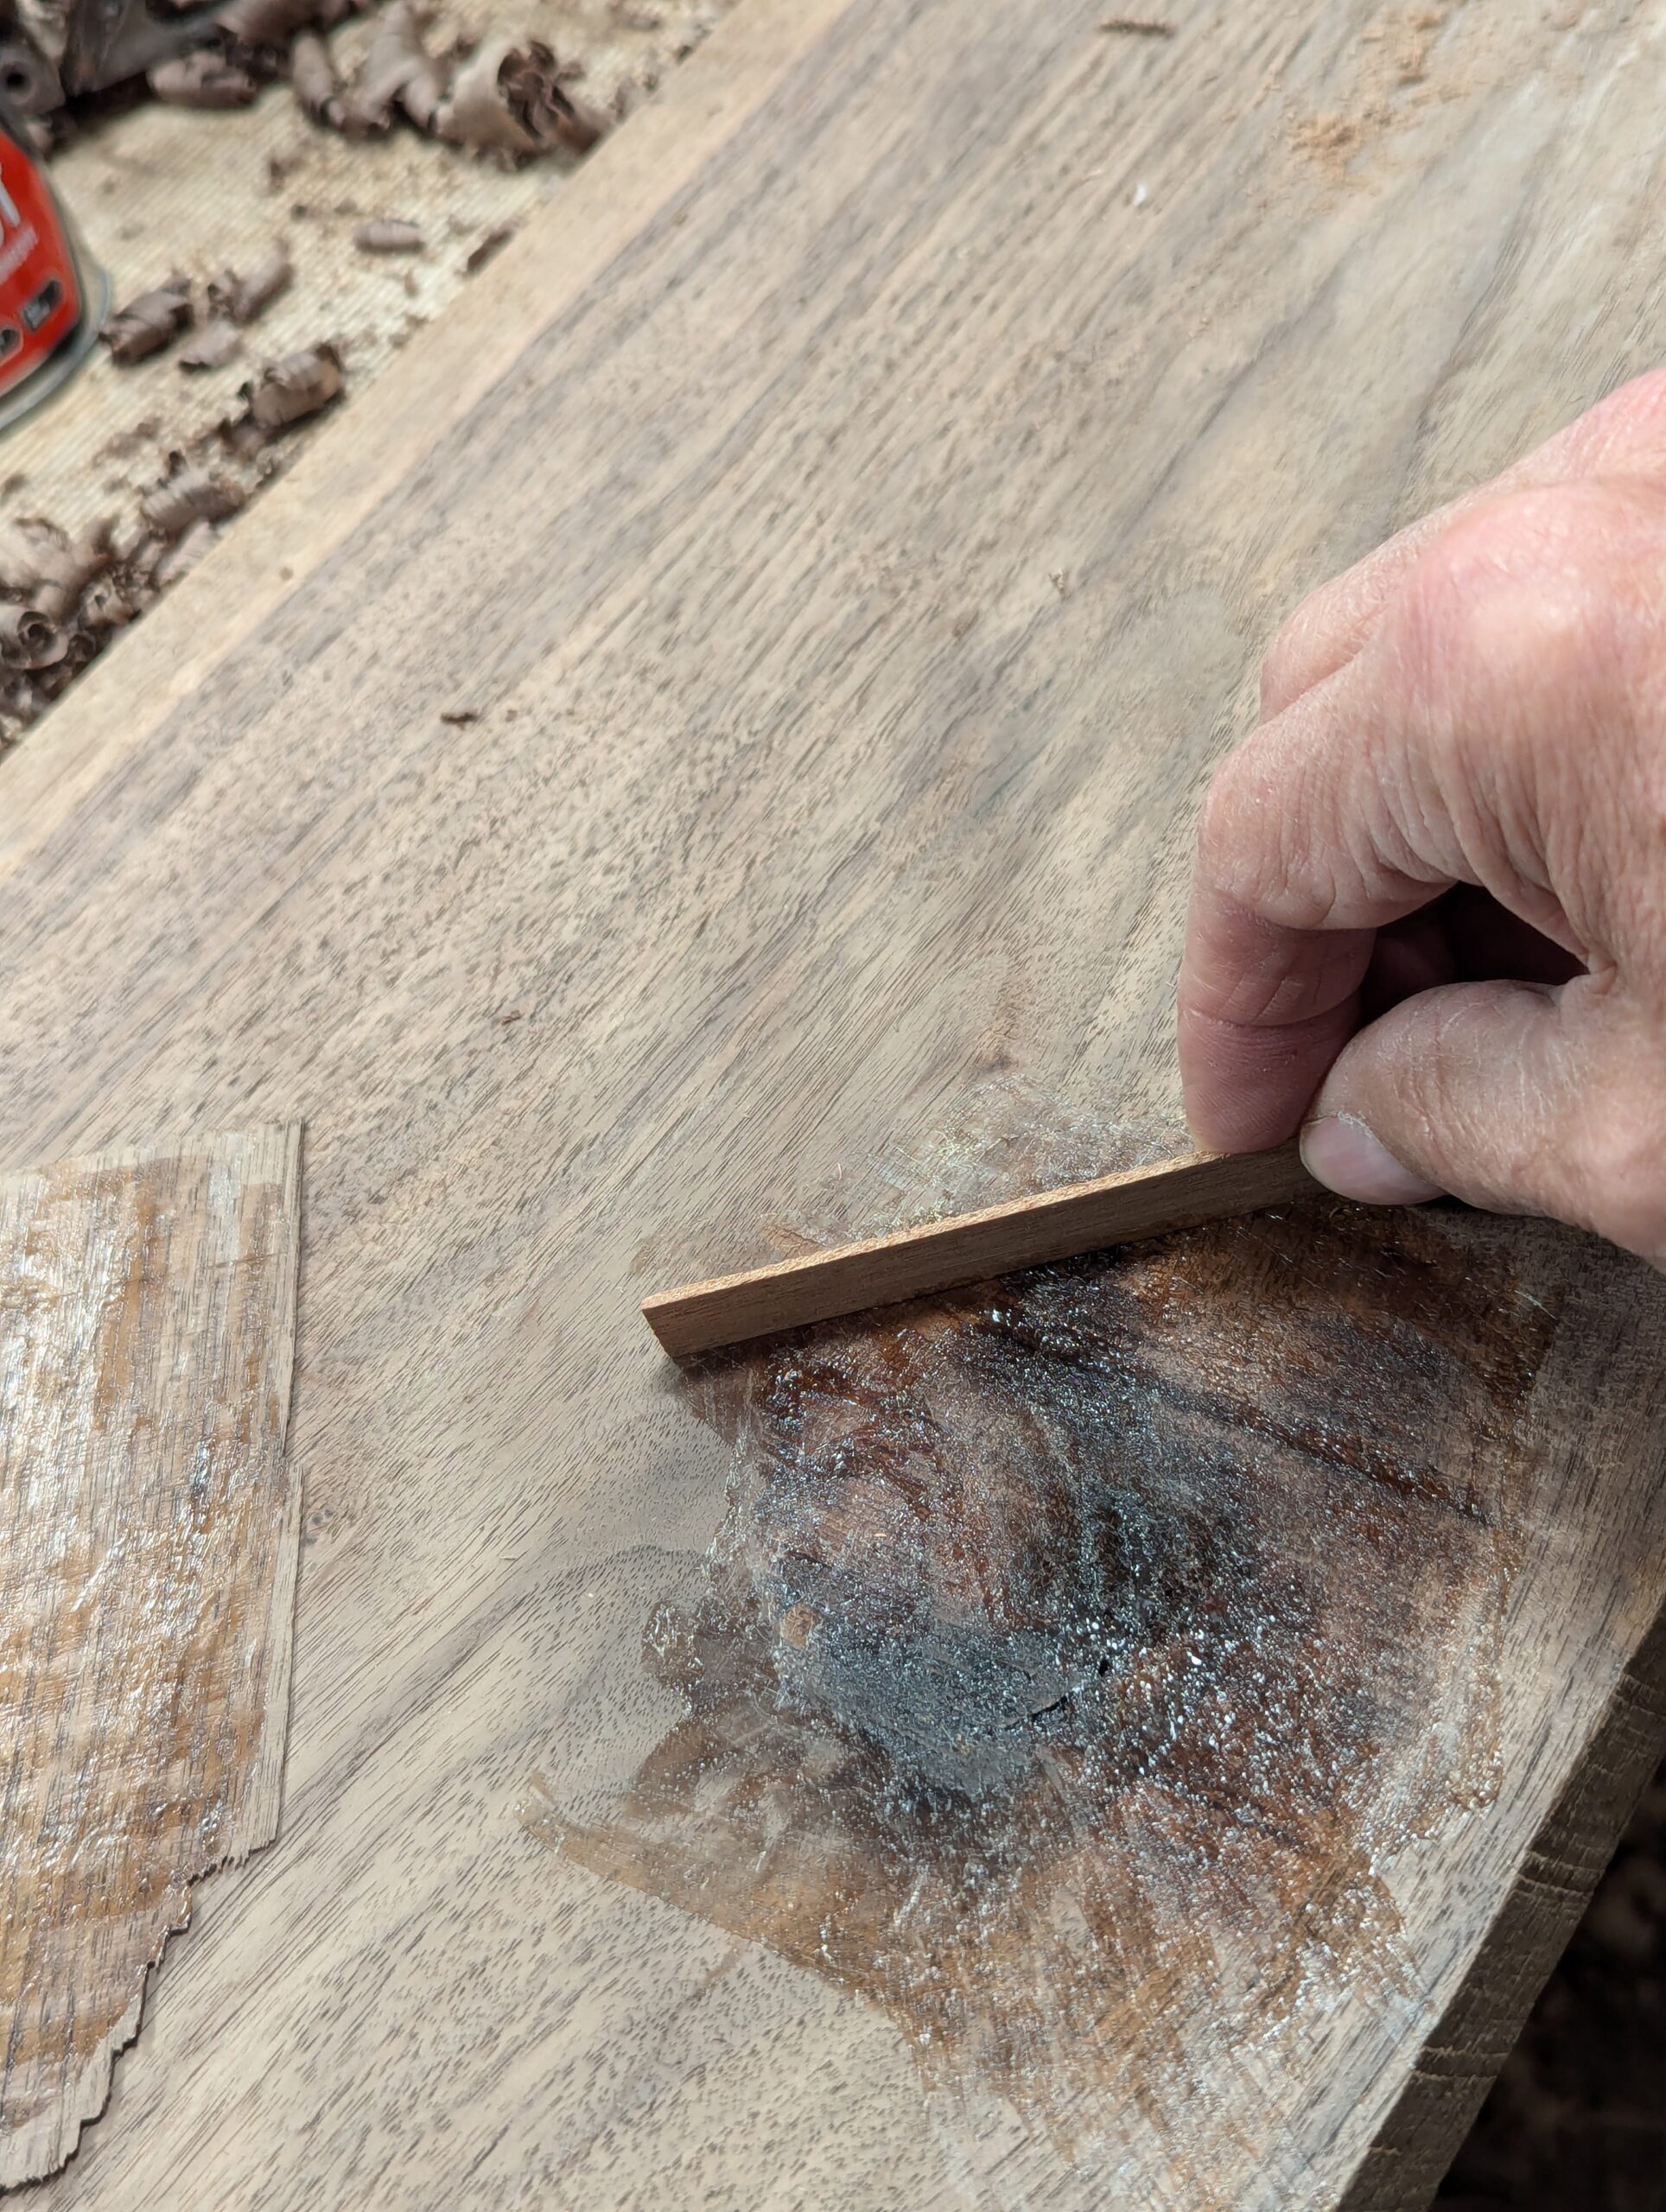
Remove the board and the patch is already permanent. Scraping is usually best but you can also belt sand if you prefer.
In my case, my patch was not intended to grain match but with the right wood, the patch of this kind makes the repair simply disappear.
As you can see, the depression is now brought level with the rest of the wood. You may never need this but you can also use the method for inlays and small veneering areas too.
Nice job. Now get to work on a 50 volume book going back to day 1 of working wood with all the tricks you have learned! 50 might not be enough though.
Thanks Paul!
dear paul
love these ‘from long real world experience’ tips, thankyou.
if you get time can i please ask for any thoughts on: i cut a 25mm thick x 15cm wide maple board for a project. its about 2mm longer than i want. what’s the best way to take down end grain in this situation to get the exact length? (a saw seems the wrong tool, as will not be precise and probably take too much off; but likewise it’s taking a LONG time to plane down the endgrain to length with the paul sellers ’round and round’ technique with hand plane and shallow-set blade). wondering if there is a tip for a better way??
Thankyou!
Ps – Also is a cabinet scraper ever used to make end grain look schmick, or does this not work for some reason??
Too short to saw with any degree of accuracy without digging into the wrong side of the knifewall, too much to plane off. Hmm! Still, planing is best. Bevel to a ridge from each side, knock the narrow edges off to the knife wall with a wide chisel and then plane the ridge out but work from each side into the middle.
Will do Thankyou. Good to know there’s not another way!
Genius!
Is this glue the same as contact cement glue?
And why not use wood glue or super glue + accelerator?
Yes, same as contact cement. Wood glue is not suitable for this technique but you could just use clamps, a softer packing and hard backing and leave it for a few hours. I am never altogether sure about questions like thi because its such a complete solution with an obvious outcome of near instancy in and of itself without using PVA or such and superglue and accelerator would like cure before you could get it in the vise to apply the rolling pressure needed to seat the whole surface.
Rayc
I’m working on walnut now. I find it very brittle, with very dark dust from the sawing.
The walnut is American, I find it tough to plane and what ever way I go it often rips. I brought it home with me about six years ago, After I went to visit my sister and brother-in-law, he took me to a lumberyard. I’m working i’m small jobs at the moment, children’s toys.
This can happen if the wood is force dried and too fast––perhaps case-hardening. Case hardening occurs in wood that’s been dried too rapidly. The wood initially dries from the outer shell (surface) which puts the core wood under compression. When this shell is at a low moisture content it will ‘set’ and resist shrinkage and also cause brittleness, uneven cell separation and more. Once we get it home and leave it afew years it is hard to talk with the miller to see what happened.
Hi Paul,
Thank you for the information.
I didn’t really store these boards when I got them. They have been moved about many time’s. Just started using them. I’ll know better next time.
Ray.
I built a Claro Walnut dining table out of amazing lumber but had to accept a couple knotholes that went through, the common solution is to fill them with clear casting plastic/epoxy and that was the plan but when the time came to fill them I hated the idea. So I sorted through the scraps and found nice solid knots, cut them out along their natural outline, and inlaid them into the through knot holes in the table. The interesting technique you offer in this post reminded me of making my table.
I find your communication valuable, essential really, thank you.
I don’t think I’ve ever heard of someone repairing a knot with a knot. Thats just knot right!
Hello, Mr. Sellers;
Thank you, SIR!, for your excellent tips.
May I suggest an addition to your site?
I think you may be pleased to see how many view your site.
Perhaps add “UP” & “DOWN” arrows (counters) after each post & allow your visitors to simply click the one they prefer.
That would let each one to express their opinion and inform visitors of the number of others that agree.
Thank you for all you do.
Also, I’m still looking for your books.
Paul, just out of curiosity, is this something that you came up with, or was it something one of your mentors passed along when you were apprenticing? I saw a very similar patch on a piece that was well over 150 years old. It isn’t really important. Woodworkers seem to reinvent solutions to problems over and over. I imagined I had invented a brand-new joint until I watched a Korean woodworker on YouTube make the same joint right down to tiny details. He did a better job, too.
The ball in the vise is mine, yes, and especially the rolling movement between the jaws of the vise. I doubt that compressing using a ball with just the hand for pressure is totally mine though, though I have not seen it done elsewhere.
Very nice idea sir, I intend to try it. Question: What other type of wood does this work on? JRW
All woods. No problem.
I’m a big fan of walnut as well but I learned early on to wear a mask when using power tools on it. The dust was very nasty on my lungs.
Yeah! Thankfully, we are not using machines (not power tools, really.) so we don’t have an atmosphere filled with toxic dust to contaminate our workspace. I am glad because of my grandchildrren and my dog. Couldn’t live with myself if they couldn’t come into my workspace and spend time learning with me. Nuh uh!
Thanks. I reckoned the tennis ball idea was yours. It was the free-form patch I was wondering about. The feathered edges are unusual, which is what brought that old piece of furniture to mind.
On a number of occasions I have needed to “clamp” an item in the middle of a project, beyond the reach of any of my clamps. I have usually managed by using a weight or a sort of caul pressing done on a block to apply the clamping pressure. The former is a bit precarious at times, and the latter fiddly to set up.
For some time I have had 3 ideas in my head, but they haven’t so far made it off the drawing board.
A variation on the caul idea, but with a central slit so that the block can be bolted in any position, making set up easier.
A sort of giant curved arm caliper made from timber with curved tips. Tightening the screw pushing the tips in. just needs suitably curved timber.
A sort of variant on the Record ratchet C clamps I have. ” wooden arms that can be moved in or out, either by 2 threaded rods, like tool makers clamps or wooden woodworking clamps, but with longer arms, or by the arms being bolted between 2 boards. (Different hole positions allowing the arms to be moved in or out.) At the end of one is a threaded rod that will push a block down to apply pressure.
What do others do?
I guess an instant grab glue might save the clamping hassle. Or even a rubbed joint.
My advice: look up! There’s a ceiling overhead, right? You can exert a tremendous amount of pressure using a long batten. I have seen instrument makers using this technique – some have made a “clamping house” (or what ever they call it) – sort of a big shelf with lots of reinforcement, plus a “roof” a set distance above which is also reinforced. This makes clamping easy, as one just need to make a stack of battens of a certain length.
Another option would be to use a piece of 2×6 or 4×6 (depending on the size of the project) and some pieces of equally thick scraps. Place the scraps on the pieces you want to clamp, put the 2×6 on top and use clamps on either end to apply pressure.
Of course, this won’t work if the piece can’t be supported from below (resting on the bench or similar).
Your idea of a wooden clamp with a threaded rod at the end is of course a good option. You could make it very simple: pieces of 2×4 glued and screwed to a piece of wood so that they are held parallell – like the letter n. Glue and screw plywood to the sides to reinforce. At the ends, drill a hole for the threaded rod which you pass through one of those flat packed furniture hardware thingys that is a metal cylinder with a threaded hole in the middle. Easy to make, and can be as big as you need. Just scale to suit your projects.
Please help. I have a klutz scraper. I have watched your video, built the jig and sharpened to 18000 grit turned the edge at different angles with resharpening in between. All I get is saw dust and a rough surface. Any ideas?
It looks like you are saying sharpened to 18,000 grit and resharpening in between which I don’t understand at all. All you needed is a 45º bevel taken from either a file cut or abraded bevel. You can actually turn the edge directly from just filing it and consolidating with a burnisher. One angle and turn the edge in three or four strokes. You say Klutz and I assume you mean Kuntz. Kuntz is not a reputable maker in any tool type so your problem could be there too.
Thank you. Success. It really helps if I push the burnisher forward as well as along the edge causing the metal to flow in the desired direction.
Mr. Paul,
Can I safely assume that if hand tools are used then PPE is not necessary with walnut? That would be fantastic! Would you still use a respirator for the bandsaw?
This is a good question, Donald and thank you for raising the point here. When it comes to toxicity and taking steps for personal protection it has to be up to us as individuals. No one really talks about the dust caused by machining wood much and that’s mostly because woodworkers have dust extraction but of course extractors don’t get all the dust. Surprisingly, the list of harmful woods and the incidents, potency levels, etc in wood toxicity tables are available online but walnut is less in potency than say oak and maple and in 95% of the different woods it is the dust from machining wood that is harmful and not the wood in its presence indicating that breathing in the dust is harmful to respiration and in some cases, wood types, etc are indeed carcinogenic meaning they can and do cause cancer.Carcinogens promote the development of cancer and can include synthetic chemicals, naturally occurring substances like wood. It seems too, from my experience, that wood dust from machines, and that includes power sanders, cause irritation in three key areas; skin, eyes and respiritory so, nasal passage, throat and so on. Lungs are irritated to a point where if you are exposed to a prticular material like oak you eventually develop consistent coughing and the need for throat clearing throughout the day as you work. Of course, the filter for all toxic materials is the kidneys.
More generally, wood often causes a reaction soon after exposure causing one or all of the following: skin rash, itchy skin, sneezing, coughing, and bronchial inflammation. I find that any such reaction dissipates quite quickly if the atmospere is cleared by good ventilation or extraction. You are right though, with hand tools there is so minimal an amount of created dust it barely registers in air tests. I use an expensive piece of kit that measures the atmosphere tp tell me what levels my atmoshpere is charged with dust. So far in all the years it has never recorded any atmospheric content of dust
As far as sensitivity goes some woods cause a more severe reaction where the allergy results in longer periods of continuous or intermittent irritation lasting weeks, months and even years. I experienced to such issues when I developed an allergy to mesquite wood and oak. This came only through machining the two woods long term over decades. I stopped using mesquite when I no longer had access to it nor use it and now I have no such allergy. In cases like this, an allergic reaction tends to worsen over time.
So to answer your question, I am no expert in this field but my personal experience tells me that some woods obviate their toxicity as soon as you breathe the atmosphere and some are more insidious. It seems to me, (again personal experience and knowing others too) that you can develop an allergy either quite quickly and/or over longer periods of exposure. So many woods some woods, yew, for instance, are indeed highly allergenic and oak is considered a confirmed A1 human Carcinogenen as is beech.
Of course, wood turning exposes you to the highest levels of puthering atmoshpheric finings in the form of harmful wood dust amd you really must wear a respirator to be absolutley protected. When my children were young I made certqin to remove dust from my clothing before I left the work and then change in the house. Now that I no longer use anthing more than the occasional use of the bandsaw I have no issues with dust as such because the dust from hand tools and hand sanding is so minimal it barely exists and I simply have nothing to worry about. And remember I have been woodworking six days a week for sixty years to date and I have really had no interuptions through allergies or intollerance in all that time. Thankfully!
Many investigative agencies have research statistics that now classify wood dusts as carcinogenic to humans. Studies as far back as 1965 observed that a arge number of furniture makers in industrial workshops and with longer term exposure to wood dust in Britain develloped a form of nasal cancer (adenocarcinoma). Since that time many studies have show other woodworking industries have an increased risk of developing cancer. That being so, and even though we are not in an industrial setting, we should take all of the precaustions we can to make sure we are as well protected as possible in our domestic and commercial settings.
Aha! I bet this trick of yours is back to full strength now that you’ve got your heavy-load precision grabbers (hands) recalibrated! 😉
A ‘handy’ trick.
I’ve never dealt with veneer, may I ask how have you got to that piece? You mentioned getting it to a certain thickness… Is that something you buy as a sheet of, then adjust thickness, or have you made it from the same walnut stock (off-cut from rough ripping)?
Thank you for your lessons, as always.
God that’s genius, I would over overkilled it with glueing in a full 1/4 thick patch after mortising out the dip.