Does Plane Iron Flatness Really Matter? This Blog Could Save You Hours
For more information on planes, see our beginner site Common Woodworking.
It takes something to change our minds and yet a paradigm shift can be what it takes to really simplify what others complicate on our behalf. I am impressed with flatness. I know many companies establish some very sophisticated equipment to create flattened surfaces to plane irons and chisels within half a thou. On the other hand there are many ways to develop your own dead flatness on your existing plane irons and chisels and yet where did this dead flatness come from? Do we really need it? And why do we need it if in fact we do?
This question of dead flatness comes up often enough to need more of a definitive answer and my general answer is no I don’t think it does, we don’t really need the wide and absolute levels of flatness people are saying is needed. That said, I have written about developing flatness on the flat faces of planes and chisels over the years but now I realise that many people are saying the whole iron must be dead flat and you should use this abrasive or that stone to achieve this or that result. Obsessing over flatness has become normalized procedure in almost every circle and the primary reason for this is that there is money in it if you can convince enough people to believe that it is critically important. For several decades Japanese water stones were the only way and keeping them flat meant of course more and more equipment. Again, this begs the question what did those early European and American craftsmen do before they discovered friable water stones from Japan? Think about it long enough and it could drive you nuts. When I apprenticed the men i worked with sharpened their irons on coarse and fine India stones which were somewhere around 250 to 400 grit. The stropped on their hands to break the burr, loaded the iron and planed for a few more hours pretty much continuously. Oak and ash, redwood pine, spruce with and without knots became pristine surfaces and and the last job of the day was to sharpen up, oil and stow the tools. they spent no time on the flat faces bar pulling at the burr with a single tug of the flat face of the iron following the angle of the hollowed stone; a movement of about 5mm (1/4”) max. Their work was exemplary.
In my daily work I maintain the convex camber along the full width of bevel. Radiussing starts at 30-degrees and drops off to somewhere around 20-degrees. Basically this creates a quarter of an ellipse with the cutting edge starting at 30-degrees. Everyone recognizes this start as the most beneficial and effective angle for a cutting edge regardless of whether it’s a flat, hollow or convex bevel. I have and do recommend that if a blade or chisel is near flatness to go ahead and abrade it down to dead flatness using the diamond plates or abrasive adhered to a proven flat block of granite or float glass. It’s hard and tedious work to take out a belly of significance and, like a diet, it requires dedication. Hollows on the other hand mostly work to our advantage. If an iron or chisel is hollow it makes sense to say that you only abrade the perimeter of the hollow until you establish a band of flatness a few millimeters wide up from the cutting edge and along the extreme edges along the side areas next to the corners and on into the large area of the large face further up the face; leaving a micro hollow just behind the cutting edge is just fine. A chisel so established will pare as well as any dead flat and a plane iron will work with the very best of dead flats. Try it and prove me wrong. That being a fact, let’s look at the bellied or hollowed plane iron as both opposites with an attitude.

Standard plane irons that come with the normal range of bench planes made by Stanley and Record and a few others often have some slightly developed flaw as described. Rather than elevating the iron on one side of the stone and developing a shallow bevel on the flat face as some advise, why not simply correct the iron with a single blow of a nylon faced hammer.
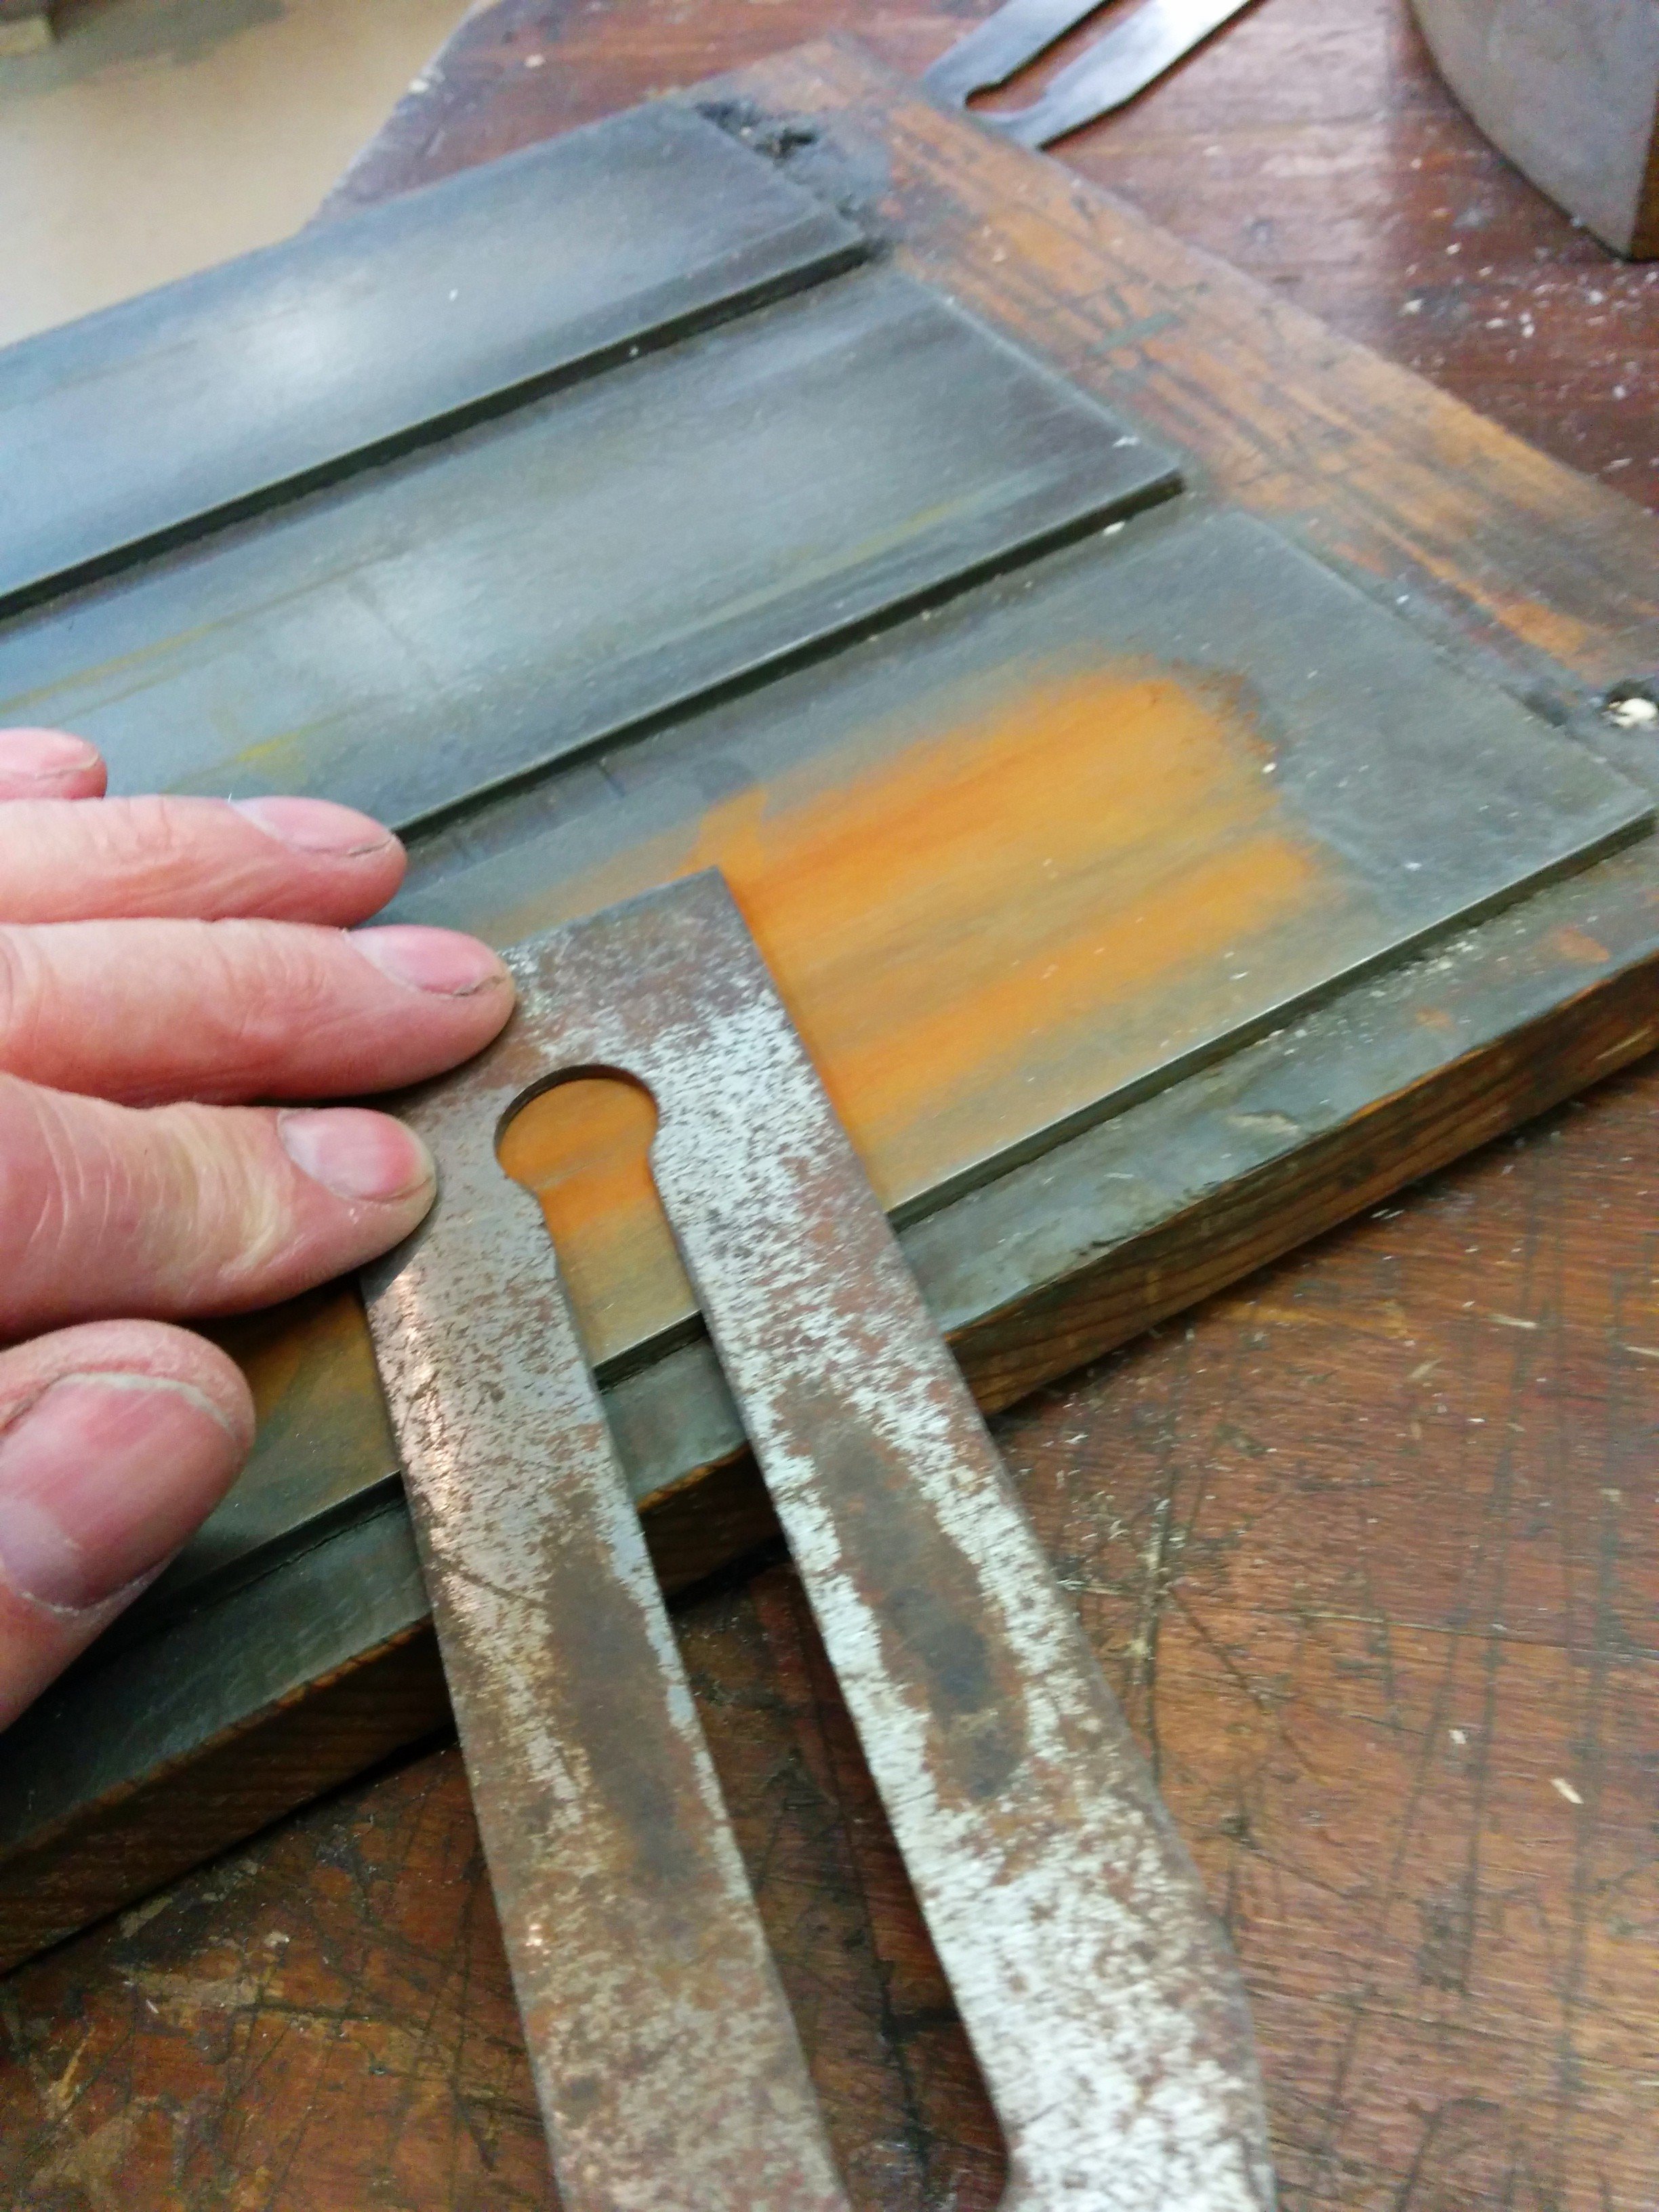
Here I have discovered a slight belly in the flat face of secondhand plane blade. It takes a couple of passes on the plate to find this out (shown top picture).
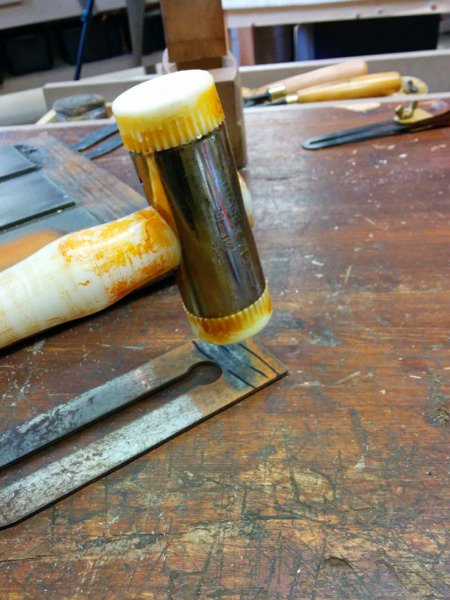
Here I have my Thorex 712 chisel hammer with hard nylon faces ready and poised above a bellied #4 plane iron. Taking out the belly would take about 5 minutes using even coarse diamond abrasive plates whereas a single confident blow removes the belly immediately in a fraction of a second. If you did like the idea of a slight hollow, a second confident blow will create a hollow of a fraction of a thou deep. The hammer blows should not harm your benchtop, but, if you are concerned, use any sacrificial board as long as it feels solid. You can see that my bench is a work bench and not prissy.
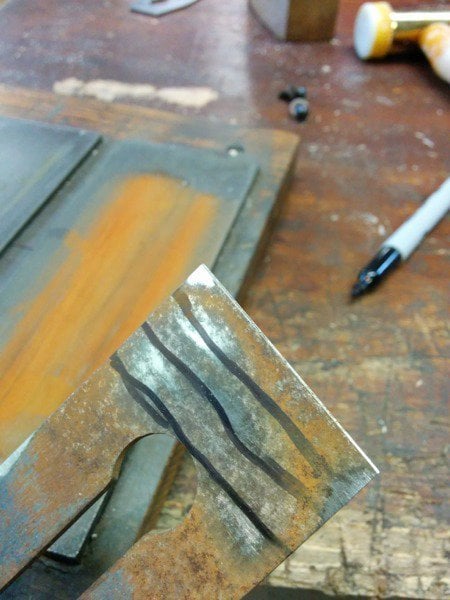
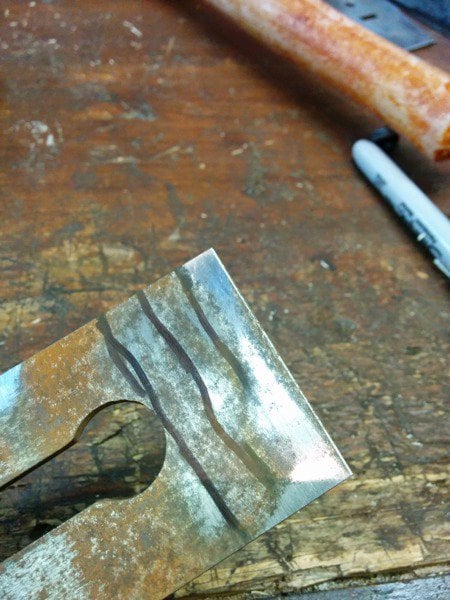
Taking the blade back to the plates shows that I now have a very slight hollow. Notice the corner areas are now bright. Any over compensation can be quickly and easily reversed or remedied. In this case a blow half the confidence of my first gave me a flat iron. This is a standard Stanley plane iron for a #4 plane.
My iron will come to full sharpness in a fraction of the time and I mean only a minute or two tops using this simple and effective corrective work.
Hello Paul.
I must perform a similar procedure on my Japanese blades. If I grind too much off the back, the blade won’t fit the plane properly. I find it interesting that steels that hard are still quite malleable. The trick as you said is that you must be confident to smite it mightily. Thank you and your team for passing on your craftsmanship. You’re the real thing in a sea of shills.
Well said!!
Thank you, Paul! Until this blog I’ve never heard or seen anyone else relate the very same sharpening methods I was taught. The only variation was the use of a figure 8 pattern on the stone. India stones at that. I still get big eyed looks, stropping on my hand. The same camber on the iron. Seems the method found its way across the pond. I never really found much if any improvement. That was about 1967!
Timely, this.
I have a Coffin smoother in “rehab” that I purchased for the lovely, full length blade of fine Sheffield steel in the tapered blade.
After four hours fettling, I have discovered why so much steel remains on this classic tool –
the blade is curved along both the length and breadth of the back.
I don’t own a power grinder. Hammers – those I’ve got.
Thank you Paul!
I love the way you give common sense answers to our most vexing questions.
Hi Paul
I always have found that quasi obsessive research of perfect flatness a bit confusing. Isn’t it more important to have a spotless surface because the smallest bit of rust can develop in a dent if close to the cutting edge than to have a perfectly flat surface?
Of course, both rely on the same treatment to be cured: polishing. It is a quick job on a new tool, it take a bit longer on a second hand one but once done, I think that a bit of oil after use will do more than diamond stones to keep it sharp.
And, on flatness, what could we expect when the iron is in place with the wedge and the “conter iron” (sorry, don’t know the name in English)?
Many Thanks to you for drawing our attention on things we hold for granted.
Thanks for the great tip on using the hammer to flatten a belly.
I have a basic question though, about why we want flatness. I understand how flatness is useful on chisels, for accurate paring and chopping. However, I’ve been wondering why plane irons should be flat at all (even just the first quarter inch). My own experience tells me that a flat plane iron cuts better, yet I don’t really understand why. Is it because a flat iron produces a more even or consistent cut, or does flatness somehow increase sharpness?
Robert
People often fail to realise the two-component assembly of cutting iron and cap iron assembly was devised as a tensioning strategy whereby the gap between the two heightens tension between the two to create a unique cutting dynamic. A flat face around the cutting edge seals off the edge between the cutting iron and the cap iron lip so that no shaving can enter the edge between the two. The cap iron is really designed to divert the shaving upwards and break the natural path the shaving might otherwise take.
Hope this helps. Any buckled, bellied or hollow surface might well allow an open edge.
A flat back makes getting the iron sharp easier.
If you only need to hone and polish one face (as with the method taught us by Mr. Sellers)
it’s fast and predictable.
If using an iron with a chip breaker (or cap iron) it make getting the two contact surfaces
to meet with no gaps for the shaving to infiltrate, and jam the works.
I’ve got an older wooden smoother with really nice steel that has a convex back, and as a result the chip breaker does not fit tightly. If I take off a shaving thinner than the gap between the cutting iron and the cap iron, everything comes to a stop.
I suppose the appeal of having one flat side is that it forms a reference surface.
Paul, Jim,
Thank you for the explanation. This really helps my understanding of why this is important.
Robert
Well, I just bit the bullet and ordered the three EZE-Lap diamond plates and chromium oxide. I already have a nice piece of leather ready to make the strop. The whole cambered bevel goes against what all the other “experts” are saying, but Paul is one of the best teachers I’ve had in 49 years of learning, so I’ll do things his way. I’ve been using scary sharp up till now, and getting half decent results. But I’m excited to see what my planes and chisels will do later on this week.
Keith I agree with you, I also tried the scary sharp method years ago. Although it was satisfactory in obtaining sharp irons, it was messy and expensive, in my opinion. I figured in the long run it was much less expensive to invest in a set of diamond plates, as you did, and a Norton combo 4000/8000 water stone. This set up is more than what is needed to maintain all my sharpening needs, except for my turning tools, I have a Tormek I purchased 15 years ago. Yes the initial investment was right around $275, but these will literally last longer than me. $275 of sandpaper really isn’t that much when one thinks about it.
Very true. Also, I’ve heard many say it that one of the tricks to keeping your tools sharp is to have a dedicated sharpening station. But what that comes down to I think, is making your sharpening system easy and accessible. The sandpaper and glass is just annoying enough to set up that I really think twice about doing it. When I see Paul just pull out that board with the three plates in it, sharpen in a minute or two and toss it aside, I can see myself sharpening a lot more frequently.
This is a great tip and it will definitely save time!
Many thanks again!
Paul,
First of all: thanks for all that you do for us. I really appreciate everything you have given and continue to give. I know this is an old blog post, but something came up regarding it that I wanted to contact you about.
Question: have you had breakage problems when hammering a hollow in plane irons?
The reason I ask is that last night I cracked an iron attempting this method. I was having trouble trying to flatten a slightly dished iron from a Stanley #35 transitional plane. First whack with a Thor 712 on a block of Doug. fir – okay but not enough, especially in one corner. Second whack – okay getting closer. Third whack… oops, cracked from one edge to about half way across the width. I wound up having no choice but to snap it off and luckily it went pretty much square across. I lost a full inch off a nice long old iron, though. In retrospect maybe my troubles making progress flattening should have alerted me to the hardness of the blade… but I haven’t done too much of this yet so it didn’t really register.
Have you had breakage problem any of the times you’ve done this? Risk vs reward, I guess, and I came up on the risk side.
I wound up making lemonade from the lemons and converted the whole plane into a scrub since the way the blade snapped loaned itself to a curved edge, and also the throat of the plane was worn a little open anyways. Hogs material off like crazy and glides over the surface like butter.
Thanks again!
Personally I have not, but someone wrote in a few months ago and said that they had broken a corner of theirs. I put this down to an iron being hardened but one that missed being annealed. Perhaps that’s the same for yours too. I have not made this a habit but do use the method from time to time and it has always worked without a problem so risk with benefit in most cases. I am glad that you at least made good with the scrub plane and thanks for your support and kind words.
The more I read everyone’s comments’ Paul Sellers, the more I realize that Paul’s advice is well worth listening too. It makes commen sense. As opposed to the profit fed advise by so many other “experts”