Restoring saws, discovering methods
I don’t think many know the origin of the bow saw. By that I mean the first date a man bent the sapling stem of new growth to stretch a steel saw blade between two extremes. My gut feeling is that the stem was already bent in growth, as a bowed branch if you will, and he took advantage of the continuous grain in the curve to add further tension by adding a little more bend. Not unlike saws like this but with only one bend instead of one at each end. Today we use the natural memory in steel to add the same type of pressure in bow saws such as logging, coping and fret saws. Between the two extremes of bent wood saws and bent tubular steel ones we find the jointed frame. Several names are acceptably applied to this saw tool type including bow, frame, Swede, buck and, if the handles allow for turning the blade in the cut, turning saws.
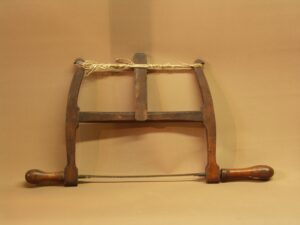
A couple came by last week and donated tools to The Hand Tool School here at The National Trust’s Penrhyn Castle. Amongst the tools was a beech wood frame saw owned by DH Petty, a cabinetmaker in the early 1900’s.
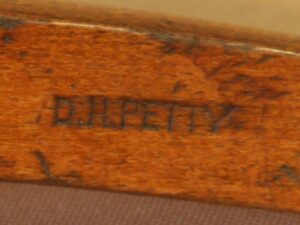
The lady donating the tools was his granddaughter. I dismantled the tool for restoration.
I think that it’s quite lovely and very graceful. I have seen fancier ones, but I like this. It’s fairly lightweight and compact being only 3/4” thick. Made from beech, the whole is hand made and when I took it apart to restore it I started to see the unseen details.
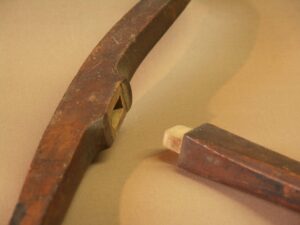
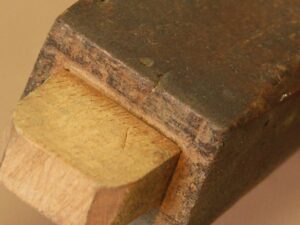
When I dismantled the saw I saw hand cut tenons and mortise holes and then I noticed that one of the tenons was numbered with Roman numerals using incised chisel cuts IIIV 1/4” (6mm) high. Quite precise. I estimate this saw to be 150 years old.
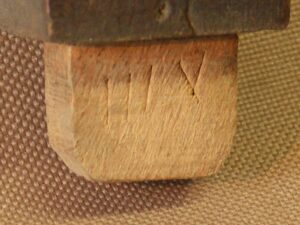
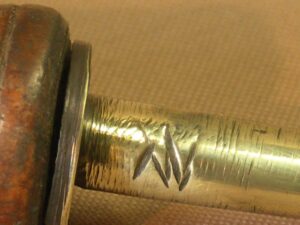
When I started to clean up the brass pins that hold the saw blade in tension I found the same IIIV Roman numerals, obviously identifying the specific parts to the specific saw. The cuts in the brass were not superficial but deeply cut.

My thoughts on the numerals are that they are more numbering than numerals. On English furniture, makers often made marks that identified cluster parts belonging to a composed piece where the parts were dismantleable; so that they didn’t get mixed up with other pieces made up of the same or similar components either in manufacture or after being sold.
One of these pins had another identifying mark on the opposite side of the other marks XV, which could be the mark of the maker or master but I think more likely the number 15. This is the only part with this mark on it.
The tenons are 5/16” and cut by tenon saw leaving slight kerf marks in the corners by the shoulders of all four sides, telling me that this craftsman always cut his tenon cheeks and then his shoulders.
I see very fine marking gauge lines delineating the mortise holes telling me this man had a very accurate gauge with pins at perfect levels.
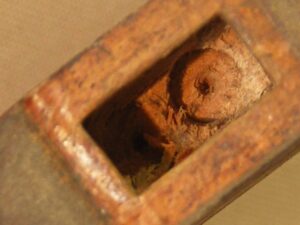
He was less concerned about the depth of the mortise holes. He used a 1/4” centre point non-auger bit, blacksmith-made, to cut holes to remove the bulk of the waste wood from the mortises, which is partly how I dated the piece.
The hole was further trimmed with a 5/16” blacksmith-made chisel because the whole was slightly less than 5/16”, which is a common flaw in forge sizing of chisels, but fully accpepted.
Another invisible but interesting feature of the brass pins in the round handles is that the opposite ends of the pins, the part that goes into the handle, is square and not round, and this square ‘tang’ is further secured by pinning through the handle with a fine steel pin. The square tang in the square hole was used instead of a round one to prevent the whole pin from turning under the pressure of using the saw as was the pin, which also served to prevent the brass pin from pulling from the handle during forwards and backwards thrusts.
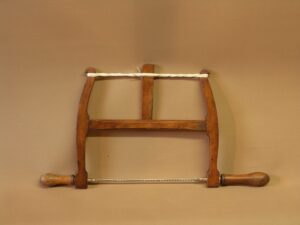
This is the finished outcome of my bow saw restoration of this finely made saw. It is fully working and there is no reason why it shouldn’t last for another 100 years in my workshop with my children and my grandchildren continuing the tradition should they wish.
Did you replace the blade and if you did, where did you get it?
Hi,
you can by frame saw blades at:
http://www.fine-tools.com/gestell.html
Regards,
Stefan
No, I simply filed it as I would a regular handsaw. I don’t know where you can buy these blades from any more. Seems they are simple to make if you have the steel though.
Make your own from an old or new bandsaw blade. It is cheap and simple once you know how.
The blades do turn up for sale from time-to-time. but it’s cheaper & simpler to make them yourself. from old bandsaw blades* – which you could probably pick up for free from a friendly woodworker. I didn’t have a bandsaw so I bought a cheap*, new bandsaw blade from ebay, quite a long one (at a good price per inch). There are many options available, I picked what I thought might be a suitable depth (should probably have gone a little shallower for optimum turning saw use) and I chose 8 TPI, which seems a little coarse in hindsight but that was recommended to me. Depends on what you expect to use it for, I was cutting mainly greenwood at the time (spoons & such), since then plywood and construction grade timber. I broke the bandsaw blade (I think I just bent it back & forth) into various lengths to suit my various bow saws (8″, 10″ and 12″), such that I used every bit of the bandsaw blade with no waste. Then I “blued” the ends of each blade in heat to soften it (I used my wood burner, but a gas burner/cooker or blow torch should work) to make it easier to drill.
The “blueing” didn’t seem to make much difference to drilling. The secret to drilling them, I think, is to get several small, cheap HSS drill bits (fancy metals & fancy name brands bits just made expensive scrap, waste of money), sometimes sold cheaply in hardware stores as “project packs”, ebay also has some interesting small sets of small drill bits with multiples of each size. Then *drill very slowly* as slow as you can and still cut and use some liquid to keep the drill-bit cool (water reputedly works well but I normally use a cheap WD40-like product). Use a pillar drill or drill press if you can – it helps. I now have blades in all my saws and .at least one spare for each in reserve. 🙂
It would be handy to have a variety of different blades e.g. different TPIs and depths. I have a few.
*Unhardened bandsaw blades are generally cheaper than hardened ones (unlike handsaws) – e.g. see Axminsters range of bandsaw blades – and it should be possible to sharpen the softer ones, as Paul suggests. On the other hand, harder ones will stay sharp longer. You pays your money and you takes your choice. 😉
Picked up 2 small, old, bandsaw blades for £1 at a car boot sale today, which I plan to use to make several bow-saw/turning-saw blades. A little rusty but look unused (although I expect they were used). Different TPI. Both blades quite shallow – which is good for turning saw use. Will use the finer TPI blades in my smaller turning saws.