Minimalist woodworking – Another poor-man’s beading tool
Bandsaw beaders with hook

Snap off a section of bandsaw blade a couple of inches long. If you bend-snap the section it will need flattening and this is done with one steel hammer in the vise as an anvil and second hammer striking from above. I snap right on the front, vertical face of a tooth
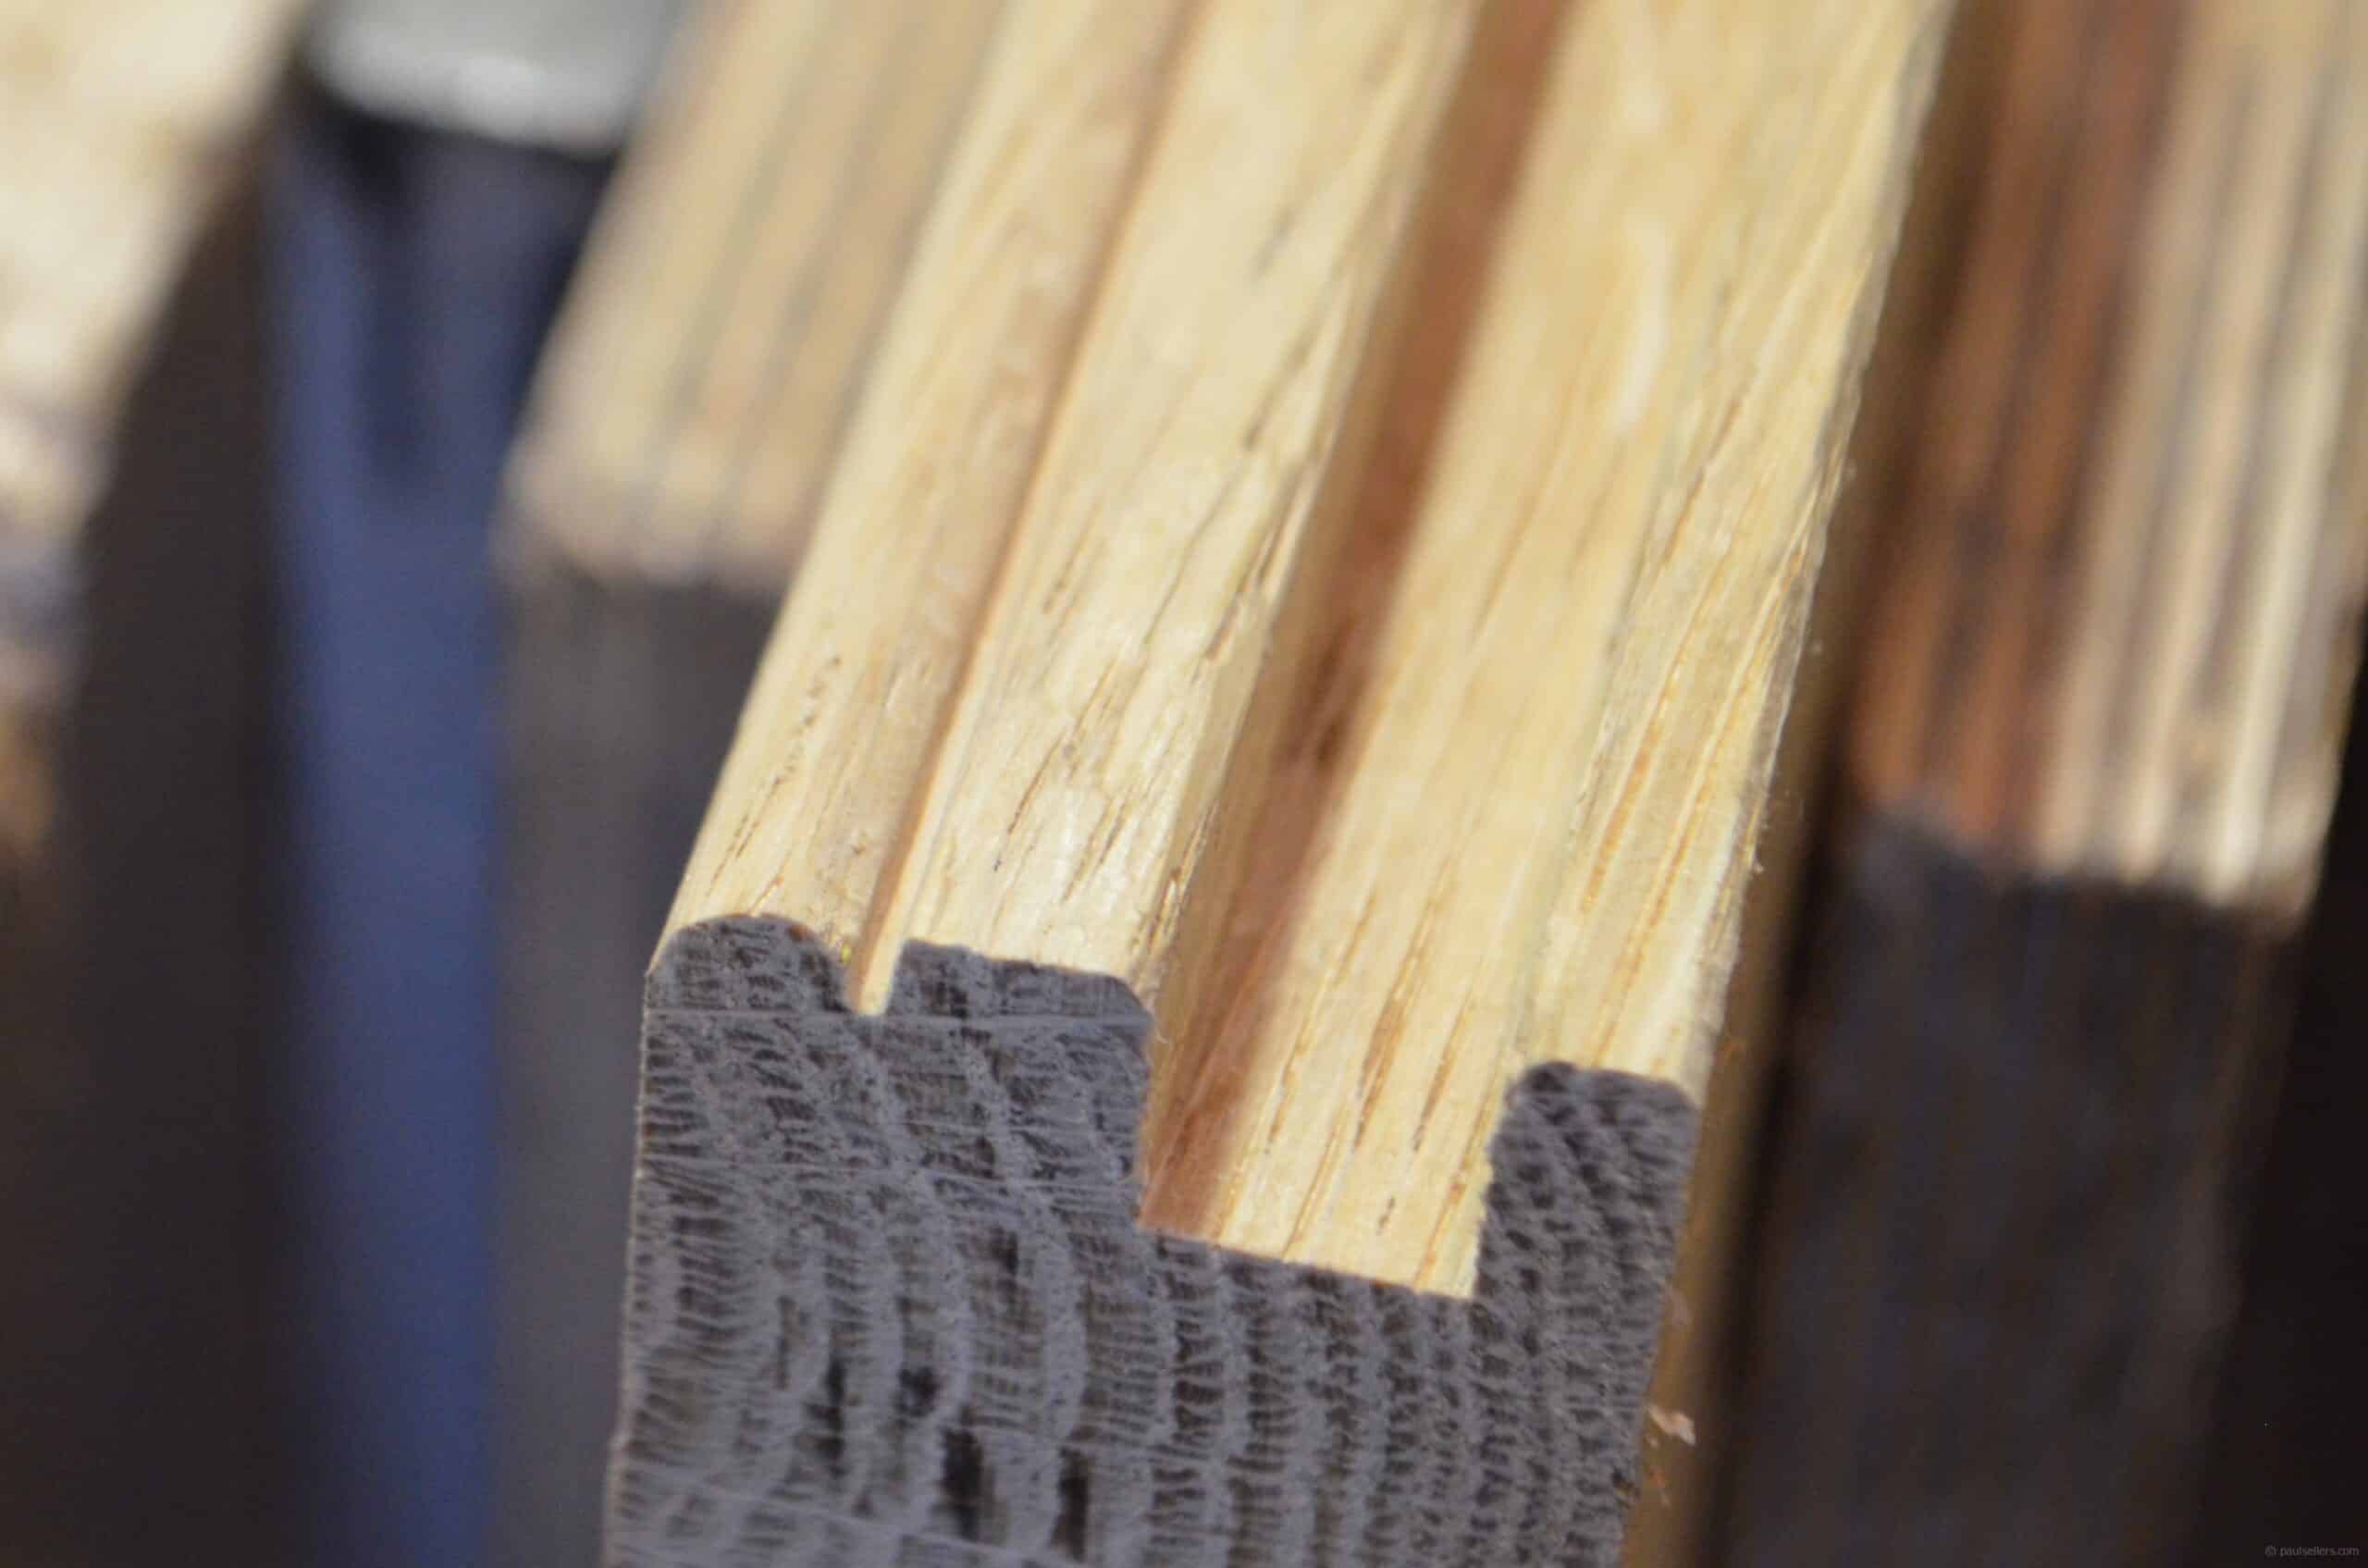
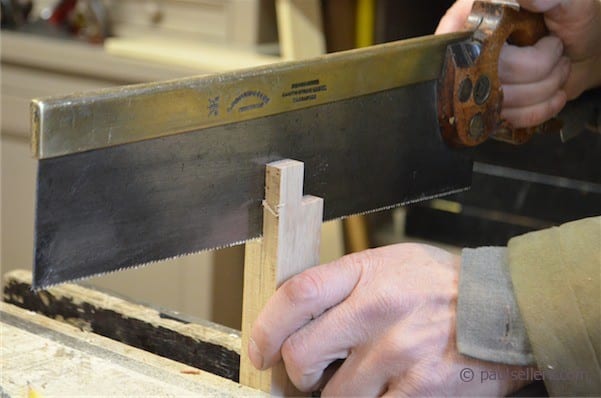
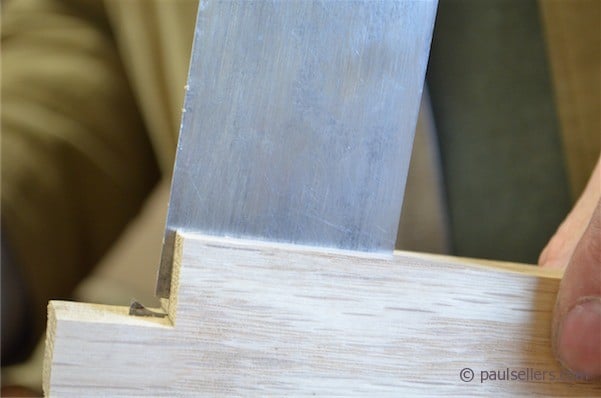
Take a piece of wood about 3/4” x 1 1/2” x 5” long (none of these are essential sizes) and cut out a notch from the end about 1” long and 5/8” deep with a tenon saw.

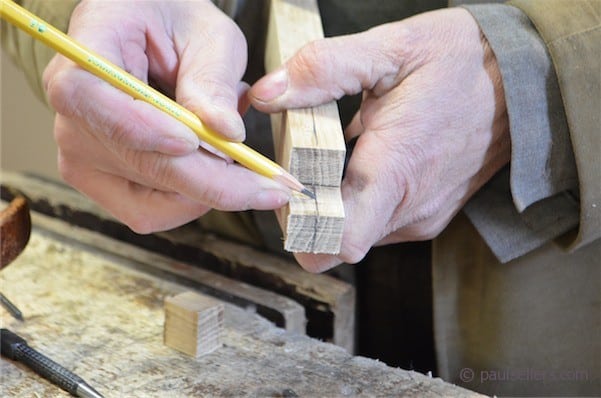
Mark a centreline along the stock using the finger as a guide.
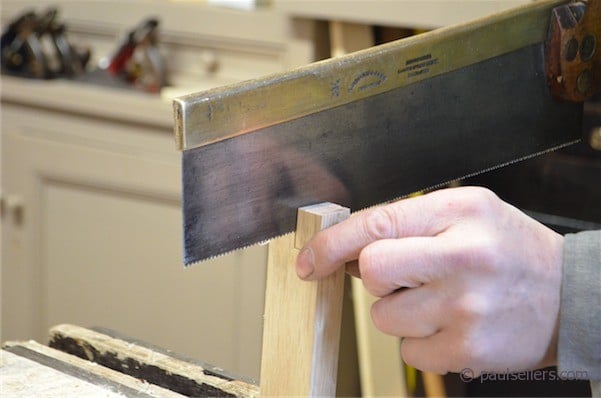
Saw down the length of the stock through from narrow face to narrow face with a tenon. I go about 3” long. If the tenon saw is thinner than the body stock of the bandsaw blade, you may need to go deeper so you can part the two sides and insert the bandsaw cutter.
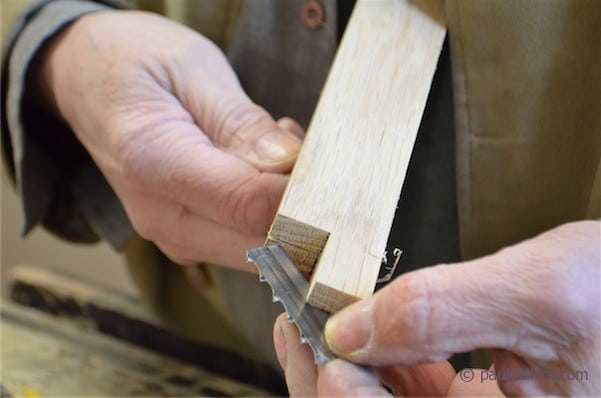
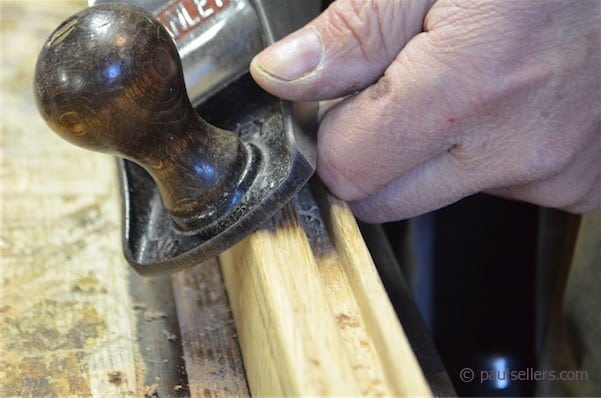
Insert the bandsaw cutter into the kerf and then adjust inside the kerf to get the angle best suited for a bead shape you like.
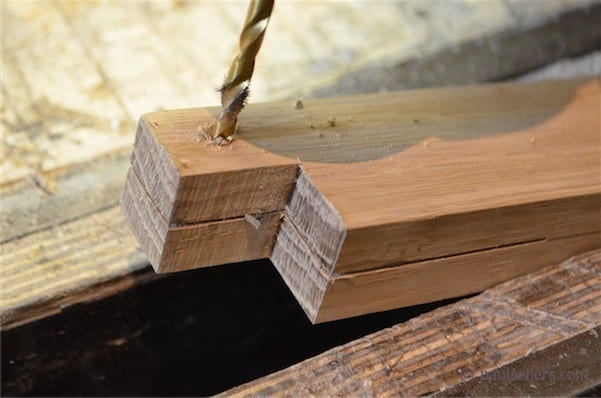
Drill a hole the size of the shank of a 3/4” long screw through one side of the saw kerf.

Drill a second hole smaller than the threads of the screw through the first hole and into the second half of the stock. This prevents the screw from splitting the wood so near to the end of the wood.
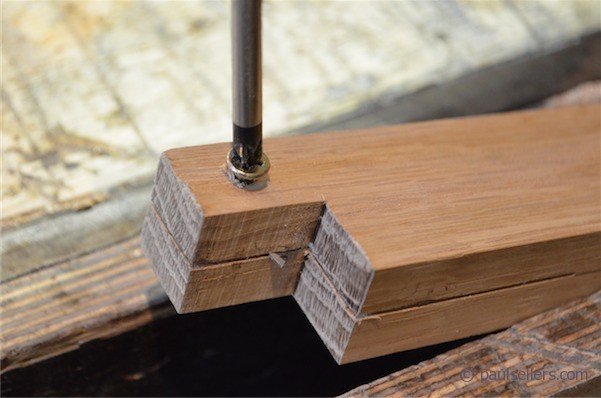
Screw the screw to tighten the blade within the stock.
Test the beading tool scratch stock on a scrap and adjust to size as needed. To use the tool, pull or push (or both alternately) along the wood, first passing lightly to get the exact course, and then more heavily to deepen in the cut.
Use sand paper to even out any discrepancy.
Round over the corner to complete the bead with smoothing plane or a block plane or just use coarse sandpaper to shape and sand to round as needed.
I generally run a tenon saw along the channel to complete the bead and crispen up the appearance both before and after sanding.
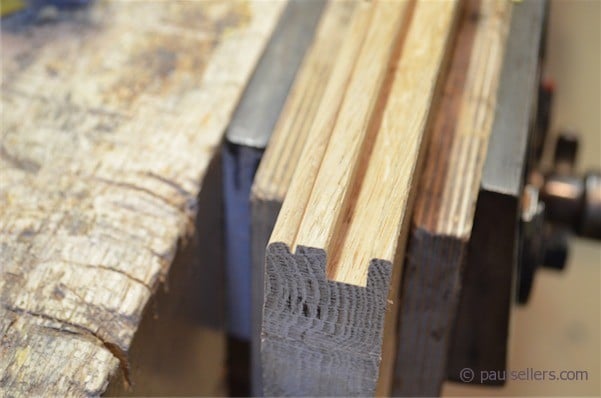
The corner of the tooth becomes a cutter, the cutout is a fence and depth stop. passing the stock along a piece of wood makes a ‘V’ parallel to the edge of the wood. Planing the corner off and rounding it makes a bead on the corner as shown in the top and bootm pictures.
the three last pictures here will explain its use:
http://villagecarpenter.blogspot.be/2007/12/scratch.html
Thanks!
Great idea! Thanks! Life can be so easy…..
Paul – Not sure where to post this question: You’ve discussed hand tools in various regards and also working in a small shop. Could you speak a bit about finishing in this regard? Many of the finishing techniques that I see presented as necessary for a professional (salable) piece advocate or require spray equipment. Even without the constraint of spray equipment, I wonder what thoughts you have about finishing in a small shop. For example, controlling dust and dirt from woodworking that is occurring while finishes dry: how you deal with that in a small shop where you can’t have a “finishing room?” One simple problem I’ve run into in my basement is that there is an open-flame gas-fired boiler nearby.
I no longer use spray equipment but used to use a full spray rig and then when hvlp sprayers came in I switched to that and liked it for sparing different finishes. Today I no longer use any type of commercial products like nitro-cellulose lacquers and such. i prefer more natural finishes like shellac and also water-based finishes, which have come a long way. i apply even water-based finishes with a rag and wipe it on in super-thin coats to the full coat I want. Because of this, I can finish right on my bench, i have no overspray problems and I do not need any specialized equipment. i also like to use a brush application on some finishes.